16 Ways to Mount a Large Staghorn Fern Beautifully

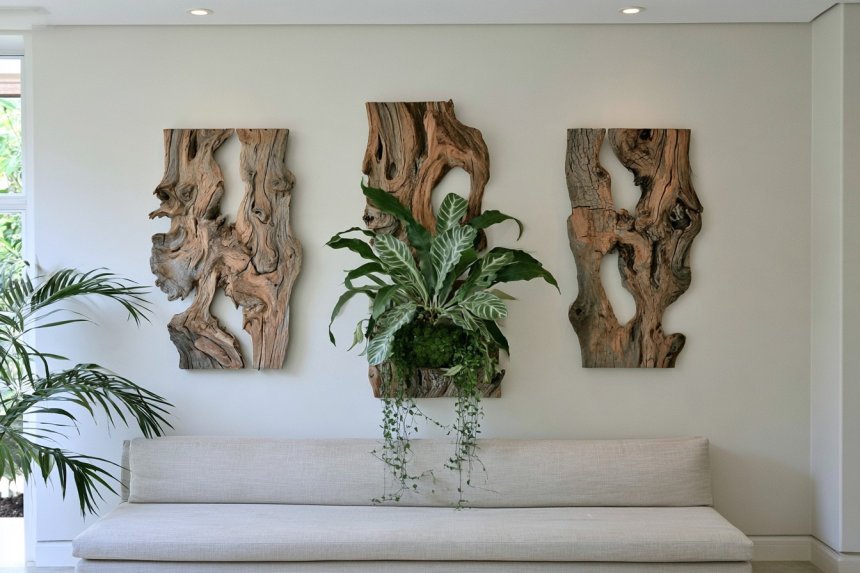
A large staghorn fern can become one of the most dramatic living features in a room, but mounting one successfully takes more thought than simply attaching it to a board. Mature plants can become surprisingly heavy, especially after watering, and their broad fronds need room to arch naturally without being pressed against a wall. The mounting surface, airflow, irrigation access, light direction, and even the distance from nearby furniture can all affect both appearance and plant health. The best displays treat the fern almost like a piece of living sculpture. These approaches combine practical mounting advice with more distinctive design ideas, from oversized timber slabs and suspended frames to corner installations and concealed watering systems.
1. Mount It on an Oversized Live-Edge Timber Slab
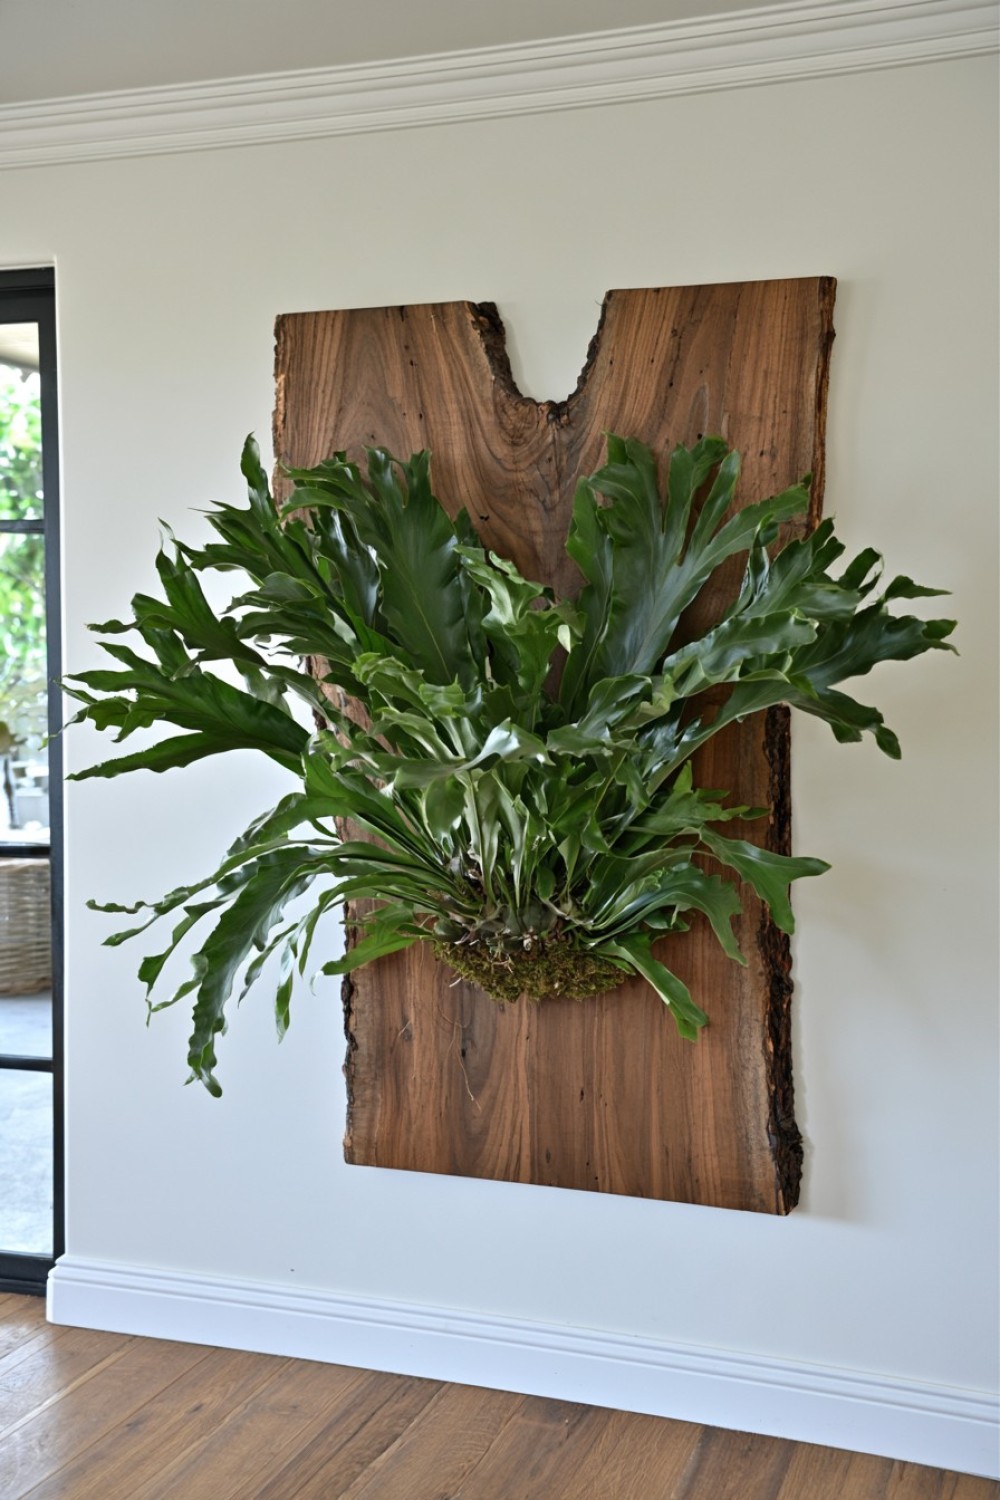
A mature staghorn fern often looks more convincing on a mounting board that feels substantial enough to match its scale.
Instead of using a small square plaque, choose an oversized live-edge hardwood slab with visible grain and an irregular outline. Cedar, cypress, oak, or another moisture-tolerant timber can work well when properly prepared.
You will need a solid wood slab, appropriate wall hardware, sphagnum moss, coated wire or plant-safe mounting line, and a moisture-resistant backing detail if the wall needs protection.
Place the fern slightly off-center rather than exactly in the middle. This allows the fronds to extend naturally and makes the whole piece feel more like botanical sculpture than a centered wall ornament.
Seal only the wood as appropriate; avoid coating the plant's root area with anything that restricts airflow. Because the mount becomes much heavier when wet, fasten it into studs or another reliable structural support rather than relying on lightweight picture hooks.
2. Create a Deep Shadow Gap Behind the Mount
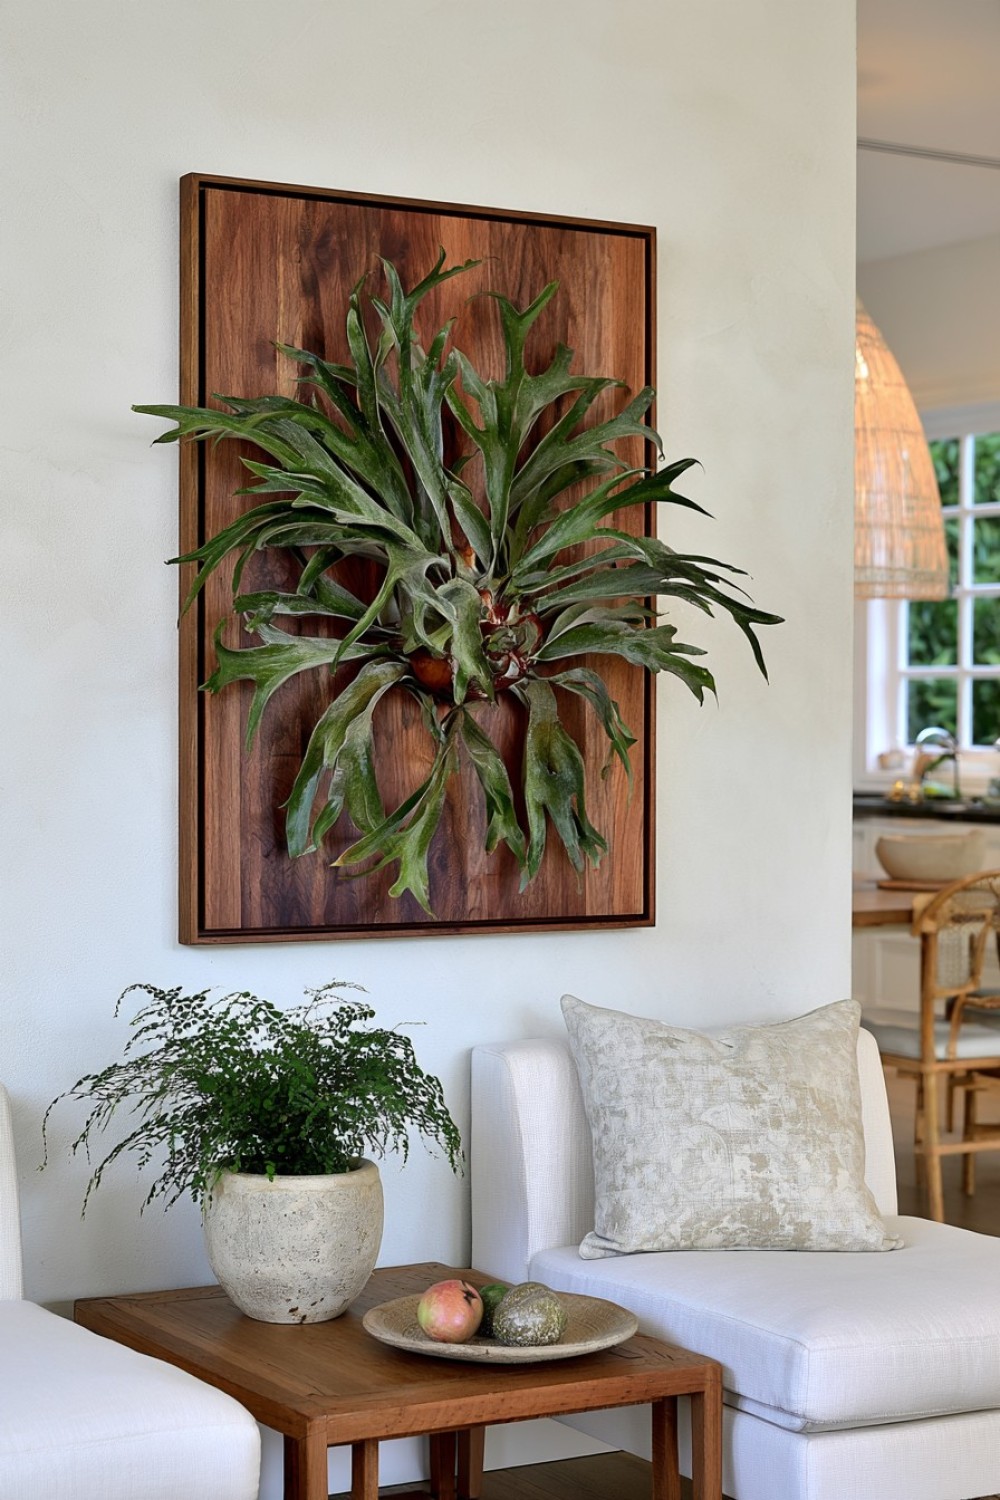
One of the simplest ways to make a large fern look more architectural is to avoid pressing the mounting board flat against the wall.
Use timber spacers or a shallow concealed frame to hold the board several centimeters away from the surface. The gap creates a natural shadow around the mount and gives air more room to circulate behind it.
This also makes the installation appear to float.
For a cleaner DIY version, build a secondary frame on the back of the mounting board and use that frame as the structural attachment point. The hardware remains mostly hidden from normal viewing angles.
A shadow gap is especially effective on plaster, limewash, dark-painted, or textured walls because the contrast around the fern becomes more visible.
It can also help reduce moisture contact between the damp mounting medium and the wall, although a protective barrier may still be appropriate depending on the installation and wall finish.
3. Build a Rounded Mount That Echoes the Fern's Shape
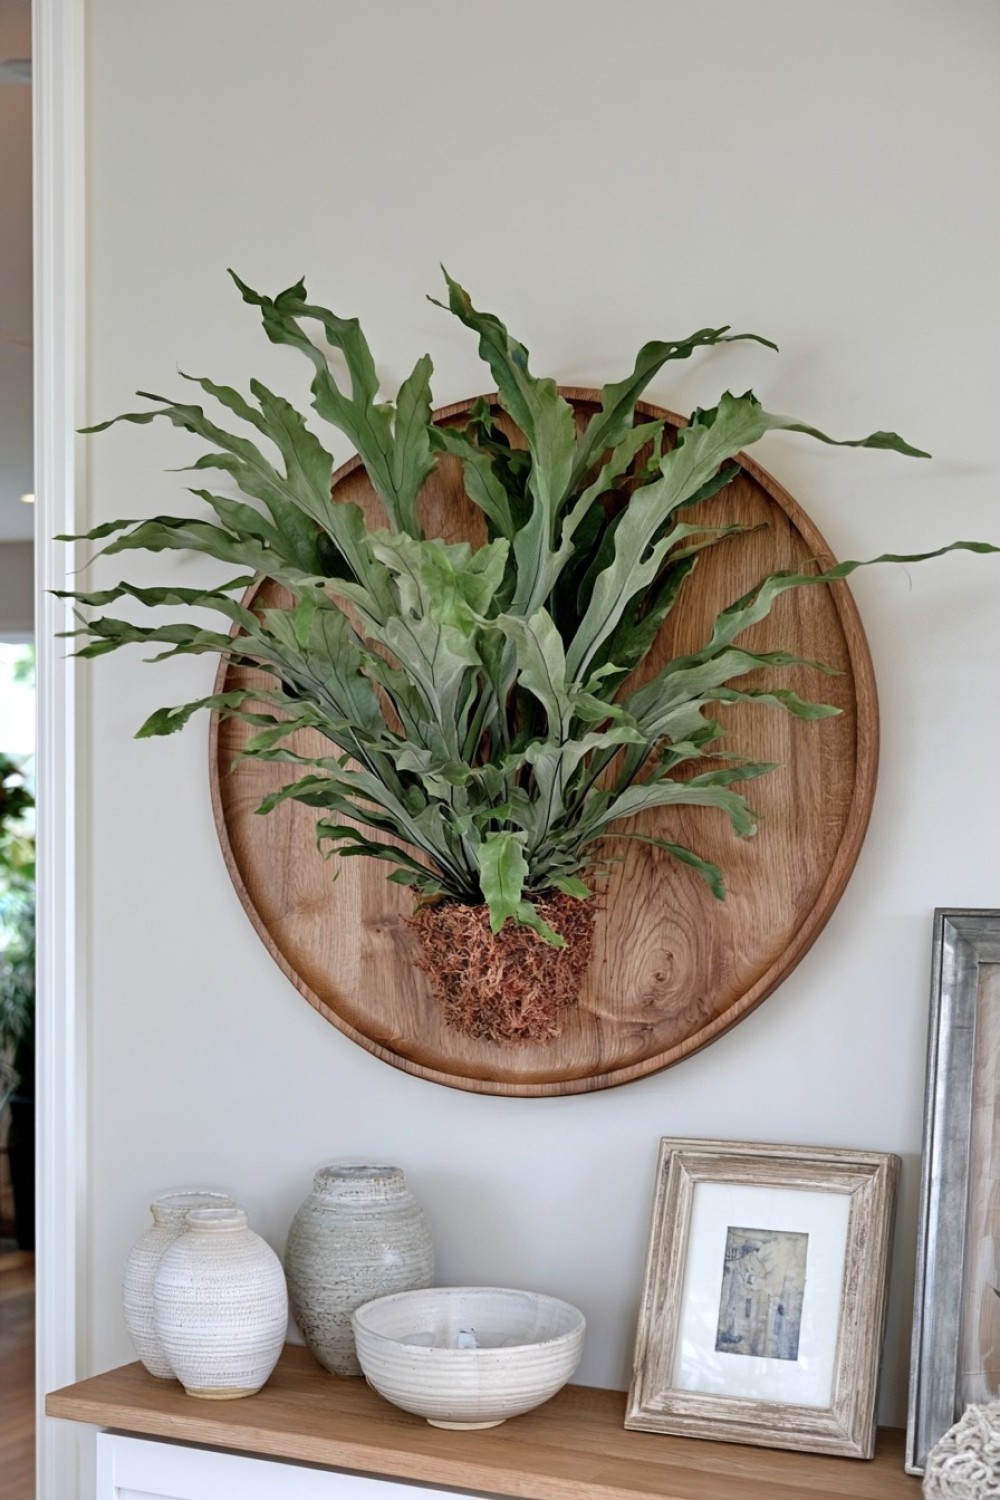
Staghorn ferns have naturally radial growth, so a circular or softly oval support can look more integrated than a rectangular board.
Cut a large round panel from exterior-grade plywood or use a solid timber disc. Finish the visible edge carefully because the perimeter becomes part of the design.
Position the fern slightly below center so upper fronds have more visual space to rise.
This works beautifully in organic-modern, tropical, Scandinavian, and contemporary interiors because the curved backing softens the irregular frond shapes without competing with them.
For a DIY project, use a jigsaw, sanding tools, moisture-resistant finish for the timber, sphagnum moss, plant-safe ties, and substantial wall hardware.
The mount must still be structurally strong. Decorative shape should never come at the cost of reducing thickness or weakening the points where the wall fasteners connect.
4. Hang It Inside a Freestanding Timber Frame
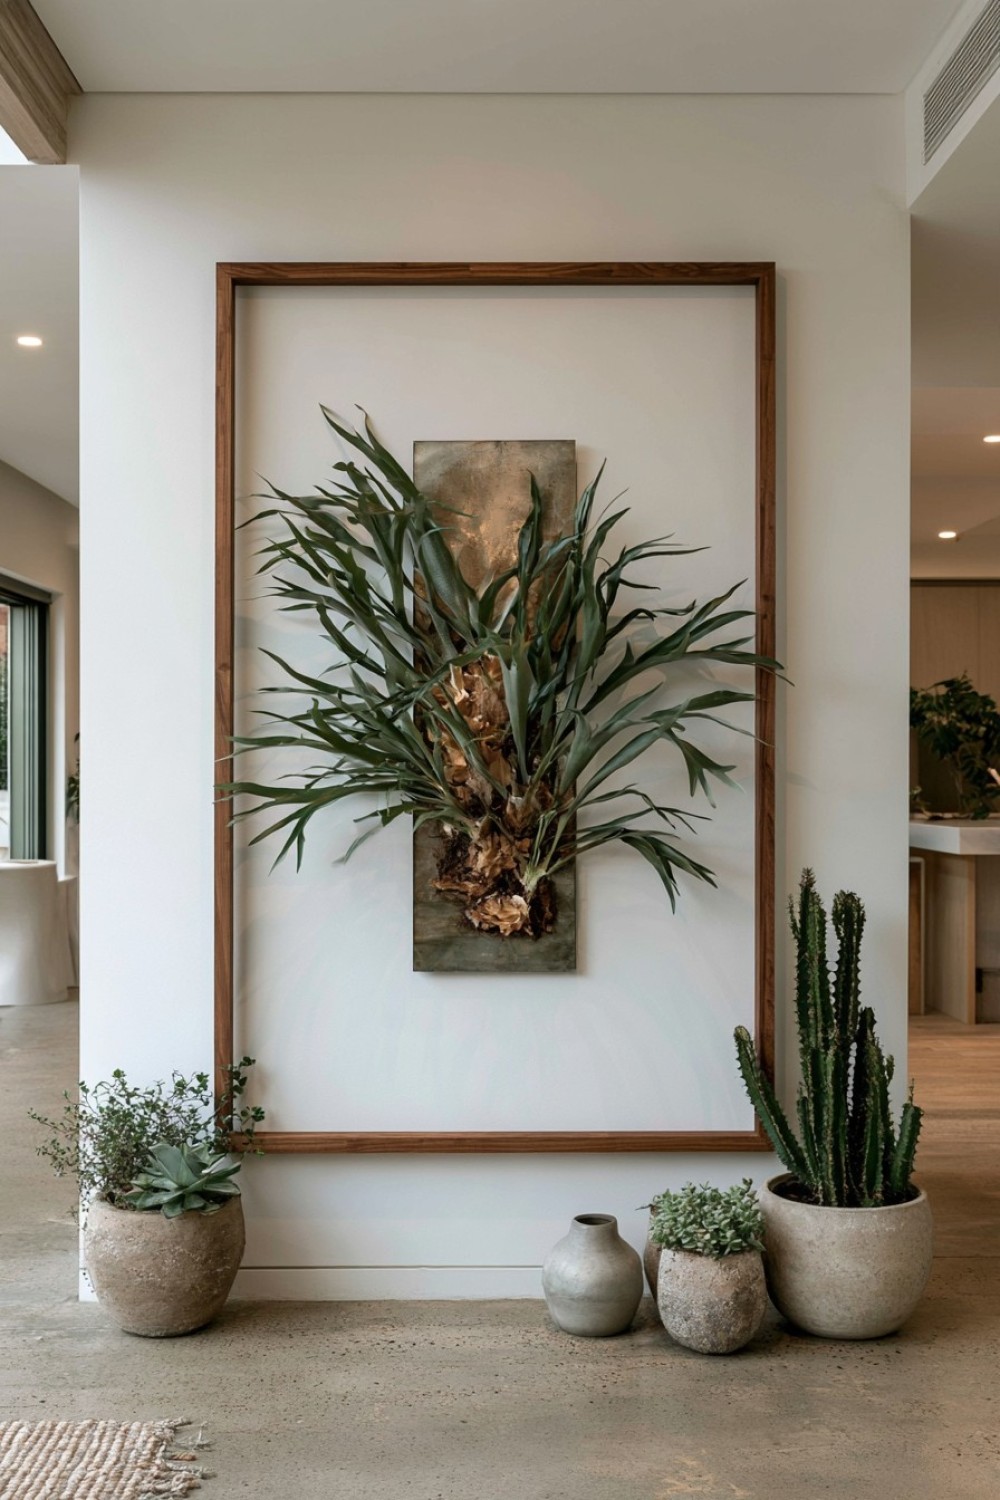
If you want the fern to feel less like wall decor and more like an installation, build a large open frame around it.
Use four substantial timber members to create a rectangular structure, then suspend the mounted fern slightly inside the frame rather than fixing it directly to the surrounding wall.
The negative space around the plant becomes part of the composition.
For a more refined look, keep the frame wider than the fern's root mass but narrower than the full frond spread. This allows the plant to visibly break beyond the frame edges.
You will need hardwood or structural-grade timber, joinery hardware, a separate fern mounting board, strong suspension points, and wall or floor anchoring suitable for the frame.
This approach can work especially well in lofts, double-height rooms, or wide stair landings where a conventional plaque would look too small.
5. Use a Corner Mount to Let the Fronds Wrap the Architecture
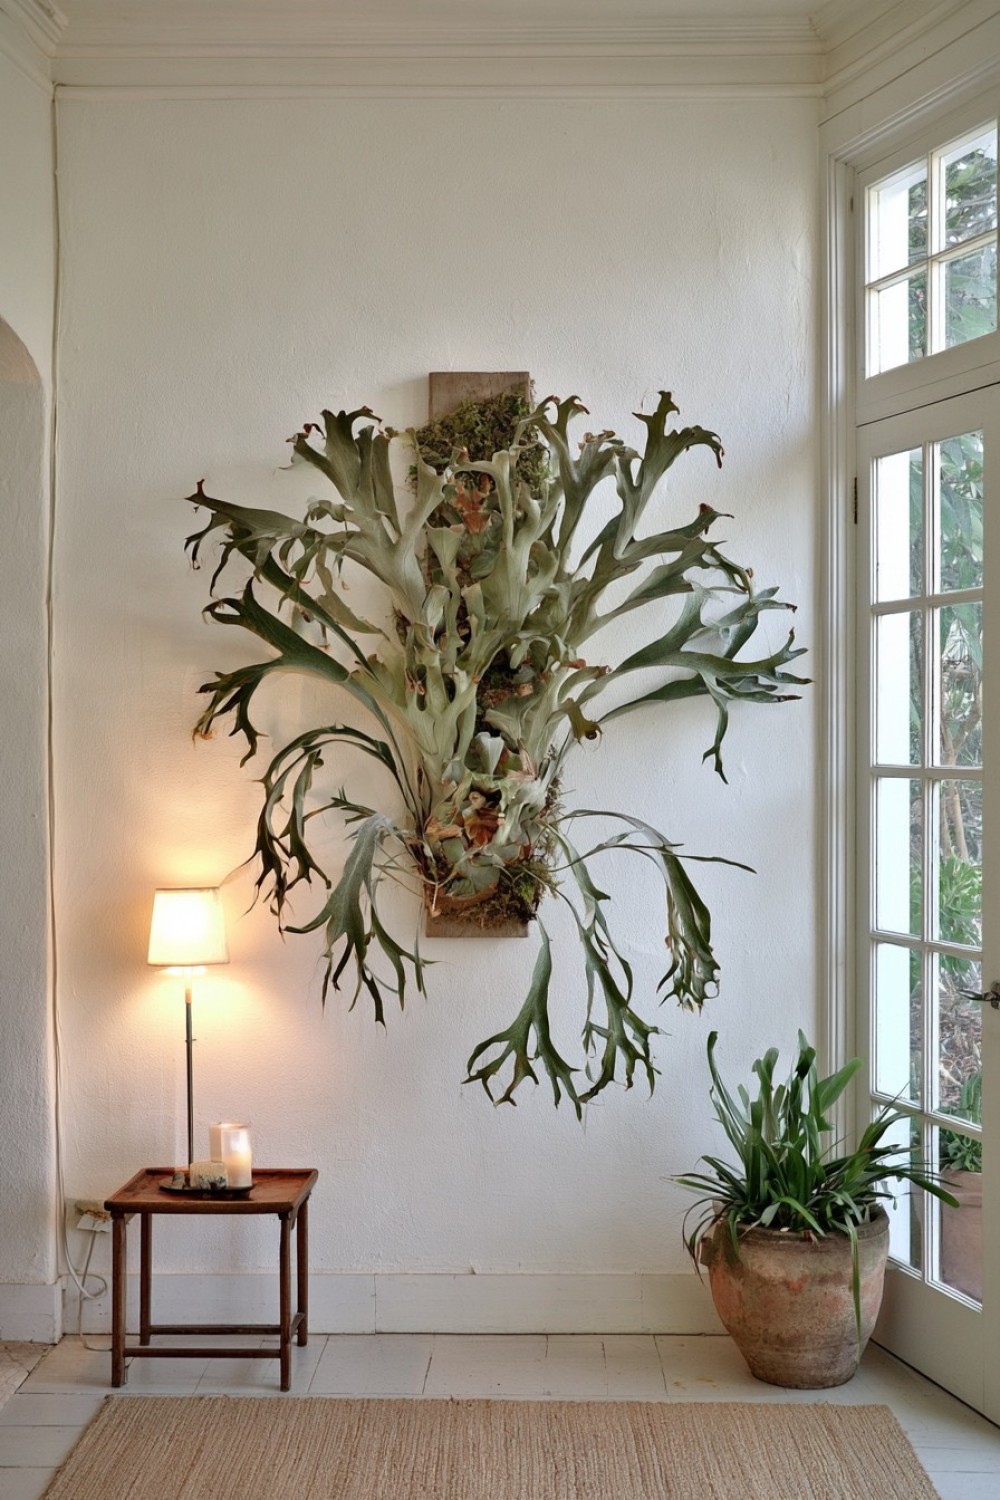
A large staghorn fern does not have to sit on a flat wall.
Mounting one near an inside corner can allow the fronds to spread across two planes, making the plant feel larger and more immersive.
The trick is to keep the root mount itself on one stable surface while positioning the plant close enough to the corner for the fronds to visually overlap the adjacent wall.
This setup works particularly well in tall rooms where a corner would otherwise remain empty.
Avoid wedging the fern tightly into the corner. It still needs airflow around the mounting medium and enough clearance for new fronds to develop.
A darker or textured corner wall can amplify the silhouette of the plant, while a lighter wall makes the green fronds feel more graphic.
6. Turn a Slatted Wood Panel Into a Botanical Backdrop
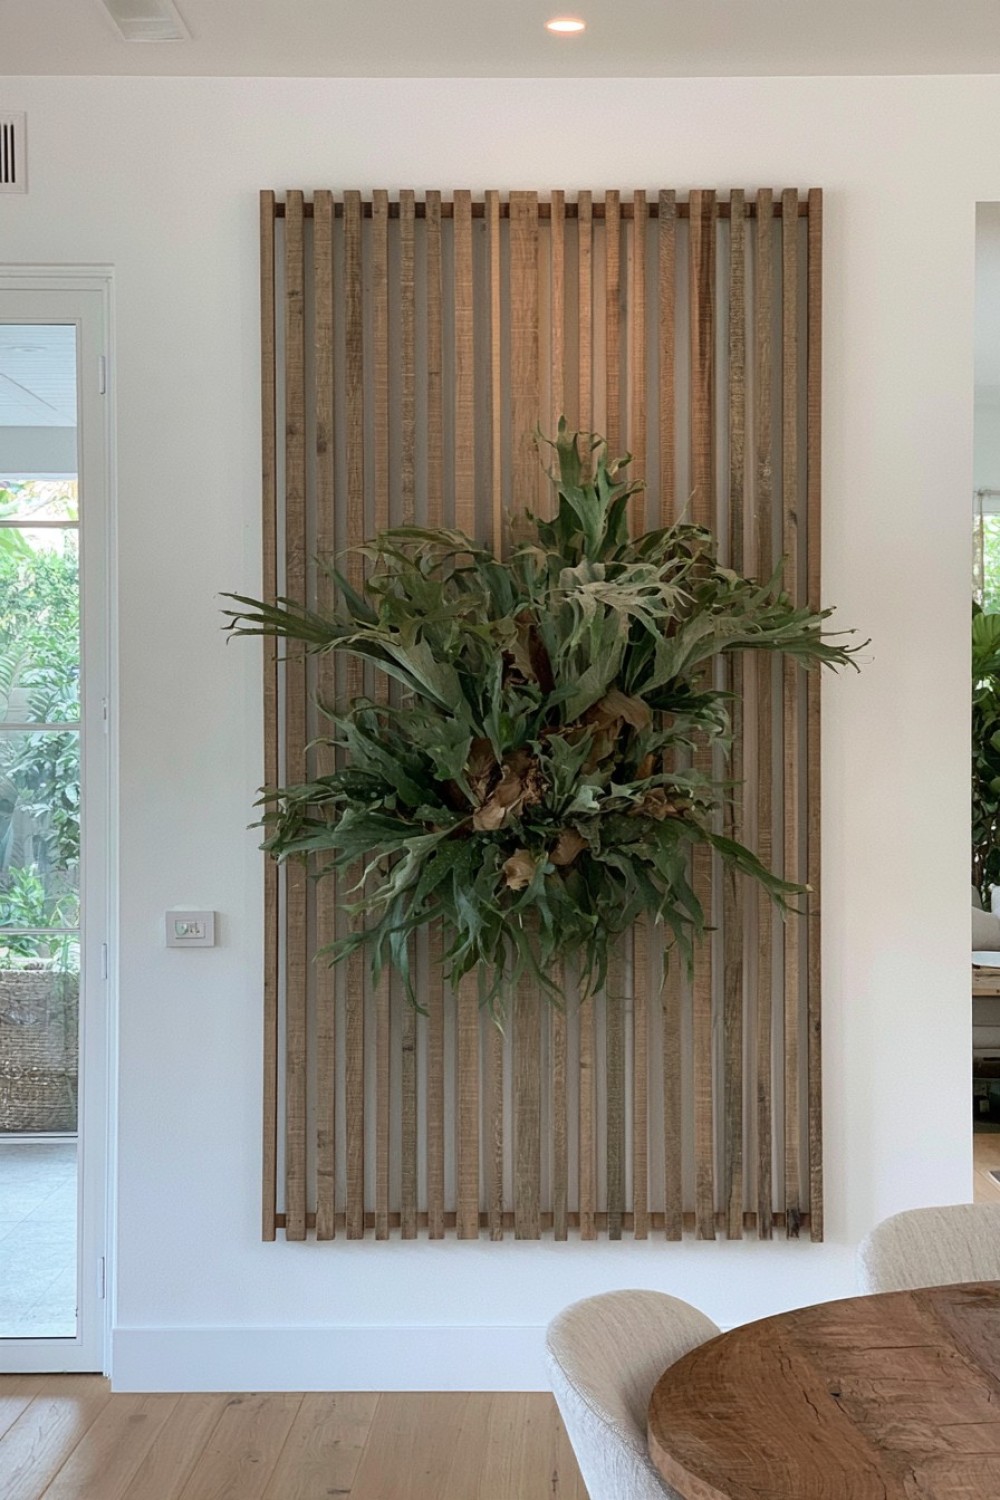
Instead of mounting the fern directly to the wall, create a vertical timber slat panel behind it.
Use evenly spaced oak, cedar, or painted wood slats mounted over a strong backing structure. Then attach the actual fern mount to the structural layer, not to decorative slats alone.
The vertical lines make the irregular fern feel even more sculptural and can visually increase ceiling height.
This is a strong solution for an entryway, dining room, or large living-room wall where one plant needs enough visual weight to anchor the space.
The slats also help create a small amount of separation from the wall, which can improve the sense of depth.
For a more dramatic effect, run the slatted panel from floor to ceiling while keeping the fern itself around eye level or slightly higher.
7. Suspend It From a Ceiling Beam Rather Than the Wall
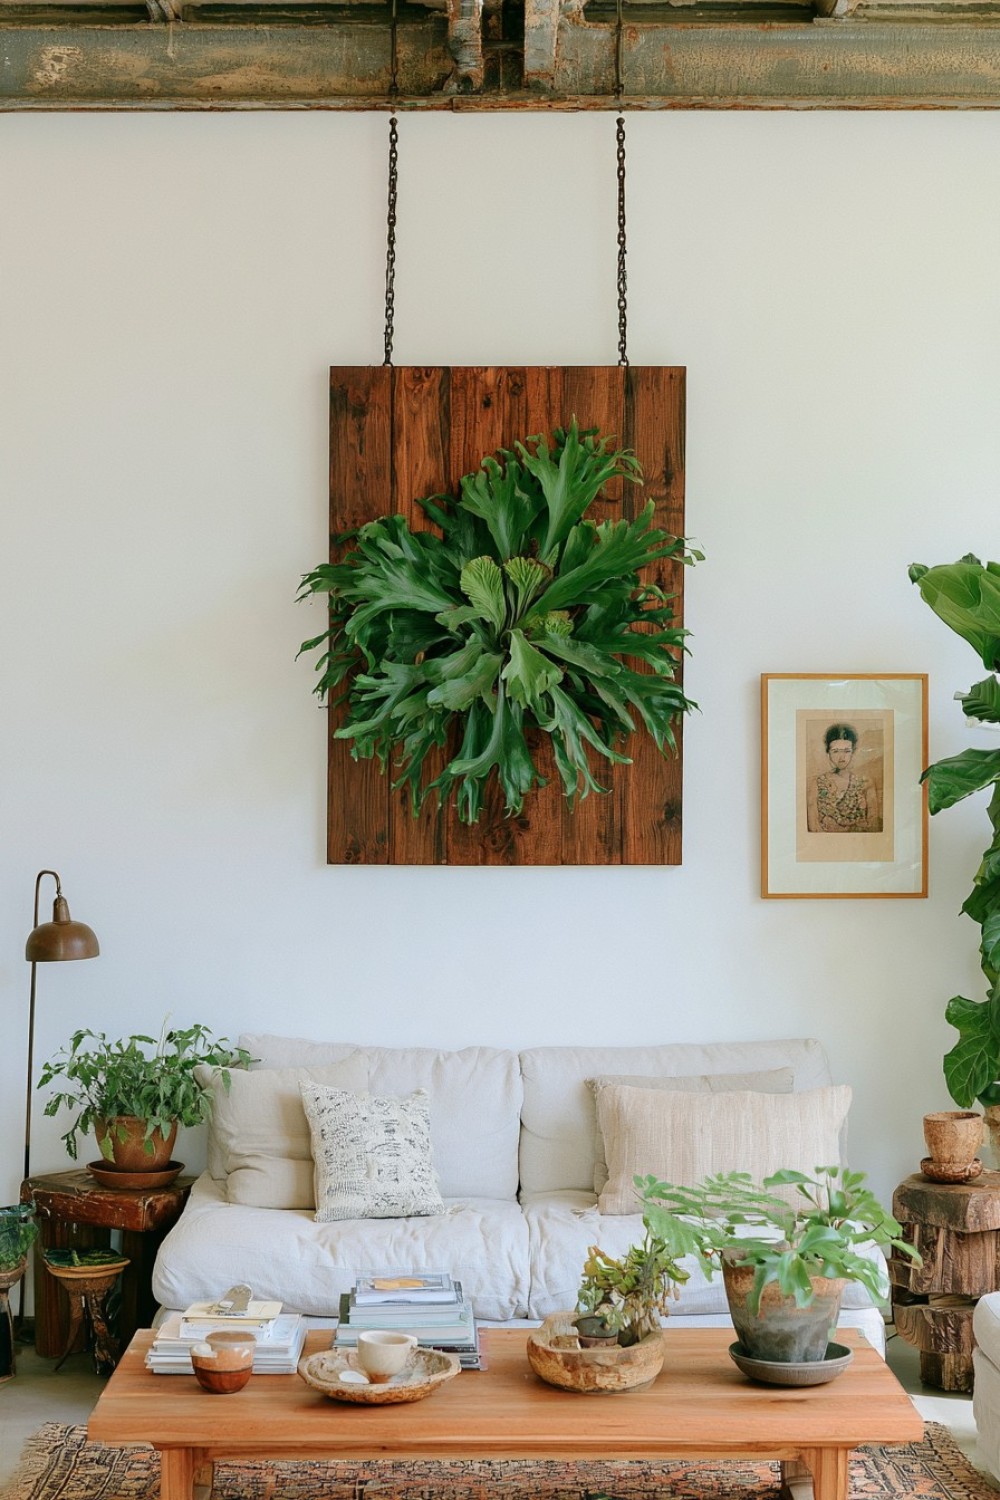
A mature fern can look spectacular when suspended in front of a wall instead of attached directly to it.
This works best when there is a structural ceiling beam or another approved load-bearing point.
Mount the fern to a rigid backing board, then suspend that board with two strong cables or chains so it stays stable and does not rotate.
The result allows air to move behind the plant and creates a floating botanical effect.
However, this should only be attempted when the ceiling structure is suitable for the full wet weight of the plant, mount, moss, and hardware.
Use two or more suspension points to control movement and prevent the board from twisting.
Keep the installation well clear of doors, fans, and high-traffic areas.
8. Design a Hidden Watering Access Point
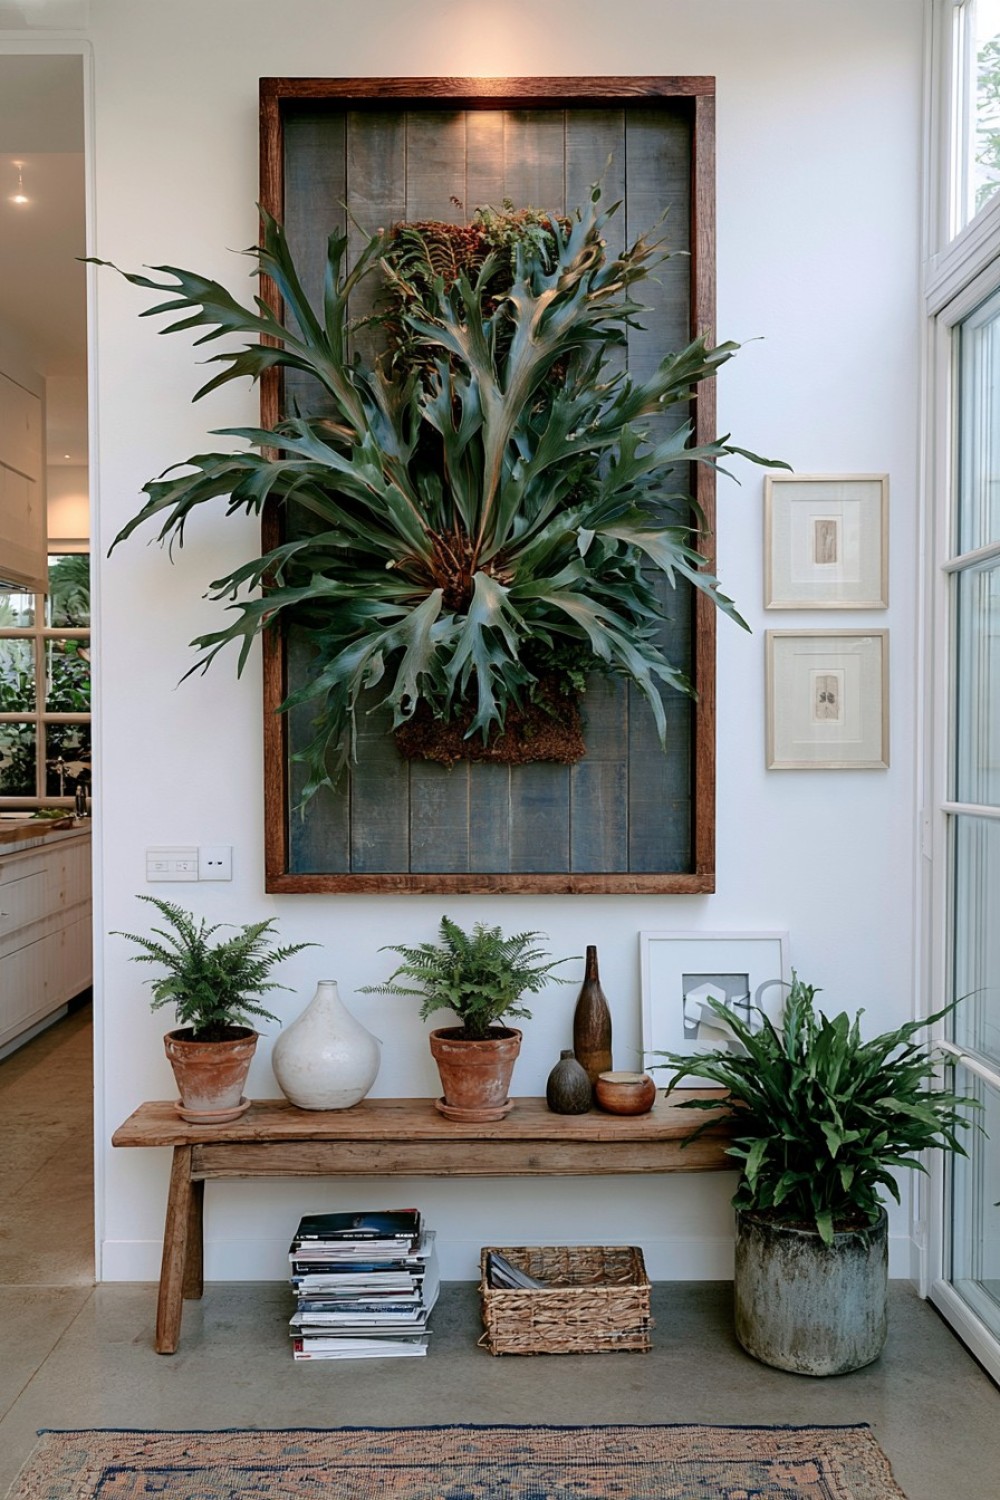
Large wall-mounted staghorn ferns can become awkward to water once they are high on the wall.
A better installation anticipates irrigation from the beginning.
One option is to mount the fern on a removable board that lifts off a French cleat. This allows the entire plant to be taken down for soaking when needed.
Another option is to build a discreet watering channel or access opening at the top of the moss bundle so water can be applied slowly without pouring over the wall.
A French cleat system is especially practical for heavy mounts because it distributes weight across a horizontal support while still allowing removal.
The hardware should be sized for the full saturated weight of the plant.
Designing watering access before mounting can prevent future damage to walls, furniture, and flooring.
9. Use a Large French Cleat for a Cleaner Heavy-Duty Mount
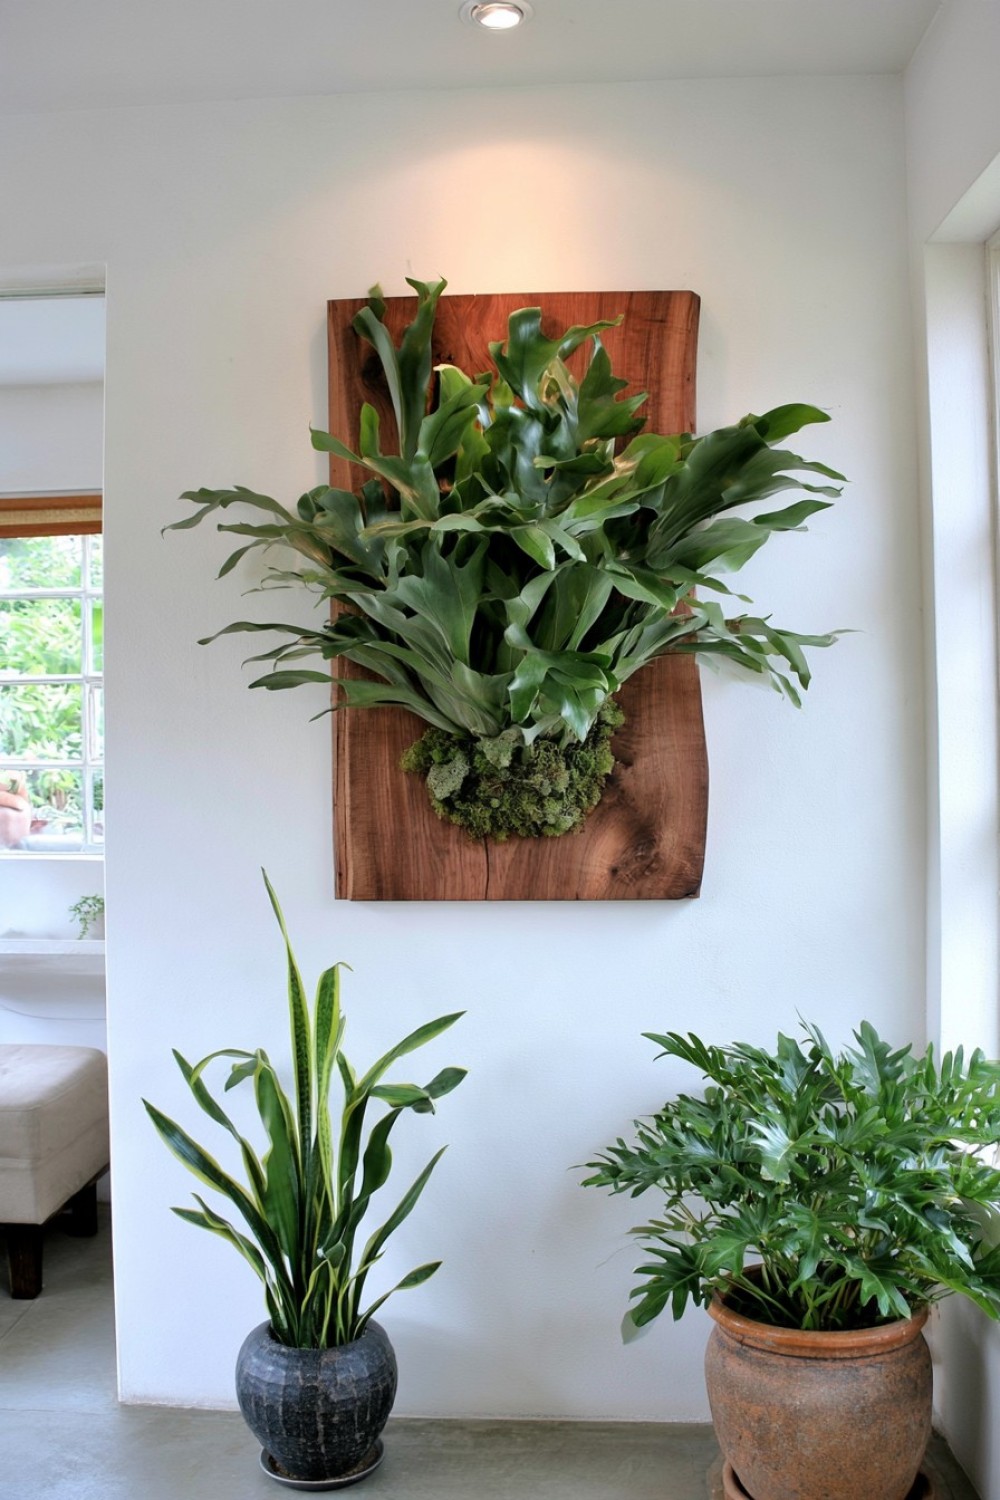
For substantial plants, a French cleat can be much more practical than several visible screws.
Attach one beveled timber rail securely to the wall and a matching rail to the back of the mounting board. The two pieces interlock and distribute weight across a wider area.
This also makes the mount easier to remove for maintenance.
Use hardwood or structural plywood rather than thin decorative strips, and fasten the wall cleat into appropriate structural backing.
The cleat should sit high enough behind the board that the mount remains stable and does not tip forward.
A small lower spacer can keep the board parallel to the wall.
This method is especially useful when the mounting board itself is part of the visual design and you want the hardware completely hidden.
10. Pair the Fern With a Dark Wall for Maximum Frond Contrast
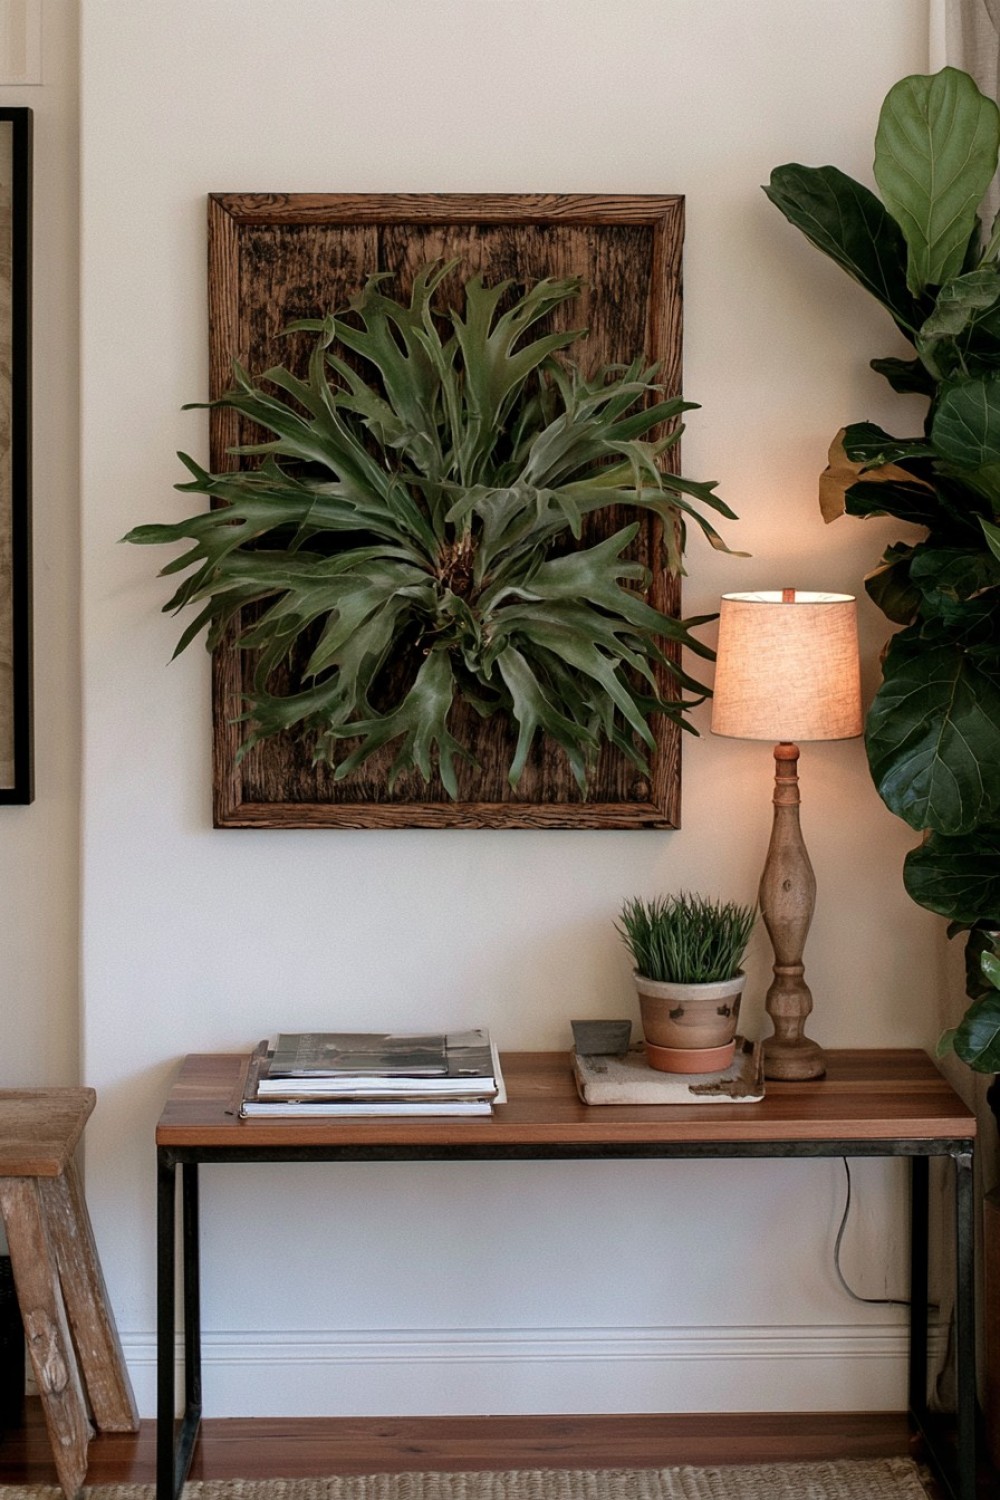
Sometimes the most powerful improvement is not the mount but the background.
Deep charcoal, forest green, muted navy, clay brown, or nearly black walls can make silver-green staghorn fronds appear much more dimensional.
Against a dark surface, the branching antler-like silhouette becomes easier to read from across the room.
Keep the mounting board relatively restrained. Natural oak, blackened timber, or warm walnut usually works better than a highly decorative painted plaque.
This is a pure styling approach rather than a DIY mounting method, but it can make an ordinary installation feel far more dramatic without altering the plant itself.
Make sure the wall color choice does not encourage you to place the fern in a dim location. The plant still needs suitable bright, indirect light regardless of the background.
11. Create a Multi-Level Fern Composition
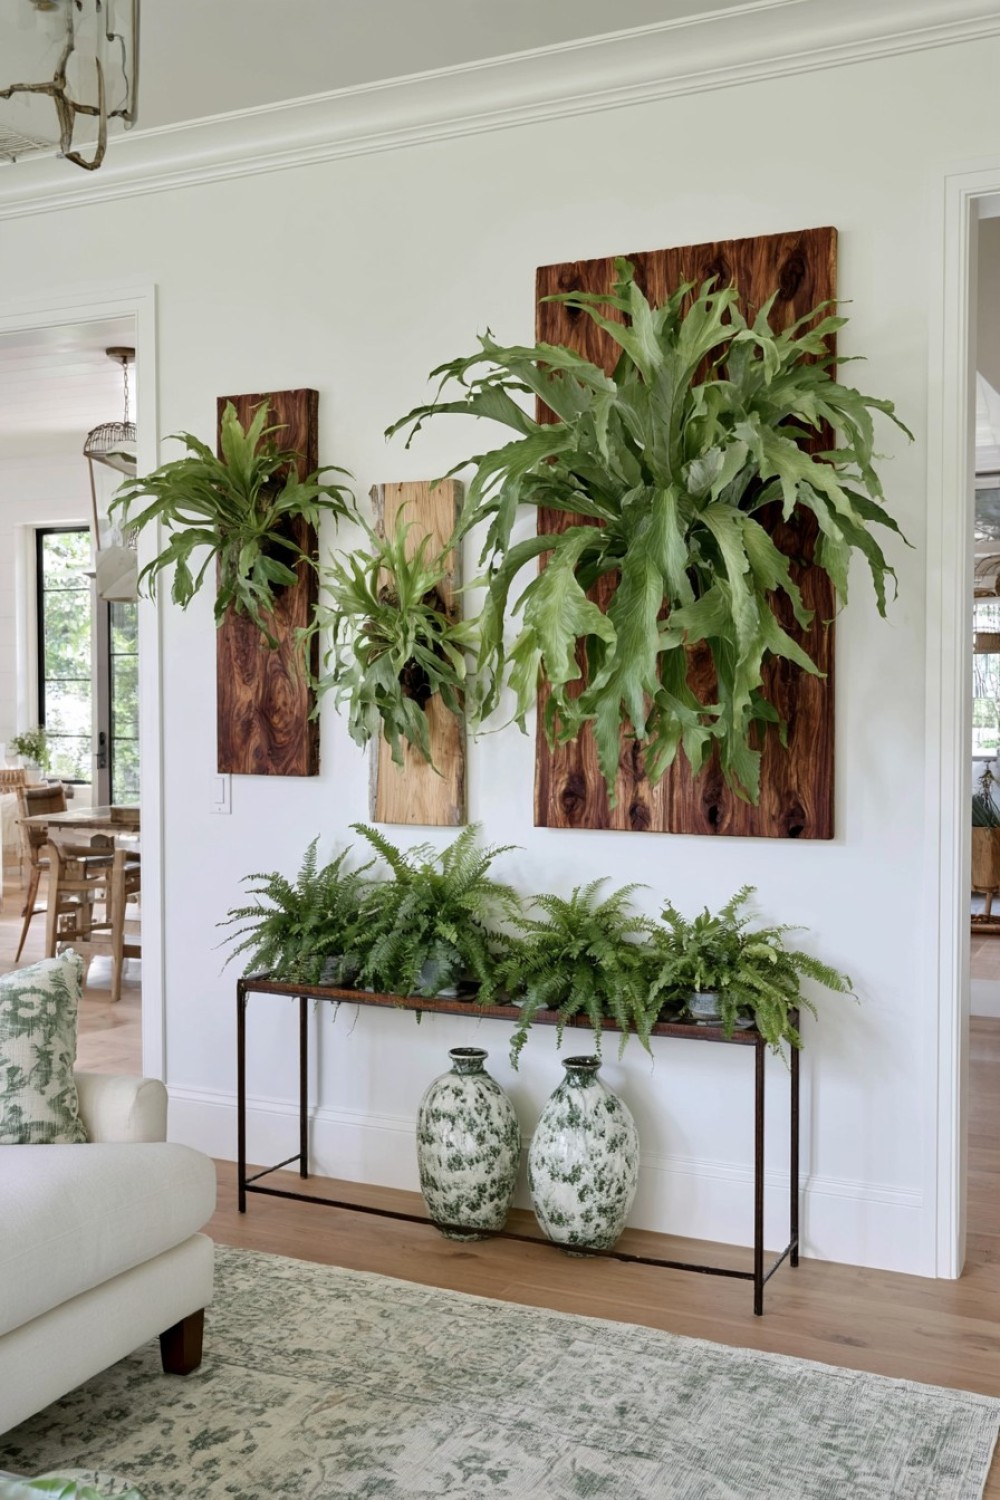
If you have more than one staghorn fern, avoid mounting them in a perfectly even row.
Use one large specimen as the anchor, then position one or two smaller mounts above or beside it at staggered heights.
The asymmetry creates a more natural composition and can make the wall resemble a botanical collection.
Use related but not identical mounting materials. For example, one mount might be walnut, another pale oak, and a third dark-stained timber.
Keep enough physical distance between plants for air circulation and future growth.
This is especially effective on tall stair walls or large double-height spaces where one fern alone might feel visually isolated.
Avoid crowding too many plants together simply to fill the wall. Their fronds need room to remain distinct.
12. Mount It on Cork for a Softer Organic Look
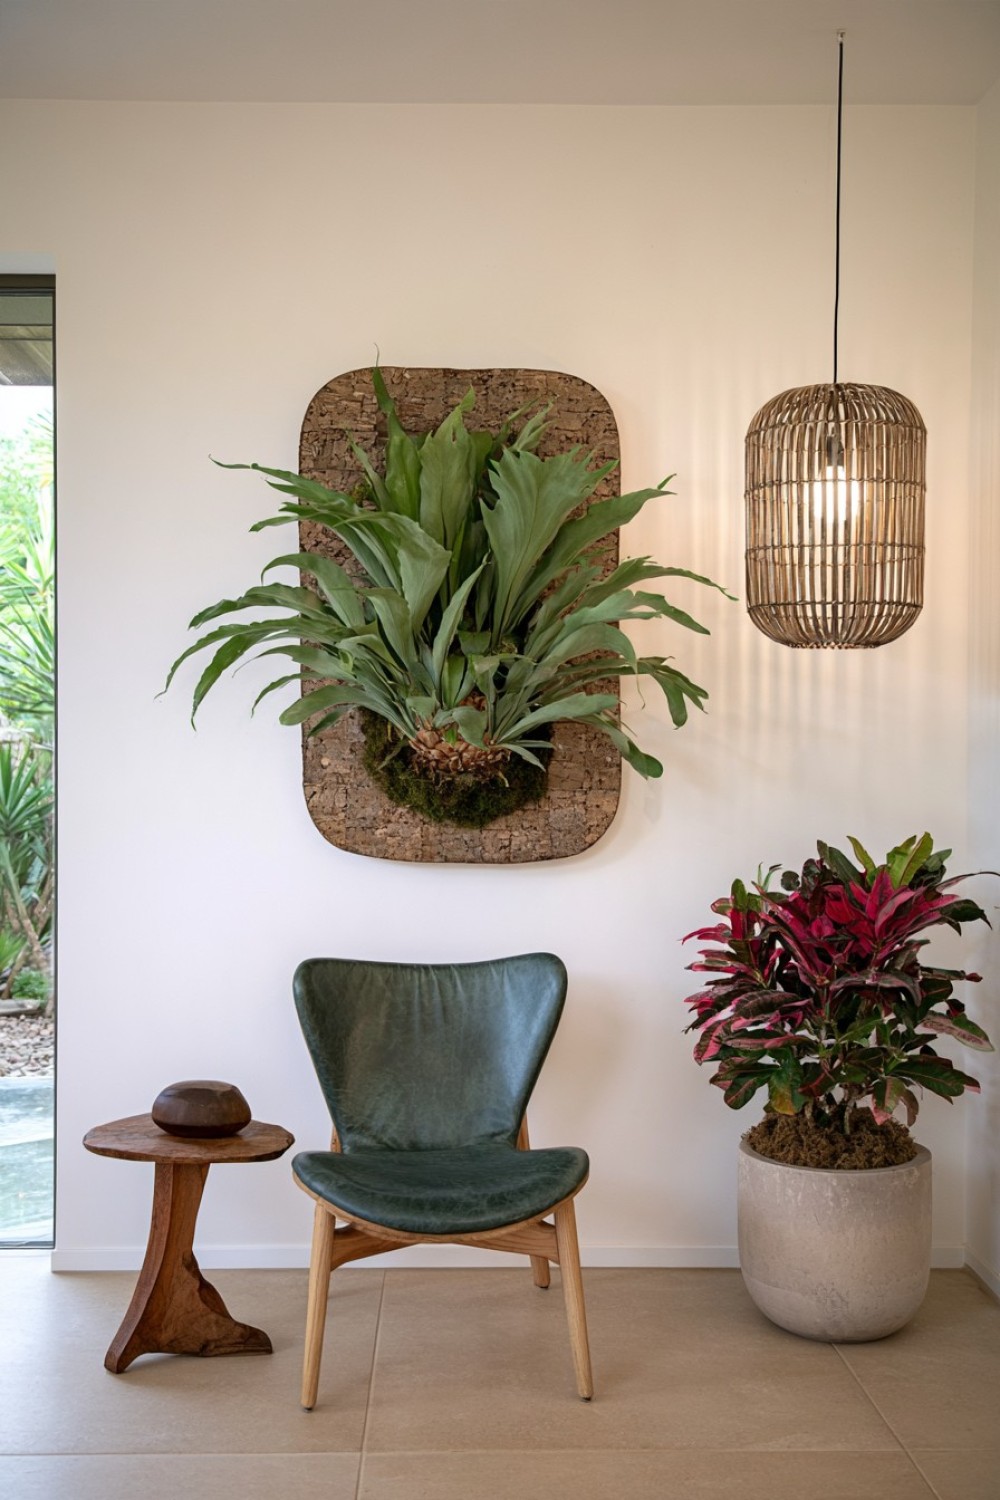
A thick cork panel can create a warmer, less expected alternative to timber.
Use cork only as the visible surface over a strong structural backing. The backing—not the cork itself—should carry the load.
The natural mottled texture complements the fern without competing with it, and the material works particularly well in modern, earthy, or biophilic interiors.
A large rounded rectangle or irregular organic shape can make the mount feel custom.
For DIY construction, adhere a thick cork sheet to exterior-grade plywood, trim the edges carefully, and mount the plant through the cork into the structural board behind.
Because cork can absorb moisture, the mounting design should prevent prolonged saturation and allow good drying between watering sessions.
13. Build a Split-Level Mount With Two Wood Planes
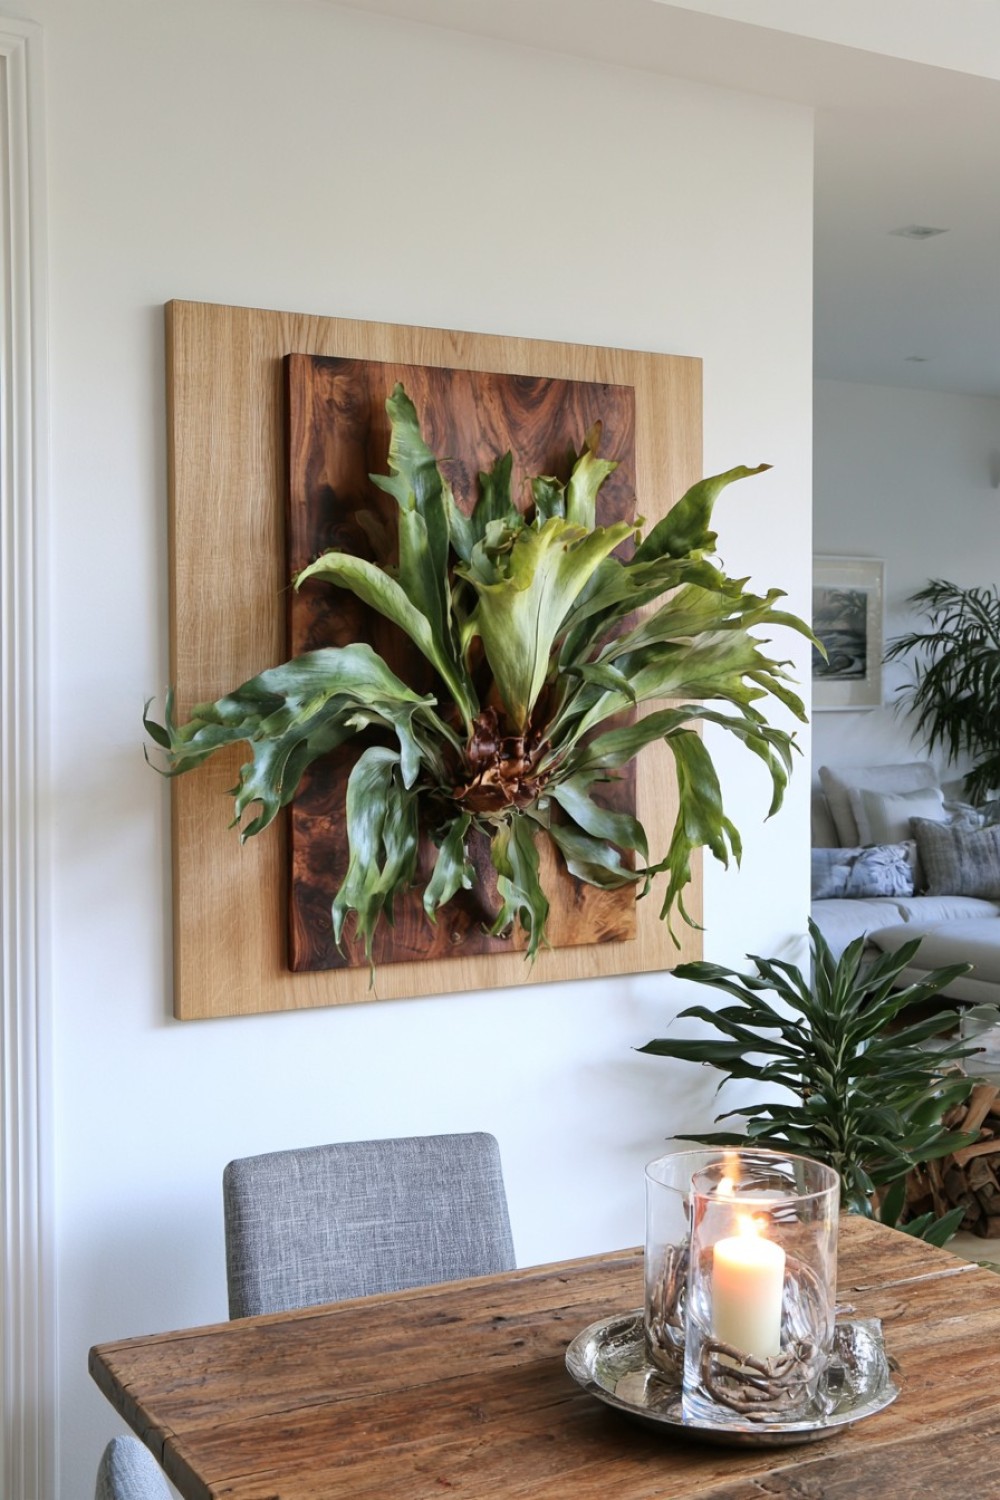
A more architectural mount can use two overlapping timber planes instead of one flat board.
Create a larger background panel and add a smaller raised panel in front of it using concealed spacers. Mount the fern onto the front section.
The offset layers create extra shadow and give the installation depth even before the plant is added.
Use two related finishes—for example, pale oak behind and darker walnut in front—to emphasize the construction.
This works particularly well in contemporary interiors where the plant needs to connect visually with built-in furniture or wall paneling.
The rear board should remain the primary structural element, with fasteners passing into suitable wall support.
Keep the stepped layers shallow enough that the plant does not project excessively into the room.
14. Use an Antique Board for a Collected, Uneven Look
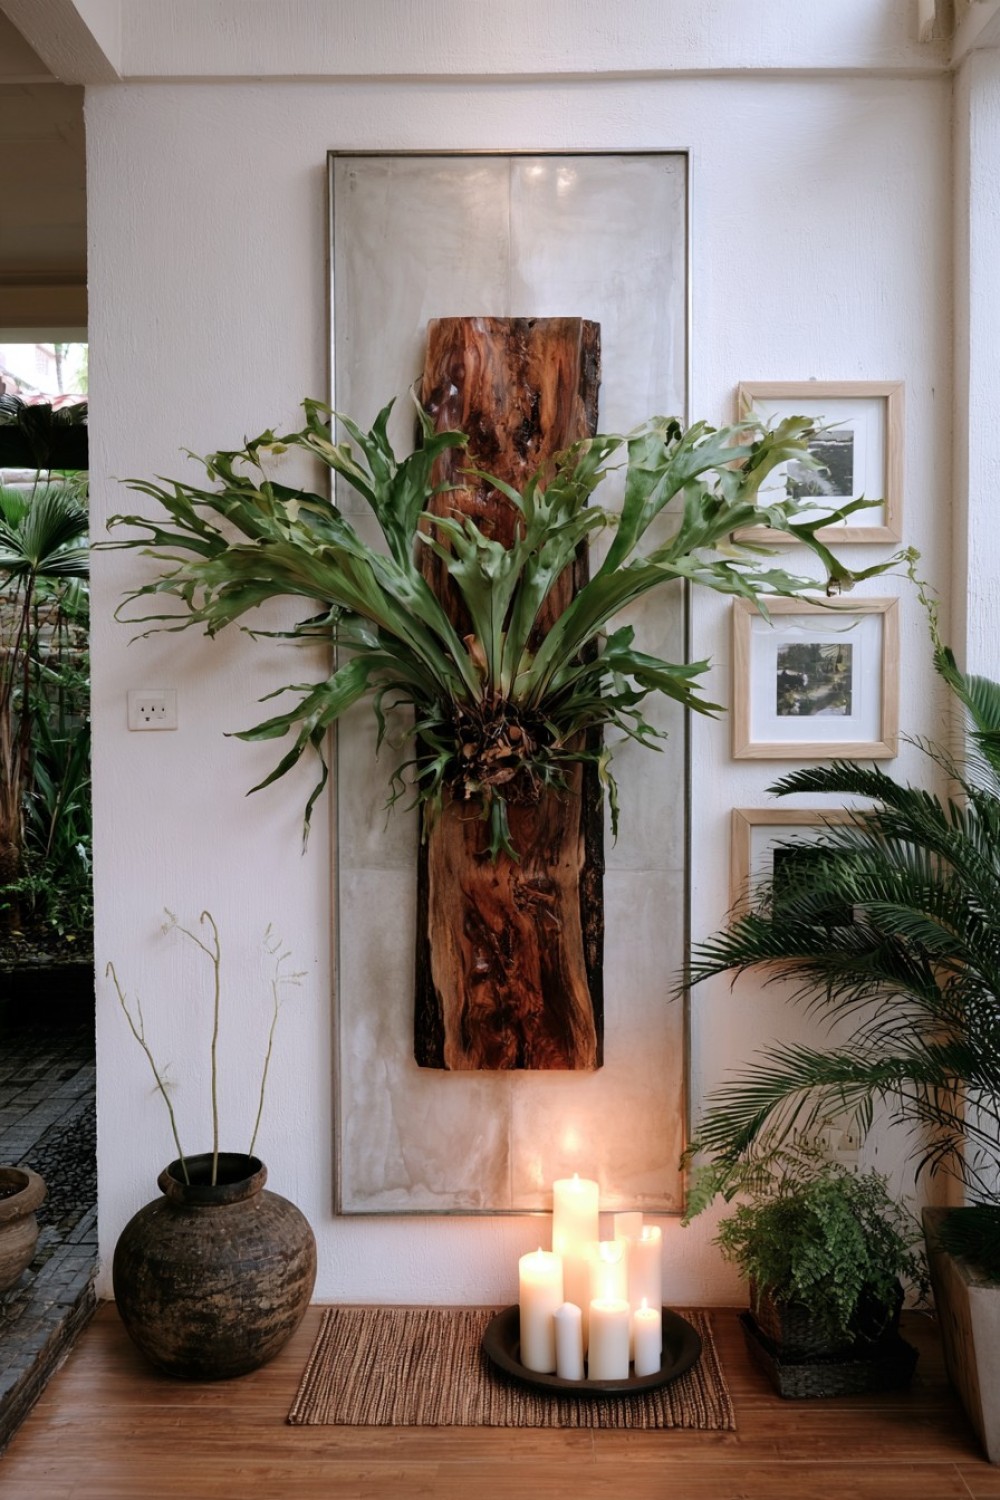
A weathered breadboard, old cutting board, reclaimed cabinet door, or salvaged timber panel can become an unusual staghorn mount.
The appeal comes from the contrast between the living fern and the aged surface.
Before using reclaimed material, make sure it is structurally sound, free from active rot or insect damage, and not coated in unstable or unknown finishes.
Clean it thoroughly and reinforce it from behind if needed.
Irregular nail holes, old saw marks, and worn edges can remain visible because they help the mount feel collected rather than manufactured.
This approach works especially well in rustic kitchens, conservatories, eclectic interiors, and rooms with antique furniture.
Do not let aesthetic age override structural safety. A mature wet fern can be far heavier than the old board was ever intended to carry.
15. Give the Fern Its Own Moisture-Safe Wall Zone
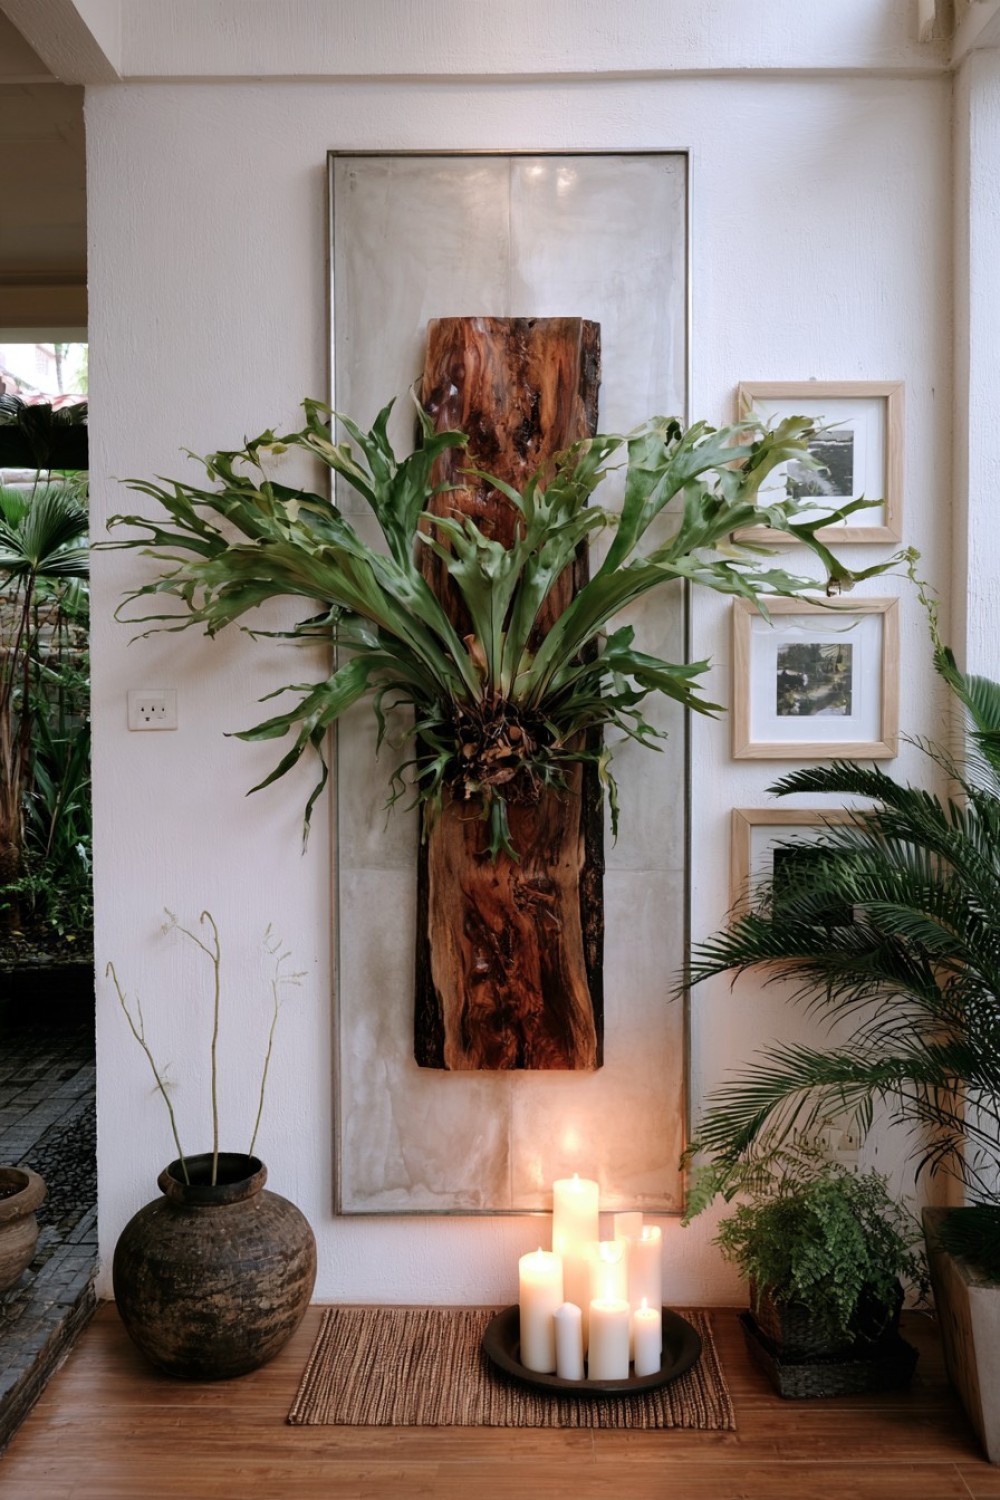
Large mounted ferns can drip during watering, especially when moss is thoroughly saturated.
Instead of treating this as an afterthought, design the wall area around the plant to tolerate moisture.
A section of stone, tile, sealed microcement, or another moisture-resistant surface can sit behind the mount.
This creates a practical splash zone while also framing the plant visually.
A narrow stone panel behind a natural timber mount can look especially refined and makes cleanup easier than painted drywall.
You can also place a discreet removable tray or absorbent mat beneath the plant during watering.
This solution is particularly useful for very large specimens that are difficult to remove from the wall regularly.
16. Let the Plant Become a Living Room Focal Point, Not Just Wall Decor
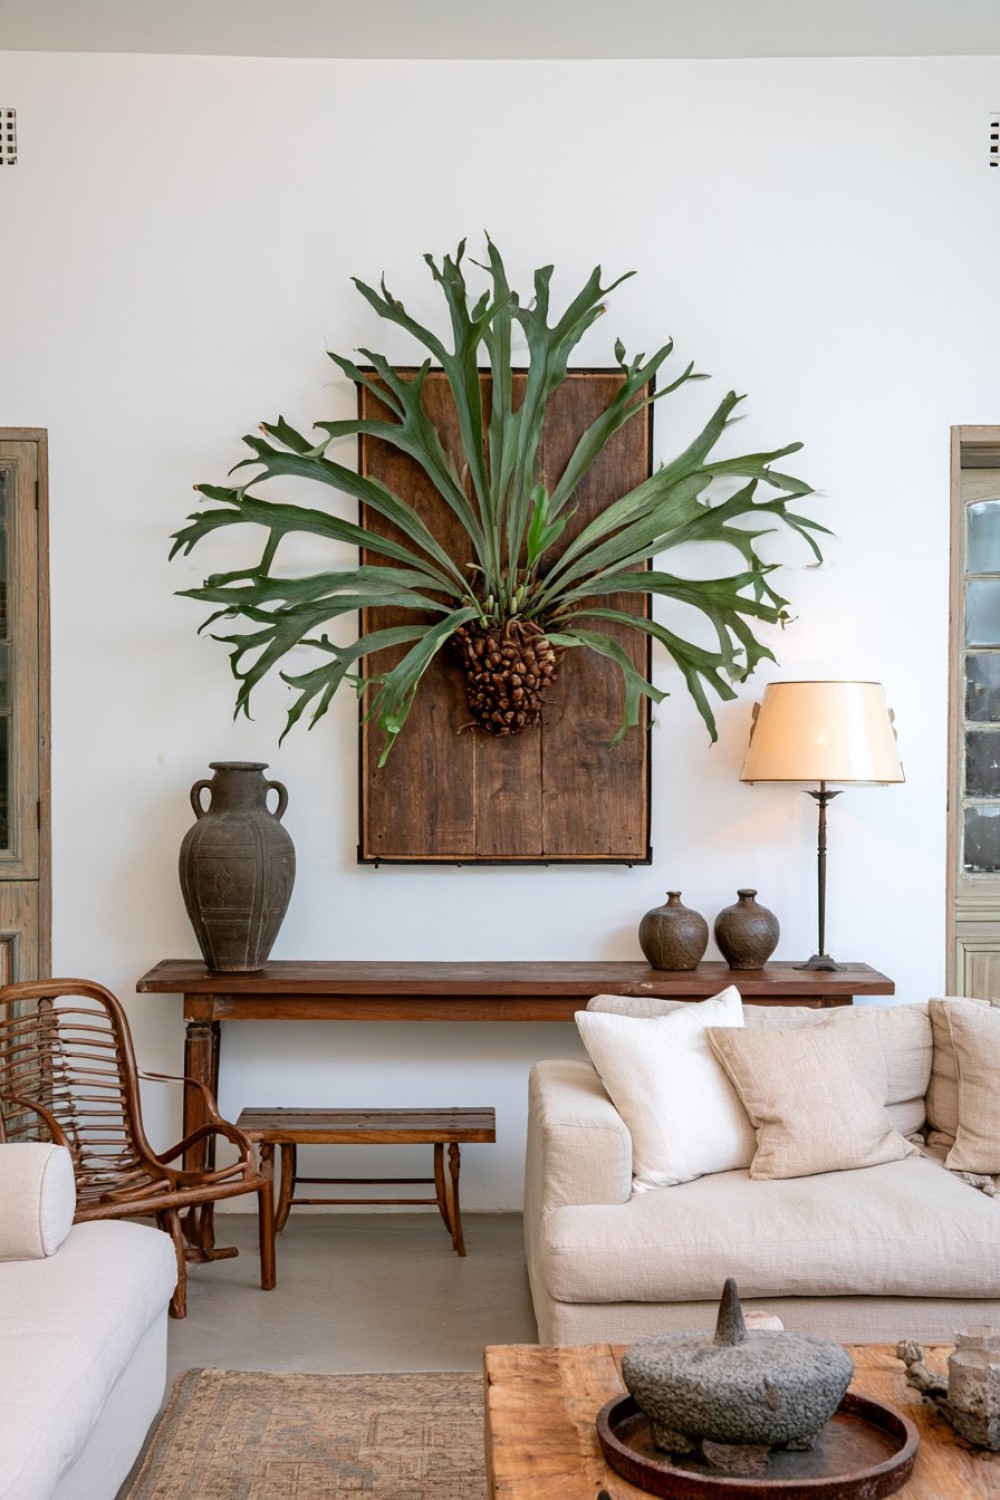
A mature staghorn fern is visually strong enough to replace conventional artwork.
Instead of fitting it into a gallery wall, give it clear space around the mount and arrange nearby furniture to acknowledge it.
A low console, sculptural chair, or narrow bench can sit beneath the fern without competing for attention.
Keep surrounding wall decor minimal and allow the fronds to cast natural shadows.
The plant should have enough room to expand without touching nearby shelves, lights, or curtains.
This styling decision also makes maintenance easier because the fern remains accessible.
Treating the plant as the focal point rather than filling every surrounding space is often what makes the installation feel most intentional.
Making a Large Staghorn Fern Look Good for Years
The best mounting system needs to work when the plant is wet, heavier, and several years larger—not just when it is first installed. Choose structural hardware based on the saturated weight of the fern and mounting medium, provide enough airflow behind the plant, and leave generous space for new fronds.
Bright indirect light is generally preferable to harsh direct sun indoors, while watering frequency should respond to temperature, humidity, airflow, and how quickly the moss dries rather than following a rigid calendar. Mature staghorn ferns also produce shield fronds that naturally brown as they age; these should not automatically be removed simply because they no longer look green.
From a design perspective, scale is equally important. A large fern benefits from a mount, wall area, and surrounding furniture arrangement substantial enough to support its visual presence. When installation and plant care are planned together, the result feels less like a hanging houseplant and more like living architecture.
MORE IDEAS


Share
What's Your Reaction?
 Like
0
Like
0
 Dislike
0
Dislike
0
 Love
0
Love
0
 Funny
0
Funny
0
 Angry
0
Angry
0
 Sad
0
Sad
0
 Wow
0
Wow
0