

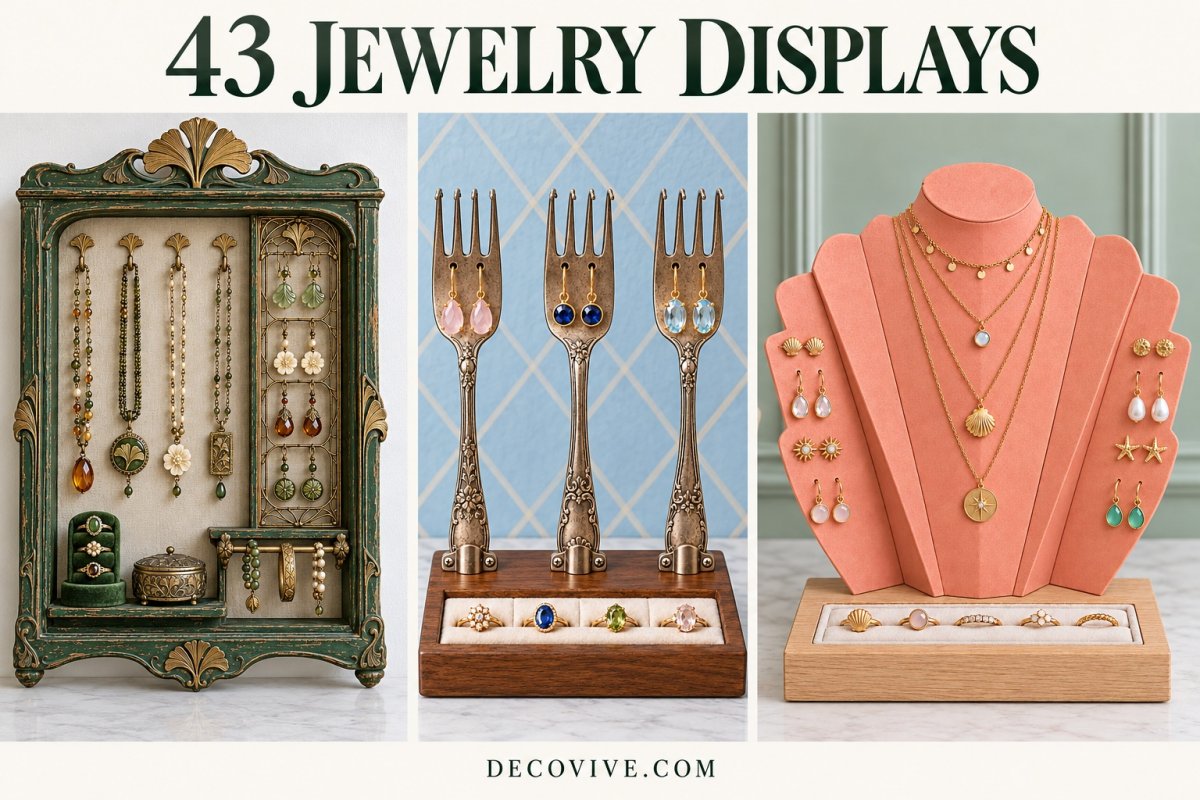
A jewelry display works best when it makes choosing what to wear easier and gives the collection a place in the room. These 43 ideas range from carved wall cabinets and small tabletop stands to fabric organizers and sculptural ring holders. Each takes a different approach to the pieces it supports, the space it occupies or the way it opens for access. Start with the jewelry you actually use, then borrow the details that suit your dresser, dressing corner or available wall.
Choose a format · Browse the 43 displays · Adapt a frame · Check the budget · Care and safety
Table of Contents
- Choose Support Before Style
- 1. Rose Carving Around a Daily Jewelry Station
- 2. Gothic Doors Become Extra Earring Space
- 3. A Powder Blue Cabinet for Brooches and Pendants
- 4. Green Floral Trim with a Clear Hanging Layout
- 5. Ginkgo Details Frame a Tall Earring Column
- 6. An Oval Case Puts Brooches at the Center
- 7. Lavender Compartments Keep Long Chains Separate
- 8. An Art Deco Necklace Takes the Spotlight
- 9. An Arched Frame Carries Color Above the Collection
- 10. A Chair Back Finds a Smaller Role on the Wall
- 11. A China Stand Sorts Jewelry by Height
- 12. An Artist's Palette Becomes a Compact Organizer
- 13. A Birdcage Makes Space for a Small Rotation
- 14. A Floral Fan Sets the Shape for an Earring Rail
- 15. A Muffin Pan Gives Each Pair Its Own Recess
- 16. A Dollhouse Cabinet Separates Four Jewelry Tasks
- 17. An Open Book Display Stands on an Easel
- 18. Three Forks Hold Three Favorite Earring Pairs
- 19. A Candelabra Becomes a Ring and Earring Sculpture
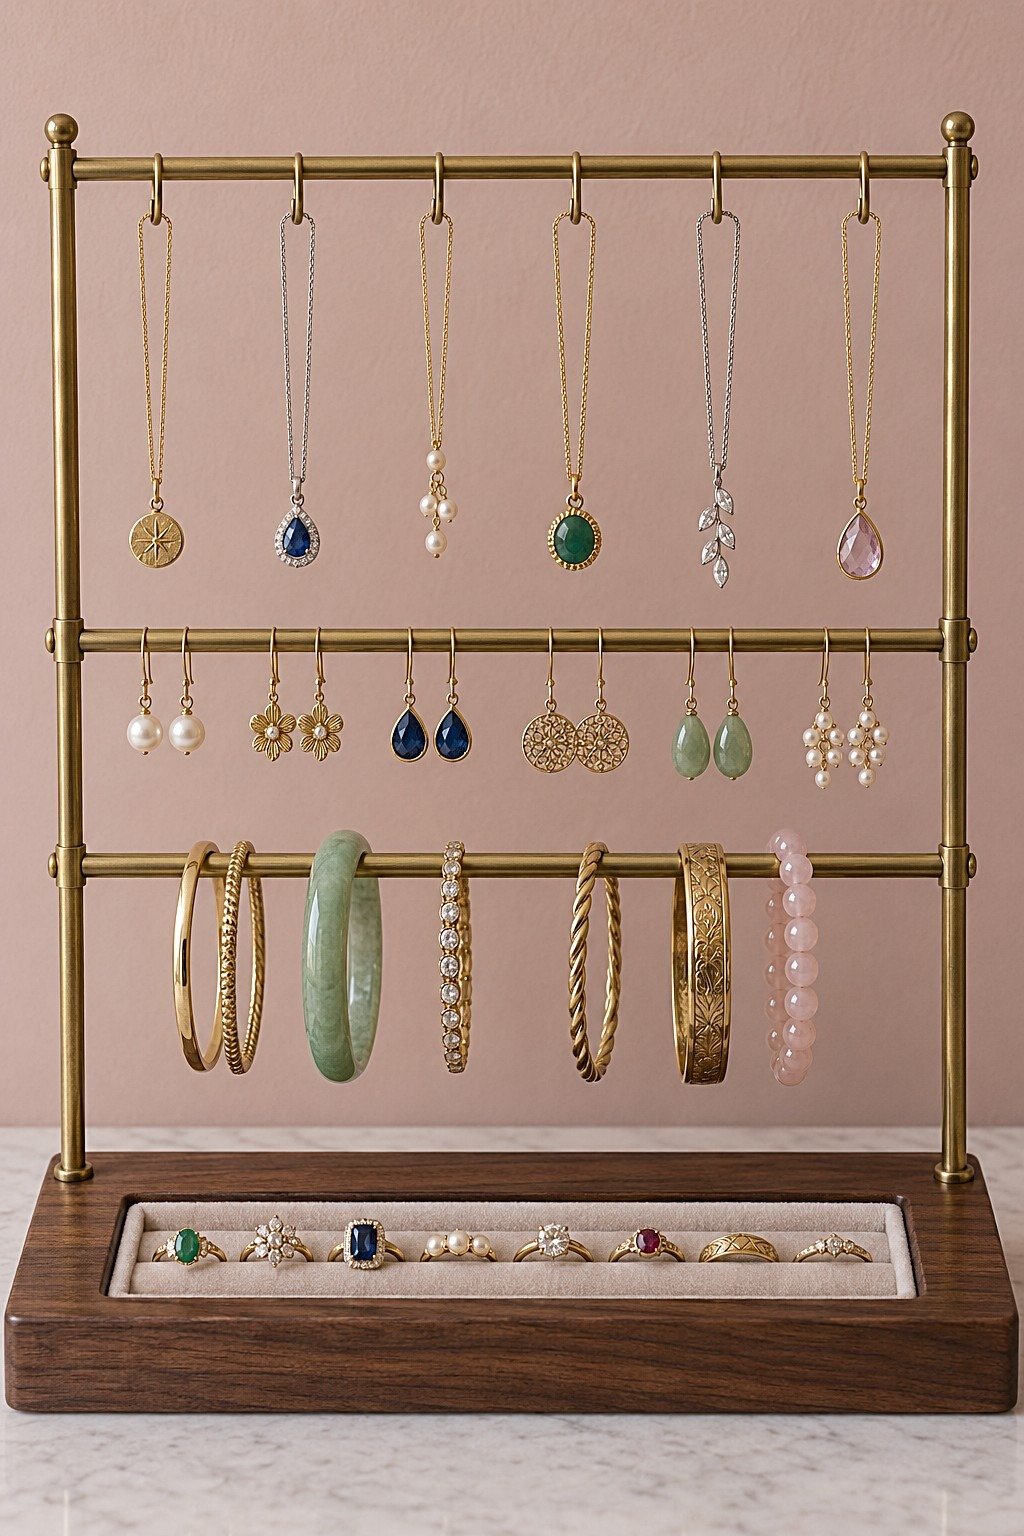
- 20. A Three Rail Stand Organizes by Jewelry Type
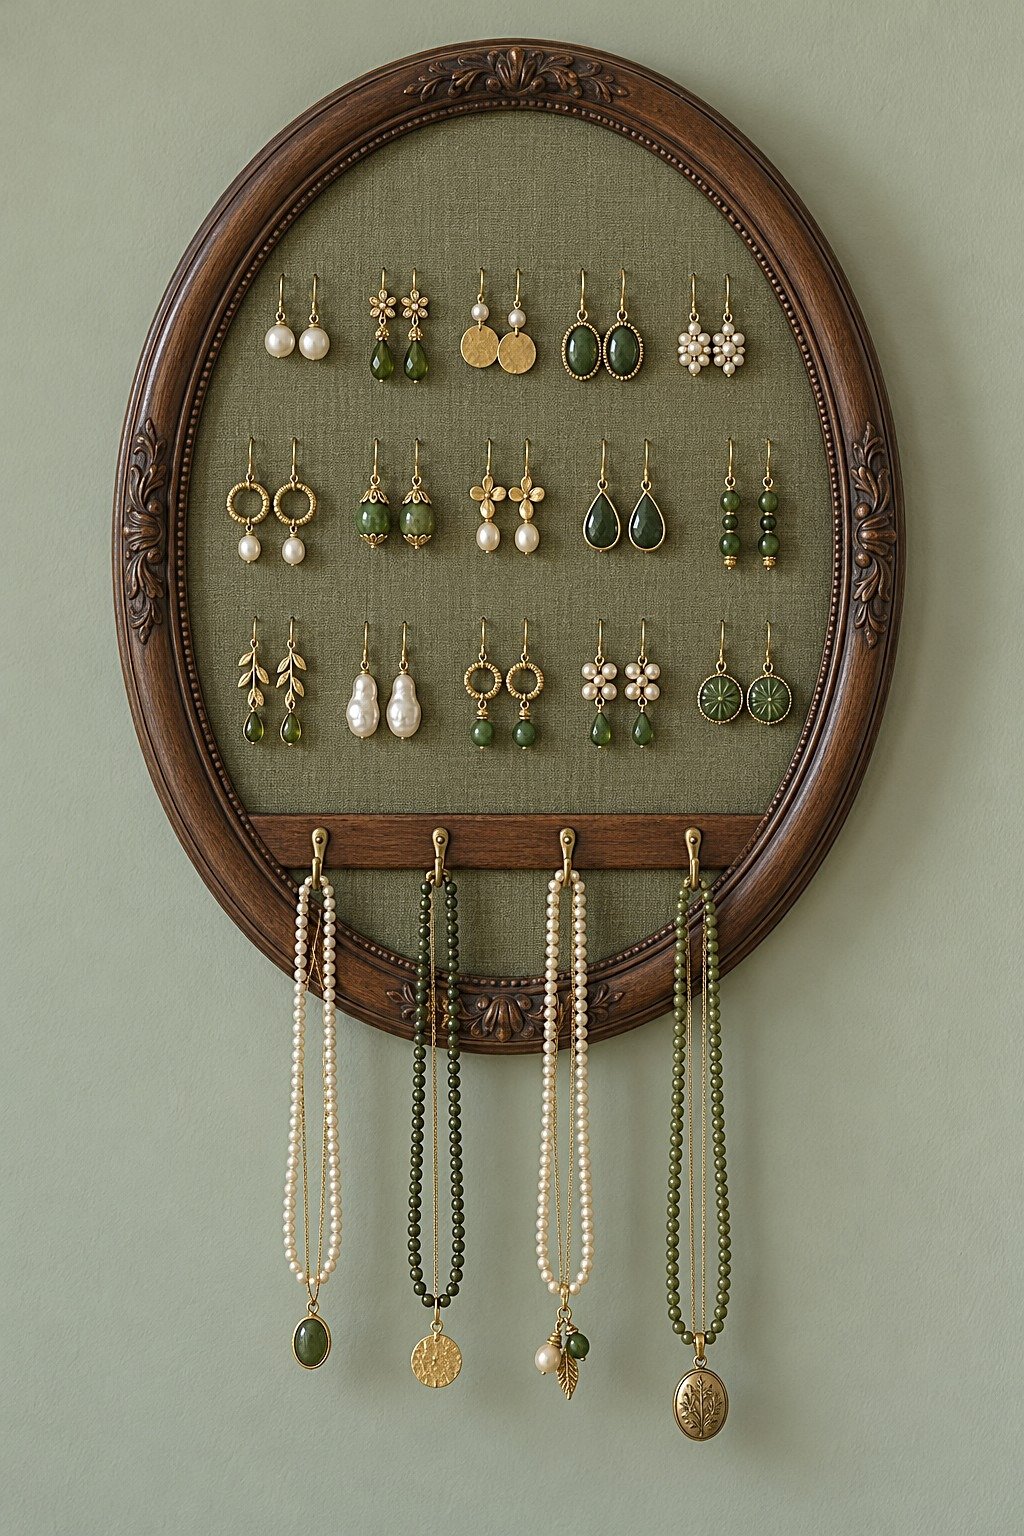
- 21. Olive Fabric Softens an Oval Earring Frame
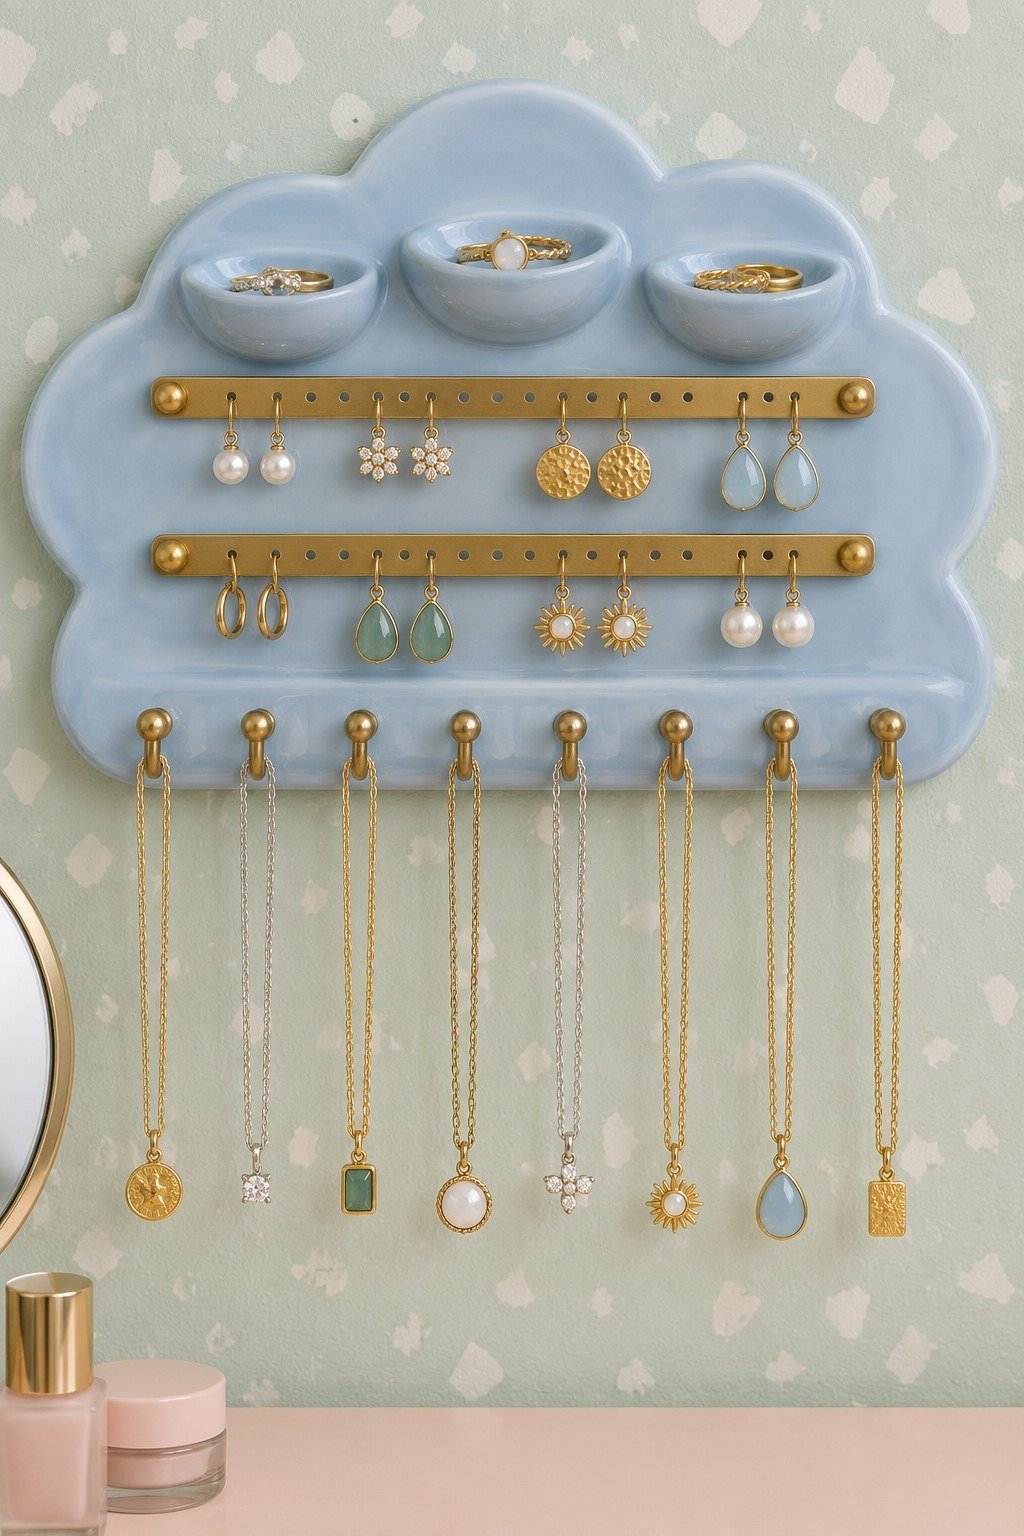
- 22. A Scalloped Blue Board Combines Cups and Rails
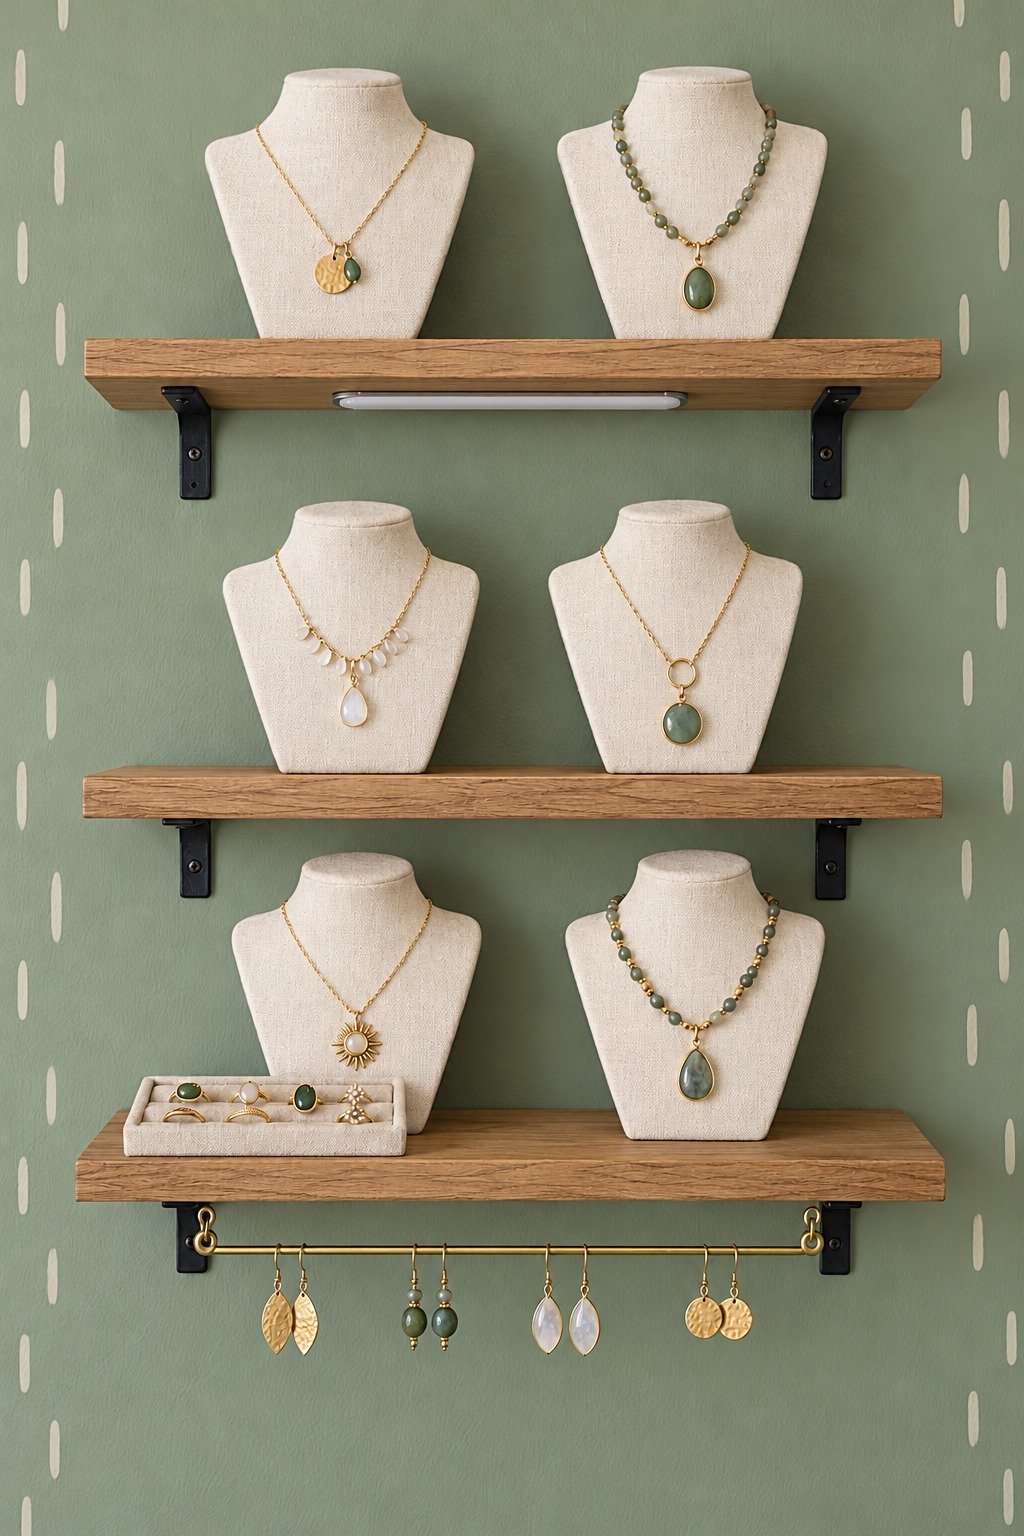
- 23. Wall Shelves Let Necklaces Keep Their Shape
- 24. Two Black Frames Turn Chains into a Simple Gallery
- 25. A Sage Hutch Uses Black Stands for Contrast
- 26. A Folding Screen Creates a Removable Dressing Corner
- 27. A Plum Armoire Houses a Larger Collection
- 28. A Lilac Rack Adds Earring Capacity Beside the Mirror
- 29. A Pink Glass Cabinet Suits a Narrow Vanity
- 30. A Countertop Cabinet Reserves a Full Bay for Chains
- 31. Teacups Keep Small Jewelry Sets Together
- 32. Colored Busts Give a Glass Showcase a Gentle Rhythm
- 33. An Earring Bridge Frames a Single Necklace Bust
- 34. An Engraved Tray Gains Rows of Earring Holes
- 35. A Fabric Wall Organizer Handles Bracelets Differently
- 36. A Glass Cloche Covers One Considered Selection
- 37. A Wire Dress Form Displays Coordinated Sets
- 38. A Cobalt Hand Gives Rings Their Own Sculpture
- 39. A Ballerina's Skirt Becomes an Earring Circle
- 40. A Chessboard Pattern Marks Out Necklace Positions
- 41. Driftwood Supports a Freestanding Necklace Rail
- 42. A Coral Fan Bust Makes Room for Studs
- 43. A Crochet Hoop Keeps Light Earrings in View
- Adapt a Sound Frame into a Jewelry Display
- What to Budget for a Small Frame Conversion
- Keep the Display Useful and the Jewelry Protected
Choose Support Before Style
Sort the collection into necklaces, hook earrings, studs, rings and closed bangles. Each needs a different attachment: hooks for chains, open mesh for fishhooks, access behind stud posts, padded slots for rings and a removable bar or opening loop for bangles. Hold your longest necklace against the proposed display to check its hanging drop. Allow room to lift pieces off without catching the row above.
A tabletop stand is a useful starting point when drilling is restricted. Wall cabinets free the dresser but need suitable fixings and door clearance. Keep a smaller rotation on open display and use separate protective storage for pieces worn less often. A beautiful arrangement should still be comfortable to use with one hand.
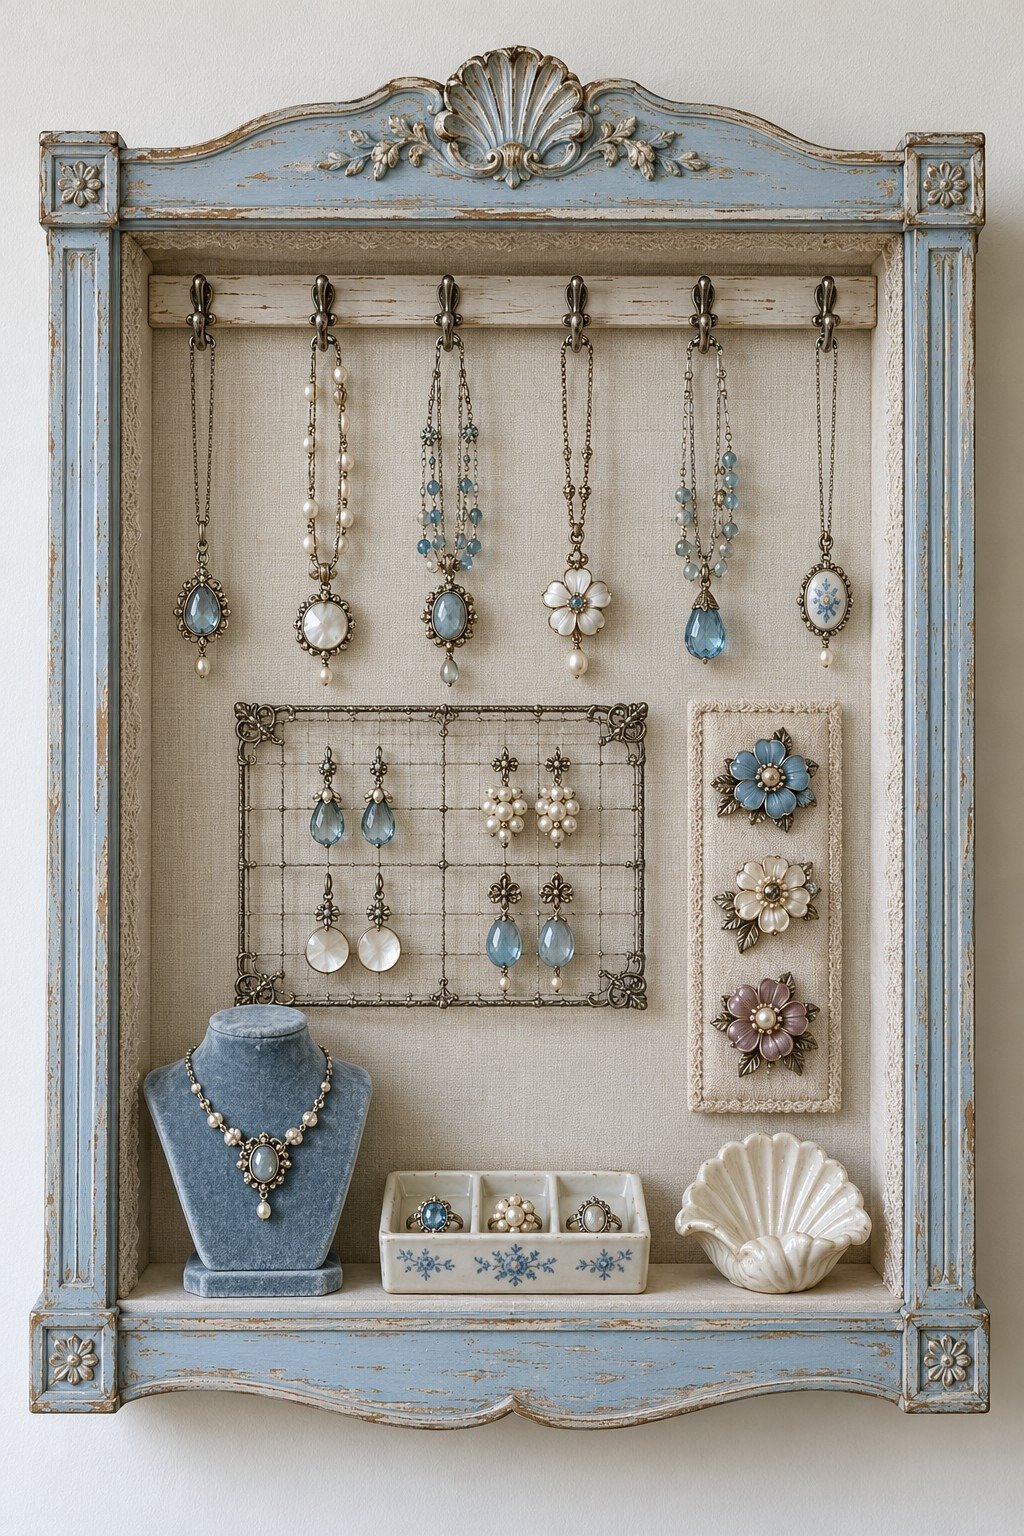
1. Rose Carving Around a Daily Jewelry Station
A carved rose ties the cream frame to the pink backing, while separate inserts give necklaces, earrings and rings their own places. Start with a sound, deep frame and fit the inserts before adding trim. Reserve the small bottom shelf for frequently used pieces; keeping it lightly filled makes the ring panel easier to reach.
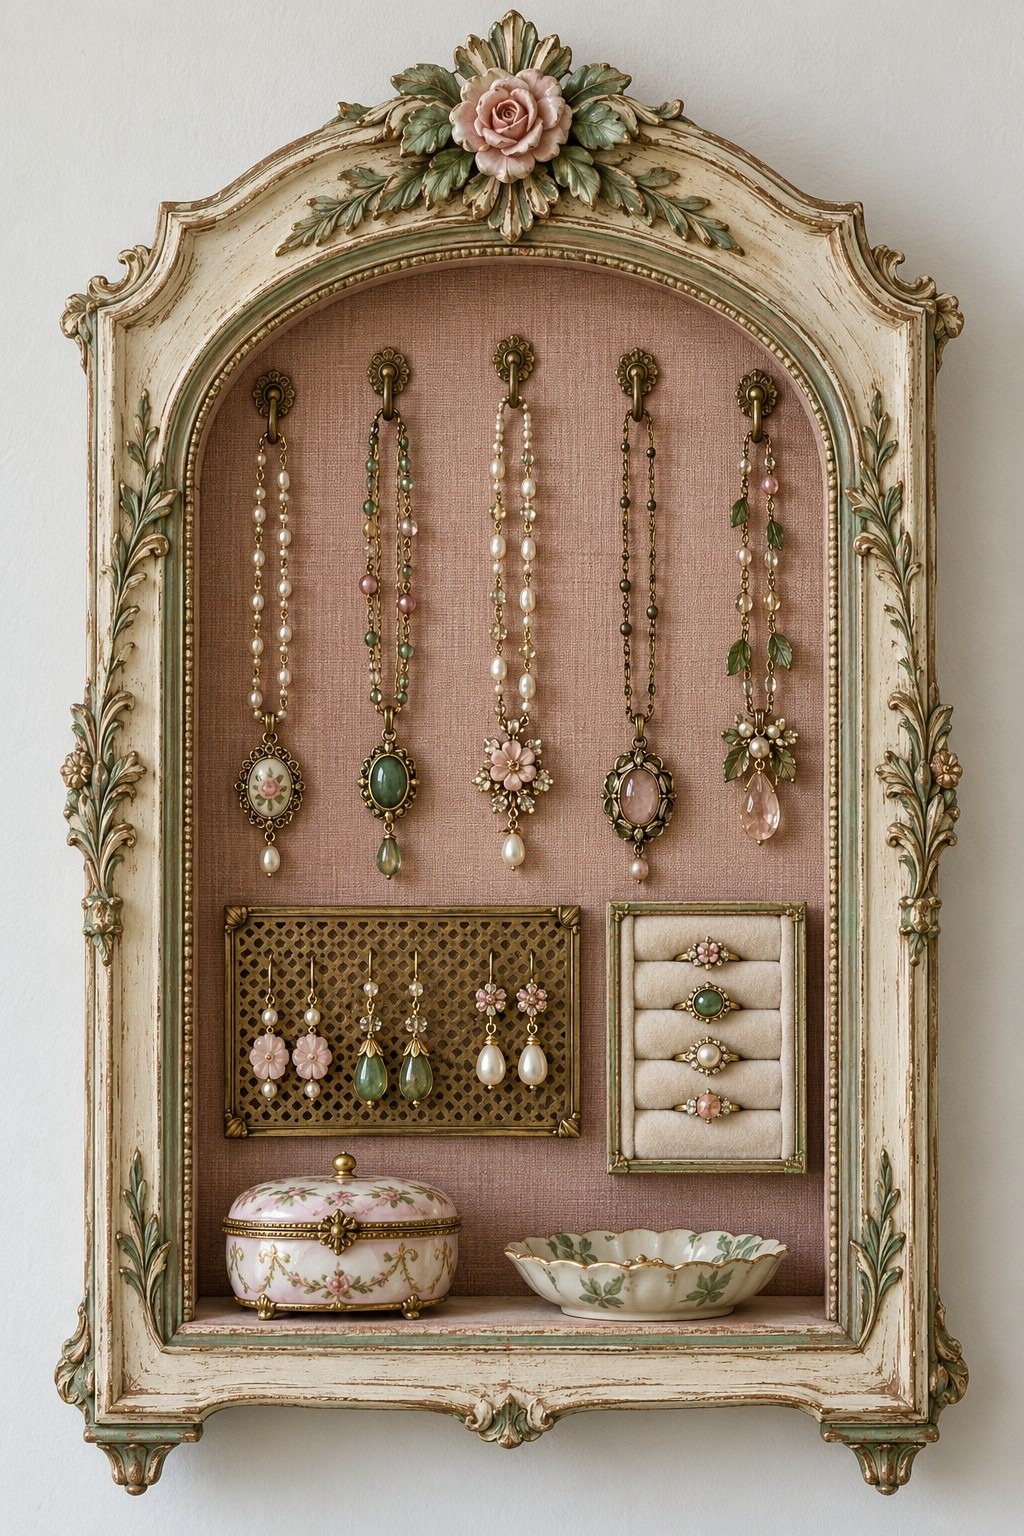
2. Gothic Doors Become Extra Earring Space
Mesh door panels extend this cabinet's useful area without crowding the central necklaces. Burgundy lining suits the dark frame and makes the pale metal details visible. Measure the full width with both doors open, then test whether hanging earrings touch anything as the doors close. Mesh provides access and visibility, but it does not create a sealed enclosure.
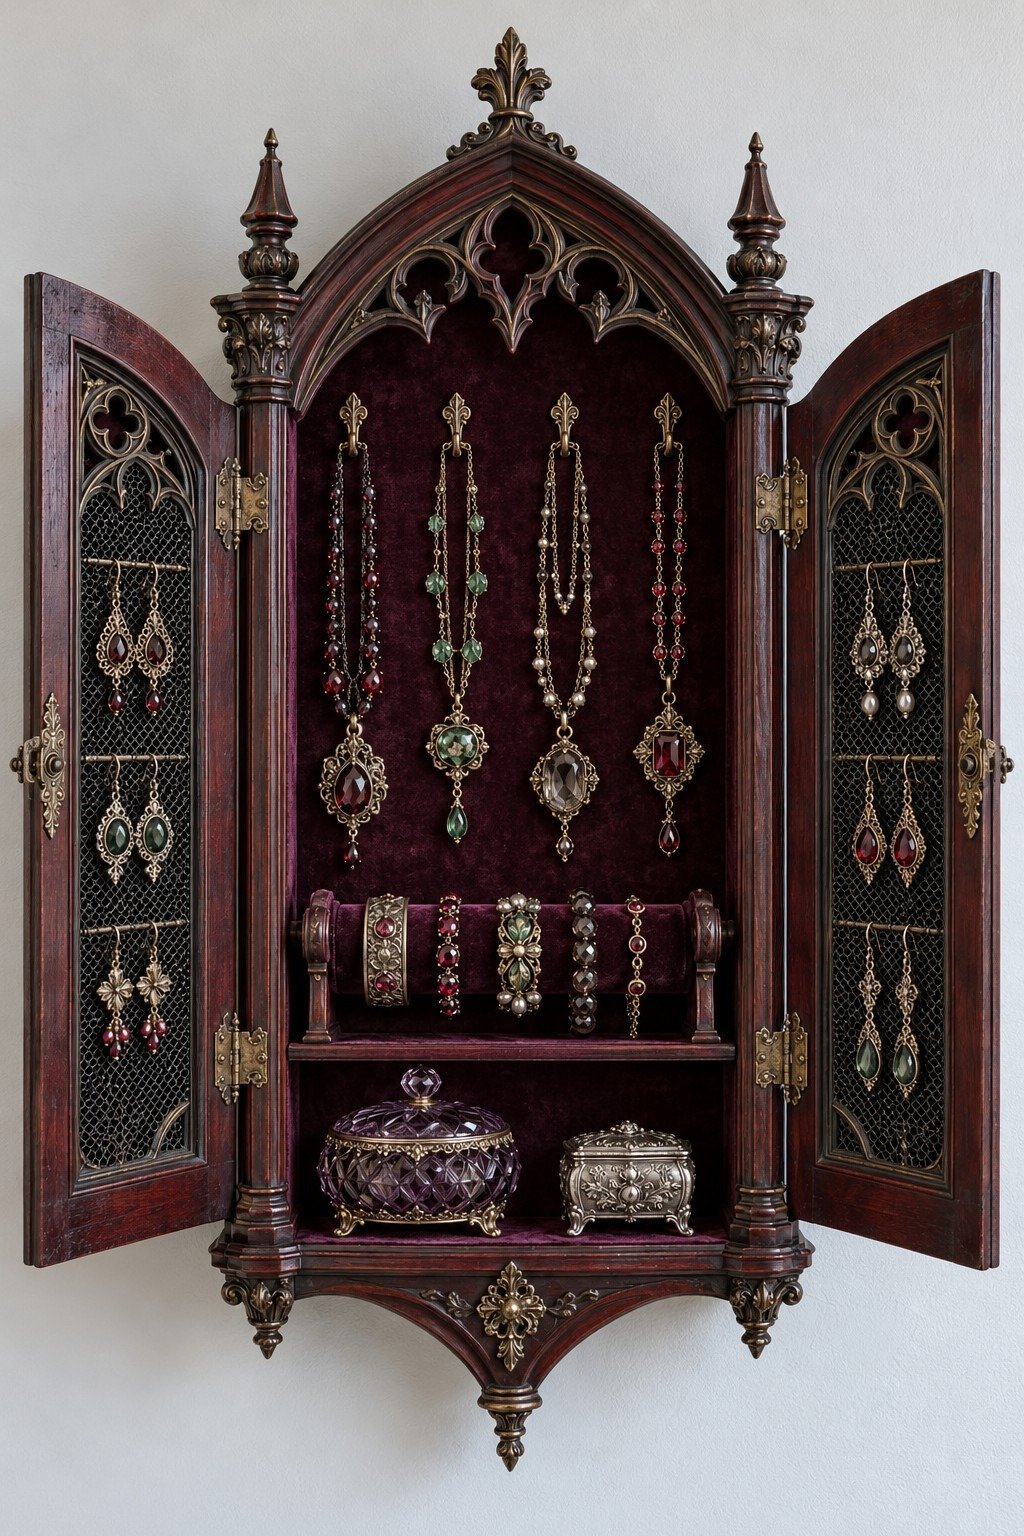
3. A Powder Blue Cabinet for Brooches and Pendants
Brooches gain a dedicated fabric strip beside the wire earring grid, so their pins do not have to compete with necklace hooks. Make that strip removable for fastening and inspection. The small blue bust brings one shorter necklace forward; the shell shaped dish and divided tray remain within the bottom shelf rather than projecting into the hanging space.
4. Green Floral Trim with a Clear Hanging Layout
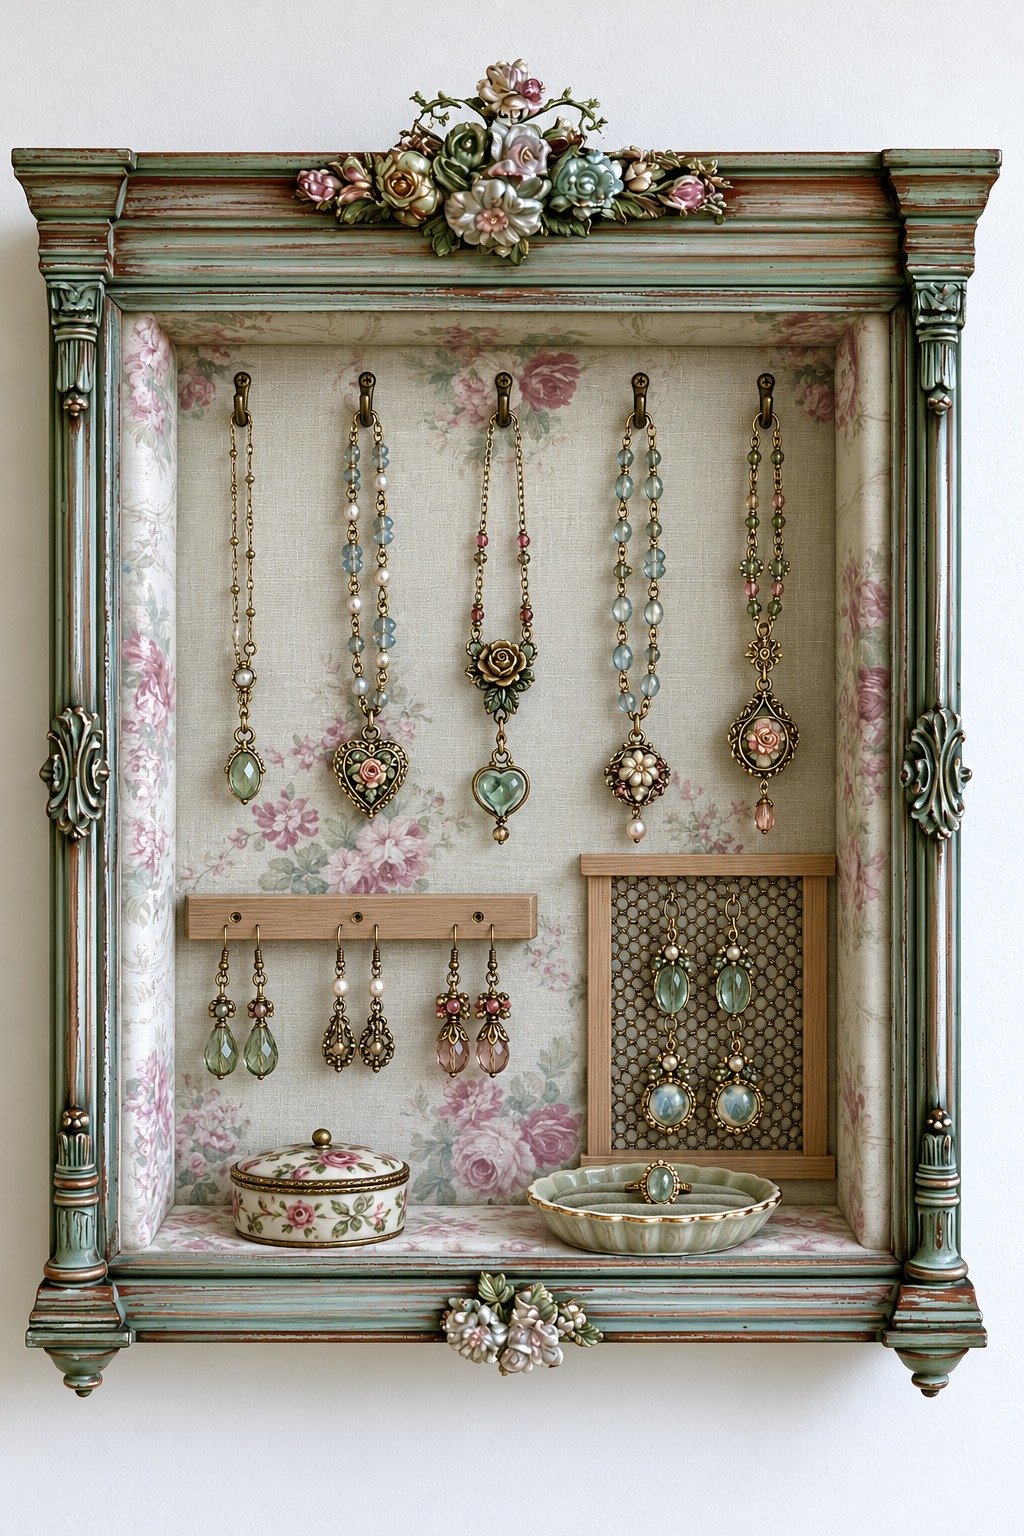
Floral backing can easily compete with a collection, so the five distinct necklace positions matter more than adding another ornament. Keep a clear gap beneath each pendant and use a small mesh insert for lighter earrings. Match the scale of the floral trim to a substantial frame; a narrow modern frame would benefit from much less decoration.
5. Ginkgo Details Frame a Tall Earring Column
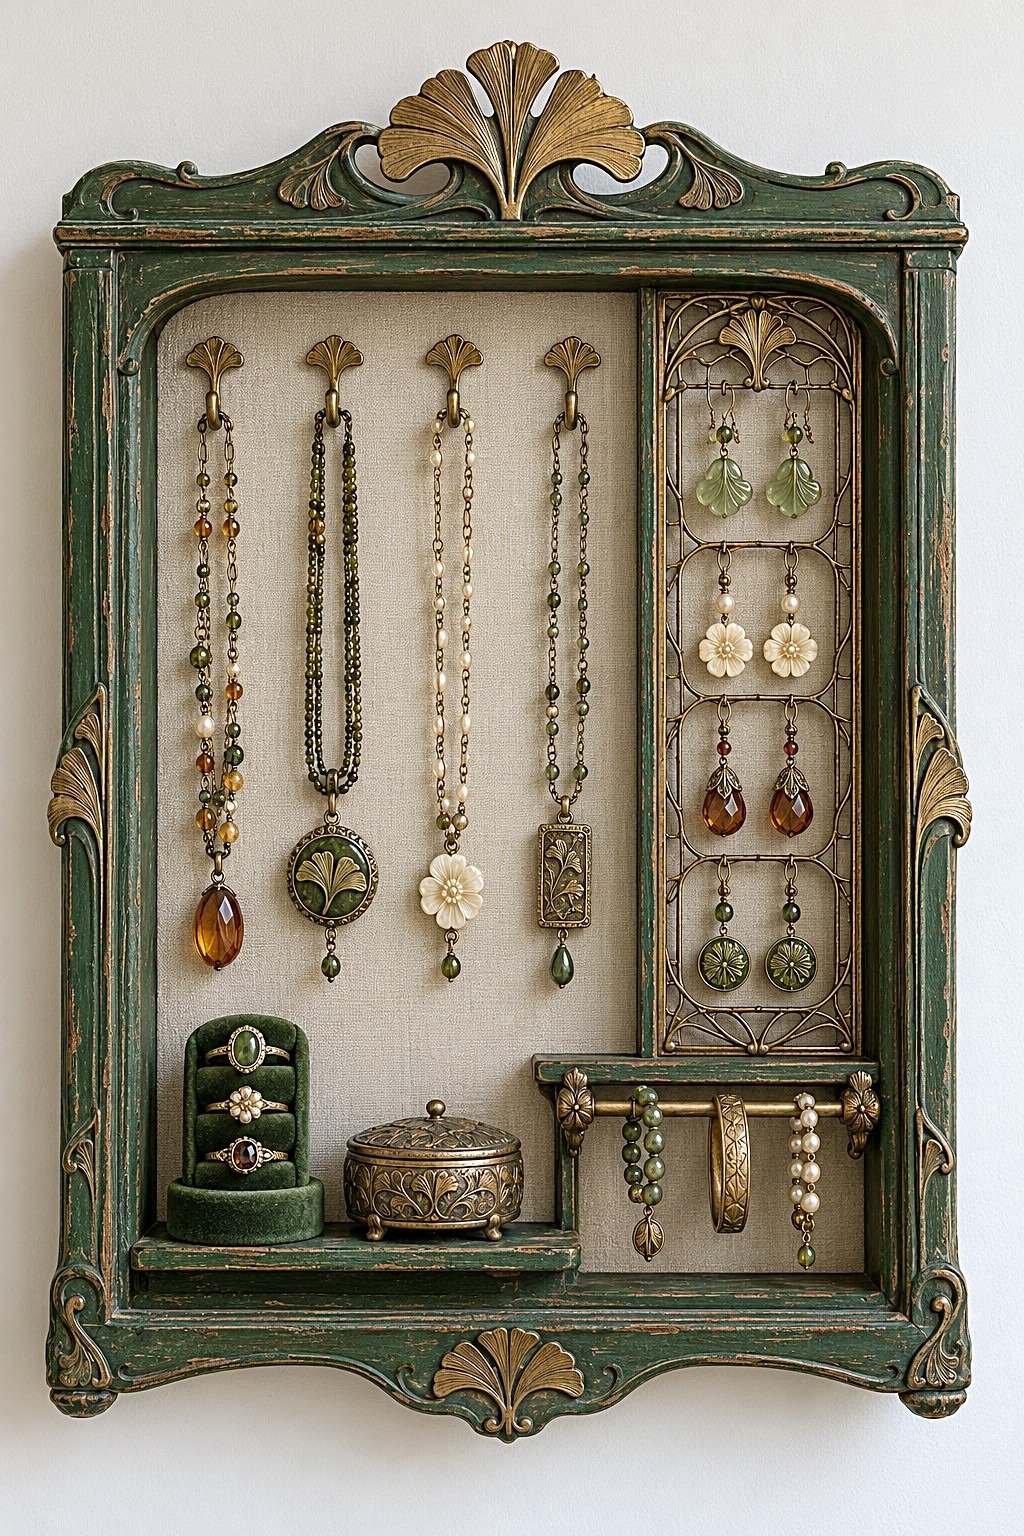
The narrow side column is useful when long earrings need more vertical separation than a broad mesh board provides. Space its crosspieces using your longest pair before fitting them permanently. Deep green and restrained gold connect the frame, ring stand and bracelet rail. Closed bangles benefit from a removable bracelet bar, since they cannot unclip.
6. An Oval Case Puts Brooches at the Center
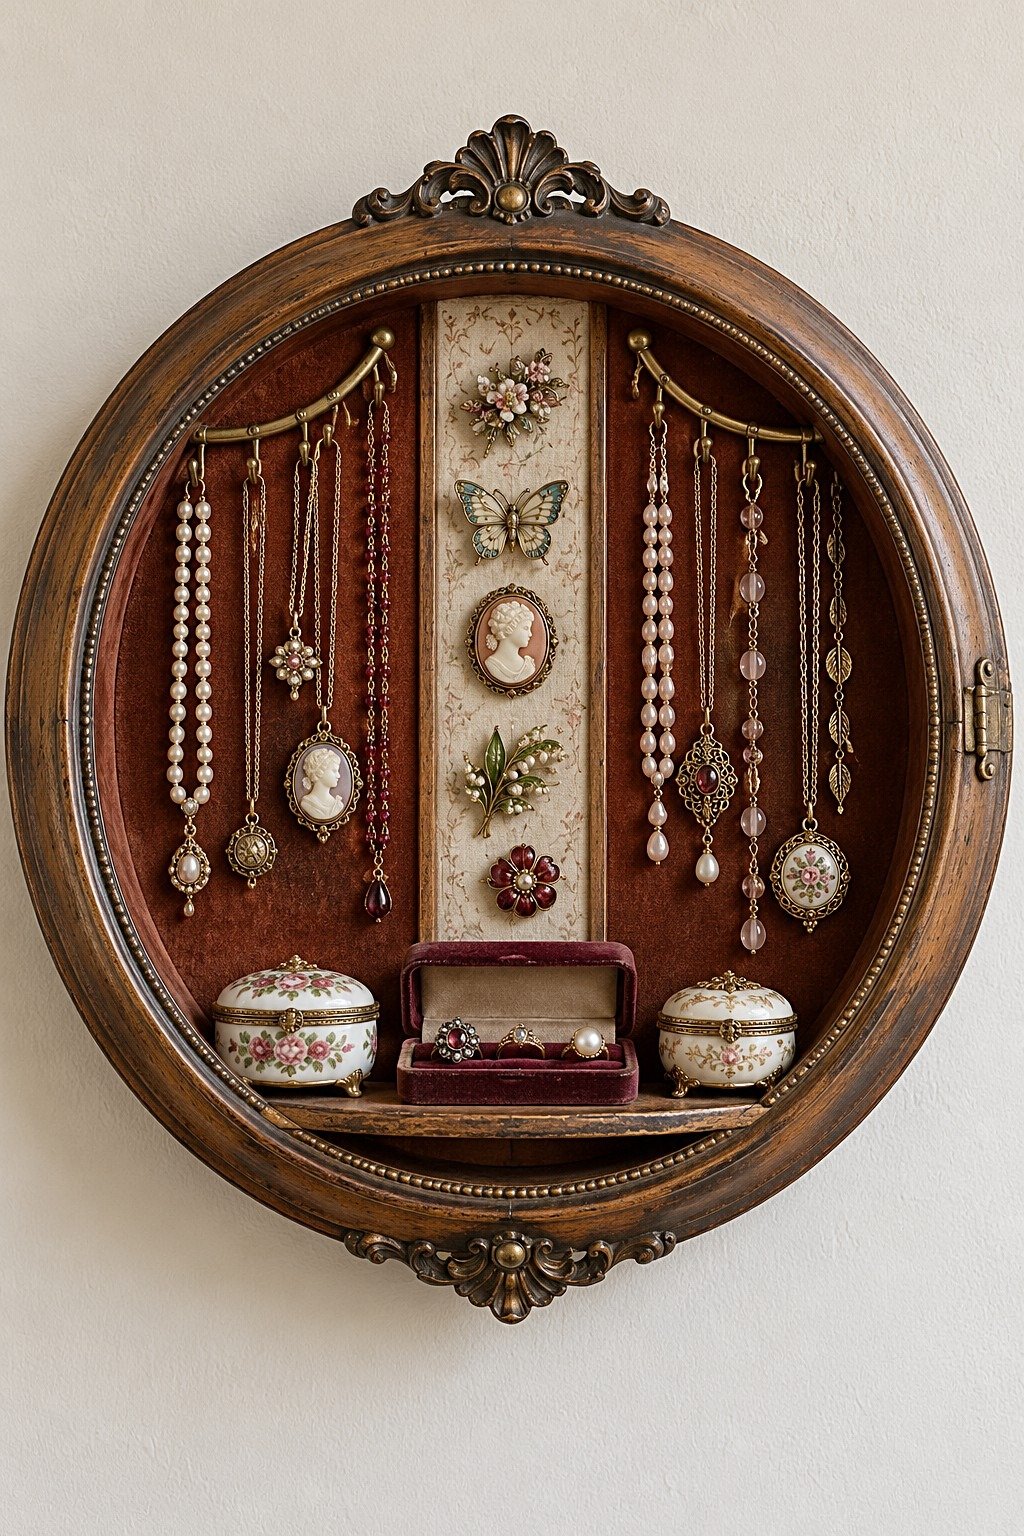
Curved rails follow the oval outline while a central strip gives cameos and other brooches a clear viewing position. Arrange the longest chains toward the outer bays so their pendants clear the shelf. For an existing oval case, make a paper layout first; the tapered sides leave less usable hanging width than a rectangular case of similar height.
7. Lavender Compartments Keep Long Chains Separate
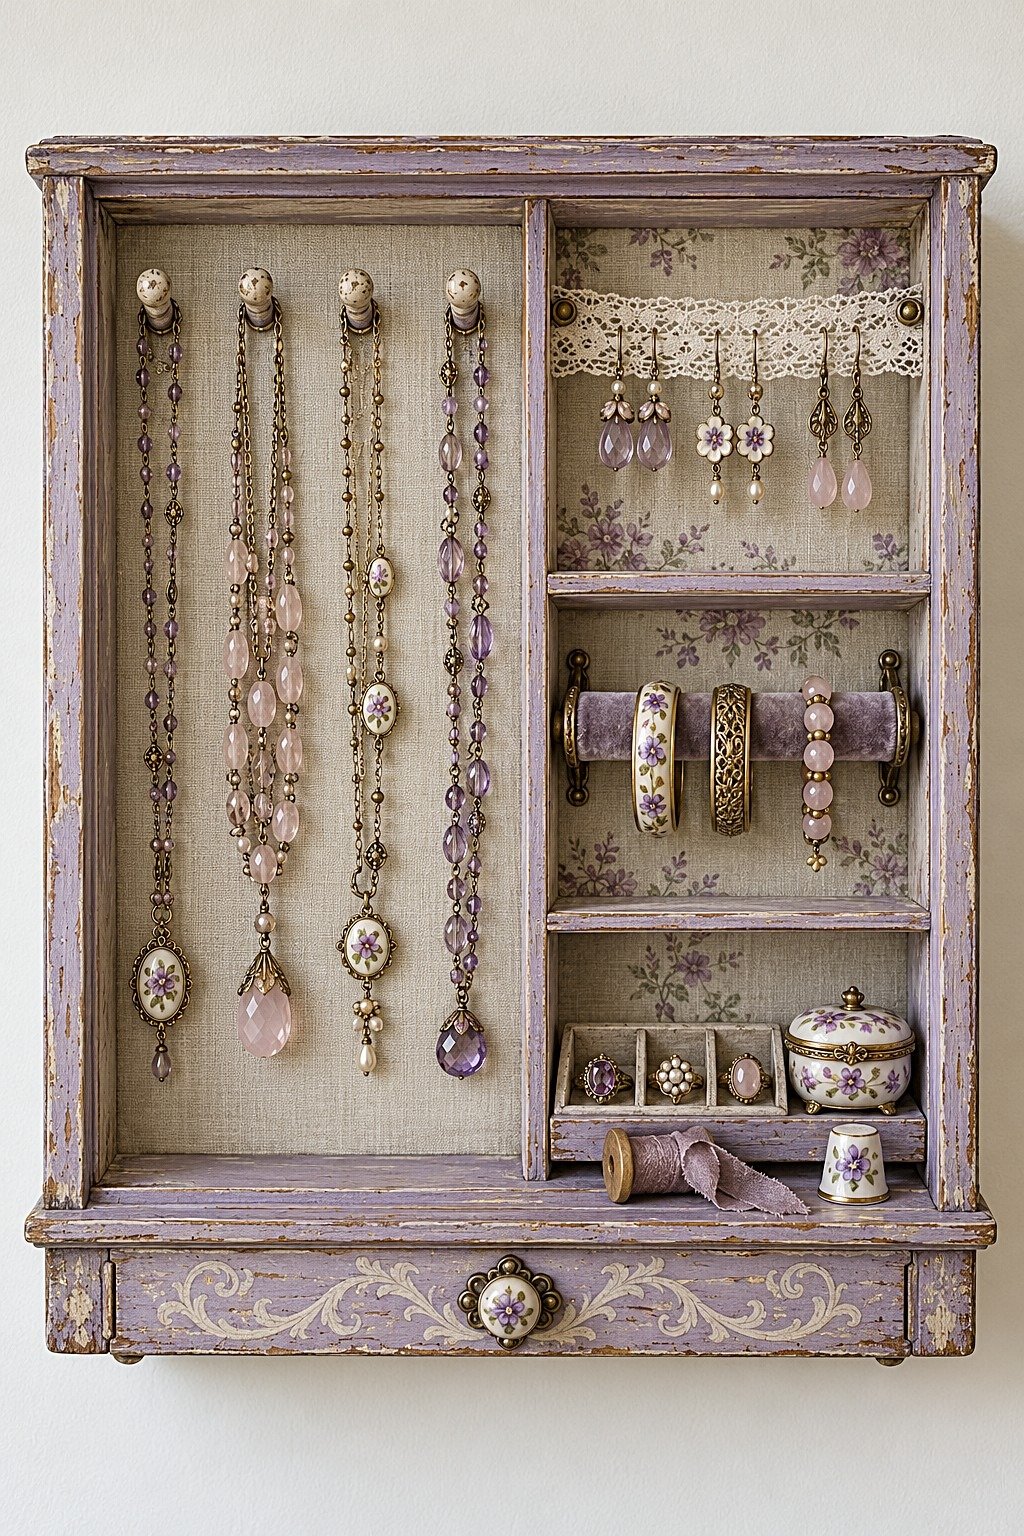
One uninterrupted bay accommodates necklaces that would catch on several small shelves. The shorter compartments handle earrings, a bracelet roll and rings. Fit lace with enough clearance behind it for the hook tips, and make the roll lift out of its supports. Lavender paint works here because the pale lining stays quiet behind the more detailed jewelry.
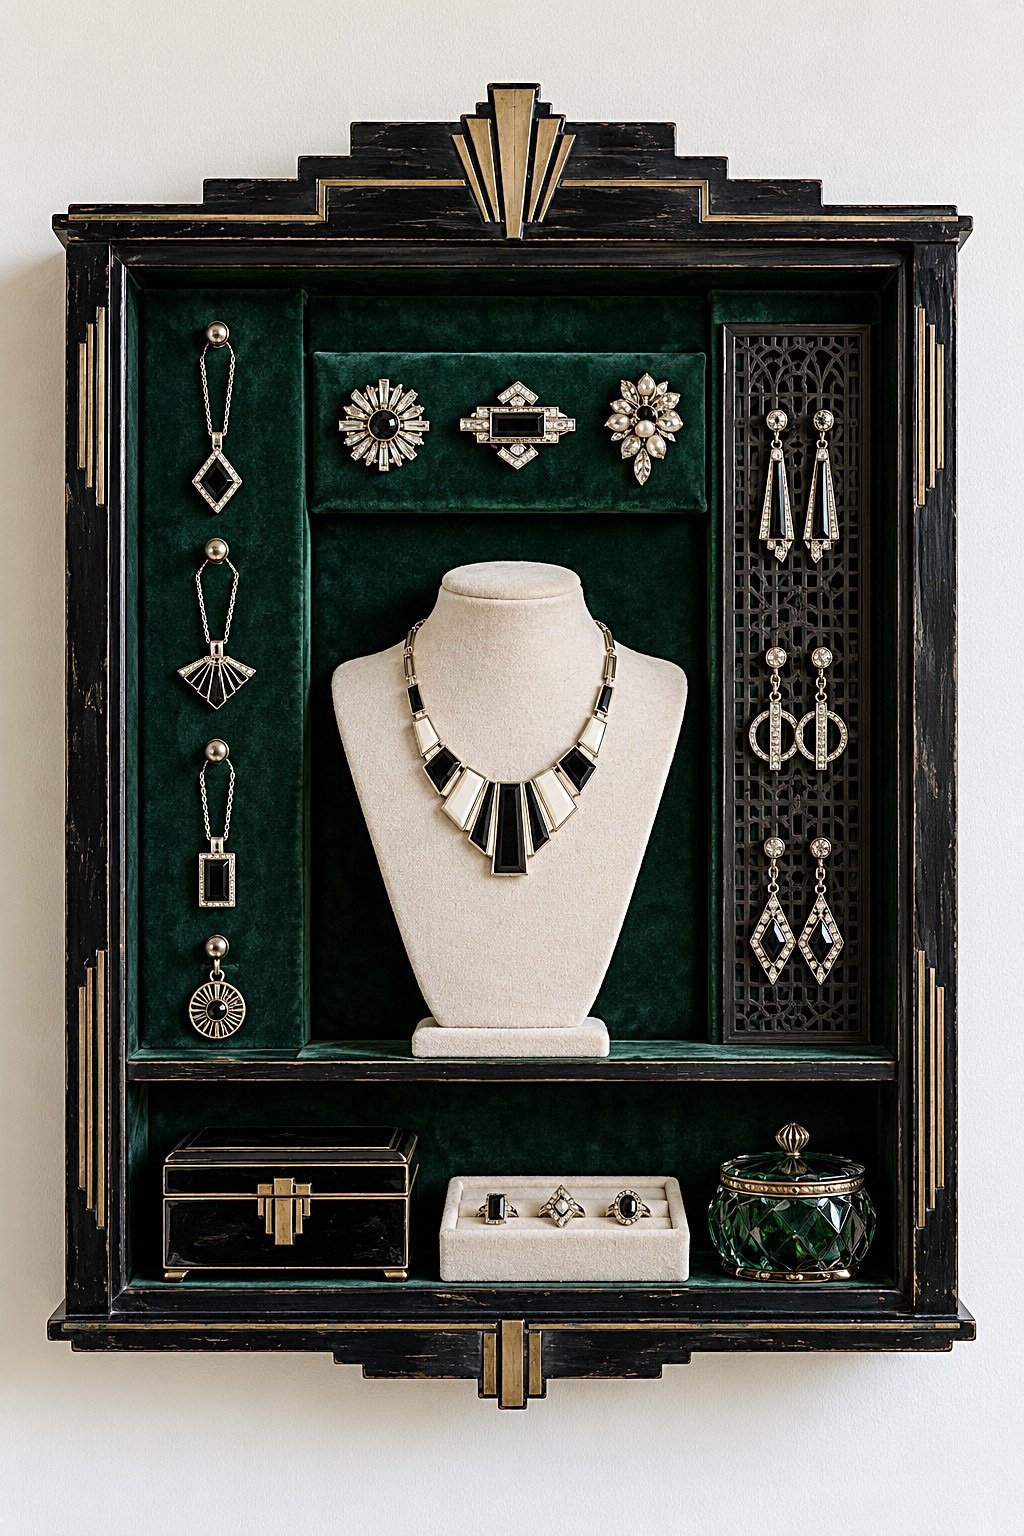
8. An Art Deco Necklace Takes the Spotlight
A broad geometric necklace needs an uncluttered bust to show its shape. The black frame, green lining and stepped gold trim give it a strong setting without adding more jewelry around its edges. Choose the bust first, then size the surrounding compartments. I'd leave the central area this open rather than filling every available patch of lining.
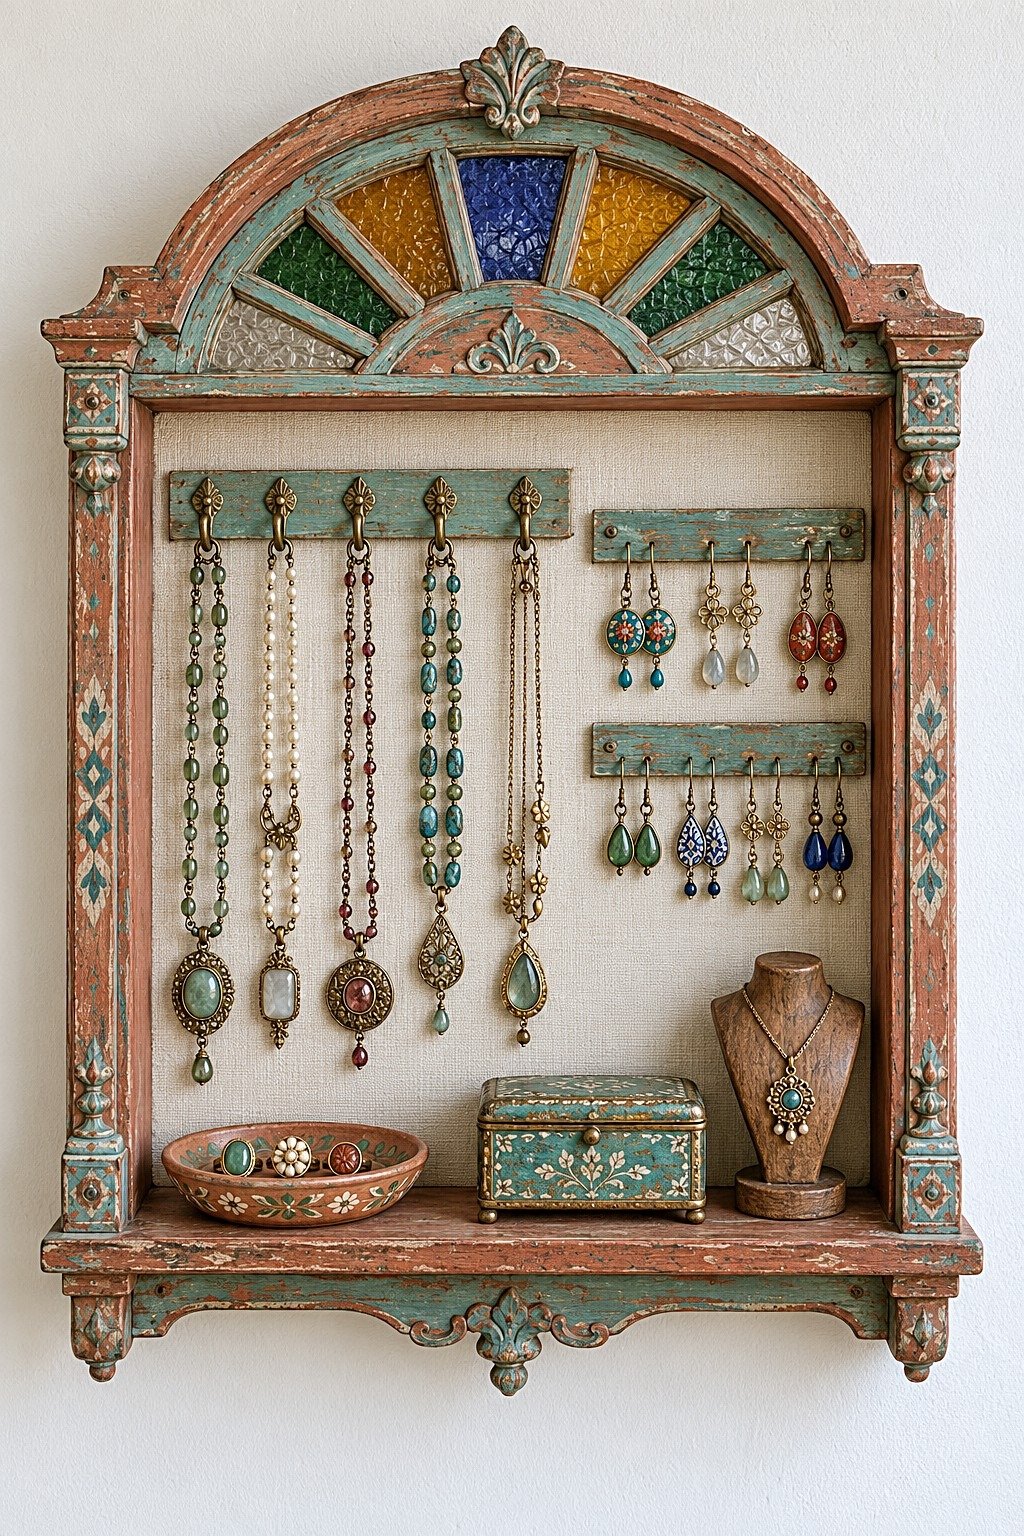
9. An Arched Frame Carries Color Above the Collection
Colored inserts occupy the arch, leaving the rectangular area below available for practical storage. Echo one or two of those colors in the jewelry or tray instead of painting every compartment differently. Use a structurally sound frame and intact, securely retained inserts. Independently spaced earring rails accommodate pairs with different drops.
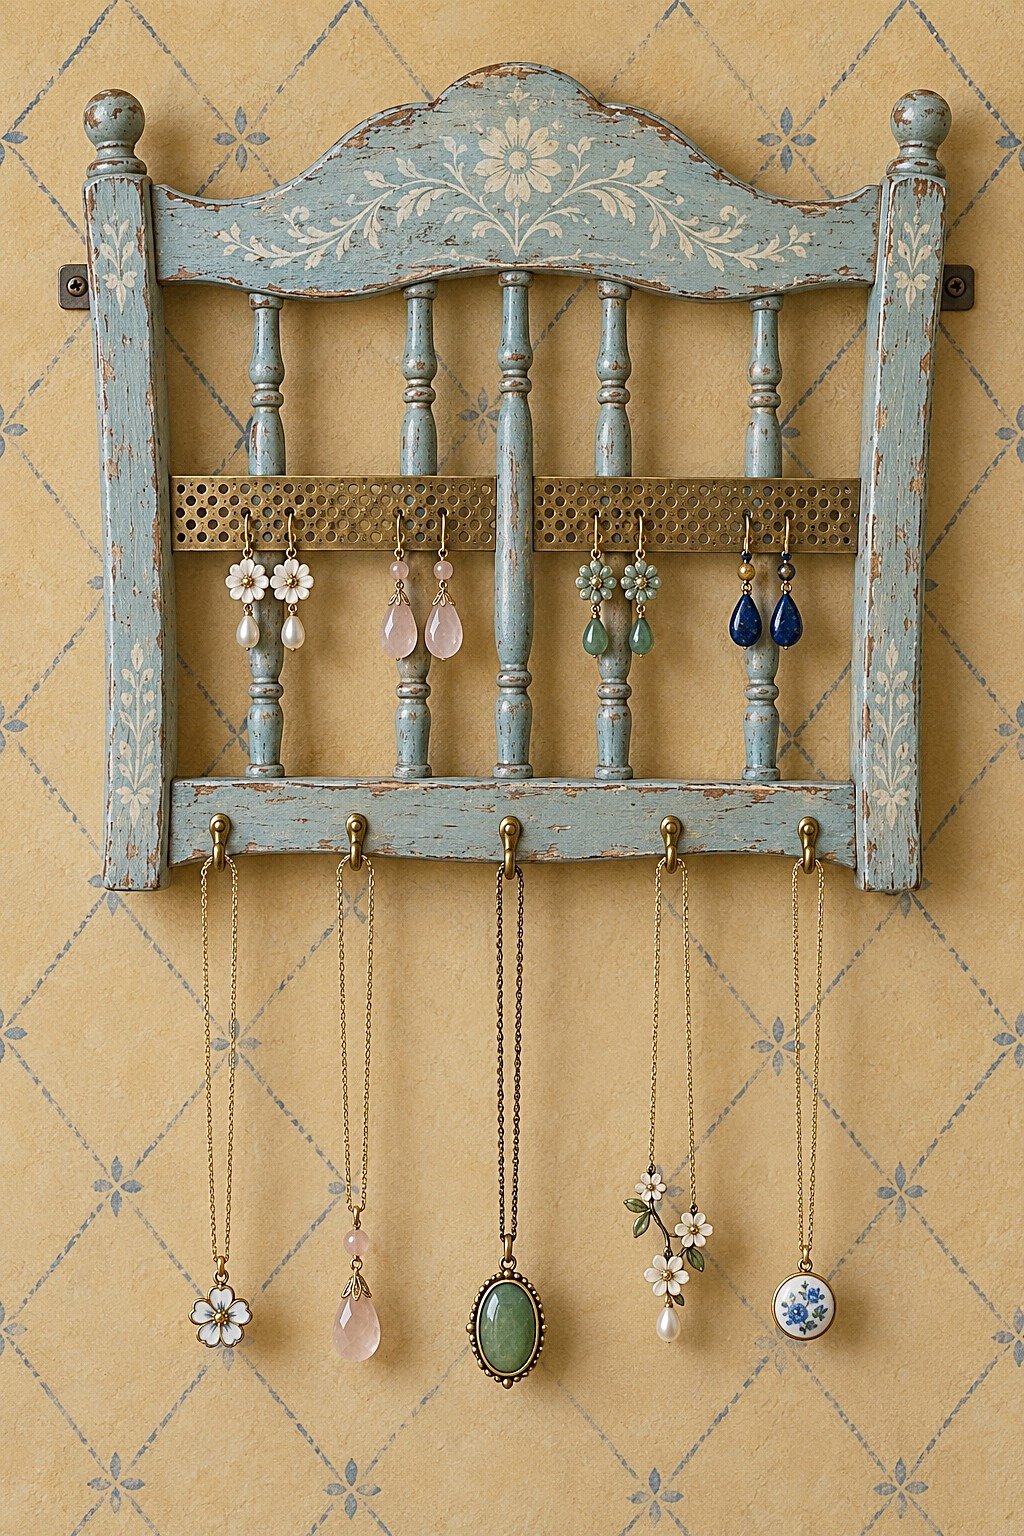
10. A Chair Back Finds a Smaller Role on the Wall
Turned spindles keep the identity of the old chair visible, while perforated strips provide actual earring attachment points. Check the joints before conversion and add rear reinforcement where needed. Hooks belong in a sound wooden rail, not thin decorative trim. Narrow walls suit this format because the necklaces hang below the chair back instead of inside it.
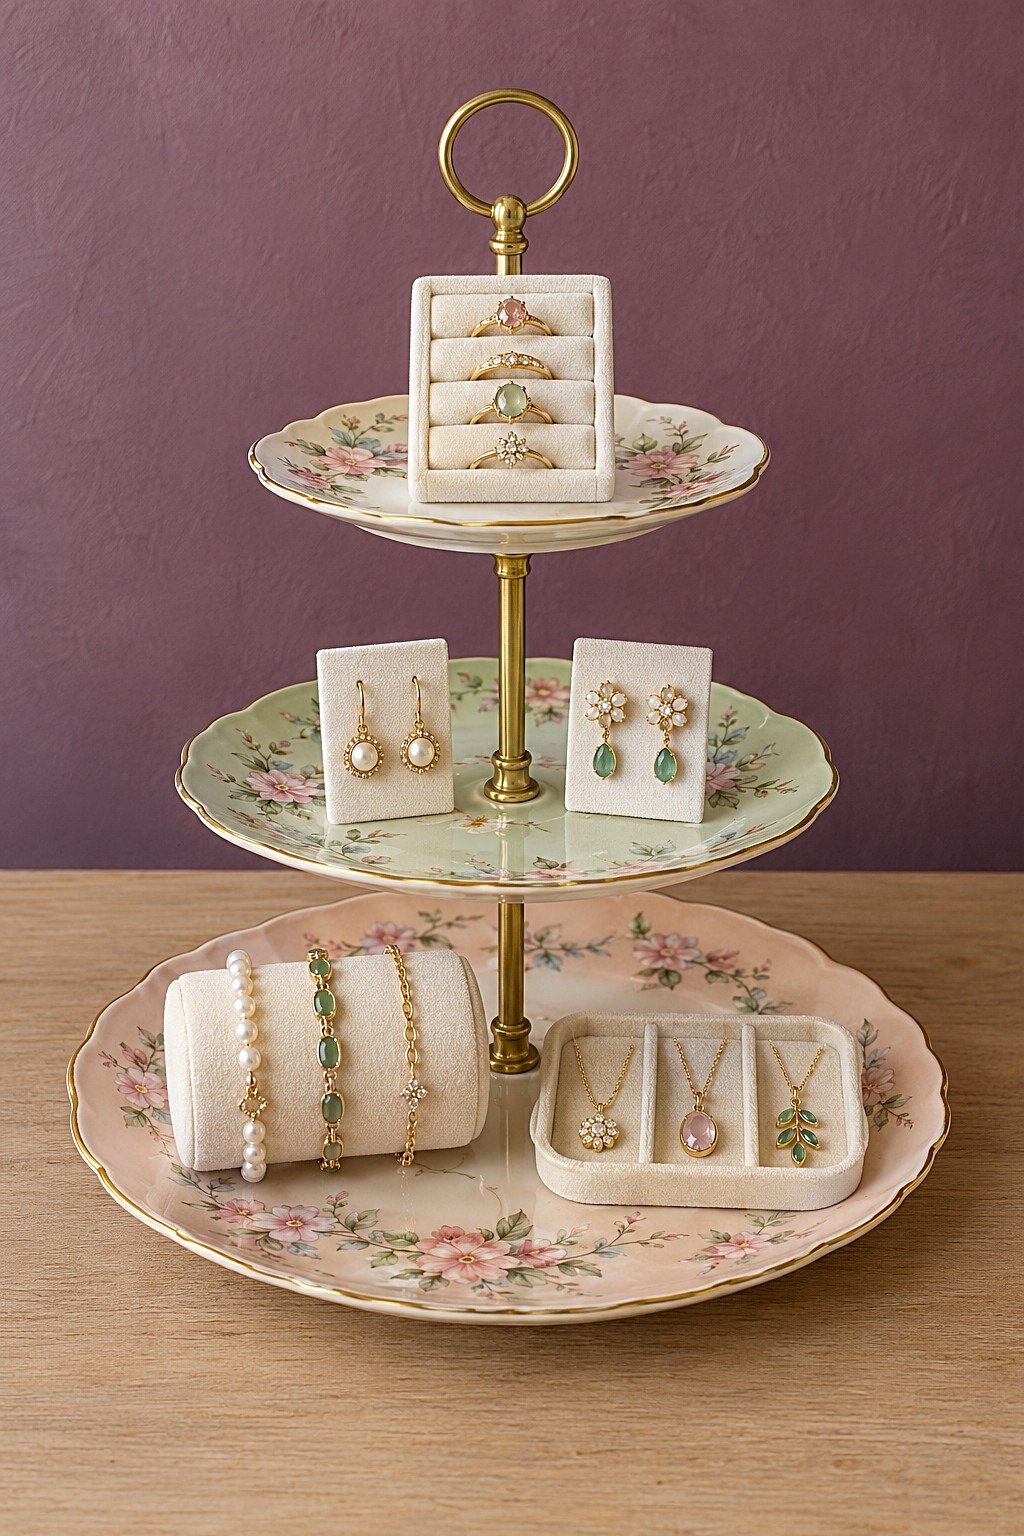
11. A China Stand Sorts Jewelry by Height
Tiered plates create distinct landing areas on a dresser without drilling into the wall. Use padded inserts so rings and delicate finishes do not scrape against the glaze. Check the center fittings and plate edges, and place the heaviest pieces on the lowest tier. Move the assembled stand by supporting its base rather than lifting it by the decorative handle.
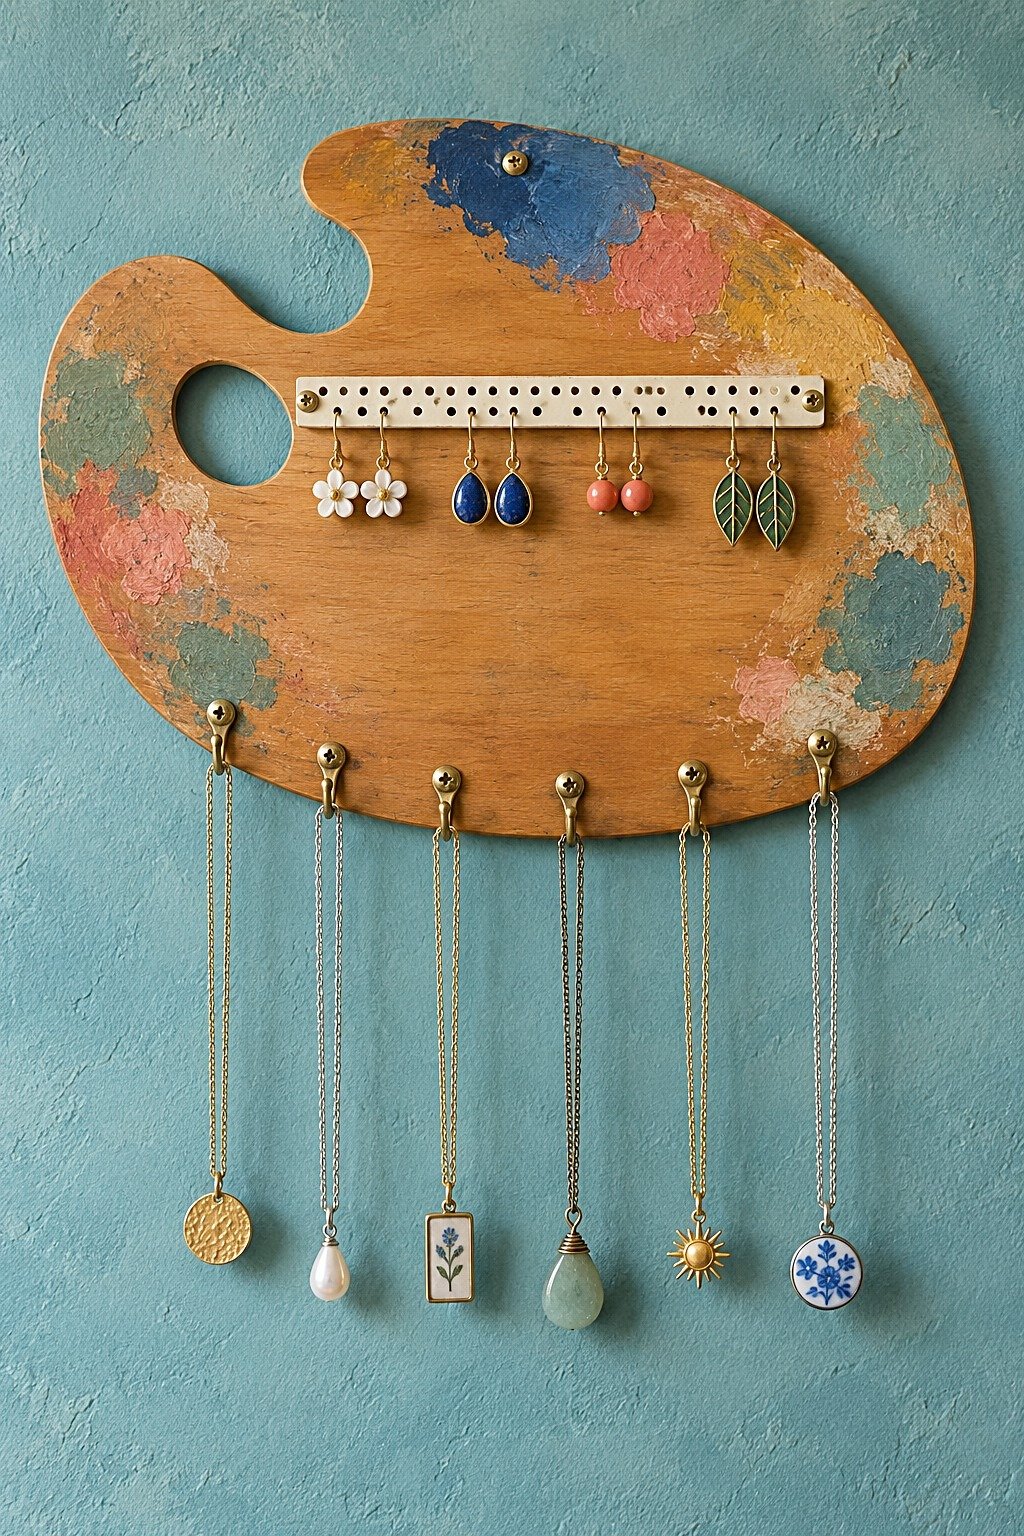
12. An Artist's Palette Becomes a Compact Organizer
The palette silhouette gives this organizer character even when only a few pieces are displayed. Choose a clean wooden blank or a surface with a known finish; do not scrape unknown old paint merely to reproduce the worn look. Secure the perforated strip through its end holes and pilot drill the lower hooks to reduce splitting near the curved edge.
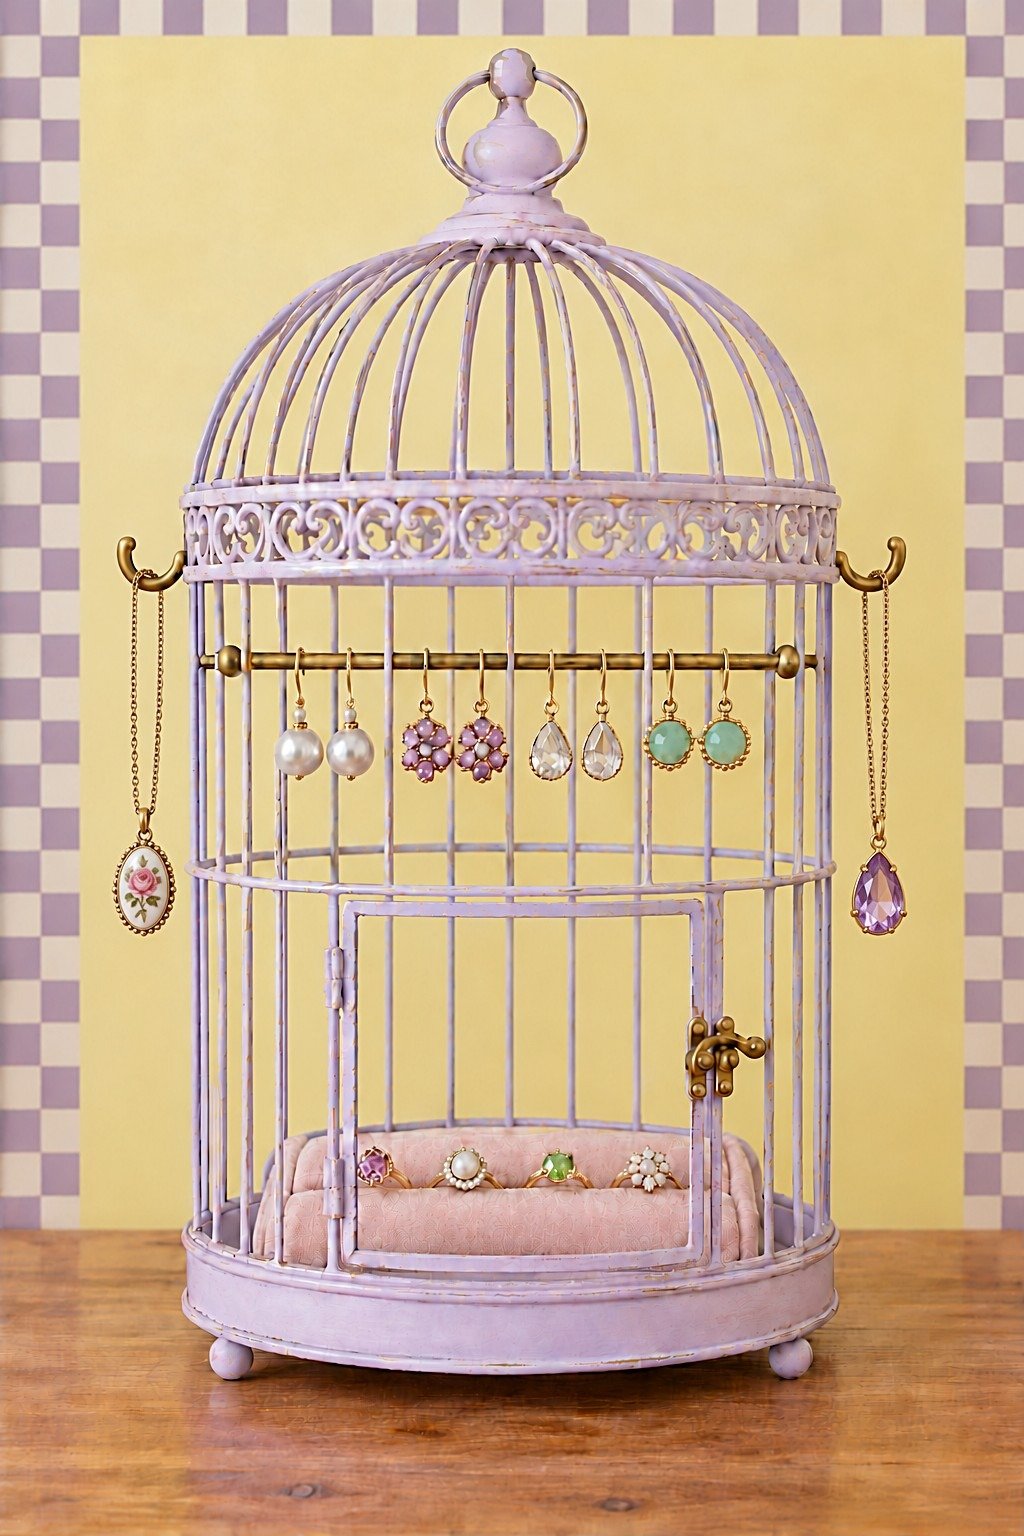
13. A Birdcage Makes Space for a Small Rotation
An internal rod turns a decorative cage into a holder for a few matching pairs, while the base accommodates a ring insert. Access is the deciding detail: the door opening must allow your hand to reach the back comfortably. Keep this as a small daily selection, because filling the cage densely would make the attractive outline harder to use.
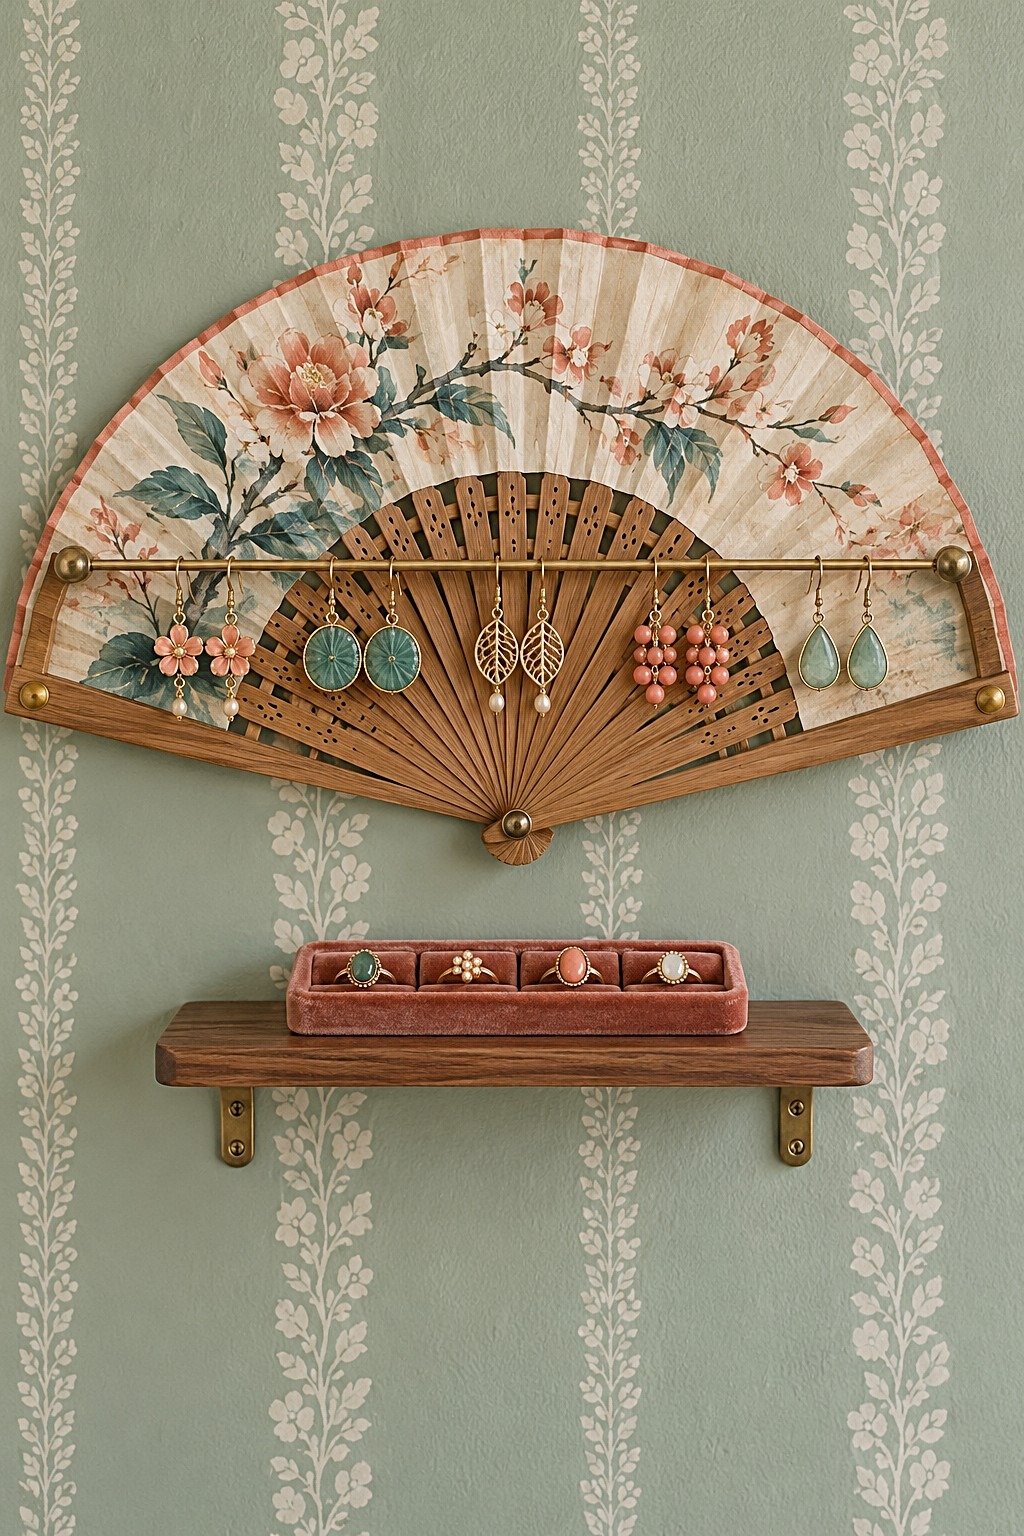
14. A Floral Fan Sets the Shape for an Earring Rail
The fan supplies the decorative shape; the rail needs its own firm support. Mount a backing board behind the fan and fasten the rail into that structure rather than relying on paper or thin ribs. A separate shelf below carries the rings. Repeat a muted color from the fan on the ring insert to connect the two pieces without matching every detail.
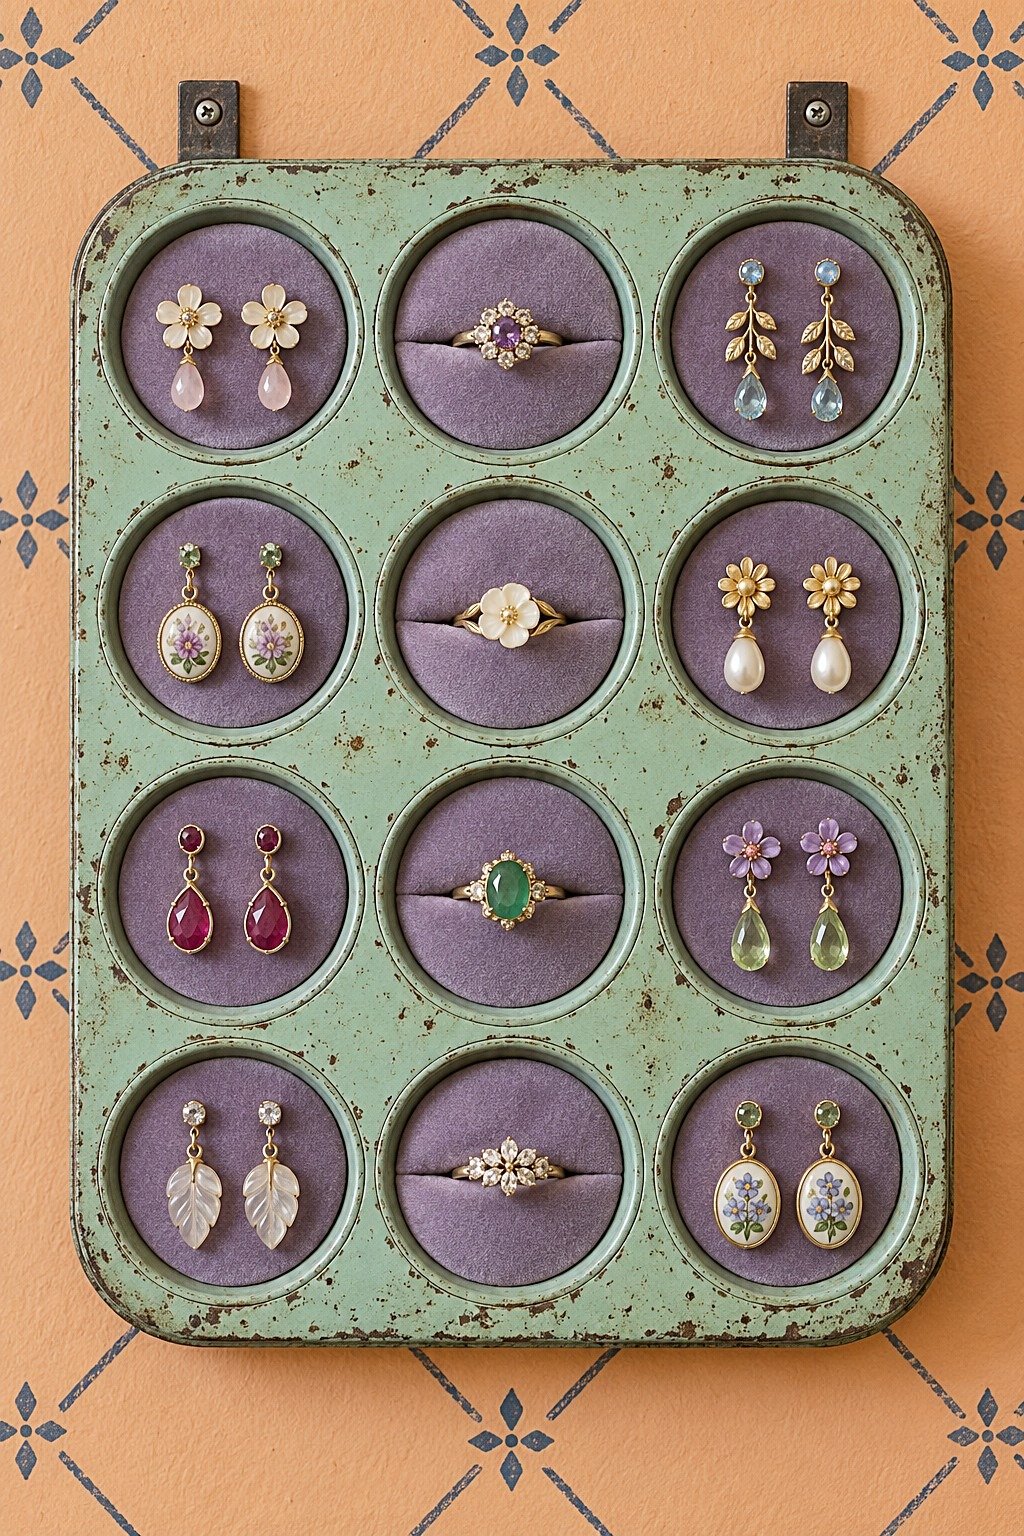
15. A Muffin Pan Gives Each Pair Its Own Recess
Individual padded cups make it easy to see where each pair belongs. Cut removable inserts to fit the recesses, with slits for rings and access behind any stud posts. Use a clean pan with sound edges and retire it from food use after decorating. Proper brackets must carry a wall version; padding and adhesive are not hanging hardware.
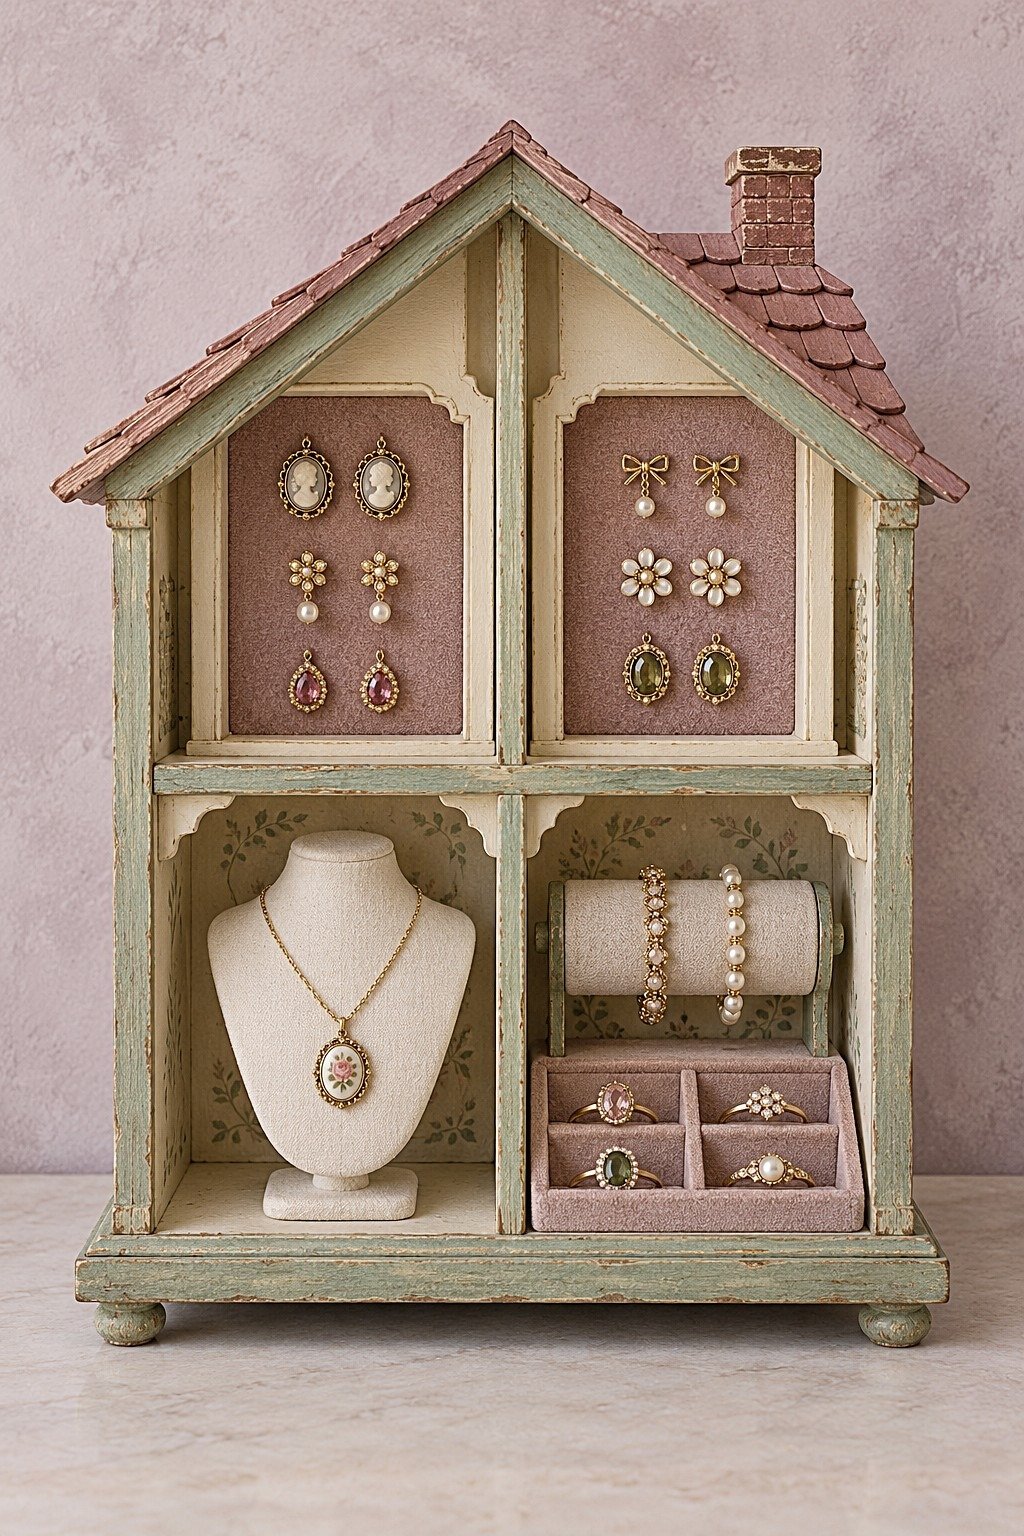
16. A Dollhouse Cabinet Separates Four Jewelry Tasks
The small rooms divide the collection naturally: earrings above, a necklace on one side and bracelets with rings on the other. Measure the bust before choosing a dollhouse shelf, since deep pendants need room in front as well as below. Removable fabric panels simplify fastening earrings. Carry the cabinet by its base and keep the decorative roof free of lifting strain.
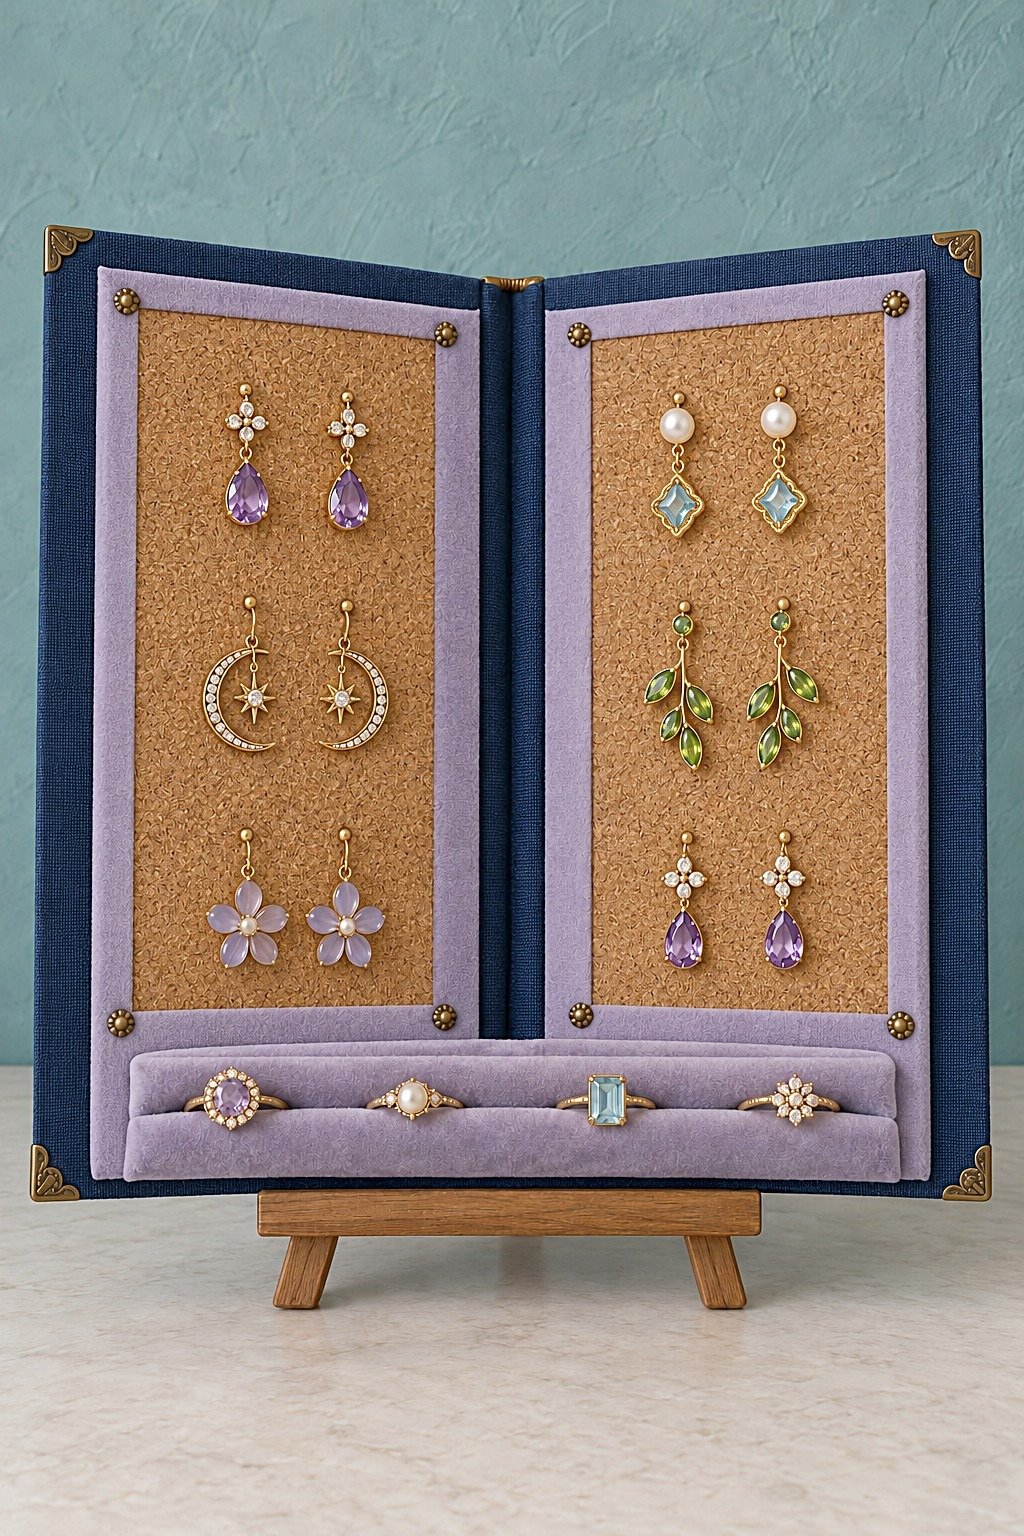
17. An Open Book Display Stands on an Easel
Cork panels turn the open book shape into a compact tabletop display. Fit sufficiently thick cork over a rigid backing so pin points cannot emerge through the cover. The ring roll should stay removable if you want the covers to close. An easel with a stable base lets you change the viewing angle without adding a permanent fitting to a rented wall.
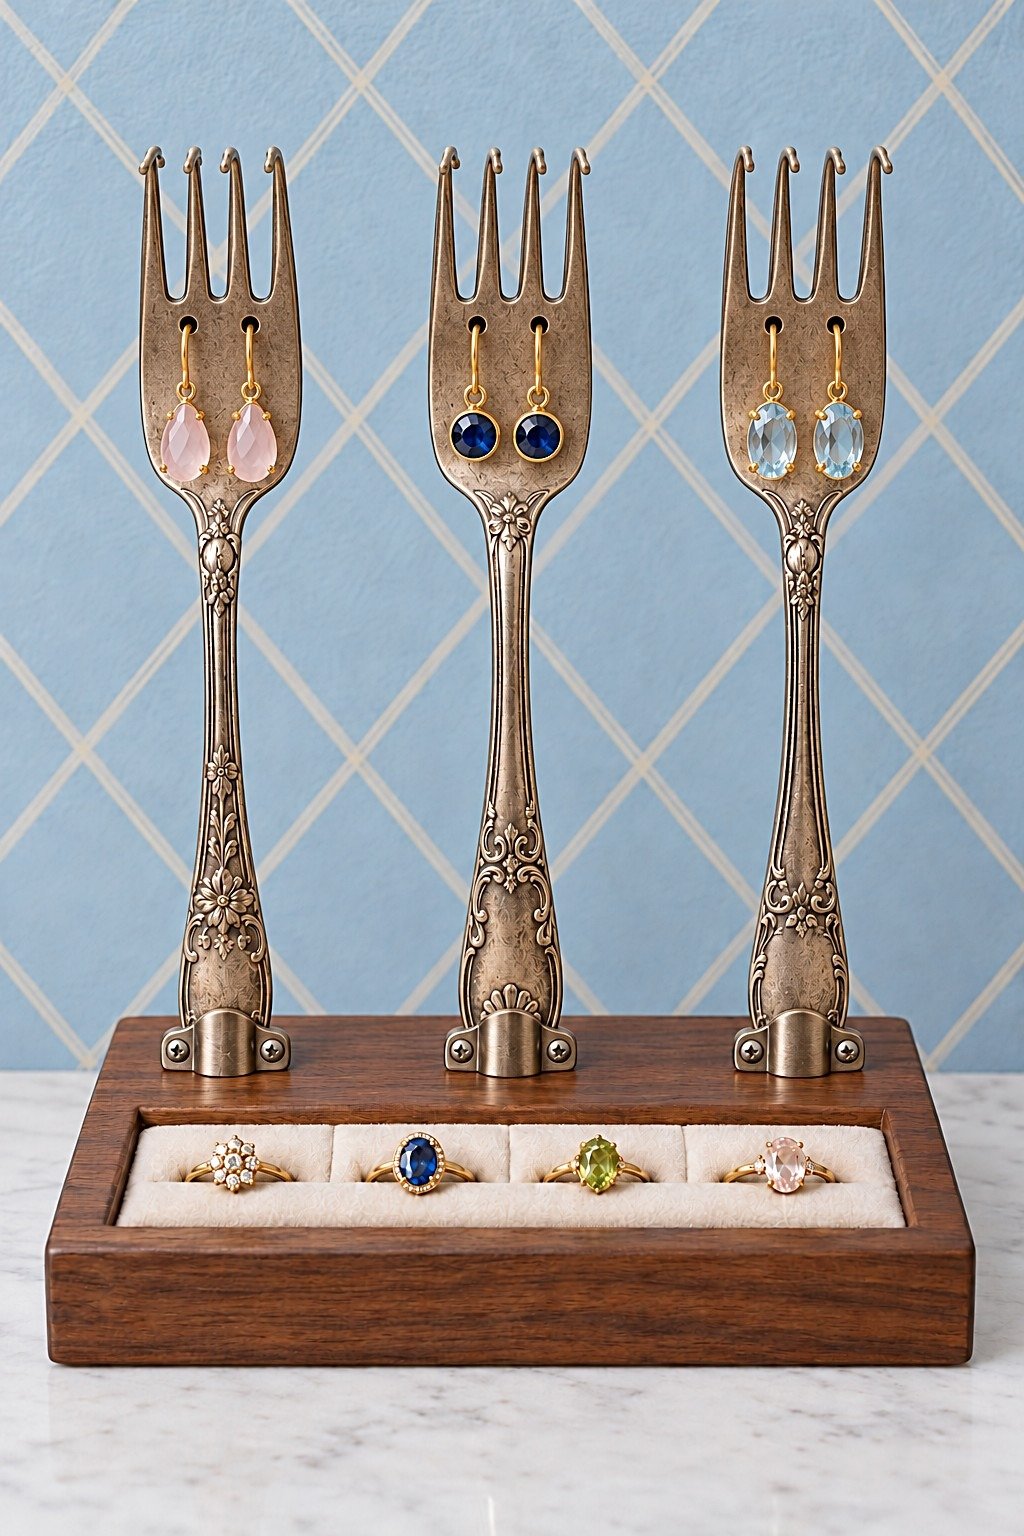
18. Three Forks Hold Three Favorite Earring Pairs
Matching forks create repeated vertical shapes, with each pair hanging through two smooth holes. This is a metalworking adaptation: clamp the cutlery for drilling, use eye protection and remove burrs from both sides. Brackets must grip the handles firmly and screw into the base. Ready perforated metal uprights offer a simpler alternative to drilling hardened cutlery.
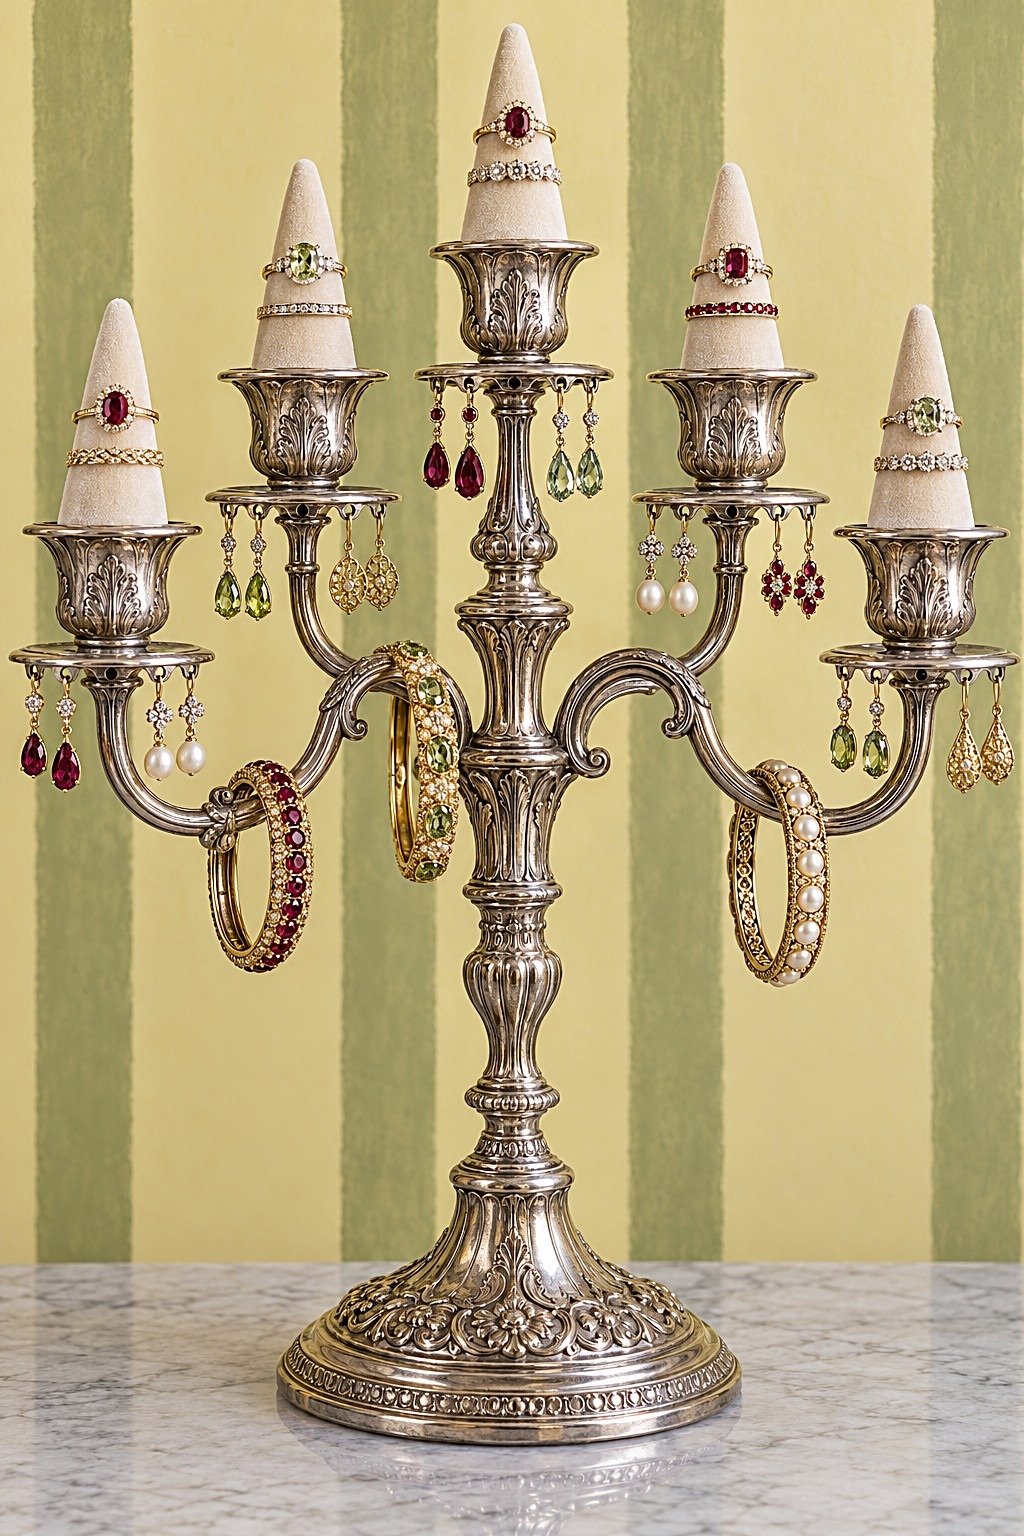
19. A Candelabra Becomes a Ring and Earring Sculpture
Padded cones replace candles, and the arms provide different heights for earrings and bracelets. Use a heavy, stable candelabra and distribute the jewelry so one side does not become noticeably heavier. Earring fittings should attach to the metal structure rather than the cone covering. Once adapted for jewelry, keep the piece entirely free of candles and heat.
20. A Three Rail Stand Organizes by Jewelry Type
Three levels let the collection sort itself by shape: necklaces at the top, earrings in the middle and bracelets below. Set the upper spacing from the actual hanging drop of your longest necklace. Closed bangles need an opening or removable end on the lower bar. Low ring storage adds useful weight near the base while keeping small pieces within reach.
21. Olive Fabric Softens an Oval Earring Frame
Olive fabric provides contrast without the visual busyness of a print. Stretch an open weave over a supportive frame and test it with a lightweight pair before filling the rows. Earring hooks need room behind the cloth, while the lower wooden strip carries the necklace load. Leave a little unused row space so replacing a pair does not snag its neighbor.
22. A Scalloped Blue Board Combines Cups and Rails
The scalloped outline makes a practical board feel softer beside a vanity mirror. Choose a ready made organizer or adapt a wooden board with separately secured shallow cups; its glossy appearance alone does not identify the material. Keep the cups for small pieces and place the board where you can see inside them. High placement would make those top compartments inconvenient to reach.
23. Wall Shelves Let Necklaces Keep Their Shape
Separate busts help you compare necklace lengths and see how each pendant sits when worn. Work out shelf spacing with a bust in place, including room to lift it off. Choose shelf depth from the whole base rather than the width of the shoulders. Solid brackets and suitable wall fixings matter here, especially when several stands occupy each shelf.
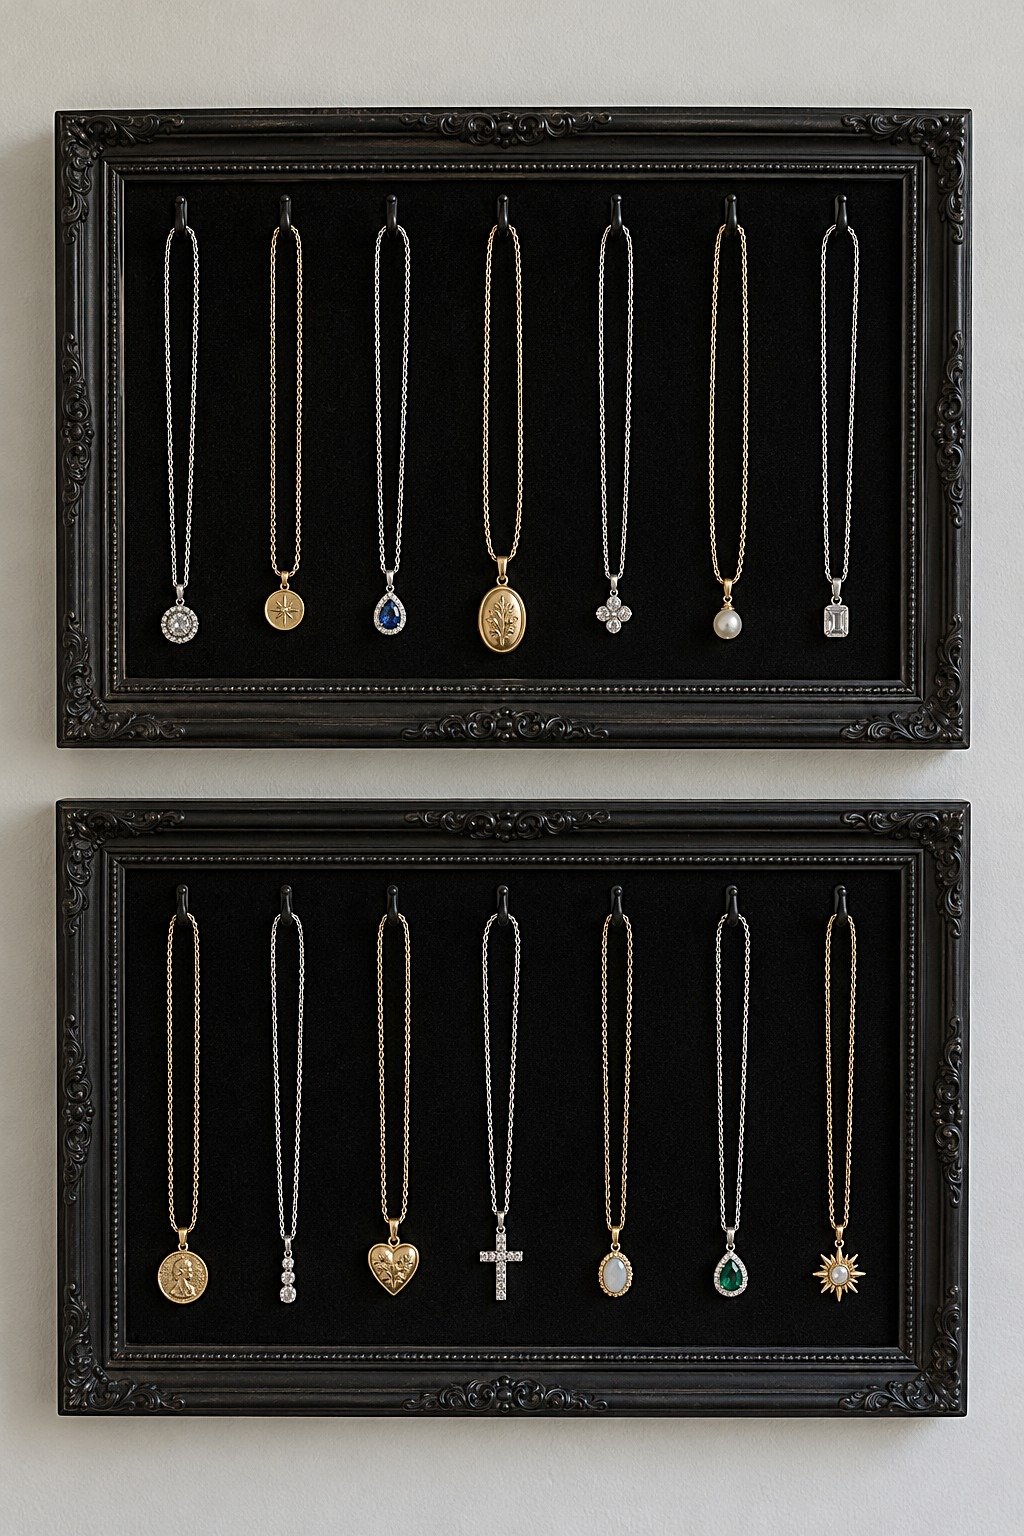
24. Two Black Frames Turn Chains into a Simple Gallery
A dark backing makes fine chains easy to distinguish, while two shallow frames divide a larger collection into manageable groups. Line the backing over a rigid panel and fix every hook into the support behind it. Use the pair for different necklace lengths or separate everyday pieces from occasional ones. Dark fabric makes dust noticeable, so keep a lint brush nearby.
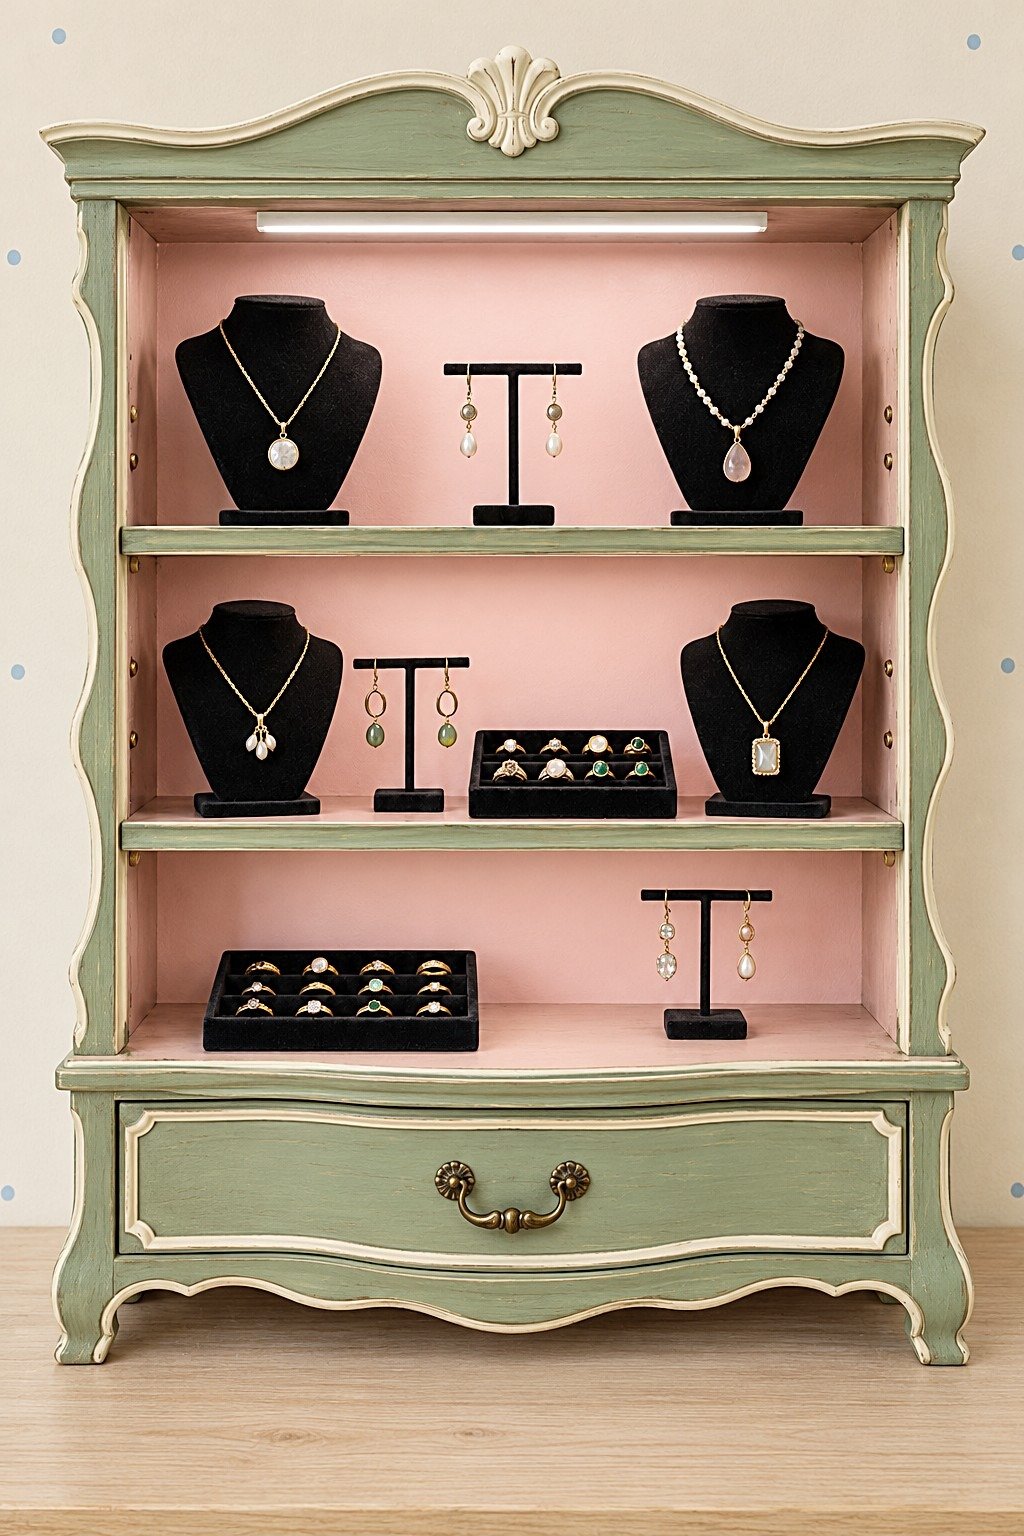
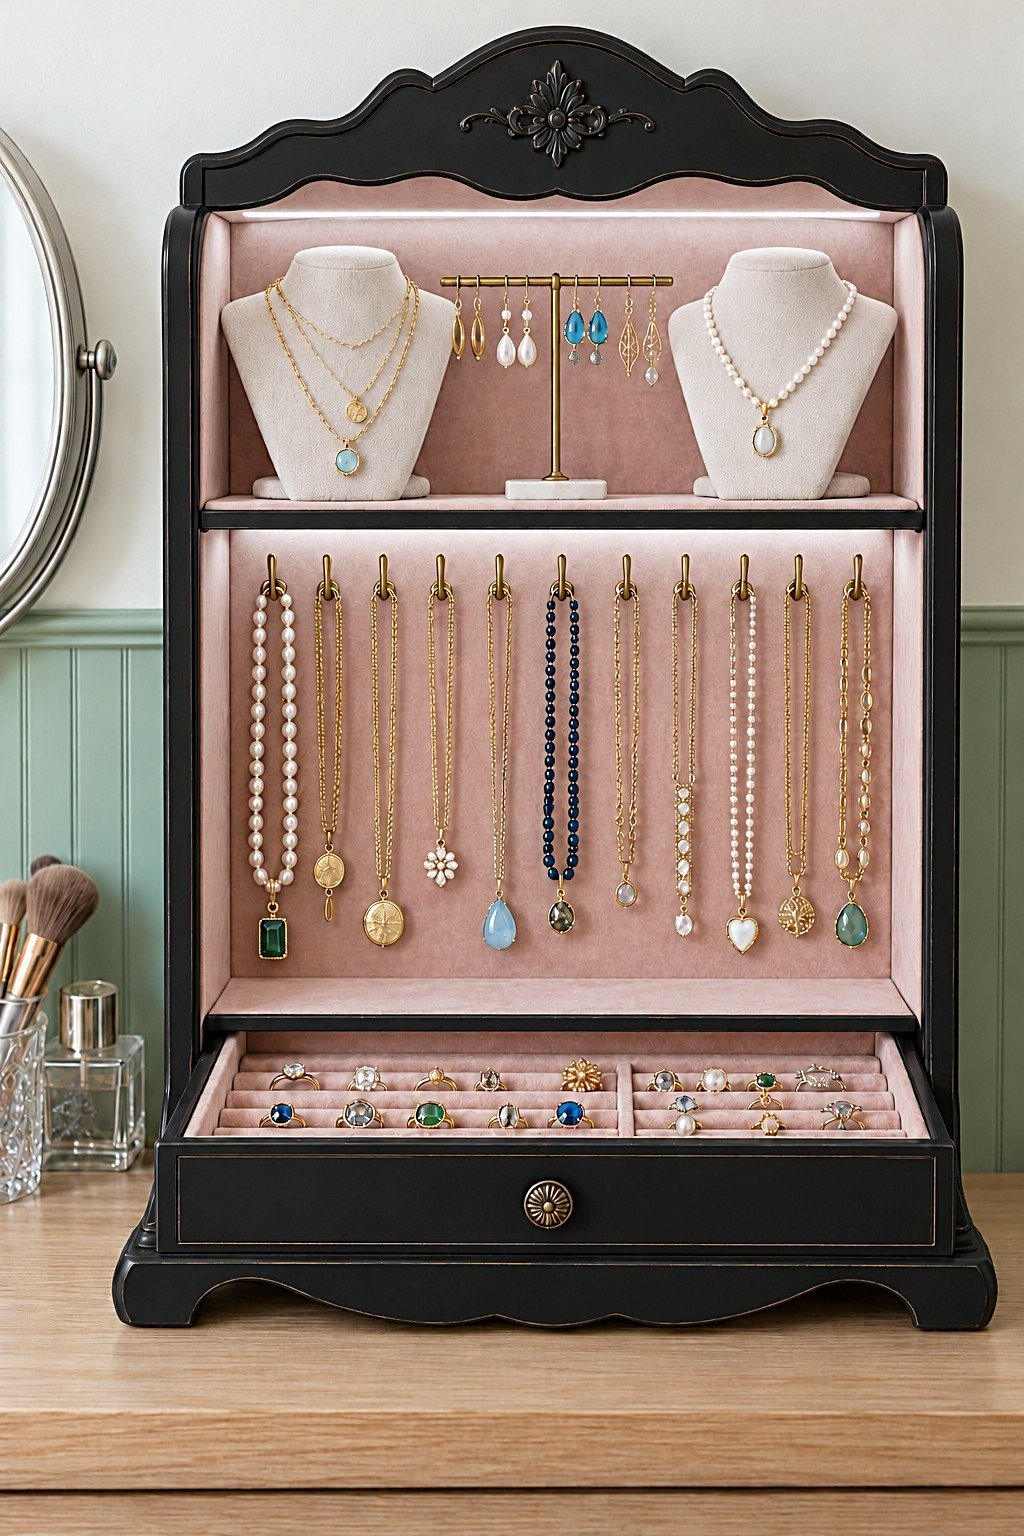
25. A Sage Hutch Uses Black Stands for Contrast
Black stands give the pale jewelry a clear outline against the pink interior. Reuse a small hutch only after checking shelf supports, depth and drawer movement. Keep the stands away from the front edge and leave space to grasp them. Use the lower drawer for pieces that do not benefit from open display, keeping the visible shelves more deliberate.
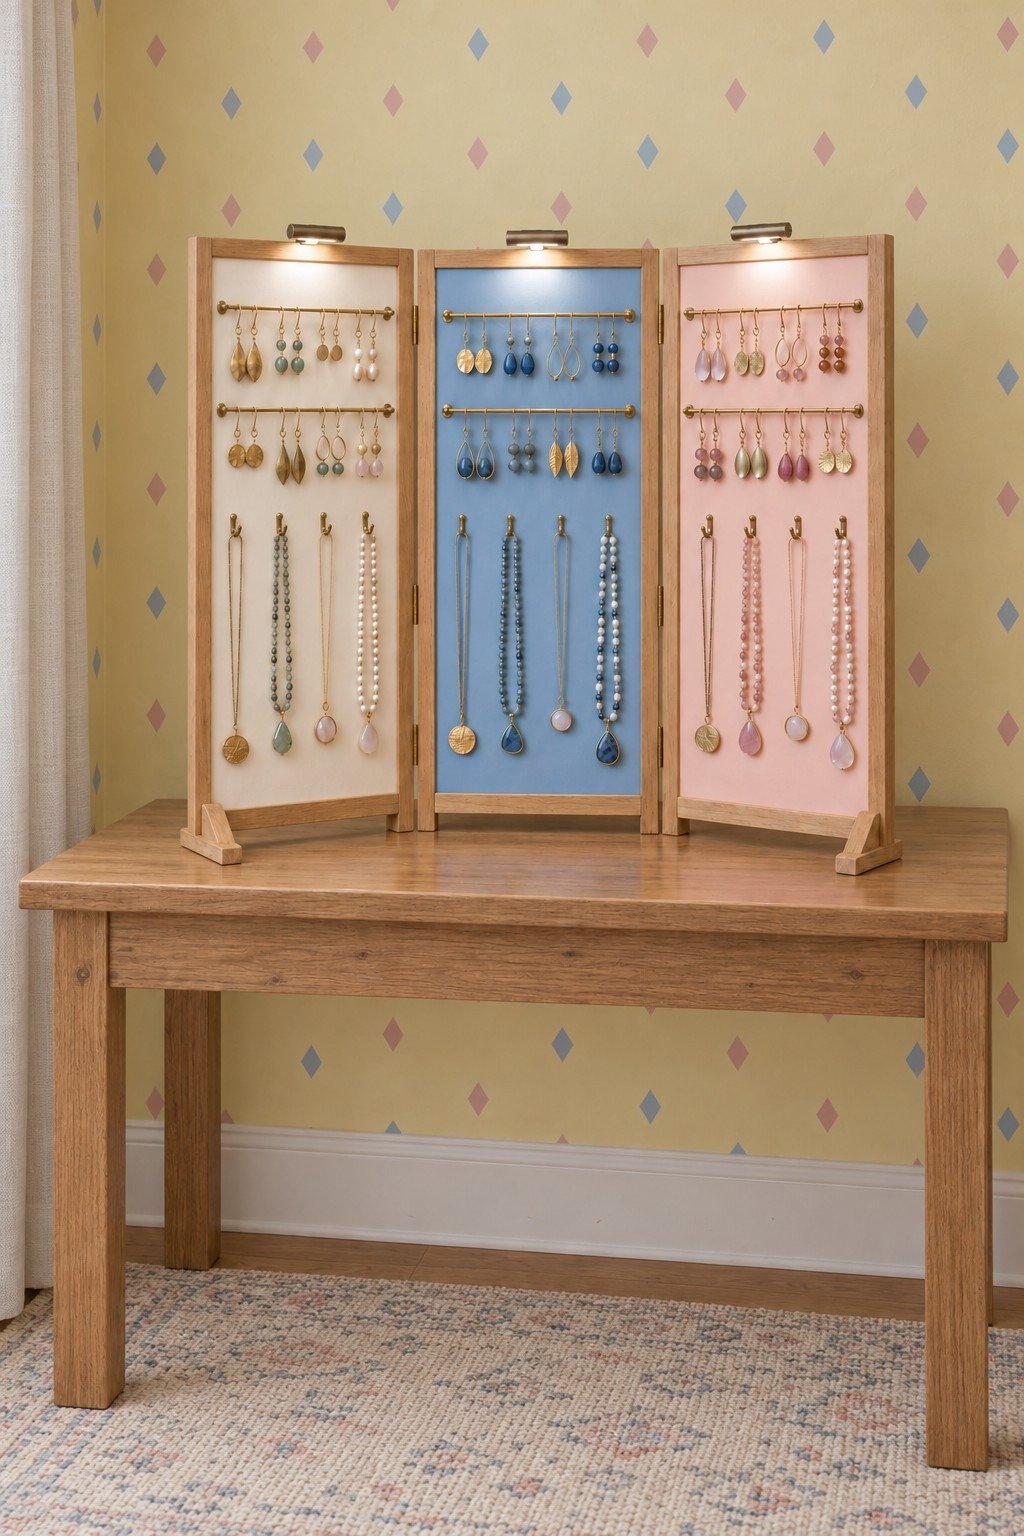
26. A Folding Screen Creates a Removable Dressing Corner
Three hinged panels can stand on existing furniture and fold away when the surface is needed. Open them into a shallow zigzag and use feet that prevent the ends from slipping. The three colors can separate categories or belong to different users. Folding clearance must accommodate hooks and pendants without compressing the jewelry.
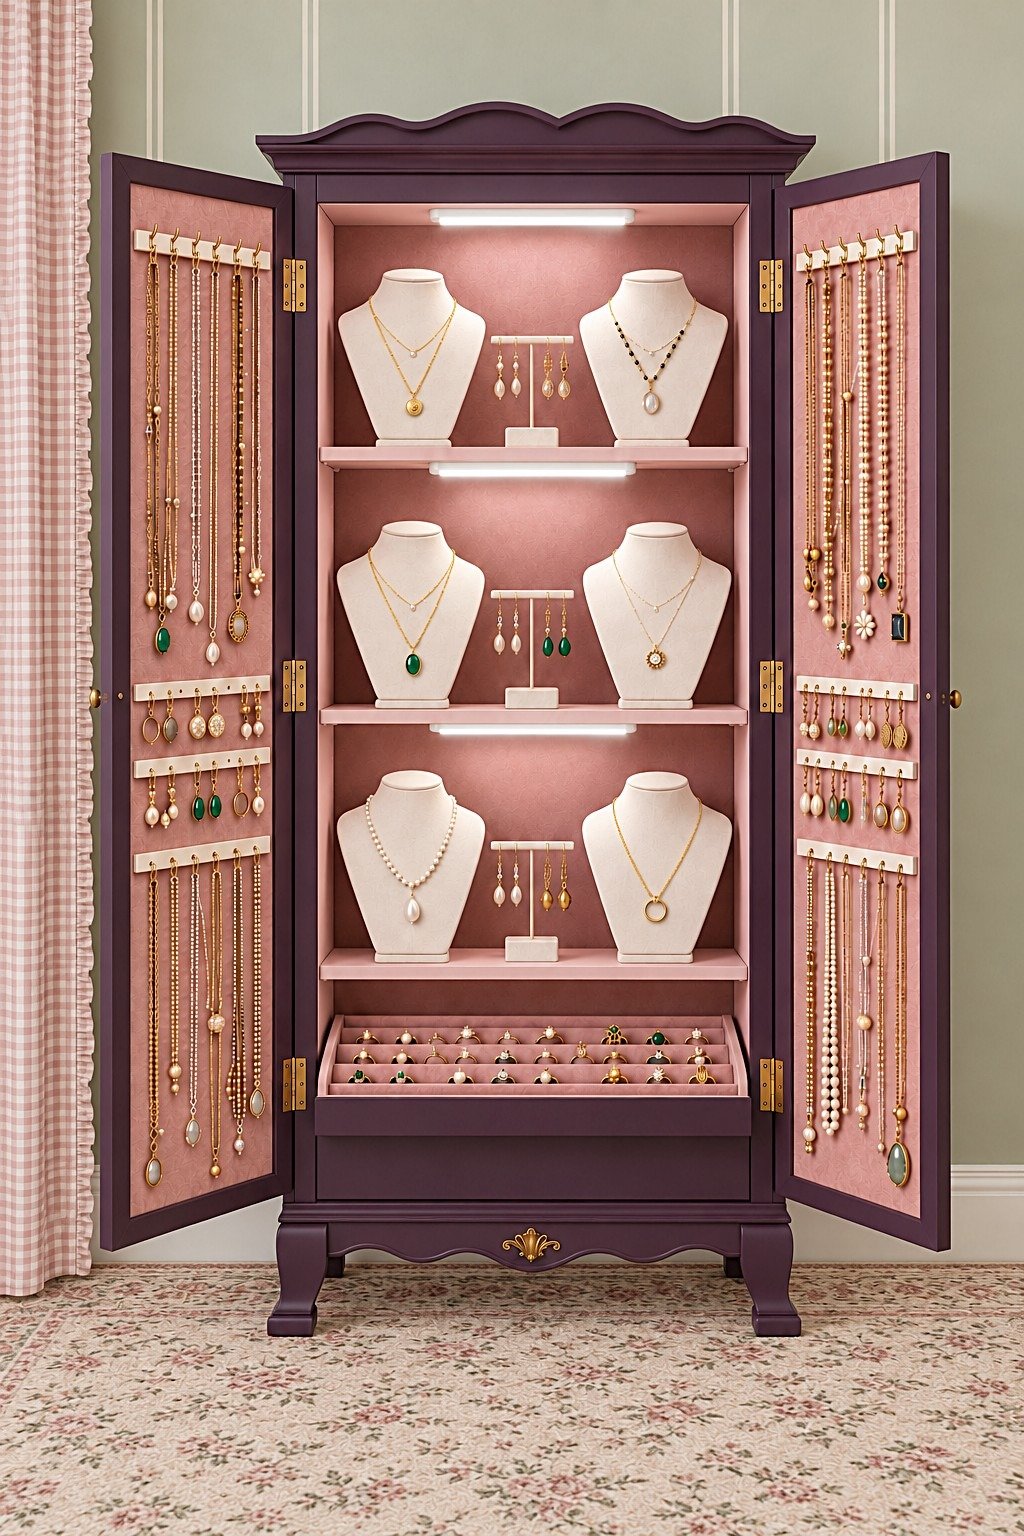
27. A Plum Armoire Houses a Larger Collection
An armoire provides room for door storage, display busts and a broad ring tray in one piece of furniture. Door depth is the critical measurement: hanging chains must clear the shelves when closed. Load both doors sensibly and anchor the cabinet according to its maker's instructions. Decovive's repurposed cabinet collection offers other ways to give existing furniture a specific role.
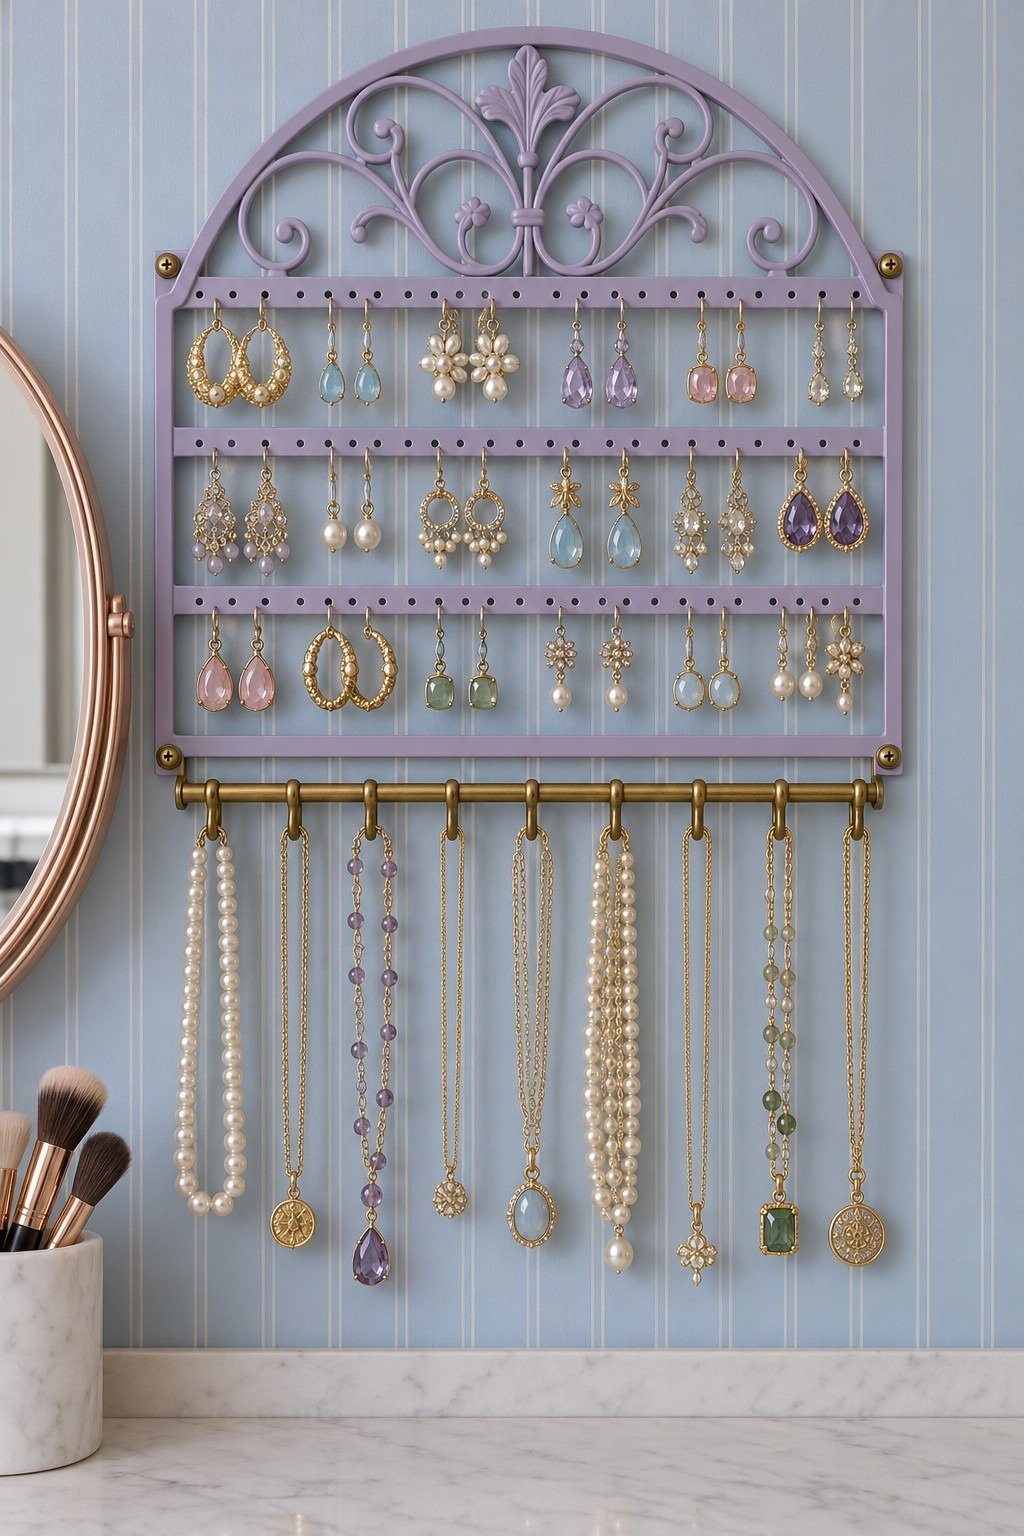
28. A Lilac Rack Adds Earring Capacity Beside the Mirror
Three perforated rails suit someone whose earrings outnumber their other pieces. Check the drop of the longest pair before deciding the gap between rows, then leave a small rear clearance for the hook tips. The independent necklace bar makes this easy to expand downward. Screw locations should meet solid support or wall anchors suited to the mounting surface.
29. A Pink Glass Cabinet Suits a Narrow Vanity
A tall, narrow cabinet uses height when the dressing surface has little spare width. Measure both the footprint and the space needed to open its glass door. Shelf clips must support the glass correctly, and each bust needs clearance above its neck. Explore these colorful vanity room arrangements for the surrounding furniture and palette.
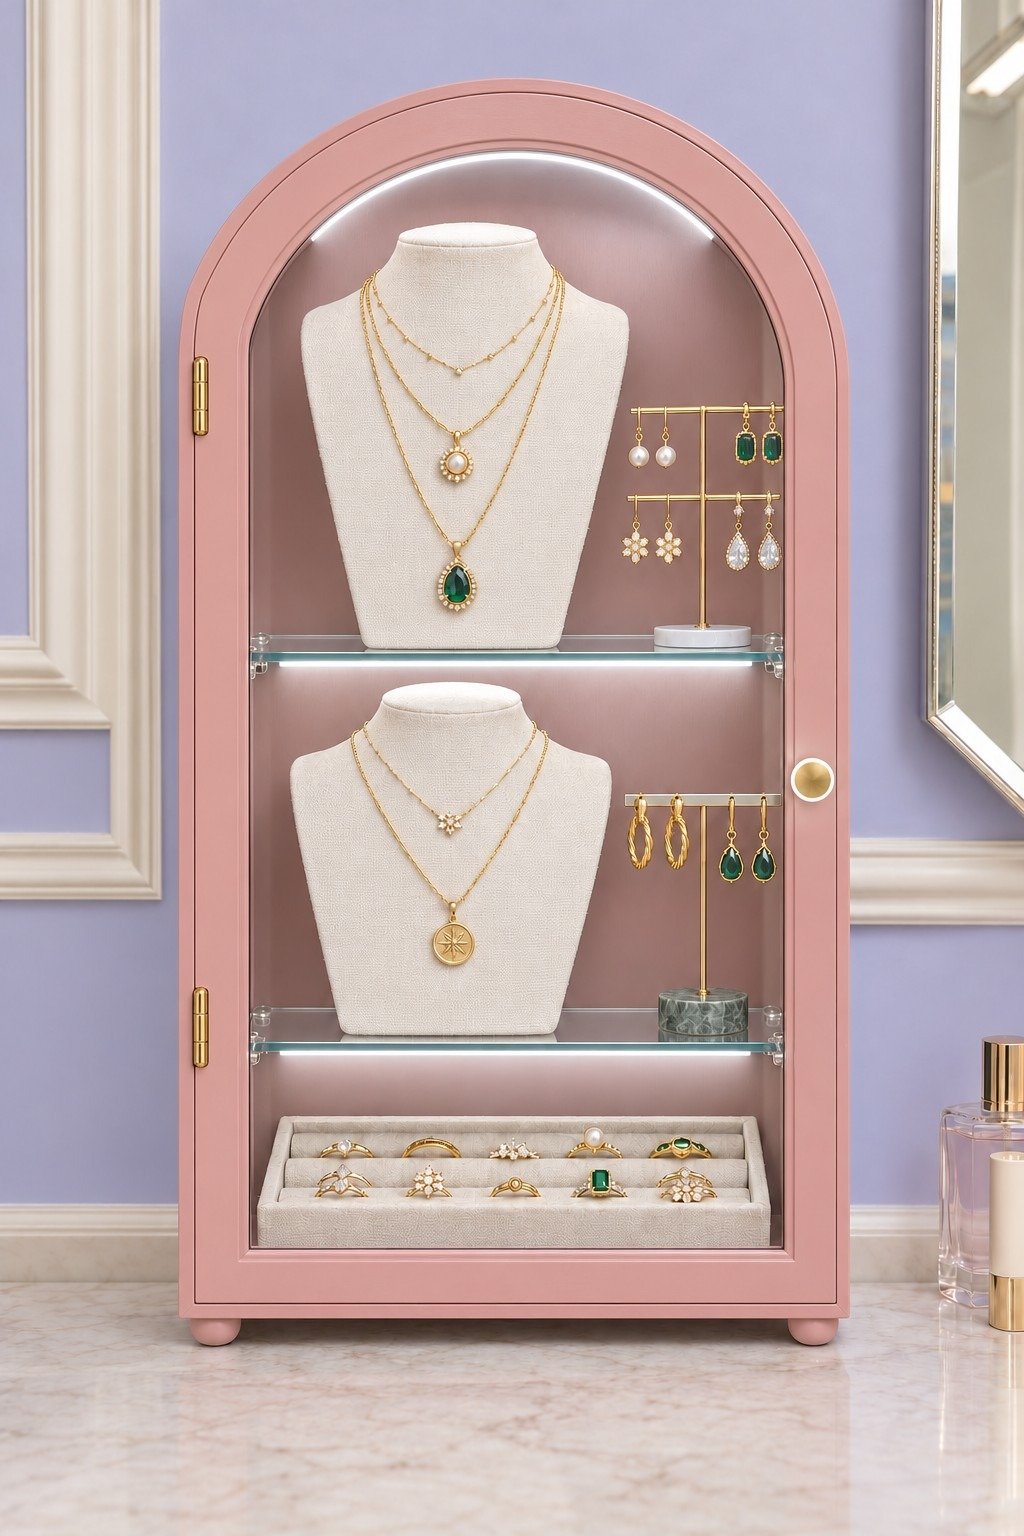
30. A Countertop Cabinet Reserves a Full Bay for Chains
The broad middle bay avoids folding necklaces around several shelves. Above it, two busts show a small selection; below, an open drawer holds rings in separate rolls. Check that the drawer extends without hitting another vanity accessory. My preference is to reserve the top shelf for occasional favorites and use the central hooks for frequently worn chains.
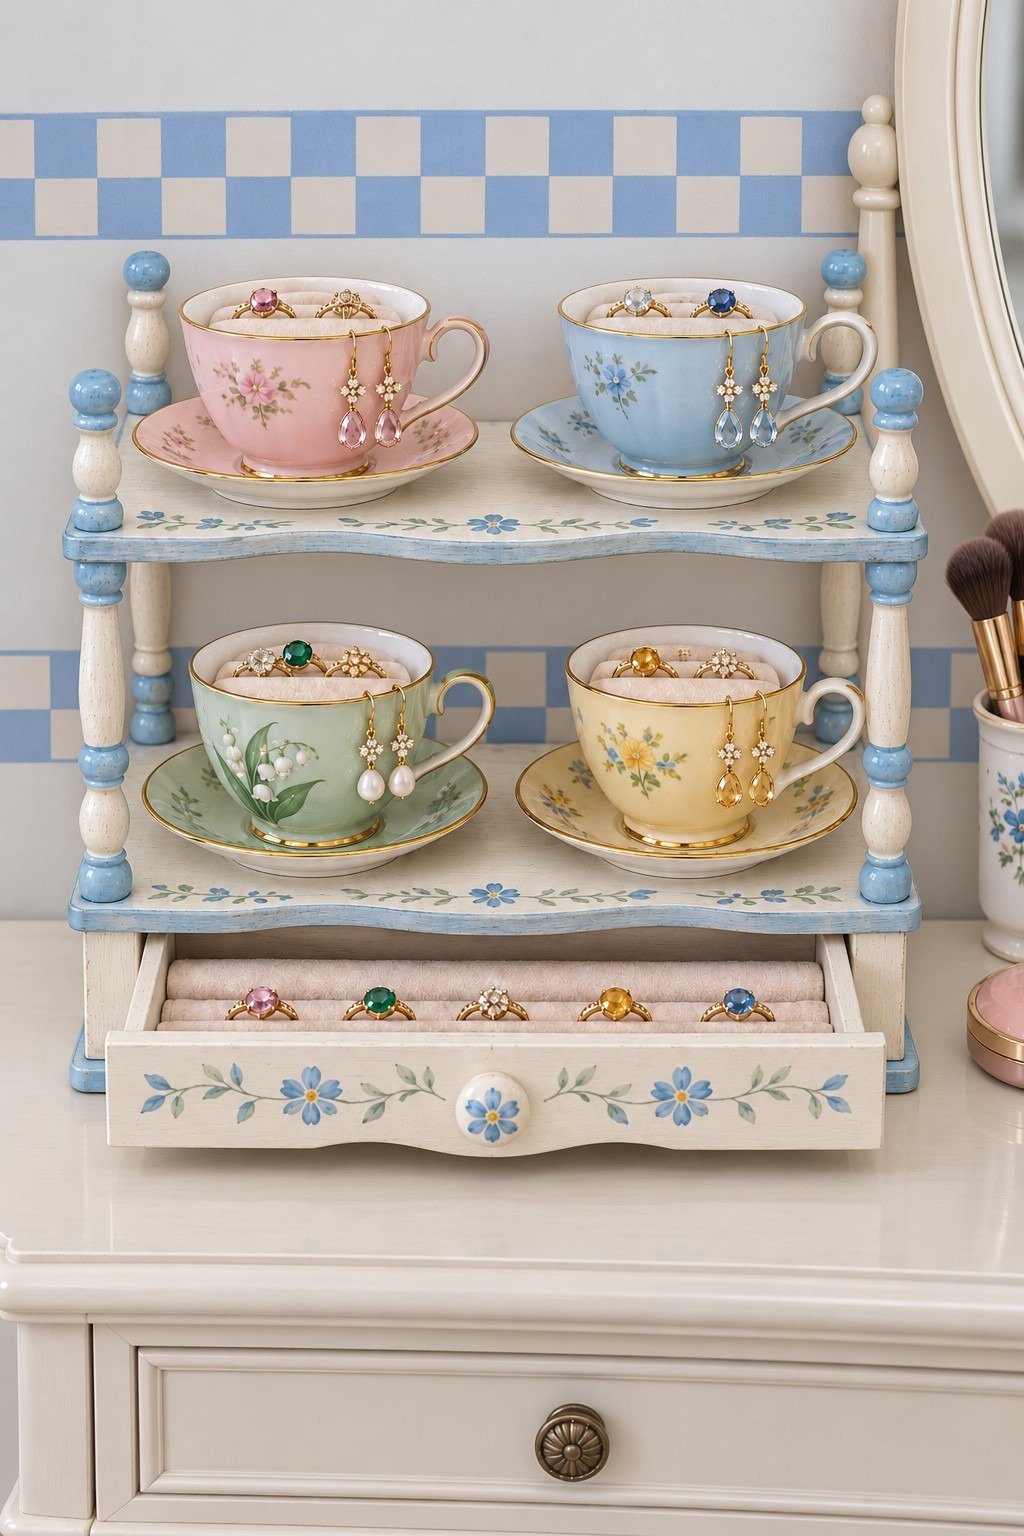
31. Teacups Keep Small Jewelry Sets Together
A padded insert inside each cup gives a pair of rings a defined place, while light hook earrings can hang from a smooth rim. Avoid chipped china and do not force a tight earring wire over a thick edge. Cup and saucer sets remain removable for cleaning. Small coordinated selections work here more comfortably than a collection of loose pieces.
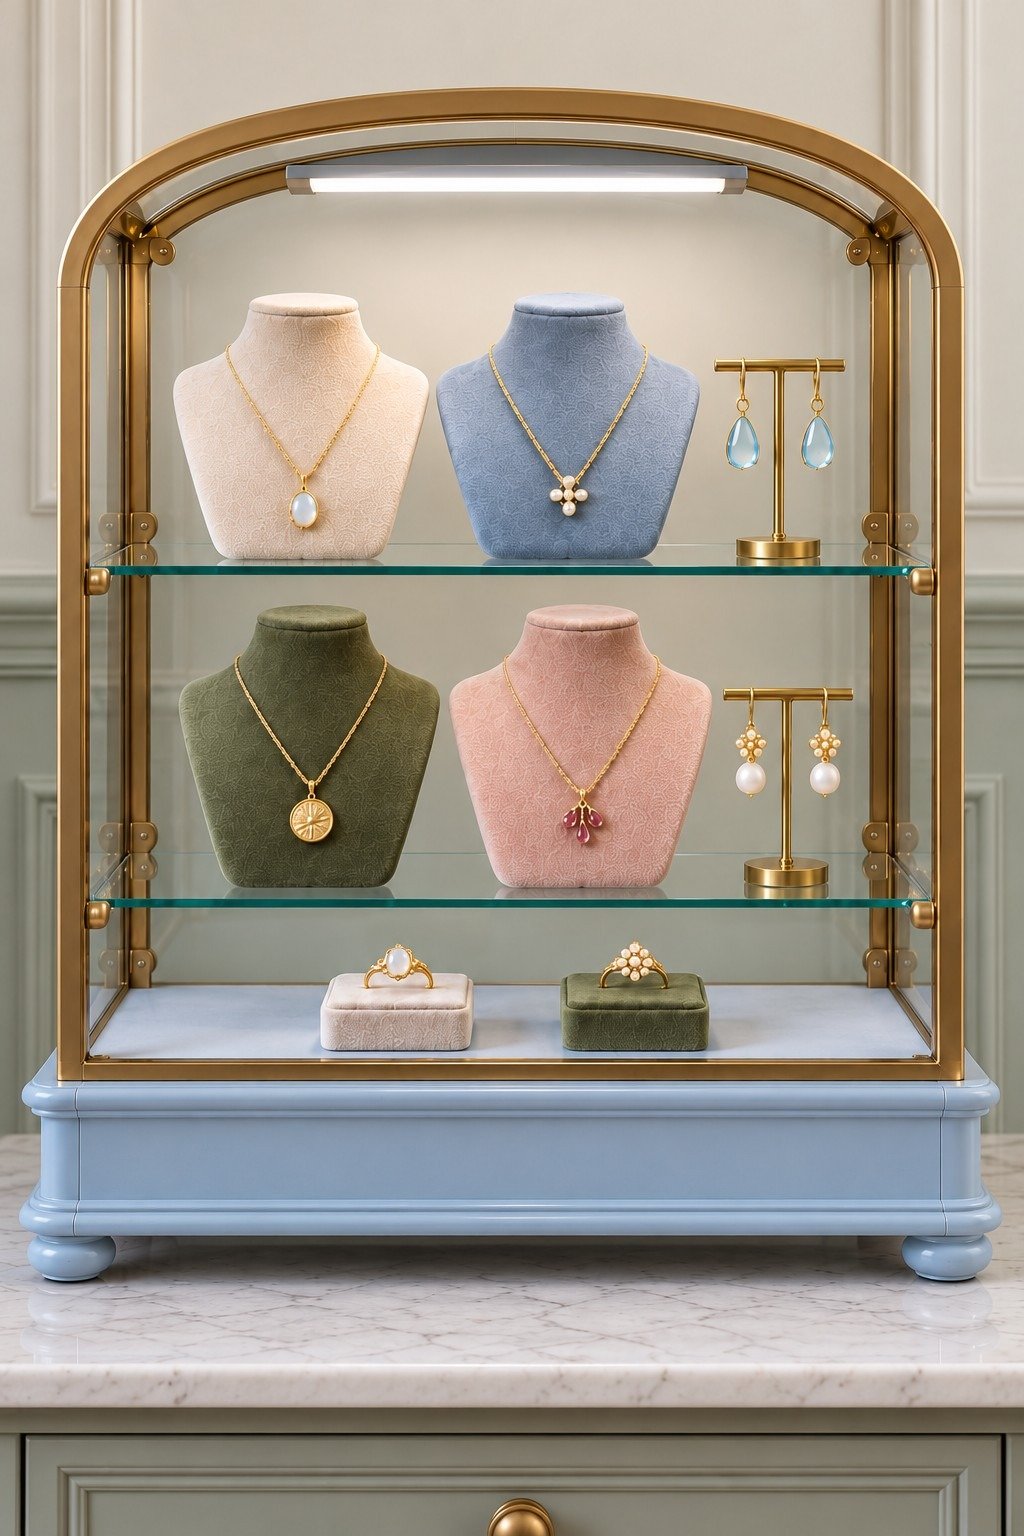
32. Colored Busts Give a Glass Showcase a Gentle Rhythm
Different bust colors help distinguish necklaces without adding printed labels. Keep their heights similar so the changing color remains the main organizing detail. Check the showcase's shelf limits and use bases that sit fully on the glass. The bottom ring boxes add another scale without crowding the busts. Glass still needs occasional cleaning and does not prevent tarnish by itself.
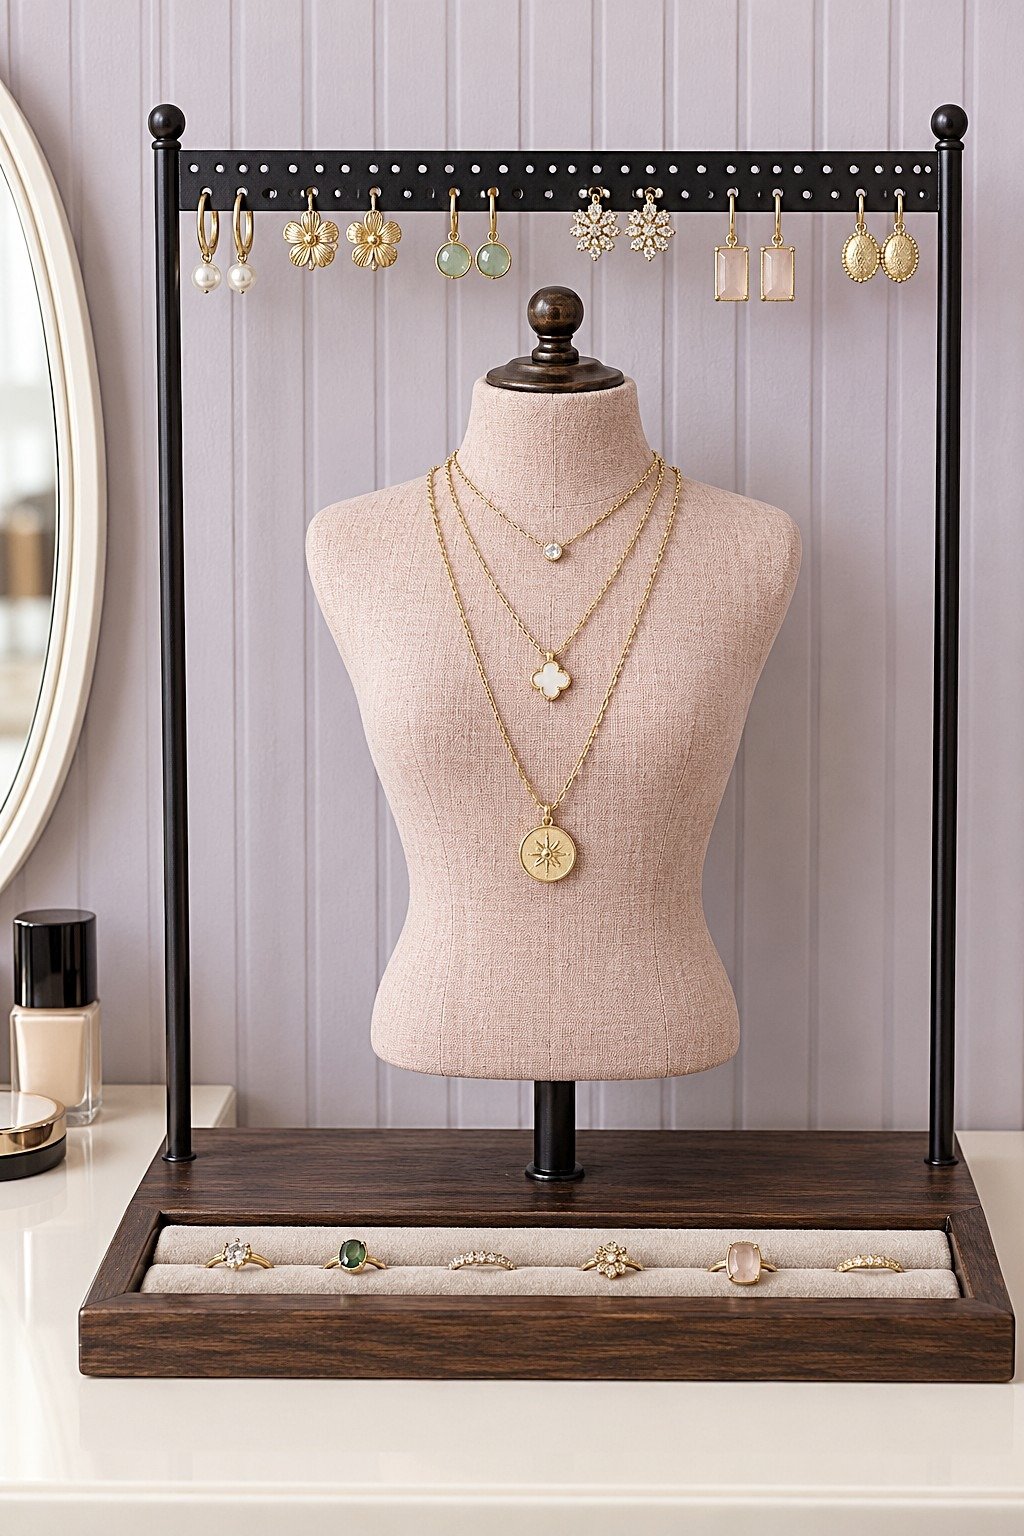
33. An Earring Bridge Frames a Single Necklace Bust
An overhead earring bridge brings several jewelry types into one footprint. Choose its height after placing the bust so neither earrings nor hands have to squeeze past the finial. A broad base supports the two uprights and central post. Layering necklaces is easier when the bust remains visible beneath the line of earrings.
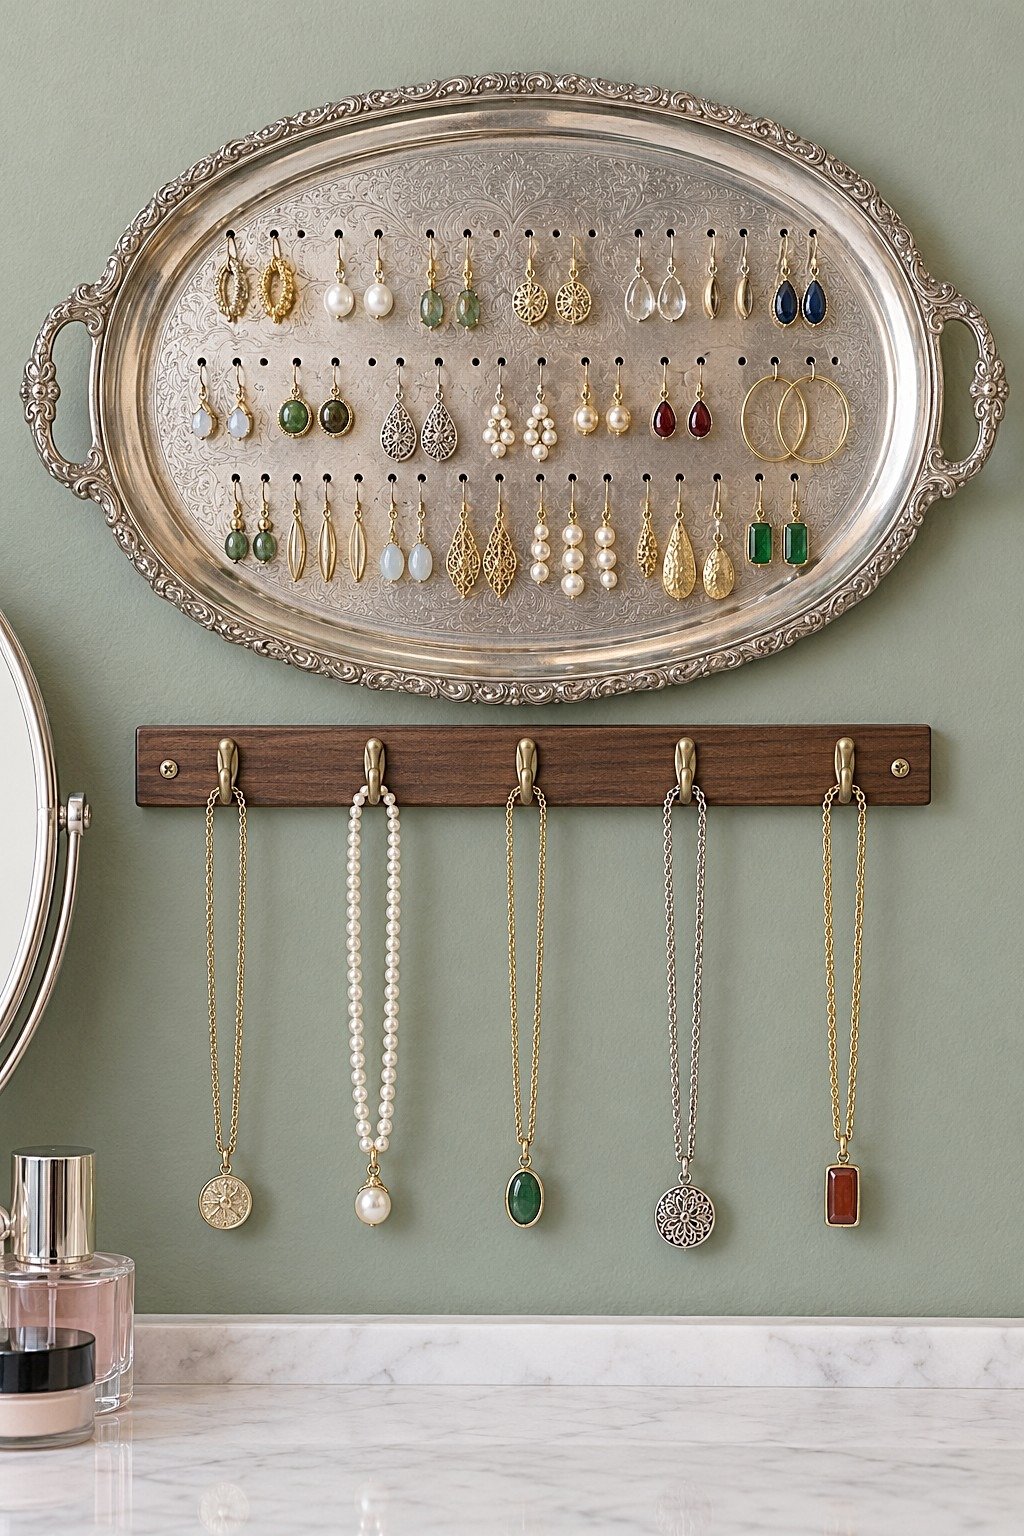
34. An Engraved Tray Gains Rows of Earring Holes
A decorative tray becomes a reflective backdrop, but its raised rim needs space behind it for earring hooks. Use inexpensive, sound metal rather than an important antique, and have difficult drilling handled by someone with suitable tools. Deburr every hole and mount the tray securely. Keeping necklaces on the separate wooden rail avoids adding their weight to the tray's thin center.
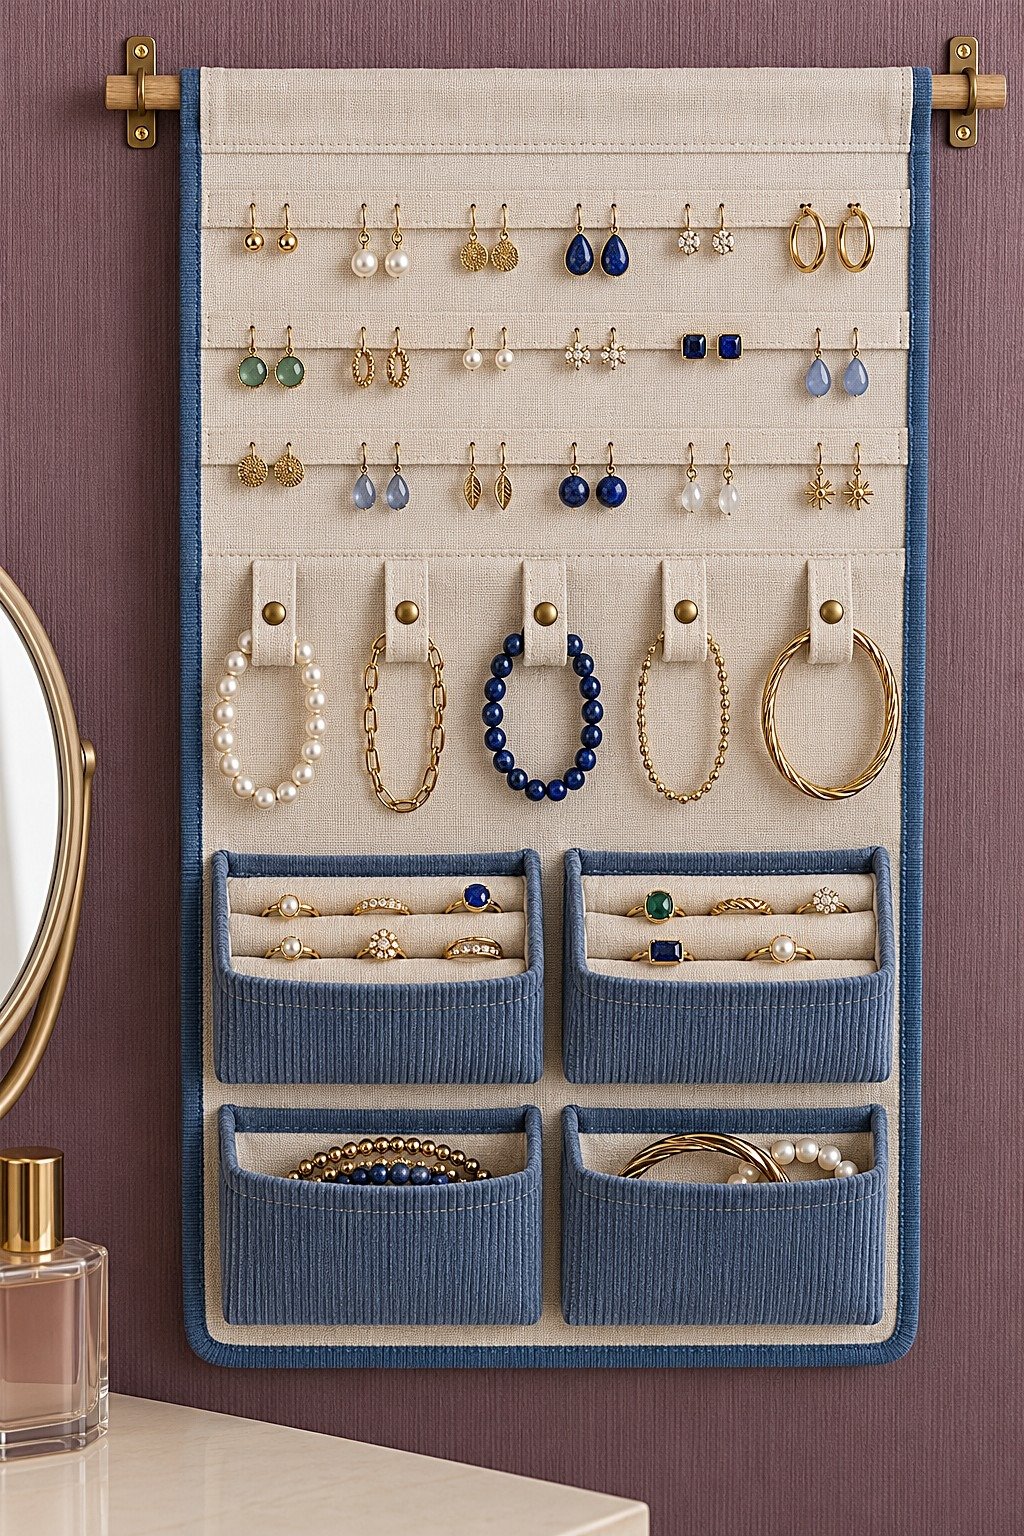
35. A Fabric Wall Organizer Handles Bracelets Differently
Snap loops let closed bracelets come off without sliding past the rest of the collection. Reinforce their stitching and use removable padded inserts in the ring pockets. The upper earring bands need access behind them for fastening studs. Choose washable fabric and remove every piece of jewelry before cleaning. Blue edging gives the soft panel a defined outline against the darker wall.
36. A Glass Cloche Covers One Considered Selection
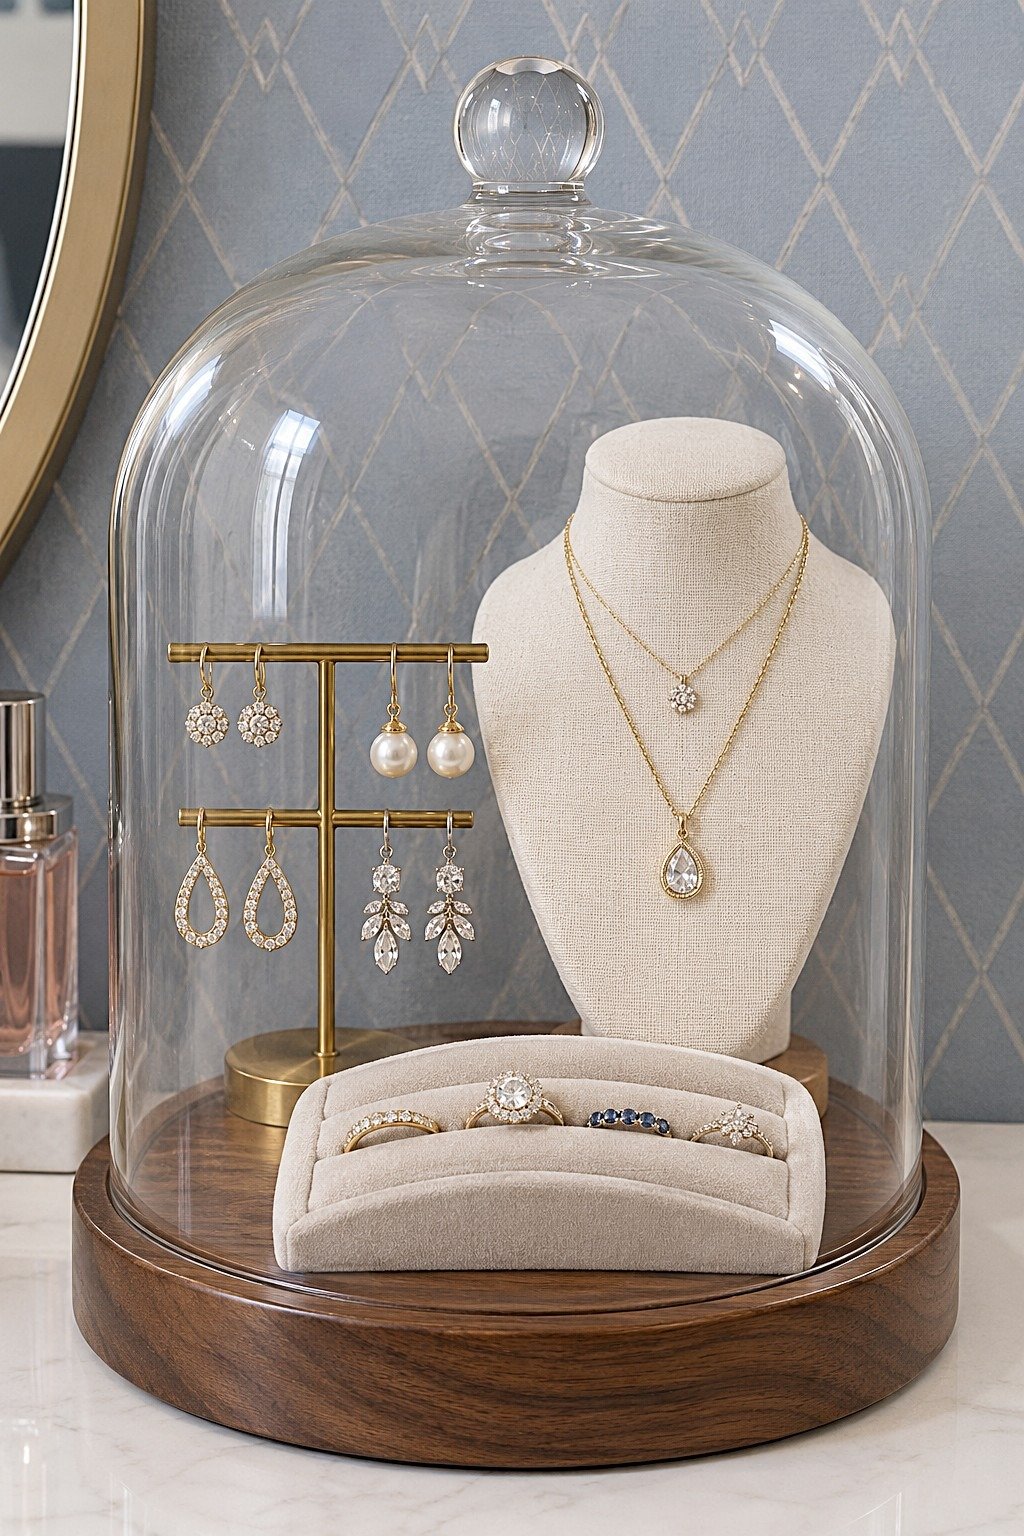
A cloche reduces settling dust around a small selection and makes the arrangement feel contained. Check the inside diameter against the full earring stand and leave room above the bust. Lift the cover straight up by its knob, with space to set it down safely. Neither security nor protection from moisture and tarnish should be assumed from a glass cover.
37. A Wire Dress Form Displays Coordinated Sets
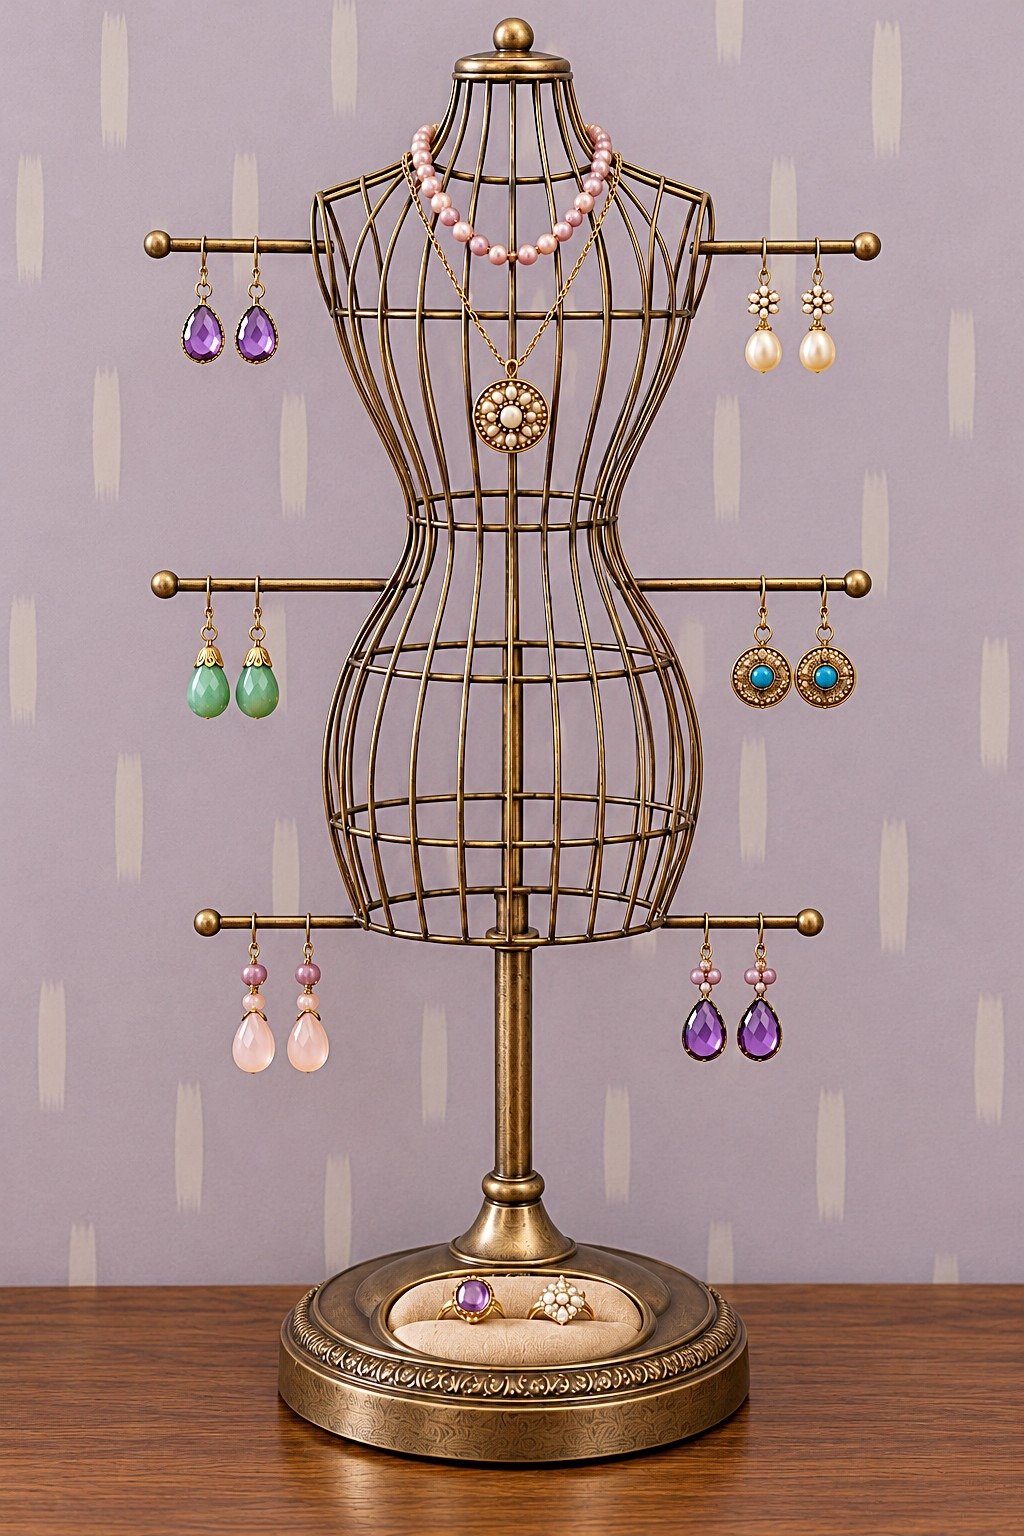
The open wire body leaves the necklace visible while horizontal arms hold several earring pairs. Use a purpose made jewelry form with smooth joints and capped rod ends. Balance the earrings across the arms and keep the tallest piece away from the edge of a dresser. Limit the small ring recess to a few pieces.
38. A Cobalt Hand Gives Rings Their Own Sculpture
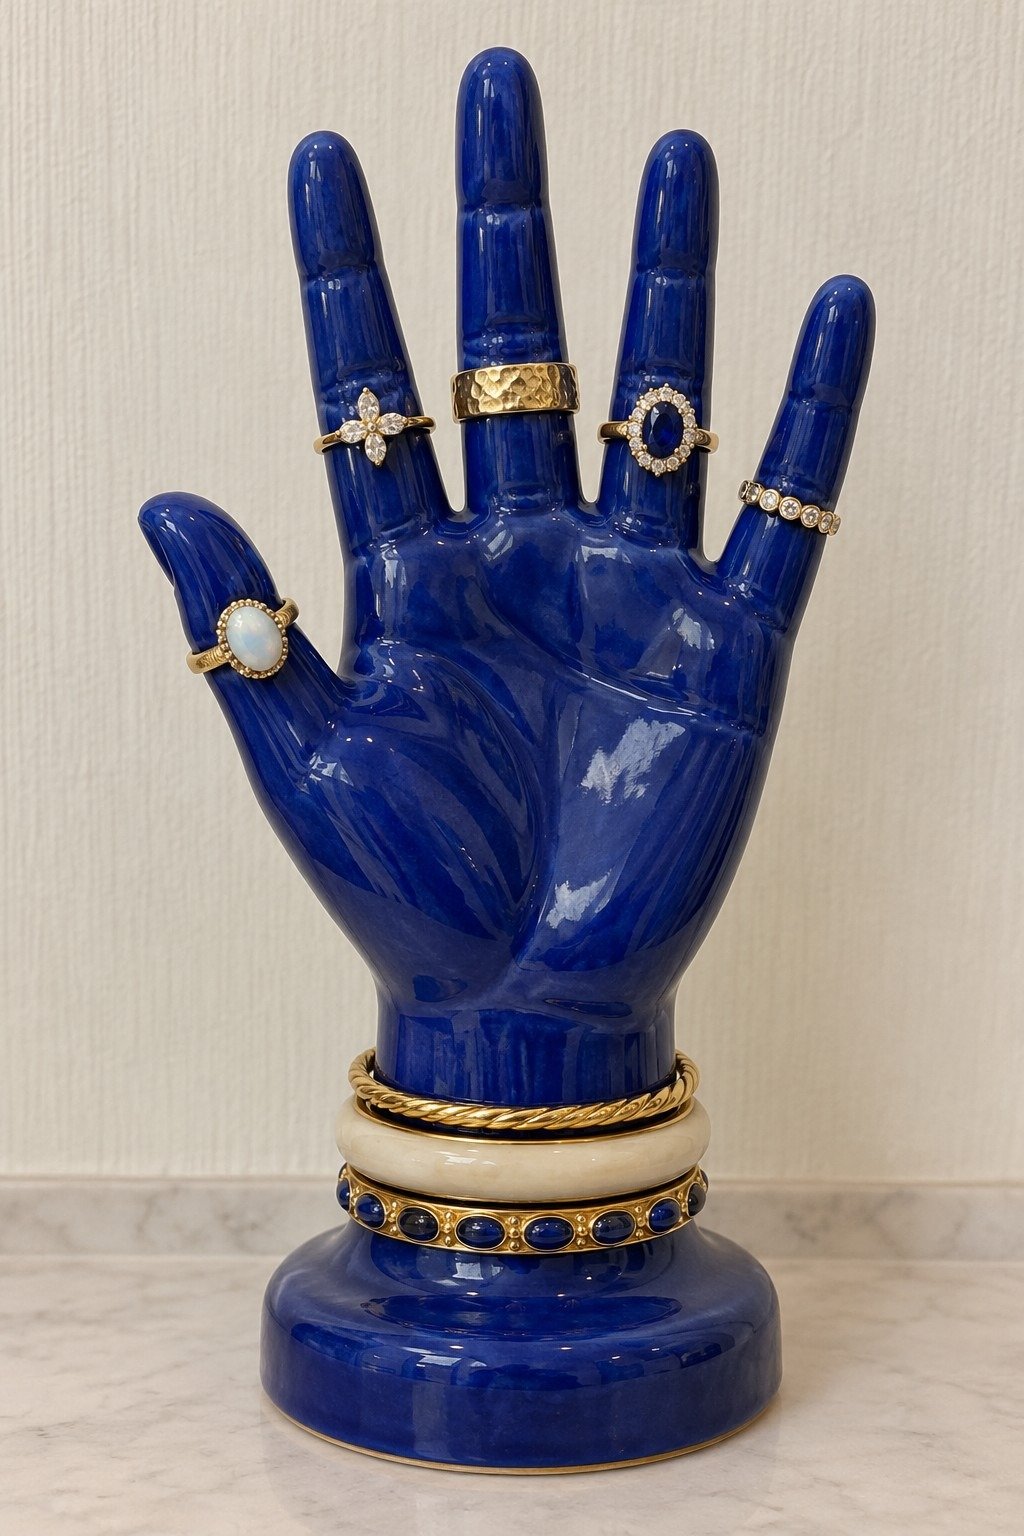
A hand shaped stand lets rings become part of the room's decoration, with cobalt creating a strong background for gold tones. Fit matters more than filling every finger: a ring must slide on and off without force. Choose a stable, smooth finished stand and inspect it for chips. Bracelets around the wrist should also clear the fingers during removal.
39. A Ballerina's Skirt Becomes an Earring Circle
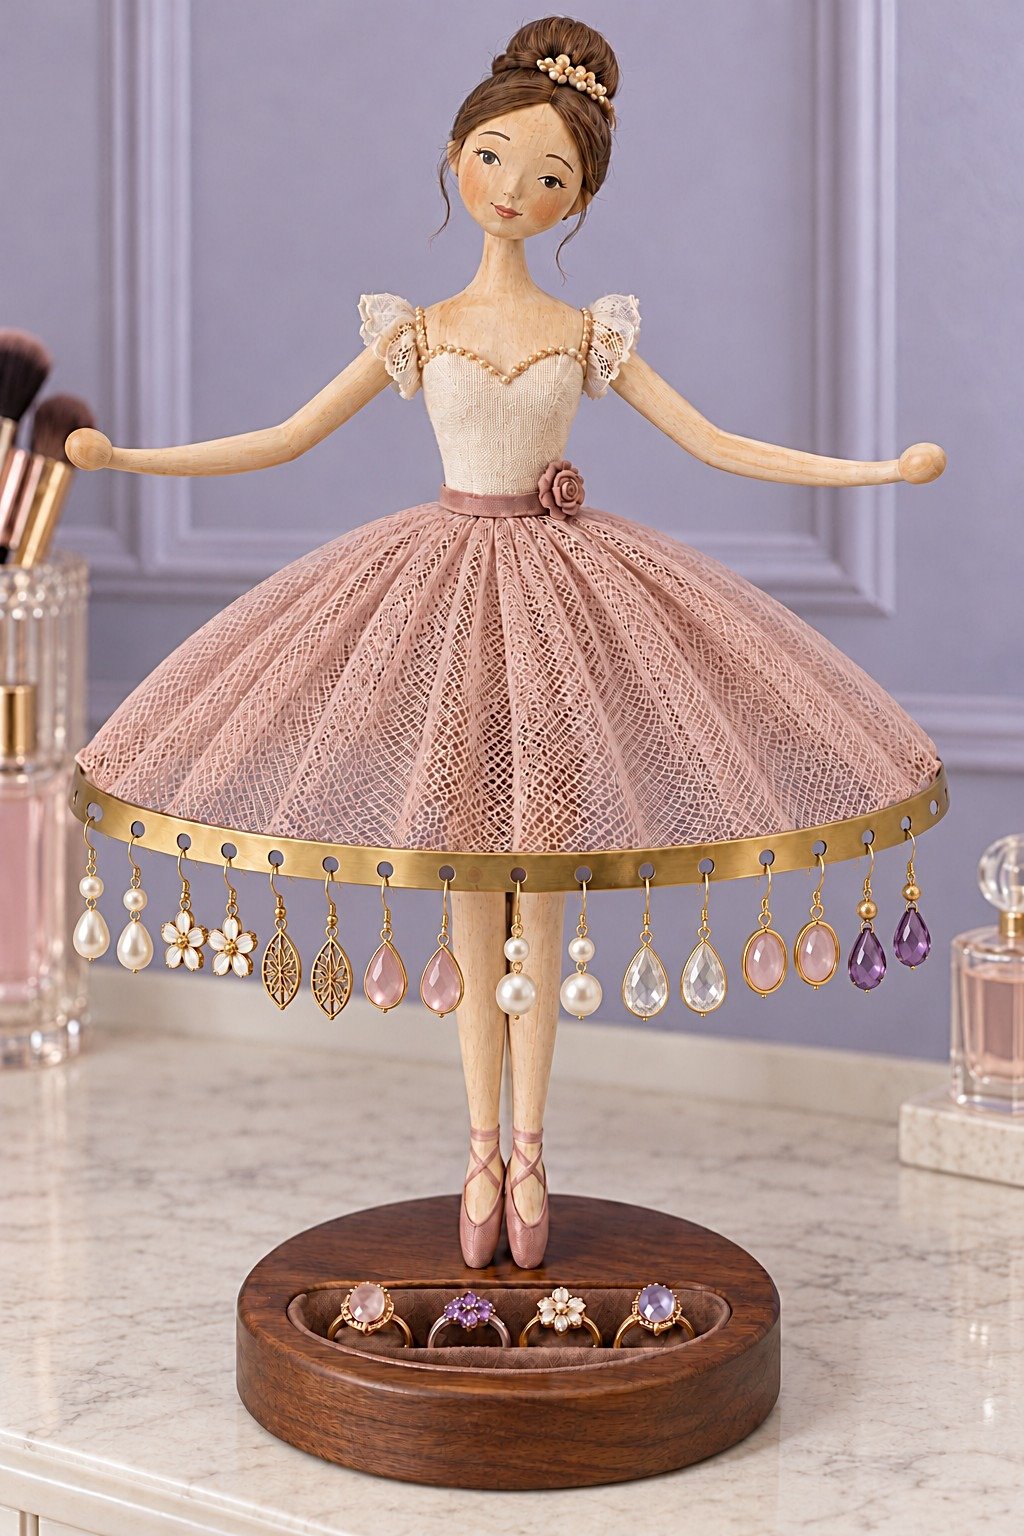
A rigid perforated rim supports the earrings; the lace skirt supplies the decorative layer above it. Choose a purpose made stand or give a custom version an internal support connected to the base. Cloth alone should not carry the rim. Similar lightweight pairs keep the circle balanced, while enough spacing between them prevents neighboring drops from knocking together.
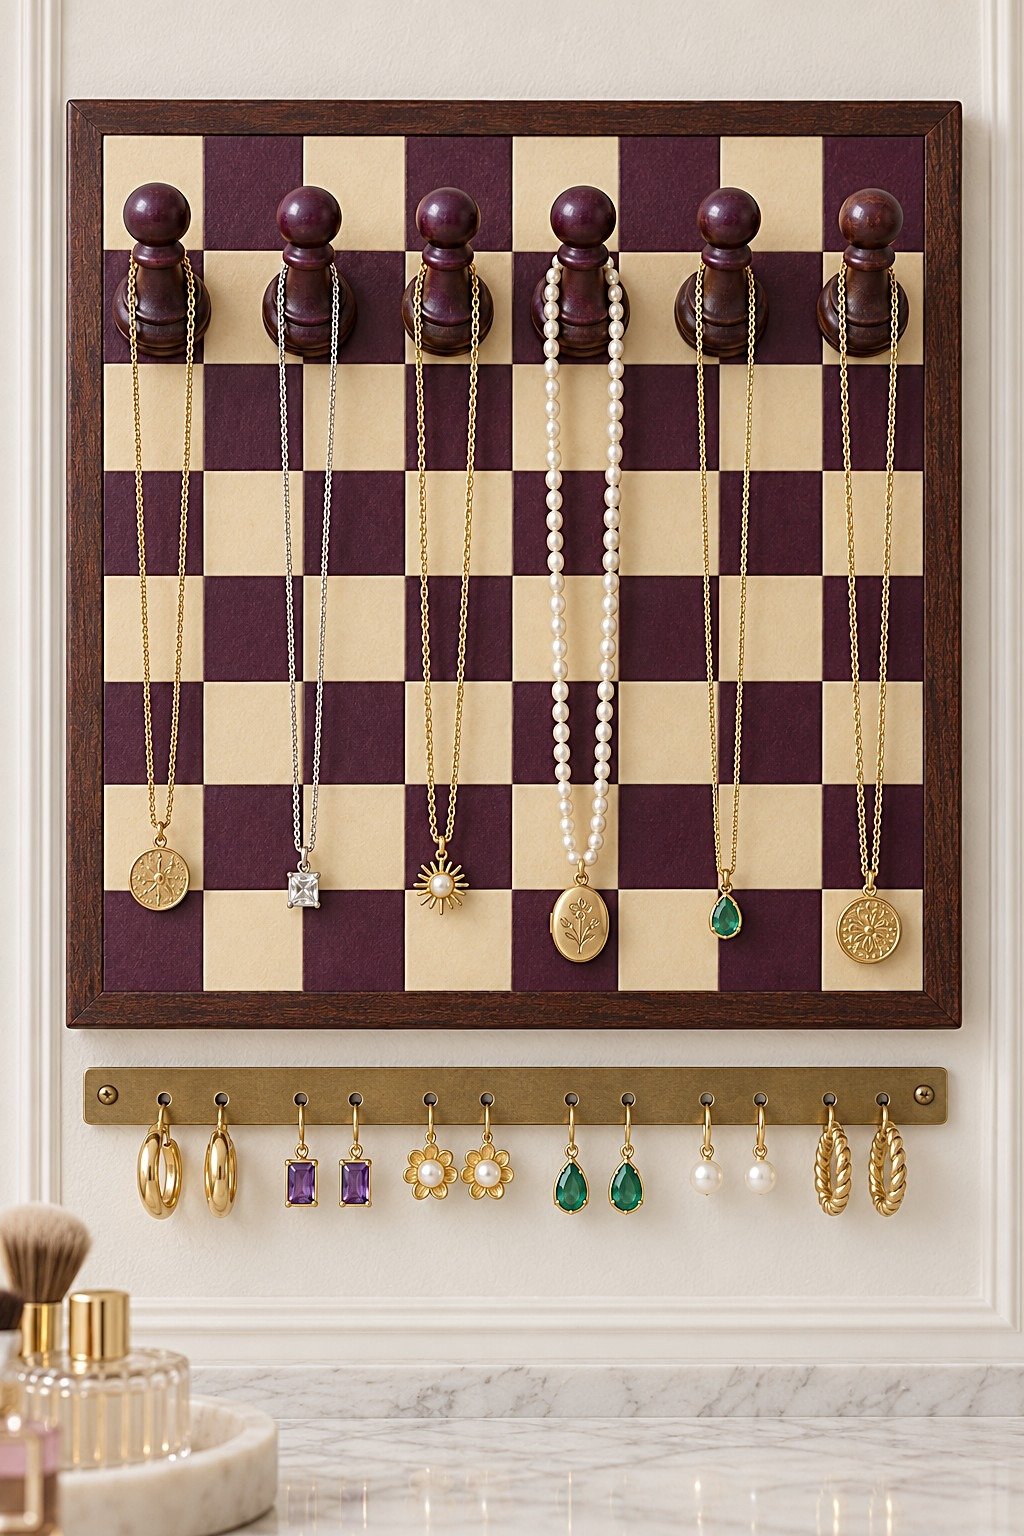
40. A Chessboard Pattern Marks Out Necklace Positions
Pawn shaped pegs give necklaces a rounded resting point and turn the checked board into a clear grid. Fix the pegs mechanically through a rigid backing instead of gluing loose chess pieces to a thin surface. Match their projection to the jewelry so chains lift off easily. Positioning the earring strip below the board keeps the main checked area visually simple.
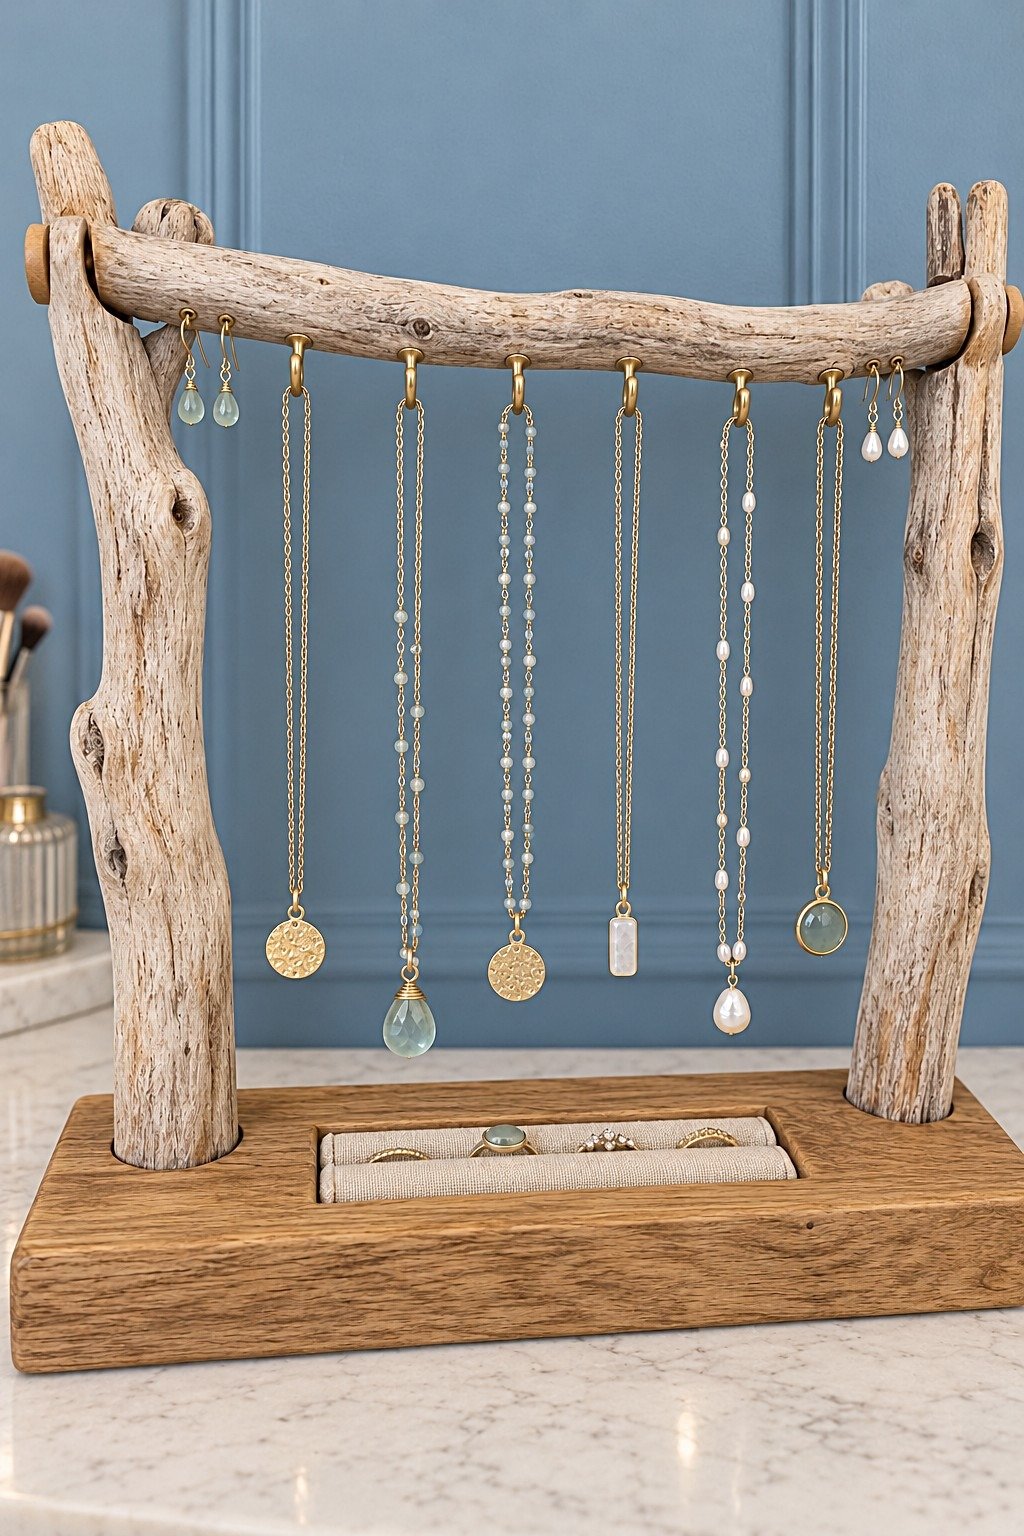
41. Driftwood Supports a Freestanding Necklace Rail
The irregular branch adds texture while a substantial rectangular base supplies stability. Start with clean, dry, sound wood and remove splinters from every contact area. Pilot drill the hooks and secure both uprights into the base; a decorative joint at the top must also resist twisting. Allow the longest pendant to hang clear of the ring tray beneath it.
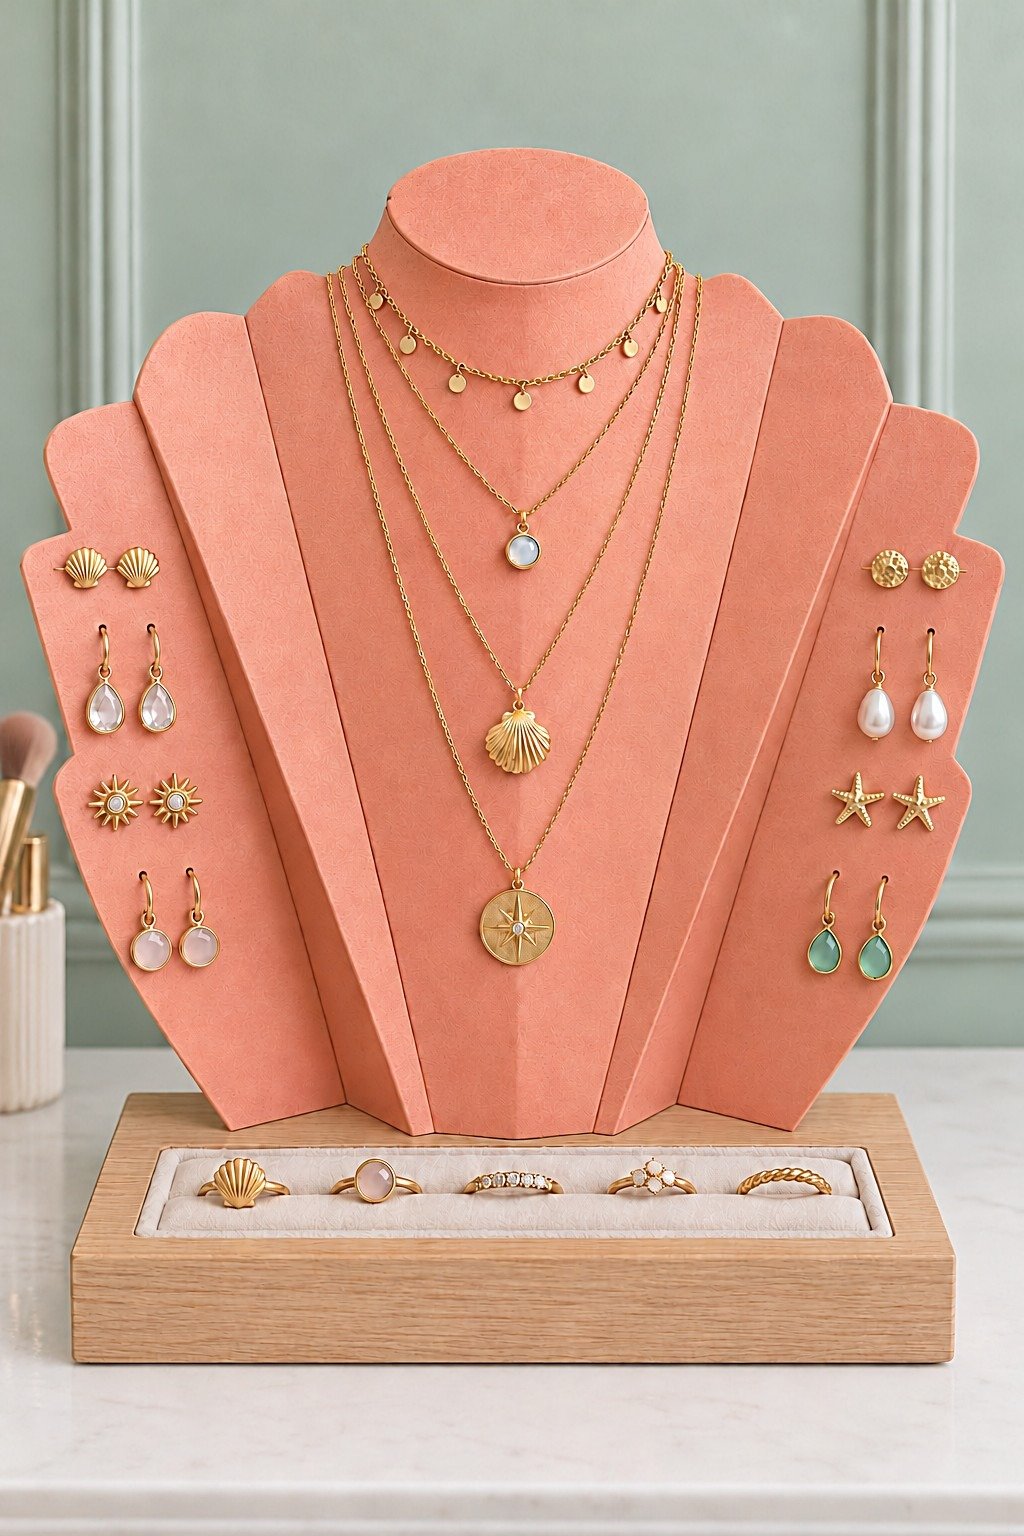
42. A Coral Fan Bust Makes Room for Studs
Side wings give studs a visible position beside the layered necklaces. Use removable or accessible panels so the backs can be attached without bending the posts. The coral surface makes the display itself a color accent, so a plain wooden base is enough. Test the angle of the wings before fixing them, especially if larger earrings would project into the necklace area.
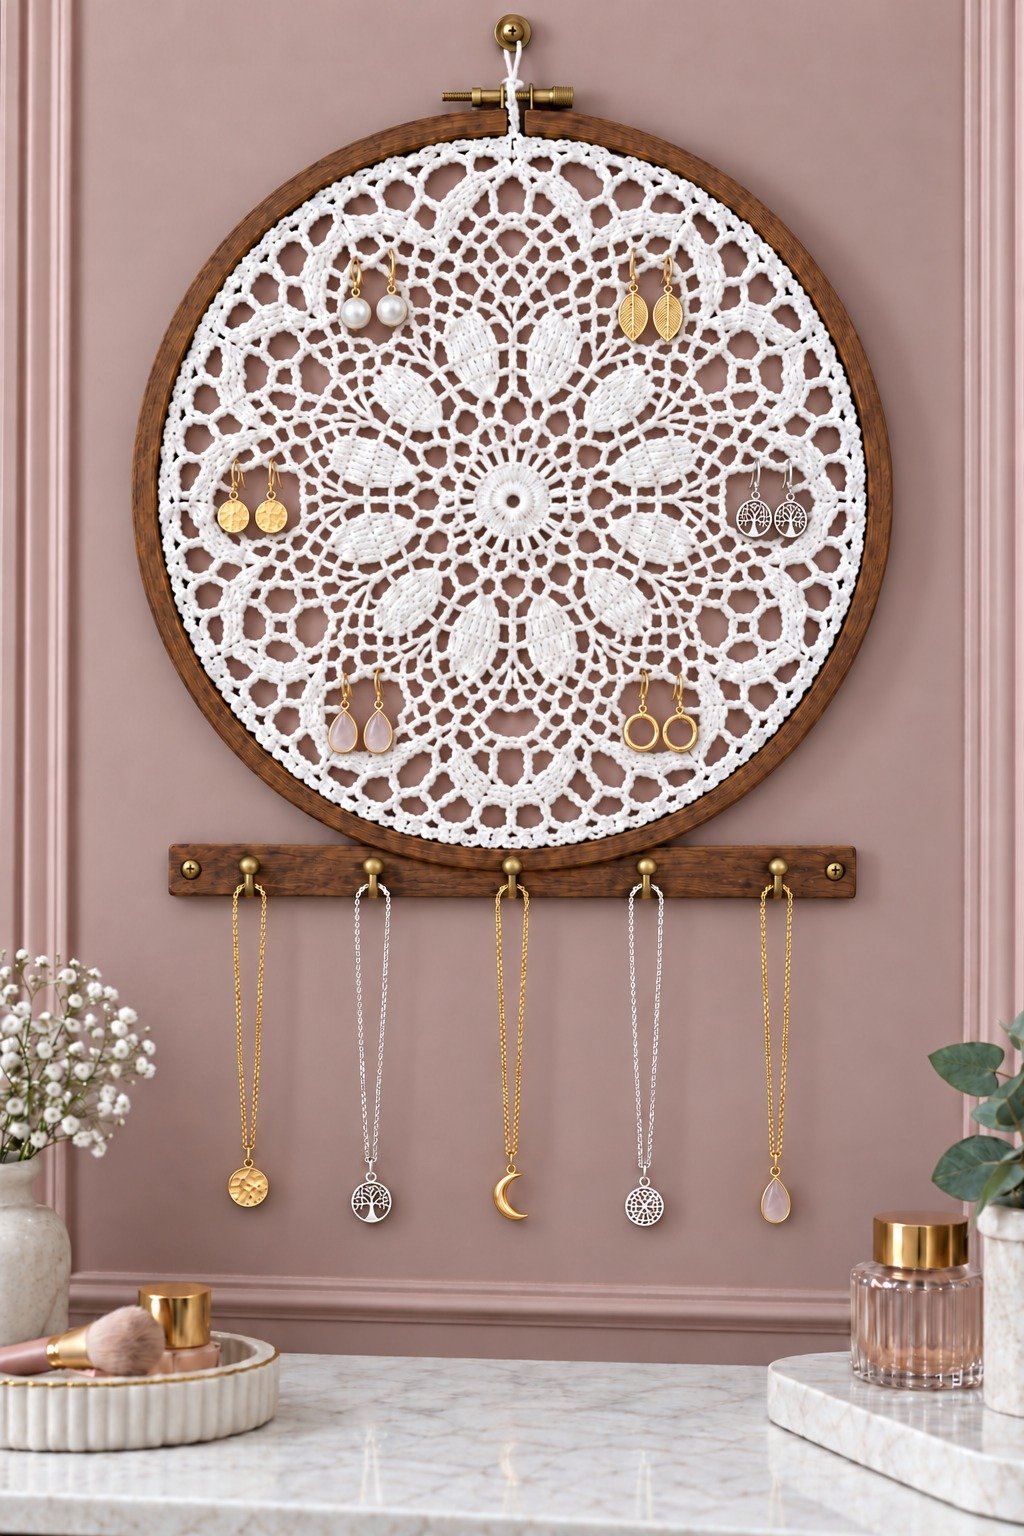
43. A Crochet Hoop Keeps Light Earrings in View
Open crochet holes suit light fishhook earrings when the curved wire passes through the opening and rests on a firm cotton strand. Tighten the hoop evenly and leave the center less crowded so the pattern remains visible. Hang necklaces from the separate wooden rail, not from the doily. Fragile or valuable textiles are best preserved; choose a new crochet piece for this use.
Adapt a Sound Frame into a Jewelry Display
For a straightforward version, use a solid wooden frame with an opening around 8 by 10 inches, one sheet of plastic canvas or smooth metal mesh, a small wooden hook rail and suitable hanging fittings. Remove the glass safely and check that the frame joints are firm. Cut the mesh with enough overlap to secure it at the rear. Plastic canvas is an alternative for lightweight earrings; test its stiffness before adding the collection.
Fasten the insert evenly, cover any sharp metal edges and leave room behind it for hook tips. Attach the necklace rail to solid wood, pilot drill the hooks and fit hanging hardware suited to the completed weight. Upright and Caffeinated's picture frame jewelry organizer uses wooden crosspieces and reinforces the frame behind the lower hooks. That detail matters when screws would otherwise protrude through a thin frame. For the simpler mesh version described here, allow an estimated 60 to 90 minutes of hands on work, plus the drying or curing time specified for your finish and adhesive.
What to Budget for a Small Frame Conversion
For the simple conversion above, the following US listings give a starting budget. Prices were checked on October 31, 2026. The calculation buys a full canvas pack and two hook packs, leaving spare material. It assumes you already own a suitable frame and basic tools; it does not price the ornate cabinets or sculptural stands pictured above.
| Supply | Purchase allowance |
|---|---|
| Existing sound wooden frame | $0 additional purchase |
| Janlynn seven count plastic canvas, six sheets measuring 10.5 by 13.5 inches | $5.38 listed sale price |
| Two packs of 1/2 inch brass plated cup hooks, four per pack | 2 × $1.09 = $2.18 |
| Hanging hardware and suitable small fasteners | $3 to $6 estimated allowance |
| Small wood strip, adhesive and finish | $8 to $18 estimated allowance |
| Total before tax and delivery | $18.56 to $31.56 |
The hardware and finishing allowances are editorial estimates, not quoted kit prices. The hook calculation supplies eight hooks; fit only as many as the rail can accommodate comfortably. Choose a larger hook if a clasp needs more clearance. Reusing offcuts or finish can reduce the cost; buying a frame, tools or metal mesh increases it. Prices, stock, taxes and delivery depend on the seller and destination. Follow the selected finish's preparation and curing instructions before allowing jewelry to touch it.
Keep the Display Useful and the Jewelry Protected
Position jewelry away from direct sun, heat, perfume spray and splashes. Keep pieces separated rather than letting chains or hard settings rub against softer surfaces. For pieces worn less often, use individual soft pouches or cases, especially for easily scratched pearls. The Canadian Jewellers Association's jewelry care guide explains separate storage, anti tarnish strips and avoiding contact with cosmetics. Ask your jeweler about unfamiliar stones or treatments before choosing a cleaning method.
Wear gloves when handling cut mesh and eye protection for drilling. Smooth holes and metal edges before adding earrings. Wall fixings must suit both the structure and the loaded display, and tall furniture needs the recommended anti tip attachment. Keep small jewelry and pin points beyond children's reach. Remove the collection before cleaning its holder, then let every surface dry. Check hooks, clips and joints periodically, especially on reused pieces.
Leave a Reply