

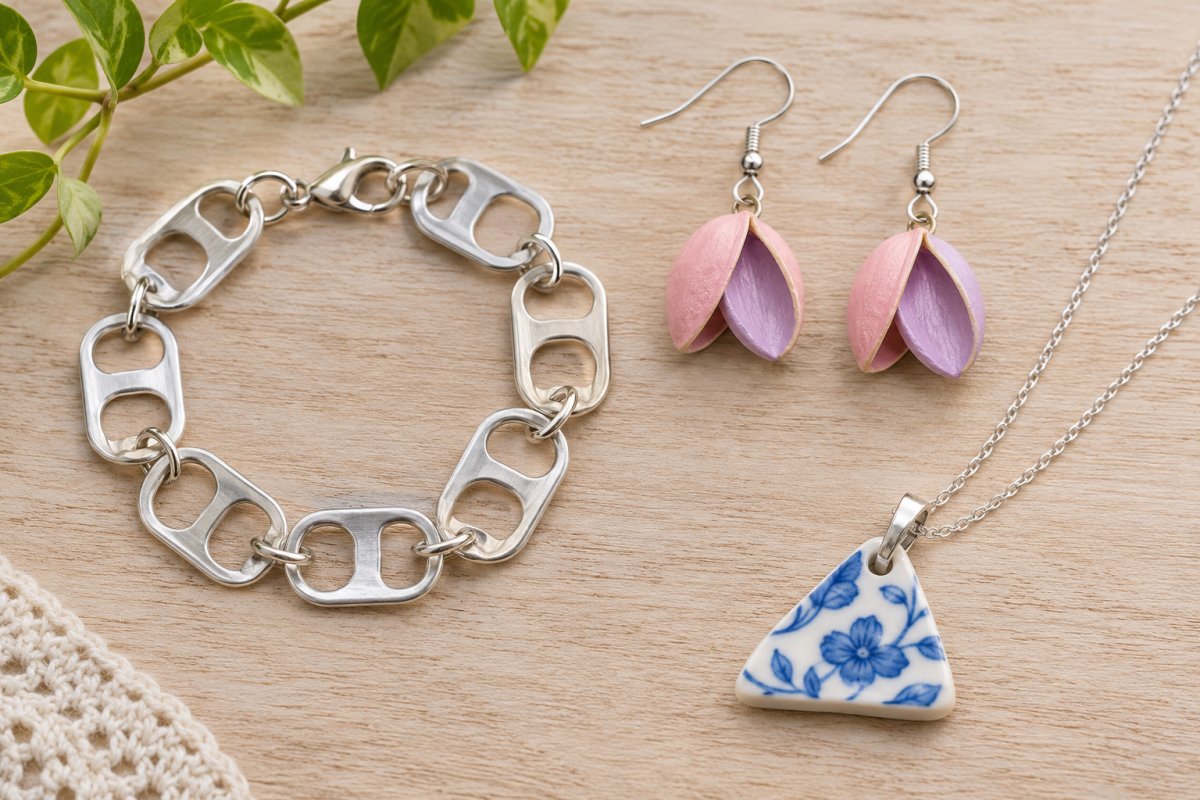
A lost puzzle piece, a single key or a handful of buttons can become the starting point for something worth wearing. These 32 recycled jewelry ideas use familiar leftovers in necklaces, bracelets, rings and earrings. Look for a sound object first, then choose the finding and finish that let it sit securely and comfortably.
Start with the material. Wash and dry reusable pieces, set aside anything cracked or contaminated, and gather jewelry pliers, suitable rings or cord, and a clasp. The best connection depends on the material: holes and closed rings suit many pendants, while fabric may need stitching and end clamps. Follow the chosen adhesive or finish instructions and let it cure before wearing.
A small reason to reuse. Giving an unwanted object another use can keep it in circulation longer. Reuse is different from recycling, which processes material into something new. Reduce what you buy first, use what is already available when suitable, and check local collection rules for leftovers. The US Environmental Protection Agency explains how reuse and recycling fit into waste reduction.
Safety before style. These are ideas for adults, not toys. Small parts can be swallowed, and unknown old metal, paint or finishes may contain harmful substances. Avoid materials with an uncertain history, sharp edges, damaged batteries and electronics. If you have a metal allergy, select ear wires and other skin contact findings with a known composition; see the American Academy of Dermatology advice on nickel allergy. The CDC explains the risk of lead in jewelry, especially when children mouth or swallow pieces. Use eye protection and suitable gloves when cutting or drilling, keep scraps away from children and pets, and never heat unknown plastics.
Two making guides. Scout Life’s pull tab bracelet guide shows how to smooth the tabs, overlap them and thread ribbon through the openings.
The WheatonArts paper bead workshop explains how to cut paper strips, roll them around a dowel and turn the beads into jewelry.
Table of Contents
- 1. A Bracelet Built from Can Pull Tabs
- 2. Let Spare Buttons Set the Color Palette
- 3. Puzzle Pieces Turn into Playful Earrings
- 4. A Heart Detail on a Cork Pendant
- 5. Give an Old Guitar Pick a New Role
- 6. Roll Paper Scraps into Soft Colored Beads
- 7. A Keyboard Key Makes an Initial Ring
- 8. Keep a Favorite Photograph Inside a Bottle Cap
- 9. Paint a Row of Mini Clothespins
- 10. Turn a Zipper into a Narrow Cuff
- 11. Layer Pastel Petals Along a Chain
- 12. Make Matching Drops from Toy Bricks
- 13. Arrange Plastic Cap Pieces as a Heart Mosaic
- 14. A Heart Ring from a Clear Plastic Bottle
- 15. Resin Filled Paper Clip Necklace
- 16. Shape Clear Packaging into Petal Drops
- 17. Link Three Pink Bottle Discs
- 18. Paint Pistachio Shells Like Flower Petals
- 19. Arrange Colored Pencil Ends into Tiny Clusters
- 20. Save Watch Faces for a Vintage Pair
- 21. Frame a Fragment of Broken China
- 22. Cut Colorful Earring Shapes from a Can
- 23. Dress Up a Spare Key
- 24. A Playing Card Heart in a Small Charm
- 25. Coil Cassette Tape into Dark Circular Drops
- 26. Wrap a Measuring Tape Around the Wrist
- 27. Turn Eggshell Pieces into a Mosaic Ring
- 28. Save Colorful Wrappers for Stud Earrings
- 29. A Lace Offcut Becomes a Pair of Drops
- 30. Showcase a Necktie Pattern in a Pendant
- 31. Give Pen Springs a Colorful Finish
- 32. A Hinge Leaf Becomes a Slim Pendant
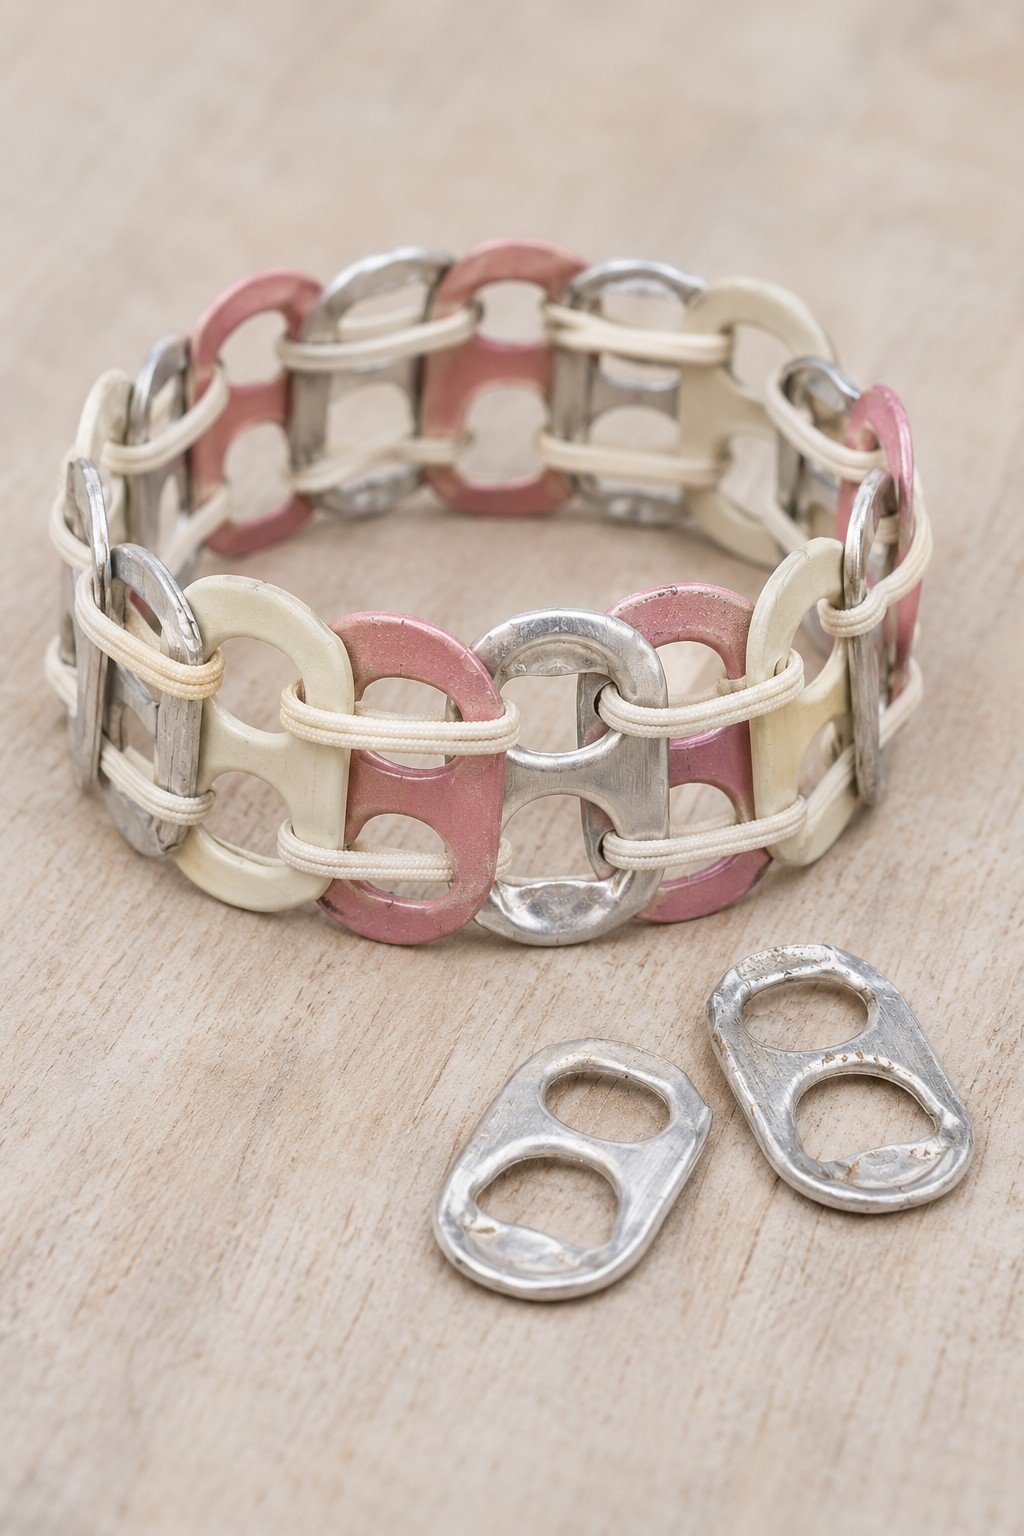
1. A Bracelet Built from Can Pull Tabs
Overlapping tabs give this bracelet its scale, while pale cord softens the metal. Wash and dry the tabs, remove any rough attachment points, and weave a strong cord through aligned openings. Check the fit before finishing the ends; the bracelet should flex without leaving a hard edge against the wrist.
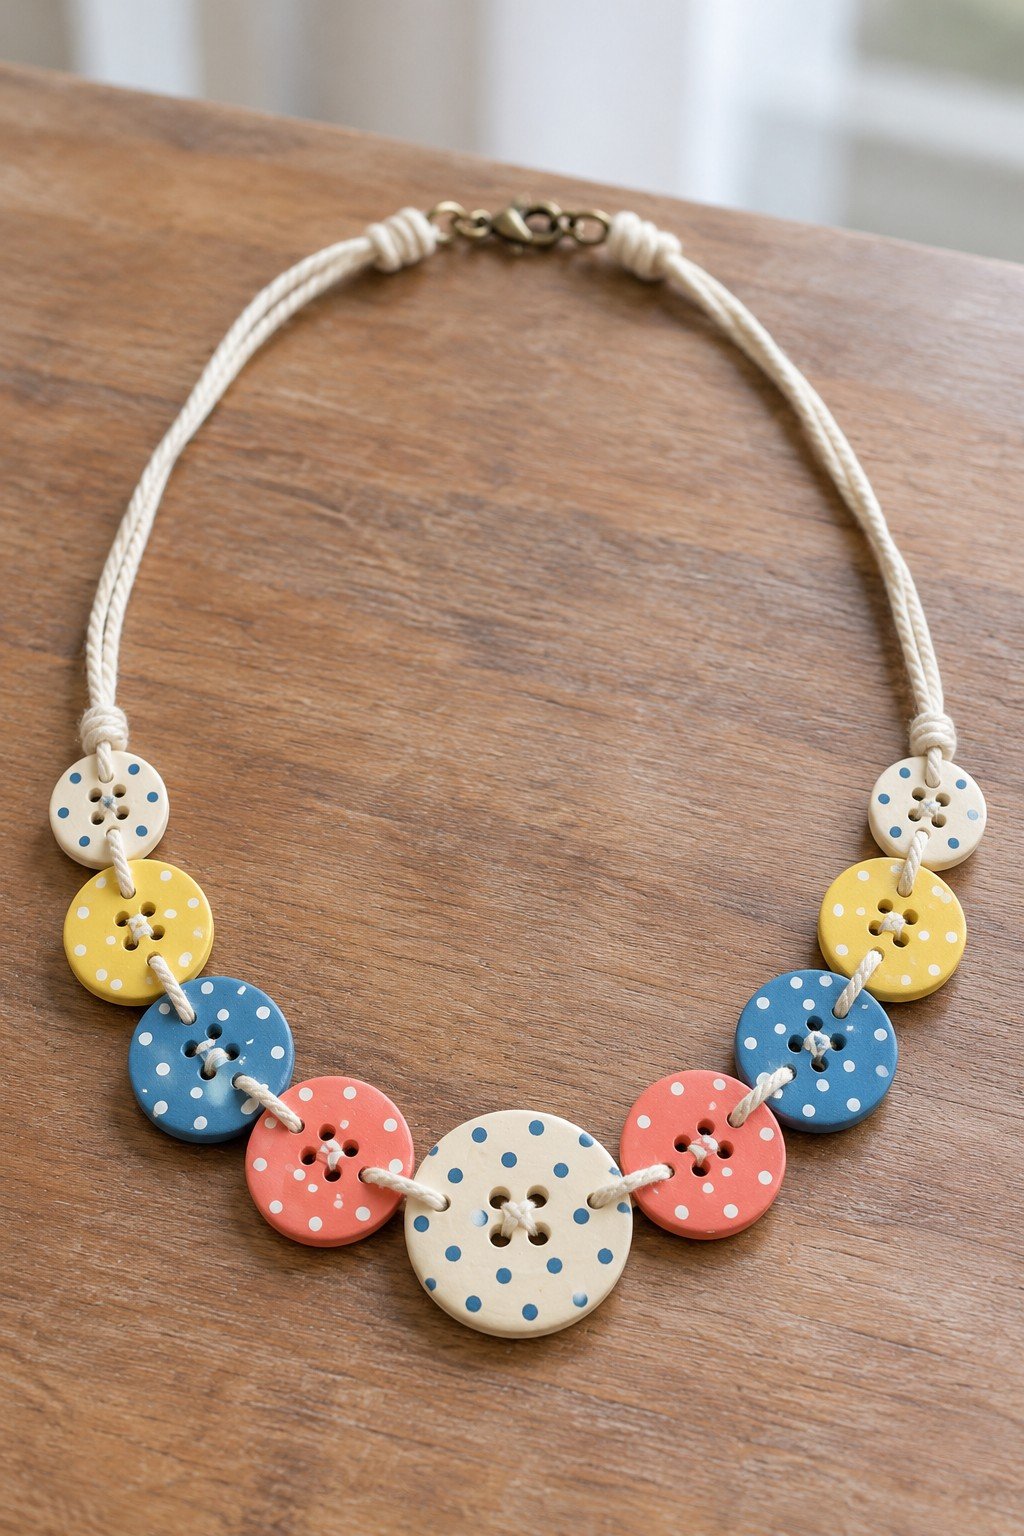
2. Let Spare Buttons Set the Color Palette
Bright buttons graduate from a large cream center to smaller pink, blue, yellow and cream circles. Sort a button collection by size before threading the holes onto cord. If the buttons tilt, pass the cord through an extra hole or secure each position with a small stitch.
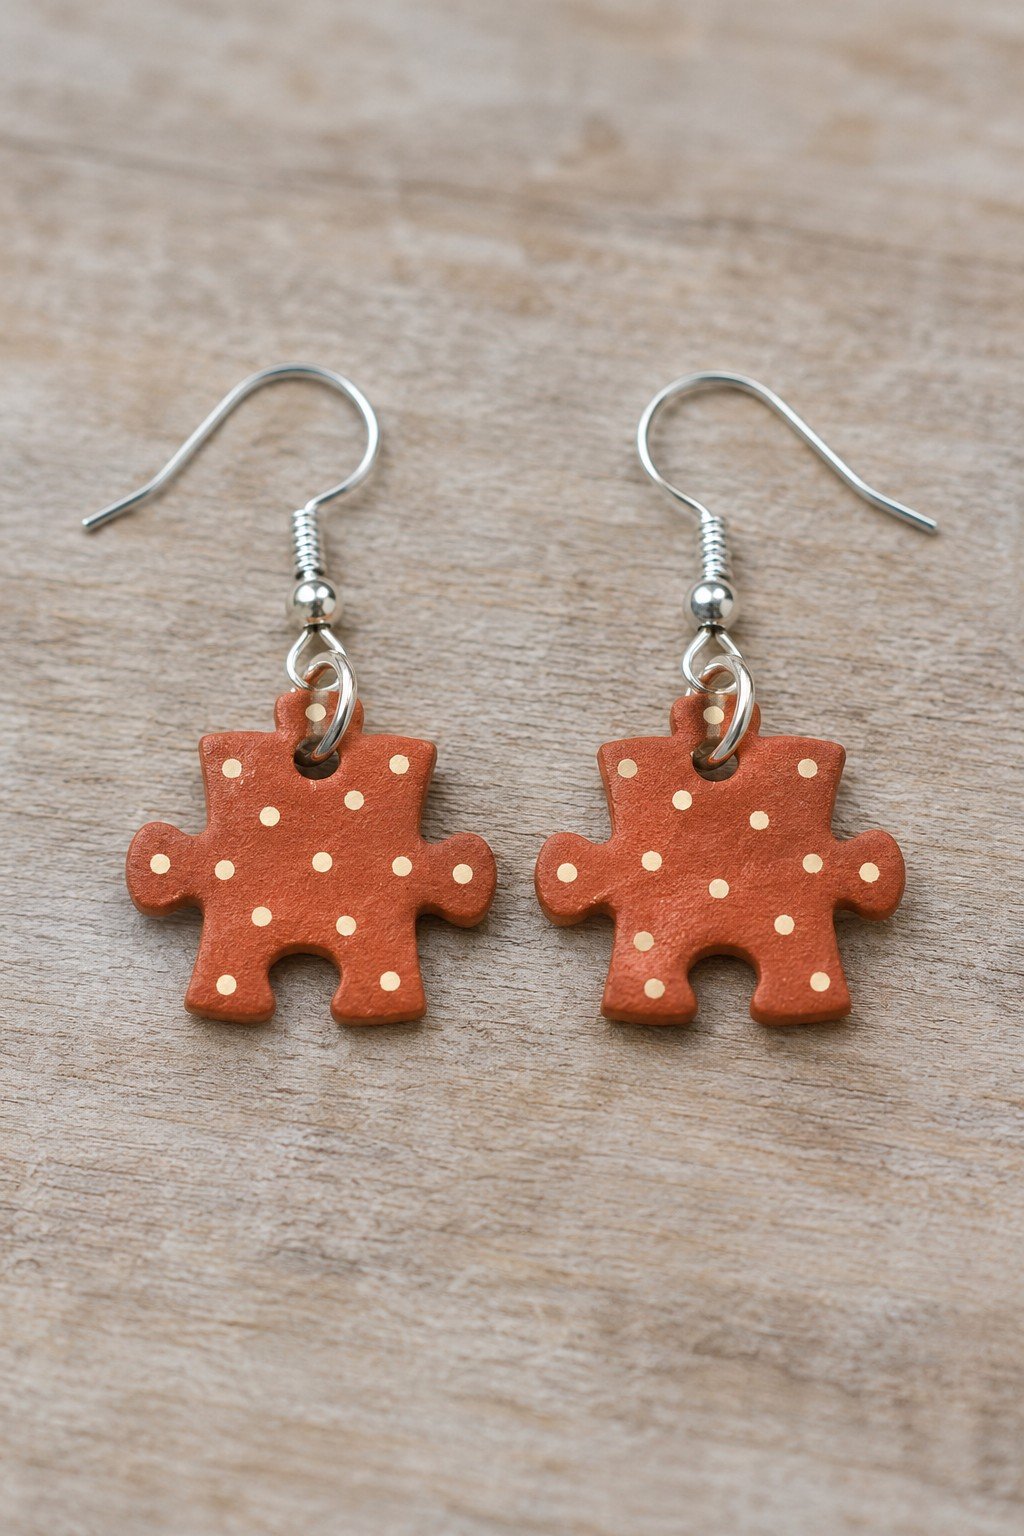
3. Puzzle Pieces Turn into Playful Earrings
Matching puzzle pieces create a light pair of drops. Choose sturdy pieces from an incomplete puzzle, paint both sides and let them dry, then make a small hole in each upper tab for a jump ring. A protective finish can help limit wear, but keep cardboard earrings away from water.
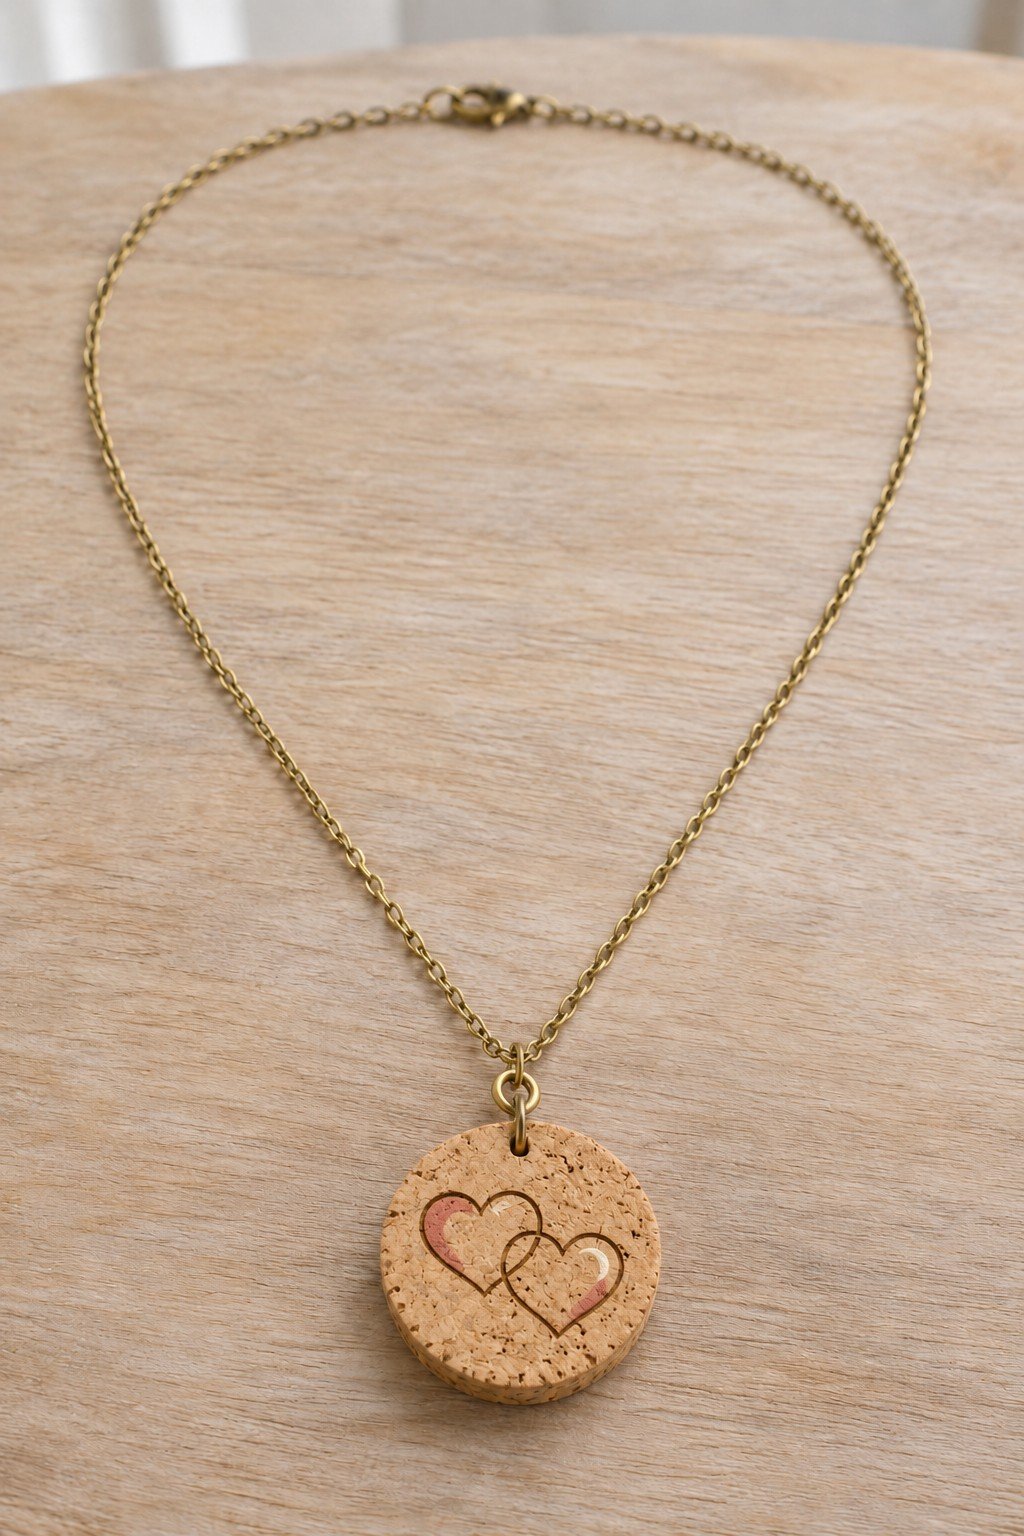
4. A Heart Detail on a Cork Pendant
Cork is a gentle backdrop for the two overlapping hearts. Cut a sound cork into an even disc, draw a small motif and make an attachment hole with enough material around it to resist tearing. Thread a ring through the hole and keep the finished pendant dry.
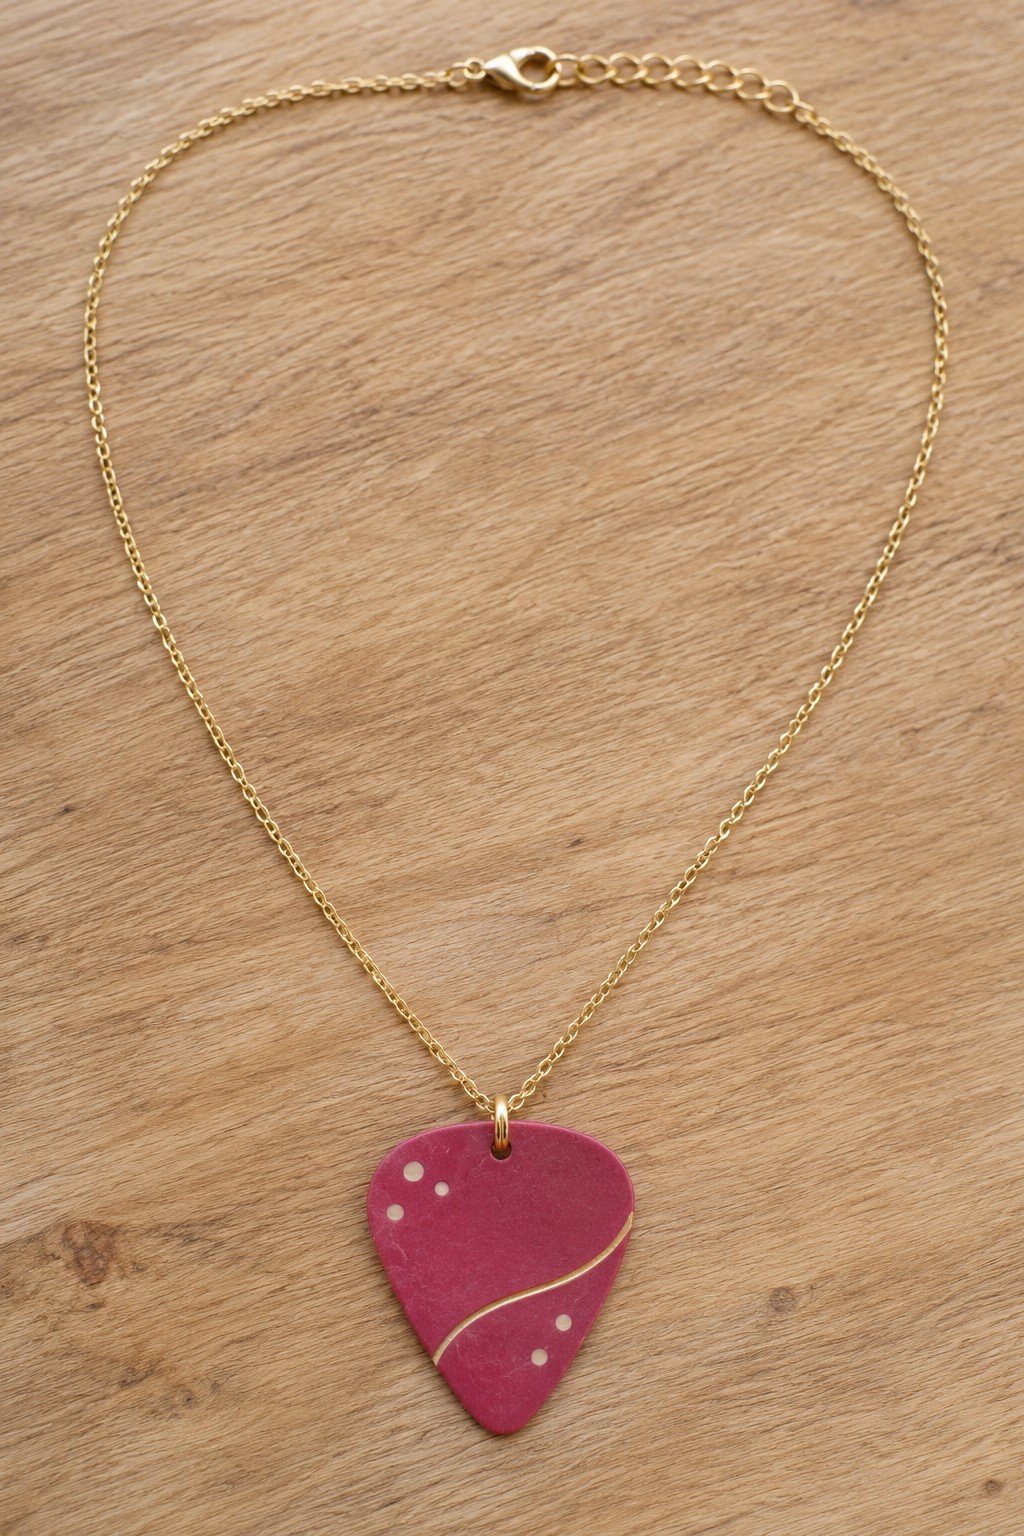
5. Give an Old Guitar Pick a New Role
A recognizable guitar pick shape does most of the work here. Use a clean, uncracked pick, add a simple painted line or dots, and make a small hole near its broad end. A jump ring joins it to a reused chain; leave a little space around the hole so the plastic is less likely to split.
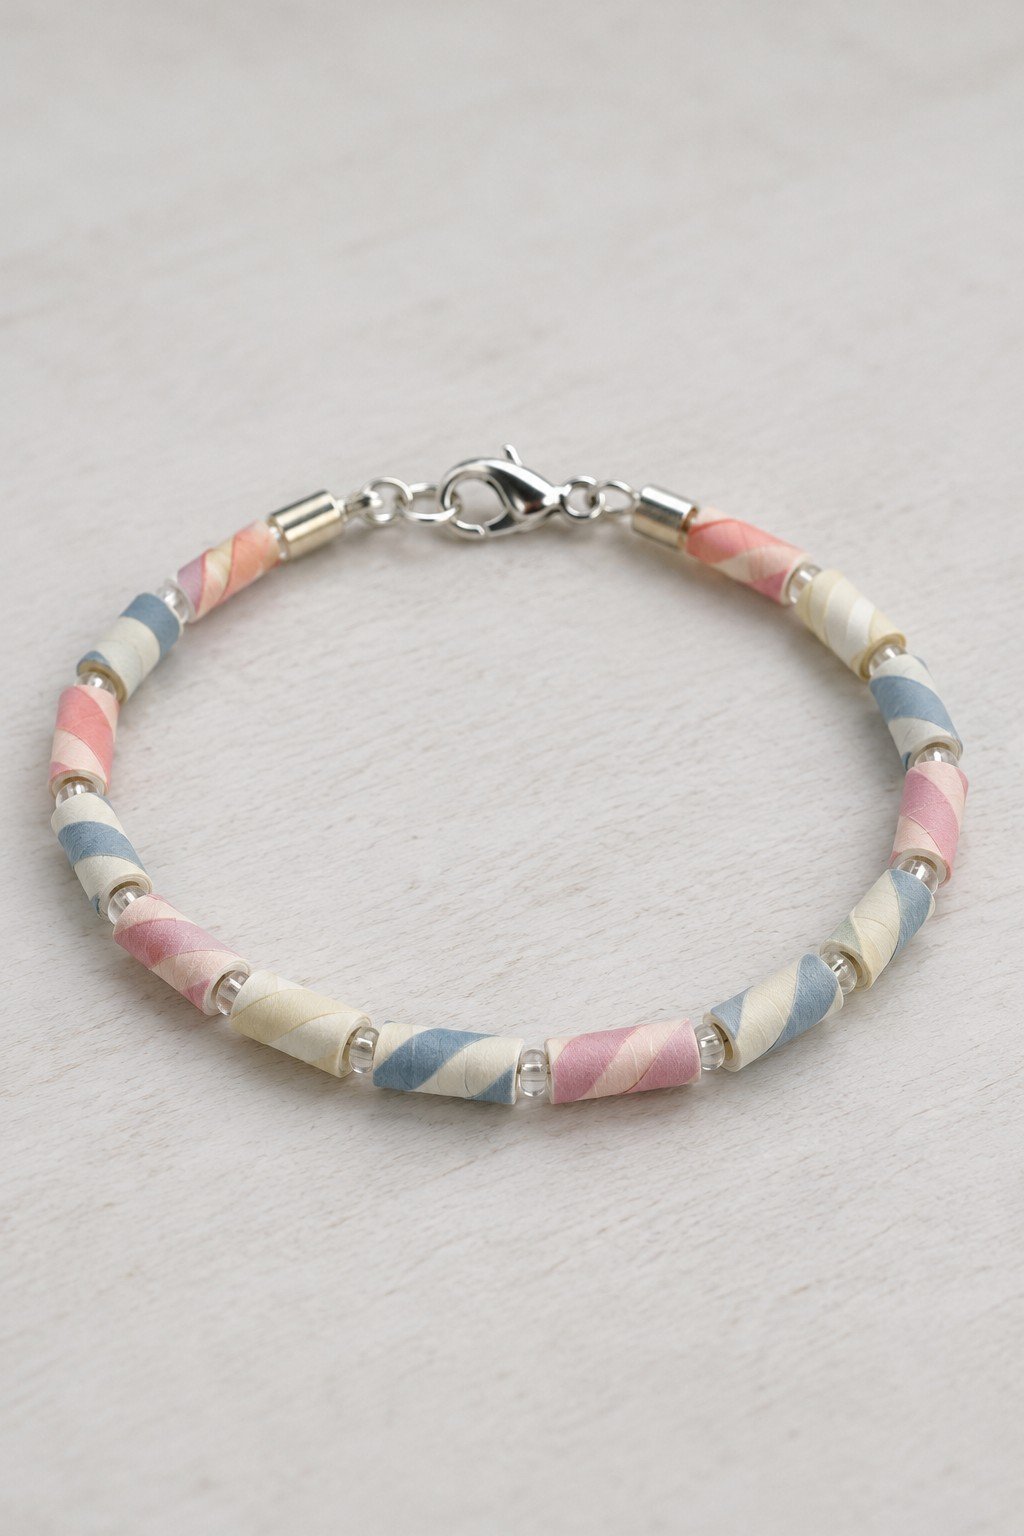
6. Roll Paper Scraps into Soft Colored Beads
Pastel paper beads alternate with small clear spacers for a neat, light bracelet. Roll strips around a thin dowel, glue the ends and leave the center hole open. Let the beads dry before threading them, and remove paper jewelry before washing your hands.
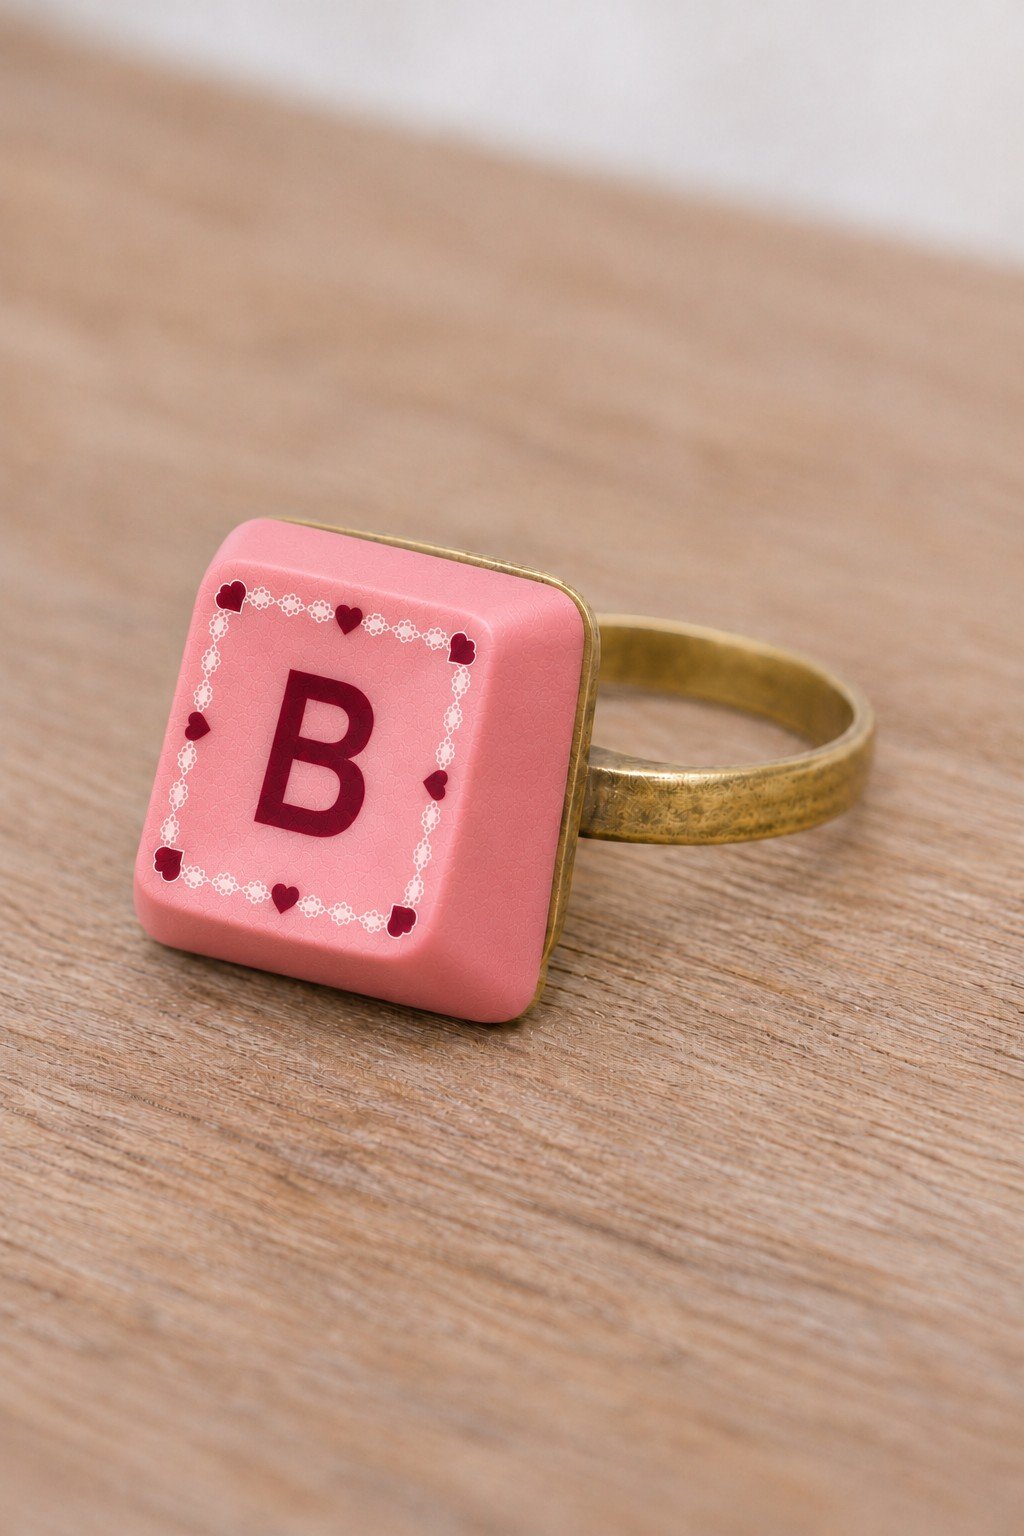
7. A Keyboard Key Makes an Initial Ring
One pink key and its tiny hearts make the letter the focal point. Choose a detached keycap with a flat, stable underside or fit a small support inside its hollow back. Bond it to a ring blank using an adhesive labeled for both materials, and allow the full curing time before testing the join.
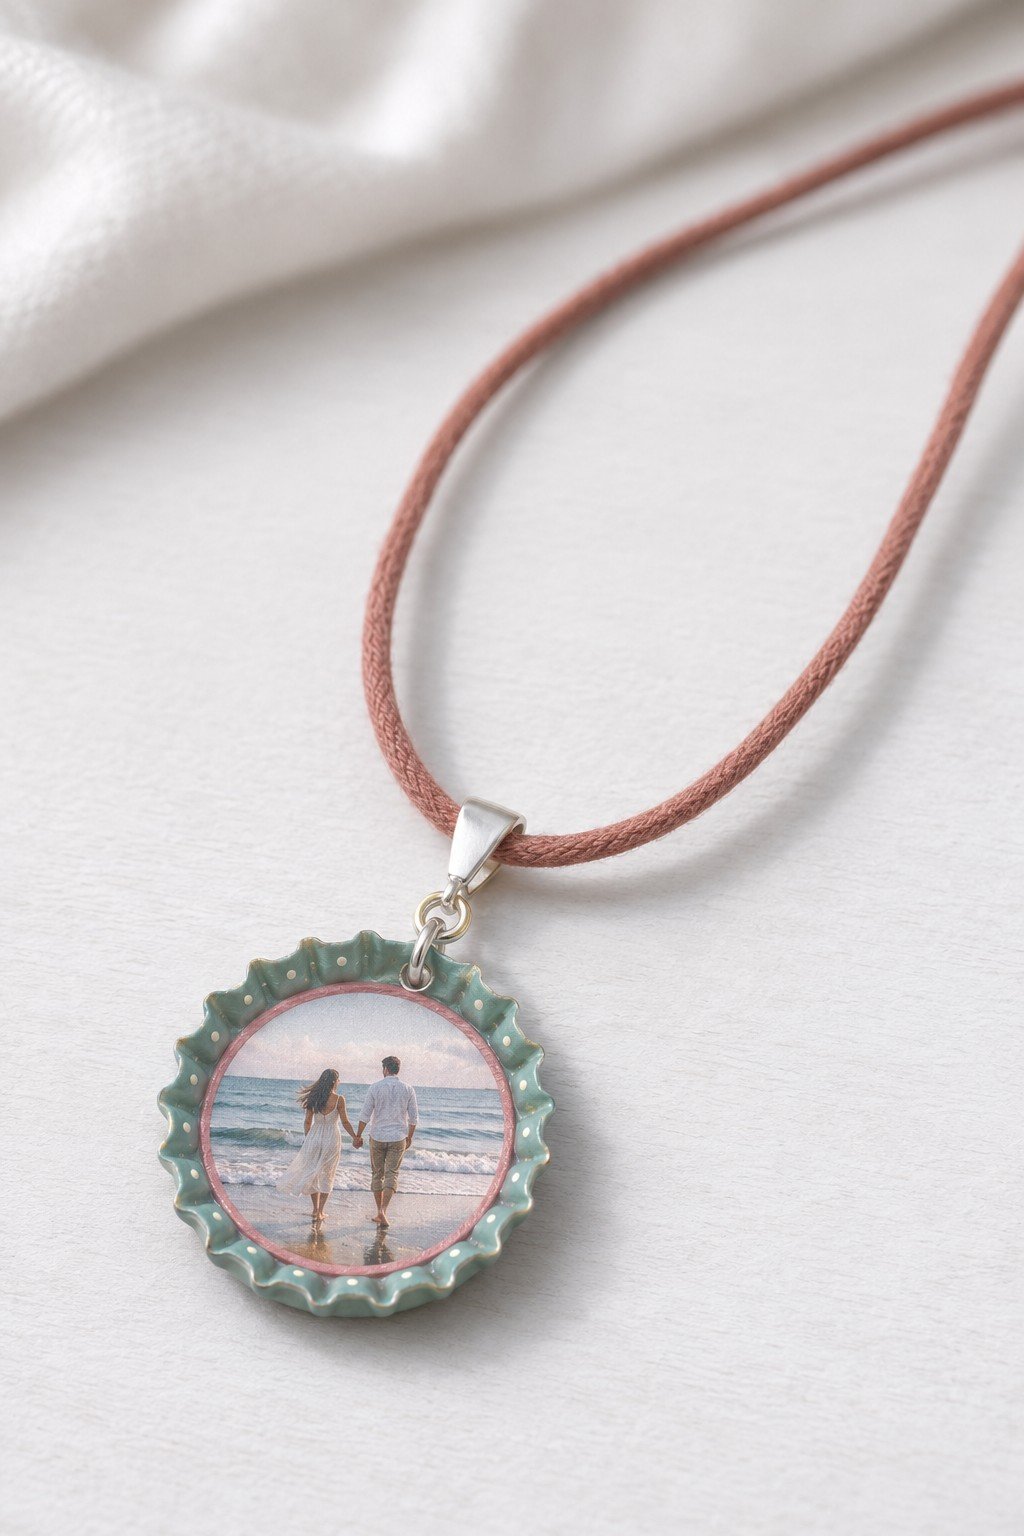
8. Keep a Favorite Photograph Inside a Bottle Cap
Inside the ridged cap, a tiny photograph picks up a pink border that echoes the cord. Use a clean cap with a smooth rim, cut a copy of the picture to fit and protect it with a fitted clear cover. Attach the hanging ring through a finished hole, not through the paper.
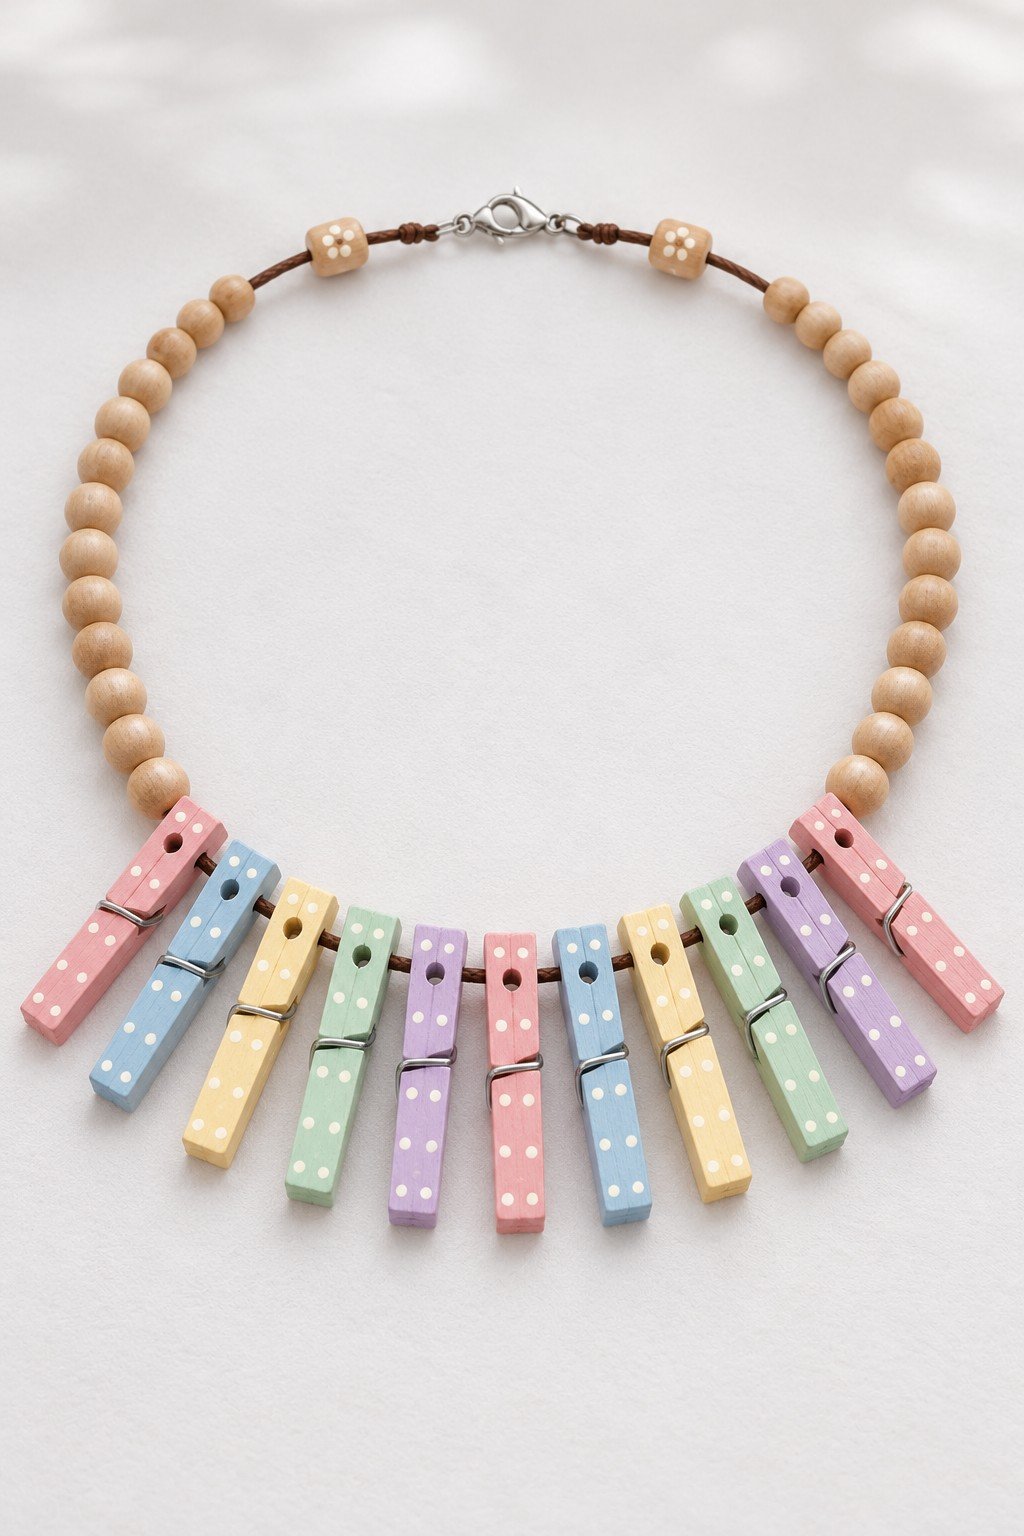
9. Paint a Row of Mini Clothespins
Pink, blue, yellow, green and lavender pins form a colorful fringe below the wood beads. I like how the plain beads give the bright row a calmer frame. Drill a small hole through each sound wooden pin and thread it securely onto the cord instead of relying on the spring to grip. Keep the pins light and evenly spaced.
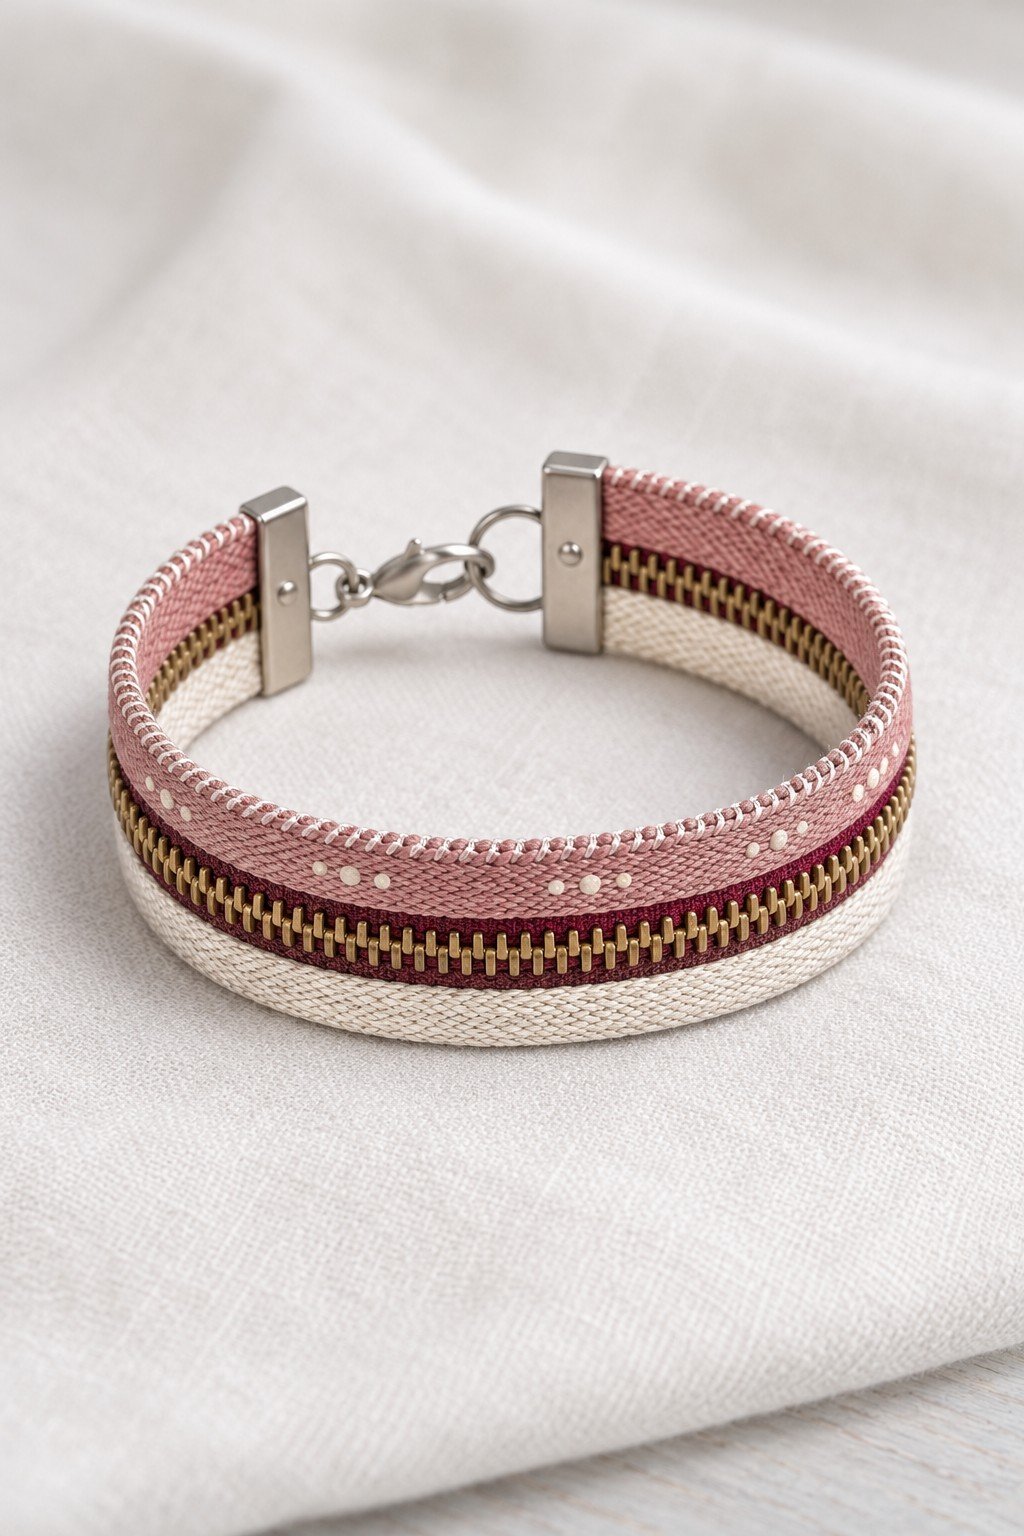
10. Turn a Zipper into a Narrow Cuff
Zipper teeth form a contrasting stripe between the pink and cream fabric edges. Cut a clean zipper section to fit, secure any loose teeth or stitching, and enclose both ends in clamps sized for the fabric thickness. Add a clasp and tug gently on the ends to check that the tape cannot slip out.
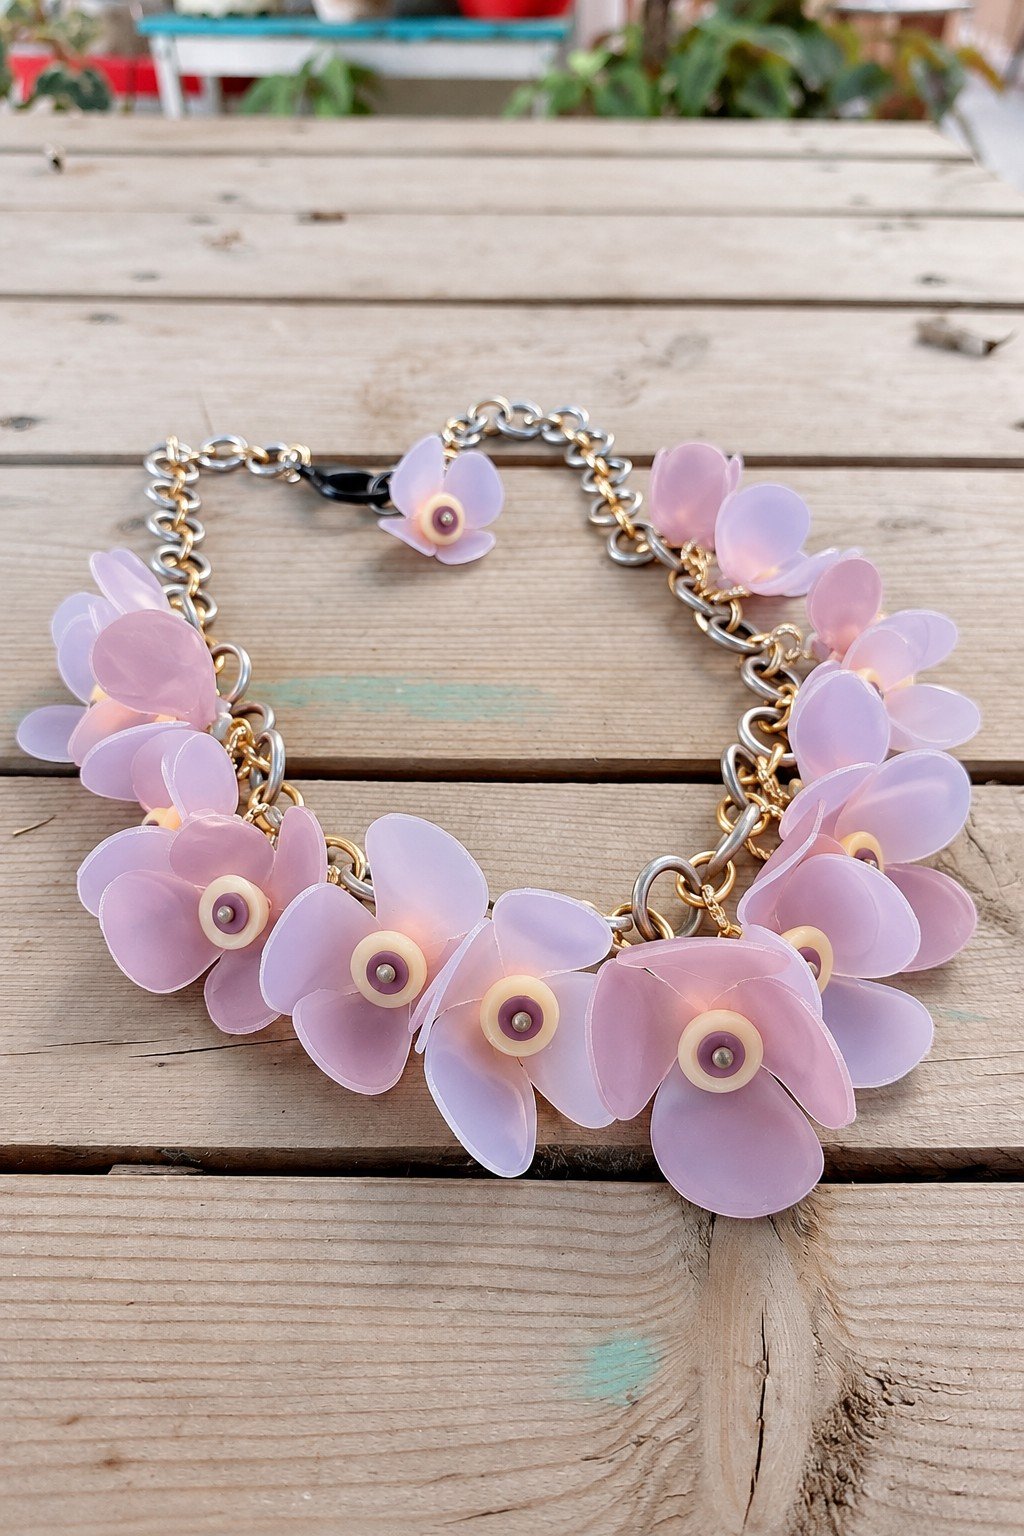
11. Layer Pastel Petals Along a Chain
Translucent petals make the large chain feel lighter. For a reuse version, cut rounded petals from clean, flexible packaging and group them around a small bead on a secure backing. Connect each flower to the chain with a closed ring. Smooth the edges and choose lightweight plastic; there is no need to heat it.
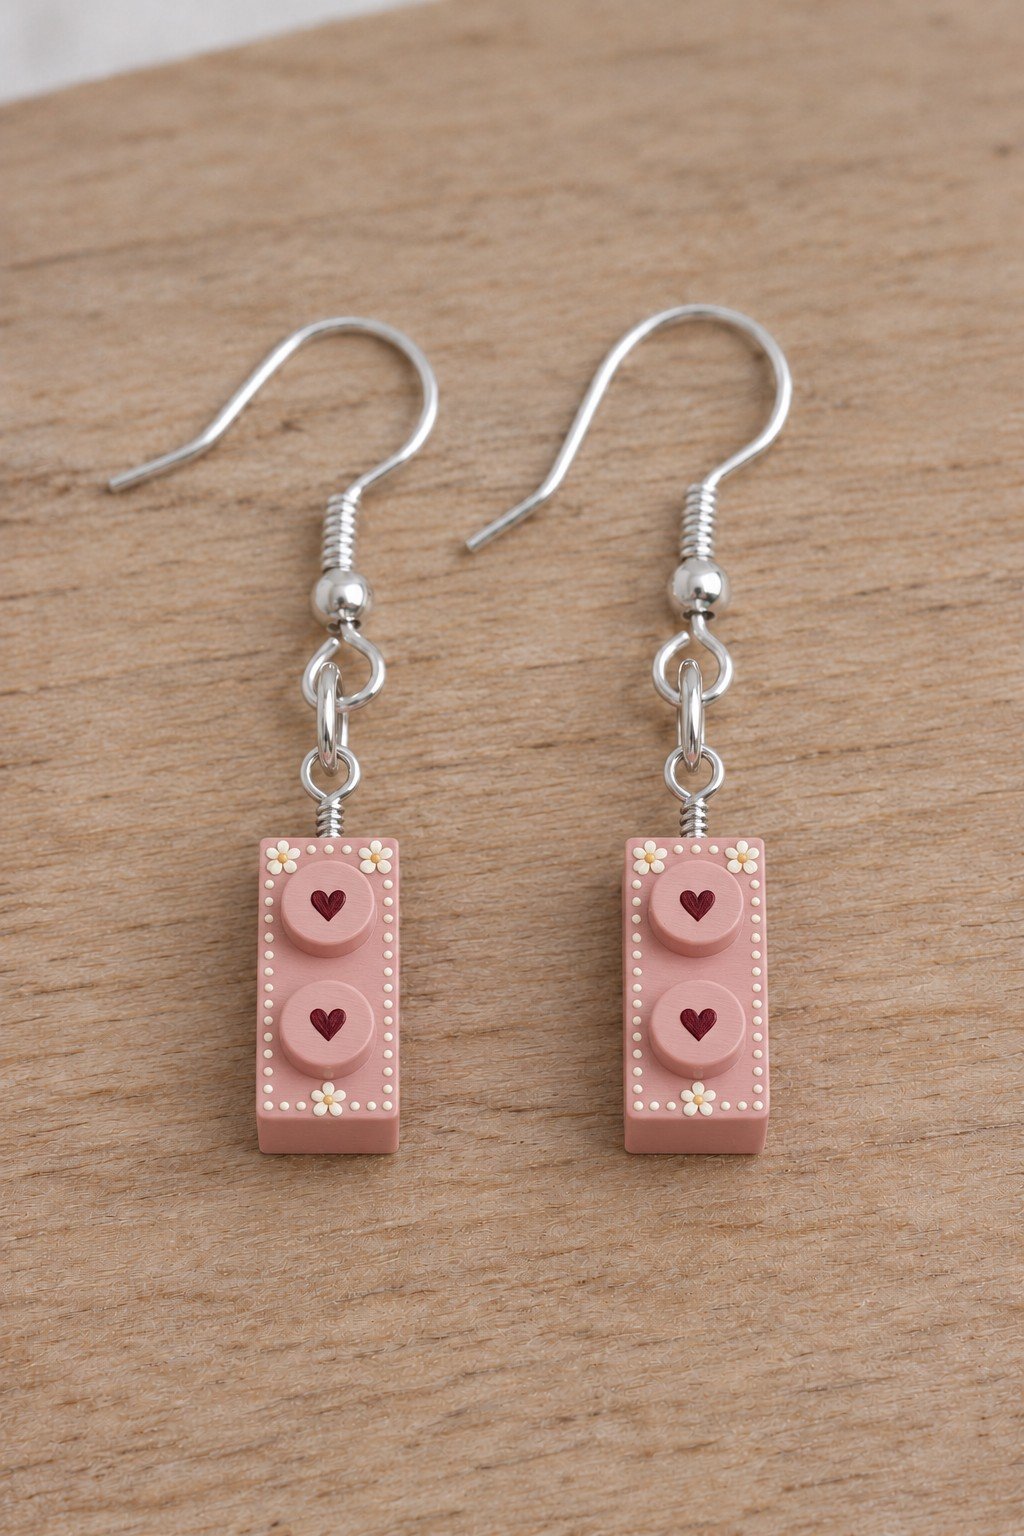
12. Make Matching Drops from Toy Bricks
Matching bricks give these earrings their geometric shape, while the little hearts add a softer detail. Start with clean, unwanted pieces and add a secure eye fitting at the top of each one. Compare their weight before attaching ear wires; a smaller brick will usually feel more comfortable.
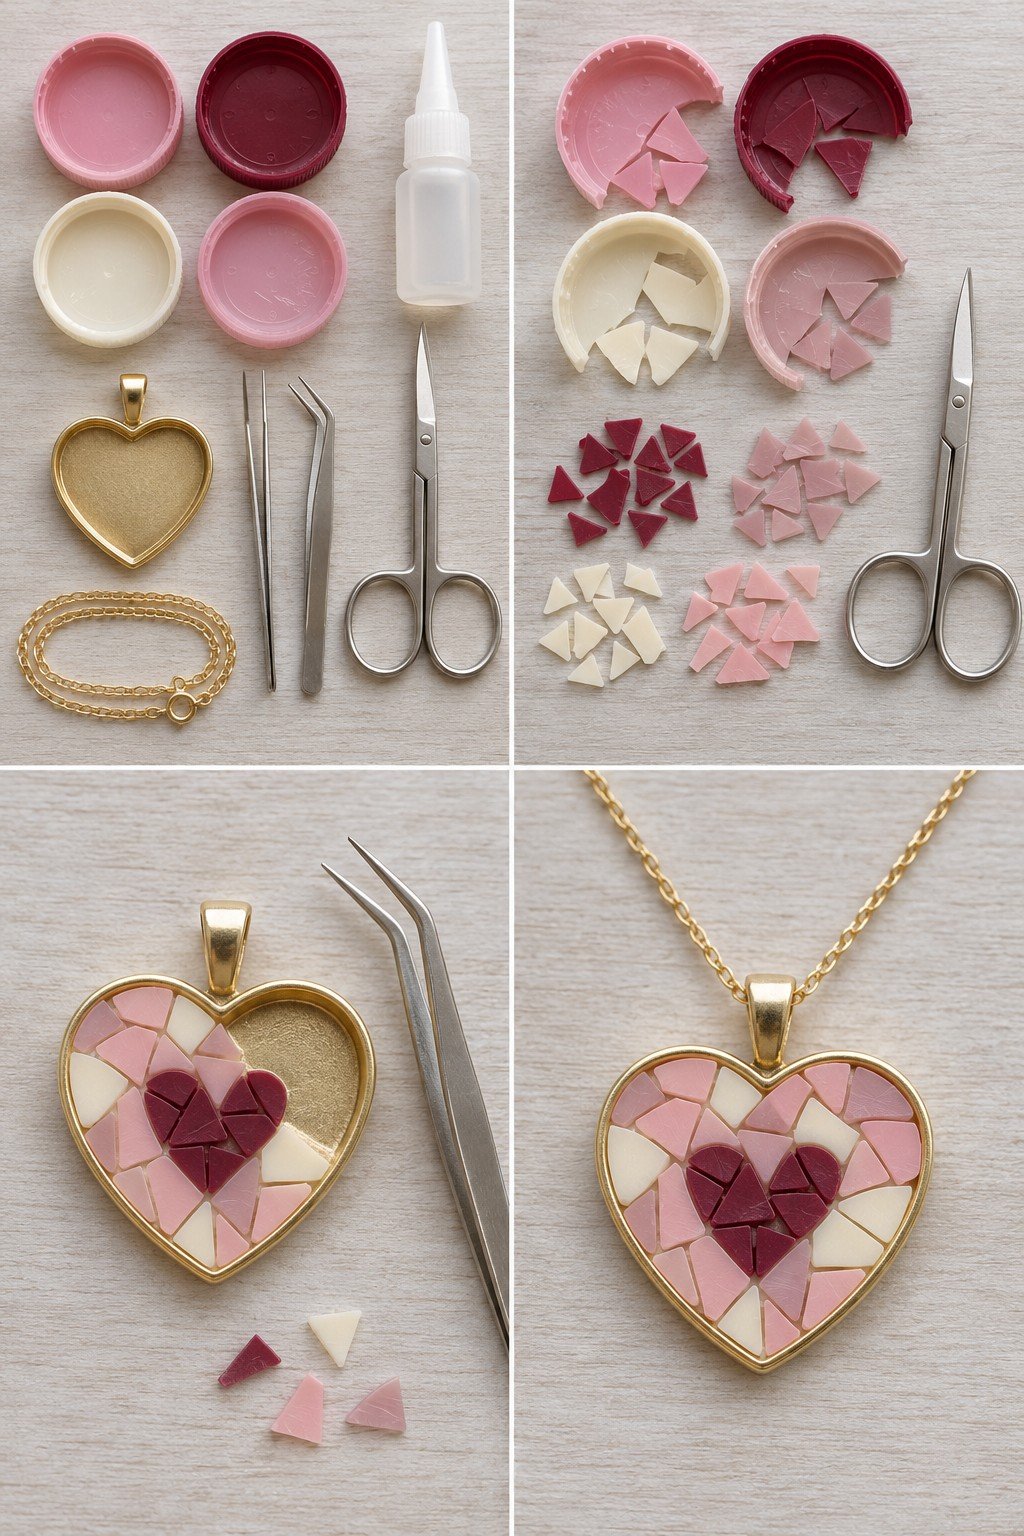
13. Arrange Plastic Cap Pieces as a Heart Mosaic
Small pieces from colored caps form a dark heart inside a pale border. Try the arrangement in a shallow pendant tray first, then use an adhesive specified for the particular plastic and metal; some cap plastics are difficult to bond. Keep every piece inside the tray and check the surface for sharp corners.
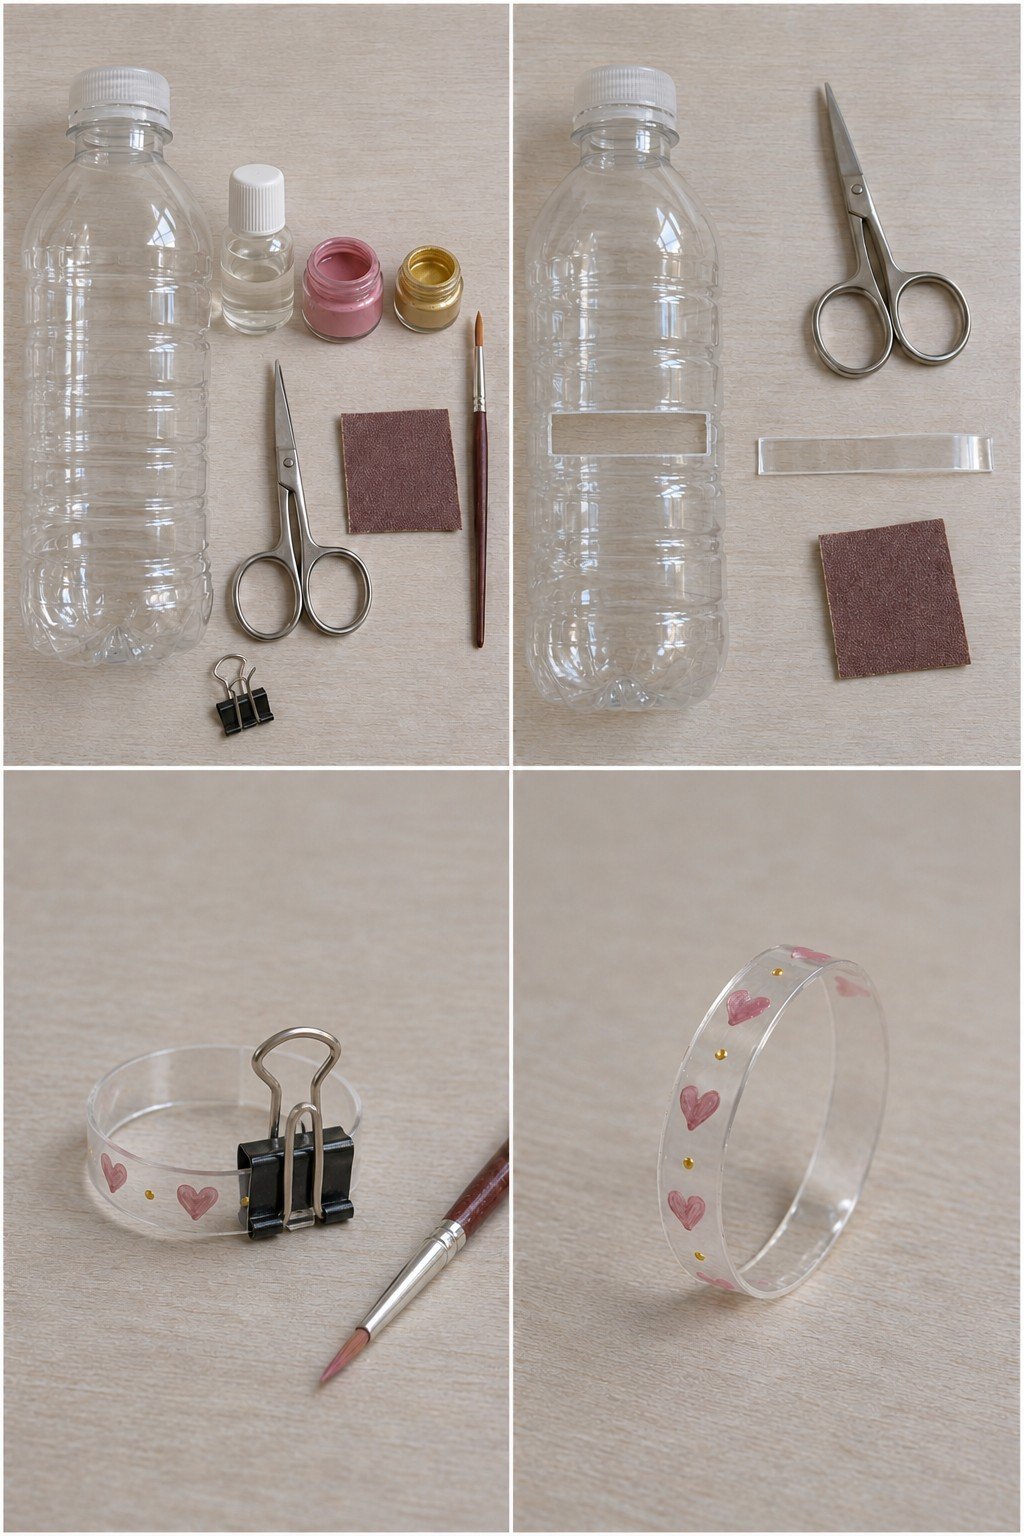
14. A Heart Ring from a Clear Plastic Bottle
A narrow strip of clear bottle plastic makes a light ring decorated with pink hearts and small gold dots. Cut a strip from a clean bottle and round and smooth its edges. Measure your finger, then shape the strip into a comfortable loop and secure the overlapping ends with an adhesive suitable for the plastic. Let it cure fully and check the join for sharp edges before wearing.
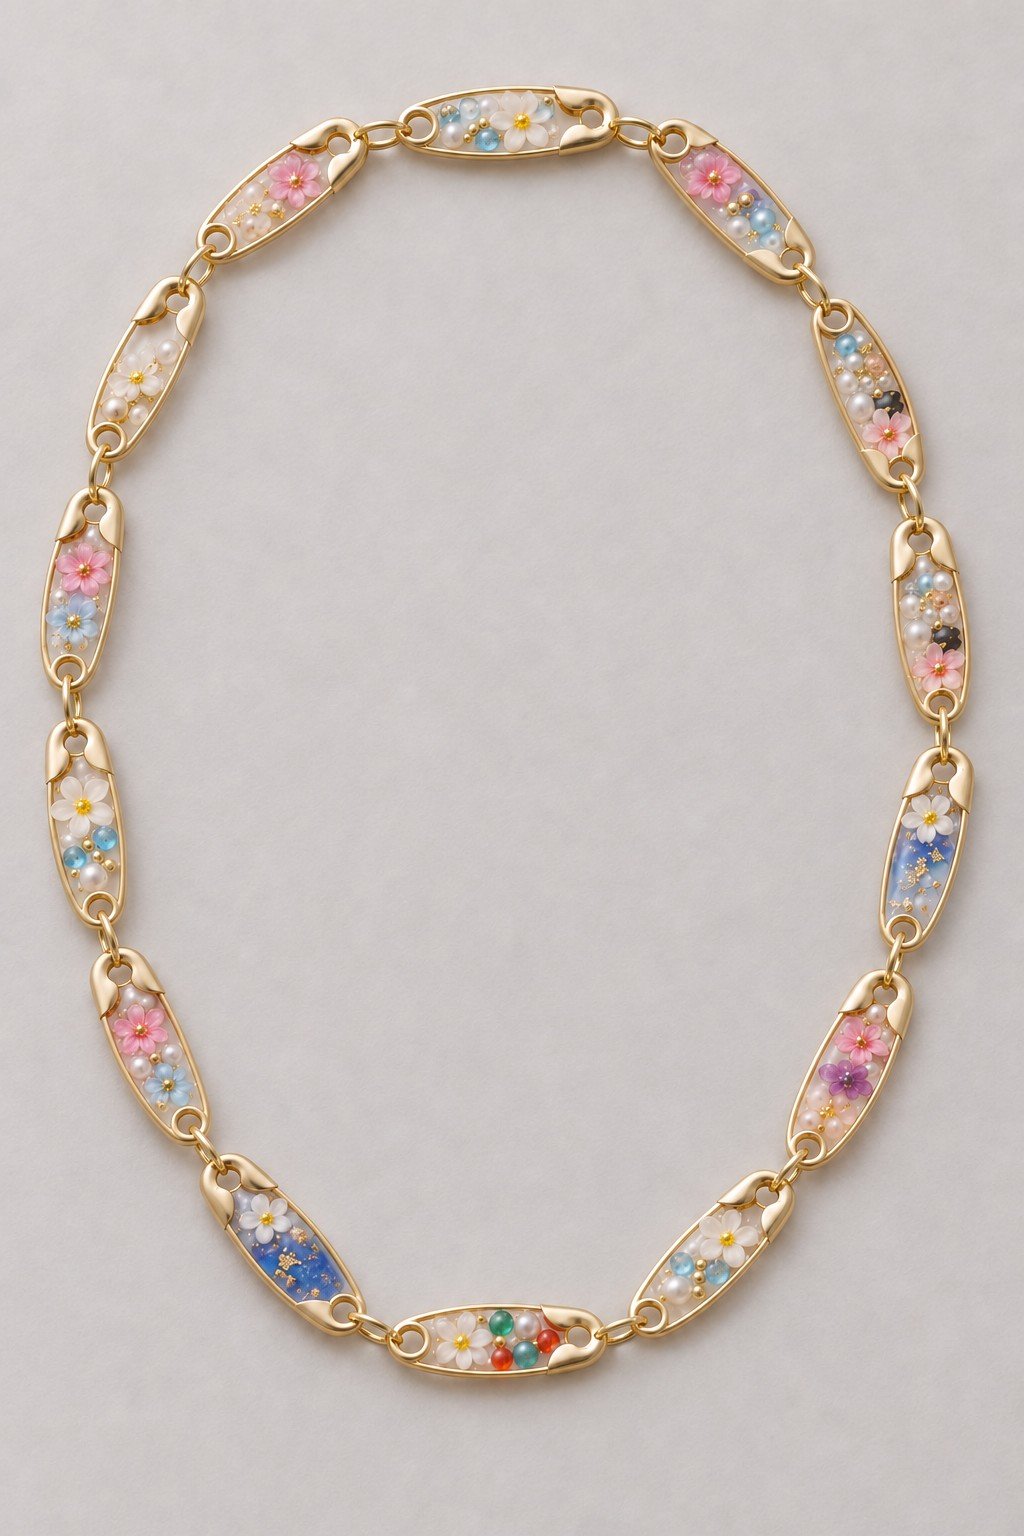
15. Resin Filled Paper Clip Necklace
Gold tone paper clips frame tiny flowers and beads suspended in clear resin. Set each clean clip in a shallow silicone mold that fits its shape, arrange dry decorations inside and pour jewelry resin while keeping the connection points clear. Follow the resin maker’s instructions for ventilation, protective gloves and curing. Once fully cured, connect the clips with closed jump rings and add a clasp.
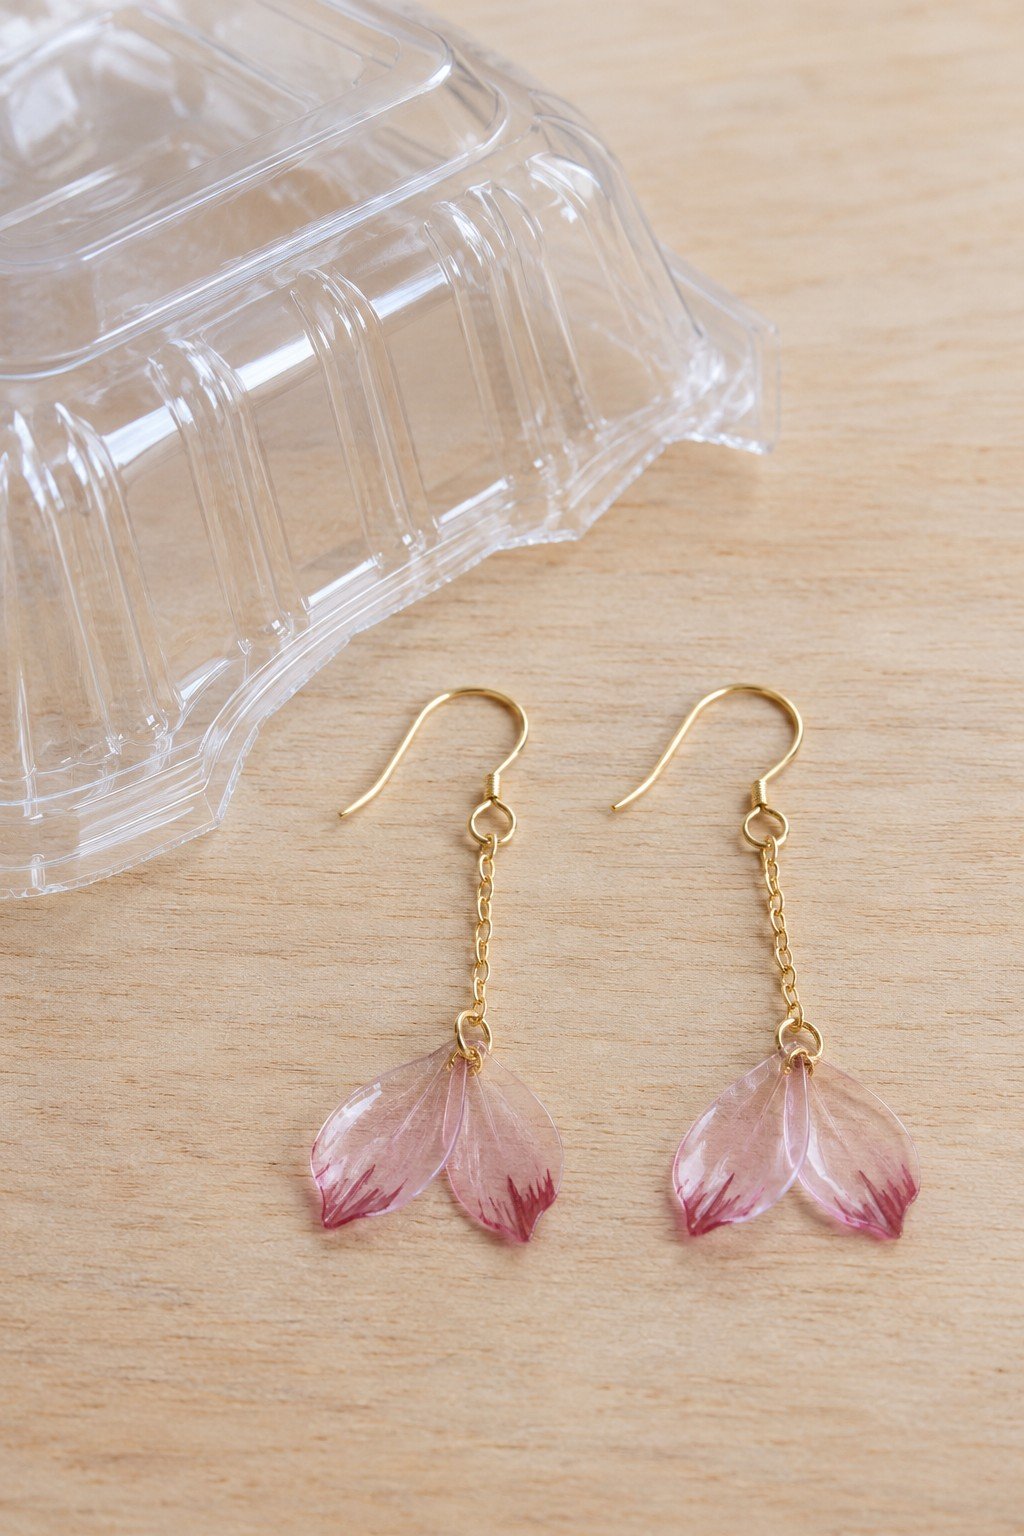
16. Shape Clear Packaging into Petal Drops
Each short chain holds two transparent petals, with deeper pink concentrated near their tips. Trace matching shapes onto clean, smooth packaging, cut them out and finish every edge. Punch a small hole near each petal base and join the pair to a chain with a closed ring; use paint compatible with the plastic.
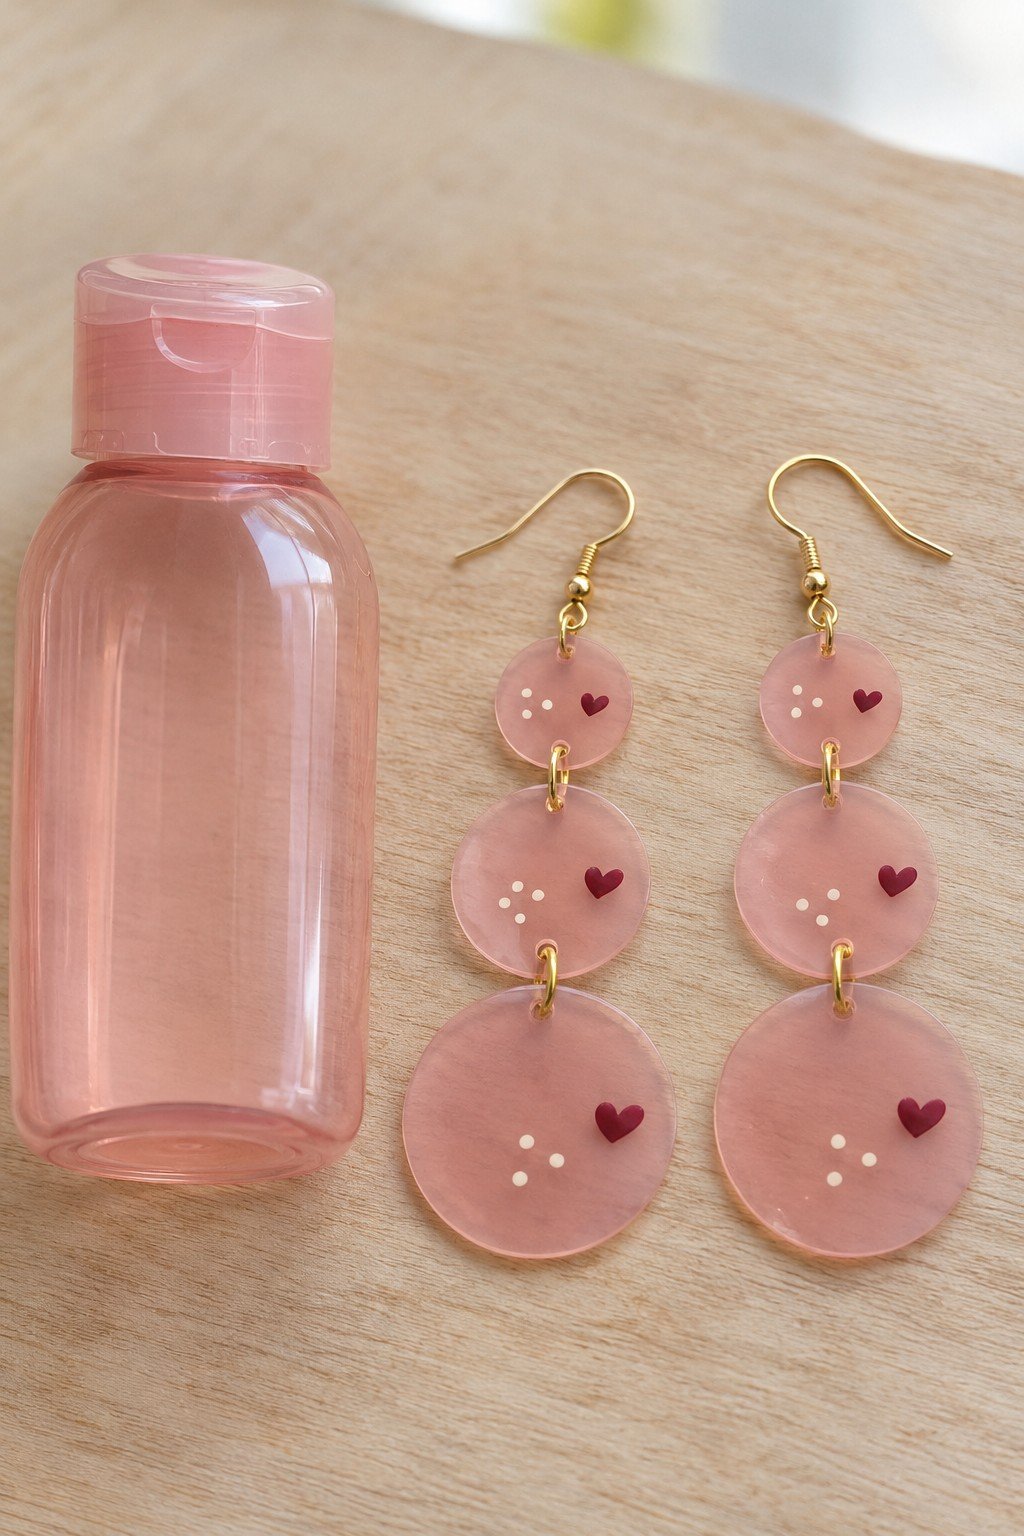
17. Link Three Pink Bottle Discs
Three circles grow larger toward the bottom, giving the earrings movement without adding many details. Cut matching pairs from a clean plastic bottle, smooth the edges and make aligned holes for the connecting rings. Leave enough space between discs for them to move freely, and test that the holes do not tear.
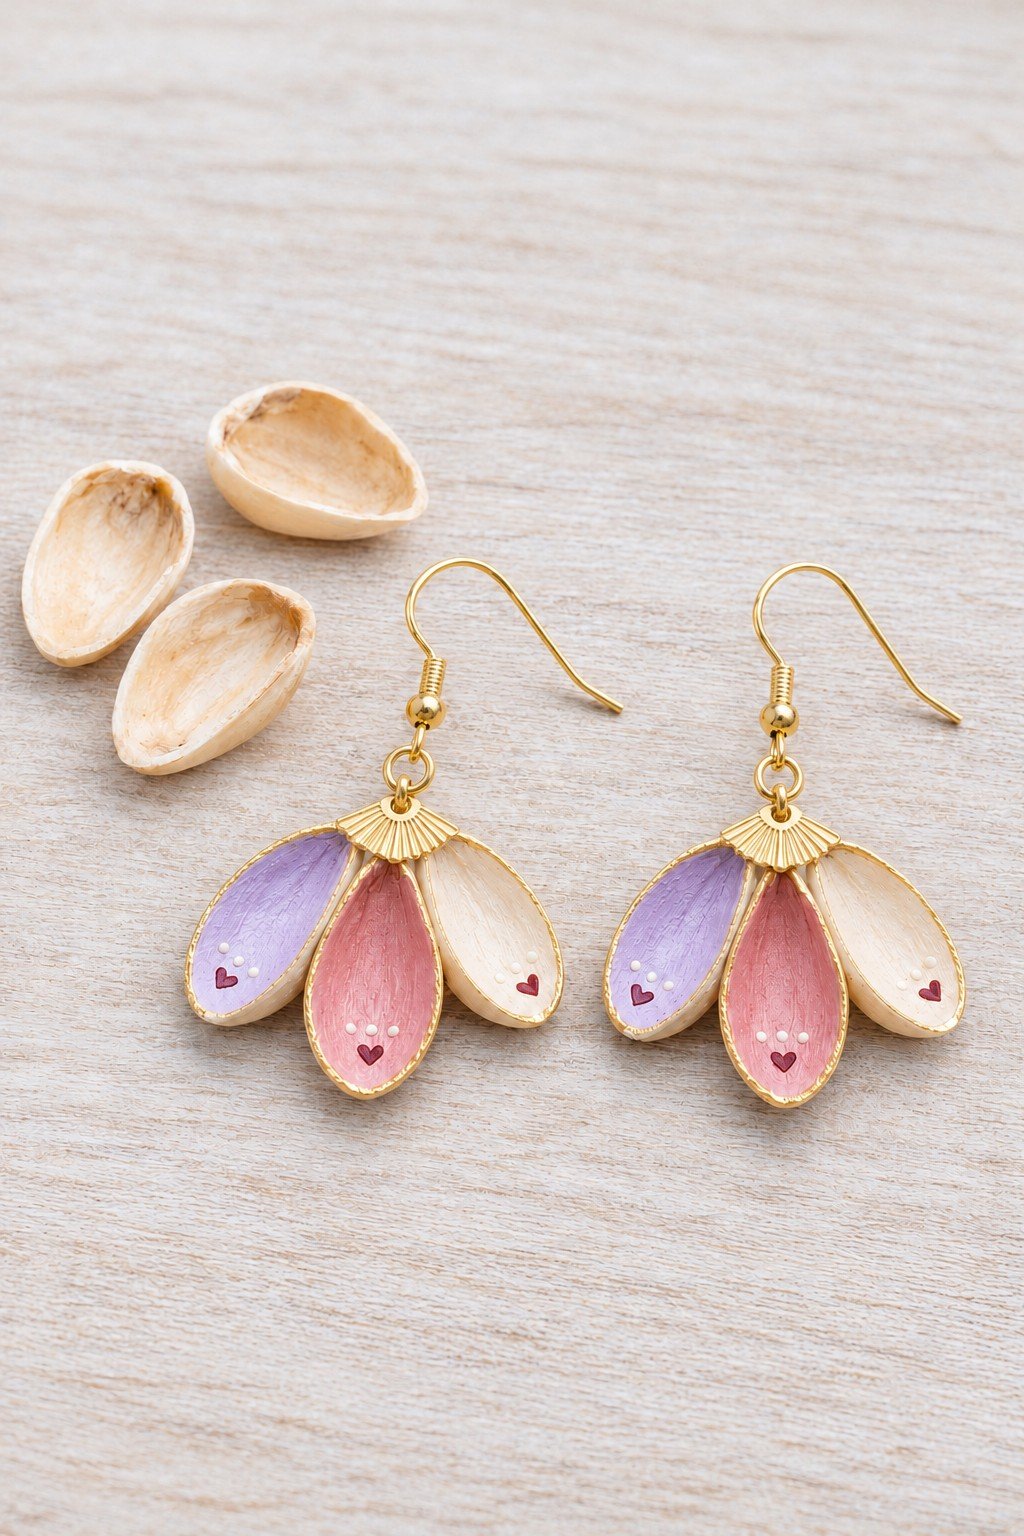
18. Paint Pistachio Shells Like Flower Petals
Three shell halves create a small fan on each earring. Choose clean, intact shells of similar size, paint the interiors and mount them on a secure jewelry backing. Keep the pair balanced in weight and inspect the joins before wearing; cracked shells are better discarded than used in a delicate drop.
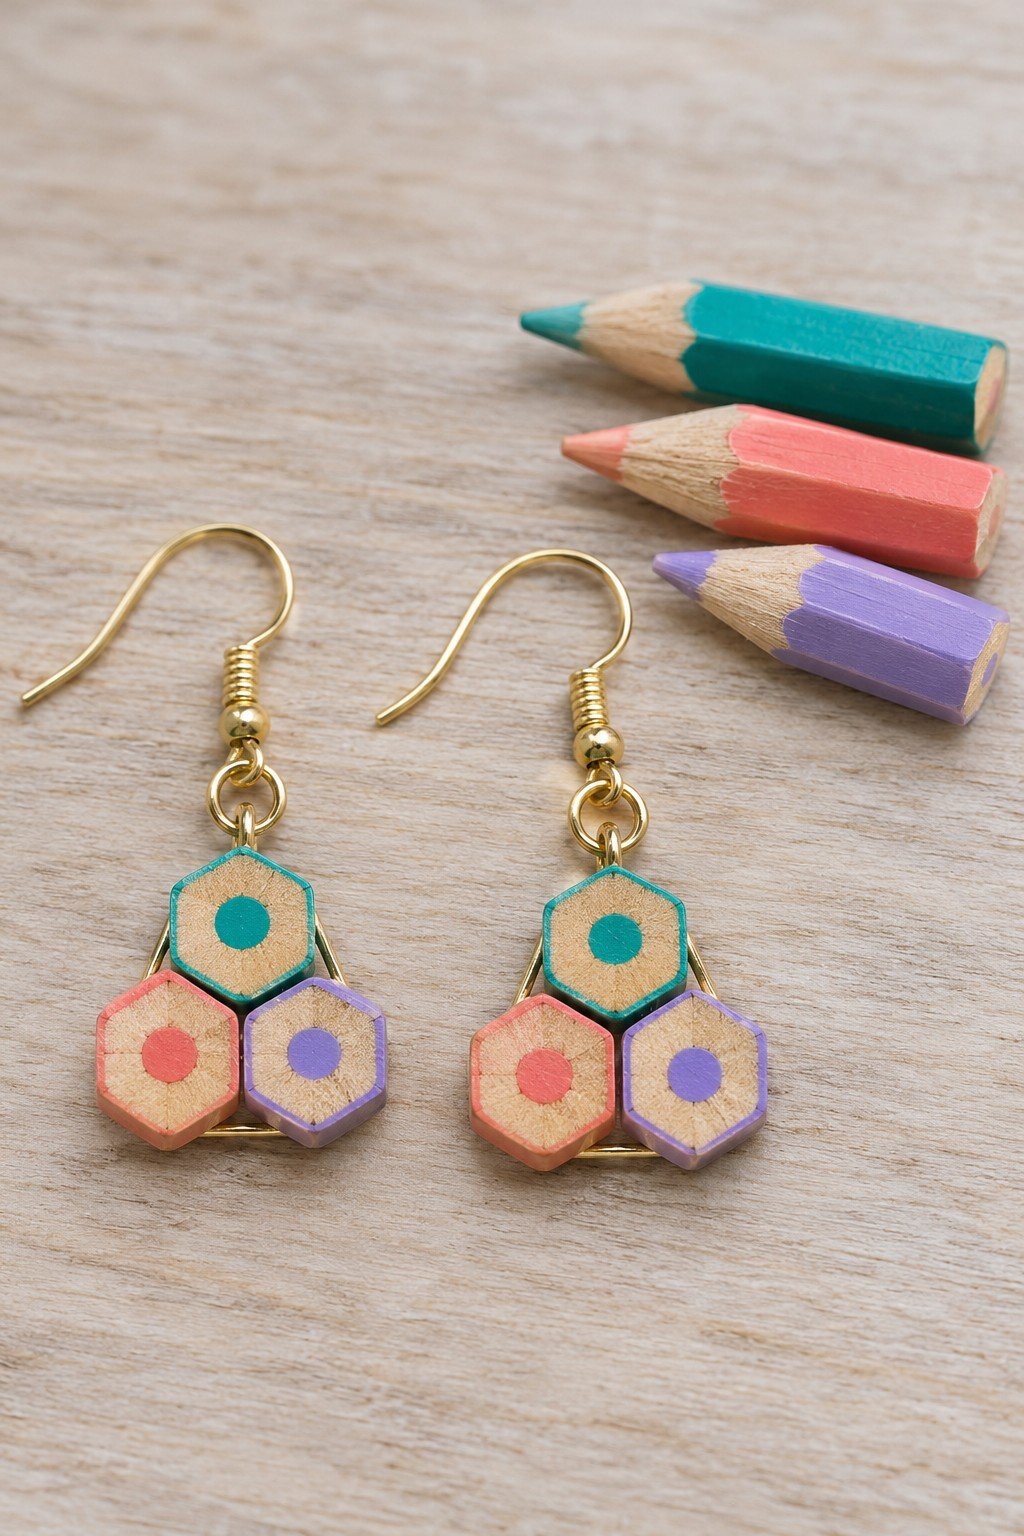
19. Arrange Colored Pencil Ends into Tiny Clusters
Exposed pencil centers become the pattern in these compact clusters. Ask someone with suitable tools to cut and smooth short sections from clean pencil stubs, then secure the pieces to a backing before adding the ear wire. Arrange the colors first so the two earrings feel related without needing to be identical.
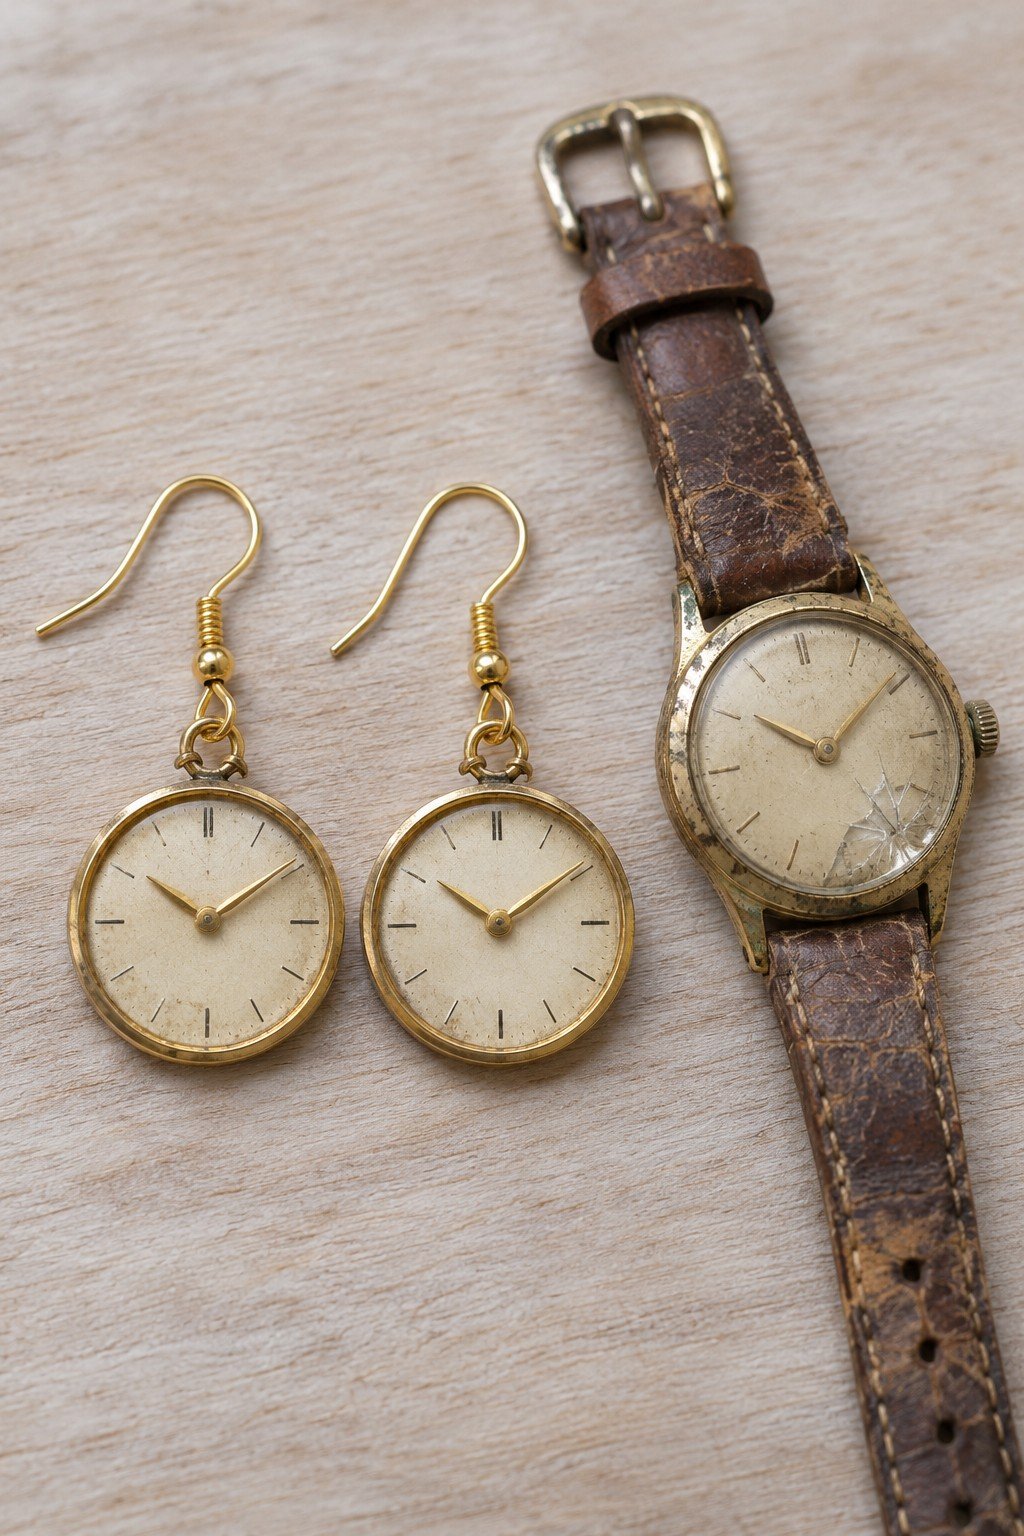
20. Save Watch Faces for a Vintage Pair
Vintage watch faces already have a border and a central design, making them natural focal pieces. Ask a watch repairer to remove the batteries and salvage suitable faces from unwanted watches. Fix each face into a secure setting with an attachment loop; avoid damaged luminous markings or unknown coatings.
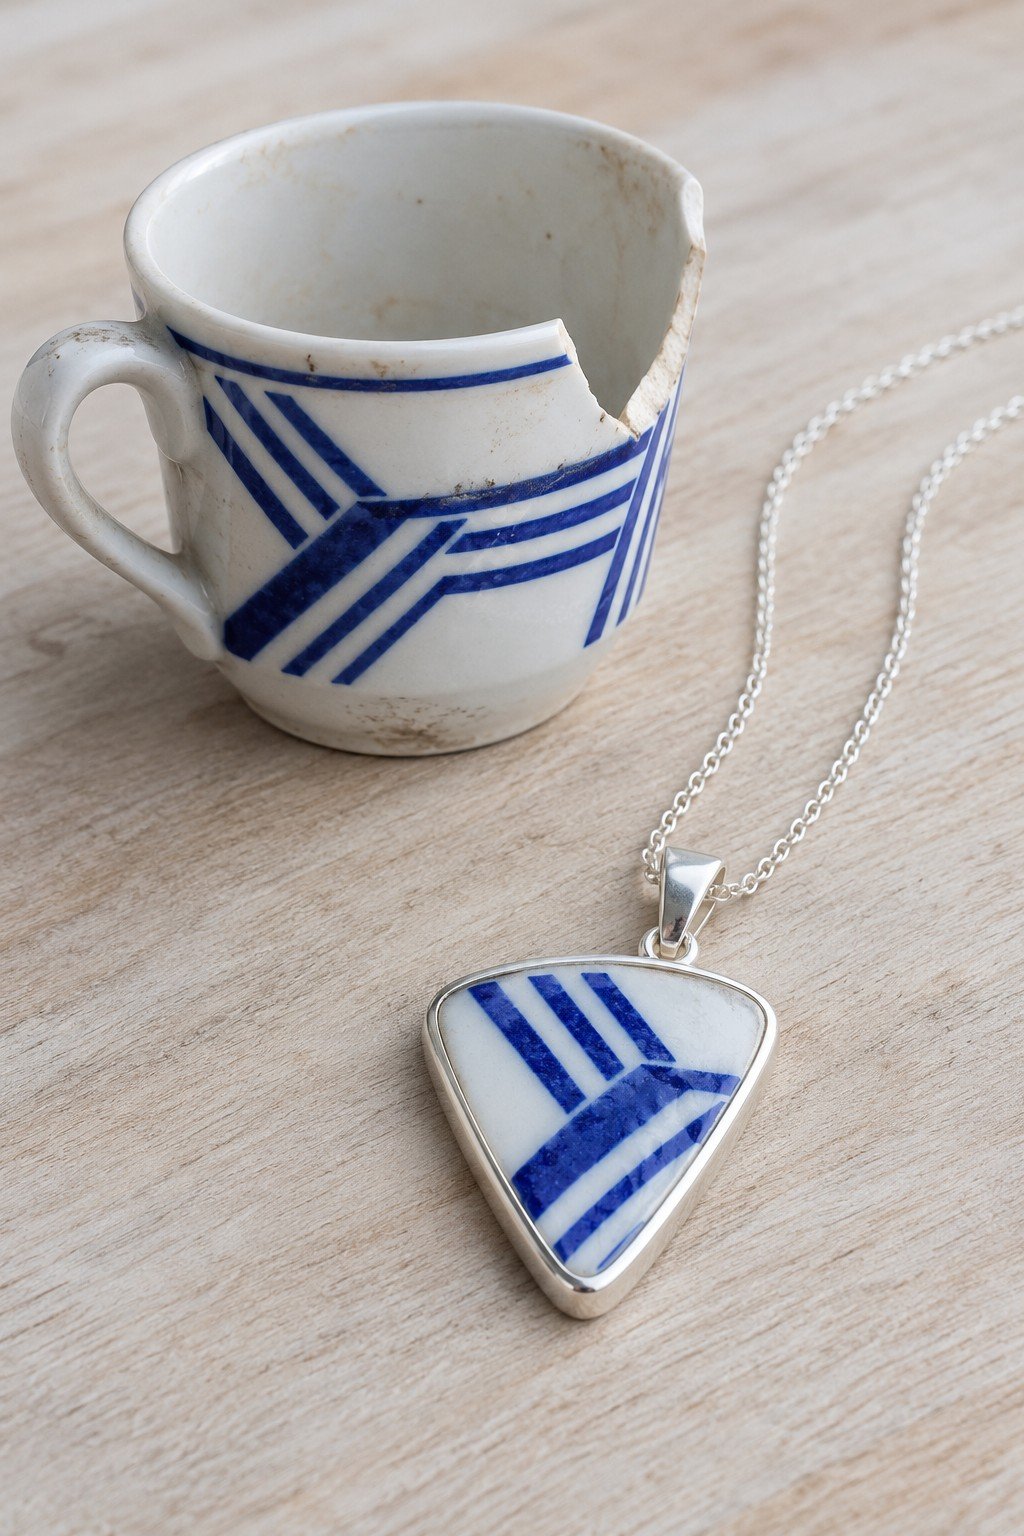
21. Frame a Fragment of Broken China
A fragment of blue pattern is enough to preserve the character of a favorite cup. Select sound china with a known finish and have a jeweler smooth and set the piece in a frame that covers its edges. Do not wear a sharp shard or dry sand ceramics at home. For larger projects, explore these broken china mosaic ideas.
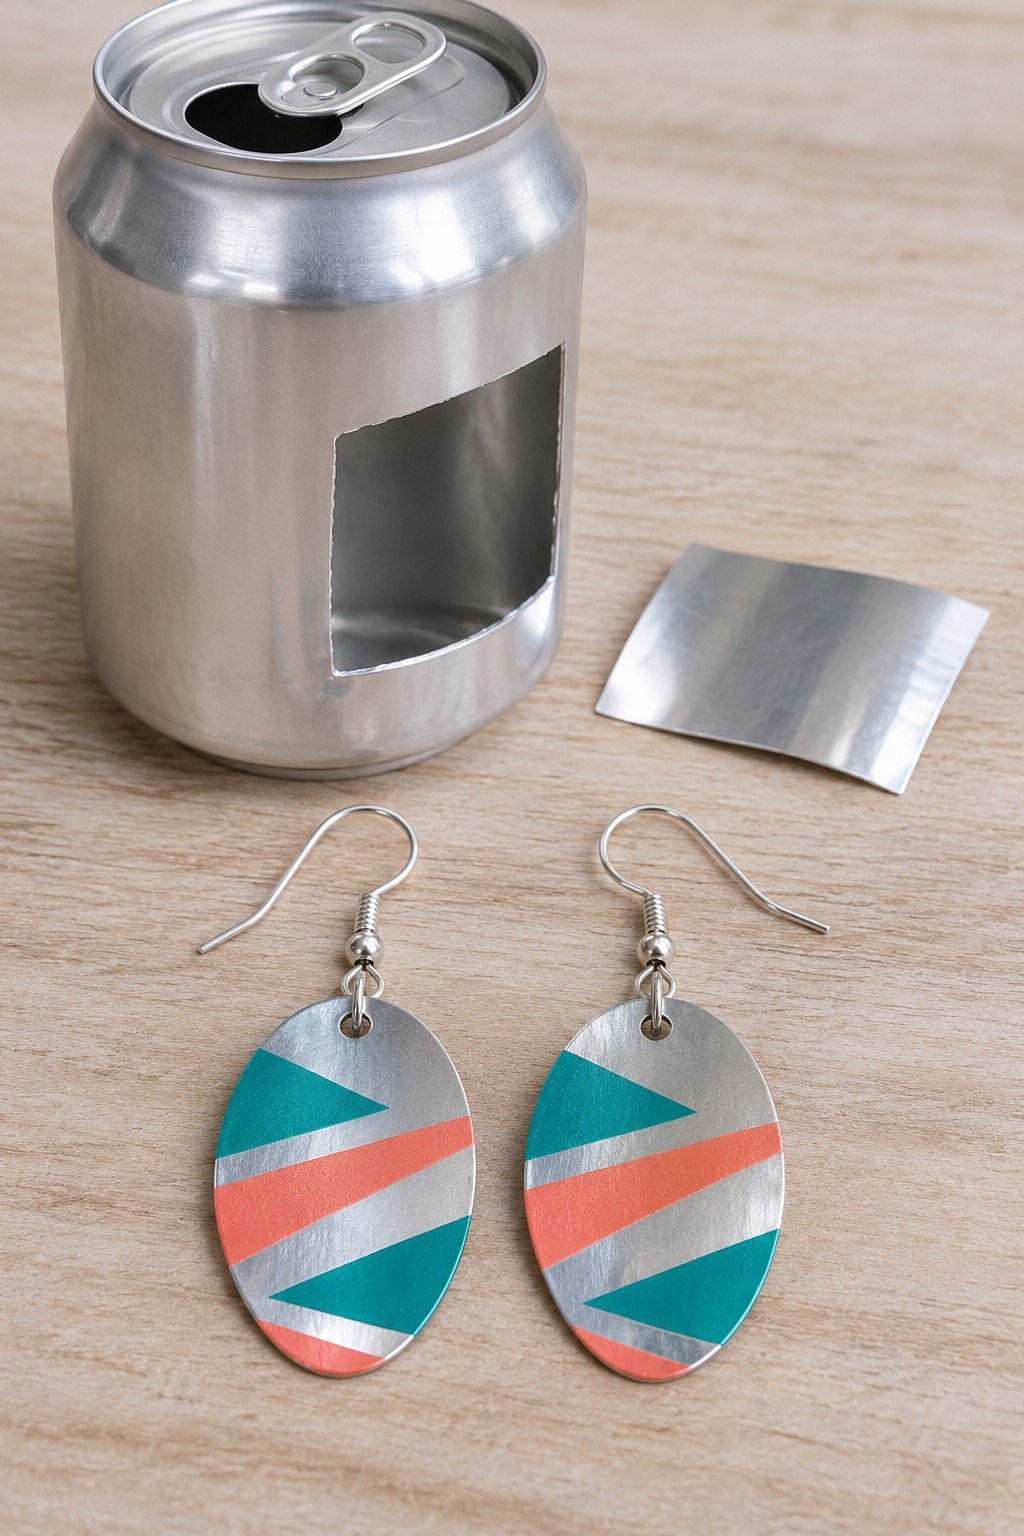
22. Cut Colorful Earring Shapes from a Can
Turquoise and coral stripes give the metal ovals a graphic finish. Cut only clean, empty cans with suitable tools, wear eye protection and gloves, and smooth every edge and punched hole before decorating. Because thin metal can remain sharp or curl, use a protective backing or choose a ready finished blank if it cannot be made smooth.
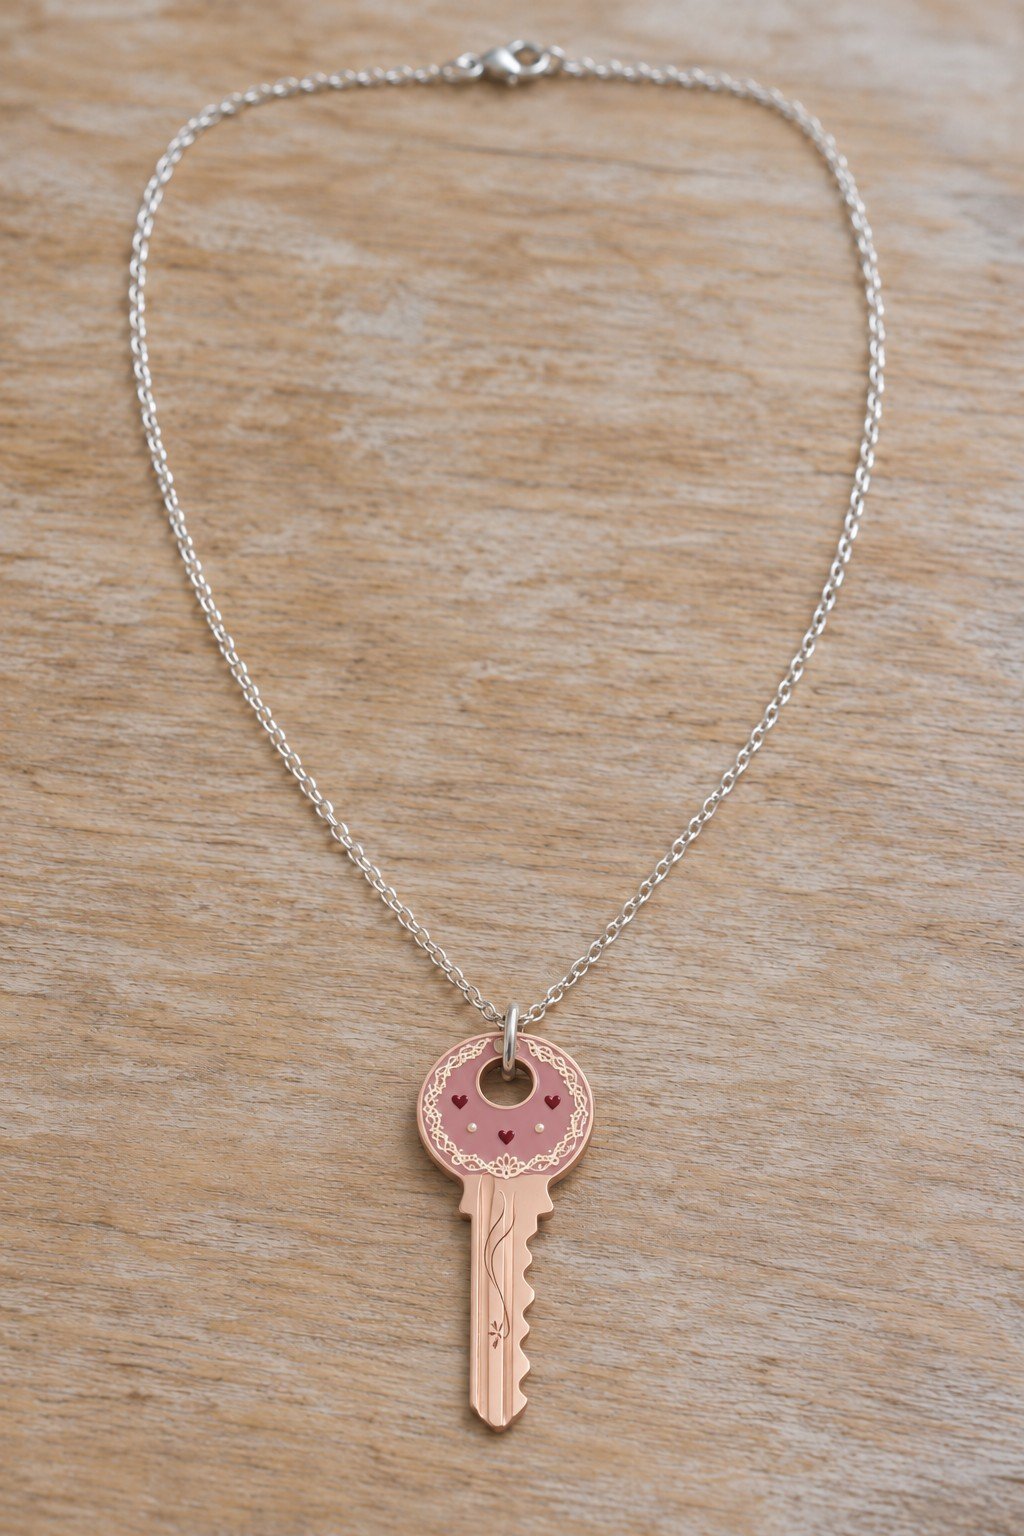
23. Dress Up a Spare Key
Beneath the pink decoration, the key stays recognizable. Start with a key you no longer need and whose material and coating are known; clean it and hang it from a closed ring through the existing hole. Keep any decorative finish away from rough edges, and do not rely on paint to make an unknown metal skin safe.
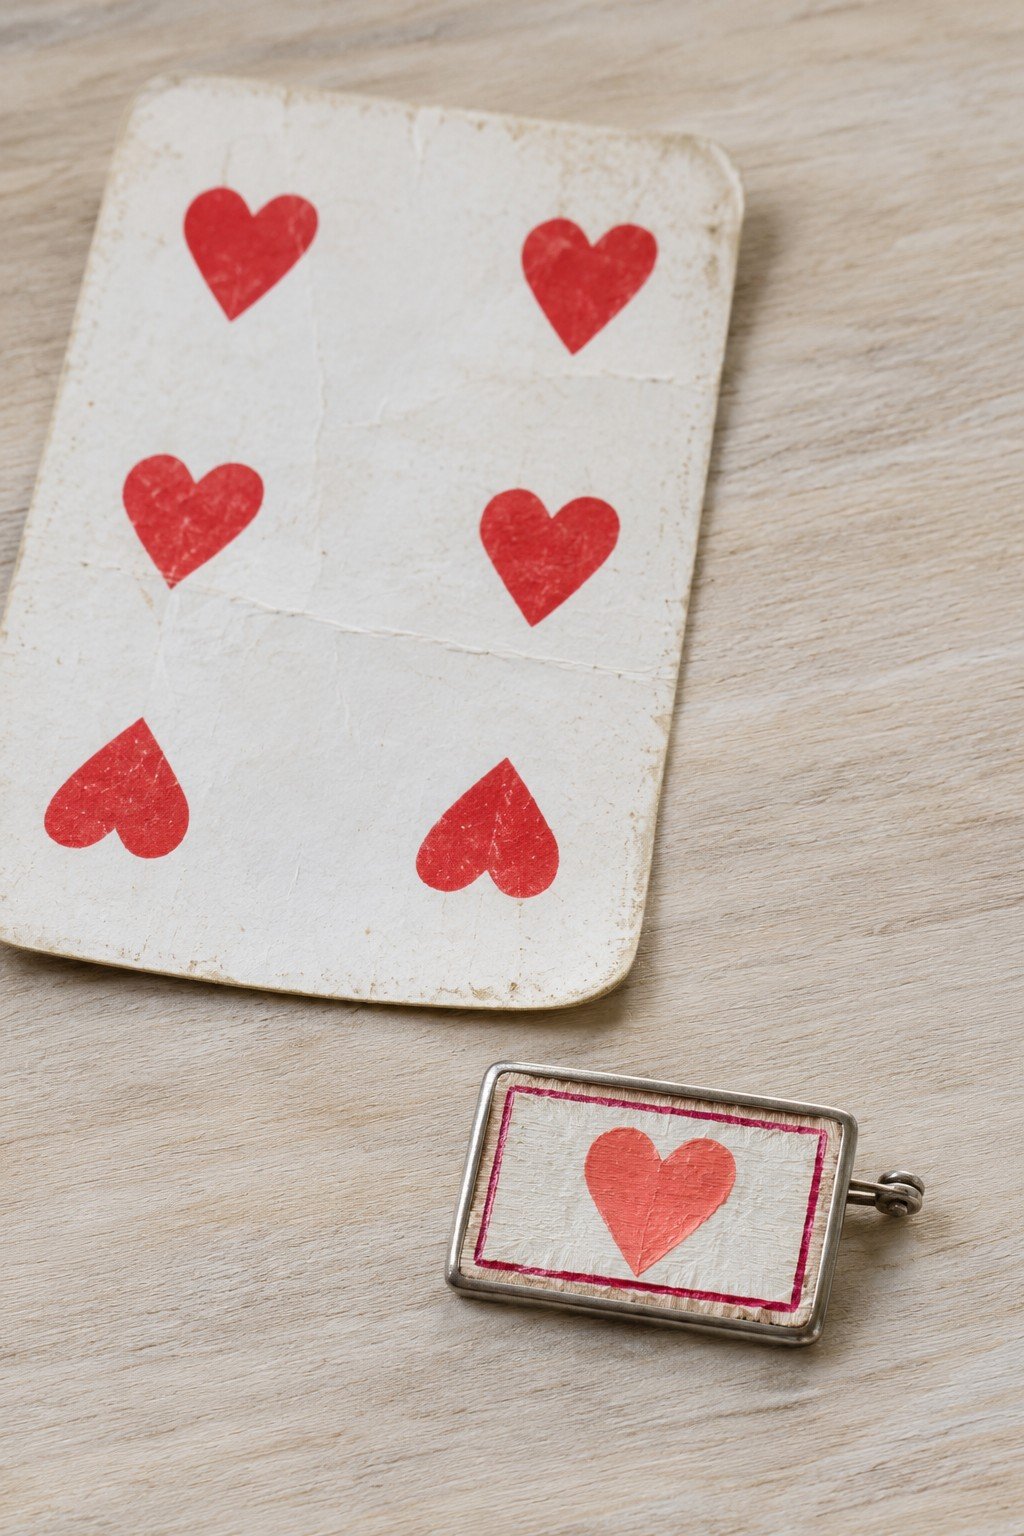
24. A Playing Card Heart in a Small Charm
One heart from a worn deck fits neatly into a small rectangular setting. Cut the motif to the inside size of a jewelry tray, attach it flat and add a fitted clear cover. Choose a setting with a secure loop so the card itself does not carry the weight of the chain or pin.
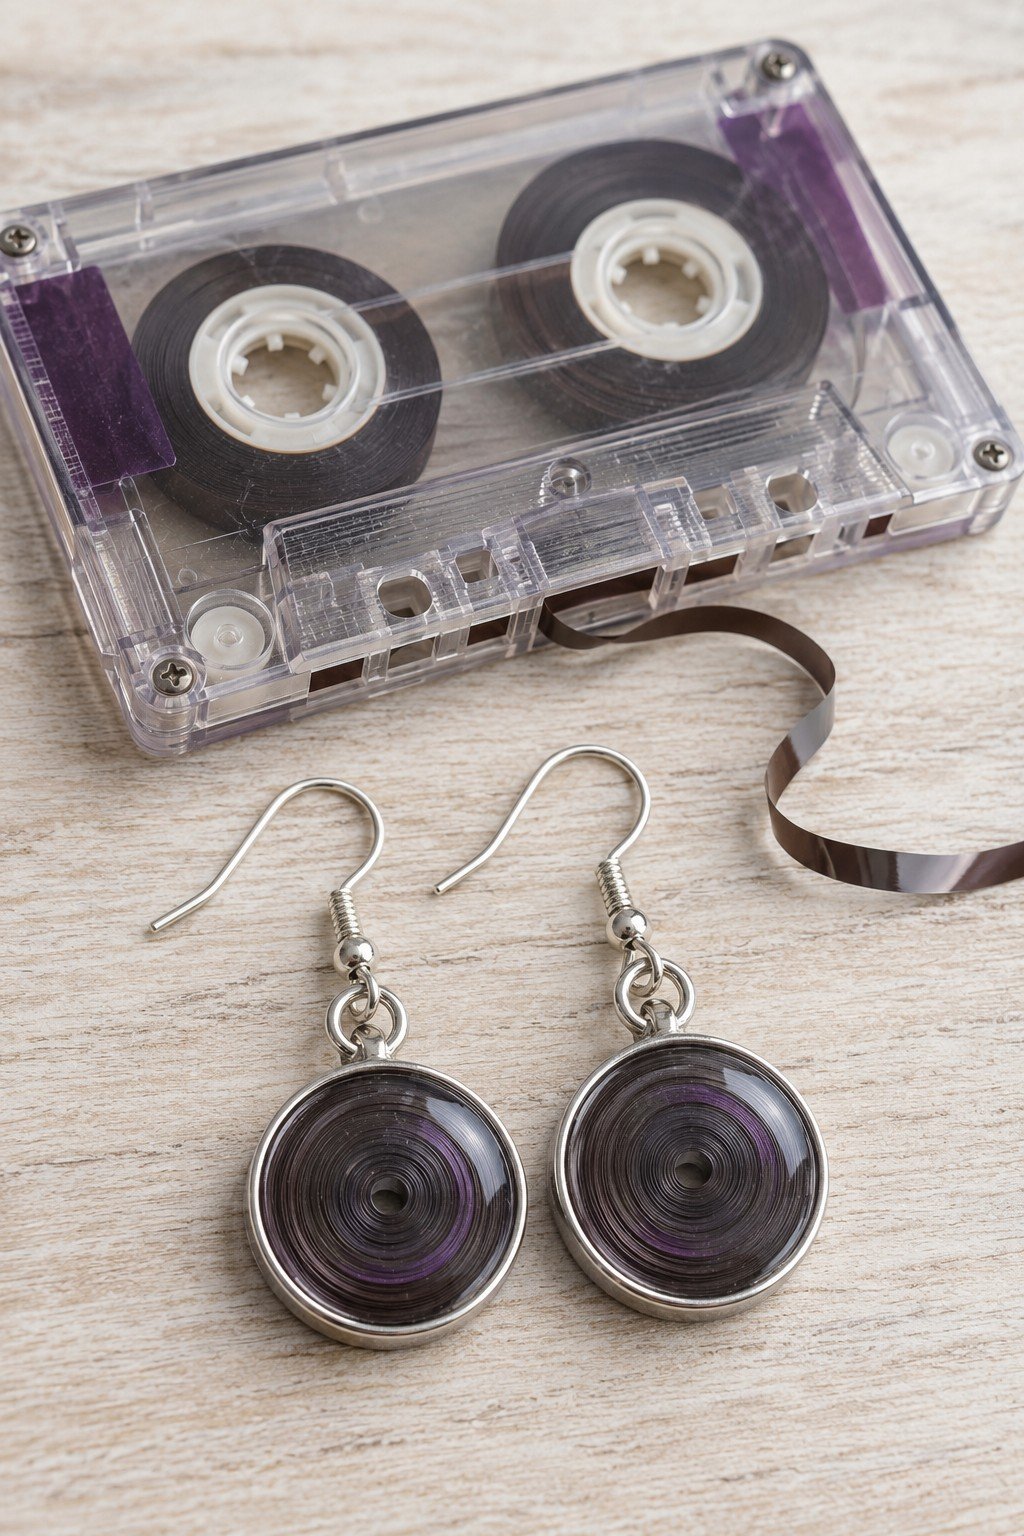
25. Coil Cassette Tape into Dark Circular Drops
Tightly wound tape creates subtle rings inside each round setting. Use loose tape from an unwanted cassette, wind two compact coils and secure them in jewelry trays with closed backs. A fitted cover helps contain the layers; attach each tray to an ear wire and check the coil cannot unwind.
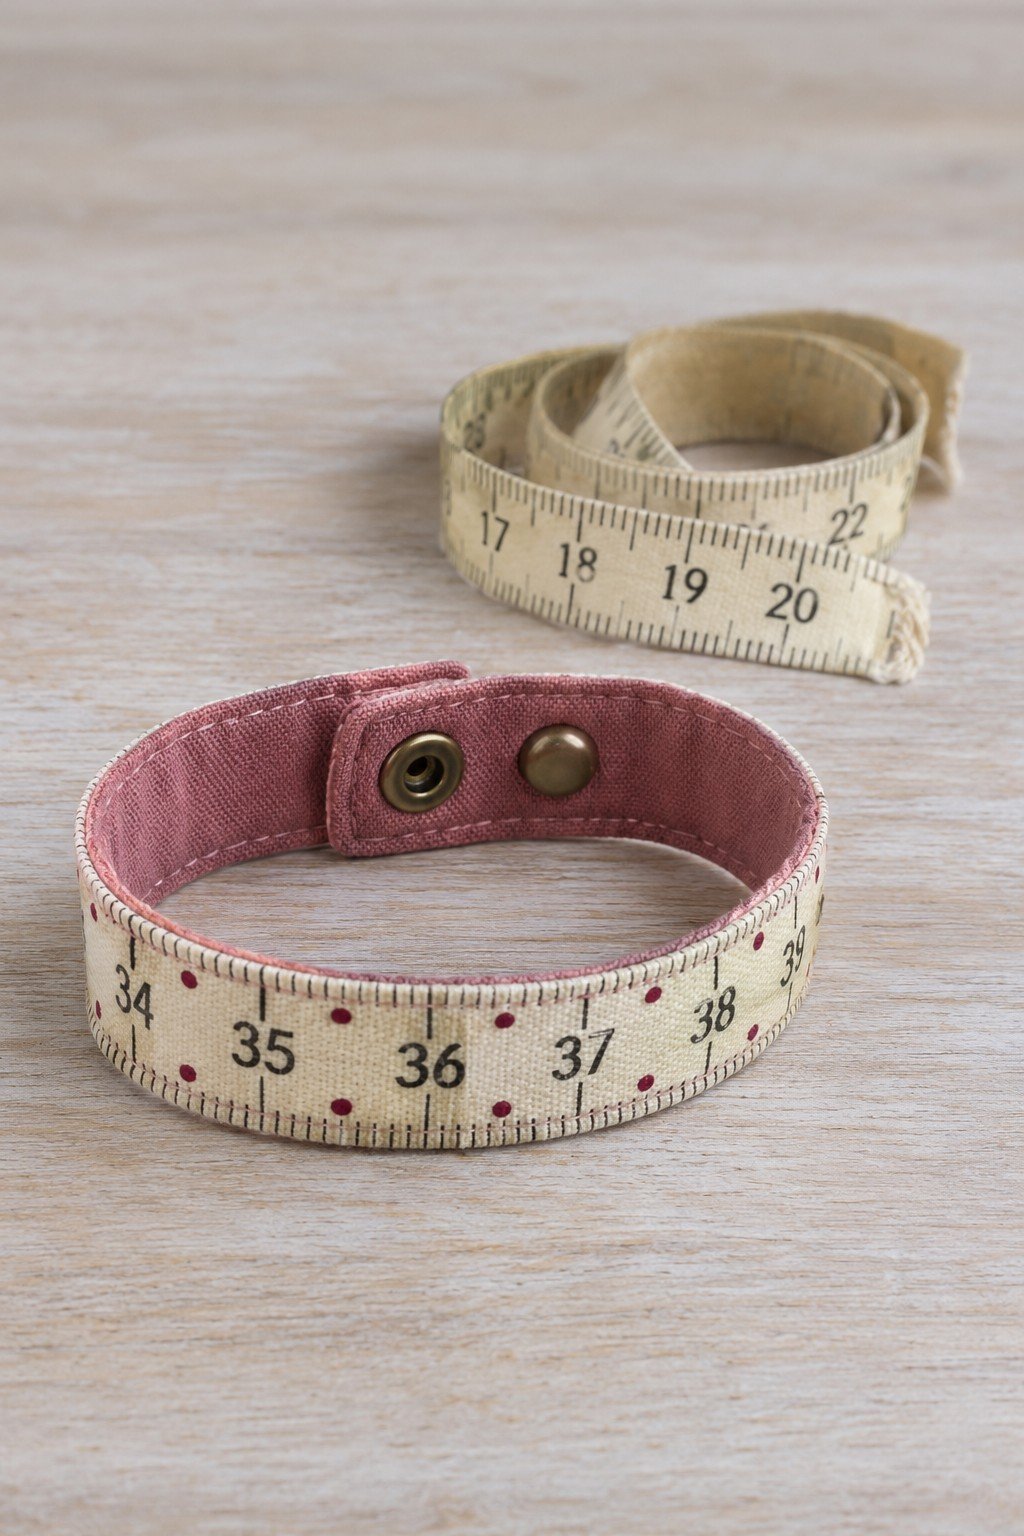
26. Wrap a Measuring Tape Around the Wrist
Numbers on the outside make this cuff especially fitting for a sewing enthusiast. Use a flexible, clean measuring tape, trim it to a comfortable length and sew it to a soft fabric lining. Overlap the ends and add a snap through the reinforced layers, keeping the hardware flat against the wrist.
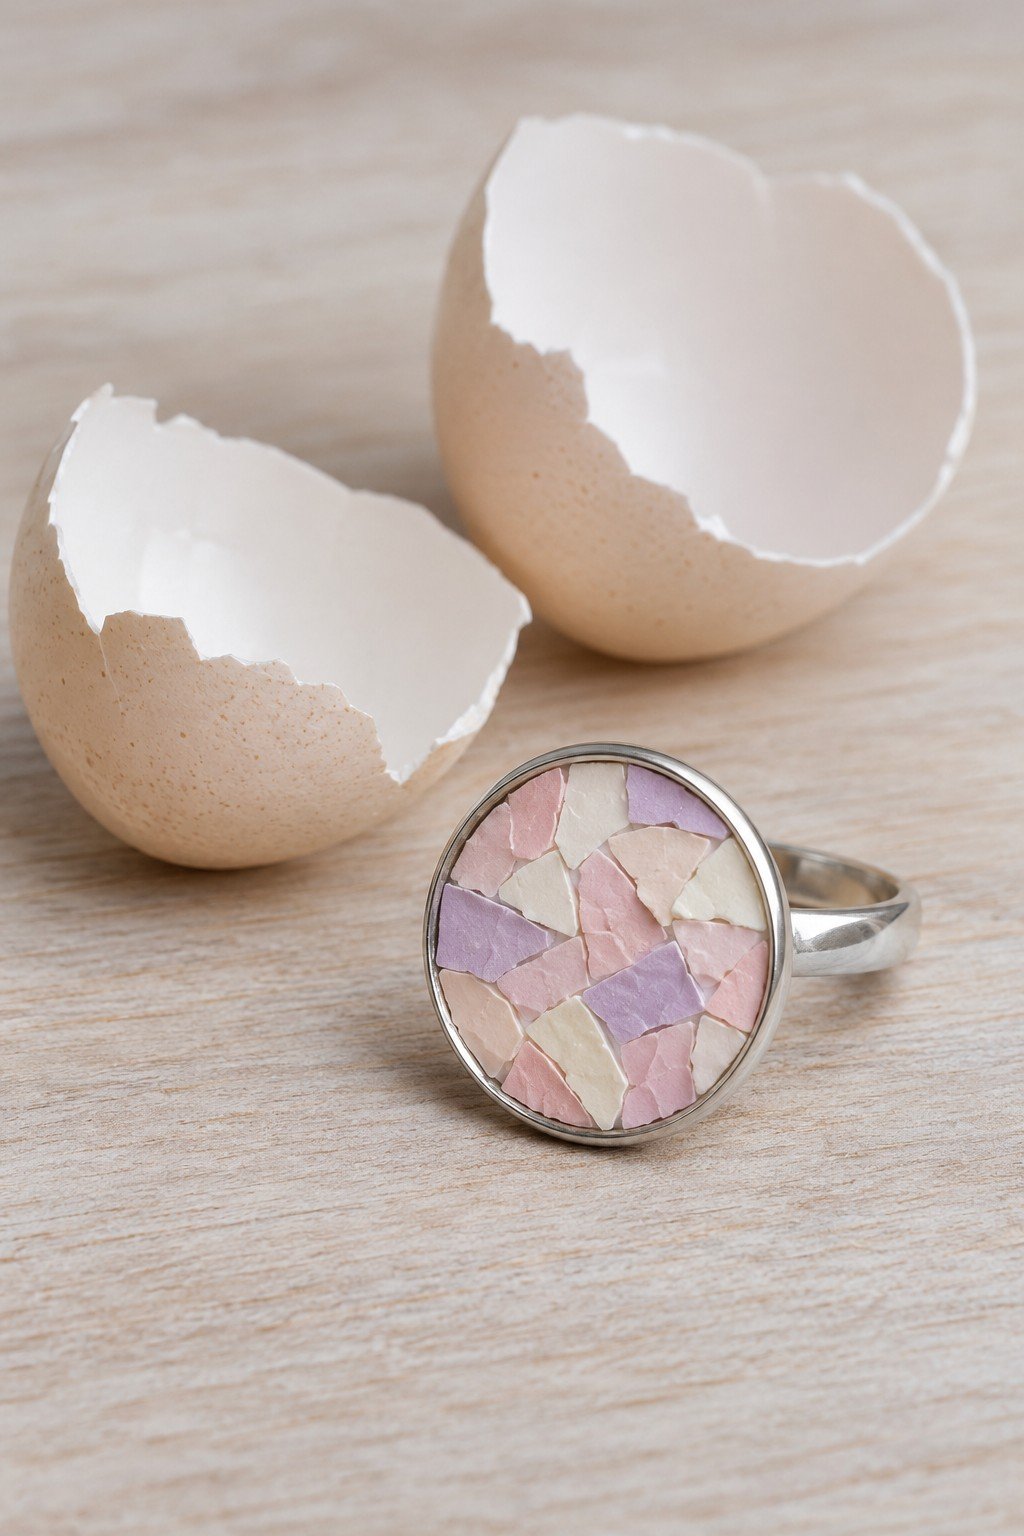
27. Turn Eggshell Pieces into a Mosaic Ring
Cream, pink and lavender pieces form an irregular surface inside a round setting. Wash and dry the shells thoroughly, color them if desired and arrange them in a shallow ring tray. Secure the mosaic and cover it with a fitted clear cabochon so loose pieces cannot rub against the skin.
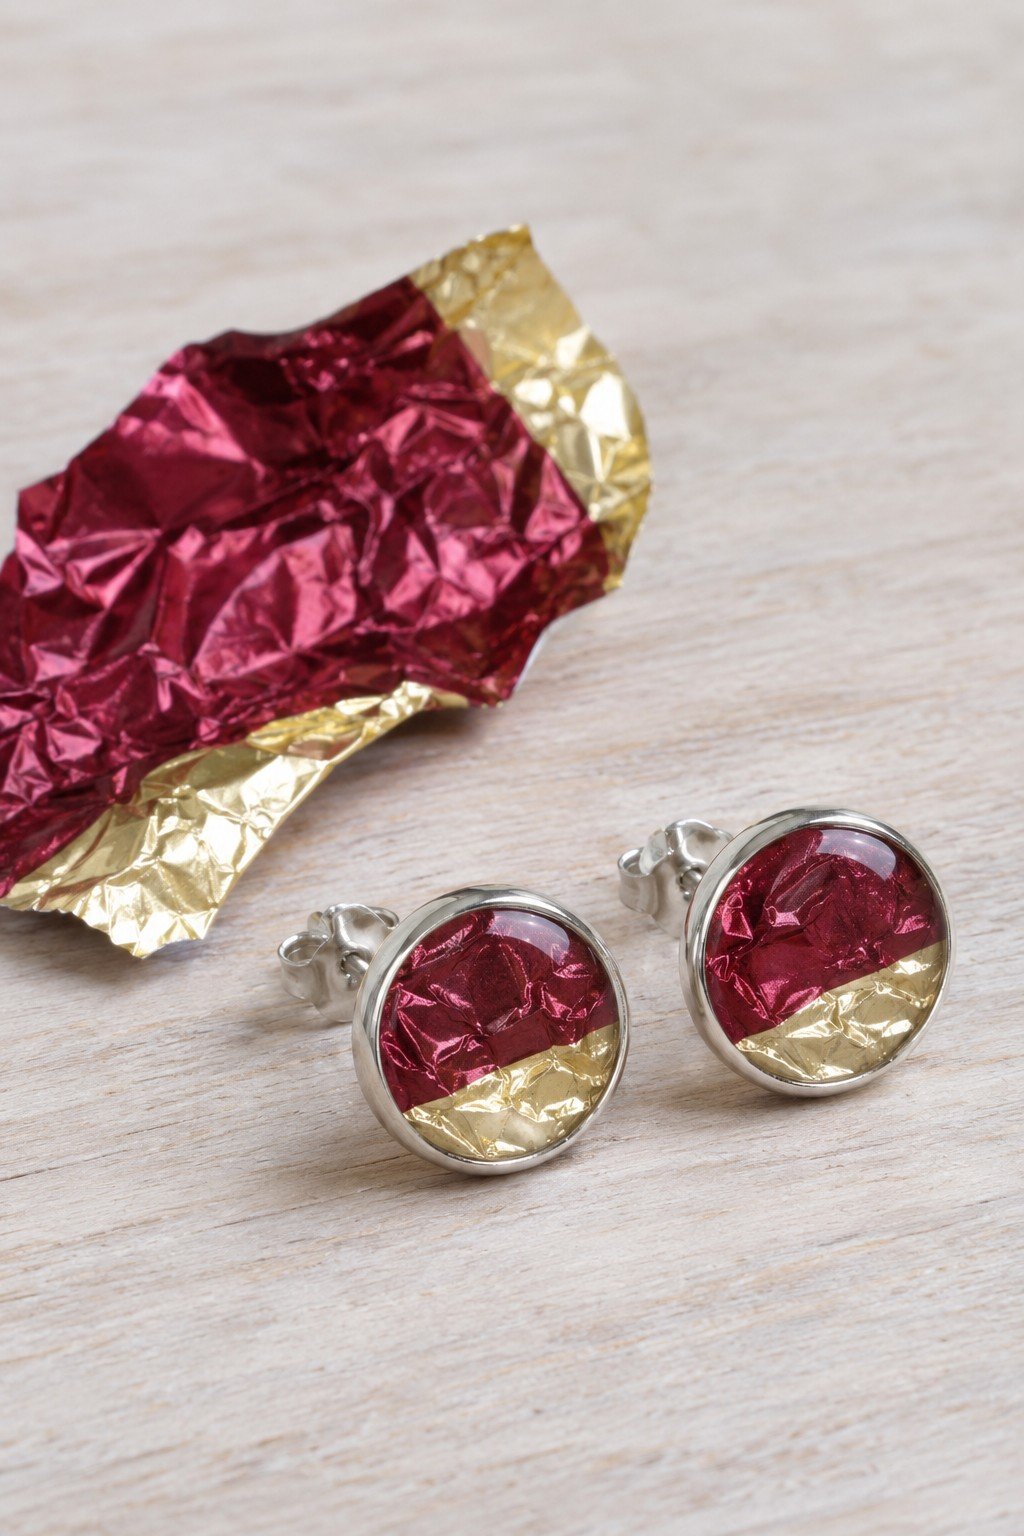
28. Save Colorful Wrappers for Stud Earrings
Crinkled foil catches the light inside two small circular settings. Clean and dry a colorful wrapper, trim two pieces and place each in a stud tray under a fitted clear cover. Keep the foil away from the post and use matching trays to bring a sense of order to the irregular folds.
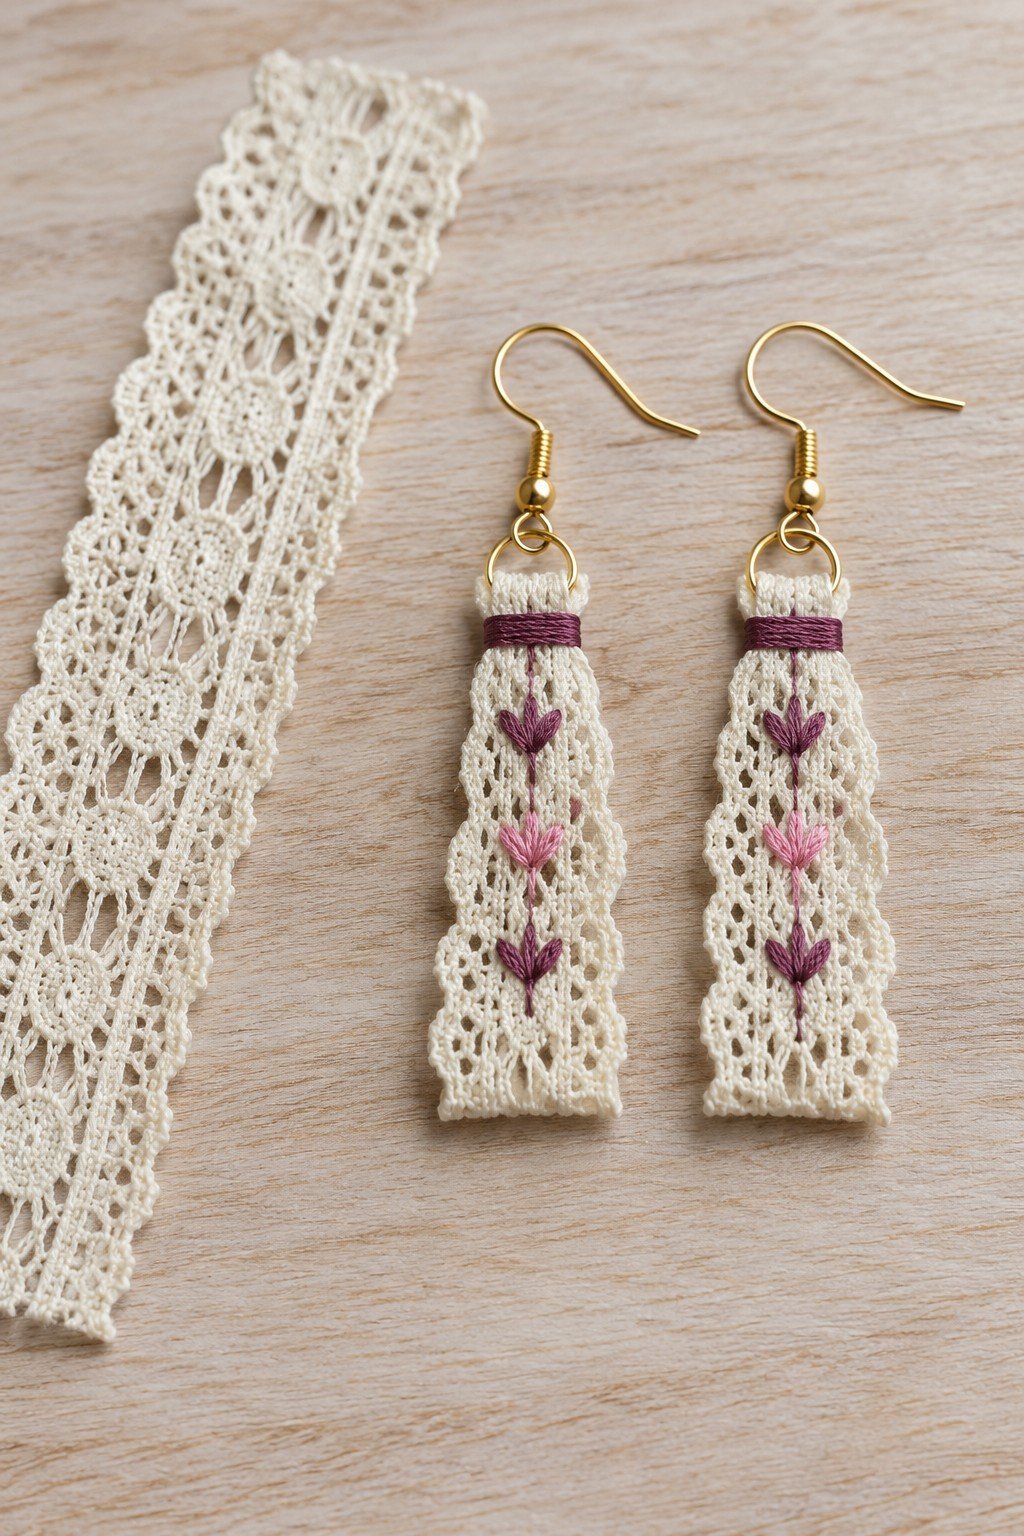
29. A Lace Offcut Becomes a Pair of Drops
Lace and tiny pink stitches make these earrings feel delicate without needing a large piece of fabric. Cut two matching sections from clean, sound trim, secure the cut ends against fraying and attach each top edge to a small finding. Choose light ear wires so the soft lace retains its shape.
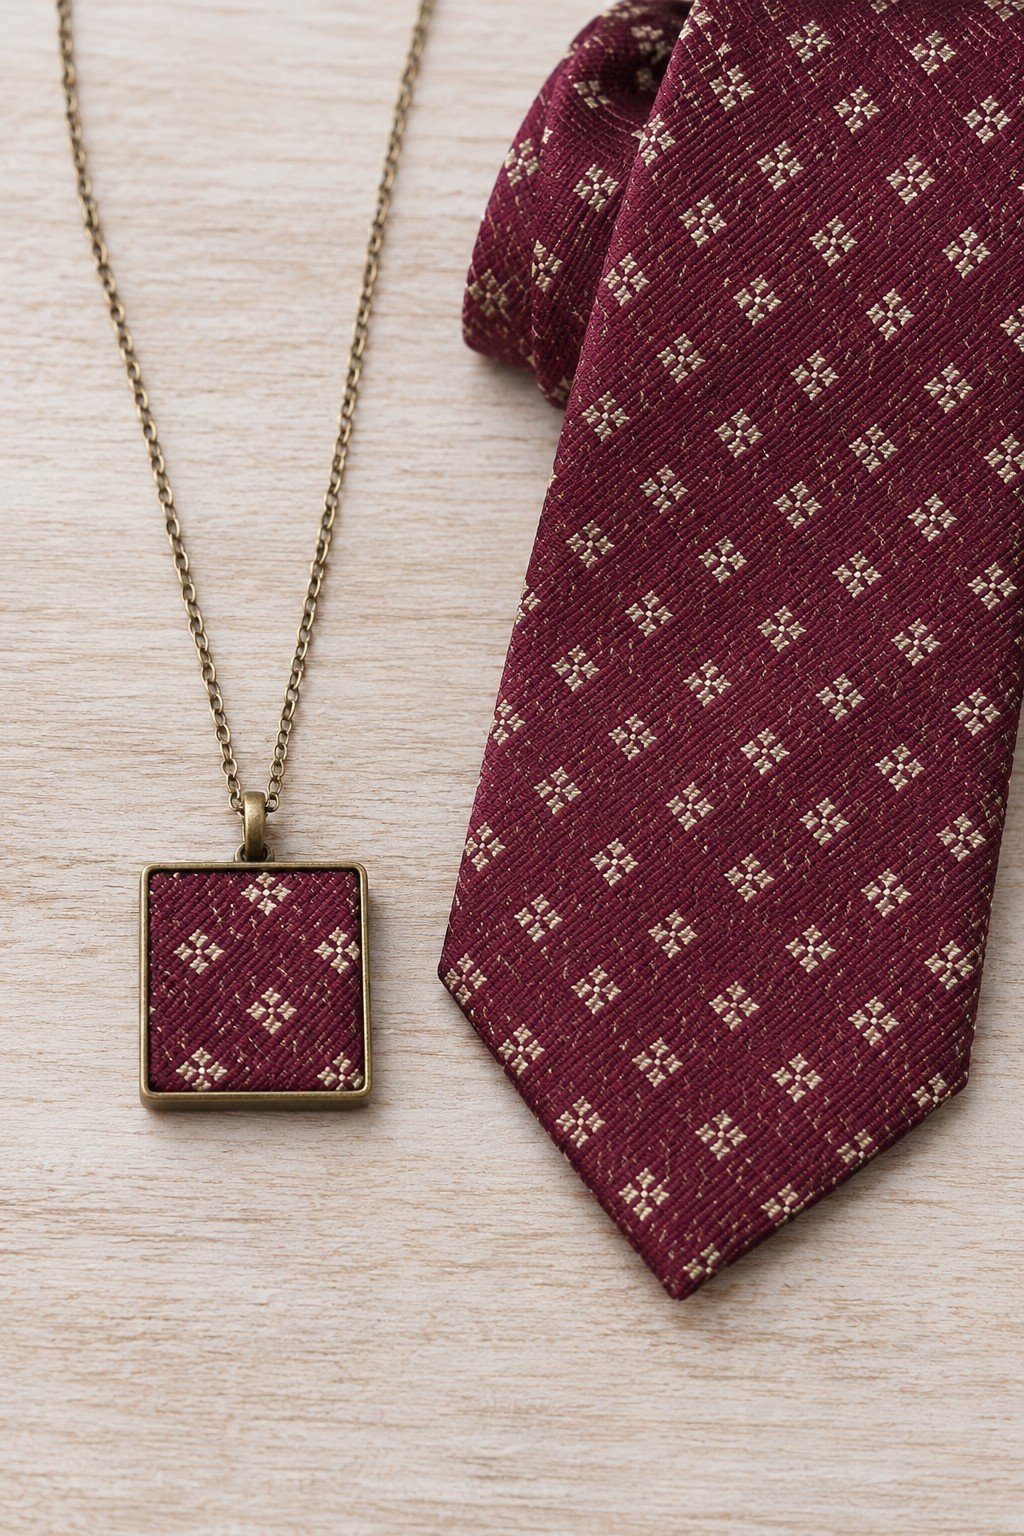
30. Showcase a Necktie Pattern in a Pendant
Even a small square is enough to show the repeat of a retired tie. Place a clean fabric offcut over a firm insert, fold the edges neatly behind it and fit the insert into a pendant tray. Align the print before fixing it; keep the fabric dry and away from perfume or lotion.
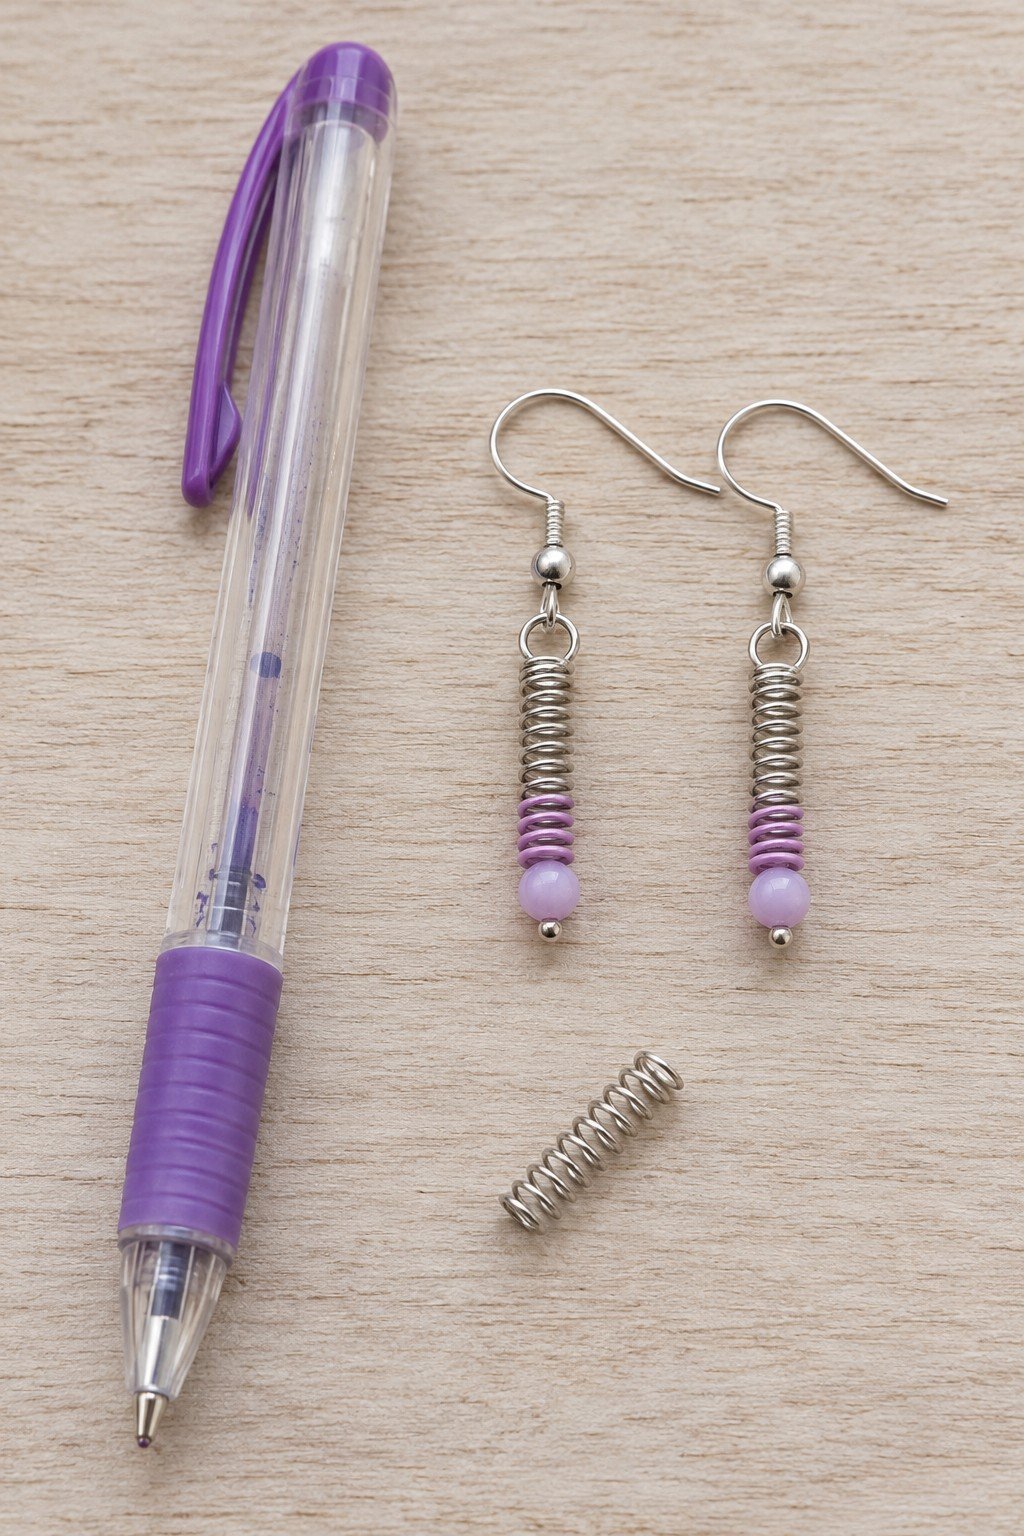
31. Give Pen Springs a Colorful Finish
Coiled springs make a compact setting for the purple accents. Reuse clean springs only if they are intact and free of ink, then secure each one on a jewelry headpin with a closed loop and a bead at the bottom. Tuck in or cap sharp ends so they cannot catch clothing or skin.
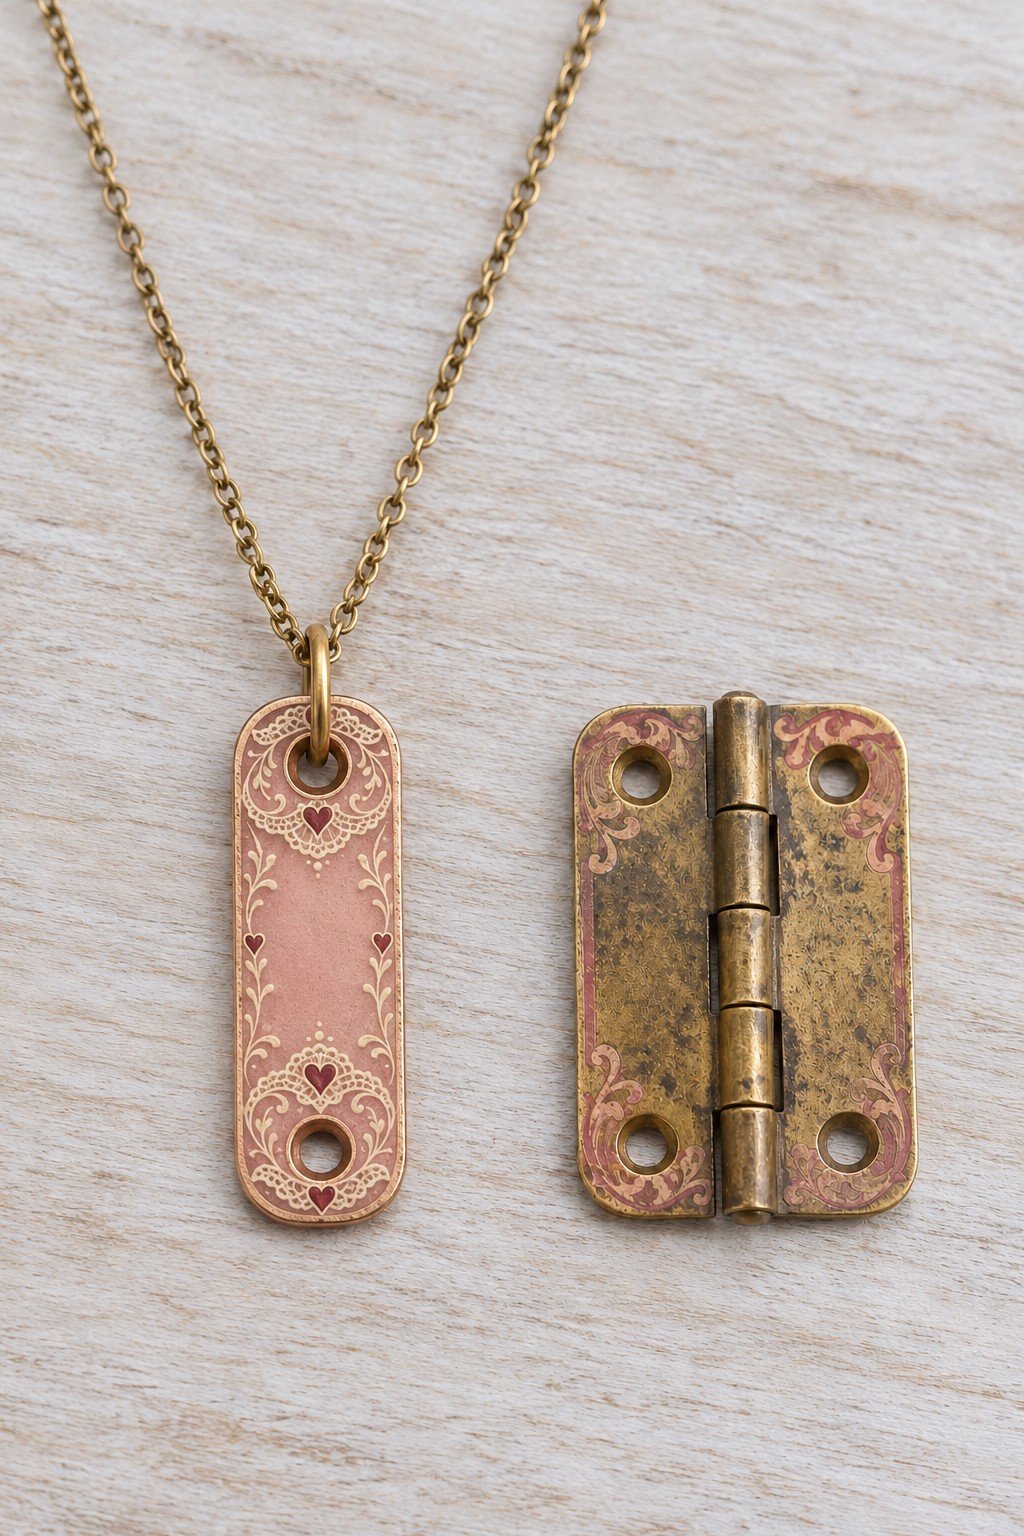
32. A Hinge Leaf Becomes a Slim Pendant
This long rectangular leaf keeps the familiar hinge shape visible. Choose an unwanted hinge with a known, sound finish, separate a suitable leaf and check both holes and edges for burrs. Hang it from an existing hole using a closed jump ring. If the metal or old coating is uncertain, choose a jewelry blank instead.
Care for the finished piece. Check clasps, bonds and sharp points before each wear. Store delicate paper, cork, shell and fabric pieces dry and separately from hard metal. If a joint loosens or a surface irritates your skin, stop wearing the piece until it is repaired or replaced. For a place to keep your favorites visible, browse these jewelry display ideas.
Leave a Reply