
DIY felt flower decorations bring soft color and handmade texture to everyday spaces, from a curtain tieback to a practical storage basket. This collection explores 30 different designs, with guidance on petal shapes, suitable bases, secure attachments, and care. Start with the simple sewn daisy below, then adapt the construction to the flower and object you prefer. Some ideas use flat appliques; others need shaped petals, supported stems, or reinforced fabric. Each design includes details to help you choose a manageable project and keep the finished decoration useful.
Table of Contents
- Make and Use Felt Flower Embellishments
- Materials and Tools to Gather
- Make a Simple Felt Daisy Before Adapting the Ideas
- Choose the Right Place and Finish
- 1. Felt Water Lily Display Mat
- 2. Arched Felt Bleeding Heart Sculpture
- 3. Cream and Peach Felt Calla Lily Arrangement
- 4. Hydrangea Heart Wreath
- 5. Felt Anemones in a Wooden Spool Vase
- 6. Layered Felt Flower Bowl Mat
- 7. Pink Felt Foxglove Vase Arrangement
- 8. Dahlia Curtain Tieback
- 9. Tulip Decorated Wooden Book Stand
- 10. Pink Flower Tissue Box Cover
- 11. Daffodil Doorstop Cover
- 12. Cherry Blossom Wooden Wall Plaque
- 13. Purple Flower Felt Catchall Bowl
- 14. Cornflower Trimmed Wooden Tray
- 15. Ranunculus Felt Wall Cone
- 16. Peony Remote Control Holder
- 17. Daisy Border Table Runner
- 18. Floral Hanging Pocket Organizer
- 19. Morning Glory Key Rack
- 20. Pansy Eyeglass Stand
- 21. Protea Felt Storage Basket
- 22. White Blossom Jar Sleeve
- 23. Bougainvillea Cabinet Handle Wrap
- 24. Geranium Chair Back Cover
- 25. Aster Sofa Arm Organizer
- 26. Yellow Freesia Drawer Tassel
- 27. Snowdrop Shelf Edge Garland
- 28. Wisteria Curtain Valance
- 29. Dandelion Cabinet Pocket
- 30. Passionflower Upholstered Footstool
- Keep Your Felt Flowers Looking Their Best
Make and Use Felt Flower Embellishments
Materials and Tools to Gather
For the sample daisy, gather one 15 cm square of beige linen, white felt for two flower layers about 6 cm across, a mustard felt circle about 1.5 cm across, and two sage felt leaves about 3 cm long. You will also need a paper template, pencil, sharp fabric scissors, a sewing needle, and matching thread. Use these measurements as a starting point rather than a pattern for every design. Choose flexible felt that bends without cracking and holds a clean cut. A small scrap sample helps you judge thickness before cutting the full set.
For larger projects, add the appropriate base: a removable fabric sleeve, sturdy basket, wooden board, wreath form, or covered stem. Felt adhesive can help hold dimensional petals, but select a product intended for your materials and follow its drying instructions. A bond that feels firm immediately may still need time before handling. Permanent glue does not automatically mean washable glue. Stitch flowers onto fabric accessories where possible, especially around handles, pockets, and other areas that move. Keep needles, loose wire ends, and small flower centers away from young children; adults should handle hot glue and sharp tools.
Make a Simple Felt Daisy Before Adapting the Ideas
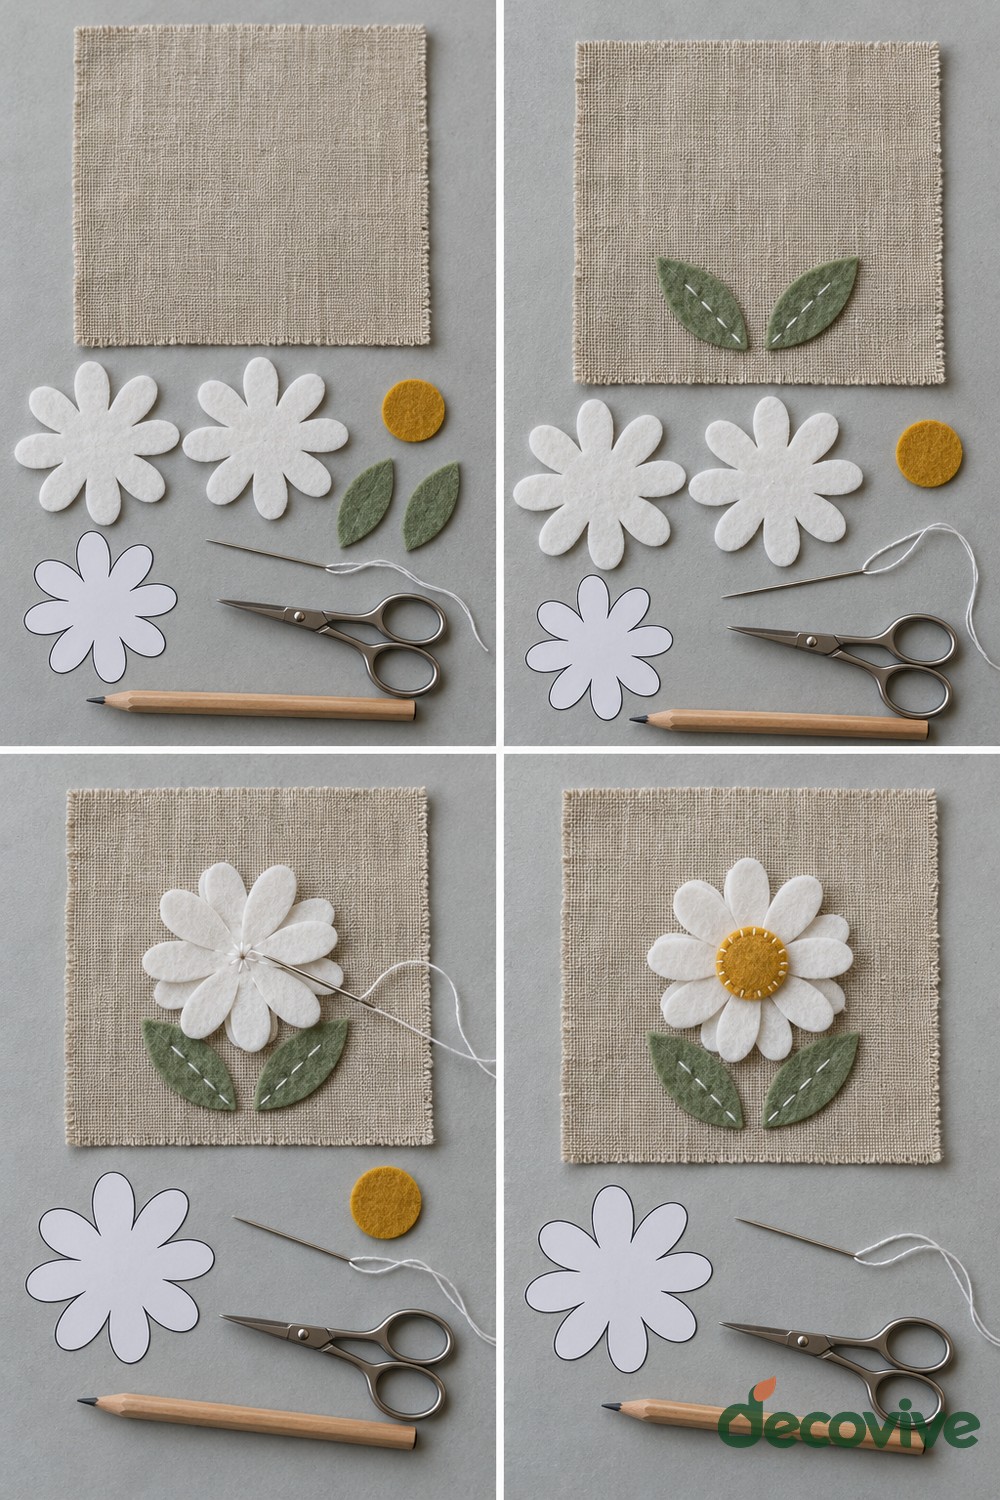
- Prepare matching pieces. Cut two identical white flower shapes, each with eight rounded petals, one mustard center, and two green leaves. Keep both flower layers the same size. Place them on the linen without sewing to check the arrangement.
- Secure the leaves first. Sew along the middle of each leaf, leaving its outer edge slightly free. Arrange the leaves just below the planned flower position, with space for both petal layers above them. Knot the thread neatly on the reverse.
- Join the petal layers. Stack the white flower shapes and turn the upper layer slightly so the petals alternate. Sew through both centers and the linen. The stitches should hold the layers firmly without pulling the fabric into a pucker.
- Finish the center. Sew the mustard circle over the central stitches with small stitches near its edge. Check the back for loose threads and gently lift the petal tips for dimension. The finished sample can guide a runner, pocket, or removable cover.
This method provides a foundation, but flower shapes need different treatment. Build a rose from a curled strip or overlapping petals, gather small cups for a hydrangea, and use a supported framework for hanging blossoms. Make one flower first and check its scale against the intended object. Arrange the entire decoration before attaching it permanently. Keep openings, drawer movement, hooks, handles, and storage compartments clear.
Choose the Right Place and Finish
Use these decorations indoors in dry locations. Keep felt away from candles, cooking surfaces, heaters, and other heat sources. Dust with a soft brush rather than soaking an assembled flower. For washable textiles, make dimensional embellishments removable when possible and follow the care instructions for both fabric and felt. Test cleaning on an offcut first. Wooden bases should be smooth and fully dry before decoration, with mounting hardware selected for the complete finished weight.
If you want to pair floral details with practical organization, explore our upcycled storage ideas. For a different approach to decorative surfaces, our jar painting ideas offer another way to introduce a coordinated color palette.
1. Felt Water Lily Display Mat
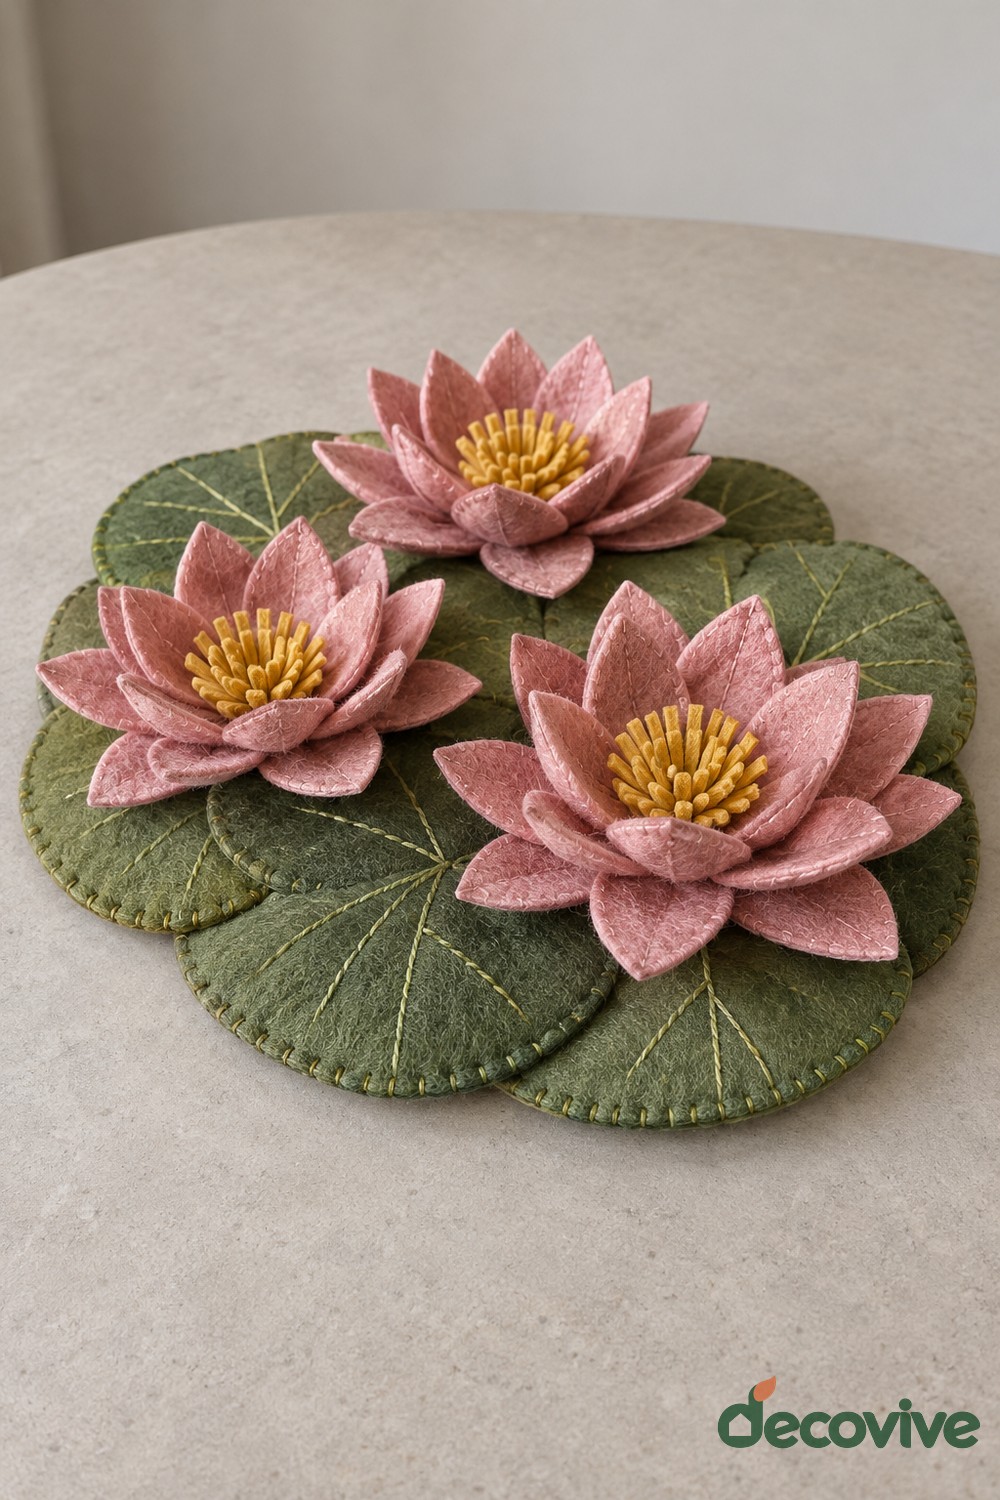
Pink felt water lilies sit on a cluster of broad green pads, creating a low decoration with a pondlike outline. The pointed petals rise in several layers around tightly grouped yellow centers, while stitched veins give the pads definition. This design works particularly well on a side table where the complete leaf arrangement remains visible.
Start with a sturdy backing cut to follow the overlapping pads, then sew the leaves together before adding flowers. Build each blossom separately and secure its base through the backing. Keep the raised petals away from cups and dishes: this is a decorative mat rather than a heat resistant trivet. A restrained pink palette makes the layered construction easier to appreciate.
2. Arched Felt Bleeding Heart Sculpture
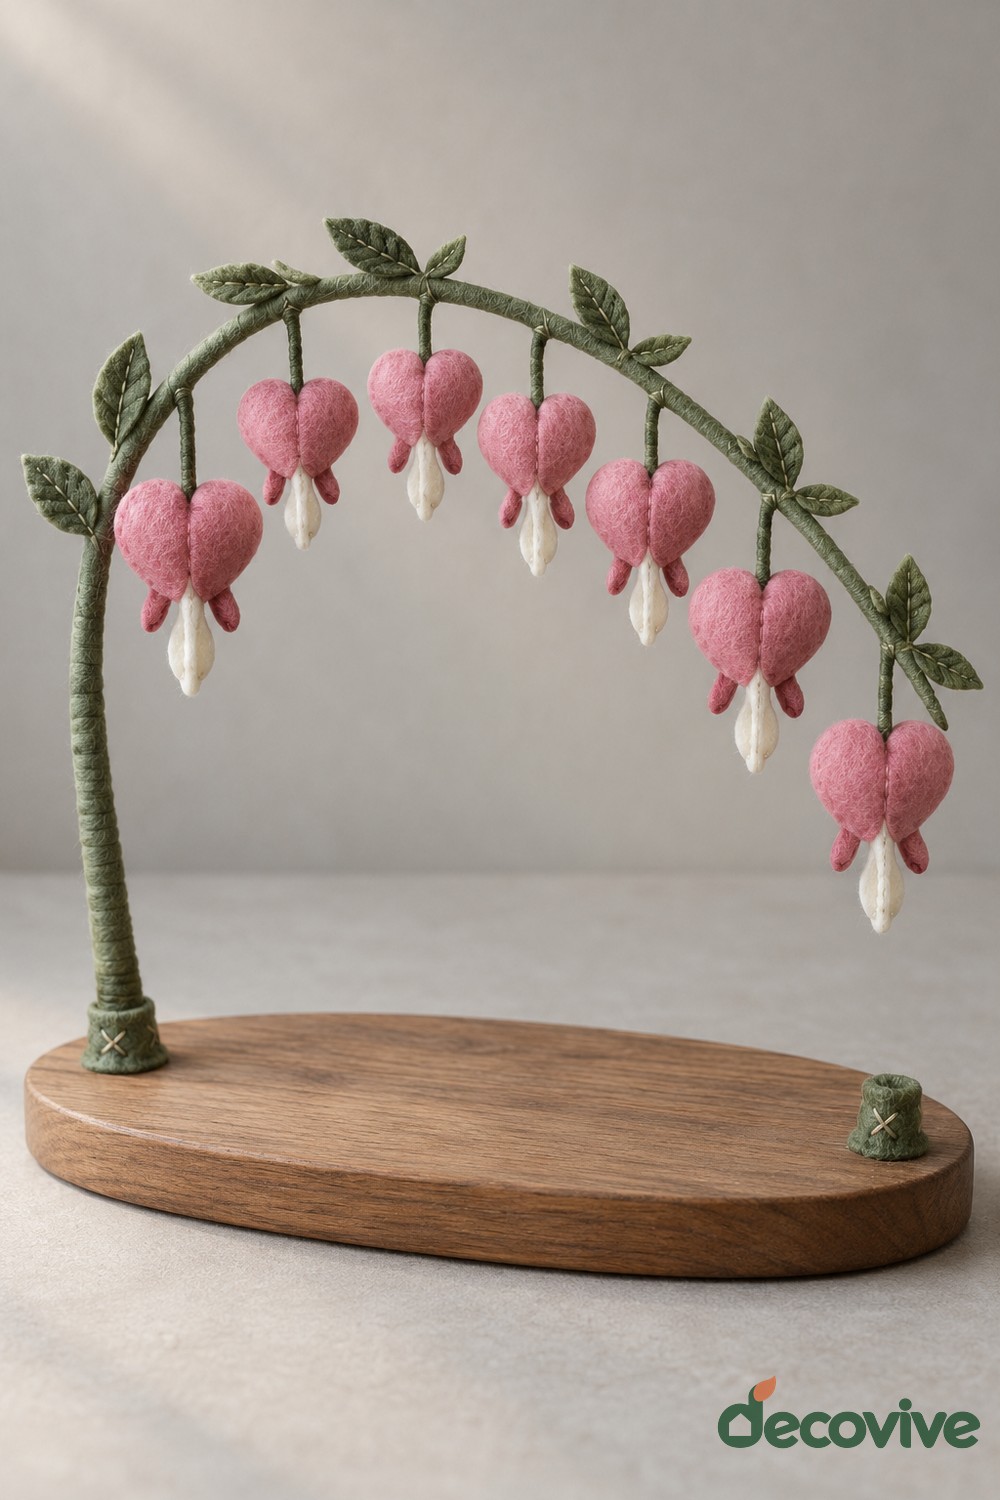
A curved green stem carries pink heart shaped blossoms with small pale drops beneath them. The arch rises from one end of an oval wooden base and returns toward the other, making the decoration feel balanced without a vase. Small leaves along the curve provide rhythm between the hanging blooms.
Shape the supporting framework before covering it with felt or fabric, and anchor both ends securely into the wooden base. Sew each heart around a little filling and attach its hanging loop to the covered arch. Do not rely on the felt covering to carry the structure. Keep the flowers lightweight and leave a clear gap above the base so their silhouettes stay distinct.
3. Cream and Peach Felt Calla Lily Arrangement
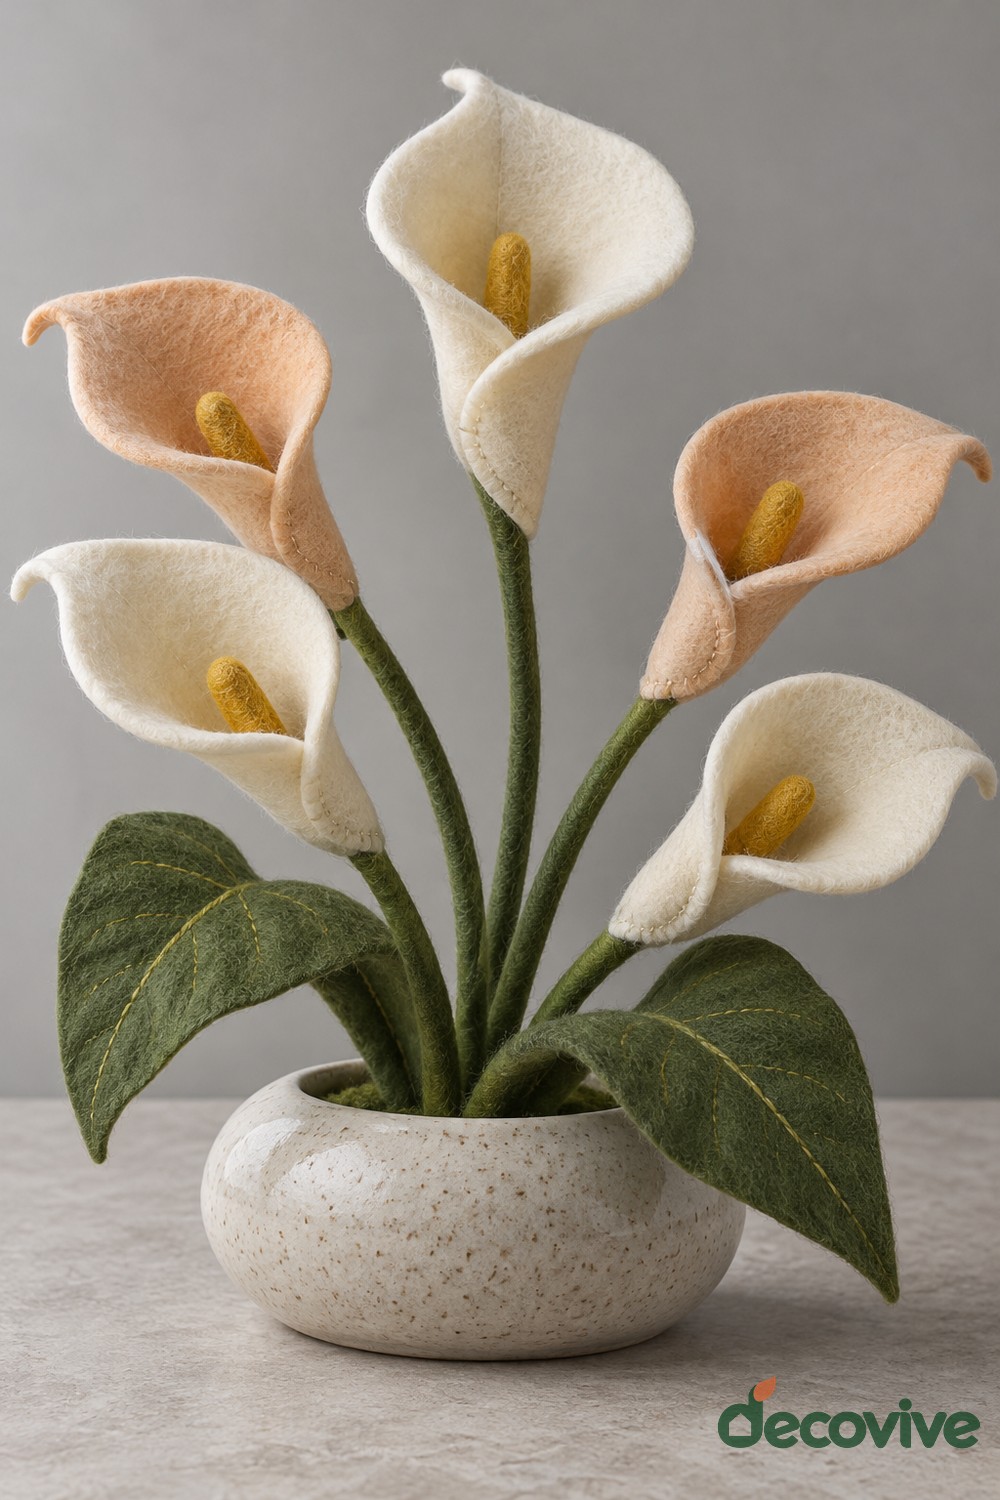
Cream and pale peach calla lilies create a simple sculptural arrangement in a shallow speckled bowl. Each bloom is shaped from a broad felt piece curled around a yellow center. Upright green stems and a few substantial leaves give the grouping height without hiding the bowl. The limited palette suits a quiet shelf or console.
Try one bloom first to check how your felt holds a curved edge. Secure the overlapping lower section around a covered support, then conceal the joint with a green base. Anchor the stems inside the bowl with a stable insert rather than balancing them loosely. Cover exposed support ends and arrange the leaves below the flowers so the individual curls remain visible.
4. Hydrangea Heart Wreath
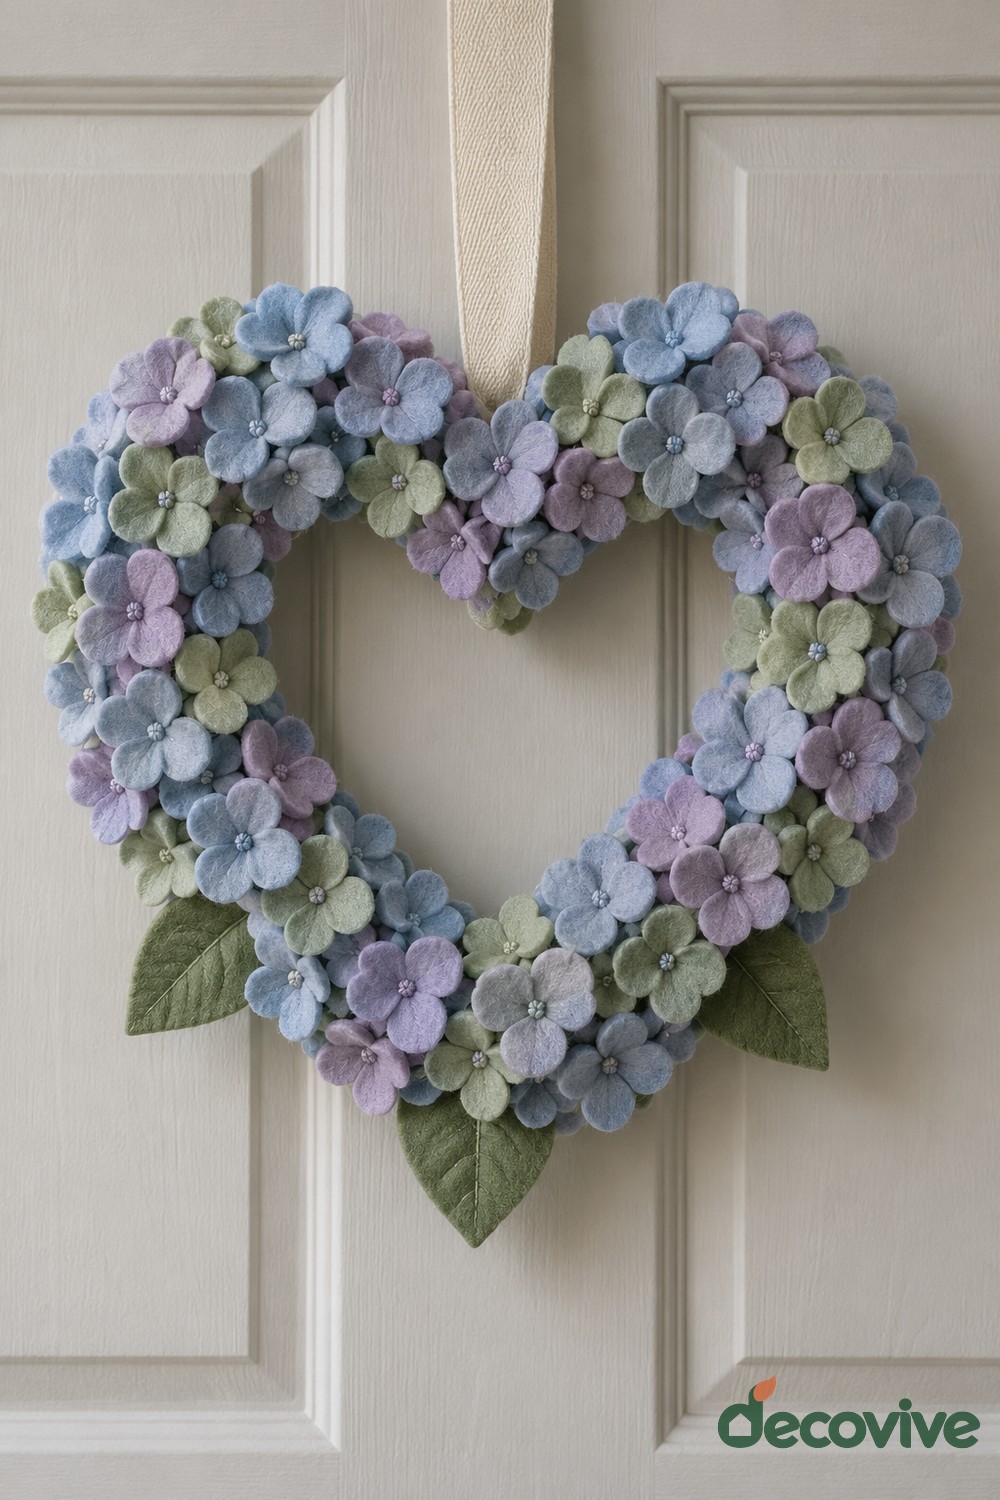
Blue, lilac, and pale green clusters cover a heart shaped wreath with a soft, full outline. The flowers are made from many small rounded petal units instead of a few oversized blooms. A cream hanging ribbon and several green leaves complete the design, allowing the empty center to preserve the heart shape.
Use a lightweight heart form and establish the inner and outer edges before filling the surface. Attach small flower clusters to a backing strip or wrap, then secure that layer around the form. Avoid crowding the inner opening, which can turn the heart into an indistinct oval. Fix the ribbon to the supporting form rather than only to the petals, and hang the wreath where a closing door will not crush it.
5. Felt Anemones in a Wooden Spool Vase
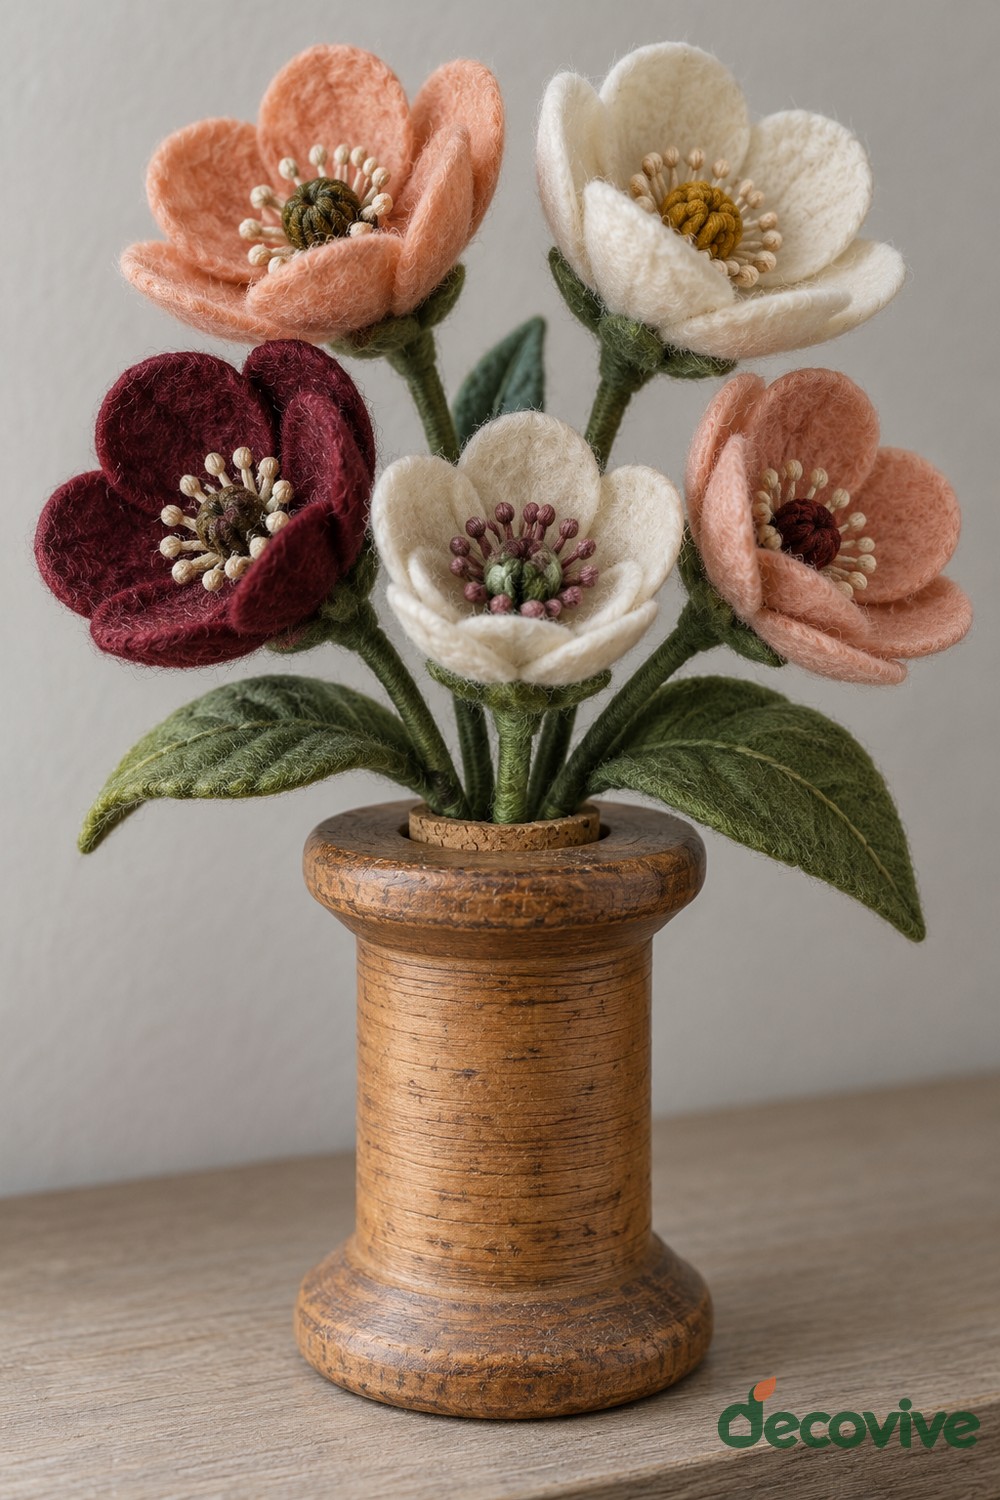
Peach, cream, and burgundy blooms rise from a wooden spool shaped holder. Their broad cupped petals surround textured centers, while green leaves spread beneath the flower heads. The warm wood and darker bloom create a stronger contrast than an all pastel bouquet, making this a useful accent for a bookshelf.
Layer individually cut petals around a stitched center and add a green calyx beneath each flower to cover the joins. A hidden stem insert can help keep the grouping upright, but the wooden holder needs enough weight and width to resist tipping. Check the bouquet from the front before fixing the stems. Vary the flower heights slightly while keeping the central construction consistent across all five blooms.
6. Layered Felt Flower Bowl Mat
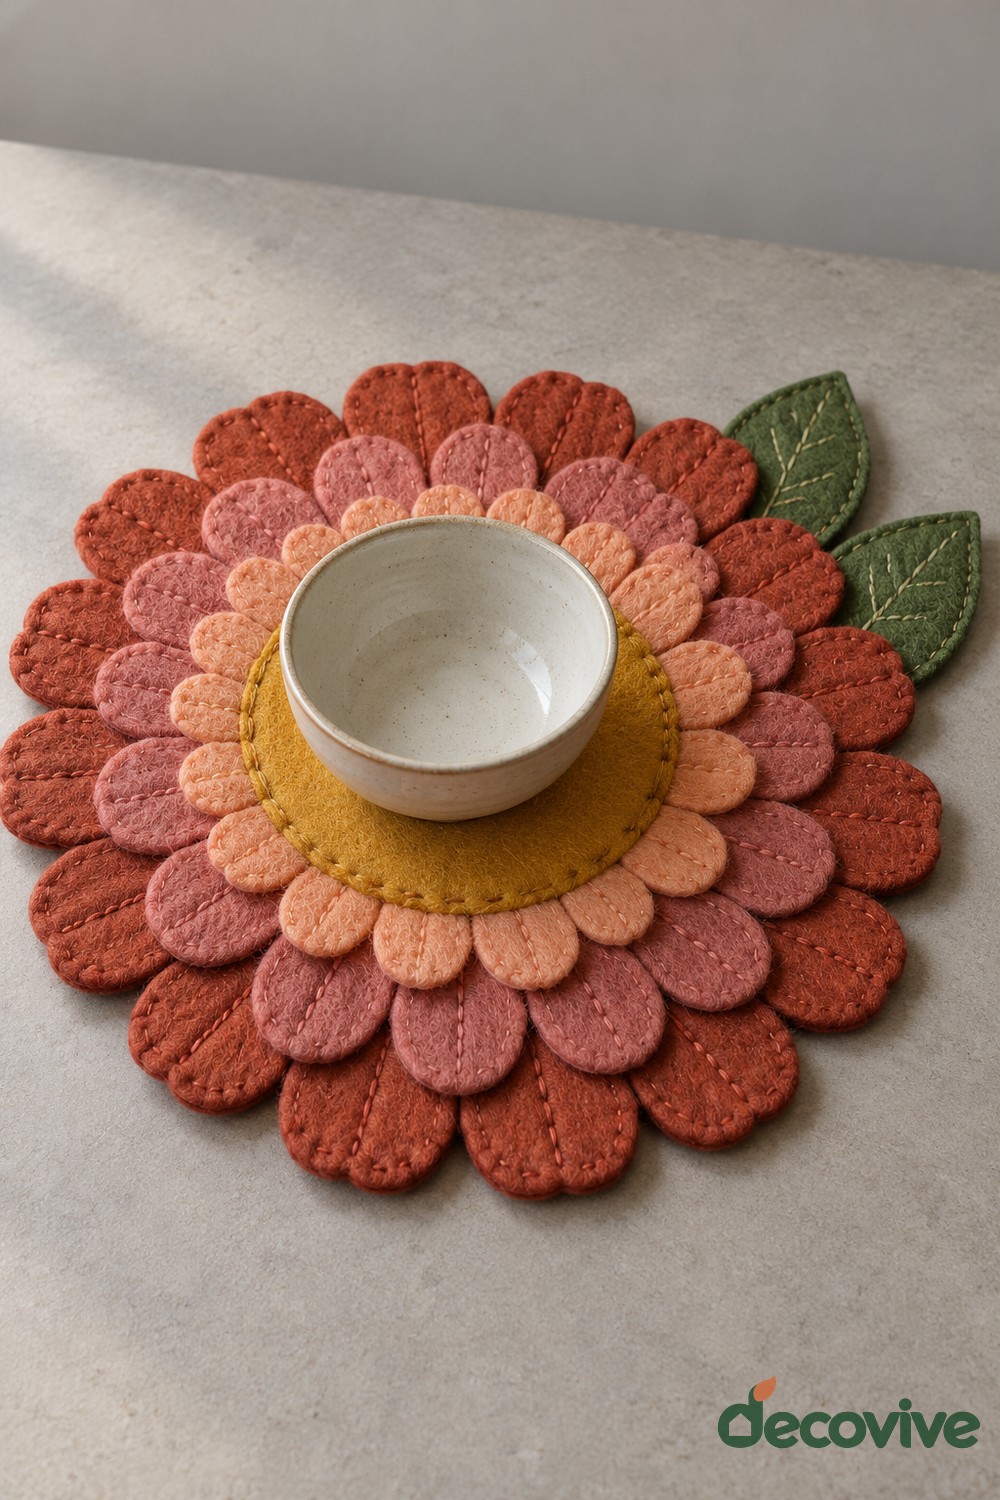
A small ceramic bowl rests in the flat center of a large flower shaped mat. Rings of mustard, peach, and rust petals surround it, with green leaves extending at one side. The design combines a usable central landing area with a decorative outer border, giving a simple tabletop object a more deliberate place.
Measure the bowl base first, then make the central circle large enough for it to sit level. Attach the petal rows outside that circle, working from the outer layer inward so the joins are covered. Add a backing to hold the overall shape. Use the mat beneath a cool, dry bowl or a small display dish. Felt should not be treated as protection for hot cookware, and spills need prompt attention.
7. Pink Felt Foxglove Vase Arrangement
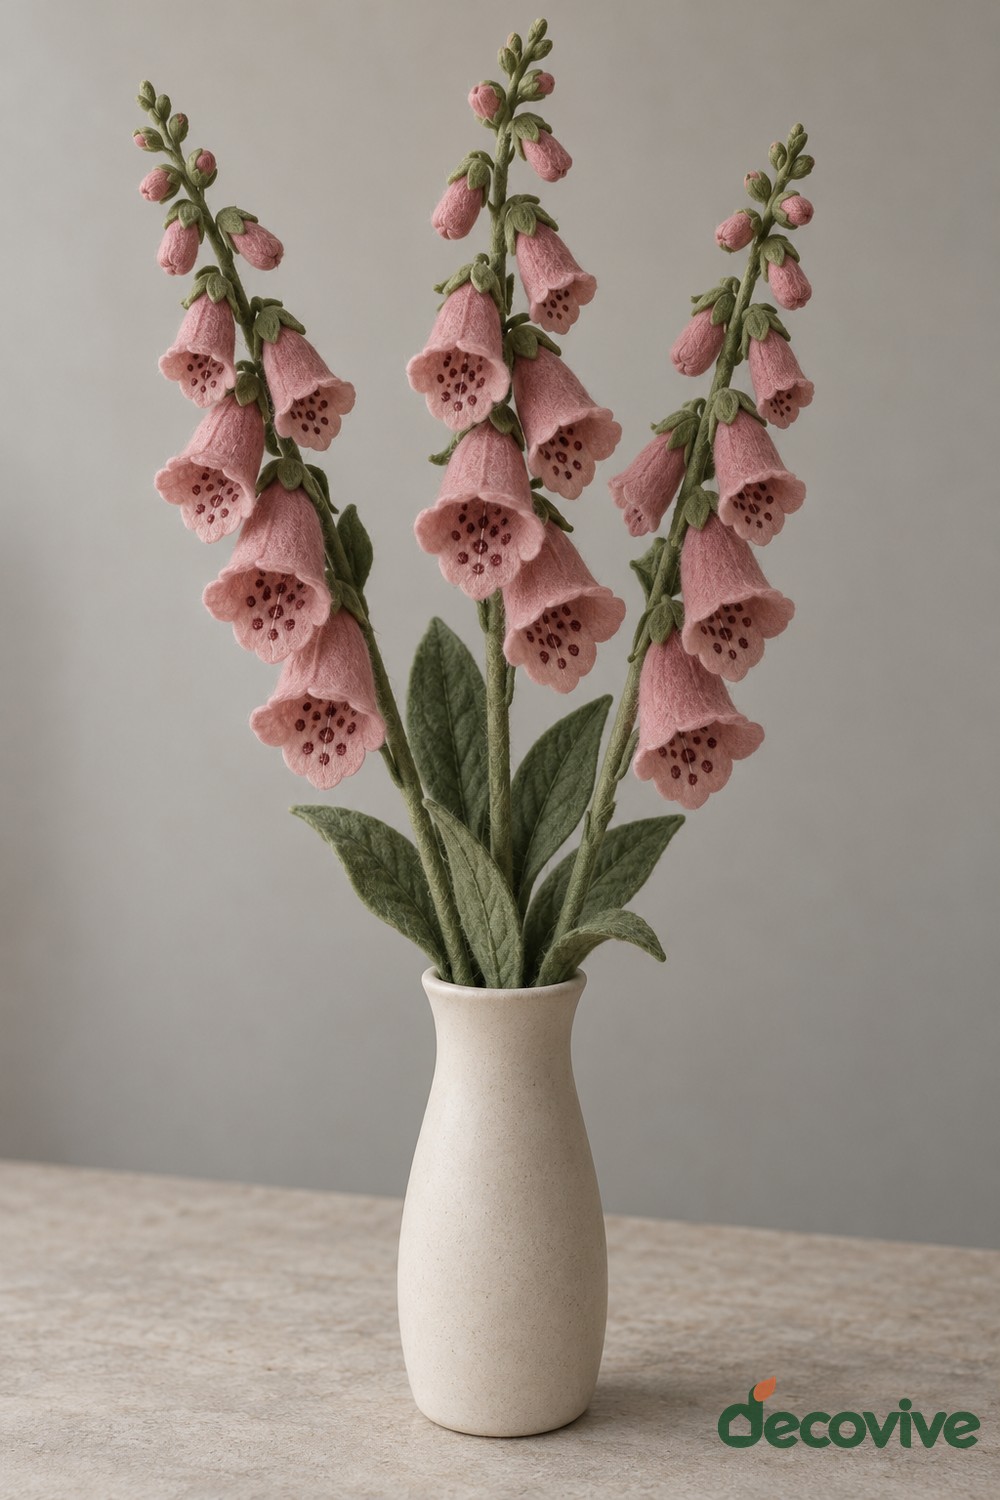
Tall stems of pink bell shaped flowers create a vertical arrangement in a slim white vase. Dark stitched spots inside the bells add depth, and smaller buds near the tops make each stem taper naturally. Green leaves gather at the lower section, keeping the upper flower spikes clear.
Make the bells from small tapered felt pieces and sew the side joins before attaching them along supported stems. Work from the smallest buds at the top toward the larger open flowers below. Place the darker markings before closing each bell so the stitching is manageable. The vase should hold the stems securely without being top heavy. Keep the flower spikes at slightly different heights, and let their openings face a few directions for a less rigid result.
8. Dahlia Curtain Tieback
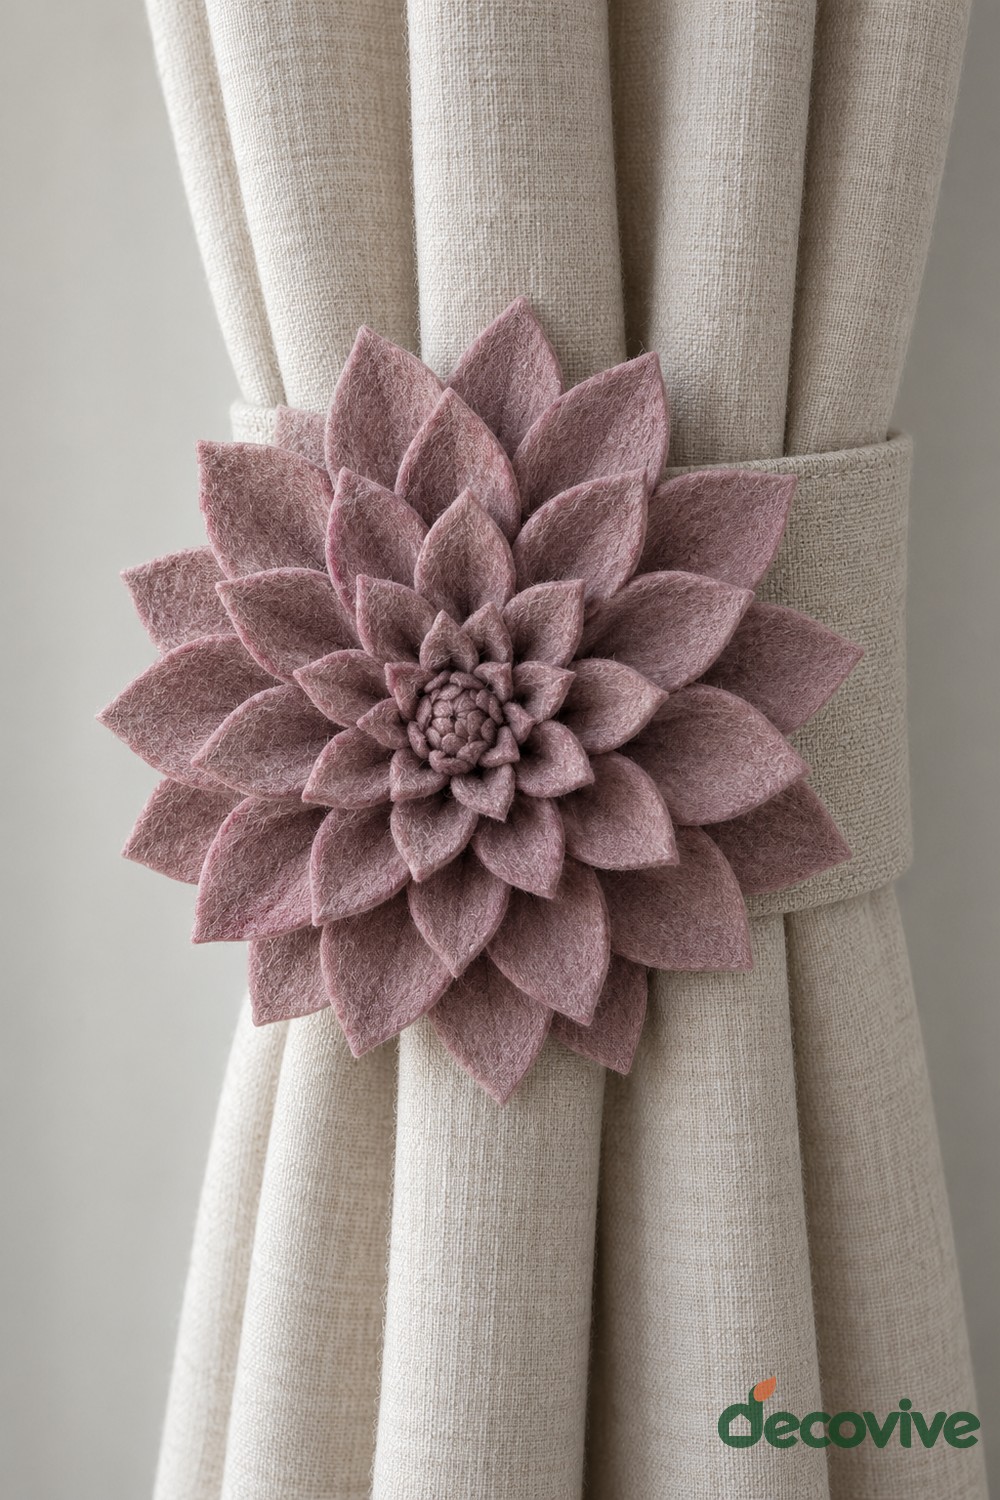
A large dusty mauve dahlia turns a plain curtain band into a floral focal point. Pointed folded petals radiate outward from a tightly packed center, producing a dimensional flower that stands out against neutral linen. The wide matching band helps the bloom feel integrated into the curtain rather than pinned on as an afterthought.
Form the petals individually, attach them in concentric rings to a felt backing, and sew that backing firmly to the band. Fit the band around the gathered curtain before deciding where to place its closure. A removable fastening lets you take the tieback off for cleaning. Keep the flower on the outward face and leave enough room for the curtain to gather comfortably without compressing its petals.
9. Tulip Decorated Wooden Book Stand
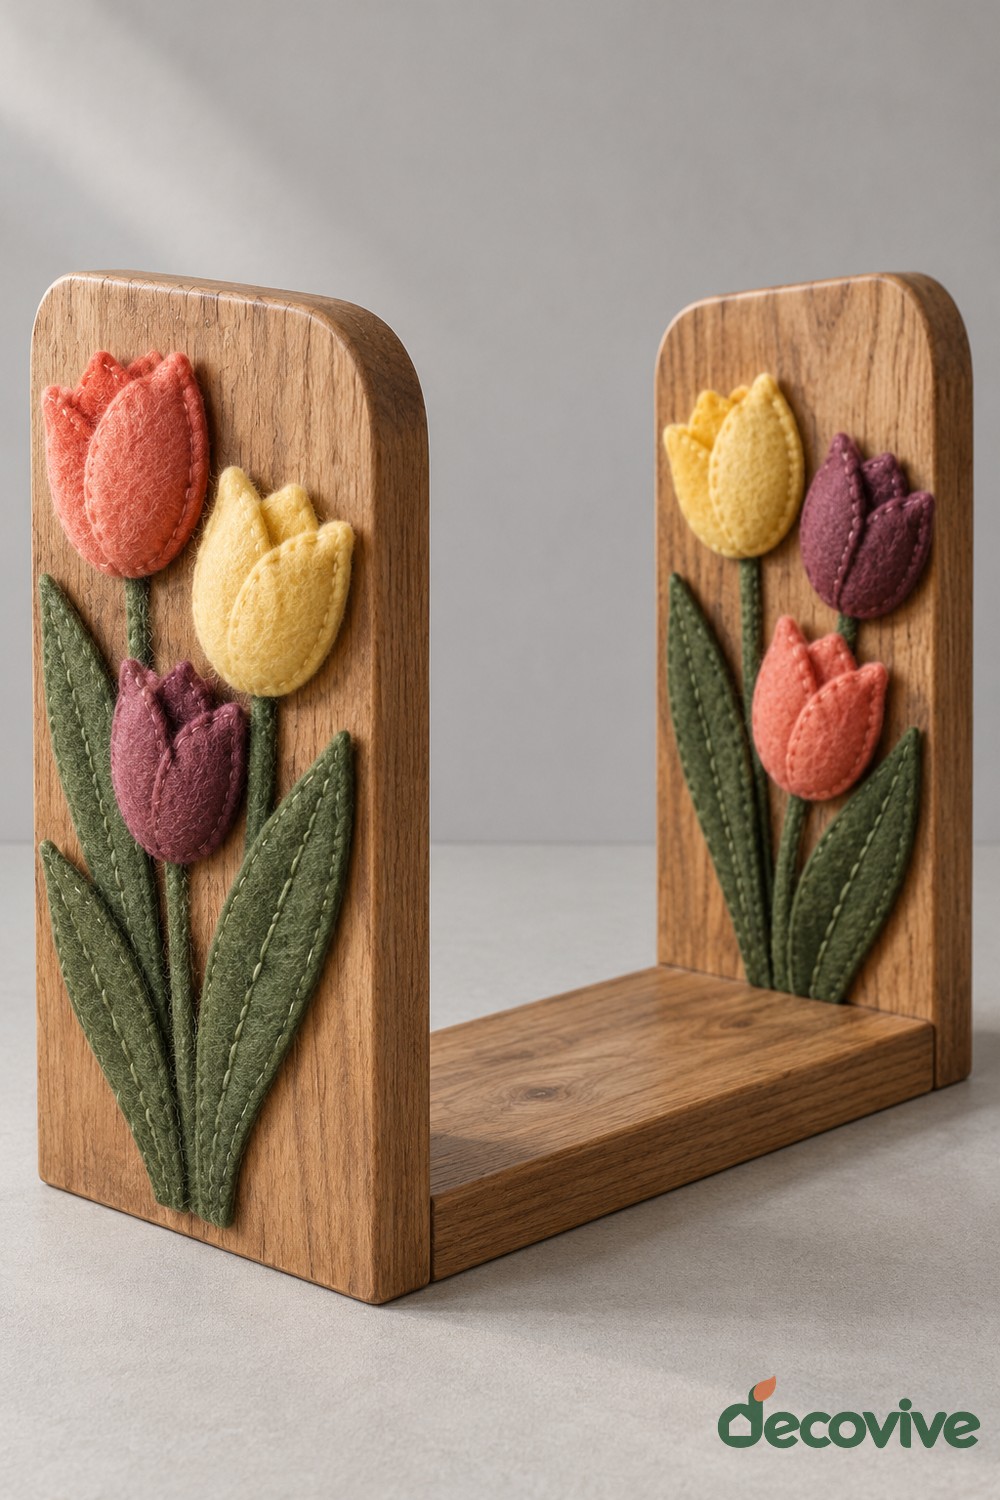
Bright coral, yellow, and plum felt tulips decorate both upright ends of a wooden book stand. Long green leaves follow the height of the boards, keeping the floral motifs neatly contained. The wooden base remains clear, so the flowers add color while leaving the book storage area useful.
Complete and stabilize the wooden stand before applying decoration. Build shallow tulip cups from overlapping felt petals and place the stems and leaves first. Attach the flowers to the outside faces, where book spines will not rub against them. Felt flowers provide no structural support for heavy books, so the joints and base must do that work. Use a small set of repeated colors across both ends to make the pair feel coordinated.
10. Pink Flower Tissue Box Cover
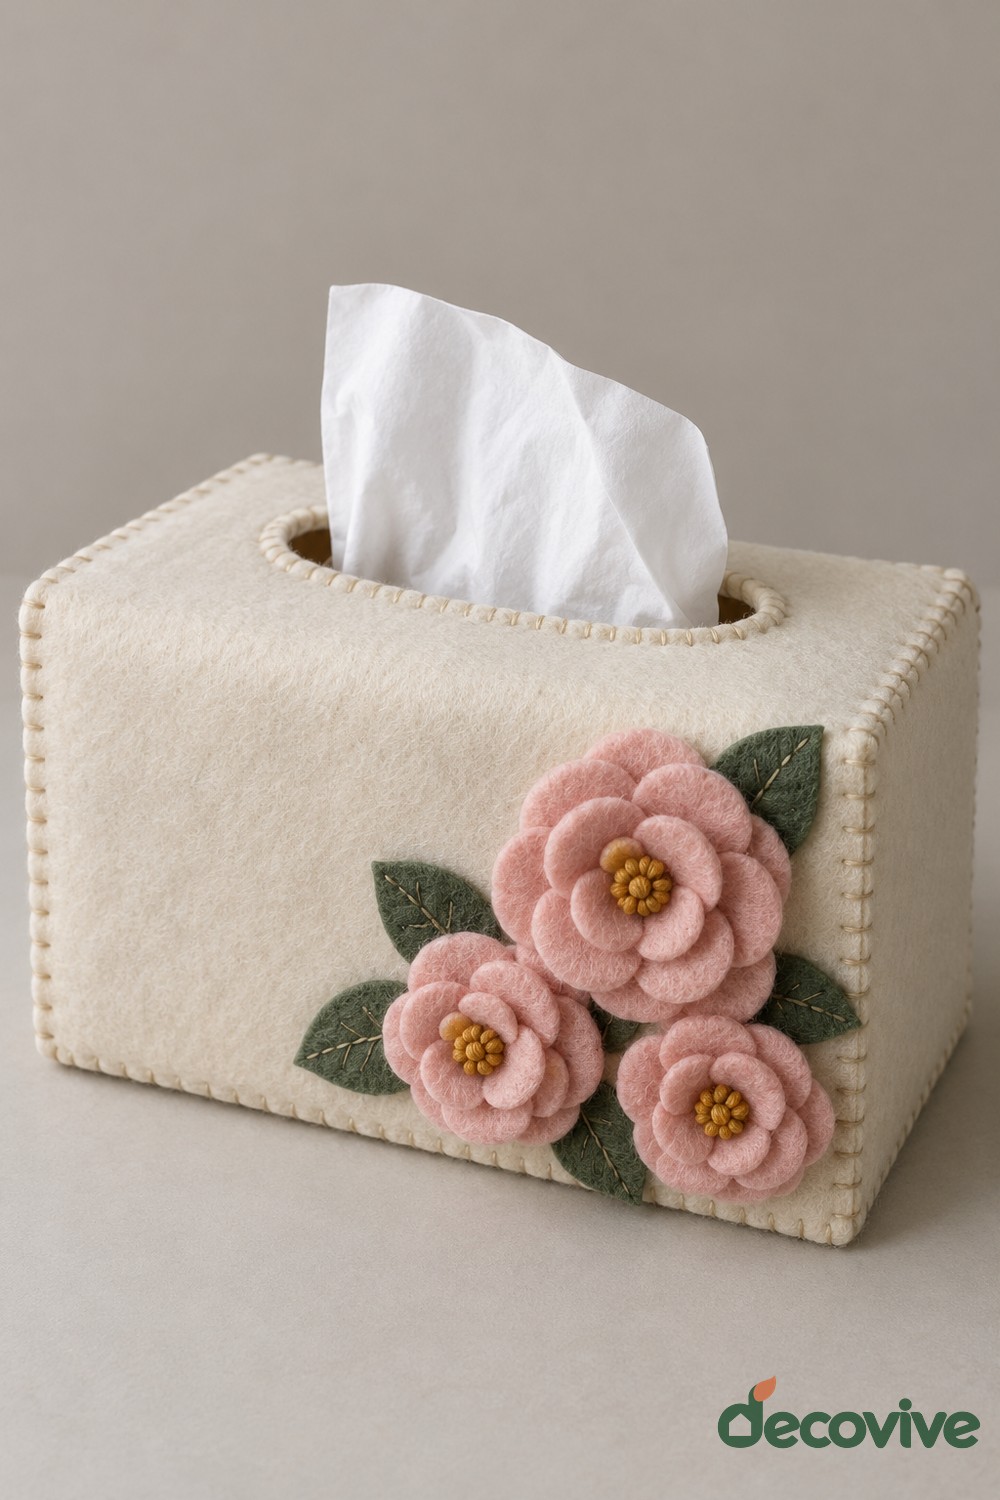
Three pink flowers and dark green leaves soften the lower corner of a cream felt tissue box cover. The stitched box edges give it a clear shape, while the top opening stays unobstructed. Placing the floral group on one corner allows the cover to look decorated without making every surface busy.
Measure the actual tissue box, including clearance for sliding the cover on and off. Sew the panels and reinforce the opening before attaching the flowers. Build the blooms separately and sew them to the front panel with a backing where needed. Keep the opening large enough for tissues to pull freely. A removable cover is easier to replace or clean than flowers glued directly to disposable cardboard, especially when the box needs frequent handling.
11. Daffodil Doorstop Cover
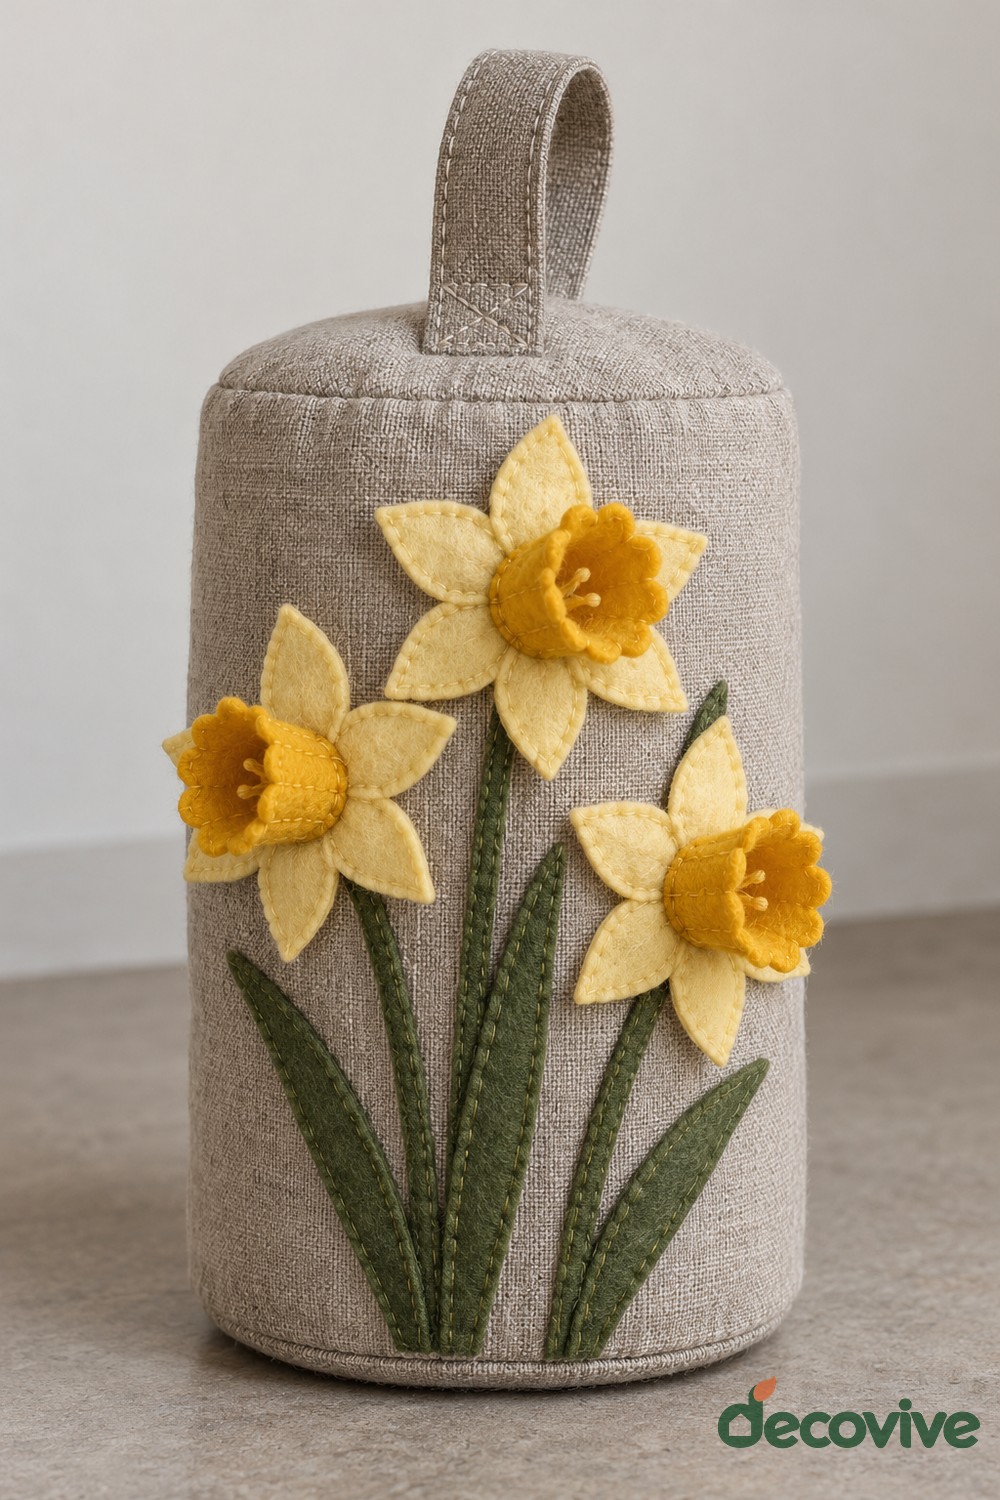
A tall rounded gray cover with a loop handle is decorated with three yellow daffodils. Pale outer petals surround deeper yellow trumpet centers, and long green leaves stretch upward from the bottom edge. The vertical layout suits the cylindrical form and gives an ordinary floor accessory a cheerful finish.
Use a properly weighted inner doorstop, with the filling enclosed in a separate secure bag. Reinforce the loop into the main seams so it can lift the complete weight. Make each trumpet from a small curved strip and sew it over the outer petals. Attach the applique to the cover before assembling the final shape. Position the flowers where they will not scrape against the door, and check the handle stitching periodically.
12. Cherry Blossom Wooden Wall Plaque
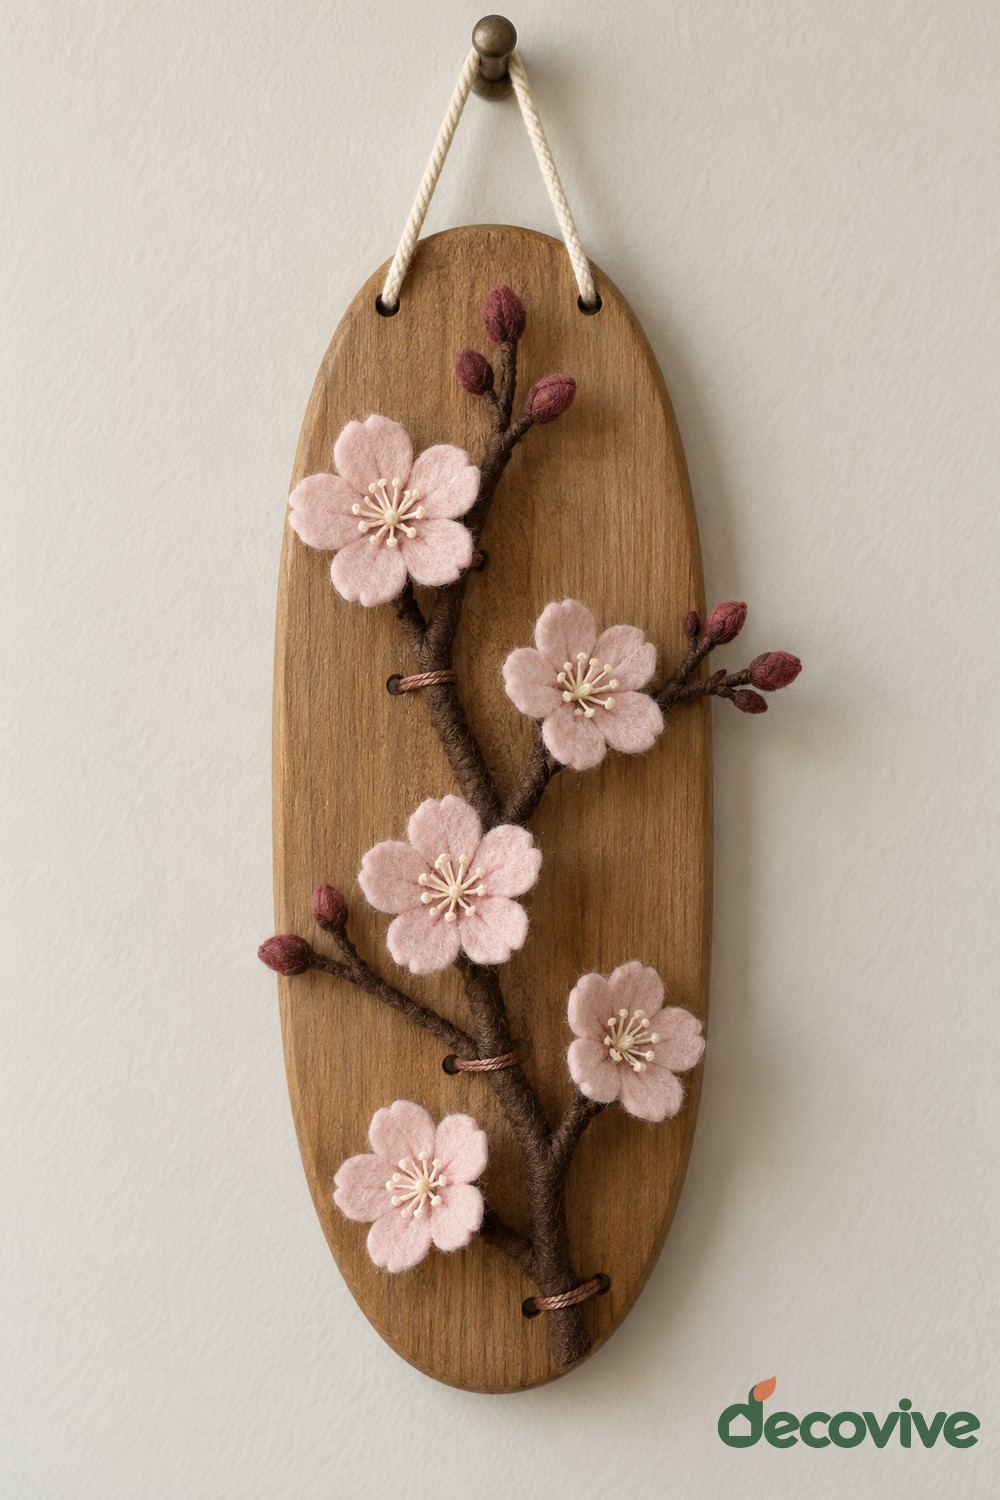
Pale pink cherry blossoms follow a branching dark stem across a narrow oval wooden plaque. Small burgundy buds fill the spaces between the open flowers, producing a balanced arrangement without covering the entire wooden surface. A simple cord through the top provides a visible hanging point.
Sketch the branch placement on paper before attaching anything to the board. Stitch or wrap the branch element, then add the open flowers and small buds in groups. Keep enough bare wood around the edges to preserve the elongated shape. Smooth the drilled holes so they do not abrade the cord, and use a wall fixing appropriate for the plaque. This narrow design suits a small entryway wall or the side of a shelving unit.
13. Purple Flower Felt Catchall Bowl
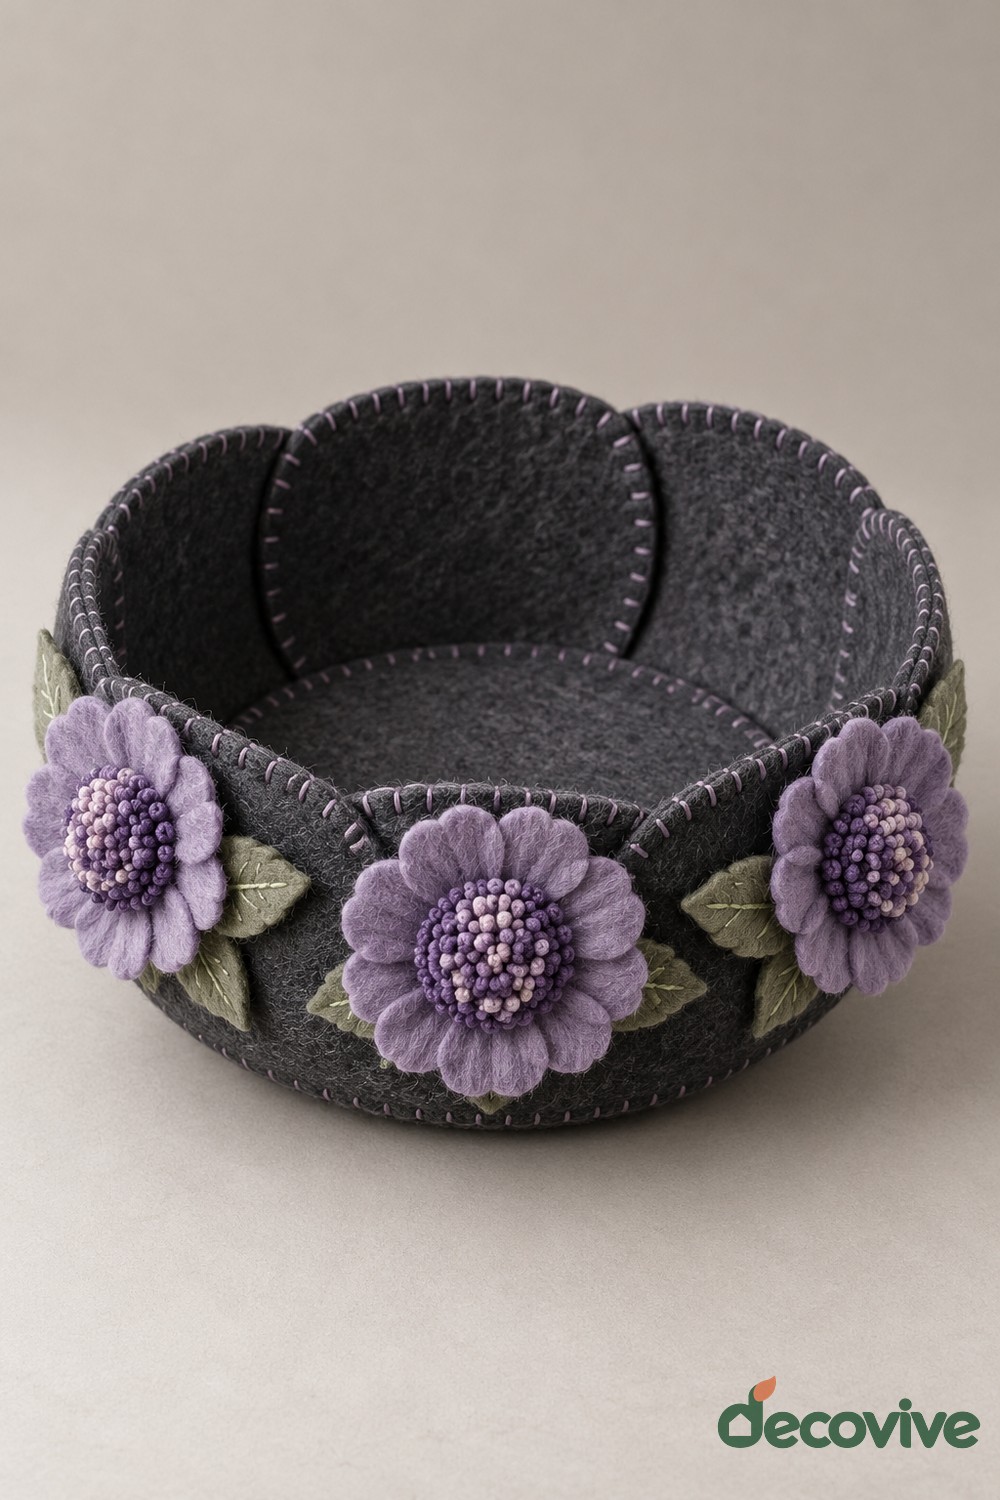
A dark charcoal felt bowl carries lilac flowers around its outer wall. The rounded segmented sides and visible edge stitching give the container a handmade structure, while the flower centers add a dense texture against the plain interior. It is a useful place for light accessories on a dresser or desk.
Cut the bowl sections from felt firm enough to stand upright and join the edges evenly. Attach each flower to a side panel before the bowl is fully assembled, making the stitches easier to reach. Add a flat base insert if the chosen felt slumps. Keep the interior free from loose thread ends that could catch small items. This soft container suits lightweight contents; sharp tools and heavy objects need a more protective organizer.
14. Cornflower Trimmed Wooden Tray
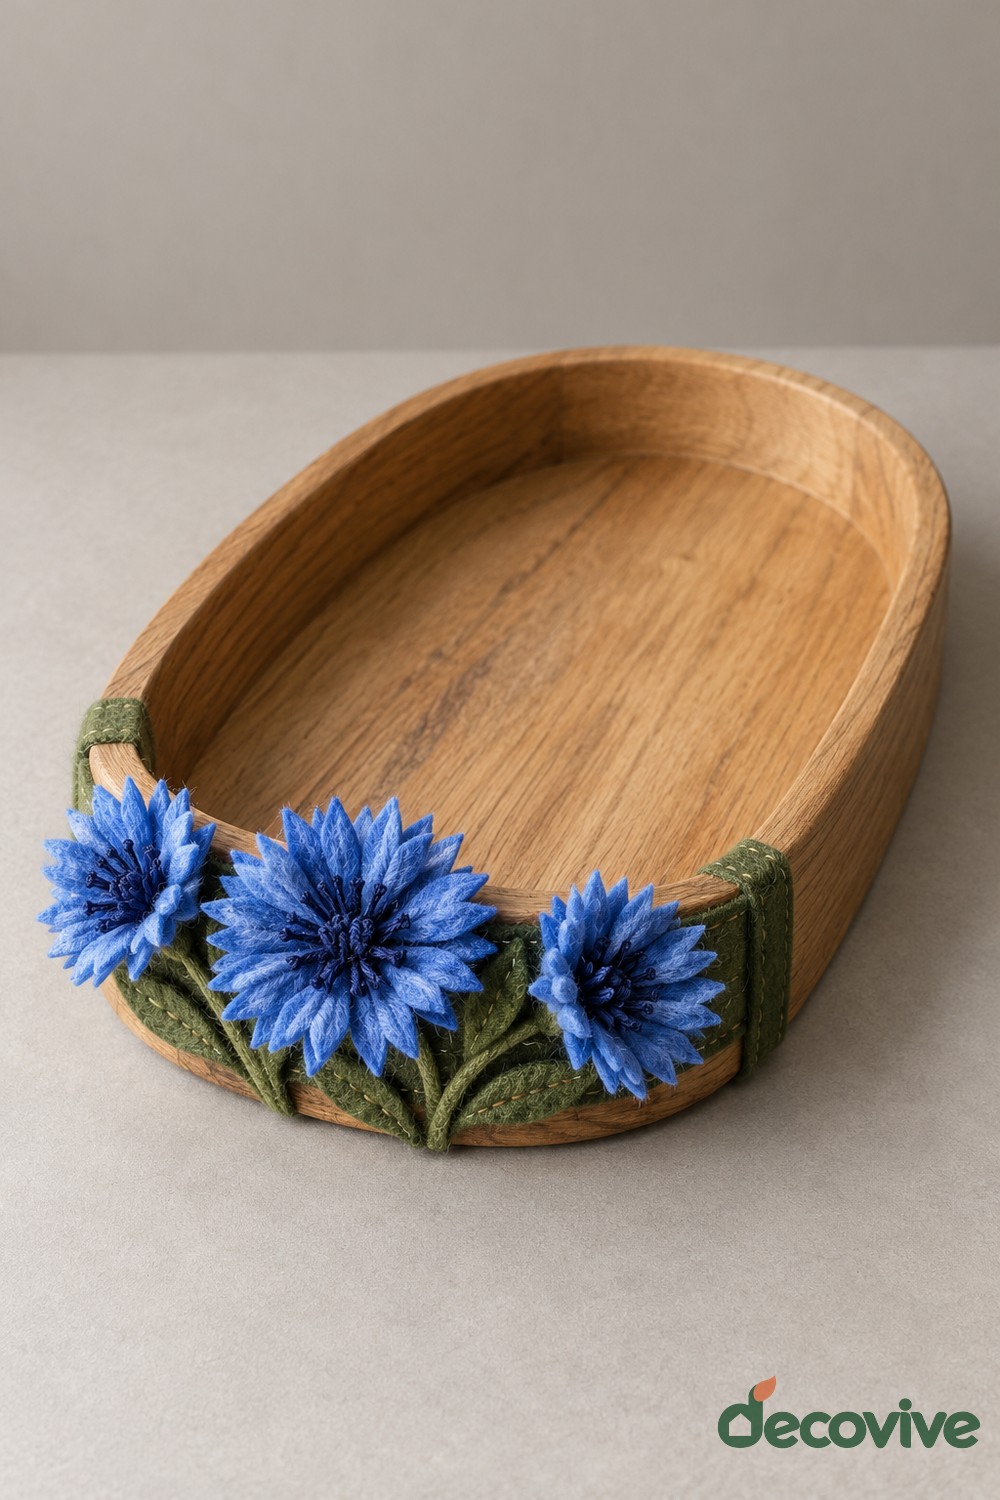
Blue felt cornflowers decorate the near edge of an oval wooden tray. Narrow pointed petals create the spiky flower heads, and green leaves sit along a fitted band around the outside. The clear wooden interior keeps the tray useful while concentrating the decorative detail in one visible area.
Make the flower band as a separate removable piece, fitting it to the tray rim before attaching the blossoms. Secure the petals to small backing circles and keep the centers compact. Leave the gripping points clear so you can lift the tray safely. Use it for dry decorative objects rather than loose food, and remove the felt trim when cleaning the wood. A snug band should stay in place without extending into the tray surface.
15. Ranunculus Felt Wall Cone
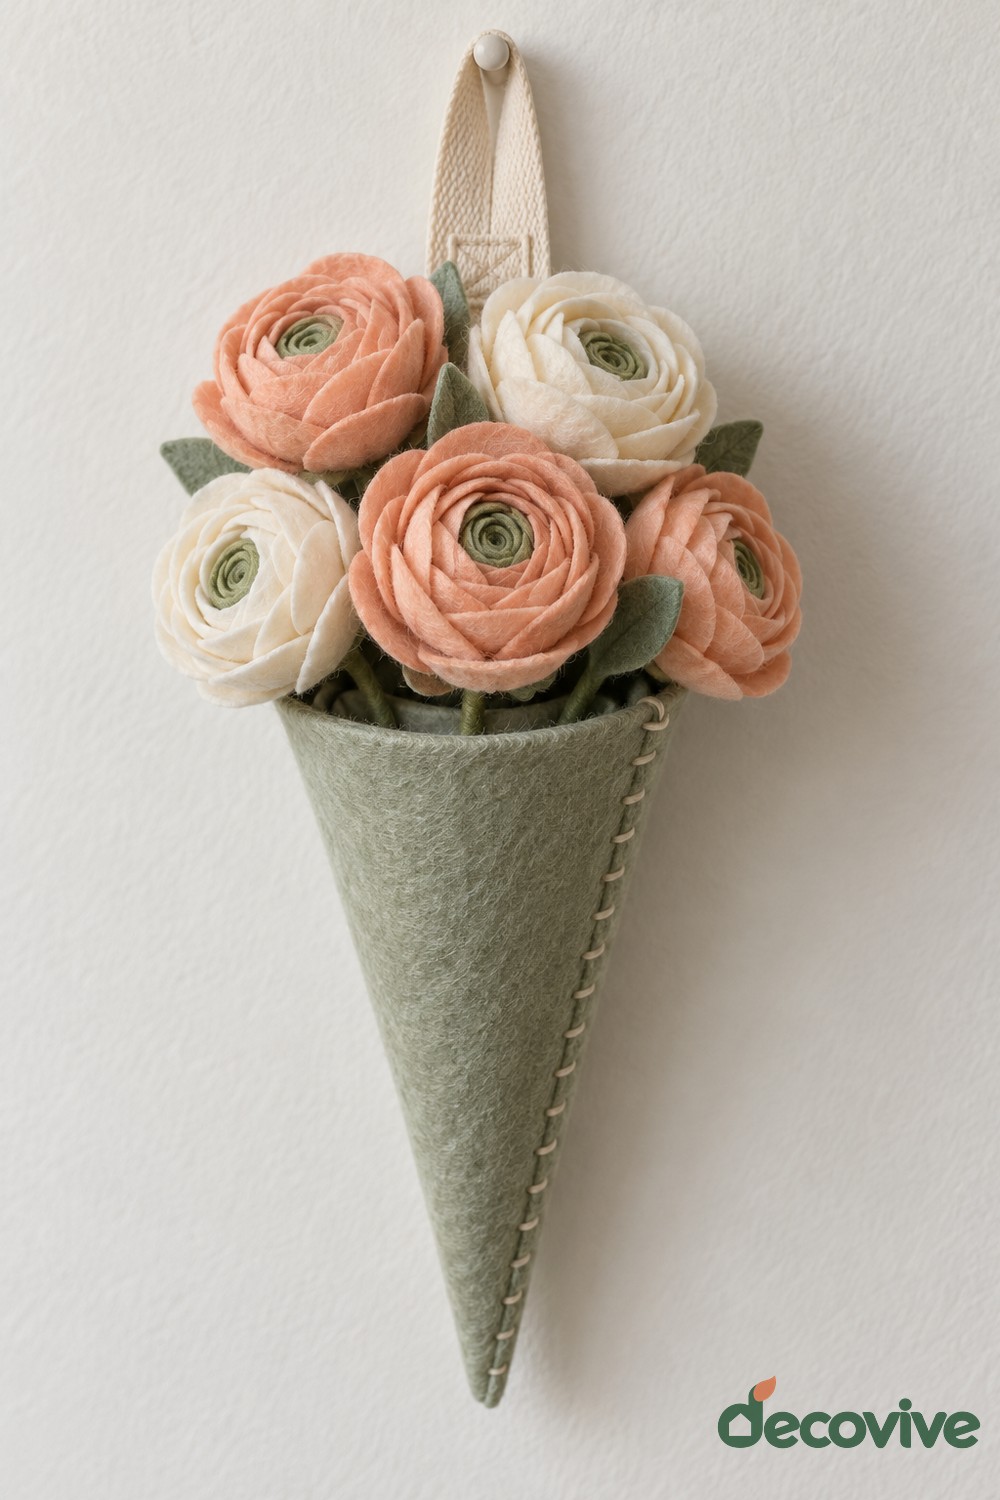
A sage green felt cone holds peach and cream ranunculus style flowers. Many curved petal layers form rounded heads, with green centers peeking through the innermost folds. A cream hanging loop extends from the top, and the narrow cone keeps the bouquet close to the wall.
Sew the cone around a light supporting insert if your felt does not hold its shape. Reinforce the hanging loop into the back seam, then arrange the supported stems inside. Build the flower heads from small inner petals outward, checking their size against the opening. Keep the upper blooms light so the cone does not tilt forward. This design works best on a quiet wall away from doorway traffic, where the layered petals are less likely to be crushed.
16. Peony Remote Control Holder
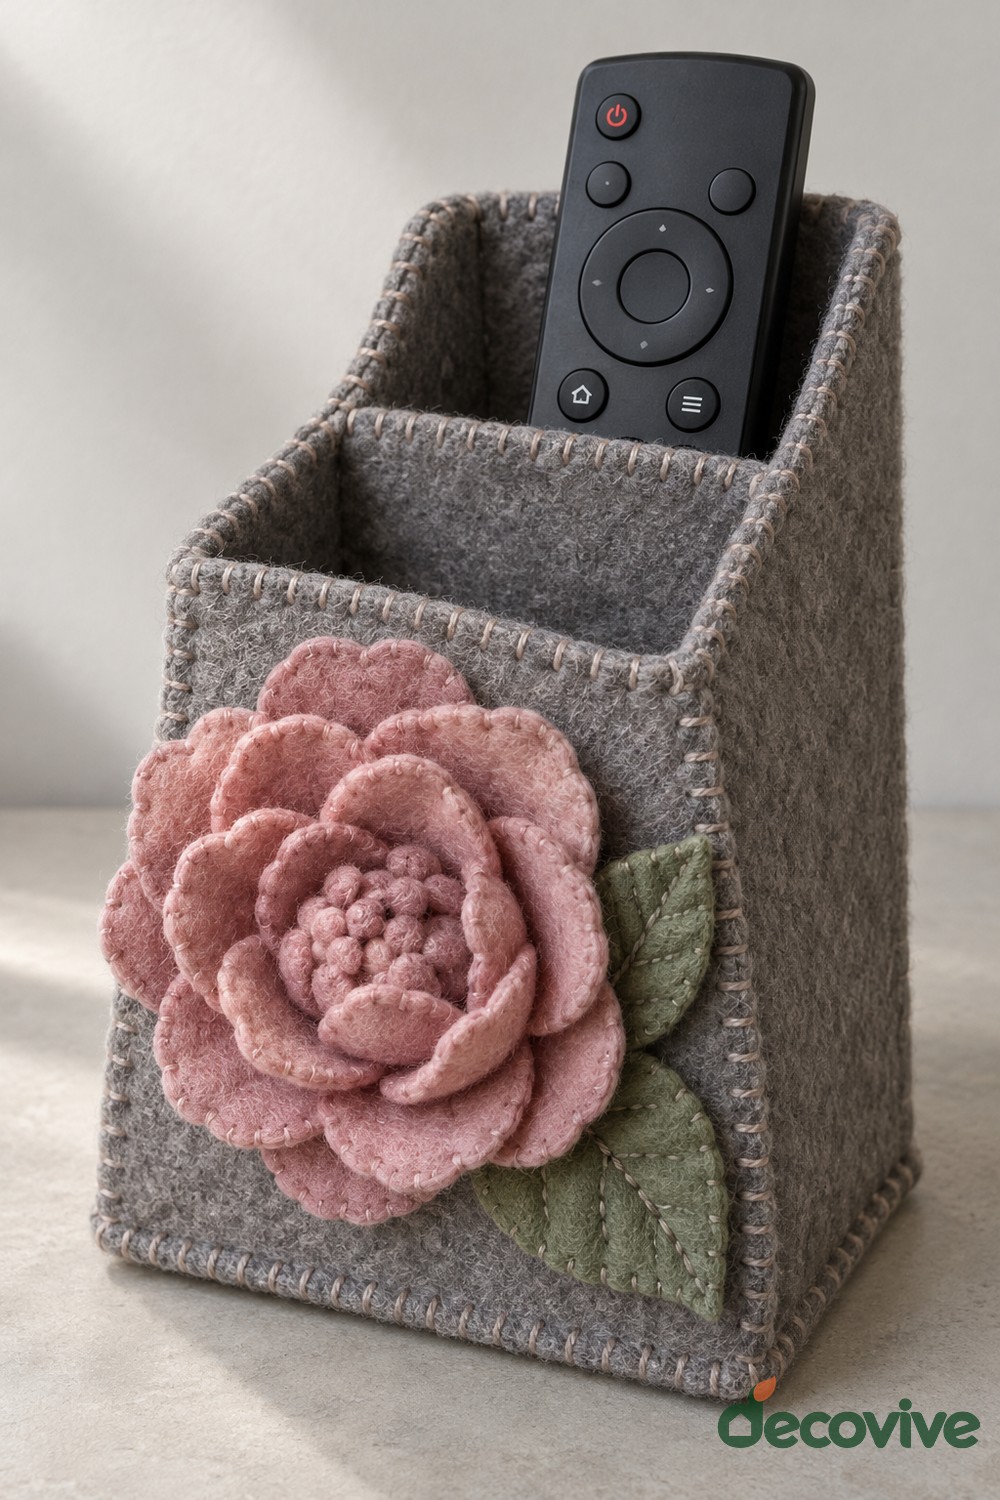
A large dusty pink peony decorates the front of a gray felt remote holder. The open top and divided compartments remain plainly visible, while the green leaves sit beneath the flower rather than crossing into the storage space. The bloom gives a practical table accessory a softer appearance.
Measure your tallest remote and plan the compartment depths before sewing the body. Use firm felt or an enclosed stiffening layer for upright sides. Attach the peony to the front panel before assembly and reinforce the panel behind the flower if necessary. Keep the base wide enough to stand securely with the remote inside. A removable embellishment is helpful for cleaning, and a clear compartment edge makes the controls easy to grasp without brushing the petals.
17. Daisy Border Table Runner
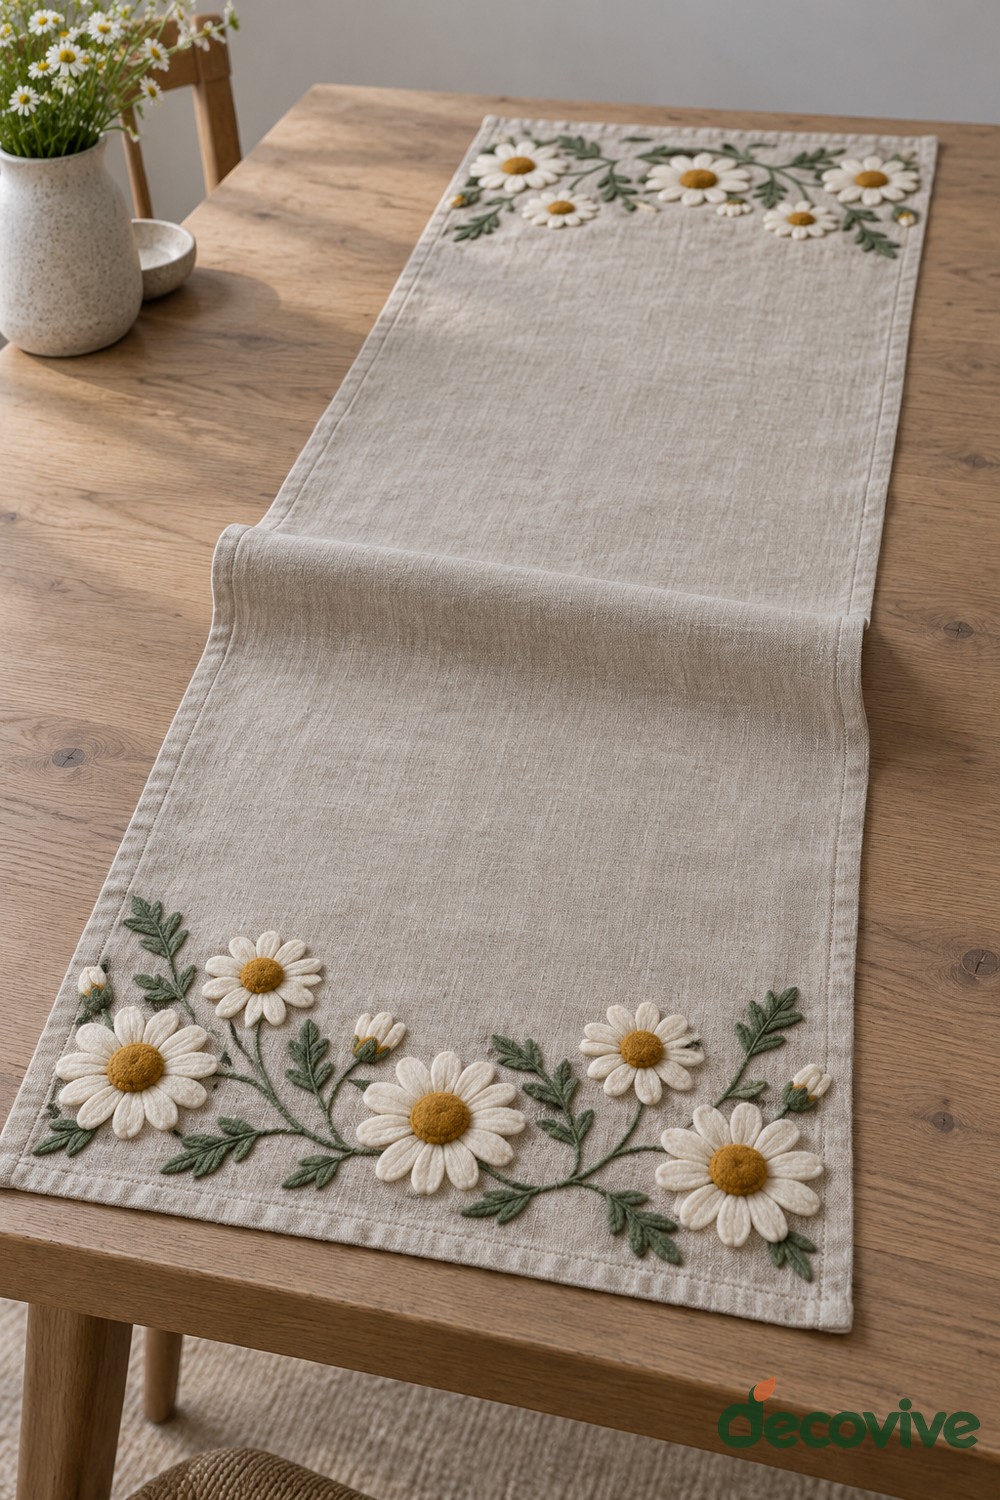
White daisies with mustard centers form floral borders at both ends of a beige table runner. Fine green stems connect the blooms while the long middle section remains plain. That open space gives dishes and tabletop arrangements room, allowing the flowers to frame the table instead of competing with everything on it.
Use the opening daisy method for each flower, scaling the petal shapes to the runner width. Sew the stems and leaves first, then attach the petals and centers. Keep any raised layers within the decorative end sections so plates and glasses sit level. Plan the two borders together before stitching to balance their visual weight. If the runner needs regular washing, choose compatible materials and removable dimensional flowers, or make the entire applique flatter.
18. Floral Hanging Pocket Organizer
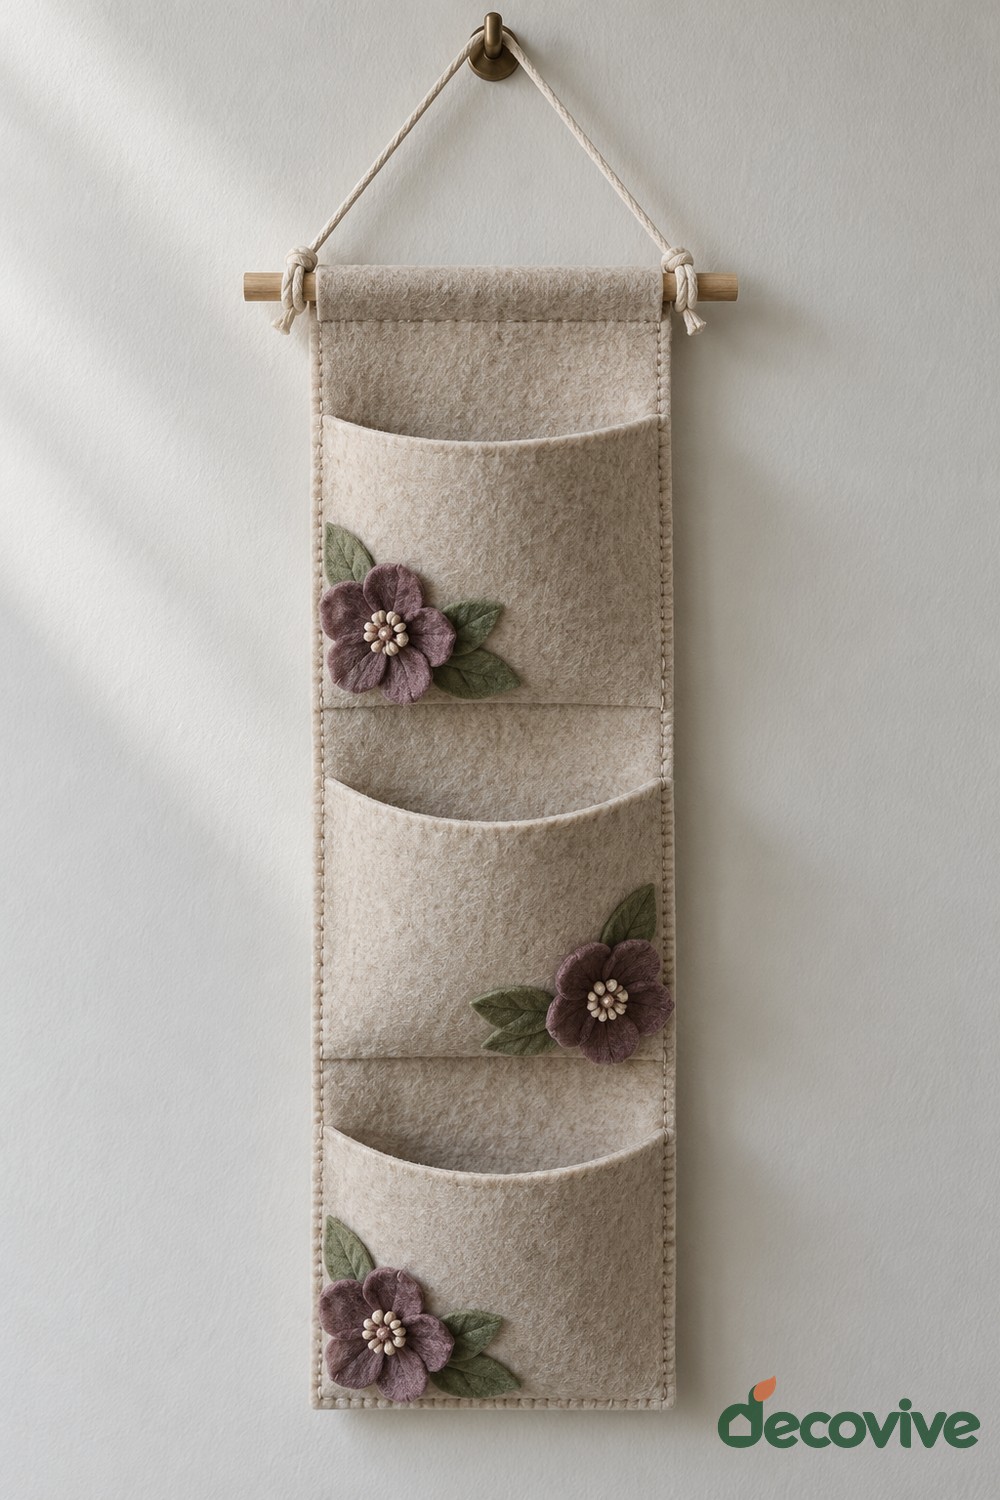
Three beige pockets hang vertically beneath a wooden dowel, with small plum flowers marking the sides. The floral details stay low on the pockets, leaving the upper openings clear. A cord at the dowel ends provides a simple mounting arrangement for a narrow wall or sheltered storage area.
Build the organizer from sturdy fabric or supported felt, and sew the pocket edges securely into the backing. Add the flowers before joining the pockets where access would become awkward. Reinforce the top channel and use a cord and wall fixing suited to the intended contents. Keep storage light, such as notes or small fabric accessories. Avoid filling the pockets until they bulge: excess weight can distort the openings and place strain on the decorative fabric.
19. Morning Glory Key Rack
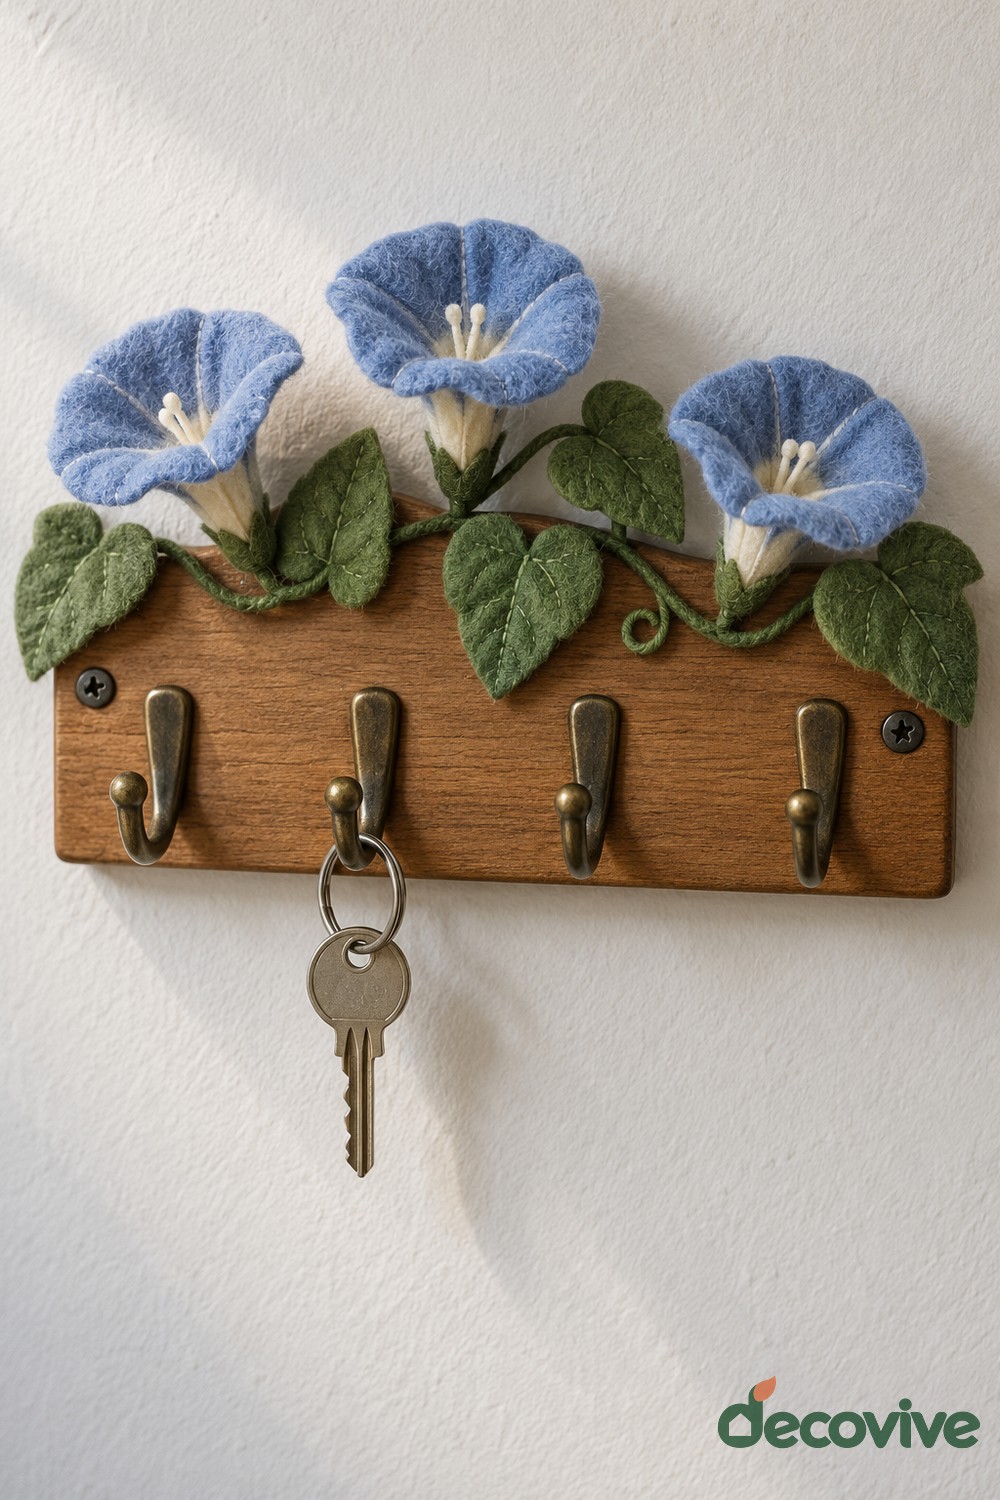
Blue morning glory flowers and curling green vines decorate the upper section of a wooden key rack. Four metal hooks sit beneath the floral group, leaving the keys accessible. The cupped flowers bring height above the board while the vine shapes connect the blooms across its width.
Install the hooks and secure the wooden rack before adding felt decoration. Form the flower cups around a pale center and attach them to a backing along the board top. Keep trailing vines above the hook openings so keys cannot snag them. Mount the rack using hardware rated for the board and contents, rather than hanging it from decorative stems. A shallow flower profile suits a busy hallway, where bags and sleeves may pass close to the wall.
20. Pansy Eyeglass Stand
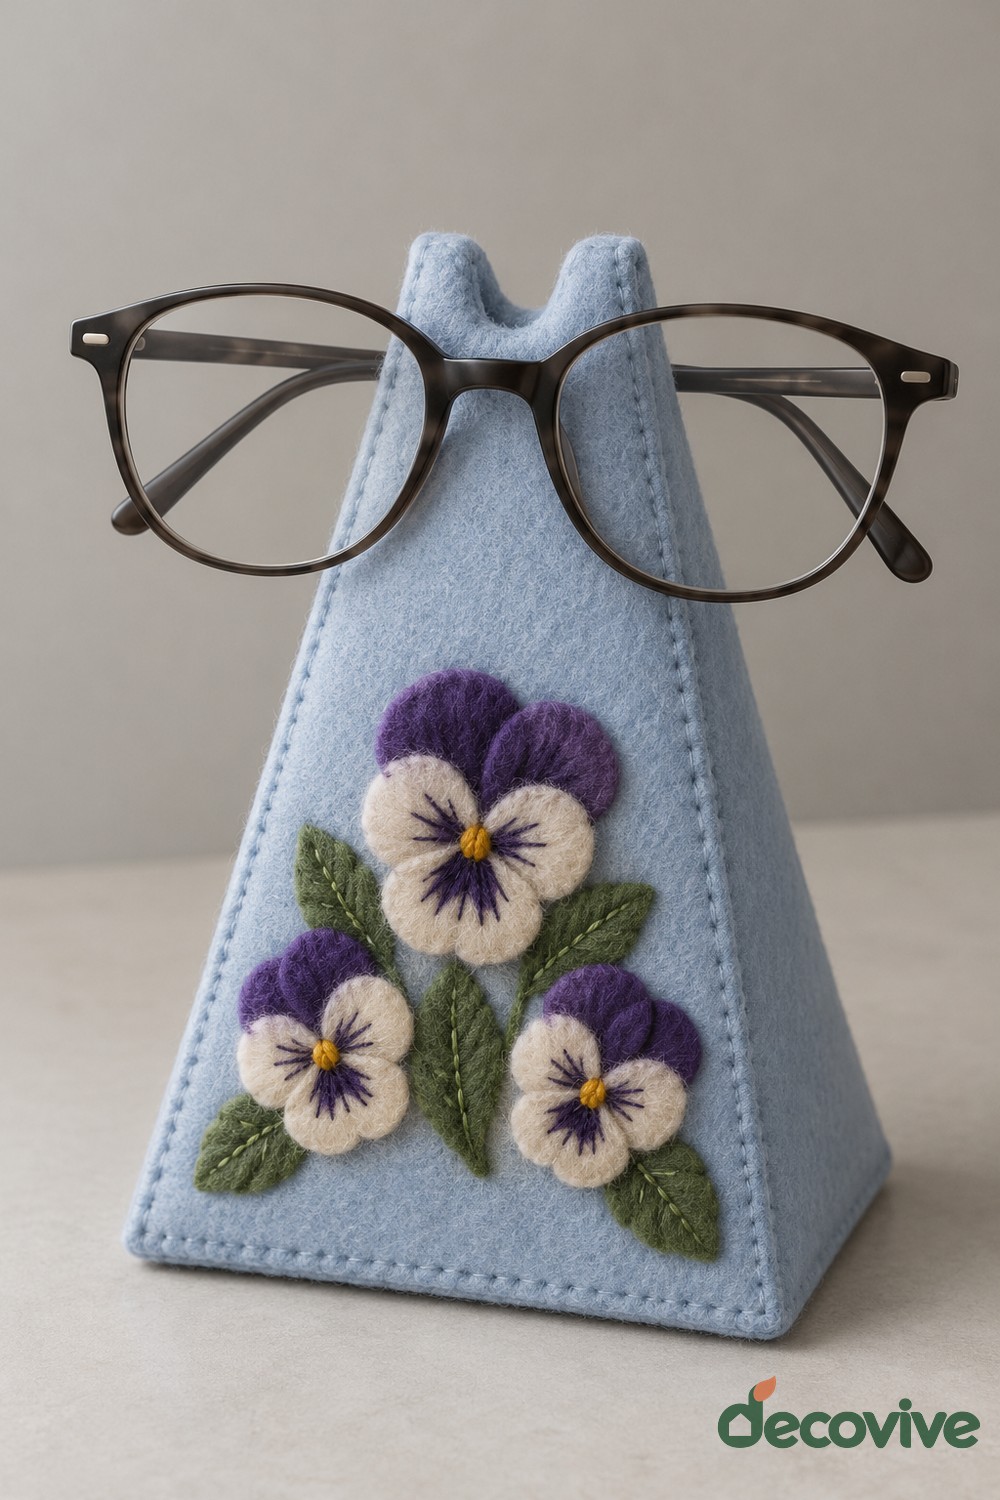
A pale blue triangular felt stand holds glasses at its upper notch. Purple and cream pansies decorate the front face, with stitched lines around their yellow centers and small green leaves below. The compact arrangement leaves the notch visible and turns a bedside accessory into a small floral display.
Use a rigid inner structure with a soft felt covering rather than expecting a single thin felt layer to support the glasses. Shape the upper resting points smoothly and check that the frame sits level without touching the lenses. Apply the pansies below that contact area. Make the base broad enough for stability and keep the seams free of hard glue lumps. Try the stand with your own glasses before fixing the decorative layers permanently.
21. Protea Felt Storage Basket
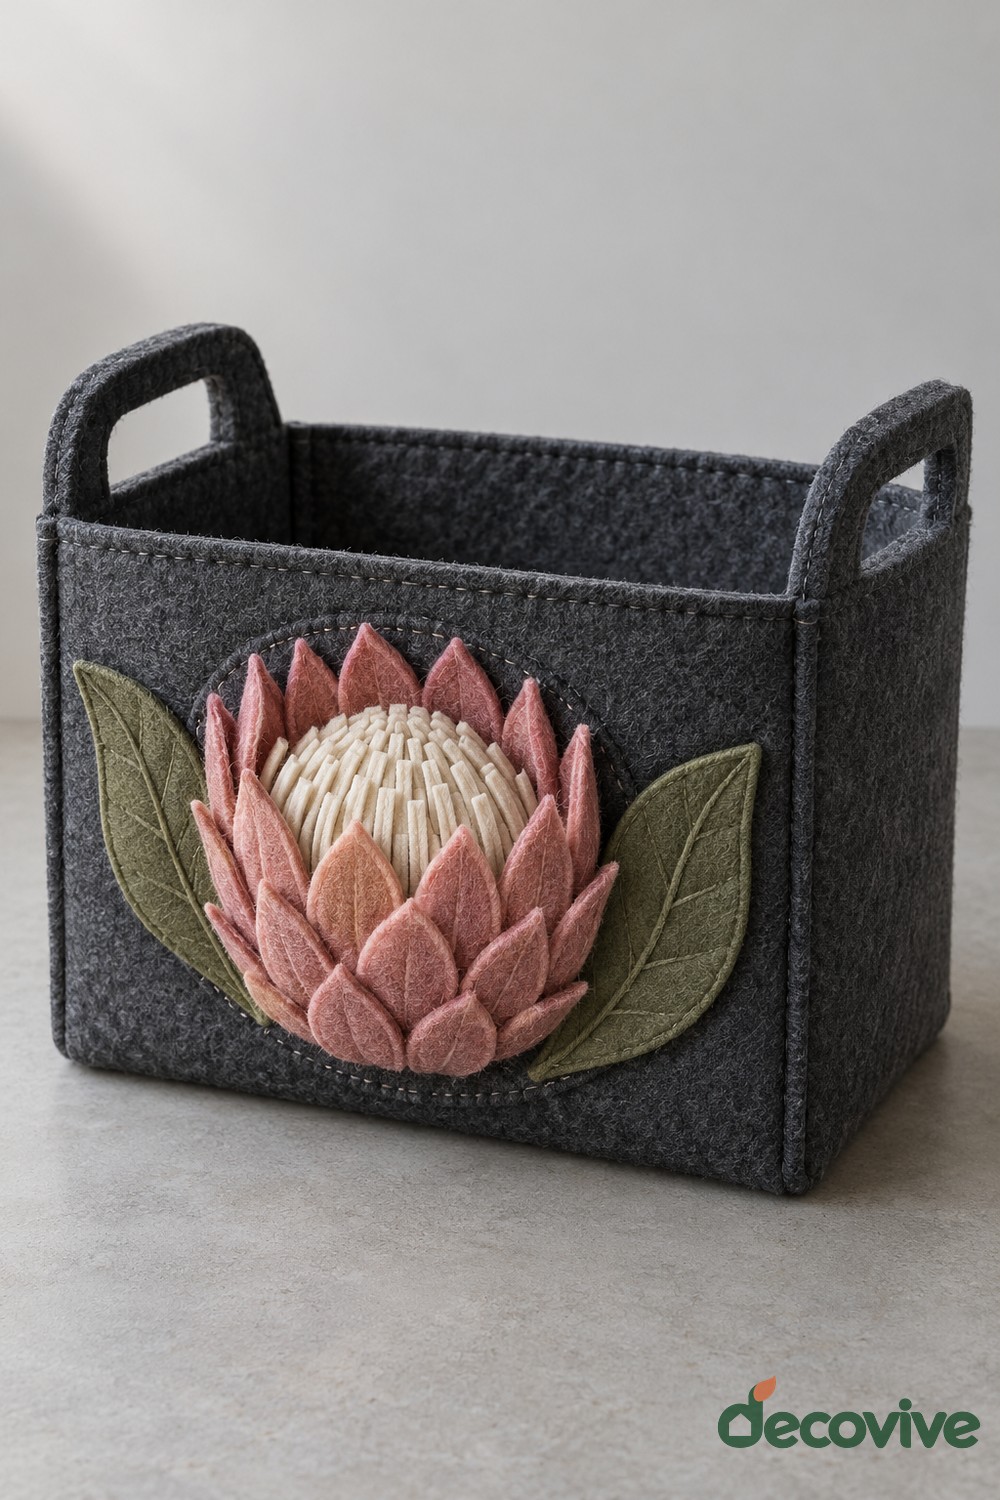
A single large pink protea fills the front of a charcoal rectangular basket. Pointed outer petals surround a pale textured center, and substantial leaves extend to either side. The basket has two integrated handles and a clear open interior, making the flower a strong accent on a useful storage piece.
Construct the basket with firm panels and reinforce the handle openings separately from the floral applique. Build the protea on a backing first, keeping its widest petals within the front panel edges. Sew it securely to the basket without trapping the interior lining. Reserve this design for lightweight textiles or small household accessories unless the basket structure is designed for more. For related container shapes and reused bases, browse our upcycled storage ideas.
22. White Blossom Jar Sleeve
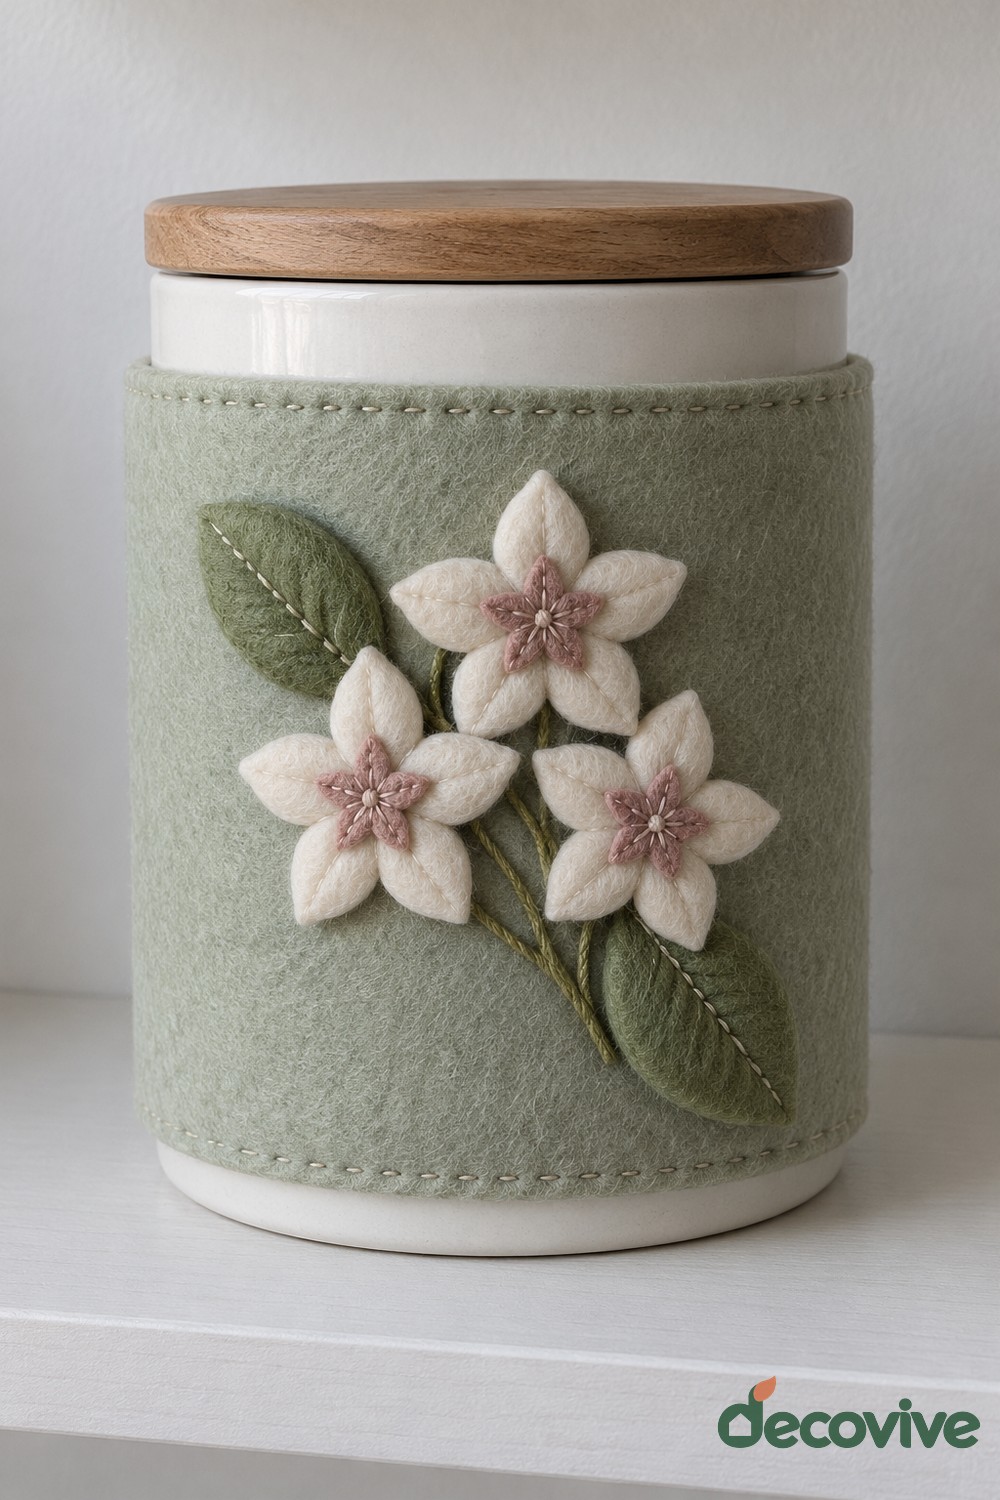
A sage felt sleeve wraps a white jar beneath its wooden lid. Three small white blossoms with pink centers and several green leaves decorate the front, while stitched upper and lower edges give the sleeve a finished outline. The lid remains exposed and usable.
Measure the jar circumference and height below the lid, allowing enough clearance for opening and closing. Sew the flowers to the flat sleeve before joining its back seam or adding a removable closure. Keep the bottom edge above the jar base so it stands level. Remove the sleeve before washing the container, and keep felt outside any food contact area. This approach pairs well with a simple painted container; our jar painting ideas offer complementary surface treatments.
23. Bougainvillea Cabinet Handle Wrap
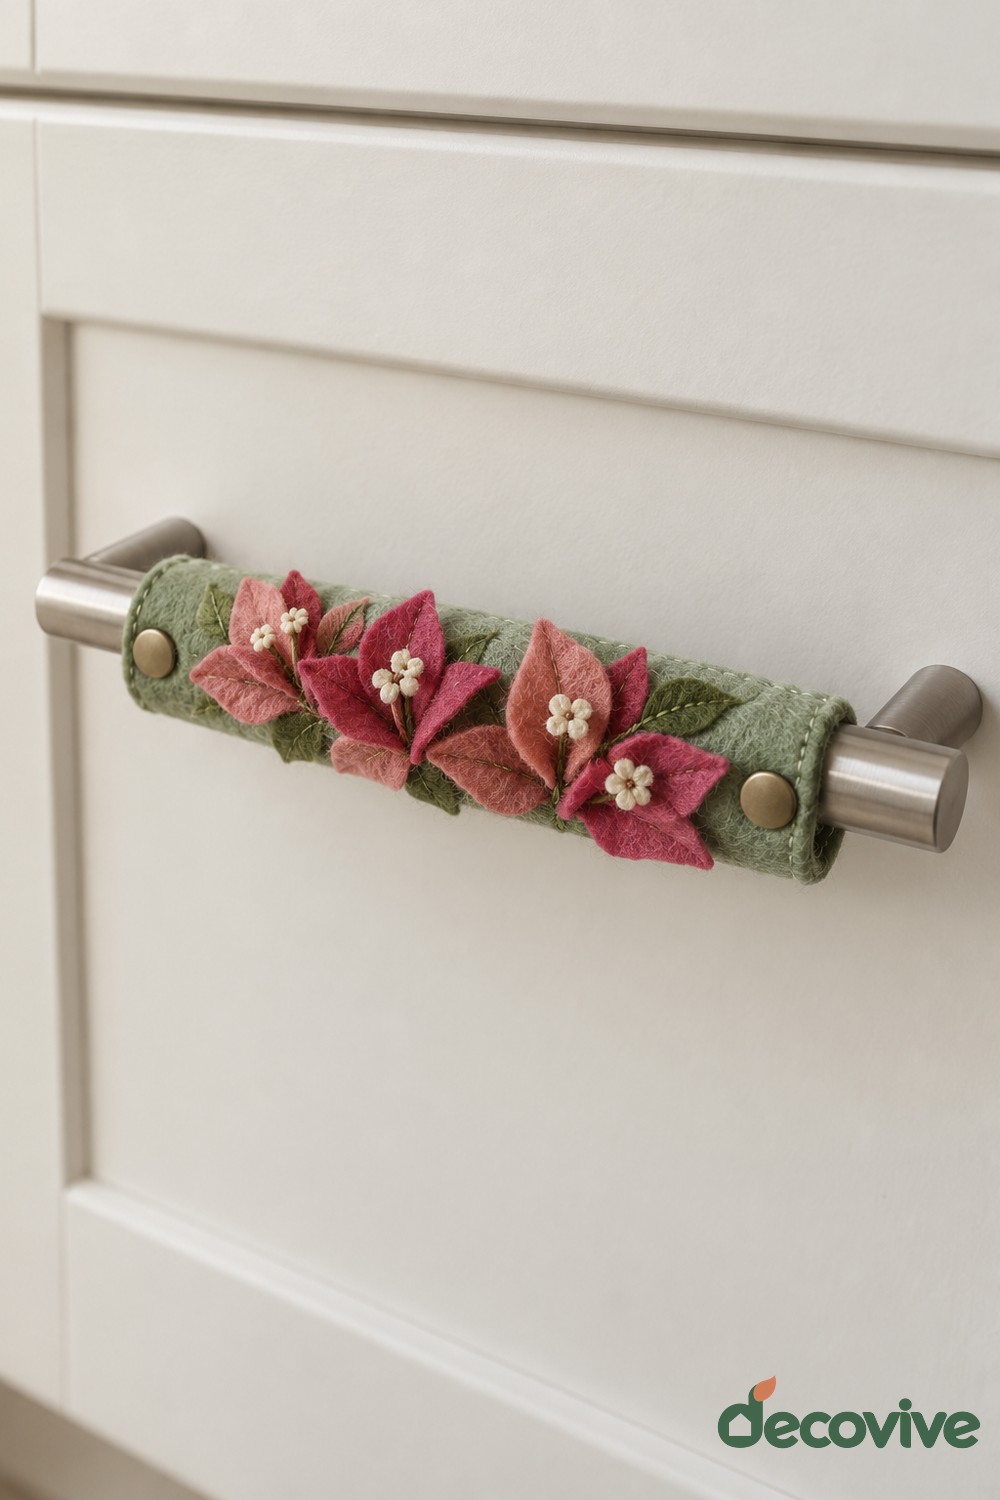
Raspberry and coral felt bracts cluster along a sage wrap fitted around a horizontal cabinet handle. Tiny pale flower centers break up the pointed bracts, and two visible closures define the ends of the sleeve. The design puts color on the handle face without covering the entire cabinet door.
Measure the handle and the space behind it before cutting the sleeve. Keep the floral pieces on the outer face and leave a comfortable grip along the back. Sew the closure points firmly, then check that the wrap does not rotate or slide when the drawer opens. Make the sleeve removable for cleaning and choose a dry cabinet away from cooking splashes. Small, shallow bracts suit this location better than a bulky flower head.
24. Geranium Chair Back Cover
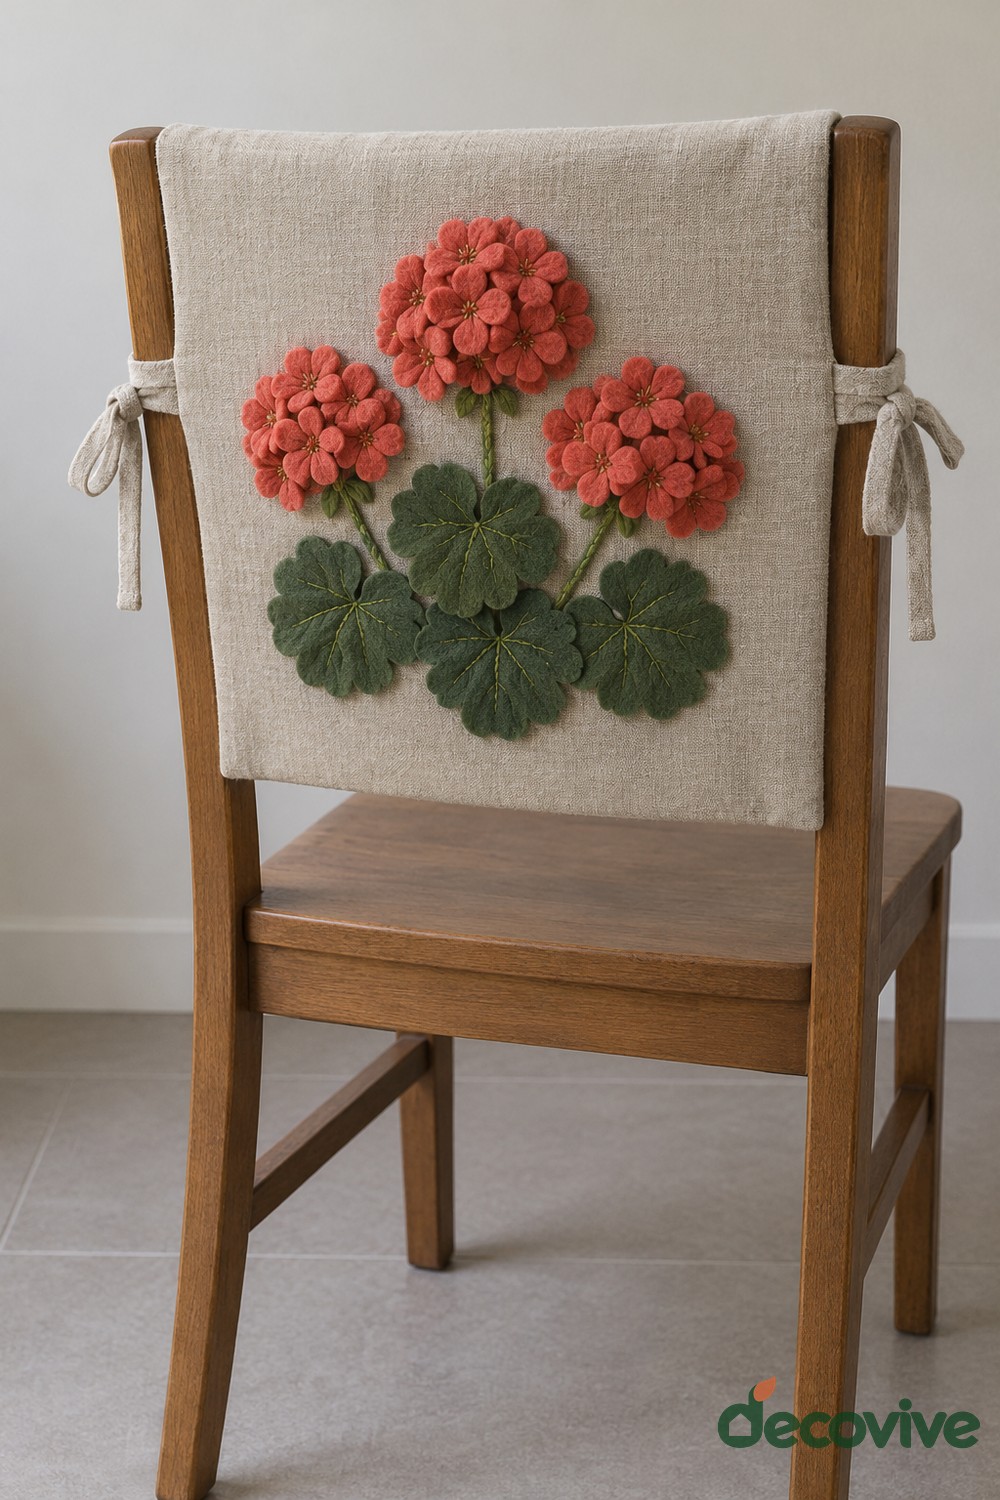
Coral geranium clusters spread across a beige chair back panel, with rounded green leaves gathered below them. Fabric ties secure the panel at the sides of the wooden chair. The floral motif stays on the outside face, where it can be seen without interfering with the seat.
Fit the panel to the chair back before making the flower arrangement. Sew the leaves and stems first, then attach groups of small petals to suggest the rounded geranium heads. Reinforce the ties at their attachment points so they can tolerate removal. Keep all loops short and secured, and check that the cover cannot slip toward the seat. A removable panel makes seasonal changes easier and allows the chair surface to be cleaned separately.
25. Aster Sofa Arm Organizer
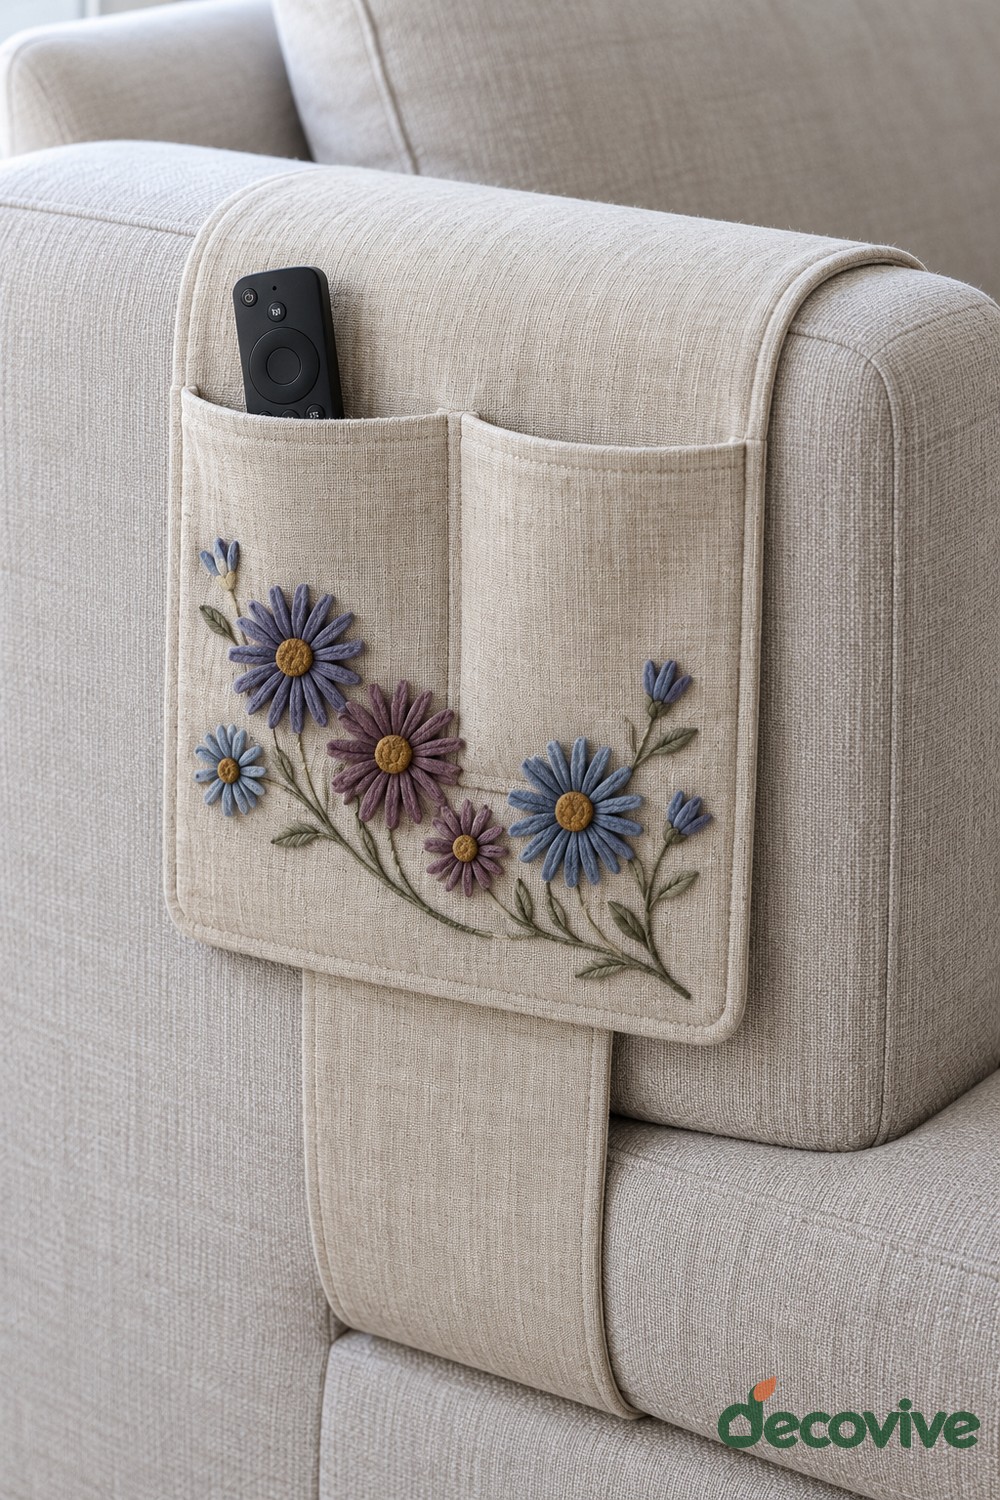
A beige organizer drapes over a sofa arm, with two pockets on the outside and a group of blue and mauve asters below. Fine stitched stems and small leaves keep the floral motif light. The remote pocket remains open and accessible, making the embellishment part of a practical living room accessory.
Measure the sofa arm width and sew a sufficiently long inner flap to help the organizer stay in place. Add a suitable nonslip backing if needed, following the upholstery care guidance. Reinforce the pocket seams before stitching the flowers onto the outer panel. Keep the appliques below the openings so they do not catch your hand. Test the organizer with its normal contents: if it slides, improve its support rather than relying on the decoration to hold it.
26. Yellow Freesia Drawer Tassel
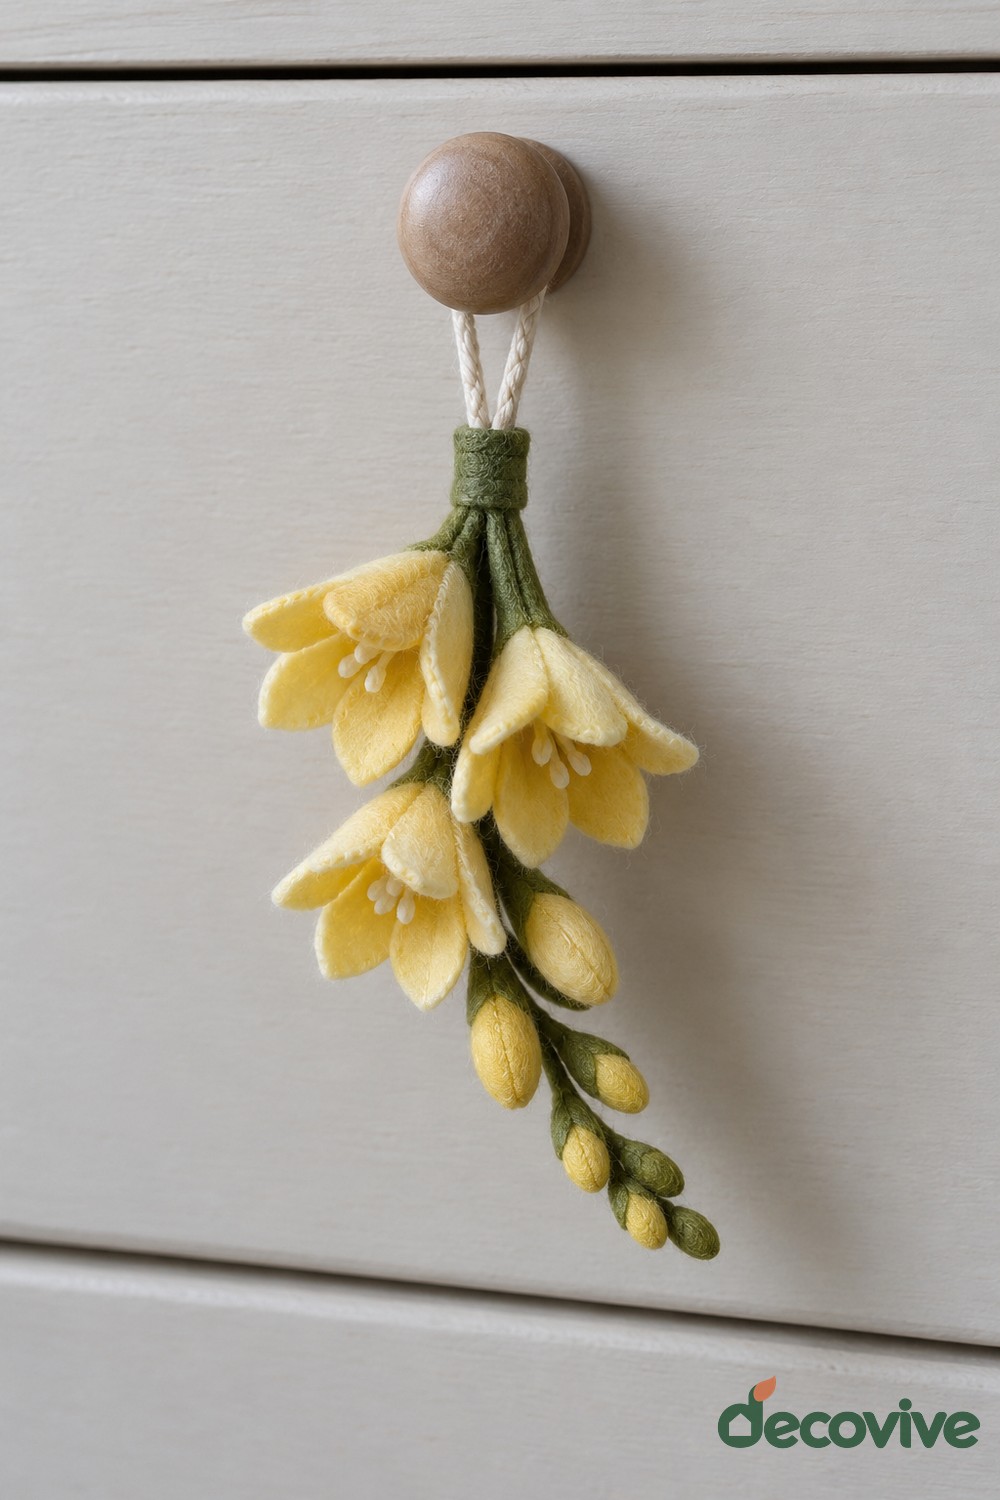
A slender spray of yellow freesia style flowers hangs from a cream loop around a wooden drawer knob. Open blooms sit near the upper part of the spray, while smaller buds taper toward its lower tip. Green stems tie the flower group together and keep the hanging silhouette narrow.
Attach the lightweight blooms to covered flexible supports, then secure the whole spray to a stitched hanging loop. Keep support ends completely enclosed. Check the length against the drawer below so the tassel cannot catch when either drawer opens. The knob must remain easy to grasp, with the flowers hanging underneath rather than over its gripping surface. Choose a rarely handled cabinet if you want the petals to retain their shape with less maintenance.
27. Snowdrop Shelf Edge Garland
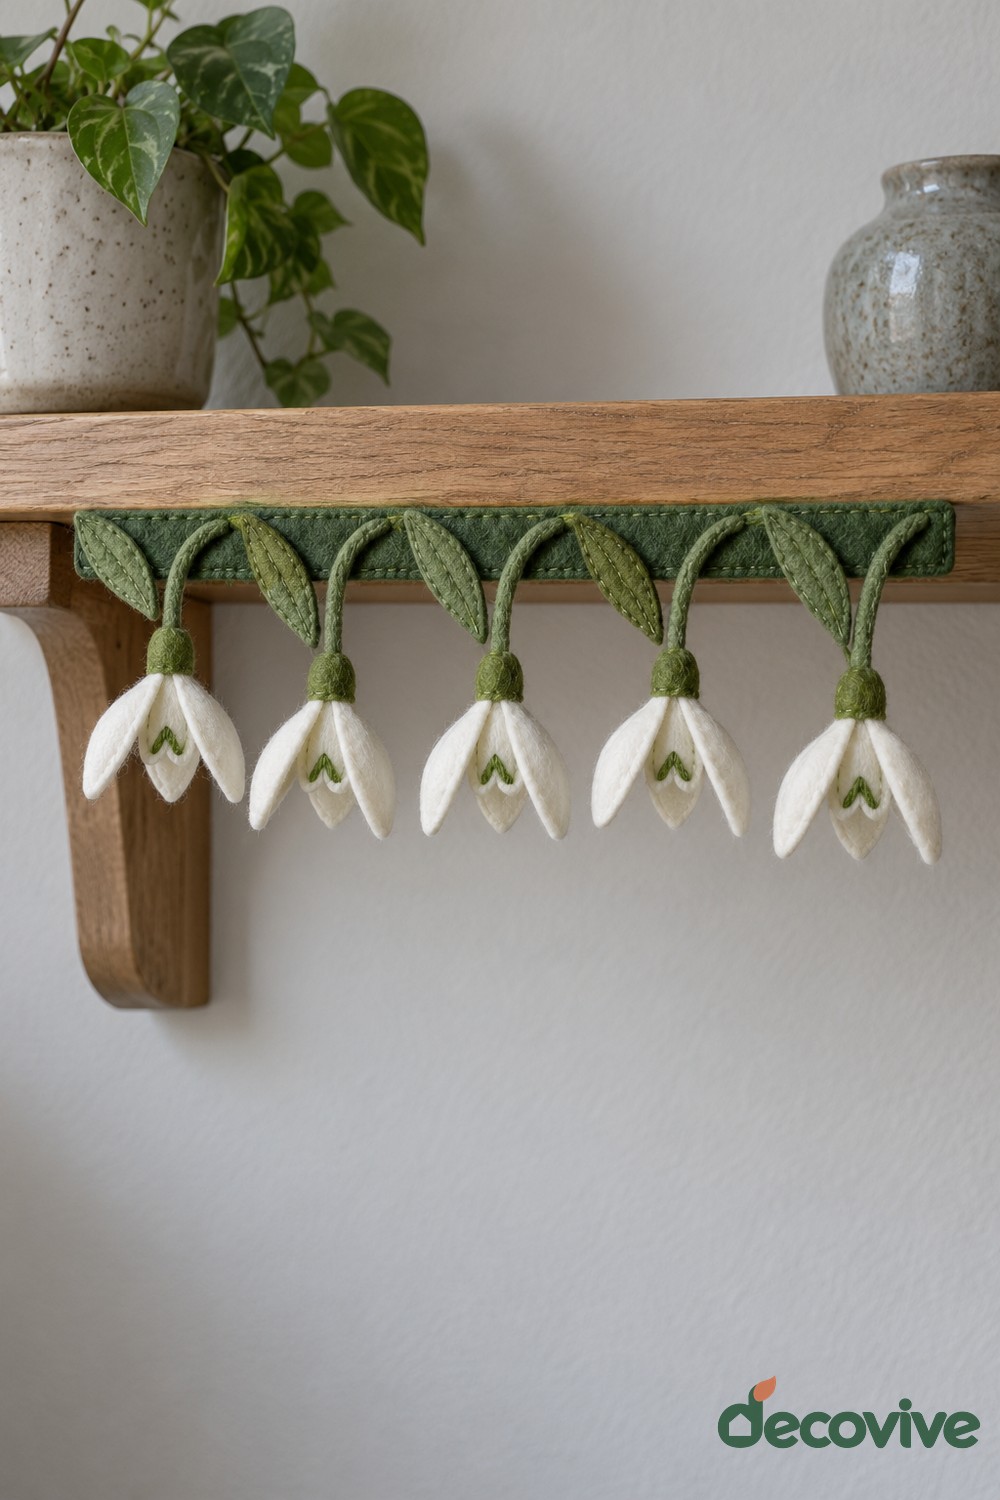
White snowdrops hang beneath a wooden shelf on curved green stems. The flowers have pointed outer petals and small green details near their centers, creating a delicate repeated fringe. The supporting band sits along the shelf edge while the usable top surface remains clear.
Make each snowdrop separately and secure its stem to a continuous backing band before installation. Space the flowers evenly but allow slight differences in their downward angles. Fasten the band securely to the shelf underside or use a fitted removable strip suited to the shelf finish. Keep blossoms clear of anything stored below and away from heat or moisture. For a restrained result, repeat one flower size across the garland instead of mixing several unrelated blooms.
28. Wisteria Curtain Valance
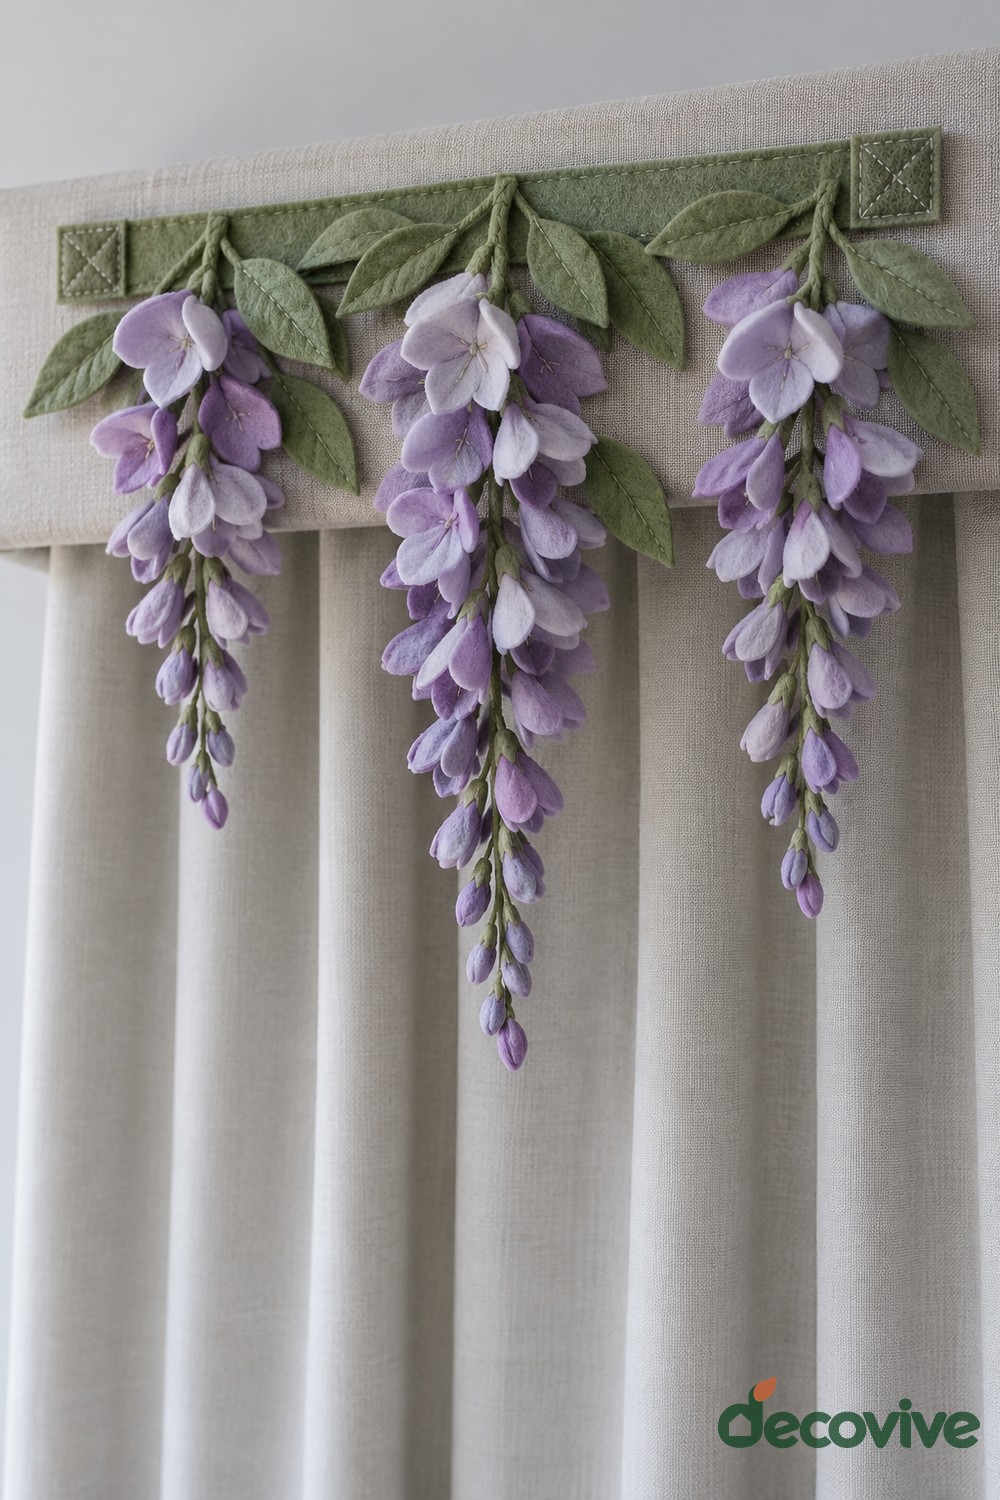
Lavender wisteria clusters descend from a green band above a plain curtain. Layered hanging petals taper from fuller tops to small lower tips, with broad leaves along the supporting edge. The design creates a floral upper border while leaving most of the curtain fabric visible.
Assemble the cascading clusters independently and attach them to a reinforced fabric band. Fit that band to a separate removable support rather than sewing weight into a thin curtain header. Leave enough clearance for the curtain to move and for any opening window beneath it. Keep the support points secure and distribute the weight across the width. Shorter clusters are easier to manage in a small window, particularly where long flowers could brush against the fabric during daily use.
29. Dandelion Cabinet Pocket
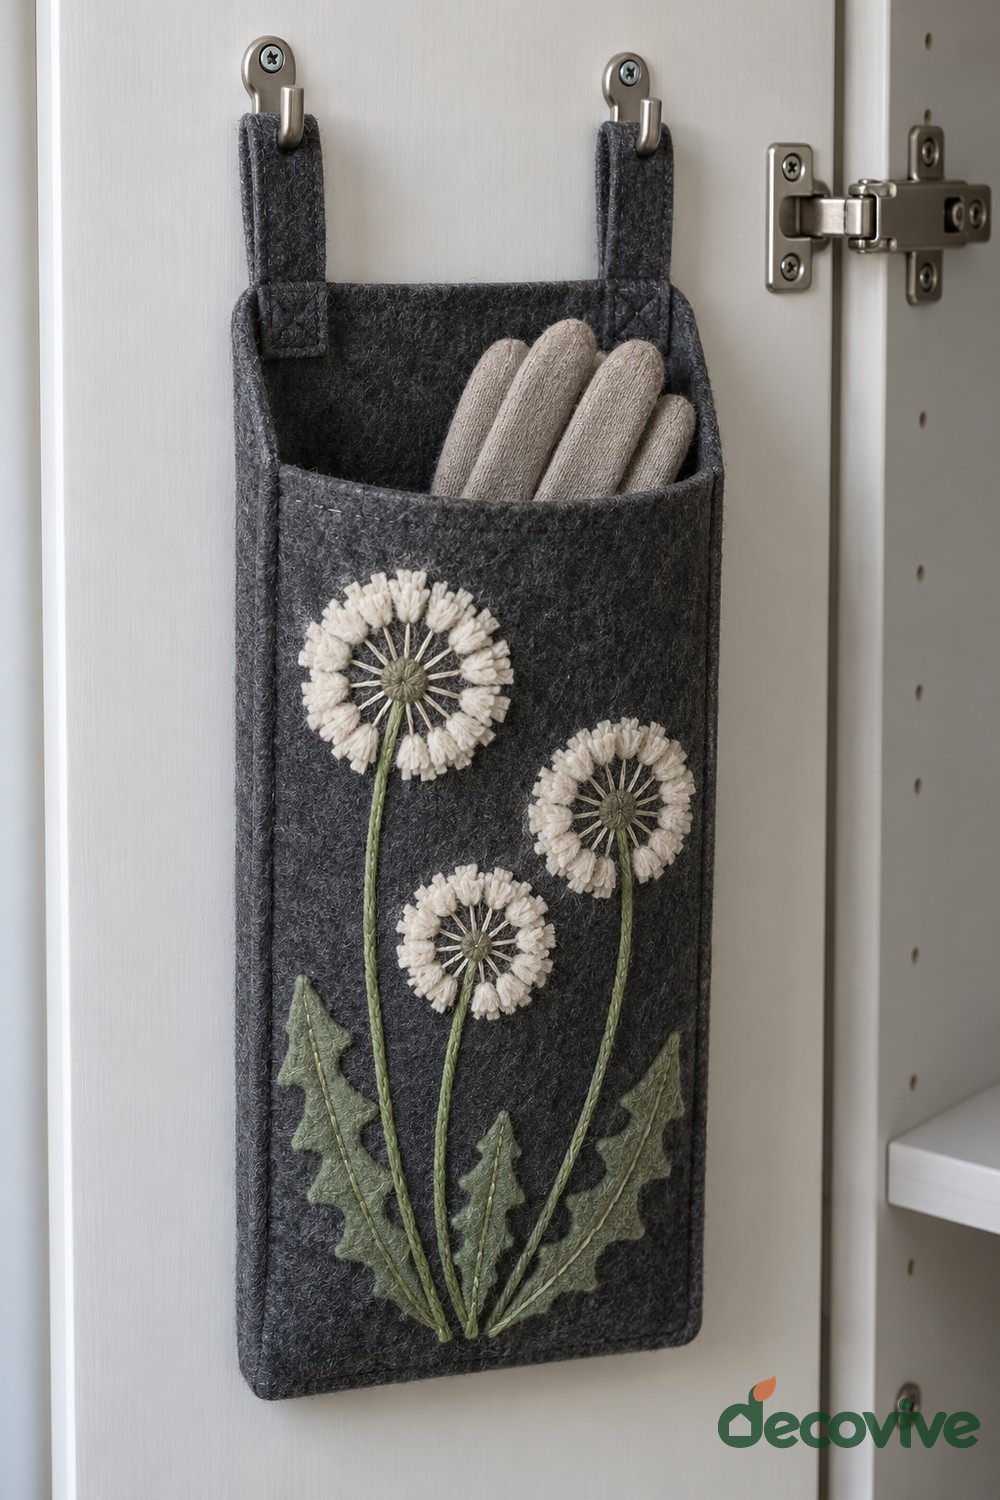
A narrow charcoal pocket hangs on the inside of a cabinet door and holds a pair of light gloves. White dandelion seed heads, green stems, and serrated leaves decorate the front. Two reinforced hanging tabs at the top keep the opening accessible while leaving the door hinge visible.
Measure the closed cabinet clearance before choosing the pocket depth. Sew the sides and tabs firmly, then add the floral stitching and felt leaves. Use mounting points appropriate for the door material and the loaded pocket, keeping screws or hooks clear of hinges and shelves. Restrict the contents to light items and check that the door closes without compression. The dandelion design is especially effective here because its slender stems suit the tall narrow shape.
30. Passionflower Upholstered Footstool
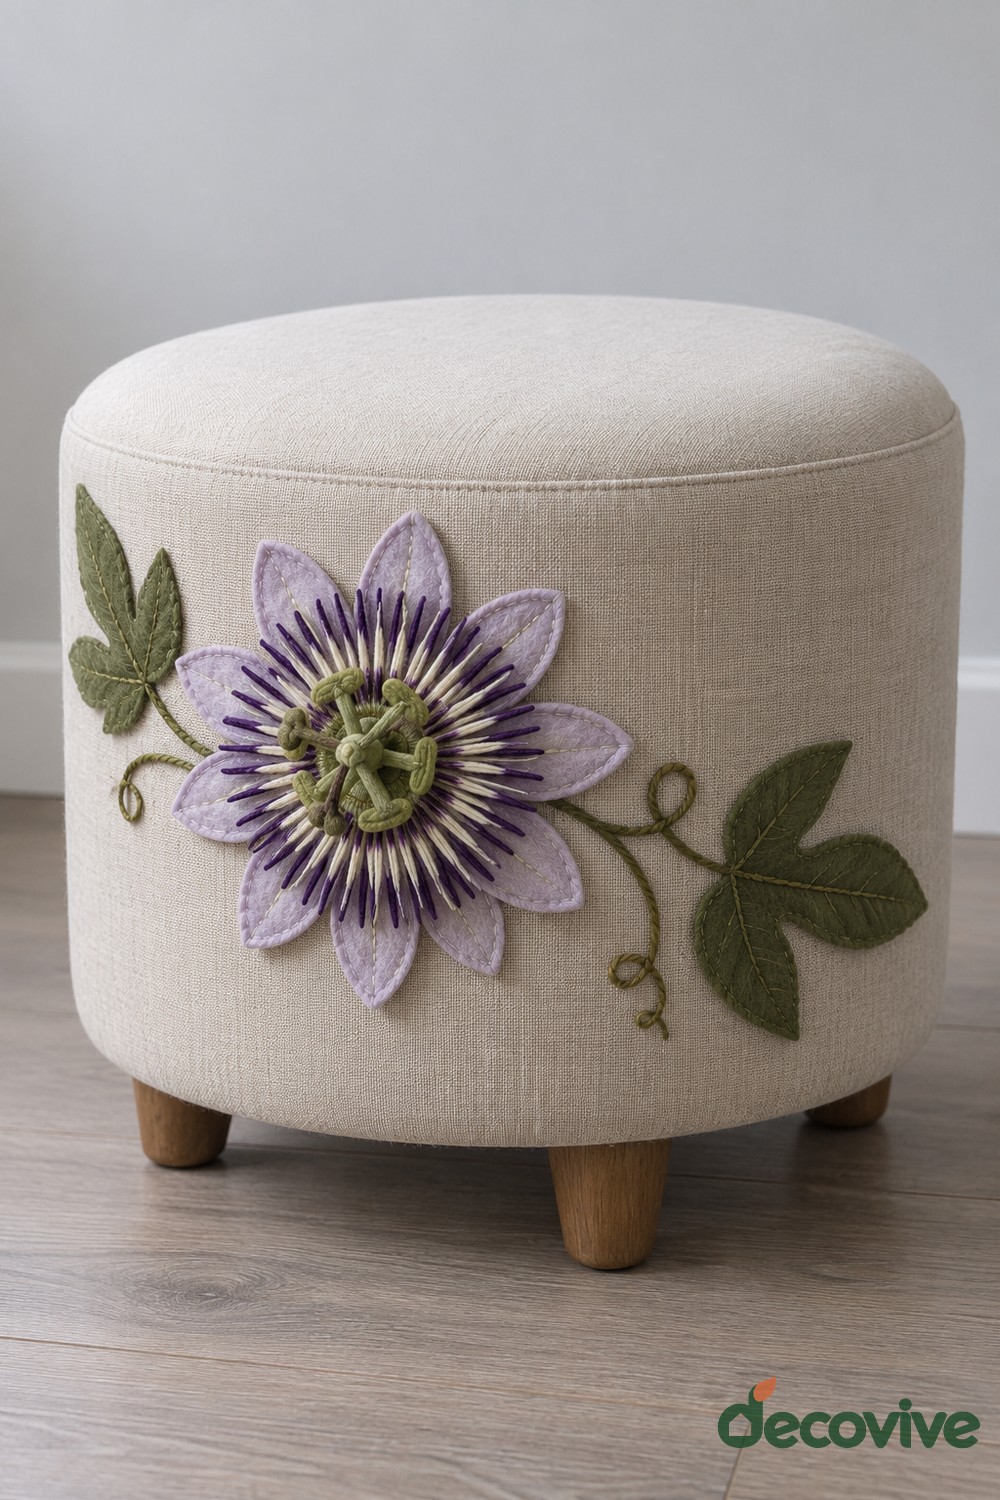
A purple passionflower applique sits on the side of a small beige upholstered footstool. Layered petals, fine pale filaments, and a green center create an intricate focal point, while climbing stems and leaves spread across the curved fabric. The seat surface stays plain and comfortable.
Treat the felt work as a decorative addition to a structurally sound stool. Build the flower on a removable fabric patch or cover, and position it away from the area where feet or shoes will rub. Sew the delicate filaments securely at both ends where practical, avoiding loose loops. A fitted cover makes cleaning more manageable than permanently gluing onto upholstery. Scale the flower to the stool side so the motif feels balanced without reaching the legs or seat seam.
Keep Your Felt Flowers Looking Their Best
Choose a design that suits how the object is used, then make a single flower before cutting the remaining pieces. Secure the decoration to its supporting base, leave working areas clear, and keep removable parts easy to access. Check handles, hanging loops, and pocket seams occasionally. Store seasonal pieces in a shallow box with space around the petals, and dust gently before putting them back on display.

Leave a Reply