

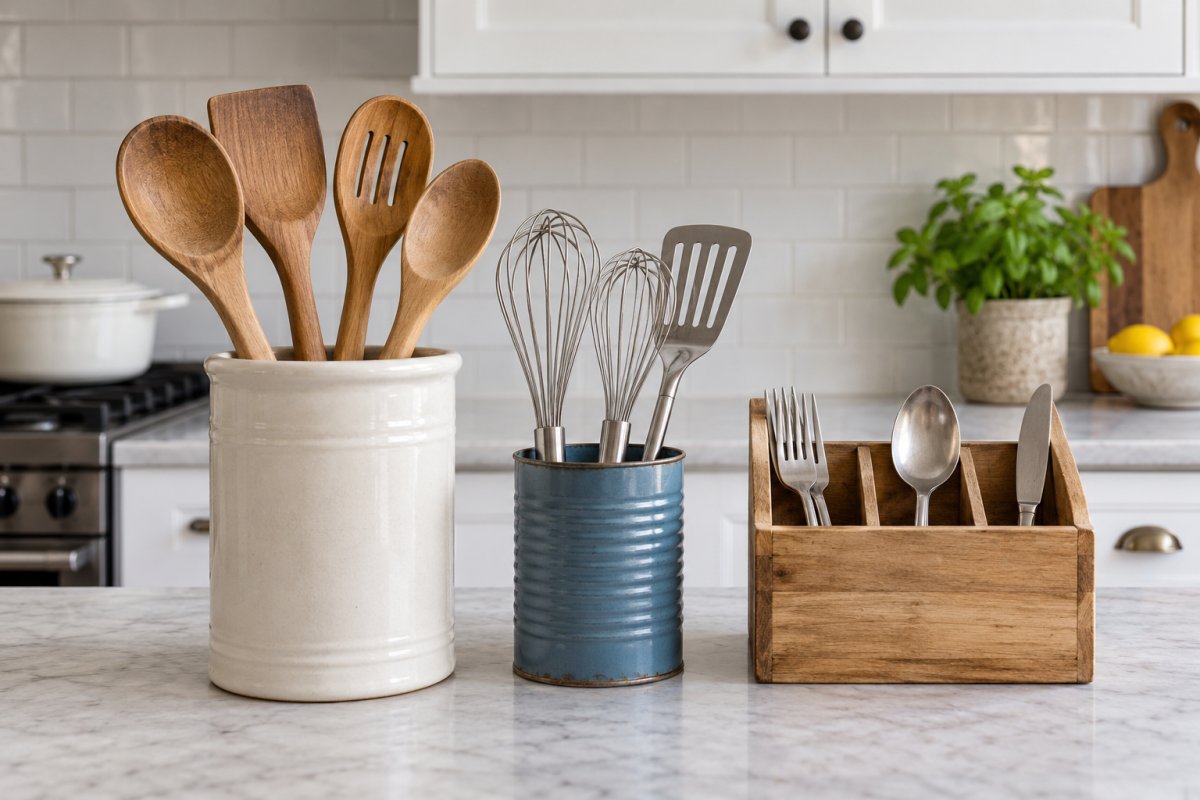
Utensil storage should fit the way you cook as well as the space you have. A deep crock can hold a handful of long tools, while divided caddies sort flatware and wall racks release counter space. These 35 ideas compare different shapes, materials and placements, with practical details to help you choose one for your kitchen.
Start with the tools. Gather the utensils you use most and measure the longest handle, the available counter or wall area, and the clearance needed to remove each item. Put bulky whisks in wider openings and leave sharp knives in a protective block, sheath or other suitable storage.
Choose a finish you can maintain. Smooth removable cups are easier to wash than rope, fabric or unfinished wood. Keep decorative coatings and adhesives on the outside, wash utensils after use and dry them before putting them away. FoodSafety.gov explains how to clean utensils and prevent cross contamination.
A simple recycled can project. Collect three empty food cans with smooth, intact rims and a spare shallow tray. Wash and dry them, then cover the interiors and rims with paper and painter's tape. Outdoors or in an open, well ventilated area away from flames, coat only the outside with spray paint suitable for metal, following its label. Remove the masking and let the finish dry before arranging the cans on the tray. Rust-Oleum recommends allowing the final coat of its 2X spray to dry for 24 hours; follow the directions on your own can. The Saratoga Springs Public Library utensil holder guide also shows how to prepare and decorate reused cans.
Example budget and time. With three cans, a tray, scrap paper, protective gloves and a metal file already on hand, one 12 oz can of metal suitable spray paint was listed at US$14.15 and a two roll pack of painter's tape at US$7.44. Buying both full packages comes to US$21.59 before tax and shipping, with supplies left over. Prices were checked in November 2026 and vary by location and date. Allow an estimated 30 to 45 minutes of active work, plus the drying and curing time stated on the paint label. Do not use a can with a sharp rim until it has been made smooth; discard damaged or rusting containers.
For more ways to reuse household finds, explore our upcycled storage ideas. If you are coordinating the whole room, these whimsical kitchen decor ideas offer color and pattern inspiration.
Table of Contents
- 1. A Steel Caddy with Room for Every Setting
- 2. Let a Chevron Crock Add Pattern
- 3. Make Space Beside the Sink for a Draining Holder
- 4. Keep a Spoon Rest Close During Cooking
- 5. Store Long Tools Flat in a Divided Tray
- 6. Try a Stepped Stand for a Small Collection
- 7. Group Three Floral Jars on One Base
- 8. Soften a Row of Cutlery Pots with Lace
- 9. Use a Small Wall Rack for Hanging Tools
- 10. Pair Sage Green Cans with Gingham
- 11. Turn Bottle Bottoms into a Flower Trimmed Set
- 12. Stack Green Cans on a Narrow Wall Board
- 13. Choose a Sculptural Octopus Rack
- 14. Sort Different Tools by Container Shape
- 15. Combine a Hanging Rail with Paper Towel Storage
- 16. Fan Out Tall Utensils in a Wire Basket
- 17. Display a Matching Spoon Collection
- 18. Carry Cutlery in Clear Cups
- 19. Wrap a Crock in Saved Wine Corks
- 20. Give Long Utensils a Rustic Crate
- 21. Put a Striped Tin Set on a Serving Tray
- 22. Frame Floral Jars with a Picket Fence
- 23. Assign a Pastel Pot to Each Type of Cutlery
- 24. Fold a Cutlery Pocket for the Table
- 25. Use a Long Wooden Box for Shared Meals
- 26. Bring Pattern to Plain Tins
- 27. Make a Jar Caddy with a Leather Loop
- 28. Add Woodland Texture with a Twig Sleeve
- 29. Line Up Three Cups in a Navy Crate
- 30. Give Everyday Tools a Woven Outer Basket
- 31. Mix Four Patterns in a Coordinated Palette
- 32. Reimagine a Copper Colored Goblet
- 33. Arrange Blue Cans in Two Compact Rows
- 34. Hang a Floral Fabric Pocket from a Hoop
- 35. Set an Ivory Crock Inside a Navy Cage
1. A Steel Caddy with Room for Every Setting
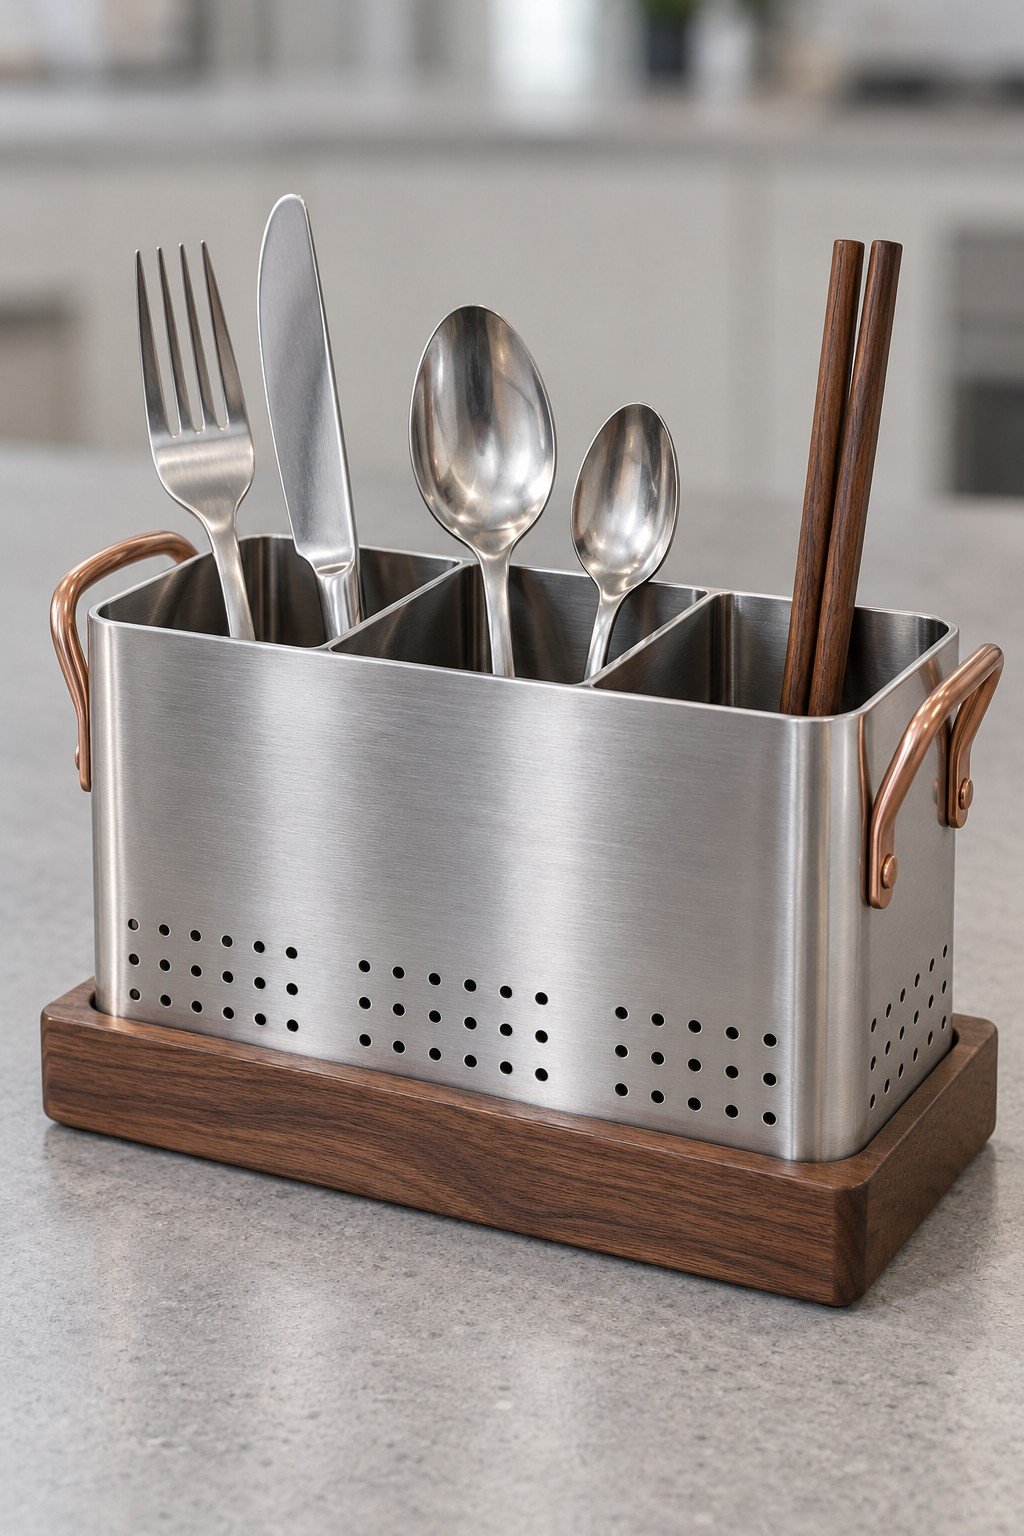
Four separate compartments keep forks, spoons, knives and chopsticks easy to sort. The steel sides give this caddy a clean look, while the dark base softens the finish. Check the base for trapped drips when cleaning, and measure the combined footprint before giving it a permanent counter spot.
2. Let a Chevron Crock Add Pattern
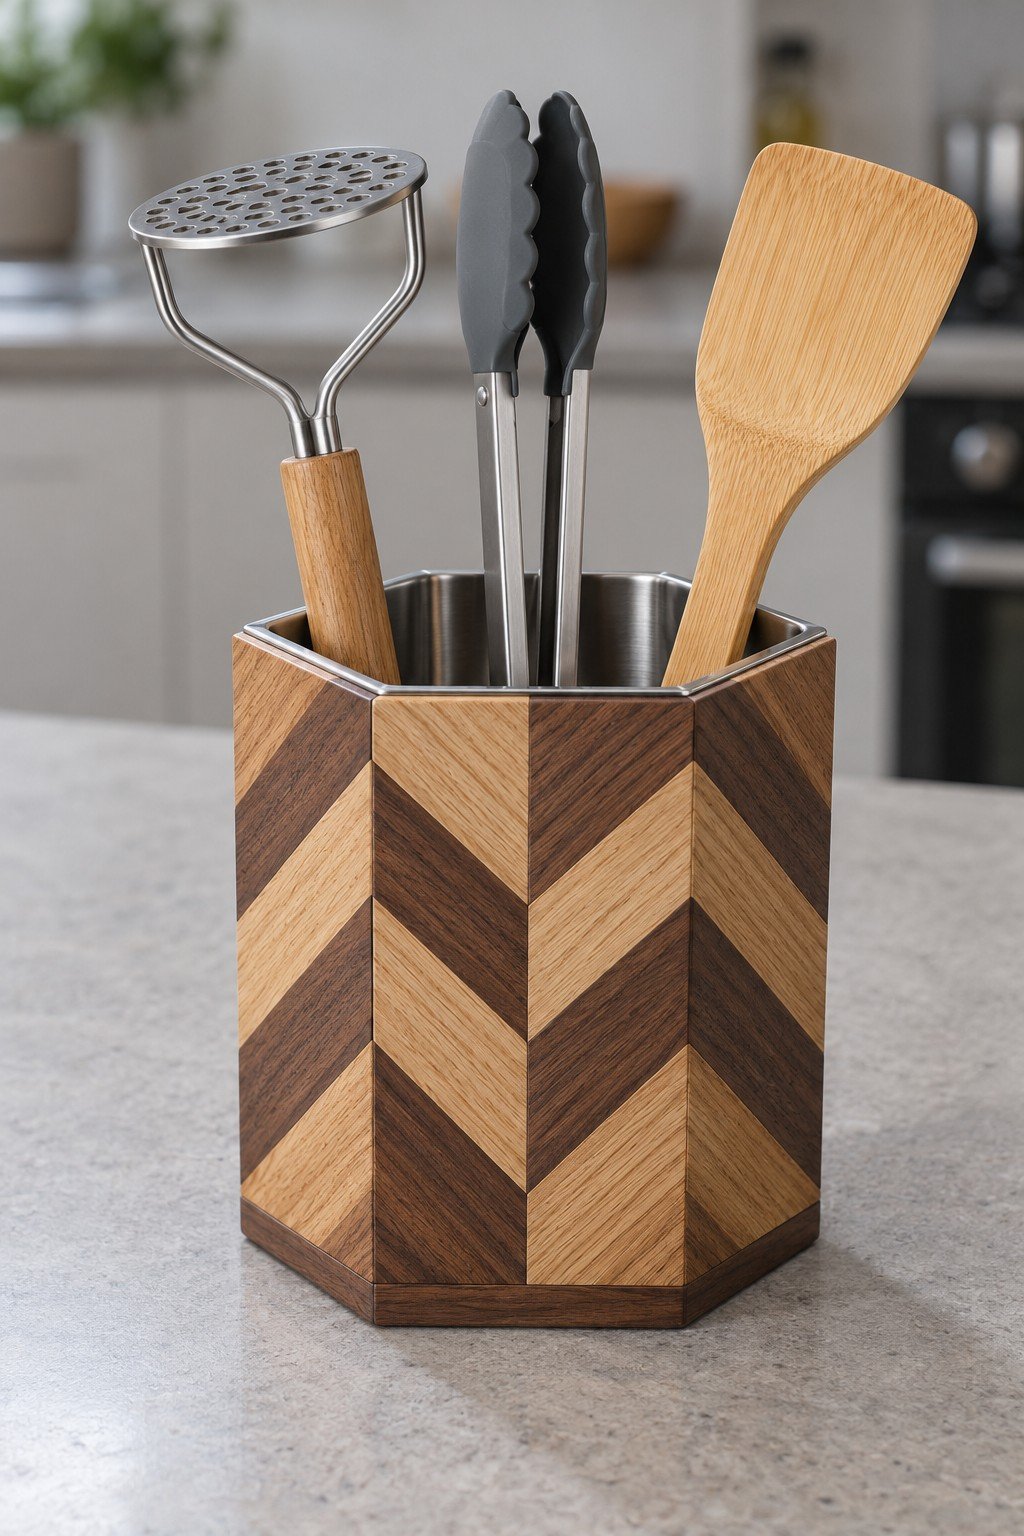
Alternating light and dark chevrons turn a simple utensil crock into a focal point. The polygonal shape suits a quiet backsplash where the pattern can stand out. A metal inner cup is useful here: choose one that lifts out for cleaning, and keep the wooden exterior away from standing water.
3. Make Space Beside the Sink for a Draining Holder
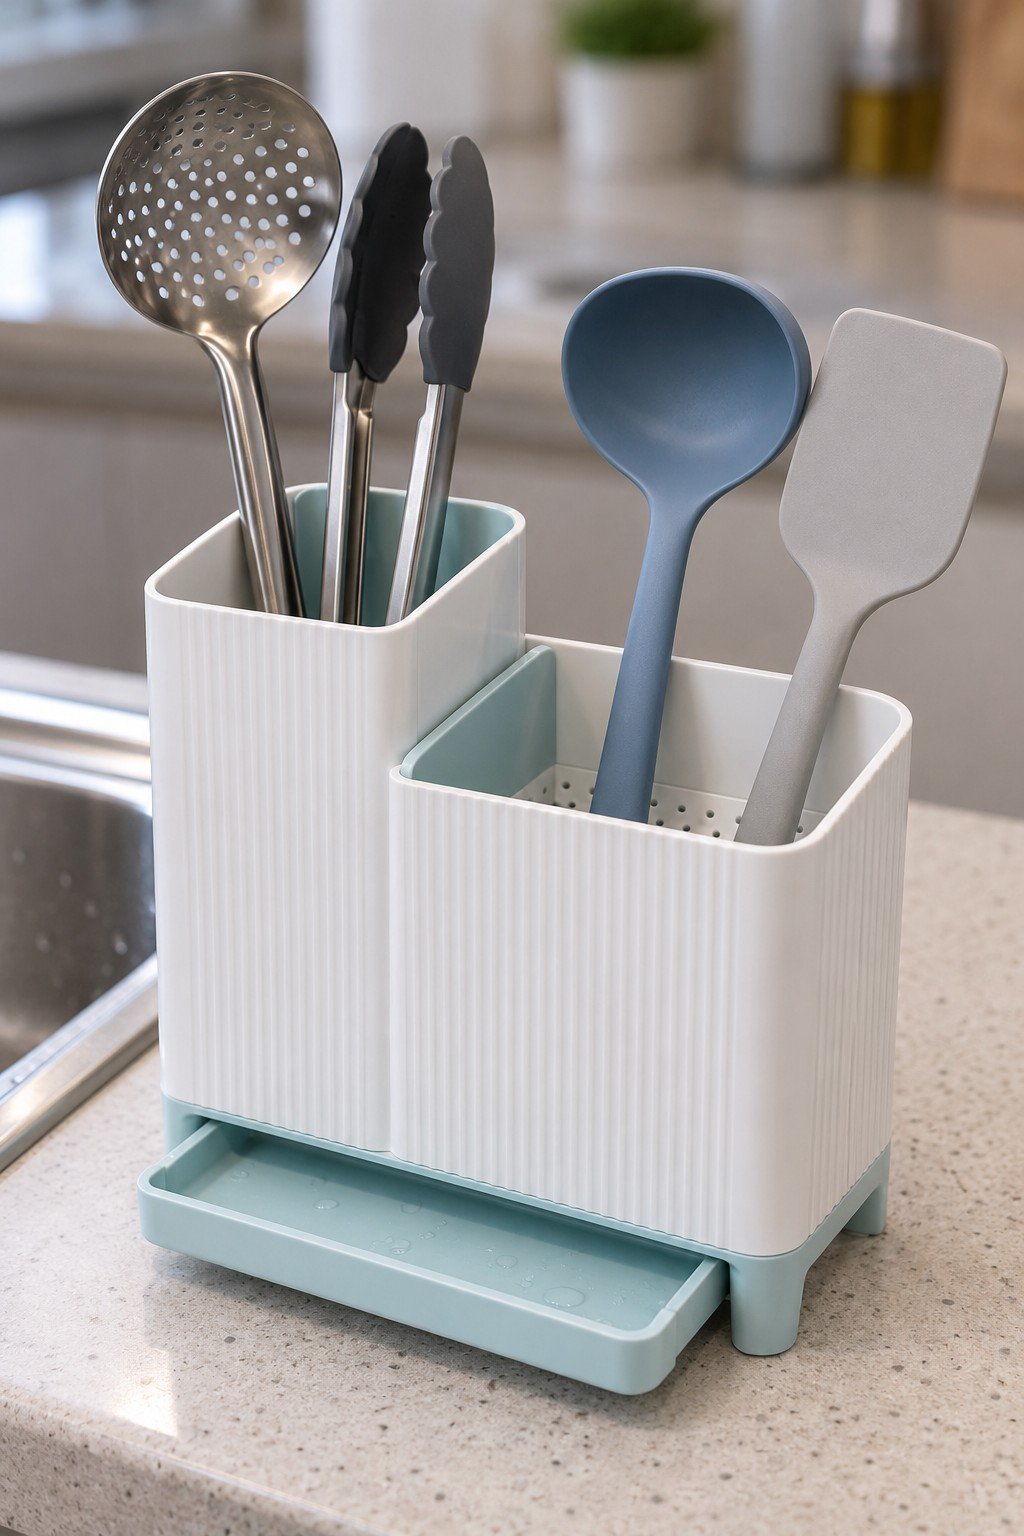
Two heights separate longer tools from shorter ones, and a tray below collects water from freshly washed utensils. Place the unit where you can slide the tray out without moving other counter items. Empty and wash the tray regularly rather than letting water sit underneath.
4. Keep a Spoon Rest Close During Cooking
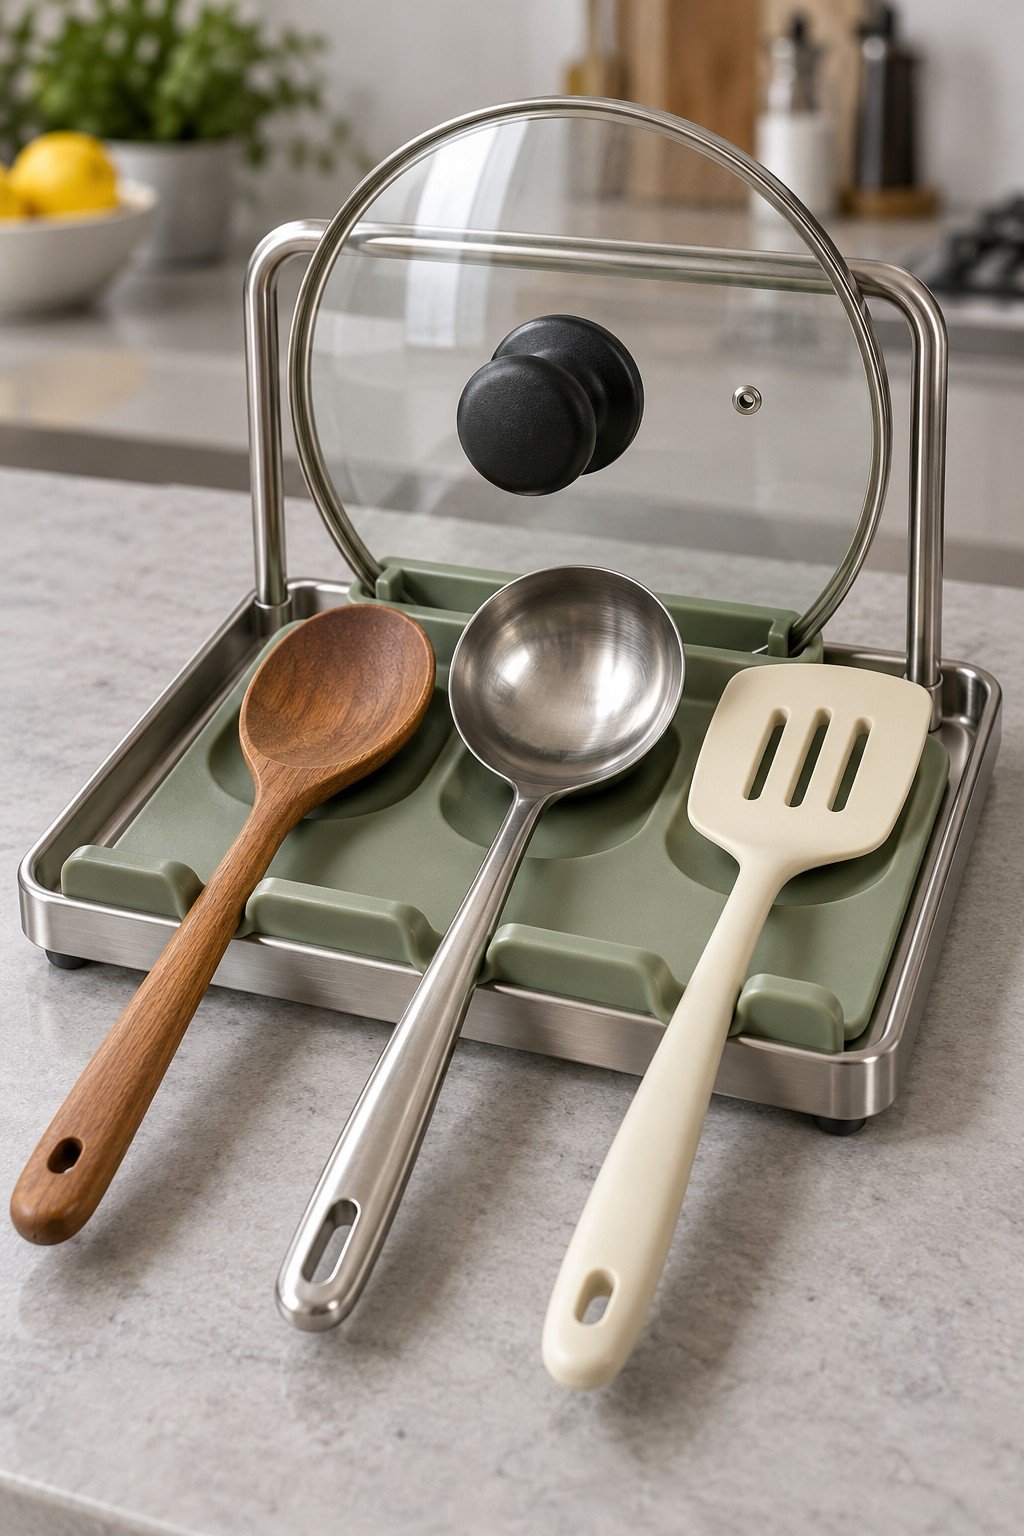
A shallow rest keeps the working ends of spoons and turners together while a lid stands at the back. This is a cooking station rather than storage for a large collection, so make sure the surface and the lid support suit the heat of the items you put on them. Wash after use.
5. Store Long Tools Flat in a Divided Tray
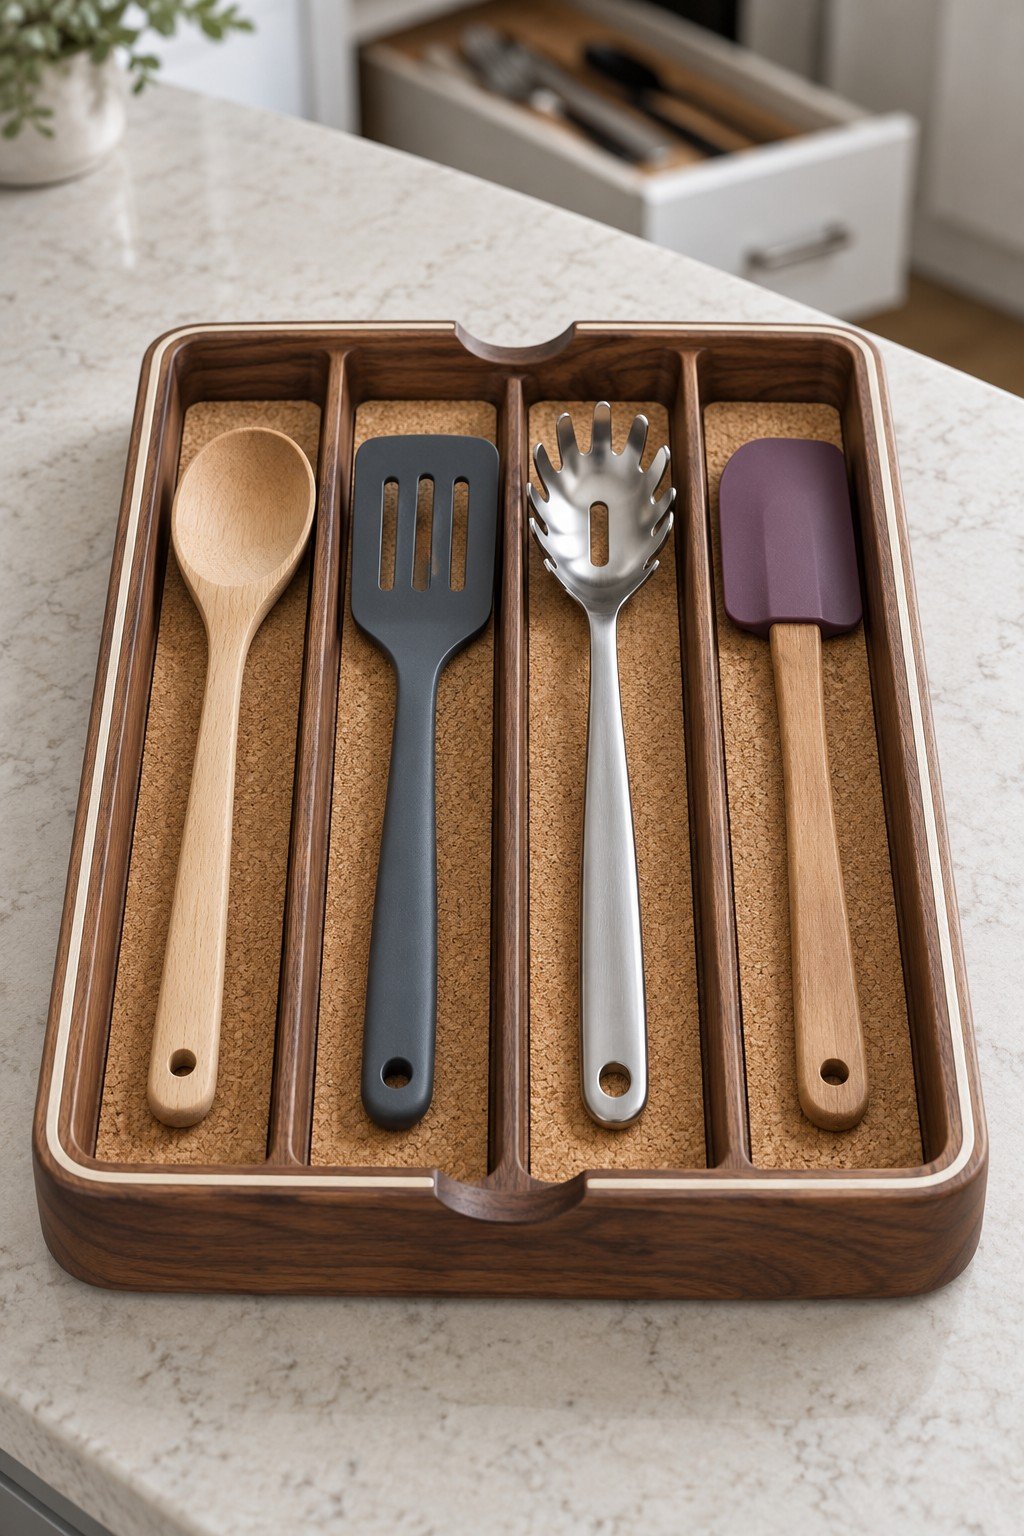
A flat tray is a useful answer when ladles and turners tangle in a deep drawer. The individual channels make each piece easy to find. Before choosing or building one, measure the drawer interior and the tallest utensil head, then check that the drawer closes without catching.
6. Try a Stepped Stand for a Small Collection
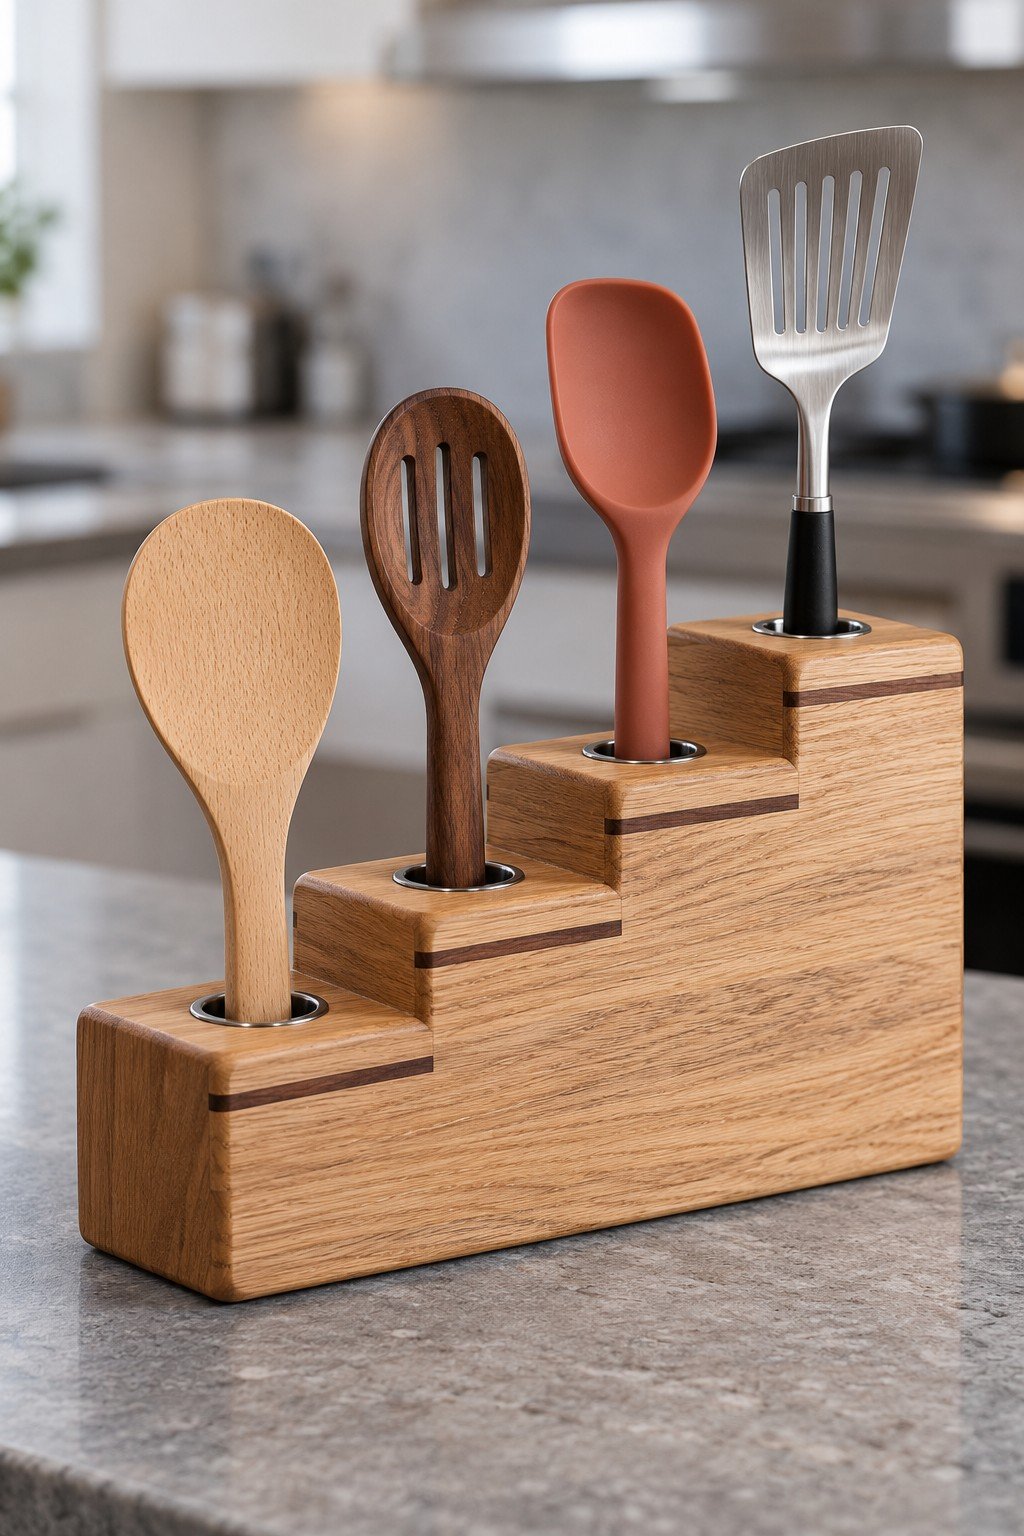
The rising wooden blocks give each utensil its own opening and make a small collection look ordered. This format works best for the tools you reach for every day; wider whisks may need a separate holder. For an easy to clean version, consider removable sleeves inside the openings.
7. Group Three Floral Jars on One Base
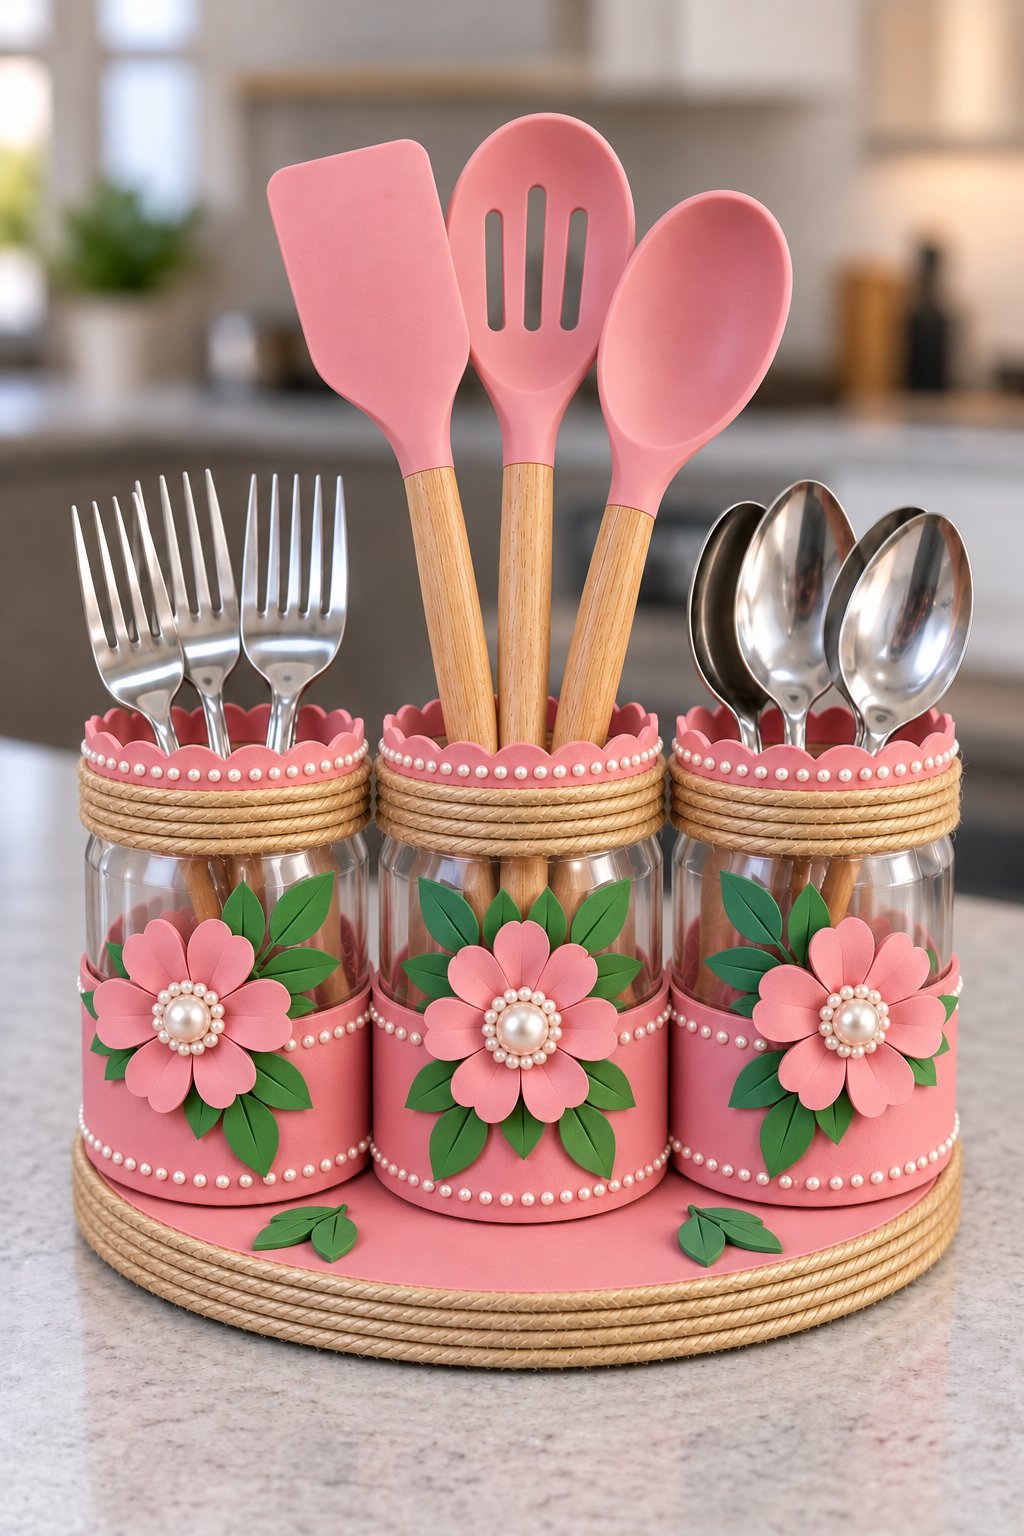
Three matching glass jars sort cooking tools and cutlery across a round tray. Pink paper flowers, twine and pearl trim create a coordinated set. Keep the paper decoration on the outside and choose washable interiors so the parts that touch utensils can be cleaned.
8. Soften a Row of Cutlery Pots with Lace
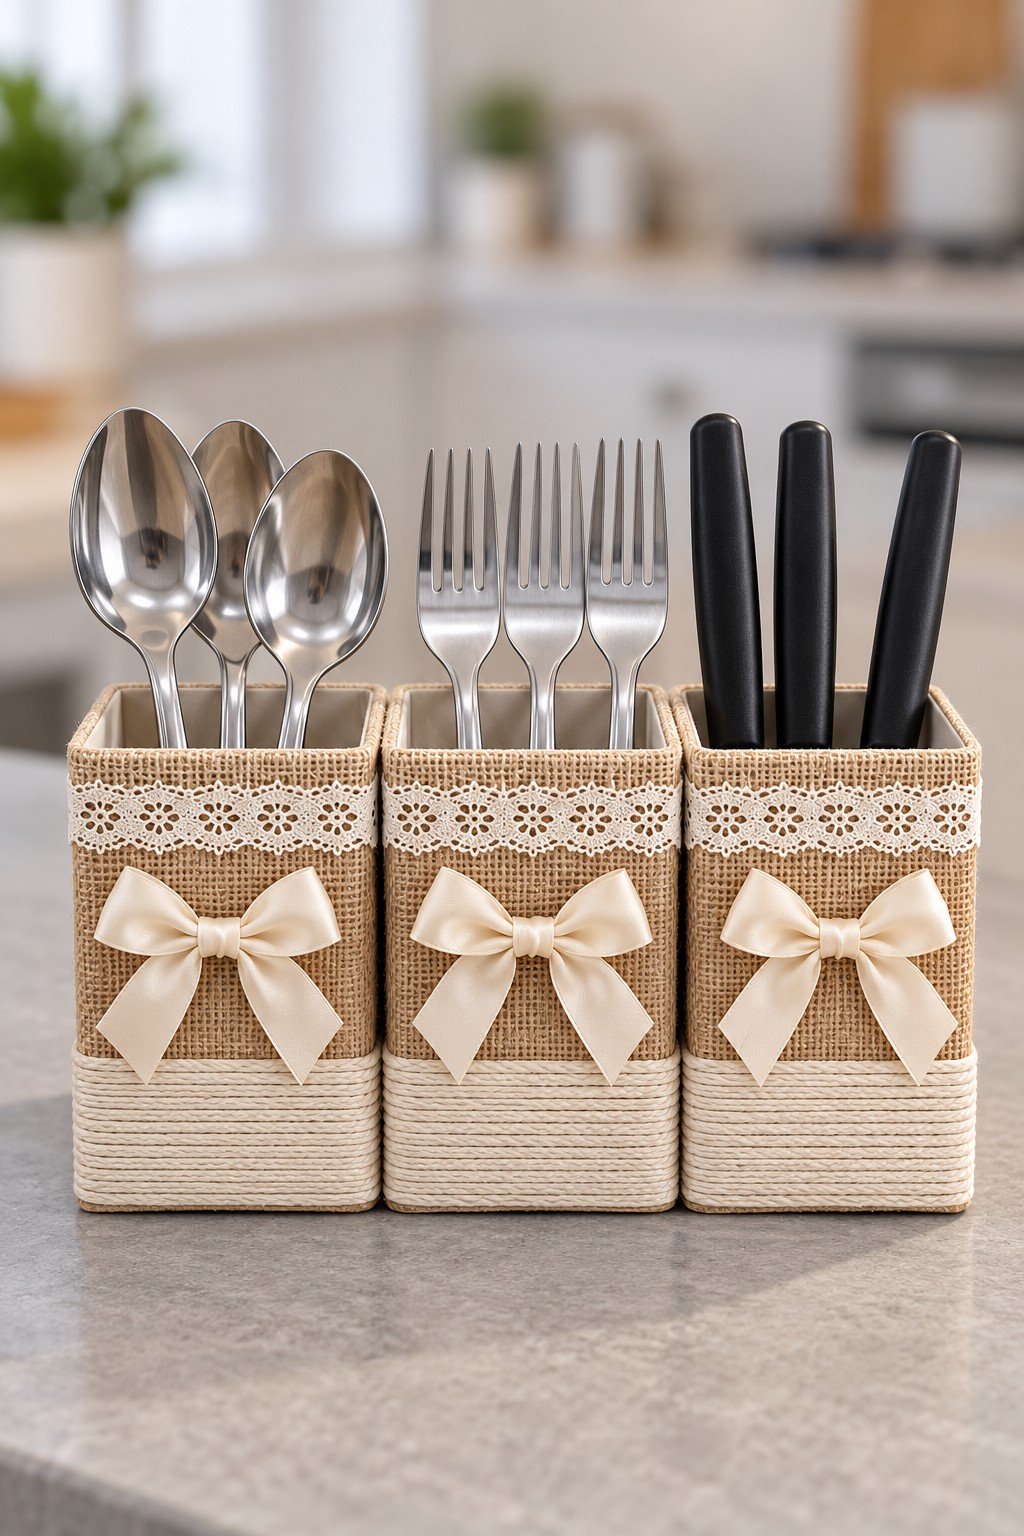
Lace bands and bows give these matching square containers a dressier look without hiding their separate compartments. They would work well at a buffet or on a serving sideboard. Place washable cups inside the decorative sleeves, and move the set away from the sink to help keep the fabric clean and dry.
9. Use a Small Wall Rack for Hanging Tools
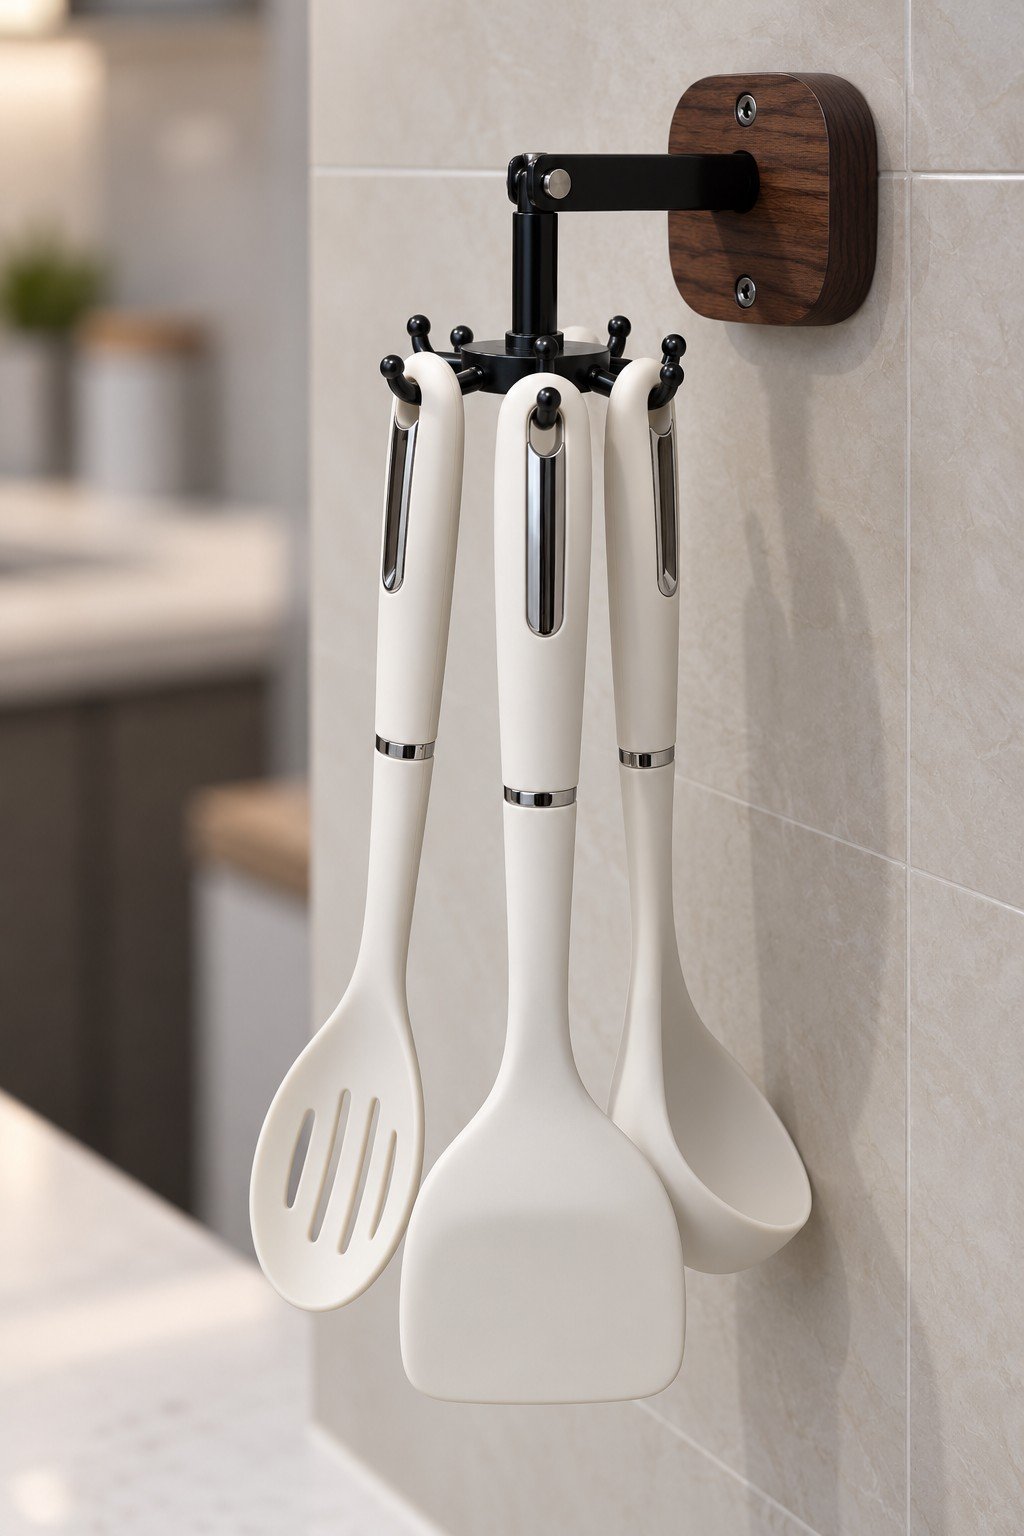
Hanging utensils by their handles clears counter space and keeps each head visible. A short wall arm like this can fit beside a prep area, provided there is clearance to lift the tools off the hooks. Select fixings for the wall material and the weight of the loaded rack.
10. Pair Sage Green Cans with Gingham
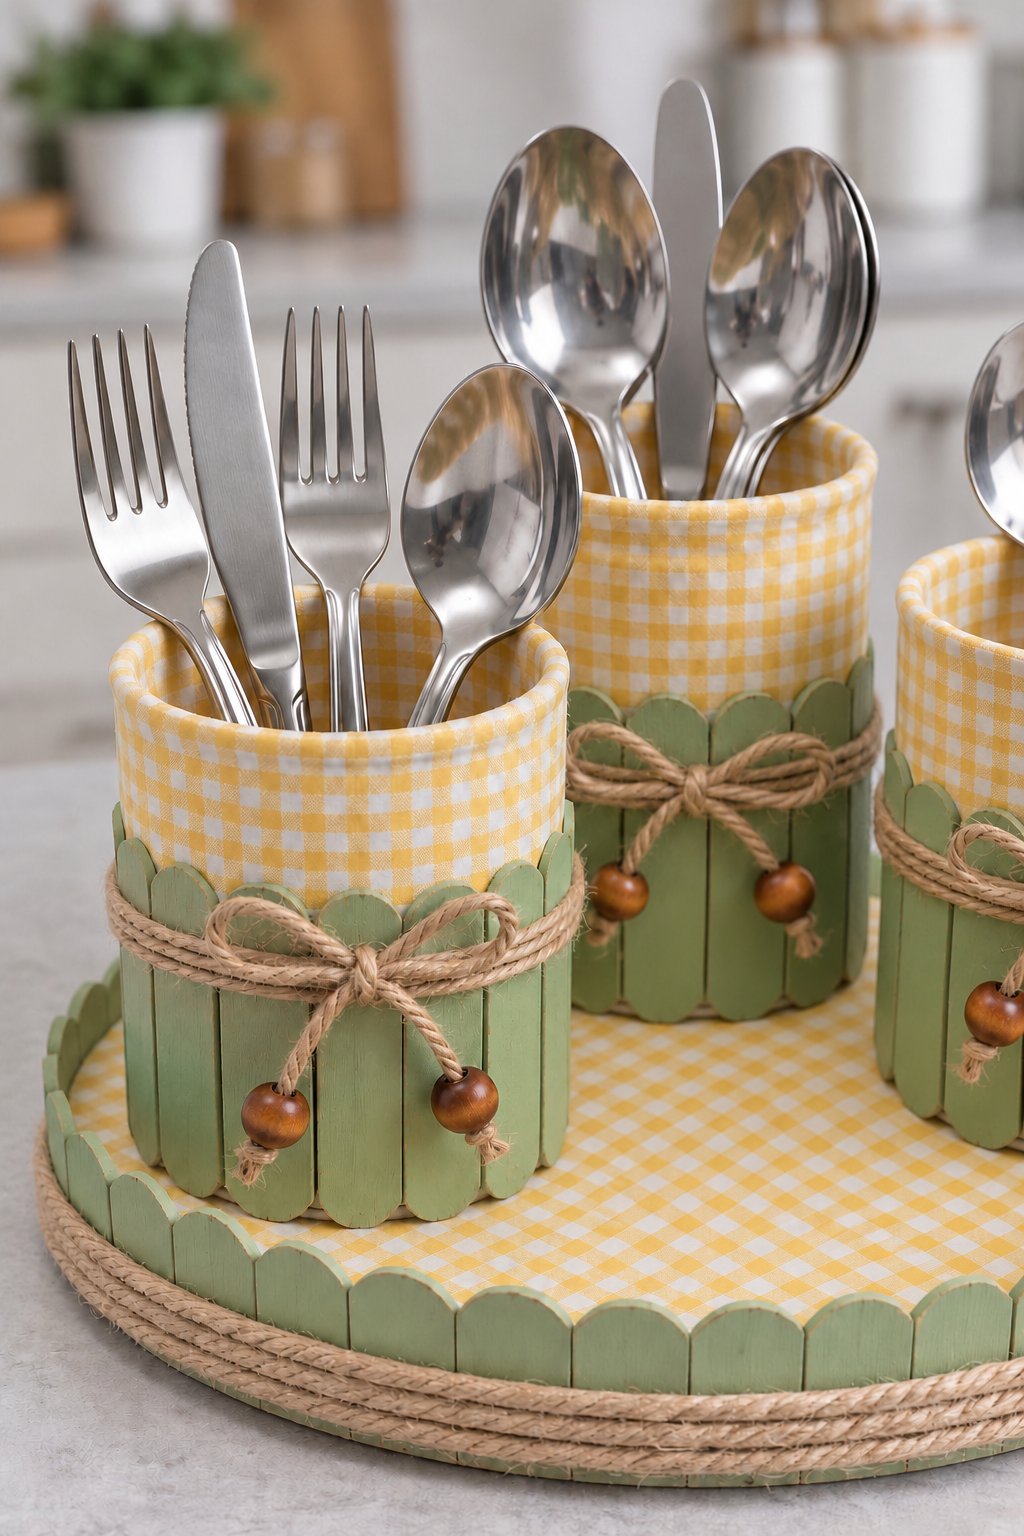
Painted sticks and yellow gingham give the cans a fresh picnic feel, while the round tray keeps the group together. Choose matching containers if a neat outline matters, or use two heights to separate serving tools from flatware. Keep the cloth trim outside the washable interiors.
11. Turn Bottle Bottoms into a Flower Trimmed Set
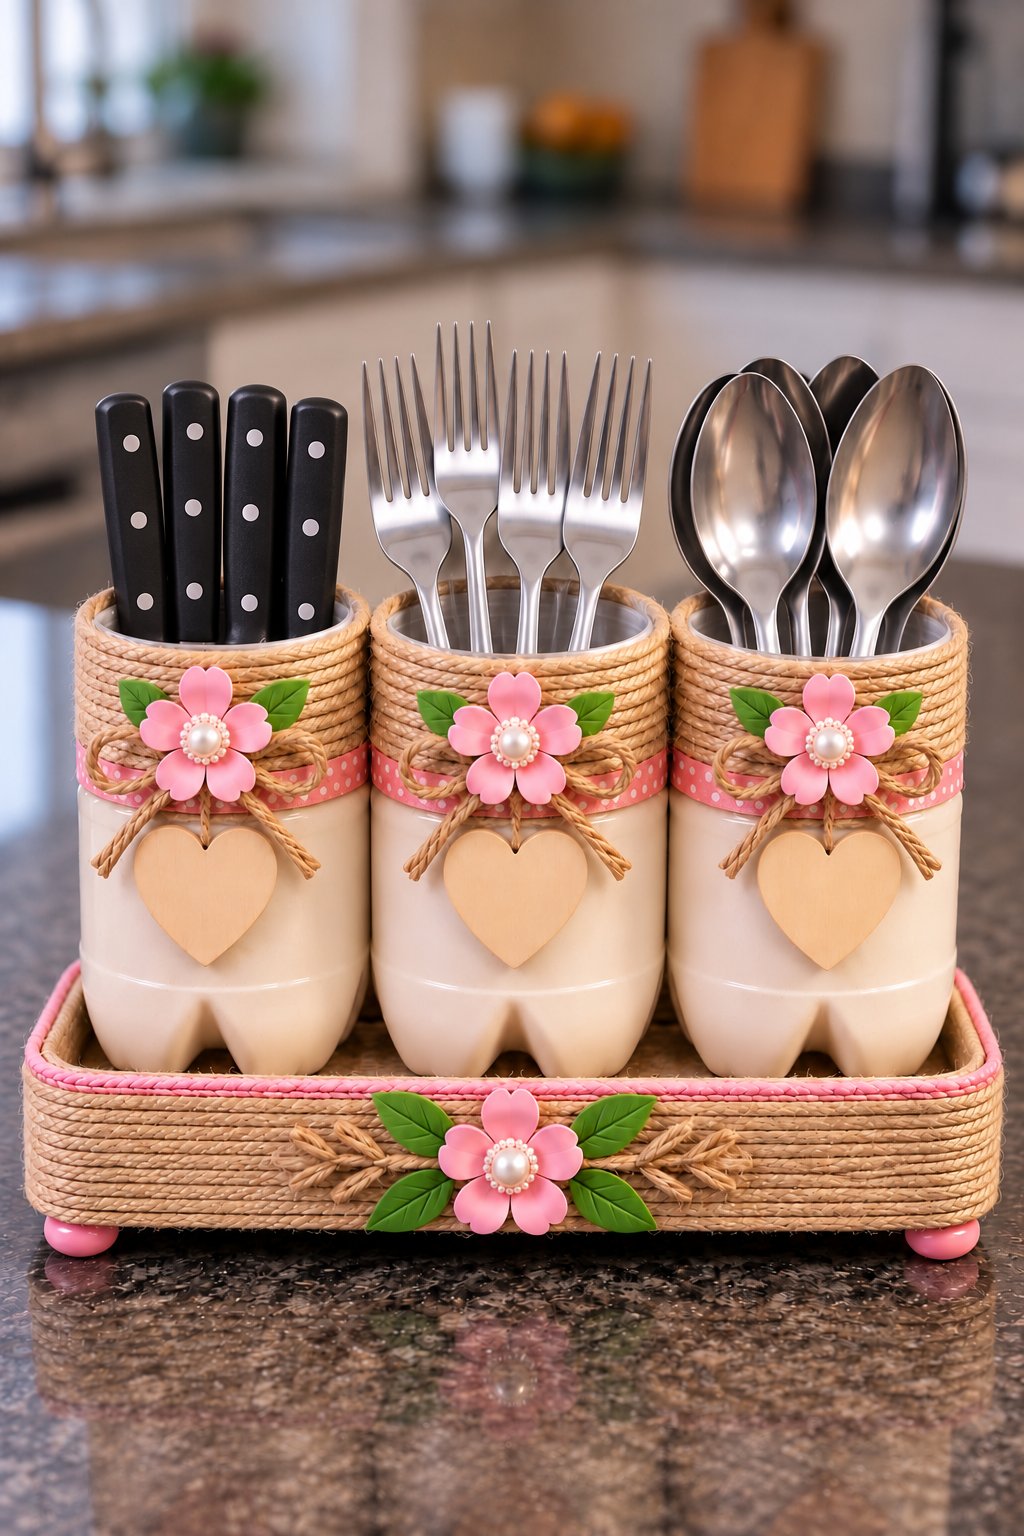
The curved bases of these bottle shaped pots create a playful set for table cutlery. A shallow tray keeps the containers from spreading across the counter. If adapting the idea, smooth and cover each cut edge, check the pots stand steadily, and keep sharp knives in a protective block or sheath instead of thin plastic containers.
12. Stack Green Cans on a Narrow Wall Board
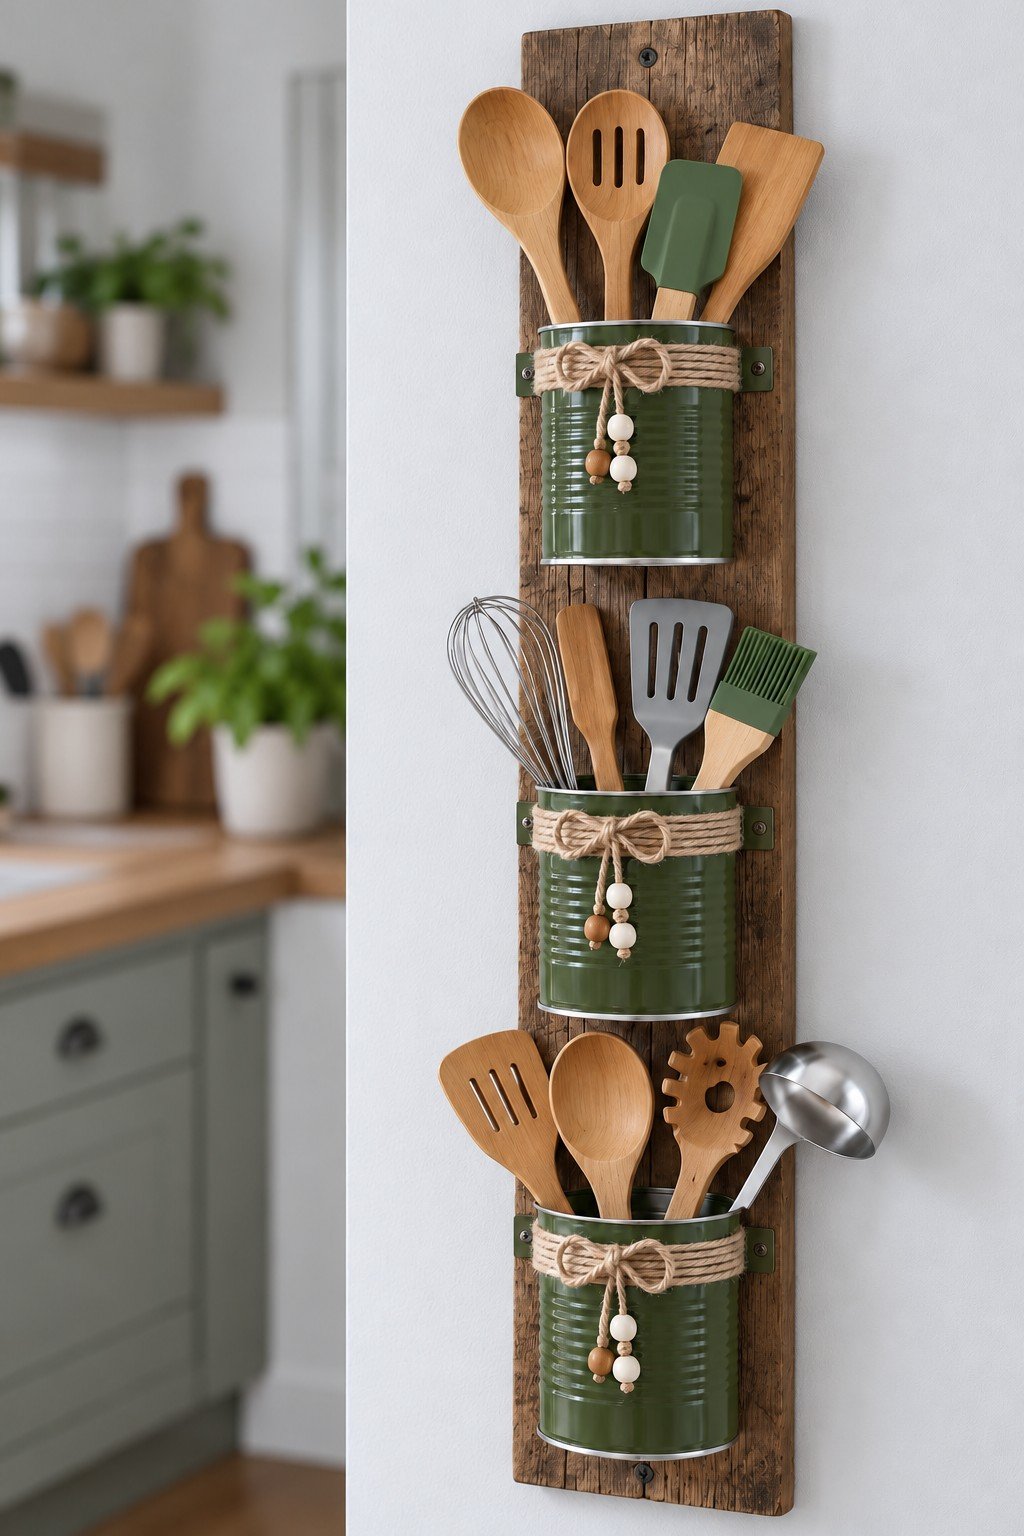
Three cans use vertical wall space instead of a wide counter footprint. The green finish and twine add color against the weathered board, and the open tops keep tools visible. Leave enough room above each can to remove a spatula; secure both the cans and board with suitable hardware.
13. Choose a Sculptural Octopus Rack
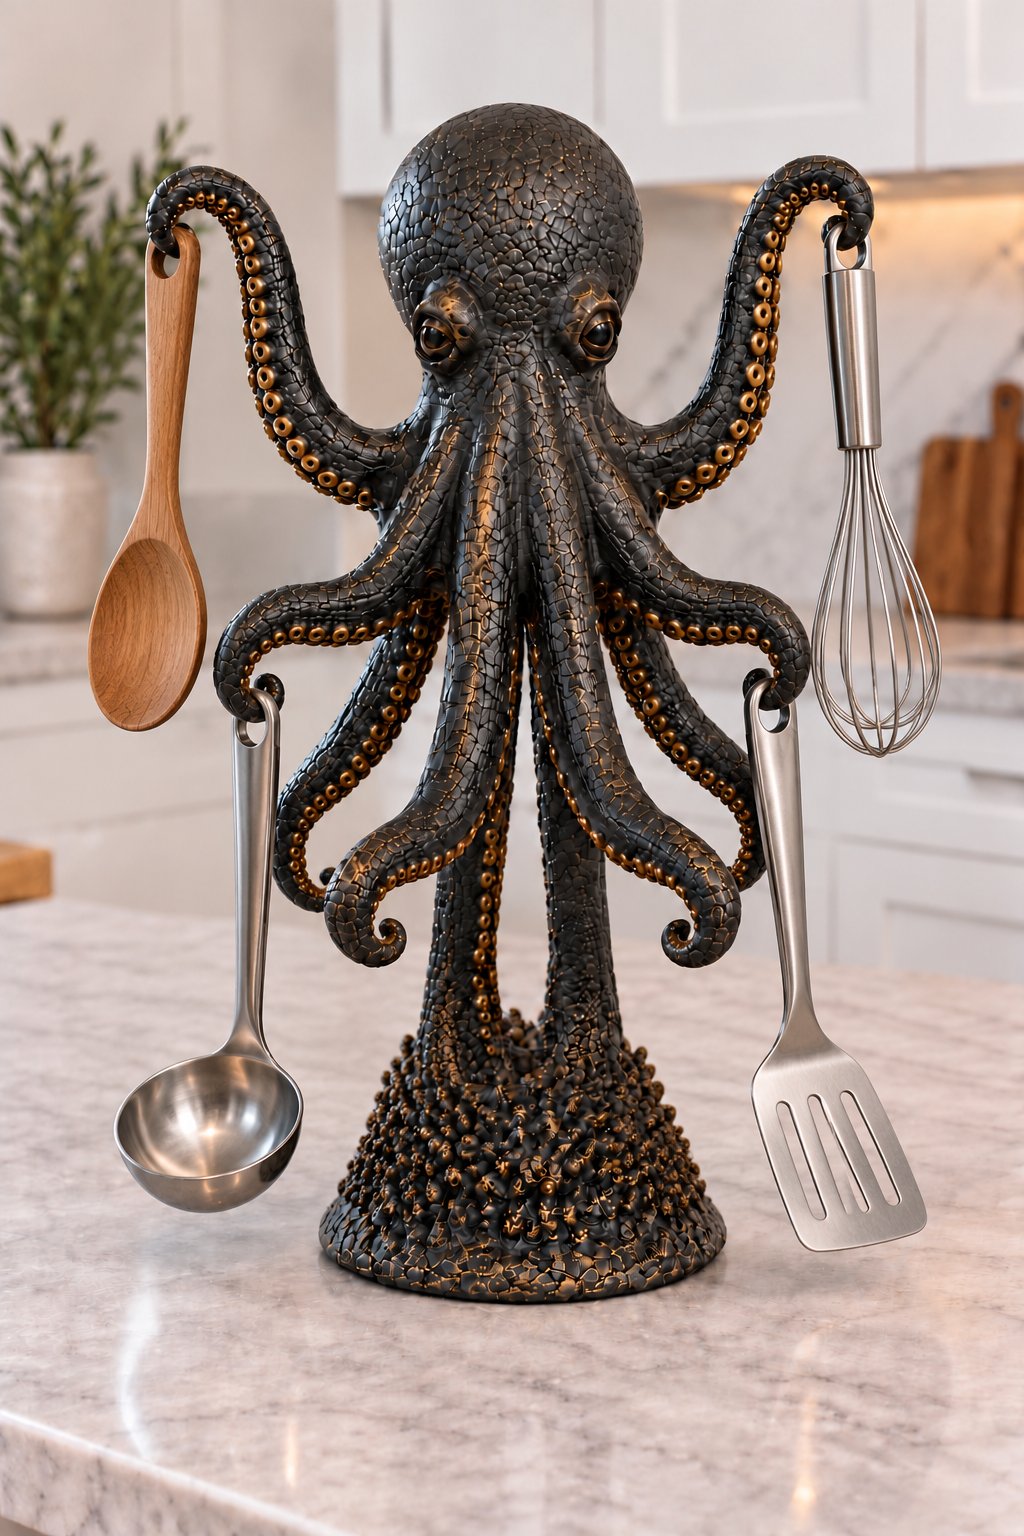
Curled arms make this octopus rack a conversation piece while holding four tools by the holes in their handles. Give a freestanding sculpture a wide, stable base and spread the weight evenly. Check that every hook passes through a handle opening before loading it, and leave enough room around the hanging heads.
14. Sort Different Tools by Container Shape
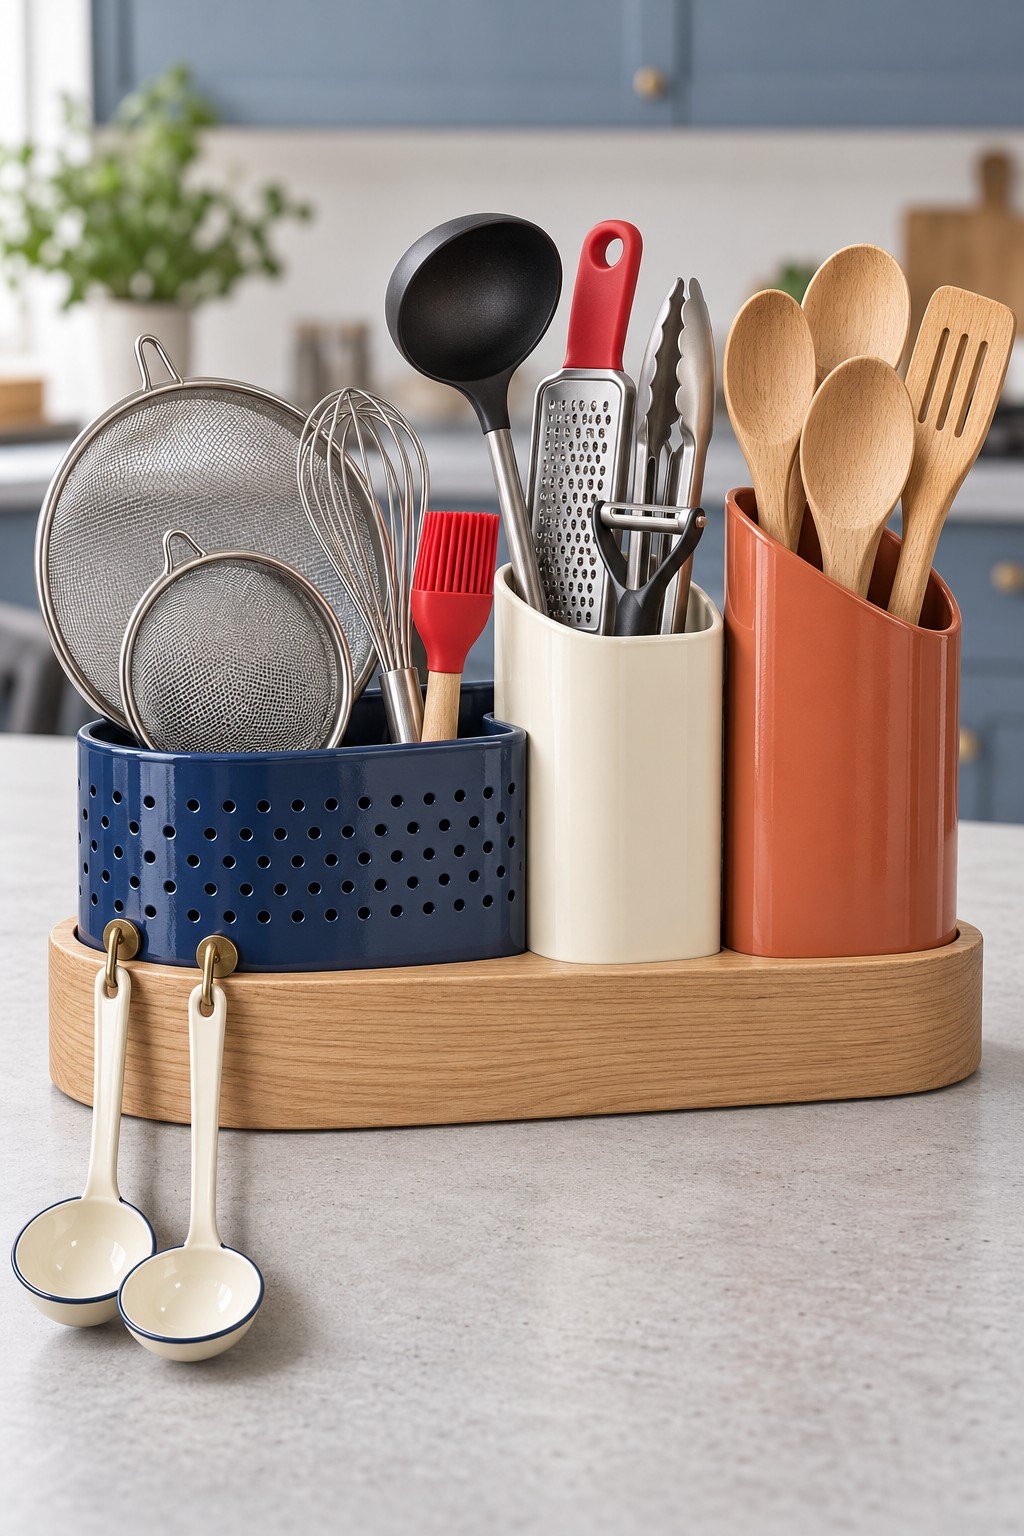
A wide navy container takes strainers and whisks, the cream section gathers compact tools, and a taller terracotta colored pot holds wooden spoons. The shared base makes the mix feel intentional. Position the station far enough from a cooking zone to limit grease buildup and leave room to remove each tool.
15. Combine a Hanging Rail with Paper Towel Storage
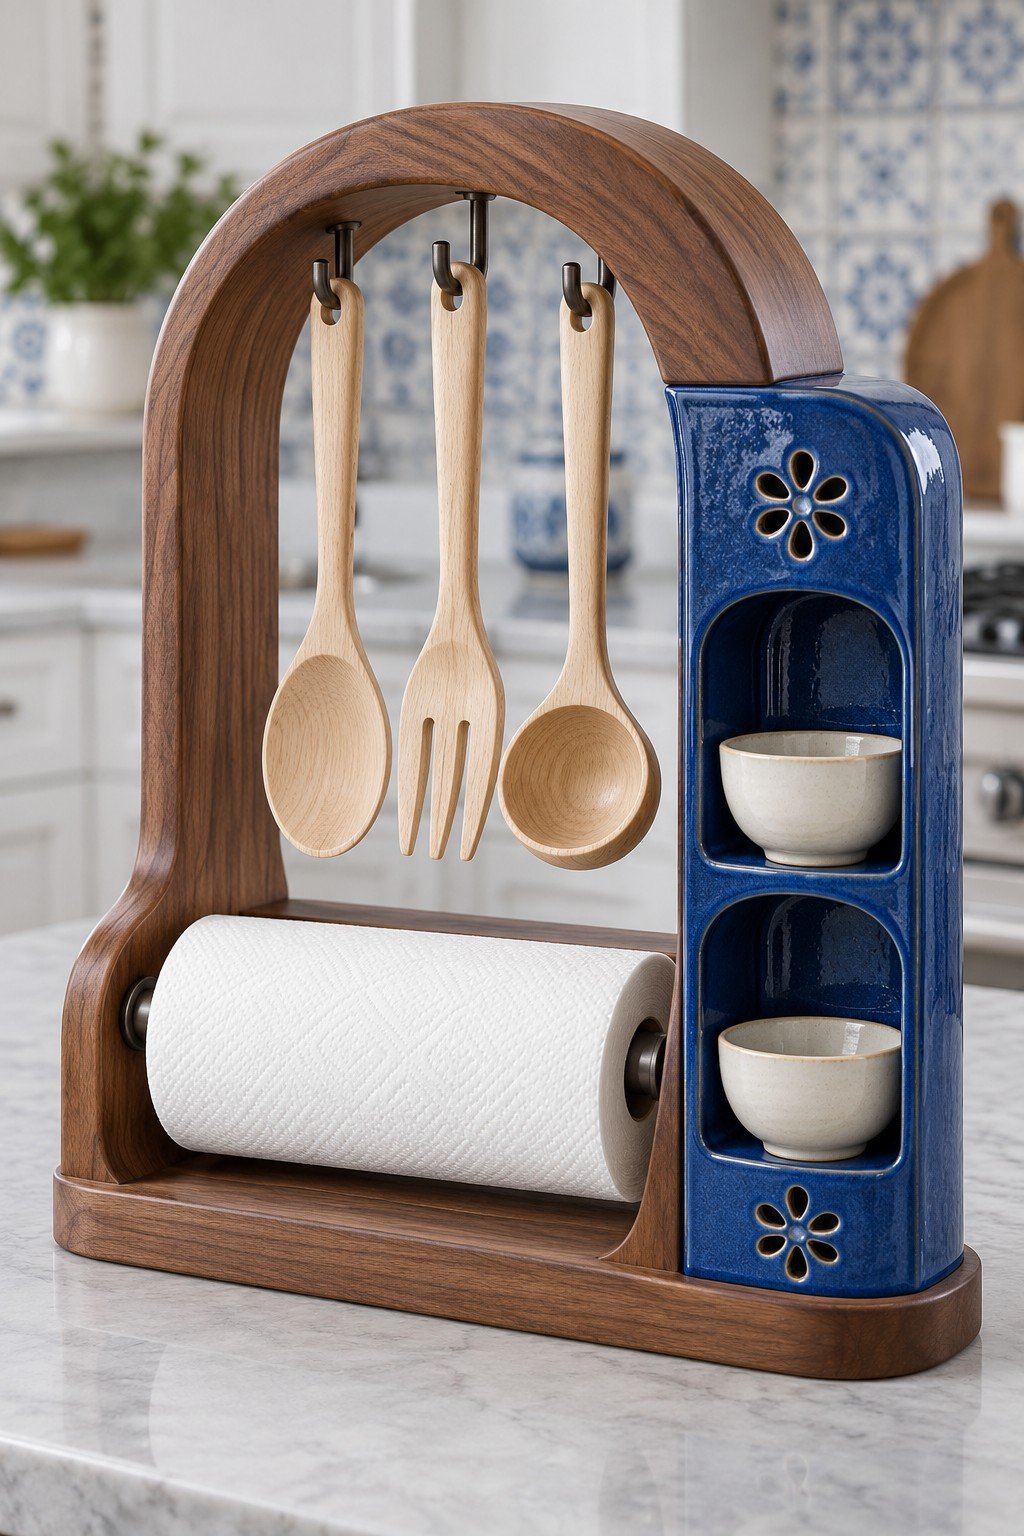
The arch frames three hanging wooden tools above a paper towel roll, while blue side compartments hold small bowls. It suits a counter where cooking and wiping happen in the same place. Measure the roll and allow enough side clearance to replace it without dismantling the stand.
16. Fan Out Tall Utensils in a Wire Basket
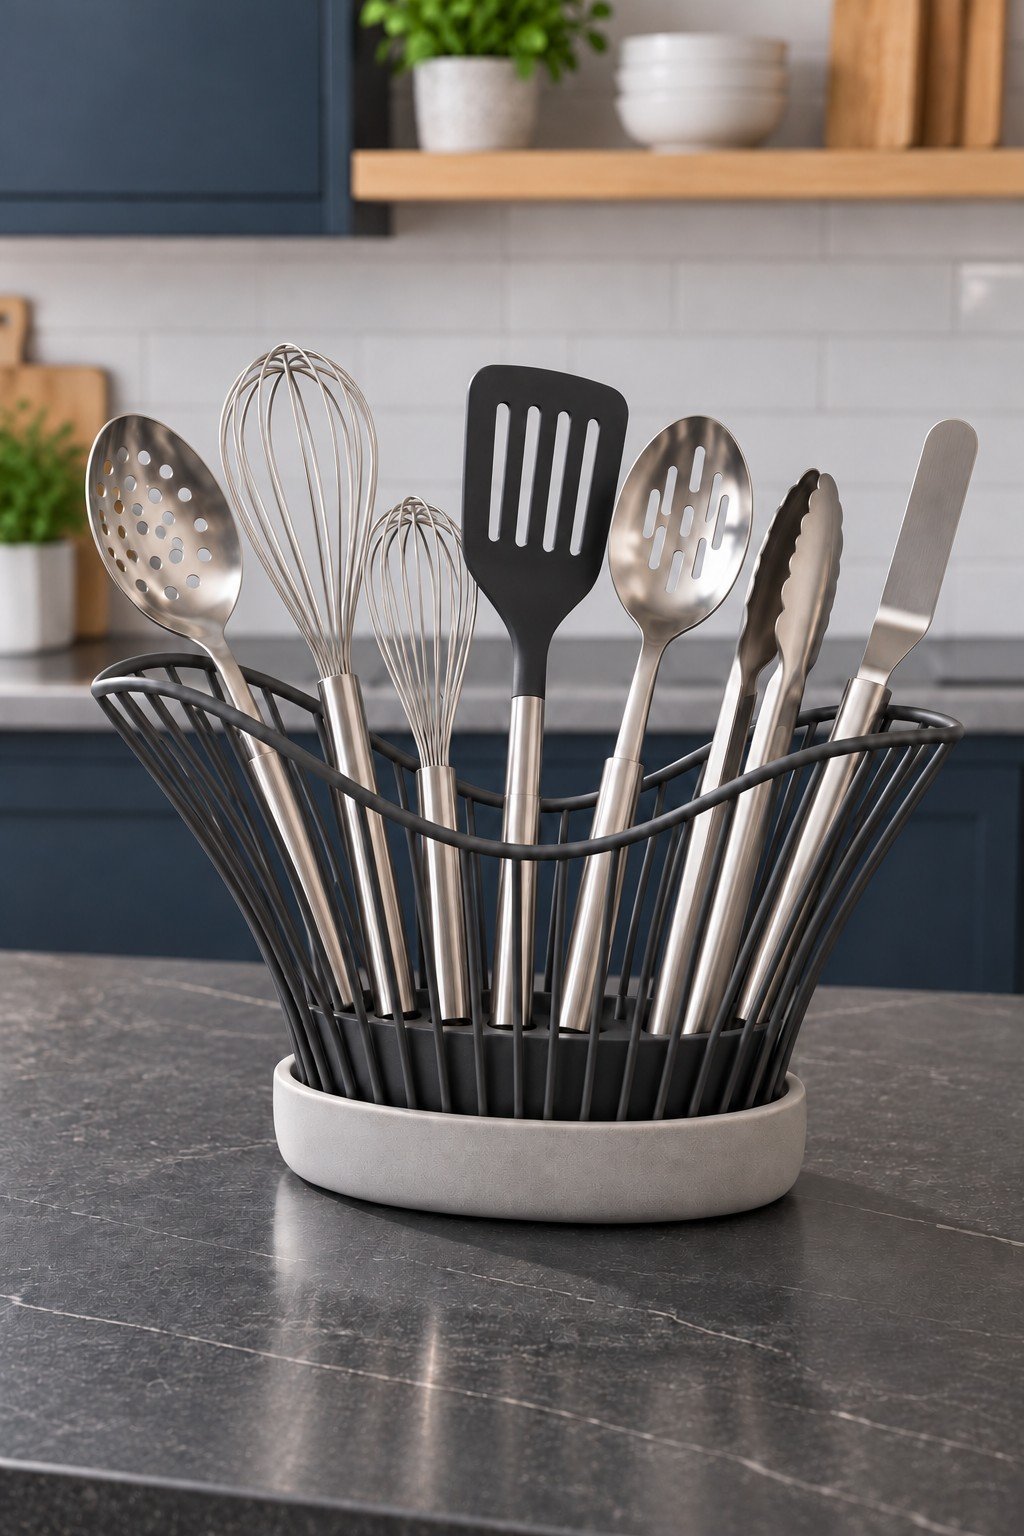
The open wire outline lets tall utensils spread out, making their heads easy to identify. A broad base helps contain the arrangement, but a narrow implement can slip between widely spaced wires. Test the spacing with your own tools and use a removable inner cup if smaller handles fall through.
17. Display a Matching Spoon Collection
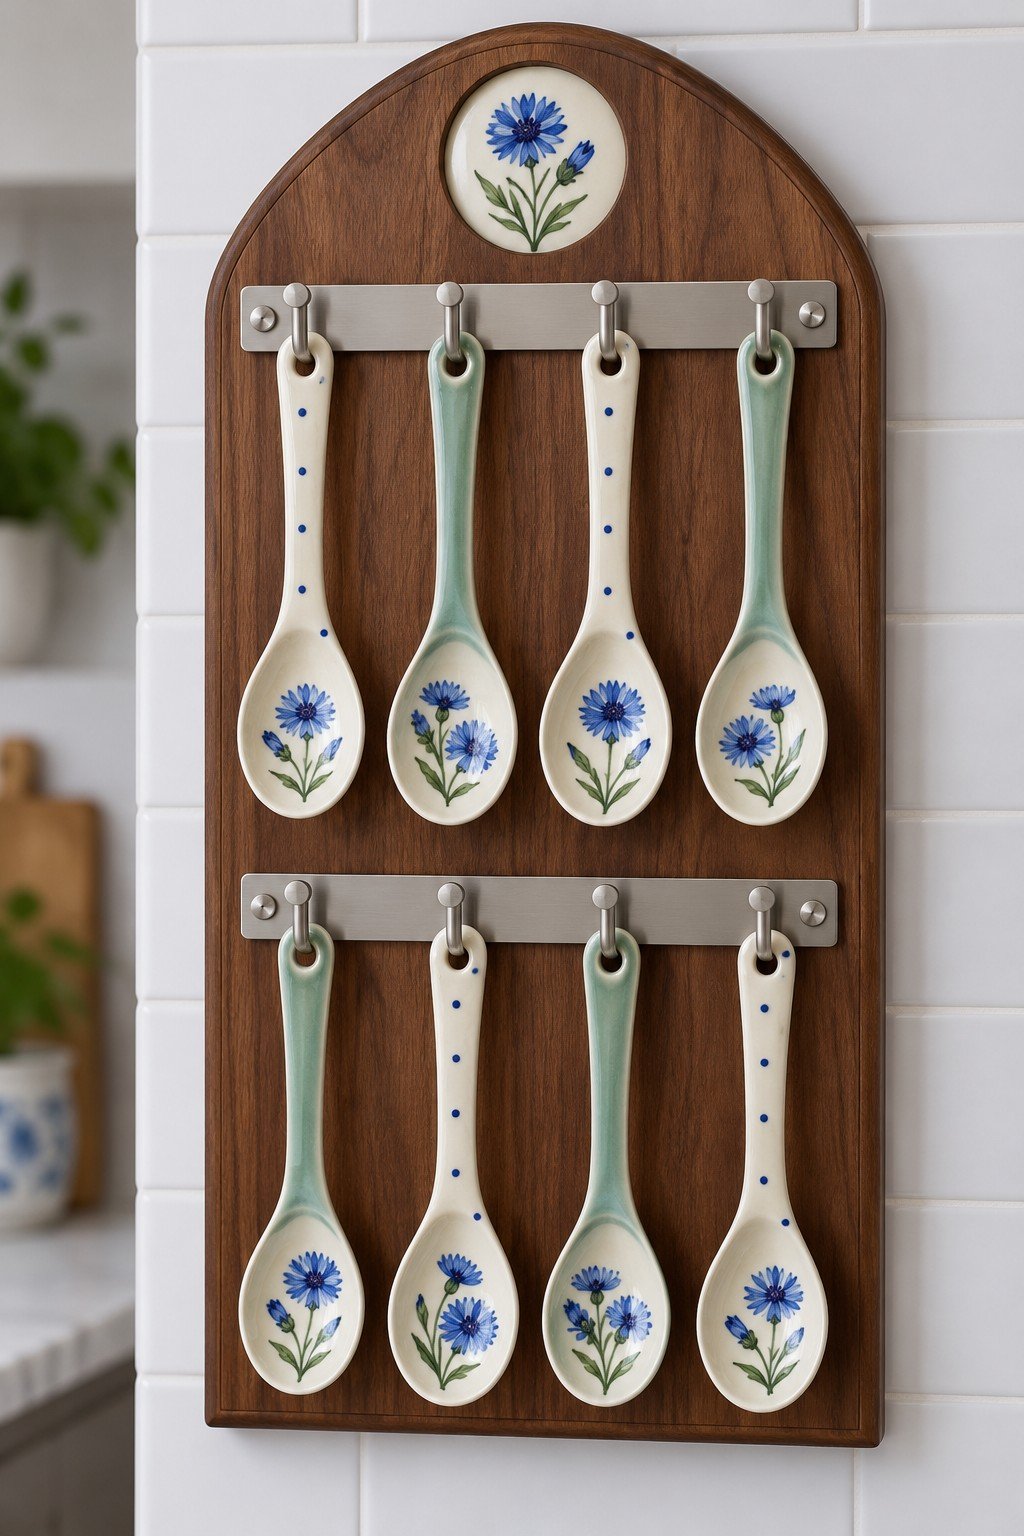
Blue floral spoons bring a decorative rhythm to a wall without taking up a drawer. This board works especially well for a coordinated collection used occasionally. Space hooks so adjacent pieces do not knock together, mount the board securely, and wash displayed spoons before using them with food.
18. Carry Cutlery in Clear Cups
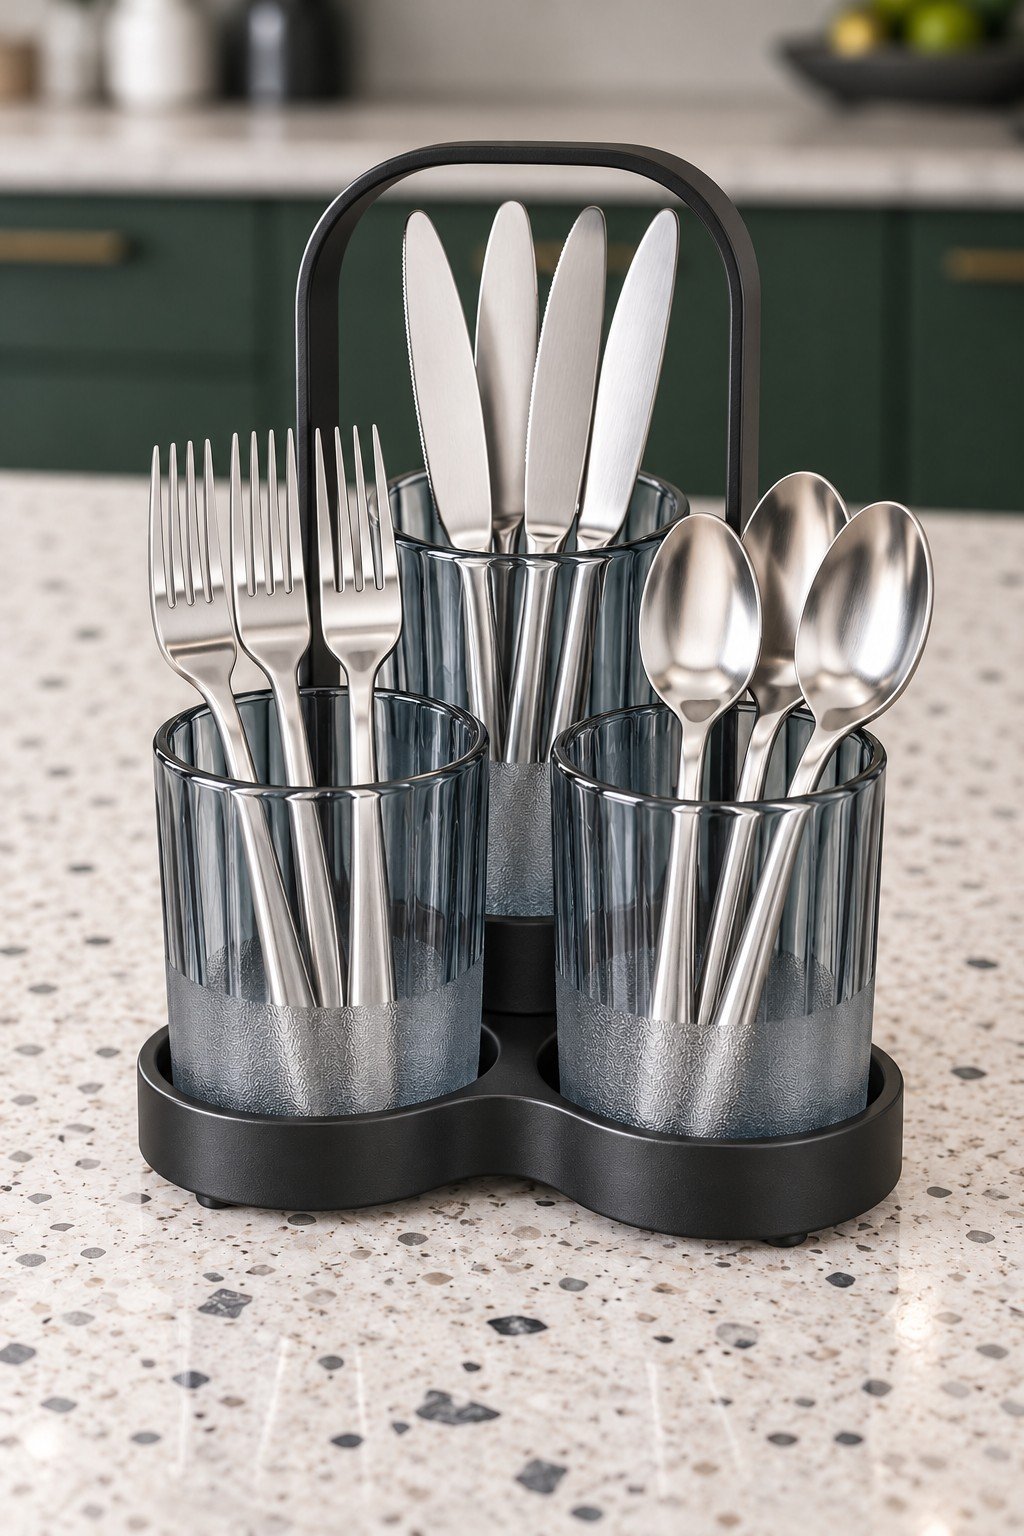
Clear cups show at a glance which type of cutlery needs replenishing, while the handle gathers them into one portable unit. Check that the glasses fit securely in the base and cannot tip when the caddy moves. Lift them out to wash and dry before refilling.
19. Wrap a Crock in Saved Wine Corks
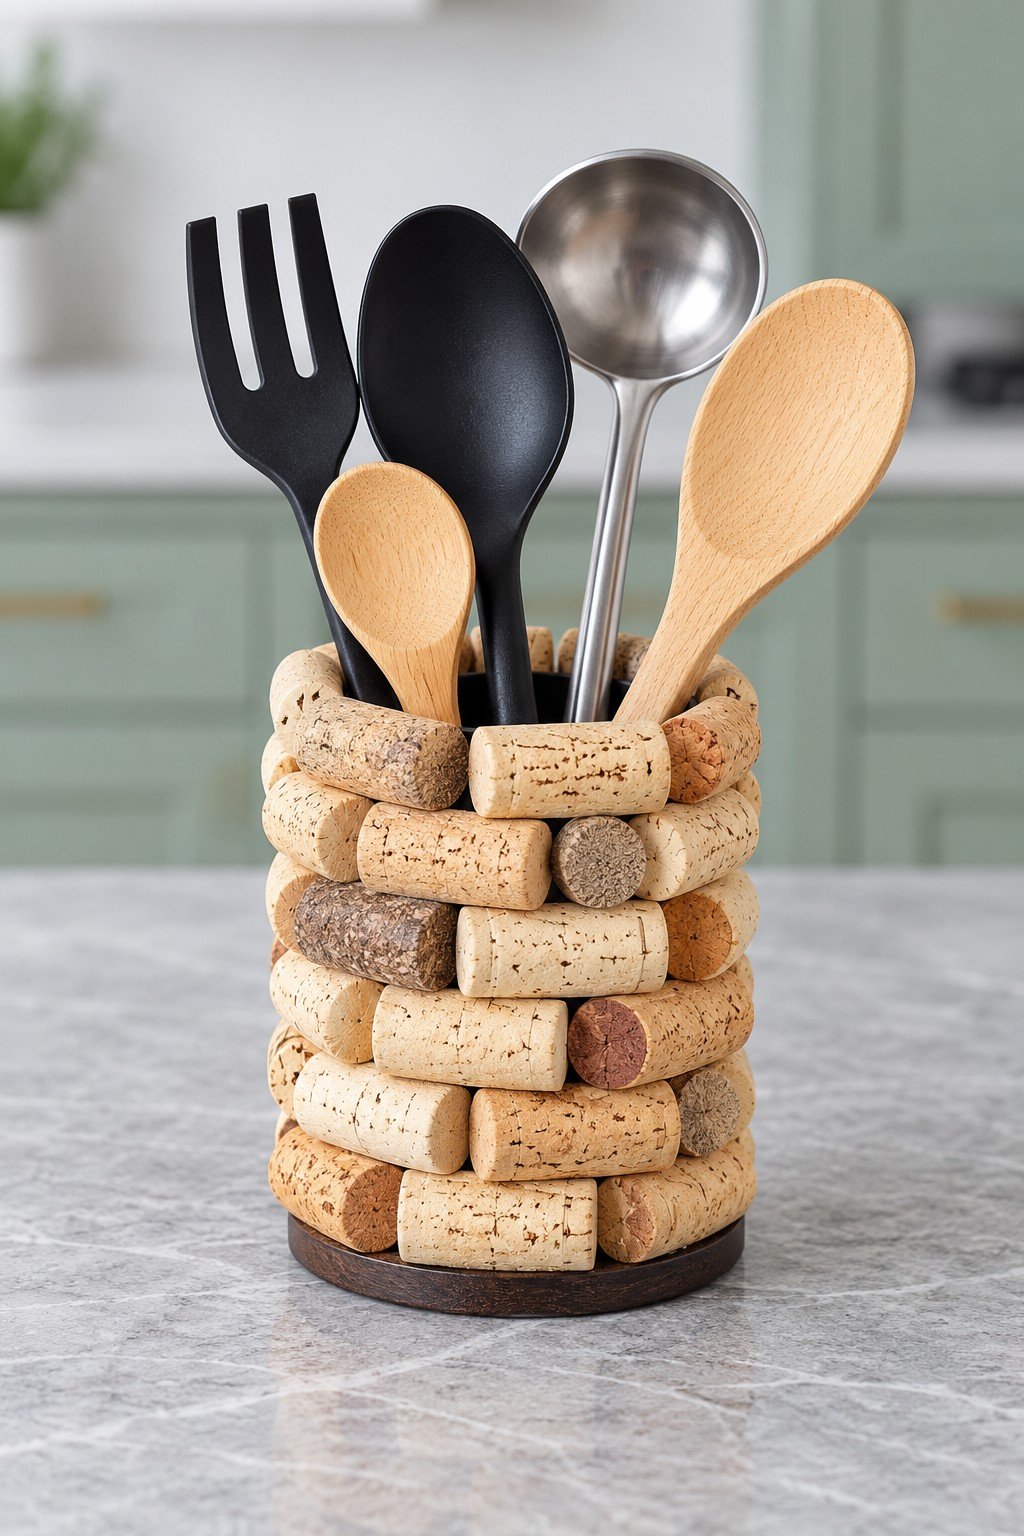
Horizontal corks introduce a warm, varied texture around a compact utensil crock. Start with a sturdy washable container that can support your tools, then attach the corks only to its exterior. A removable liner makes cleanup simpler and keeps damp utensils away from the decorative cork surface.
20. Give Long Utensils a Rustic Crate
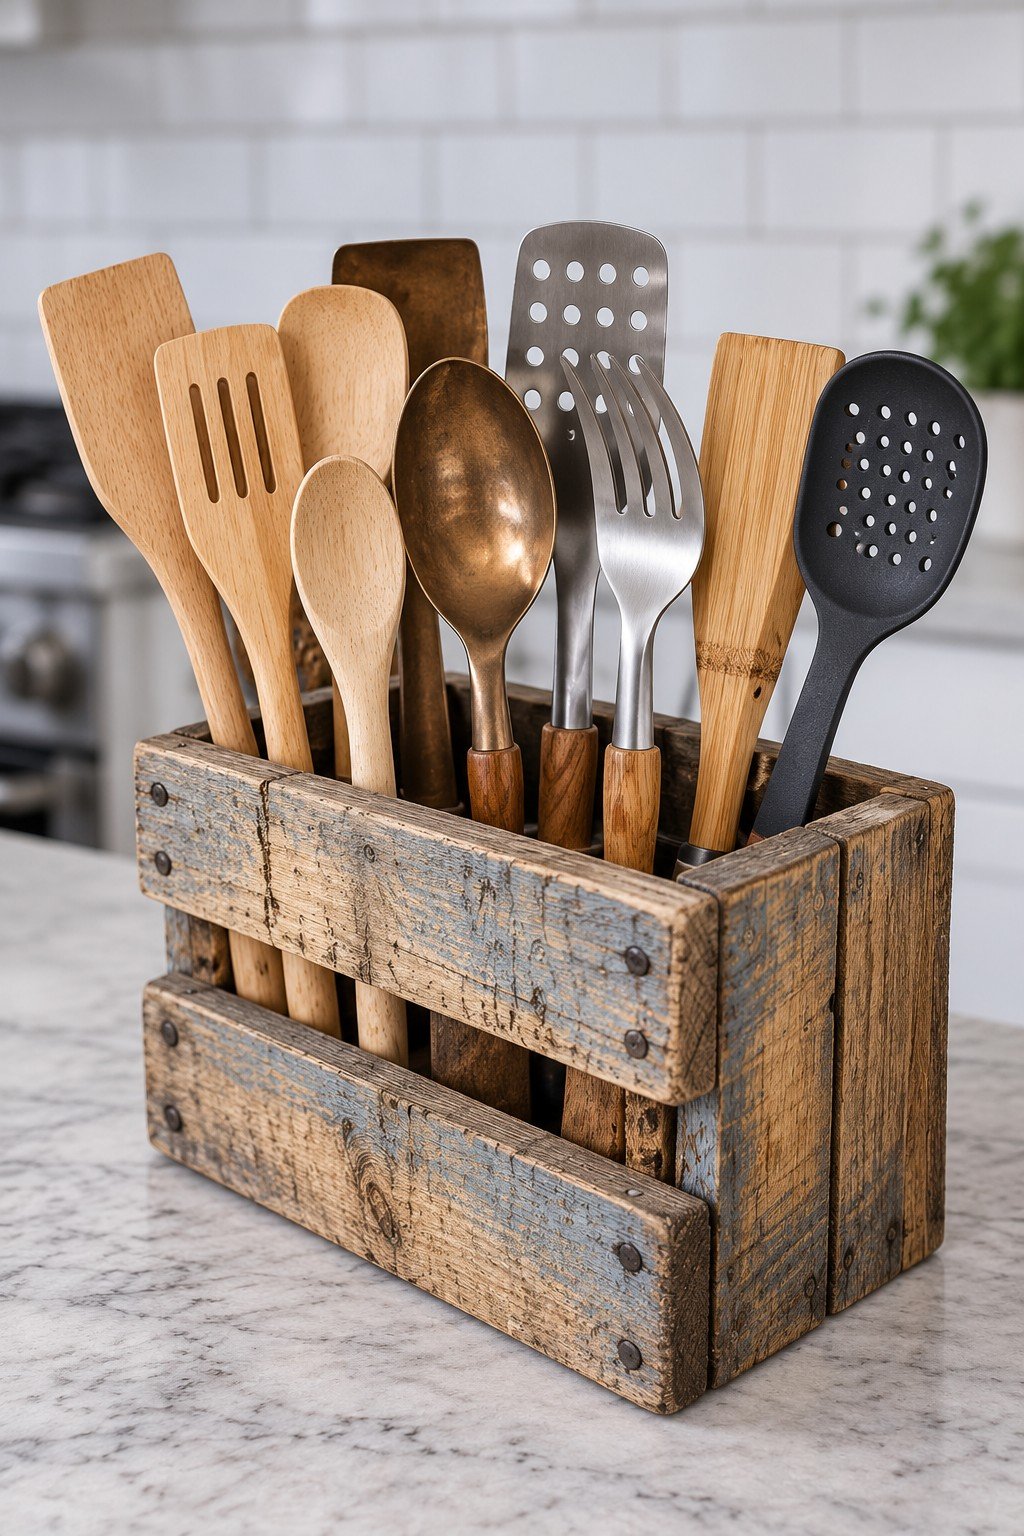
The slatted crate keeps a generous collection in one place while its aged wood supplies a rustic accent. Check for splinters, exposed fasteners and an intact base before reusing a crate. If the gaps are too wide for your handles, add a removable smooth sided insert inside.
21. Put a Striped Tin Set on a Serving Tray
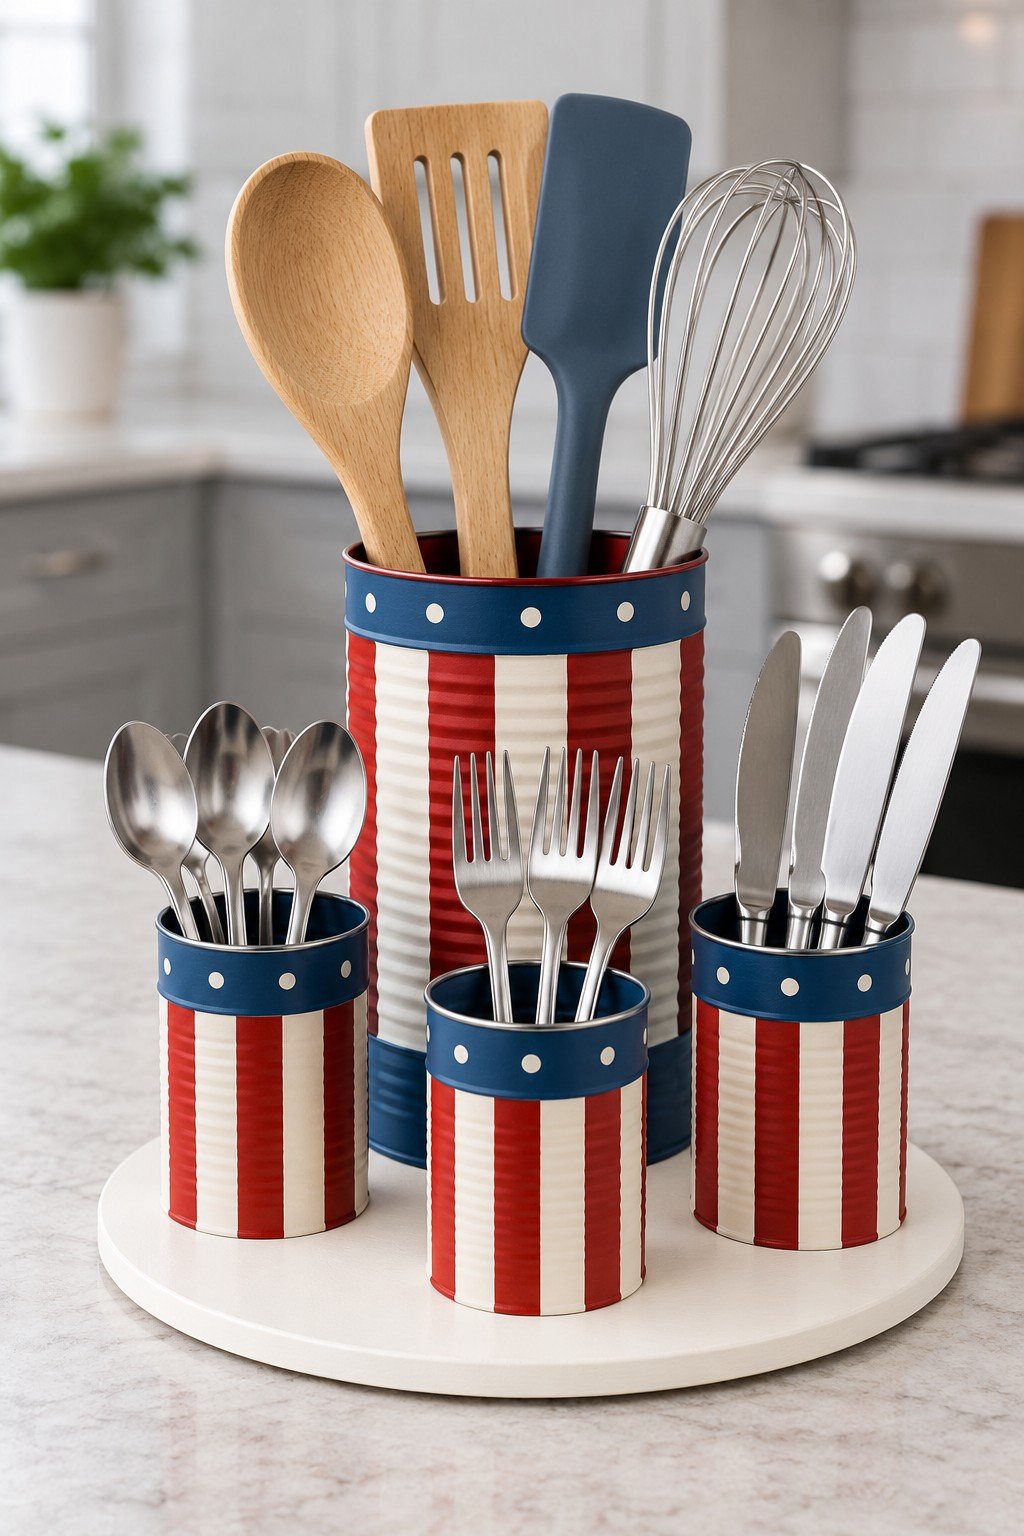
A tall central can and three smaller ones create distinct places for serving tools and table settings. The red, white and blue stripes are especially easy to coordinate with an outdoor meal. Keep the cans separate or secure them to the tray, and check the group is stable when fully loaded.
22. Frame Floral Jars with a Picket Fence
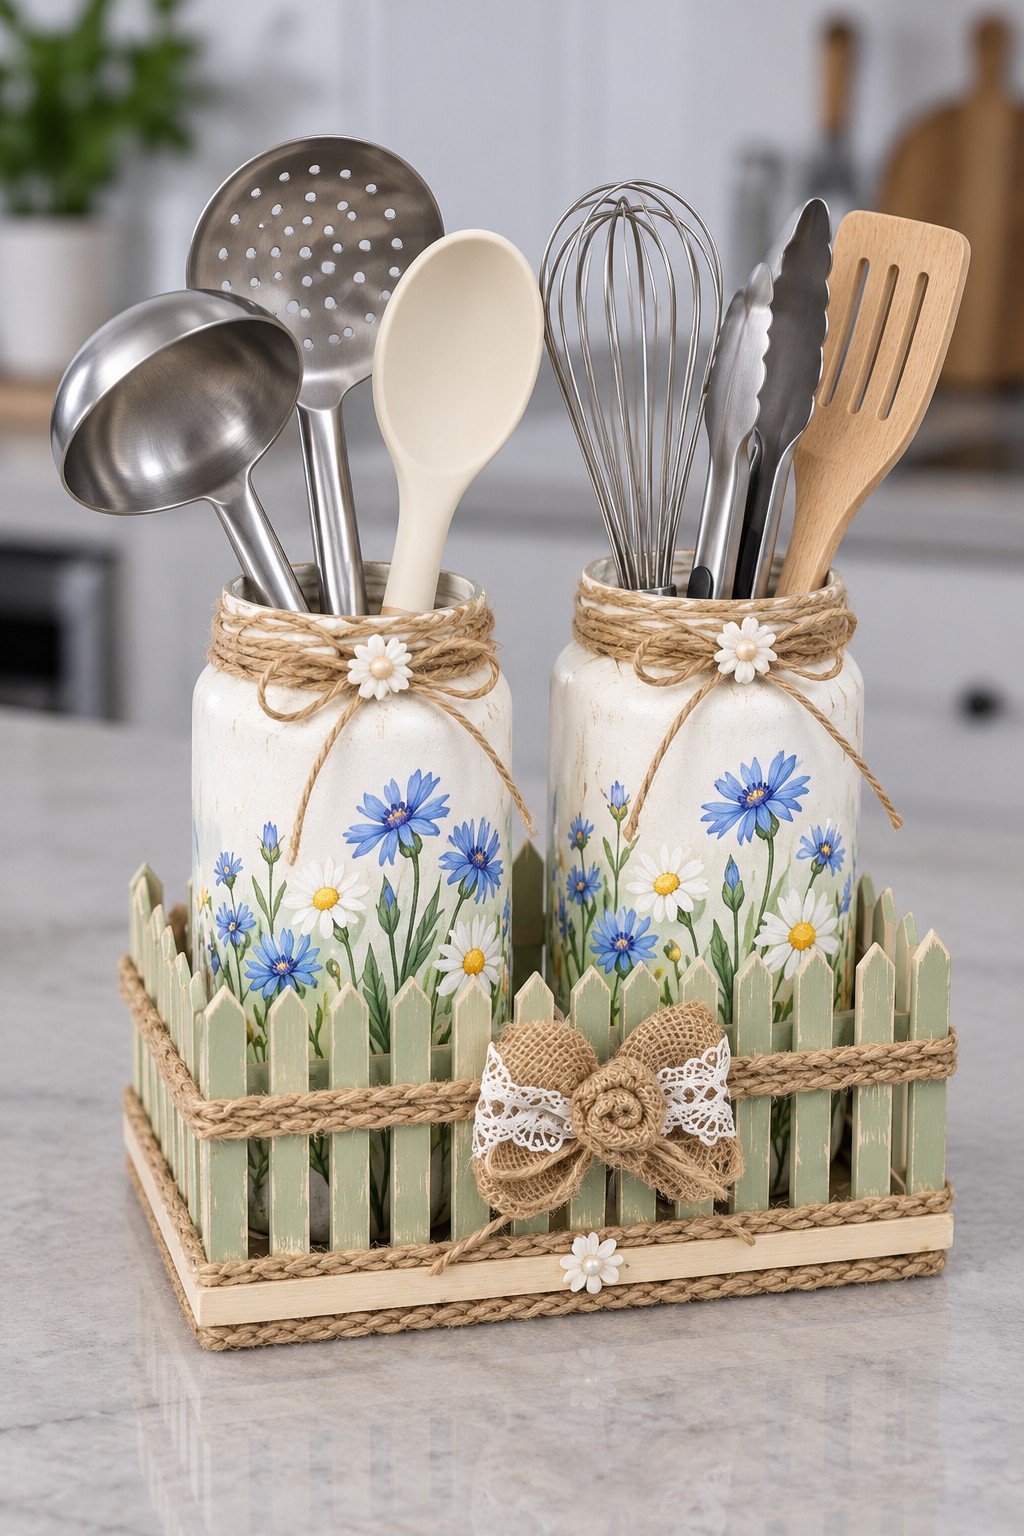
Blue flowers on the jars echo the light green fence, making this pair feel like one small garden inspired display. The open tops provide room for whisks and spatulas. Choose jars that lift out of the frame for washing, and keep the twine and fabric bow away from splashes.
23. Assign a Pastel Pot to Each Type of Cutlery
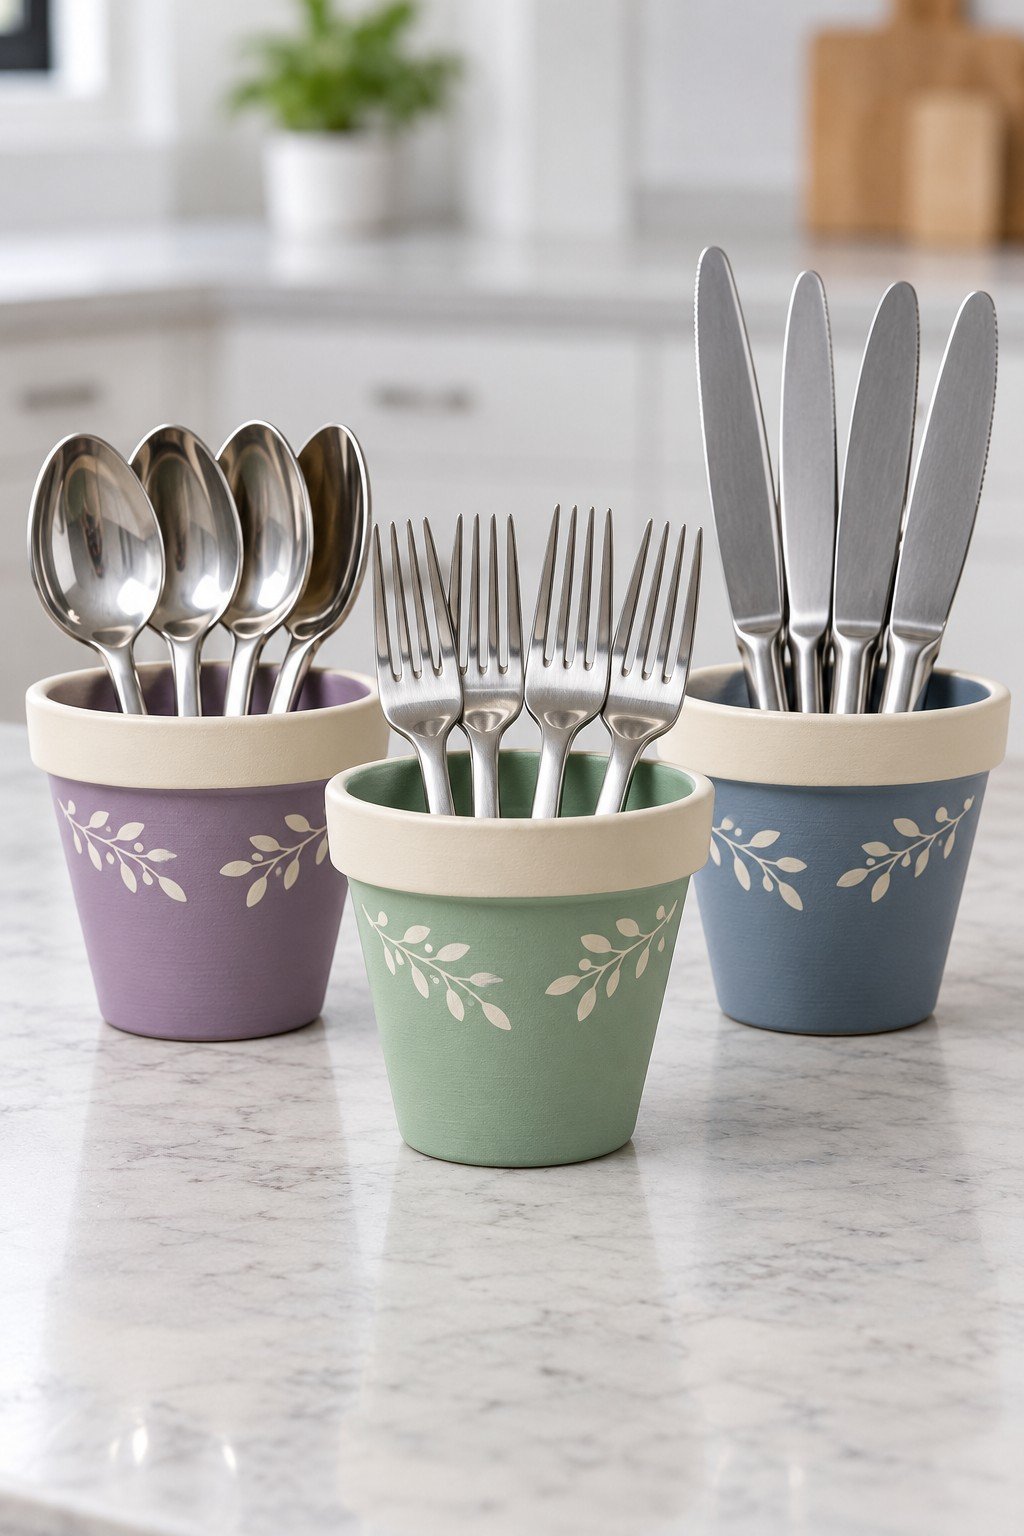
Lavender, green and blue pots sort forks, spoons and table knives without labels. The white rims make the different colors feel coordinated. If using decorative plant pots, insert removable washable cups and cover drainage openings in the outer pots; do not assume an unknown glaze is suitable for food contact.
24. Fold a Cutlery Pocket for the Table
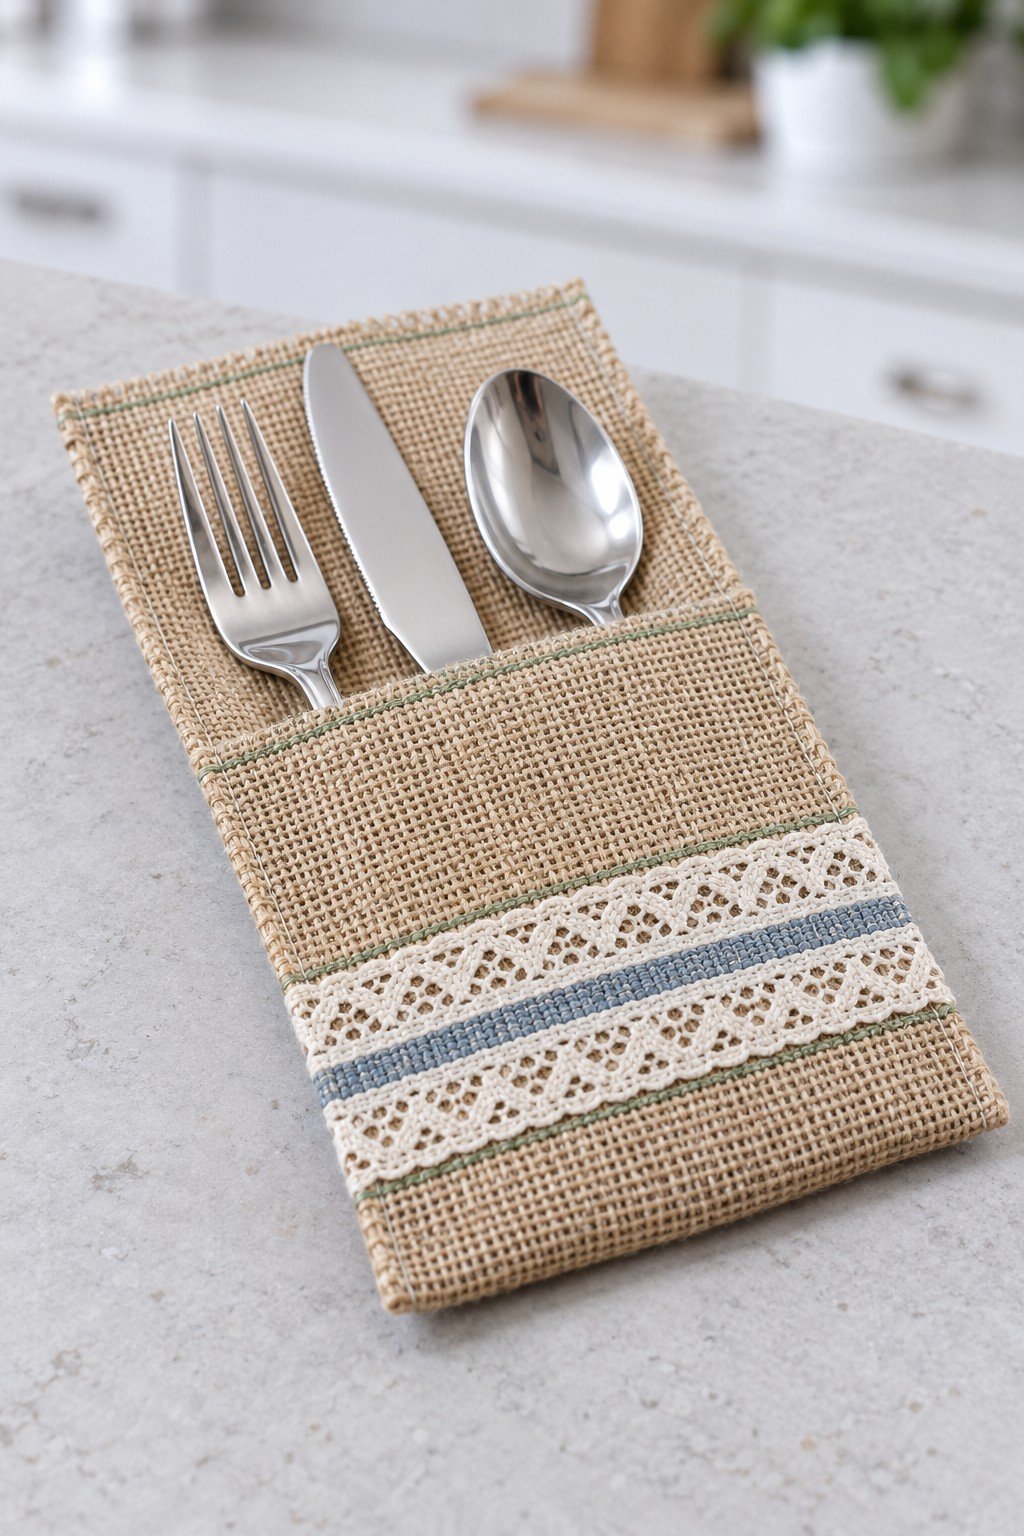
A flat pocket holds one place setting and takes almost no storage space when empty. The lace and blue stripe make it suitable for a casual table or picnic. Use a washable inner sleeve or food safe napkin between the fabric and eating ends, and replace the pocket if it becomes soiled.
25. Use a Long Wooden Box for Shared Meals
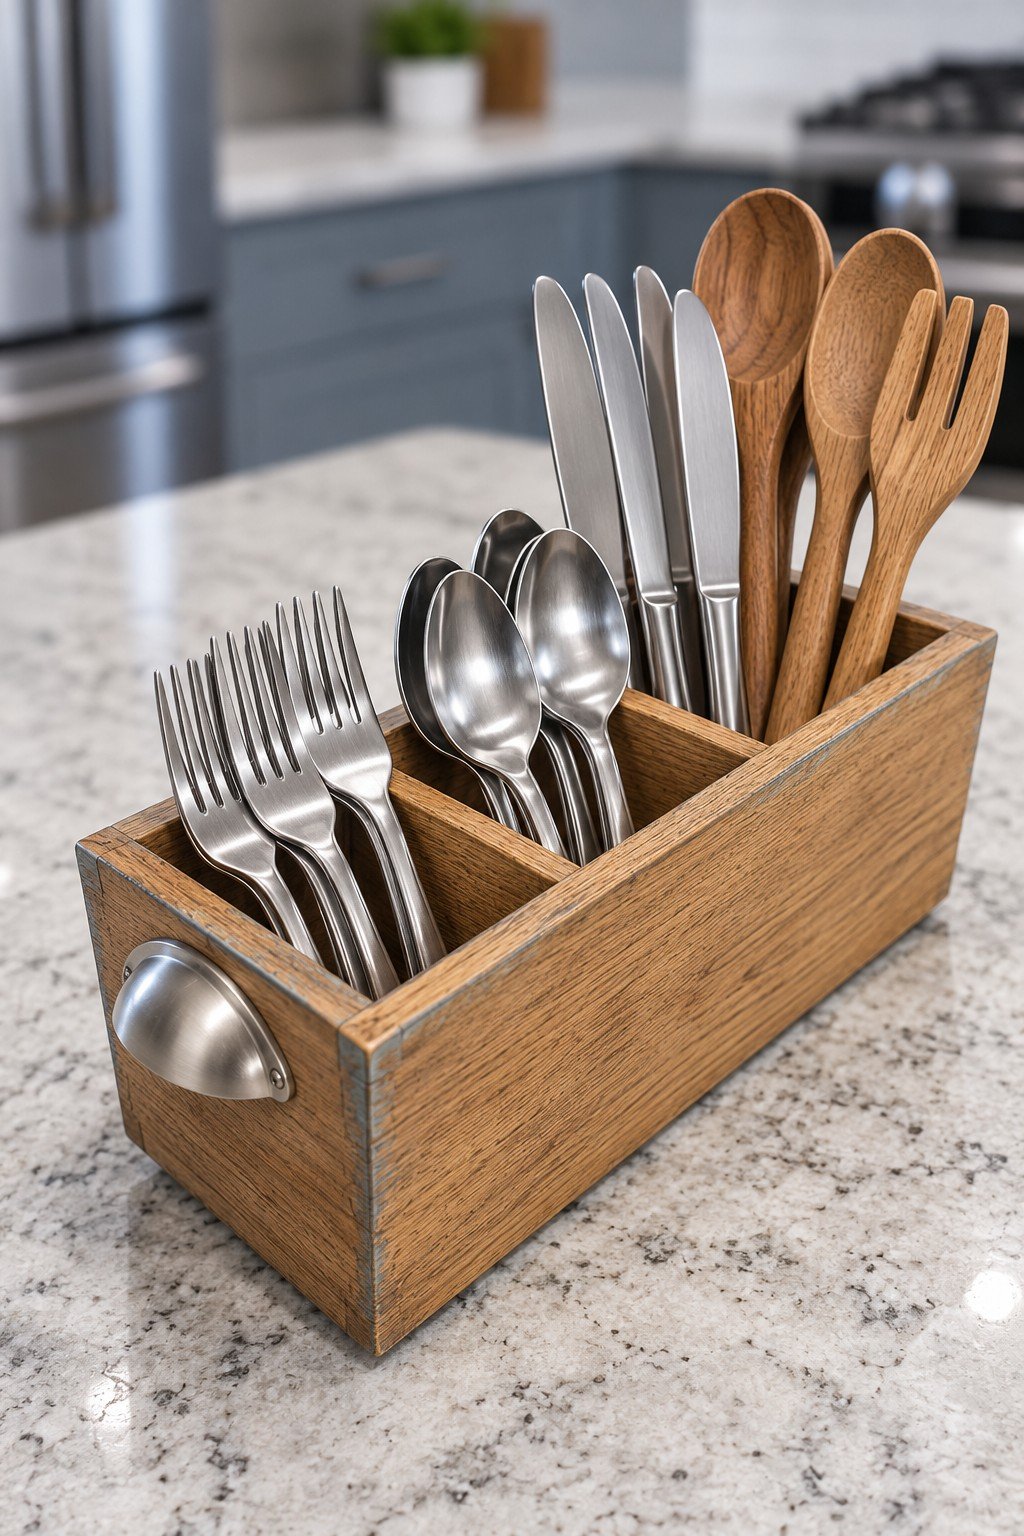
A rectangular box sorts serving tools and cutlery into sections that are easy to take to the table. Its low profile leaves handles within reach, while the end pull helps with repositioning. Measure your longest spoons before choosing dividers, and add removable washable cups if the wooden interior is difficult to clean.
26. Bring Pattern to Plain Tins
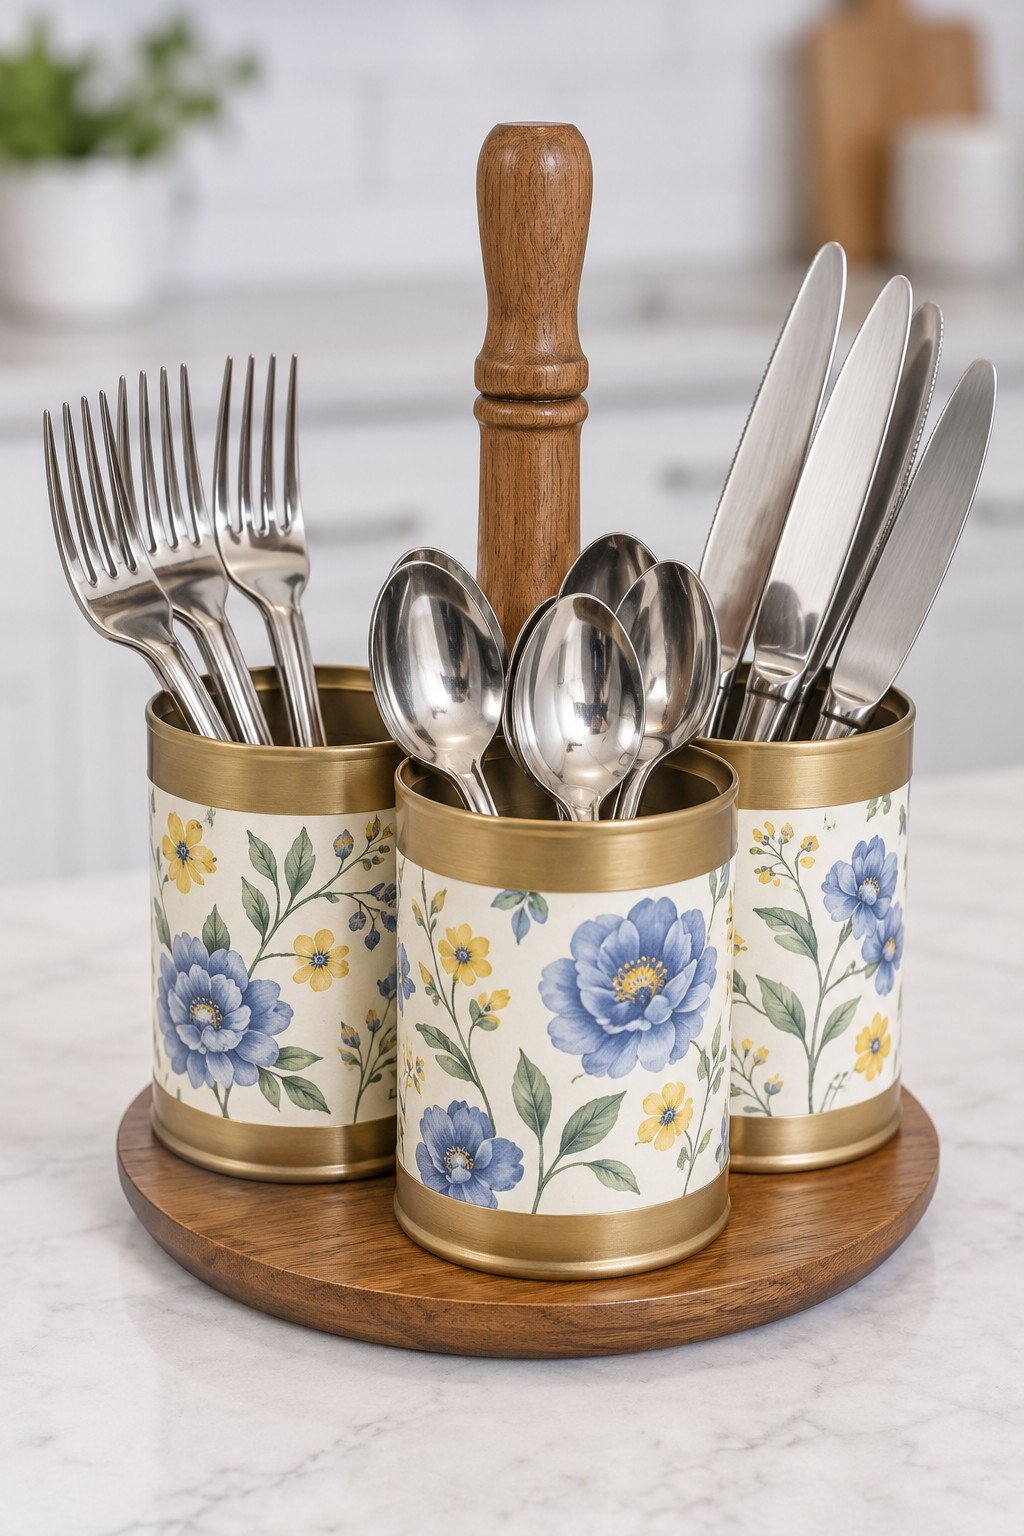
Blue flowers and gold colored rims give three tins a coordinated look, while the round wooden base keeps them together. Use the individual cans for forks, spoons and table knives. When recreating the design, leave the interiors unpainted and make sure the handle and cans are secure before carrying the set.
27. Make a Jar Caddy with a Leather Loop
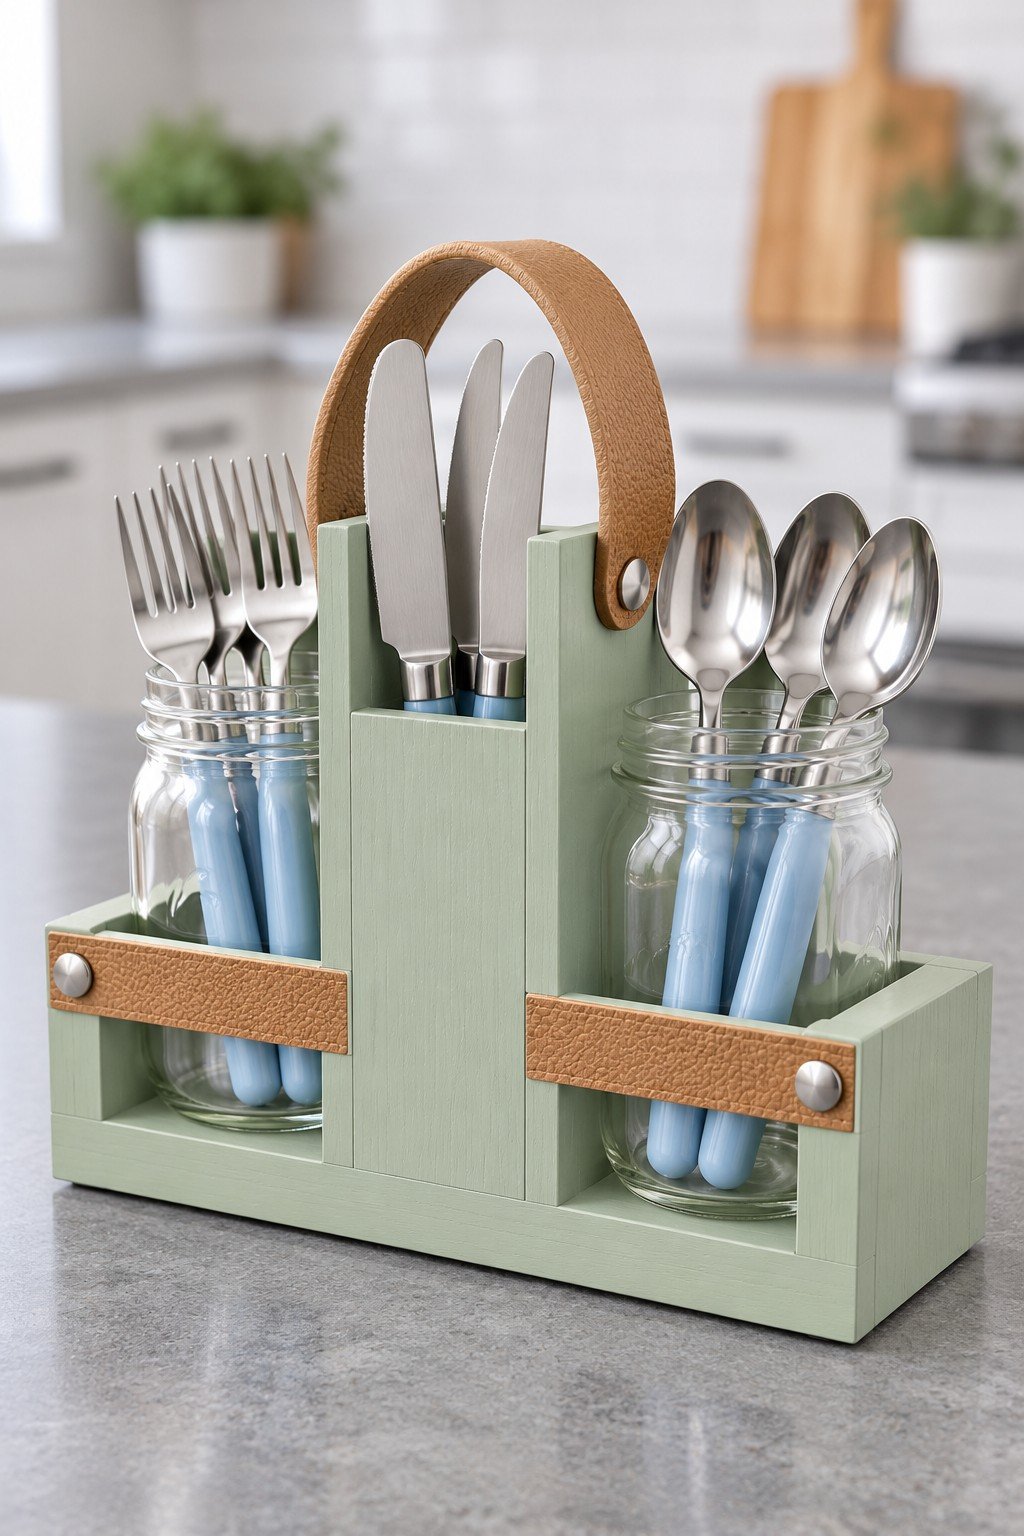
Two glass jars separate forks and spoons on either side of a narrow center compartment. Sage paint and a tan loop add a soft contrast to the clear glass. Check the handle attachments and weight before lifting; removable jars make the everyday cleanup easier.
28. Add Woodland Texture with a Twig Sleeve
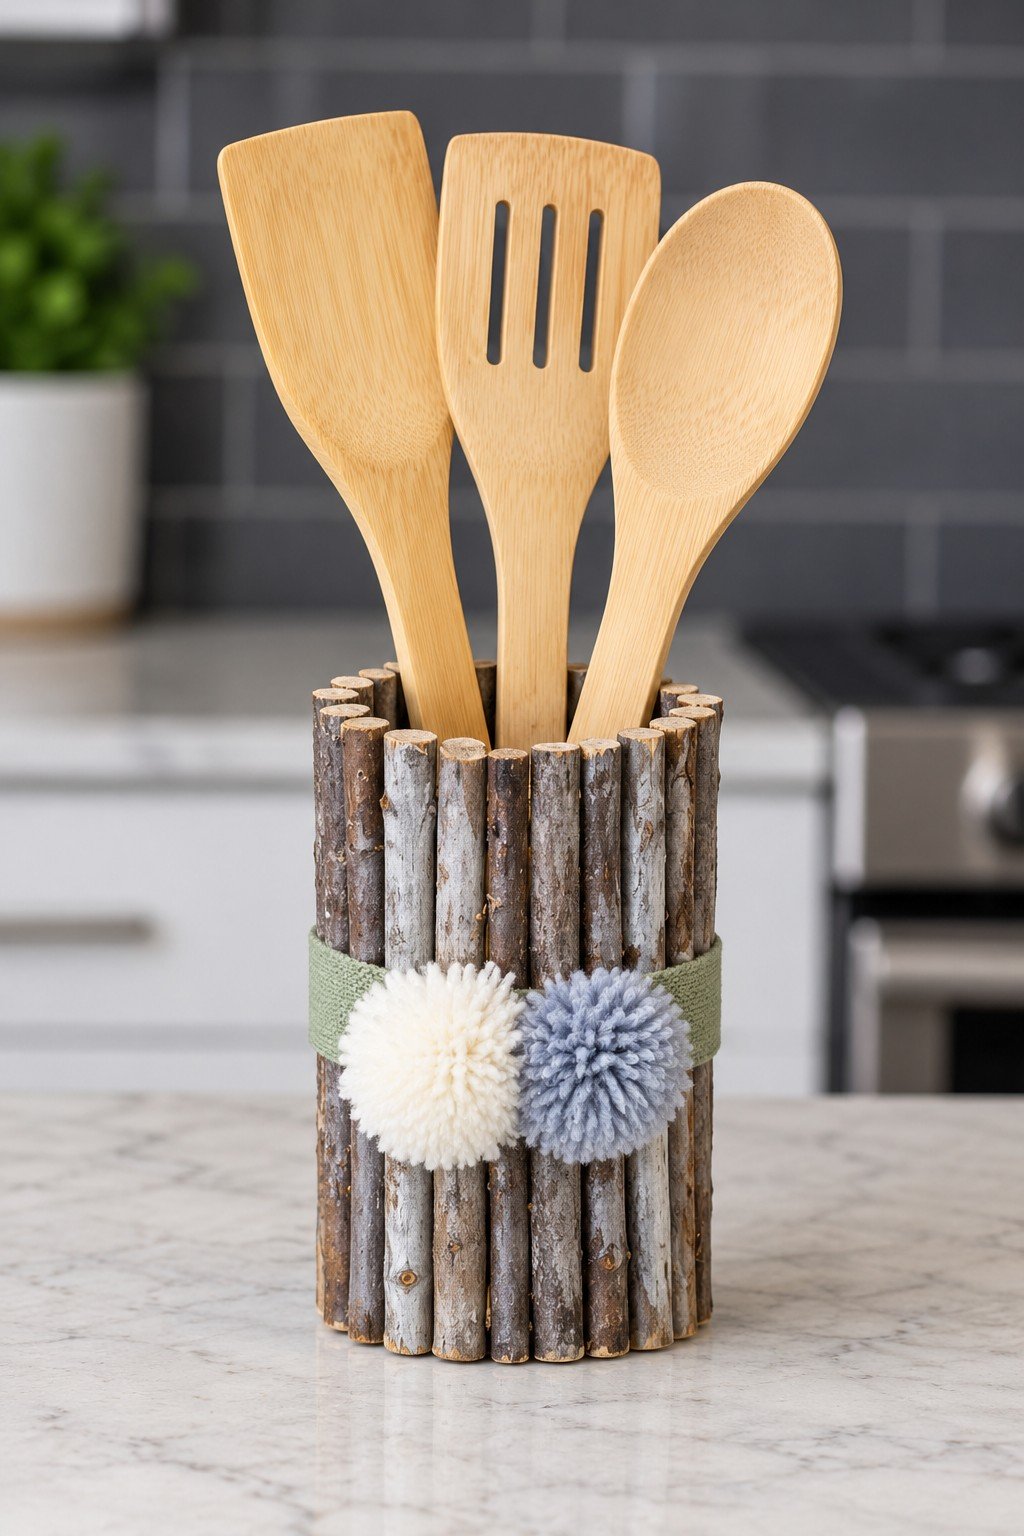
Short twigs turn a plain cylindrical holder into a woodland accent, with pom poms adding a lighter touch. Build the decoration around a stable inner cup instead of relying on the twigs to contain the utensils. Keep the textured exterior dry and use a washable insert for the tools.
29. Line Up Three Cups in a Navy Crate
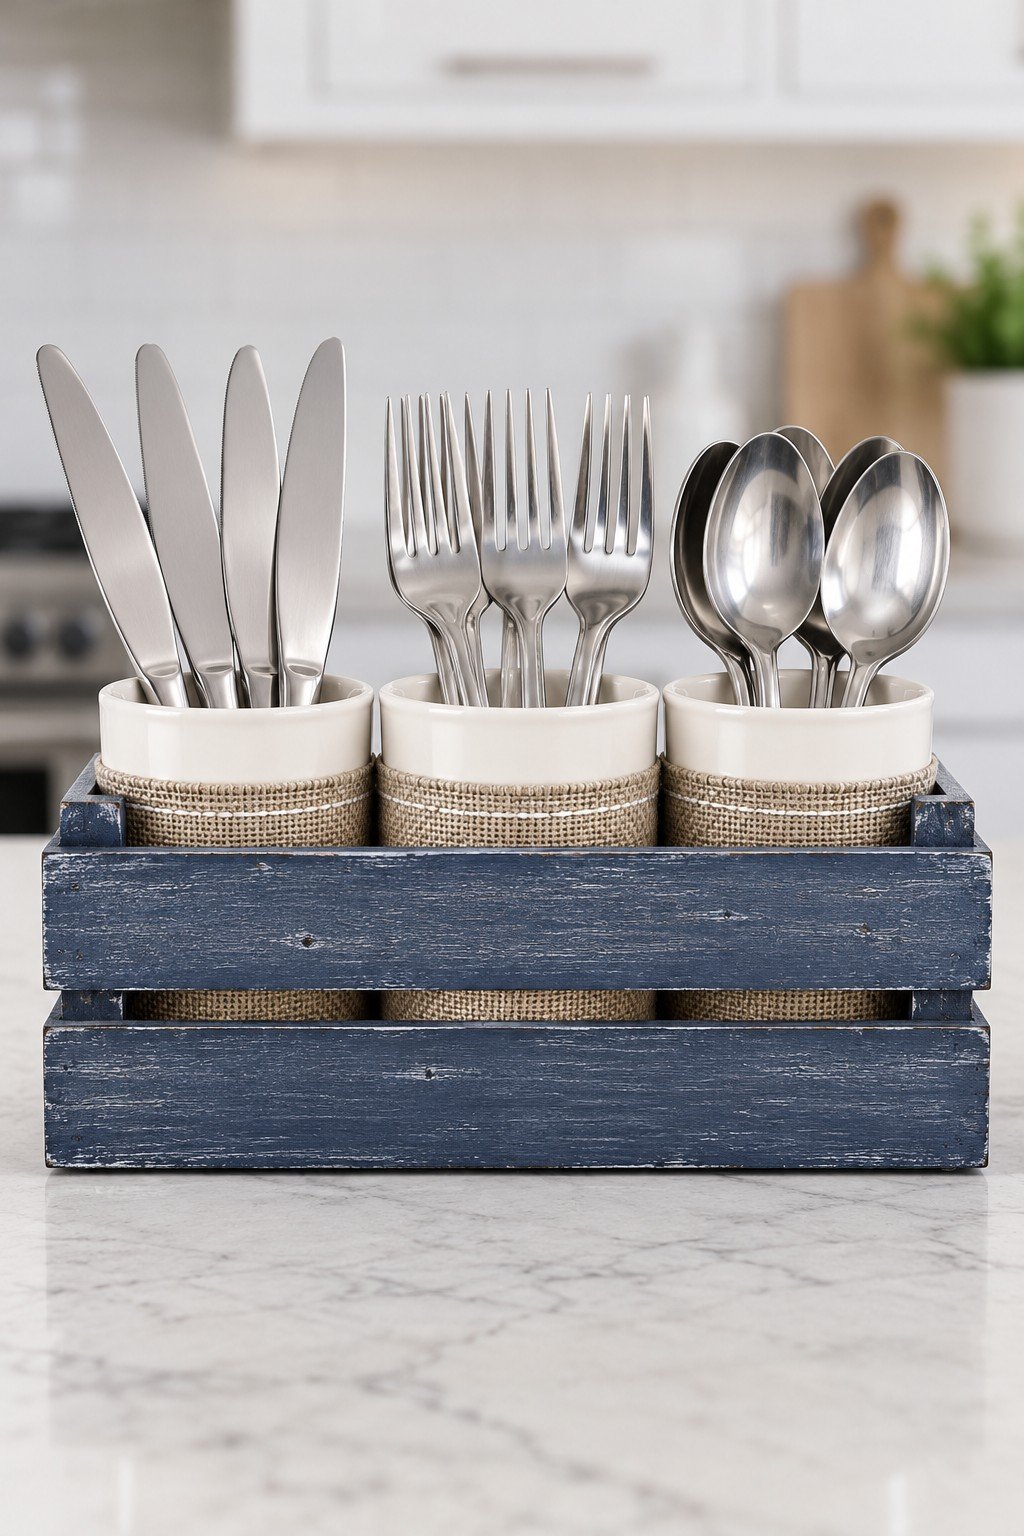
A narrow navy crate gives three light colored cups a shared frame and stops them drifting apart. The straight row fits a shelf or buffet better than a wide circular arrangement. Check that each cup can be lifted out over the crate edge before choosing its final position.
30. Give Everyday Tools a Woven Outer Basket
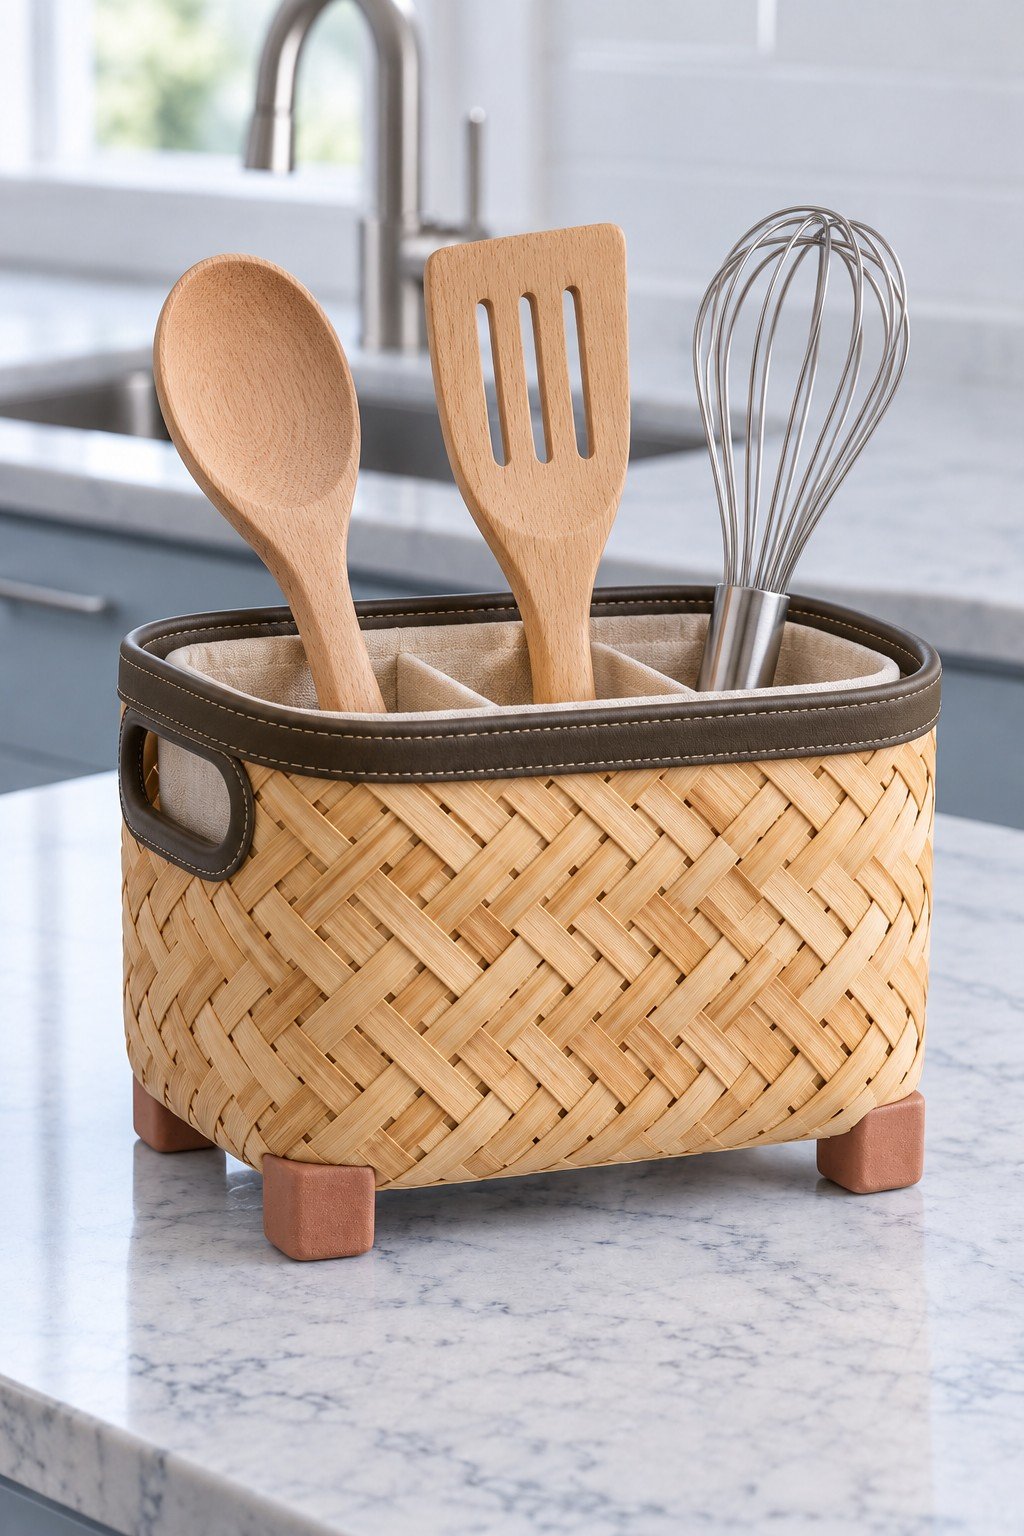
The woven exterior adds texture, while the divided interior gives a whisk, turner and spoon their own places. A compact rectangular shape can sit against a backsplash without leaving awkward gaps. Select a washable inner container and clean beneath the feet whenever you wipe the counter.
31. Mix Four Patterns in a Coordinated Palette
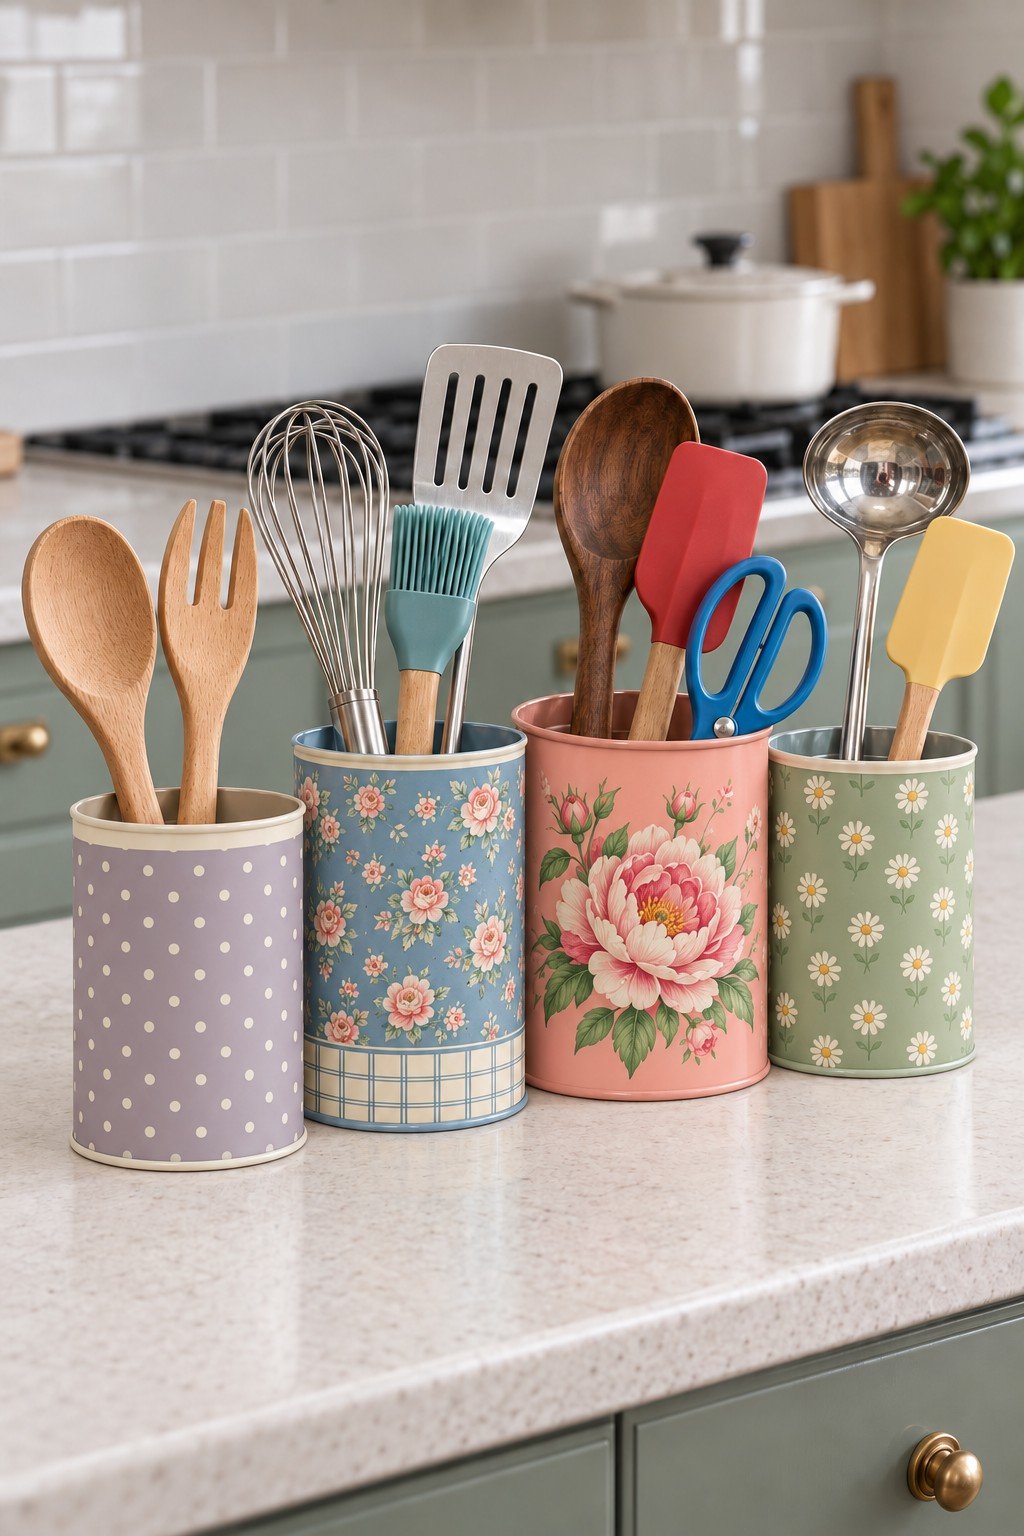
Dots, small florals and a larger pink flower make these cans feel collected rather than identical. The muted colors hold the group together despite their different patterns. Allocate each container to one task, such as stirring, baking or serving, so it stays useful as well as decorative.
32. Reimagine a Copper Colored Goblet
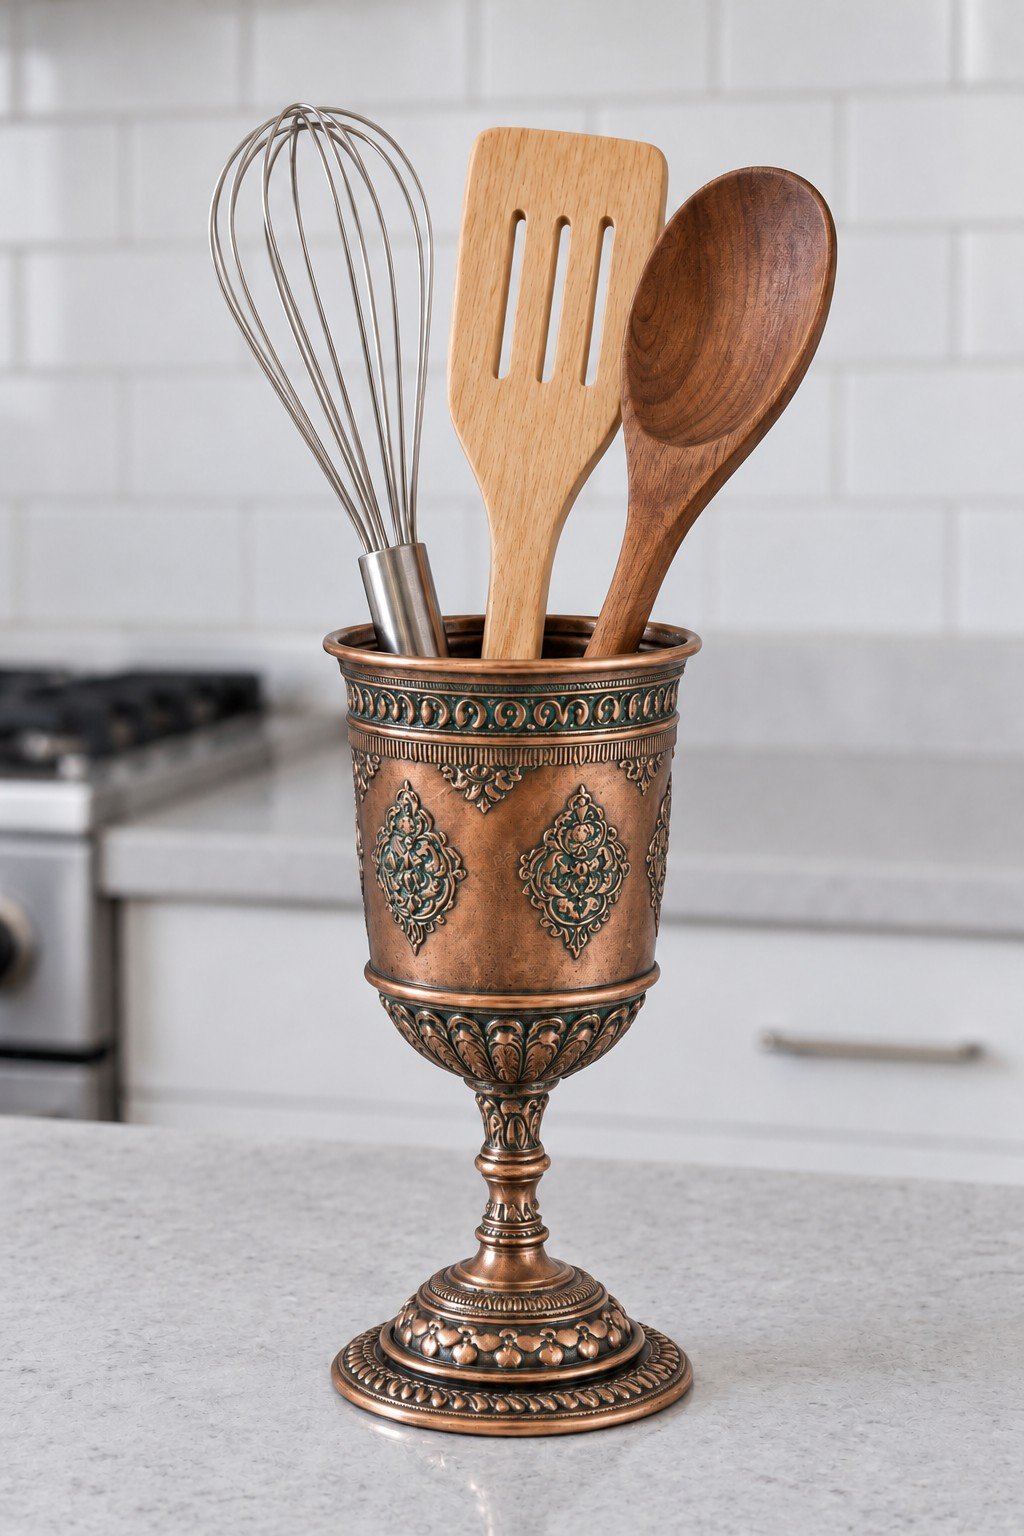
An ornate goblet brings a vintage accent to a small group of cooking tools. Its pedestal is narrower than a conventional crock, so test stability with the longest utensil before placing it near a counter edge. For an old or decorative vessel, add a clean washable insert and avoid unknown interior finishes.
33. Arrange Blue Cans in Two Compact Rows
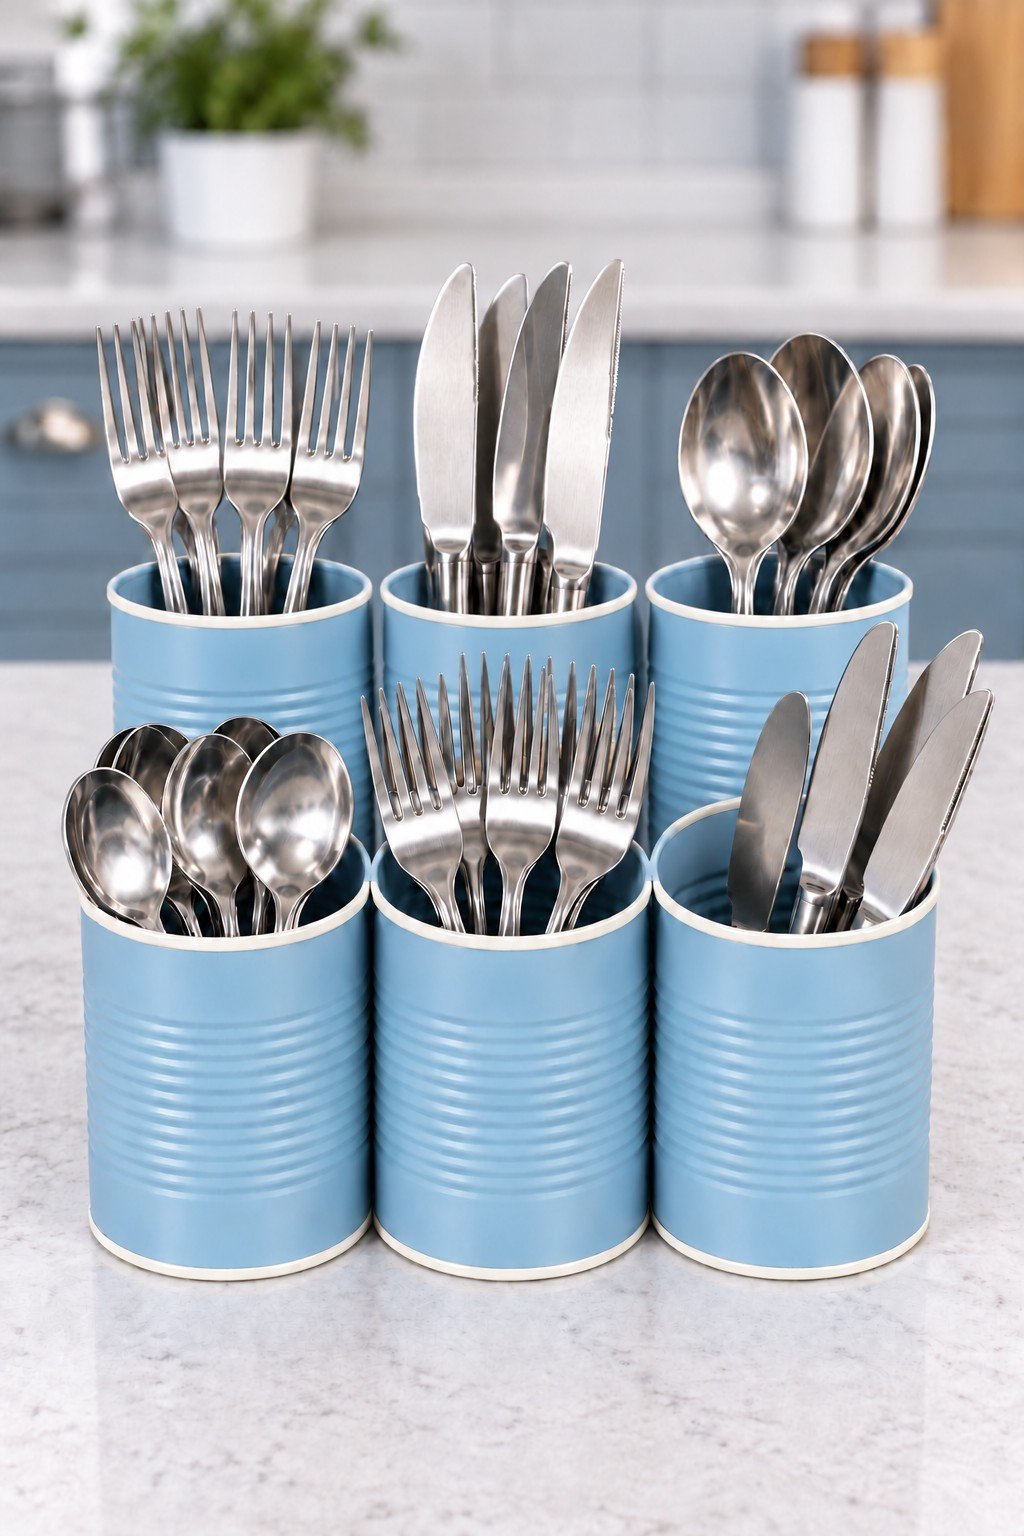
Six matching cans provide separate spaces for a larger flatware collection without needing a built in drawer organizer. The two rows make good use of a deeper counter or sideboard. Set the cans on a tray for easier moving, and check that their rims are smooth before adding cutlery.
34. Hang a Floral Fabric Pocket from a Hoop
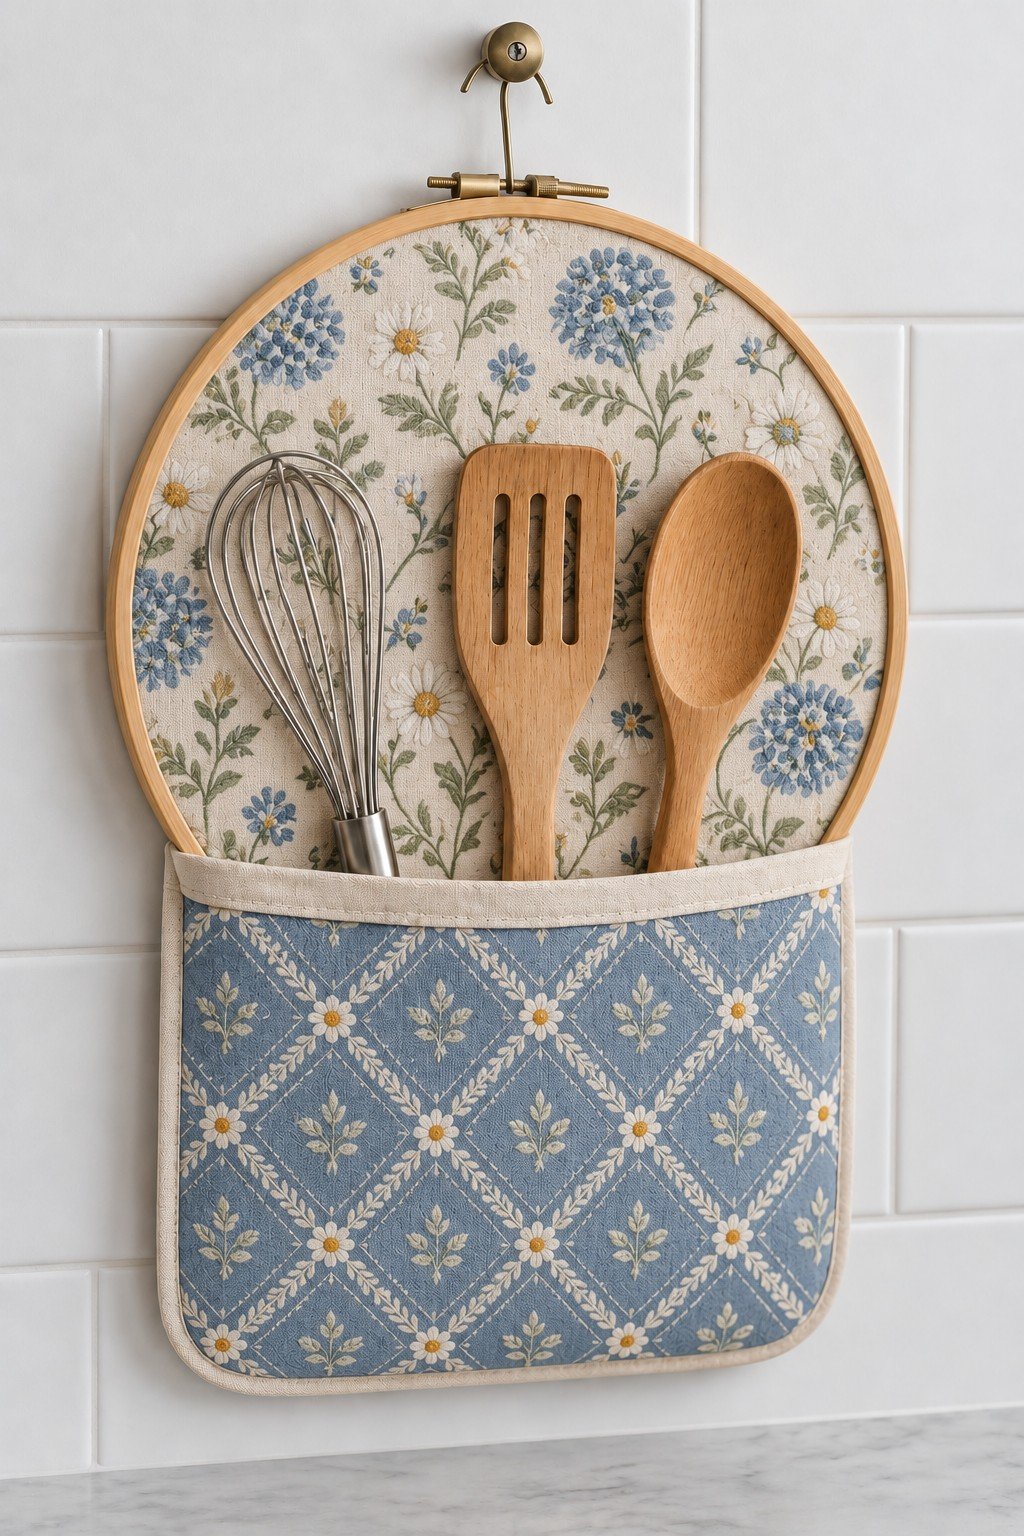
A fabric pocket backed by a hoop turns a small wall space into light storage for a few dry tools. The blue patterned pocket contrasts with the floral fabric behind it. Reinforce the pocket seams and hanging point, and make the fabric removable or washable so it can be cleaned when needed.
35. Set an Ivory Crock Inside a Navy Cage
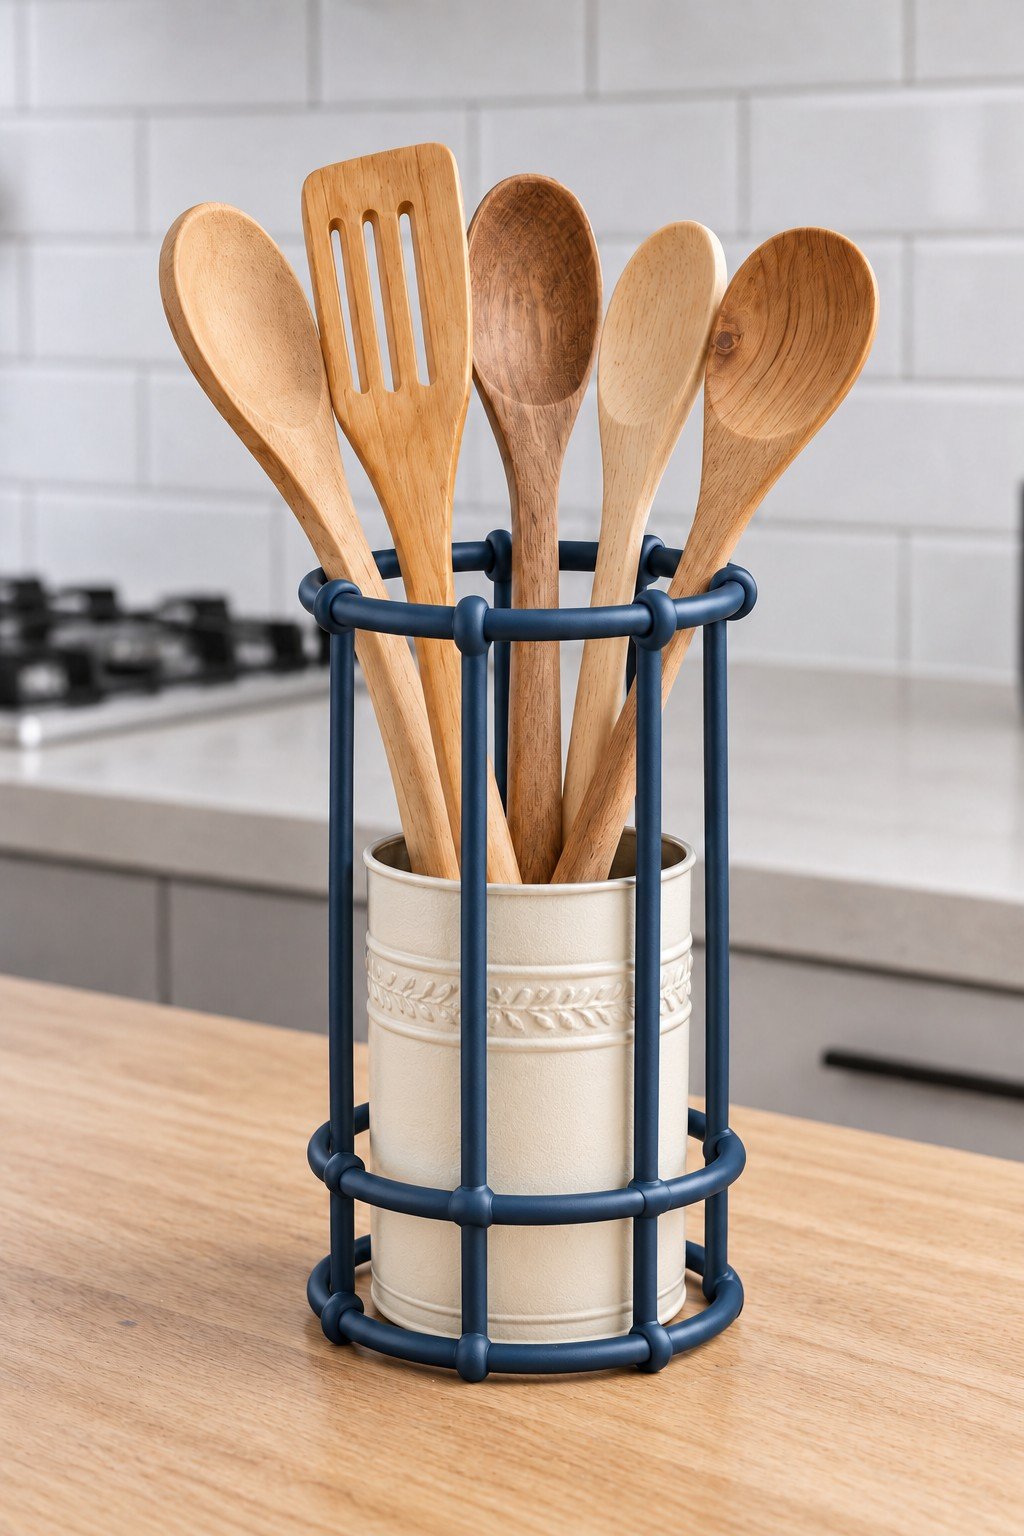
The navy cage outlines a cream crock without concealing its decorative band, giving a simple group of wooden tools a stronger silhouette. Pick a crock that stands flat inside the frame and can be removed for washing. Leave enough room around it to lift the utensils out freely.

Leave a Reply