16 Skeleton Decor Concepts With a Creative Halloween Twist

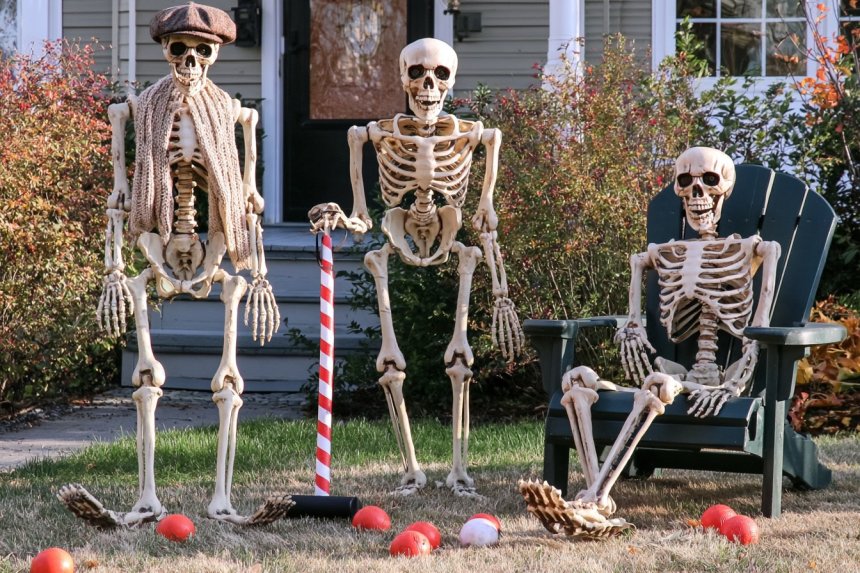
Skeleton decorations can be funny, eerie, theatrical, or surprisingly sophisticated depending on how they are styled. The biggest difference comes from treating the skeleton as part of a scene rather than placing it randomly in a room. A figure emerging from built-in shelving creates a different mood from one displayed beneath a glass cloche, while a skeletal hand used as a table detail can feel more like sculpture than novelty decor. Materials matter too: aged wood, smoky glass, matte black metal, plaster, dried botanicals, and tarnished finishes can make inexpensive props feel far more intentional. These skeleton decoration concepts focus on atmosphere, composition, and unexpected placement so Halloween decor feels creative rather than repetitive.
1. Build a Skeleton Library Scene Inside a Bookcase
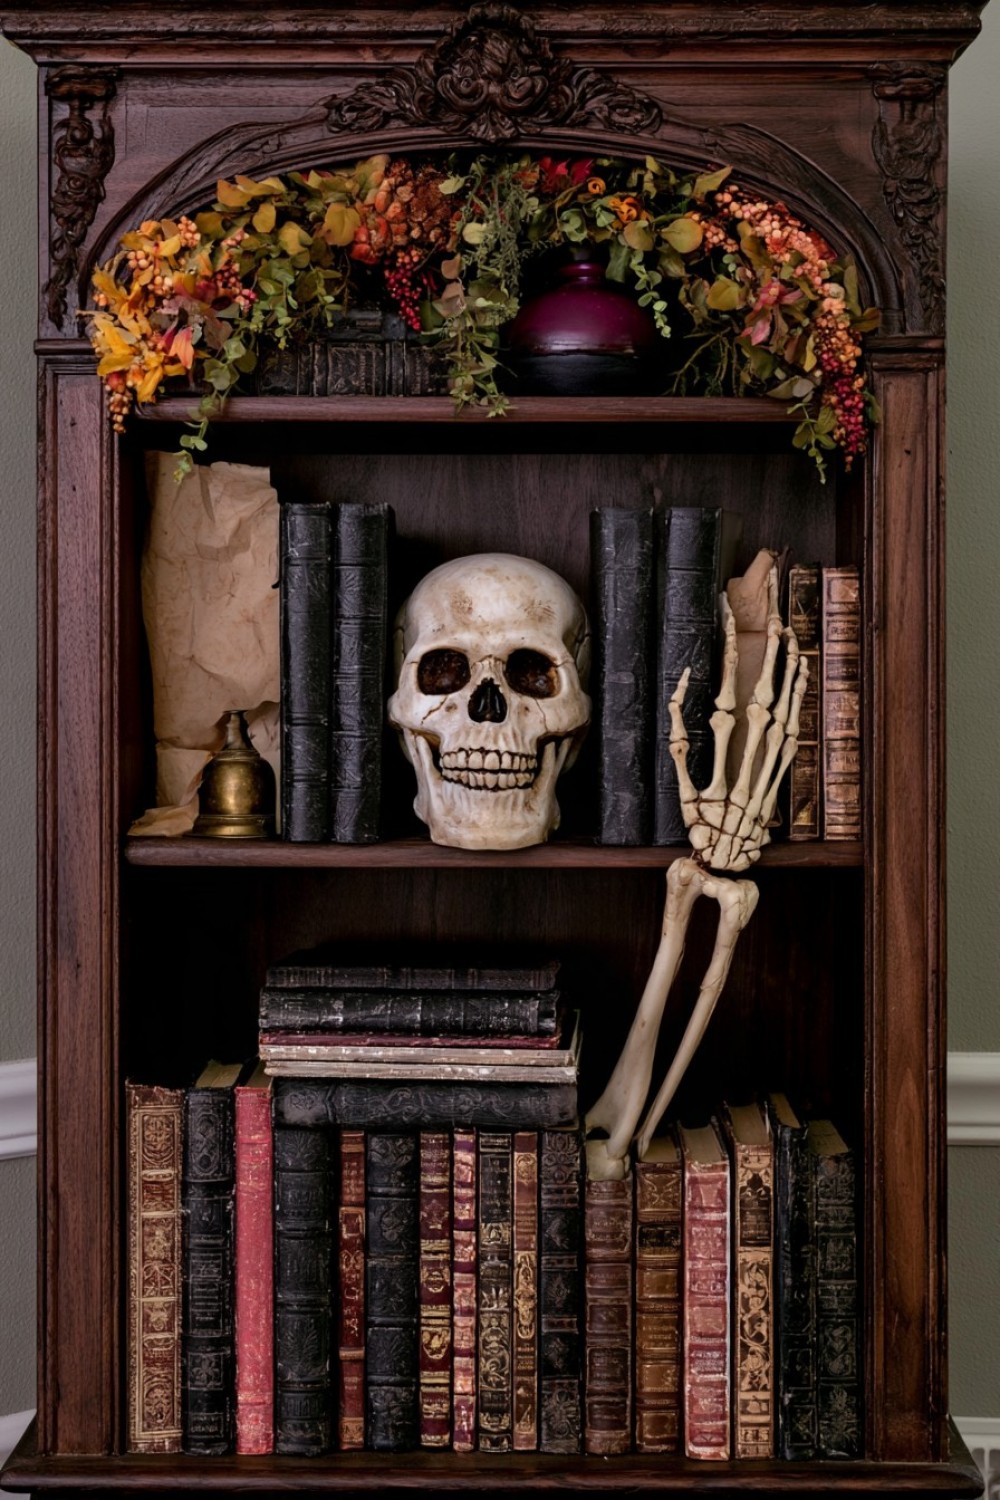
Instead of placing a full skeleton in the middle of the room, let it appear as though it has quietly taken over one section of a built-in bookcase.
Use only part of the figure. A skull can rest between old books, one skeletal hand can extend around a shelf edge, and a forearm can disappear behind stacked volumes. This partial reveal feels more intriguing because the viewer has to discover the scene rather than seeing everything immediately.
Add dark book covers, aged paper, a small brass object, and one deep-toned ceramic vessel to create a collected library atmosphere.
Avoid filling every shelf with Halloween objects. The contrast between normal decor and one strange interruption is what makes the setup work.
For a DIY variation, lightly distress inexpensive book boxes with brown and charcoal paint so they resemble old reference volumes. The skeleton should feel like it belongs to the room rather than like a prop placed in front of it.
2. Create a Skeleton Shadow Wall Instead of Showing the Figure
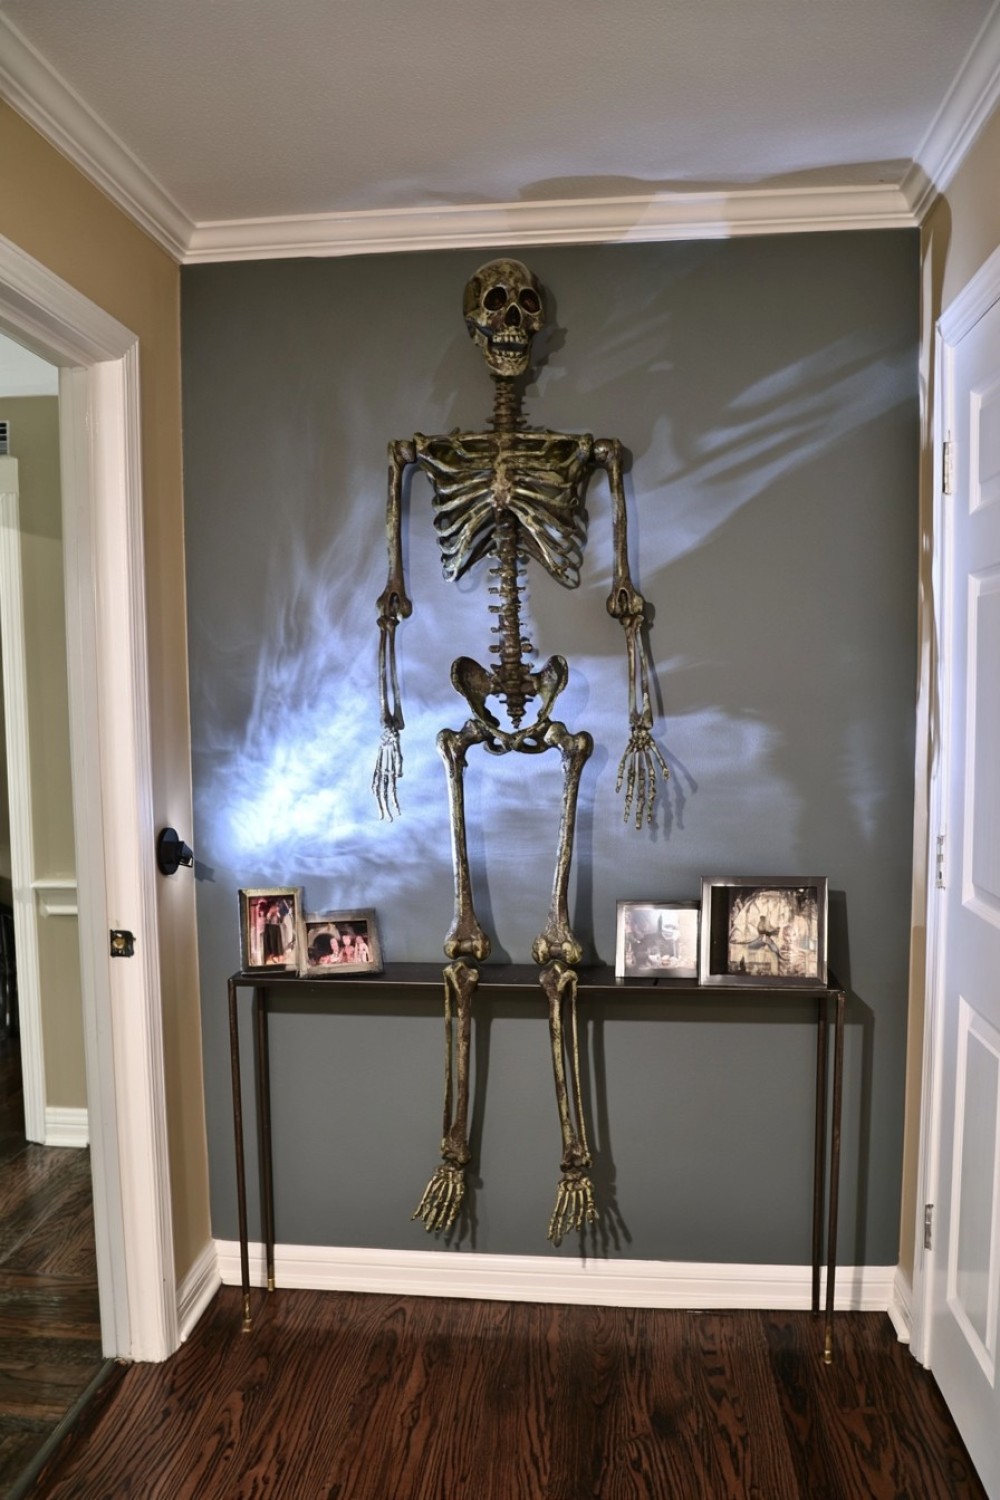
One of the most unexpected ways to decorate with a skeleton is to hide most of it.
Position a lightweight skeleton close to a wall and use a low directional lamp or spotlight to cast an enlarged shadow across the surface. Adjust the angle until the silhouette becomes distorted and dramatic.
This works particularly well in hallways, stair landings, or dining rooms where the shadow can appear before the actual prop is noticed.
For a stronger graphic effect, place the skeleton behind a sheer curtain or translucent panel. Only the silhouette becomes visible from the other side.
Use warm white or dim neutral lighting instead of colored LEDs if you want the scene to feel more cinematic than theatrical.
Make sure floor-mounted lights and cables are secured away from walking paths.
3. Turn a Skeleton Rib Cage Into a Botanical Arrangement
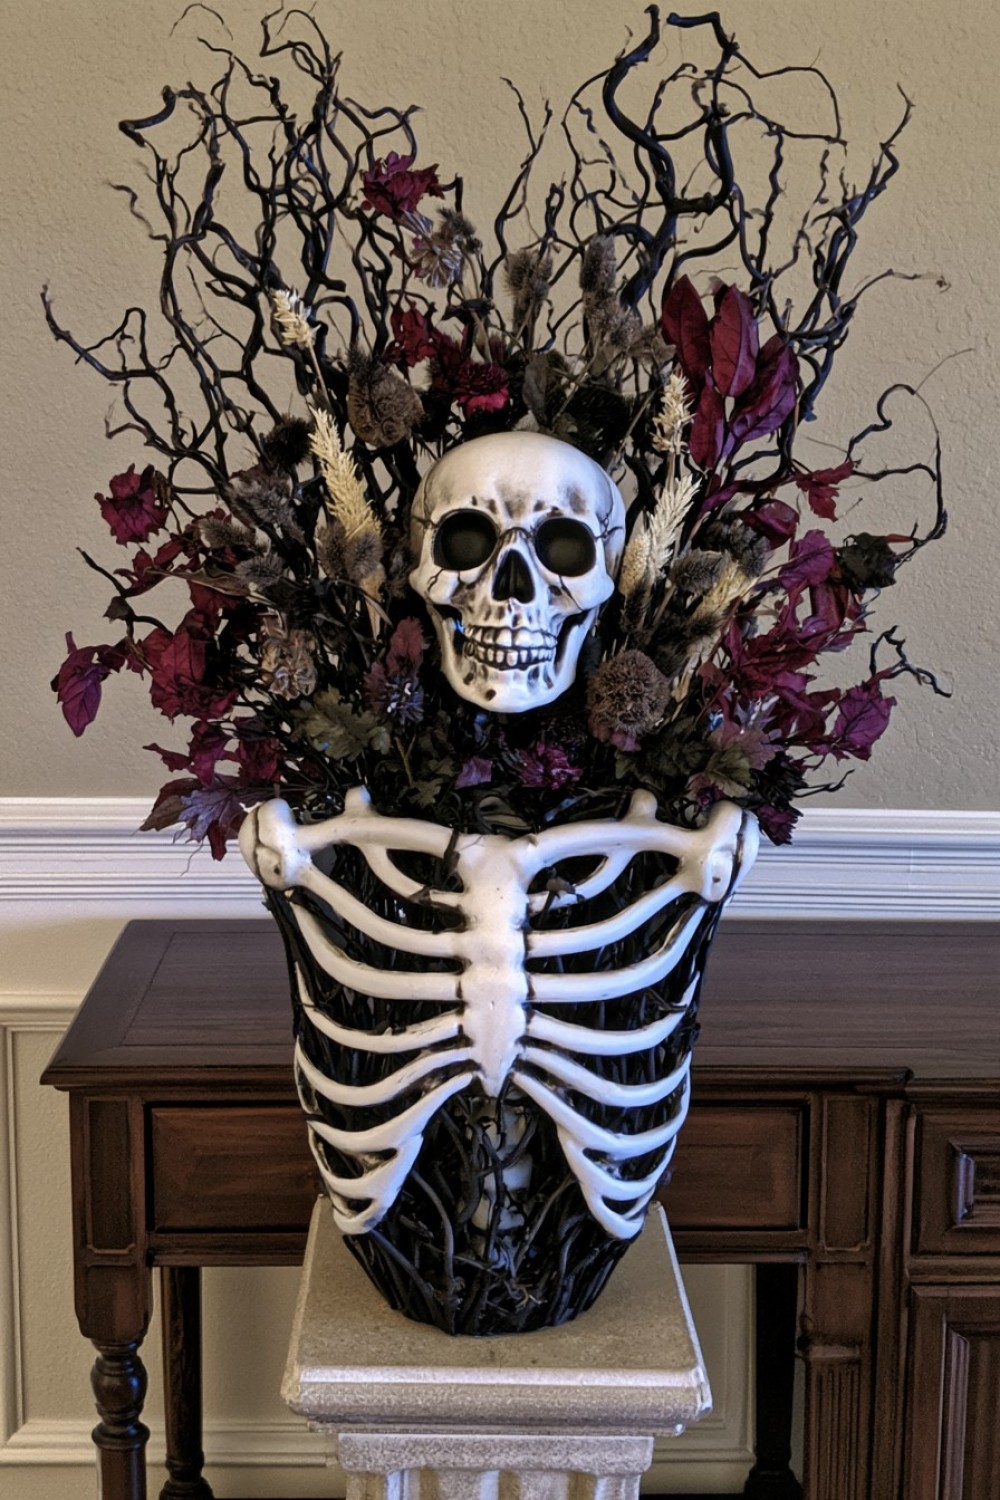
A rib cage can become an unusual vessel for dried florals.
Use a lightweight decorative skeleton torso, floral wire, dried branches, preserved leaves, seed pods, and dark or neutral flowers. Feed the stems through the rib openings rather than attaching a bouquet to the outside.
Allow some branches to extend upward from the shoulders while shorter dried elements emerge through the sides.
The result feels more like a sculptural botanical piece than traditional Halloween decor.
For a softer version, use bleached grasses and pale dried flowers. For something moodier, combine burgundy leaves, blackened branches, and muted brown seed heads.
Avoid fresh flowers if water would need to sit inside the prop. Dried or preserved materials are much easier to manage and safer around lightweight plastic skeletons.
4. Create a Skeleton Portrait Gallery With Relief Frames
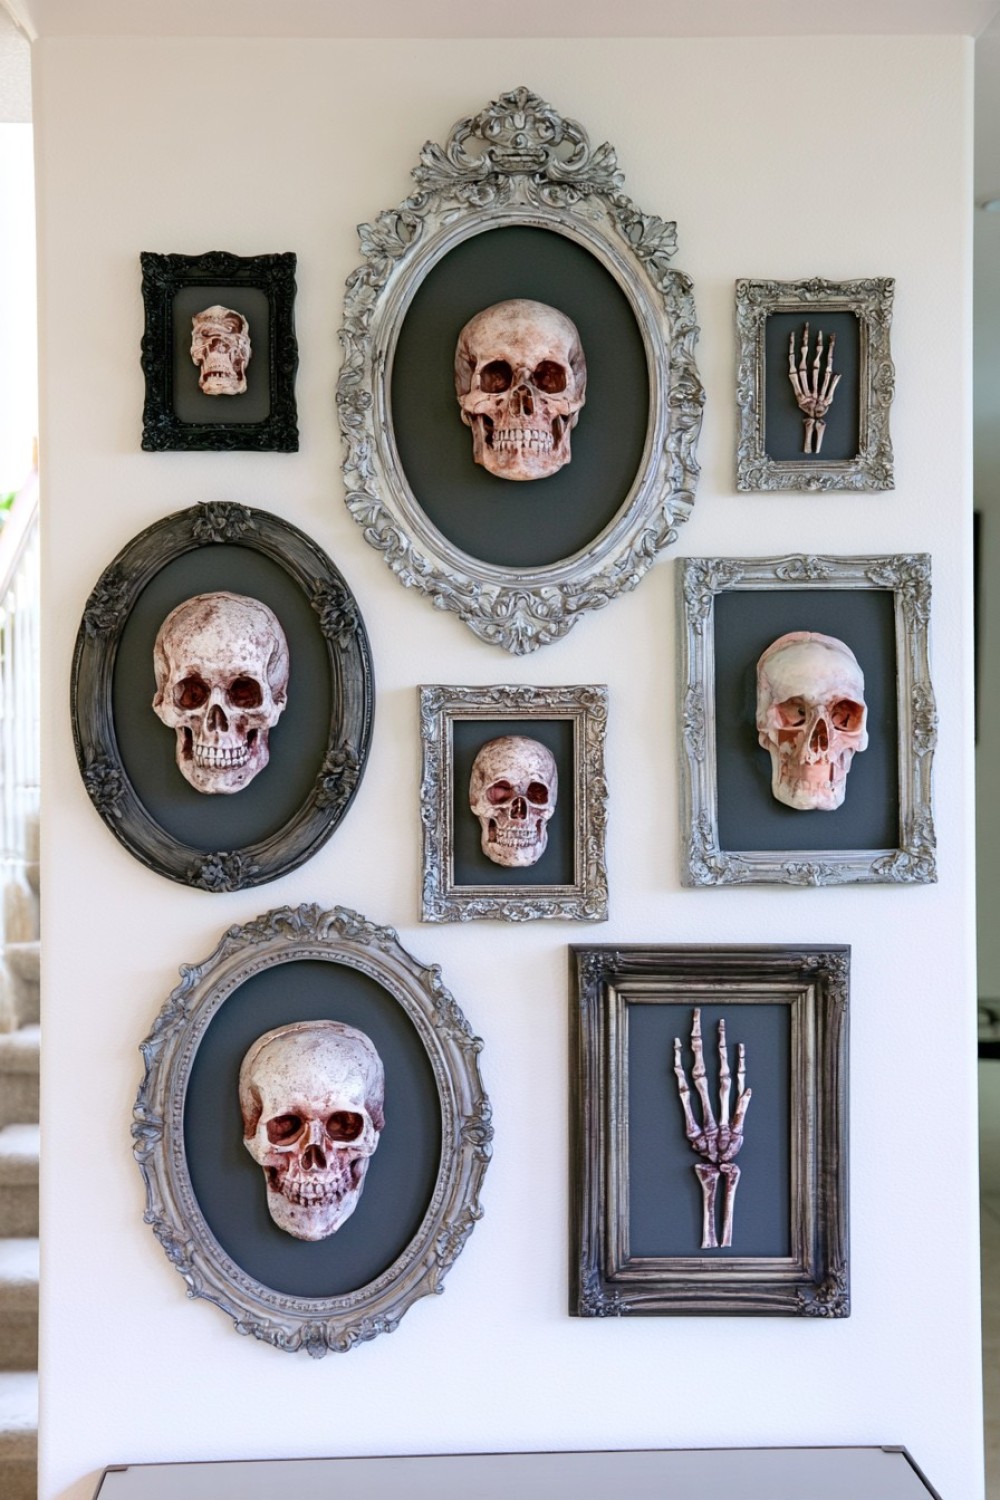
Rather than hanging printed skeleton images, build three-dimensional wall portraits.
Use shallow thrifted frames, matte black or aged silver paint, lightweight skull replicas, strong wall-safe mounting hardware, and dark backing board.
Mount each skull or partial skeletal profile inside a frame so it projects outward like a museum specimen.
Vary the frame shapes instead of making everything identical. Oval, narrow rectangular, and ornate vintage frames create a more collected look.
One skull could face forward, another sideways, and another show only a jaw or hand detail.
This approach works especially well on a staircase wall or above a console where guests can view the pieces up close.
Keep the surrounding wall relatively uncluttered so the relief effect remains visible.
5. Make a Skeleton Crawl Through a Wall Niche
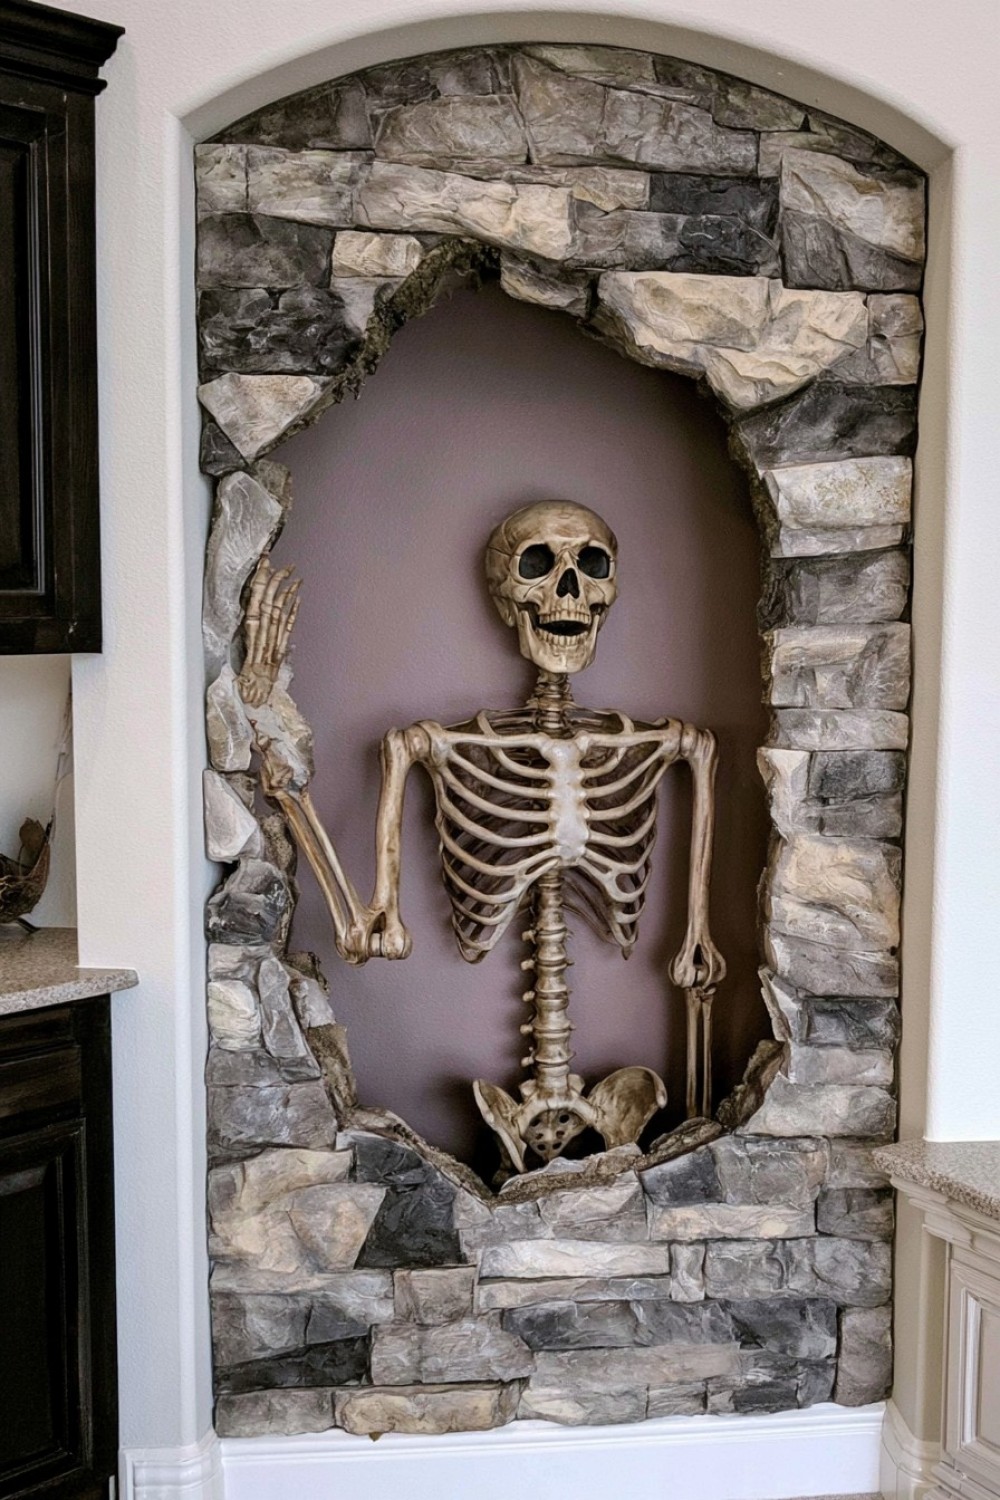
Built-in niches, pass-through shelves, or open shelving can become perfect places for partial skeleton installations.
Instead of displaying an entire figure, position the torso behind the opening and let one arm reach through as if the skeleton is emerging from inside the wall.
Add cracked-plaster-style foam panels or lightweight removable faux masonry around the opening if you want a more theatrical effect.
You can make faux wall fragments from rigid foam board carved with a utility knife, then painted with layered gray, beige, and charcoal acrylics.
Keep the structure removable so the original wall surface is not permanently altered.
The most convincing version uses only a few “broken” pieces rather than covering the entire area in fake rubble.
6. Use Skeletal Hands as Unexpected Cabinet Hardware
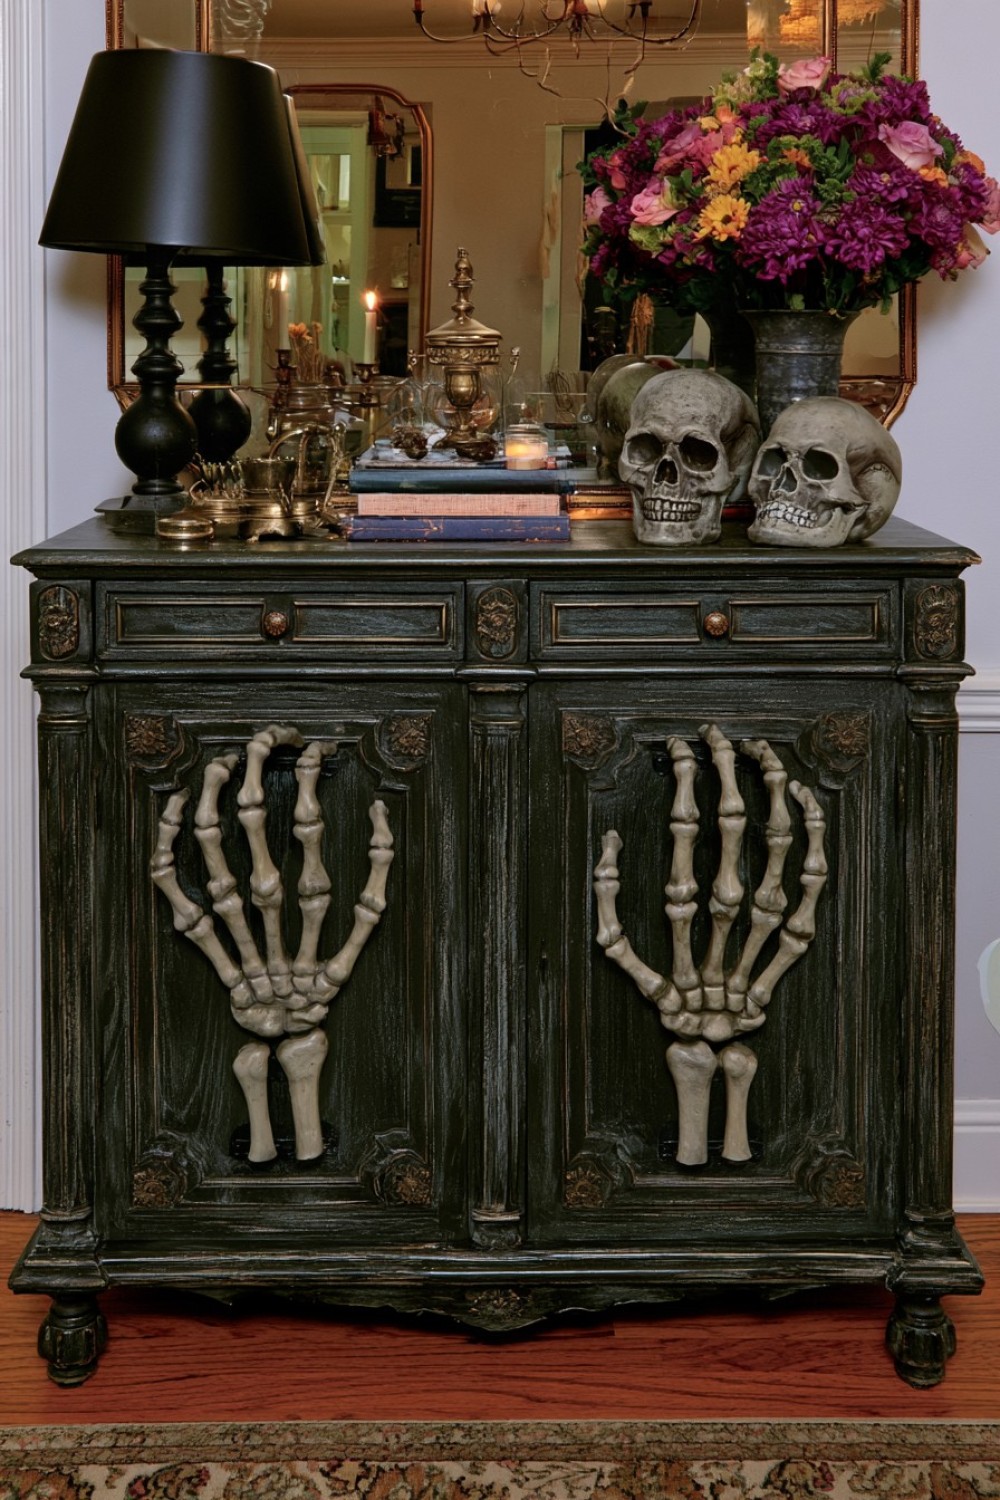
For a smaller DIY detail, turn skeletal hands into temporary drawer or cabinet pulls.
Use lightweight plastic hand props, removable mounting plates, strong temporary adhesive rated for the surface, or small mechanical hardware if working with a sacrificial furniture piece.
Attach one hand to a cabinet door so the fingers appear to curl around the edge. Another can act as a pull on a small chest or bar cabinet.
This idea works particularly well on a black sideboard, vintage apothecary cabinet, or dark-painted console.
Keep the hands relatively compact so they do not interfere with normal movement.
For furniture you do not want to modify, attach the hands to a freestanding decorative panel placed in front of the cabinet rather than drilling into the original surface.
7. Build a Skeleton Dinner Guest Into the Table Design
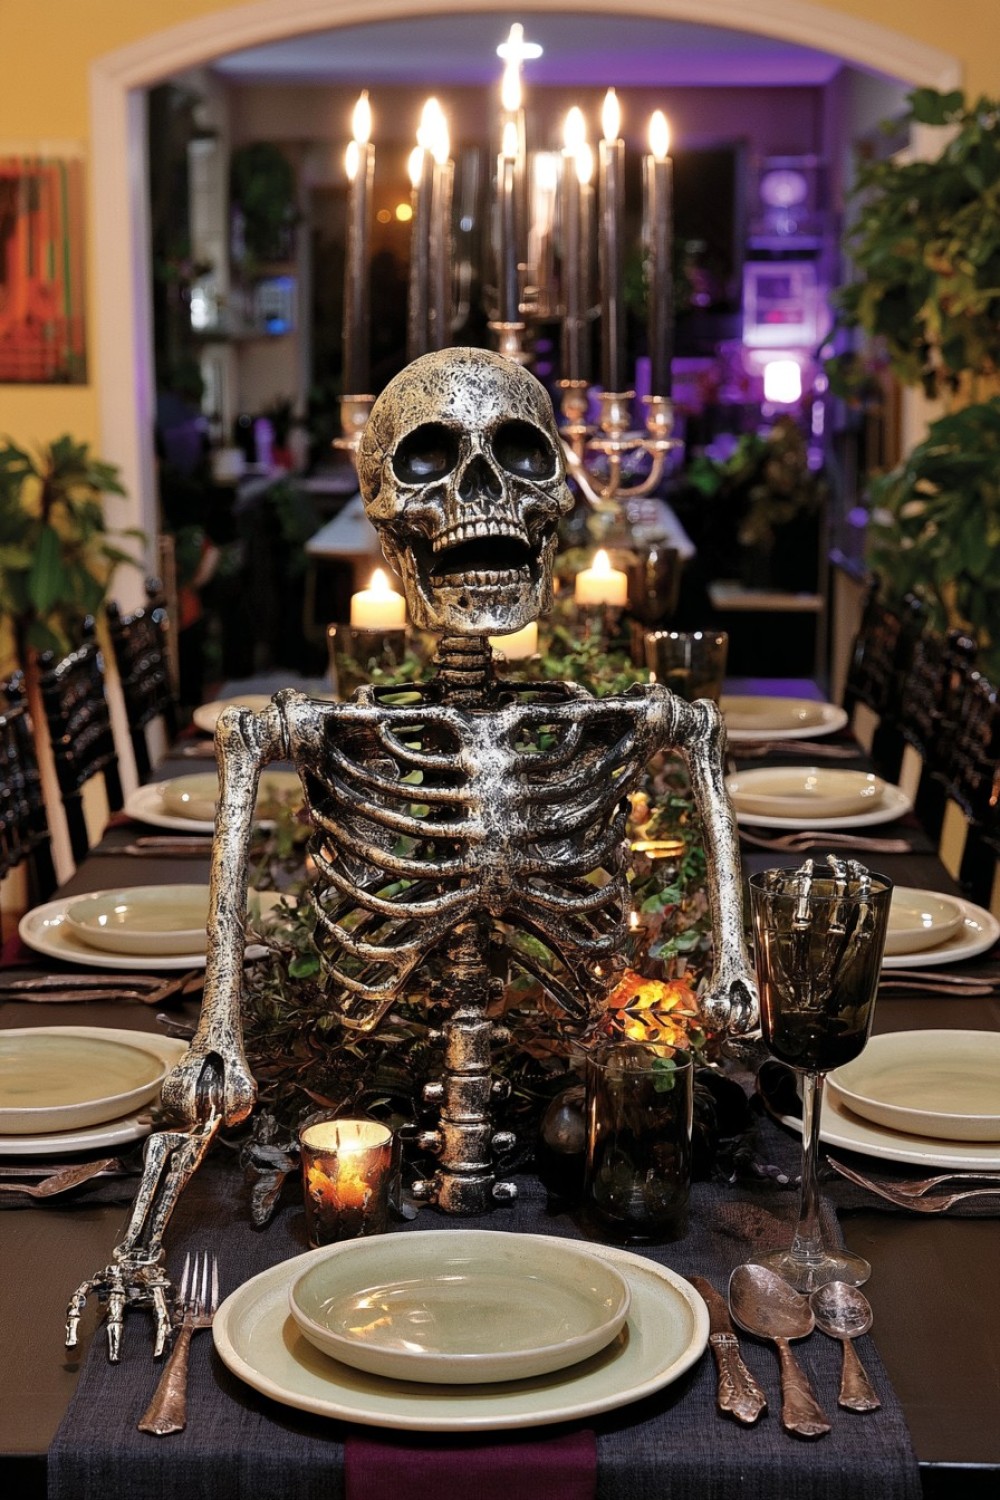
Instead of simply seating a skeleton at the table, integrate the figure into the tablescape.
Let one skeletal arm extend naturally across the table edge, with the hand lightly holding a place card, folded napkin, or empty goblet.
Use dark linen, smoked glassware, tarnished silver-tone flatware, and low ceramic dishes so the scene feels coordinated.
The skeleton should not be overloaded with hats, wigs, or novelty accessories if the goal is a more refined look.
One seated figure is usually enough. Surrounding it with multiple smaller skeleton props can make the scene feel cluttered.
For a more unexpected composition, position the skeleton at the head of the table with only its hands visible above the surface and the rest concealed behind the chair.
8. Turn a Skull Into a Plaster-Look Sculpture
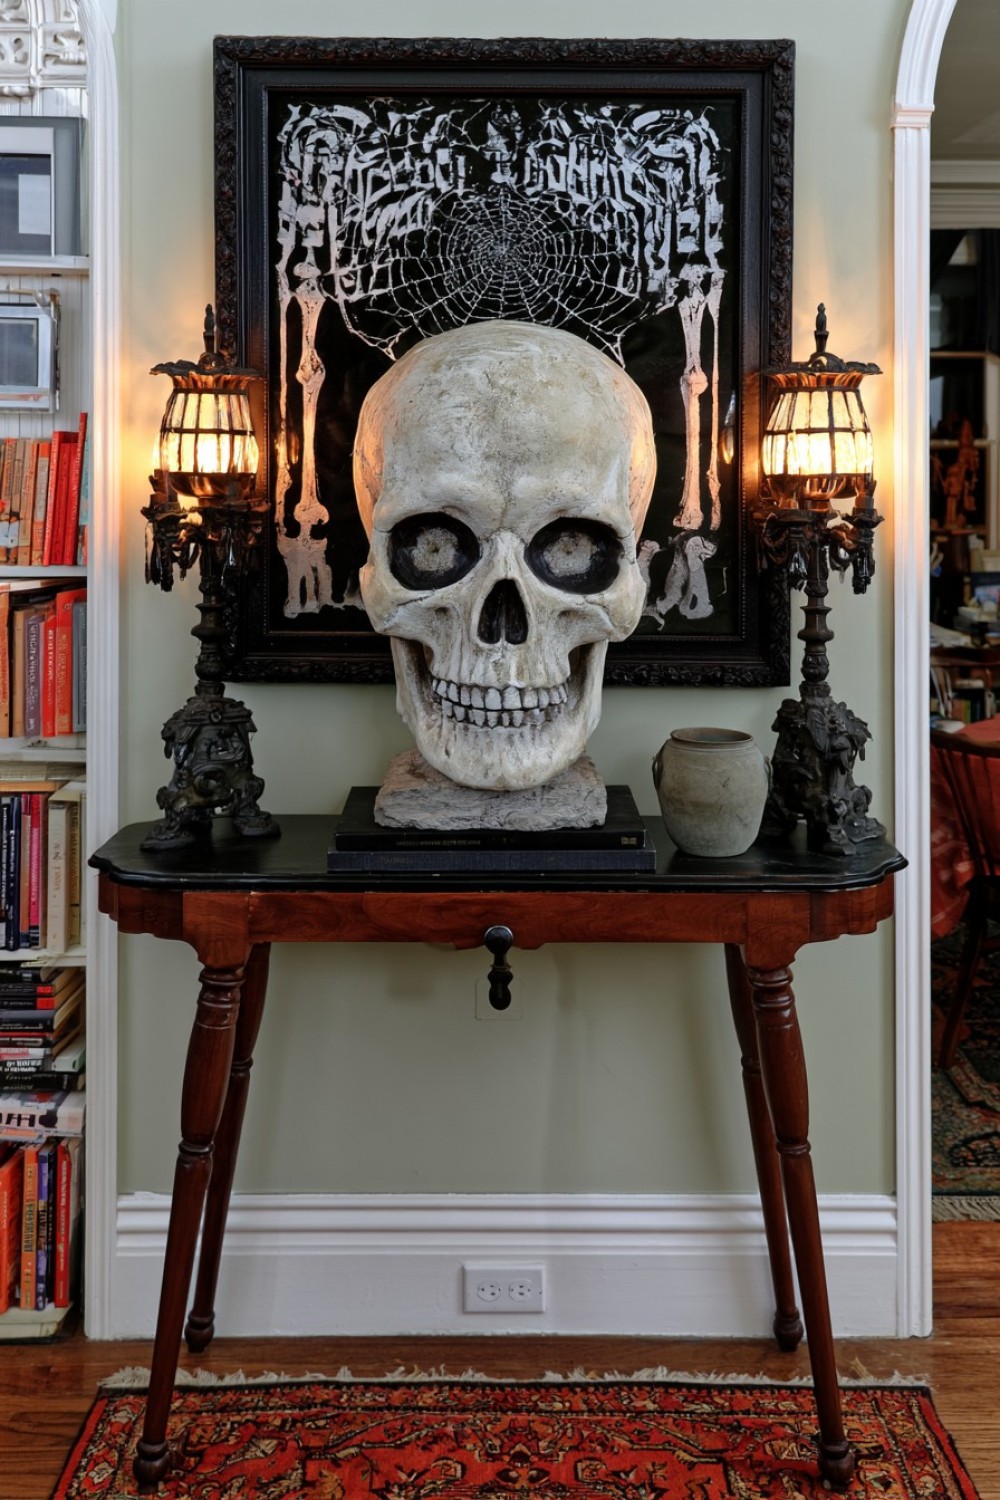
Cheap plastic skulls can look surprisingly convincing after a surface treatment.
You will need a lightweight skull prop, matte primer suitable for plastic, textured plaster-effect paint or a mixture of acrylic medium and fine sand, a brush, and a soft gray or warm ivory topcoat.
Apply primer first, then build thin irregular texture rather than coating the skull heavily. Once dry, use a lighter color over raised areas and a deeper gray-beige tone in recesses.
The finished object can resemble an old archaeological cast or studio sculpture rather than a Halloween-store prop.
Place it on a stone pedestal, stack of art books, or dark wood console.
For a less eerie version, use a chalky limestone palette. For a more aged look, introduce subtle brown-gray washes around the eye sockets and jaw.
9. Create an Under-the-Stairs Skeleton Scene
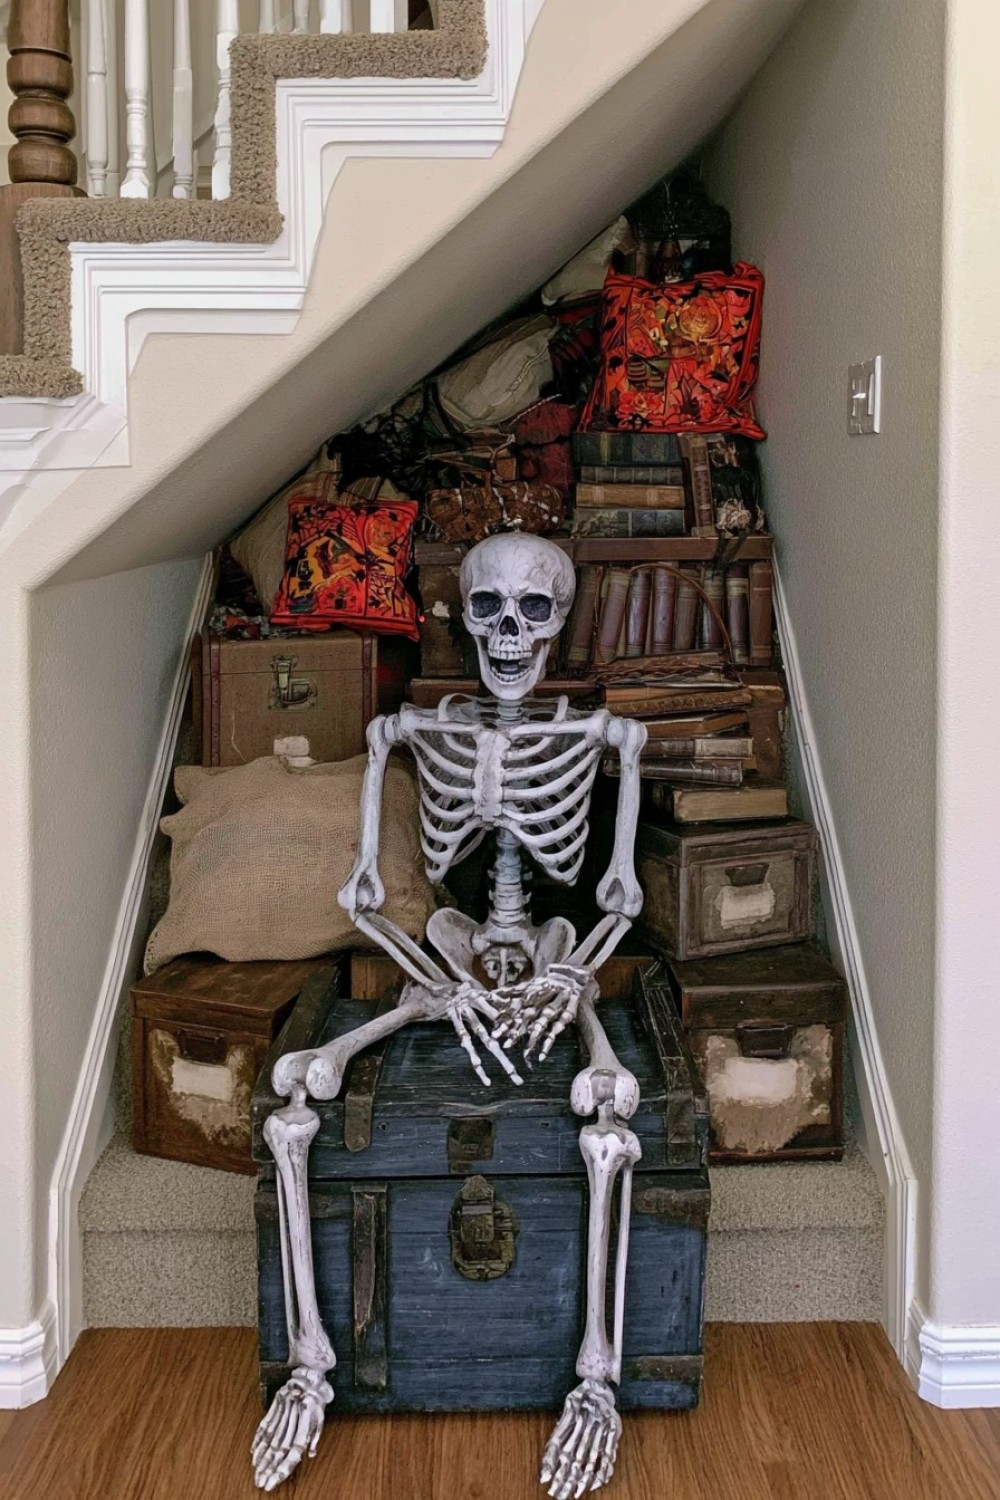
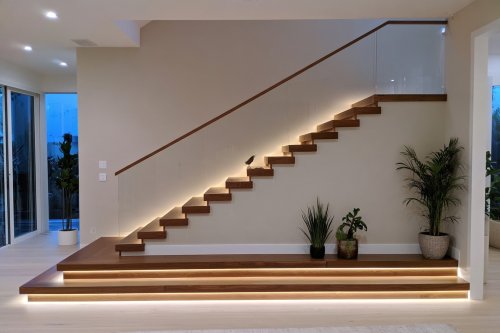
The triangular space beneath a staircase is ideal for a hidden Halloween vignette.
Position a skeleton low to the floor or seated partially behind storage, then add one directional light so the figure is visible only from certain angles.
You could place old trunks, wood crates, faux archival boxes, or draped fabric around it so the scene feels like a forgotten storage area.
The important part is not to over-decorate. One figure, one light source, and a few believable objects can create more tension than a crowded haunted-house setup.
If the area is open to foot traffic, keep the skeleton completely outside the walking path and secure all props.
This works especially well because guests may not notice the scene immediately.
10. Build a Skeletal Hand Wall Sconce Effect
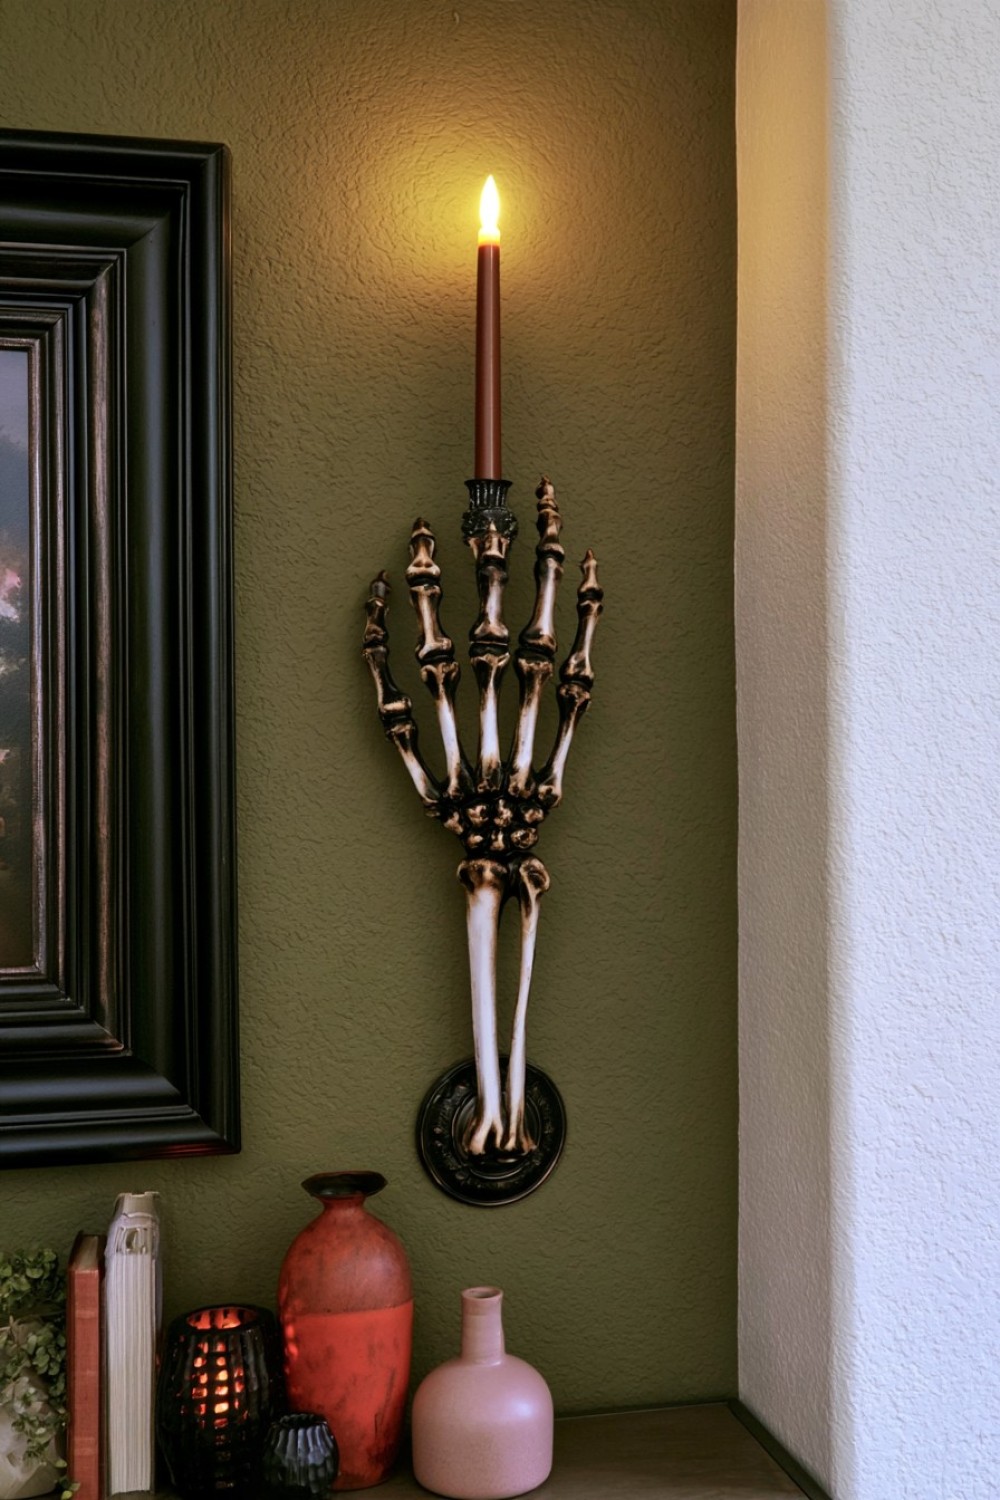
A plastic skeletal hand can become an unusual decorative wall support for a flameless taper.
Use a lightweight hand prop, small mounting bracket, dark wall plate or wood block, adhesive suitable for the prop, and a battery-operated LED taper.
Mount the hand so the fingers appear to grip the candle from below. The wall plate hides the attachment point and gives the piece a more finished appearance.
Paint the base matte black, antique brass, or plaster white depending on the room.
Do not use a real flame with plastic, resin, foam, or improvised materials. A flameless LED taper gives the visual effect without introducing heat or fire risk.
A pair placed asymmetrically on either side of artwork or a mirror can look especially striking.
11. Suspend a Skeleton Beneath a Translucent Draped Canopy
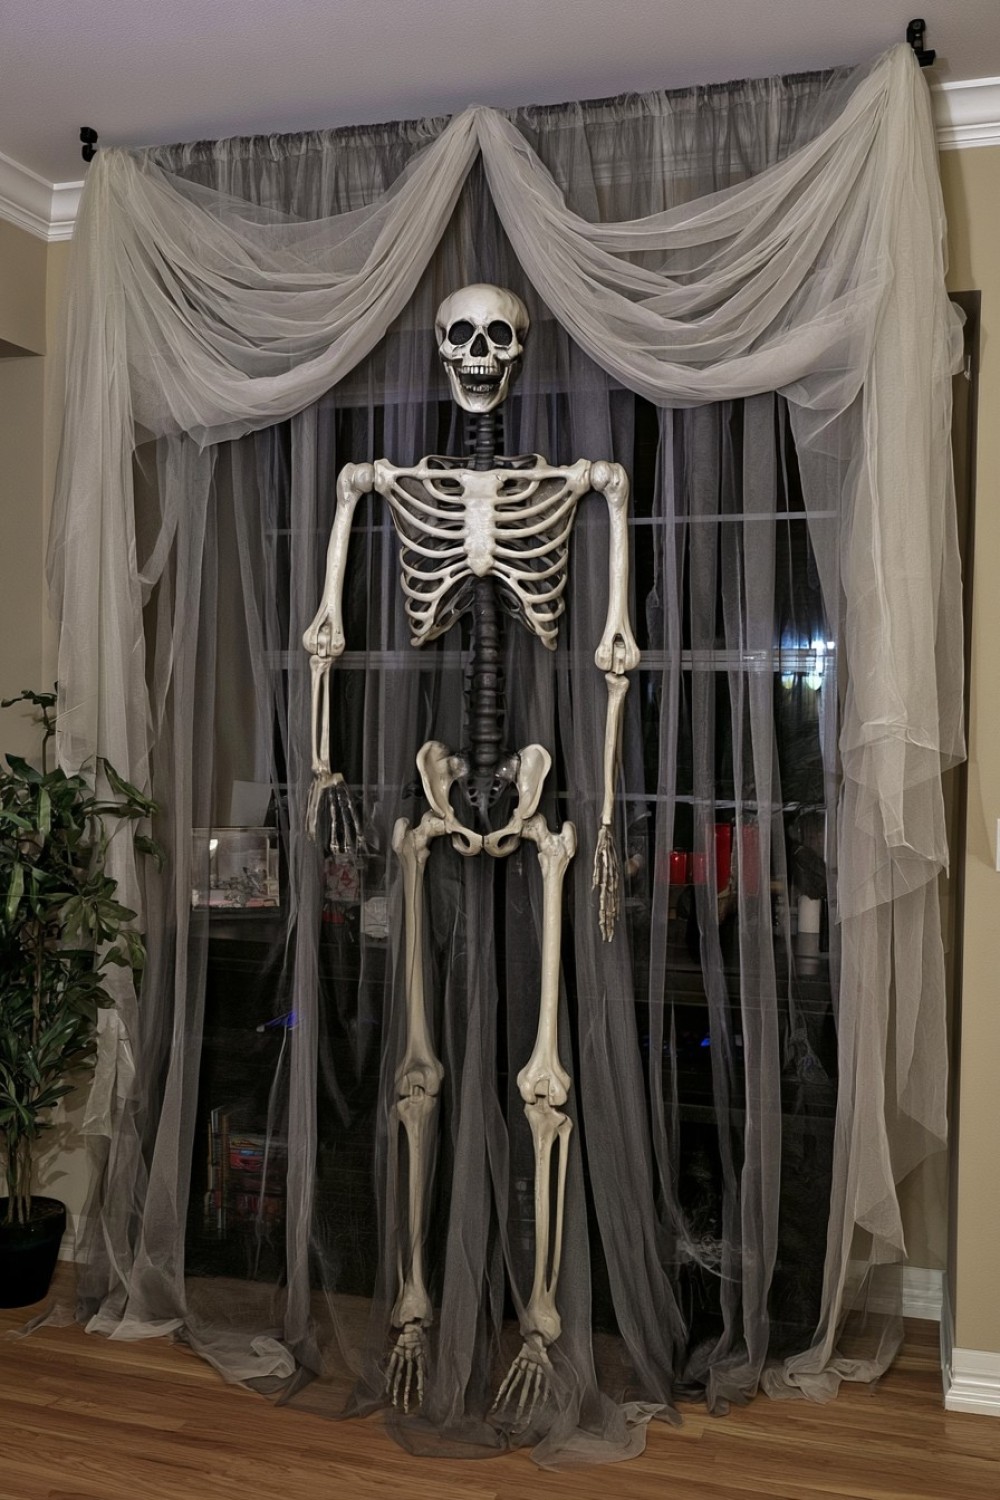
Instead of hanging a skeleton openly from the ceiling, partially hide it behind fabric.
Use lightweight sheer white or gray fabric, a securely supported decorative frame, and a lightweight skeleton prop.
Drape the material loosely so only parts of the figure remain visible—the outline of a skull, an arm, or the rib cage.
Backlighting the fabric softly can create a ghostly silhouette without relying on obvious special effects.
This idea works well over a console, in an entry alcove, or across a large wall installation.
Any overhead installation should be securely mounted according to the venue or home's structural limitations. Do not suspend weight from curtain rods or decorative trim unless they are rated to support it.
12. Make a Skeleton Terrarium Under a Glass Cloche
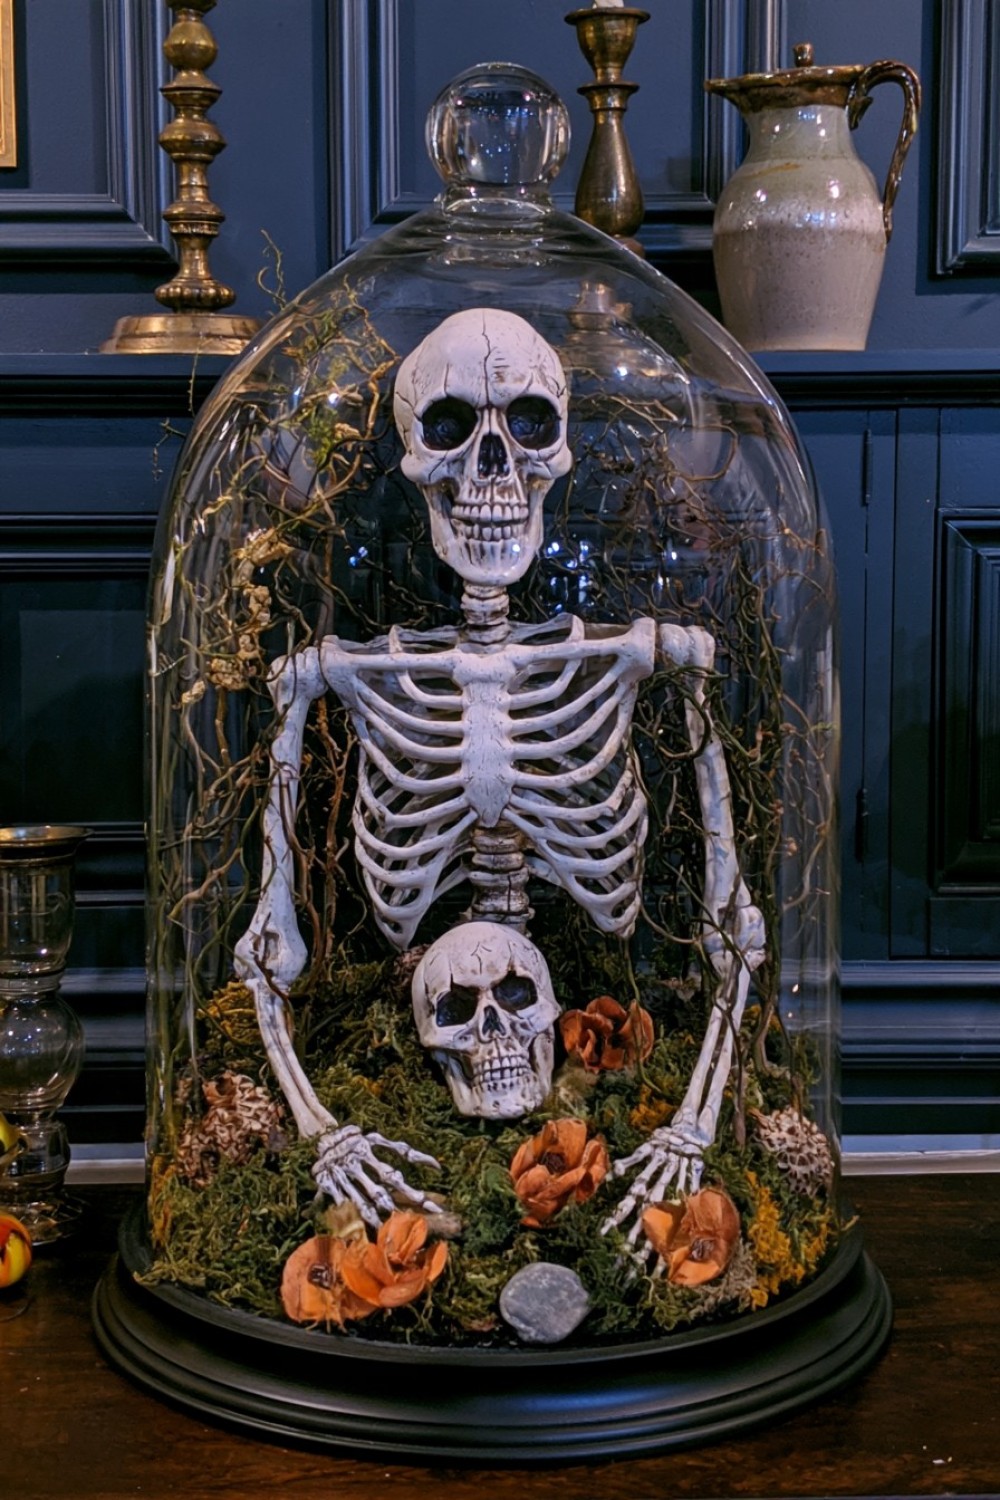
For a more compact display, create a miniature specimen-like scene beneath a glass dome.
Use a small skull or skeleton figurine, glass cloche, dark wood base, preserved moss, dried seed pods, tiny stones, and fine wire.
Instead of creating a cute miniature graveyard, style it more like a natural-history collection.
Place the skull slightly off-center, add a few dried botanical elements, and leave part of the base exposed.
A handwritten label can make it more theatrical, but if you prefer a cleaner display, skip text entirely and let the materials tell the story.
This works well on a sideboard, bookshelf, or entry table where guests can examine the details closely.
13. Turn a Full Skeleton Into a Living Wall Installation
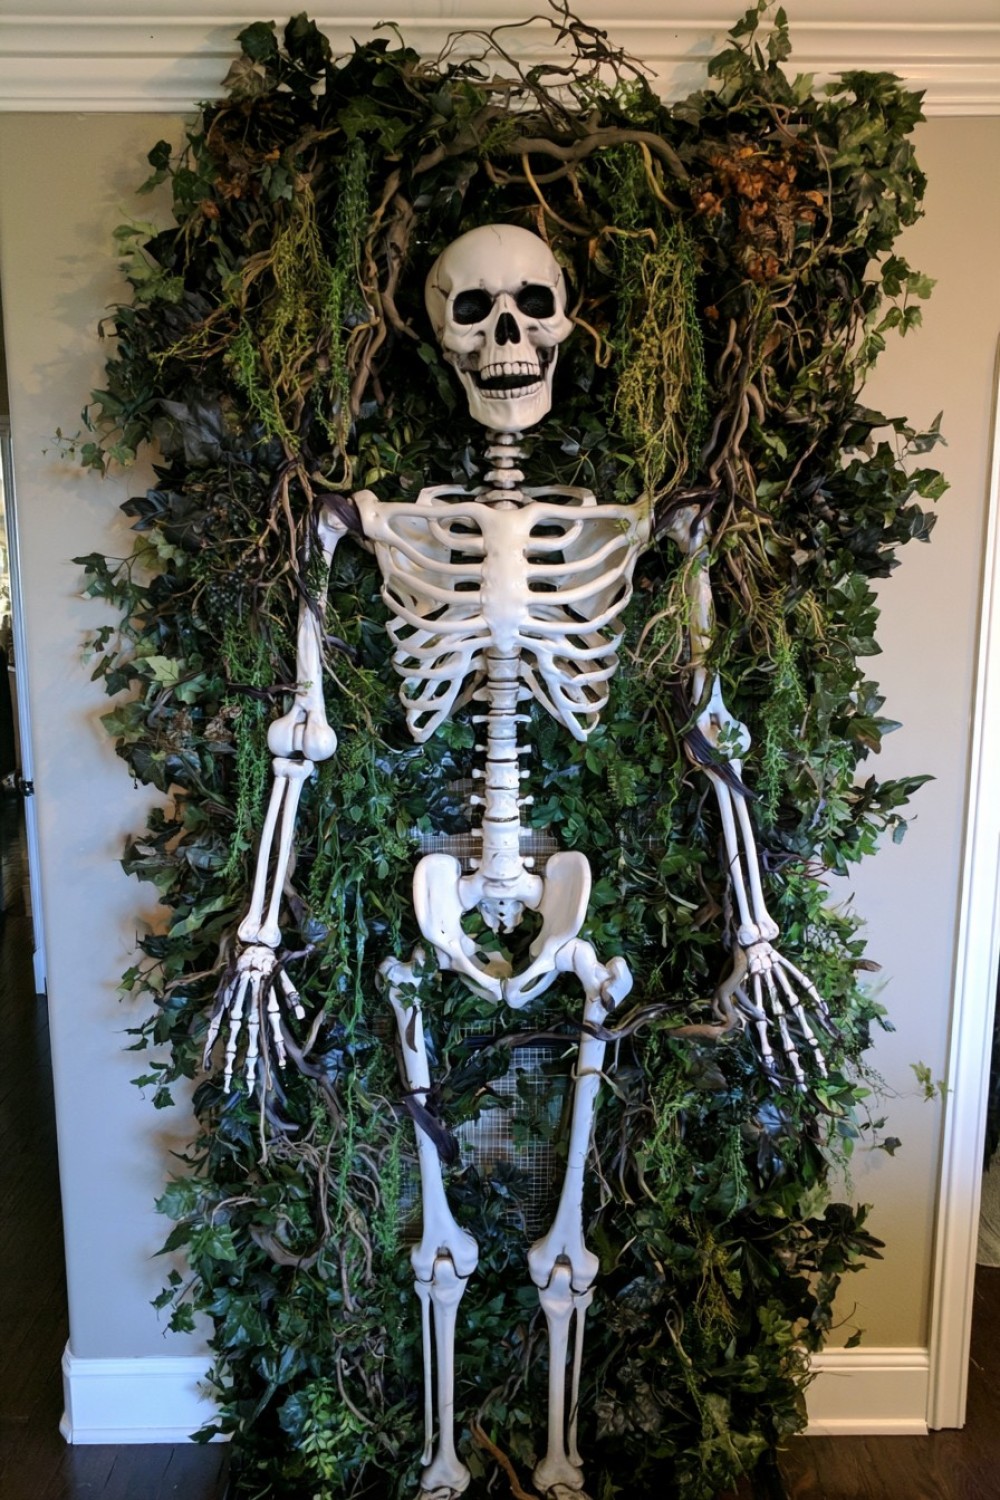
A vertical plant wall or large arrangement can become the setting for a skeleton that appears partially absorbed by greenery.
Position the skeleton behind artificial or preserved foliage rather than in front of it. Allow only parts of the ribs, hands, shoulders, and skull to remain visible.
Use dark green leaves, trailing vines, twisted branches, and a few dried elements rather than bright tropical foliage if you want a moodier result.
The contrast between botanical growth and skeletal structure creates a strong visual story.
For a temporary setup, attach greenery to a freestanding mesh frame instead of directly to the wall.
This concept can work beyond Halloween as a more artistic seasonal installation, especially in eclectic or maximalist interiors.
14. Build a Skeleton Mirror Illusion
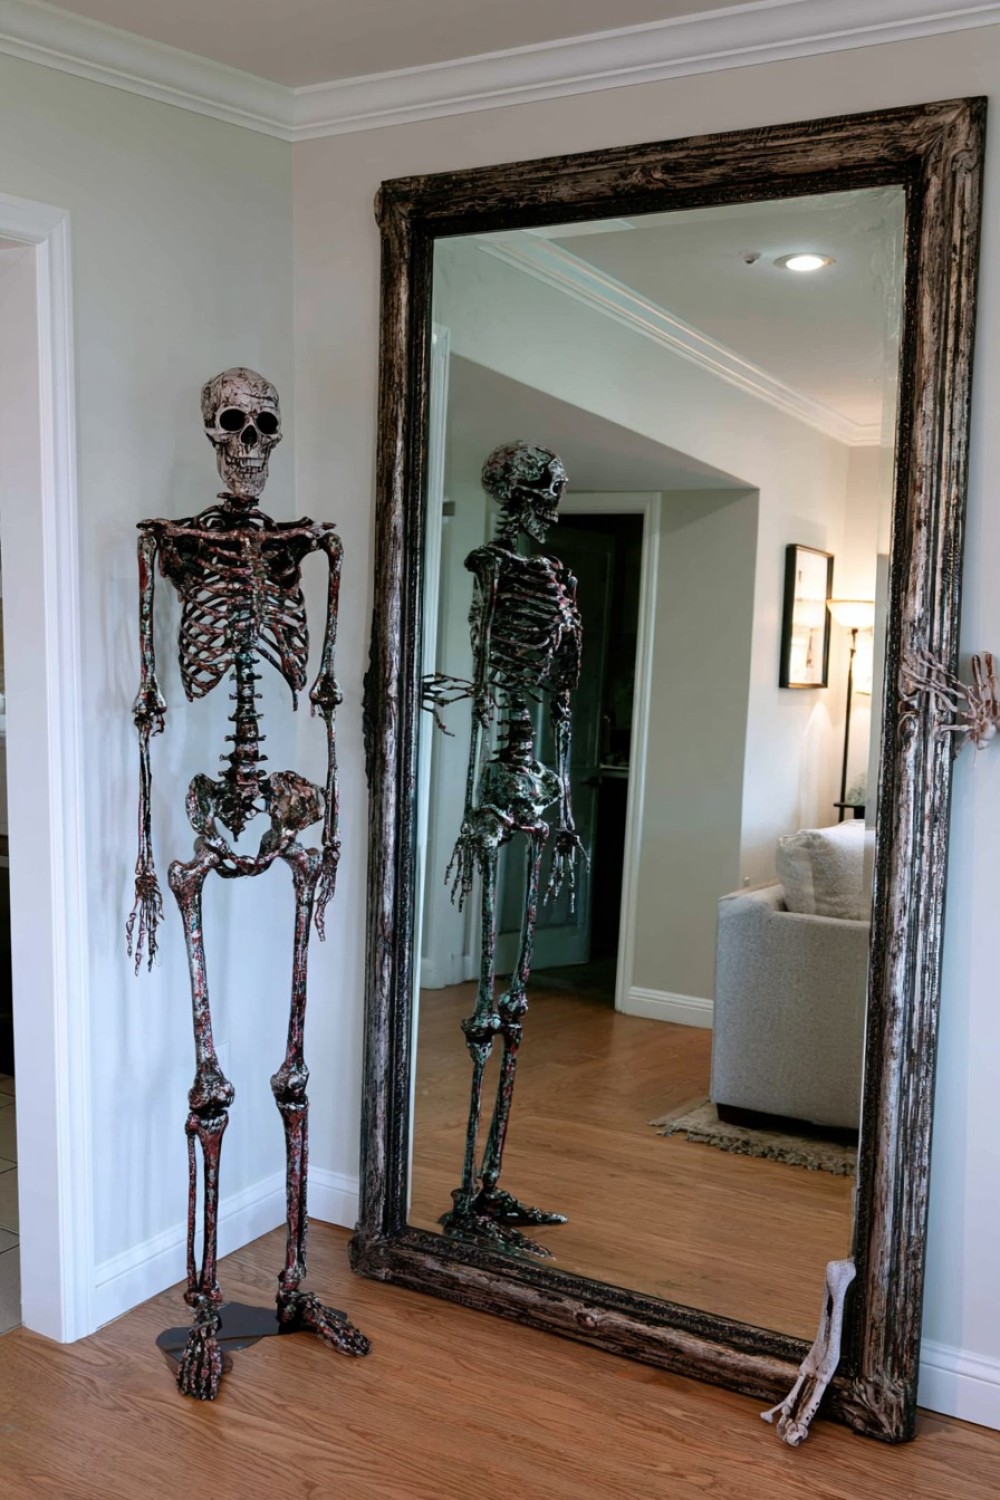
A mirror can make one skeleton look like several without adding more props.
Position a tall skeleton close to a large floor mirror, but angle the body slightly so the reflection does not perfectly match the real figure.
Add one skeletal hand or skull on the opposite side of the mirror to create visual confusion about what is real and what is reflected.
Smoked or antiqued mirrors enhance the effect because the reflection becomes less clear.
For an even more dramatic setup, partially cover the mirror with translucent gray film or removable aged-mirror effect material.
Keep the actual decor around it minimal so the reflection remains the central trick.
15. Create a Skeleton “Excavation” Coffee Table Display
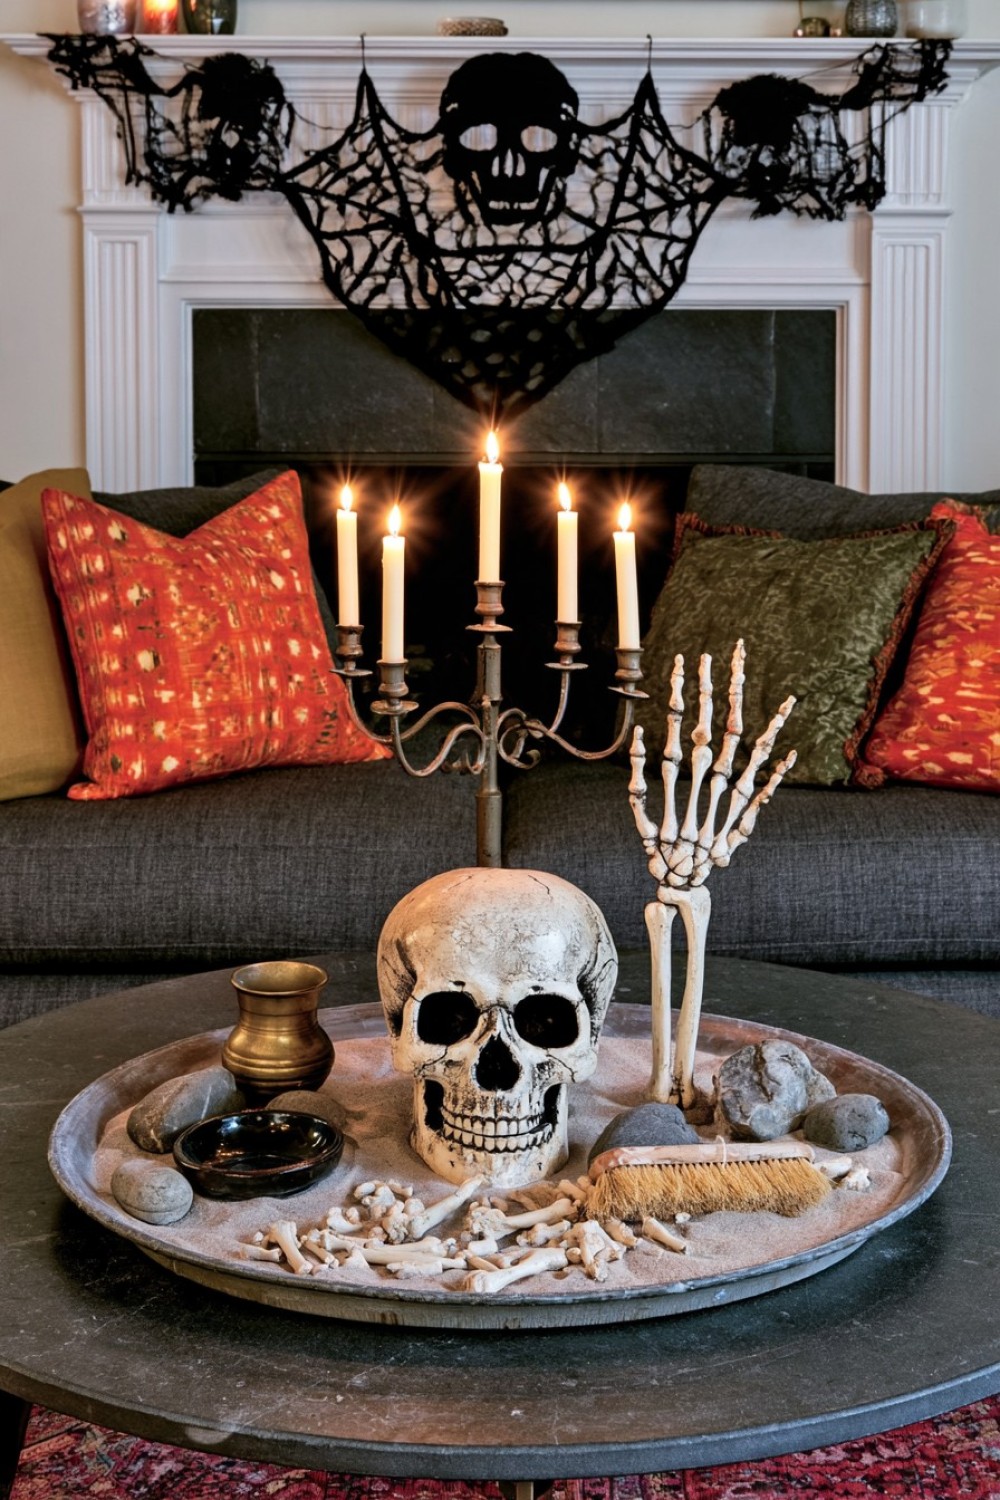
Turn a shallow tray into something resembling an archaeological excavation.
Use a large flat tray, clean decorative sand, small replica bones, stones, a soft brush, and one partially exposed skull or hand.
Arrange the bones so they appear to be emerging gradually from the sand rather than sitting on top.
Add a small magnifying glass, dark ceramic bowl, or brass tool-like object for visual context.
This becomes a tactile-looking centerpiece without requiring a full-sized skeleton.
If the coffee table is used frequently, keep the display contained inside a tray so it can be moved easily.
Avoid loose fine powders that could spread through the room; clean decorative sand or small-grain substrate is easier to manage.
16. Create One Dramatic Skeleton Installation Instead of Decorating Everywhere
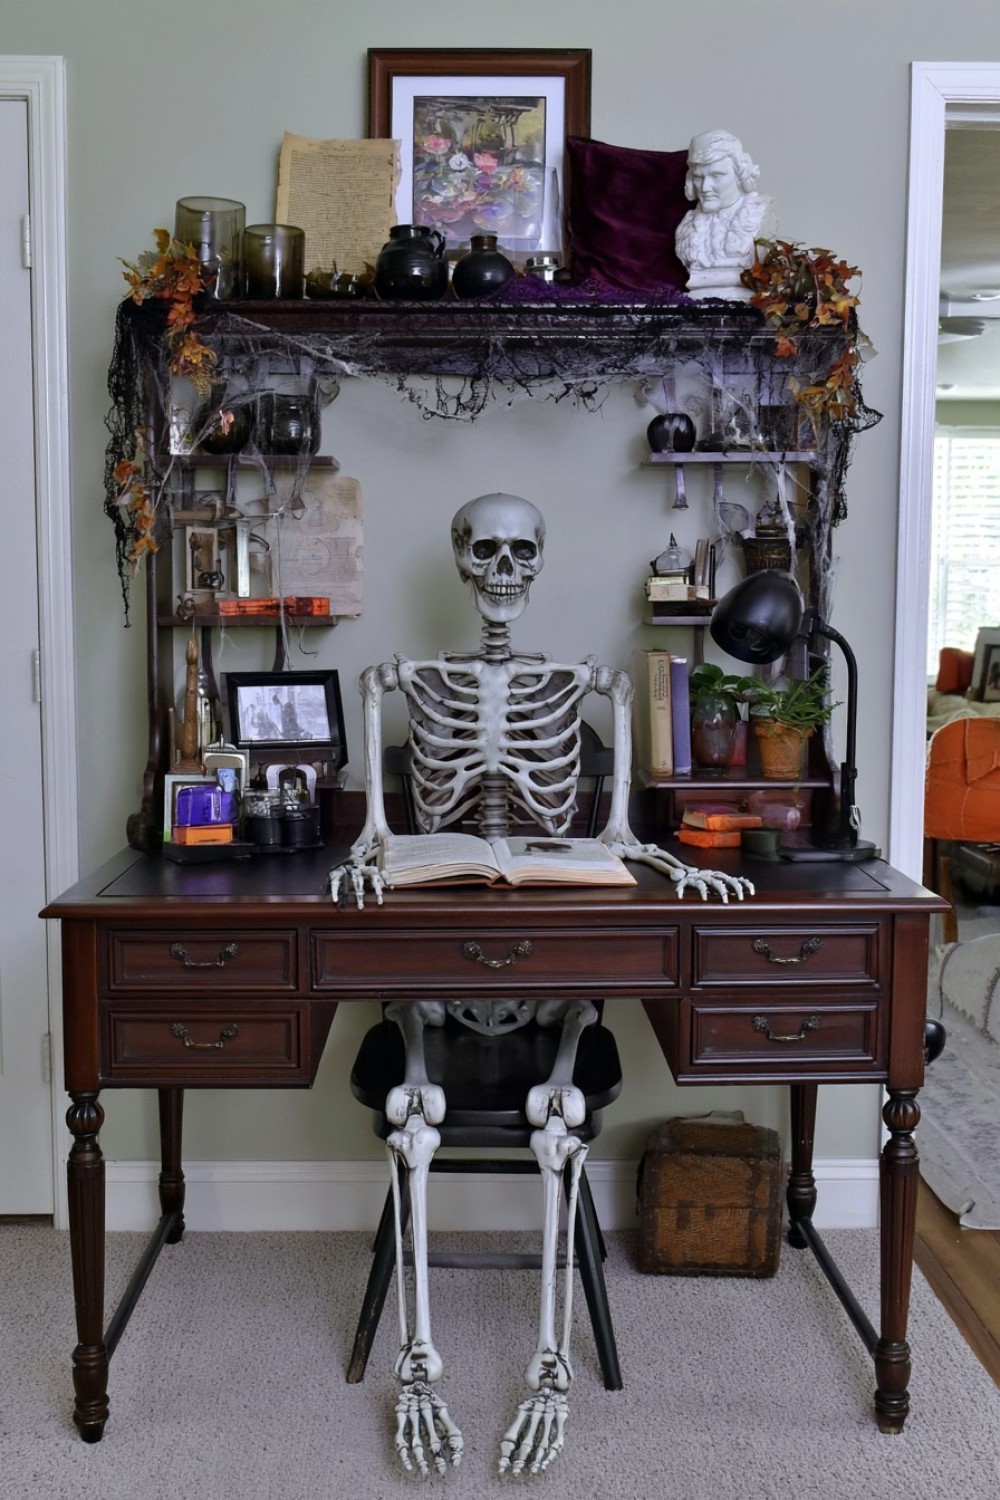
The most memorable skeleton decor may come from concentrating everything into one strong scene.
Choose one location: the staircase landing, fireplace, dining room, entry wall, or reading corner.
Then build a complete composition around a single skeleton using light, furniture, material, and negative space.
For example, a skeleton could sit at a writing desk with one hand resting on an open book, surrounded by dark wood, a plaster bust, smoky glass, and a single low lamp. Another could stand behind translucent curtains at the end of a hallway with no other Halloween decor nearby.
The restraint is what makes the scene convincing.
When skeleton props appear in every room, each individual moment becomes less surprising. One strong installation can create a much more memorable experience than dozens of unrelated decorations.
Making Skeleton Decor Feel Designed Rather Than Random
Skeleton decorations become far more effective when the scene has a clear visual idea. A rib cage used as a botanical structure, a skull finished like plaster sculpture, or a figure revealed only through shadow gives the viewer something to discover. That sense of discovery is often more interesting than simply increasing the number of Halloween props.
Material choice can also change the mood dramatically. Matte plaster, aged metal, smoked glass, dark wood, dried botanicals, and translucent fabric can make inexpensive skeleton decorations feel more connected to the room.
Think about what should be visible immediately and what should be noticed later. Partial views, reflections, silhouettes, and hidden details encourage guests to look twice.
Above all, keep installations stable, walking routes clear, and any improvised props away from real flames or unsafe electrical setups. Creative Halloween decor is strongest when the surprise comes from the design rather than from unnecessary risk.
MORE IDEAS


Share
What's Your Reaction?
 Like
0
Like
0
 Dislike
0
Dislike
0
 Love
0
Love
0
 Funny
0
Funny
0
 Angry
0
Angry
0
 Sad
0
Sad
0
 Wow
0
Wow
0