
This Halloween DIY turns simple corrugated cardboard into a lightweight coffin-shaped wall shelf with two display levels. The project follows a clear build sequence from drawing and cutting the matching cardboard parts to reinforcing the structure, painting the surface, making the red dripping trim, and finishing the shelf with small spooky decorations.
Table of Contents
- Tutorial
- Materials and Tools
- 1. Draw the Coffin Template
- 2. Cut the Cardboard Pieces
- 3. Build the Outer Coffin Frame
- 4. Install the Two Inner Shelves
- 5. Reinforce the Edges with Paper Tape
- 6. Paint the Shelf Black
- 7. Create the Dripping Trim with Hot Glue
- 8. Paint the Dripping Trim Dark Red
- 9. Attach the Red Drips to the Shelf Fronts
- 10. Hang and Decorate the Finished Coffin Shelf
- Final Result
Tutorial
1. Draw the Coffin Template
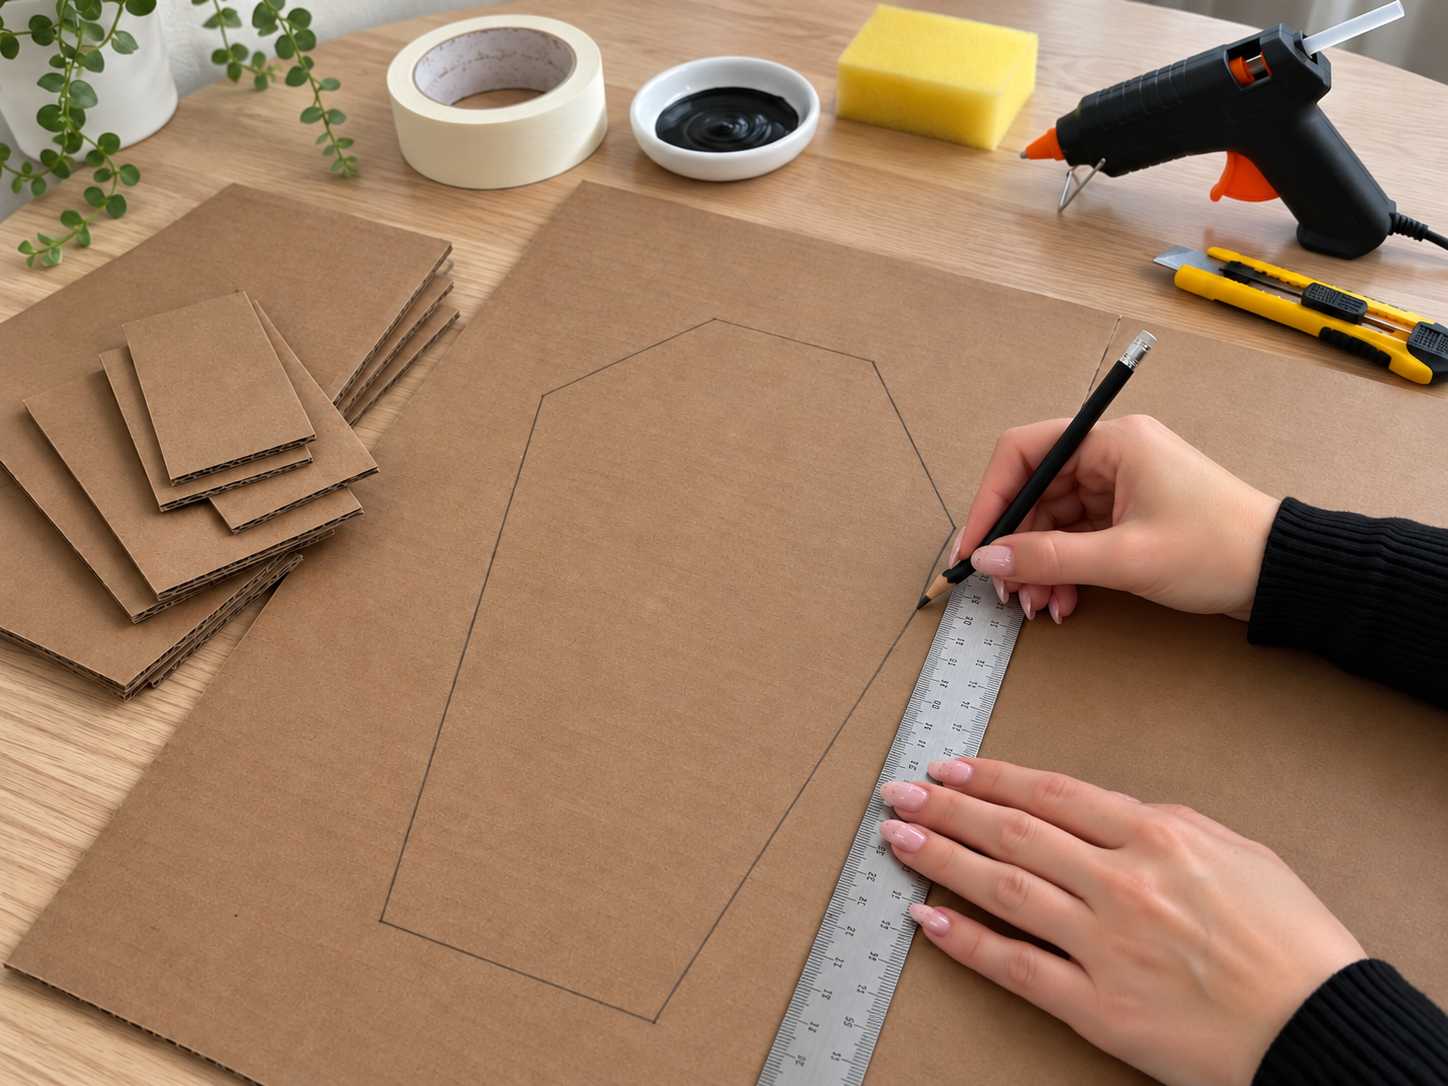
Place a large sheet of corrugated cardboard on a flat work surface. Use a metal ruler and pencil to draw the coffin-shaped back panel with clean, symmetrical angles. Taking time to keep both sides balanced will make the later assembly much easier.
2. Cut the Cardboard Pieces
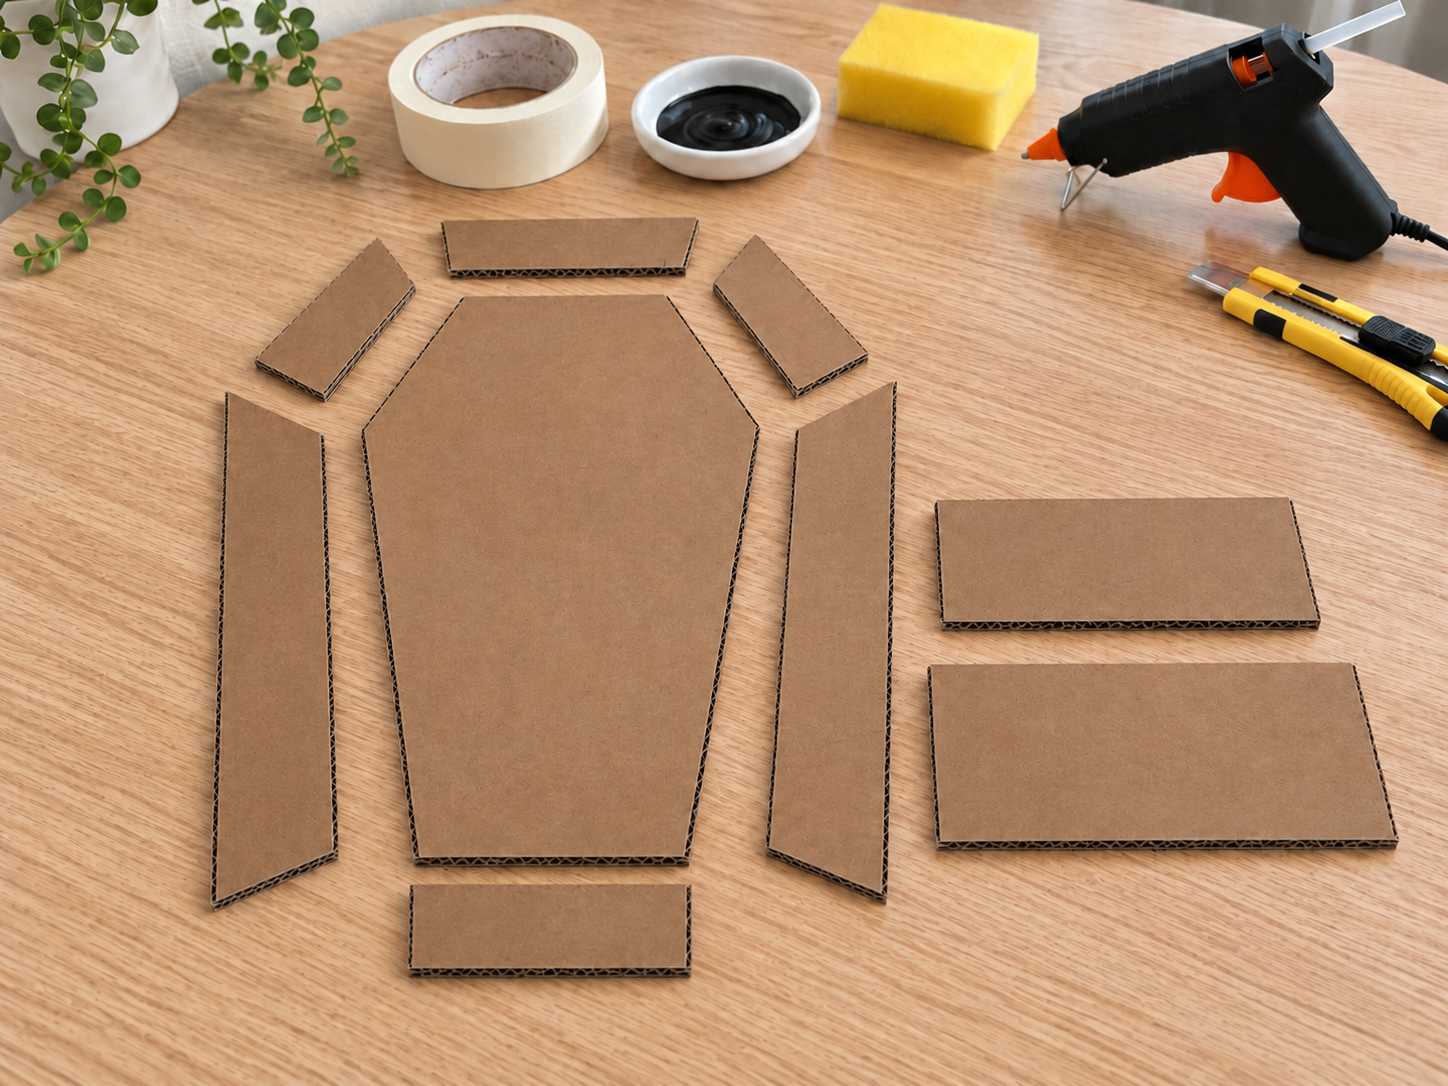
Cut out one coffin-shaped back panel, six narrow wall sections for the outer frame, and two separate shelf pieces. These parts are sized to match the exact body shape and two-shelf layout used in the next assembly steps.
3. Build the Outer Coffin Frame
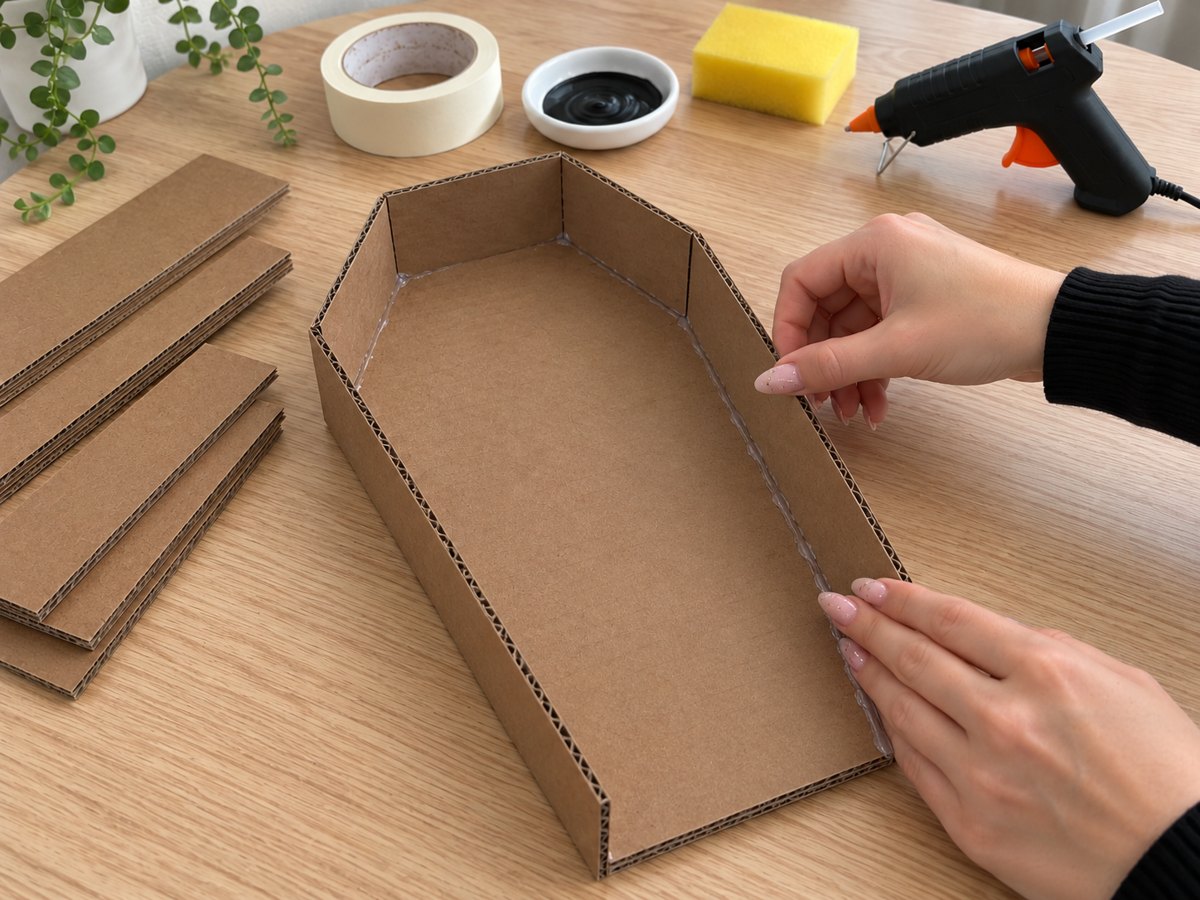
Attach the six wall sections around the perimeter of the coffin-shaped back panel with hot glue. Work one section at a time, align every edge carefully, and hold each piece in place for a few seconds until the glue begins to set.
4. Install the Two Inner Shelves
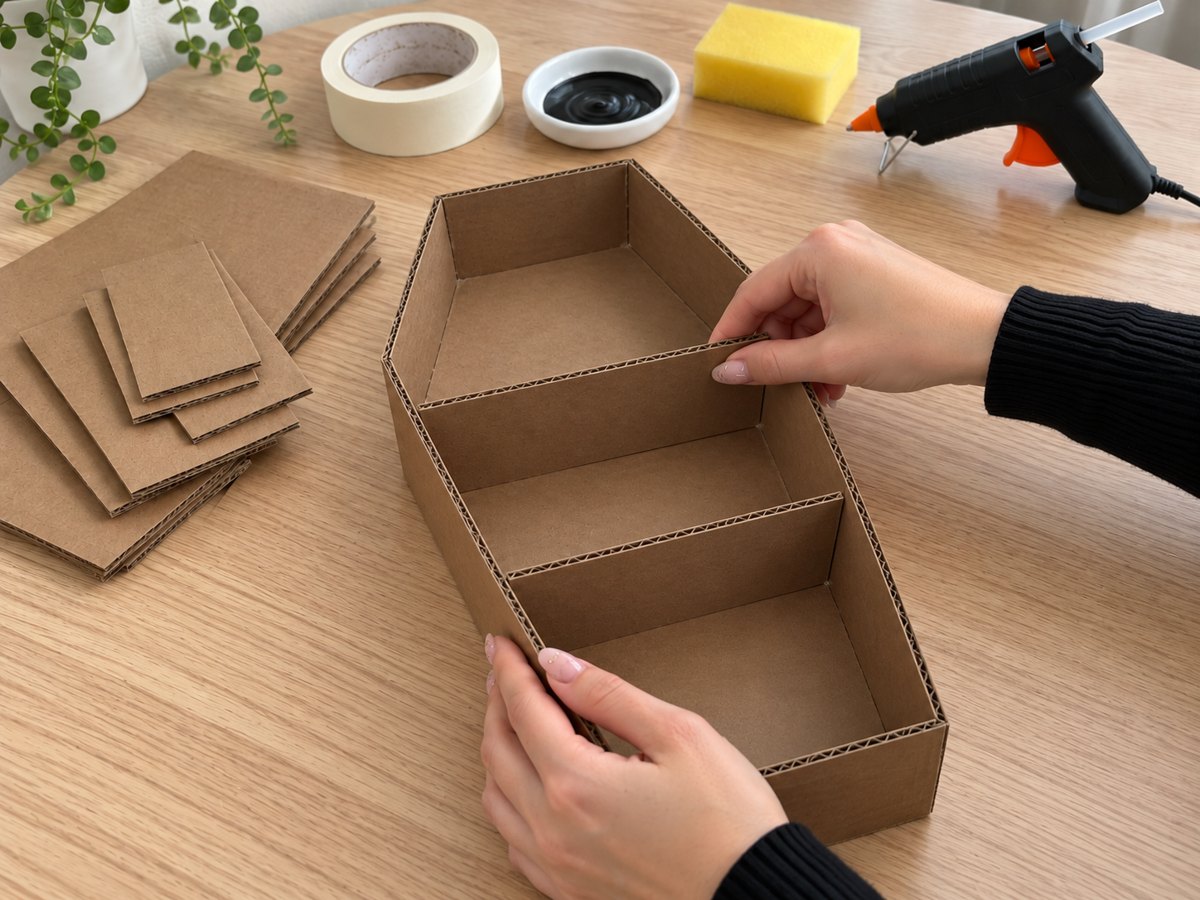
Position the two shelf pieces inside the coffin frame at even intervals. Glue both ends of each shelf firmly against the side walls so the interior is divided into three usable display compartments.
5. Reinforce the Edges with Paper Tape
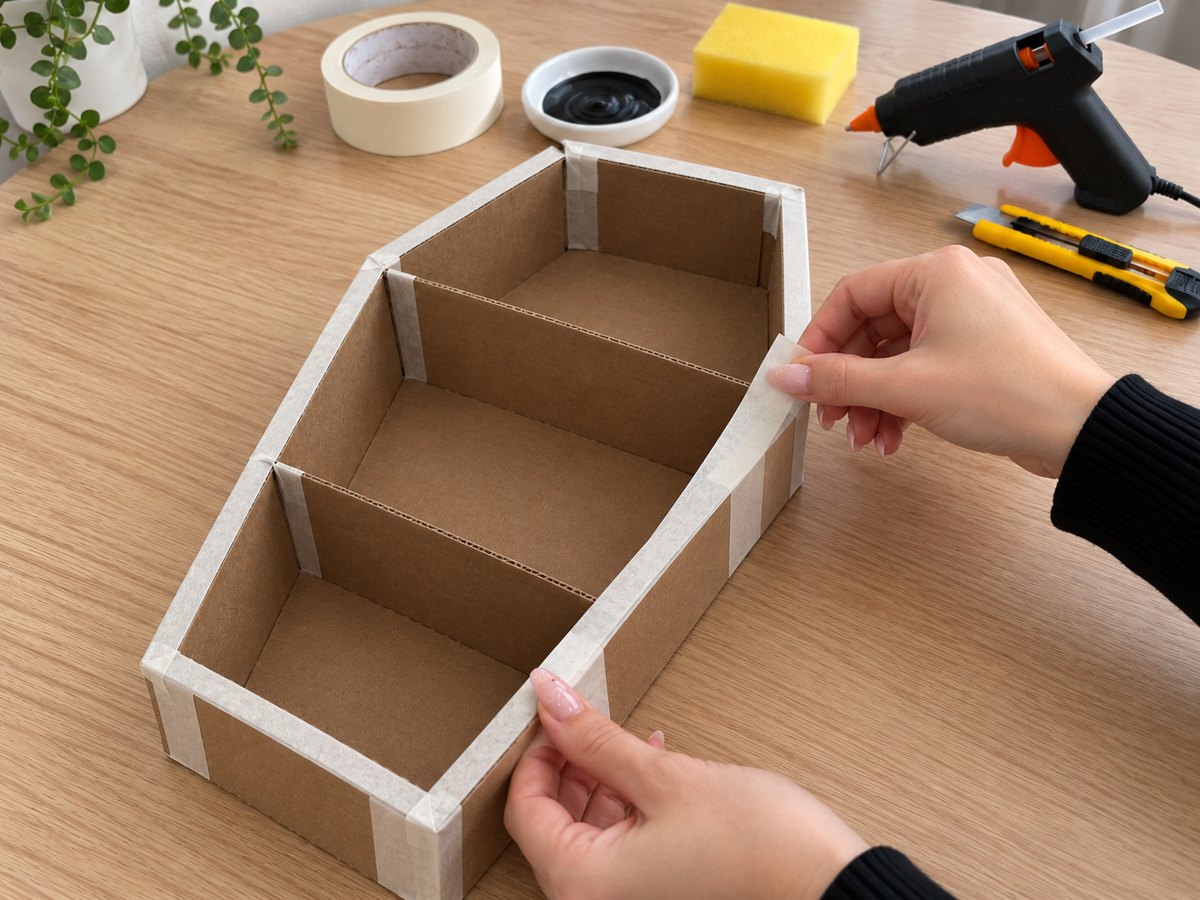
Cover the exposed joins, corners, and outer rim with white paper tape. This strengthens the cardboard structure, hides uneven seams, and creates a cleaner surface before painting.
6. Paint the Shelf Black
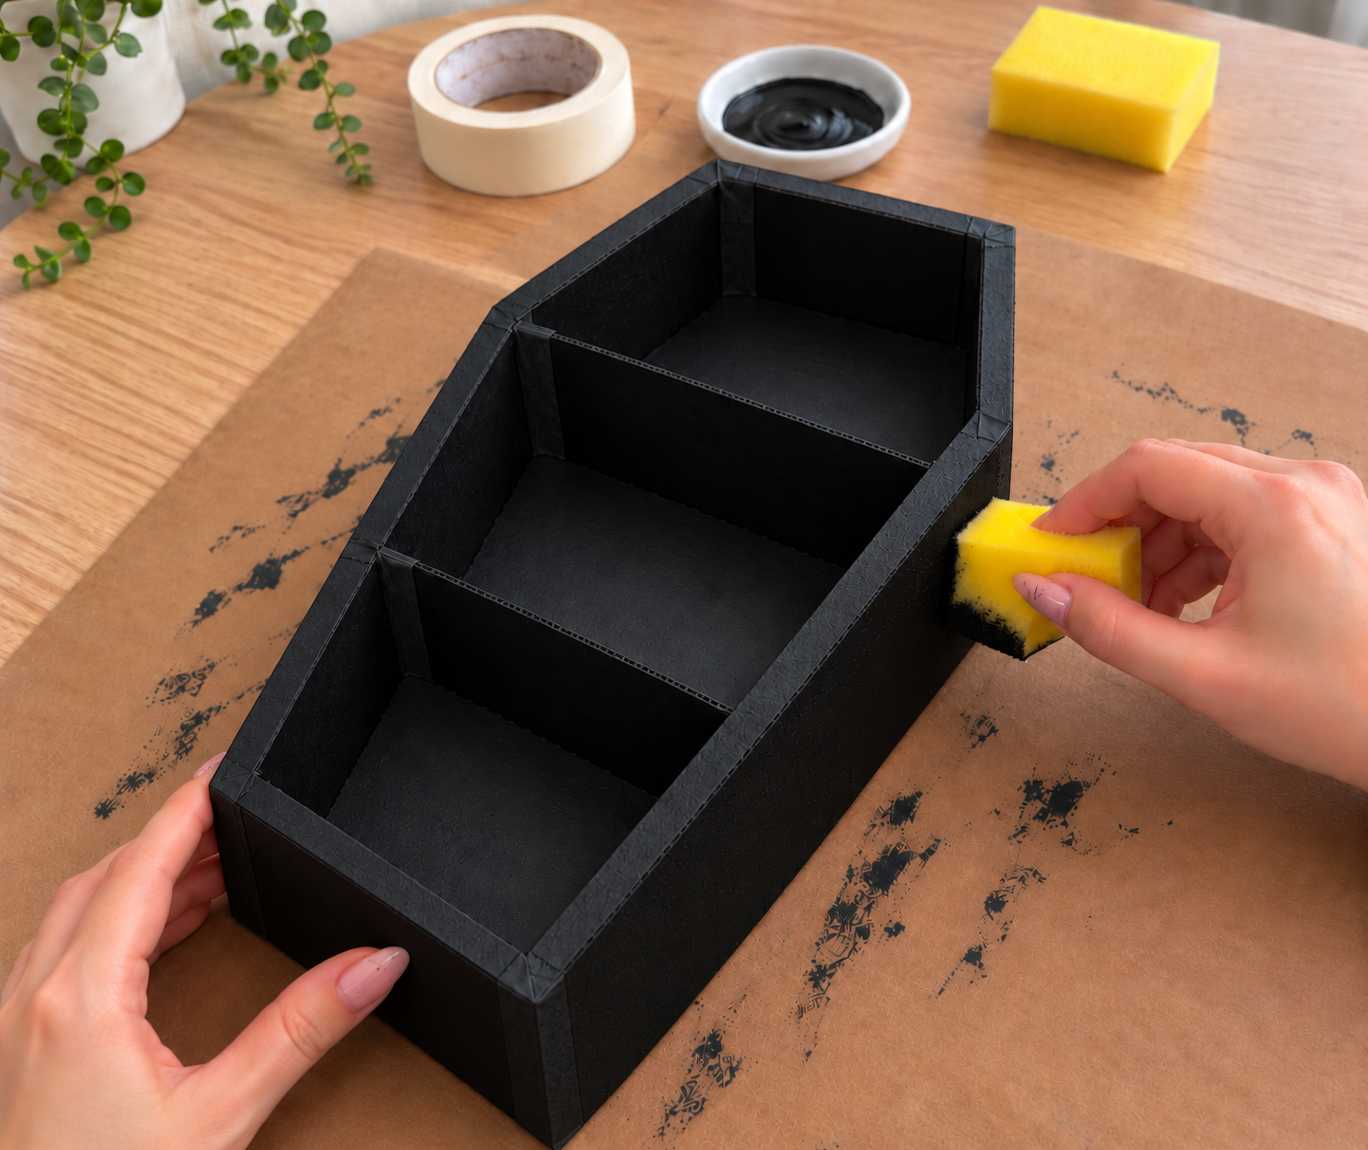
Apply black acrylic paint to the inside, outside, shelves, and edges using a small sponge. Use light dabbing motions for an even finish and allow the first coat to dry before touching up any thin areas.
7. Create the Dripping Trim with Hot Glue
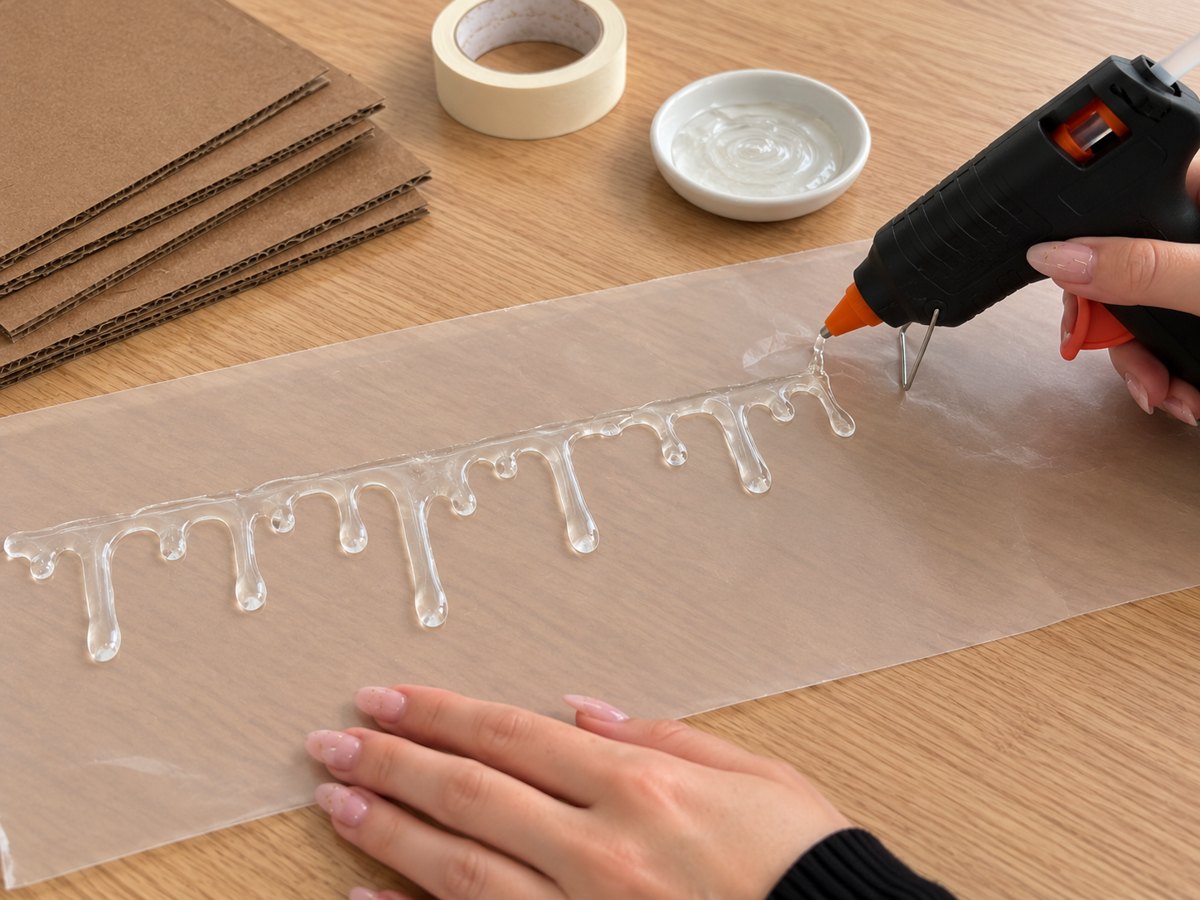
On a sheet of clear acetate or smooth plastic, draw two long horizontal strips with hot glue and extend irregular drips downward. Make both strips approximately the same width as the front edges of the two shelves, then let them cool completely.
8. Paint the Dripping Trim Dark Red
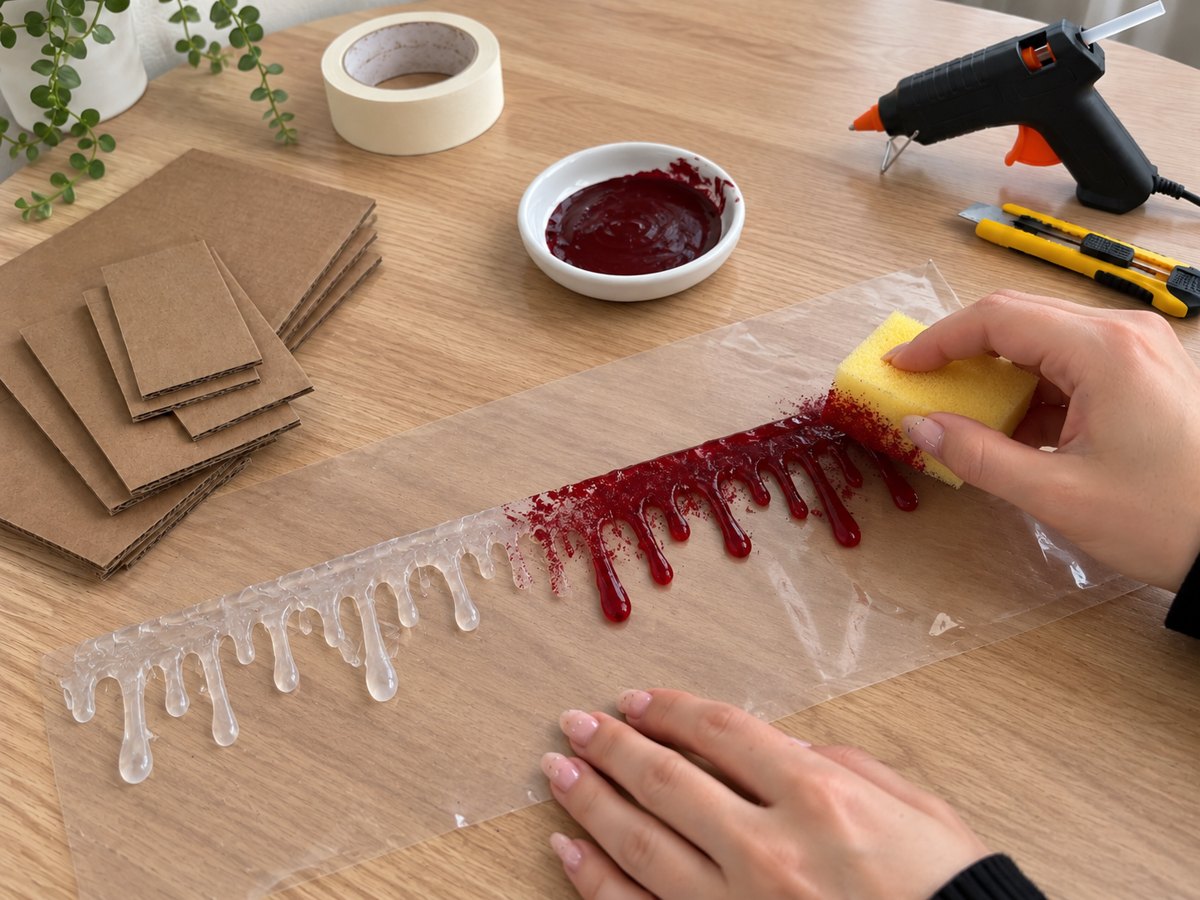
Once the glue strips have hardened, paint them with dark red acrylic paint. Build up the color with a sponge until the transparent glue is fully covered and the drips have a rich, opaque finish.
9. Attach the Red Drips to the Shelf Fronts
Glue one red drip strip along the front edge of each inner shelf. Align the top edge carefully so the decorative drips hang downward without twisting or blocking the shelf surface.
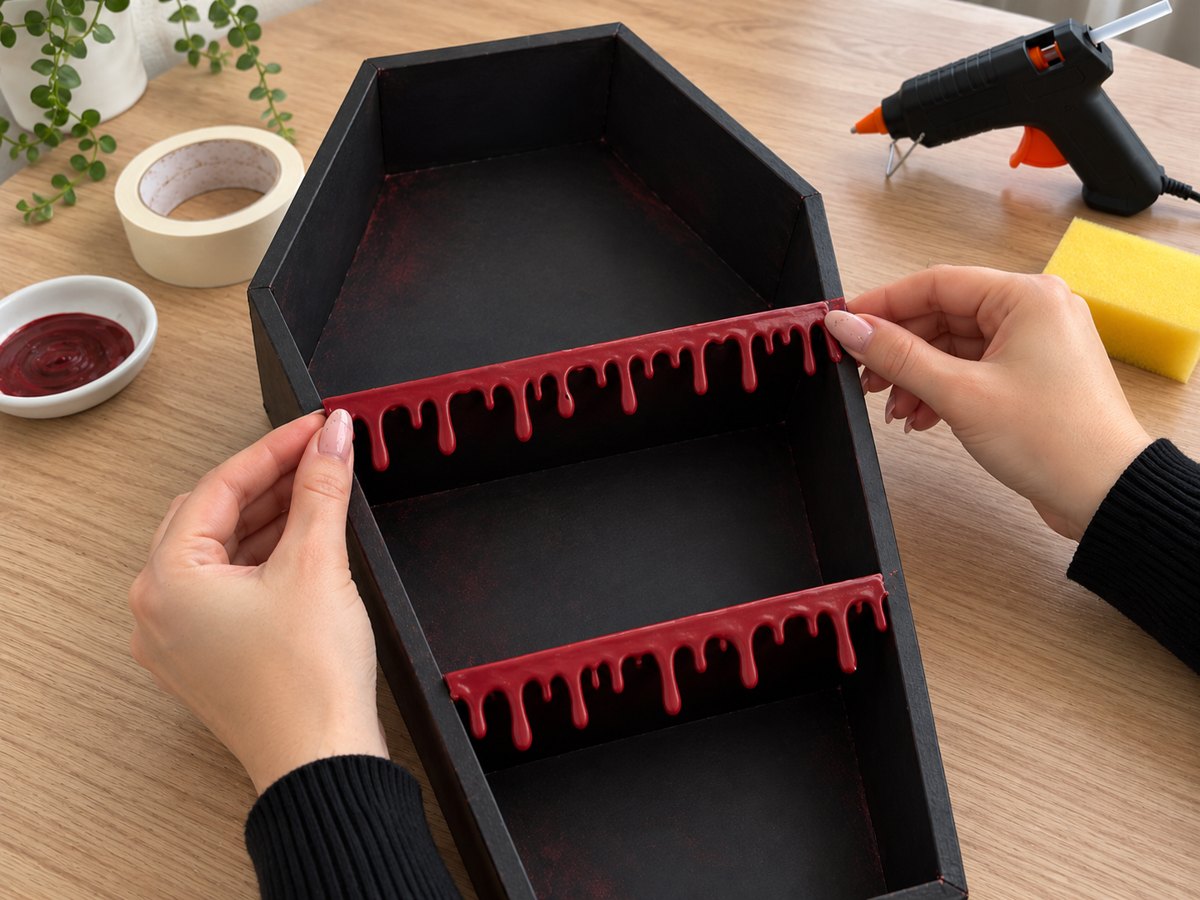
10. Hang and Decorate the Finished Coffin Shelf
Add a suitable hanging fixture to the back and secure the finished shelf to the wall. Complete the Halloween display with a small ghost, miniature figures, faux spiderwebs, plastic spiders, and an LED tealight candle.
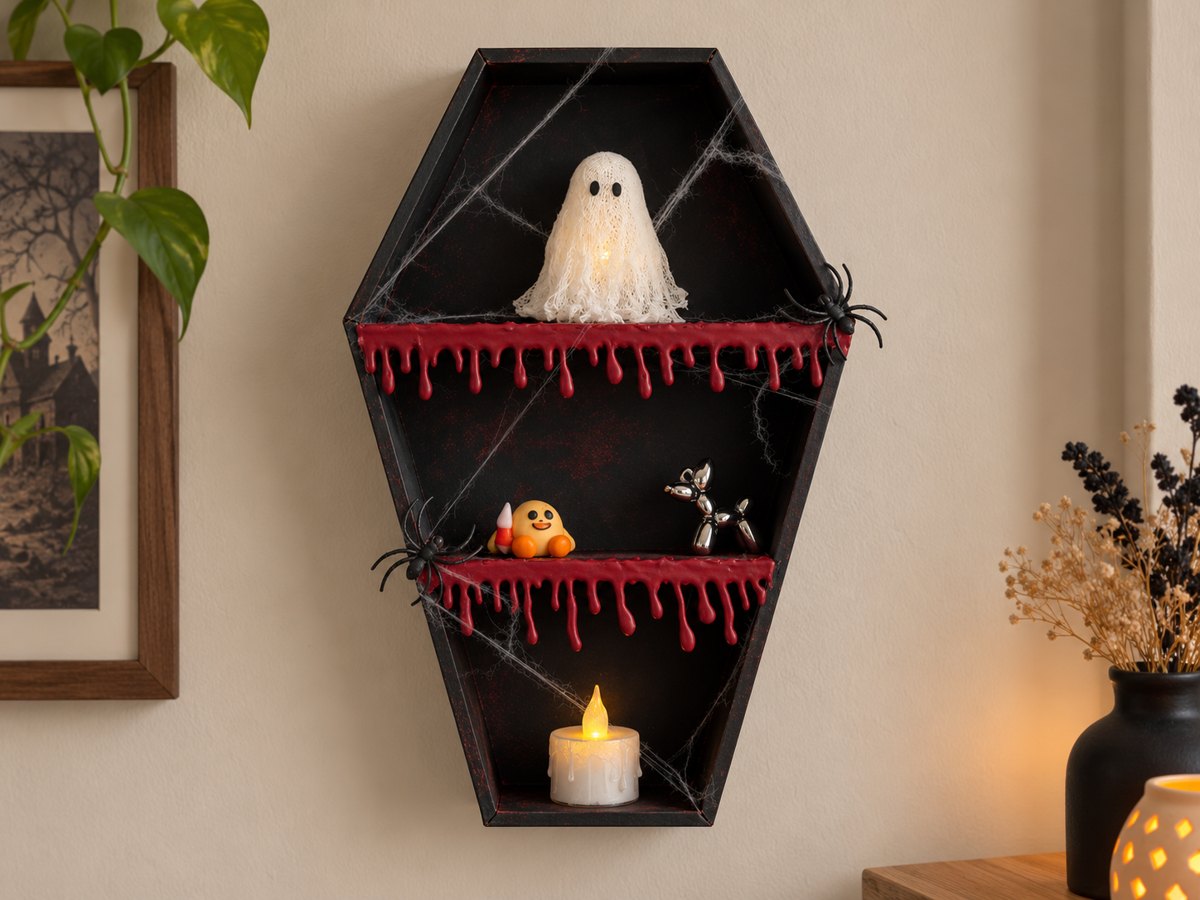
Final Result
The finished coffin shelf has three display sections, a matte black surface, and two dark red dripping shelf fronts that give the cardboard structure a strong Halloween character. Because the shelf is made from cardboard, keep the decorations lightweight and use battery-powered LED candles rather than real flames. For styling the finished shelf within a wider room scheme, explore these gothic decor ideas and select accessories that suit the shelf's limited load capacity.



Leave a Reply