17 Craft Closet Systems That Make Creative Work Easier

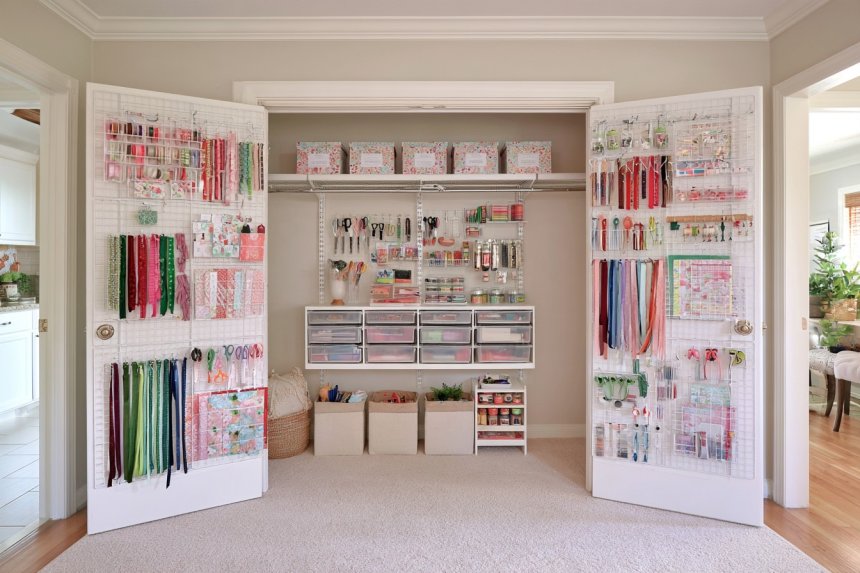
A well-organized craft closet should do more than hide supplies behind closed doors. The best setups make materials visible, keep unfinished projects from disappearing, and reduce the time spent searching for scissors, ribbon, paper, thread, paint, or small tools. Instead of filling every shelf with matching bins, think of the closet as a compact workshop with zones for storage, preparation, and active projects. Pull-out panels, vertical dispensers, modular trays, hidden work surfaces, and shallow compartments can often use awkward space more effectively than deep shelves alone. These craft closet organization ideas focus on practical systems that make creative supplies easier to manage while giving the closet a more intentional, studio-like feel.
1. Install a Pull-Out Pegboard Hidden Between Shelves
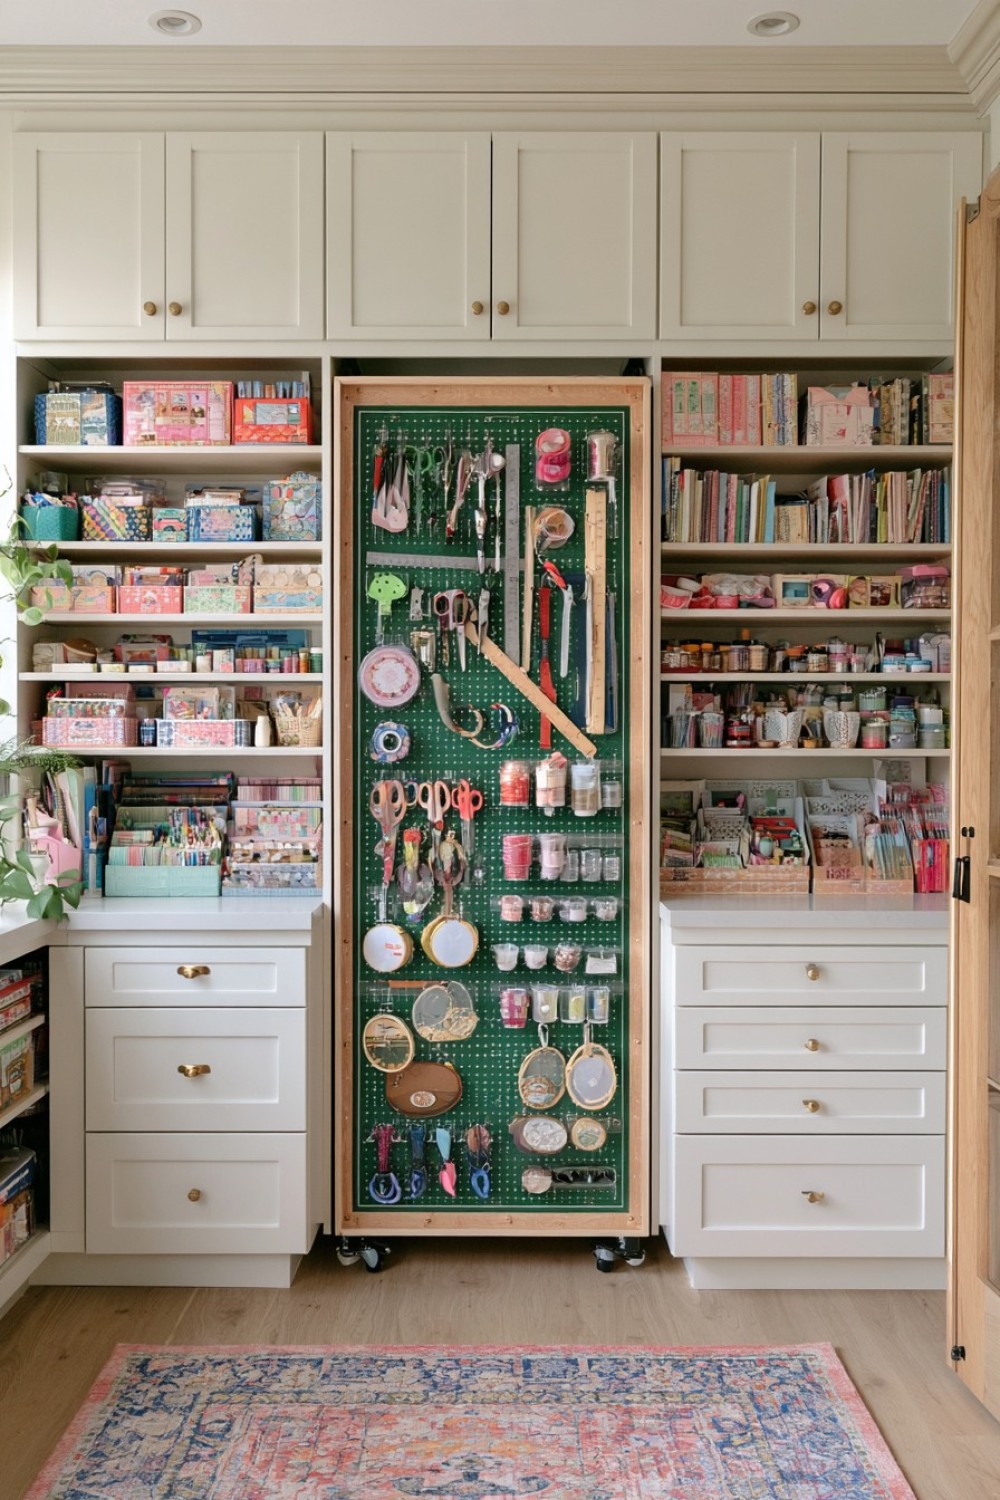
Instead of covering the back wall with pegboard, mount a narrow pegboard panel on heavy-duty drawer slides so it pulls forward like a vertical drawer.
This creates two usable faces for scissors, rulers, cutting tools, embroidery hoops, tape, and small baskets while taking up only a few inches of closet width.
For a DIY version, use plywood-backed pegboard, full-extension drawer slides, small hooks, and lightweight accessory cups. Frame the panel with thin timber so it remains rigid when pulled forward.
Keep frequently used tools toward the outer edge where they can be reached immediately. Less-used supplies can sit farther back.
This is especially useful in deep closets where the side walls normally become wasted space. Instead of stacking bins deeper and deeper, the pull-out panel turns that narrow zone into visible tool storage.
2. Build Project Boxes That Store an Entire Craft in One Place
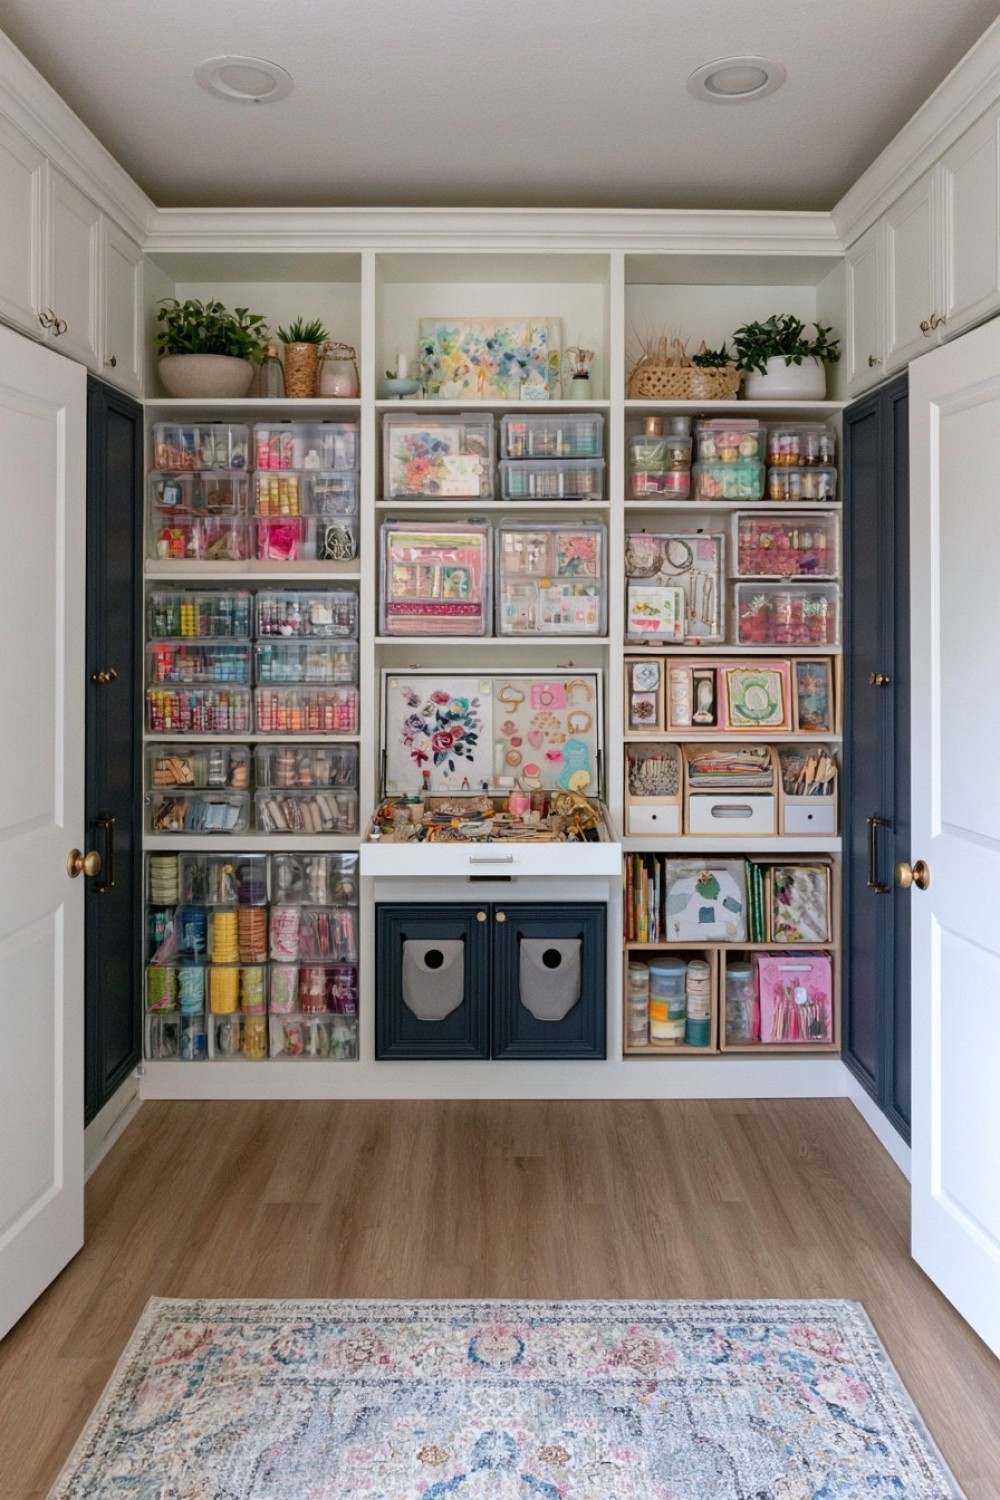
Traditional organization often separates supplies by type, but active projects are easier to finish when everything needed for one task stays together.
Create shallow project boxes sized for common activities: watercolor painting, jewelry making, greeting cards, embroidery, or clay work.
Each box might contain the project's materials, reference image, unfinished pieces, and a small tool set.
Use transparent lidded cases, shallow document boxes, or custom plywood trays with finger pulls. Add a card pocket to the front where you can insert a project name or deadline.
The important difference is that these are temporary working boxes rather than permanent material categories.
When you want to work, remove one complete box instead of gathering supplies from five shelves. When finished, either empty the box back into permanent storage or immediately assign it to the next project.
3. Turn the Closet Door Into a Fold-Down Cutting Station
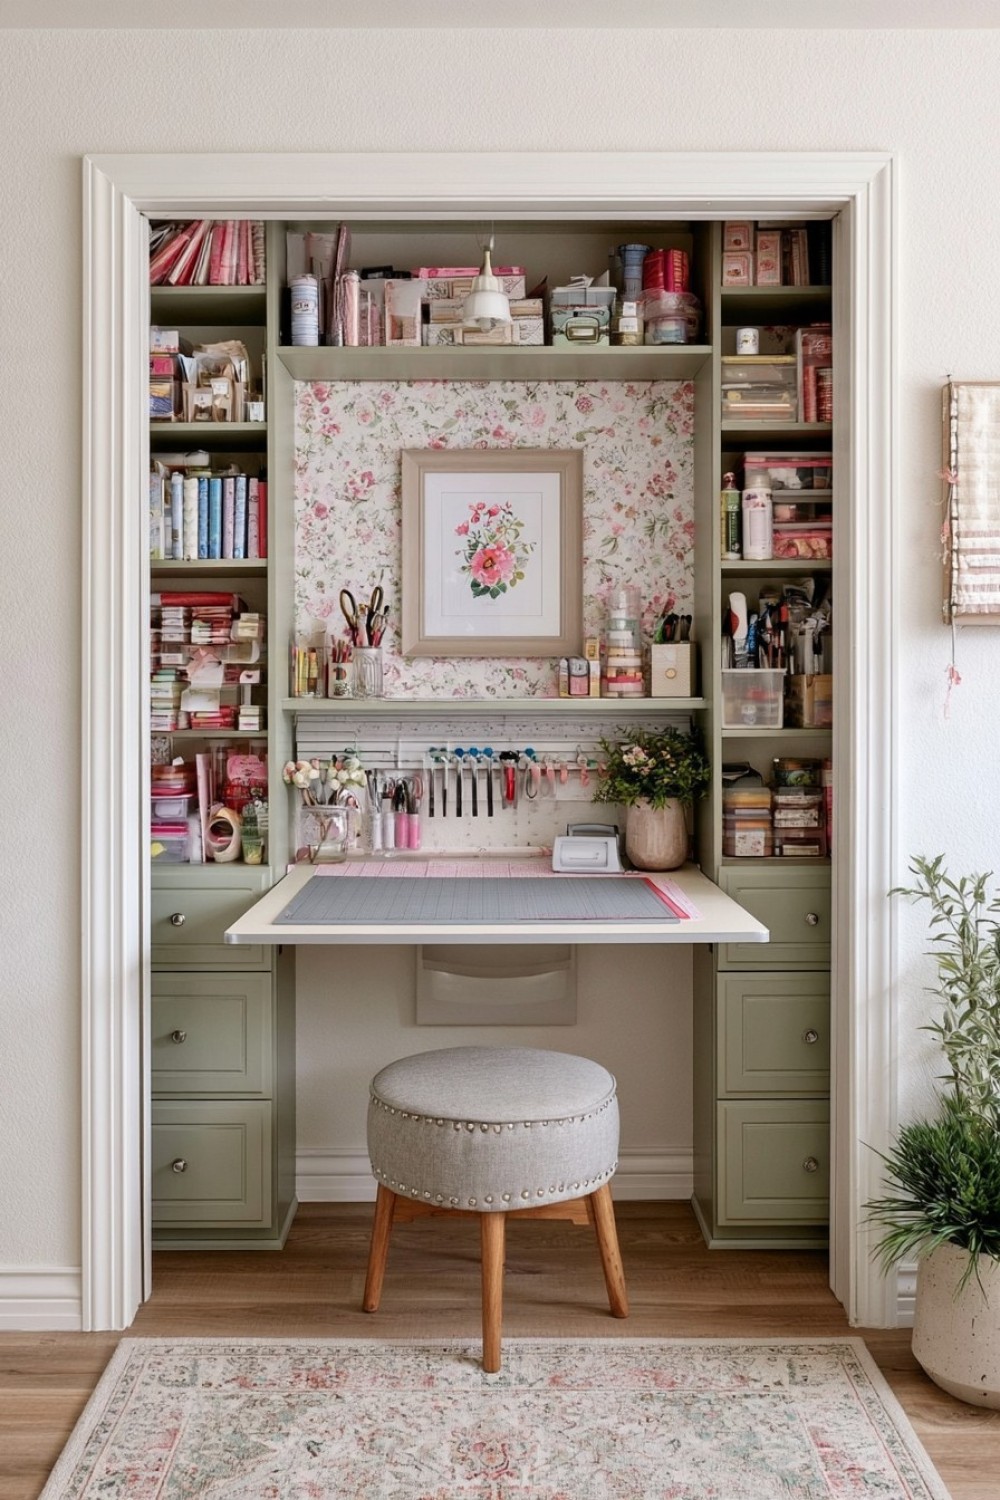
A craft closet can contain its own work surface without sacrificing floor area.
Attach a shallow fold-down panel to the inside of a sturdy closet door or to a reinforced interior wall. When closed, the panel sits almost flat. When lowered, folding brackets or support chains hold it horizontally.
Use sealed plywood or laminated board and add a removable self-healing cutting mat on top.
A narrow ledge above the panel can store rulers and cutting tools, while a slim pocket below can hold scrap paper.
Before building, make sure the door hinges and structure can safely support the added weight. For heavier work surfaces, mounting the desk to a wall inside the closet may be more appropriate.
This setup is particularly effective for paper crafts because you can cut, measure, and sort supplies without moving everything to the dining table.
4. Create a Vertical Paper “Library”
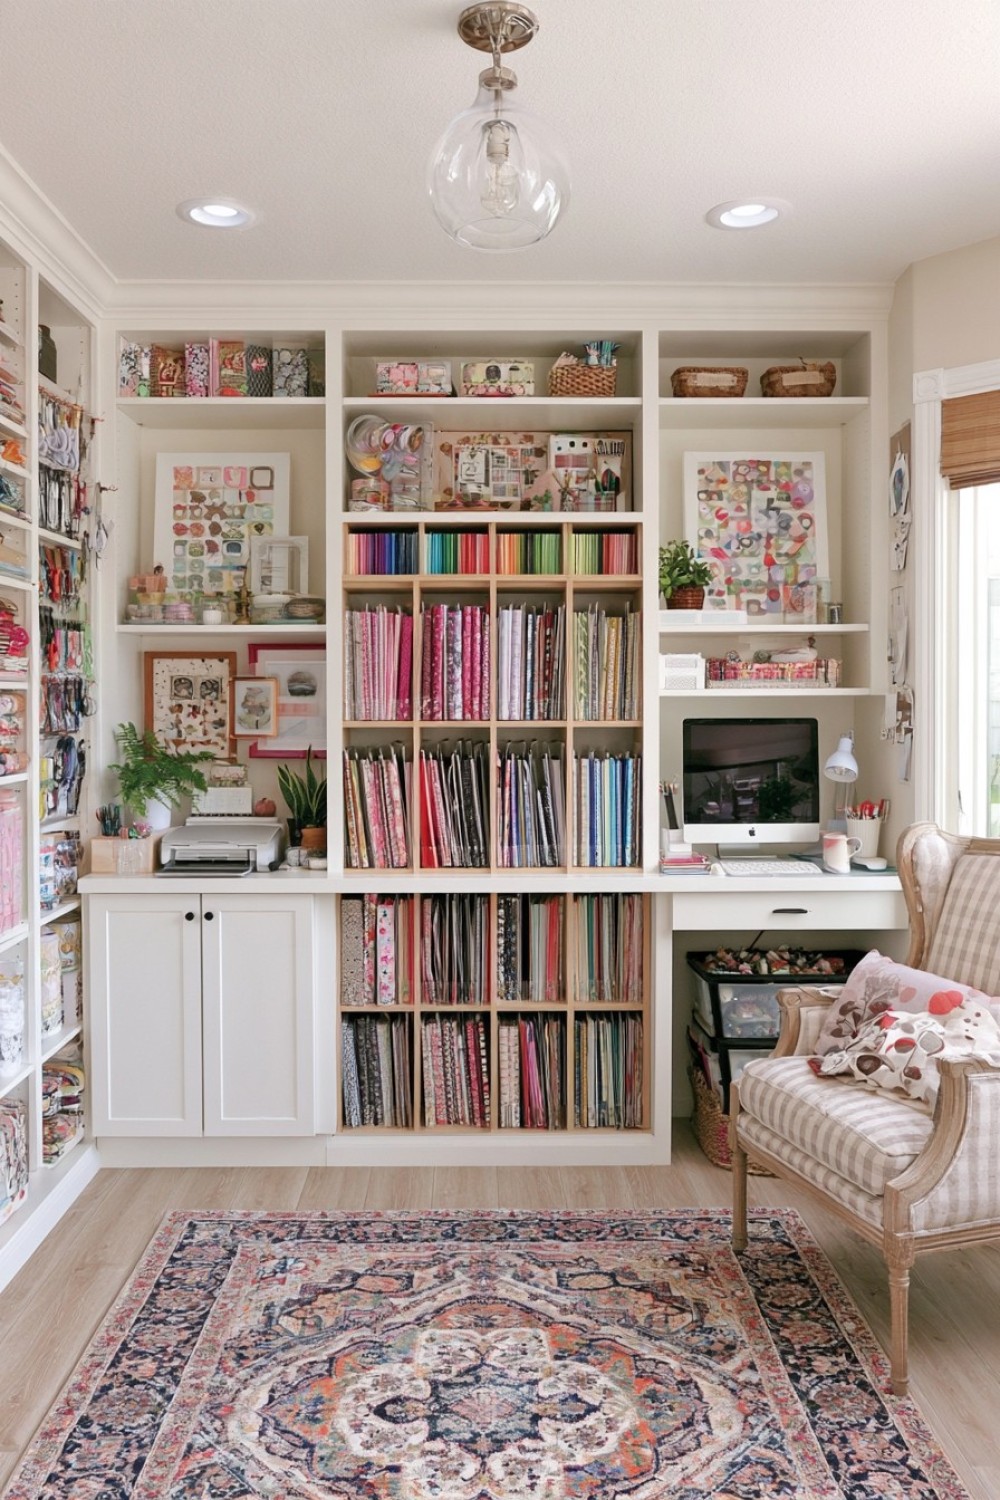
Stacks of paper quickly become difficult to browse because the sheet you want always seems to be at the bottom.
Instead, store cardstock, scrapbook paper, vinyl sheets, felt, and thin foam board vertically like books.
Use narrow plywood dividers, magazine files, or repurposed record-storage boxes to create individual sections.
Organize by color family, material, or project type rather than by exact shade. Too many tiny categories can make the system harder to maintain.
For large 12-by-12-inch scrapbook paper, build square cubbies with removable vertical dividers. A small sample tab clipped to each divider can show the colors inside without pulling everything out.
Vertical storage reduces bending and curling while allowing you to remove one sheet without disturbing an entire stack.
It also transforms a deep shelf into something you can actually browse at a glance.
5. Install a Ribbon Wall That Works Like a Fabric Store
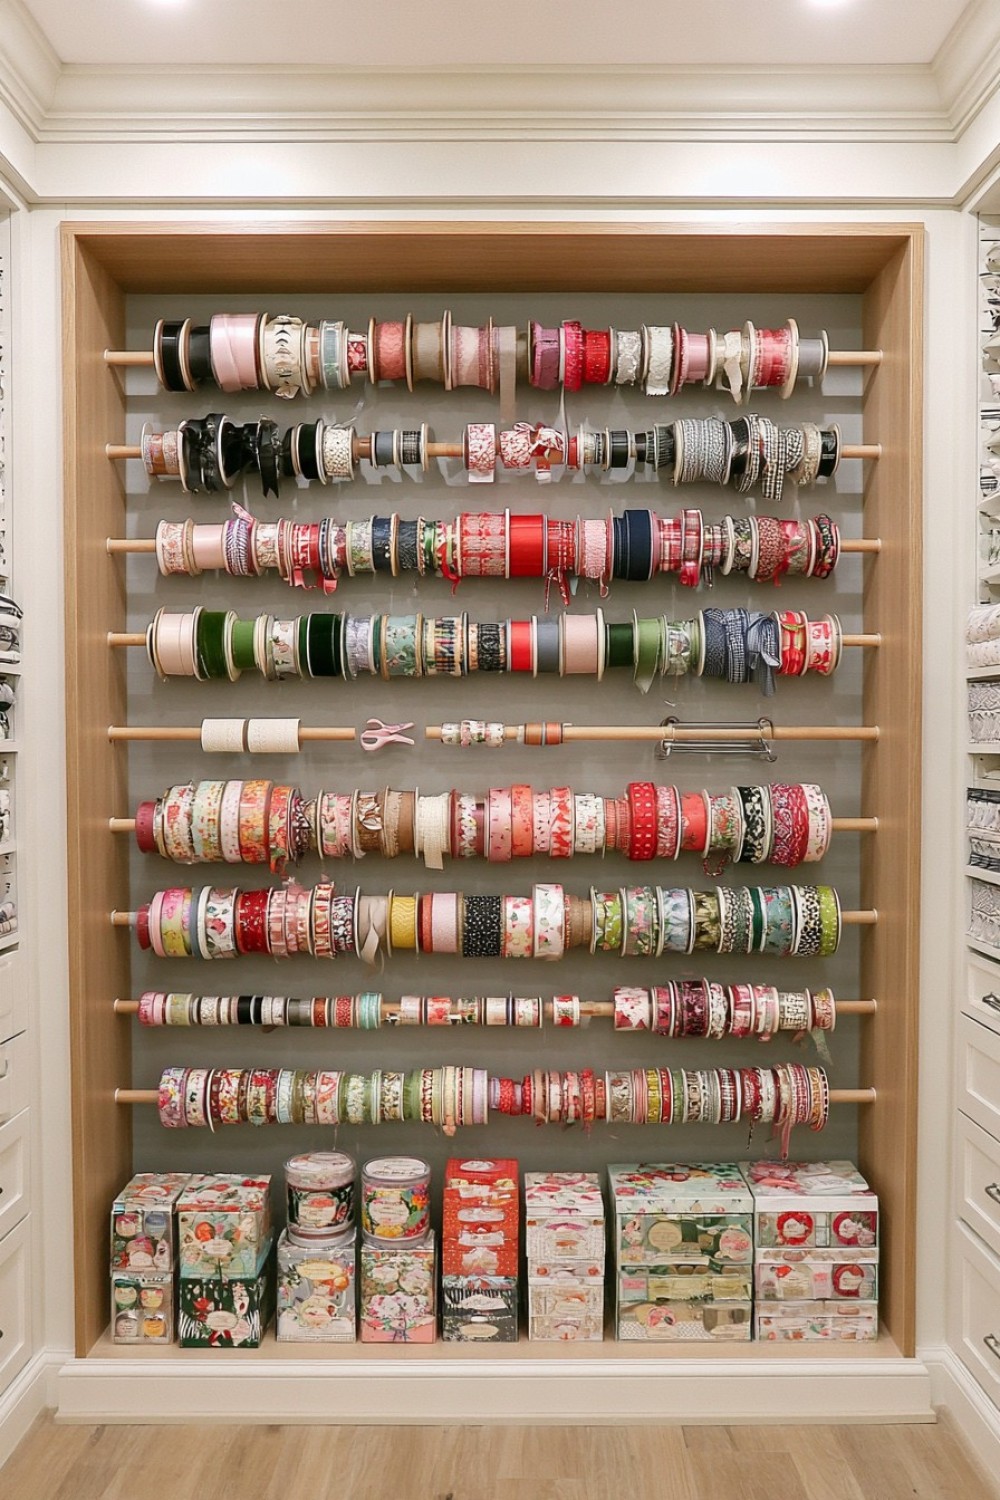
Instead of keeping ribbon in bins, create a dispensing system that allows each roll to unwind while staying in place.
Mount several removable dowels between two vertical side supports. Slide ribbon spools onto the rods, grouping them by width or material.
For a more flexible DIY design, drill matching holes into two plywood panels and use timber dowels with removable end caps.
Position a narrow cutting rail or pair of scissors on a tether nearby so ribbon can be measured and cut without removing the spool.
Leave enough space between rows for bulky velvet or wired ribbon.
The same system can hold washi tape, decorative cord, elastic, or small rolls of vinyl.
Unlike a drawer full of loose spools, this setup lets you see color and texture immediately and can make the closet feel more like a small creative supply shop.
6. Build Shallow “Ingredient Drawers” for Tiny Craft Parts
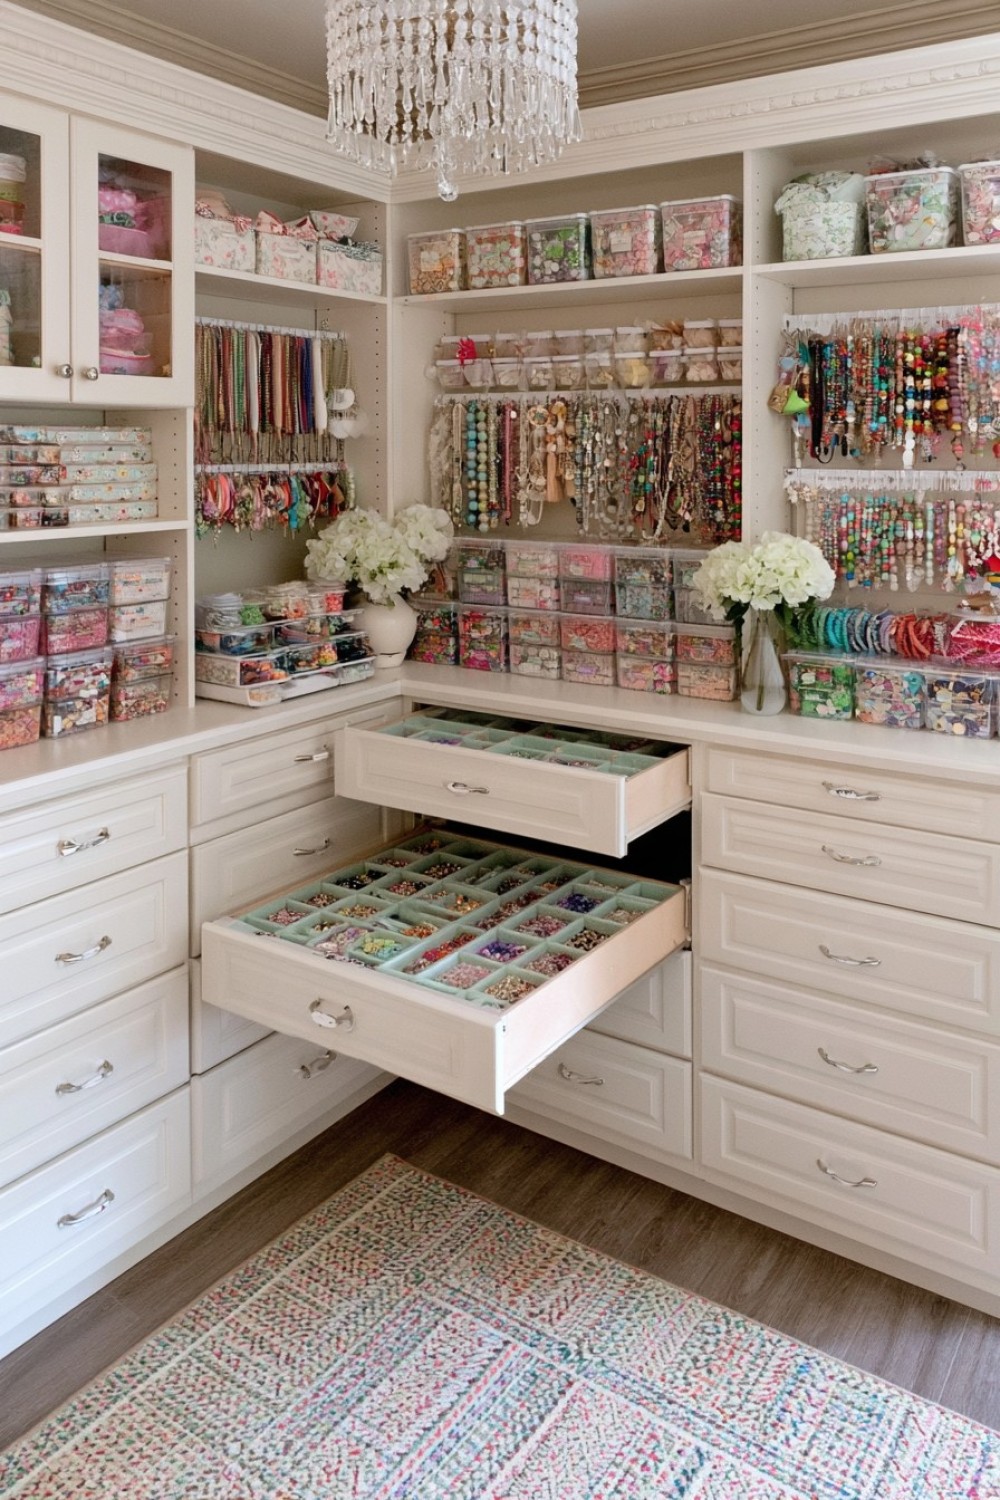
Beads, charms, buttons, eyelets, clips, sequins, and jewelry findings do not need deep storage.
Use very shallow drawers with removable compartment trays so small pieces remain visible instead of disappearing into containers stacked on top of one another.
A useful DIY approach is to build a simple plywood drawer carcass and fill it with inexpensive divided trays normally used for hardware or fishing tackle.
Line the bottom of each compartment with pale felt or paper if you regularly store dark beads or metal findings. The contrast makes tiny pieces easier to spot.
Label the drawer by broad category rather than every single compartment.
Because the trays lift out, you can carry one entire bead palette to a worktable without moving the whole drawer.
This system is especially valuable for crafts where choosing colors and components is part of the creative process.
7. Create a Rotating Supply Tower Inside a Deep Corner
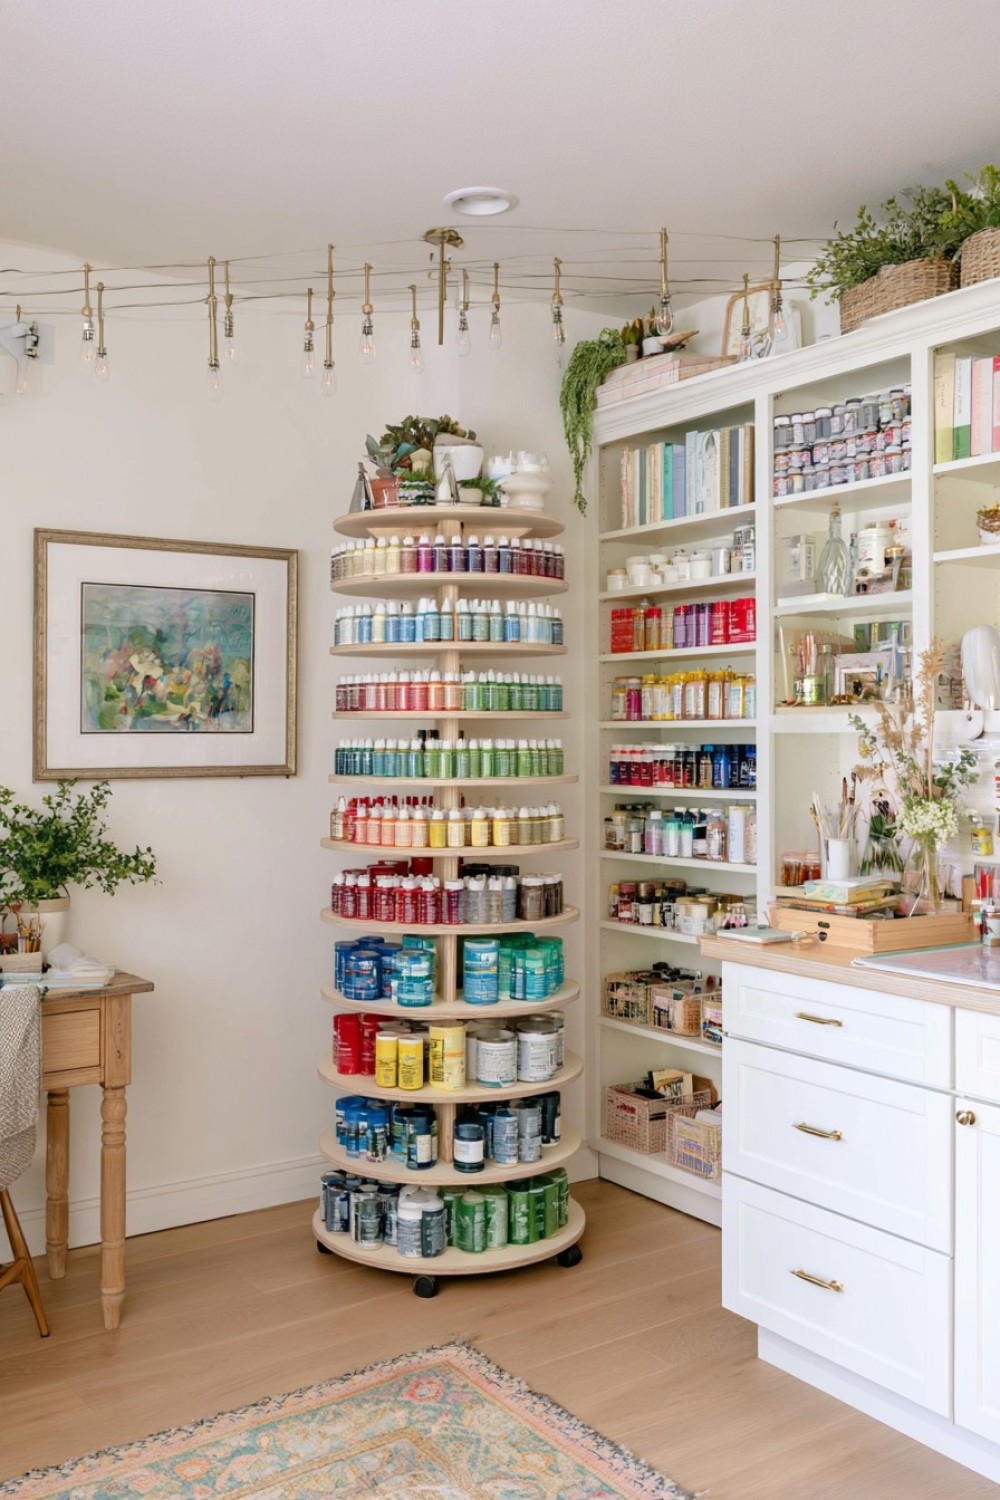
Closet corners often become dead zones because anything pushed into them is difficult to retrieve.
Install a lazy-Susan-style rotating tower with circular or semi-circular shelves for paint bottles, glue, inks, mediums, and spray containers.
For a DIY version, use plywood discs, a heavy-duty turntable bearing, and a central vertical support. Add low lips around each shelf so bottles remain secure while the unit rotates.
Group supplies by function rather than color: adhesives together, paint mediums together, finishing products together.
Keep heavier bottles on lower levels for stability.
The advantage is access. Instead of reaching behind three rows of containers, rotate the shelf until the product you need faces forward.
This idea works particularly well in walk-in closets or wide reach-in closets with awkward side pockets that standard rectangular storage does not use efficiently.
8. Hang Fabric Swatches Like a Designer Sample Library
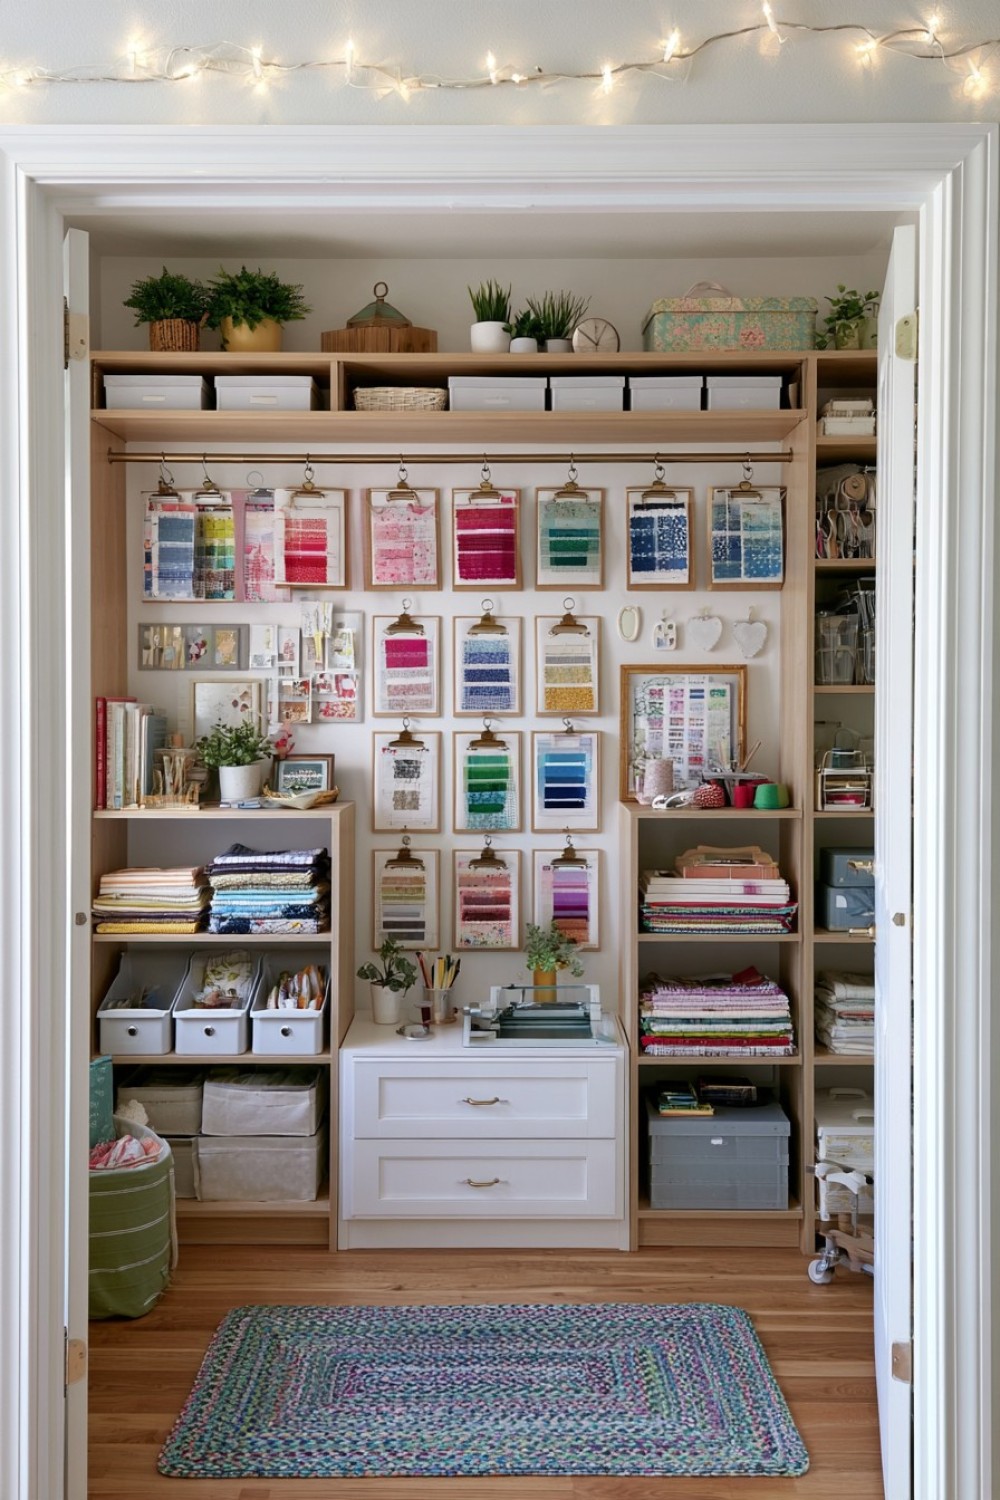
Folded fabric stacks look neat briefly, but pulling one piece from the middle usually disrupts the entire pile.
For smaller fabric remnants, mount a slim rail and hang each piece from skirt hangers or clip hangers.
Arrange fabrics by color family, fiber, or project type and keep the folded edge facing outward so patterns remain visible.
For very small pieces, attach them to sturdy sample cards with removable clips and hang the cards from metal rings.
This makes fabric feel more like a designer sample library than a pile of leftovers.
You can quickly compare several materials side by side and return unused pieces without refolding an entire stack.
Heavy yardage should still be stored on shelves or bolts, but this system is excellent for quilting cotton, upholstery samples, ribbon scraps, and decorative textiles.
9. Add a “Use First” Shelf for Leftovers
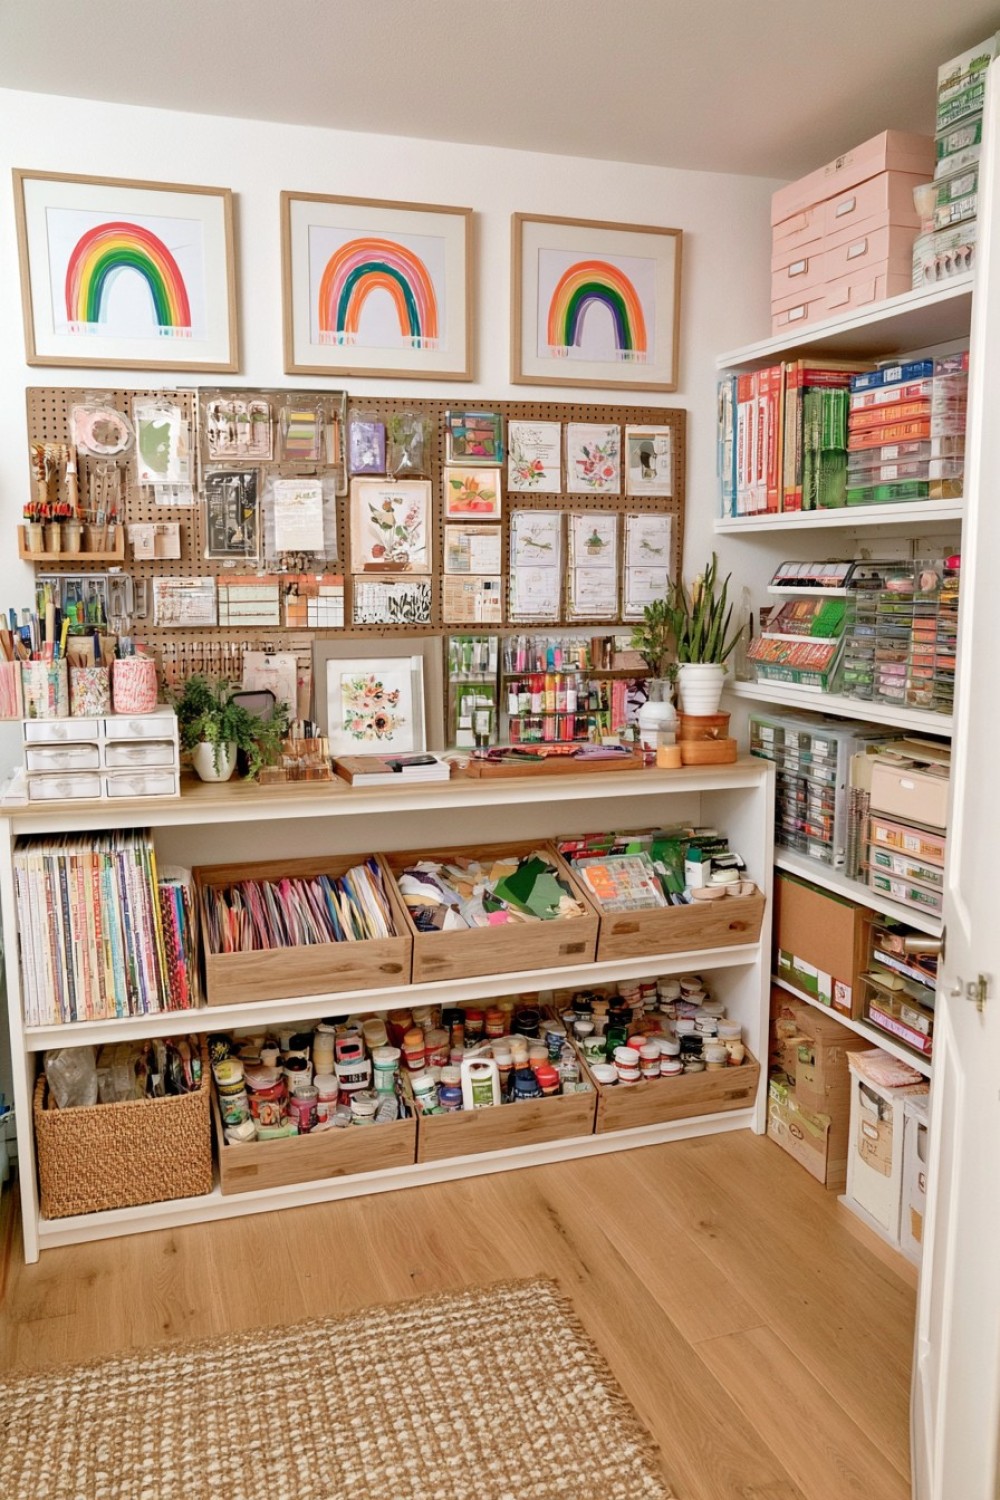
Craft closets often become cluttered because partially used materials are stored with full supplies and then forgotten.
Dedicate one shallow shelf to leftovers that should be used before new materials are opened.
Place half-used paper sheets, short ribbon pieces, clay scraps, partial paint containers, leftover vinyl, and fabric offcuts here.
Use open trays rather than closed boxes so the materials remain visible.
The shelf should have a strict size limit. Once it is full, materials must either be used, recycled, donated, or moved into permanent storage.
This small rule prevents scraps from spreading throughout the closet.
For extra usefulness, divide the shelf into three trays: paper, textile, and miscellaneous.
A “use first” zone can also make creative work more interesting because it encourages you to design with materials already on hand rather than automatically reaching for something new.
10. Store Rolls Vertically in Oversized Mailing Tubes
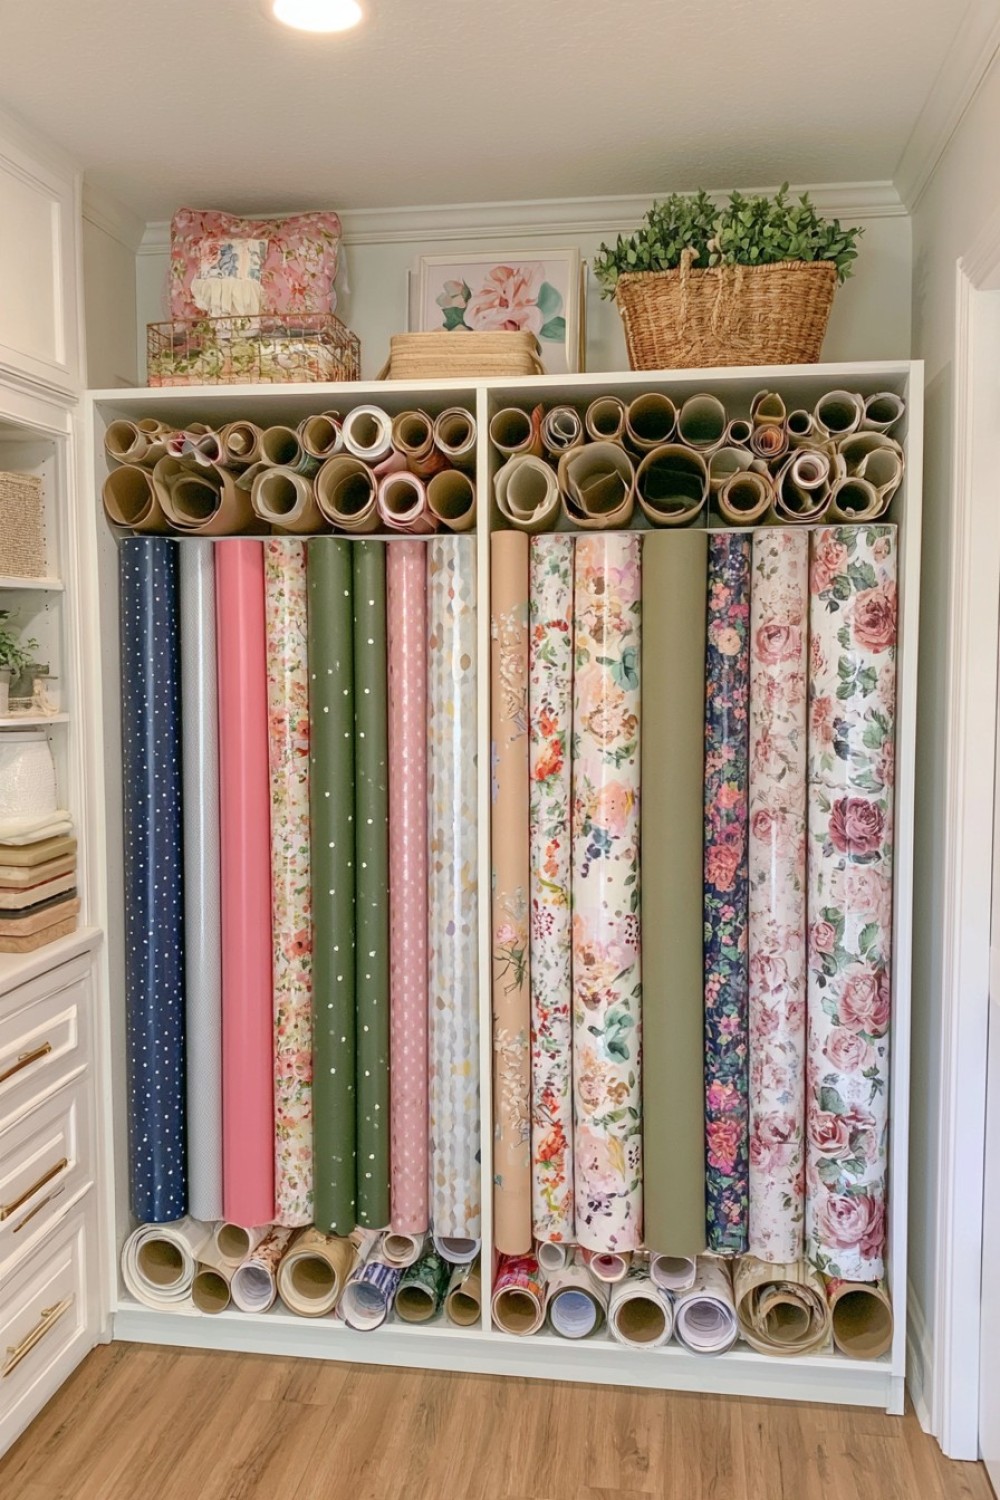
Wrapping paper, vinyl, kraft paper, contact paper, and large pattern sheets are difficult to store because they collapse or roll into one another.
Create a vertical roll rack using wide cardboard mailing tubes or PVC-free storage tubes fixed into a wooden base.
Each tube holds one or two rolls upright, preventing them from leaning across the closet.
For a cleaner DIY version, cut heavy mailing tubes to the same height and arrange them inside a rectangular plywood box. Cover the exterior box with paint or veneer so the tubes remain hidden.
Label only the upper rim of each section so the system stays visually quiet.
This approach works especially well beneath a low shelf where horizontal storage would waste depth.
It also keeps delicate papers from being crushed beneath heavier supplies.
11. Create a Sliding Inspiration Board
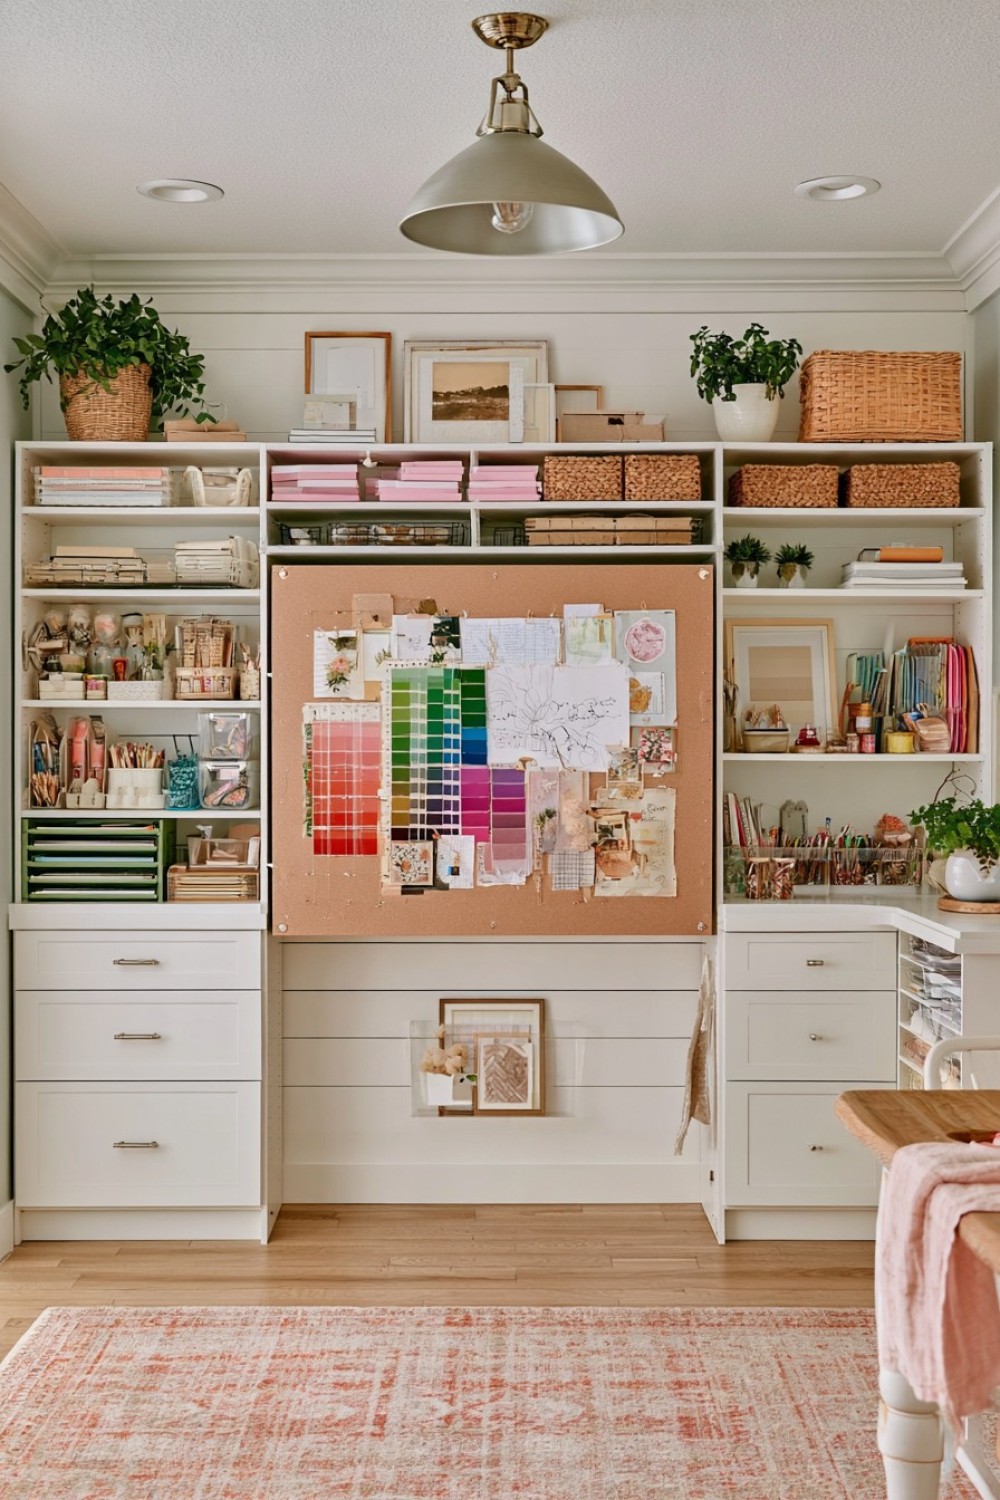
Mood boards, color combinations, and project references are useful while working but can make a closet look visually chaotic.
Mount a corkboard, magnetic board, or fabric pinboard on drawer slides so it disappears behind a shelving unit when not needed.
Pull it out while planning a project, pin up paint samples, fabric swatches, sketches, or photographs, then slide it away when finished.
For a DIY version, attach a thin plywood panel to full-extension runners and cover one side with cork tiles or magnetic sheet.
Keep the board shallow and lightweight so it moves smoothly.
This is particularly helpful in small homes where there is no dedicated craft room. The visual planning space exists only when you need it and does not permanently take over a bedroom or hallway wall.
12. Build Removable Tool Caddies That Dock Into the Closet
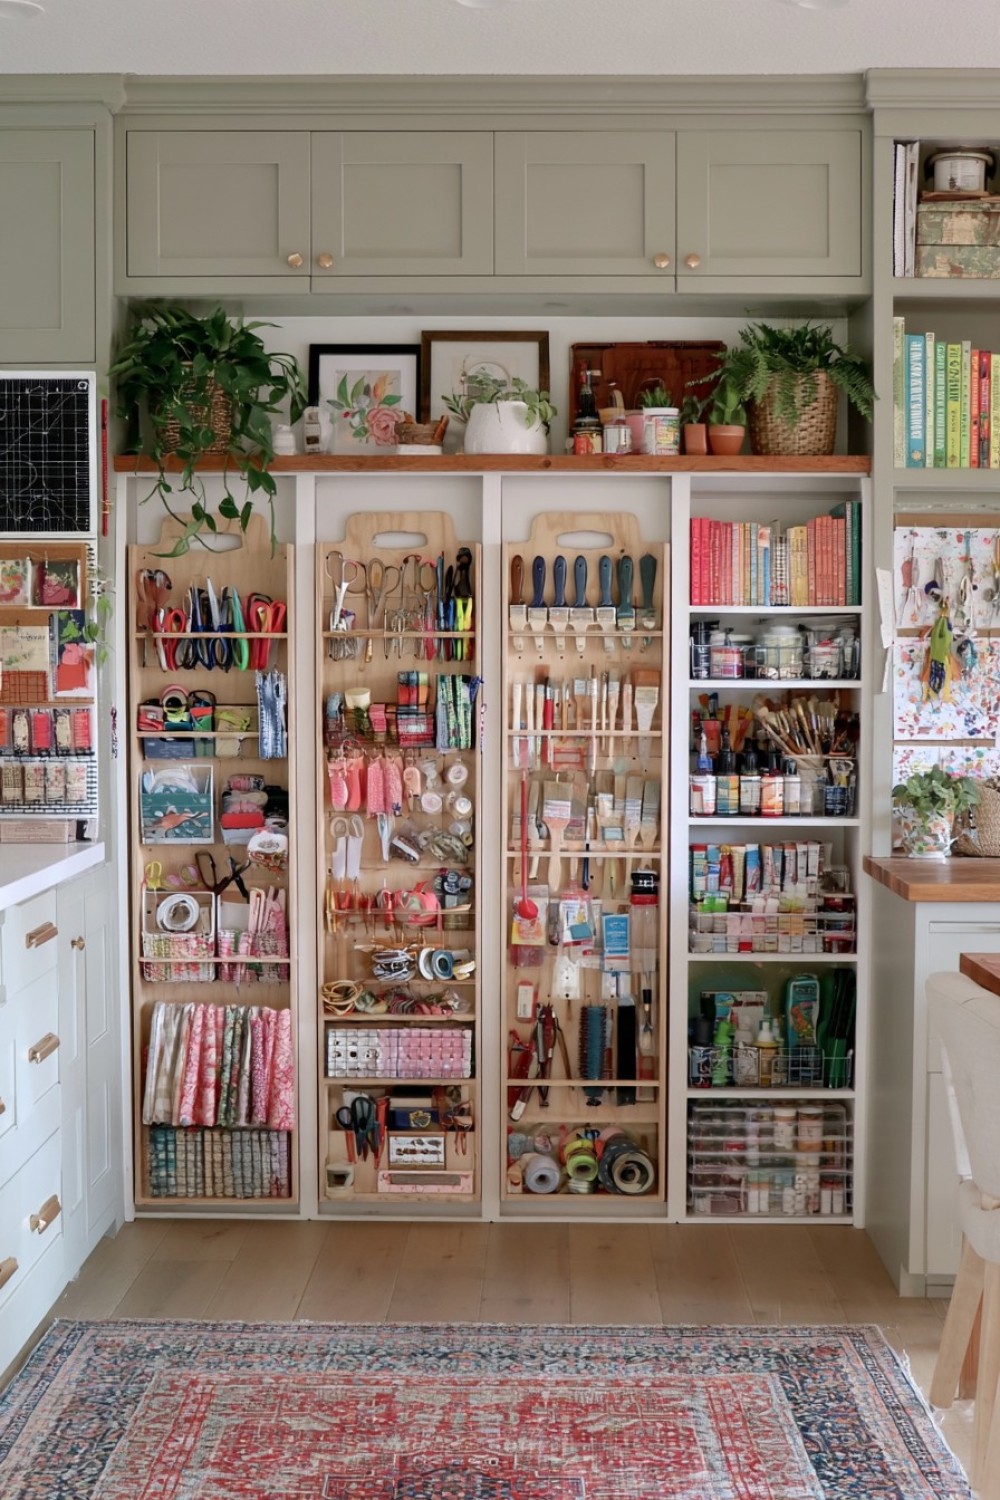
Instead of storing every tool individually, group tools by activity inside portable caddies.
A sewing caddy might contain fabric scissors, seam ripper, measuring tape, clips, and marking tools. A painting caddy might hold brushes, palette knives, masking tape, and cleaning supplies.
Build narrow plywood boxes with handles and assign each one a shelf slot like a docking station.
When you want to work, remove the entire caddy and carry it to your table.
The important part is avoiding oversized containers. A caddy should hold only the core tools needed for that activity.
You can even shape the internal dividers around specific tools so everything returns to the same position.
This system is particularly useful when your workspace and storage area are in different parts of the room.
13. Add Transparent “Inventory Windows” to Opaque Bins
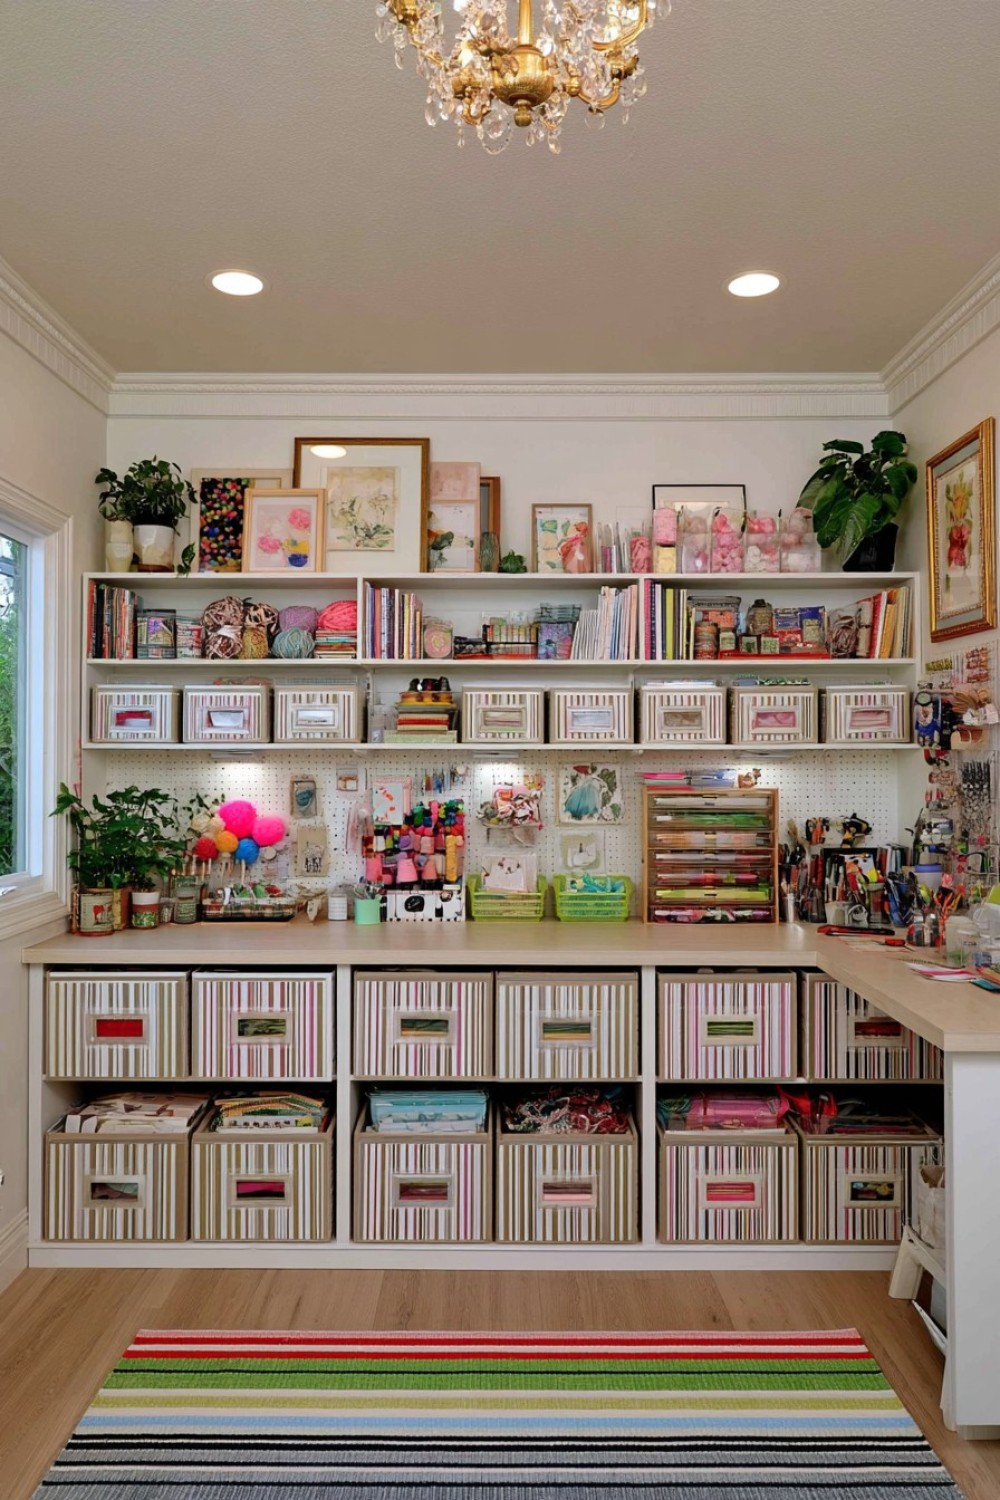
Matching storage boxes can make a closet look calm, but opaque containers create another problem: you forget what is inside.
Instead of switching entirely to clear plastic, cut a small rectangular opening into the front of sturdy cardboard or plywood bins and cover it with clear acrylic or acetate.
The window only needs to reveal a sample of the contents.
For softer materials such as yarn, pom-poms, or fabric scraps, even a narrow viewing slot is enough to show color and quantity.
This gives the closet a cleaner look than fully transparent bins while still providing visual inventory.
If cutting existing boxes is impractical, attach a small clear sample pocket to the front and place one example material inside.
The principle is simple: labels tell you what a box is supposed to contain; a window shows what is actually left.
14. Turn the Lowest Shelf Into a Rolling Project Garage
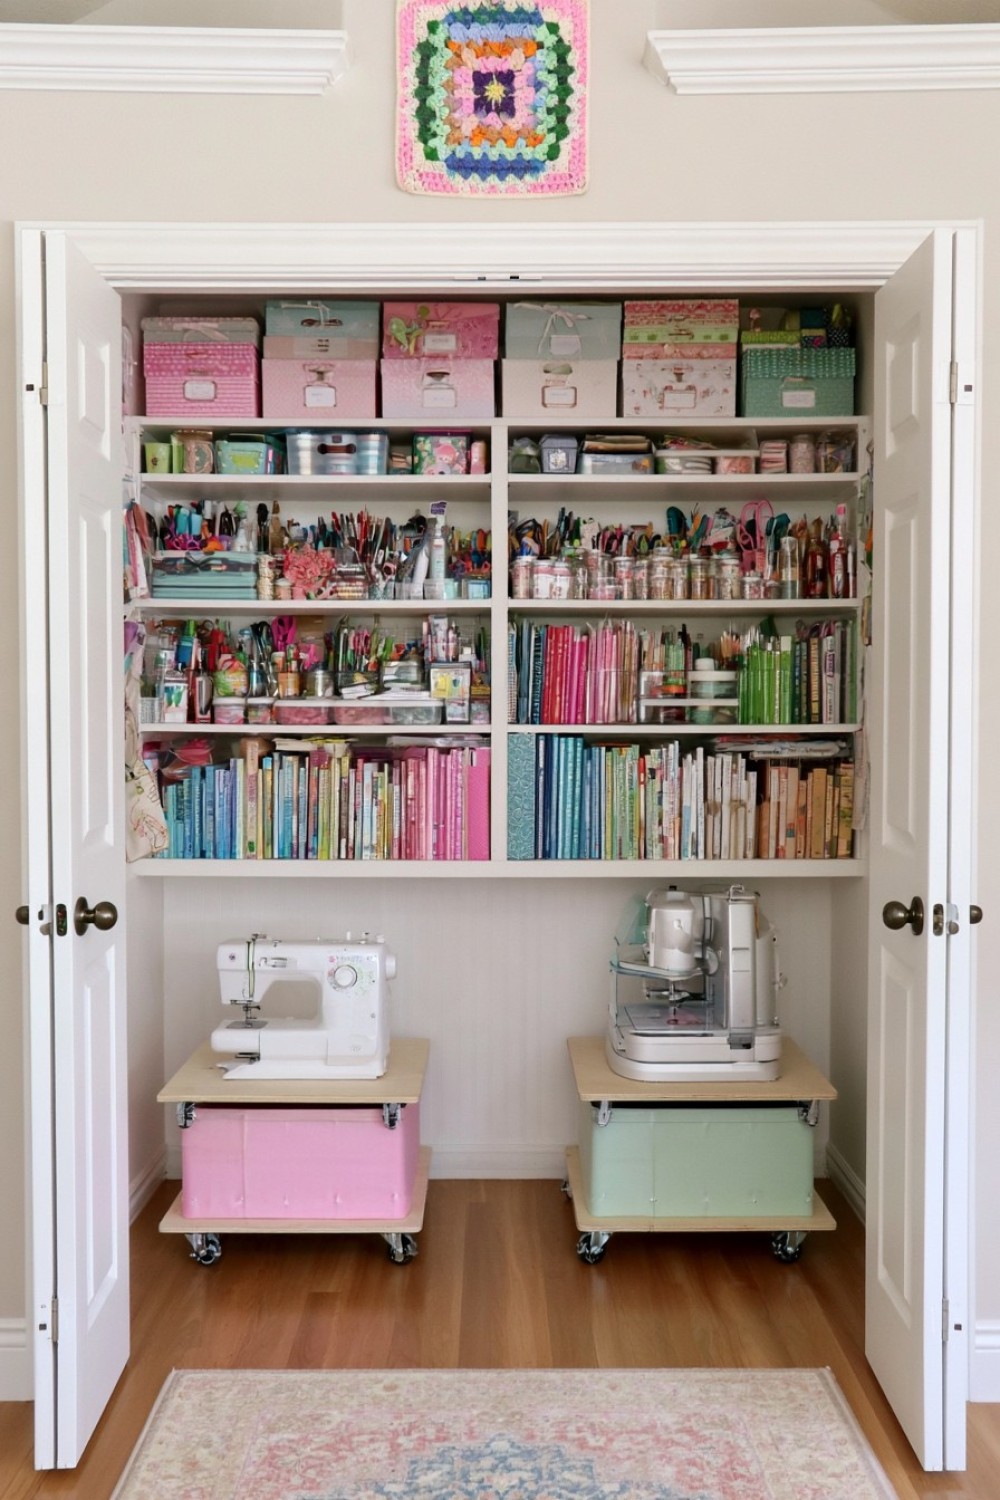
Large machines and bulky tools are awkward to lift from high shelves.
Use the bottom of the closet as a “garage” for a sewing machine, cutting machine, heat press accessories, or large craft boxes.
Build low wheeled platforms from plywood with locking casters. Each machine or heavy box gets its own platform and can roll forward when needed.
Add a small front lip to prevent equipment from sliding during movement.
The platform should be only slightly larger than the object so you do not waste floor space.
This solution is particularly useful for people who work at a nearby table but cannot leave equipment out permanently.
Rather than lifting a heavy machine from the floor, you pull it forward and lift it from a better position.
Always use casters rated for the actual weight and lock them whenever the platform is stationary.
15. Build a Vertical “Tool Spine” Along the Door Jamb
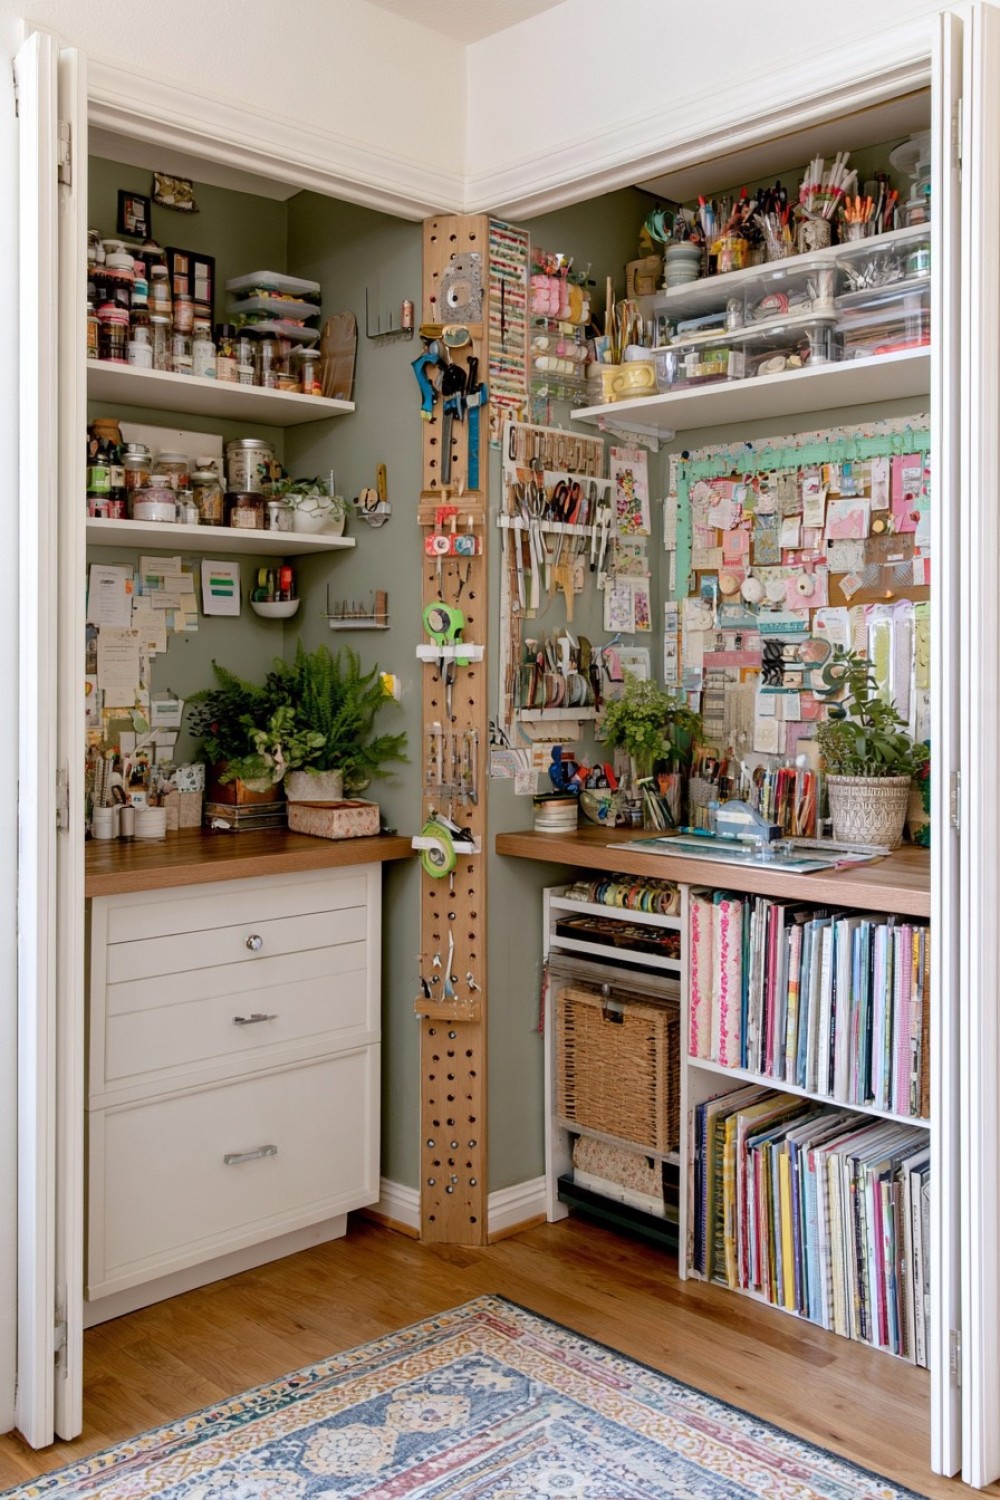
The narrow strip beside a closet opening is often too small for shelving but wide enough for frequently used tools.
Install a slim timber board vertically and attach magnetic strips, small hooks, clips, or shallow holders along its height.
This can become a dedicated home for rulers, scissors, rotary cutters, measuring tapes, hole punches, and pens.
Because the board faces outward when the closet opens, the most important tools are visible immediately.
Keep sharp tools above child reach and use enclosed holders where appropriate.
For a more refined DIY version, recess small magnets into the timber so metal tools appear to attach directly to the wood.
This approach turns a nearly useless strip of wall into one of the most efficient areas in the closet.
16. Create a “Next Three Projects” Display
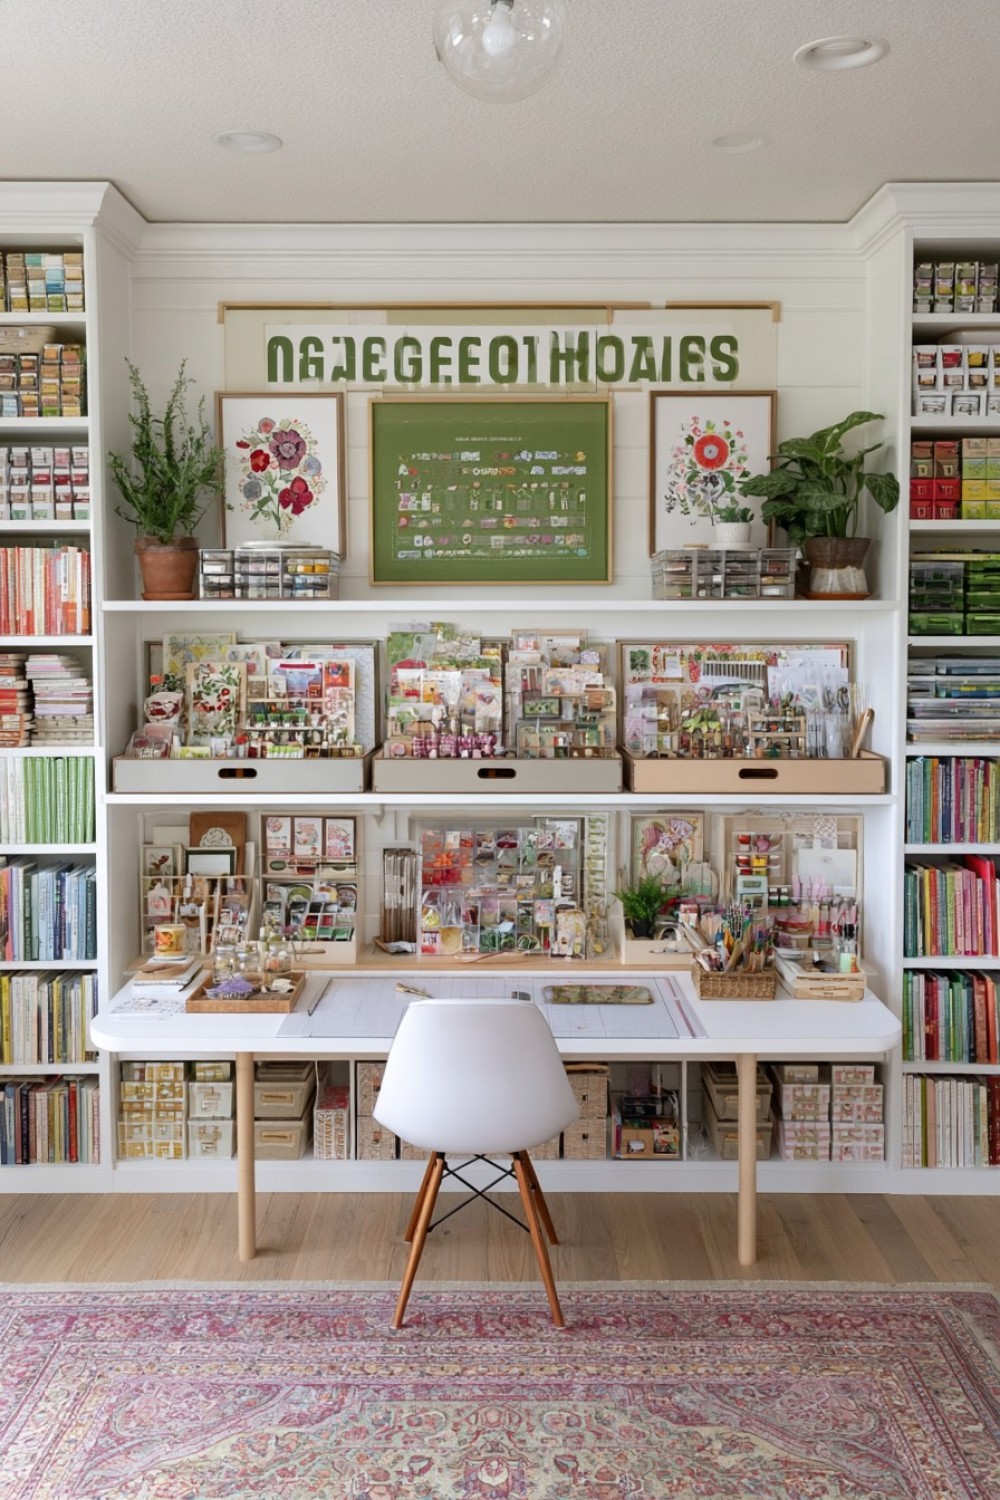
One reason craft supplies accumulate is that future projects remain abstract ideas rather than visible commitments.
Reserve one eye-level shelf for only the next three projects you genuinely intend to make.
Each project gets one shallow tray containing its key materials, pattern, reference image, or unfinished component.
Do not allow a fourth tray. A new project can enter only when one of the existing three is finished, abandoned, or returned to storage.
This is less about physical storage and more about creative workflow.
The system prevents half-started projects from spreading throughout the closet and makes it easier to sit down and begin working without deciding from scratch.
A small clip-on card at the front of each tray can list the next action, such as “cut fabric,” “choose paint color,” or “assemble frame.”
17. Build the Closet Around a Reset Zone
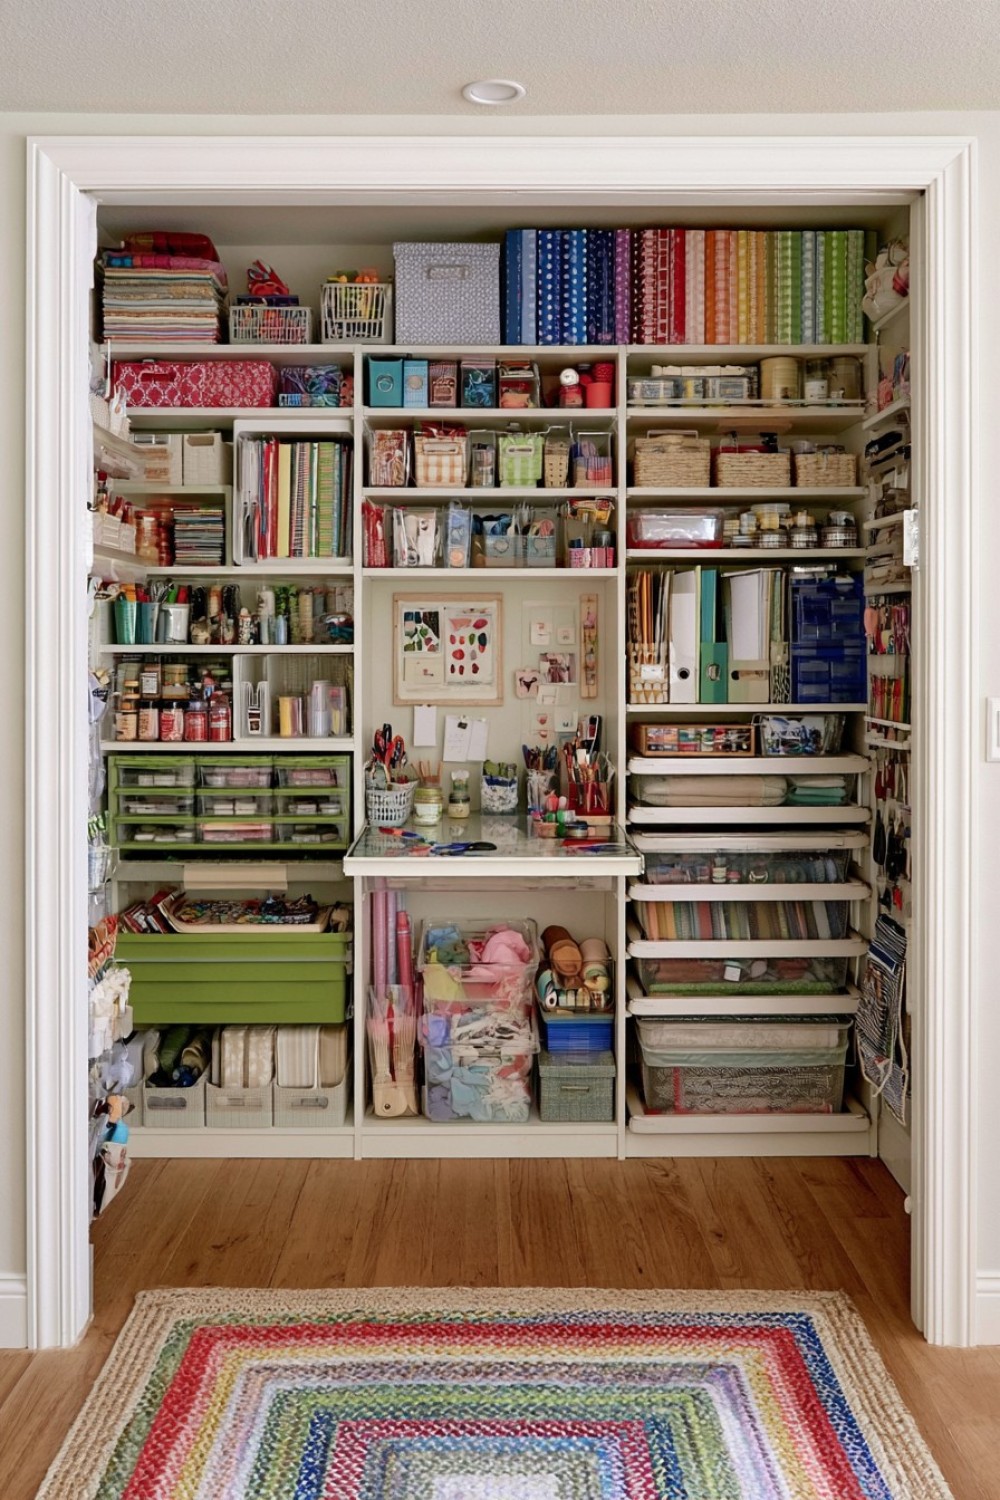
The most useful craft closet feature may be one empty surface.
Leave one shallow shelf or pull-out tray completely clear and designate it as the reset zone.
When you finish crafting, everything that needs to be put away lands there first. You can then return items to their proper locations in one quick sorting session.
Without a reset zone, temporary items tend to migrate into permanent storage areas and gradually destroy the system.
A pull-out tray works especially well because it can disappear once cleared.
You can also use the surface when unpacking new supplies, matching materials for a project, or photographing small handmade items.
It may seem counterintuitive to leave valuable closet space empty, but that breathing room is what helps the rest of the storage system stay functional over time.
Making a Craft Closet Work Like a Small Studio
A craft closet becomes more useful when storage is designed around the way creative work actually happens. Deep shelves are good for bulk materials, but tools benefit from visible vertical storage, tiny supplies need shallow compartments, and unfinished projects need dedicated temporary homes.
The most successful system usually mixes several types of access. Pull-out panels reveal tools, portable caddies move supplies to the worktable, vertical files make paper easy to browse, and project trays keep ongoing ideas from disappearing.
Avoid organizing every item into tiny permanent categories before you understand how often you use it. Frequently used supplies deserve the easiest locations, while seasonal and backup materials can occupy higher or deeper shelves.
Most importantly, leave room for projects to move through the closet. Organization should support creativity rather than turn the storage system itself into another craft project that is difficult to maintain.
MORE IDEAS


Share
What's Your Reaction?
 Like
0
Like
0
 Dislike
0
Dislike
0
 Love
0
Love
0
 Funny
0
Funny
0
 Angry
0
Angry
0
 Sad
0
Sad
0
 Wow
0
Wow
0