18 Microgreen Container Designs for Smarter Indoor Growing

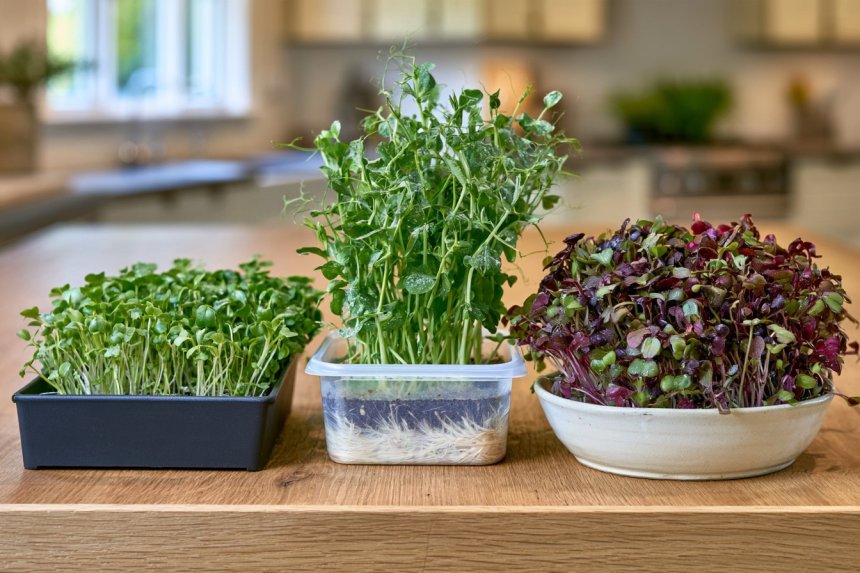
Microgreens need very little soil depth, which makes them perfect for containers that would be impractical for most other edible plants. A shallow tray can become a compact countertop garden, a divided serving dish can hold several varieties at once, and a stackable system can turn a narrow shelf into a productive growing station. The best containers, however, are not chosen for appearance alone. Drainage, food-safe materials, easy cleaning, airflow, and access to light all matter when young edible shoots are involved. These microgreen container ideas combine creative presentation with practical growing logic, including several DIY projects that can be adapted for kitchens, windowsills, grow-light shelves, or small apartments.
1. Turn a Stainless-Steel Serving Tray Into a Minimal Microgreen Bed
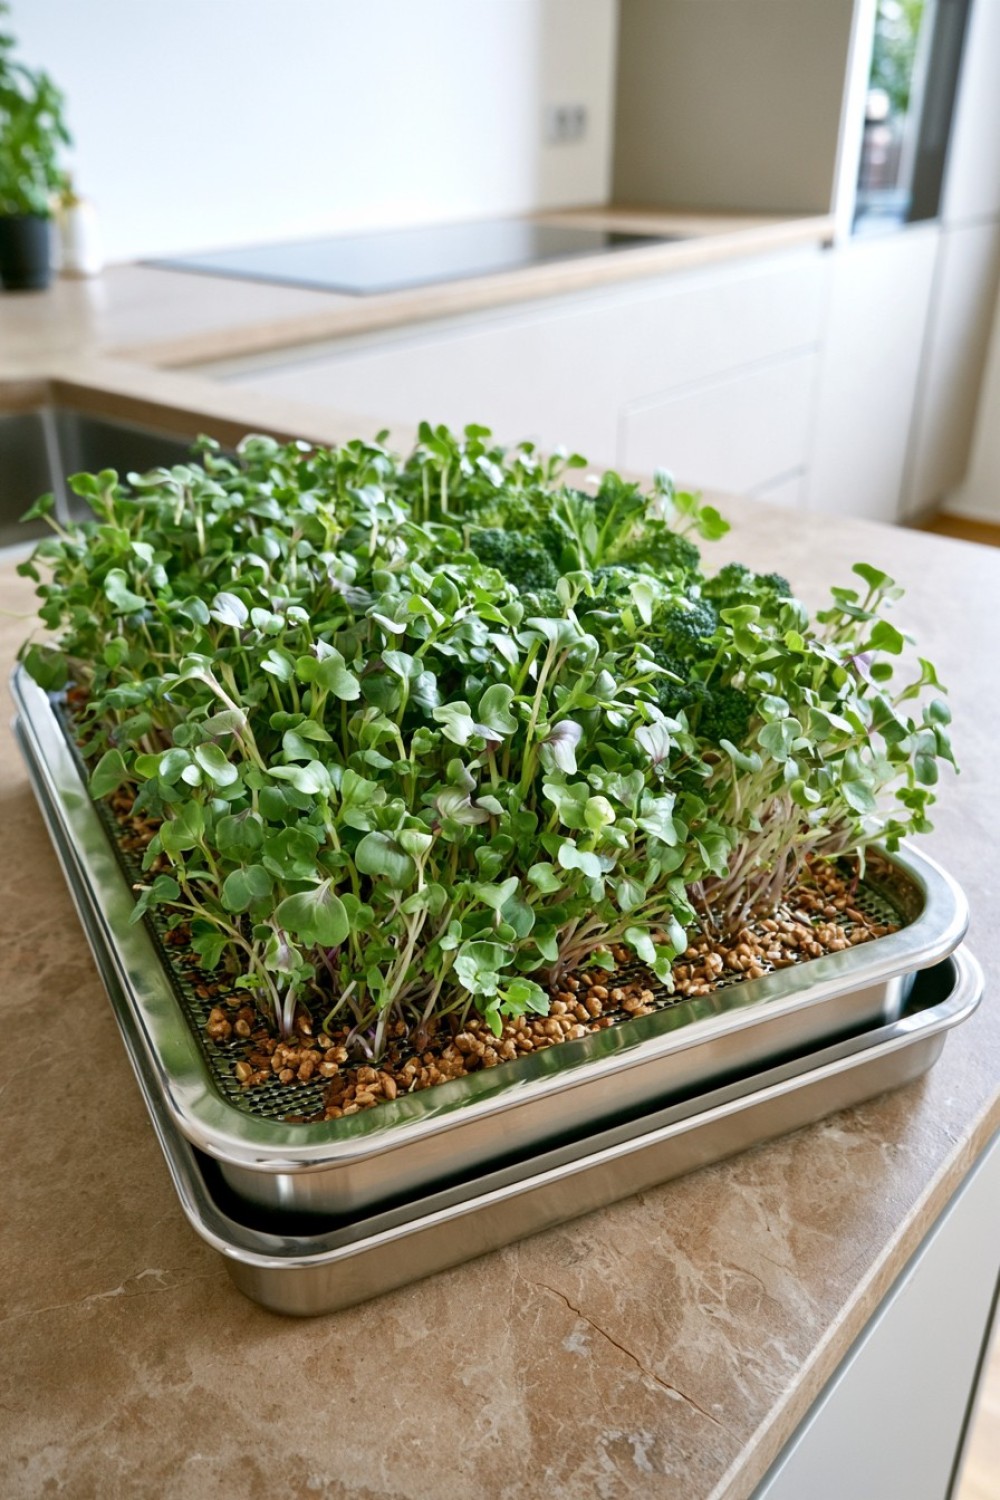
A shallow stainless-steel tray can look far more intentional on a kitchen counter than a standard nursery flat.
Choose a food-grade tray roughly 2–5 cm deep. Hotel pans, serving trays, or shallow catering dishes are especially useful because they are durable and easy to sanitize.
For a DIY drainage setup, nest a perforated stainless-steel insert inside a slightly deeper solid tray. The upper layer holds the growing medium while the lower tray catches excess water.
This creates a clean bottom-watering system that helps keep foliage dry.
Stainless steel works particularly well for pea shoots, radish, broccoli, and sunflower microgreens. The reflective metal also suits modern kitchens without visually competing with countertops.
Avoid using rusty, painted, or unknown metal containers for edible crops.
2. Build a Modular Microgreen Grid From Food-Safe Inserts
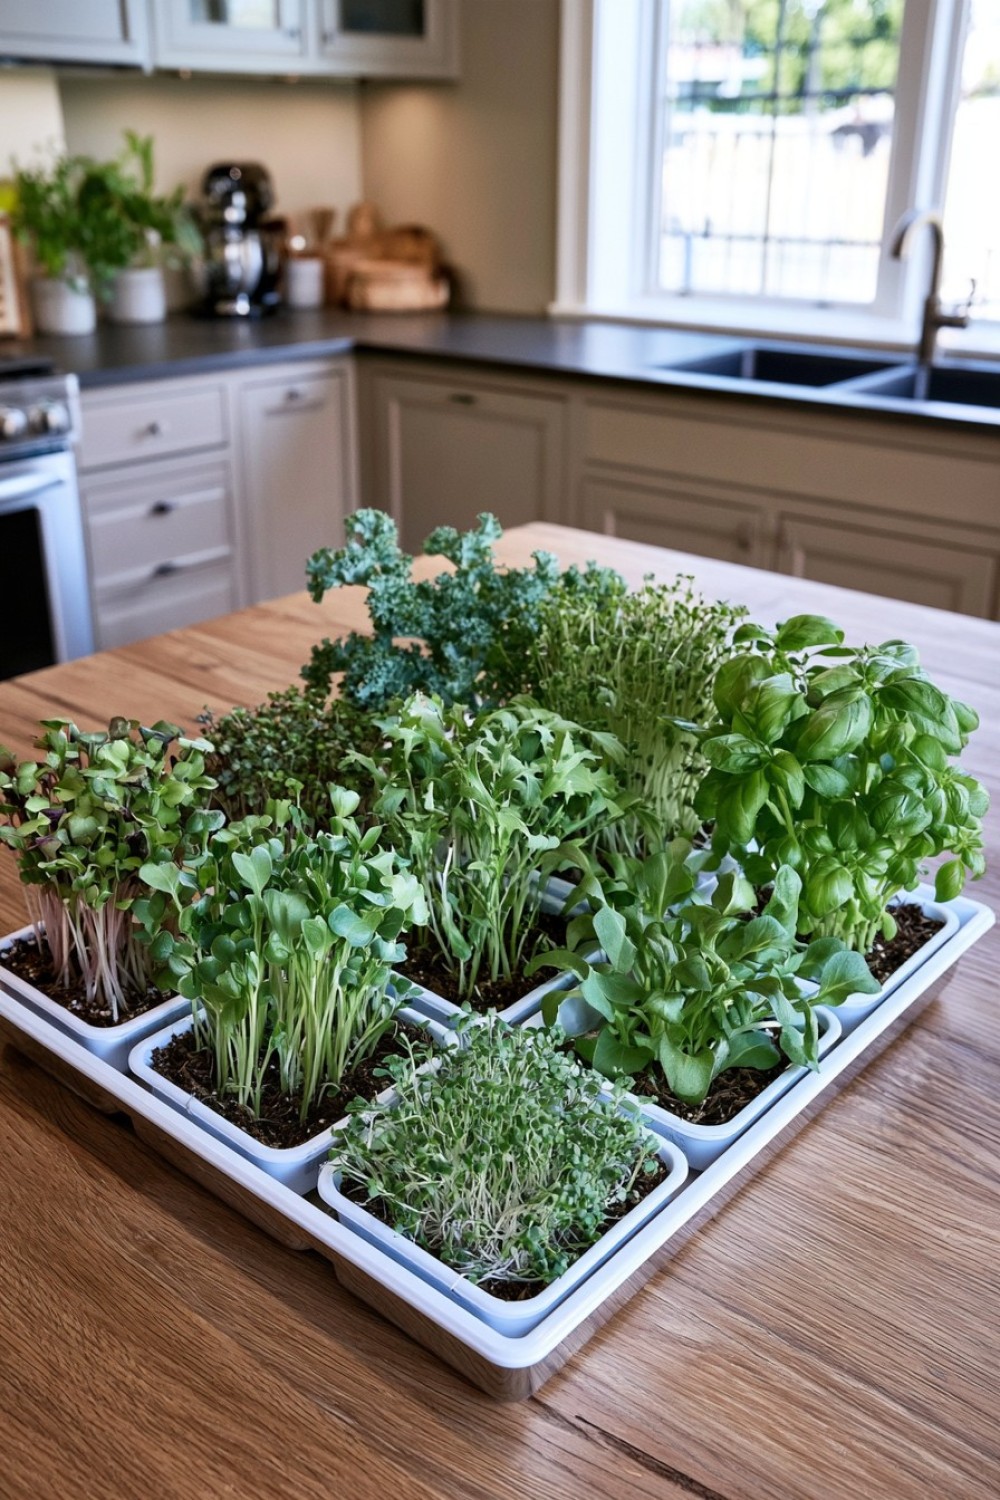
Instead of growing one crop across a large tray, divide the surface into removable modules.
Use a larger food-safe outer tray and fit several small BPA-free containers inside it. Each insert can hold a different variety—radish, mustard, kale, arugula, or basil.
Drill or punch drainage holes only in the inner containers, leaving the larger outer tray solid for bottom watering.
The advantage is flexibility. Fast-growing radish can be harvested without disturbing slower basil, and an empty module can be cleaned and replanted immediately.
Arrange the inserts in a clean grid so the system looks more like a designed kitchen garden than a collection of mismatched pots.
Label the modules on the outside rather than placing loose markers directly in the growing medium.
3. Use a Ceramic Sushi Plate as a Tiny Countertop Grower
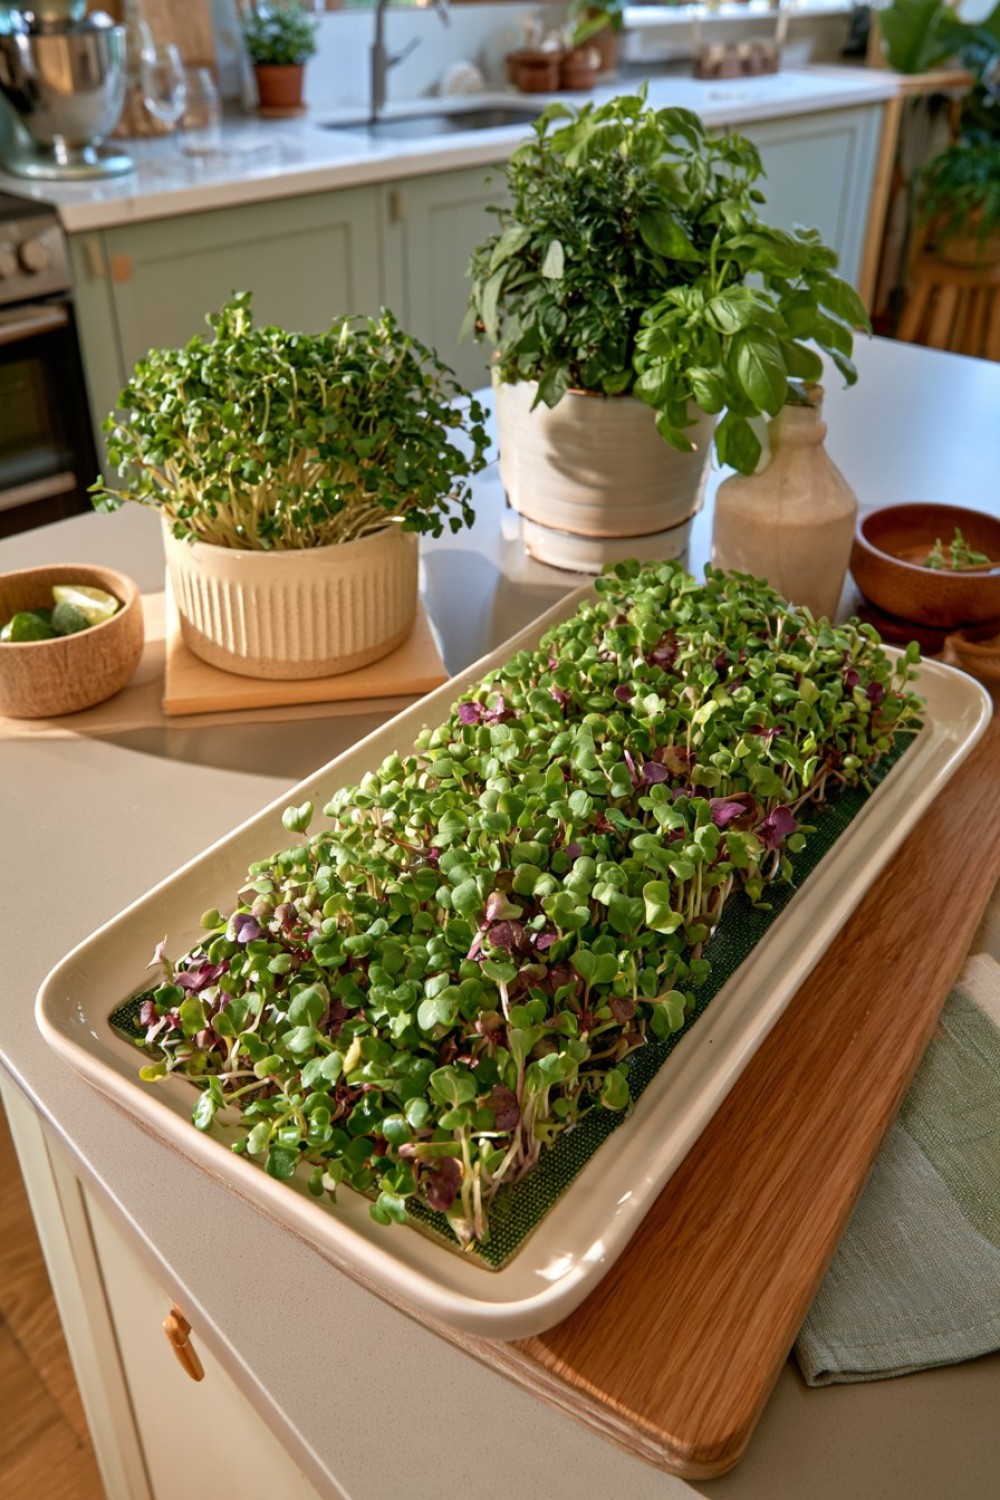
Long rectangular sushi plates have proportions that happen to work surprisingly well for small batches of microgreens.
Choose a food-safe glazed ceramic dish with no cracks or damaged glaze. Because most serving plates do not have drainage holes, use a thin reusable grow mat, hemp mat, or carefully controlled shallow layer of medium and water sparingly.
This works best for experimental batches rather than large harvests.
Sow one narrow stripe of seeds down the center and leave a clean border around the edge. Once germinated, the shoots form a living green strip that looks almost like part of the table setting.
A matte black or off-white dish can make bright radish or mustard stems stand out beautifully.
Because there is no drainage, avoid overwatering and empty any standing water promptly.
4. Build a Two-Level Microgreen Tray From Cooling Racks
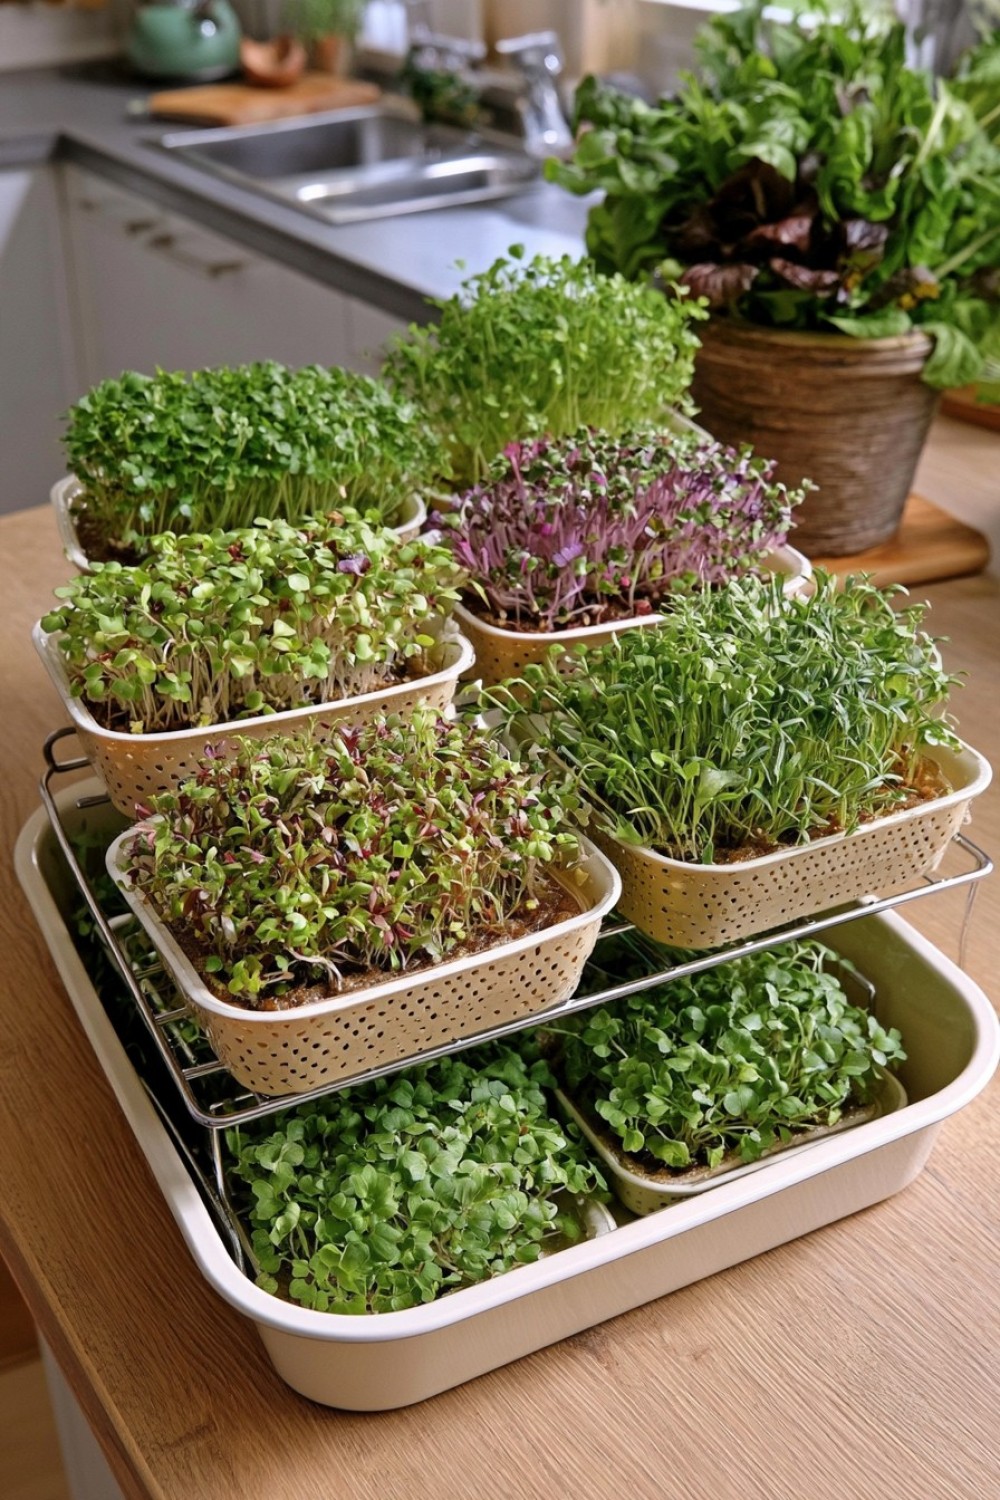
A kitchen cooling rack can become the basis of a practical bottom-watering container.
You will need a shallow food-safe tray, a small stainless-steel cooling rack that fits inside it, and several lightweight perforated grow containers.
Raise the containers slightly above the tray bottom using the rack. Water can collect underneath without leaving the growing medium continuously saturated.
This approach is particularly useful if you grow several small batches at once.
The elevated structure also improves airflow beneath containers and makes cleanup easier because the grow pots can be lifted out individually.
Use only corrosion-resistant racks intended for kitchen use. Avoid craft mesh, painted wire, or unknown galvanized materials around edible crops.
The finished system feels almost like a miniature greenhouse bench scaled down for a countertop.
5. Repurpose Clear Berry Containers Into Mini Greenhouses
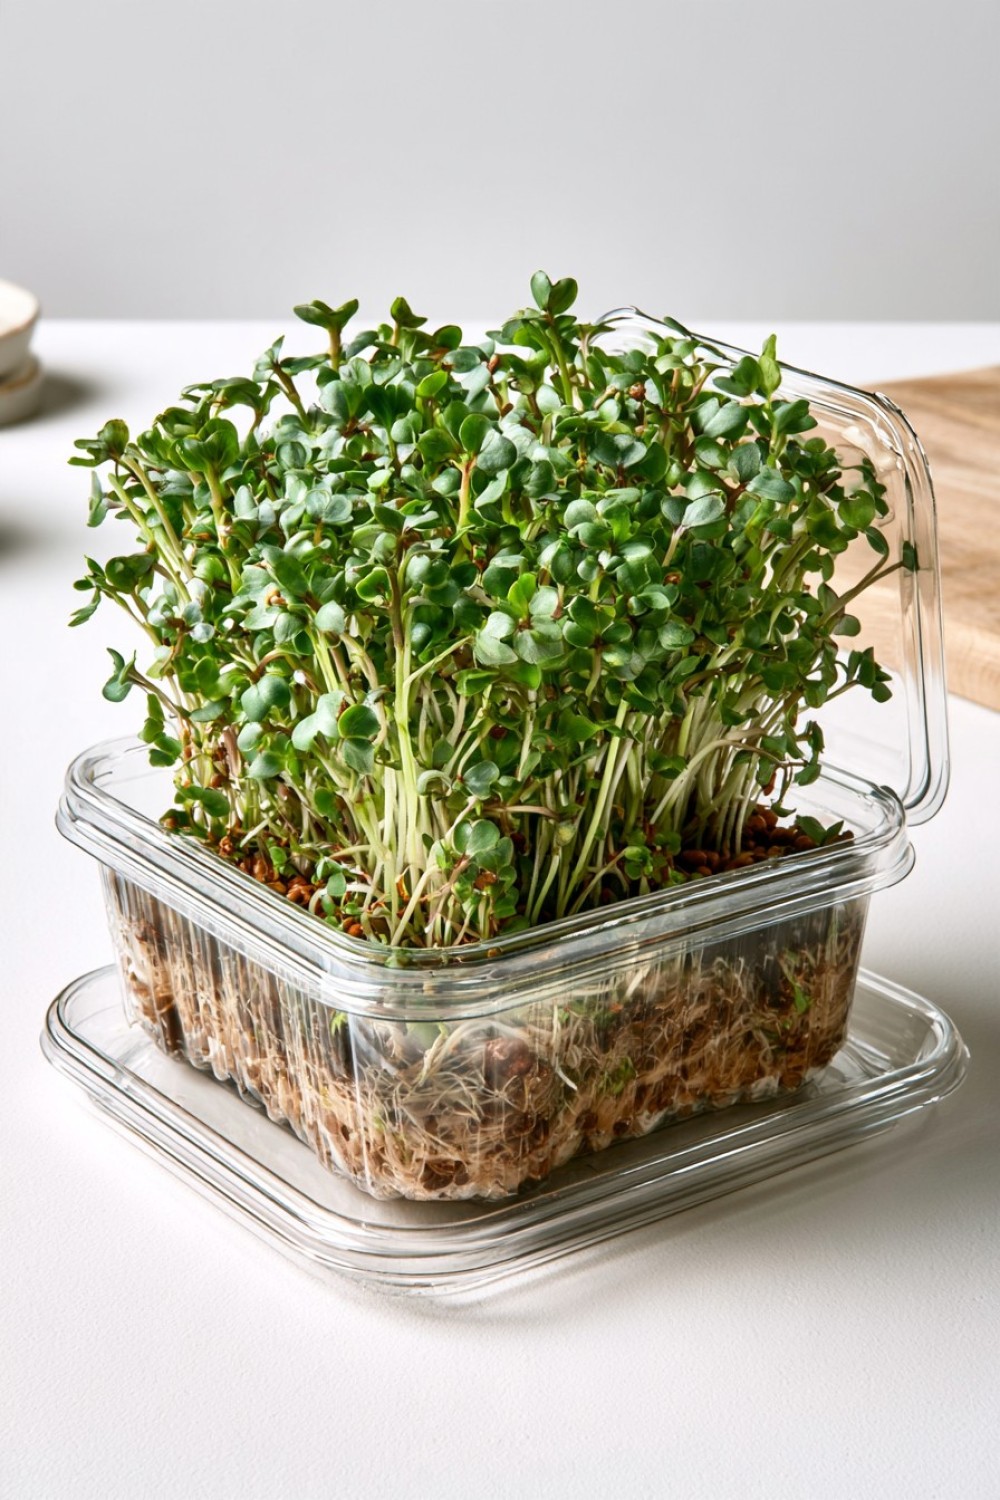
Clear produce containers can be reused as short-term microgreen growers if they are clean, intact, and food-safe.
Berry clamshells are especially useful because many already contain ventilation and drainage openings.
Line the bottom with a thin layer of microgreen medium or a grow mat, sow seeds evenly, and use the clear lid during early germination if additional humidity is needed. Once seedlings emerge, open or remove the lid to improve airflow.
The transparent sides make root development visible, which can be especially useful for children or beginners learning how microgreens grow.
Place the container inside a waterproof tray to catch drainage.
Because thin disposable plastic degrades with repeated use, inspect it regularly for cracks and replace it rather than trying to keep one container indefinitely.
6. Create a Tiered Microgreen Stand From Shallow Food Trays
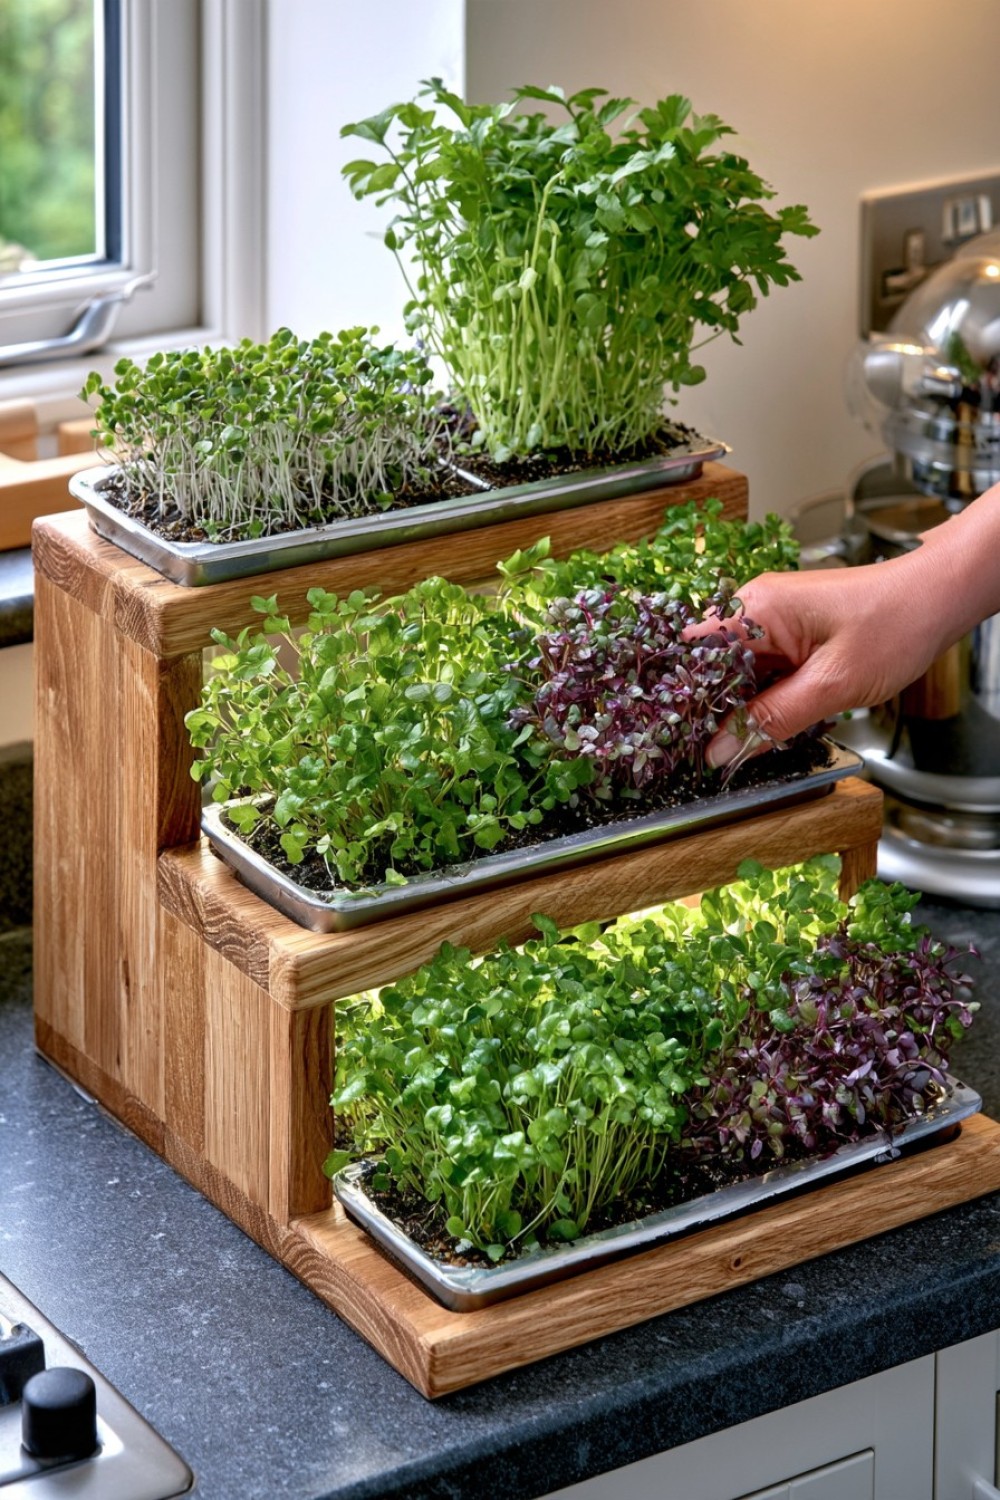
A narrow kitchen counter can produce several crops if the trays are arranged vertically.
Build a simple stepped stand from sealed hardwood, stainless steel, or another washable material and place one shallow food-safe tray on each level.
The key is not stacking trays directly above one another. Each tier should step backward enough for light to reach the plants below.
Under grow lights, leave additional clearance as the shoots grow.
This setup can hold three different harvest stages at once: one tray germinating, one developing, and one ready to cut.
Removable trays make cleaning much easier than building soil directly into the structure.
If using timber for the stand, keep growing medium inside separate waterproof food-safe trays rather than allowing damp soil to remain in contact with wood.
7. Make a Divided “Tasting Tray” for Several Varieties
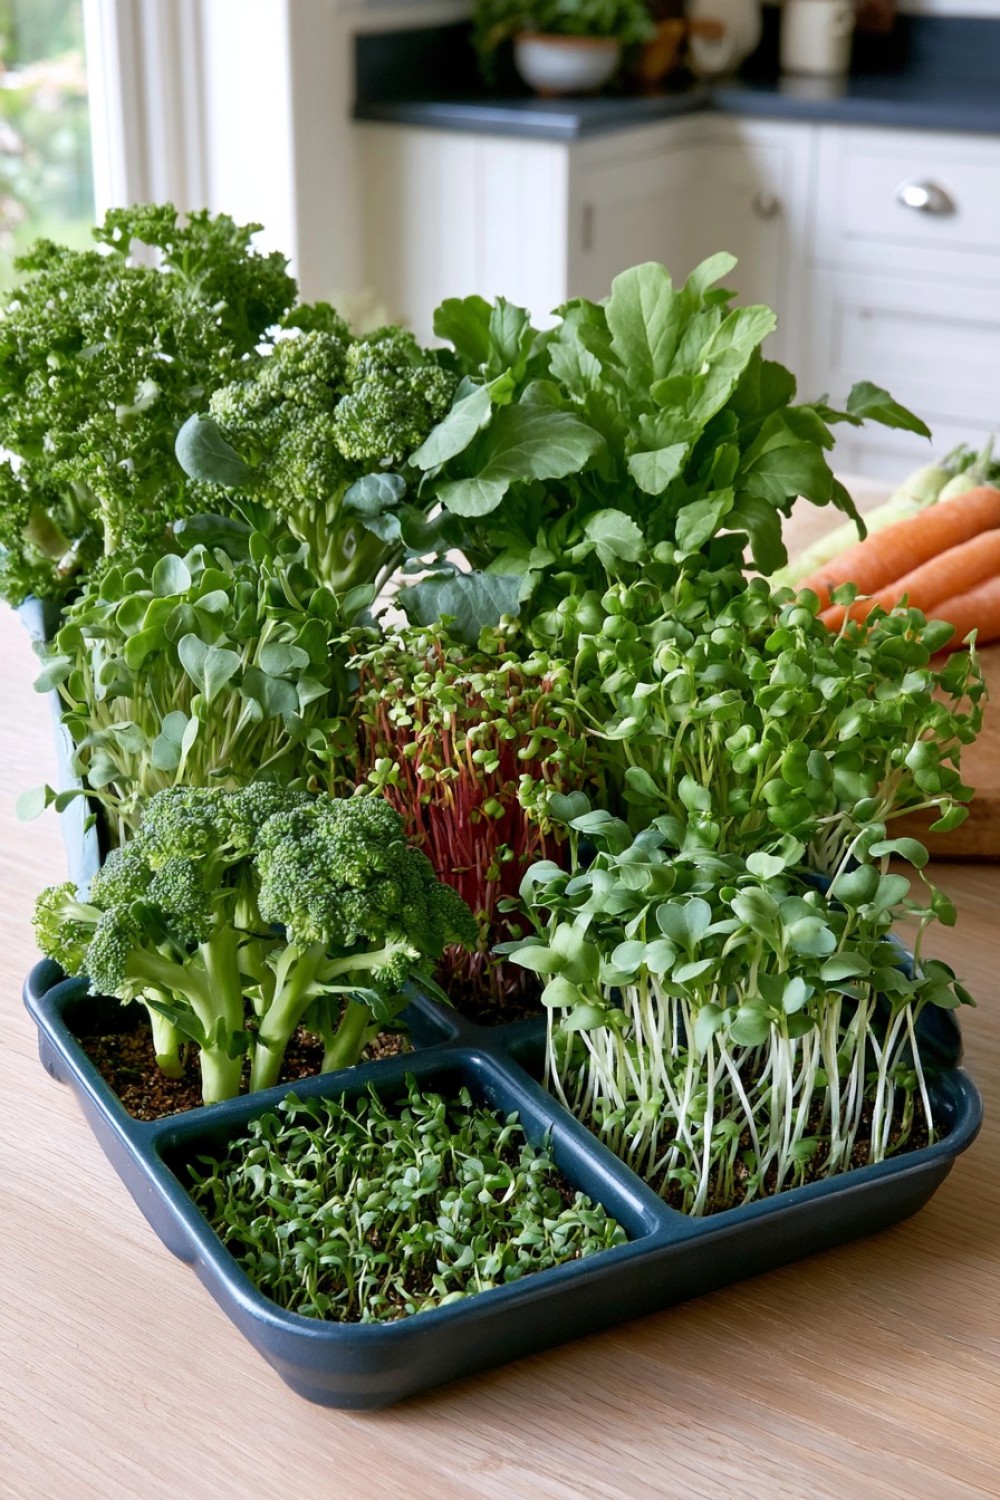
A compartmentalized serving tray can become a microgreen sampler.
Look for a food-safe divided tray with several shallow sections. Each compartment can hold a small quantity of a different crop.
Try combining spicy radish, mild broccoli, colorful amaranth, peppery mustard, and pea shoots.
Because different species germinate and grow at different speeds, this idea works best when varieties with broadly compatible watering needs are grouped together.
If the tray has no drainage, use thin grow mats and controlled watering rather than deep soil.
The finished display becomes surprisingly decorative as each compartment develops a different height, leaf shape, and stem color.
It is also a useful way to discover which microgreens you actually enjoy before dedicating full-size trays to them.
8. Build a Self-Watering Microgreen Box With a Capillary Mat
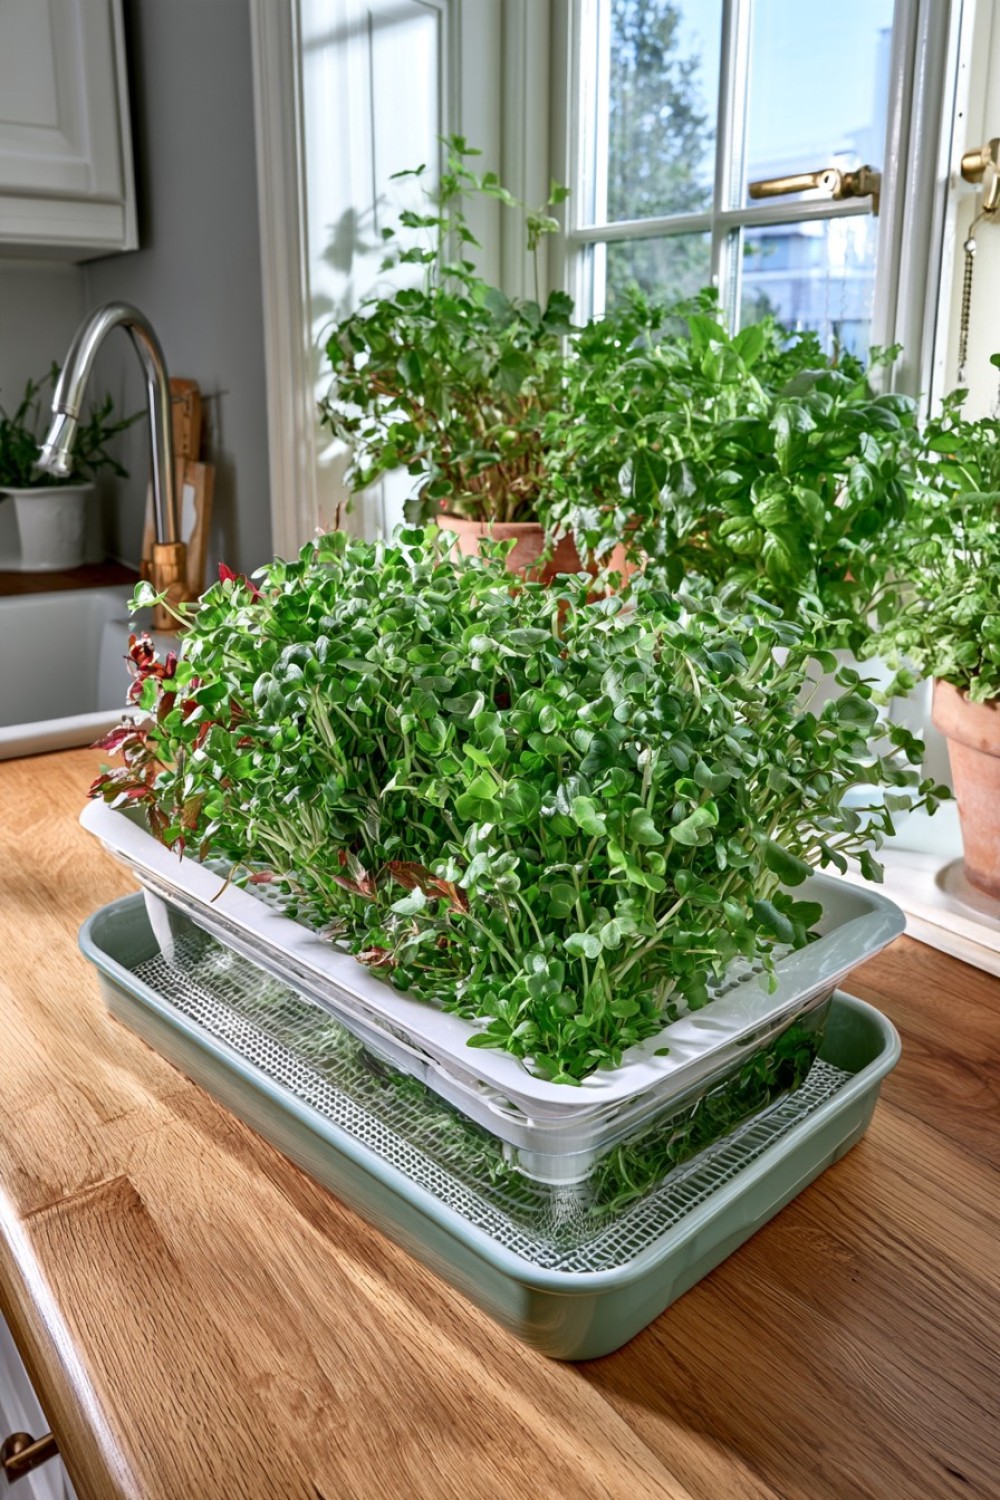
A simple wick system can reduce how often a shallow microgreen tray needs attention.
Use two nesting food-safe containers, a capillary mat, and a perforated upper tray. The lower container acts as the water reservoir while one end of the mat stays in contact with the water below.
The growing medium rests on the damp mat and draws moisture upward gradually.
The reservoir should not permanently flood the root zone; the goal is consistent moisture, not waterlogging.
This design can work well for people who find that small trays dry out quickly under grow lights.
Make the upper tray removable so both layers can be washed thoroughly between crops.
Because microgreens have short growing cycles, simple accessible systems are generally preferable to complicated permanent irrigation equipment.
9. Use a Glass Baking Dish as a Visible Root Garden
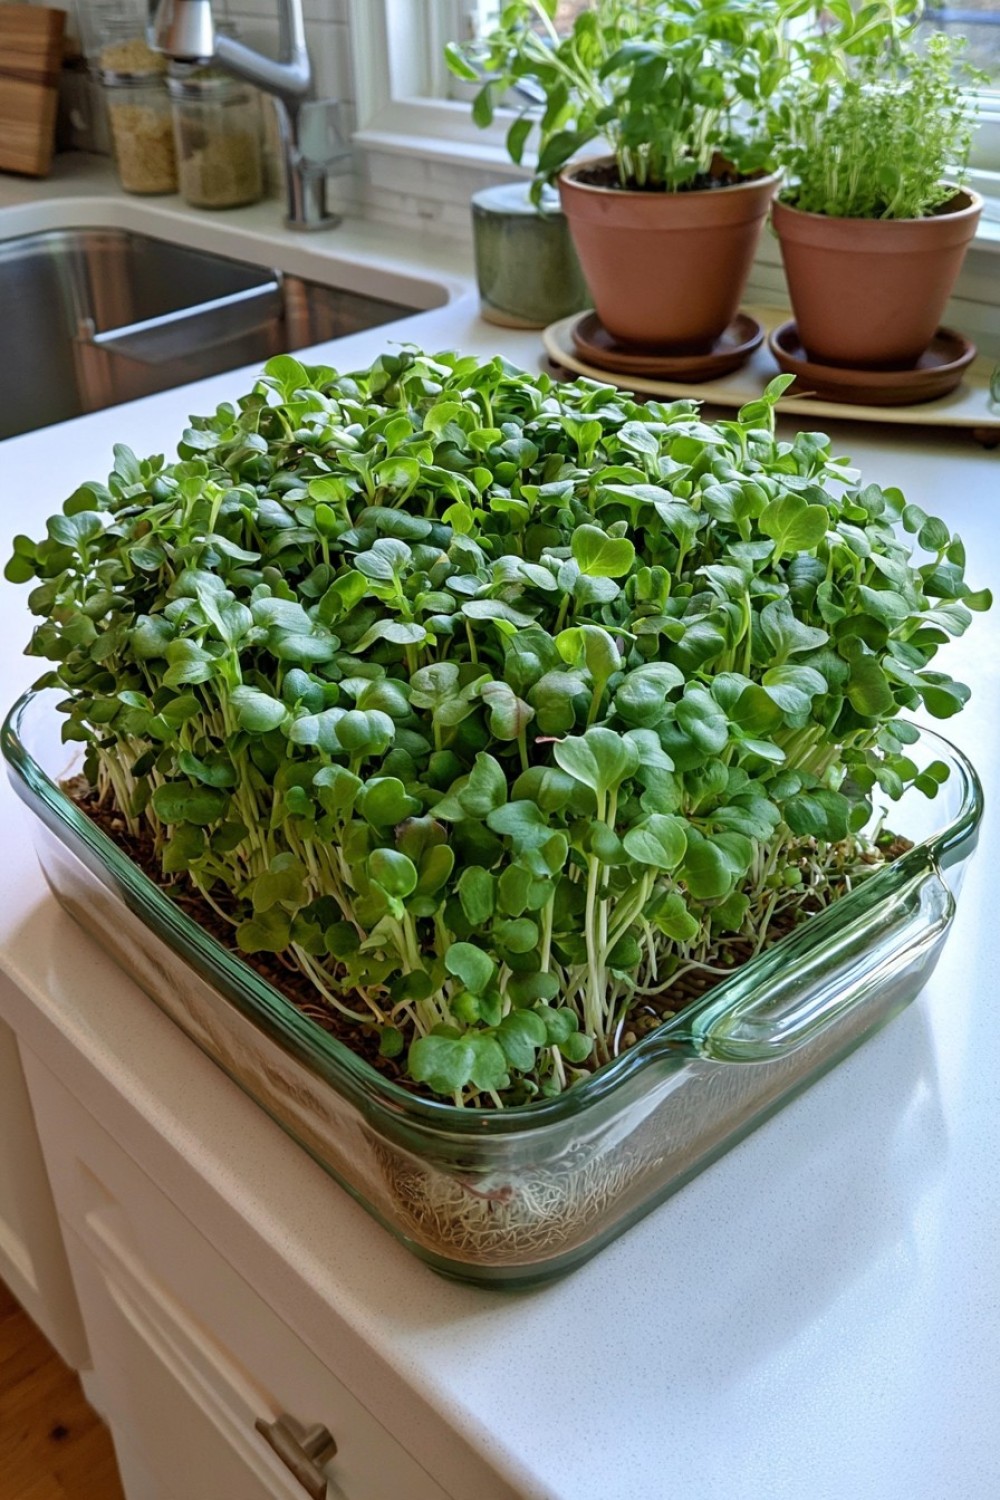
A clear glass dish can turn root growth into part of the display.
Use a shallow food-safe glass baking dish and either a thin grow mat or modest layer of medium.
Without drainage holes, watering must be controlled carefully. Add small amounts from the edge and avoid allowing water to remain pooled underneath.
The transparent sides reveal roots forming beneath the green canopy, which makes this setup especially interesting for educational growing.
Place the glass dish on a bright counter or under a grow light but avoid drastic temperature changes that could stress glass.
Dense white roots beneath bright green shoots can create a surprisingly attractive layered effect.
This method works best for small batches where moisture can be checked frequently rather than large production trays.
10. Turn an Ice Cube Tray Into a Microgreen Experiment Lab
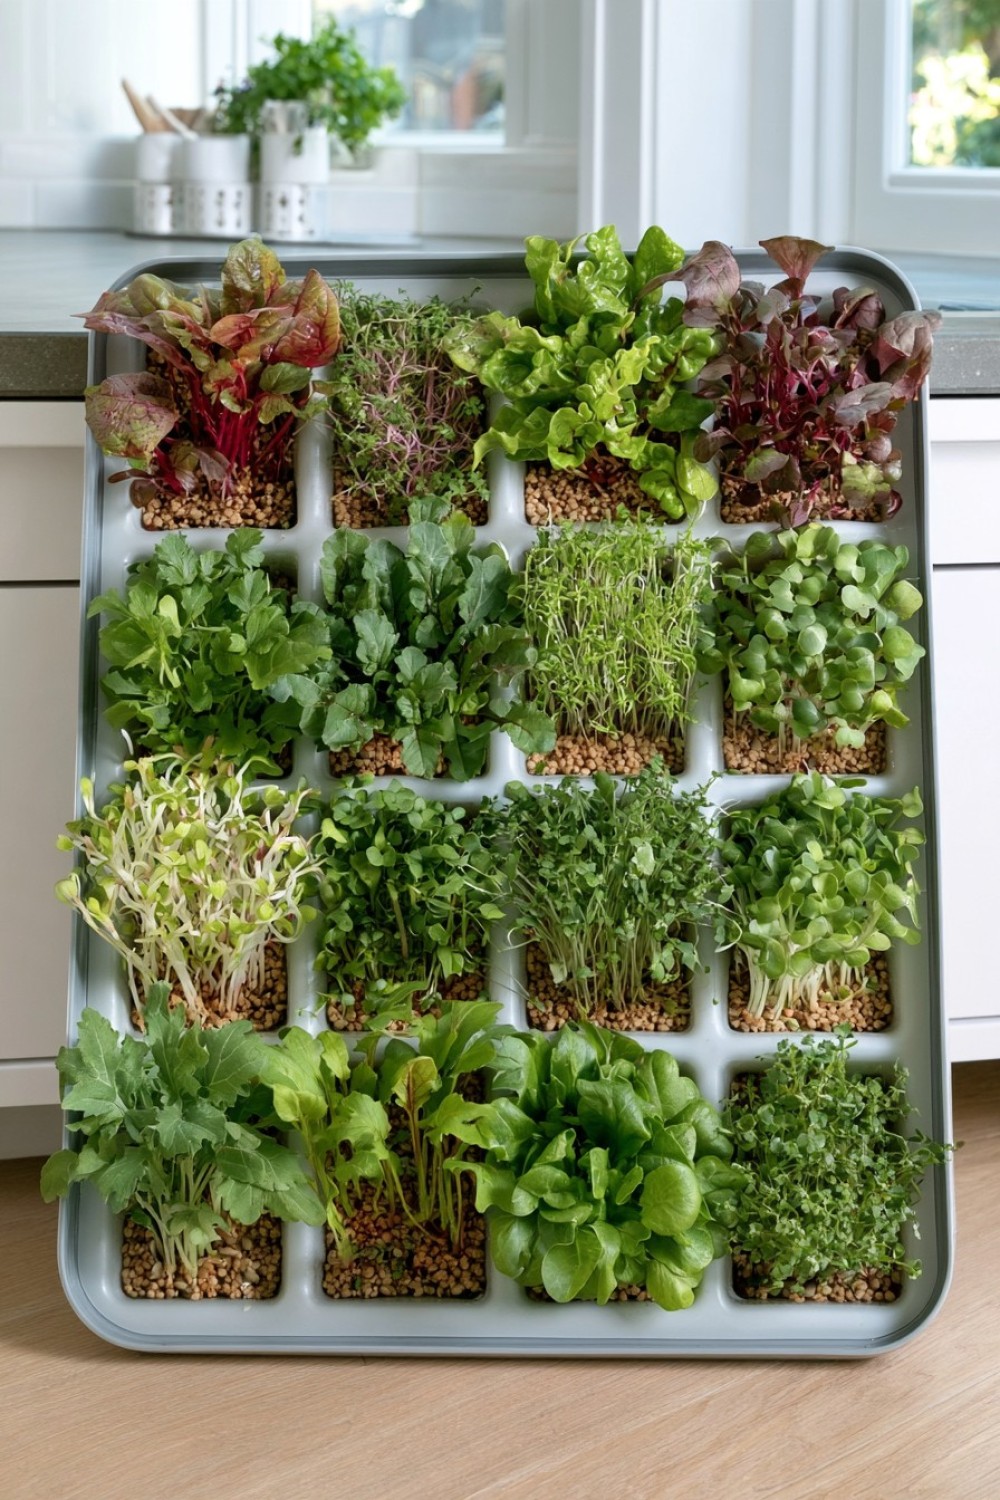
An oversized silicone ice cube tray can be used to test very small batches of seeds.
Fill each cavity with a small amount of suitable growing medium and sow a different variety in every section.
This is not the most efficient way to produce a large harvest, but it is excellent for germination experiments, seed comparisons, or children's growing projects.
Choose food-grade silicone and make sure each cavity can drain or is watered very conservatively.
Place the entire tray inside a waterproof catch tray.
You can compare seed density, different varieties, or even two growing media side by side.
Once the shoots are ready, each little block can be harvested independently.
The result resembles a botanical sample grid rather than a conventional indoor garden.
11. Make a Microgreen Drawer That Slides Beneath a Grow Light
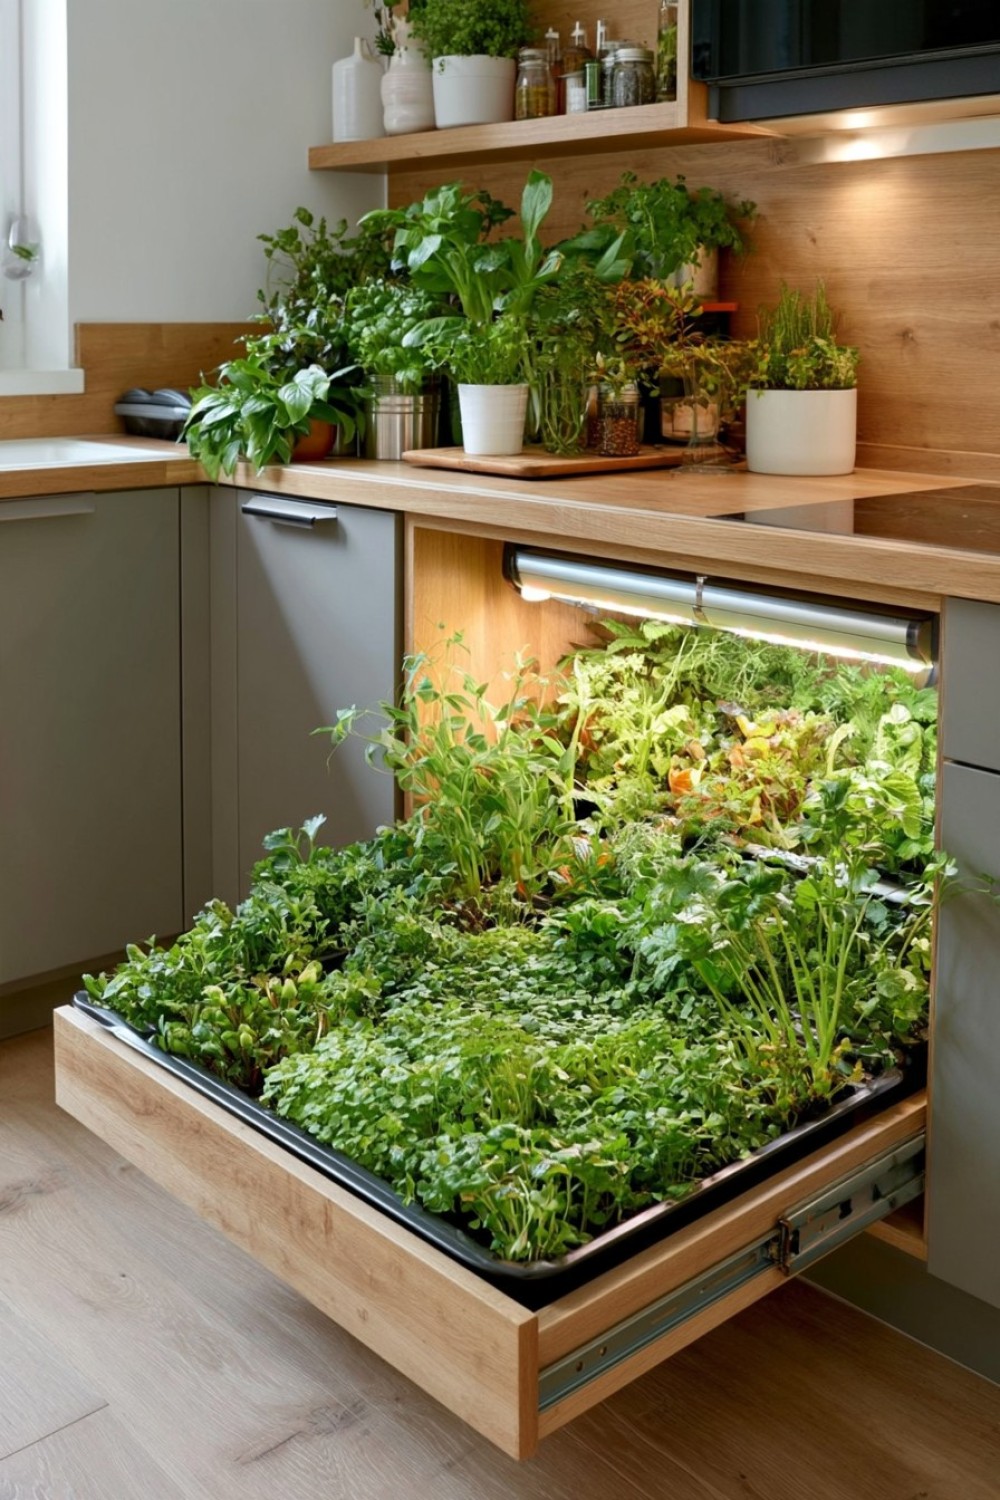
For a more permanent setup, build a shallow pull-out grow tray beneath a shelf-mounted light.
Use a waterproof food-safe tray placed inside a drawer-style wooden frame mounted on full-extension runners.
The drawer pulls forward for sowing, watering, and harvesting, then slides back beneath the light.
This can turn a kitchen utility shelf, pantry nook, or unused cabinet bay into a compact growing station.
Keep electrical components clearly separated from water and follow the light manufacturer's required clearances.
The actual crop tray should remain removable for cleaning.
This design works particularly well for people who grow microgreens continuously because it makes the routine much easier than moving loose trays around the kitchen every few days.
12. Create a Circular Microgreen “Wreath” Planter
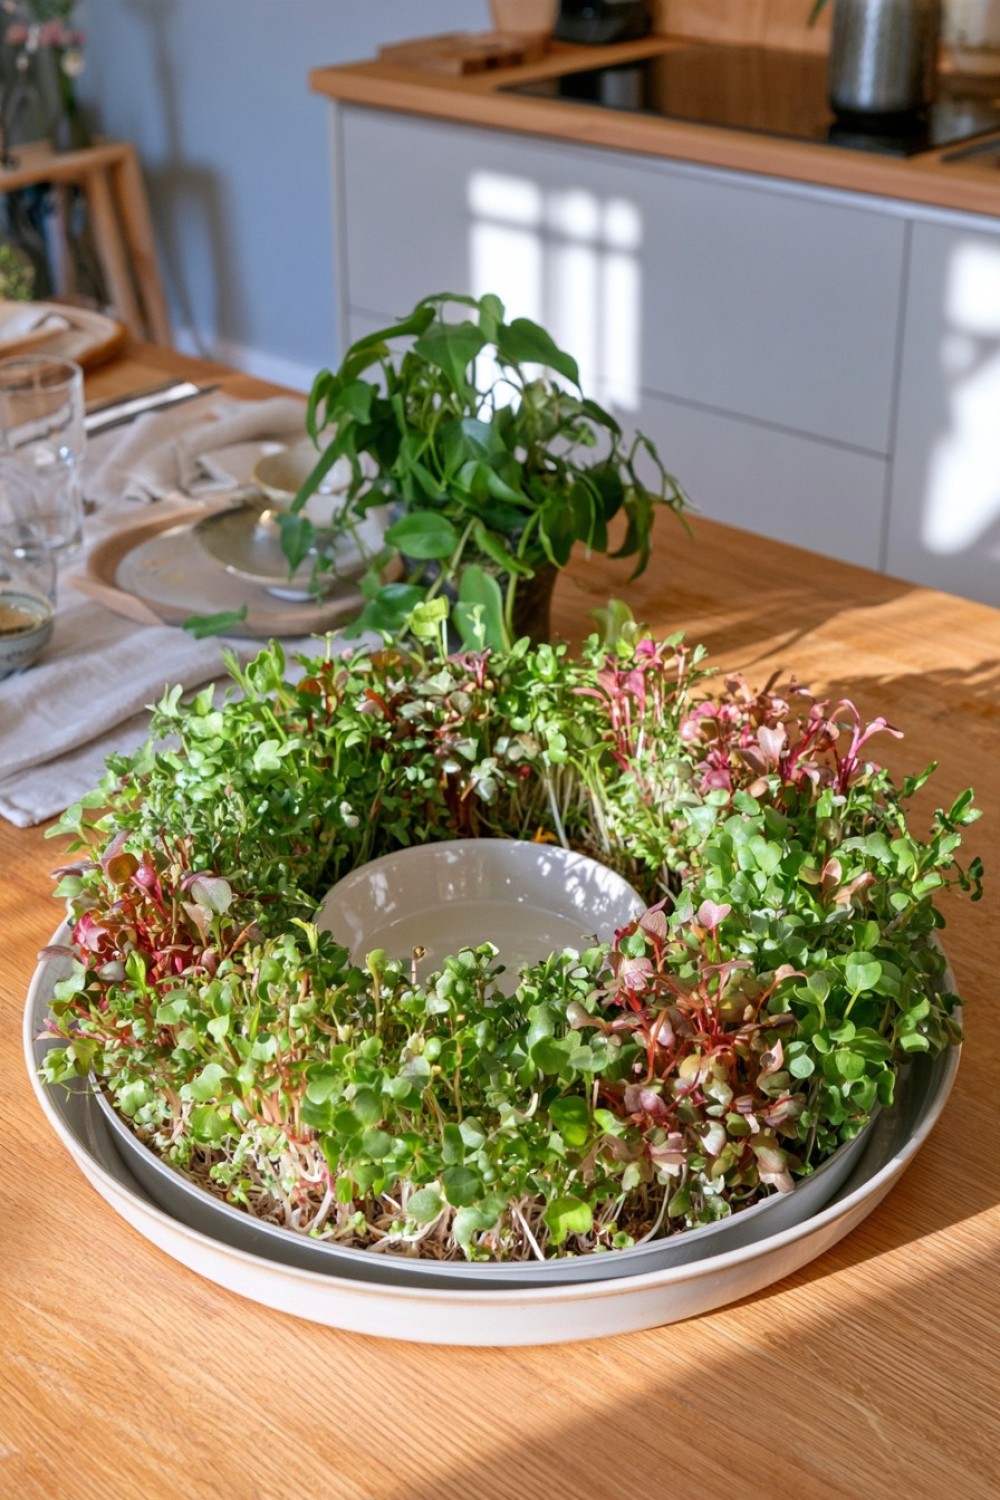
Most microgreens are grown in rectangles, which makes a circular planting immediately more unusual.
Use a shallow food-safe ring-shaped dish or create a donut-shaped insert within a larger tray.
Sow the seeds densely around the ring while leaving the center open.
Once grown, the result looks like a living wreath of edible shoots.
The center can hold a small removable bowl for harvested greens, kitchen scissors, or simply remain empty as negative space.
Colorful crops such as red amaranth, radish, and mustard make the circular form especially visible.
A food-safe molded insert is preferable to improvised painted or resin-coated materials that may not be suitable around edible crops.
This concept is ideal for a decorative countertop batch rather than maximum production efficiency.
13. Grow Microgreens in Reusable Silicone Food Pouches
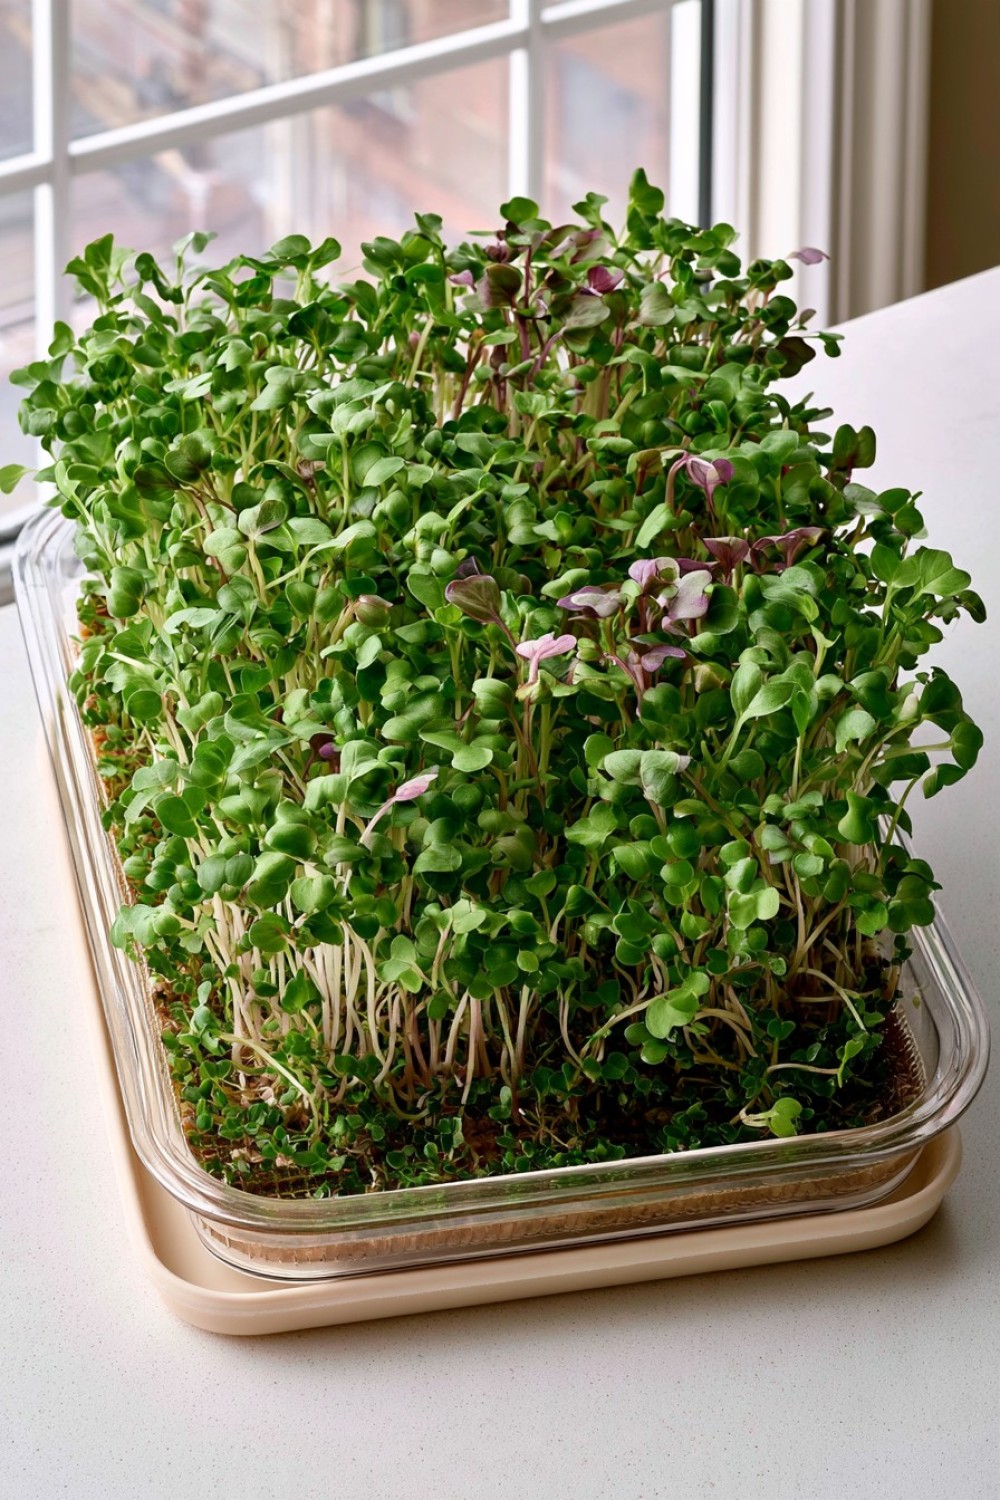
Wide silicone food-storage pouches can become compact growing containers when used horizontally.
Choose sturdy food-grade pouches with broad flat bases. Fold the top edge outward to create a shallow open container, then add a thin grow mat or small amount of medium.
If the pouch does not drain, water conservatively and avoid standing water.
The major advantage is storage: once the crop is harvested and the pouch is cleaned and dried, it can fold almost flat.
This is useful in very small apartments where rigid growing trays occupy valuable cabinet space between crops.
Use different pouch colors to separate seed varieties or growth stages.
Keep the pouches open during growth so seedlings receive adequate airflow.
14. Build a Vertical Microgreen Sample Wall With Removable Trays
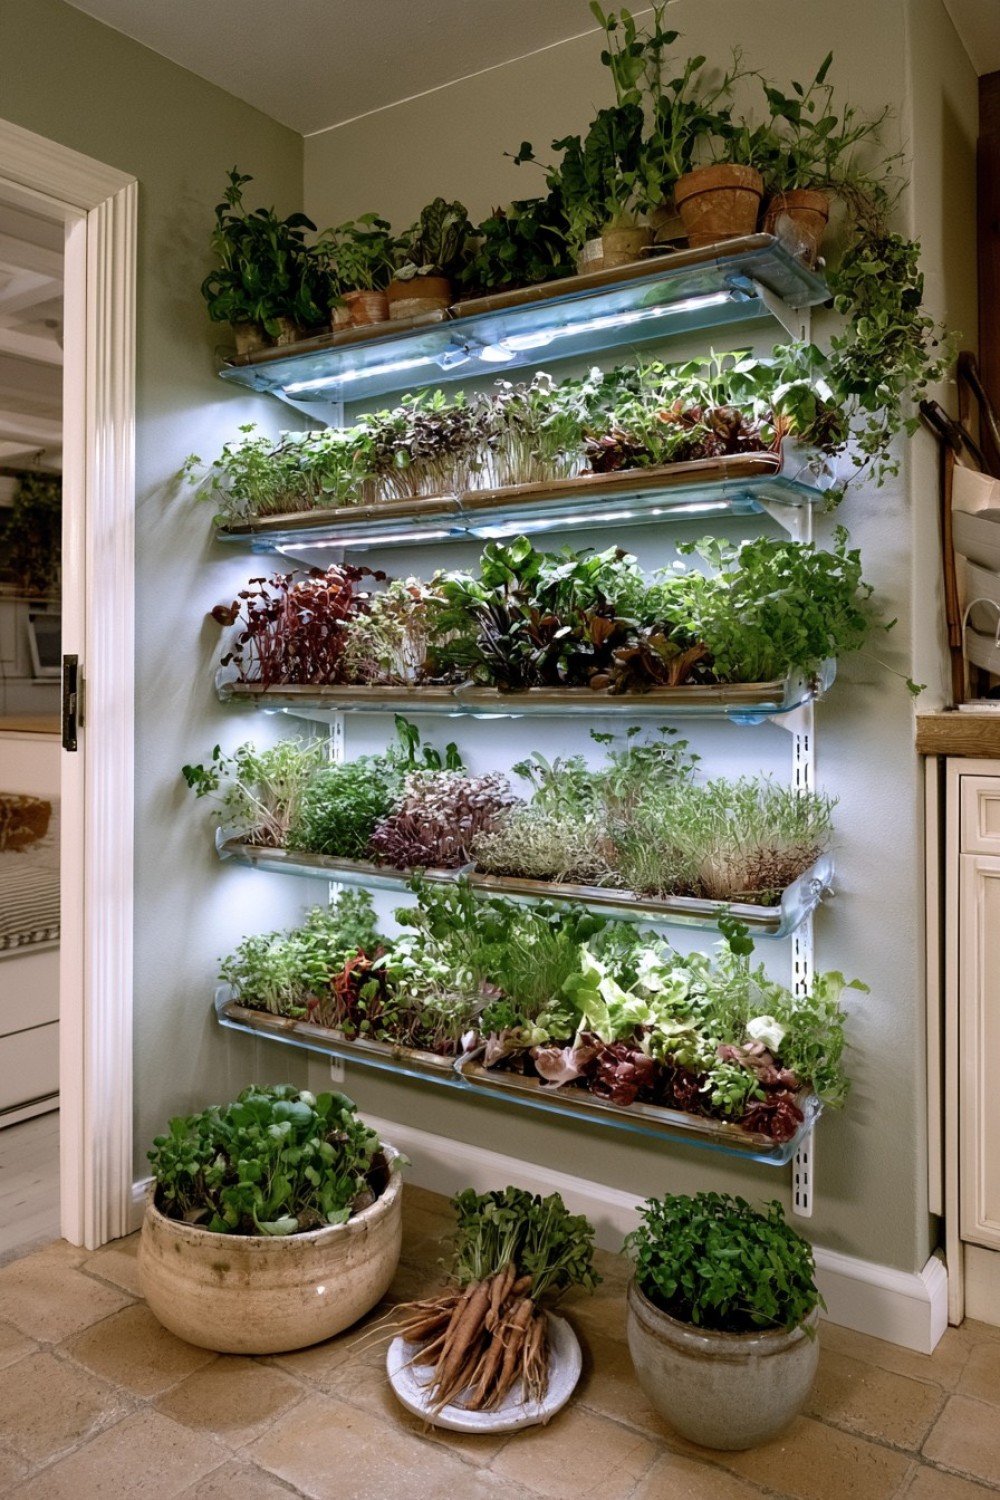
Microgreens are usually better suited to horizontal growing, but the storage system itself can go vertical.
Install several shallow wall-mounted tray holders one above another, each designed so the grow tray can slide completely out.
The crops remain horizontal while growing, but the wall system uses unused vertical space.
Think of it as a filing cabinet for living trays.
Use waterproof removable trays and leave sufficient spacing for light and airflow. If natural light is inadequate, each level may need appropriately installed grow lighting.
This can look particularly striking in a utility room or dedicated kitchen growing corner.
Do not mount trays where water can drip onto electrical outlets or food-preparation equipment below.
15. Repurpose a Bamboo Steamer as a Decorative Outer Cover
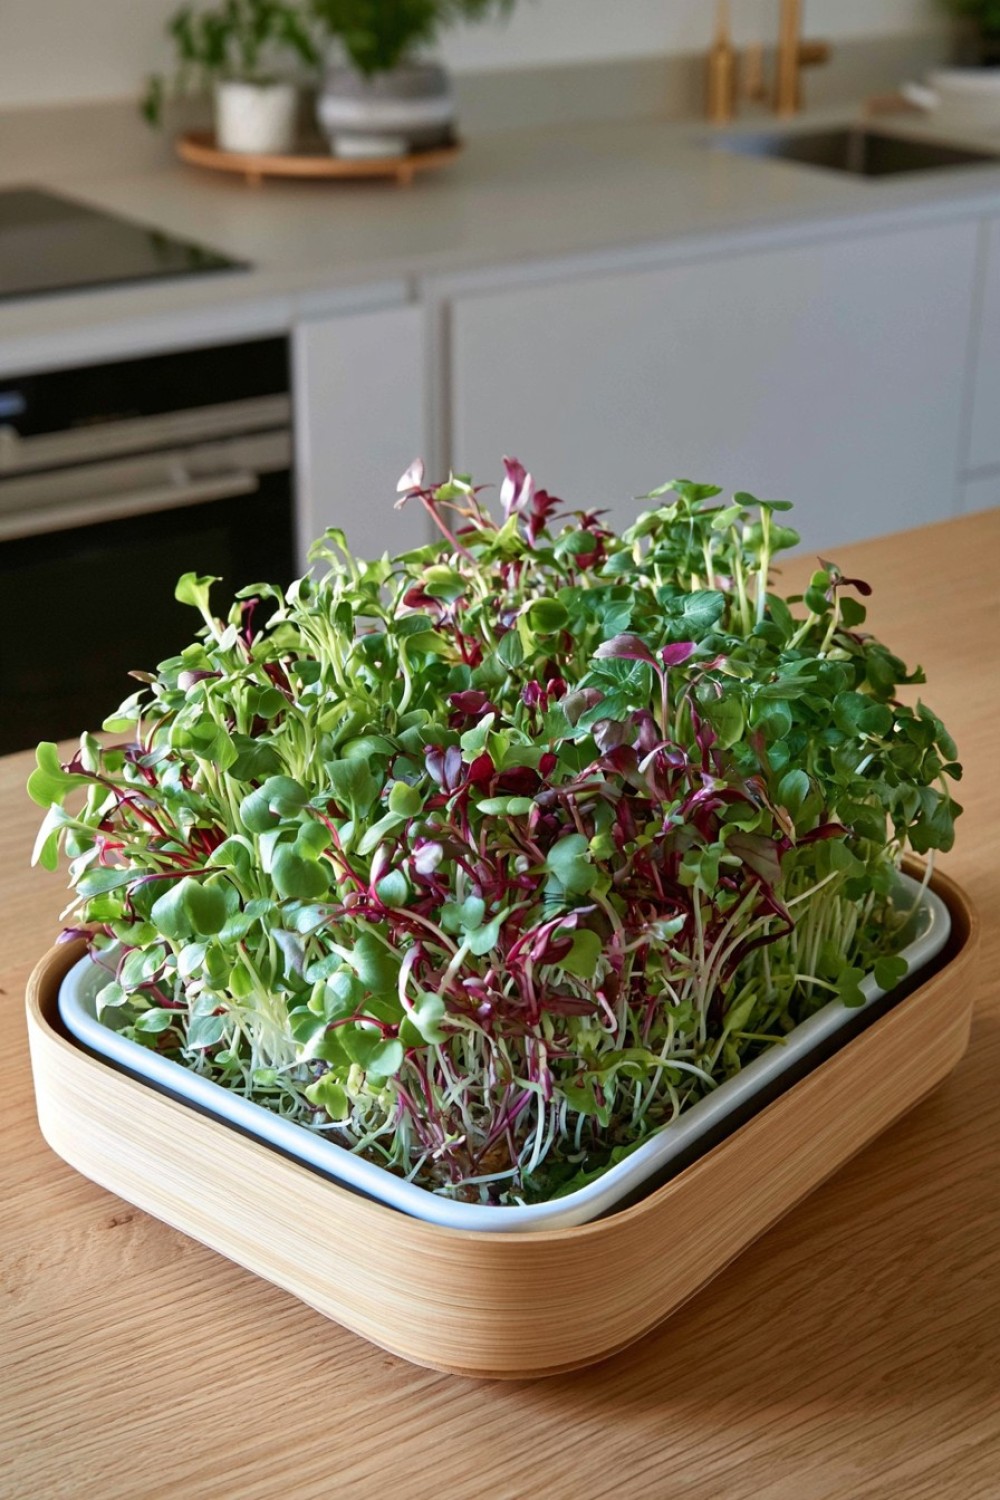
A bamboo steamer can provide an attractive exterior while a separate food-safe tray handles the actual growing.
Place a shallow waterproof container inside the lower steamer basket, keeping damp growing medium away from direct prolonged contact with the bamboo.
The woven sides create texture and make the planter look much warmer than a plastic nursery tray.
Remove the inner tray for watering and cleaning.
This combination works beautifully in natural, Japandi, or warm minimalist kitchens.
Do not treat the bamboo steamer itself as the wet growing container; repeated moisture can encourage staining, swelling, or microbial growth.
The concept works because the decorative shell and functional food-growing container remain separate—a useful principle for many creative microgreen displays.
16. Create a Color-Blocked Microgreen Tray
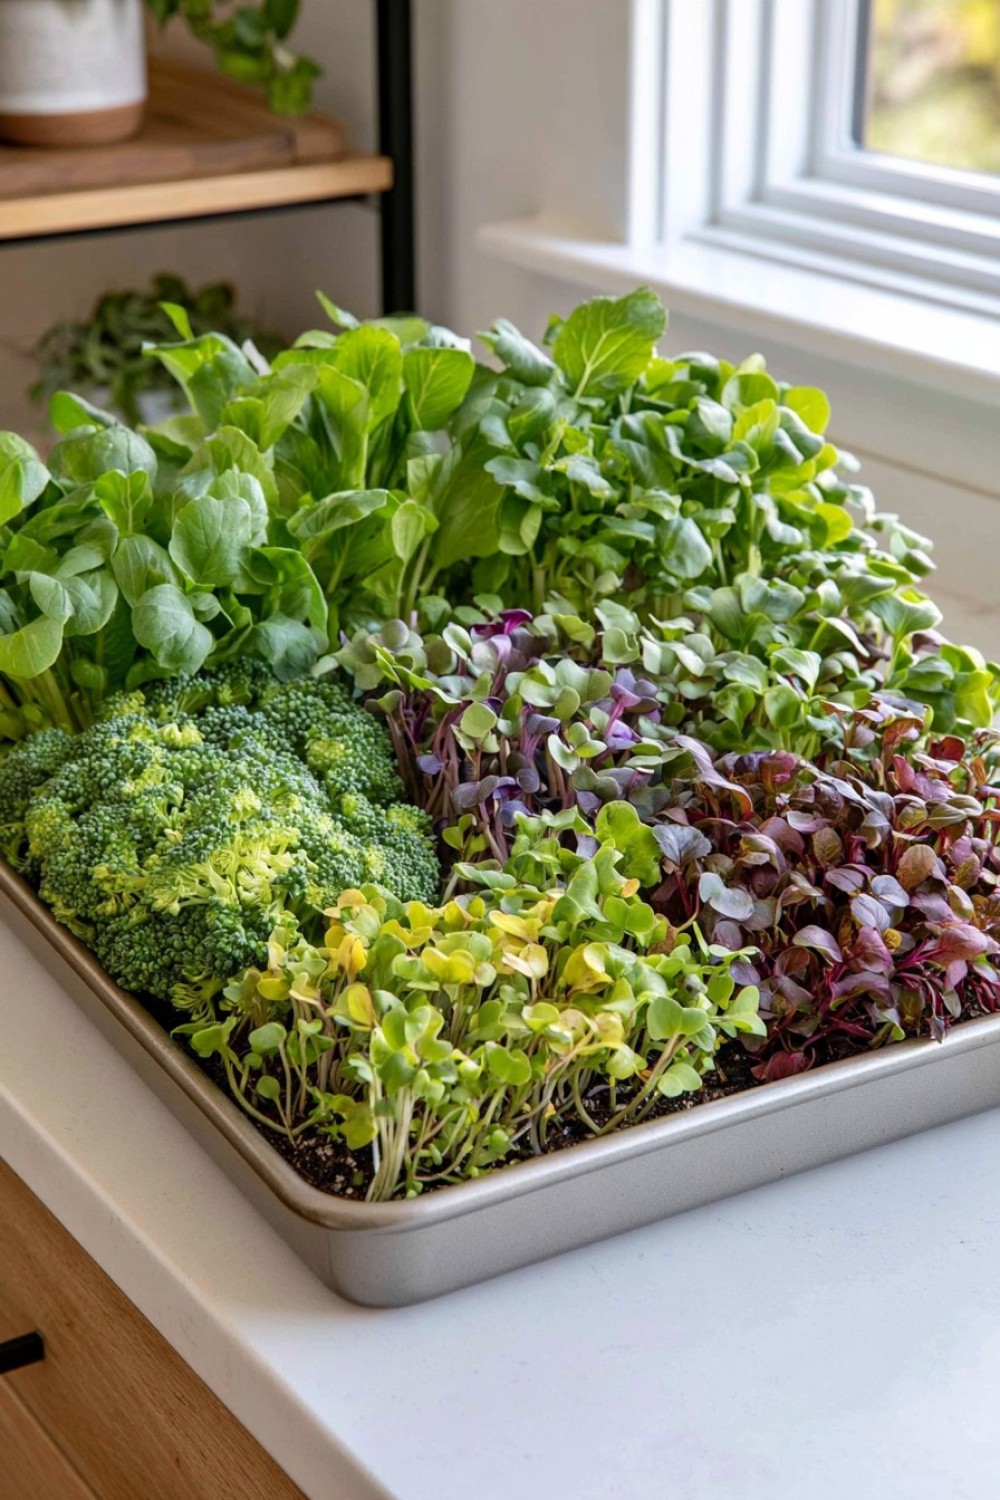
Instead of dividing crops with physical walls, use planting patterns to create visual sections.
Take one broad shallow tray and sow three compatible microgreen varieties in distinct geometric blocks.
For example, bright green broccoli can sit beside purple-stemmed radish and deep red amaranth.
Use thin removable strips of cardboard or food-safe dividers while sowing, then lift them away once the seeds are in place.
As the crops grow, the tray becomes a living color composition.
This works best with varieties that have similar germination and harvest windows; otherwise one block may be ready much earlier than another.
It is an unusual way to make a productive tray look intentional without purchasing any special decorative container.
17. Build a Microgreen Cart With Removable Shallow Trays
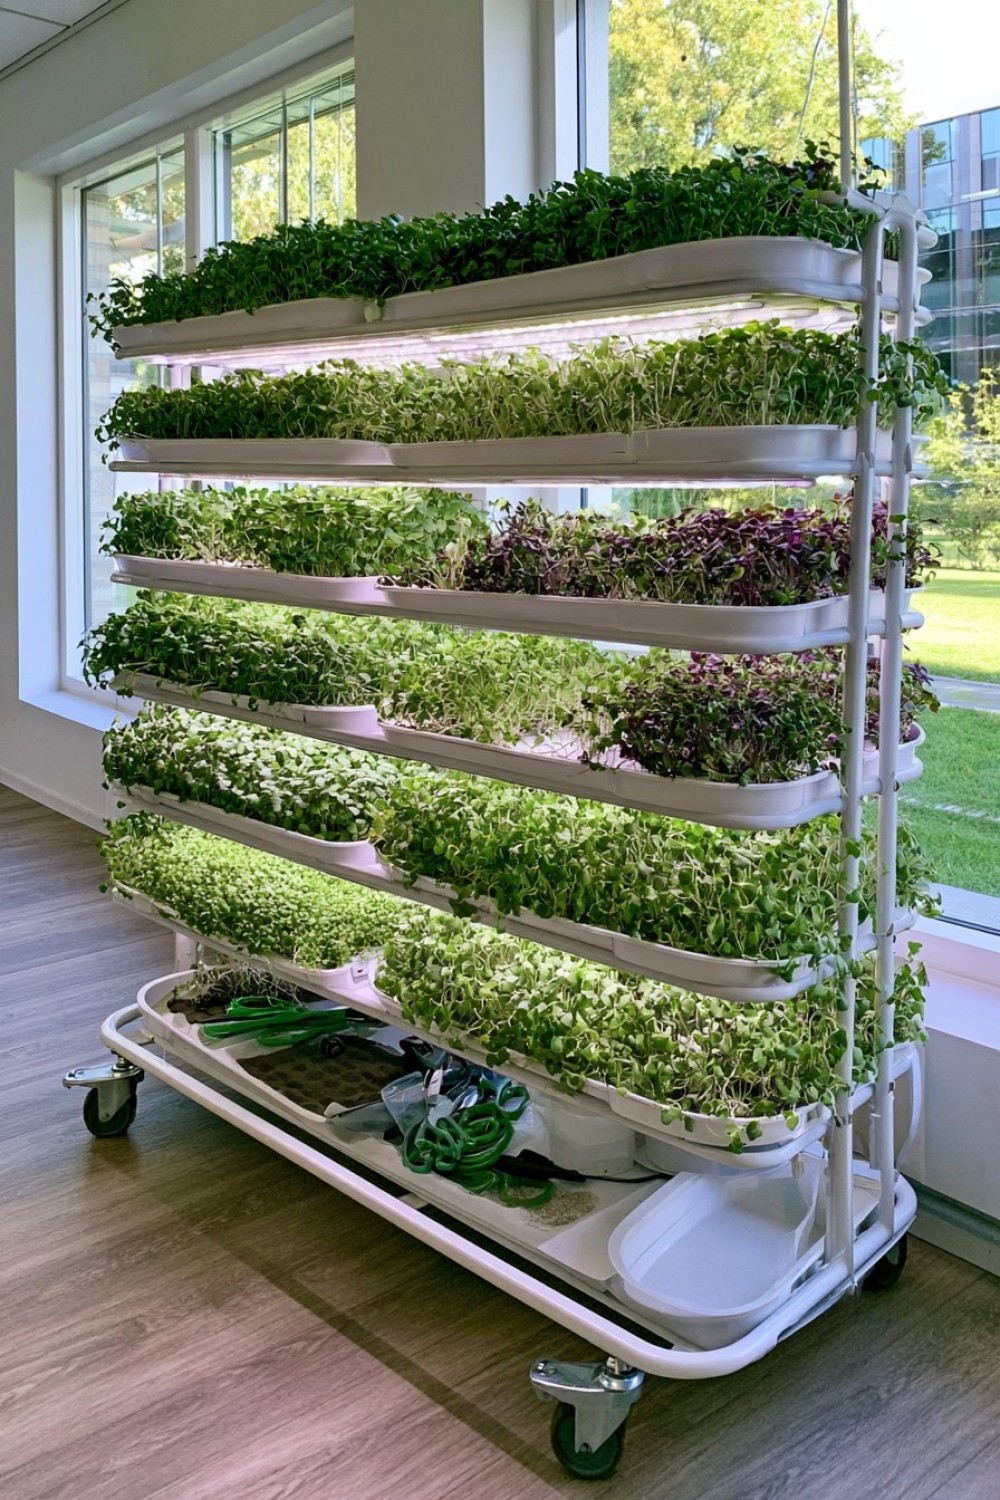
If you grow several trays continuously, a compact rolling cart can make the entire setup easier to manage.
Fit each level with one or two removable shallow food-safe trays and reserve the bottom shelf for clean growing medium, seeds, scissors, and empty containers.
A narrow cart can move toward daylight during the day or sit beneath a dedicated grow-light station.
Use locking casters so it remains stable while watering or harvesting.
Choose shelves with waterproof surfaces or install washable liners because small spills are inevitable.
Rather than filling the cart with decorative objects, treat it like a miniature working garden.
A tidy seed box and clearly separated clean tools make the station easier to reset after each harvest.
18. Make a Countertop Microgreen Bar With Interchangeable Trays
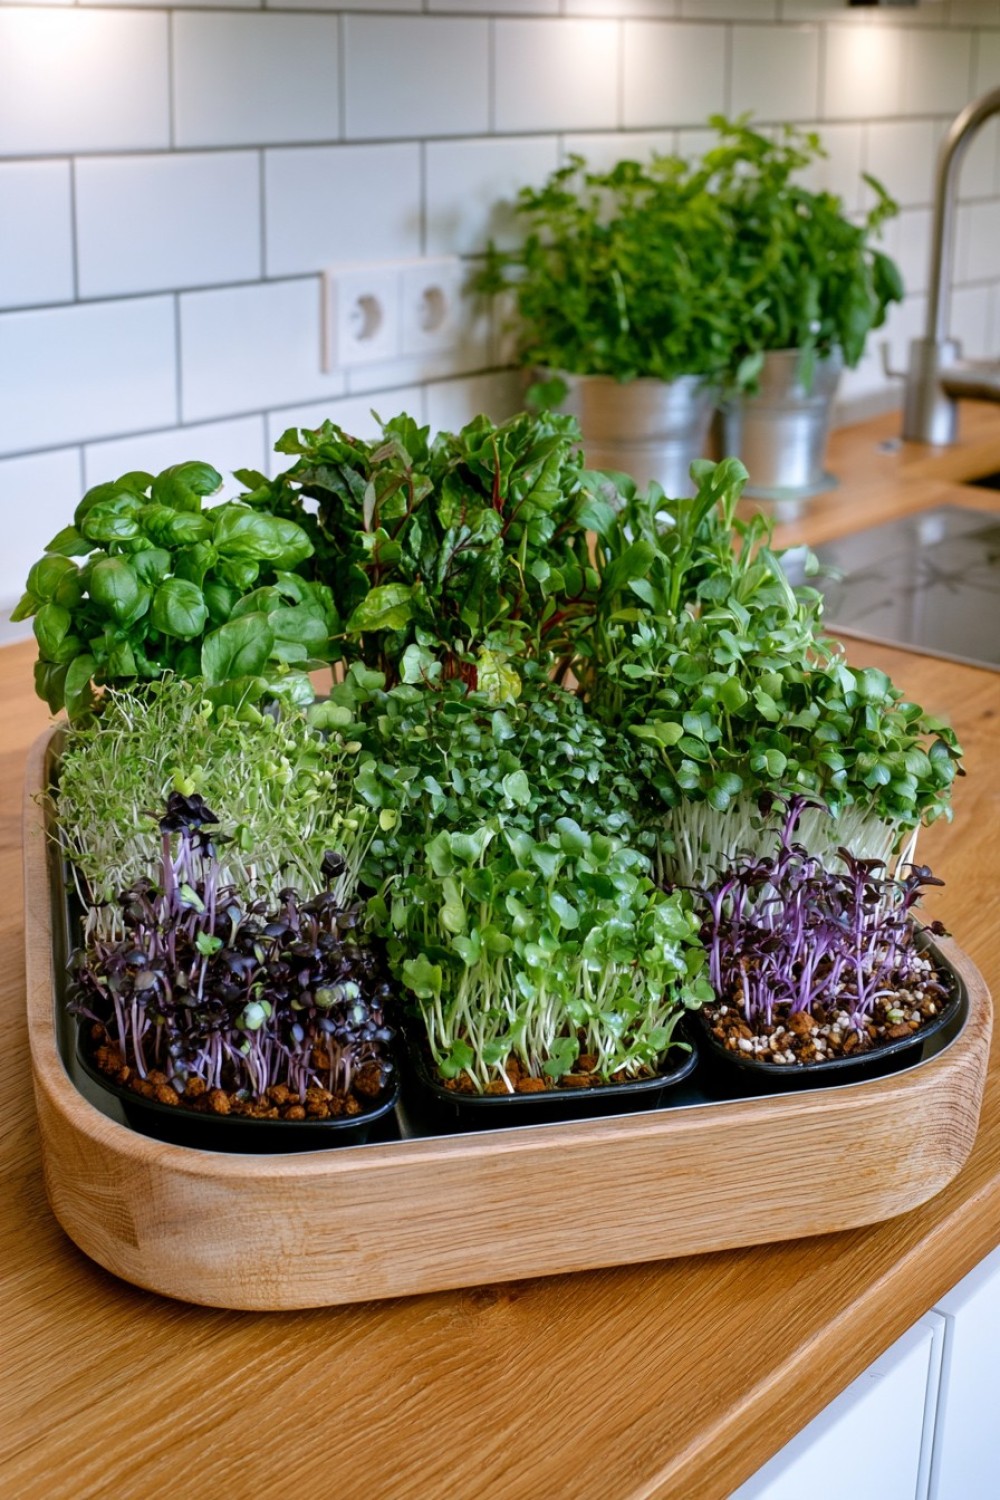
For the most polished setup, build one permanent outer box that accepts several interchangeable grow trays.
Use a waterproof outer shell or sealed decorative housing sized around standard food-safe inserts. The inserts lift out independently for sowing, harvesting, and sanitizing.
You might keep three trays in rotation: one germinating in darkness, one actively growing under light, and one ready for the kitchen.
The exterior housing can be wood, metal, or another decorative material because it never directly touches the growing medium.
A narrow label rail can identify what is currently growing without sticking markers into the plants.
This system separates aesthetics from hygiene: the beautiful outer container stays in place while the actual food-growing components can be thoroughly washed between crops.
It is particularly suitable for someone who wants microgreens to feel like a permanent part of the kitchen rather than a temporary gardening project.
Designing Better Containers for Edible Microgreens
Creative containers are useful only when the growing conditions still make sense. Microgreens generally benefit from shallow, clean containers, consistent moisture, good airflow, adequate light after germination, and easy access for harvesting. Drainage or carefully controlled bottom watering can help prevent the growing medium from staying excessively wet.
Material choice matters because the crop is edible. Food-safe plastic, stainless steel, intact food-safe glazed ceramic, glass, and purpose-made growing trays are easier to justify than containers with unknown paint, old chemical residue, rust, treated timber, or questionable glazes. Decorative outer covers can still be made from unusual materials as long as a separate food-safe insert holds the actual growing medium.
The most interesting setups combine those practical requirements with a clear design idea: a removable modular grid, rotating crop system, circular planting, sliding drawer, or compact growing cart. That is what turns a simple tray of seedlings into a genuinely useful indoor garden.
MORE IDEAS


Share
What's Your Reaction?
 Like
0
Like
0
 Dislike
0
Dislike
0
 Love
0
Love
0
 Funny
0
Funny
0
 Angry
0
Angry
0
 Sad
0
Sad
0
 Wow
0
Wow
0