17 Hanging Planter Designs That Make Indoor Greenery Feel Sculptural

Indoor hanging planters can do far more than save floor space. Used creatively, they can define a corner, soften a window, create a living divider, or turn an ordinary ceiling into part of the room’s design. The most interesting displays often come from changing the support system rather than the plant itself: a planter suspended inside a timber frame, several pots hanging from one rail, a ceramic vessel floating inside a metal ring, or a cascading plant descending through multiple levels. These ideas combine decorative impact with practical considerations such as watering access, weight, drainage, ceiling structure, and plant growth, so the final result feels intentional rather than improvised.
1. Suspend a Planter Inside an Oversized Wooden Ring
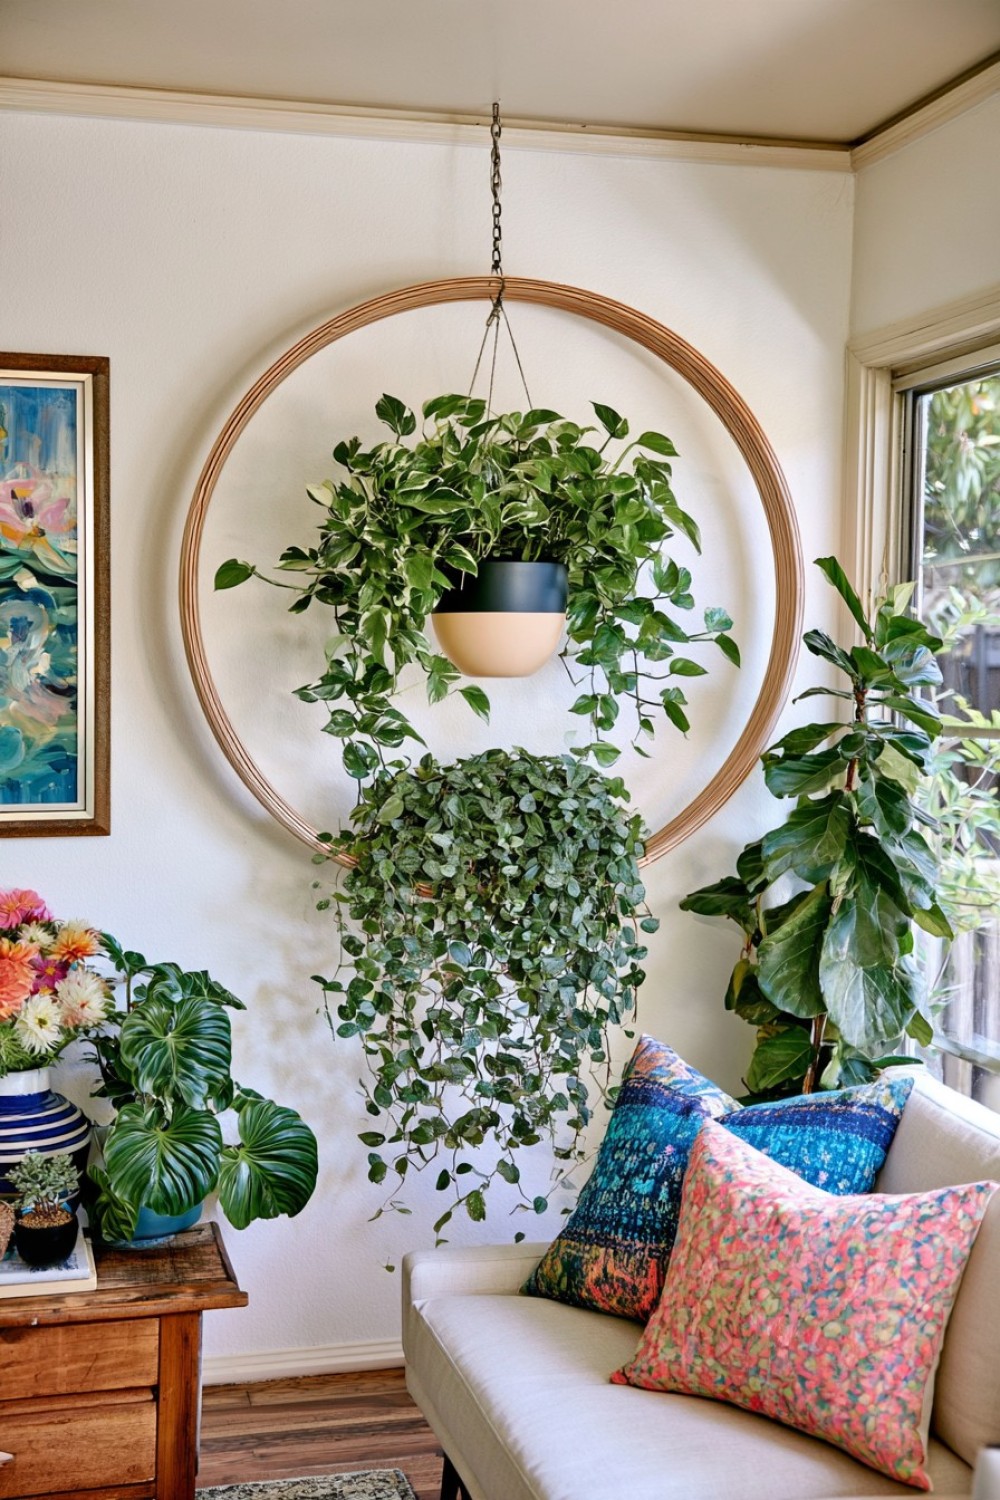
Instead of hanging the planter directly from rope, place it inside a large wooden hoop so the plant becomes part of a circular sculptural frame.
You will need a large plywood or bentwood ring, a lightweight planter, coated wire or strong cord, ceiling-rated hardware, and a drip tray or watertight cachepot.
Suspend the ring vertically, then hang the planter inside it slightly below center. A trailing plant such as pothos, philodendron, or scindapsus can spill through the lower part of the circle and soften its geometry.
For a more architectural effect, leave the ring natural while using a matte black or cream planter.
This works especially well in an empty corner where ordinary hanging plants might feel too small.
The ring itself should not carry more weight than it is designed for, so the planter should remain relatively light and ceiling fixings should be sized for the full wet weight.
2. Build a Ceiling Rail for a Moving Plant Collection
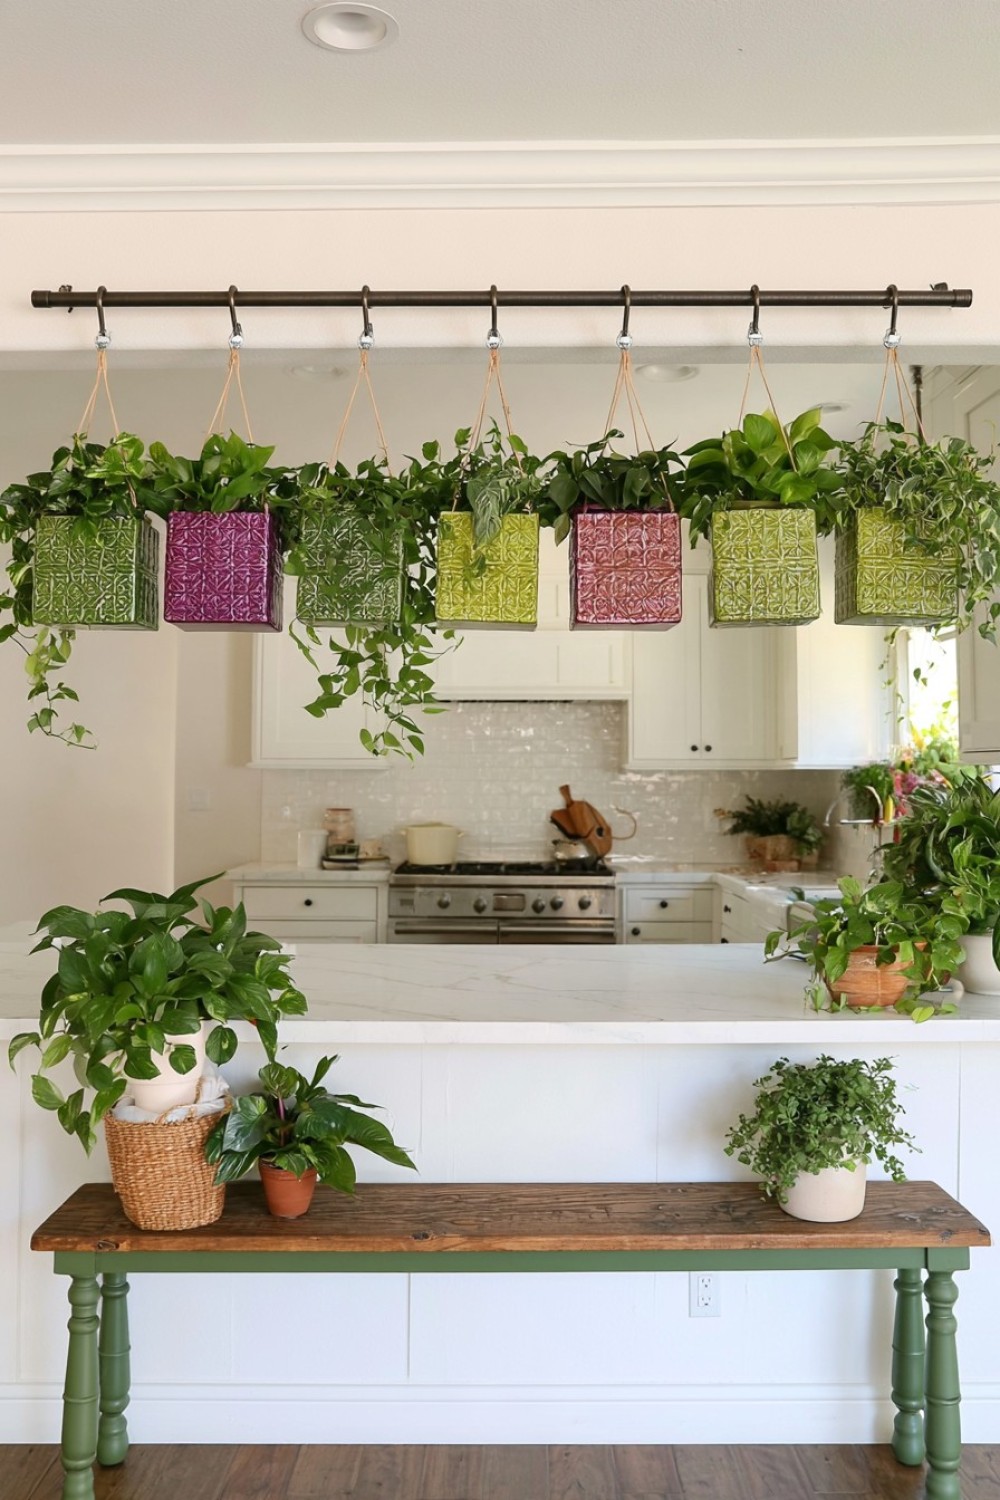
A fixed hook limits where plants can hang. A ceiling-mounted rail allows the arrangement to change as the plants grow.
Use a strong metal or timber track with movable hanging points. Several planters can slide along the rail so you can adjust spacing without drilling new holes.
This works particularly well above a kitchen peninsula, sunroom bench, or long console.
For a DIY-style version, use a properly anchored timber beam fitted with several sliding eye hooks or removable S-hooks. Keep the beam design simple so the plants remain the focus.
Different cord lengths create a layered skyline rather than one rigid row.
The practical advantage is flexibility. Plants can be moved closer to available daylight or separated as their foliage becomes larger.
Any ceiling rail carrying live plants should be attached to structural framing rather than decorative plaster alone.
3. Create a Hanging Herb Ladder
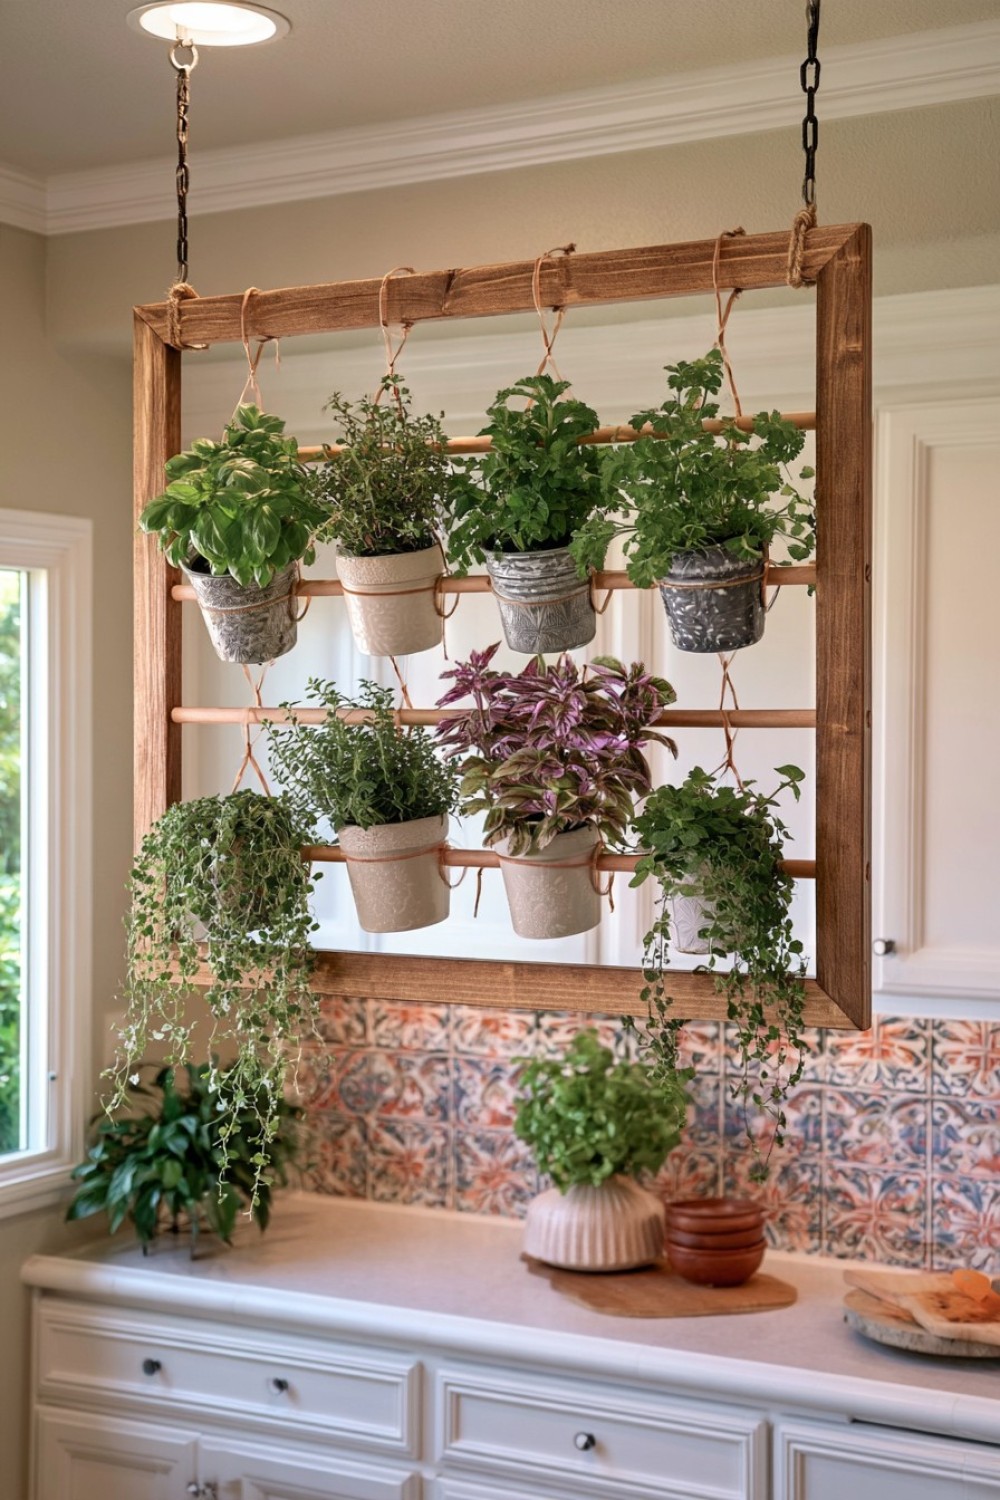
Instead of hanging individual herb pots from separate hooks, suspend a narrow timber ladder horizontally from the ceiling.
You will need two long wooden rails, several dowel rungs, strong cord or chain, ceiling-rated anchors, and lightweight herb pots.
Attach small hanging pots between the rungs or clip them directly to the ladder structure.
The result works beautifully above a kitchen prep area or near a bright window where basil, thyme, mint, parsley, or trailing herbs are easy to reach.
Keep frequently harvested plants toward the lower side of the arrangement.
For watering, removable cachepots are much easier to manage than pots fixed permanently to the frame.
This solution feels more like a functional kitchen installation than decorative plant storage and makes good use of vertical space without covering the countertop.
4. Float a Ceramic Pot Inside a Metal Orbit
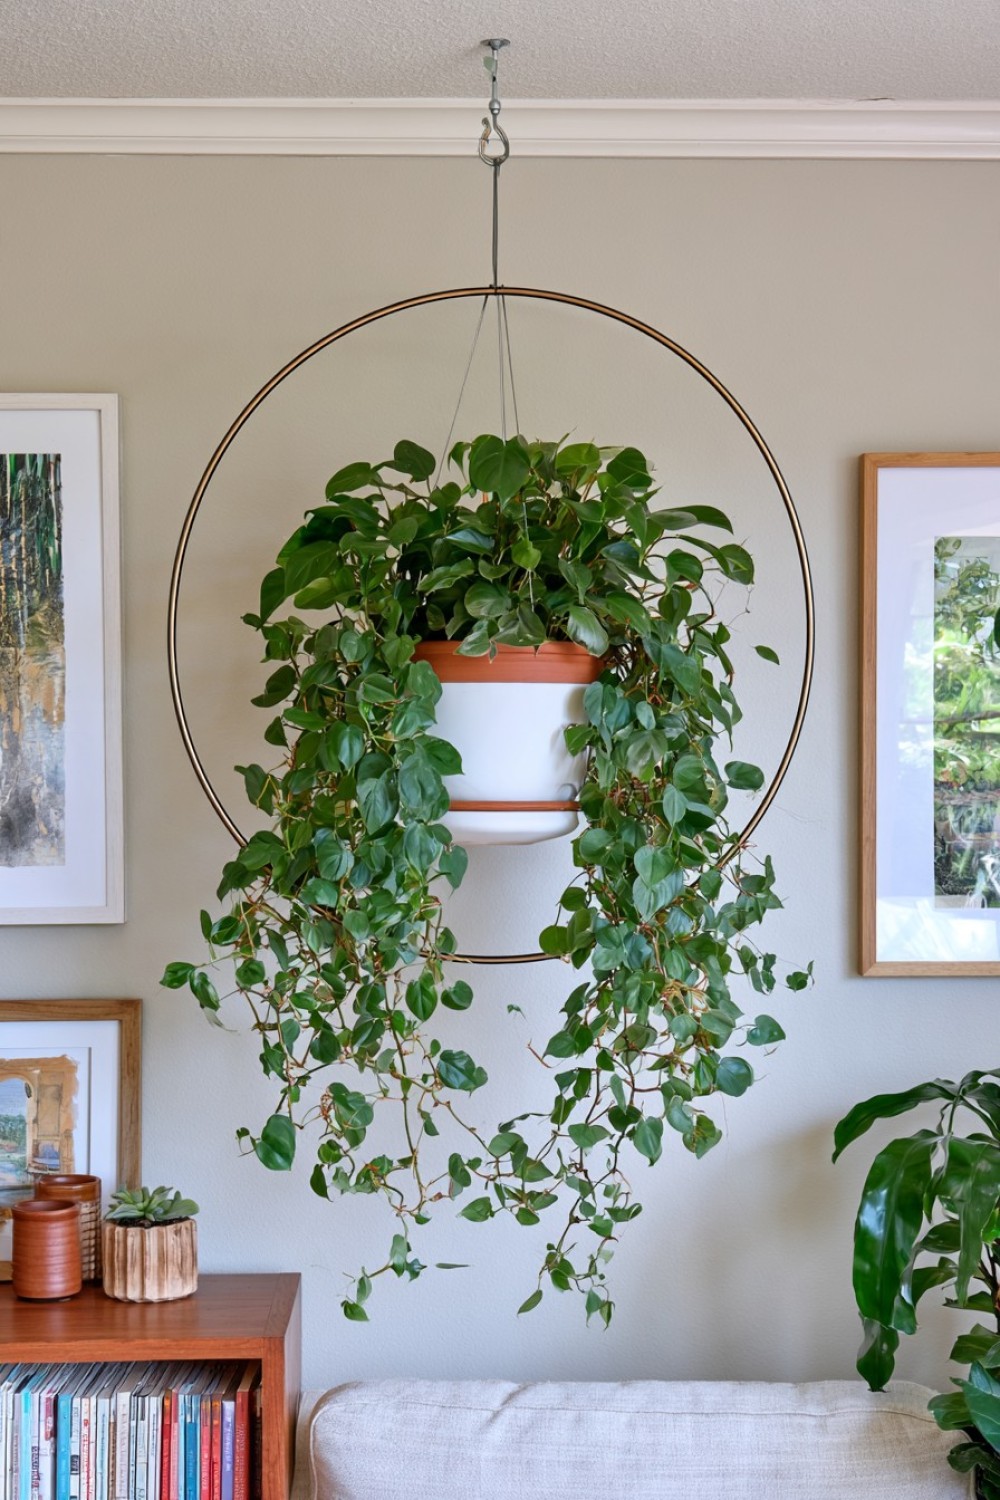
A planter can become much more sculptural when it appears to sit inside a larger metal ring.
Use a powder-coated steel hoop, lightweight ceramic or composite planter, strong hidden supports, and ceiling suspension cable.
Mount the pot inside the ring so it appears to float slightly below the center.
A single trailing plant can then grow through and around the frame, gradually changing the composition.
Black metal with warm terracotta feels earthy and modern, while brushed brass with white ceramic creates a softer, more refined version.
This idea works best as a single focal point rather than a repeated system.
Treat the decorative metal ring as a frame, not as improvised structural hardware. The actual suspension method should be rated for the combined weight of the planter, soil, water, and plant.
5. Build a Multi-Level Planter From One Vertical Cable
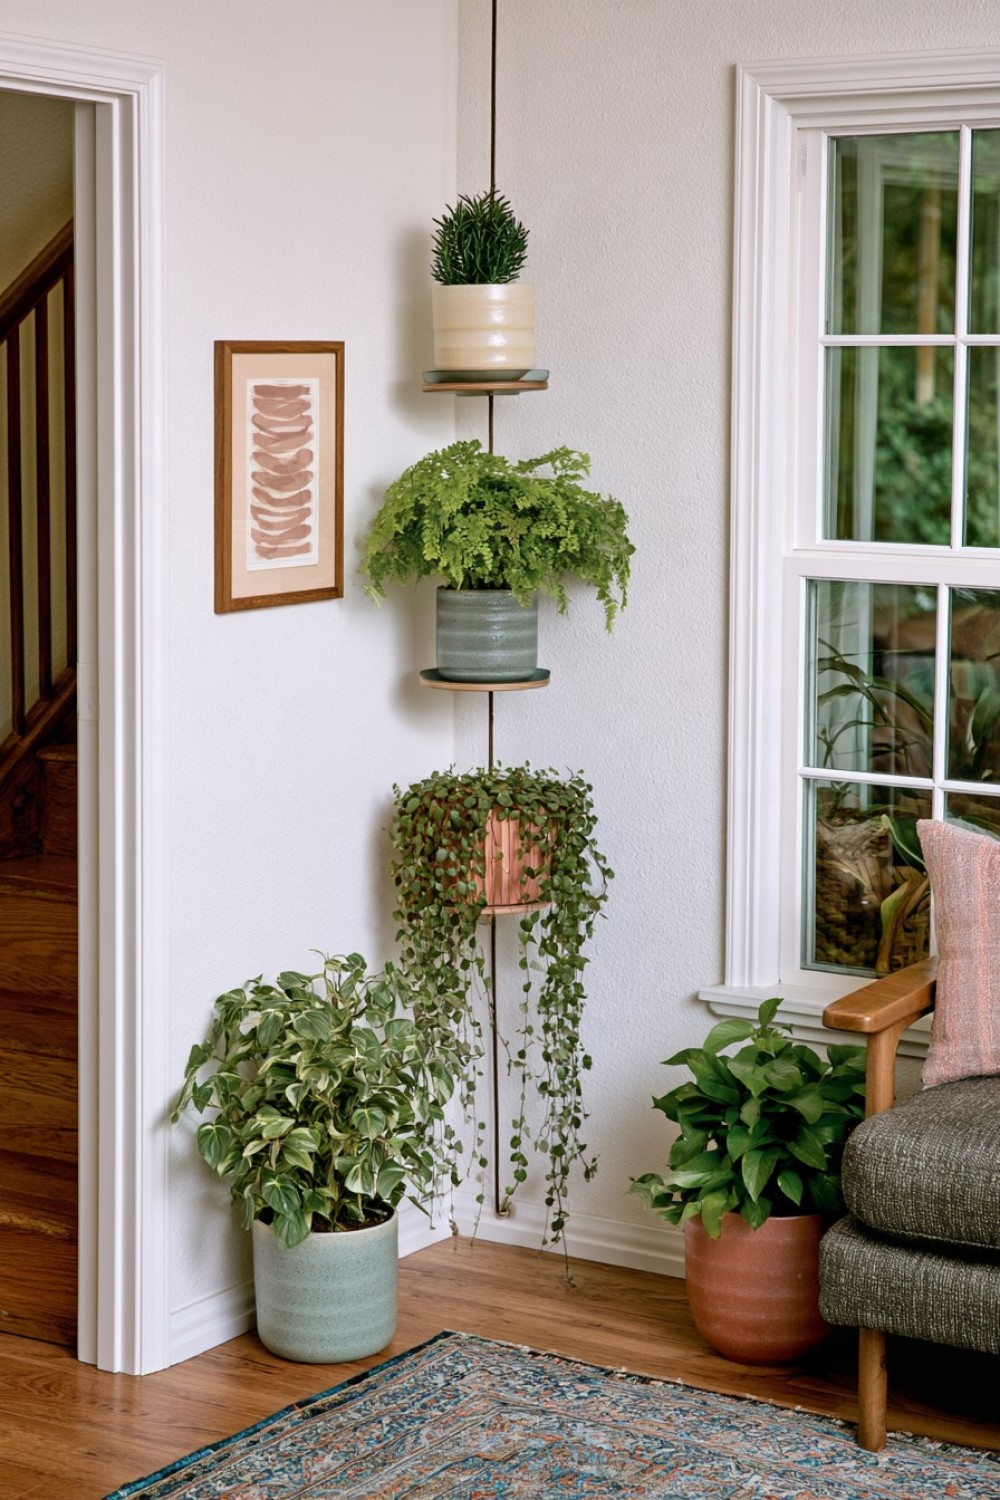
Instead of hanging three separate planters, stack them along one vertical line.
Use one strong ceiling cable and attach lightweight planter platforms at different heights using mechanical stops or support brackets.
The pots can vary in size, with the smallest at the top and the widest near the bottom.
Leave enough vertical space so each plant receives light and does not grow directly into the planter above.
This works particularly well in tall corners, stair landings, and rooms with high ceilings.
Choose plants with different growth habits: an upright peperomia at the top, a compact fern in the middle, and a trailing vine below.
The repeated vertical structure creates more impact than several unrelated hanging pots while using only one ceiling zone.
6. Turn a Vintage Birdcage Into a Botanical Planter Frame
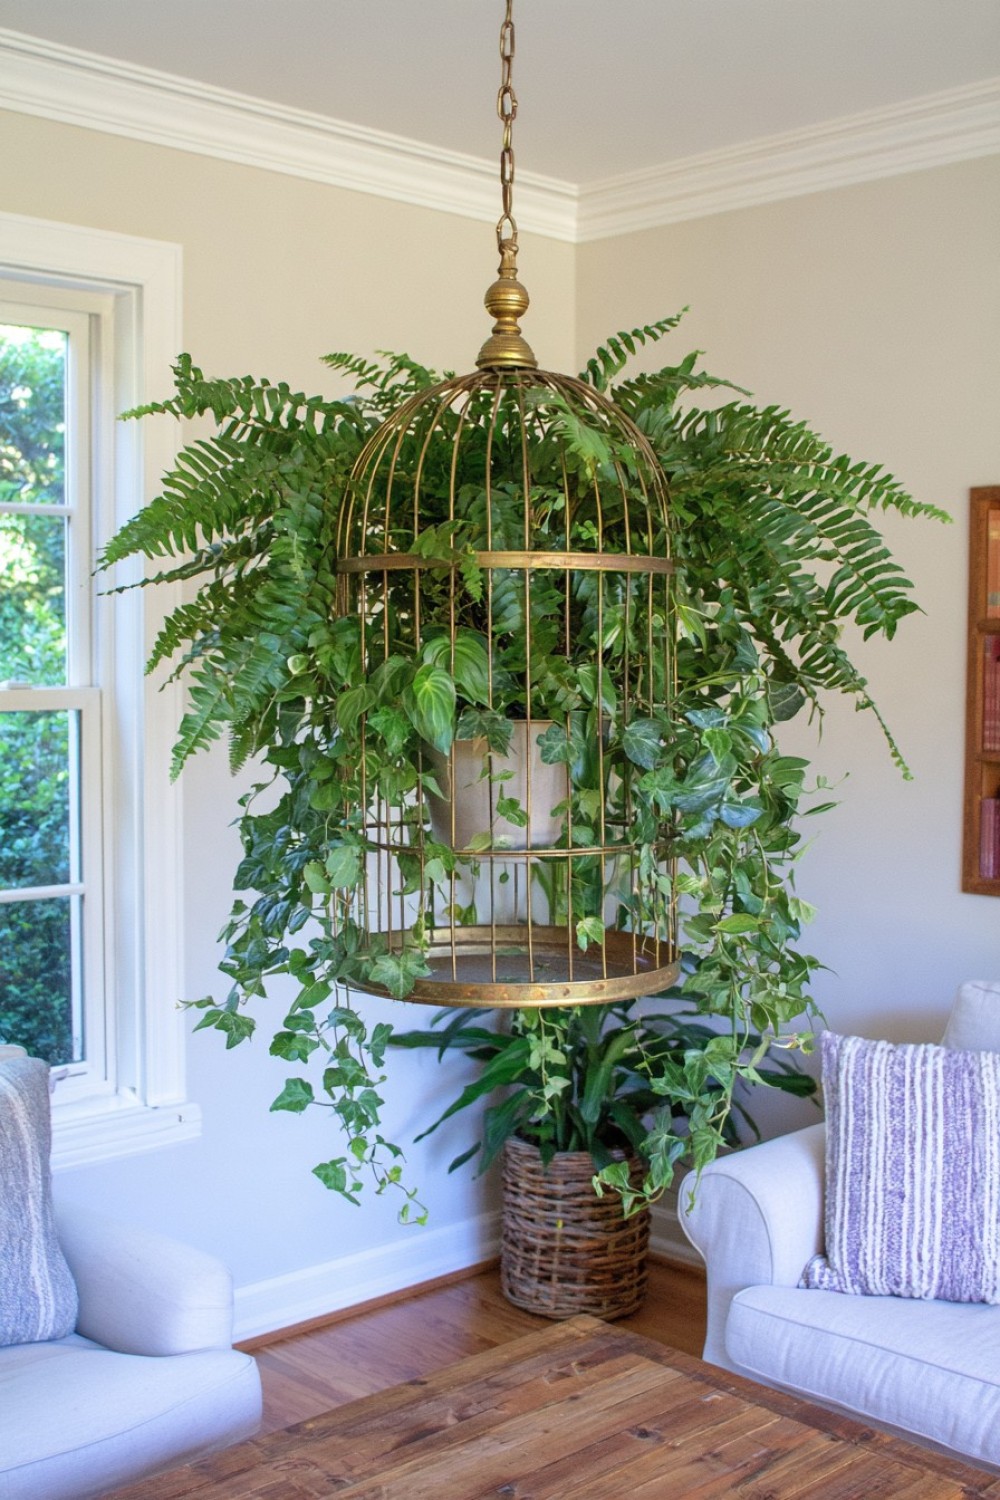
Instead of putting a pot directly inside a decorative birdcage, use the cage as a structural outer shell.
Place a removable lightweight planter inside, allowing foliage to grow through selected openings.
Trailing ivy-like plants, ferns, or string plants work especially well because the leaves gradually blur the cage outline.
For a DIY refresh, strip unstable paint, clean the metal thoroughly, and refinish it with a suitable coating if needed.
Add a hidden saucer inside to prevent dripping.
Avoid using antique cages with unknown flaking finishes around edible plants or where pets may chew the metal.
The result feels more like a suspended botanical curiosity than a standard hanging planter, especially in eclectic, vintage, or conservatory-style interiors.
7. Suspend a Planter Beneath a Floating Shelf
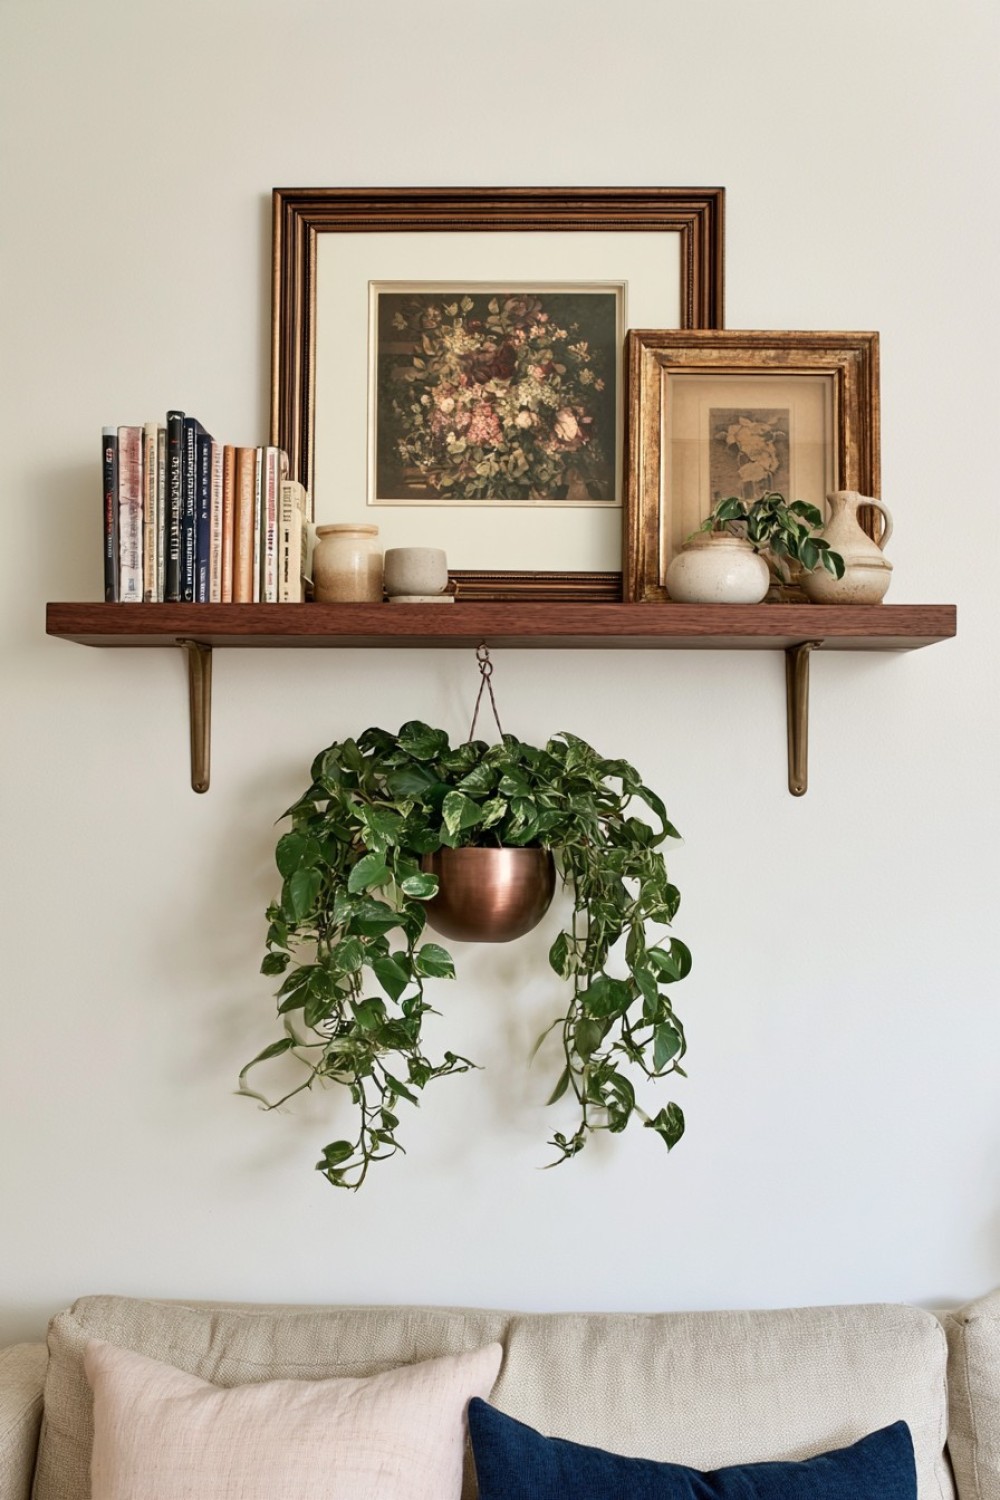
A hanging planter does not always need to come from the ceiling.
Mount a deep wall shelf securely, then install a short hanging point beneath it for one lightweight planter.
This creates a layered composition: books, ceramics, or framed art above, with foliage dropping below.
Use the planter to soften an otherwise rigid shelf arrangement.
For a more integrated look, drill a concealed hanging point into the shelf support structure rather than adding a visible hook later.
This is especially useful in rentals or rooms where ceiling drilling is difficult, although the shelf itself still needs secure wall mounting.
Keep the planter light and choose a plant that tolerates the actual light conditions rather than selecting it purely for trailing growth.
8. Create a Hanging Planter Mobile
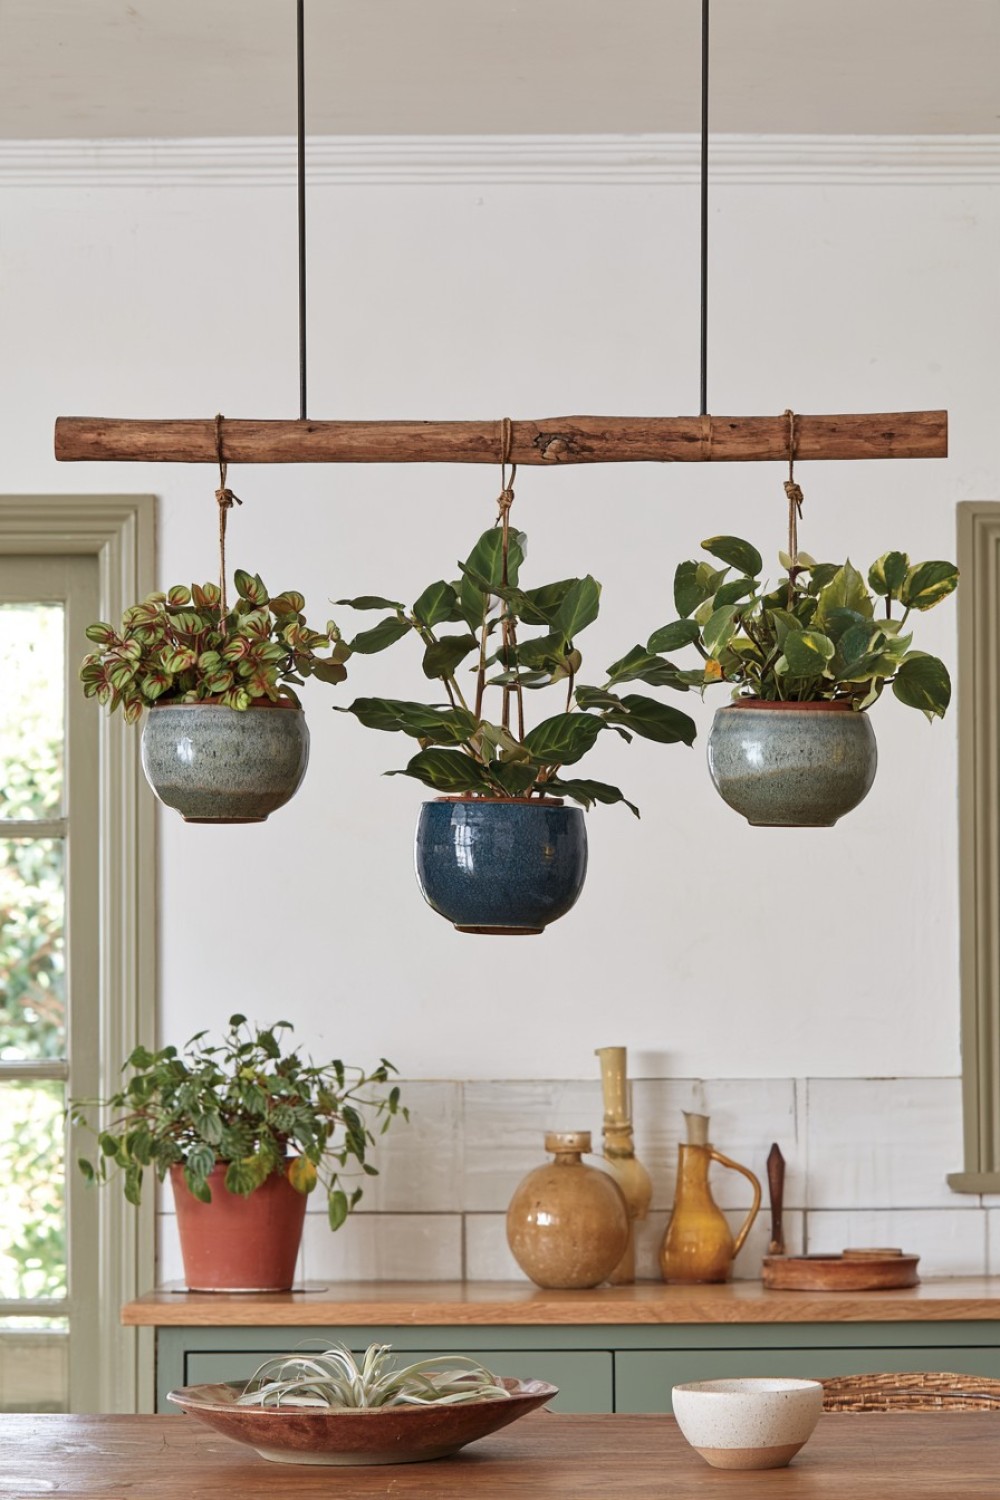
Treat plants like the elements of a kinetic sculpture.
Use a lightweight balancing frame with three or four hanging points and suspend small planters at different heights.
Each planter should remain relatively light, and the mobile structure must be balanced carefully before plants are added.
Air plants, small peperomias, tiny hoyas, or lightweight hydroponic vessels work better than heavy soil-filled pots.
For a DIY version, use hardwood dowels, strong cord, small metal rings, and lightweight containers.
The mobile should hang where people will not bump into it, and it should remain well clear of fans.
Unlike a static cluster, the arrangement can move very slightly with air circulation, giving the plants a more dynamic presence.
9. Hang Planters From a Tensioned Wall-to-Wall Cable
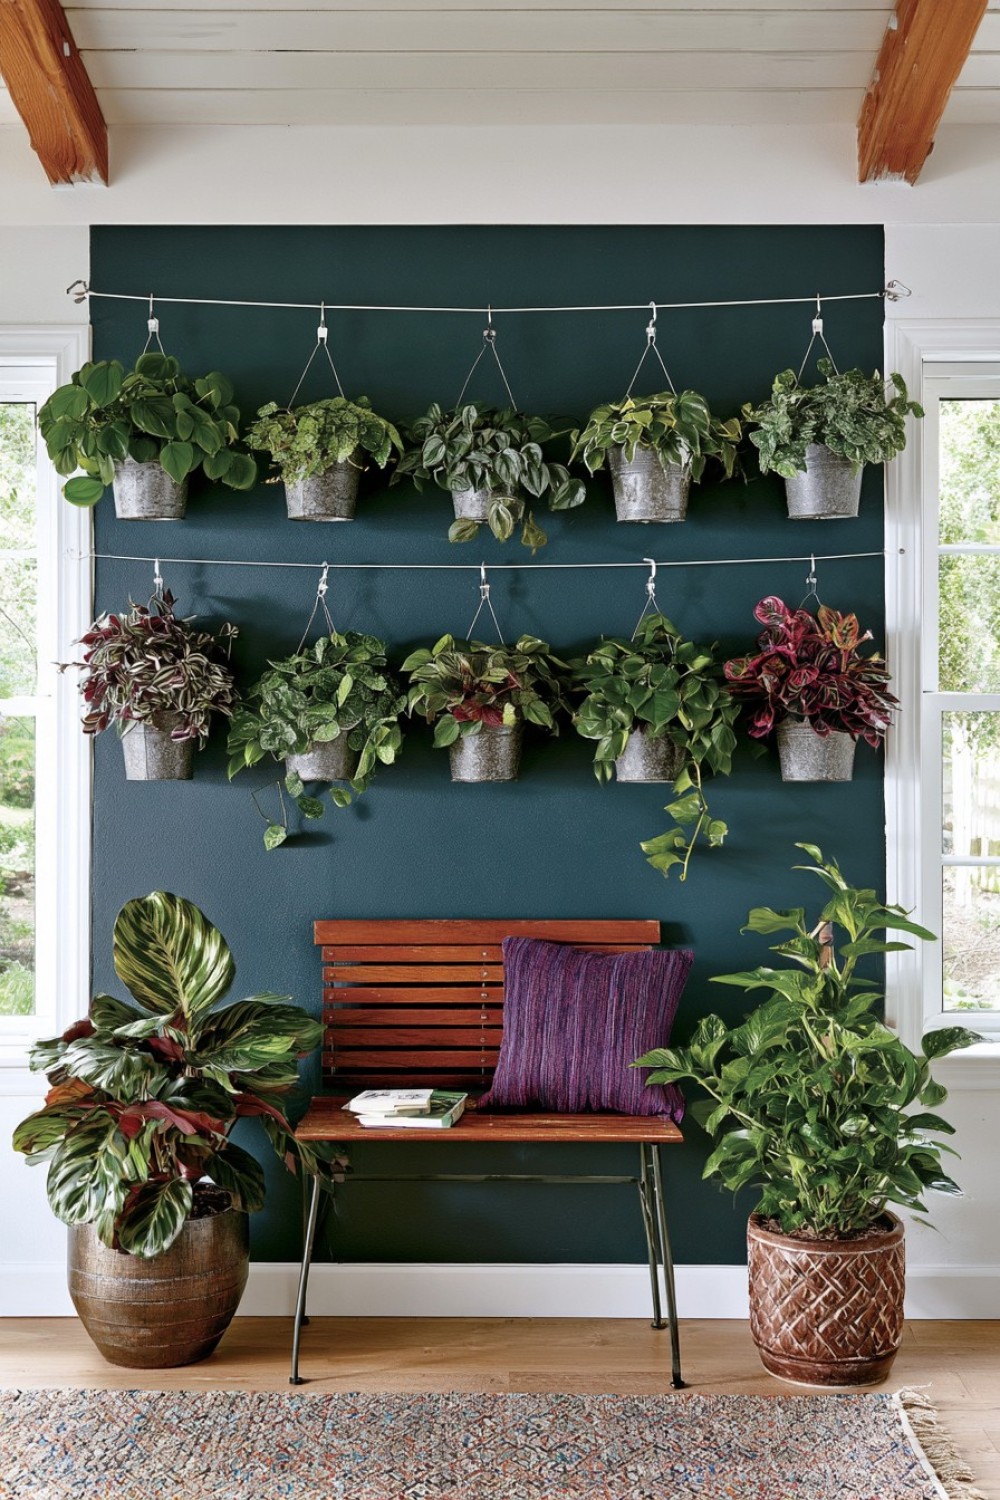
Instead of placing hooks in the ceiling, span a strong cable between two structural walls.
Multiple small planters can hang from the cable using adjustable clips or hooks.
This works especially well across a bright window wall, reading corner, or studio area.
Keep the cable visually minimal so the plants appear to float in a horizontal line.
Do not overload the system. Tensioned cables create significant force at their anchor points, so both ends need proper structural attachment.
This approach is best for lightweight planters and smaller plants rather than large mature specimens.
The advantage is adaptability: pots can be moved along the cable as their spacing needs change.
10. Build a Hanging Planter From Slatted Timber
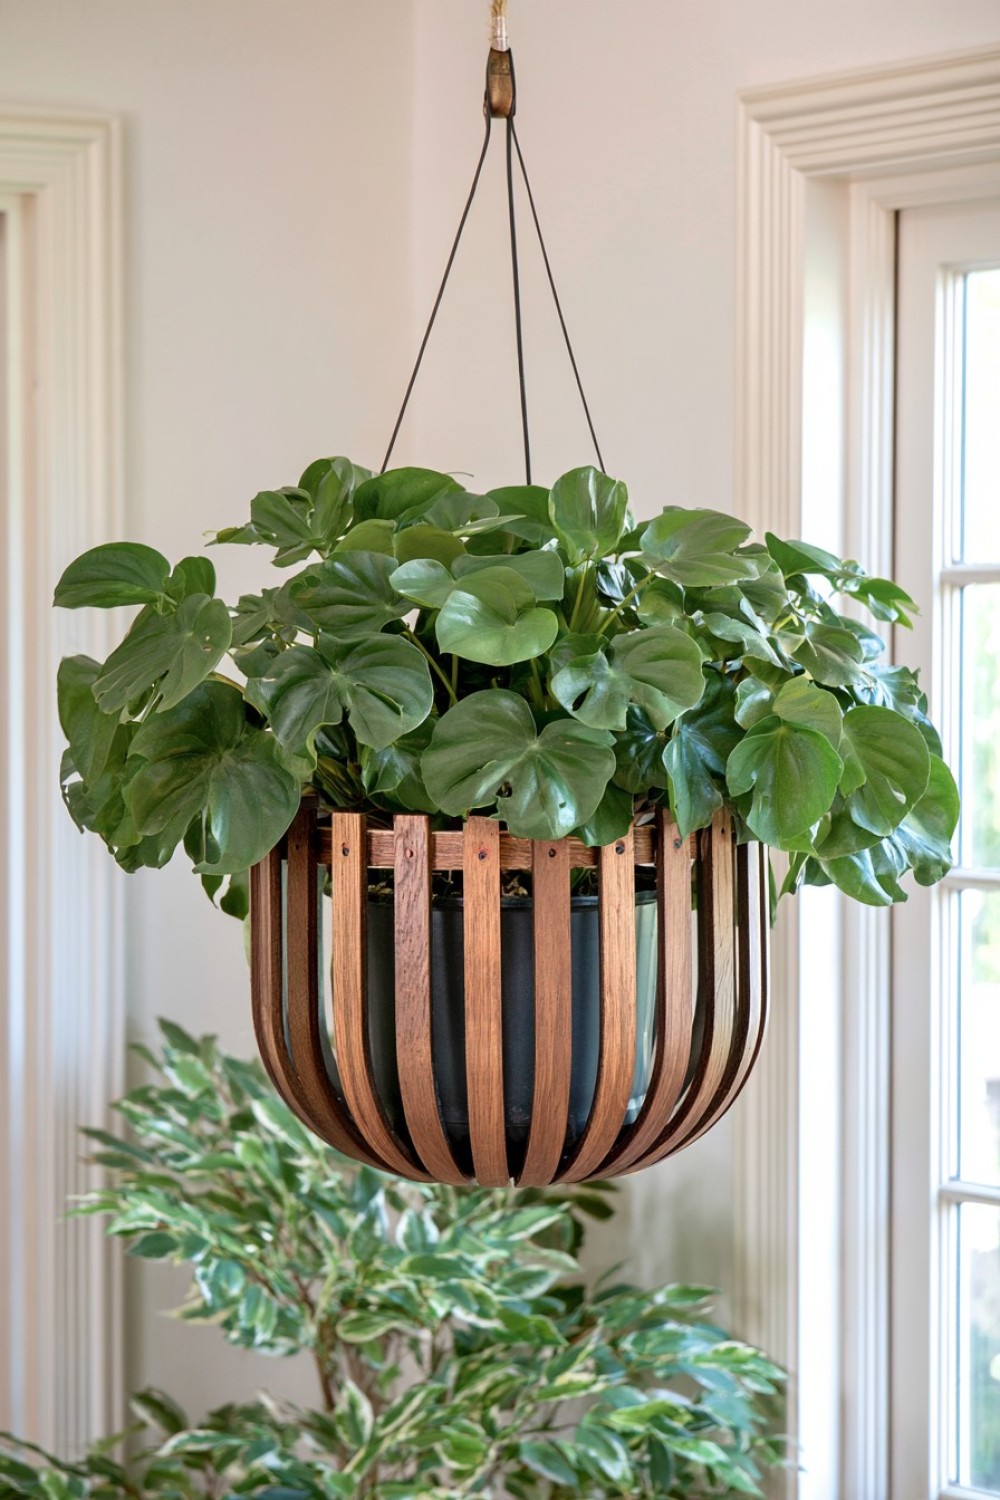
Instead of suspending a standard pot, create a wooden outer shell from vertical slats.
You will need thin timber strips, two circular support rings, strong cord, and a removable waterproof pot inside.
Arrange the slats evenly around the rings to create an open cylindrical cage. The gaps allow glimpses of the inner planter while making the overall piece feel handcrafted.
Oak gives the design a warm modern look, while painted black timber creates a more graphic effect.
The inner pot should remain removable so watering and drainage are easy.
This DIY project works particularly well for plants with simple foliage because the timber structure already adds plenty of visual interest.
11. Create a Hanging Plant Divider
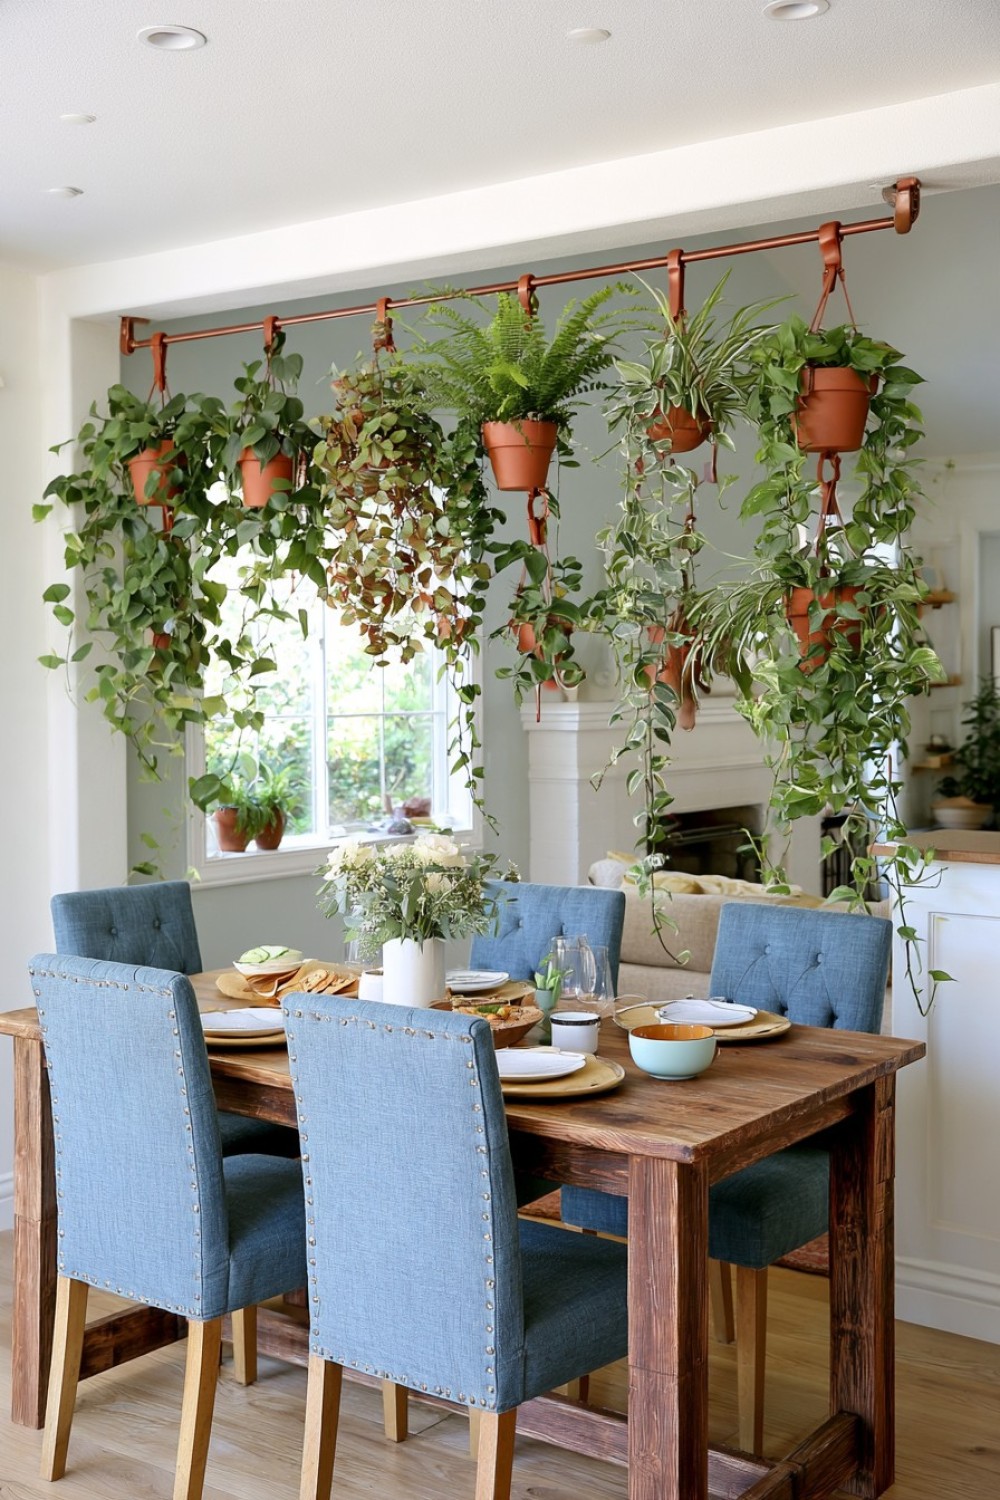
Instead of using a bookcase or screen to divide a room, suspend several planters in a vertical line between two zones.
Use a ceiling rail or strong beam and hang plants at different heights so foliage forms a loose green curtain.
Choose plants with varied textures rather than one repeated species.
For example, combine a trailing philodendron, fern, hoya, and spider plant.
Leave enough open space between pots so the divider feels airy rather than dense.
This works especially well between a dining area and living room, or between an entry and open-plan interior.
Keep the lowest planters above head and shoulder height if they sit directly in a circulation route.
12. Suspend Glass Propagation Vessels as a Living Installation
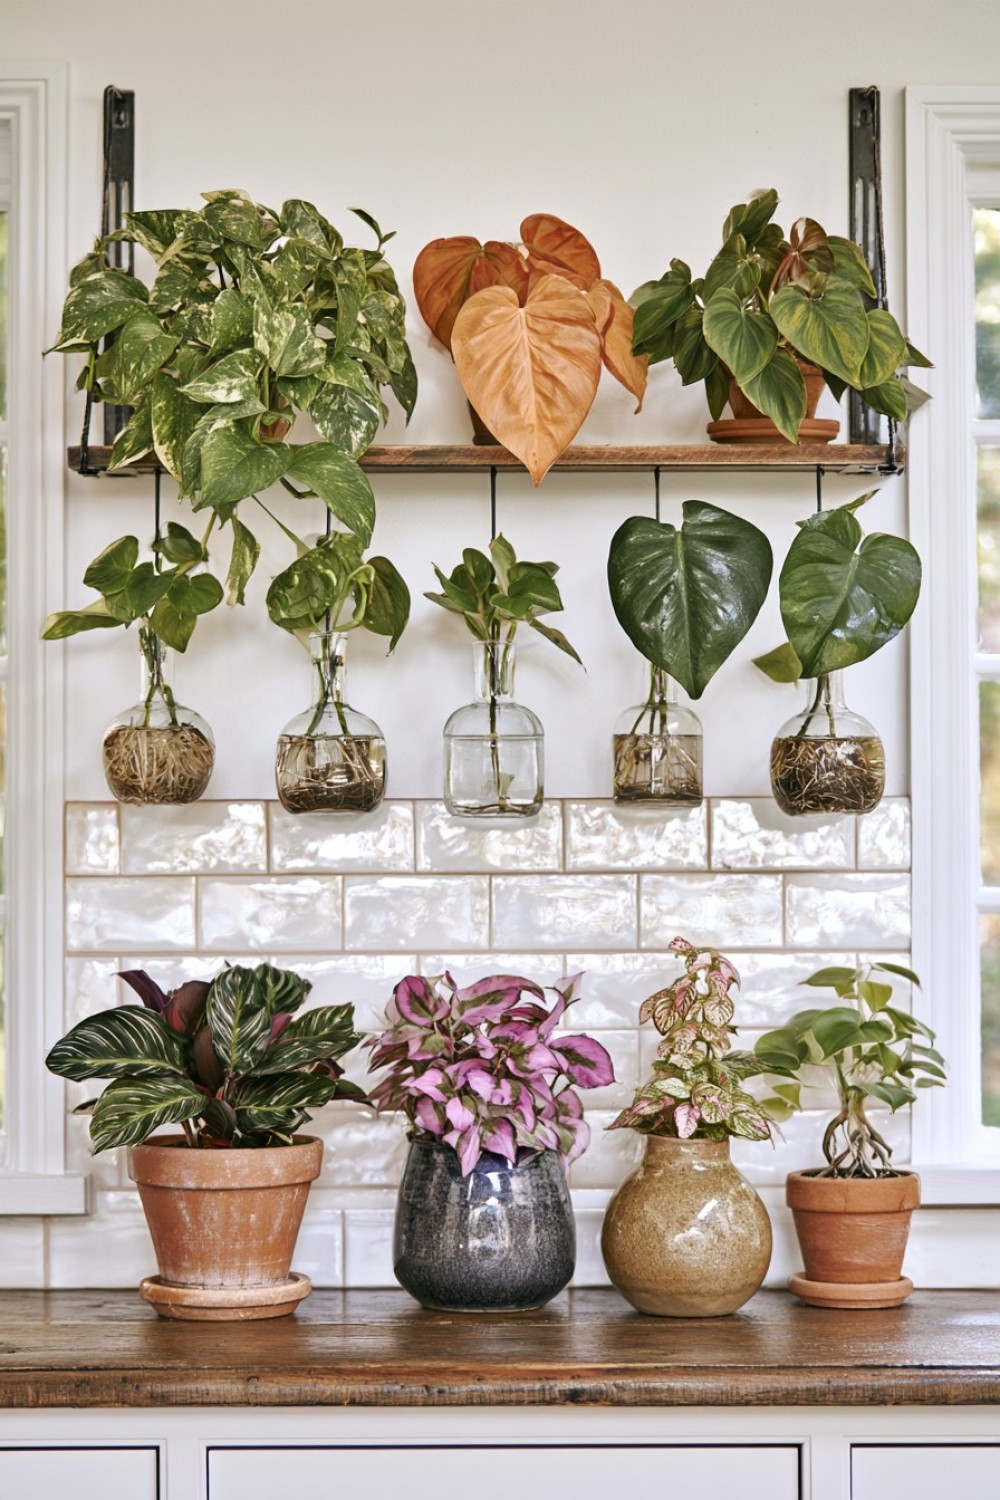
A hanging planter does not always need soil.
Create a suspended propagation display using several lightweight glass or acrylic vessels filled with water and plant cuttings.
Mount the vessels from a wooden bar, metal frame, or individual ceiling points.
Pothos, philodendron, monstera cuttings, and many common houseplants can be rooted in water, provided their care needs suit propagation.
Keep each container easy to remove so the water can be refreshed and glass cleaned.
A row of clear vessels near a bright wall creates beautiful reflections and allows roots to become part of the display.
Avoid placing glass where accidental impact is likely, and do not suspend heavy vessels from weak decorative hooks.
13. Hang a Planter Inside a Fabric Sling
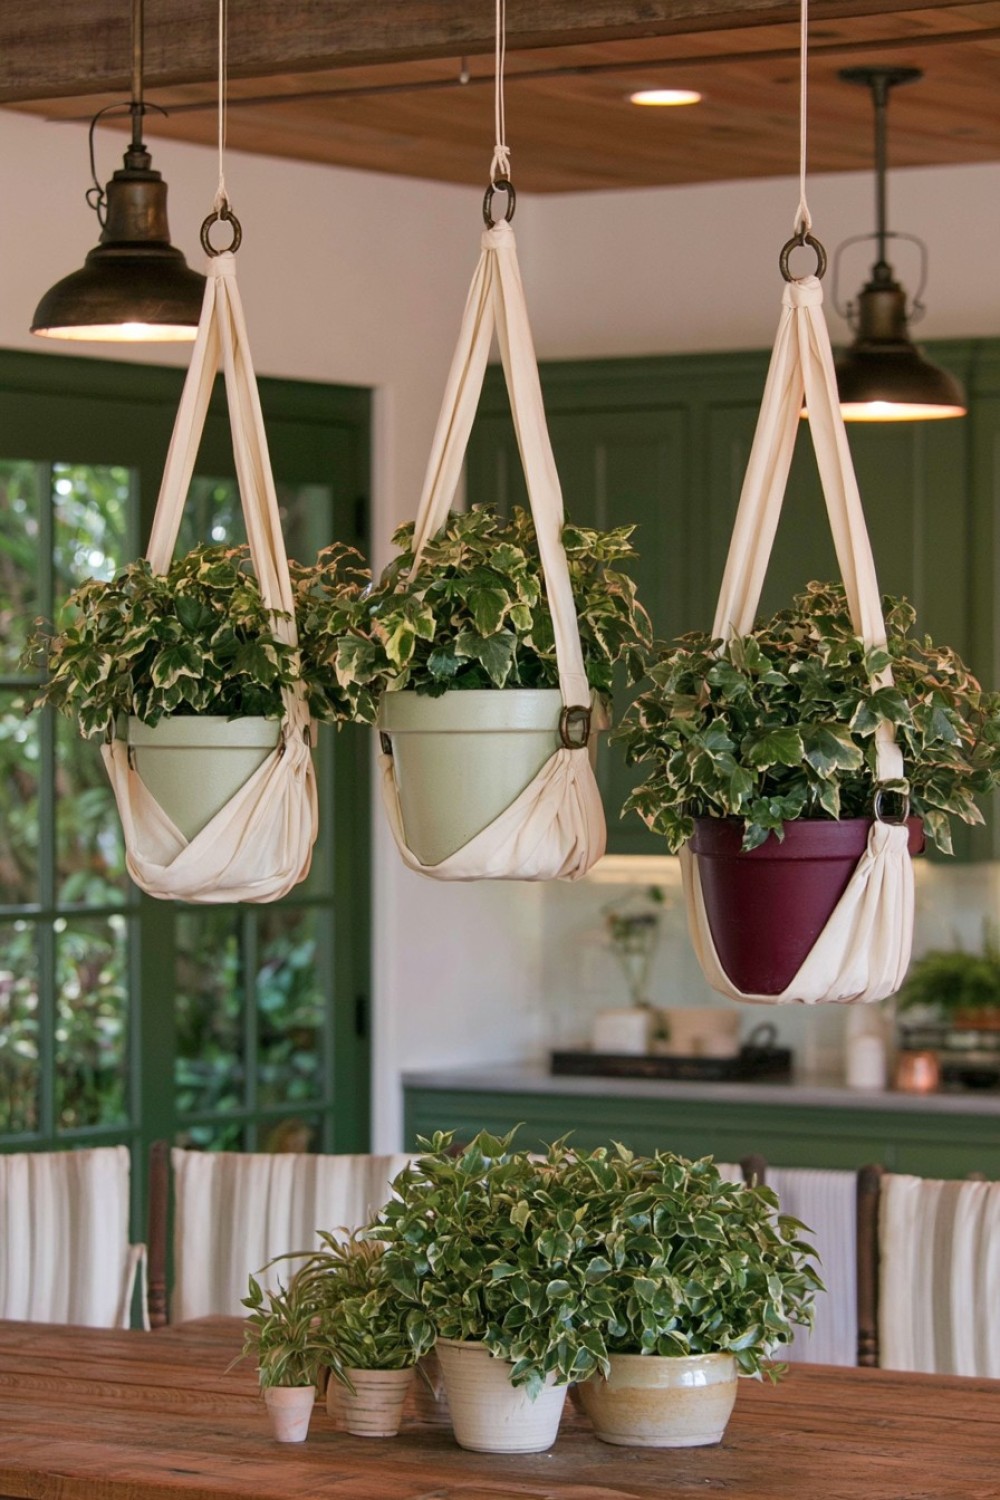
Instead of macramé knots, use a wide fabric sling that wraps around the pot like a soft cradle.
You will need strong canvas, heavy linen, or upholstery fabric, reinforced stitching, metal rings, and suitable hanging cord.
Cut the fabric into a wide cross or pouch shape and reinforce all stress points before placing the planter inside.
This creates a cleaner and more tailored look than traditional knotted hangers.
Striped linen can suit coastal interiors, canvas works well in utility spaces, and dark fabric can make pale ceramics stand out.
The planter should have a secure base and should not be so narrow that it can slip out of the sling.
This project is most appropriate for lightweight pots rather than heavy terracotta.
14. Build a Suspended Terracotta Tile Platform
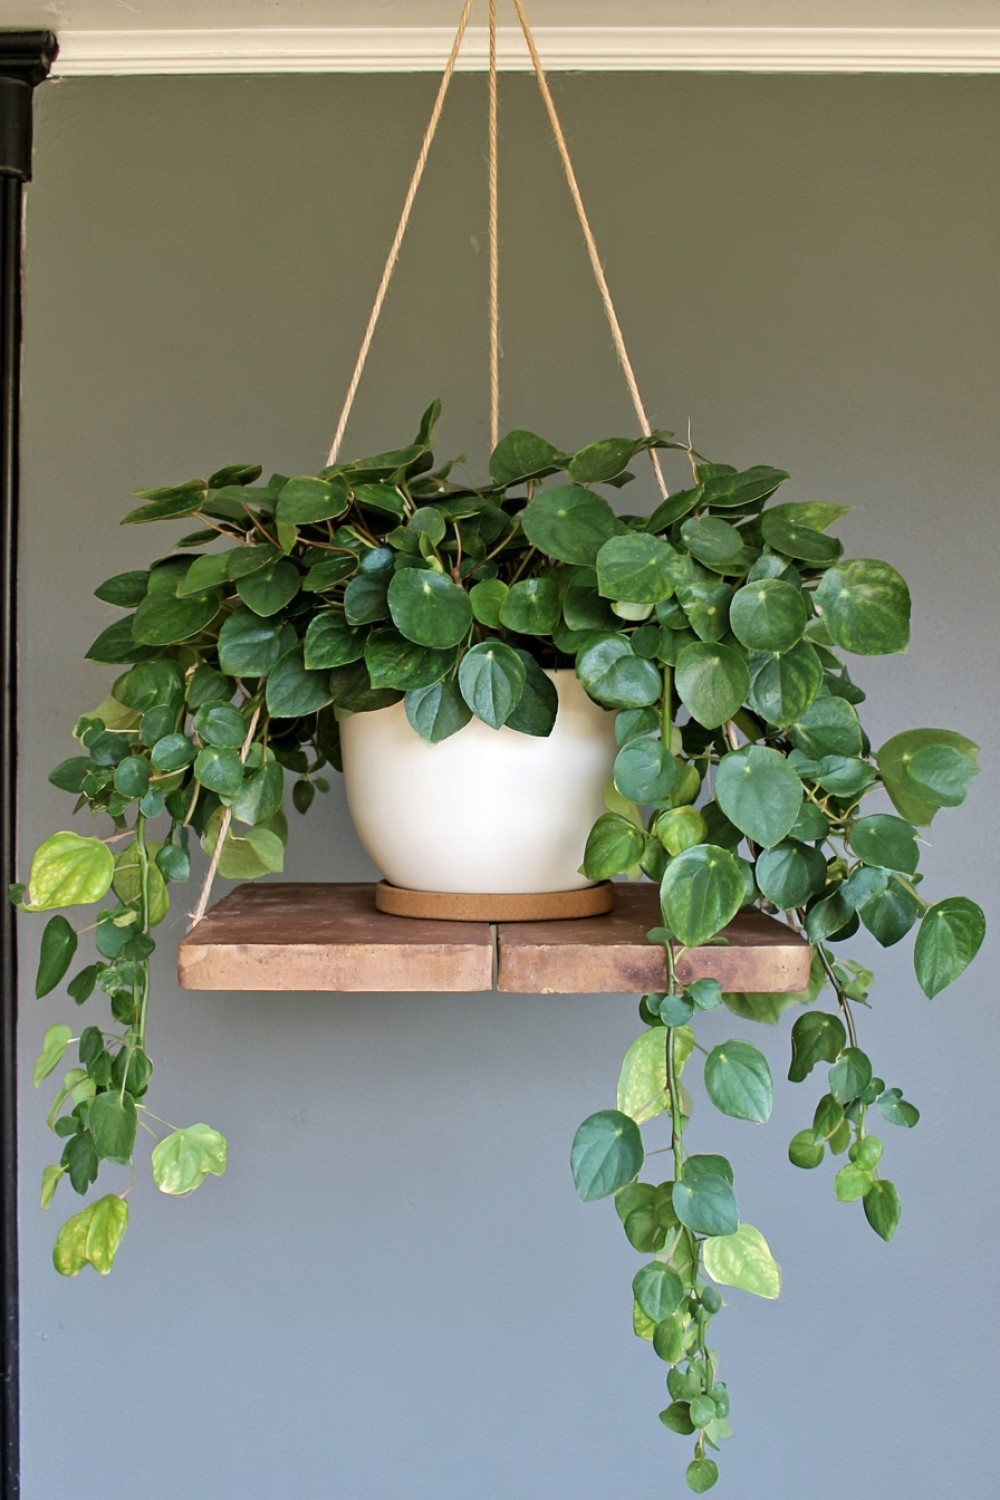
Instead of hanging the pot itself, suspend a small platform made from terracotta tile.
Use one sturdy tile or paver, drill only if the material is suitable, and suspend it from three or four balanced cables attached to a support frame.
A simpler DIY method is to build a metal or wood cradle beneath the tile rather than drilling it directly.
Place a small planter on top and use a non-slip pad beneath it.
The terracotta adds warmth and texture, especially in Mediterranean or earthy interiors.
This concept works well because the plant container can change while the hanging platform remains permanent.
Make sure the tile weight is included when calculating the load on the suspension system.
15. Create a Corner Cascade From Three Different Heights
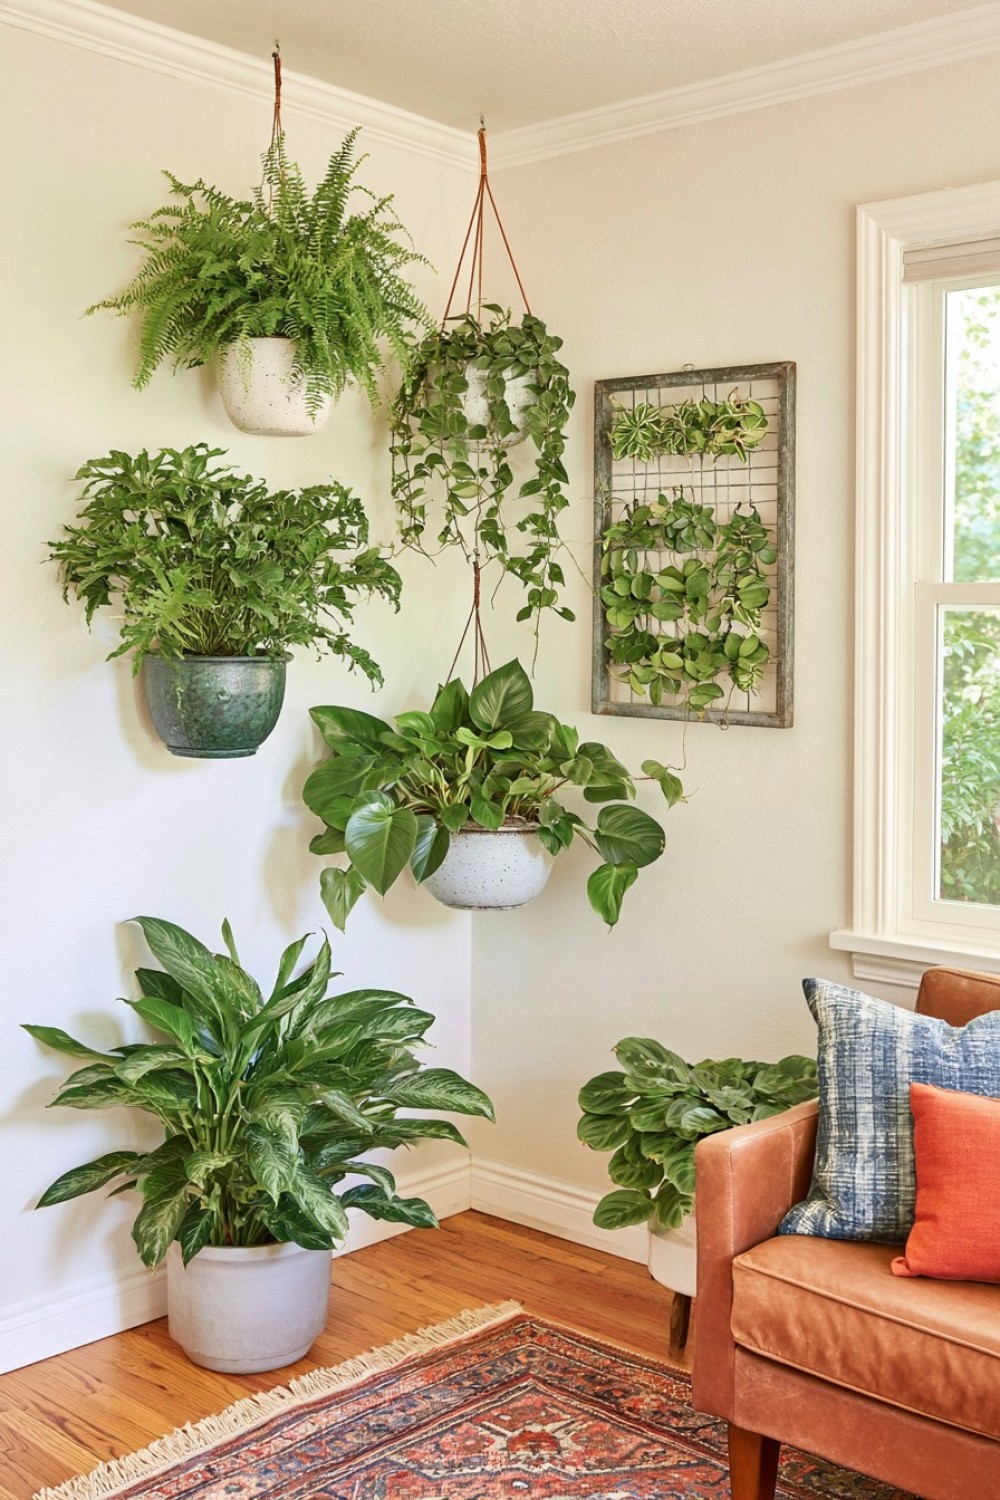
An empty corner can become much more interesting with a vertical composition of three planters.
Instead of hanging them directly above one another, offset each planter slightly so the leaves overlap without competing for the same space.
Place the tallest suspension near the corner, the middle one slightly outward, and the lowest planter farther into the room.
This creates a spiral-like movement when viewed from below.
Choose plants with different leaf shapes and growth habits so the arrangement feels layered.
For example, use a fern, a trailing philodendron, and a compact hoya.
The staggered structure looks much more intentional than three identical hanging pots lined up side by side.
16. Make a Removable Hanging Planter Cassette
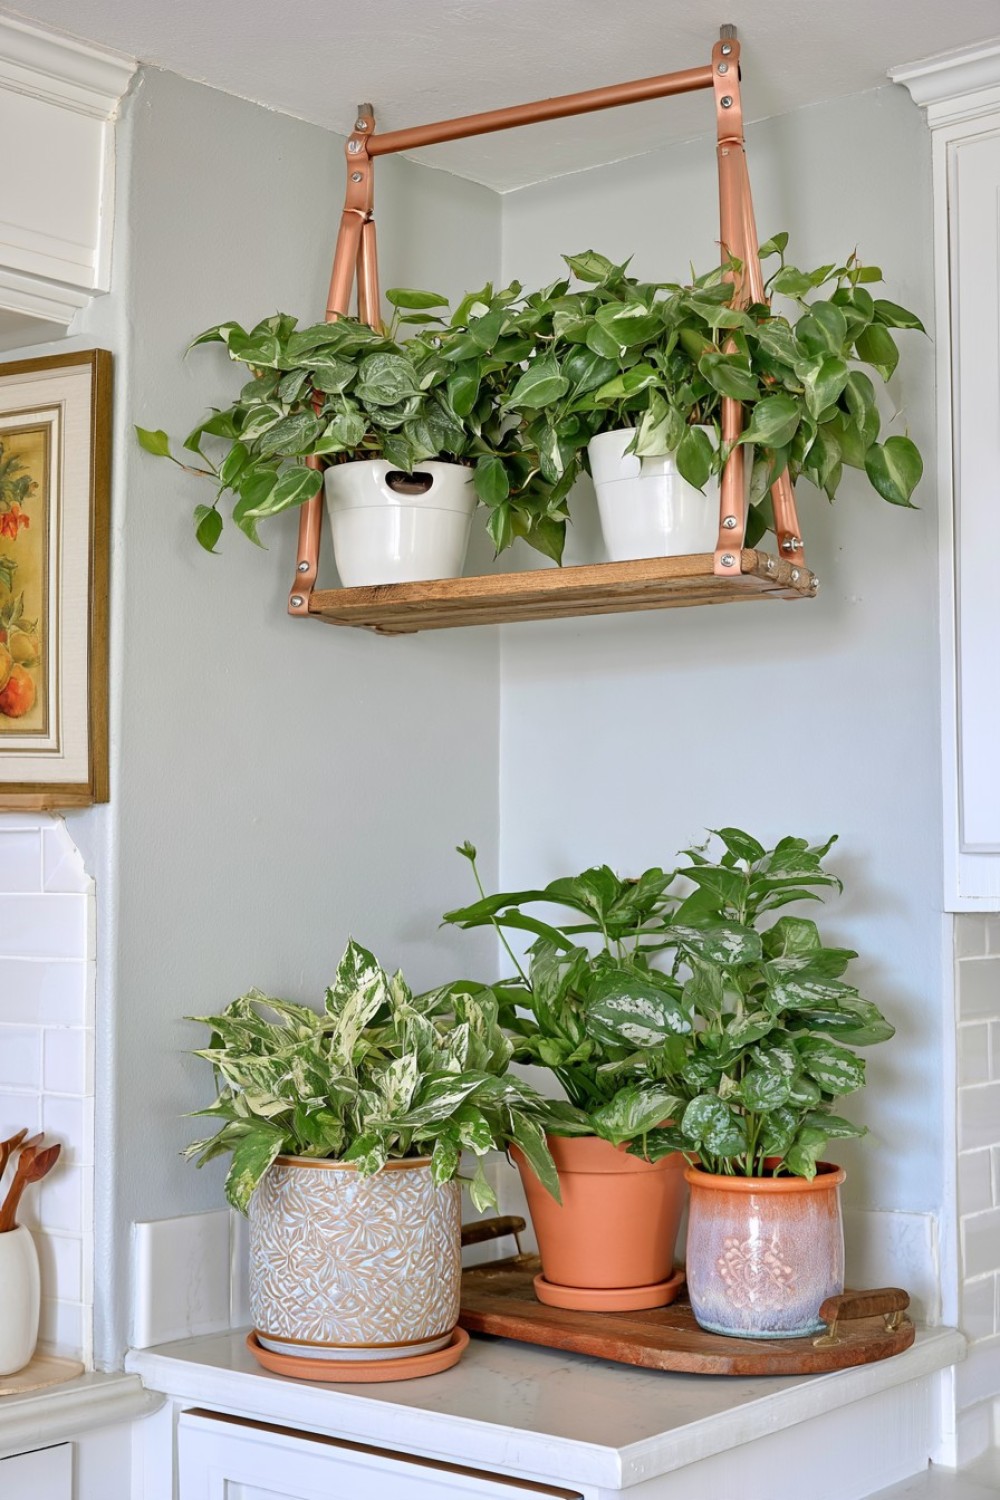
Create a hanging frame that allows the pot itself to slide out for watering.
Build a small wooden or metal cradle with two side rails and a removable planter insert.
The hanging structure remains attached to the ceiling while the inner pot slides forward or lifts out independently.
This is particularly useful for high installations where taking down the entire hanging system would be inconvenient.
Use a lightweight cachepot with no permanent drainage opening or place a removable saucer inside.
The cassette can also include a discreet finger notch so the planter is easy to pull free.
This is a good example of combining design with maintenance: the planter looks integrated but remains practical to care for.
17. Turn One Oversized Hanging Plant Into a Living Ceiling Feature
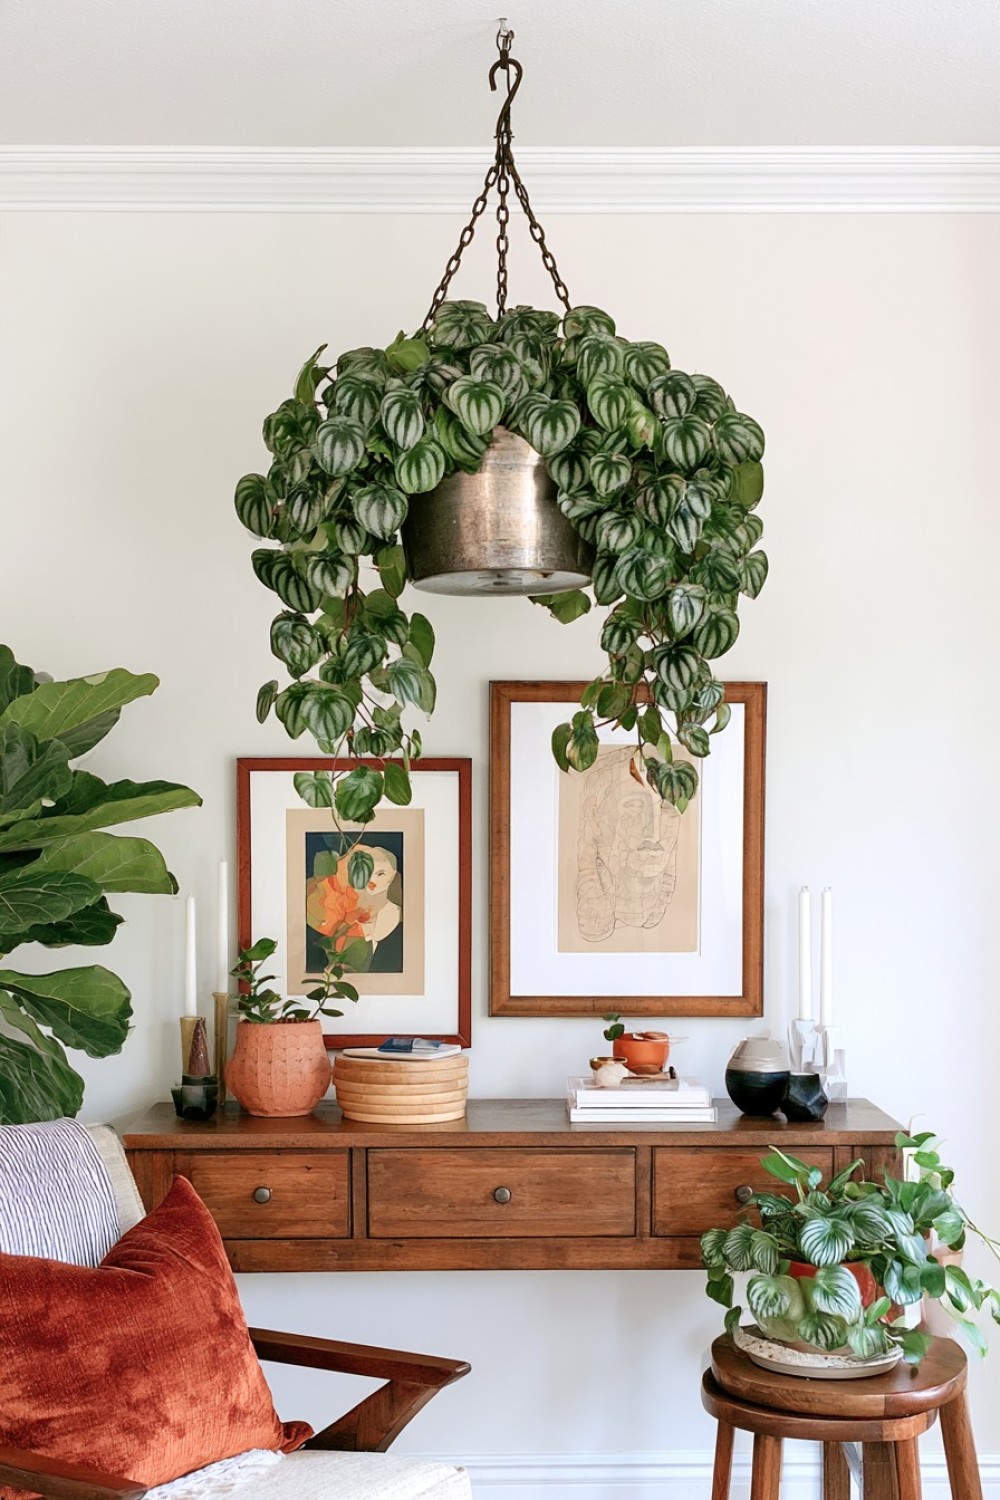
Instead of creating a cluster of small pots, use one substantial hanging planter as the room’s botanical focal point.
Choose a wide but lightweight container and a plant with dramatic cascading growth.
Place it above a low console, reading chair, or side table where the hanging foliage has visual space without interfering with circulation.
A broad fern, large pothos, rhipsalis, or mature trailing philodendron can create enough volume to replace several smaller plants.
The mount should be visually simple because the plant itself provides the drama.
This approach works best when the surrounding wall and ceiling remain relatively uncluttered.
For a mature specimen, always calculate the full wet weight of the planter and use structural ceiling hardware suited to that load.
Making Hanging Planters Feel Intentional
The best hanging planter arrangements balance three things: plant health, visual composition, and maintenance. A beautiful installation becomes frustrating if every watering session requires a ladder or if plants are suspended where they receive insufficient light.
Start with the room rather than the planter. Look for empty vertical zones, corners, window edges, and architectural transitions where foliage can add softness without obstructing movement. Then choose plants that suit the available light and humidity.
Weight also matters. Soil, ceramic, and water can make a planter far heavier than it appears when dry. Ceiling-mounted installations should connect to appropriate structural support, and removable inner pots make watering safer and easier.
Creatively, the biggest opportunity is often the support itself. Timber rings, rails, slings, cables, frames, and modular platforms can make a hanging plant feel like part of the architecture instead of an accessory suspended as an afterthought.
MORE IDEAS


Share
What's Your Reaction?
 Like
0
Like
0
 Dislike
0
Dislike
0
 Love
0
Love
0
 Funny
0
Funny
0
 Angry
0
Angry
0
 Sad
0
Sad
0
 Wow
0
Wow
0