17 Resin Coaster Projects to Add Color and Character to Your Home

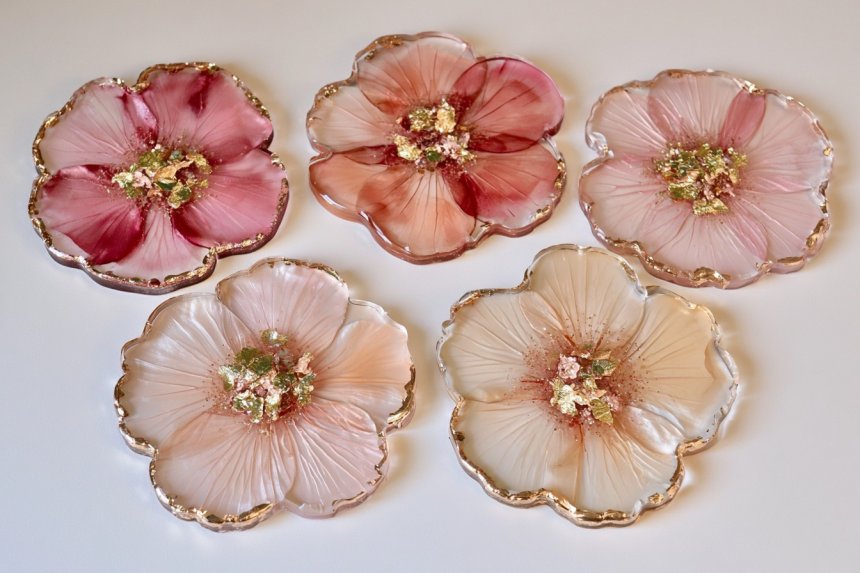
Resin coasters are a creative way to combine practical tabletop protection with handmade decorative detail. Epoxy resin can capture dried flowers, pigments, metallic flakes, shells, photographs, natural textures, and countless other materials, making every coaster set feel unique. Before starting, use a level work surface, accurate resin measurements, clean silicone molds, and enough curing time to achieve smooth results. Color choices and embedded elements can be matched to modern, coastal, botanical, minimalist, or seasonal interiors. The following resin coaster ideas explore different techniques, decorative finishes, and customizable approaches that can help you create distinctive pieces for coffee tables, dining spaces, desks, or handmade gifts.
1. Pressed Flower Resin Coasters
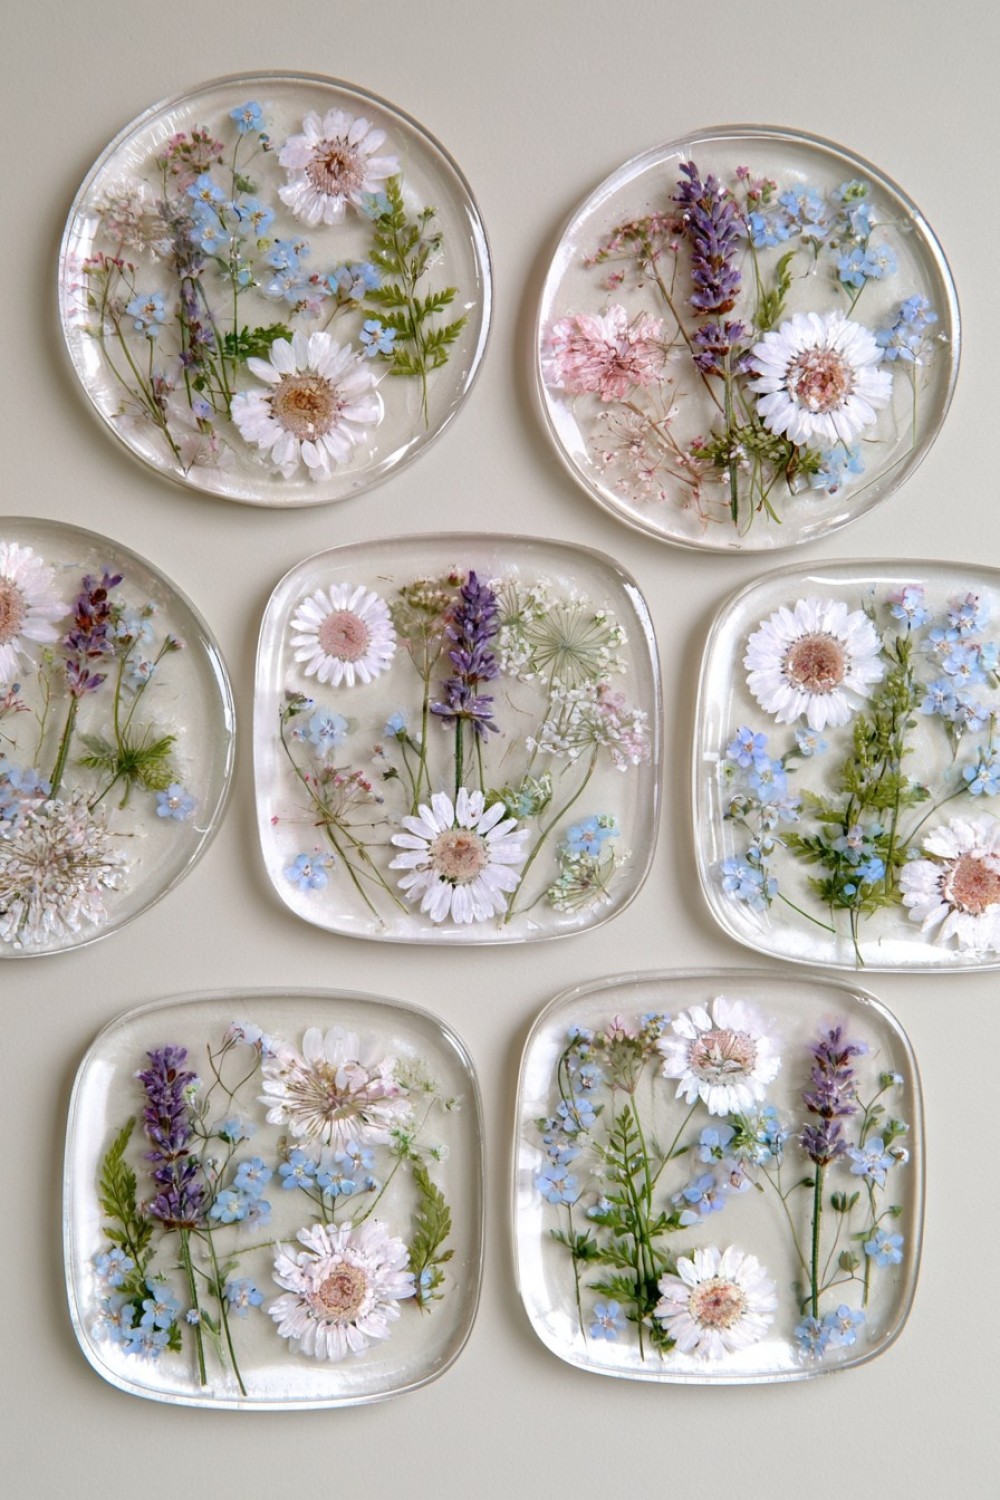
Pressed flowers create delicate resin coasters that work beautifully in botanical and romantic interiors. Begin by drying small flowers completely so moisture does not become trapped inside the resin. Pour a thin base layer into a silicone coaster mold and allow it to thicken slightly. Arrange petals or flattened blossoms using tweezers, then slowly add the remaining resin. Keep each flower separated enough to preserve a clean composition. White daisies, lavender, forget me nots, and tiny fern leaves are especially effective. Once cured, sand any sharp edges if necessary. These coasters can decorate coffee tables, bedside tables, dressing areas, or spring themed dining settings.
2. Gold Leaf Resin Coasters
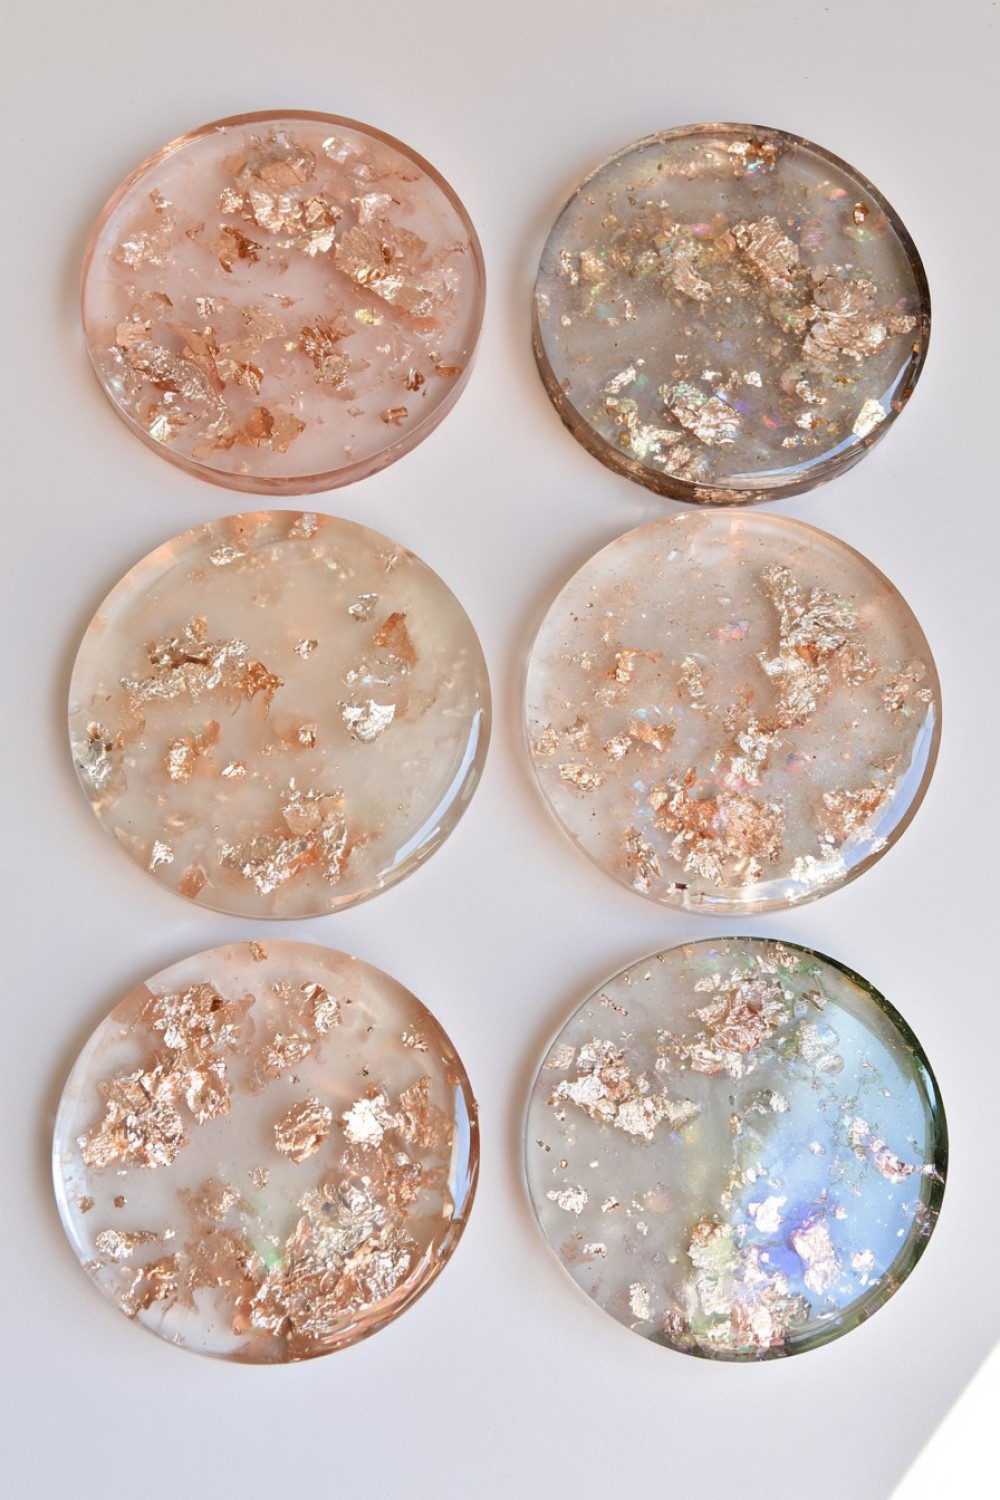
Gold leaf can transform a simple resin coaster into a refined decorative accent without requiring complicated techniques. Mix clear epoxy resin according to the manufacturer’s ratio, then pour a shallow layer into the mold. Tear metallic leaf into irregular pieces and scatter them lightly across the surface. Avoid using too much because small fragments often create a more elegant effect. Add another layer of resin to encapsulate the metallic details completely. You can keep the background transparent or tint it with smoky gray, blush, ivory, or deep green pigment. These coasters suit modern living rooms, sophisticated dining areas, vanity tables, and handmade gift sets.
3. Ocean Inspired Resin Coasters
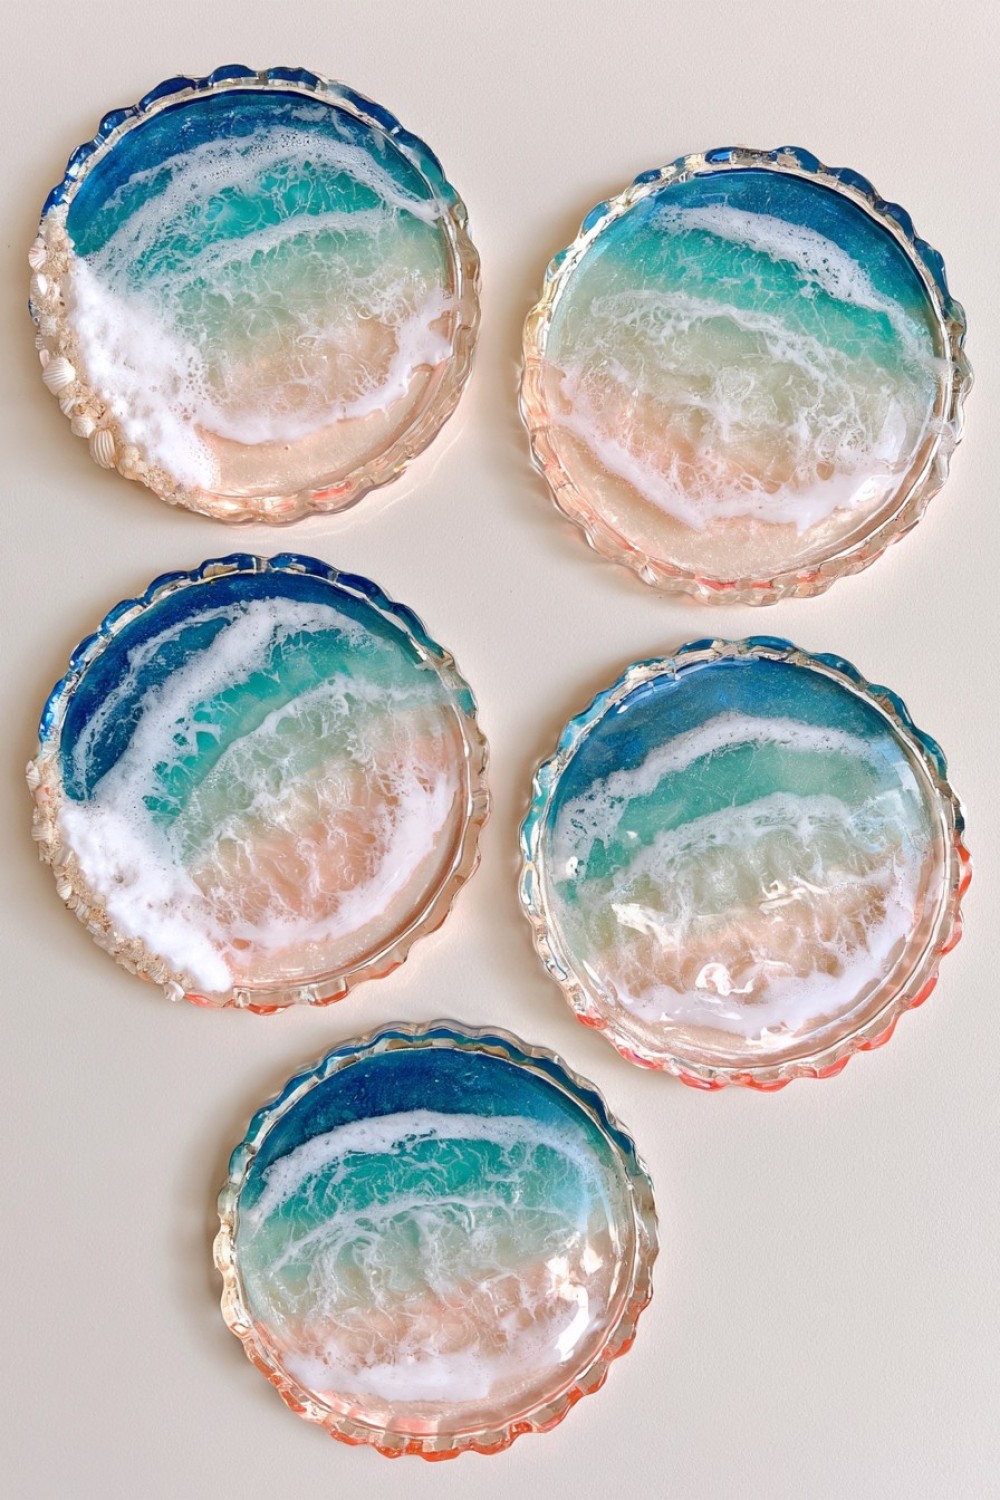
Create a coastal effect by blending translucent blue, turquoise, white, and clear resin in layered sections. Start with several small resin portions and tint each one separately. Pour darker blue near one edge, transition toward turquoise, then finish with clear resin. Add a thin line of white resin and gently move it with a craft stick or low heat to create a soft wave effect. Fine sand or tiny shell fragments can be embedded near one side for extra texture. Keep the design balanced rather than overcrowded. These coasters look especially attractive in beach houses, summer dining areas, bathrooms, or coastal style living rooms.
4. Terrazzo Style Resin Coasters
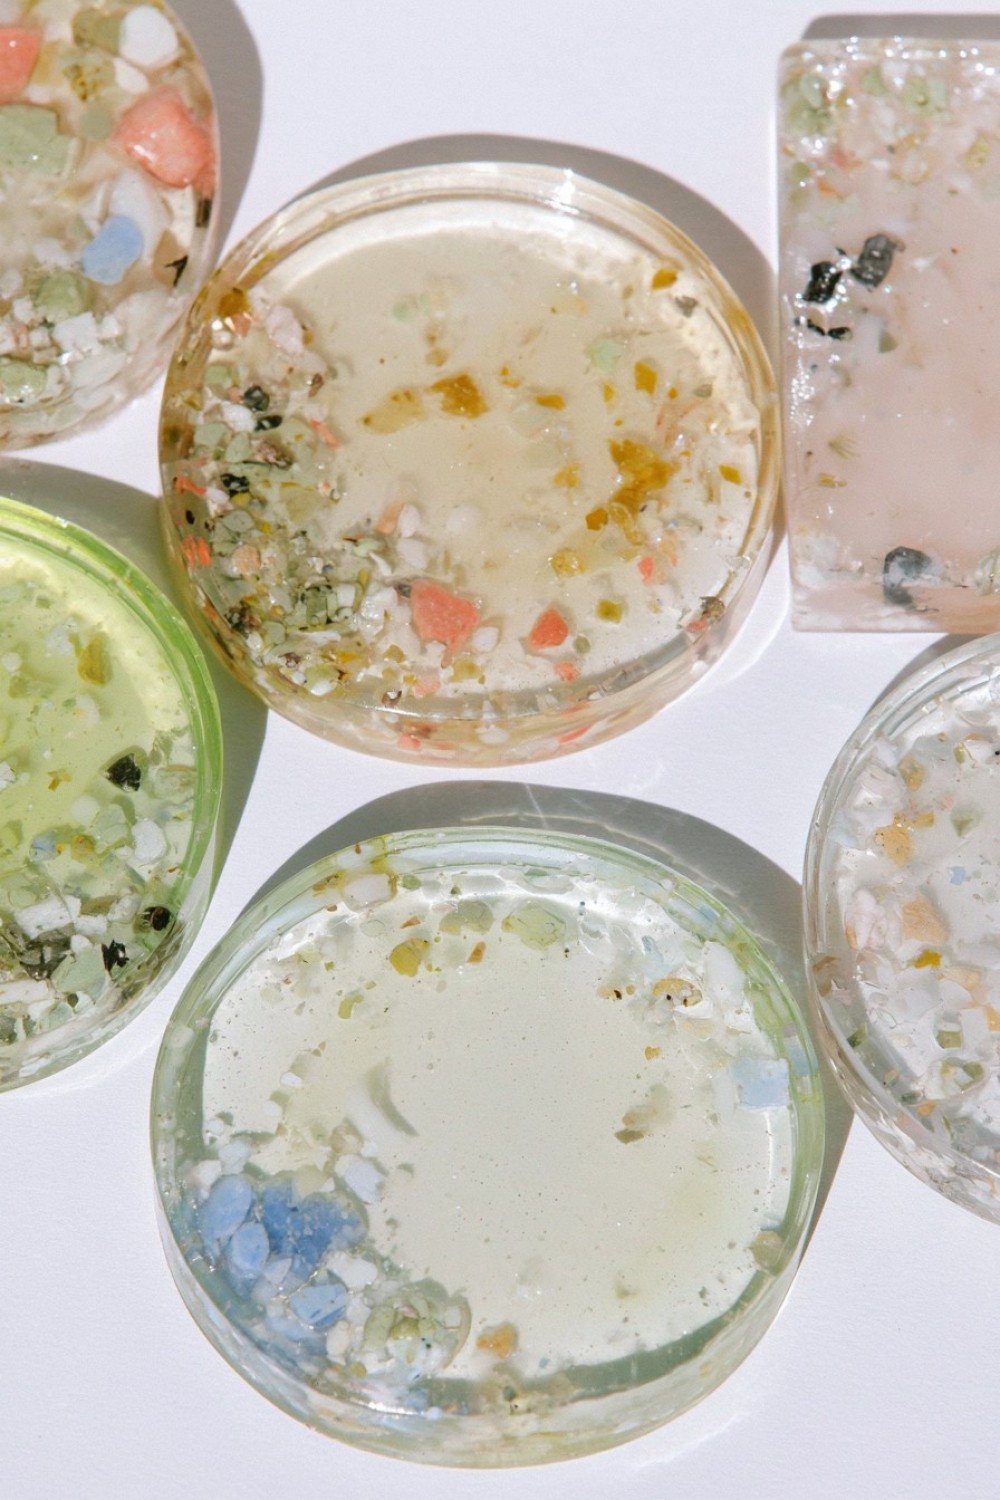
Terrazzo inspired coasters are ideal for colorful contemporary interiors. Begin by creating thin cured resin sheets in several colors, then break them into small irregular chips. Arrange those pieces inside a clean silicone mold before pouring a neutral base resin over them. Cream, pale gray, soft pink, or warm beige backgrounds help the colored fragments stand out. Distribute the chips evenly but avoid making the pattern too uniform. After curing, sanding the surface can reveal more of the terrazzo effect if needed. Seal the finished coaster with a thin clear resin layer. These pieces pair well with modern kitchens, desks, coffee tables, and creative workspaces.
5. Dried Citrus Resin Coasters
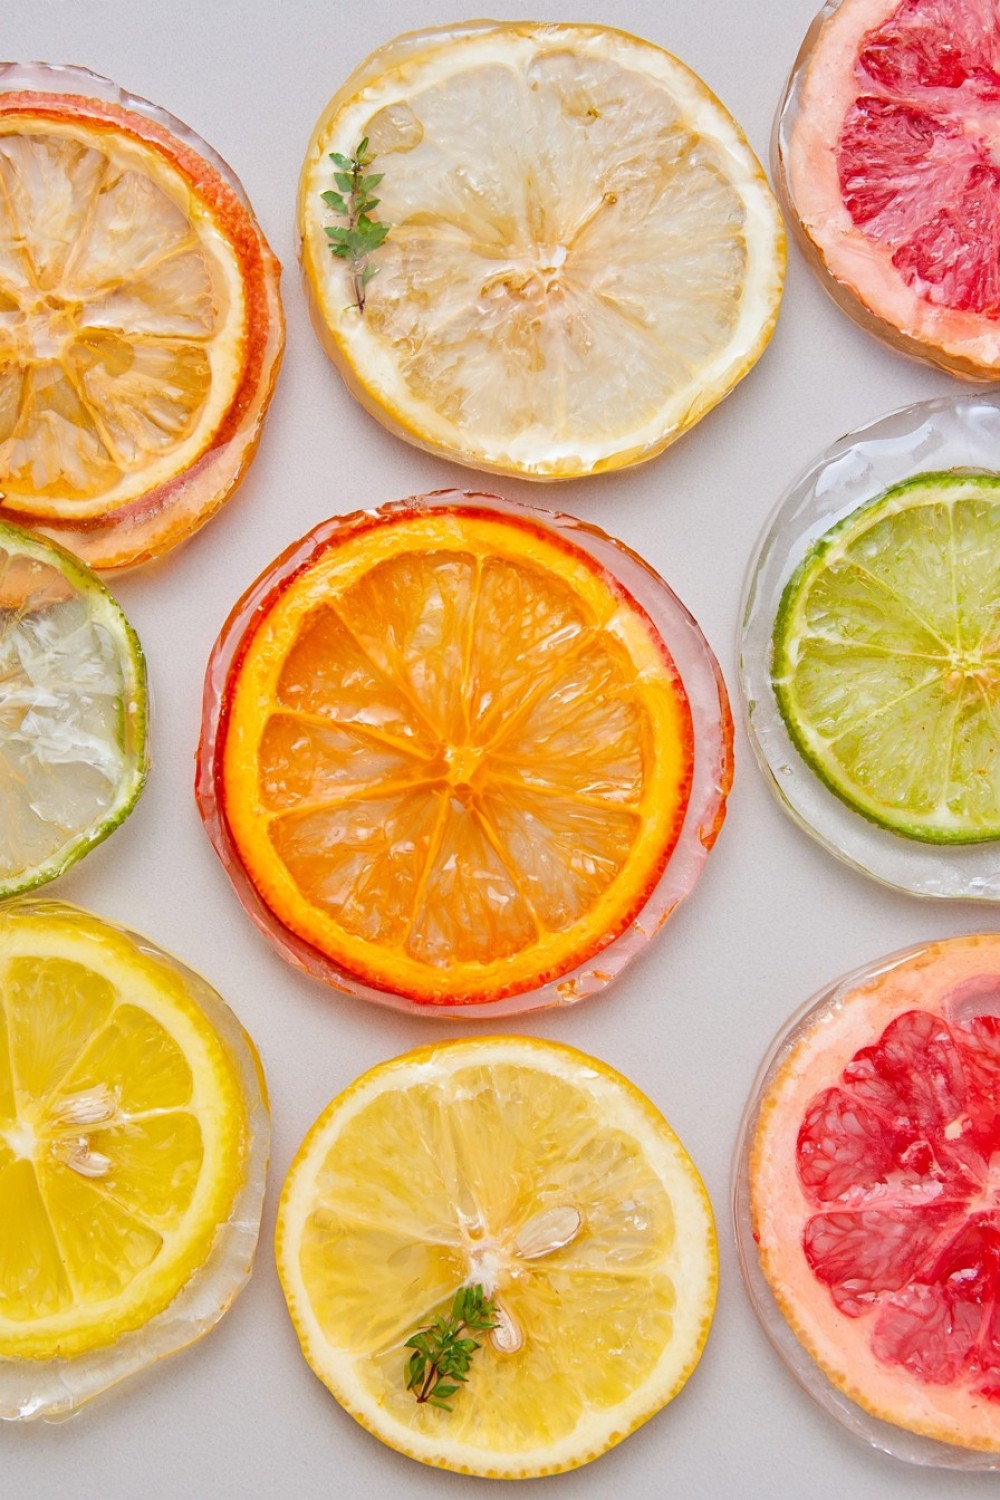
Thin slices of dried citrus can create vibrant resin coasters with a fresh natural appearance. Dehydrate orange, lemon, lime, or grapefruit slices until they are completely dry and firm. Place a thin layer of clear resin in the mold, position one or more slices, then slowly cover them with additional resin. Smaller citrus pieces can be combined with tiny leaves or herbs for more detail. Make sure all organic materials are dry to reduce the risk of cloudiness. Once cured, smooth rough edges with fine sandpaper. These coasters are perfect for kitchens, brunch tables, summer entertaining spaces, or colorful handmade hostess gifts.
6. Marble Effect Resin Coasters
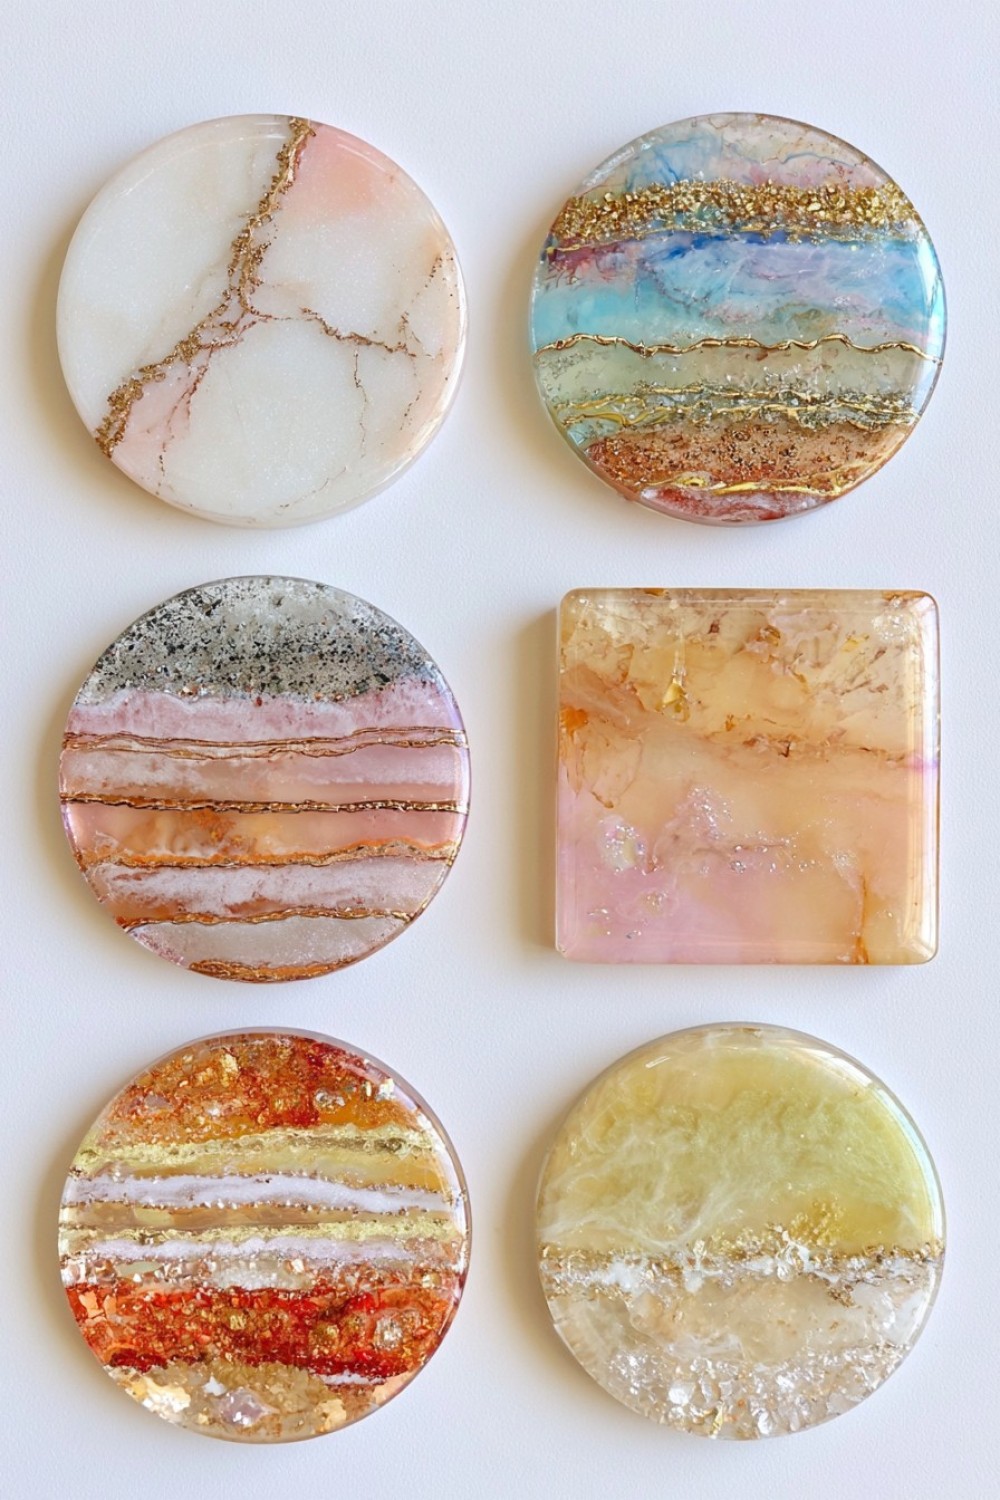
Marbled resin coasters can imitate natural stone while remaining lightweight and fully customizable. Divide mixed resin into several cups and tint them with white, gray, black, beige, or muted stone inspired pigments. Pour the colors into the mold in alternating ribbons, then lightly drag a toothpick or craft stick through the surface to create organic veining. Avoid excessive mixing because this can muddy the pattern. A small amount of metallic pigment can be added along selected veins for subtle contrast. Let the resin cure on a perfectly level surface. These coasters work particularly well in elegant, minimalist, or contemporary living and dining areas.
7. Botanical Leaf Resin Coasters
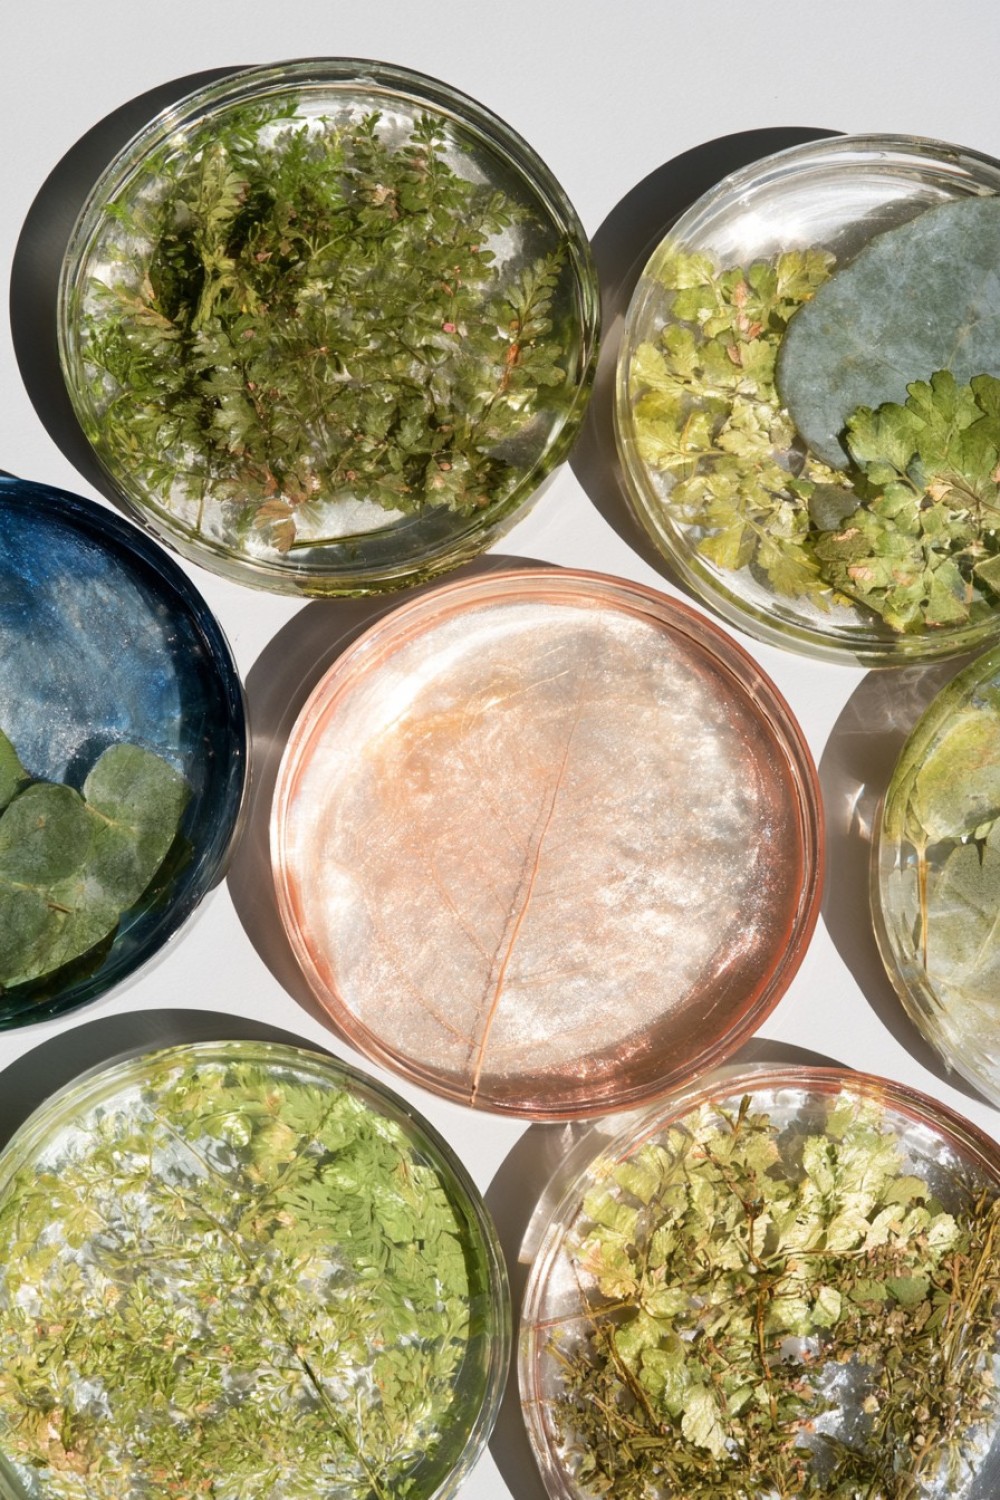
Small fern fronds, eucalyptus leaves, or pressed herbs can be preserved inside clear resin for a clean nature inspired design. Dry the leaves thoroughly before use and flatten them between heavy books if necessary. Pour a shallow resin layer, place the botanical element carefully, and remove any trapped air around its edges. Add the remaining resin slowly so the leaf stays in position. A transparent background keeps the design airy, while a lightly tinted base can add contrast. Use one large leaf or several smaller pieces depending on the mold size. These coasters complement organic modern interiors, garden rooms, desks, and natural tabletop arrangements.
8. Abstract Color Swirl Resin Coasters
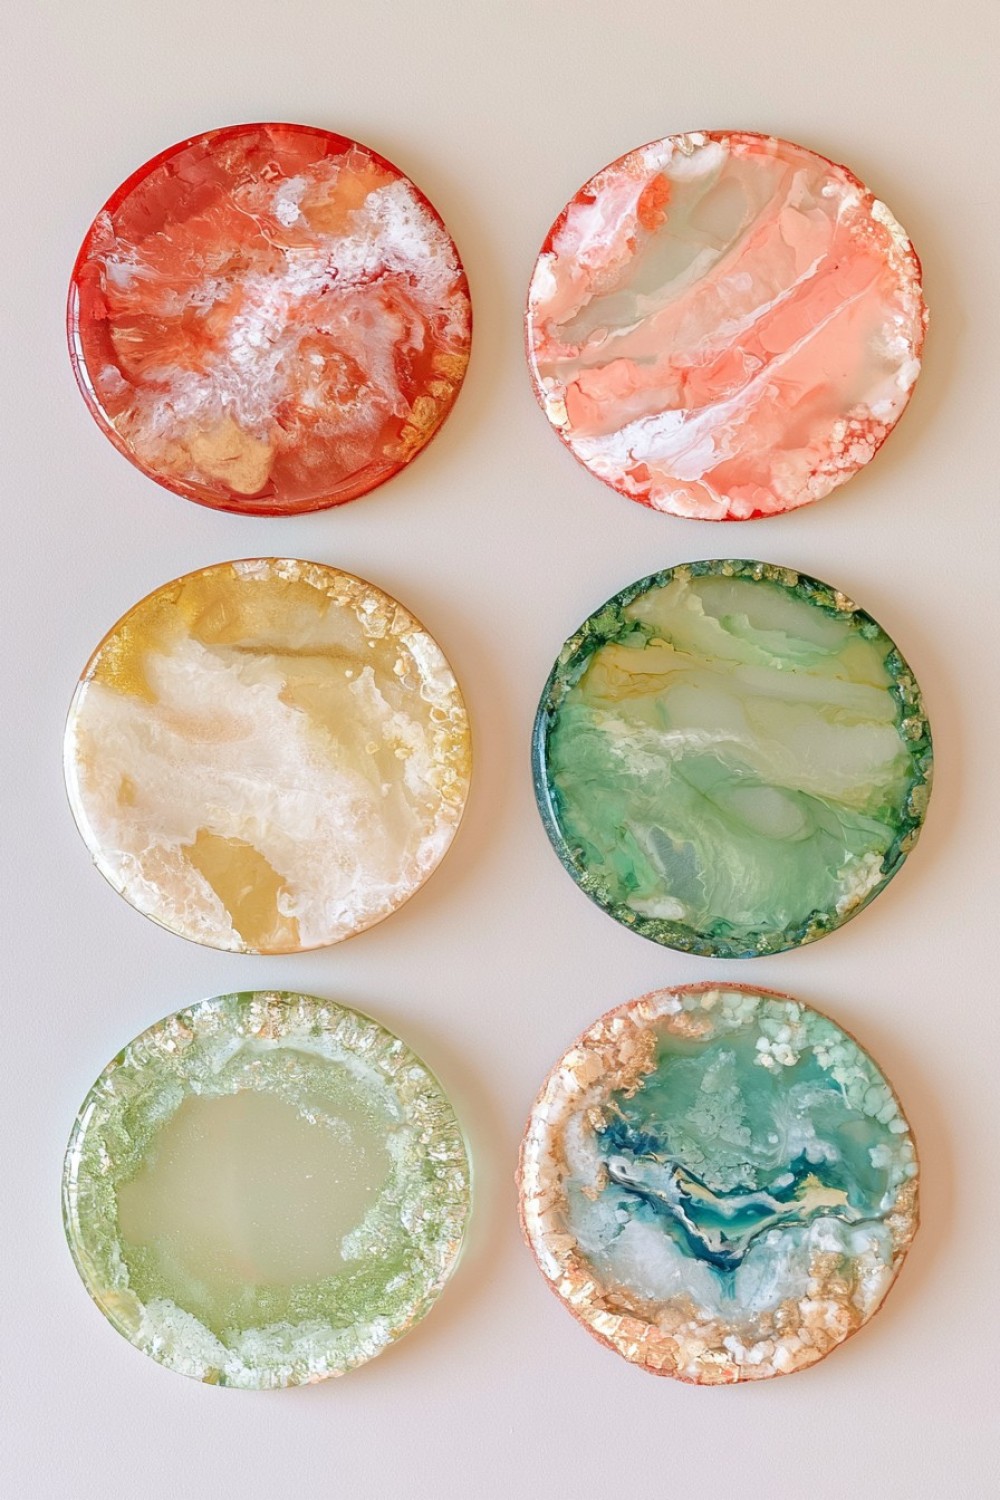
Abstract resin coasters offer freedom to experiment with color without following a fixed pattern. Prepare several small batches of tinted resin using complementary or contrasting pigments. Pour the colors into the mold from different directions, allowing them to meet naturally. Use a thin stick to gently pull sections together and create soft swirls, curves, and fluid lines. Limit the number of colors so the design remains visually clear. Adding a small transparent section can provide breathing space between stronger tones. Every coaster will develop slightly different movement, making the set feel intentionally handmade. These designs work well in eclectic homes, creative studios, and modern spaces.
9. Crushed Shell Resin Coasters
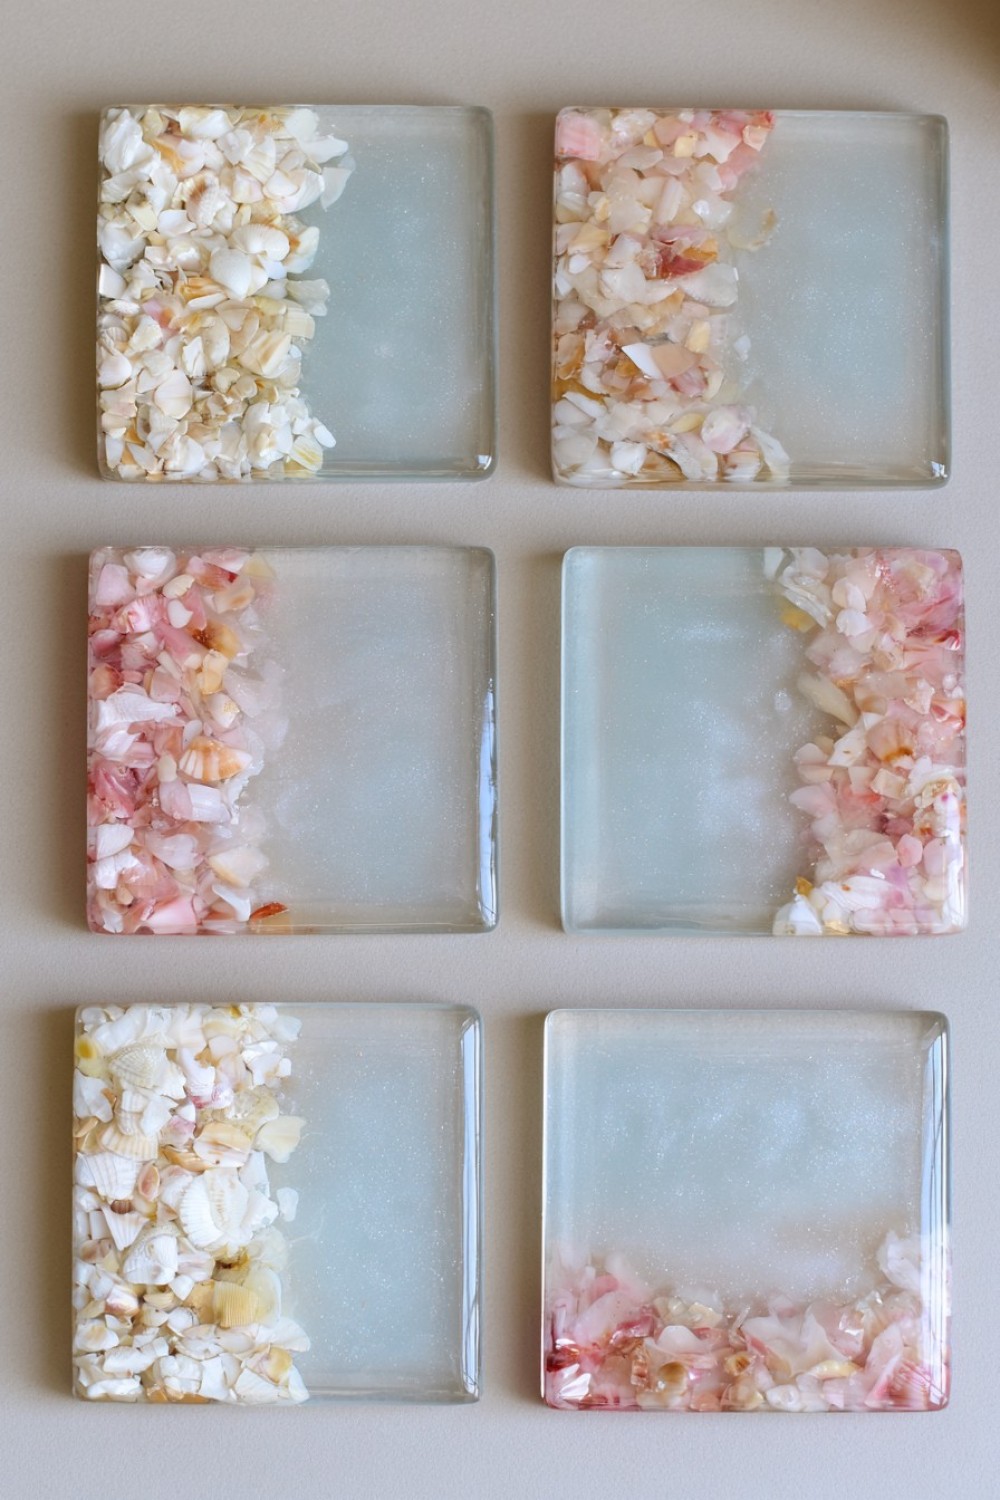
Crushed shells can add natural texture and subtle shimmer to resin coasters. Clean and dry the shell pieces carefully before embedding them. Use fine fragments rather than large sharp sections, especially near the edges of the mold. Pour a thin clear resin base, sprinkle the shell pieces into one area or around the border, then cover them completely with another layer. White, pearl, beige, and pale pink shells create a softer look, while darker fragments can introduce stronger contrast. Combine them with transparent resin for a light coastal appearance. These coasters are suitable for beach inspired rooms, patios, bathrooms, or summer entertaining areas.
10. Coffee Bean Resin Coasters
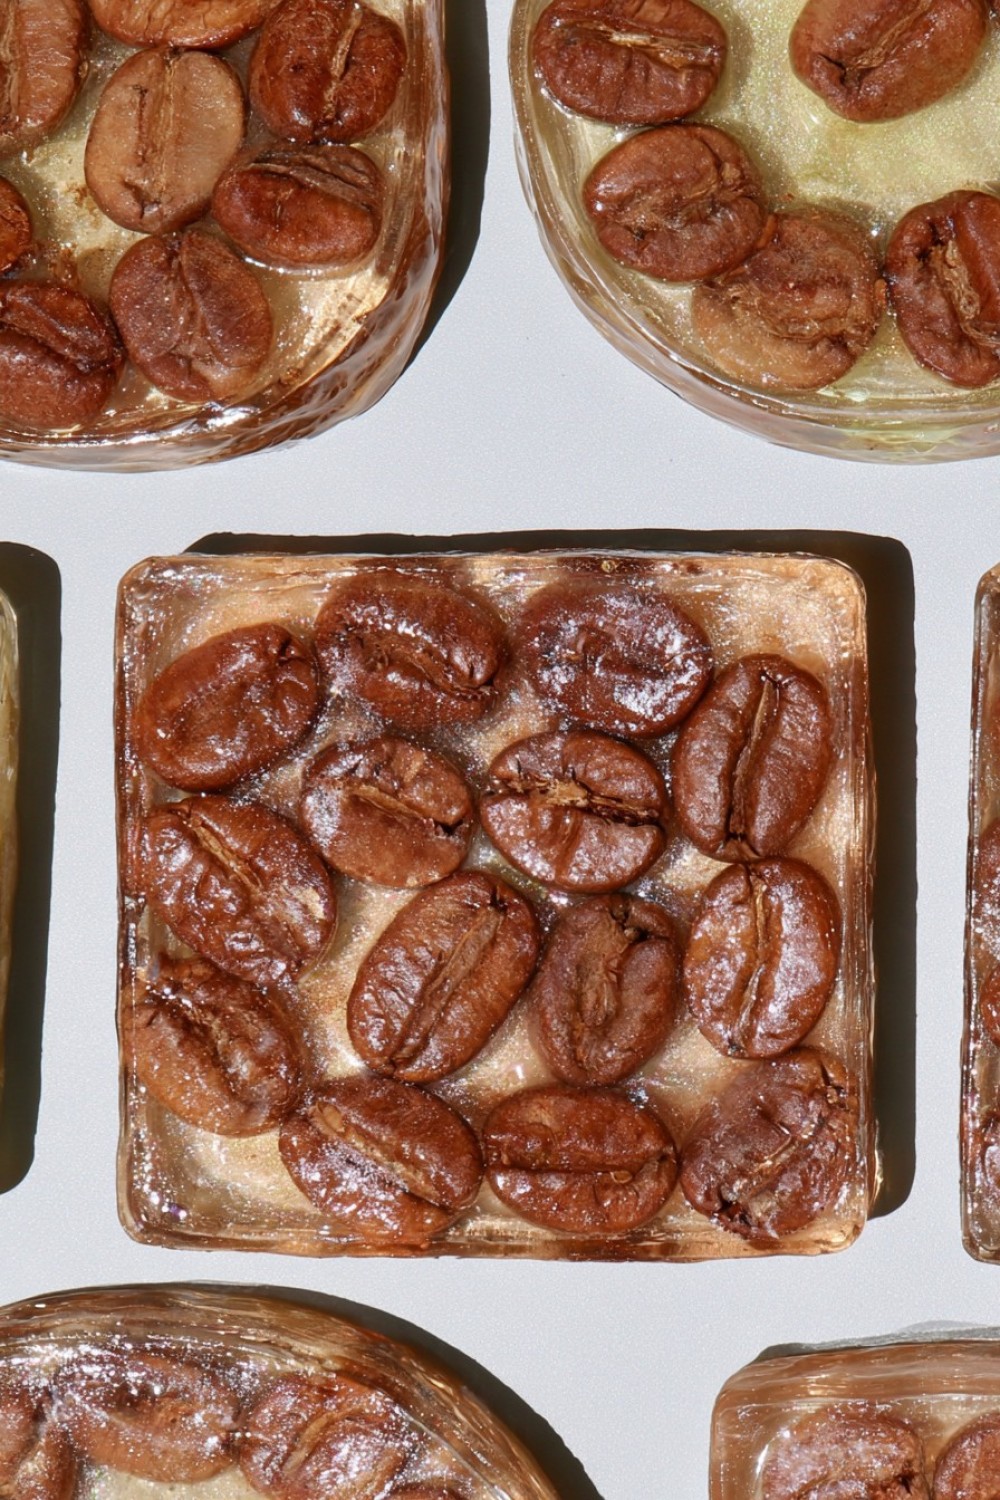
Coffee beans can create warm, textured coasters that feel especially appropriate in kitchens and coffee corners. Begin by arranging whole roasted beans in the silicone mold before adding resin. You can cover the entire base for a dense look or create a simple circular border around the edge. Pour the resin slowly so it flows between each bean and minimizes trapped air. A transparent finish keeps the natural brown tones visible, while amber tinted resin can create a richer appearance. Once fully cured, check the underside for uneven spots and sand if necessary. These coasters make practical decorative pieces for breakfast tables, home offices, and coffee stations.
11. Monochrome Resin Coasters
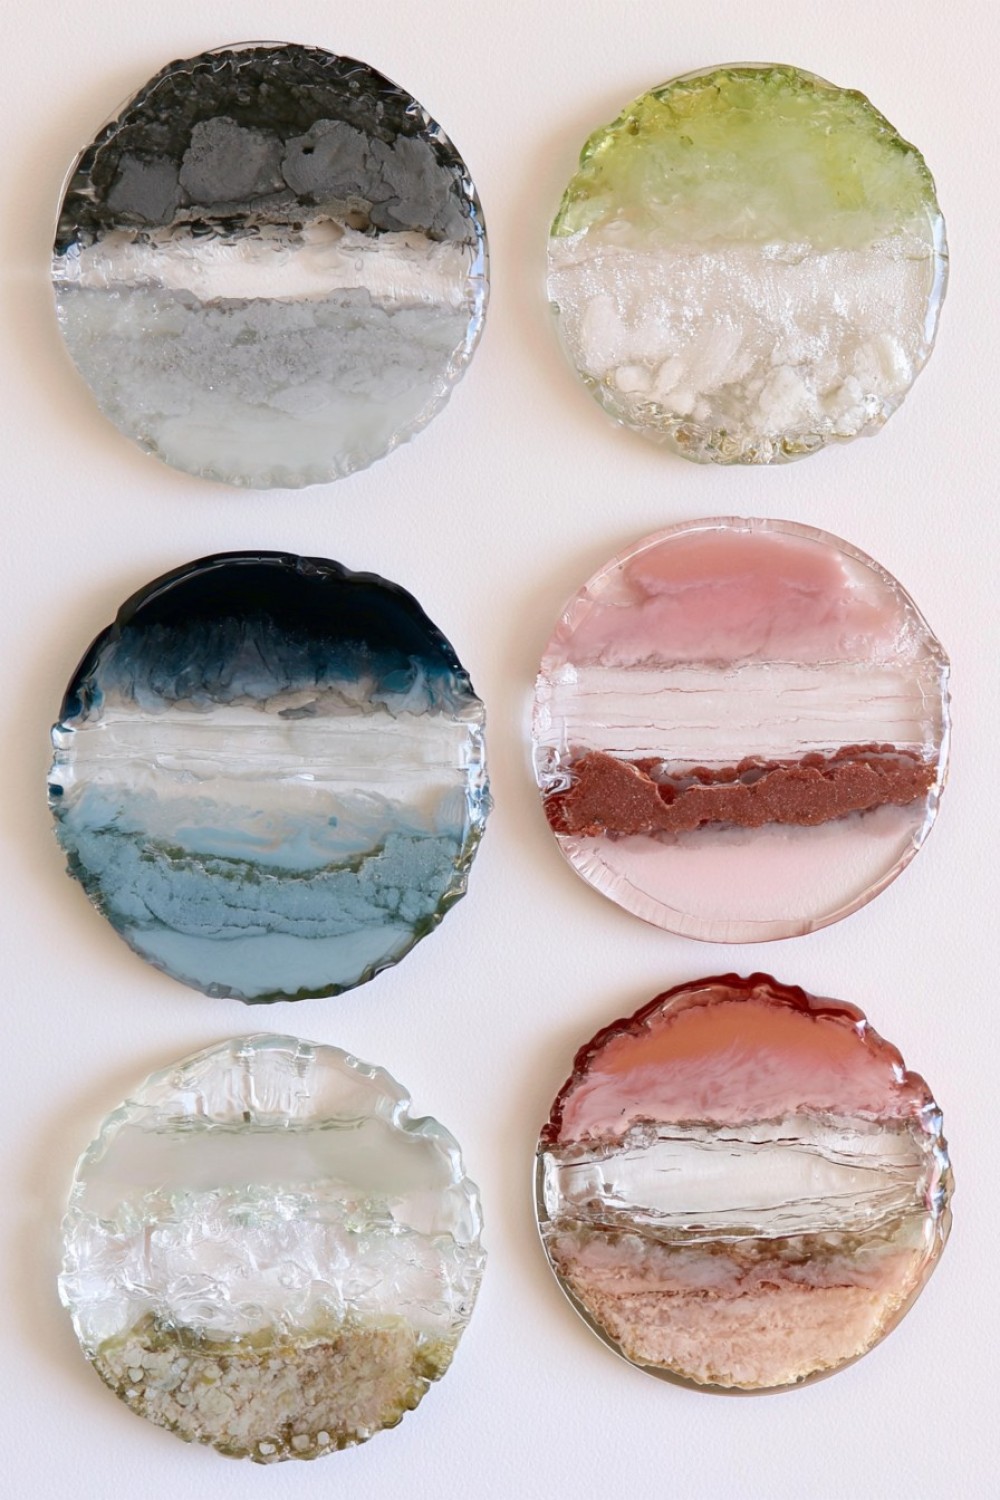
A monochrome palette can make resin coasters feel modern and sophisticated. Select one main color and create several shades by varying the amount of pigment in separate resin batches. Pour the tones in layered sections, gentle gradients, or irregular shapes. For example, use charcoal through light gray, navy through powder blue, or terracotta through pale peach. Keeping every coaster within the same color family creates cohesion even when the patterns differ. A small amount of clear resin can be included between shades for extra depth. These designs are easy to coordinate with existing interiors and work particularly well on minimalist desks, dining tables, or coffee tables.
12. Glitter Edge Resin Coasters
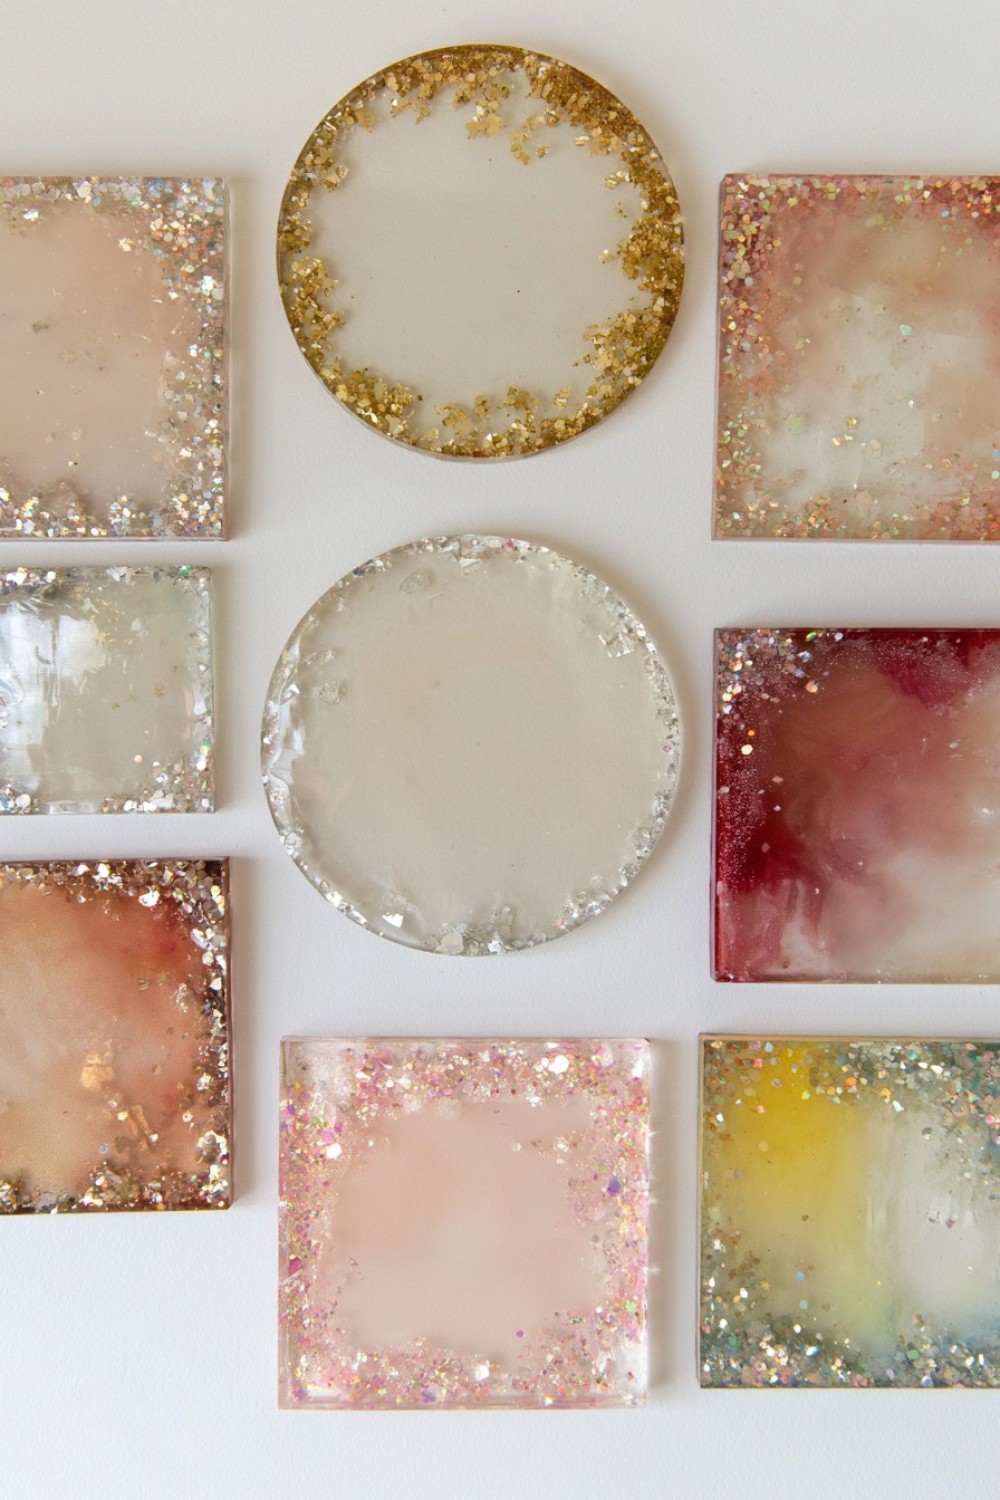
Instead of filling an entire coaster with glitter, concentrate sparkle around the outer edge for a more balanced decorative effect. Pour a clear or lightly tinted resin base into the mold, then place fine glitter, mica flakes, or metallic powder around the perimeter. Use a small stick to keep the center relatively clean. Add another clear resin layer to seal everything in place. Gold, silver, rose gold, or iridescent particles can all produce different moods. This method creates visual interest without overwhelming the coaster surface. Finished pieces work well for festive tables, vanity areas, modern bedrooms, or gift sets intended for special occasions.
13. Wood and Resin Combination Coasters
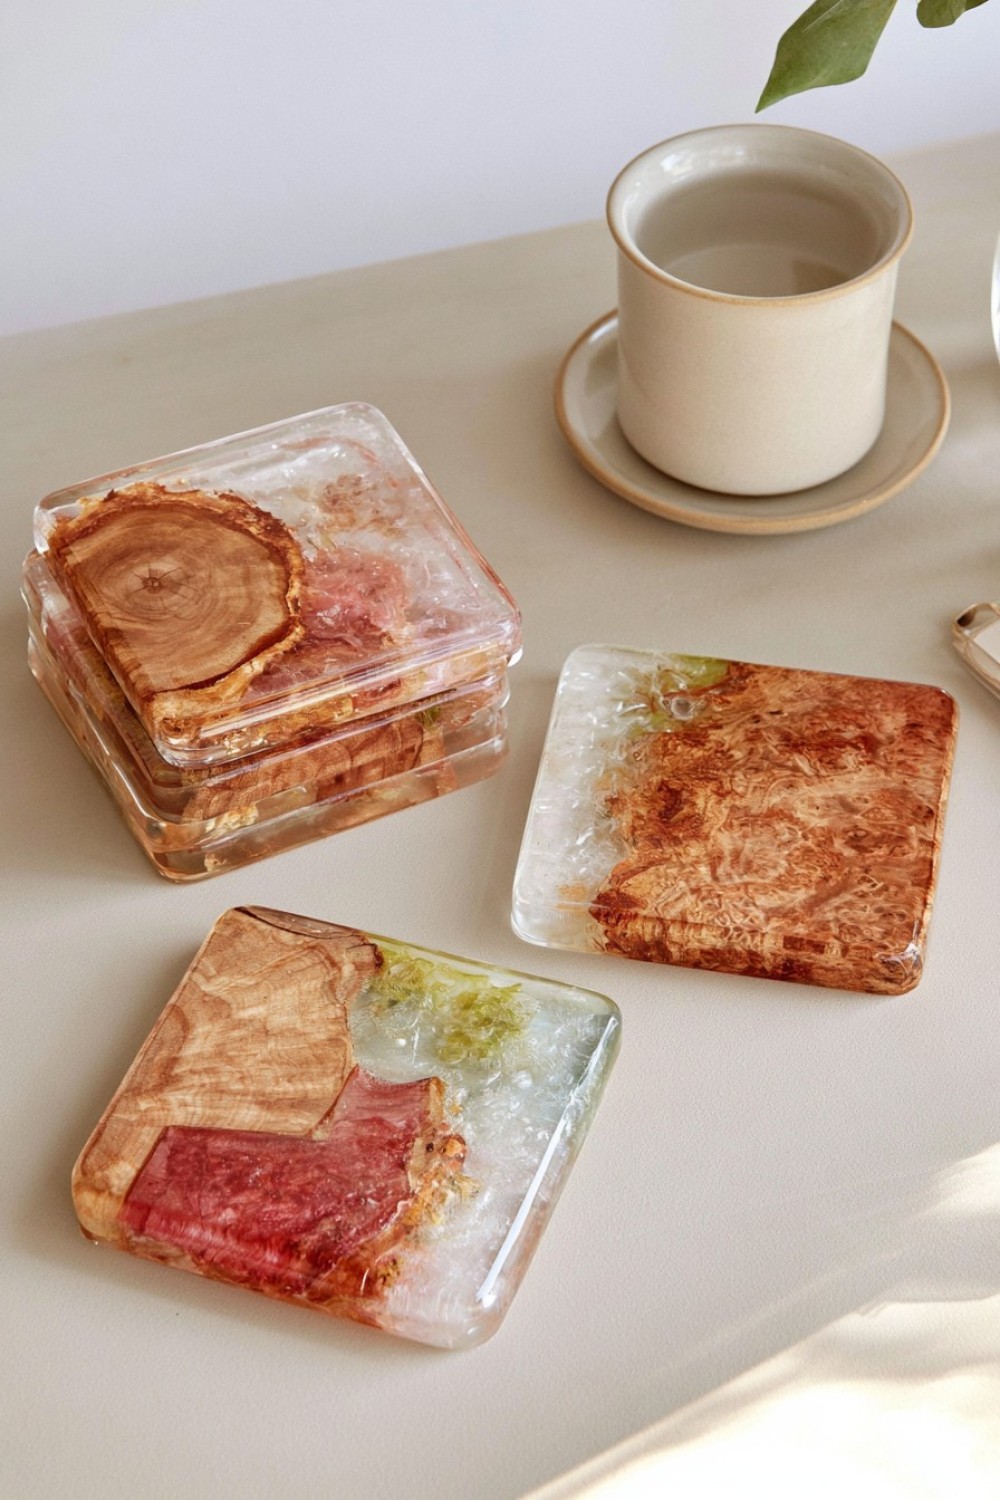
Combining thin wood pieces with resin creates an attractive contrast between natural grain and glossy transparency. Cut small wood slices, veneer sections, or geometric plywood pieces slightly smaller than the mold. Seal the wood first so air does not escape into the resin during curing. Position the wood inside the mold and pour resin around or over selected sections. Clear resin highlights the grain, while tinted resin can create stronger contrast. Sand and finish the cured edges carefully for a smooth result. These coasters fit rustic, modern, Scandinavian, and industrial interiors and can also be customized with different wood species or stain colors.
14. Geode Inspired Resin Coasters
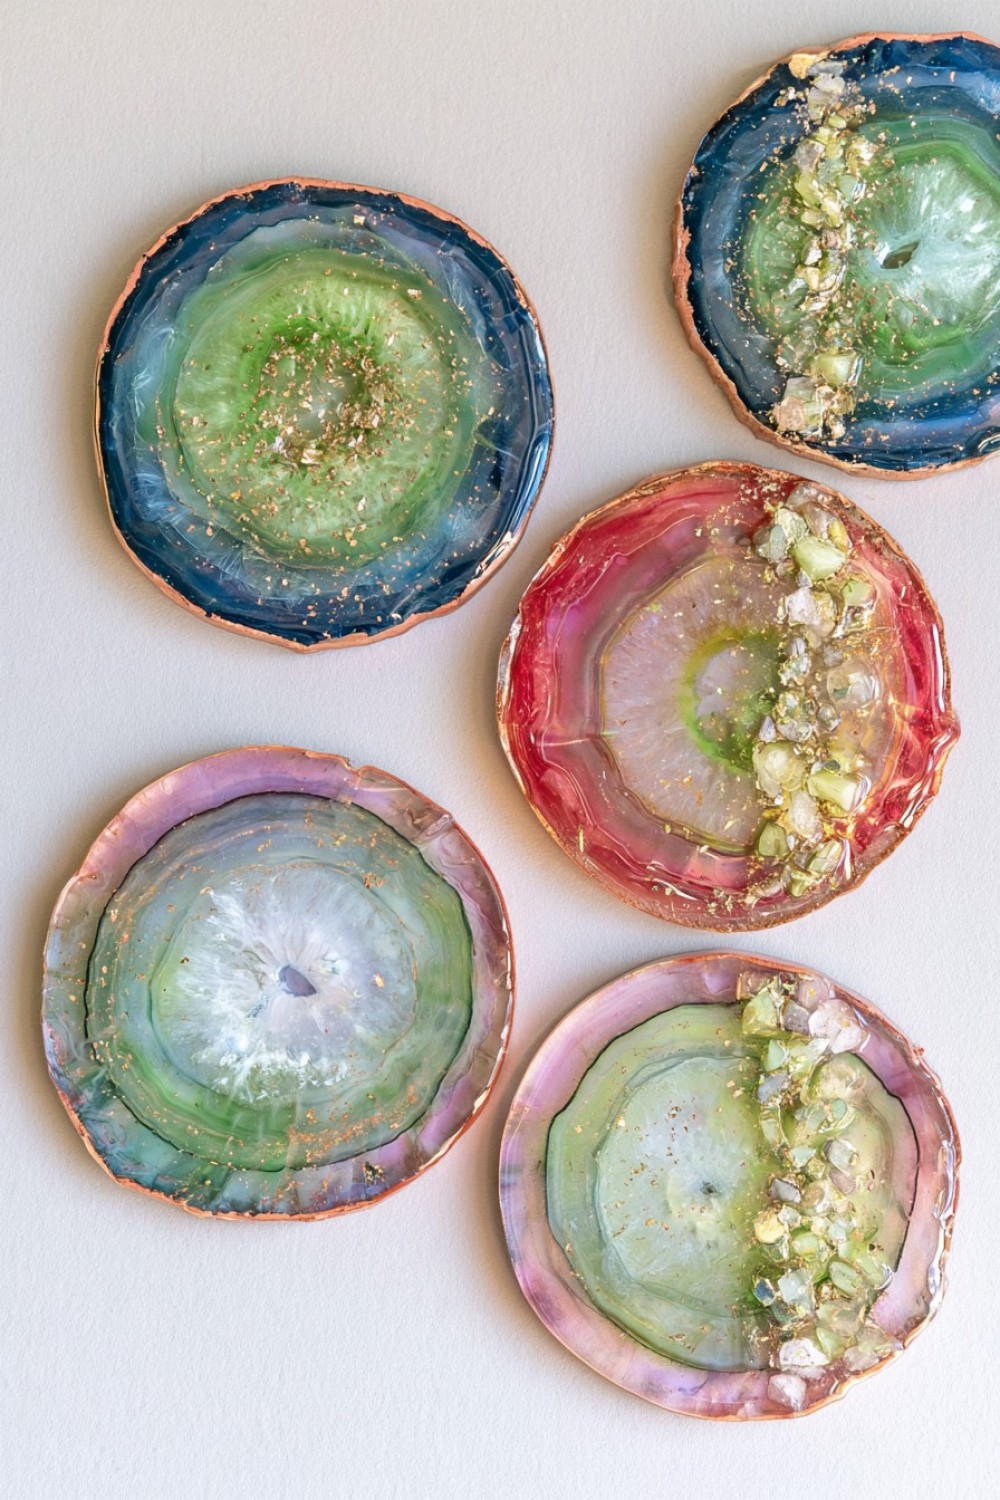
Geode style coasters use layered color, metallic accents, and crystal like textures to create a dramatic decorative surface. Begin with irregular round molds or standard circular molds if you prefer a cleaner shape. Pour several bands of colored resin from the outer edge toward the center, using shades such as deep blue, violet, emerald, white, or charcoal. Add metallic flakes or mica powder between selected layers. Small decorative crystal chips can be placed near the center for texture. Once cured, sand sharp edges and apply a clear finishing coat if needed. These statement coasters look best on simple tabletops where their layered patterns can stand out.
15. Minimal Clear Resin Coasters
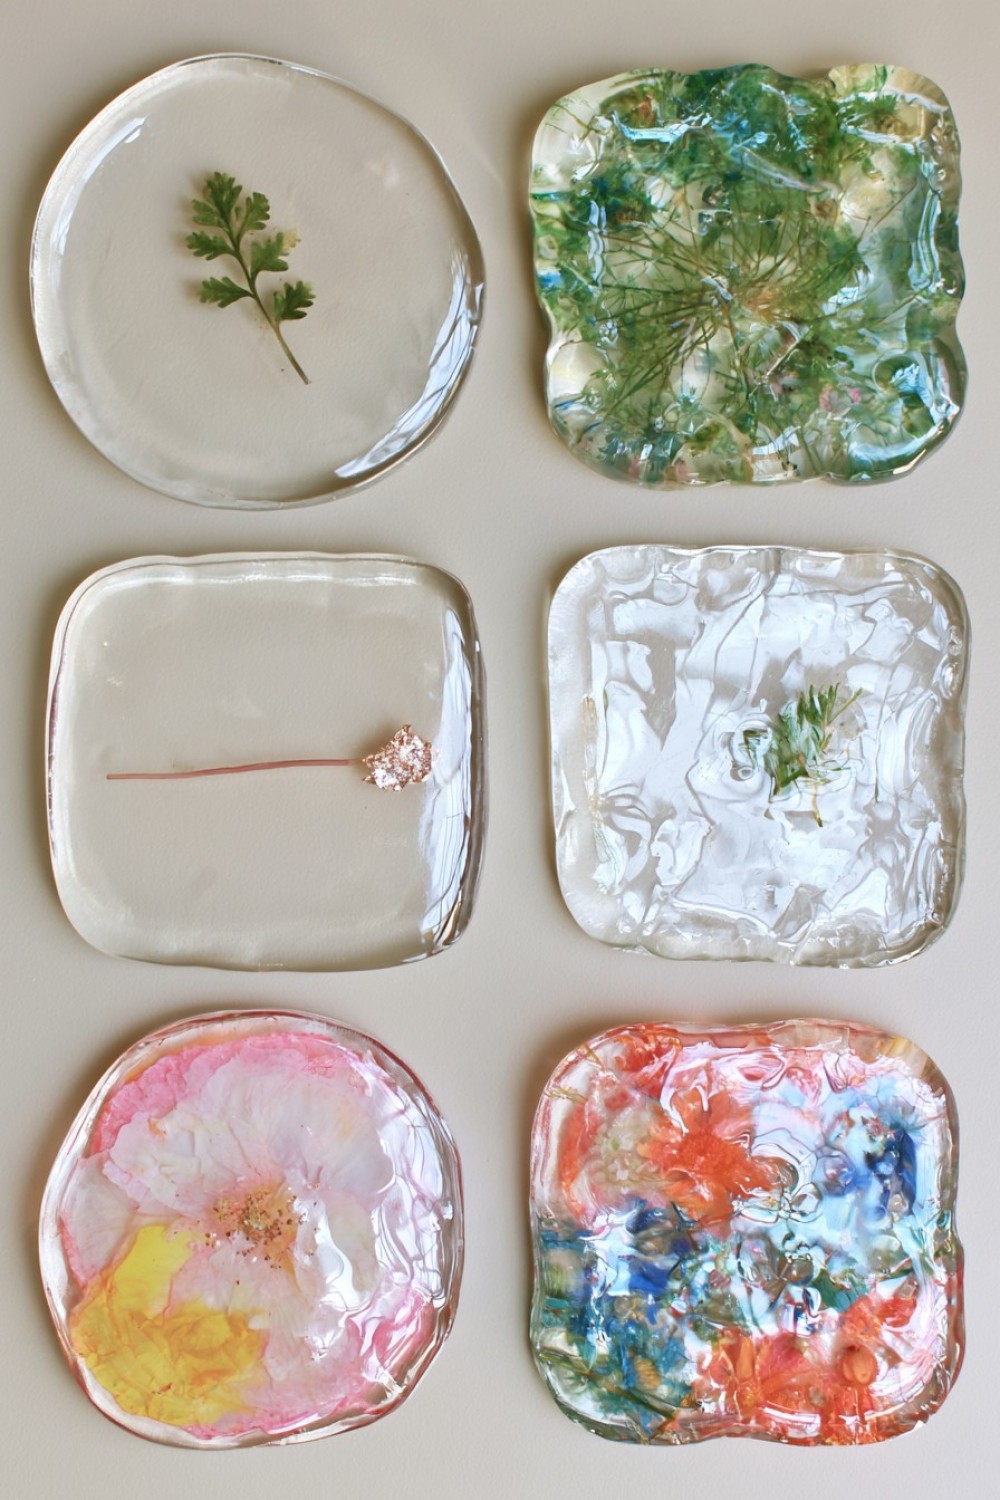
Clear resin coasters are ideal when you prefer subtle decoration rather than heavy color or embellishment. Use high clarity resin and work carefully to minimize bubbles. Add only one or two small elements, such as a tiny pressed leaf, delicate metallic flake, or narrow colored line. Leaving most of the surface transparent creates a clean, almost glass like appearance. Pour the resin slowly and allow bubbles to rise before curing. Simple geometric molds, including circles, squares, and rounded rectangles, work especially well with this style. These coasters complement minimalist interiors, modern offices, light wood furniture, and neutral dining areas without competing with surrounding decor.
16. Confetti Resin Coasters
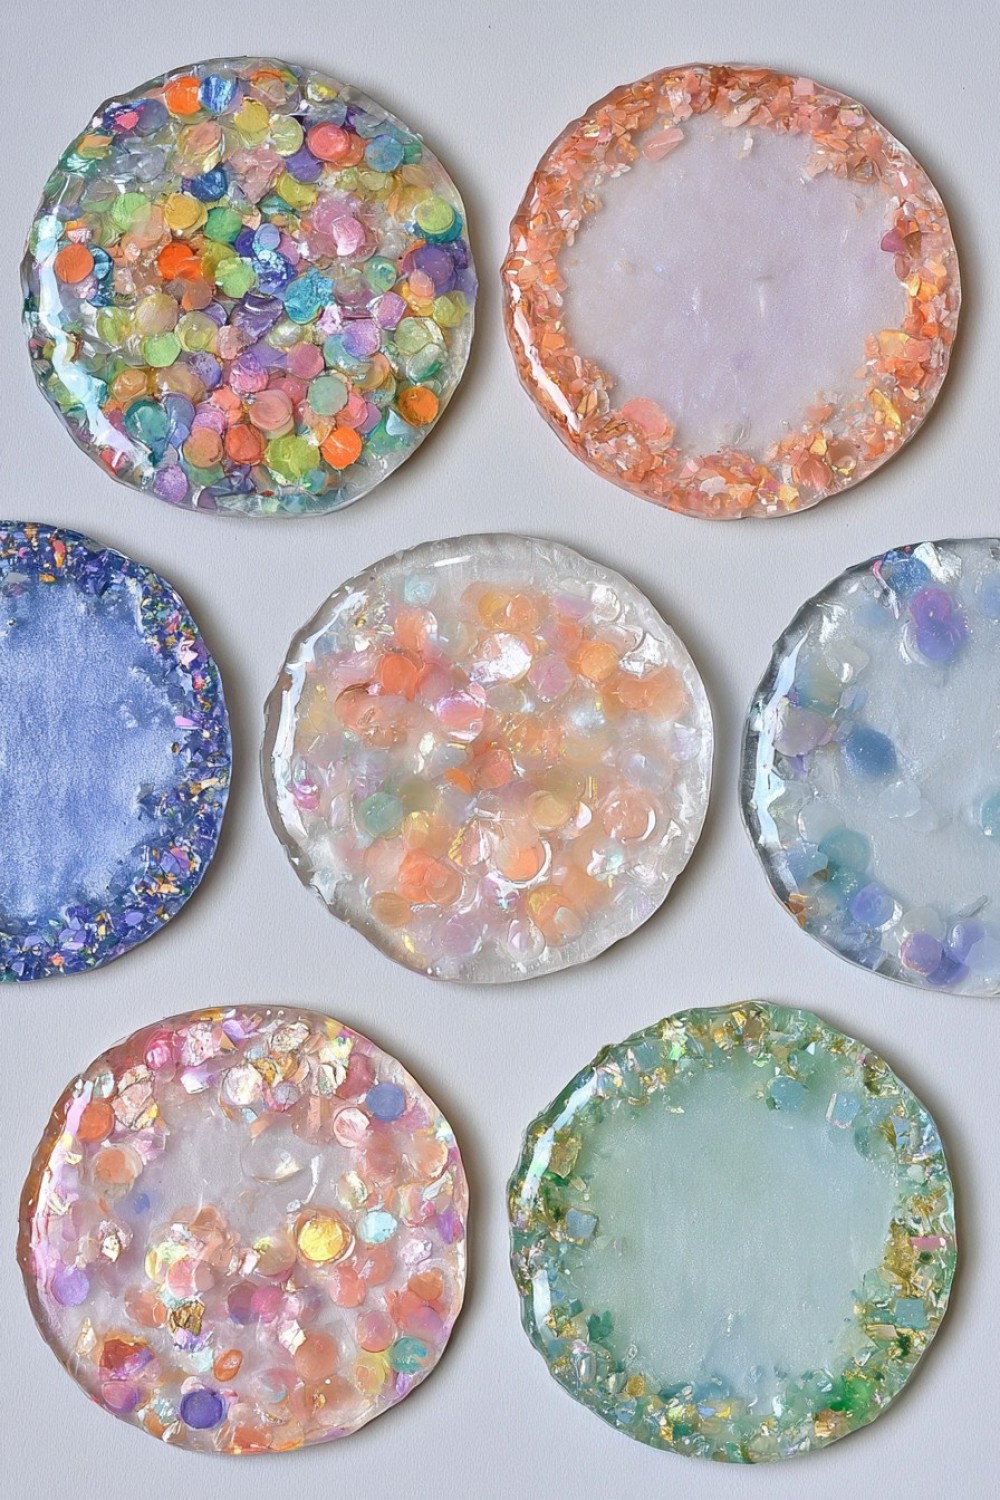
Colorful confetti pieces can turn resin coasters into playful decorative accessories. Use paper confetti only if it has been sealed first, or choose plastic, foil, or resin based decorative pieces that will not absorb moisture. Scatter the confetti randomly or organize it by color around the edges. Pour clear resin slowly over the arrangement and use a toothpick to separate overlapping pieces when needed. Bright multicolor combinations create a festive effect, while pastel confetti produces a softer appearance. These coasters are especially suitable for party tables, craft rooms, children’s study areas, cheerful kitchens, or handmade gifts for birthdays and celebrations.
17. Personalized Color Palette Resin Coasters
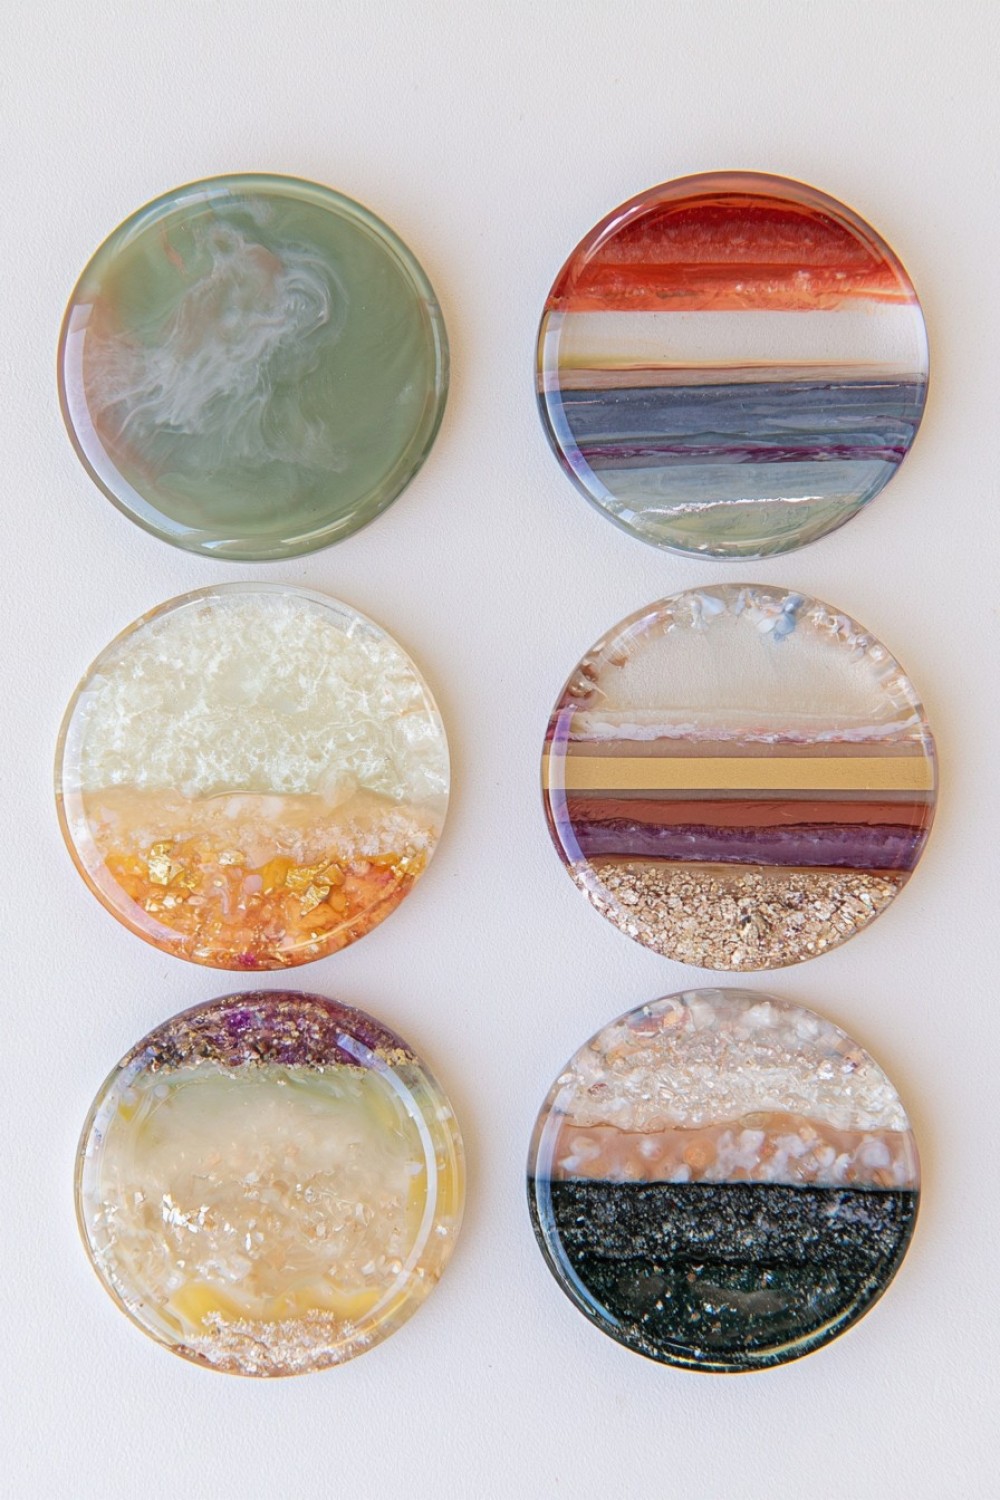
Design a resin coaster set around the exact colors already used in your home for a coordinated decorative result. Identify three or four shades from nearby cushions, artwork, rugs, ceramics, or furniture finishes. Tint separate resin batches to match those tones, then create a different composition for each coaster while keeping the palette consistent. One piece might feature swirls, another layered bands, and another transparent sections with small color accents. This approach creates variety without making the set feel mismatched. Add subtle metallic or neutral details only if they complement the chosen scheme. Personalized sets work beautifully in living rooms, dining spaces, offices, or custom gift packages.
MORE IDEAS


Share
What's Your Reaction?
 Like
0
Like
0
 Dislike
0
Dislike
0
 Love
0
Love
0
 Funny
0
Funny
0
 Angry
0
Angry
0
 Sad
0
Sad
0
 Wow
0
Wow
0