
A broken flower pot can become a planting border, a miniature garden, or the outline of a flower filled turtle, kite, or umbrella. These 22 broken pot garden projects explain how to arrange surviving pot sections, give flowers enough root space, and keep the clay securely in place. Begin with the simple flower spill method below, then adapt its preparation and planting approach to the designs that suit your pieces. Each idea includes details about construction, placement, and upkeep so you can plan beyond the finished appearance.
Table of Contents
- Turn Broken Pots Into a Planted Display
- Choose the Pieces Before Choosing the Design
- Make a Simple Broken Pot Flower Spill
- Adapt the Method to Your Flowers and Climate
- 1. Terracotta Staircase in a Mossy Bowl Garden
- 2. Sunflower Outline Made from Curved Pot Pieces
- 3. Graduated Terracotta Sails in a Flower Border
- 4. Octopus Flower Bed with Winding Terracotta Arms
- 5. Yellow Pot Waves in an Oval Gravel Planter
- 6. Honeycomb Flower Pockets with a Golden Center
- 7. Blue Ceramic Dividers in a Rectangular Flower Trough
- 8. Broken Vase Necks as Viola Planting Frames
- 9. Leaf Pattern in a Dark Gravel Bowl
- 10. White Flower River Spilling from a Broken Pot
- 11. Scalloped Terracotta Edging Along a Gravel Path
- 12. Purple Flowers Tumbling from Three Broken Pots
- 13. Flower Ring Around a Garden Post
- 14. Mixed Flower Spills Beside a Garden Path
- 15. Two Level Flower Cascade in a Broken Terracotta Pot
- 16. Blue Flower Stream in a Fence Corner
- 17. Flower Filled Bow with Terracotta Ribbon Tails
- 18. Terracotta Turtle with a Colorful Flower Shell
- 19. Umbrella Flower Garden with a Curved Clay Handle
- 20. Spiral Snail Garden with a Purple Flower Head
- 21. Open Envelope Flower Bed with a Terracotta Outline
- 22. Flower Kite with a Broken Pot Bow Tail
Turn Broken Pots Into a Planted Display
Choose the Pieces Before Choosing the Design
Work with pots that are already broken rather than smashing sound ones to match a shape. Wash off loose soil with water and a stiff brush, let the pieces dry, and discard fragments that crumble when handled. Wear sturdy gloves; eye protection is sensible when brushing away loose chips. Do not dry grind pottery to reshape it. Choose naturally rounded fragments, bury rough broken edges, and keep exposed shards away from walking routes and play areas. Unknown containers that previously held chemicals should not become planters.
A simple flower spill needs one broken terracotta pot with a sound rim, four curved fragments for low edging, three young white flowering plants, a trowel, gloves, and a watering can. Prepare a patch of garden soil large enough for the plants at their mature spacing. For the bowl and trough designs, add a container with drainage holes and potting compost suited to the flowers. Decorative pebbles are optional surface dressing; a deep stone layer does not replace drainage holes or adequate compost.
Make a Simple Broken Pot Flower Spill
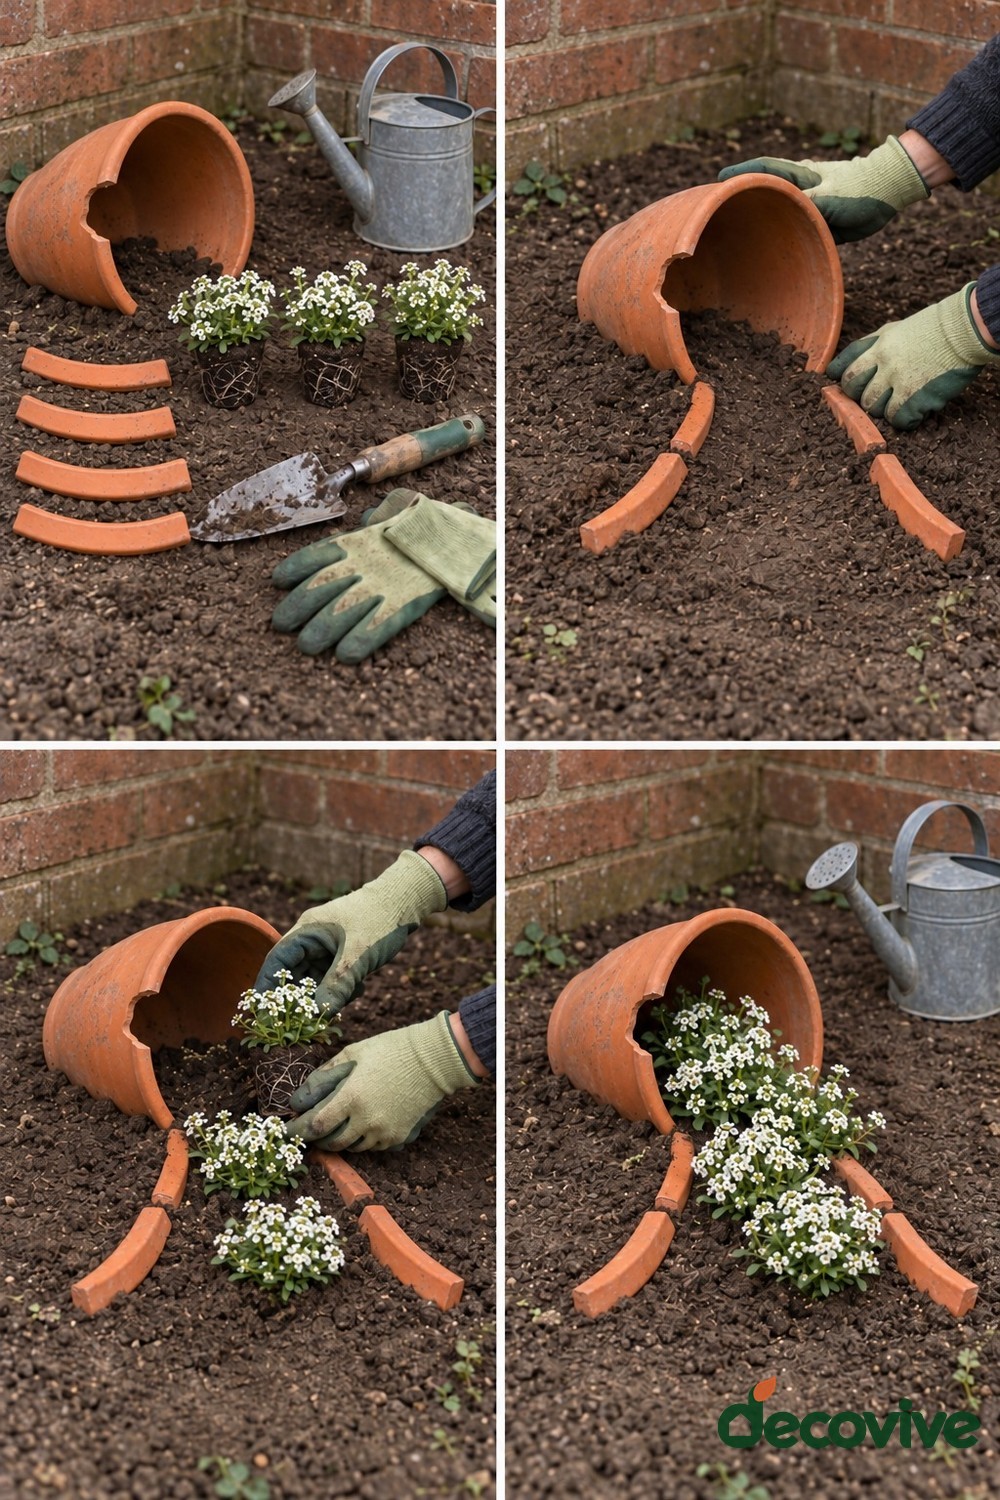
1. Gather and check the materials. Match the pot and edging pieces to the planting area before digging. Keep the young plants in their nursery containers until their planting holes are ready. Choose a site that meets the flowers' sunlight needs and does not collect standing water.
2. Anchor the pottery. Set the pot on its side in a shallow recess with its mouth facing the intended spill. Firm soil beneath and around it. Partly bury the four curved pieces as two short borders leading away from the mouth. Every piece should stay still when gently pressed; no glue is needed for this soil supported layout.
3. Plant into the soil. Make holes deep and wide enough for the root balls, then plant one cluster near the opening and the others along the spill. Keep each plant at its original nursery depth and firm soil gently around the roots. The pot acts as a visual frame rather than a tiny sealed container.
4. Water and maintain the outline. Water gently at the roots, check for washed out soil, and reset any loose fragments. Let the flowers develop naturally rather than packing the area to look instantly mature. Remove spent blooms and weeds, and trim only where growth conceals the pot opening or the border.
Adapt the Method to Your Flowers and Climate
The illustrated layouts show established flowering displays. Newly planted versions will usually have more visible soil until their plants grow. Choose compact varieties suited to your climate, planting season, and exposure; similar flower colors do not guarantee similar care needs. Check labels for mature spread and give roots room beneath shallow decorative dividers. Enlarge tiny sections instead of squeezing root balls into narrow openings.
Container designs need closer moisture checks than beds with roots in open ground. Feel the growing medium below the surface before watering, keep drainage outlets clear, and follow the fertilizer guidance for your plants and compost. Unglazed terracotta can lose moisture quickly, while wet weather and freezing temperatures can worsen existing cracks. Inspect the pottery after storms and seasonal changes, and move vulnerable portable arrangements into a sheltered position when necessary.
1. Terracotta Staircase in a Mossy Bowl Garden
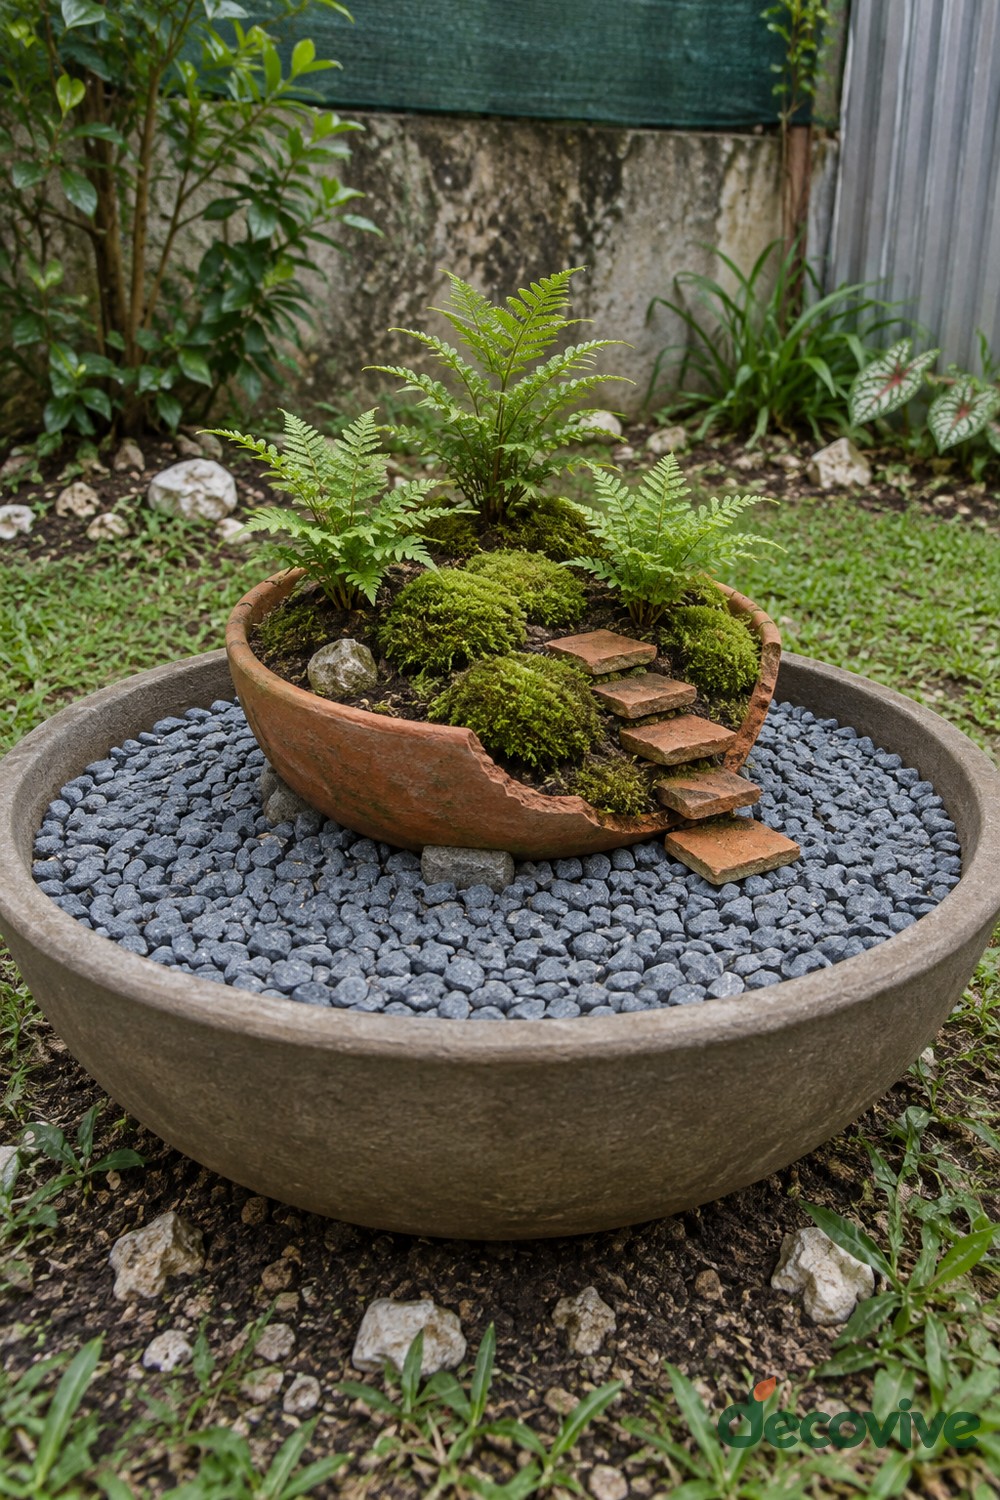
A broken terracotta bowl becomes a miniature hillside when its open side faces the viewer and short clay steps climb toward a small fern. The wider outer planter frames the scene with gray pebbles, while moss softens the terracotta edges. This arrangement suits a sheltered garden corner where you can appreciate the changes in height at close range. Use a draining outer container and a growing medium suited to the fern rather than filling the bowl entirely with decorative stone.
Build the slope gradually, pressing each stair fragment into firm soil so its tread stays level. The steps are decorative and should never carry weight. Give the fern enough space for its roots and keep moss away from the crown. Check moisture beneath the surface dressing before watering. For a more detailed approach to layered layouts, explore our layered fairy garden guide, adapting the planting to this moisture loving scene.
2. Sunflower Outline Made from Curved Pot Pieces
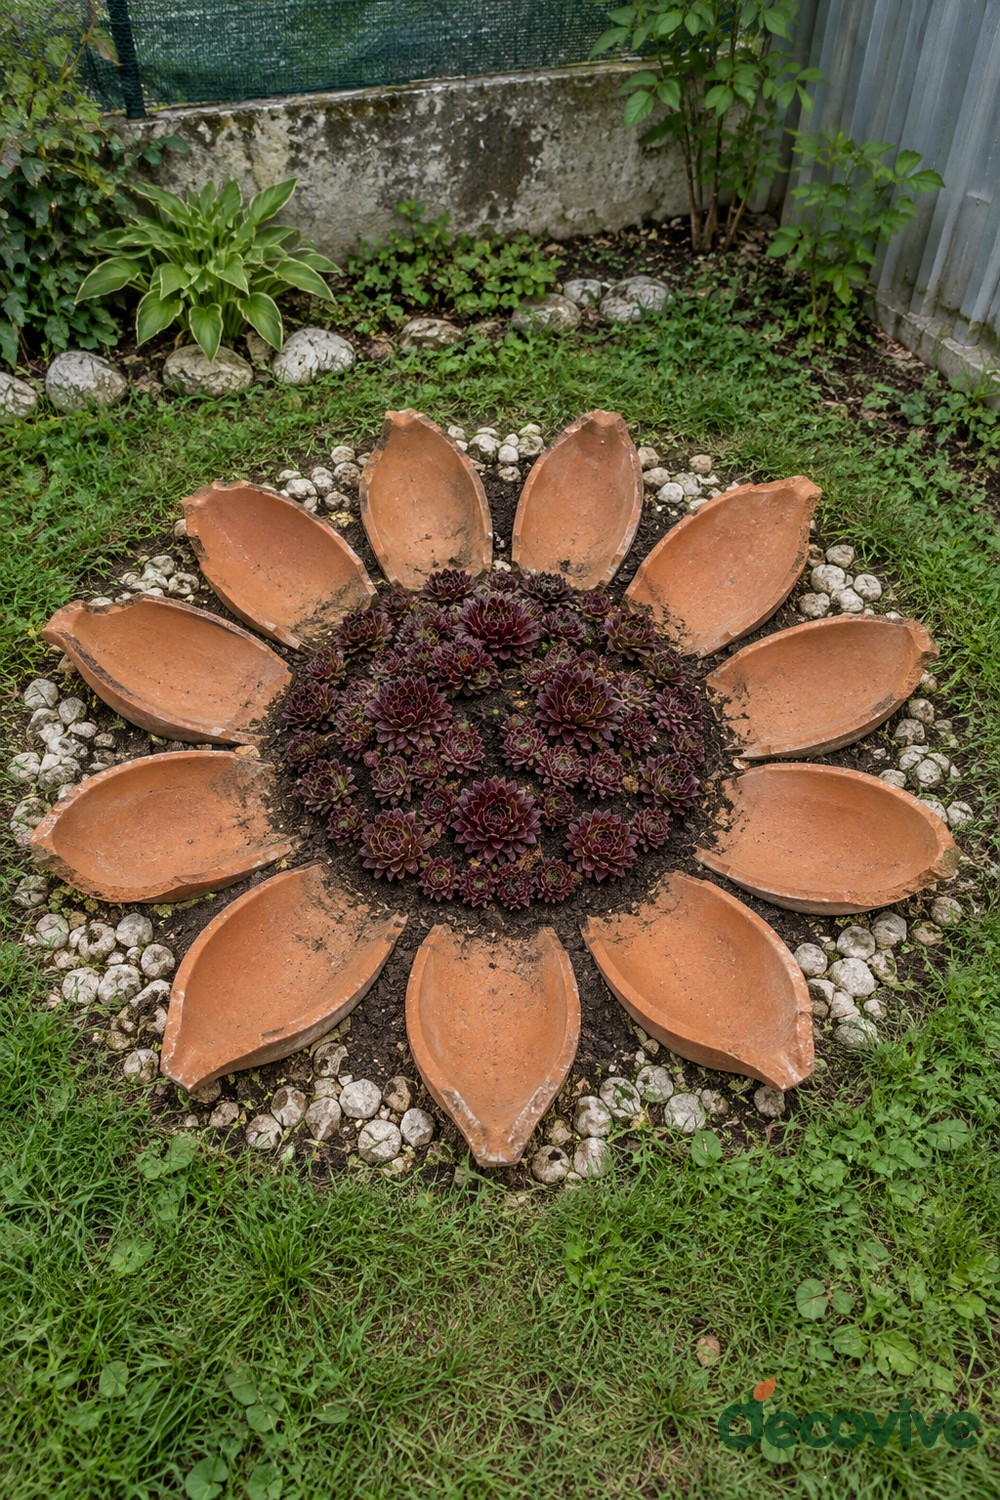
Broad curved fragments arranged around a dark central planting circle create a sunflower that remains recognizable even between flowering seasons. Their orange interiors act as petals, while the low burgundy planting gives the center a contrasting texture. This design works best in a level patch of soil with enough open space around it to reveal the full outline. Select pieces with similar curves and rounded ends, but allow small differences in size to preserve the character of reused pottery.
Lay out the whole flower before digging, then seat each petal in a shallow recess with its underside supported by earth. Avoid balancing the fragments on a single narrow edge. Plant the middle as one shared bed, choosing low growing plants suited to the available sunlight. Keep the surrounding grass back from the clay so the petals remain visible, and remove weeds from gaps without levering against the brittle pieces.
3. Graduated Terracotta Sails in a Flower Border
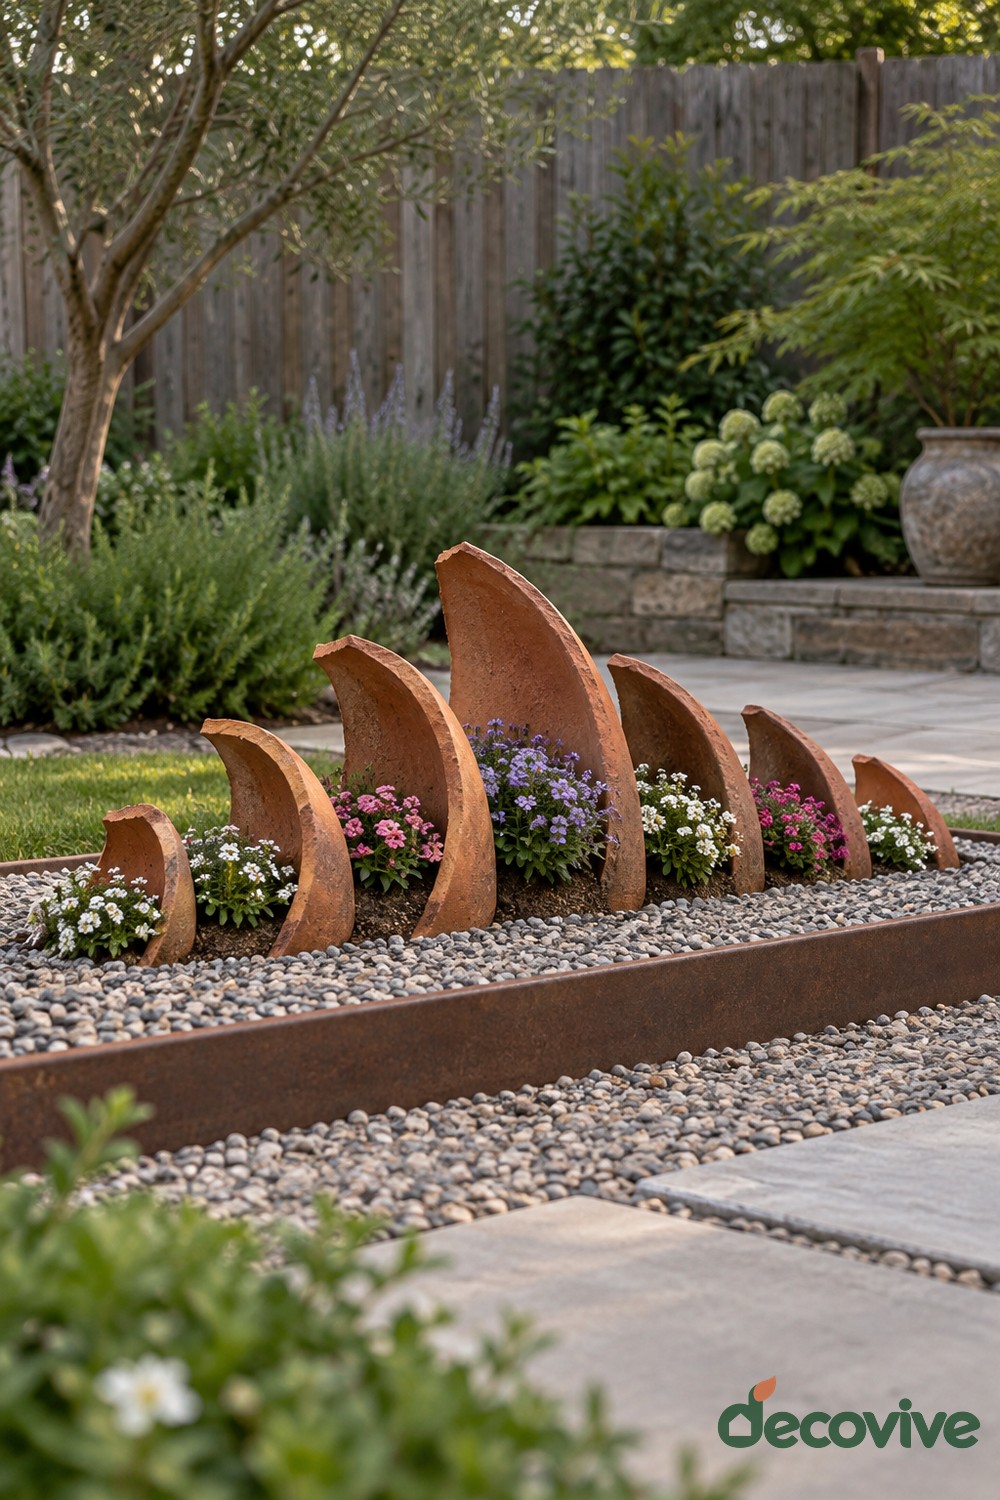
A sequence of upright curved shards gives a narrow flower bed the rhythm of little terracotta sails. The tallest piece stands near the middle, with progressively smaller fragments toward the ends. White, pink, and purple flowers settle into the spaces at their bases, and a restrained gravel surface keeps the outlines clear. This is a sculptural option for a bed beside a patio, where a side view reveals the changing heights.
Tall shards require more care than low edging. Choose sound, thick fragments, bury a substantial lower section, and compact soil firmly on both sides. If a piece still rocks, lower it or use a shorter alternative. Keep the display away from paths used by children or pets. Flowers should root in the soil beneath the gravel rather than in thin pockets balanced against clay. After heavy rain, check that no shard has tilted or exposed a sharp edge.
4. Octopus Flower Bed with Winding Terracotta Arms
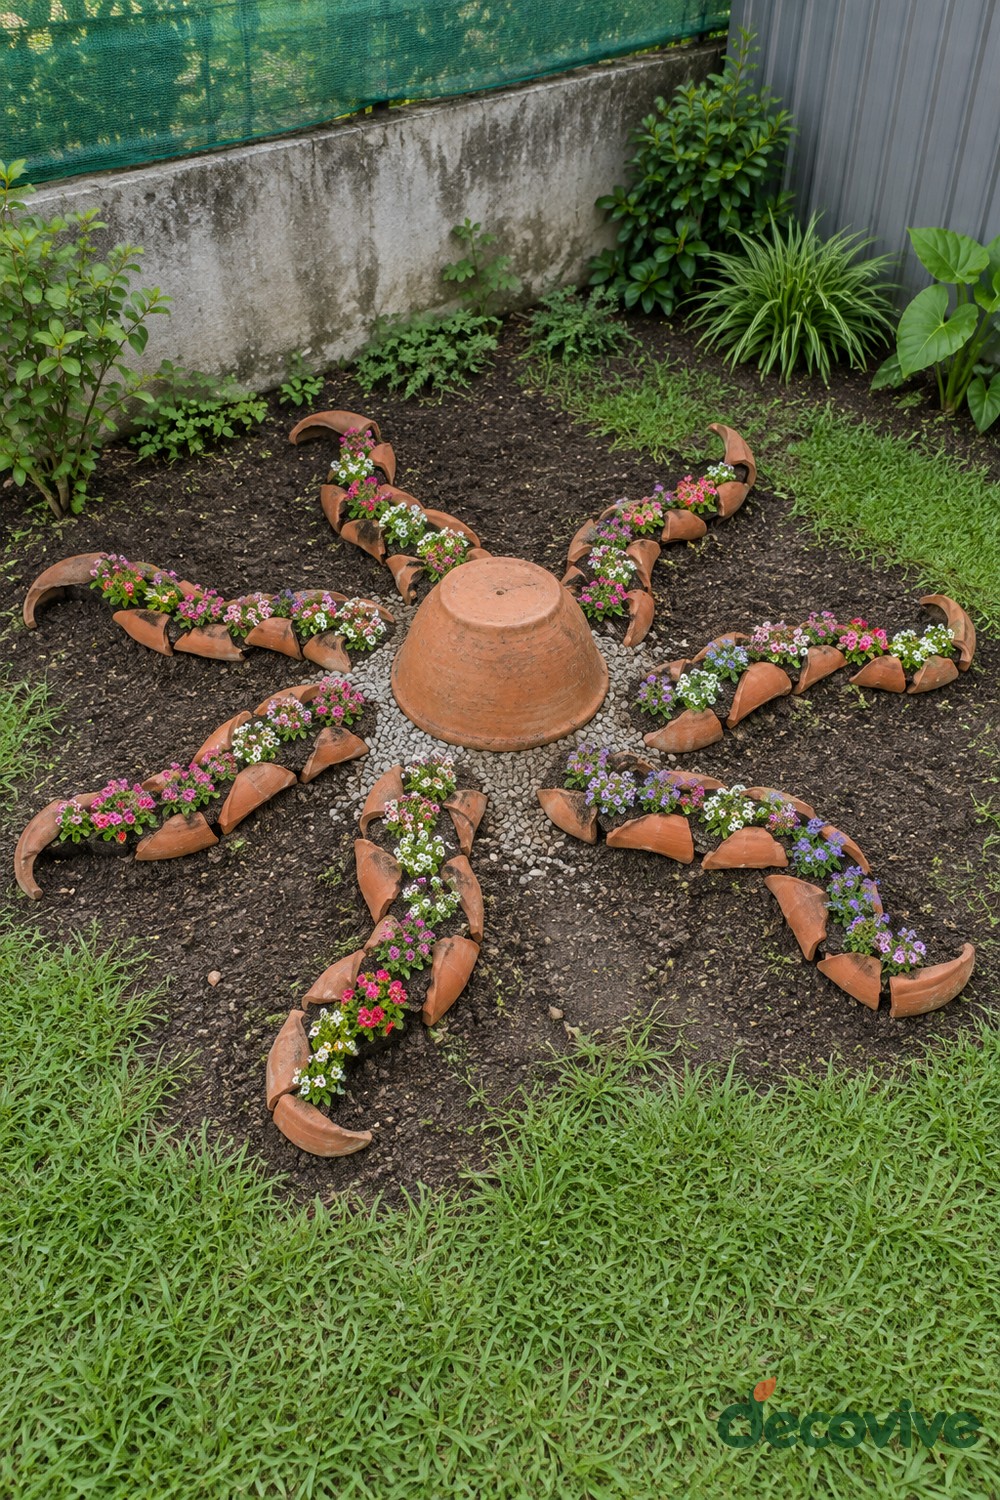
An inverted terracotta pot forms the raised center of this playful octopus, while narrow shard borders trace winding arms across a bare garden bed. Small pink and white flowers occupy the soil between the clay edges. The appeal comes from the relaxed curves rather than a perfectly symmetrical outline, making this a useful design for an awkward open patch near a lawn. Leave enough bare soil between the arms so their separate paths remain legible.
Position the central pot first, then sketch the arms in soil and arrange the smaller pieces along those lines. The pot sits as a decorative feature; it does not need to contain the flowers. Partially bury the borders and plant compact varieties directly into the garden soil. Avoid filling every gap with large nursery plants, which would quickly conceal the shape. Trim spreading growth selectively and keep grass from creeping into the arm tips.
5. Yellow Pot Waves in an Oval Gravel Planter
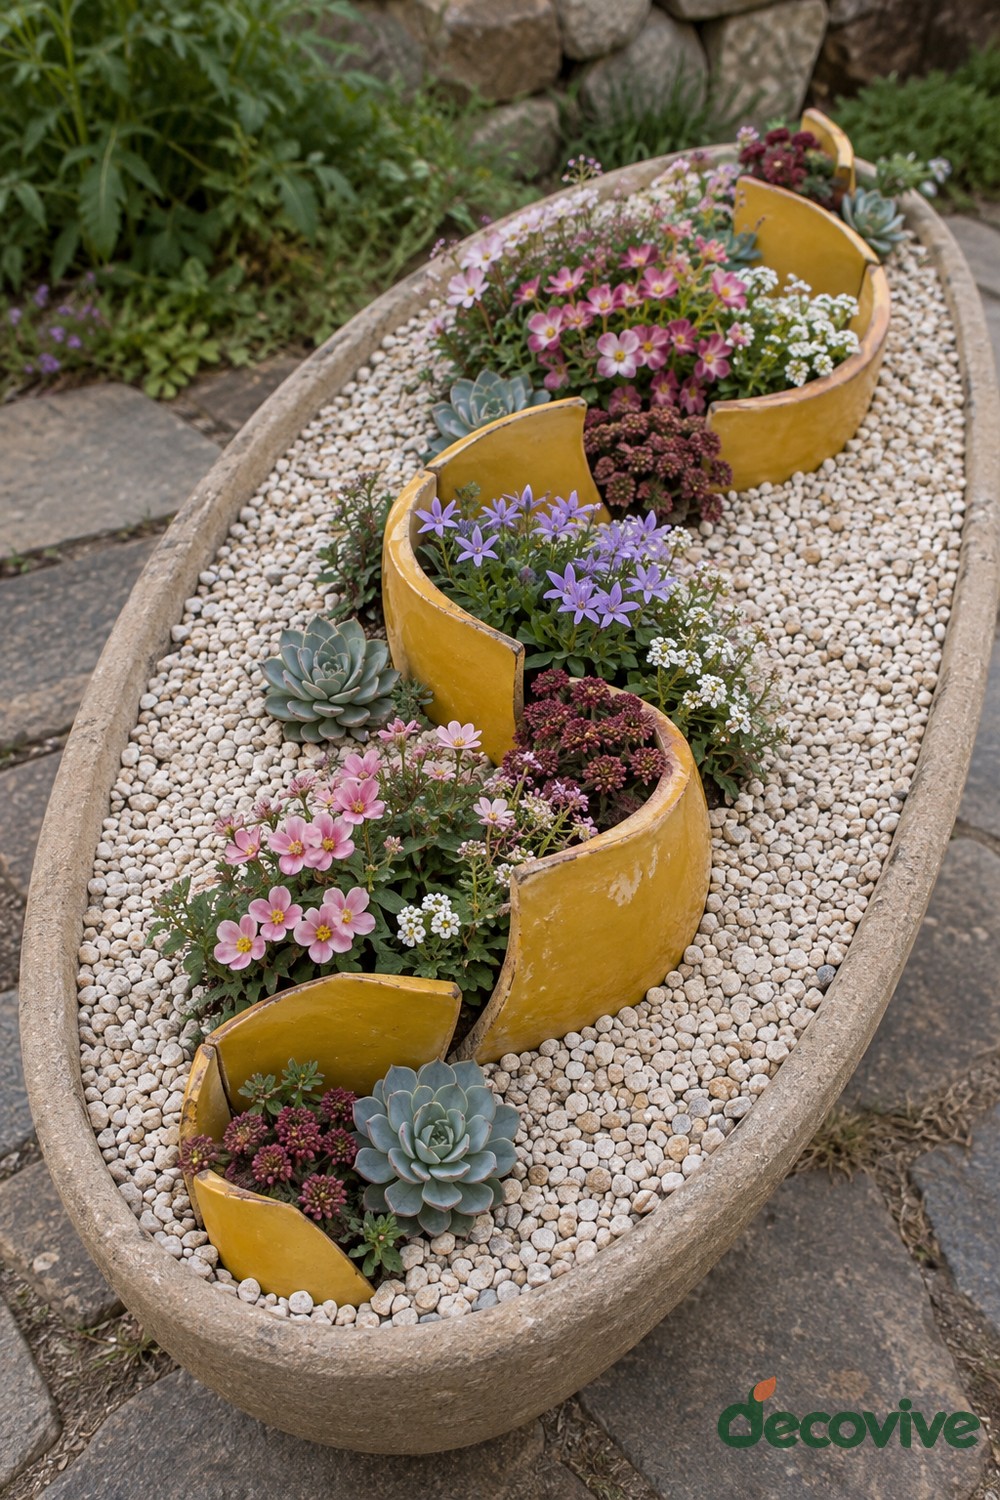
Yellow glazed pot sections curl through a long oval planter, creating a gentle wave between pockets of pink and purple flowers. Pale gravel surrounds the fragments and brings out their color. Small rosette plants add a different texture at the ends, so the arrangement has interest beyond the blossoms. The elongated container makes this suitable for a patio edge where the entire sequence can be seen from above.
Use an outer planter with working drainage holes and enough depth beneath every flower pocket. Set the curved sections into the growing medium before adding the gravel dressing. The pottery should shape the display without sealing the roots into tiny compartments. Where rosettes need drier conditions than the flowering plants, use separate draining inserts and water them individually. Inspect chipped glaze before handling the pieces, and keep the gravel clear of plant crowns.
6. Honeycomb Flower Pockets with a Golden Center
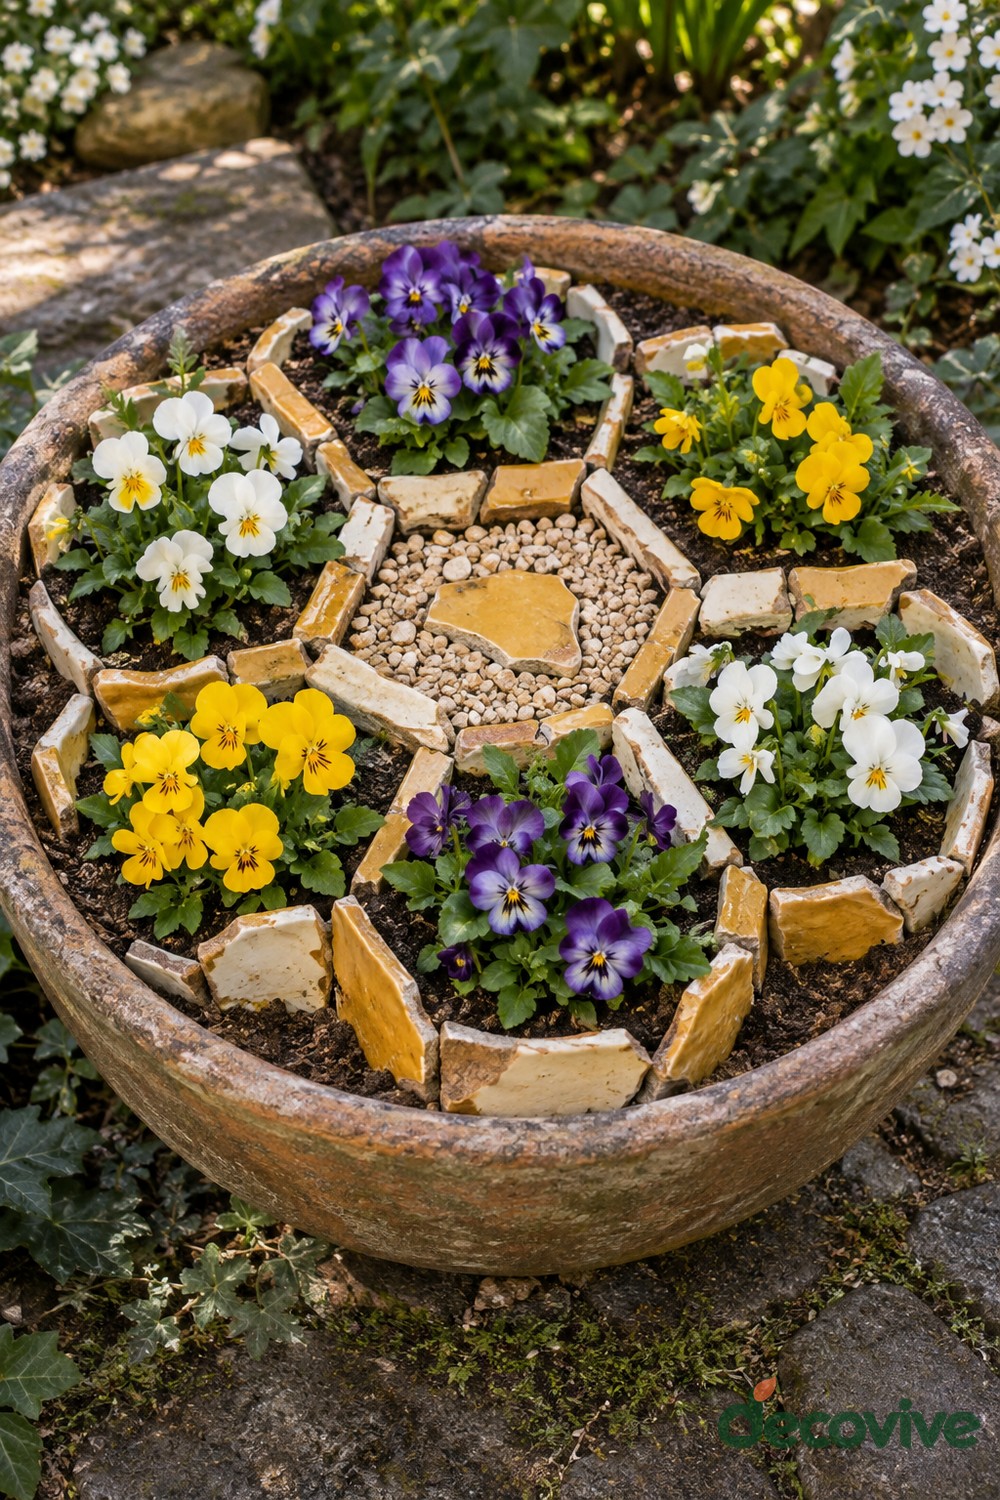
Small pottery pieces divide a broad bowl into a honeycomb pattern, with yellow, white, and purple flowers arranged around a central decorative cell. The repeated angled borders create a deliberate geometric design from irregular fragments. It is especially effective on a low stand or wide step where the pattern can be viewed from above. The center can remain unplanted, using a modest layer of pebbles and a warm colored pottery piece as the focal point.
Start with the outer cells and adjust the spacing before setting any dividers into the compost. Make the cells wide enough for the selected plants at maturity, with continuous root space beneath the shallow borders. Do not pack several full sized plants into miniature cells simply to obtain instant coverage. Water each planted area at soil level, remove fading flowers, and keep a narrow strip of visible terracotta around the compartments so the geometry does not disappear.
7. Blue Ceramic Dividers in a Rectangular Flower Trough
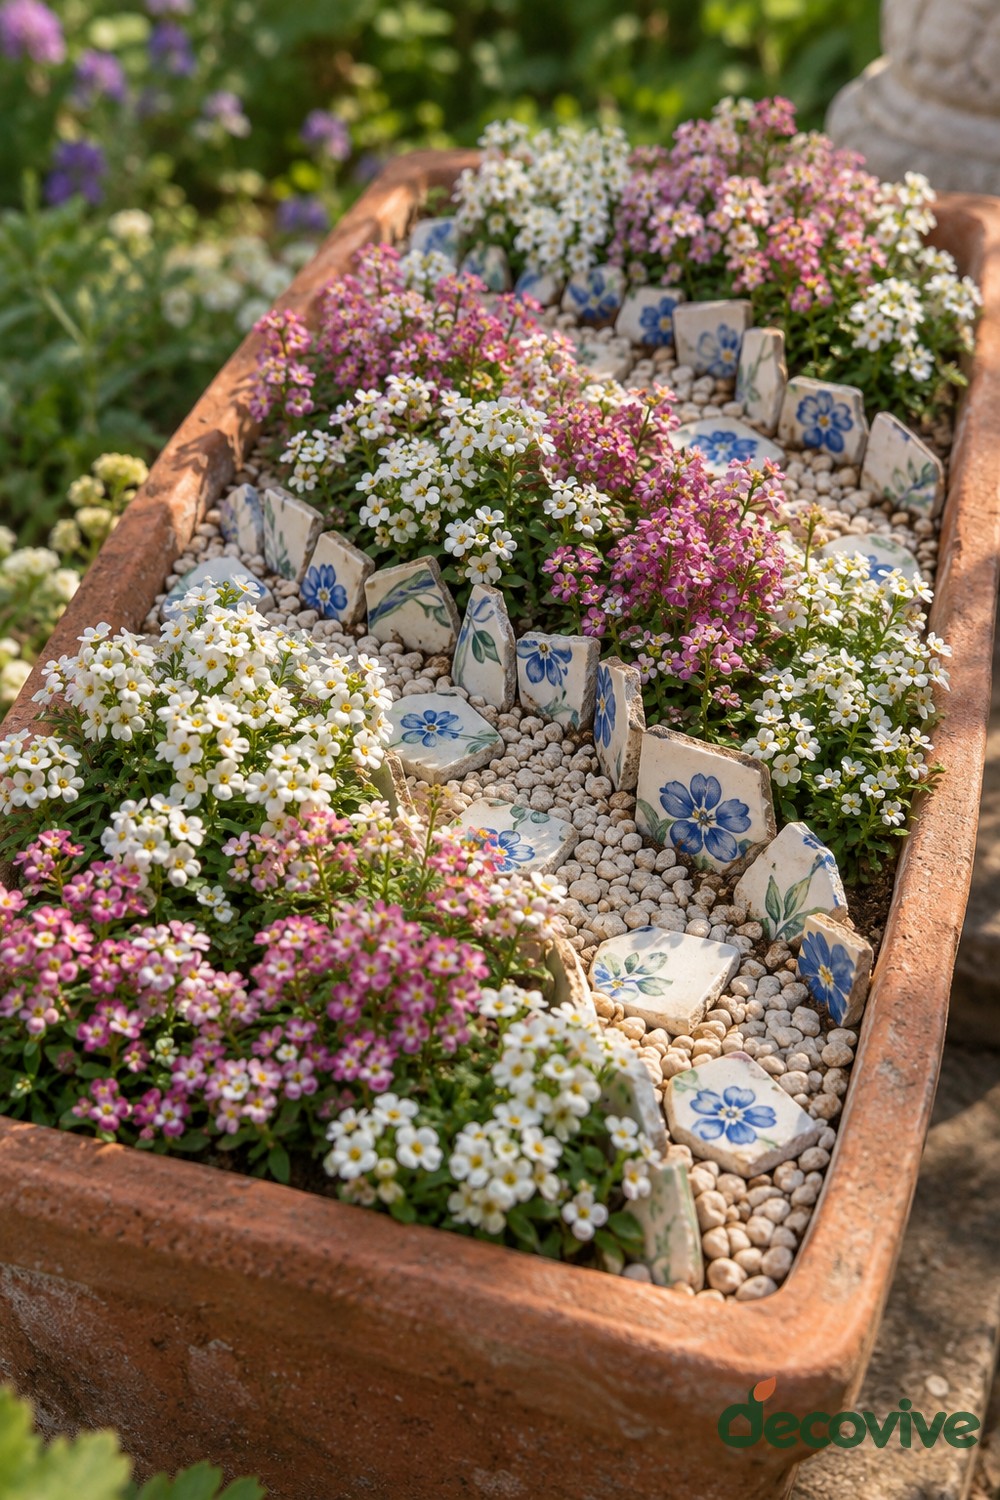
Blue patterned ceramic fragments bring a patchwork quality to a terracotta trough filled with small pink and white blooms. Rather than arranging the pottery into one recognizable object, this design repeats decorative pieces along a narrow central route. Pale pebbles emphasize the blue motifs and separate the flower clusters visually. A rectangular container is practical beside a low wall or along a patio boundary where a round planter would take up more space.
Choose thick, stable fragments and reject pieces with needle sharp corners. Place their broken lower edges beneath the compost, leaving only safe portions visible. Set the flowers into a shared growing layer with sufficient depth for their roots, then add a thin pebble dressing around them. Treat the ceramic as decoration rather than a watertight partition. As the flowers grow, shorten any stems that hide the patterned pieces, and lift loose shards before moving or refreshing the trough.
8. Broken Vase Necks as Viola Planting Frames
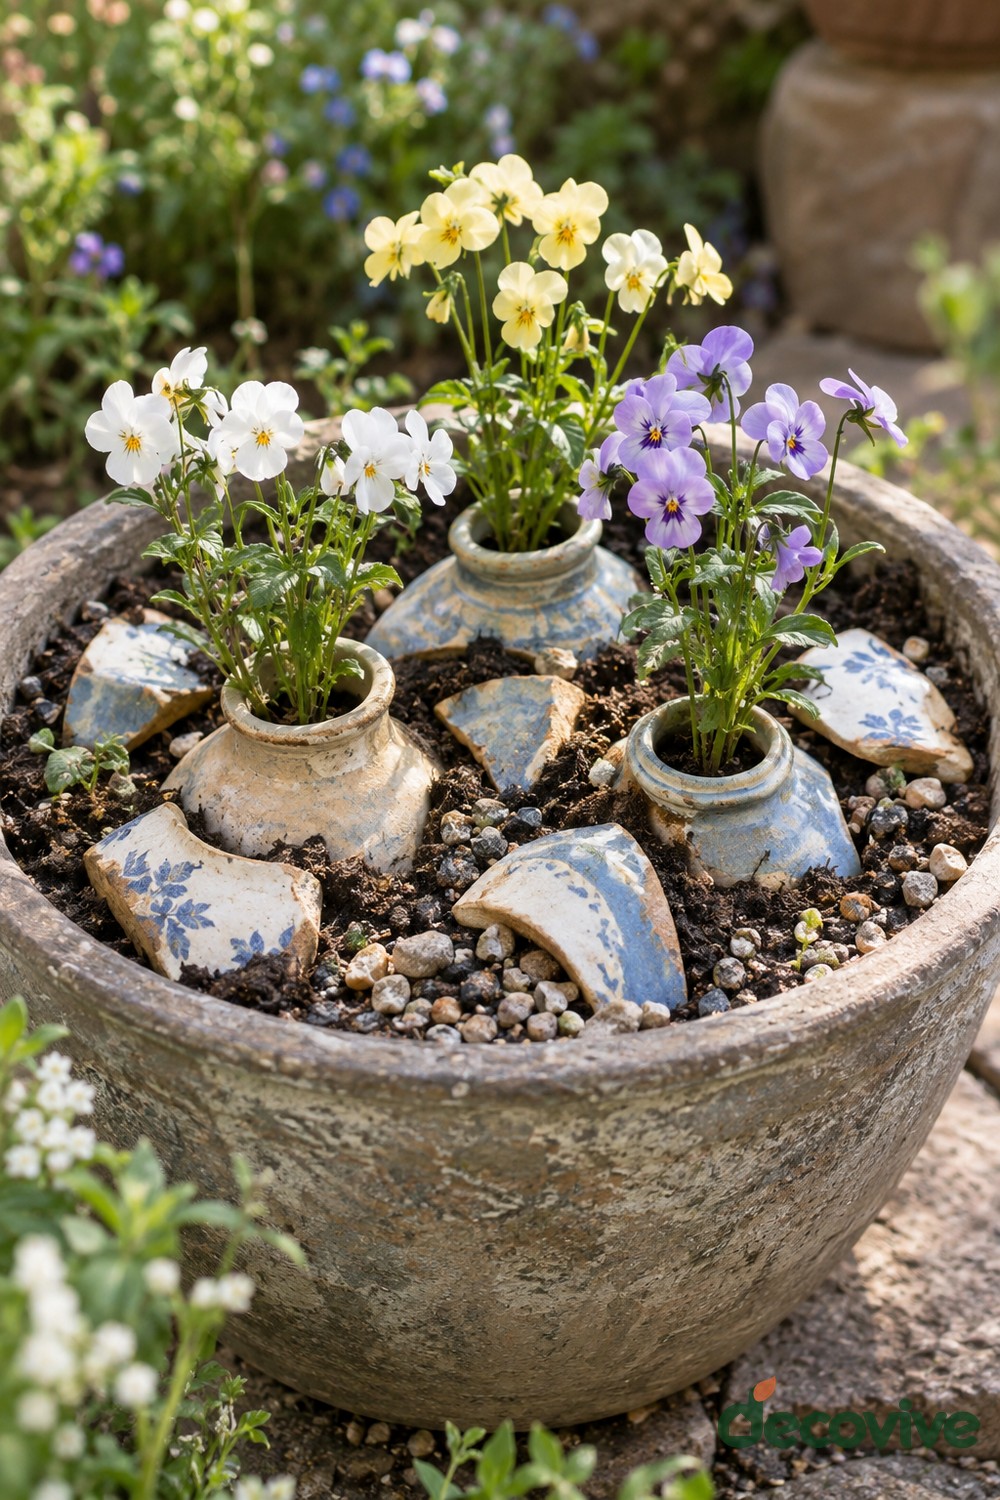
Three blue and cream vase necks frame white, pale yellow, and lavender violas inside a weathered round bowl. Matching patterned fragments lie between them, turning a collection of broken pottery into a coordinated display. The intact circular openings are the distinguishing detail: each flower cluster rises through a narrow collar while the broader bowl holds the composition together. This idea suits ceramic pieces whose upper sections survived even though their lower bodies broke.
Use the necks as open collars set into a common layer of compost, allowing roots to extend below and beyond the openings. If a section still has a closed bottom, it needs a drainage route or should remain purely decorative. Choose young plants that pass through the openings without crushing their roots or stems. Position the collars first, plant carefully, and leave space for watering at soil level. Remove any unstable decorative shards that could tip onto the flowers.
9. Leaf Pattern in a Dark Gravel Bowl
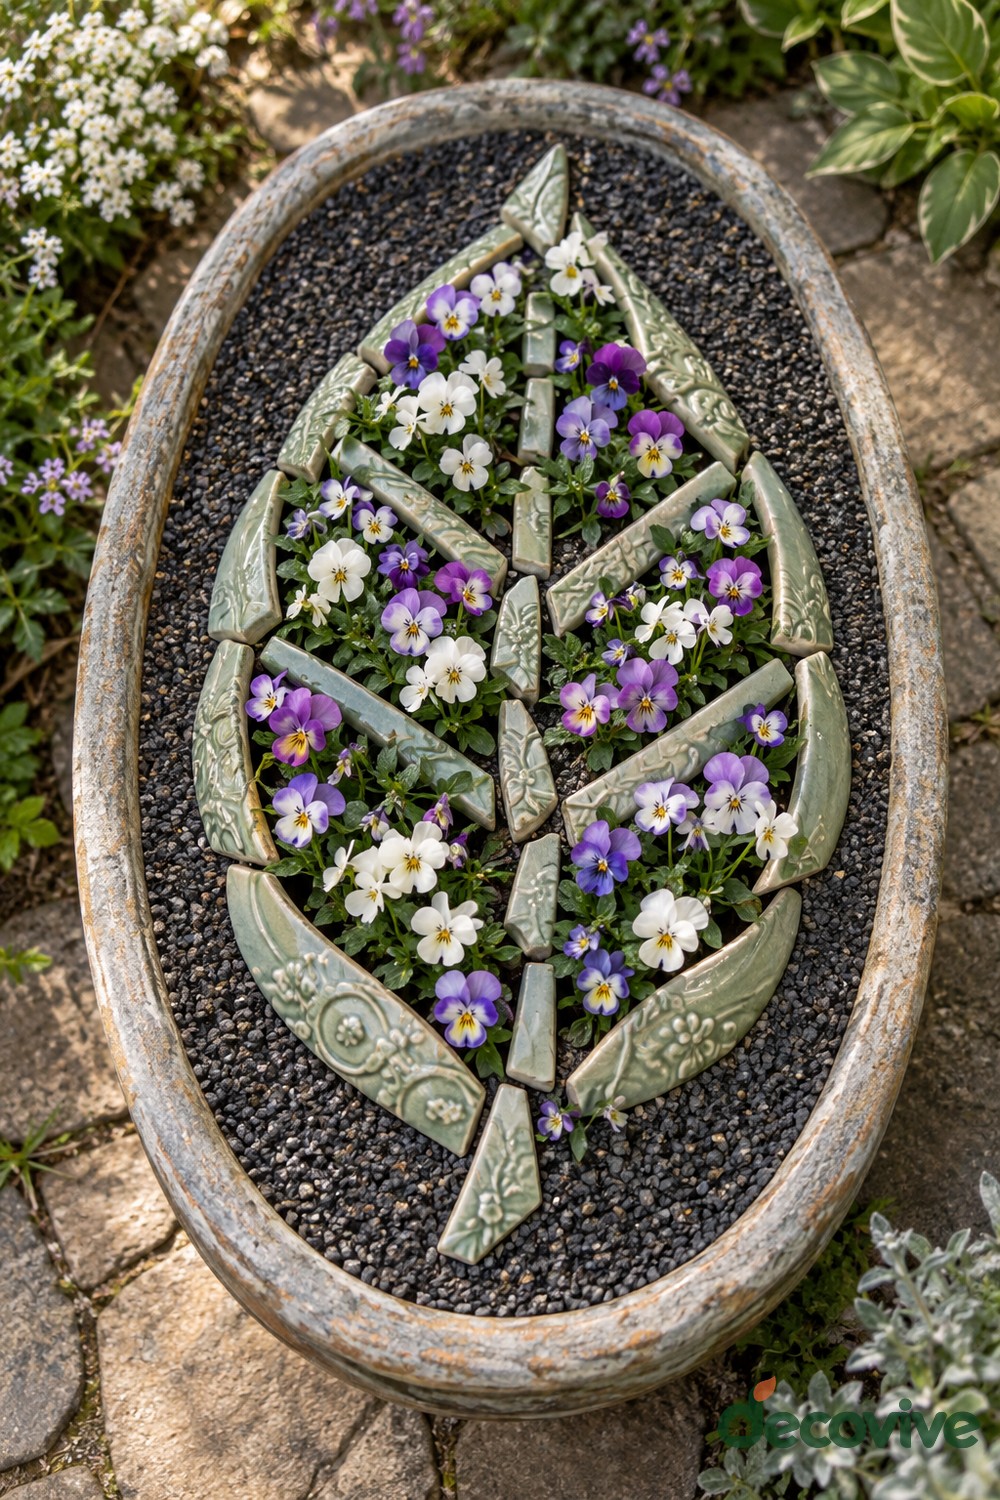
Green patterned ceramic shards form the pointed outline, central vein, and branching segments of a leaf inside an oval bowl. White and purple flowers occupy the spaces between them, while dark gravel defines the outer silhouette. This arrangement offers a calmer graphic alternative to animal shapes and works well when you have a small collection of similarly colored pottery. Its success depends on keeping the vein pattern visible as the planting fills out.
Establish a continuous layer of suitable compost beneath the design, then place the central vein and build outward. Partially bury the ceramic pieces so they cannot wobble, and keep their safest edges above the surface. Add compact flowering plants with enough root room in each opening. Spread the dark gravel only over the exposed surface, without blocking drainage holes or covering plant crowns. Remove seedlings and fallen leaves regularly to maintain the contrast between the leaf and its background.
10. White Flower River Spilling from a Broken Pot
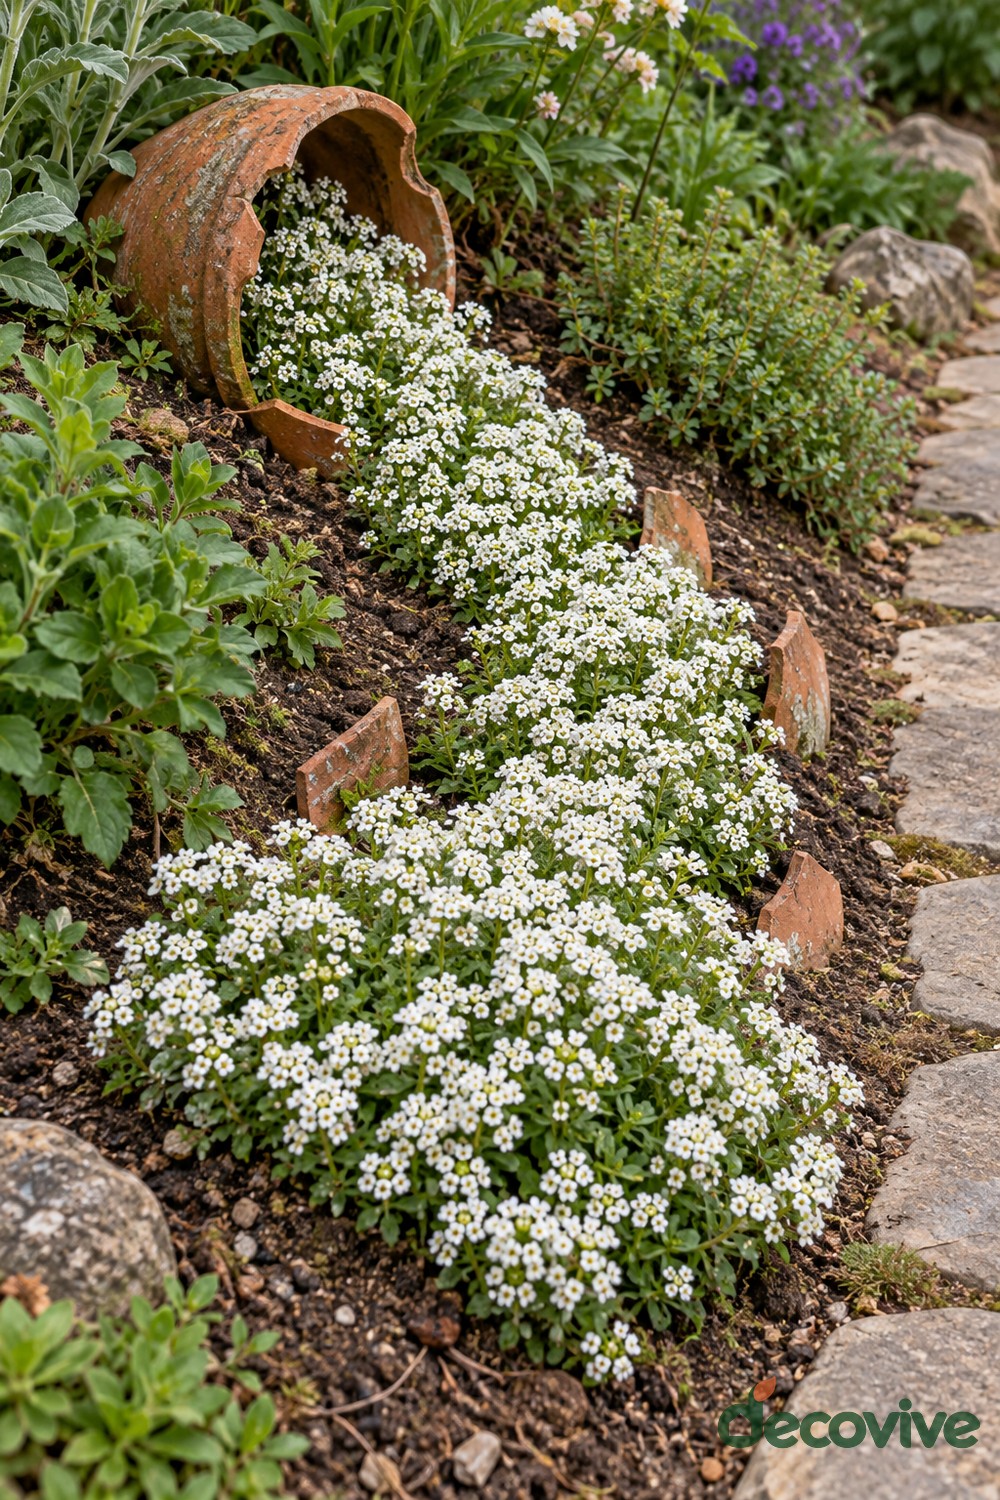
A tipped terracotta pot releases a broad ribbon of tiny white flowers into the garden bed. Curved fragments loosely border the spill, reinforcing the impression that the flowers are flowing outward from the opening. This is one of the simpler designs to adapt because it can follow an existing gap between established plants. Keep the river wider at the front and narrower near the pot so the direction is immediately clear.
Set the pot securely on its side, partly buried rather than resting loosely on mulch. Prepare the whole planting area before placing compact white flowering plants along the route. The roots belong in the garden soil, including beneath the pot opening, rather than in a shallow layer inside the clay shell. Space plants for their mature spread and let them fill the gaps gradually. Clip back growth that entirely covers the terracotta mouth, and weed by hand around the edging.
11. Scalloped Terracotta Edging Along a Gravel Path
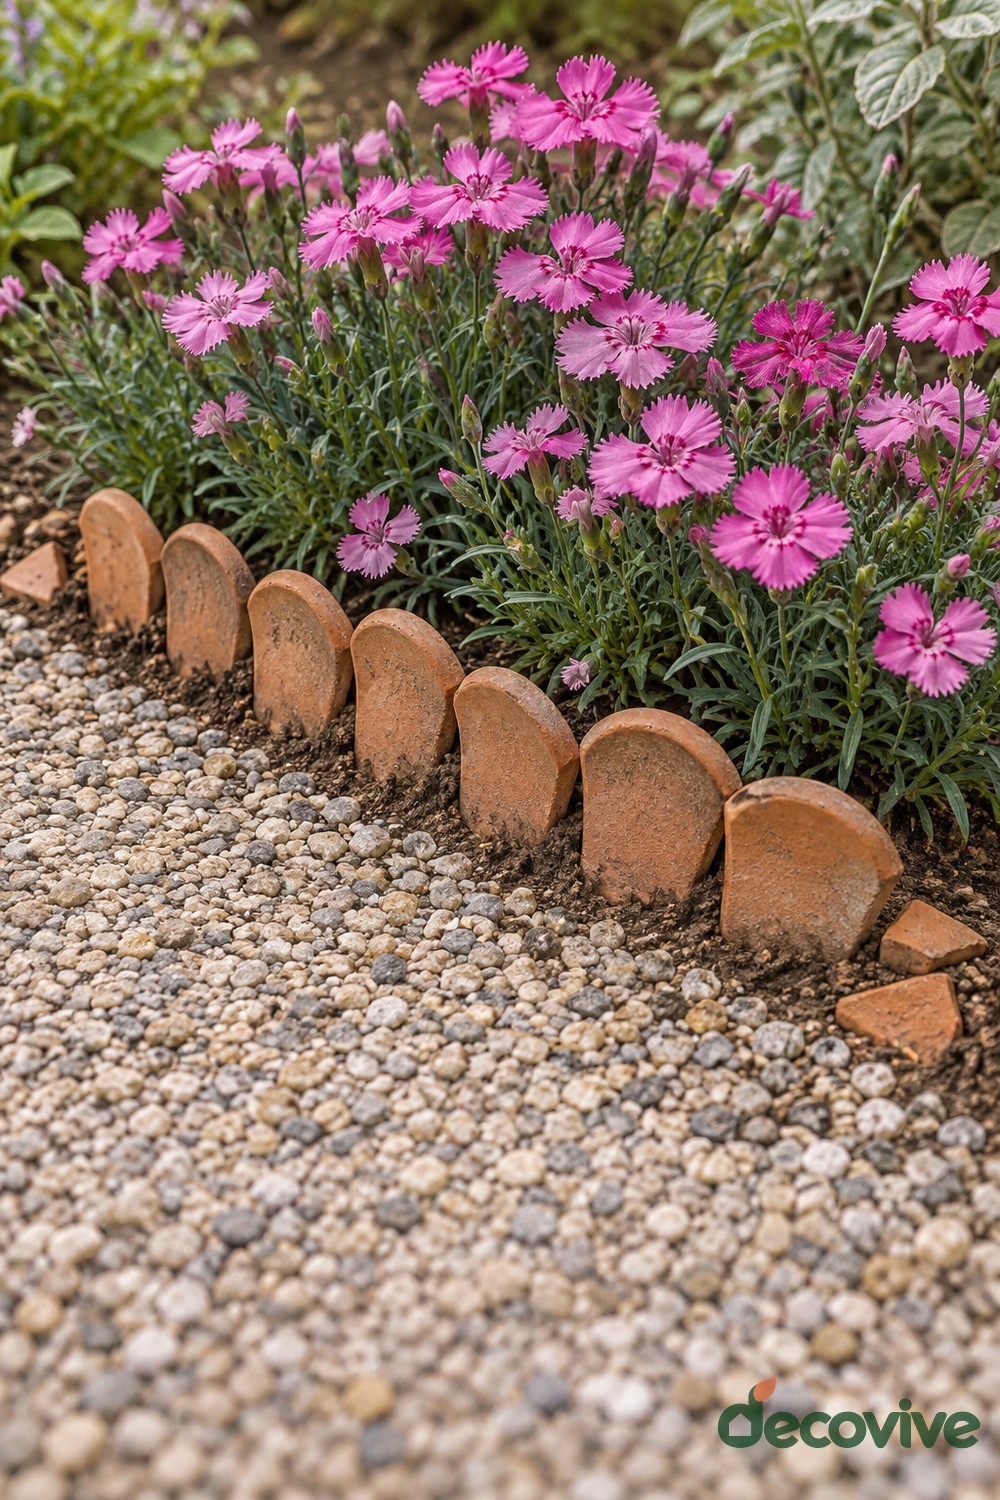
A row of rounded pot sections makes a low scalloped border between pink flowers and a gravel path. The pieces rise only a little above the soil, giving the planting a handmade outline without turning the edging into a barrier. Similar curves create a pleasing rhythm, but slight variation keeps the border relaxed. This approach is useful when a large pot has broken into several curved body sections that no longer suit a container arrangement.
Place the fragments with their broad ends anchored in a shallow trench and their rounded faces toward the path. Firm the earth around them and remove sharp projecting corners. Keep the border back from the walking line so shoes and garden tools do not strike the clay. It is decorative edging and cannot reliably stop vigorous grass roots or retain a raised bed. Brush displaced gravel away from flower crowns and replace any fragment that cracks further during seasonal changes.
12. Purple Flowers Tumbling from Three Broken Pots
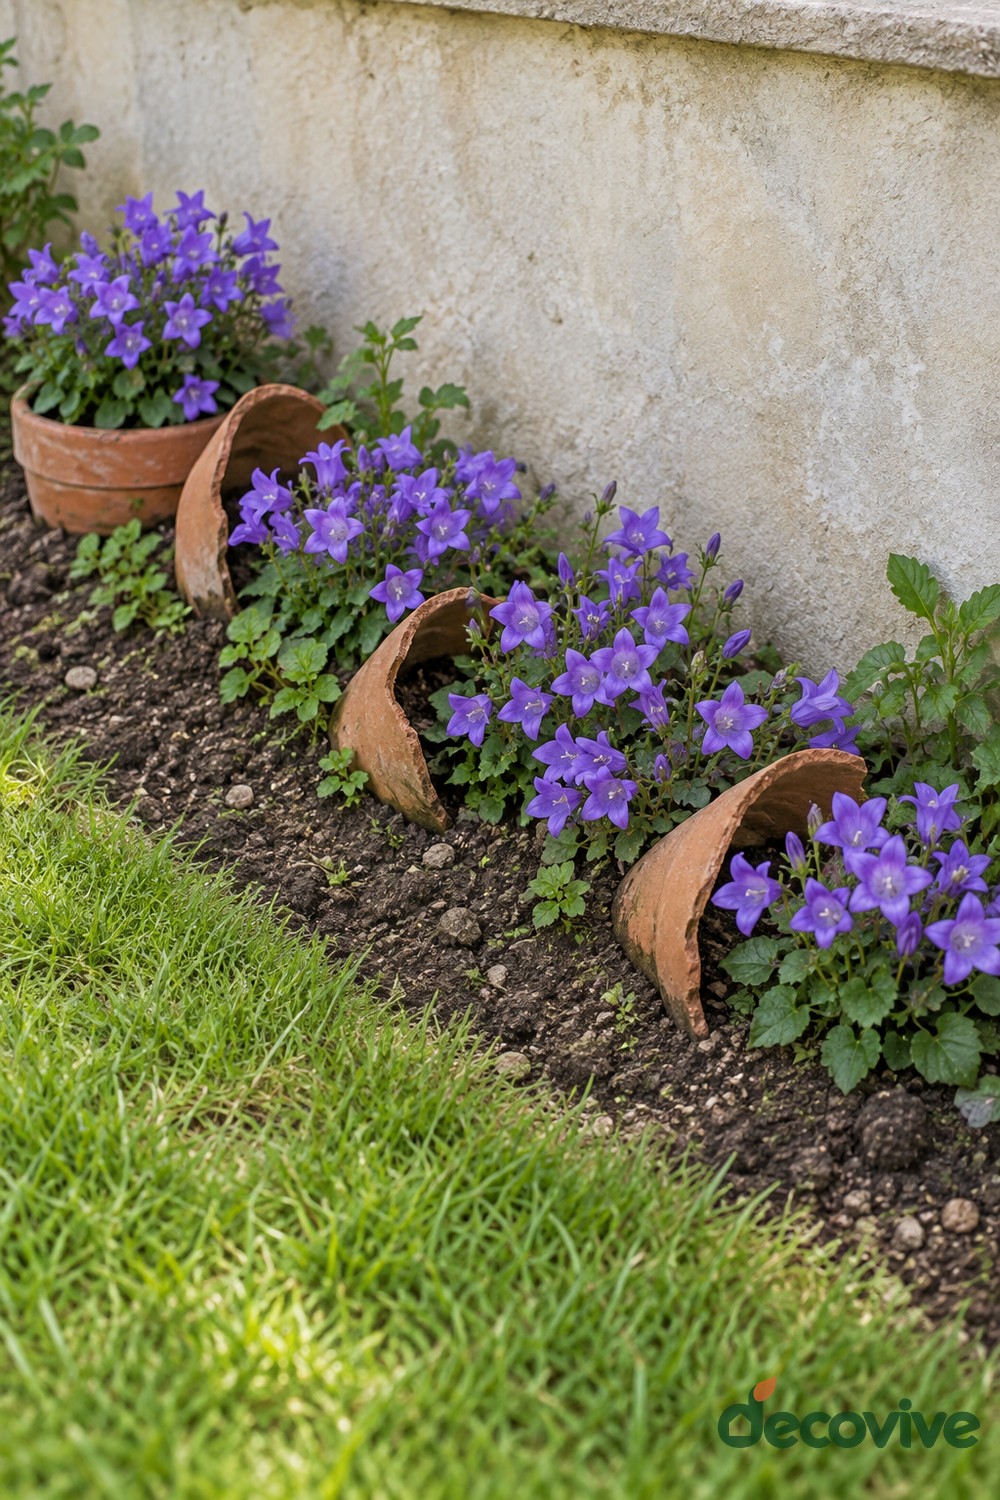
A series of broken terracotta pots repeats the same purple flowering spill along the base of a pale wall. Each vessel opens toward the lawn, and the flowers bridge the gap between the pot interior and the border soil. Repeating one color gives the arrangement continuity, even though the pots differ slightly in shape. This design is helpful for turning a long, narrow wall bed into a sequence of small focal points.
Arrange the pot openings at similar angles before planting, leaving enough distance for the flower clumps to expand without merging into one indistinct mass. Let roots access the bed soil through the missing sides. Choose a compact purple flowering variety that suits the wall exposure rather than relying on color alone. Keep a little space between the pots and the wall for inspection and watering. Cut back growth that reaches the lawn, and avoid hitting the brittle terracotta with a mower or trimmer.
13. Flower Ring Around a Garden Post
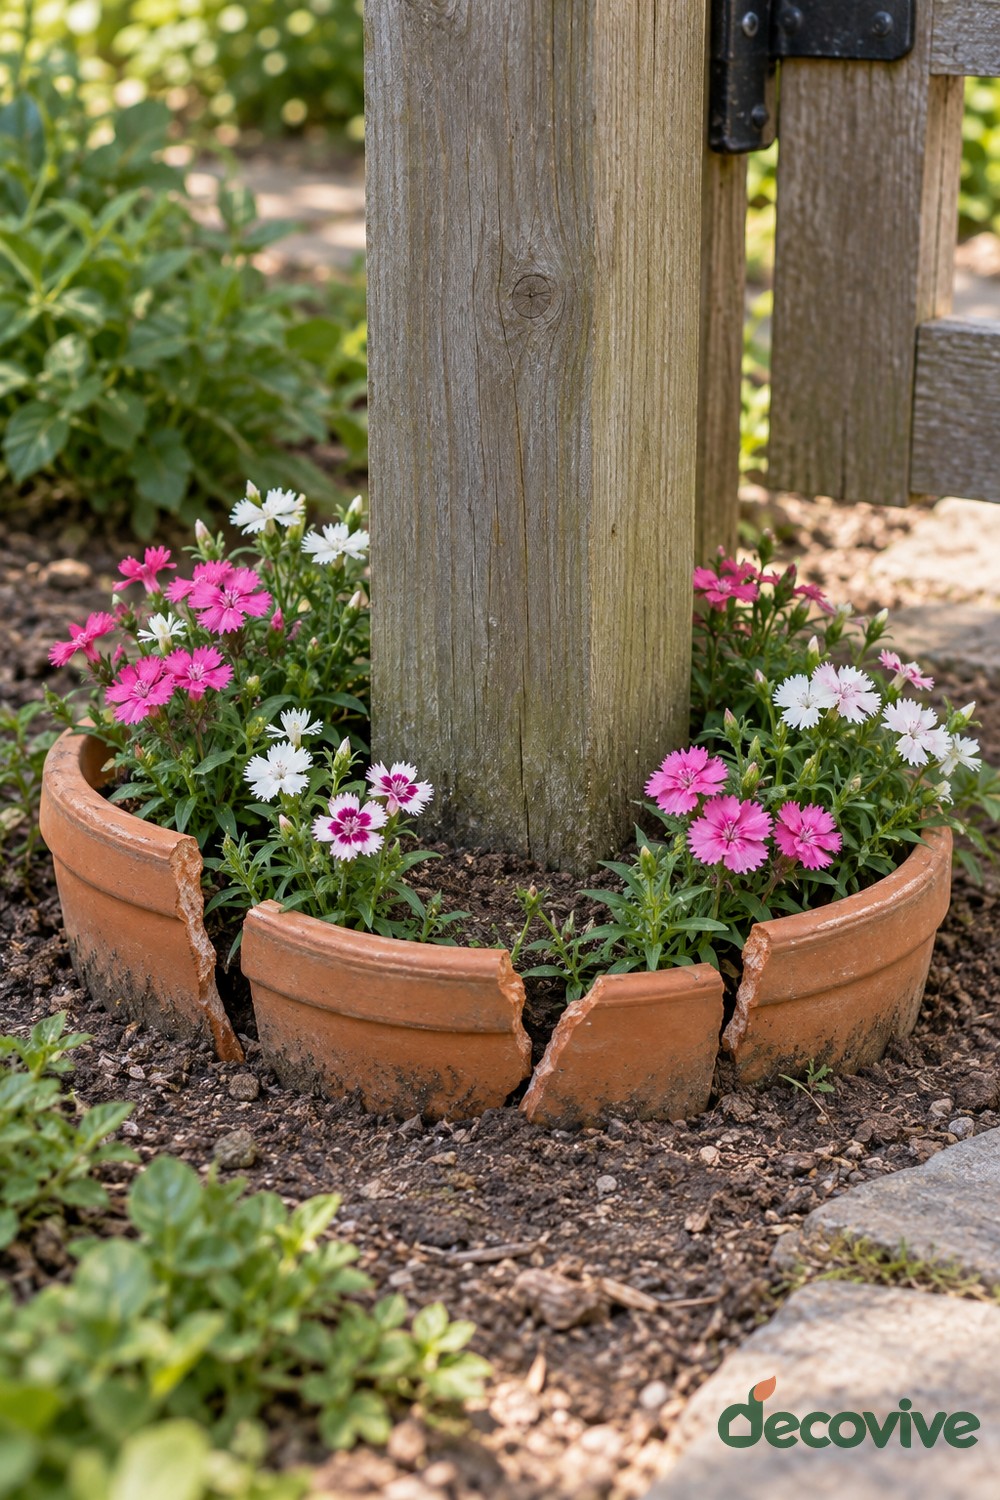
Broken terracotta rim sections form a low circular flower border around a timber post. Pink and white blooms brighten the base while the clay pieces give the ring a clear edge against surrounding soil. Because the post supplies the vertical element, the planting can stay modest and low. This is a useful way to finish the base of a garden structure without adding another freestanding container.
Make the ring larger than the post footprint and leave a clear inspection gap around the timber. Soil, mulch, and frequent watering should not be piled against the wood. Set the pottery fragments firmly into the outer edge and use the existing garden soil for the flowers. Maintain access to any brackets, fixings, or drainage around the post base. Select plants whose mature spread will not completely conceal the gap, and check that the arrangement does not obstruct gate movement or routine maintenance.
14. Mixed Flower Spills Beside a Garden Path
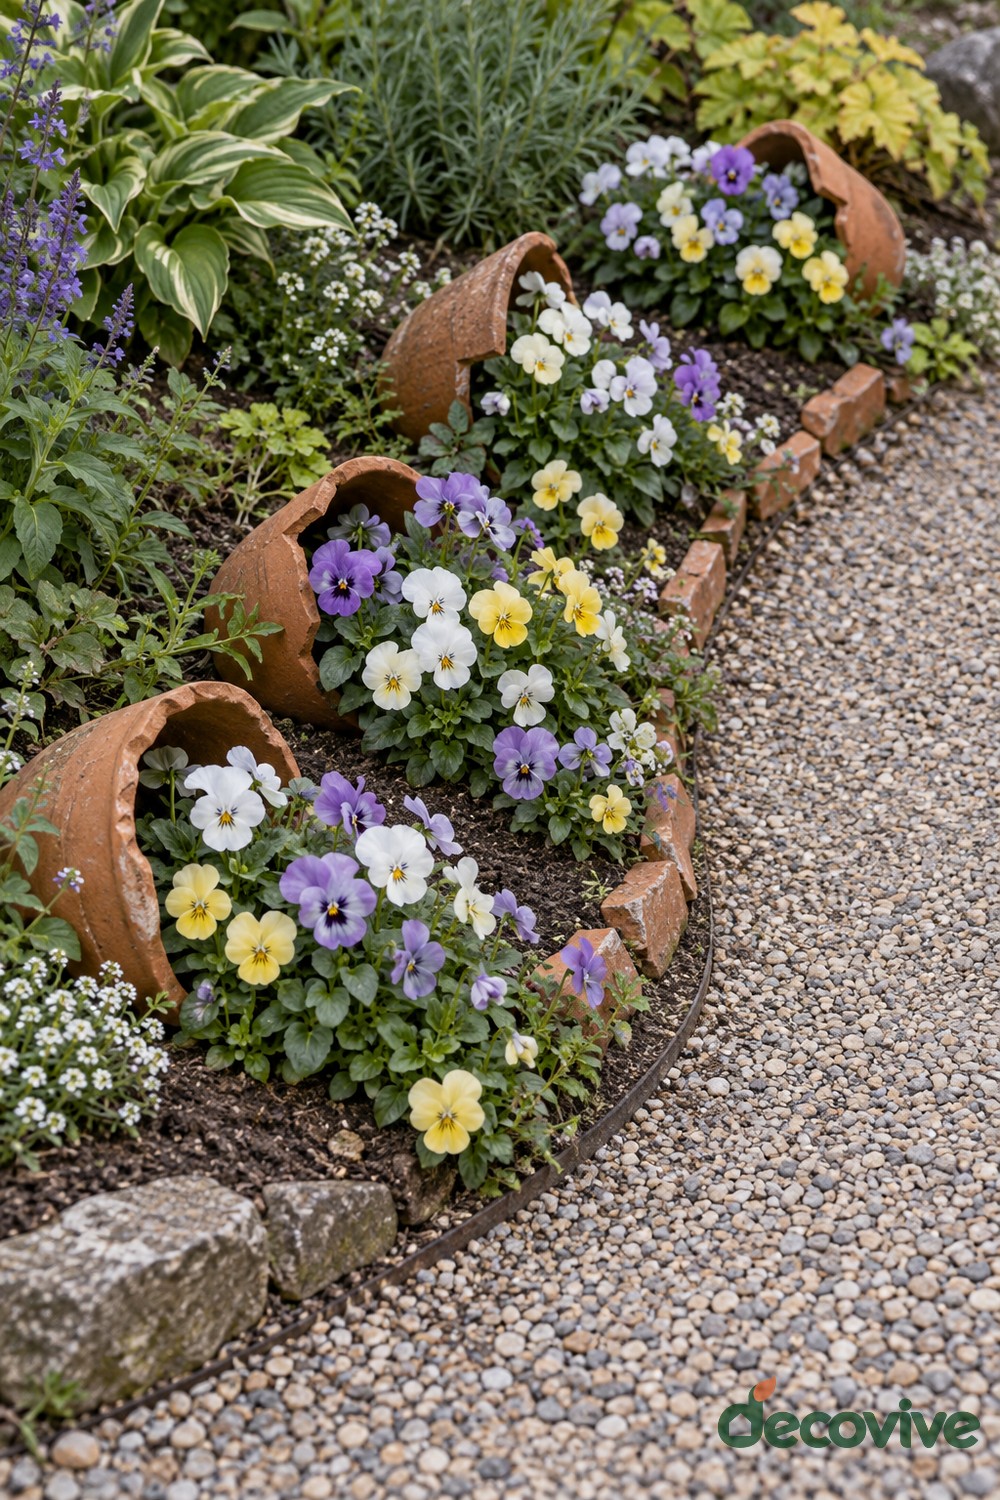
Several broken pots create little bursts of white, yellow, and purple flowers along a gravel path. Each opening faces the walkway, while additional terracotta fragments connect the clusters into a loose border. The mixed palette makes this feel like a casual cottage garden detail rather than a formal pattern. It works particularly well where the planting bed is narrow but still deep enough to support the flowers beyond the visible pot shells.
Place the larger pot remnants first and leave the path fully clear. Partially bury the shells, then plant through their openings into prepared soil. Use a few repeating flower colors so the series remains coherent without making every cluster identical. Reserve smaller fragments for low edging, keeping rough edges beneath the soil line. Water the root area without washing soil across the gravel. As stems lengthen, trim them away from the walking surface and check for loose clay pieces after routine garden work.
15. Two Level Flower Cascade in a Broken Terracotta Pot
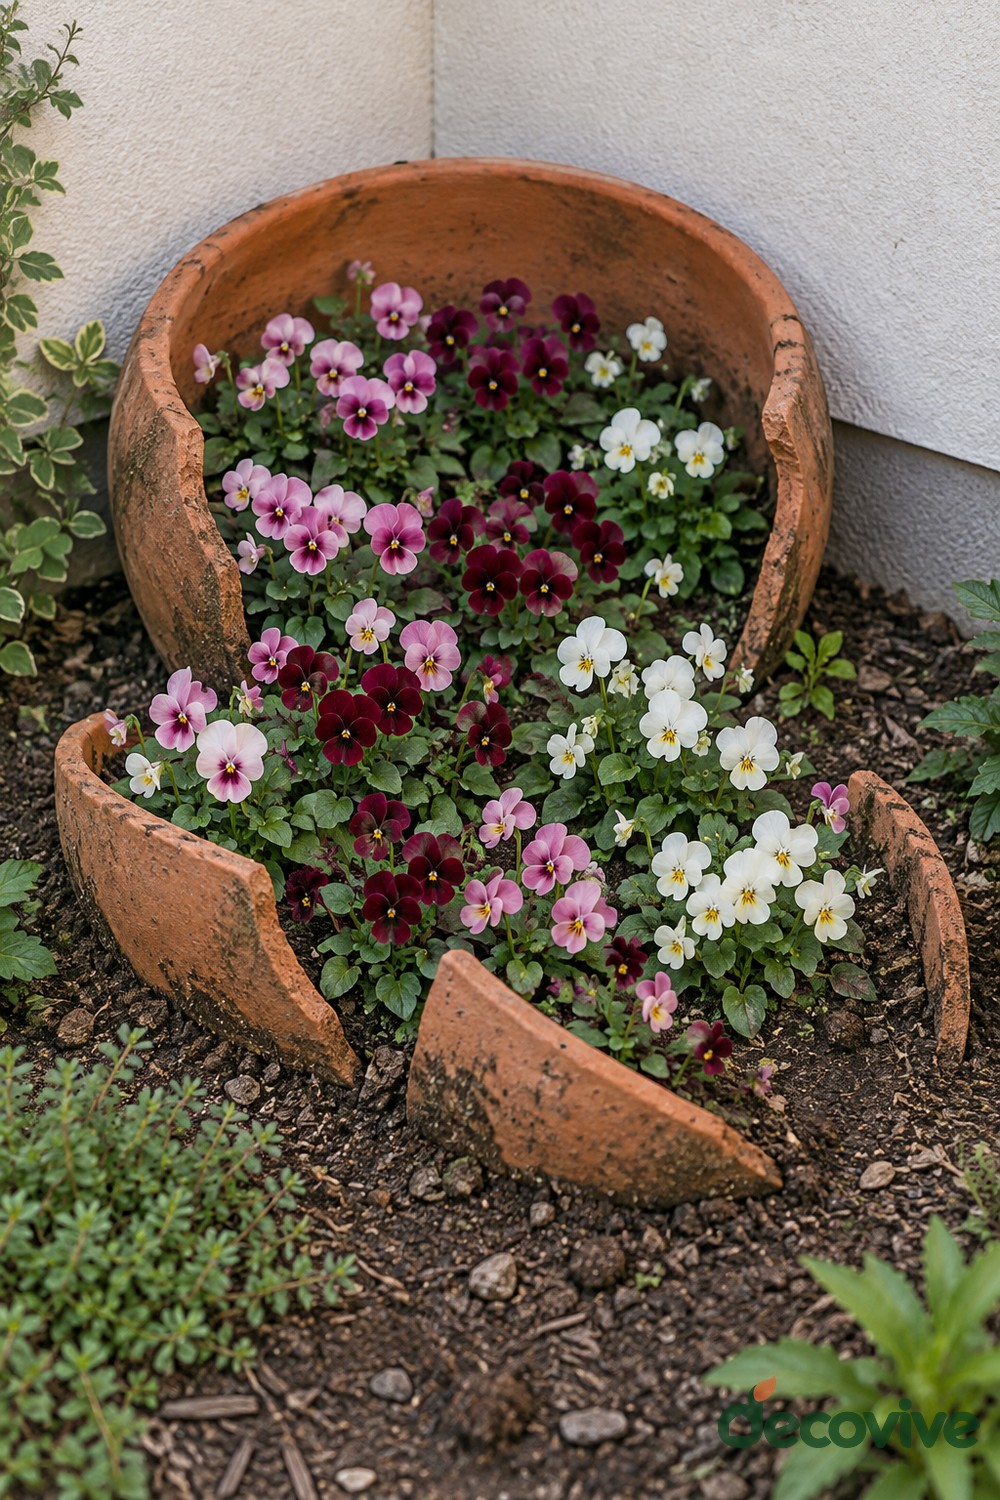
A large broken pot holds a raised cluster of burgundy, pink, and white flowers, while a curved front fragment frames a lower planting area. The two levels make the flowers appear to cascade through the missing side. This arrangement makes good use of a pot whose back and base remain sound, especially in a small bed beside a wall. The open front should reveal the change in height without exposing loose compost.
Build the lower planting pocket first, then position the main pot and fill behind its surviving wall. Firm the compost gently so it supports the plants without forcing pressure onto weakened clay. Use the curved front piece as a low retaining edge only, and reduce the height if soil spills through the gaps when watered. Give each flower cluster adequate root space. Avoid gluing together crumbling fragments to carry a heavy soil load; a less elevated version is easier to maintain.
16. Blue Flower Stream in a Fence Corner
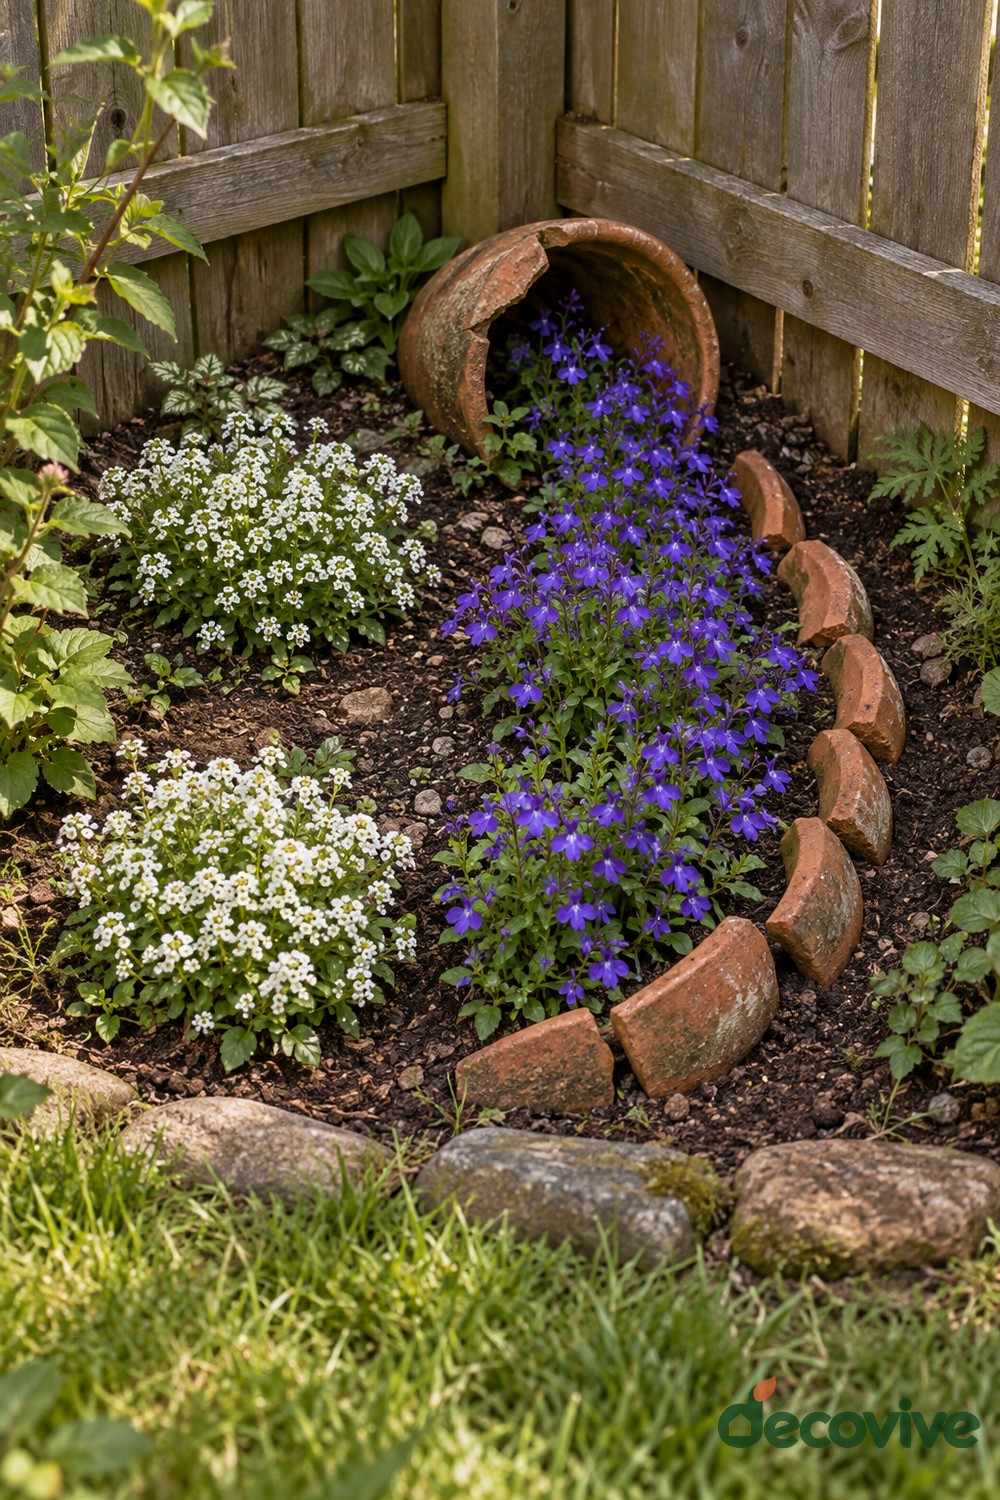
An overturned pot tucked into a fence corner begins a narrow stream of blue flowers that curves outward through the bed. Upright rim pieces mark one side of the route, giving the planting a sense of movement without enclosing it completely. The cool blue flowers contrast with the warm terracotta and soften an otherwise plain boundary. A corner location also gives the pot a natural destination rather than leaving it stranded in the middle of a lawn.
Set the opening toward the clearest viewing angle and anchor the pot in the soil before planting. Leave room beside the fence for maintenance and prevent compost from touching timber boards. Choose low blue flowering plants for the light actually available in the corner. Their roots should occupy the garden soil beneath the spill, not just the mouth of the pot. For additional ways to position a compact feature, browse our corner garden ideas and keep the surrounding layout simple.
17. Flower Filled Bow with Terracotta Ribbon Tails
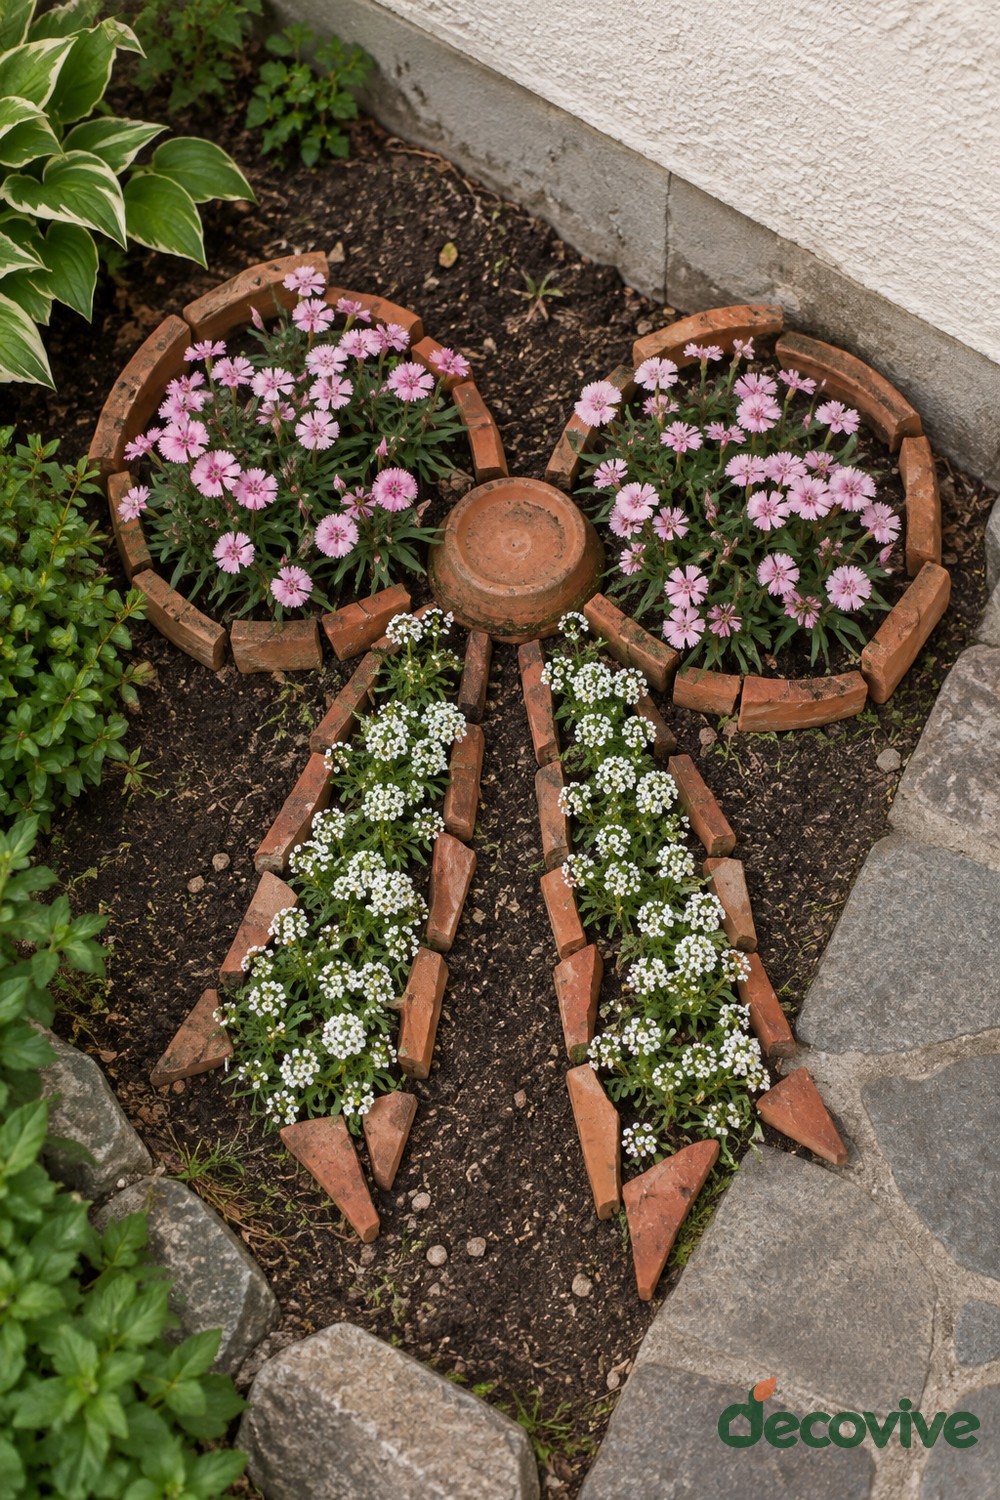
Two rounded flower beds, an inverted central pot, and a pair of long tapered planting strips create a large bow at ground level. Pink flowers fill the upper loops, while tiny white blooms run down the tails. Curved rim sections outline the loops, and smaller fragments finish the pointed ribbon ends. This design is best viewed from a patio or slightly elevated position where the bow shape can be read as a whole.
Lay out the loops and tails on bare soil before planting, adjusting both sides until the central pot connects them visually. Keep the ribbon strips wide enough for roots and watering access. The central pot can remain empty as a decorative knot. Partially bury the outline fragments and maintain a small border of visible clay around the flowers. Do not place the tails across a walking route. Trim spreading blooms selectively so the pointed ends and central knot stay distinct.
18. Terracotta Turtle with a Colorful Flower Shell
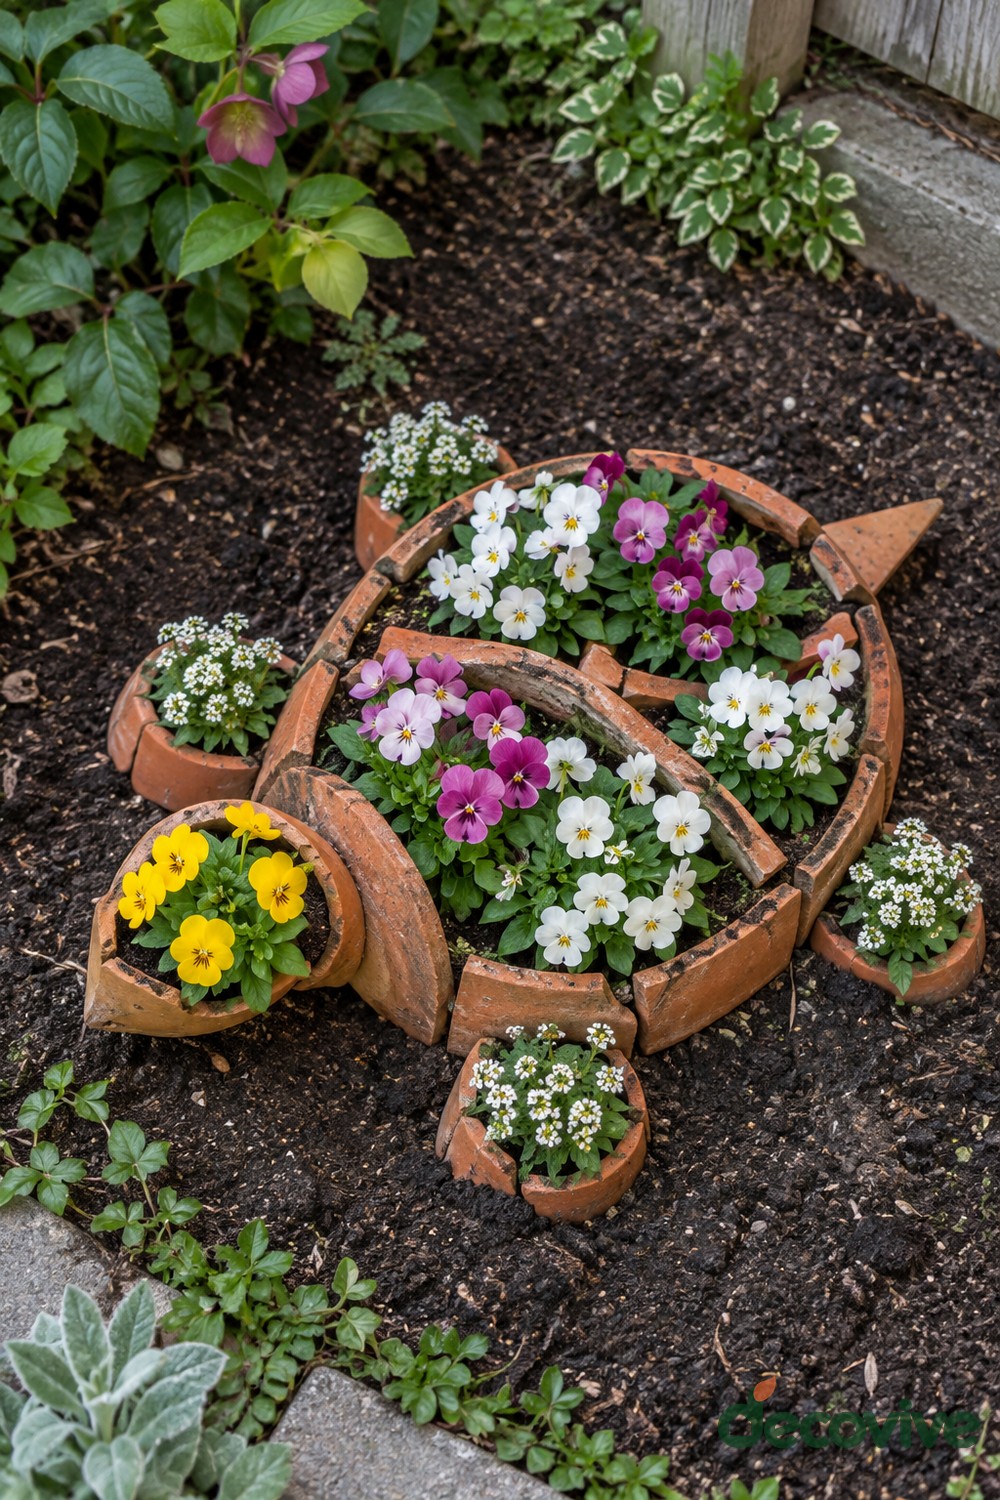
A round terracotta outline becomes a turtle shell filled with white and magenta violas. Curved internal dividers suggest shell sections, while a small yellow flower pocket forms the head and four white flowering pockets represent feet. A pointed shard completes the tail. The design adds a playful focal point to a garden bed without needing a separate ornament, and it makes several differently sized broken pot sections useful in one arrangement.
Begin with the shell and check that the head, feet, and tail fit comfortably around it. Use the pottery as shallow edging above a continuous root zone, rather than confining plants to thin closed pockets. Make the feet larger if the available flower plants need more room. Set the pointed tail mostly into the soil so its sharp end does not project upward. Keep nearby foliage from obscuring the outline, and replace any broken fragment that becomes loose or dangerously exposed.
19. Umbrella Flower Garden with a Curved Clay Handle
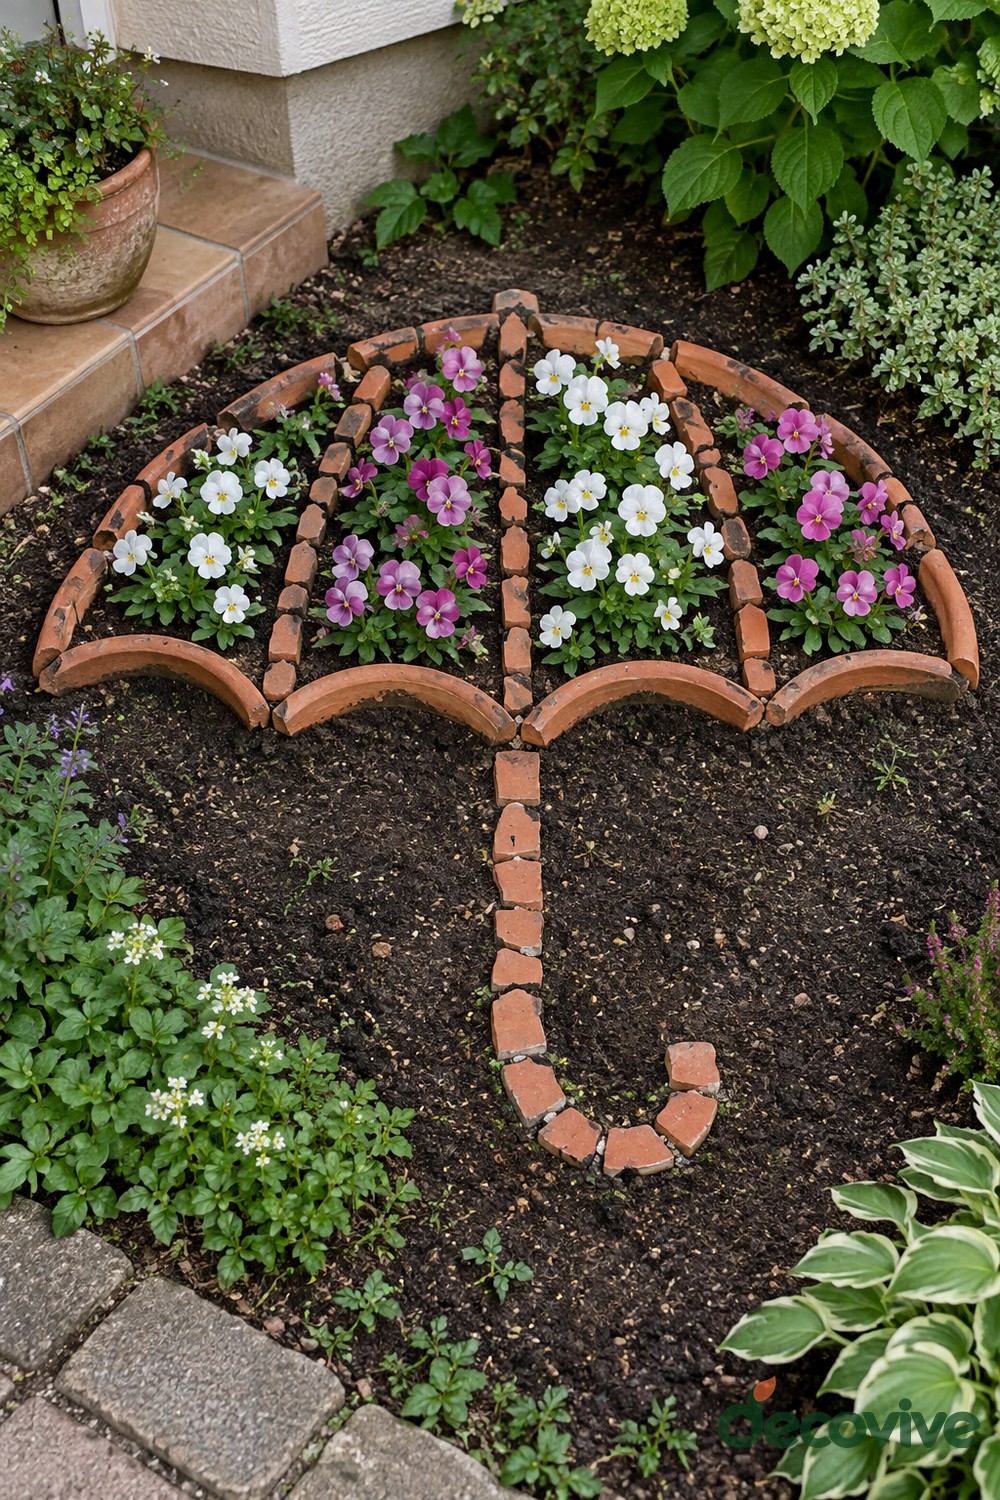
A scalloped terracotta canopy holds alternating bands of white and pink flowers above a long hooked handle made from small clay pieces. The canopy outline and internal dividers create the umbrella shape, while the handle remains unplanted so its curve is easy to follow. This is a strong graphic design for a bare bed near a house corner, especially when viewed from an upstairs window or the edge of a raised patio.
Arrange the canopy first and give every planted section enough width for the chosen flowers. Set the internal borders into the soil only as deeply as needed for stability, allowing roots to spread underneath. Place the handle pieces low and well supported so they cannot catch shoes or garden tools. Avoid adding plants along the handle, which would blur its silhouette. Remove weeds between the small clay pieces and trim flowers away from the scalloped edge as the canopy fills out.
20. Spiral Snail Garden with a Purple Flower Head
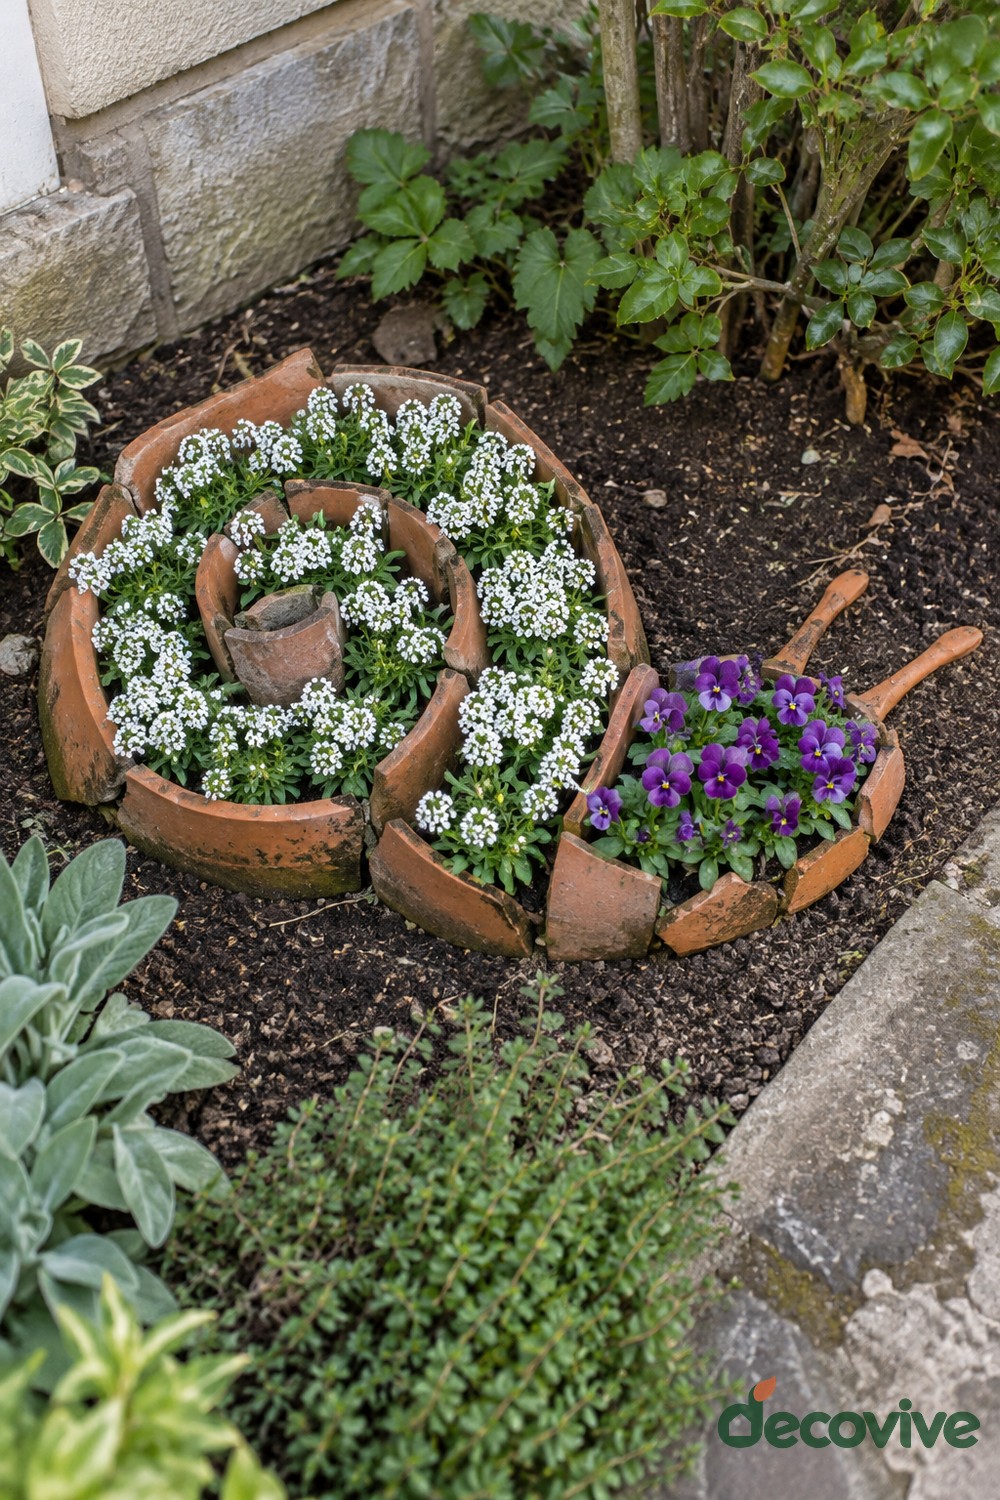
A broad spiral of terracotta fragments forms the shell of a snail, filled with tiny white flowers. Beside it, a smaller rounded pocket holds purple blooms for the head, with two narrow clay pieces extending forward as antennae. The contrast between the two flower colors makes the snail readable without painted details. A garden corner near paving gives this low design an accessible viewing angle while keeping it separate from larger border planting.
Build the outer shell curve first and continue inward, leaving generous planting space between the spiral walls. Keep the dividers shallow enough for roots to share the soil below them. Form the head only after the shell is settled, and place the antenna pieces flat against the ground rather than projecting upward. Choose flowers with compatible watering needs for the shared bed. Remove growth that bridges every spiral gap, keeping a few terracotta edges visible so the shell pattern survives through the flowering season.
21. Open Envelope Flower Bed with a Terracotta Outline
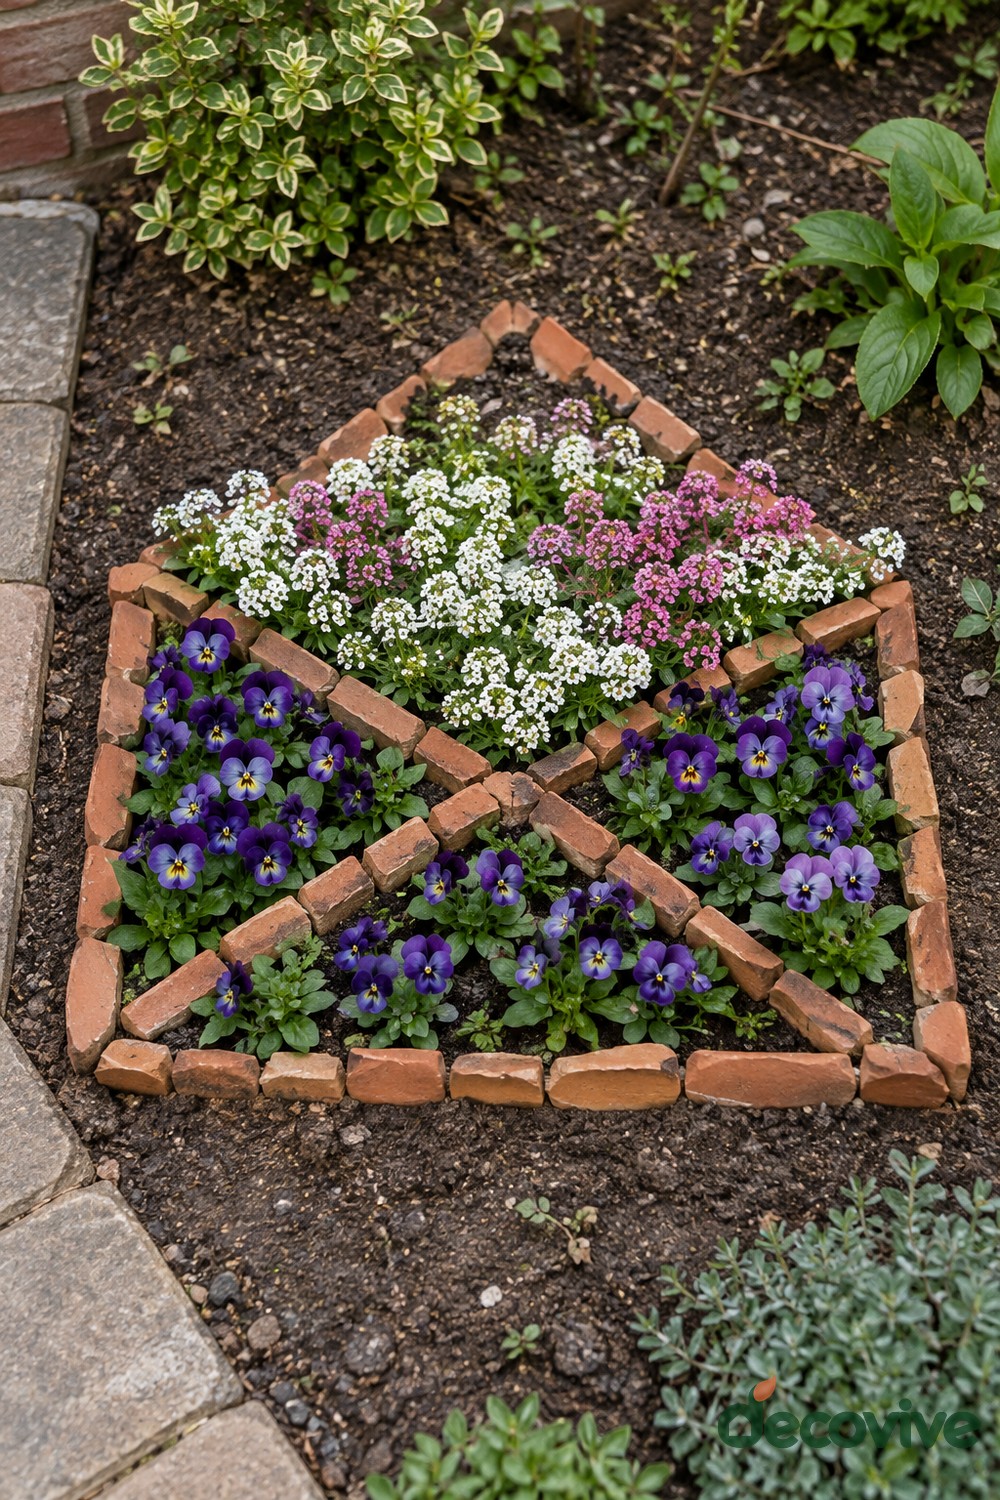
A rectangular terracotta frame and diagonal clay dividers create an open envelope filled with flowers. White and pink blooms rise through the upper flap area, while purple flowers occupy the lower triangular sections. The arrangement feels like a small floral message laid directly in the garden. Straight rim fragments suit the outer edges, and irregular shorter pieces can form the diagonal folds without requiring perfectly cut pottery.
Mark out the rectangle first and check it from the intended viewing position before setting the pieces into soil. Add the diagonals as low decorative borders, keeping the flower sections broad enough for practical planting. Leave roots access to the common garden bed underneath. Use small flowering plants initially rather than overcrowding the design for immediate fullness. Clear weeds from the terracotta outline and shorten stems that hide the fold lines. Keep this feature away from places where a wheelbarrow or hose regularly passes.
22. Flower Kite with a Broken Pot Bow Tail
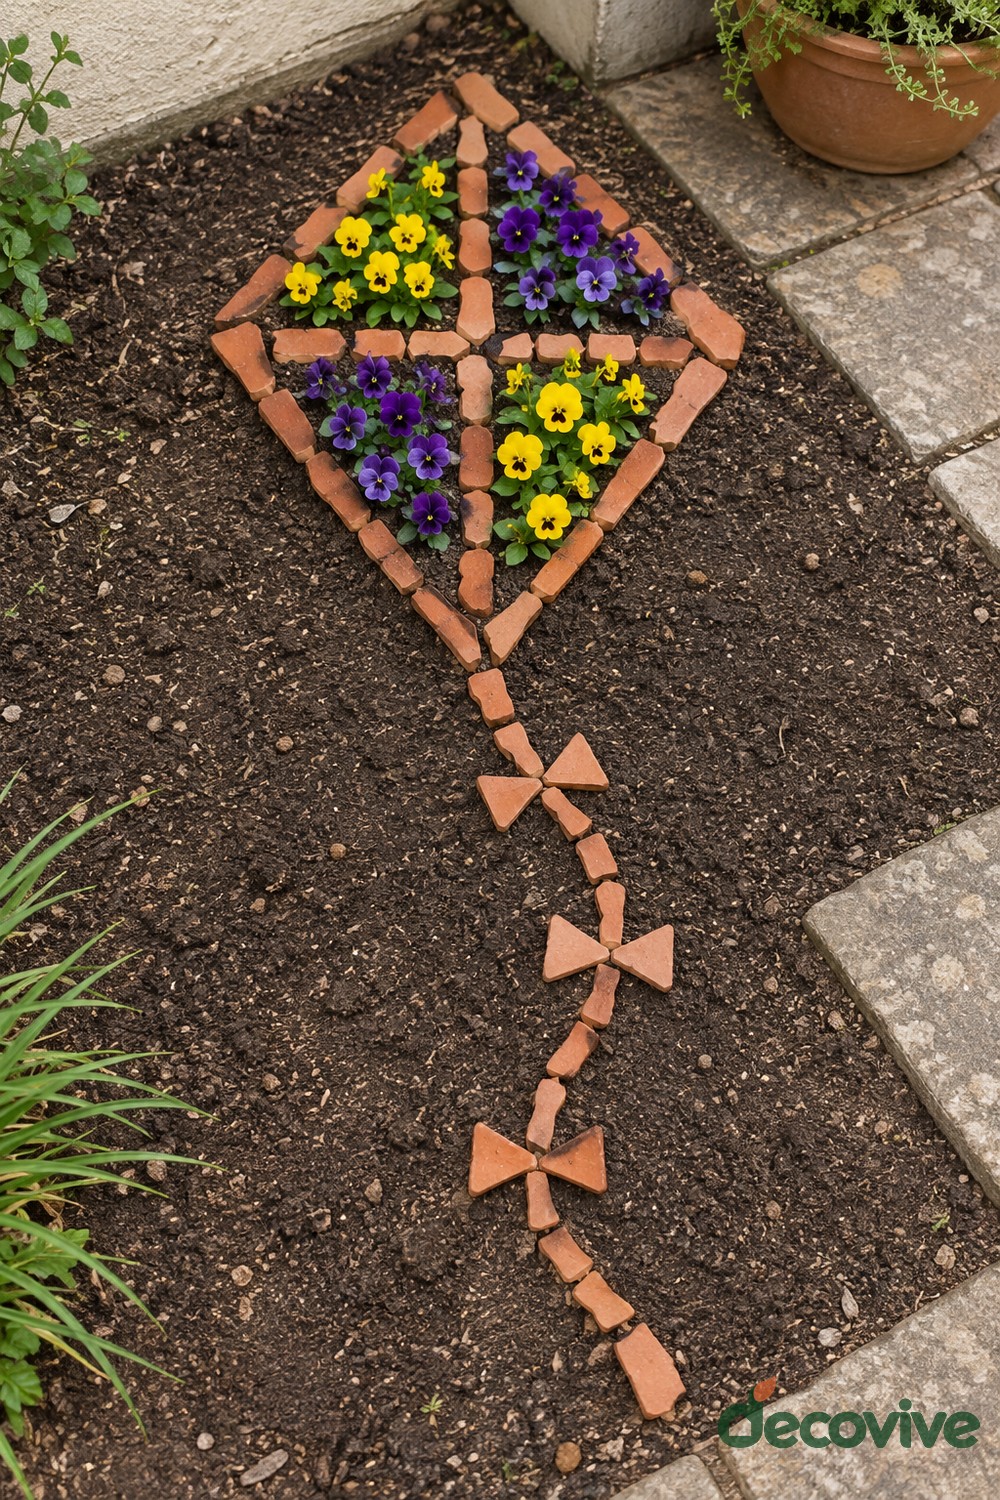
A diamond shaped terracotta border becomes a garden kite, with crossing clay dividers separating yellow and purple flowers into four compartments. Below it, a winding line of small pottery chips carries little triangular bows. The planted diamond supplies the color, while the unplanted tail gives the design its lighthearted movement. This is a good use for a mix of straighter fragments and small triangular pieces that would be awkward in a conventional pot arrangement.
Lay out the diamond and its central cross before extending the tail. Make the flower compartments large enough to support mature roots in the underlying soil, and partially bury every border piece. Set the tail chips and bows flat and securely into shallow recesses. Small pieces can shift during watering or weeding, so inspect them periodically and simplify the tail if maintaining it becomes difficult. Keep a strip of exposed soil between the kite and neighboring plants so the diamond and its color pattern remain visible.


Leave a Reply