

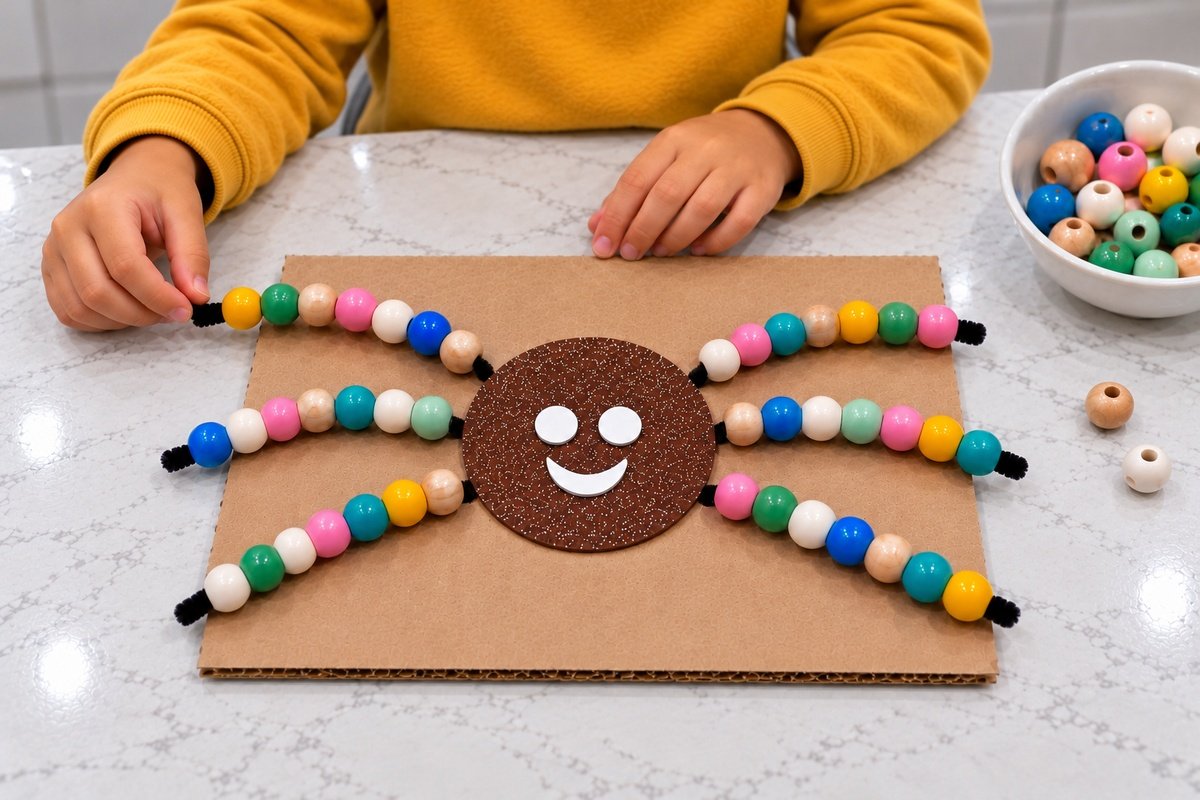
Six bendy legs turn a cardboard face into a bead threading station. Children hold a pipe cleaner steady, guide a wooden bead over its cut end, and slide it toward the body. Once the legs have a few beads, the same board becomes a place to match colors, count, and build short patterns.
An adult handles cutting, hole making, and the rear glue joints. Children can arrange the secured legs, add the face, and thread the beads with close supervision. Allow about 20 to 25 minutes of active making time, plus drying time between the glued stages. Aleene's Felt & Foam Tacky Glue, the glue used in the cost example, tells you to let it dry for one hour before handling. When the board is ready, start with a 10 to 15 minute play session and follow the child's interest.
Table of Contents
- What Children Can Practice
- Materials and Tools
- 1. Cut the Foam Body and Face Pieces
- 2. Glue the Body to the Cardboard
- 3. Tidy the Stem Tips
- 4. Pierce Six Mounting Holes
- 5. Glue the Roots to the Back
- 6. Let Your Child Arrange the Legs
- 7. Add the White Eyes and Smile
- 8. Thread the Beads One at a Time
- 9. Leave Space at Each End
- Material Cost
- Safety and Storage
What Children Can Practice
- Fine motor skills. Picking up, holding, and sliding individual beads gives children practice with small, controlled finger movements.
- Hand and eye coordination. Looking at the bead's hole while lining it up with a stem encourages the eyes and hands to work together.
- Attention and focus. Finishing one short row gives the child a manageable task to follow, one bead at a time.
- Color recognition. Ask for a named color, find a matching bead, or copy a short sample made with two colors. Keep the choices small at first.
- Early math skills. Count the beads on a leg, compare two rows, sort a small handful, or repeat a simple blue and white pattern.
- Problem solving. Turning a bead to find its hole and adjusting its angle gives children small, practical problems to solve before trying again.
- Hand strength and control. Gentle gripping and sliding give the thumb and fingers repeated light work that can support hand strength and steadier handling.
Demonstrate with one bead, then let the child take over. A short row is enough for a first turn. For a different tabletop challenge on another day, try the color match game for kids.
Materials and Tools
- One clean, dry corrugated cardboard base, about 24 × 18 cm (9.4 × 7.1 inches).
- Brown glitter EVA foam, about 1.5 to 2 mm thick, for an 8 cm (3.1 inch) circle; a small white foam offcut for two eyes and a smile.
- Three black chenille stems (pipe cleaners), about 6 mm thick and 30 cm (12 inches) long. Cut each one in half to get six legs of about 15 cm (6 inches).
- About 50 smooth wooden beads with large holes. Choose roughly 12 to 16 mm beads with holes at least 6 mm wide, and check the package's age guidance. Beads that already come in colors keep preparation shorter.
- A tacky craft glue made for foam that also holds chenille stems to cardboard, such as Aleene's Felt & Foam Tacky Glue.
- Adult tools: sharp craft scissors for the foam, wire cutters for the stems, small pliers, a narrow awl or small screwdriver, a pencil, a ruler, and a spare piece of thick cardboard to use as a backing pad.
Check the fit first. A bead's outside diameter does not tell you its hole size. Test one bead on an actual stem before preparing the whole set. It should slide with light pressure as the soft fibers compress. If it catches, choose a larger hole rather than shaving the stem's fuzzy body. If you color unfinished beads yourself, use a nontoxic acrylic craft paint and keep paint out of the holes. Let the beads cure for the full time stated on the paint label before use; allow at least 24 hours and longer if the label requires it. Check that the finish stays intact when rubbed with a damp cloth.
1. Cut the Foam Body and Face Pieces
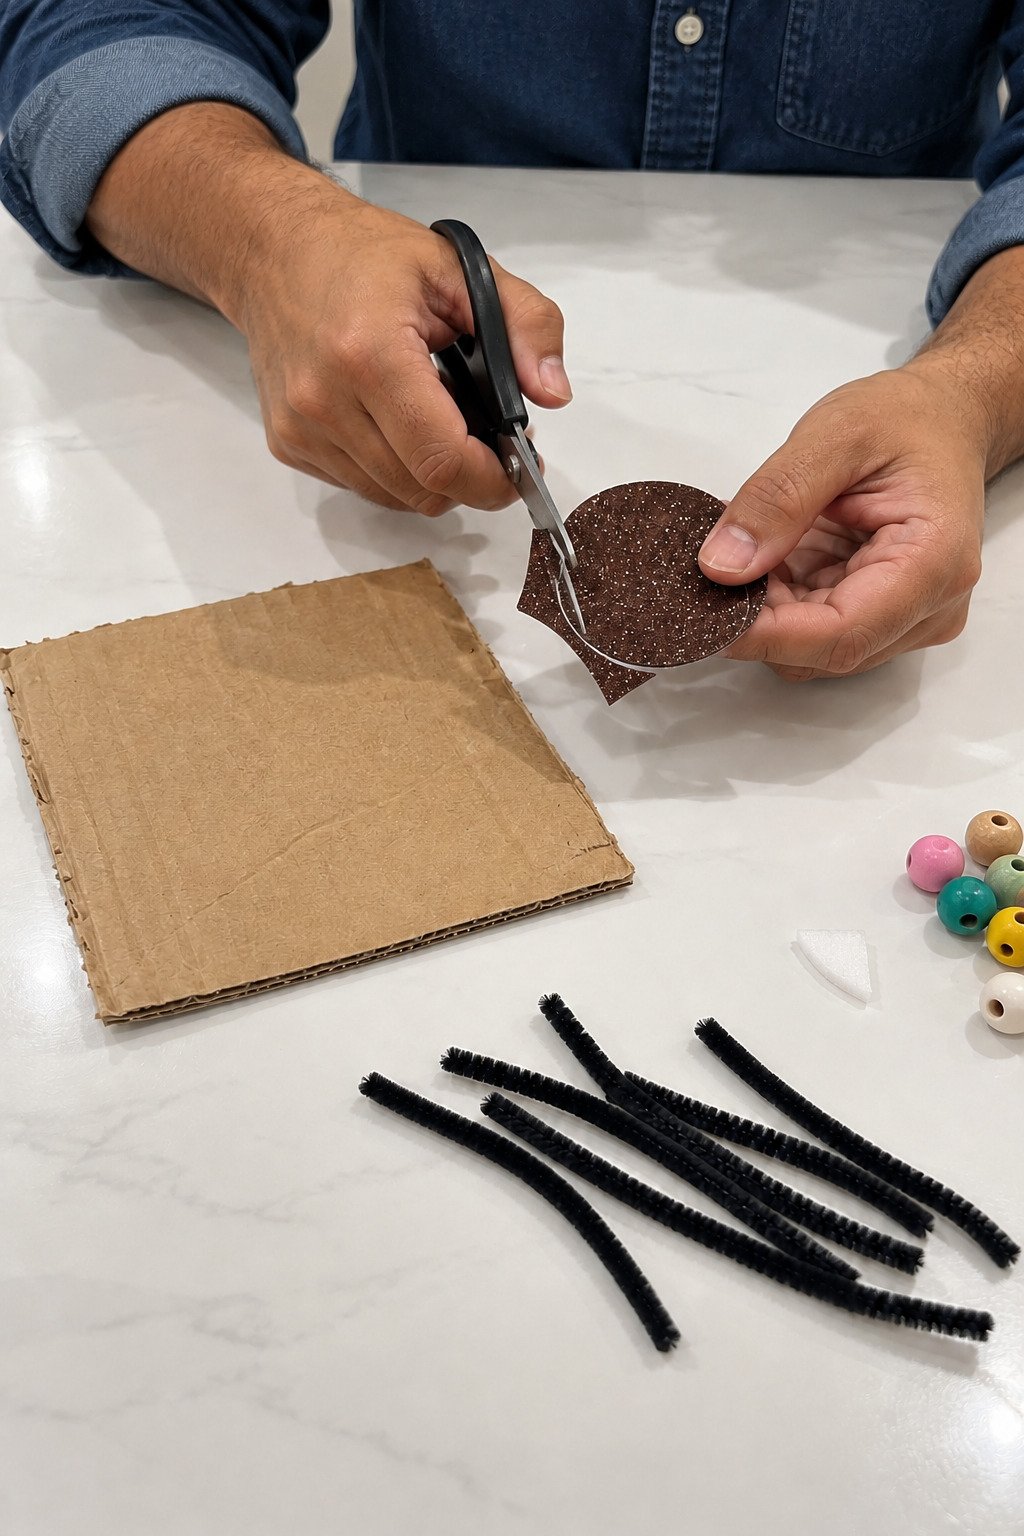
Have an adult cut the cardboard base and cut the three chenille stems in half with wire cutters, giving six legs of about 15 cm. Trace an 8 cm circle on the brown foam and cut around it, then prepare two small round white eyes and a curved smile. Keep these face pieces separate until the legs are secure.
2. Glue the Body to the Cardboard
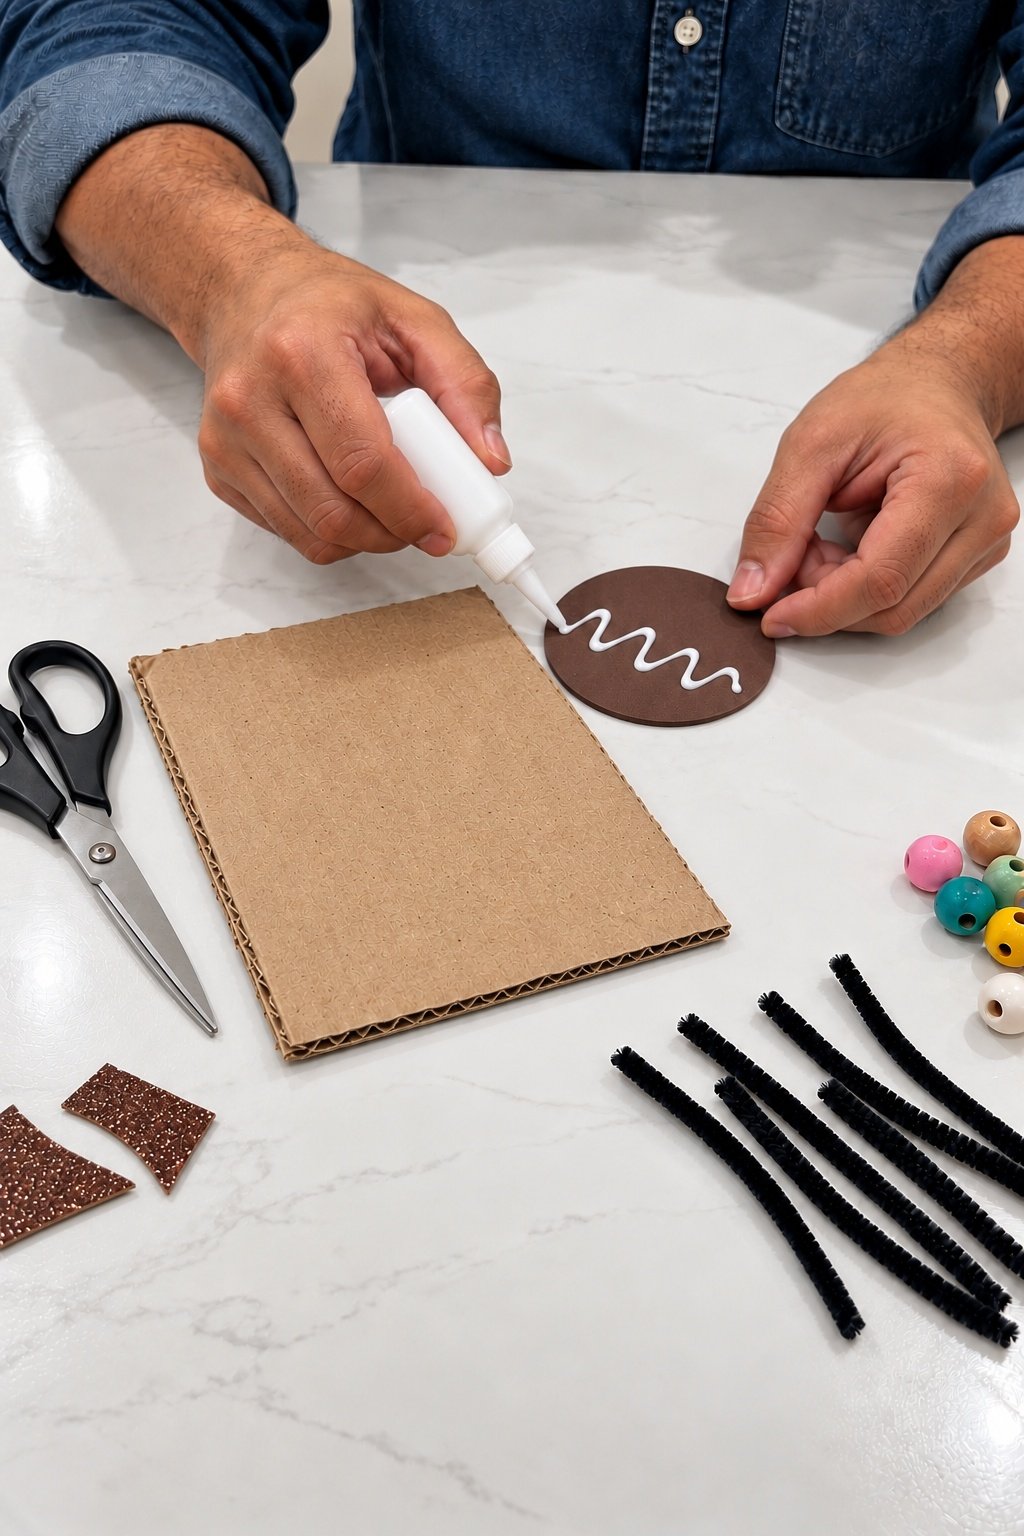
Squeeze a thin zigzag of glue onto the circle's plain back and spread it toward the edges. Turn it glitter side up, center it on the cardboard, and press it flat. Keep the board level and allow the bond to set for the time stated on your glue label before making the mounting holes.
3. Tidy the Stem Tips
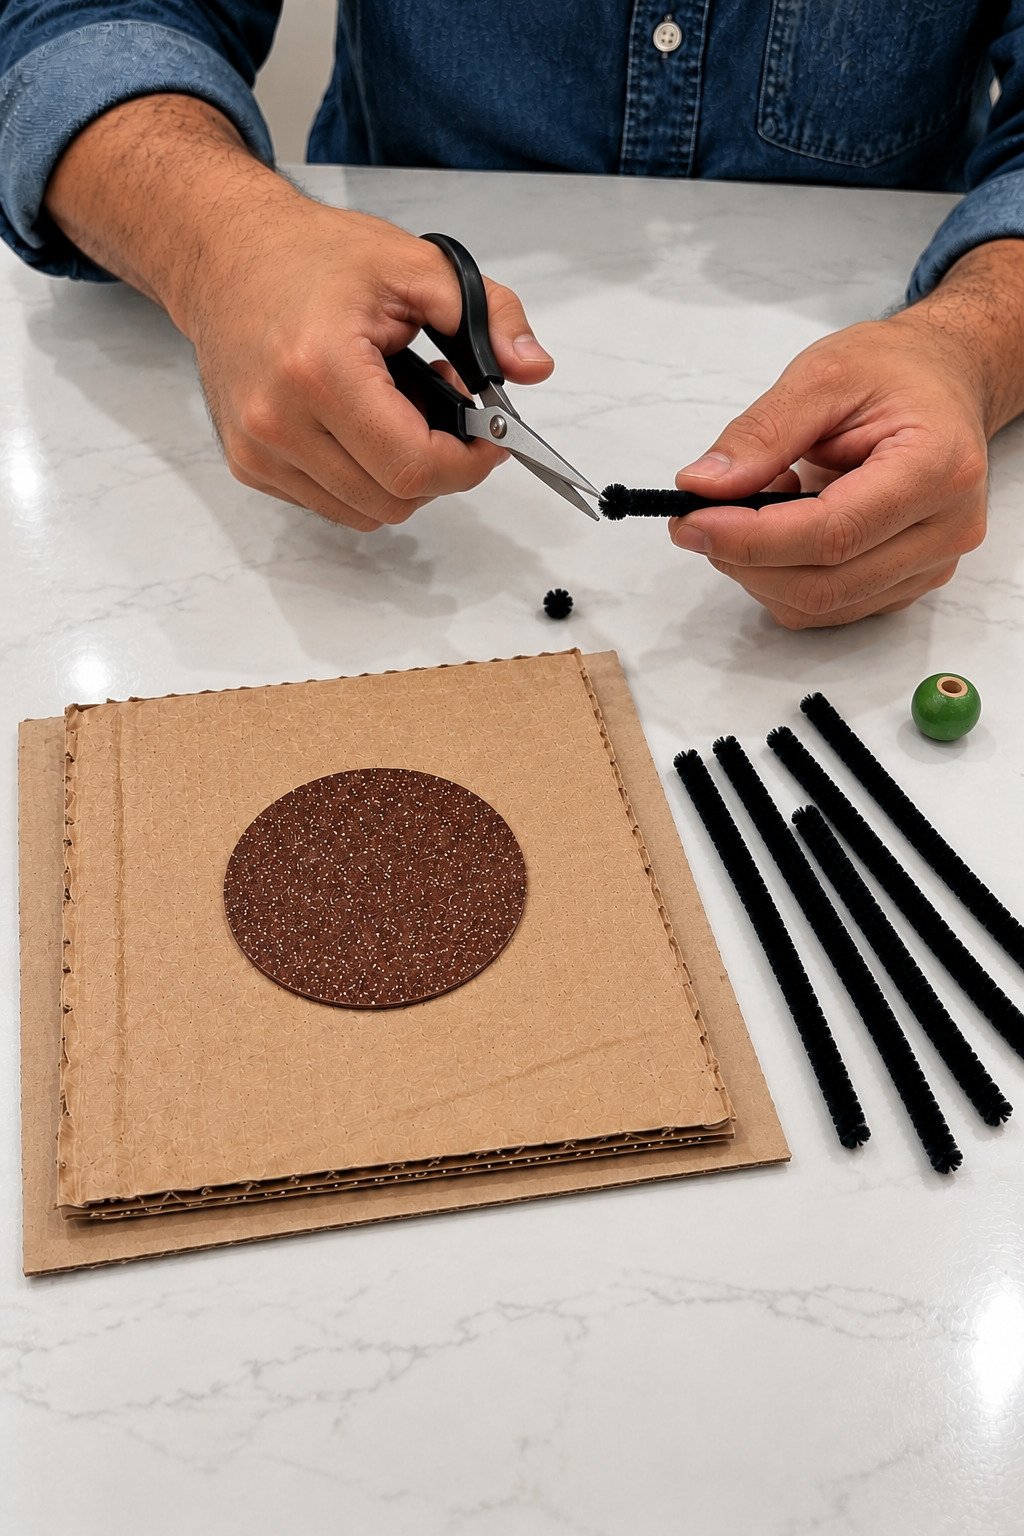
Look closely at both ends of every leg. If the fibers at a tip have bunched into a thick tuft, an adult snips that tuft off so the tip is no wider than the rest of the stem. Keep the full fuzzy thickness along the leg itself. Check each end for projecting wire and turn any tiny sharp point inward with pliers, keeping the end compact enough for a bead to pass.
4. Pierce Six Mounting Holes
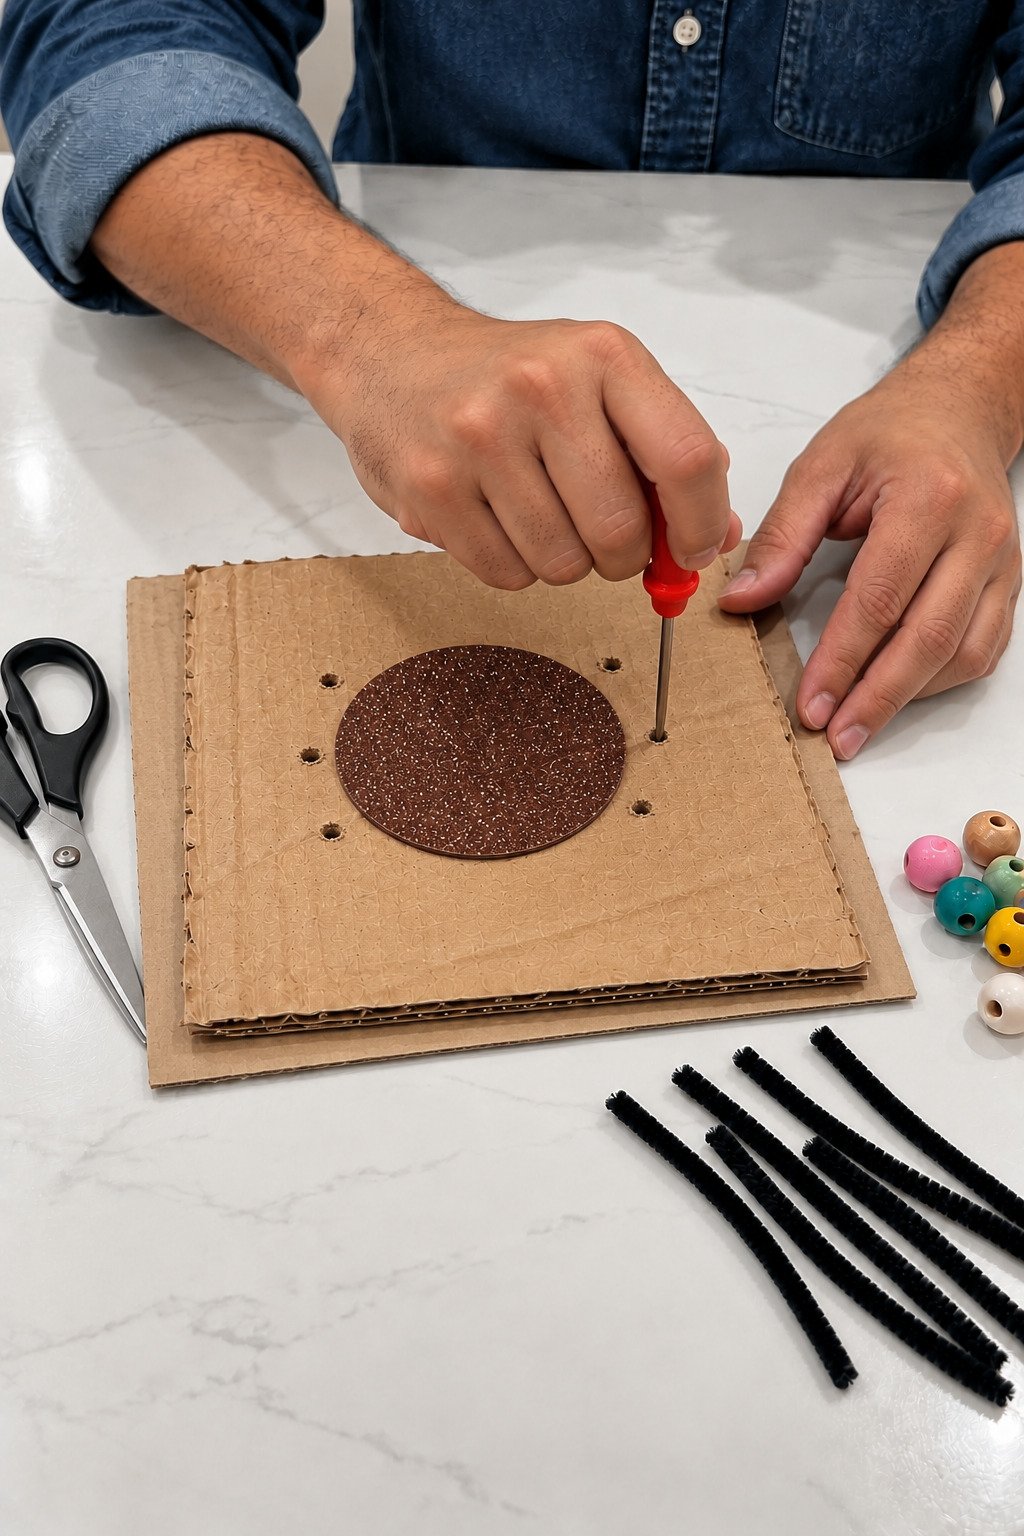
Mark three points on each side of the brown circle, just outside its edge. With a spare piece of thick cardboard underneath as a backing pad, an adult carefully pierces the six points. Make each opening just large enough for a stem, leaving intact cardboard between neighboring holes.
5. Glue the Roots to the Back
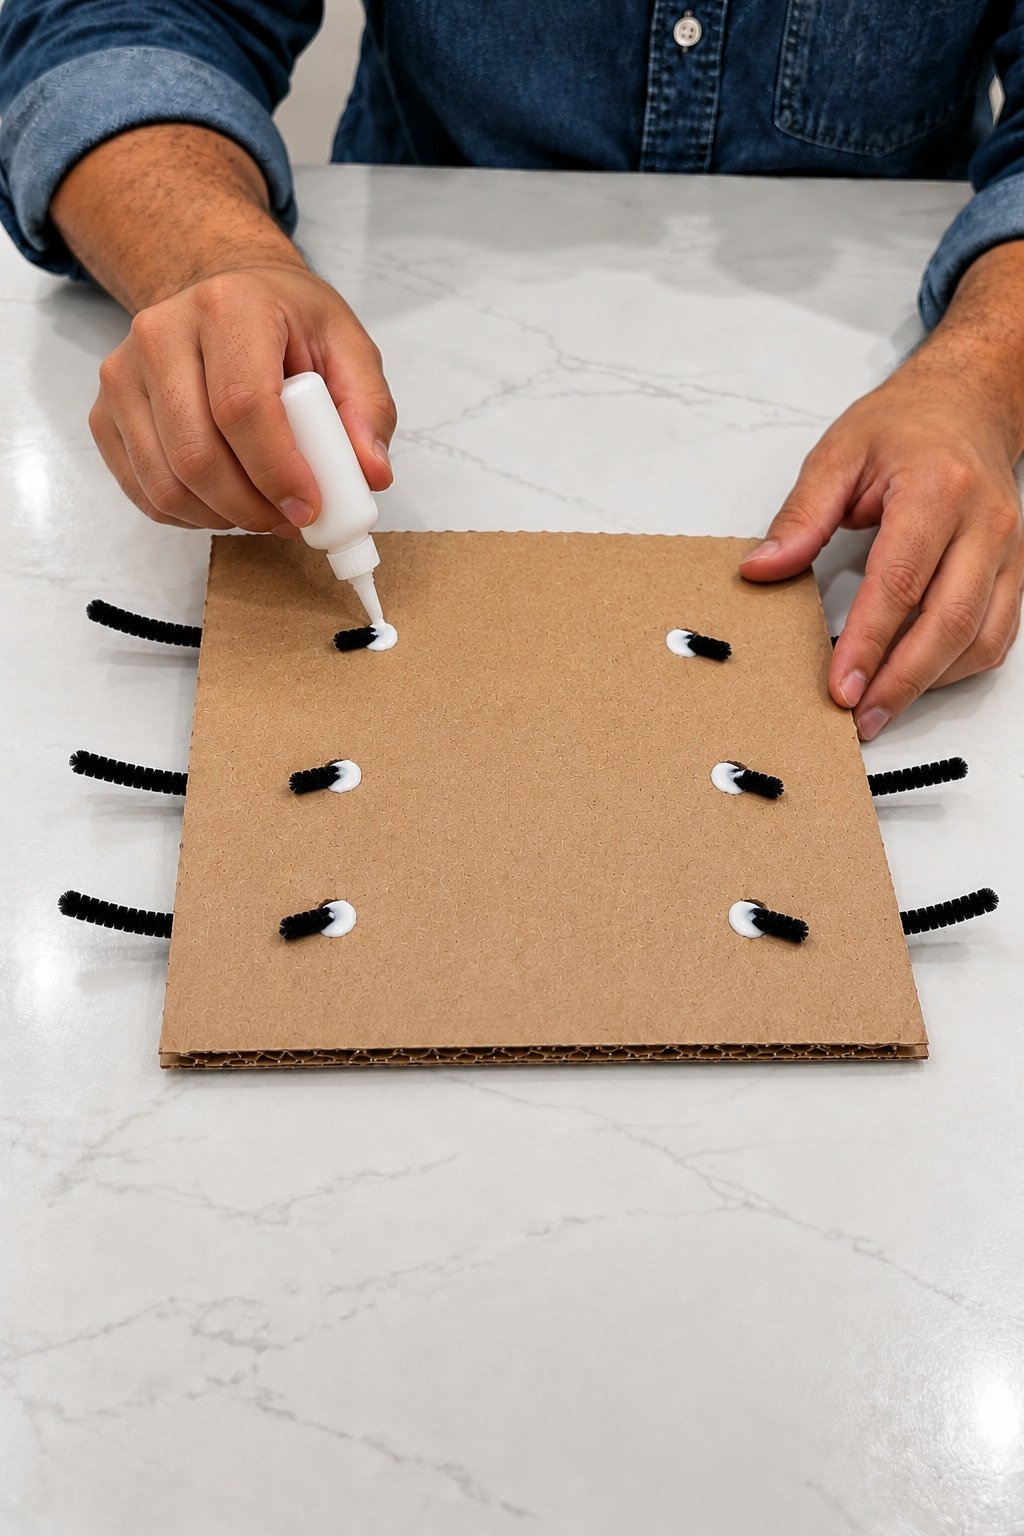
An adult feeds one stem through each hole, leaving about 2 cm (0.8 inch) at the back. Turn the board over, fold the six short roots flat, and glue them directly to the cardboard. Let the joints dry fully, then check each leg with a gentle pull.
6. Let Your Child Arrange the Legs
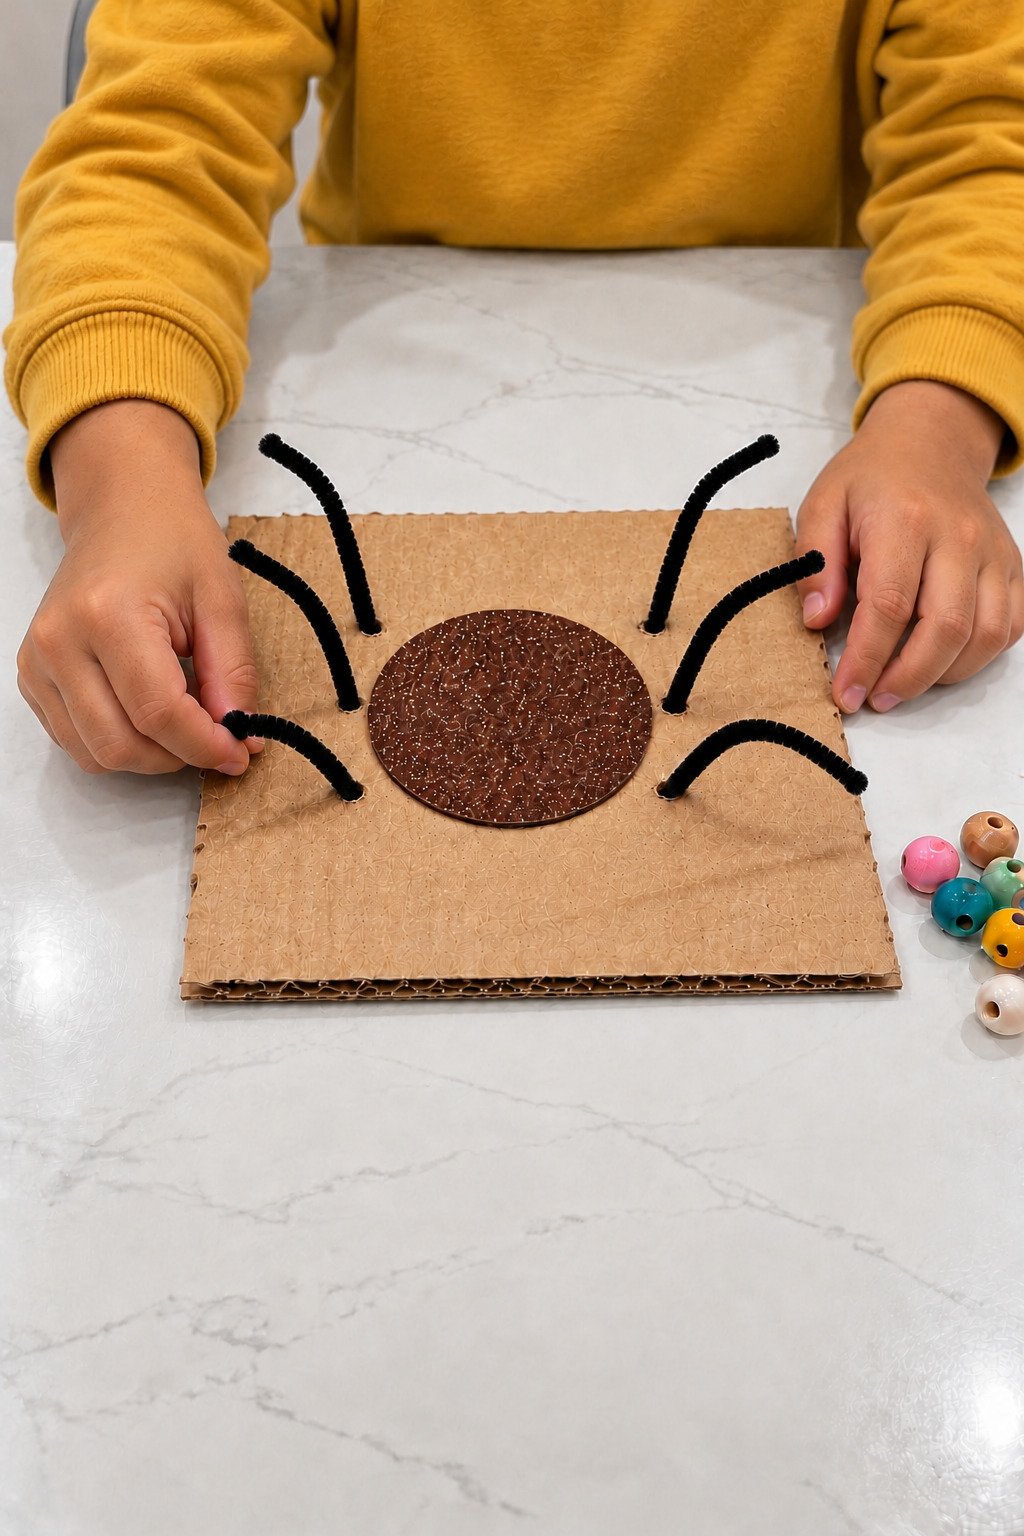
Turn the dry board face up. Let your child gently curve the secured legs outward, with three on each side. Space them apart for threading. Bend each leg with light pressure and avoid tugging it straight up, so the glued root on the back stays in place.
7. Add the White Eyes and Smile
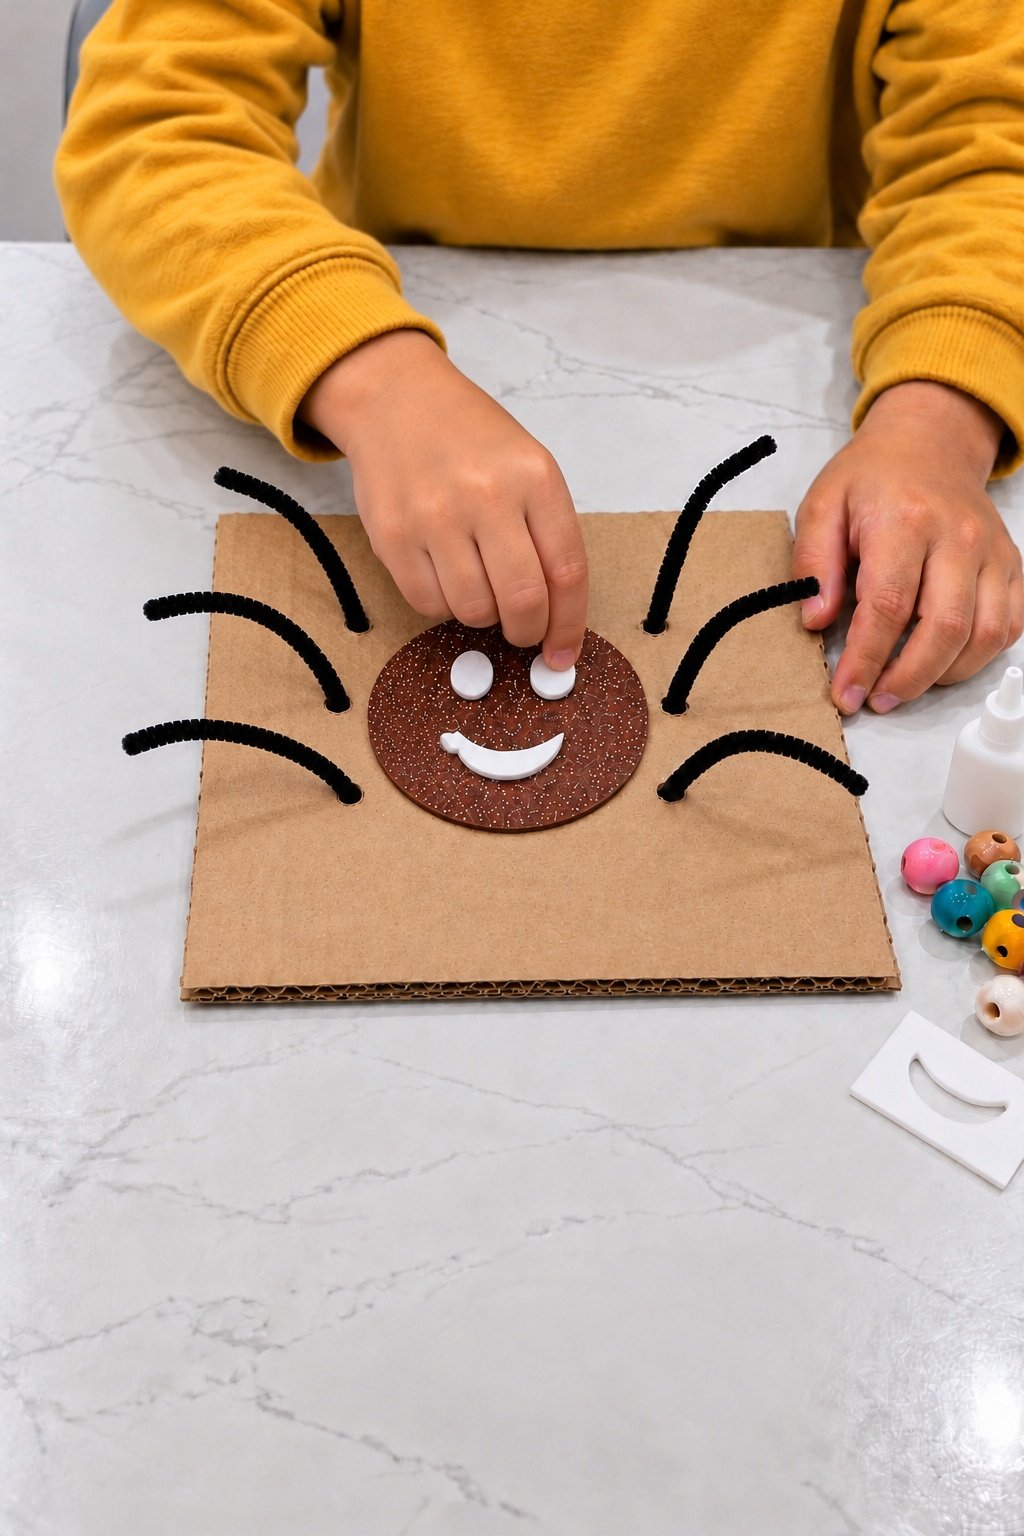
Have an adult put a small dot of glue on the back of each face piece, then let your child place the two eyes and smile on the brown circle. Leave the mounting holes clear. Press the pieces gently and allow them to dry before bringing the bead dish into the work area.
8. Thread the Beads One at a Time
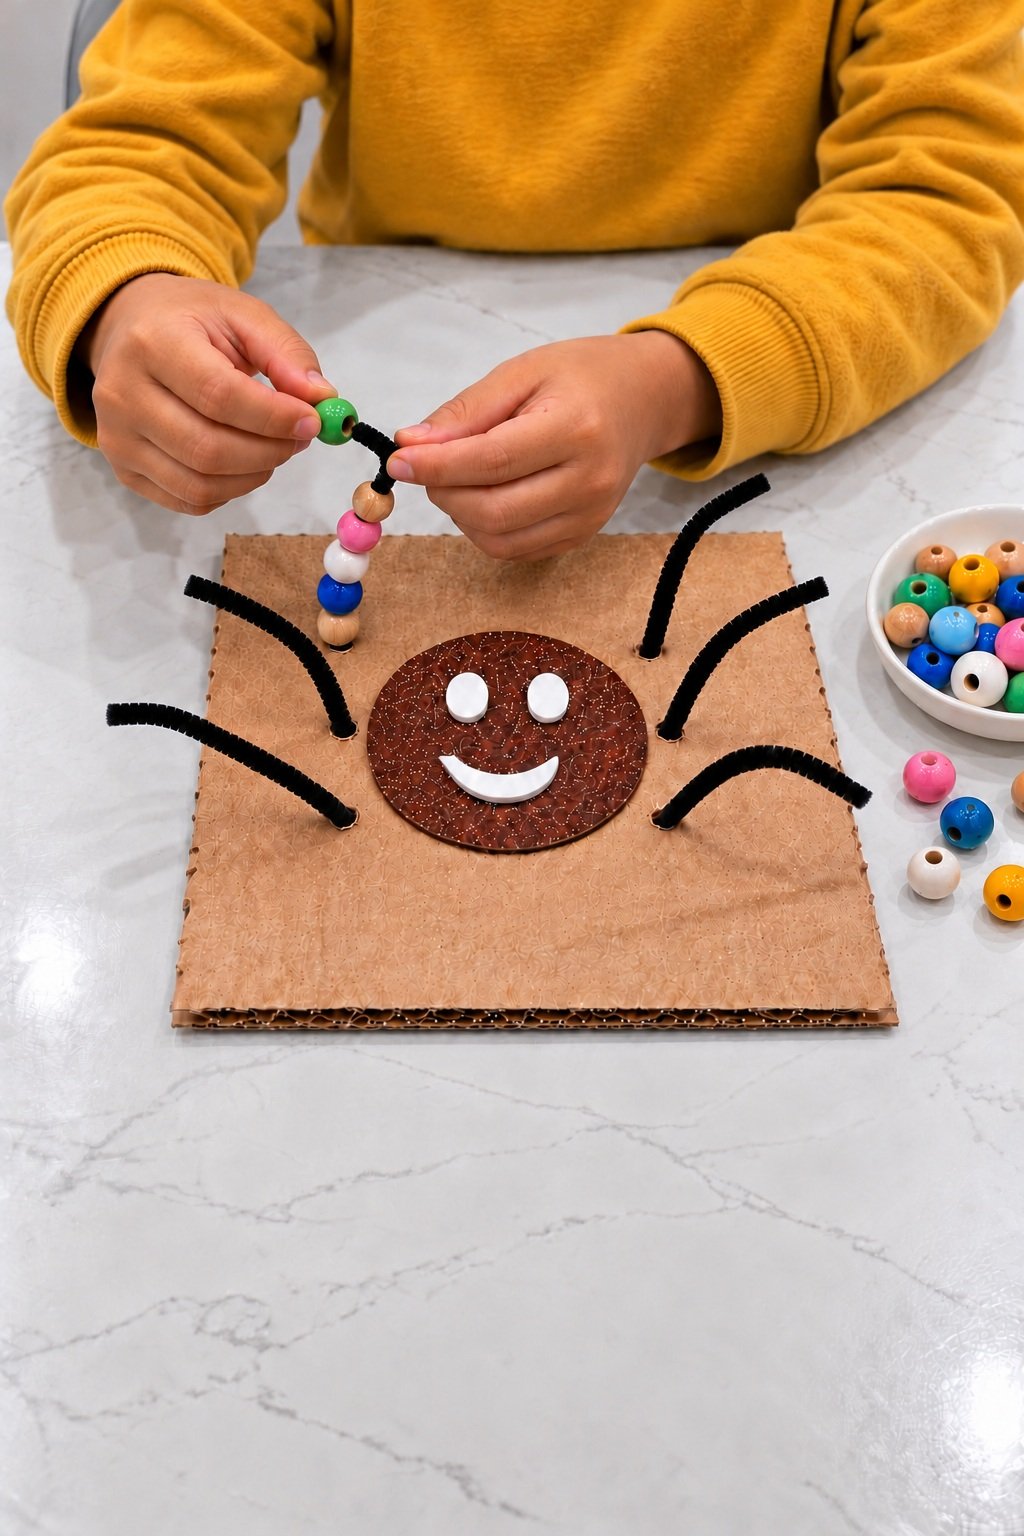
Your child holds a stem near its free end with one hand and guides a bead's hole over the cut tip with the other. Slide it gently toward the body. Begin with one leg and a few beads; invite a color choice or a short pattern once the movement feels comfortable.
9. Leave Space at Each End
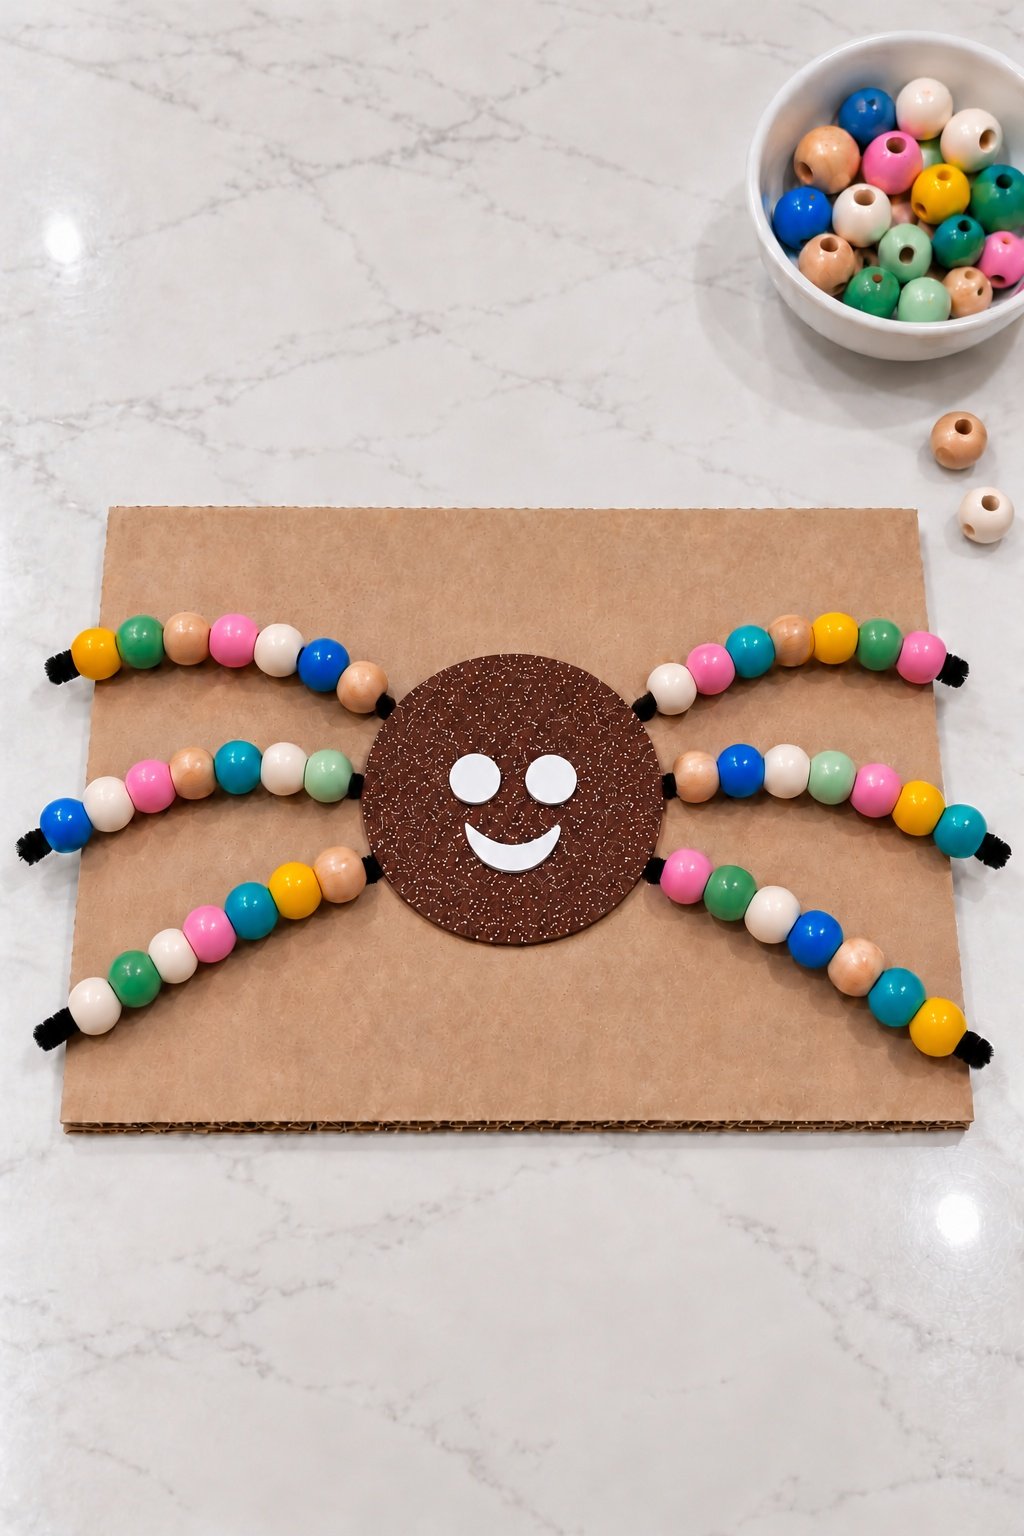
Thread about seven beads onto each leg, leaving a short length of bare stem at each tip, roughly half to one bead width. Set two spare beads aside. Let the weighted legs settle so the bead rows lie flat on the cardboard. Keep the board flat, and hold a tip while sliding beads so they stay on the stem.
Material Cost
Prices below are approximate online benchmarks in US dollars seen in October 2026, before shipping and tax. They change often, so check your own store before buying.
- Black 6 mm chenille stems, pack of 25: about $1 to $2
- Unfinished 16 mm wooden beads, pack of 100: about $10 to $16. Check that the listing states the hole size, since many 16 mm beads have holes smaller than 6 mm.
- Brown glitter foam sheet: under $1
- White 2 mm foam sheet: about $1
- Aleene's Felt & Foam Tacky Glue, 4 fl oz: $5.99 on the maker's product page
- Optional nontoxic acrylic craft paint set for unfinished beads: about $8 to $12
Buying every full pack comes to roughly $19 to $26, or about $27 to $38 with the paint set. You use only part of most packs. Three stems, about 50 beads, small foam scraps, and a little glue come to roughly $6 to $10 for one board, and the leftovers are enough for later projects.
Safety and Storage
- Choose an appropriate age. This activity uses small parts and is intended for closely supervised children aged 6 and up who do not mouth objects. Follow any higher age restriction on your supplies, and keep all beads away from younger children.
- Keep sharp work with an adult. Adults cut the stems and foam, inspect wire ends, pierce the cardboard, and make the rear glue joints. Collect every wire and foam offcut before children continue.
- Use a comfortable fit. Never force a bead over a thick end or let a child push against exposed wire. Replace a rough, cracked, or tight bead rather than forcing it along.
- Check the board before each session. Stop if a root pulls loose, cardboard tears, or a wire point appears. Repair it and let glue dry completely before playing again. Carry the board by its base, not its legs.
- Store it dry. Keep the board flat and the loose beads in a closed container out of young children's reach. Put the dish away when play ends.
Leave a Reply