

A backyard wall display works best when it reads clearly from the patio and its flowers can be watered without moving the furniture. An arch, a repeated pot shape, or a broad mosaic curve gives an ordinary boundary character while leaving the ground available for sitting and walking. The important decision is what should lead the composition, followed by how much daily care you can give the arrangement.
These ideas are for gardeners decorating small yards, tea corners, and larger courtyard boundaries, including people working with salvaged objects. The collection opens with a tiled fountain wall, moves through growing supports and pot arrangements to collections around seating, and closes with more water features and large mosaic compositions. Some ideas begin with an object you already own; others call for permanent masonry or water installation work. Start with the wall you can maintain, then borrow the colors, shapes, and spacing that suit that spot.
Table of Contents
- Give the Display a Place in Everyday Patio Life
- Read the Wall from the Seat
- Make Watering Reachable and Plan the Drainage
- Separate Decoration from the Load
- Decide How Much Weather the Materials Can Take
- 1. Cobalt Pots and an Urn
- 2. Fan Trellis and Pink Roses
- 3. White Shutters and Flower Boxes
- 4. Metal Hoops and Nasturtiums
- 5. Fuchsia Baskets and Stone
- 6. Wooden Hexagons and Flowerpots
- 7. Gabion Troughs and White Flowers
- 8. Terracotta Pots on Black Brackets
- 9. Black Fabric Flower Pockets
- 10. Ornate Mirrors and a Cream Bench
- 11. An Arched Shelf and Blue Plates
- 12. Colored Frames and Leaf Cutouts
- 13. A Scrollwork Arch and Patterned Plates
- 14. A Watering Can and Blue Pots
- 15. Iron Arches and Botanical Art
- 16. Rust Botanical Panels and a Tall Mirror
- 17. Star Jasmine and Botanical Plates
- 18. A Wooden Hutch for Flowerpots
- 19. Framed Bottles and Cut Flowers
- 20. Tennis Rackets and Cream Pots
- 21. Chair Backs and Flower Boxes
- 22. Ceramic Relief Flowers around a Planter
- 23. Terracotta Bell Strings and Floral Plaques
- 24. Teal Shelves and Yellow Chairs
- 25. Arched Niches on a Sage Wall
- 26. A Winding Floral Mosaic Ribbon
- 27. A Pink Frame and Rose Plates
- 28. Green Boards and Rose Medallions
- 29. An Iron Headboard and Enamel Lids
- 30. Mosaic Trays and Colander Planters
- 31. An Oval Mosaic and Stone Basin
- 32. An Arched Frame and Tile Waterfall
- 33. Rose Tiles and an Enamel Sink
- 34. A Circular Mosaic and Flowerpots
- 35. Shutter Stripes and White Pots
- 36. A Mosaic Tree and Flowerpots
- 37. Gothic Arches and Oxblood Pots
- 38. Crossing Mosaic Ribbons and Flowers
- Match the Material to the Work You Want to Do
- Where to Start
Give the Display a Place in Everyday Patio Life
Read the Wall from the Seat
Stand at the usual entrance, then sit where the wall will be viewed most often. Decide which outline should remain visible: an arch, a pot grouping, or the outer edge of a mosaic. Mark its footprint before buying smaller ornaments. Pots and trailing stems must leave room for chair backs, opening doors, and anyone passing with a watering can.
Make Watering Reachable and Plan the Drainage
Observe sun and shade through the day before selecting flowers, and group containers by their watering needs. The RHS container growing advice explains why drainage holes and winter protection matter. Direct runoff away from seats and masonry vulnerable to staining. A wall covered with small pots creates more individual watering tasks than a modest collection of larger containers.
Separate Decoration from the Load
Ornamental shutters, empty frames, and old racket strings should not carry watered planters. Have fixings selected for the wall material and the total wet load, including containers and growing medium. Homes built before 1978 may contain lead based paint, so treat old painted salvage with care before sanding it and follow the EPA lead safe practices for DIYers. Renters should agree on drilling with the owner before marking the wall.
Decide How Much Weather the Materials Can Take
Indoor ceramics, wooden furniture, and paper artwork need different treatment from exterior tile and metalwork. Sheltering a delicate collection can be simpler than rebuilding it for rain. Large mosaics need a wall preparation and movement plan, while fountains need waterproofing and service access. For powered water features, have outdoor equipment connected through ground fault circuit interrupter protection, commonly called GFCI, with electrical connections protected from rain and splash, following the outdoor section of the CPSC home electrical safety checklist.
1. Cobalt Pots and an Urn
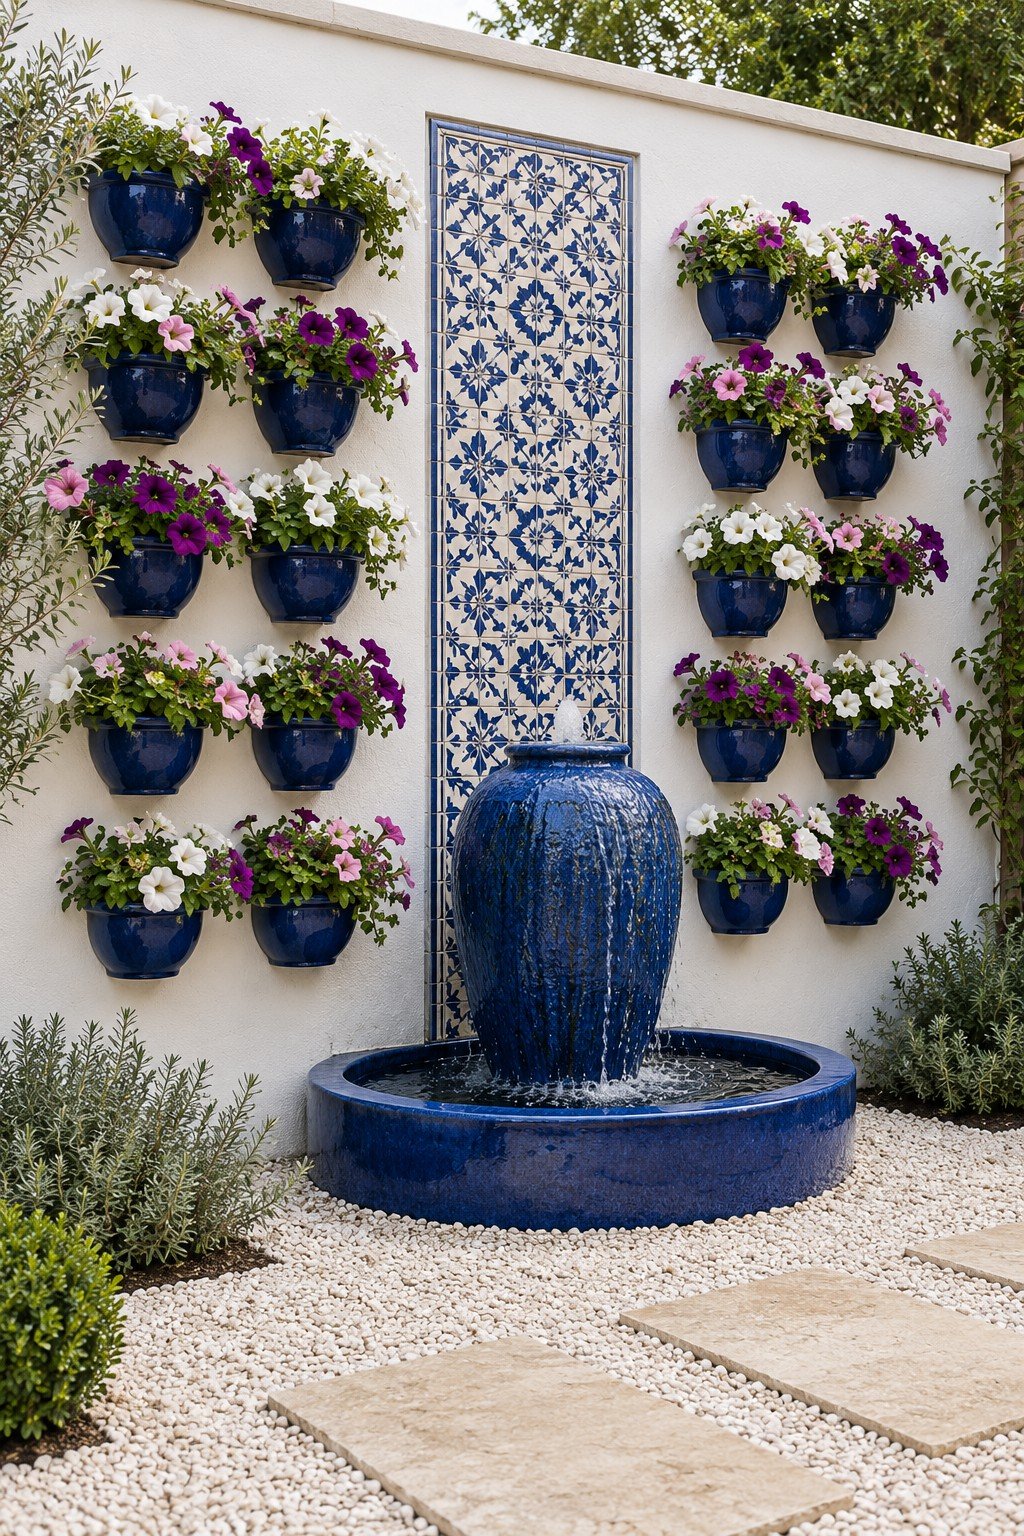
Cobalt pots filled with white, pink, and purple petunias flank blue patterned tiles and a cobalt urn spilling water into a round basin. Using the same cobalt glaze on the pots and the urn ties the planting to the fountain. The narrow tiled column gives the wall a clear center line. Plan the tile arrangement first, then mark the pot positions symmetrically without crowding the urn. For a working fountain, resolve basin access, splash containment, and winter care before attaching the decorative pieces. Reduce the composition to a short tiled strip and a modest group of cobalt pots when a courtyard cannot accommodate the basin.
2. Fan Trellis and Pink Roses
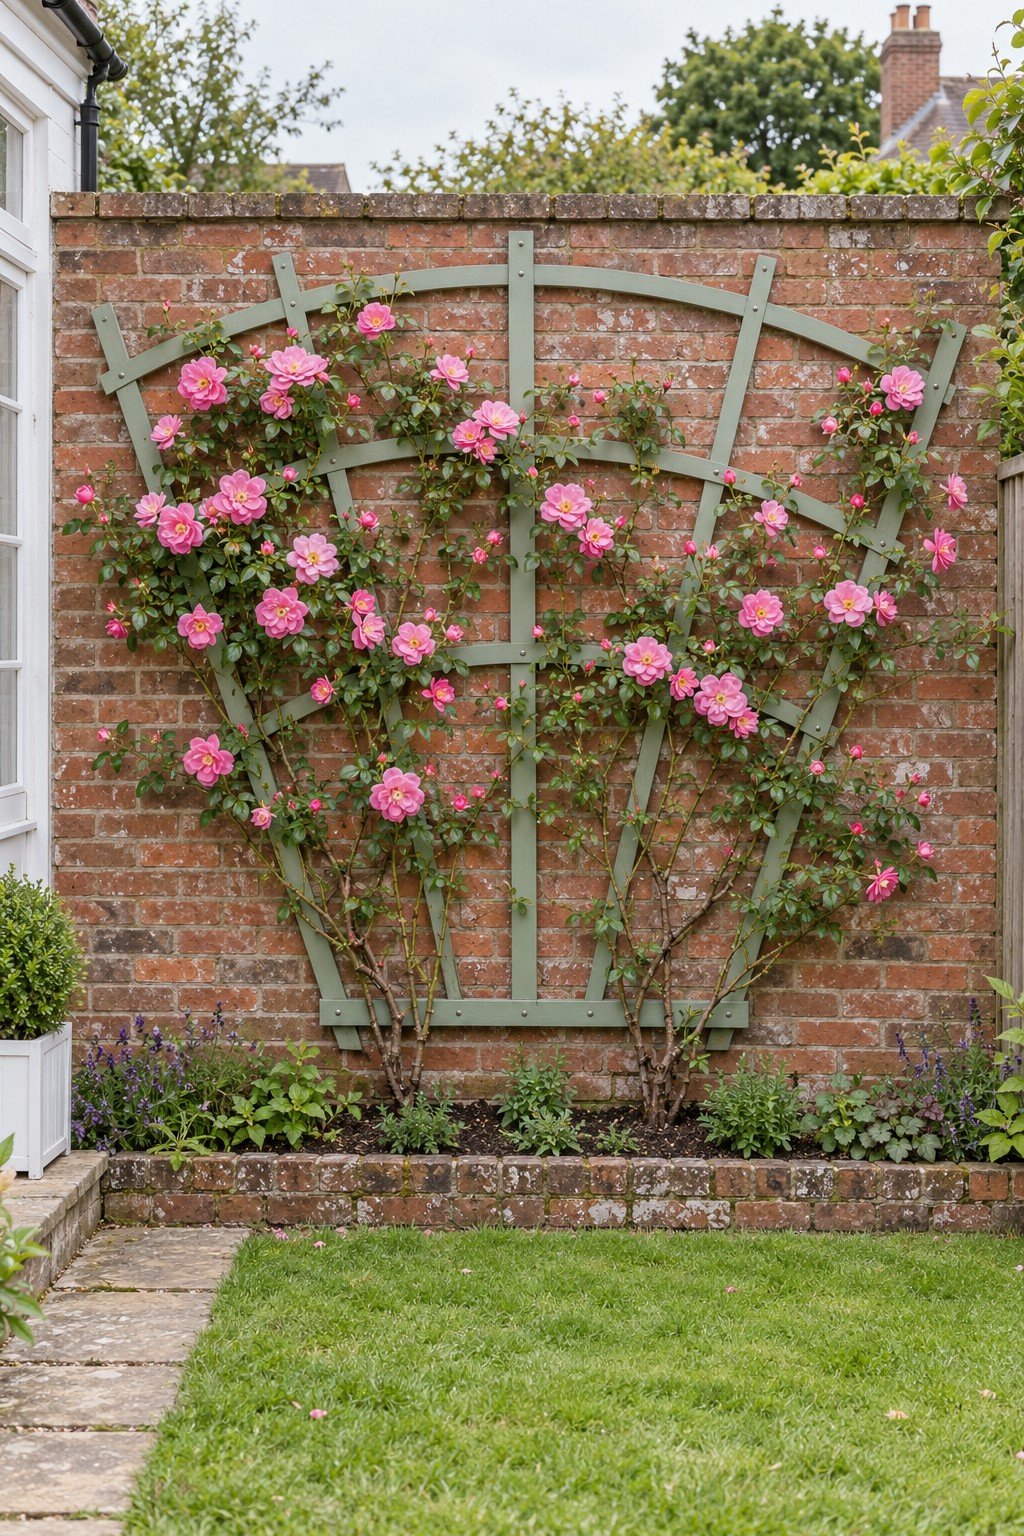
Pink roses spread across a sage green fan trellis, leaving patches of red brick visible between the stems. A trellis is an open framework that guides climbing growth, and the broad fan gives the roses room to spread sideways. Build the fan from exterior timber and mount it on wooden spacers a couple of inches off the brick, which lets air move behind the stems and makes tying in easier. Tie new growth loosely to the trellis and leave access to inspect the brick and prune the roses. Train a smaller rose across a narrower fan when the wall borders a short path or a compact lawn.
3. White Shutters and Flower Boxes
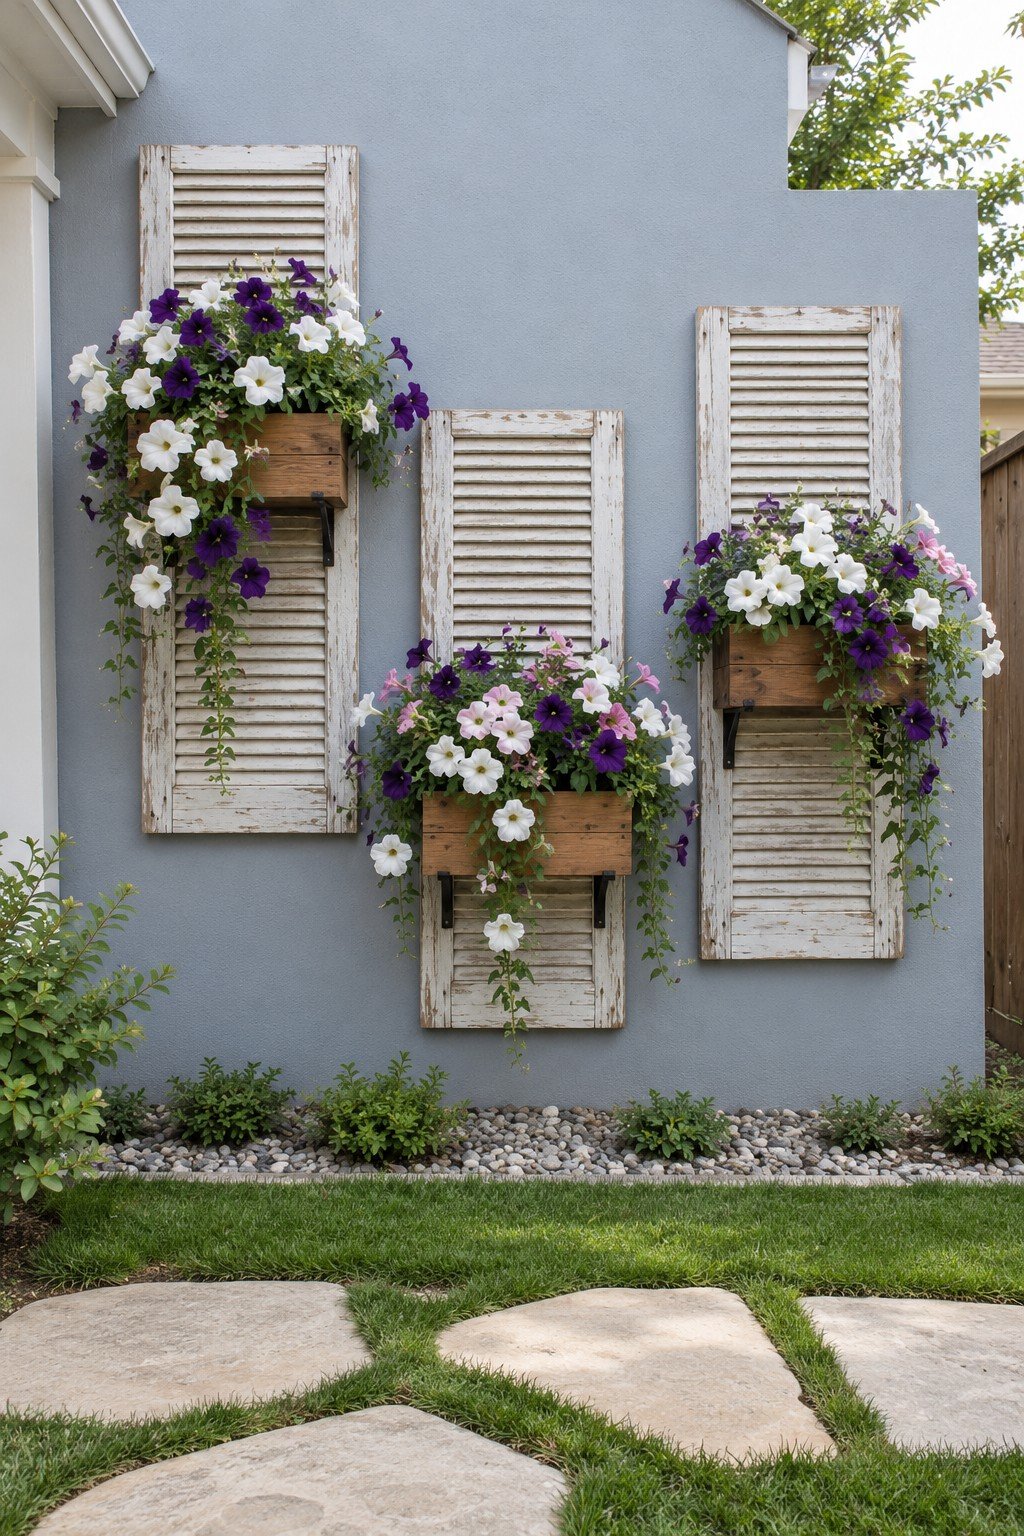
White shutters carry wooden flower boxes against a gray wall, with white, purple, and pale pink blooms softening the slats. The shutters hang at staggered heights, so a small collection fills the wall without looking like a rigid storage grid. Paint reclaimed shutters with an exterior coating for wood, then fasten each flower box through to its own wall support. Leave enough space between the boxes for trailing growth and for lifting out the planting. Repeat the white shutters in a tighter grouping for a narrow side yard, keeping the flower boxes clear of the walking route.
4. Metal Hoops and Nasturtiums
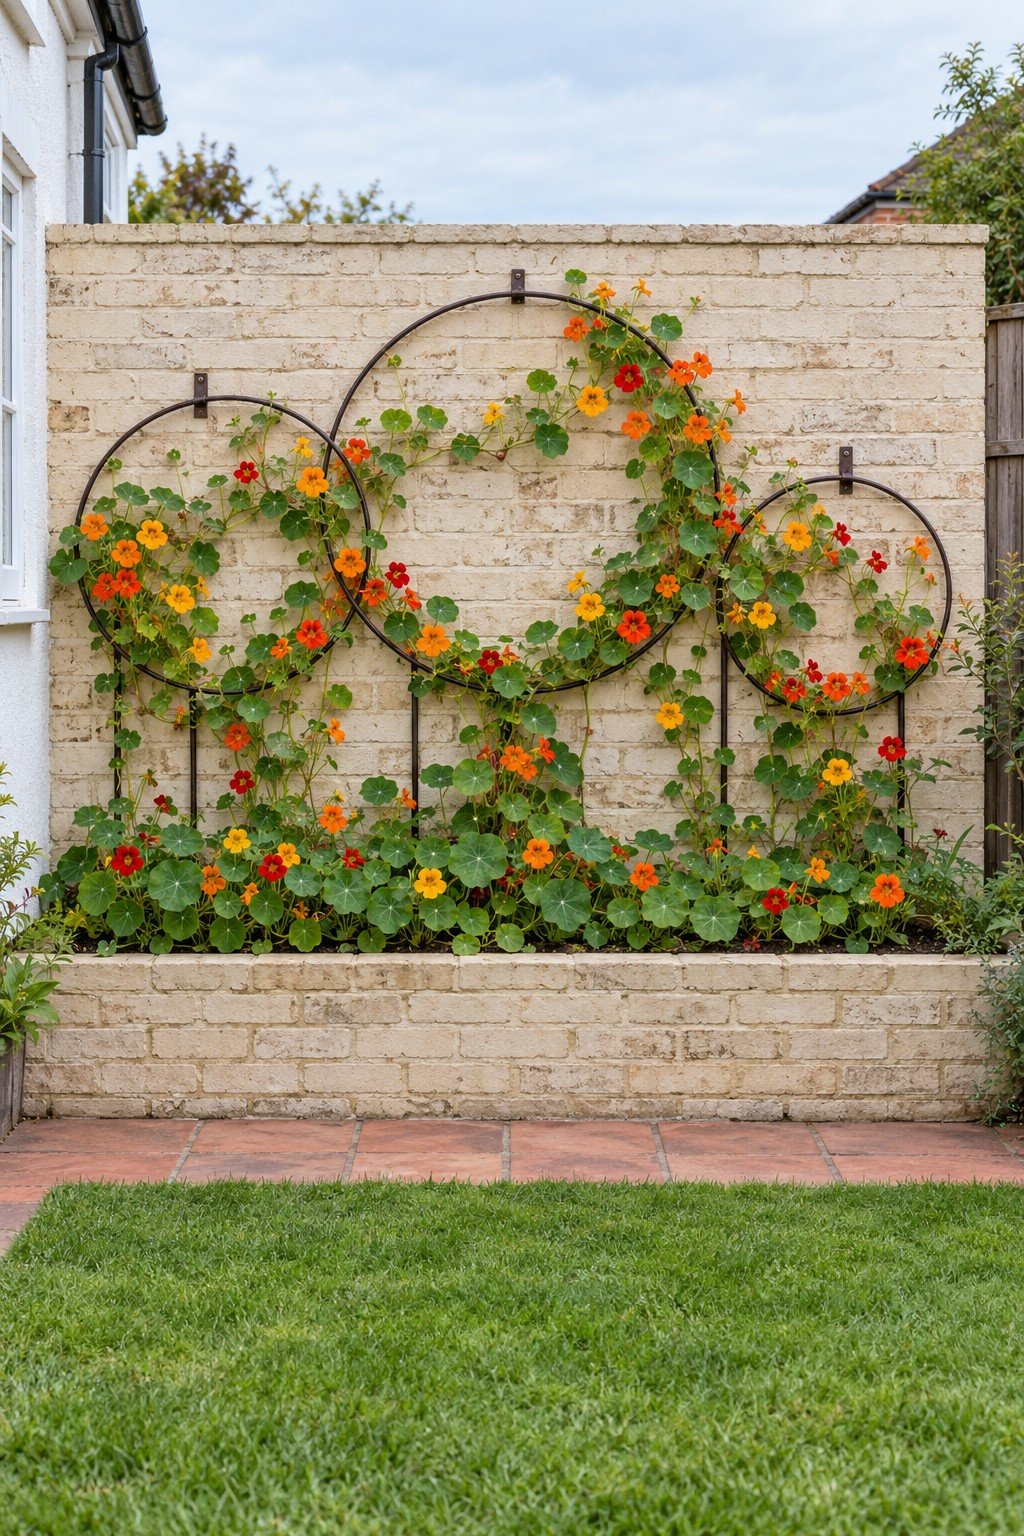
Black metal hoops overlap across pale brick, with orange and yellow nasturtiums weaving through their circular outlines. The repeated curves soften the rectangular wall and raised flower bed without covering every brick. Start with rigid hoops fixed at several points, then guide a climbing or trailing nasturtium variety toward the lower curves. Preserve some exposed metal so the circular pattern remains legible as the leaves spread. Echo the same idea with a smaller group of hoops above a short flower bed, rather than filling a narrow wall with undersized circles.
5. Fuchsia Baskets and Stone
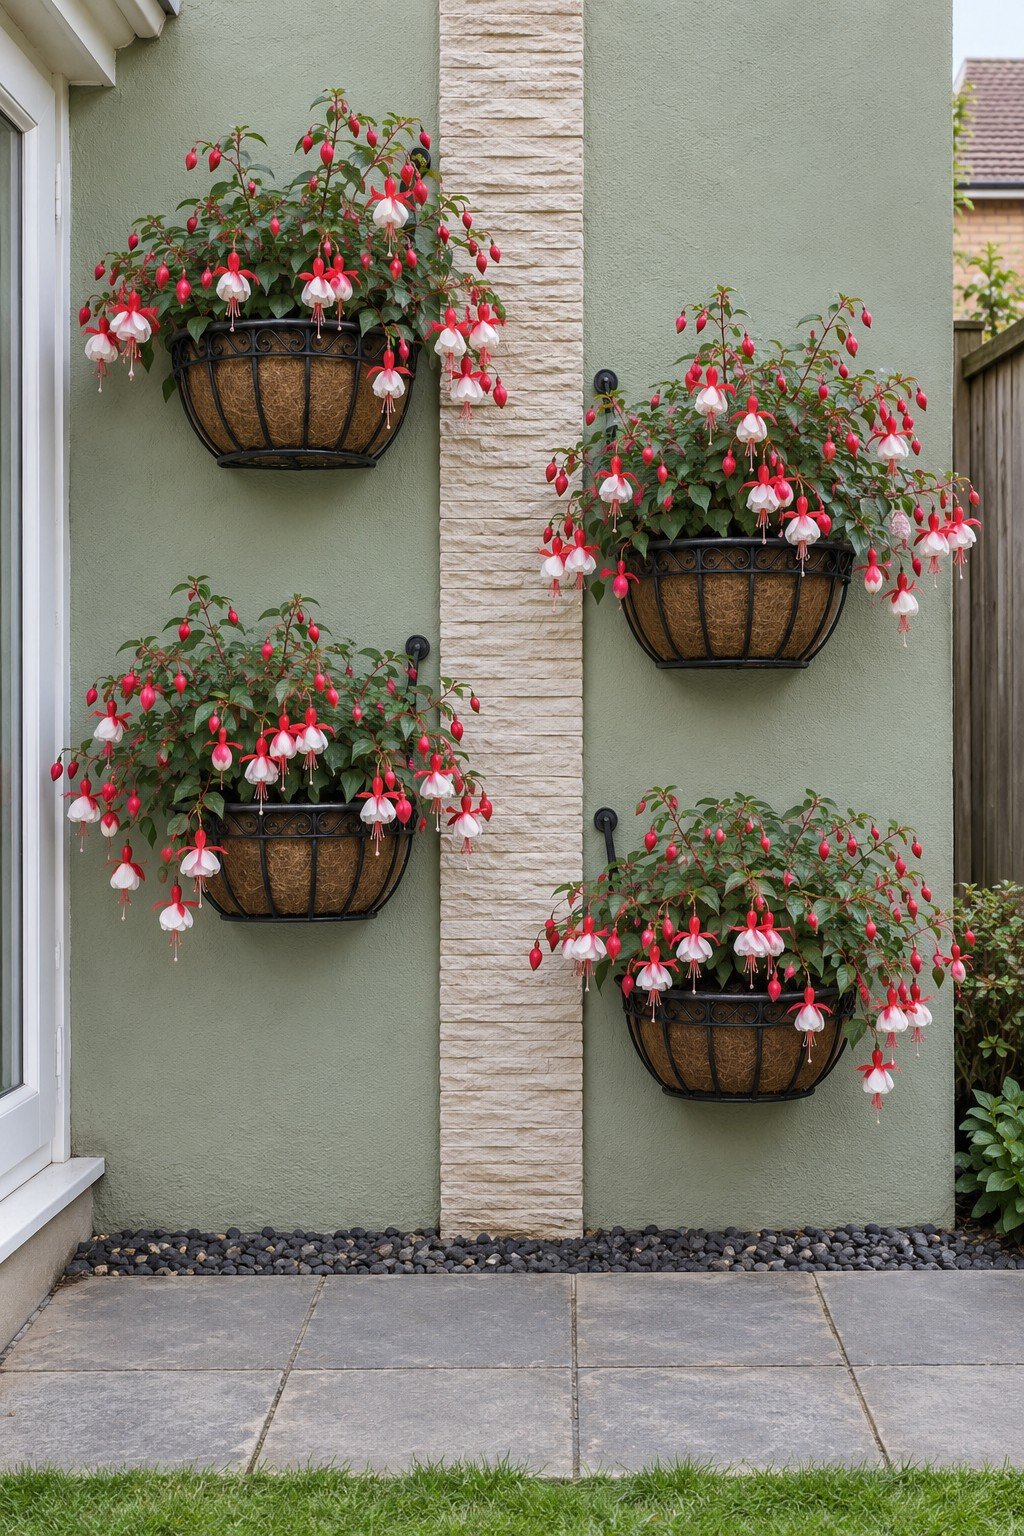
Red and white fuchsias spill from black wall baskets across a sage wall interrupted by a pale stone strip. Alternating the baskets across the stone creates movement while the repeated basket shape holds the arrangement together. Mark the baskets around their mature flower spread, then select wall brackets by the watered basket weight and the wall construction. Lift each basket gently to judge it, since a light basket needs water, and pour slowly so the water soaks into the compost instead of running out, as the RHS hanging basket guide explains. Limit the display to the most reachable positions if regular watering at different heights would become awkward.
6. Wooden Hexagons and Flowerpots
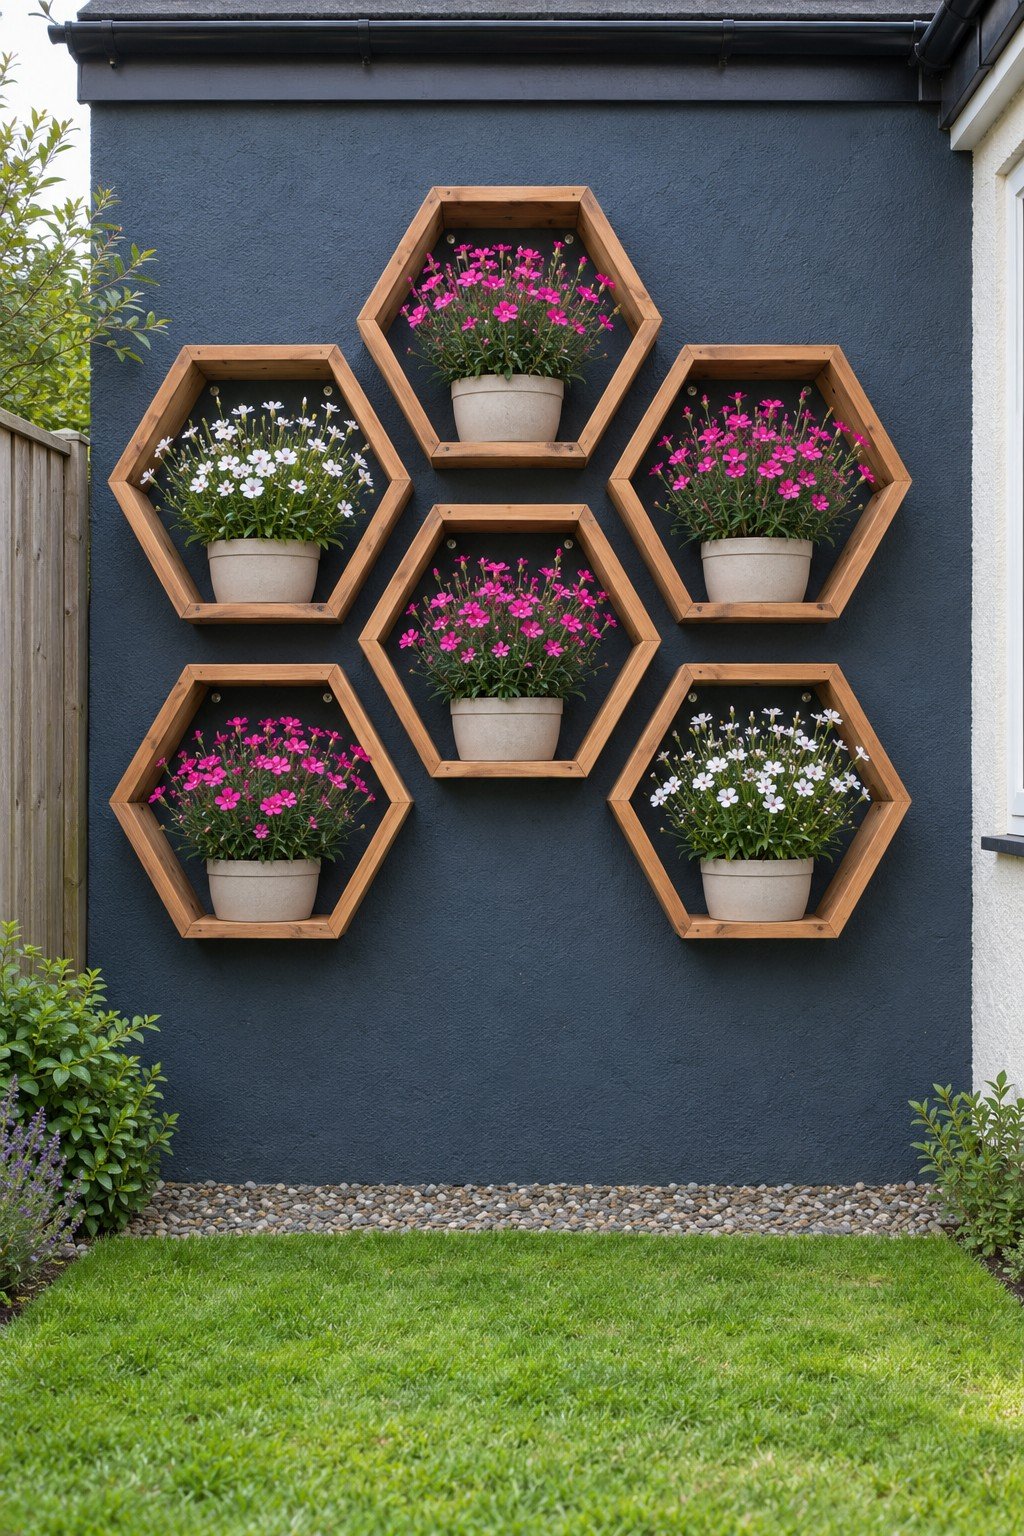
Wooden hexagons hold cream flowerpots against a dark gray wall, with pink and white flowers breaking up the angular outlines. Open centers let the gray background show through, preventing the honeycomb arrangement from feeling like a bulky cupboard. Assemble each hexagon with a flat lower shelf, exterior timber, and joints that cannot twist under a loaded pot. Size the opening around the flowerpot and the space required to lift the flowers out without catching the upper edges. Low, mounded flowers such as dianthus suit these shallow openings, where taller stems would press against the upper edges.
7. Gabion Troughs and White Flowers
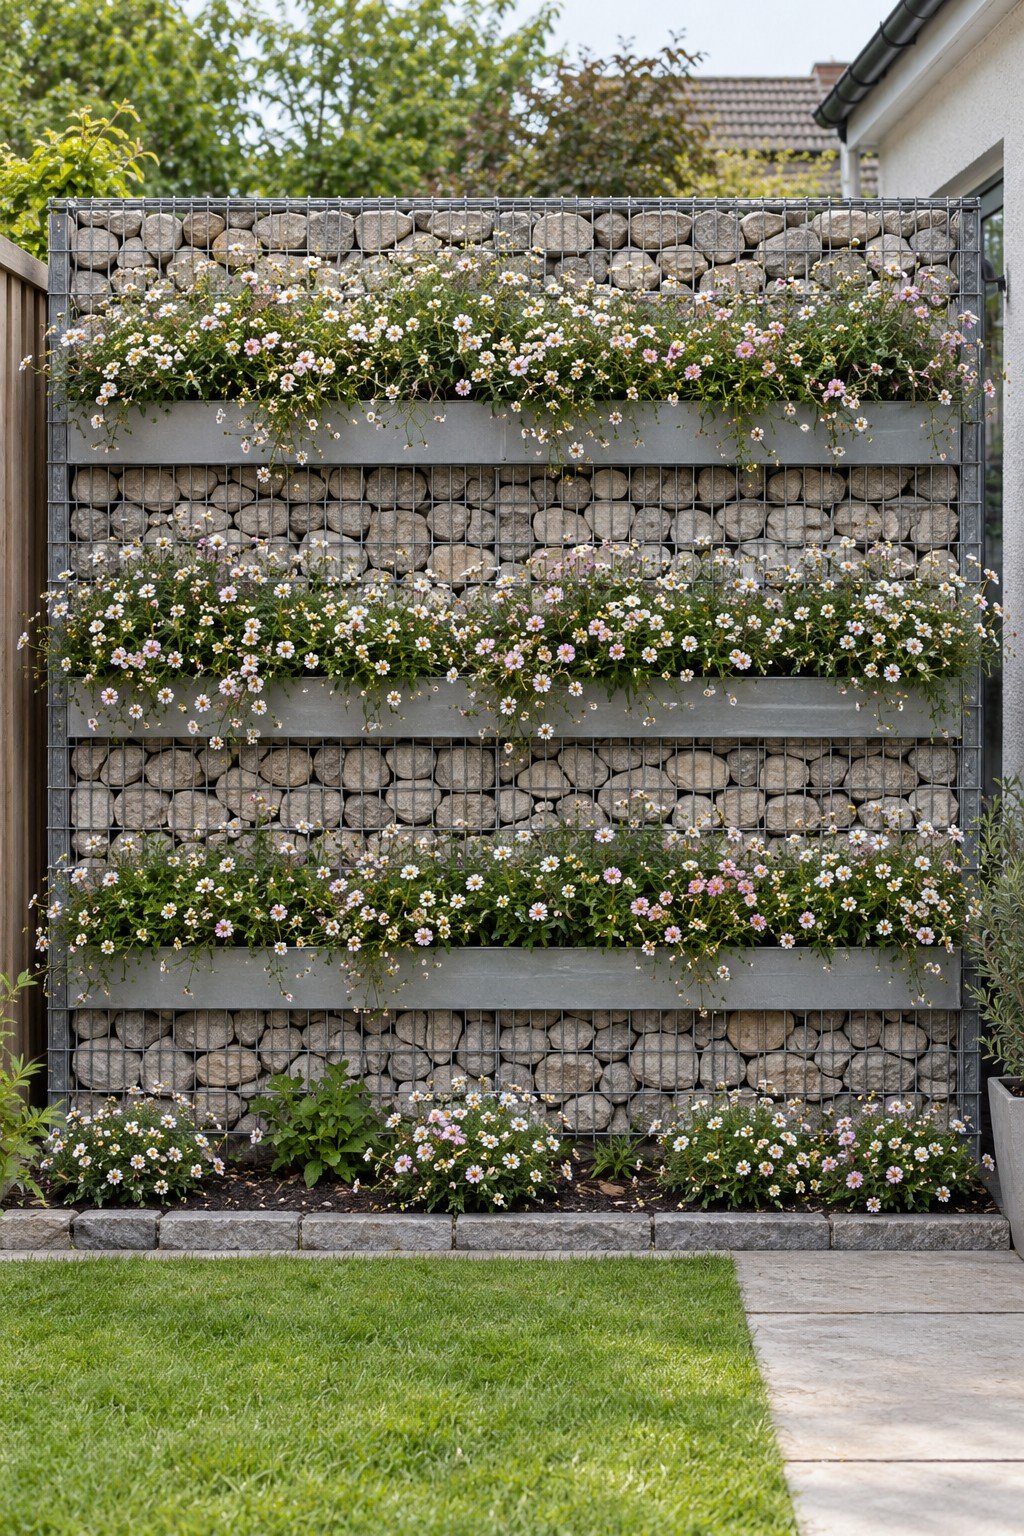
Long gray troughs of white and pale pink flowers cross a gabion wall, a wire cage structure filled with stones. Three horizontal troughs bring order to the rough stone, and the trailing flowers soften the wire grid. Treat the gabion as a structural installation and have its base, cage connections, and added planting loads designed before adapting this look. The troughs need a support arrangement that carries watered planting without distorting the wire facing. Reserve this version for a larger boundary where the stone depth has a purpose; a modest wall can borrow the long trough arrangement without the gabion.
8. Terracotta Pots on Black Brackets
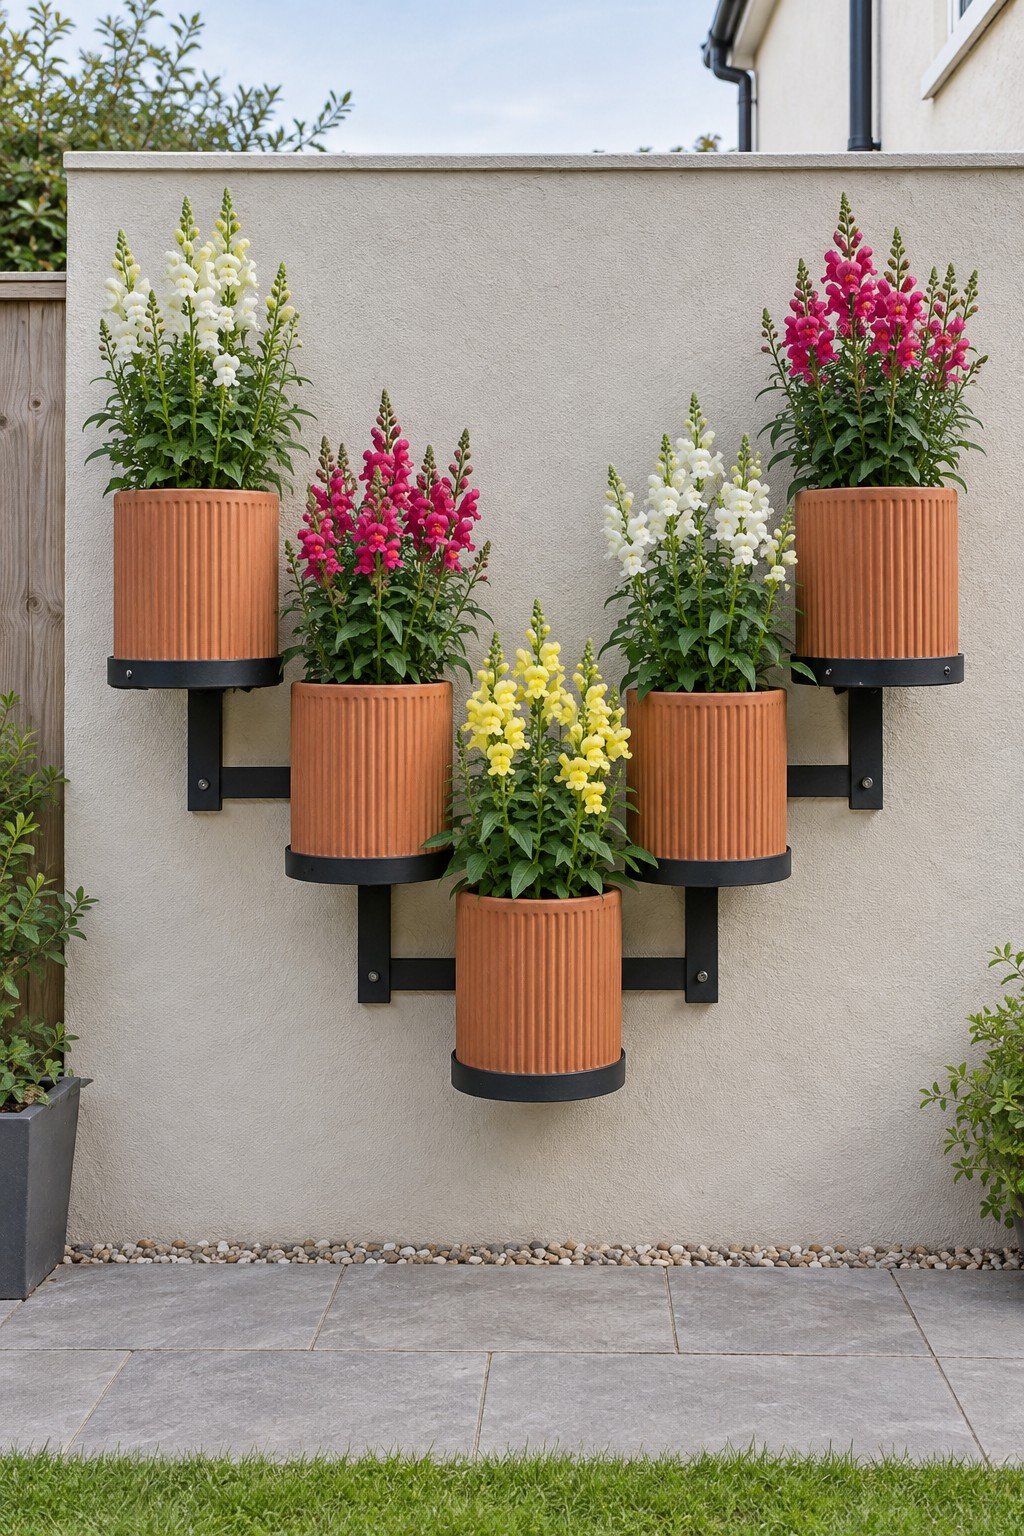
Ribbed terracotta pots of white, pink, and yellow snapdragons step down in a V across black brackets on a pale wall. The V shape adds movement, and because every pot shares the same ribbed texture, the changing heights look planned. Lay out the bracket positions around the full width of each pot, allowing the tall flowers to remain distinct. Where winters freeze, buy pots labeled frost proof rather than frost resistant, because the RHS warns that terracotta can crack in cold weather. Arrange a shorter V of three pots within comfortable watering reach when the wall is small or the pots must be lifted indoors seasonally.
9. Black Fabric Flower Pockets
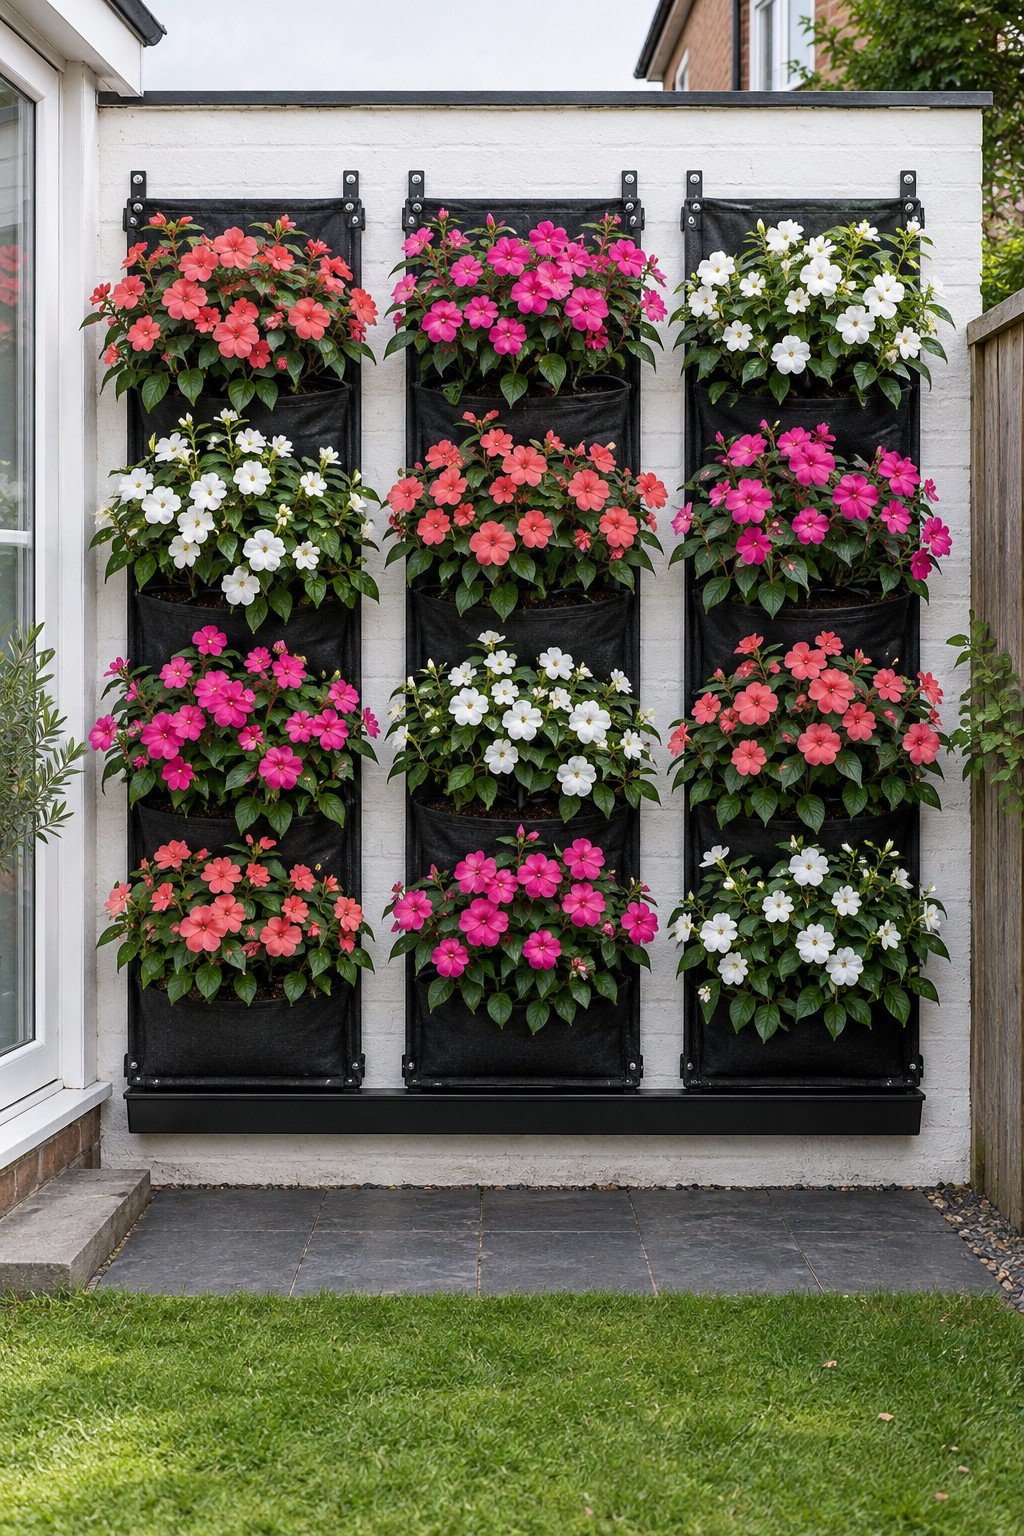
Black fabric pockets hold coral, pink, and white flowers in a dense grid on a white wall. The dark background visually recedes, allowing the flowers to read as broad blocks of color. Recreate the effect with an exterior vertical planting system whose instructions cover pocket depth, irrigation, drainage, and wall protection. Plan a collection route for runoff so watering does not repeatedly soak the wall or the paving beside the lawn. Begin with a small pocket section to learn how quickly it dries before committing to a whole wall of flowering plants.
10. Ornate Mirrors and a Cream Bench
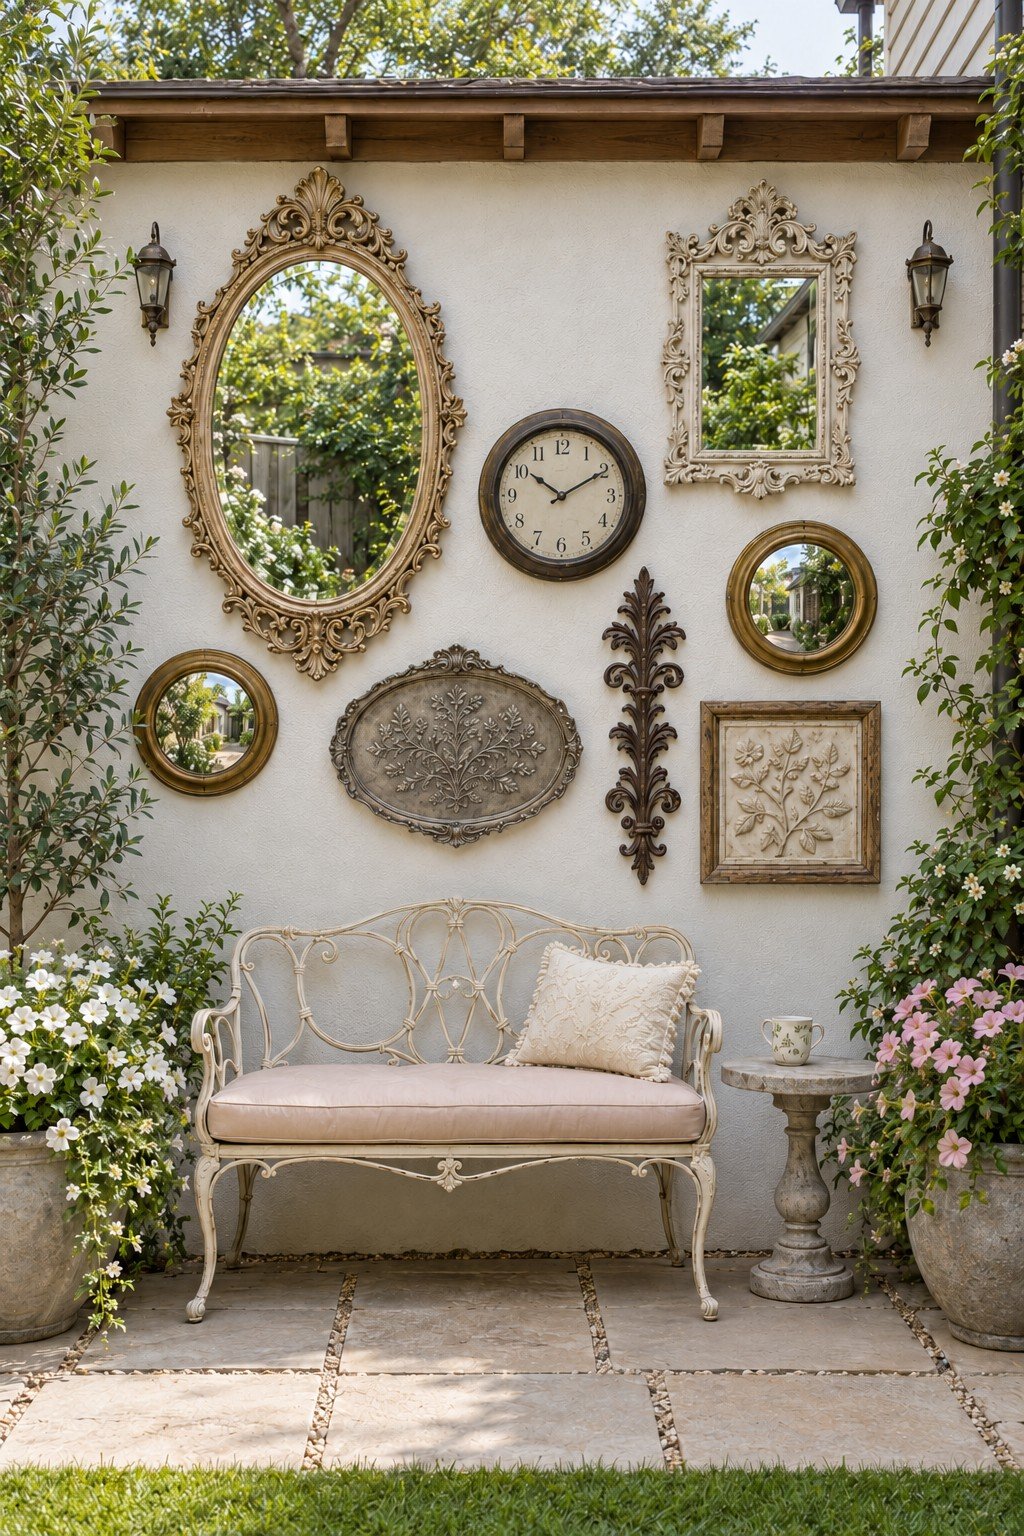
Ornate mirrors, a round clock, and botanical reliefs form a loose collection above a cream bench. Different shapes feel connected because their muted gold and cream finishes repeat across the wall and the metal seating. Lay out the larger mirror first, then distribute smaller pieces so their outer edges form a balanced group. Specify mirrors and a clock made for outdoor exposure, and position reflective surfaces away from direct sun and clear flight routes, covering the mirrors if birds approach the reflections. Edit the collection down to an ornate mirror and a botanical relief for a shallow patio, retaining the cream bench as the quiet base.
11. An Arched Shelf and Blue Plates
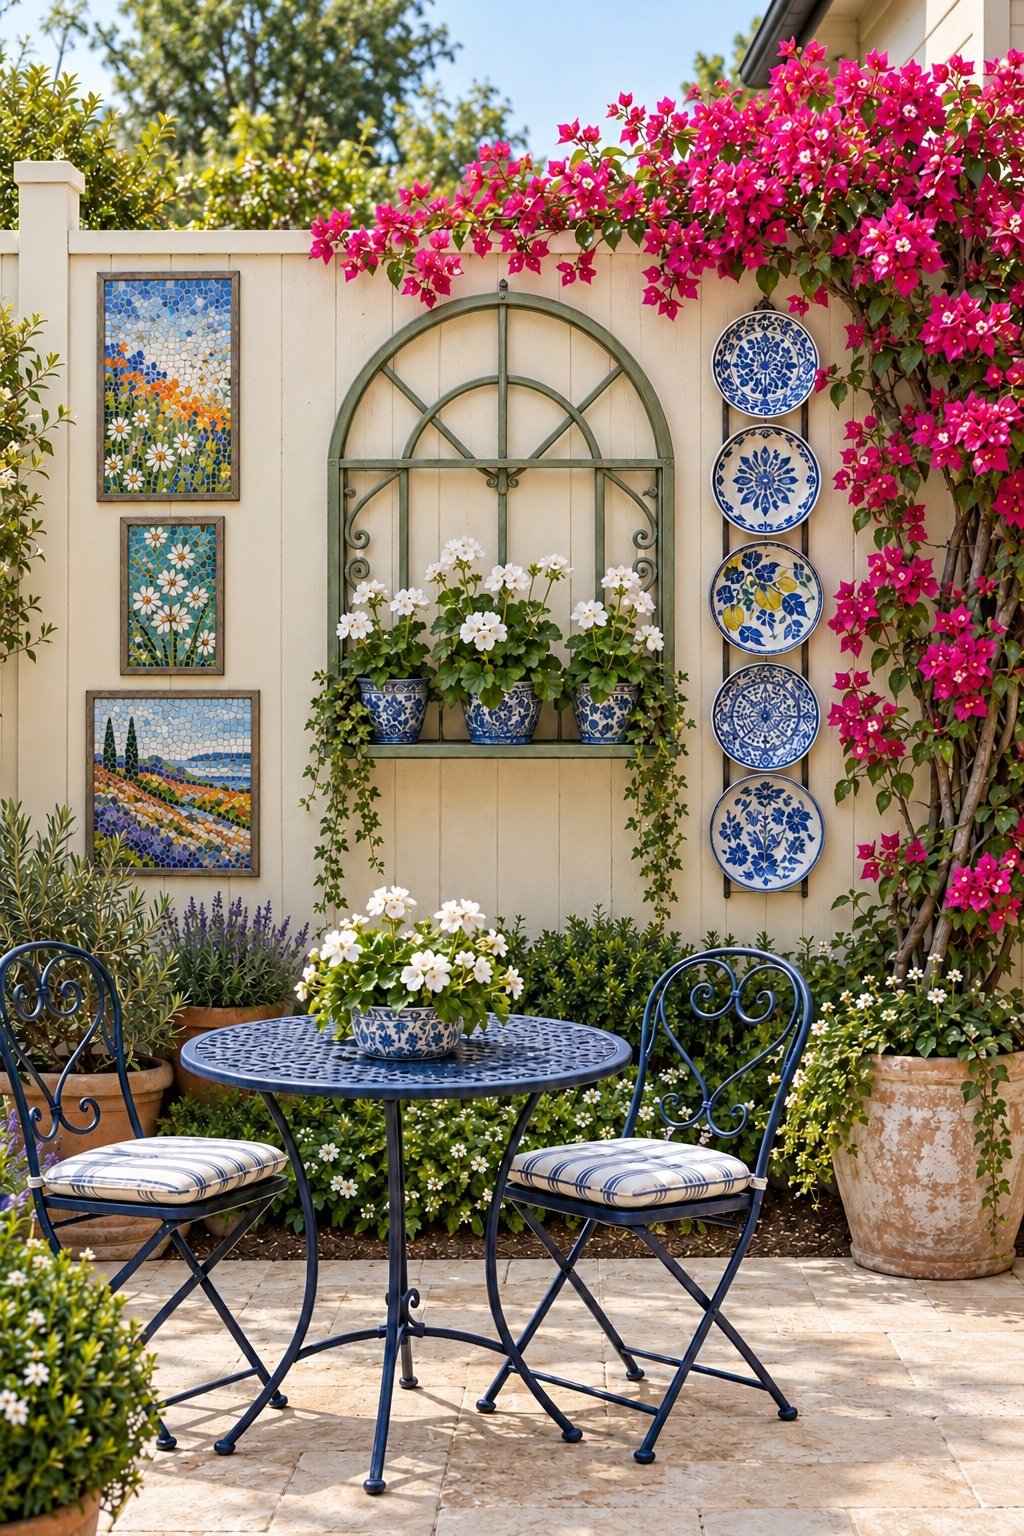
An arched green shelf holds blue and white pots, with patterned plates and framed mosaics extending the collection across a cream wall. Blue patio chairs repeat the ceramic color, giving the seating and wall decoration a shared visual thread. Hang the arched shelf first and center the three pots on its ledge, then arrange the plates and framed mosaics around it, leaving clear wall between the groups. Fasten the shelf into the supporting wall structure and allow room to remove every pot without tilting it into the arch. Retain the arch and a short column of blue plates for a smaller tea corner, leaving the surrounding wall mostly open.
12. Colored Frames and Leaf Cutouts
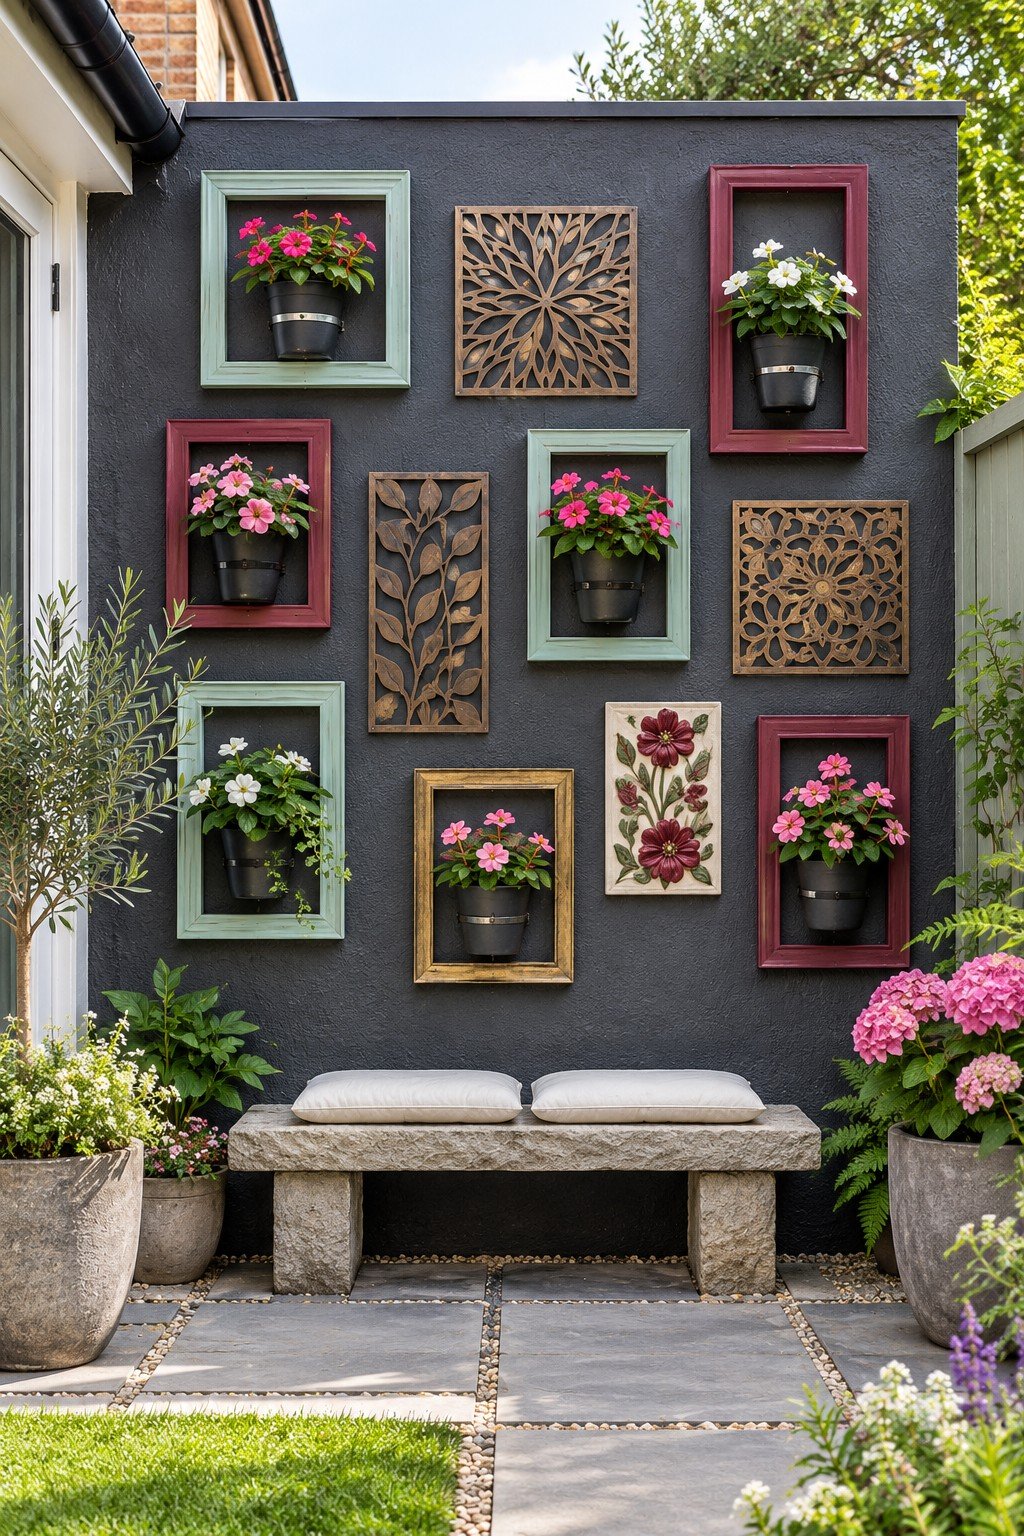
Colored frames in mint, burgundy, and gold surround dark flowerpots among leaf cutouts on a charcoal wall. Open space inside each frame keeps the pots apart from the busy fretwork panels. The charcoal wall pulls the mint, burgundy, and gold together. Gather frames made from timber or metal that can accept exterior paint, avoiding decorative molding that swells when damp. Mount every flowerpot independently so the frames remain ornamental rather than carrying wet planting.
13. A Scrollwork Arch and Patterned Plates
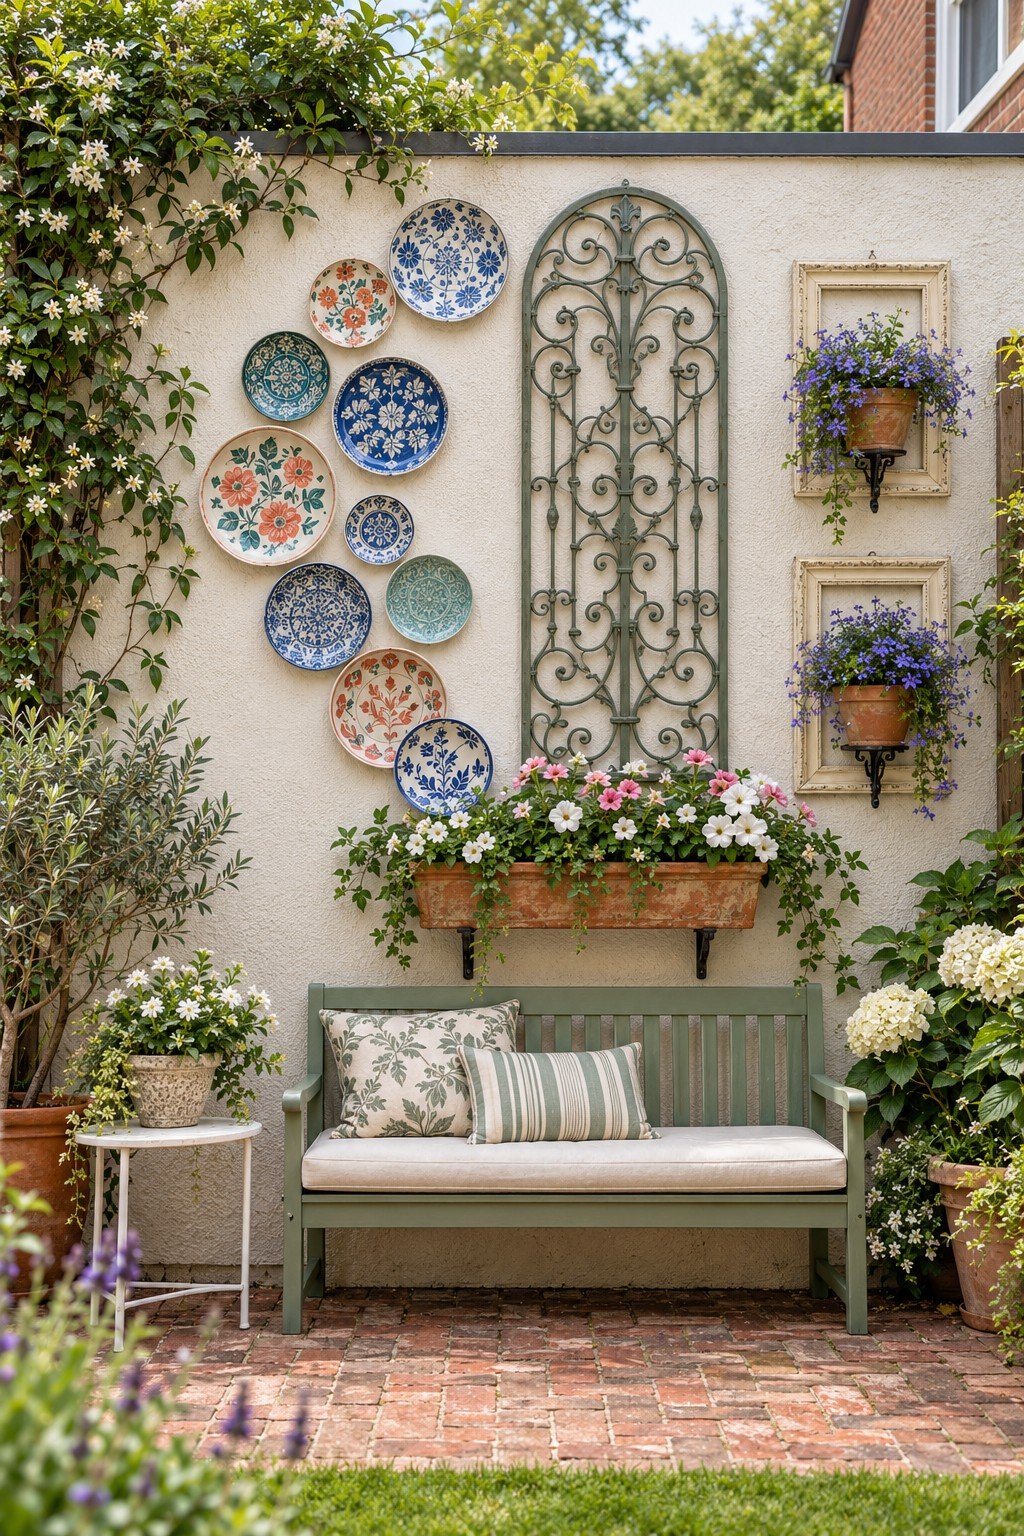
A sage scrollwork arch rises above a green bench, with patterned plates on one side and framed flowerpots on the other. Scrollwork means curled metal ornament, and its open lines give the tall arch presence without hiding the cream wall. Position the arch first, then balance the broad plate grouping against the narrower framed pots. Attach the long flower box through its supporting brackets and preserve room for a seated person beneath the flowers.
14. A Watering Can and Blue Pots
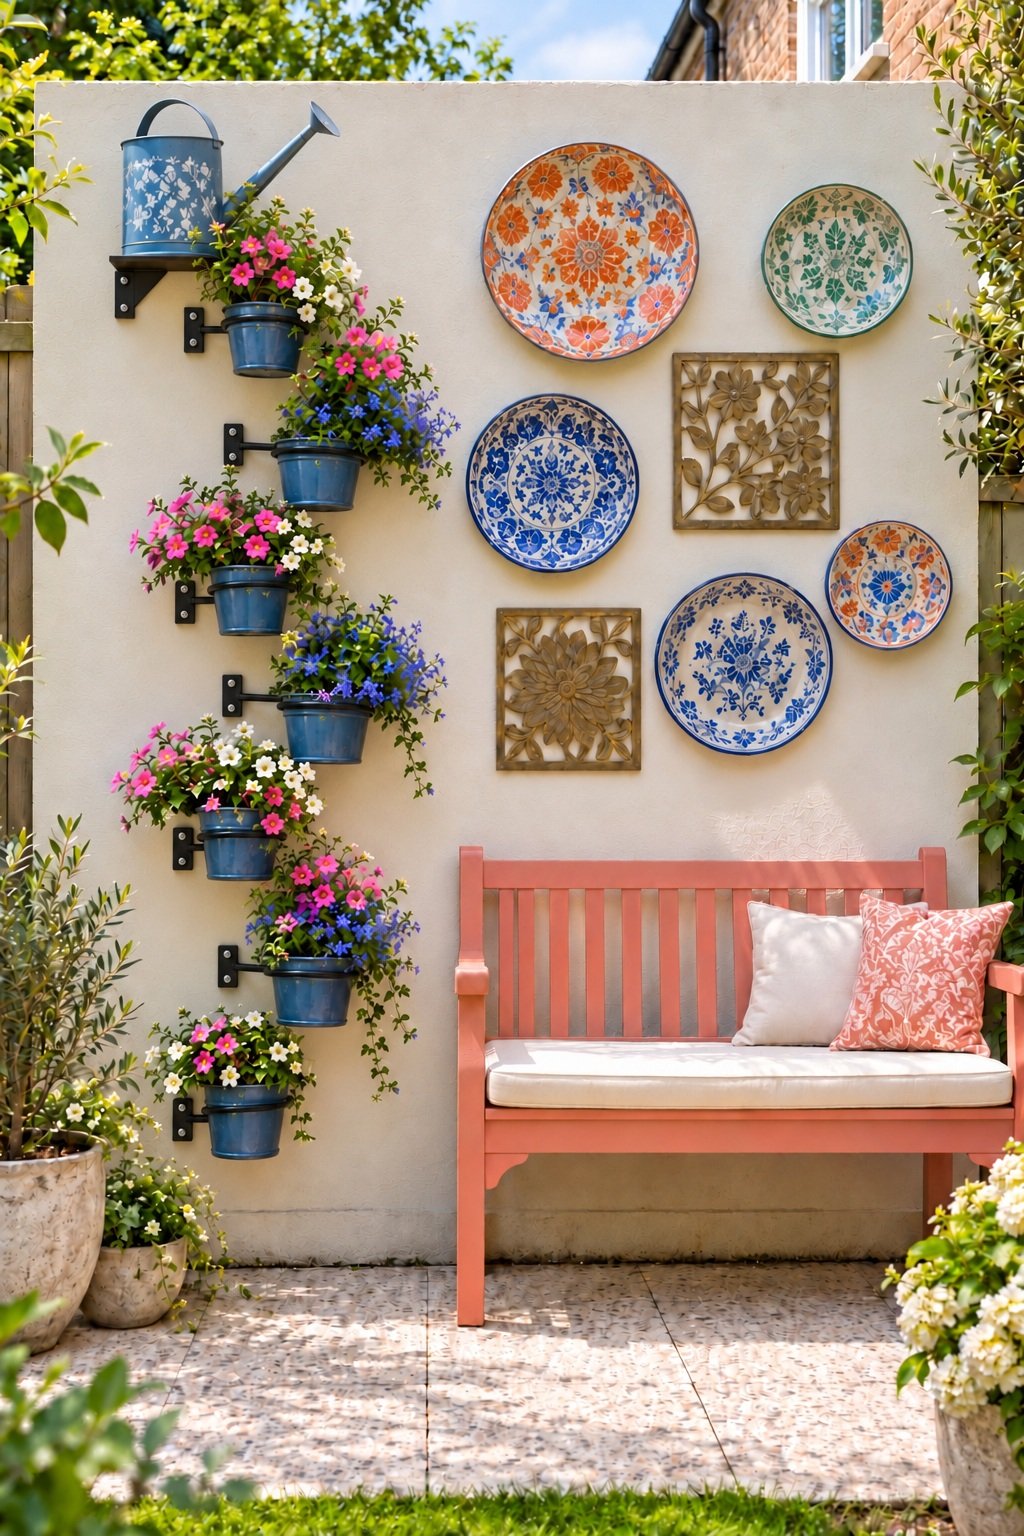
A blue watering can crowns a vertical row of blue pots, while patterned plates spread across the wall beside a coral bench. The tall pot column acts as a visual edge, keeping the more scattered plates from looking disconnected. Build the column from individually supported pots and brackets, with each container removable for watering and seasonal replacement. Treat the watering can as an empty ornament and fix it against wind movement without suggesting that it irrigates the pots. Shorten the pot column for a low wall, preserving the blue watering can and coral bench as the main color contrast.
15. Iron Arches and Botanical Art
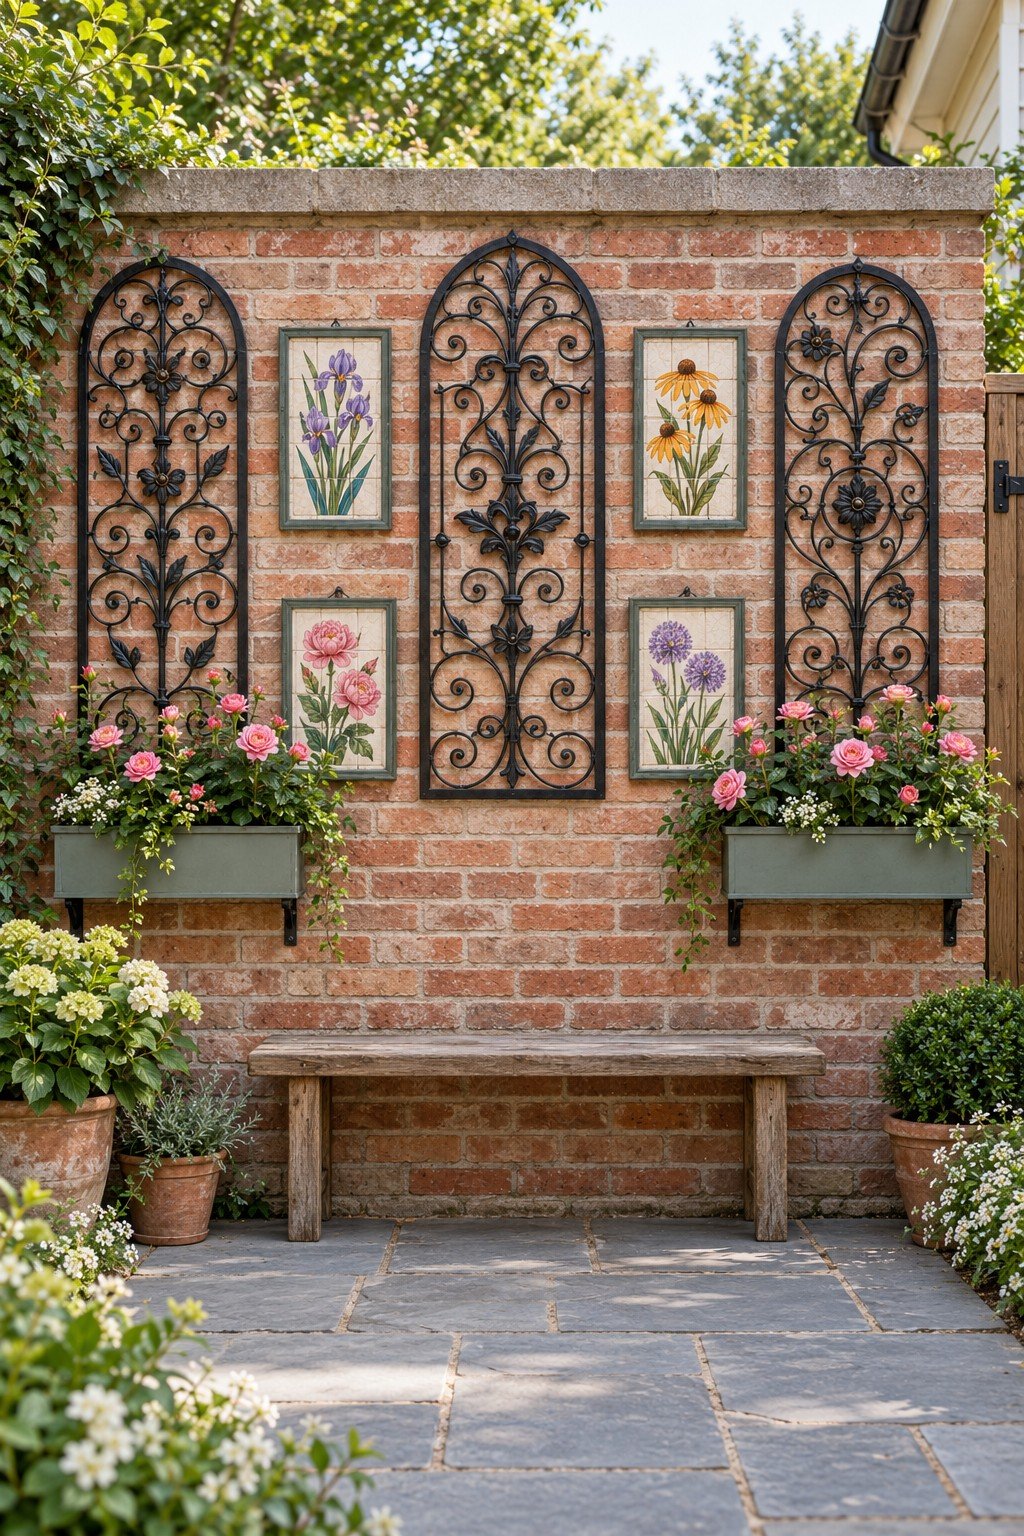
Black iron arches alternate with framed botanical tiles on a red brick wall, with sage green flower boxes of pink roses and a weathered wooden bench below. The rounded tops add height. Between them, the four square frames sit in a tidy grid that keeps the busy scrollwork calm. Select rigid iron ornaments whose edges have no loose rust flakes, then map their spacing before drilling the brick. Ceramic botanical art made for exterior exposure can supply the floral detail without relying on paper prints behind indoor frames.
16. Rust Botanical Panels and a Tall Mirror
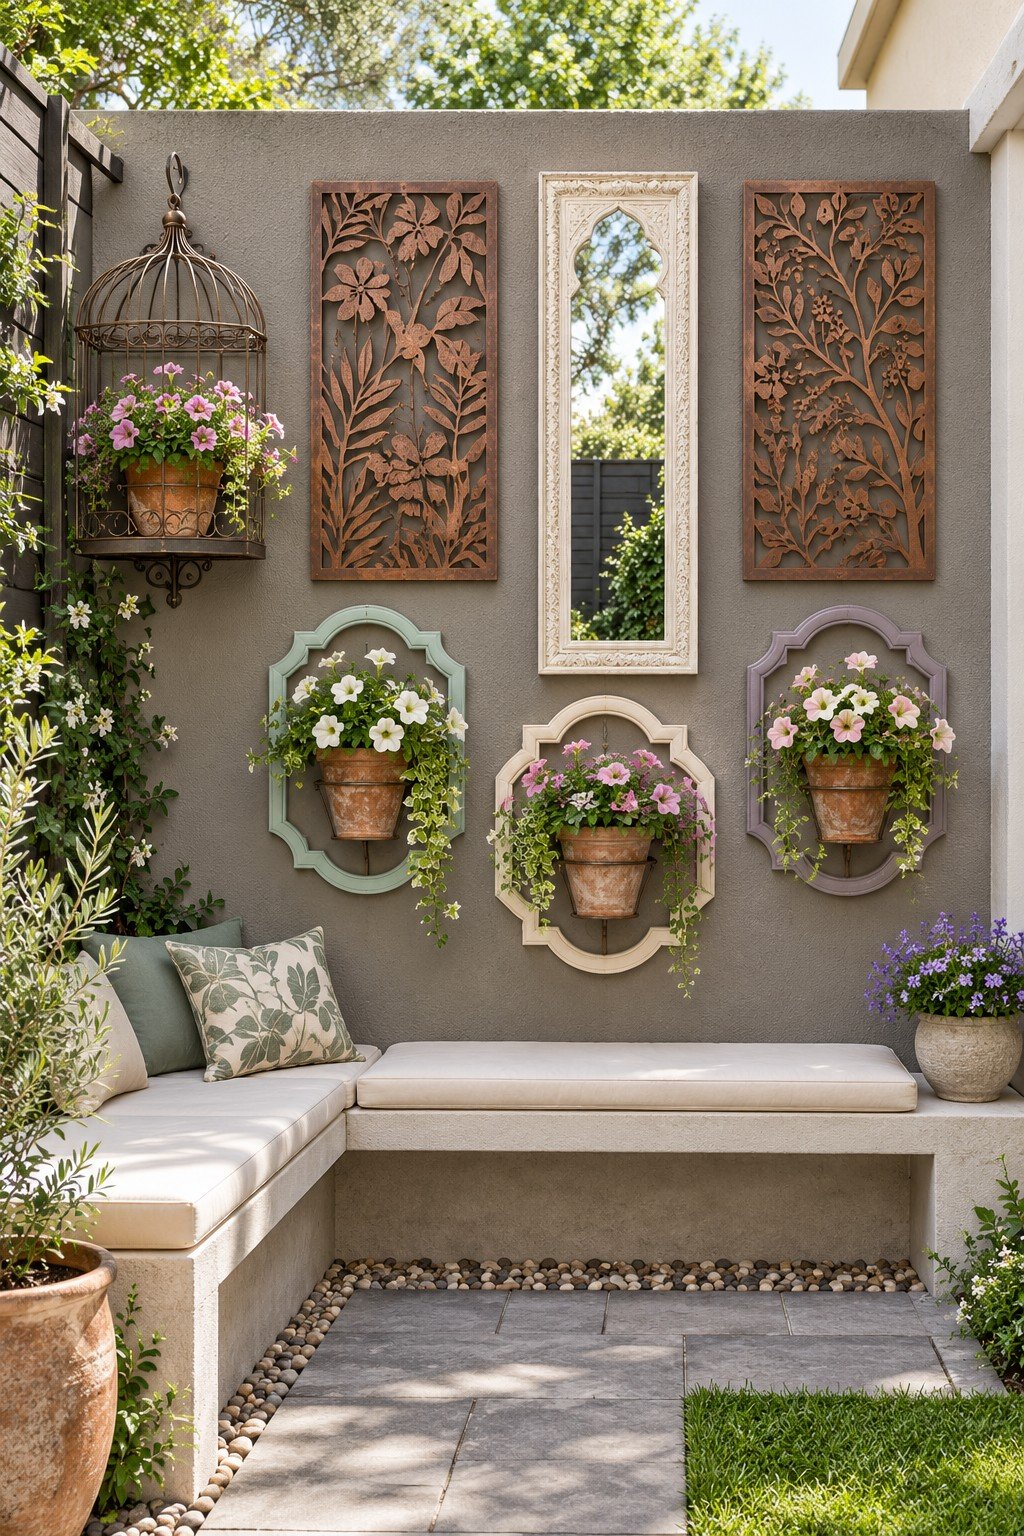
A tall mirror stands between rust colored leaf cutouts, with framed flowerpots arranged above a pale corner bench. The vertical mirror interrupts the dense botanical shapes and reflects greenery into an otherwise enclosed seating corner. Reproduce the balance with exterior metal leaf cutouts and a garden mirror whose backing tolerates the location. Antiqued mirror glass gives a softer reflection than a clear mirror, so the corner glares less in afternoon sun. Hang each pot from its own wall hook so the shaped frames carry no weight, and let the birdcage planter at the top left add a third shape without crowding the bench.
17. Star Jasmine and Botanical Plates
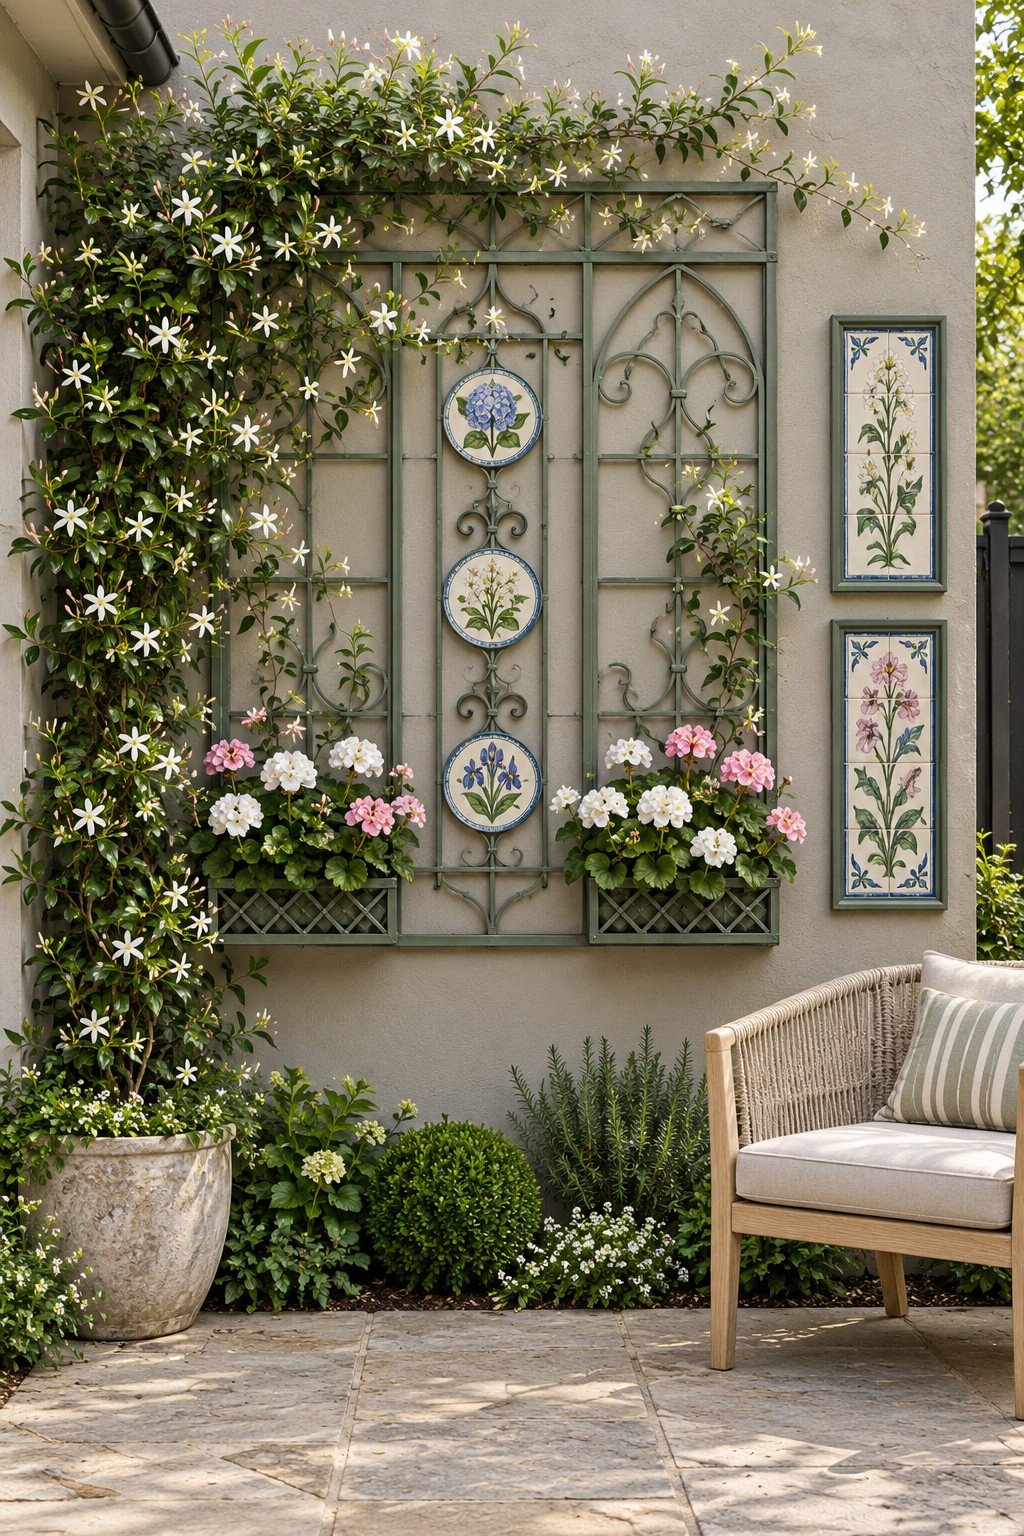
Star jasmine with small white flowers climbs across a sage metal grille decorated with botanical plates and low flower boxes. Framed floral art extends the arrangement sideways, but the repeated sage metal keeps the wall from feeling like unrelated collections. Establish the grille and its wall attachments before guiding the vine through the open metalwork. Leave the plates and framed floral art accessible so growing stems do not trap them against the wall.
18. A Wooden Hutch for Flowerpots
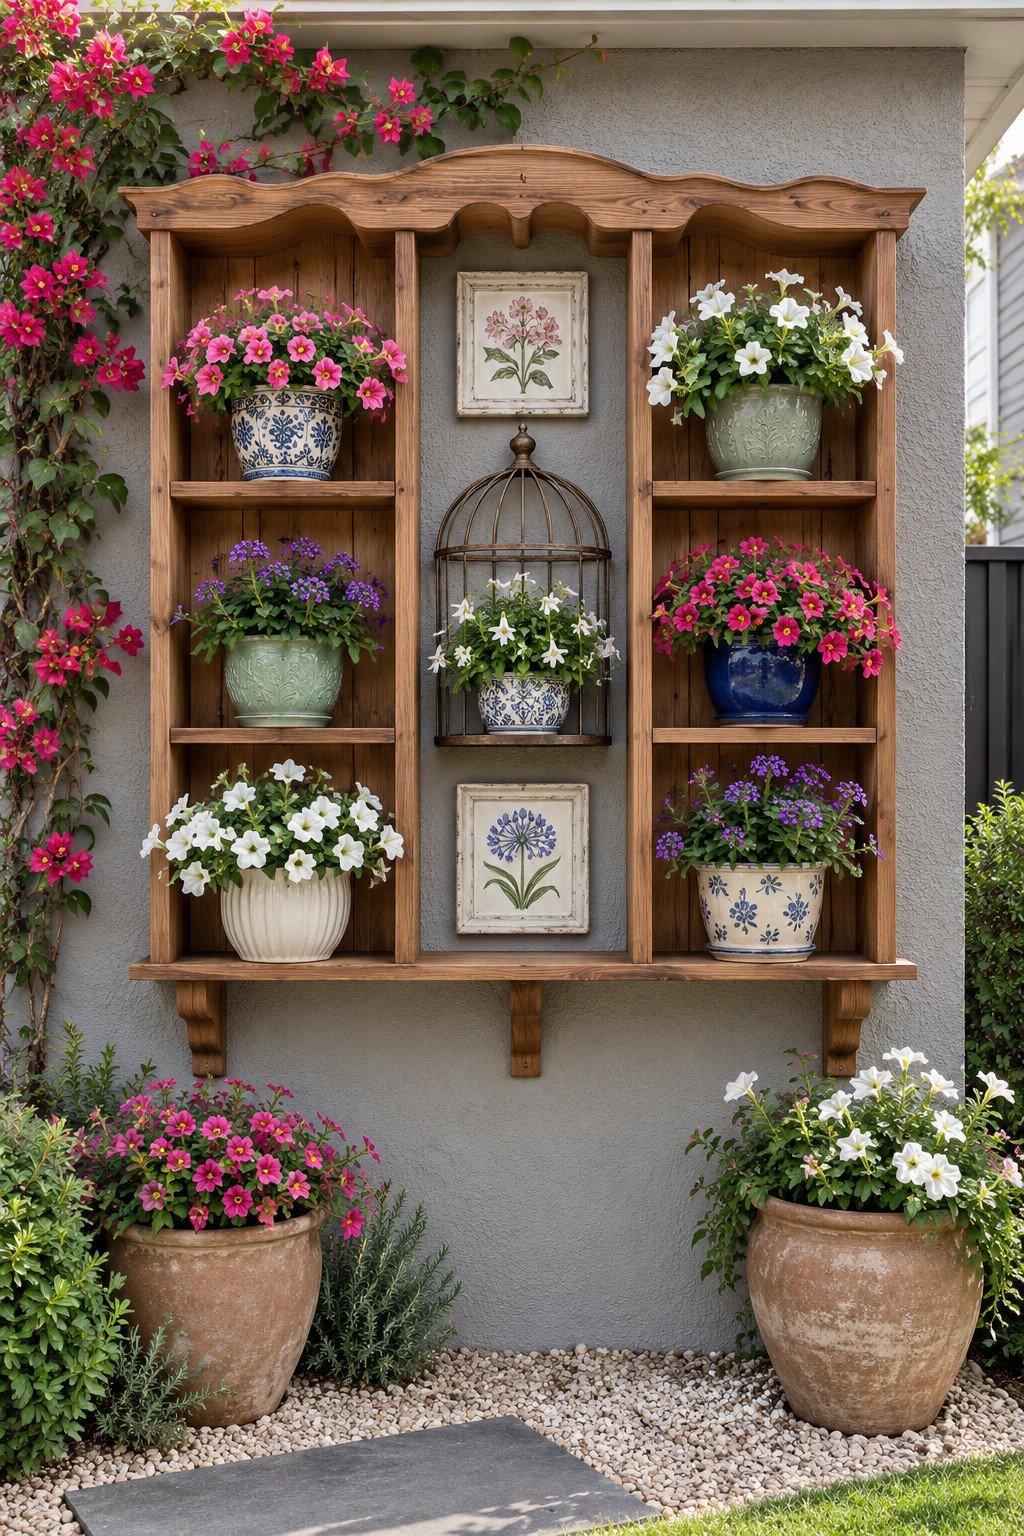
A wooden hutch gathers blue, green, and cream flowerpots around botanical art and a small decorative cage. Divided shelves give each pot its own outline, turning an assortment of flowers into an organized outdoor collection. Adapt an empty hutch only after inspecting the shelf joints and arranging wall attachments for its weight with watered flowerpots. A sheltered location and removable pots make more sense for indoor furniture timber than leaving it exposed to repeated soaking. Convert a smaller wall cupboard into a short flowerpot hutch when a full height collection would dominate the patio.
19. Framed Bottles and Cut Flowers
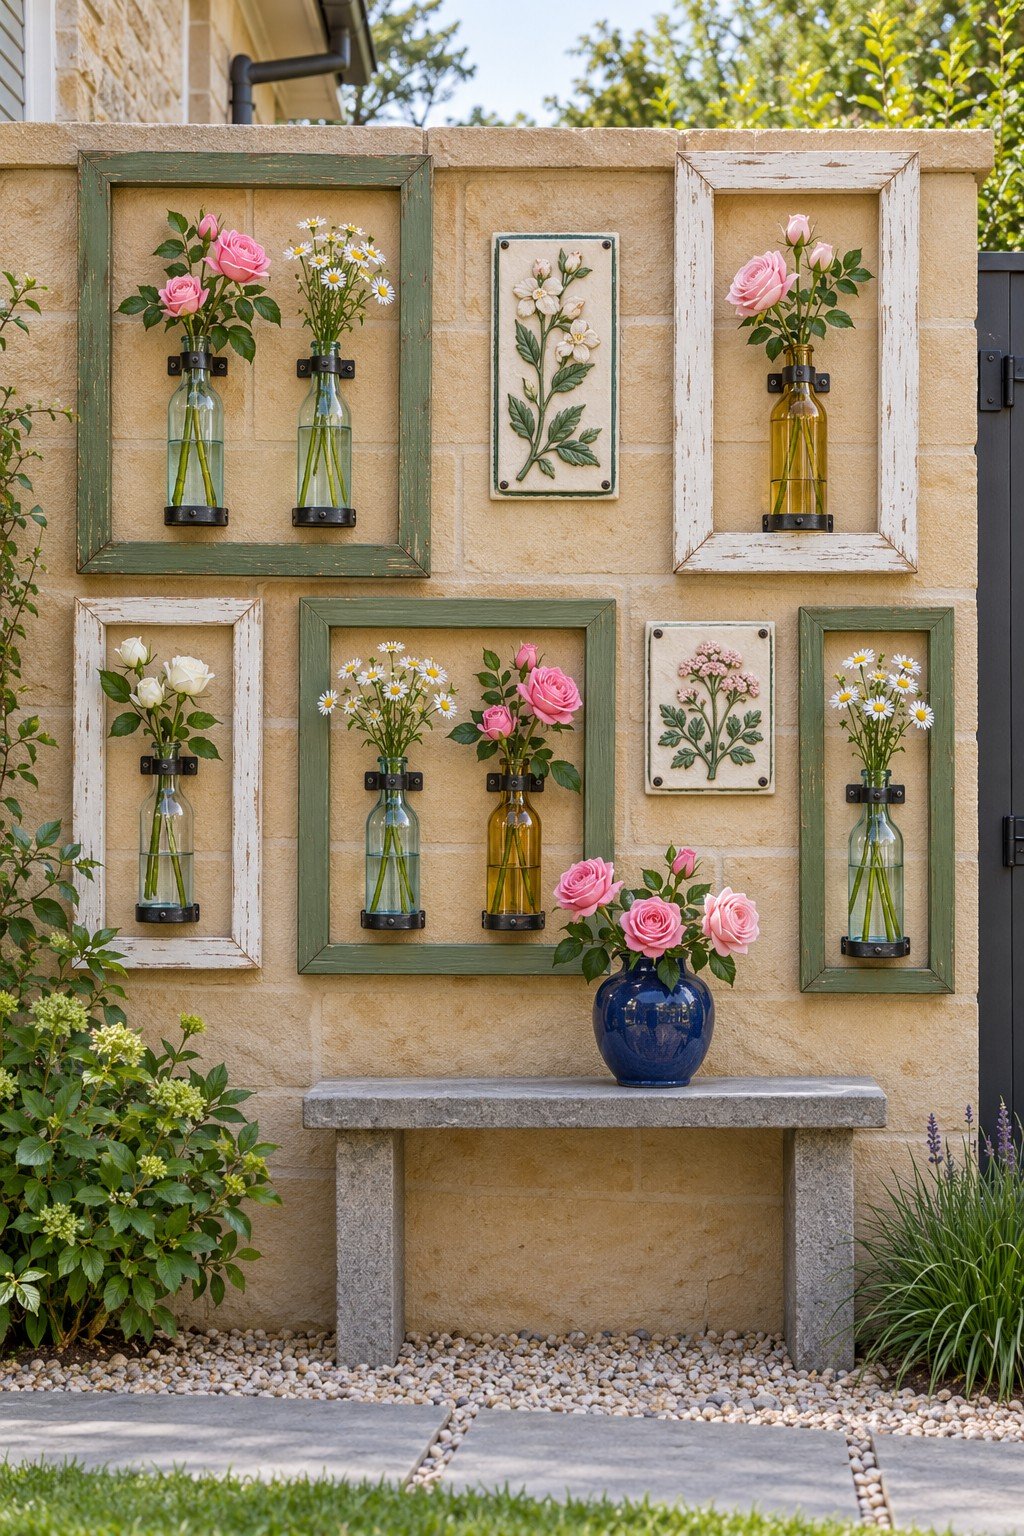
Framed bottles in clear and amber glass hold cut flowers inside green and white frames on a pale stone wall. The slim bottles repeat like pencil lines, and a few pink roses add color without filling the frames. Secure bottle necks with individually sized metal holders, then hang the decorative frames around them without loading the molding. Lift the bottles out to replace the water and wash away deposits before returning fresh cut flowers. Substitute a small group of matching bottles for the larger collection when decorating a rental courtyard, using only existing fixings that the owner permits you to reuse.
20. Tennis Rackets and Cream Pots
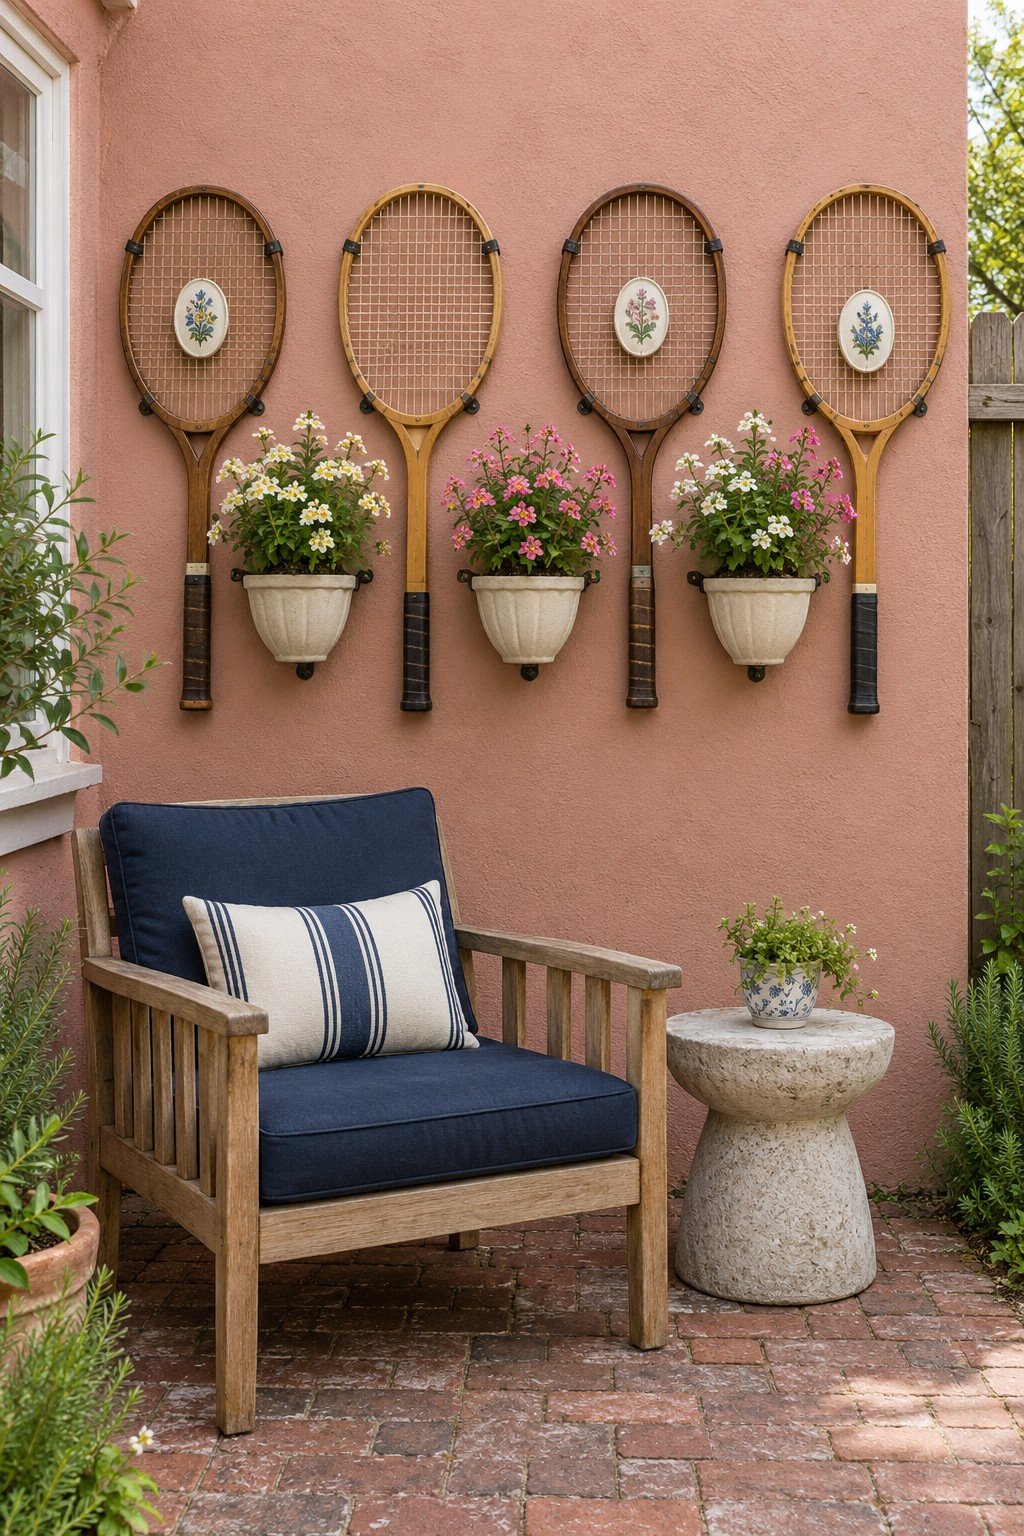
Wooden tennis rackets hang across a dusty pink wall, with small botanical ornaments on the strings and cream pots between the handles. The long handles make a playful row of vertical lines. Cream pots break up the brown wood so the rackets do not read as one heavy block. Clean retired rackets without forcing brittle strings, then secure the racket heads and handles against wind movement. Give the cream pots their own wall fixings and keep the botanical ornaments light enough that the strings stay taut.
21. Chair Backs and Flower Boxes
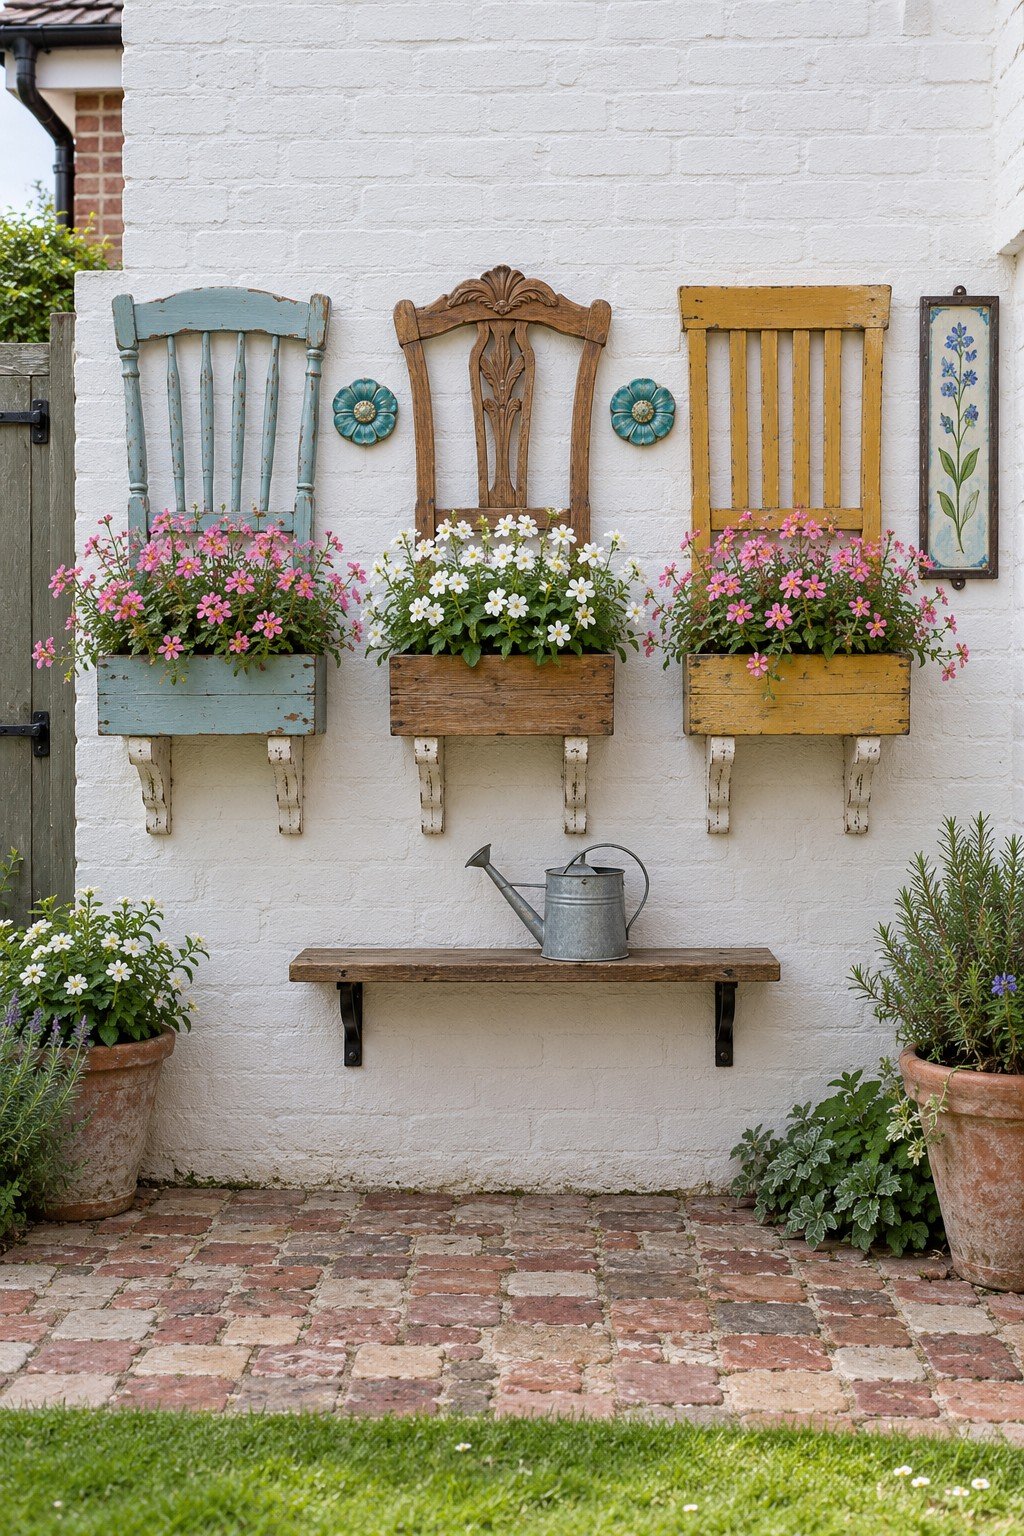
Blue, natural wood, and mustard chair backs rise from wooden flower boxes on white brick. Recognizable furniture shapes give the planting humor, while repeating the box width makes the different chair backs feel related. Salvage intact chair backs, remove projecting hardware, and finish exposed wood before assembling the decorative grouping. Support each flower box directly from the wall through its brackets, rather than expecting an old chair joint to carry watered soil. Reclaim a single distinctive chair back for a small wall, letting its painted finish supply the accent instead of collecting several competing shapes.
22. Ceramic Relief Flowers around a Planter
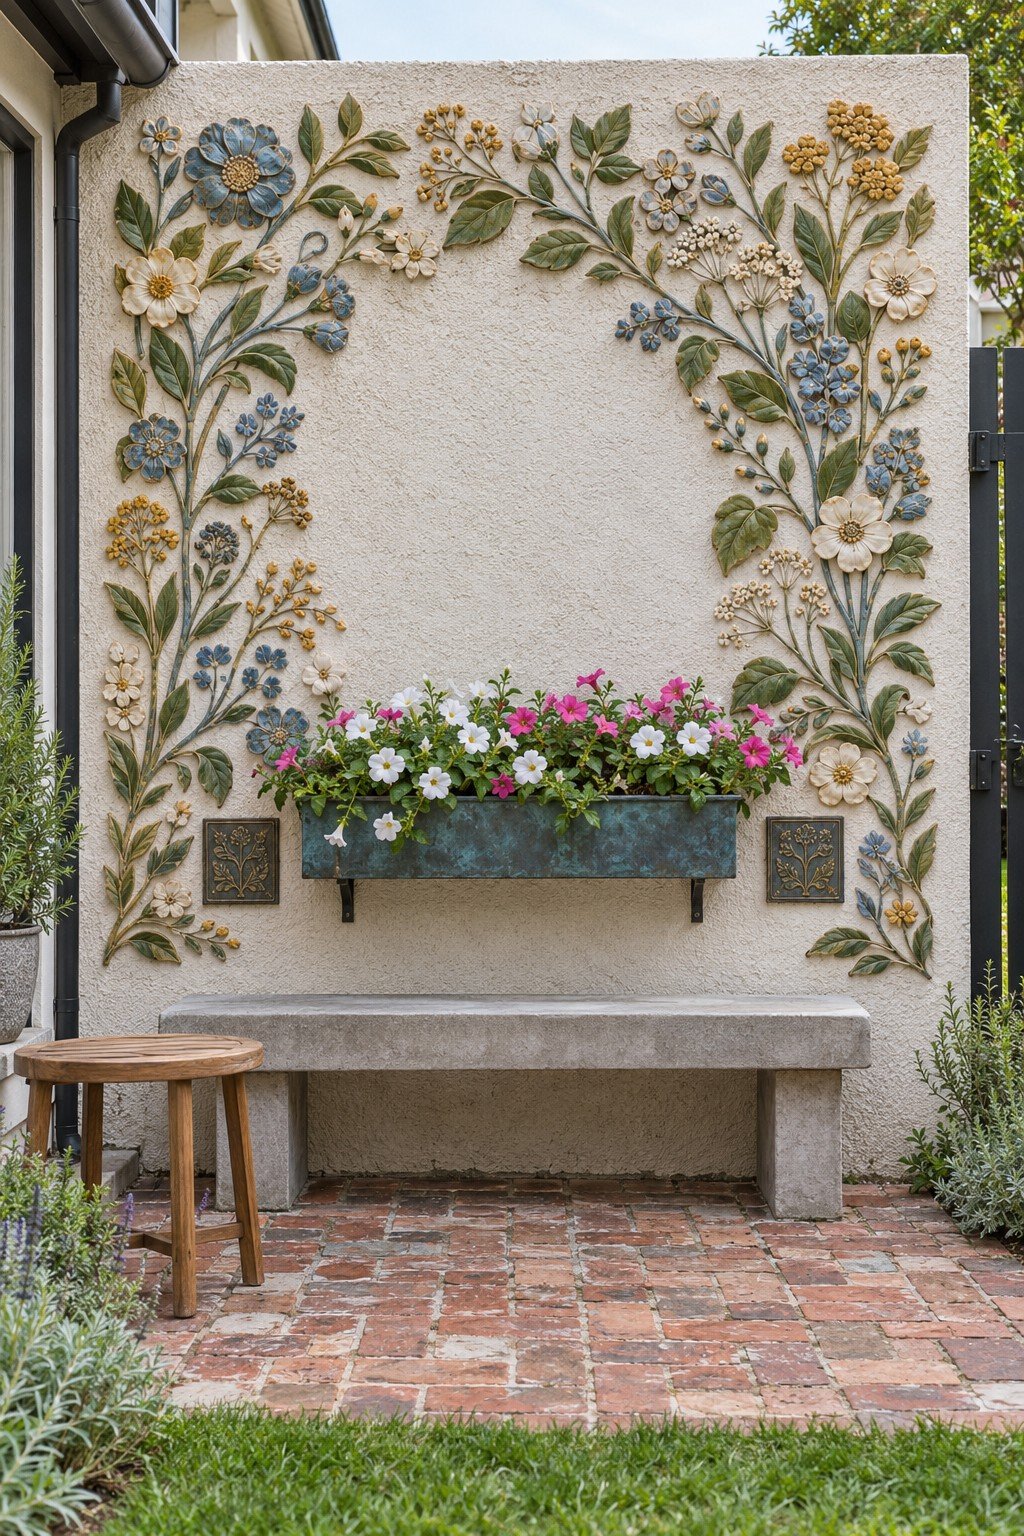
Blue, cream, and ocher ceramic relief flowers climb both sides of a cream wall and arch toward the center, framing a verdigris planter of pink and white petunias. The open center gives the raised stems room to read clearly, making the empty wall part of the design. Sketch the border at full scale before fixing ceramic flowers made for exterior walls and the local winter conditions. Rounded edges and individually secured pieces matter where someone might brush the decoration while sitting on the stone bench. Outline a smaller corner of the wall with ceramic flowers when a full border would crowd the flower box or compete with nearby furniture.
23. Terracotta Bell Strings and Floral Plaques
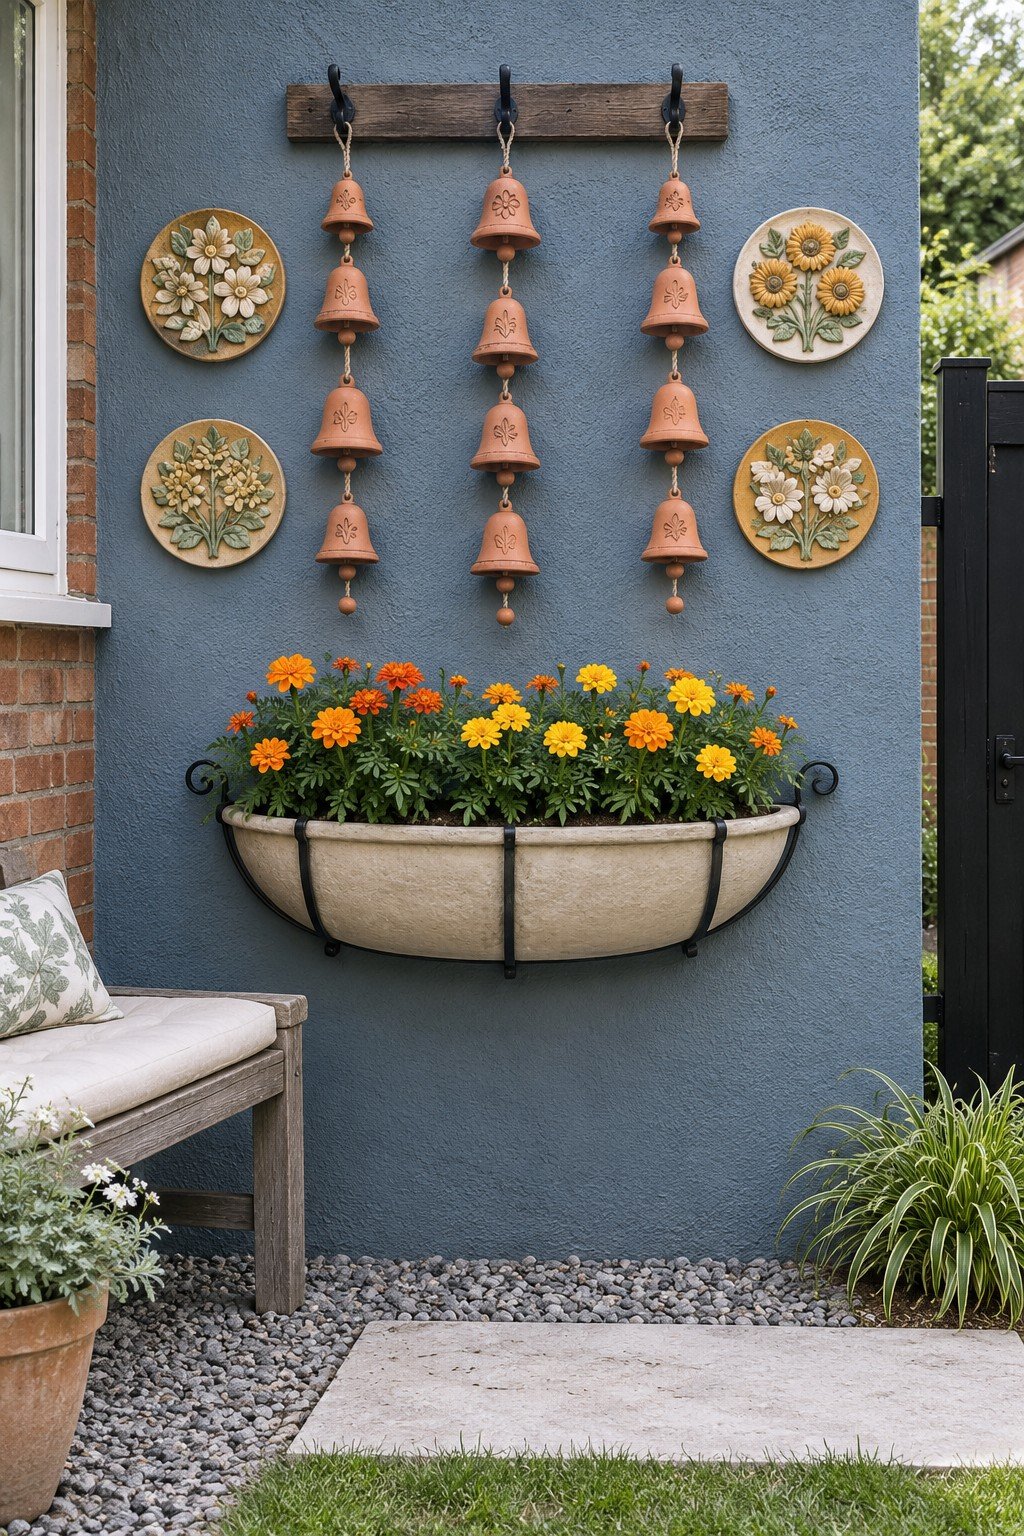
Three strings of terracotta bells hang from a weathered wooden rail between round floral plaques on a blue gray wall. Their warm clay color links the orange and yellow marigolds in the trough below to the sunflowers and daisies on the plaques. Thread the bells onto outdoor cord with a knot or bead under each one, so they keep their spacing and swing clear of the plaques. Unglazed clay can crack if it freezes while wet, so take the strings indoors for winter, and also before a storm, since the bells can chip each other in strong wind. On a compact wall, a single string centered between two plaques keeps the same rhythm.
24. Teal Shelves and Yellow Chairs
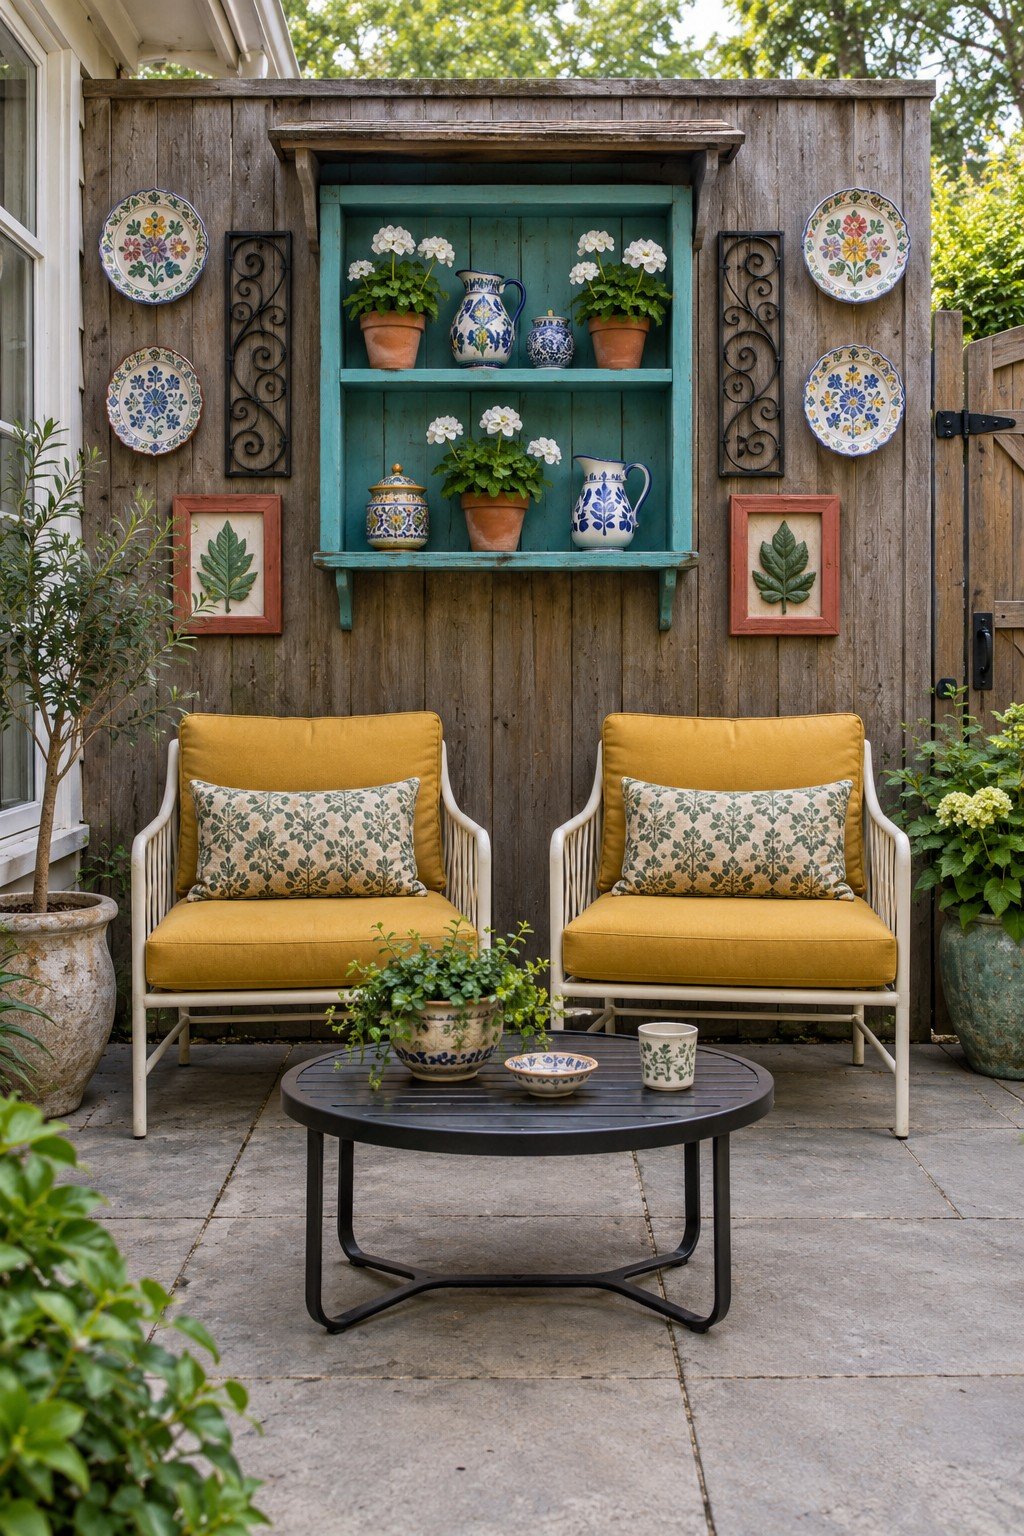
Teal shelves hold flowers and patterned pitchers against weathered boards, with yellow chairs bringing the wall colors into the seating area. Against the bright teal back, the blue and white pitchers stand out clearly. The mustard cushions below keep the gray boards from feeling flat. Fix the shelves to the supporting structure behind the boards and measure each shelf around the tallest pitcher you plan to display. Restrain fragile pitchers against wind and remove the flowerpots for watering so the wood can dry. Borrow the teal shelves and yellow chair pairing for a tiny patio, reducing the surrounding plate collection instead of shrinking the shelf openings.
25. Arched Niches on a Sage Wall
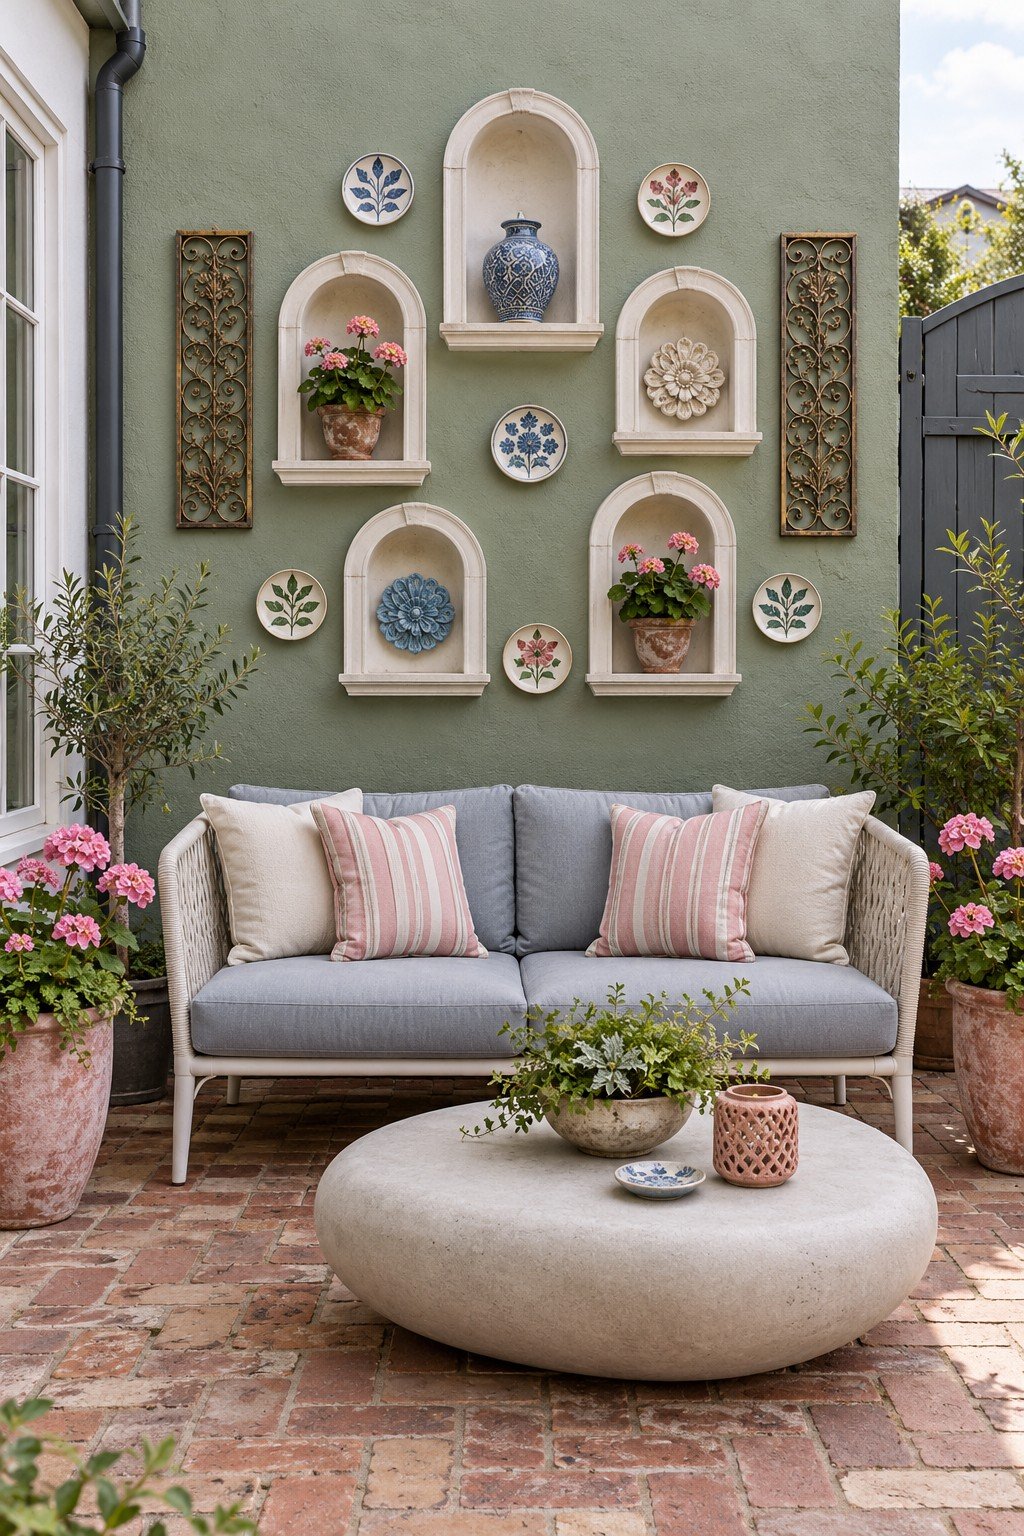
Cream arched niches hold flowerpots and ceramic ornaments against a sage wall, with small plates filling the gaps between the arches. A niche is a recess or shallow display enclosure, and the repeated curved tops make the different contents feel connected. Recreate the effect with exterior wall enclosures whose lower ledges drain and whose attachment points remain accessible. Position the contents so no flowerpot projects beyond its ledge or hides the cream arch.
26. A Winding Floral Mosaic Ribbon
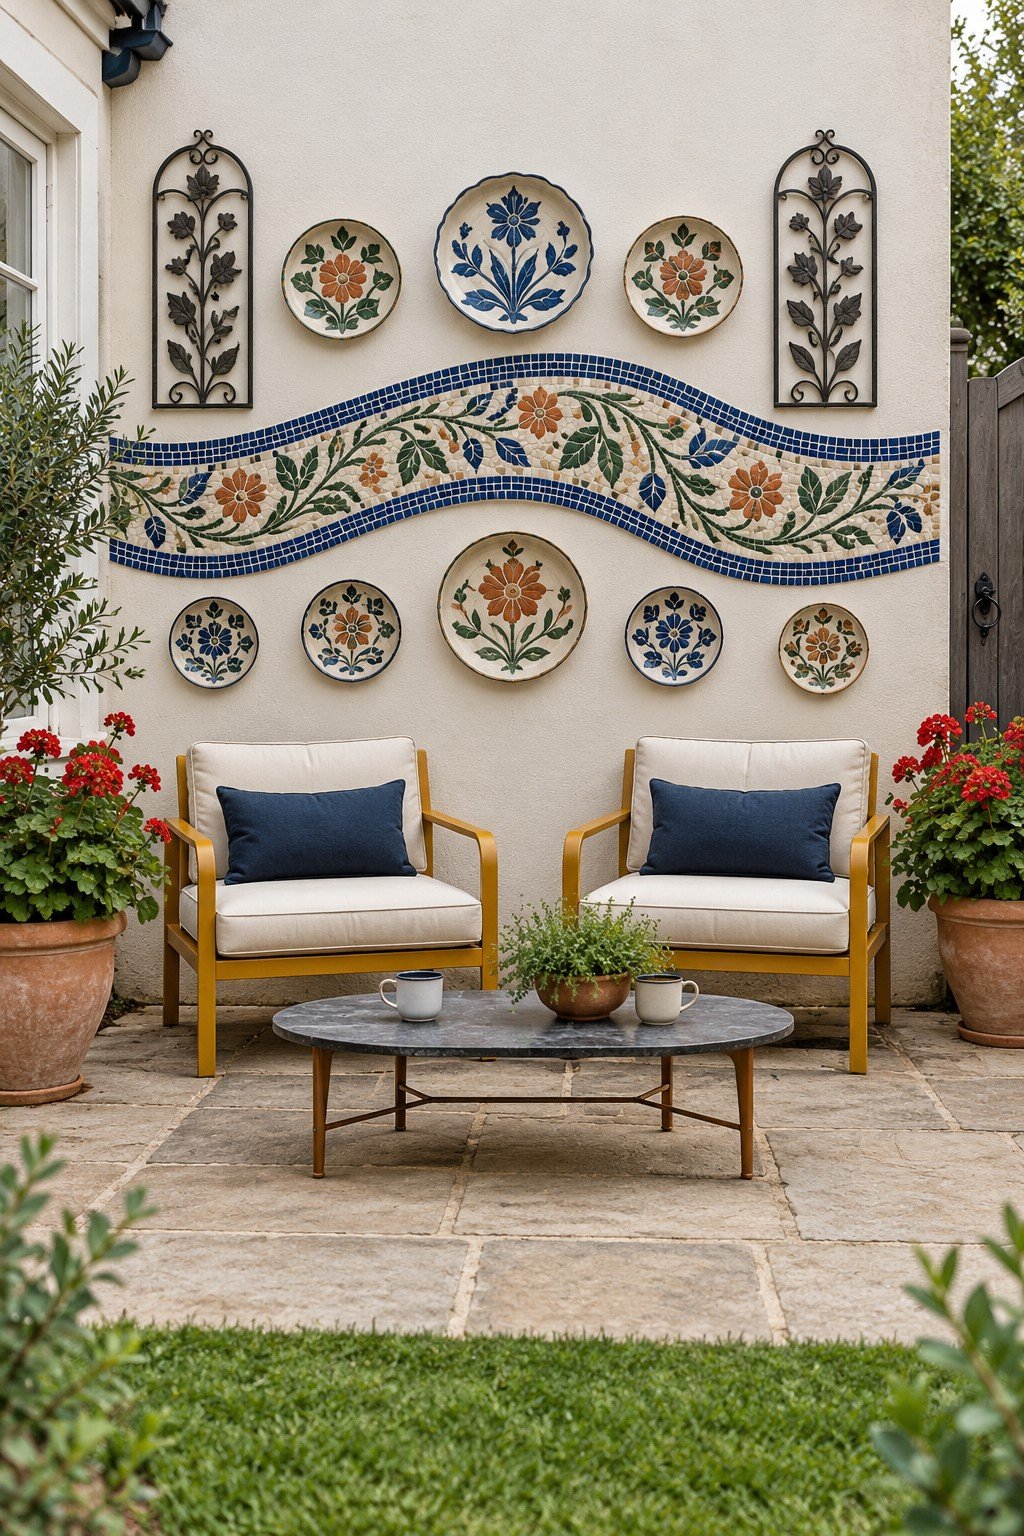
A winding floral mosaic ribbon crosses a cream wall between two rows of patterned plates, with blue edging tying its orange flowers and green leaves to the navy cushions below. The sweeping line draws the eye horizontally, giving a broad seating wall a clear direction. Transfer a simple curved outline to the prepared masonry before setting exterior tiles in a mortar system selected for that wall. Seal the masonry against water first. Exterior tile also moves with heat, cold, and moisture, so it needs planned movement joints, as this Construction Specifier guide to tile movement joints explains. Simplify the floral mosaic ribbon into a shorter curve for a modest wall, preserving the blue edging so the shape stays readable.
27. A Pink Frame and Rose Plates
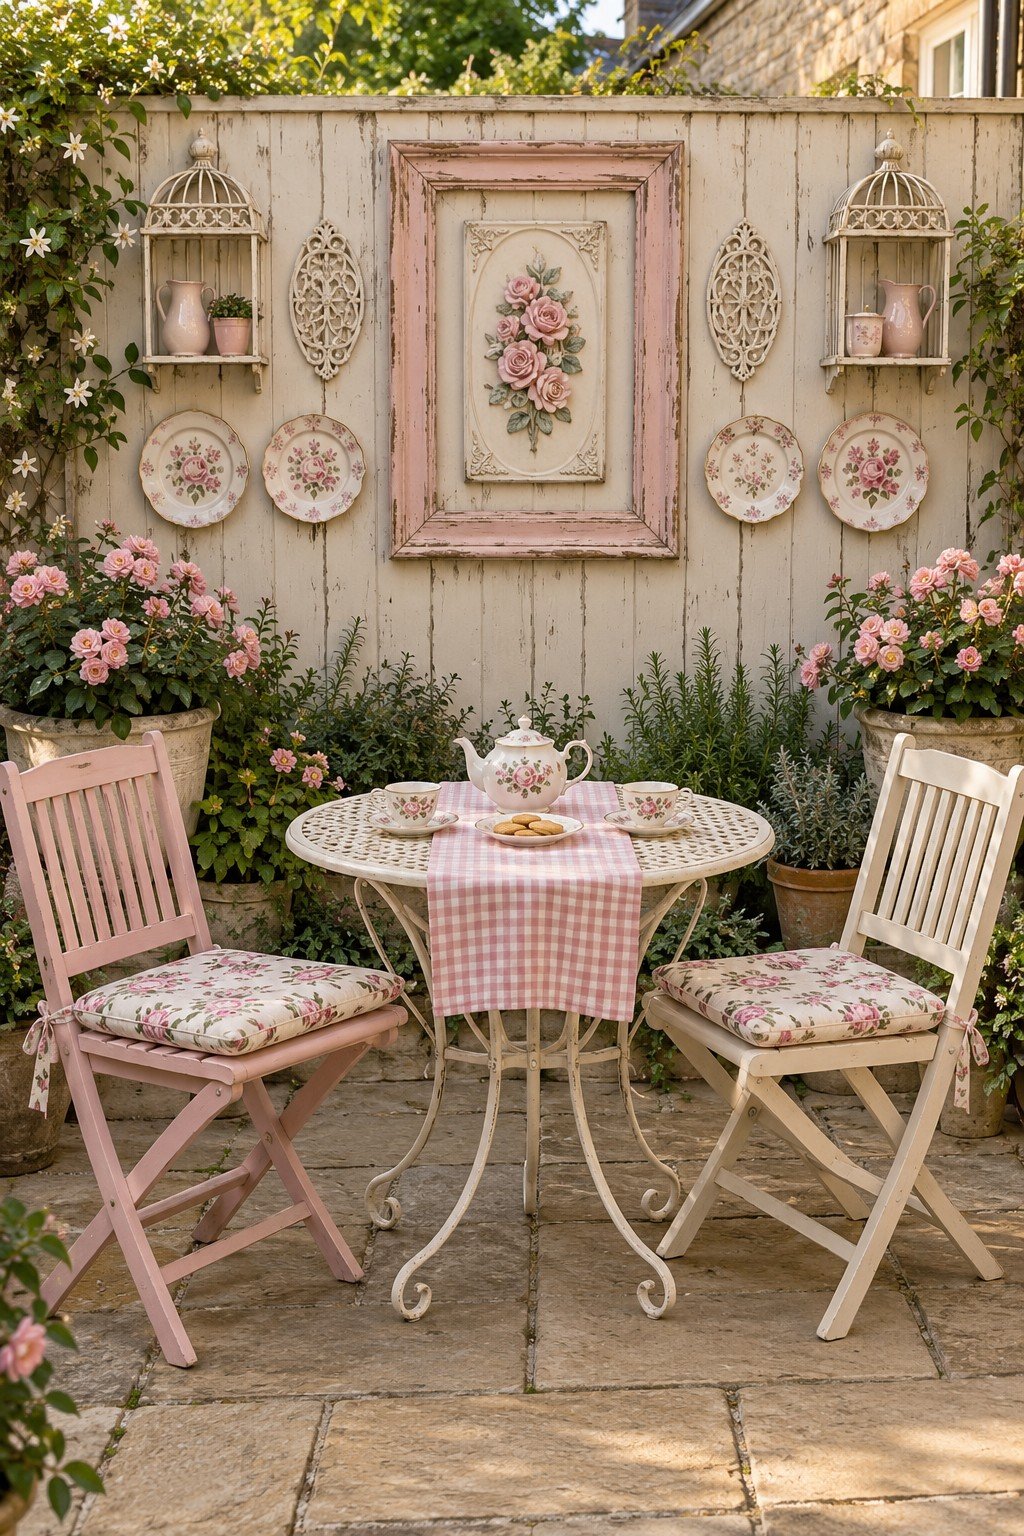
A pink frame surrounds a rose relief on pale boards, with rose plates and small open shelves extending the floral theme. The large frame establishes a center, allowing delicate ceramics to remain secondary details around the tea table. Recreate the rose relief in a material labeled for exterior exposure, then fix the pink frame independently to the supporting boards. Bring fragile tea ceramics inside after use and separate their storage needs from the permanent wall decoration. Introduce a smaller pink frame and a modest set of rose plates when the tea table occupies a narrow porch or sheltered courtyard.
28. Green Boards and Rose Medallions
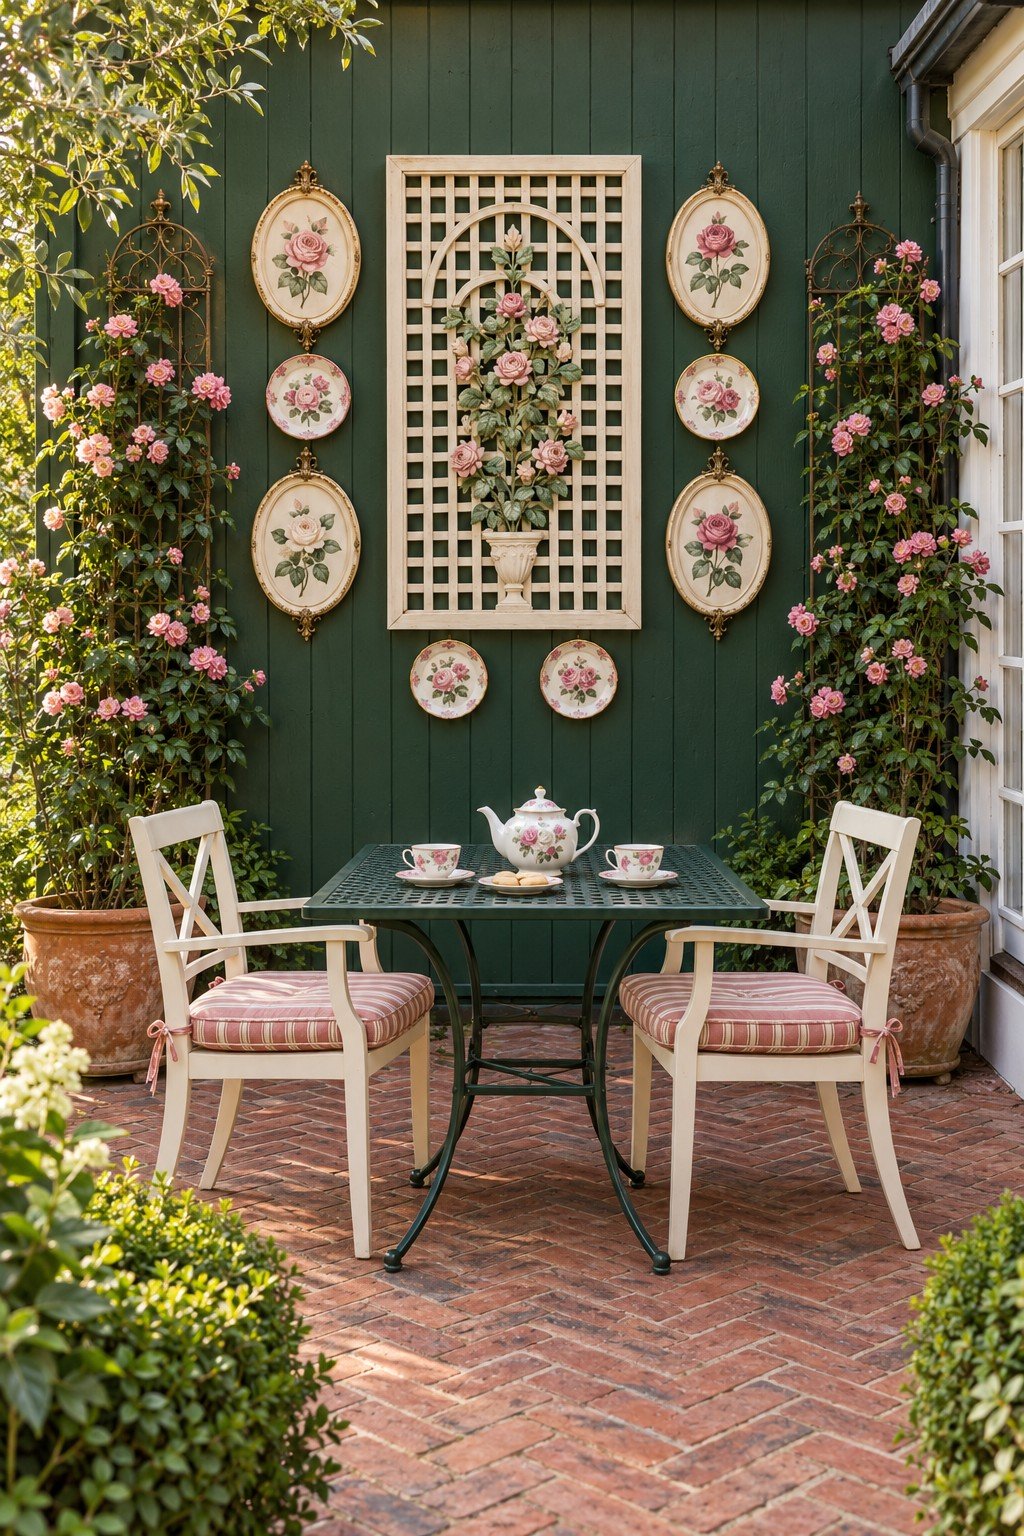
A cream lattice panel framing a relief of roses spilling from an urn rises against dark green boards, flanked by oval rose medallions and small floral plates. Pink climbing roses in terracotta pots climb black iron trellises at both ends, so living flowers bracket the painted ones. The pale lattice and gilt edged medallions stand out sharply against the deep green, which is why so many small pieces still read clearly. Screw the lattice panel and medallions into the timber framing behind the boards, and give the potted roses freestanding supports so you can tie in and prune new stems without touching the wall pieces. Choose reproductions made for outdoor display, because antique painted finishes rarely tolerate rain.
29. An Iron Headboard and Enamel Lids
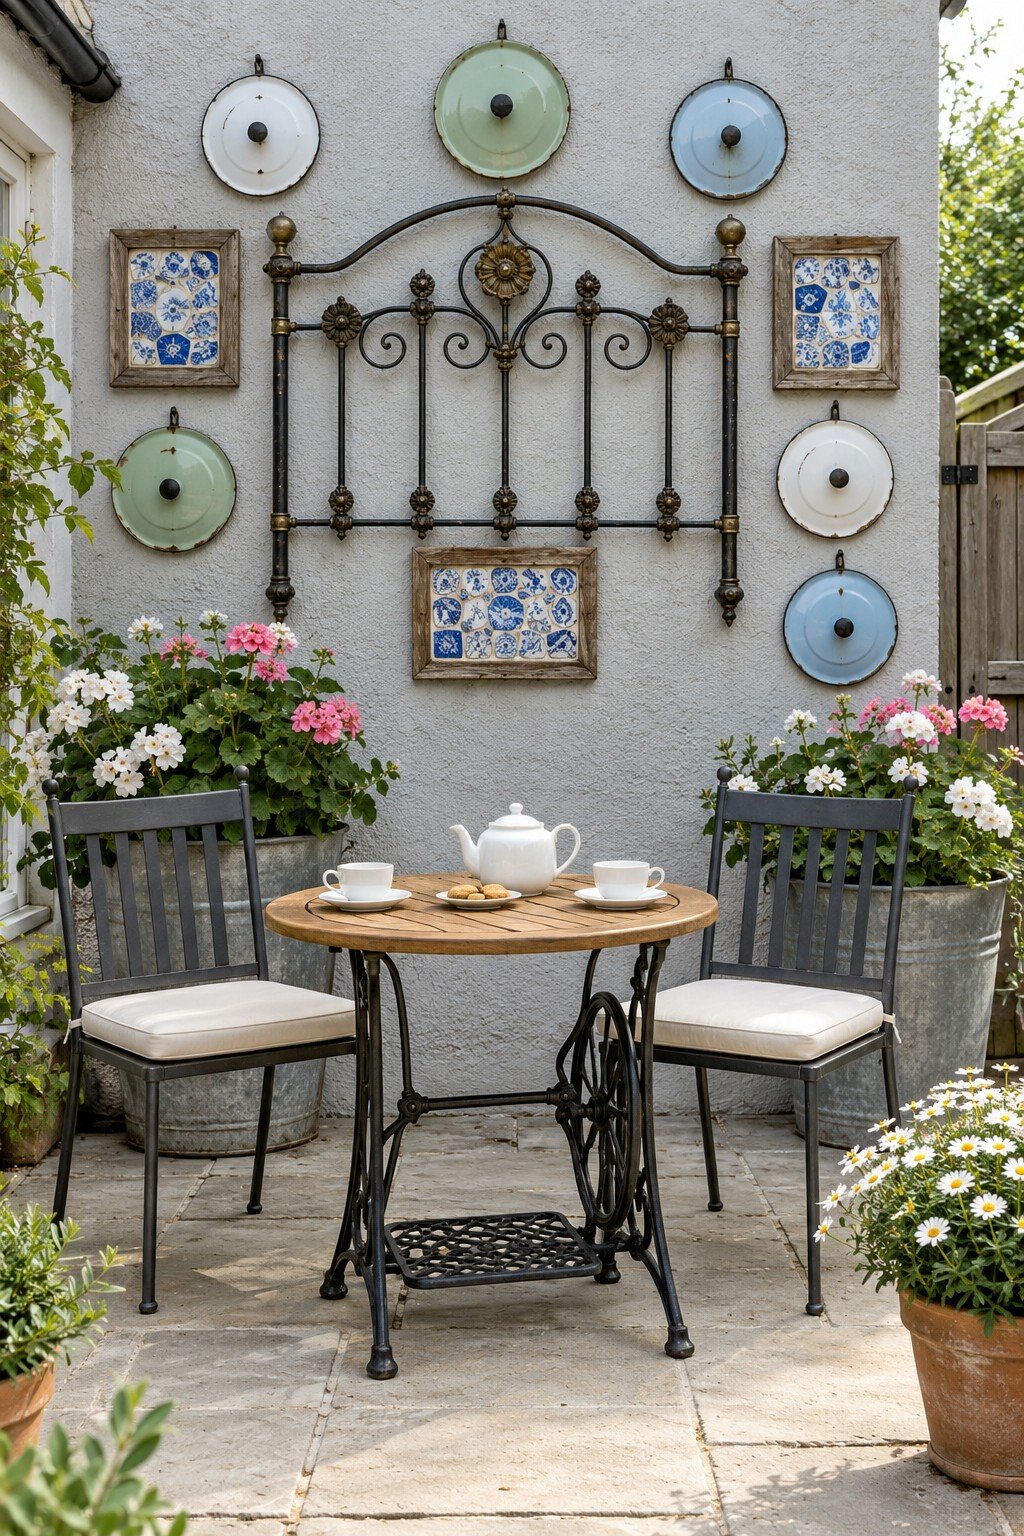
An iron headboard hangs among pale enamel lids and framed blue mosaics above a garden tea table. The headboard's broad curve anchors the collection. Around it, the round lids echo its small metal rosettes at a larger scale. Clean a retired headboard, remove projecting bed hardware, and secure it through the rigid frame into the wall structure. Hang the enamel lids through separate mechanical holders so their knobs remain decorative and no loose lid can swing into a mosaic. Even the tea table joins the salvage theme, with a wooden top set on an old treadle sewing machine base.
30. Mosaic Trays and Colander Planters
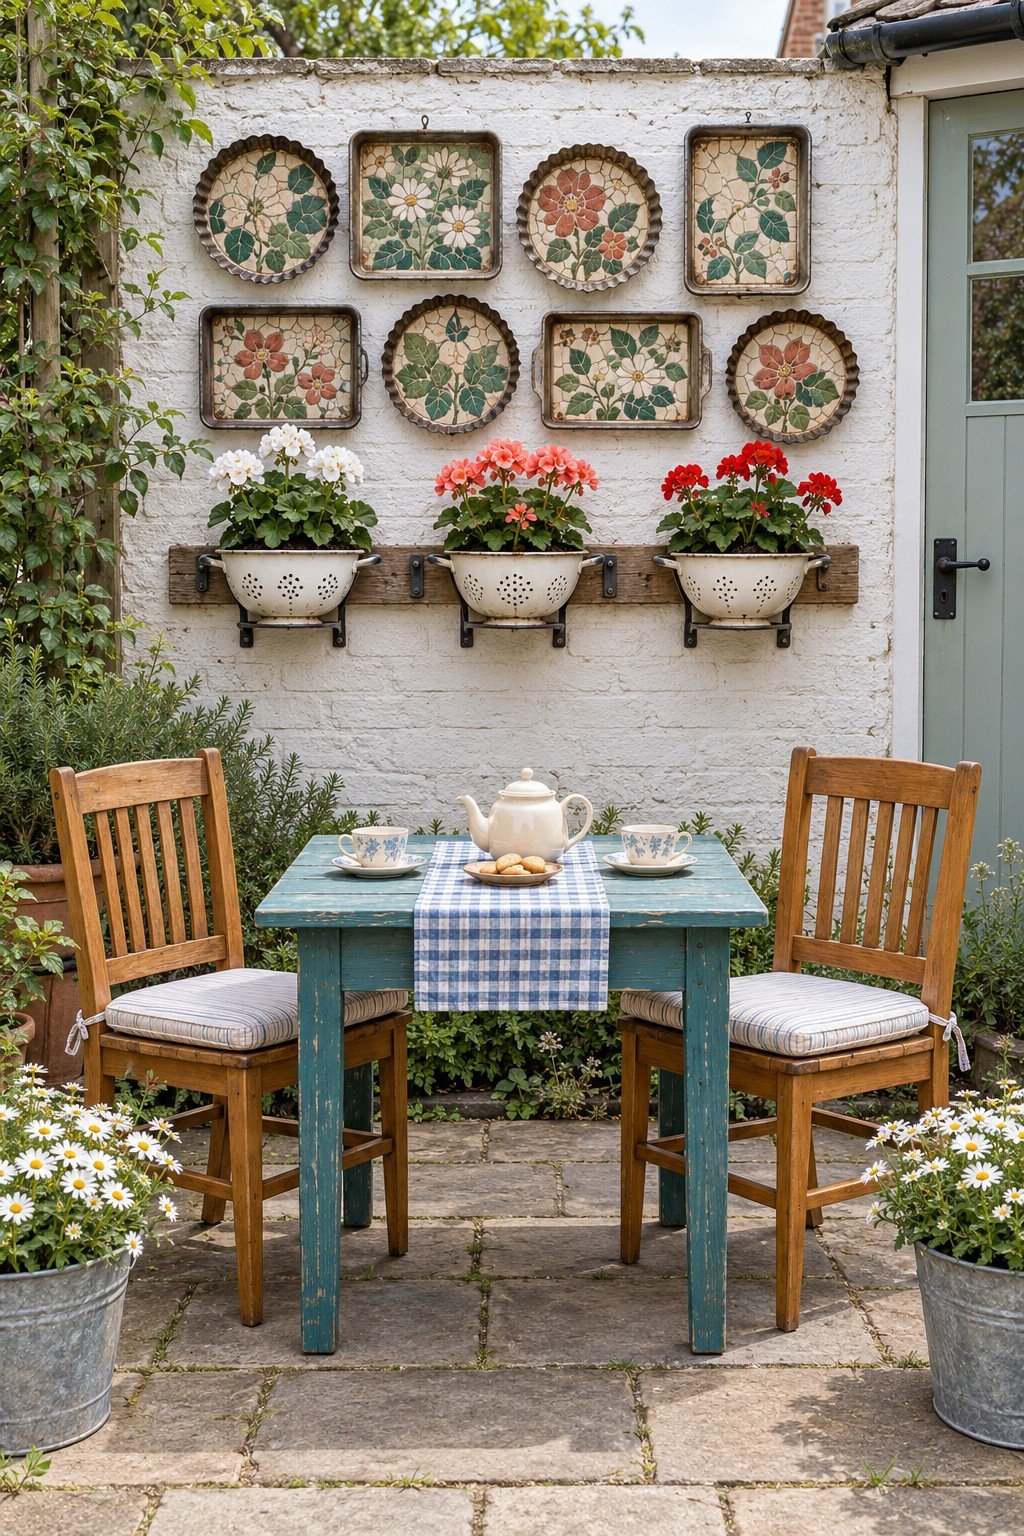
Mosaic trays hang above white enamel colanders planted with geraniums on white brick, with floral motifs repeating across the different tray shapes. The arrangement has a useful split between permanent ceramic pattern and flowers that can change through the season. Line each colander with coir matting before adding compost, as in the RHS colander planter steps, so the soil stays put while water still drains through the holes. The trays need exterior mosaic materials and mechanical hangers rather than adhesive pads exposed to rain. Select a smaller group of mosaic trays and a single colander planter when a teal tea table already fills most of the patio.
31. An Oval Mosaic and Stone Basin
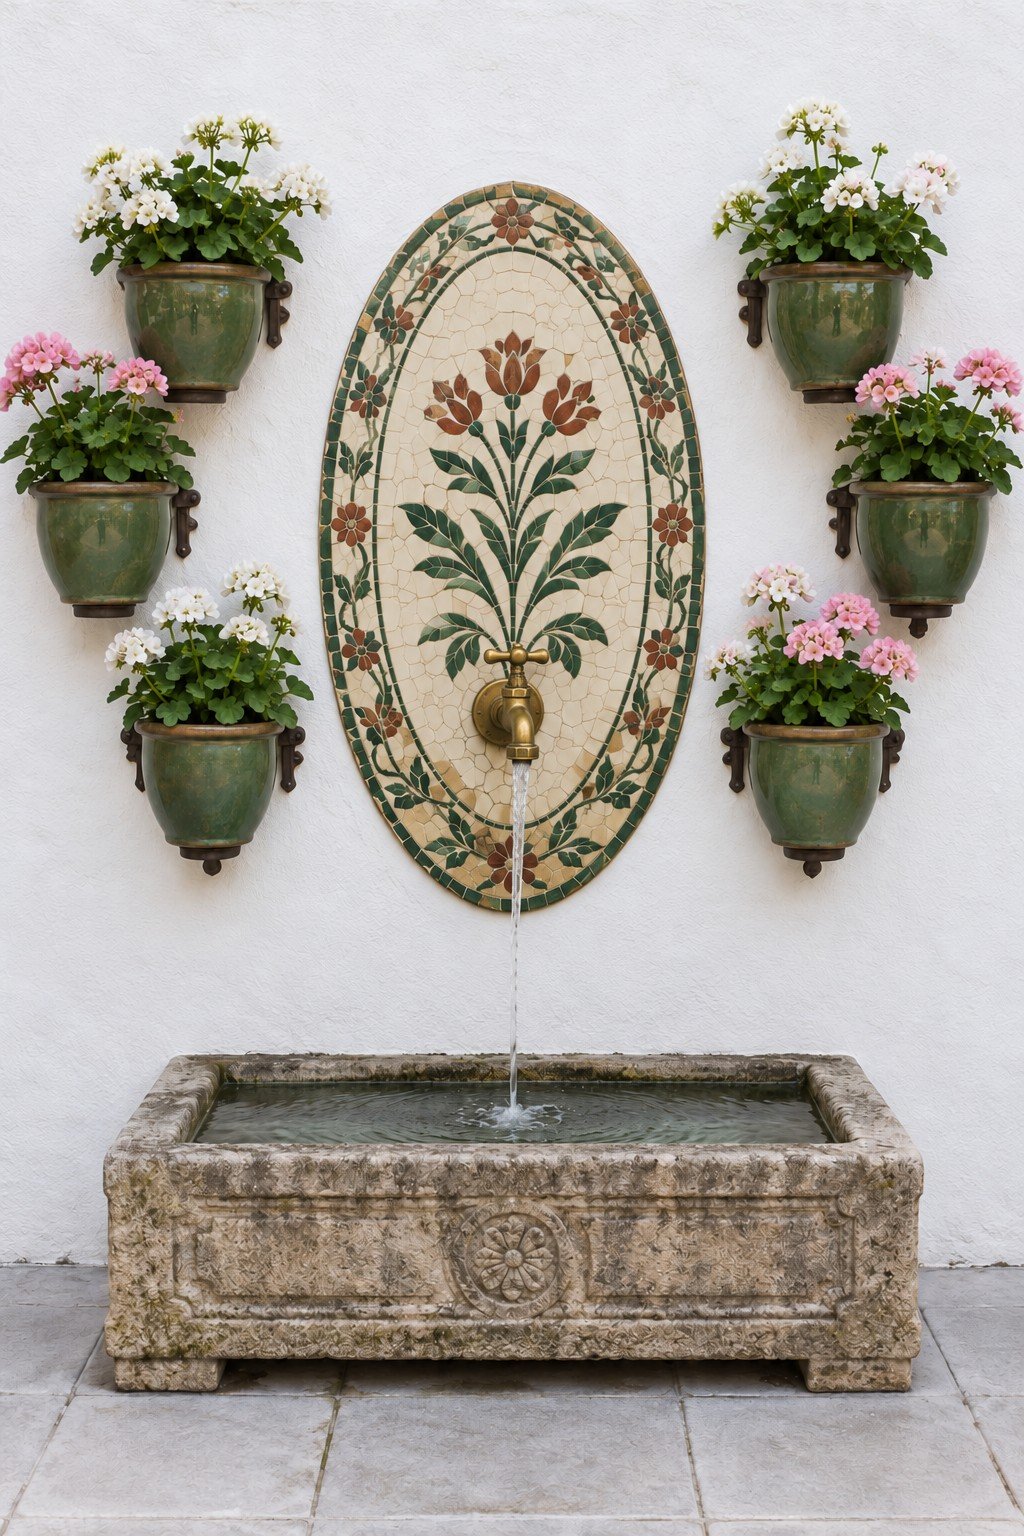
An oval mosaic of flowers and leaves surrounds a brass faucet above a rectangular stone basin, with green flowerpots at the sides. The heavy basin grounds the tall oval, and the green glaze on the pots picks up the mosaic's leaves. Draft the oval and its floral border before selecting tile, mortar, and grout for repeated wetting and local freezing conditions. A stone basin needs level support and a water installation that can be isolated and serviced without dismantling the mosaic. Center a smaller oval mosaic over a compact basin for a tight courtyard, keeping the green flowerpots outside the splash area.
32. An Arched Frame and Tile Waterfall
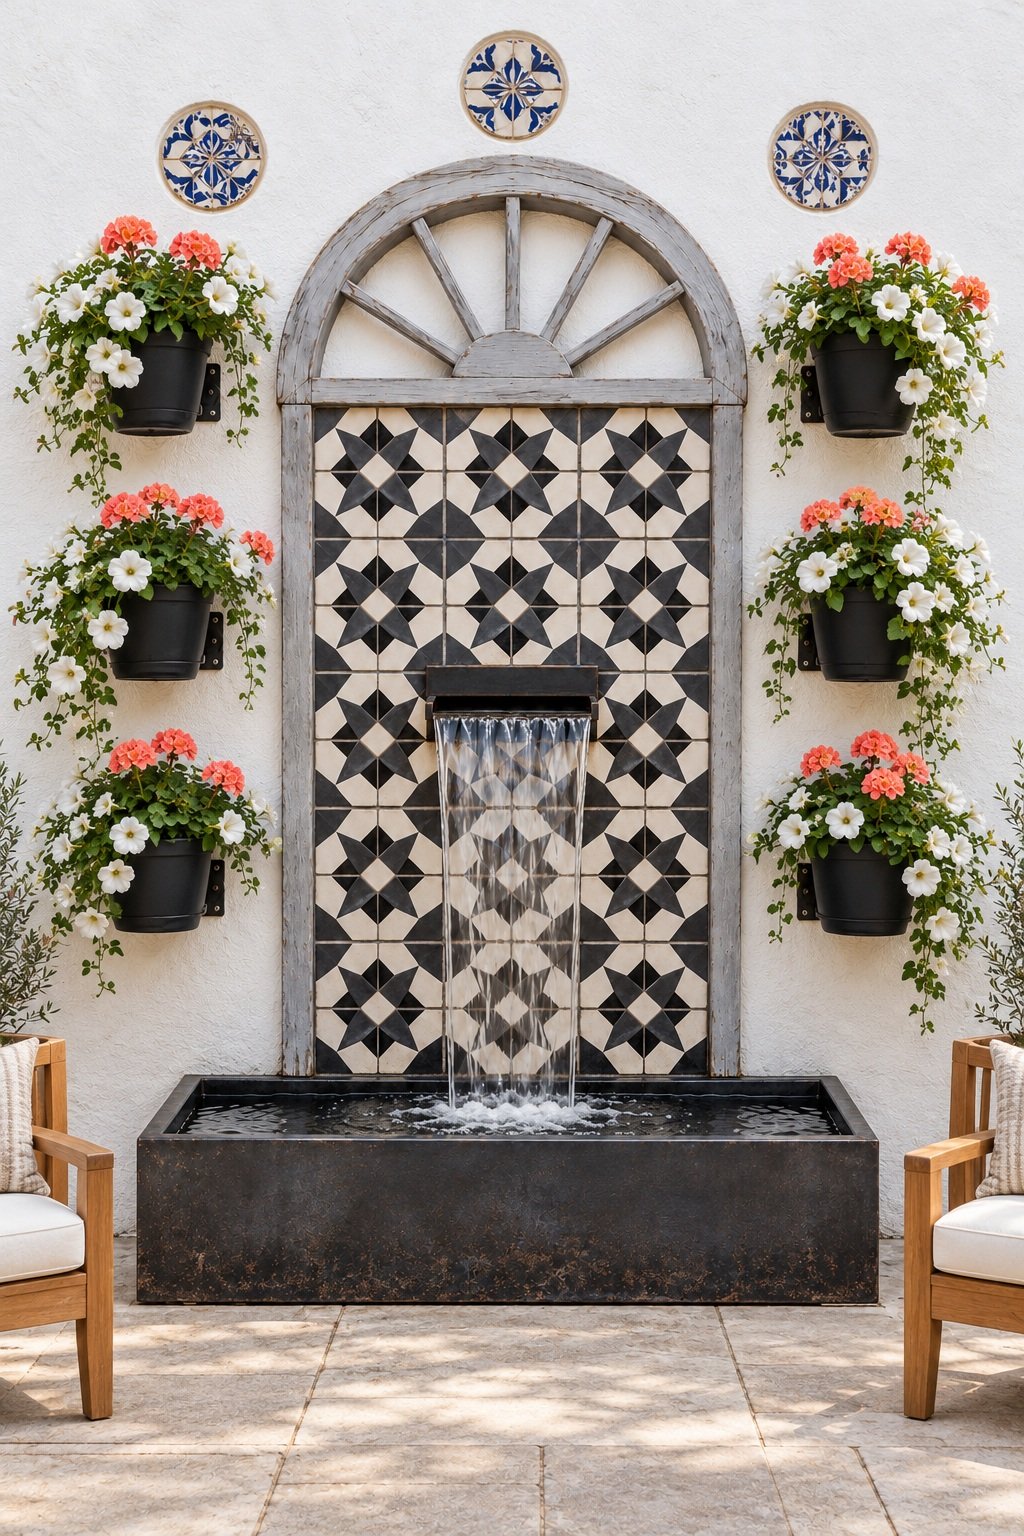
A gray arched frame surrounds black and cream tiles, with a waterfall dropping into a dark rectangular basin. Matte black pots of white and coral flowers soften the strong geometric tile pattern and pick up the black in the tiles. Establish the waterproof fountain installation first, then fit the arched frame and nearby pots without covering access needed for maintenance. Adjust the water flow so it falls inside the basin without wetting the approach, and follow the fountain maker's cleaning and winter instructions. Frame a narrower section of black and cream tiles for a small patio, allowing a compact basin to set the width of the arrangement.
33. Rose Tiles and an Enamel Sink
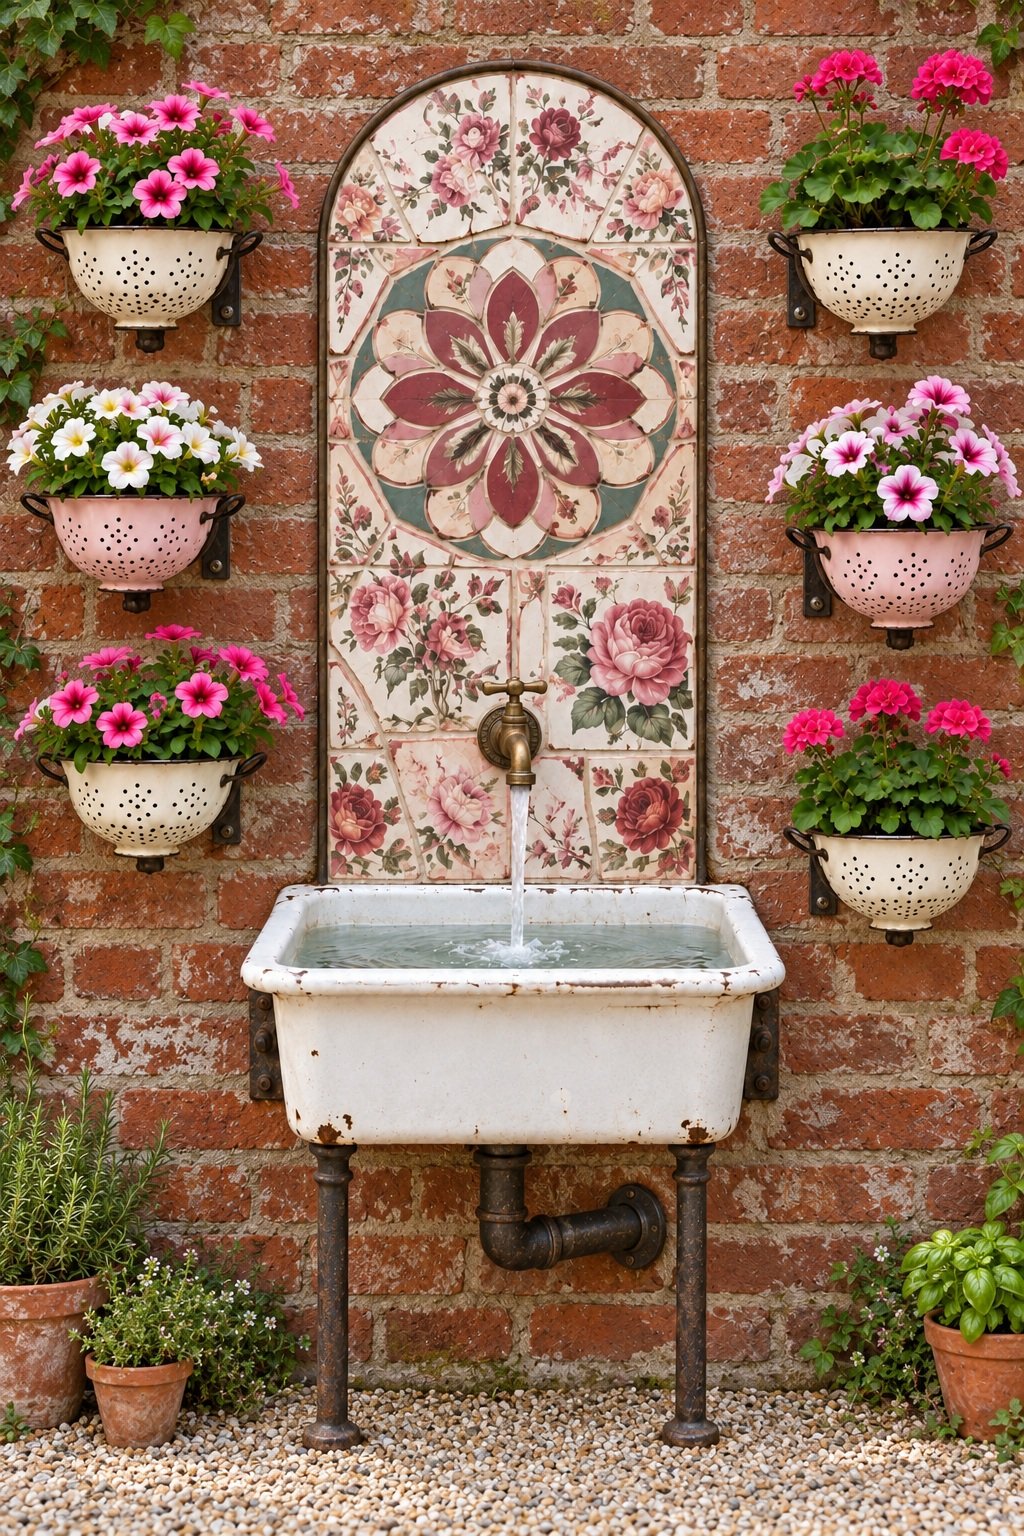
Rose tiles form an arch around a brass faucet above an enamel sink, with pink and cream colander planters repeating the soft floral palette. The recognizable sink adds a practical outline, while the rose tiles make the wall feel intentionally decorated. Inspect a salvaged enamel sink for cracks and sharp chips, then have its legs and wall brackets assessed for the basin filled with water. A fountain conversion also requires a controlled water circuit and a cleaning method that does not damage the enamel. Rework the arrangement as a dry decorative sink beneath rose tiles when adding running water would exceed the space or installation budget.
34. A Circular Mosaic and Flowerpots
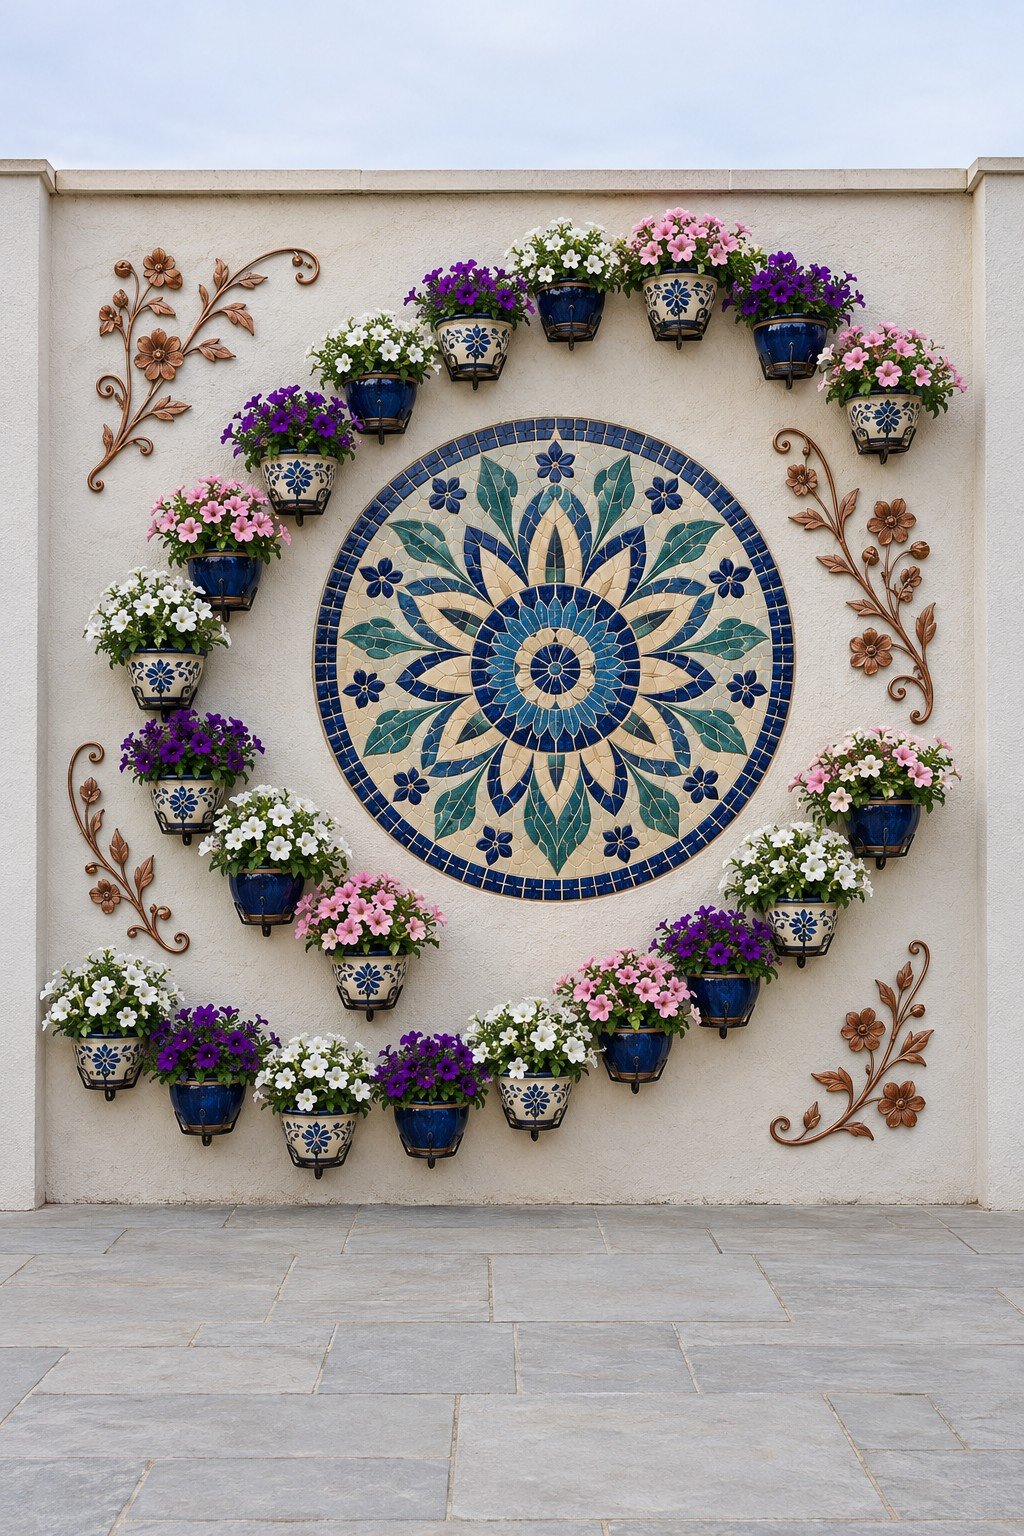
A circular mosaic in blue and cream sits inside a sweeping ring of flowerpots and copper colored botanical ornaments. The mosaic holds the center. The ring of pots, left open on the right side, keeps the edge loose and less mechanical. Draw the circular mosaic and the surrounding pot positions together before fixing either element to the wall. Leave room for mature flower spread so the pots do not disappear into a continuous mass that hides the mosaic border.
35. Shutter Stripes and White Pots
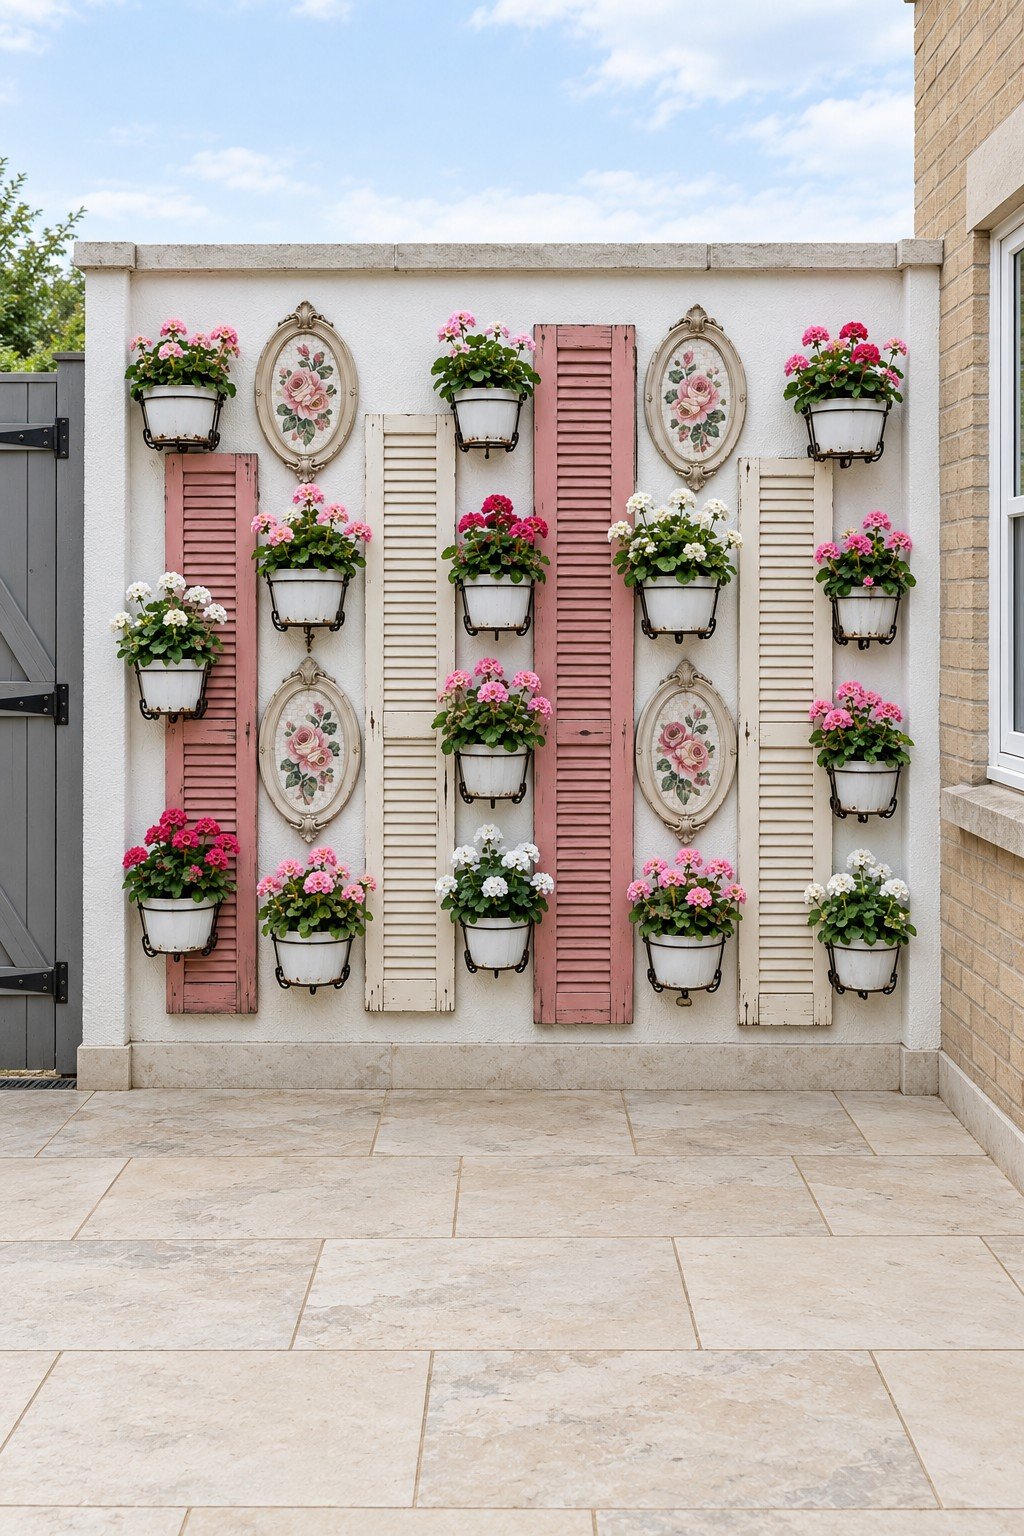
Pink and cream shutters create tall stripes across a pale wall, with white pots and oval floral ornaments overlapping the rhythm. The narrow shutter slats add texture without requiring a different object at every position. Paint exterior timber shutters before installation, then place each white pot on a bracket fixed through to the supporting wall. Align the pots around reachable watering positions rather than letting the shutter lengths dictate inaccessible planting heights.
36. A Mosaic Tree and Flowerpots
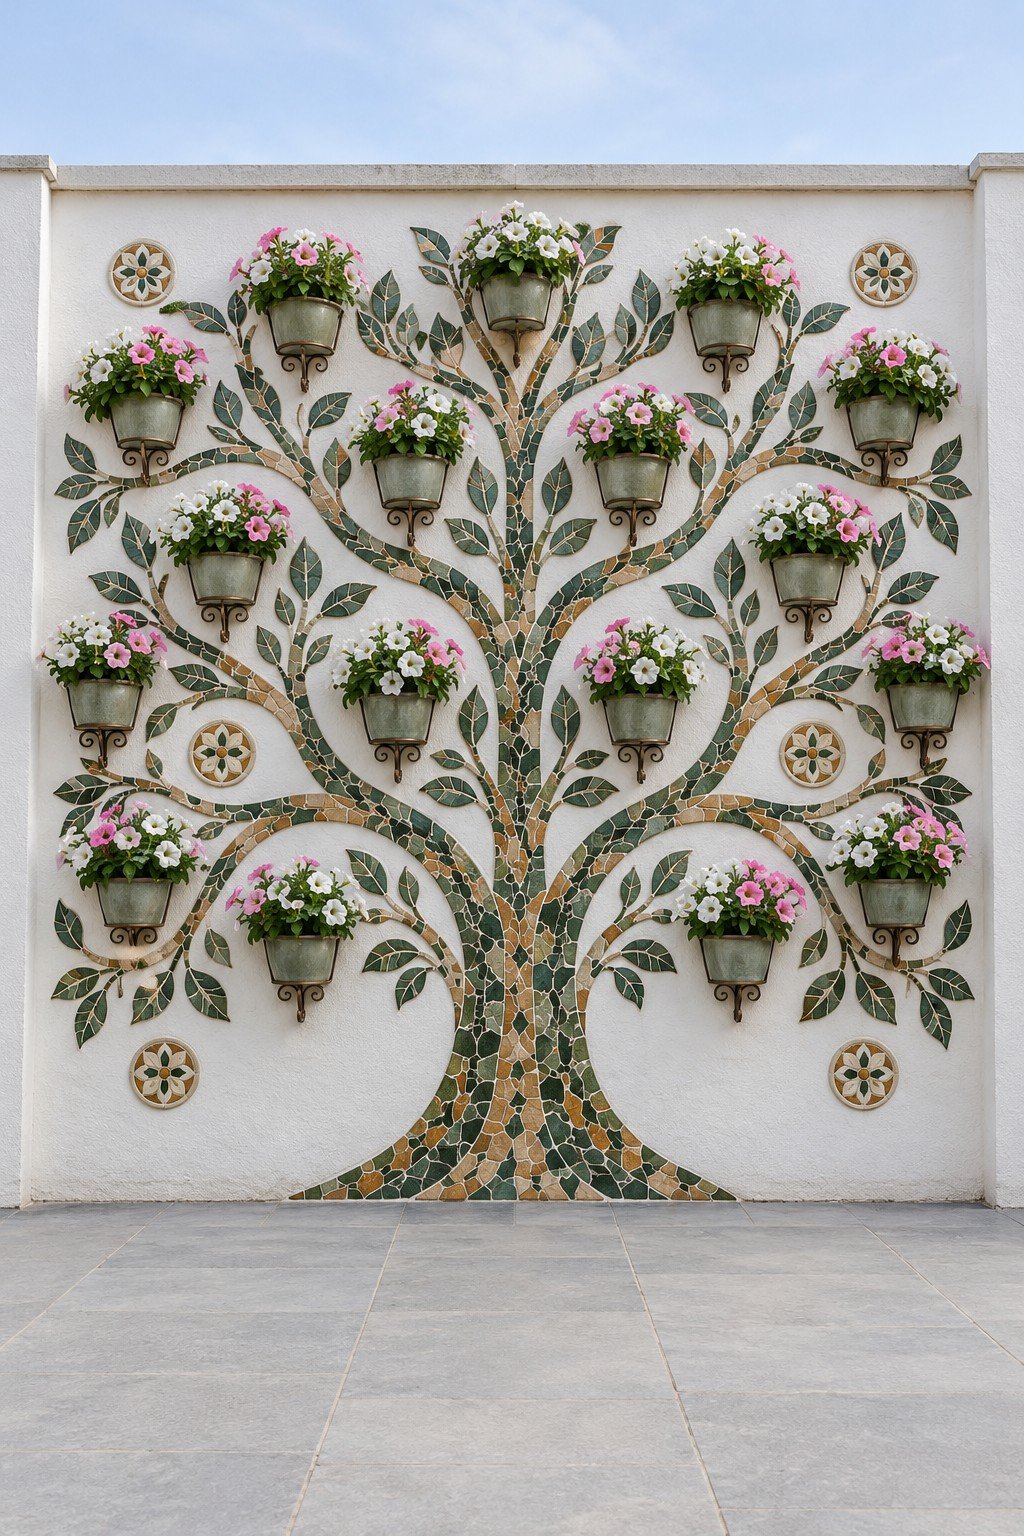
A mosaic tree spreads green and ocher branches across a white wall, with sage green flowerpots positioned among its leaves. The tree connects otherwise separate containers through a recognizable branching structure, giving the wall a large scale outline. Sketch the trunk, major branches, and pot positions as a single composition before setting exterior mosaic pieces. Fix the flowerpot brackets independently into the wall, keeping attachment points accessible instead of burying them beneath the mosaic.
37. Gothic Arches and Oxblood Pots
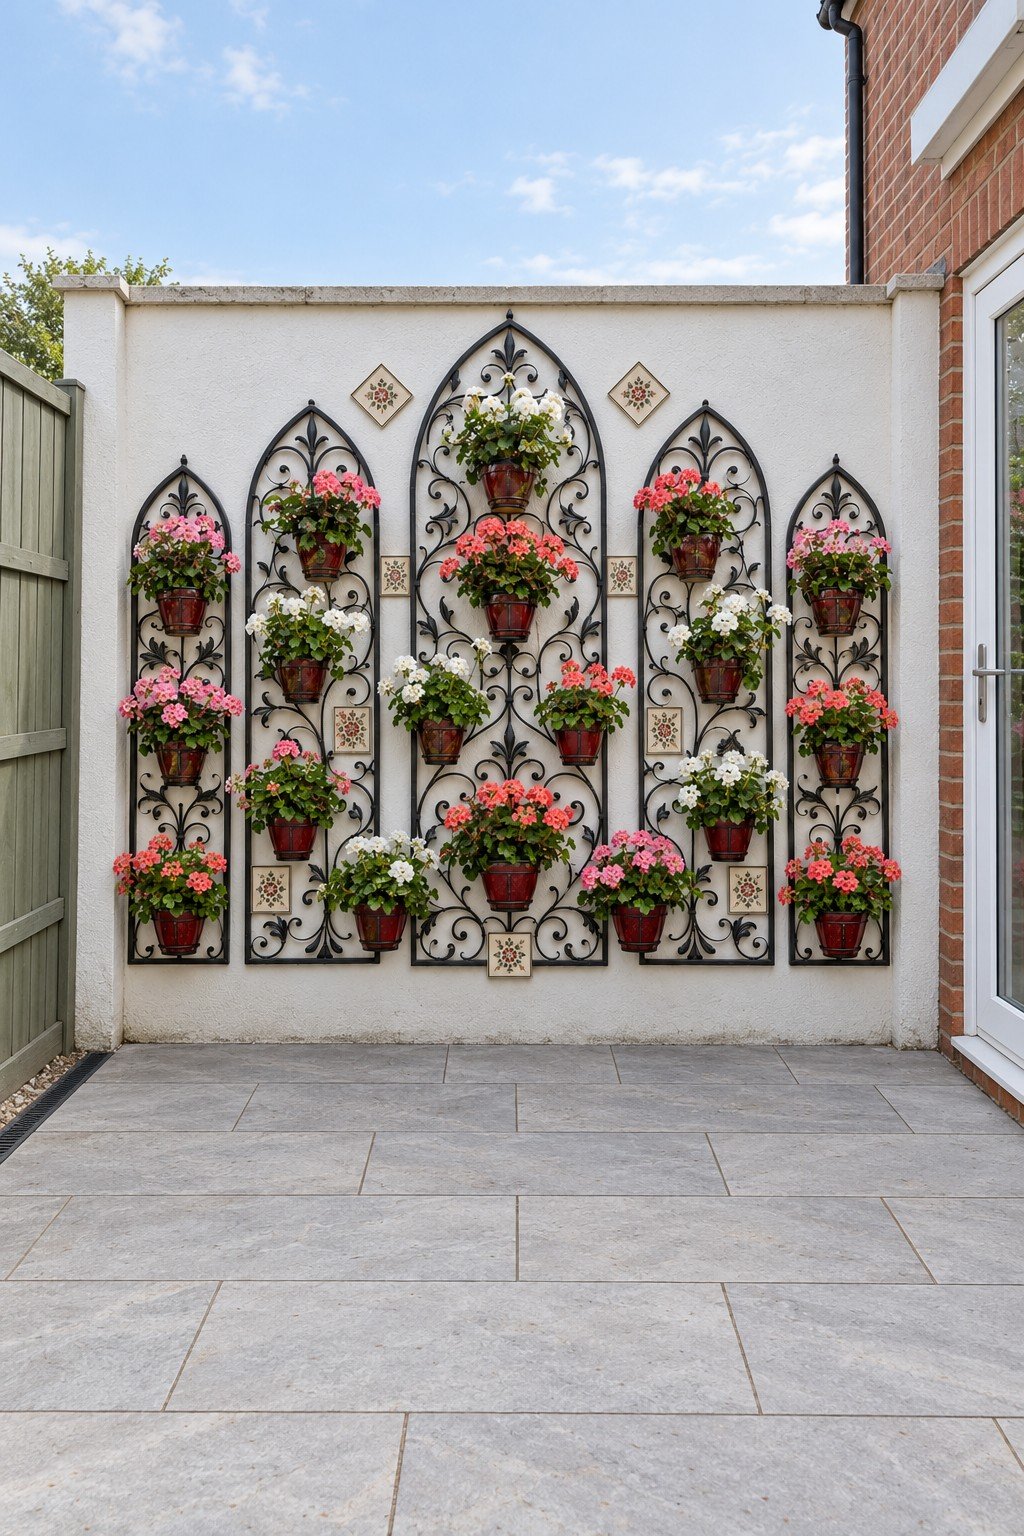
Gothic arches in black metal carry glossy oxblood pots filled with pink, white, and coral geraniums against a cream wall. Gothic arches have pointed tops, and their changing heights give the planted collection a rising center. Small floral tiles set between the frames repeat the flower colors. Select metalwork made to carry pots, with rigid connections and holders that prevent individual containers from tipping forward. Fasten the arches to the wall structure and confirm that every pot lifts free without catching the neighboring flowers.
38. Crossing Mosaic Ribbons and Flowers
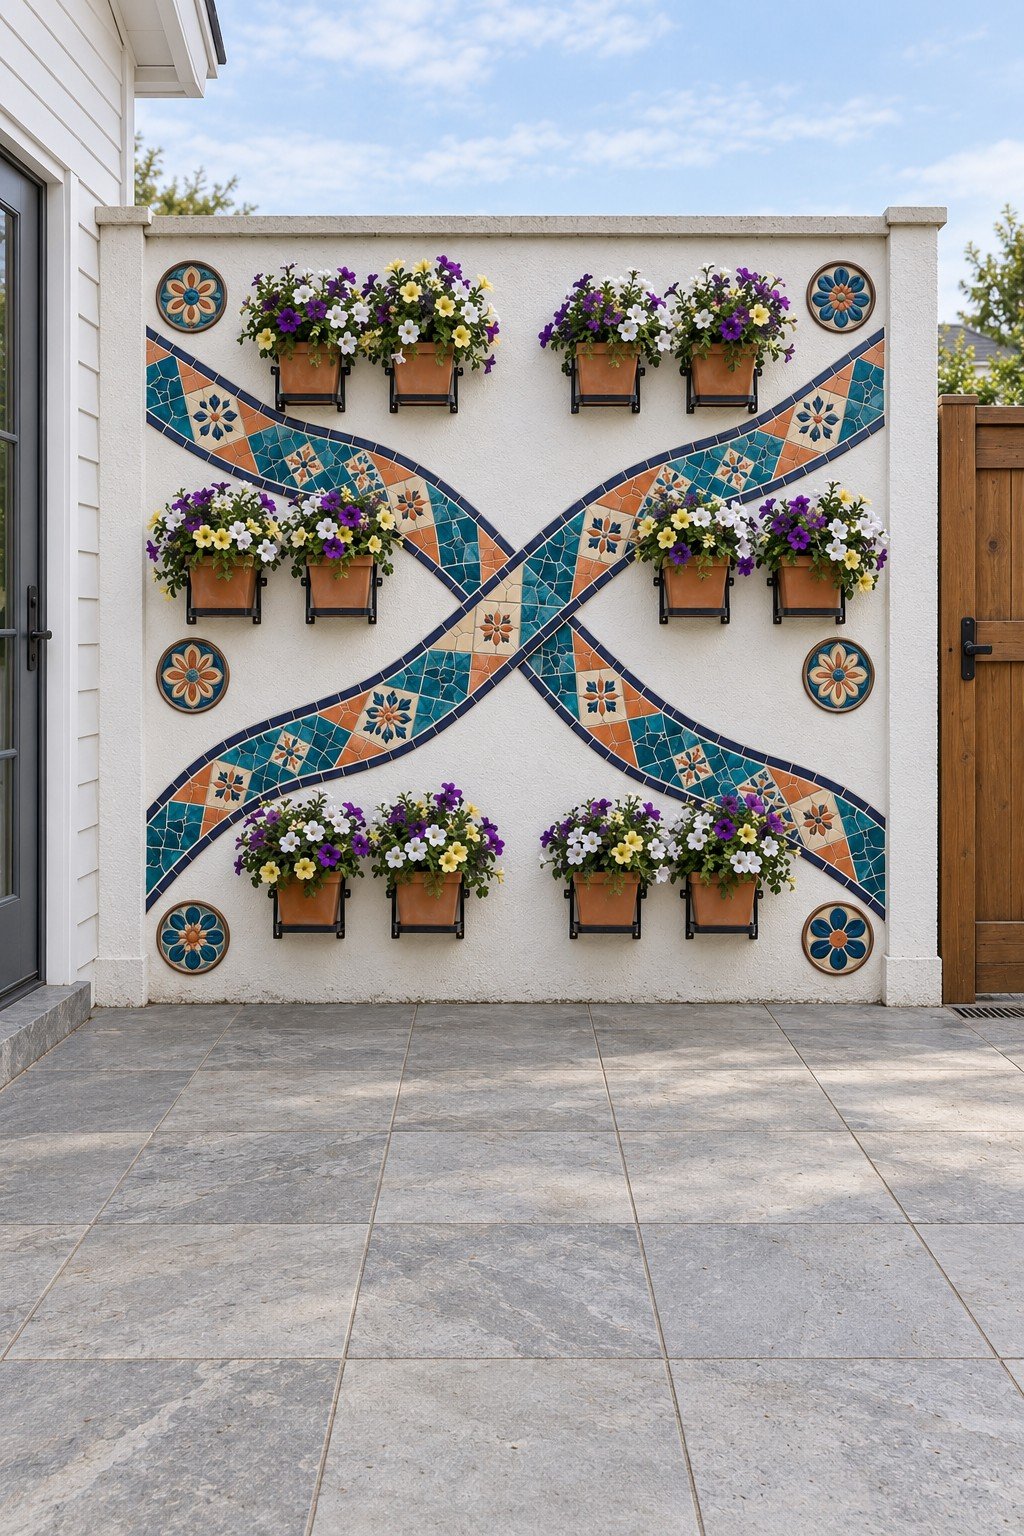
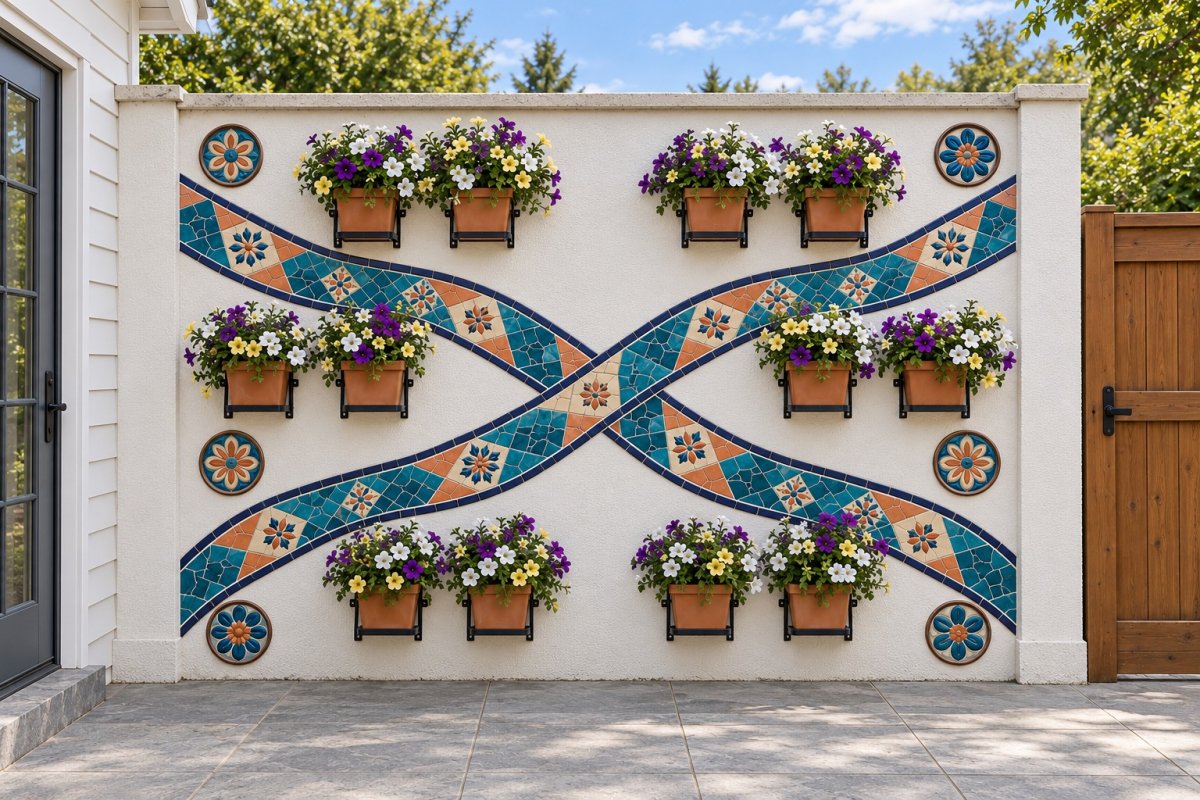
Crossing mosaic ribbons in teal and terracotta sweep between rows of flowerpots across a cream wall. The ribbons carry the eye across the open wall, and the black pot holders, set in three even rows, keep the flowers orderly. Mark the pot brackets and their fixing locations before laying out the mosaic ribbons, keeping fasteners clear of fragile tile edges. Dry arrange the tile colors so the crossing remains readable and neighboring floral motifs do not merge into a confusing patchwork. Adapt the crossing mosaic ribbons into a single diagonal sweep for a smaller wall, retaining the teal and terracotta contrast around fewer flowerpots.
Match the Material to the Work You Want to Do
| Material or method | Weather exposure | Load and installation | Routine care | DIY commitment |
|---|---|---|---|---|
| Painted timber shutters and frames | Exterior coatings slow weathering; joints and exposed ends still need inspection. | Decorative pieces and planted containers need separate support decisions. | Wipe away dirt, allow wood to dry, and repair peeling finishes. | Moderate preparation, especially with salvaged paint and damaged joints. |
| Metal arches and pot brackets | Outdoor finishes need attention where scratches expose the metal. | Fixings must carry watered pots and resist wind movement. | Inspect connections and treat corrosion before it loosens a joint. | Simple to arrange when bought ready to mount; custom fabrication takes more skill. |
| Terracotta and glazed flowerpots | Cold resistance depends on the individual pot; unglazed clay dries faster. | Heavy containers require holders matched to their shape and wet weight. | Clear drainage holes and remove cracked pots. | Easy to change seasonally once the wall supports are resolved. |
| Exterior ceramic mosaics | Tiles, mortar, grout, and wall preparation must address rain and freezing. | A permanent installation needs attention to bonding and movement joints. | Clean gently and inspect loose pieces or cracked grout. | Detailed setting work; large designs benefit from an experienced tile installer. |
| Fabric planting pockets | The system must tolerate sun, watering, and the exposure of its wall. | Anchorage and drainage are part of the growing system. | Monitor moisture and replace worn fabric or blocked irrigation parts. | Quick to assemble from a system, with ongoing watering work. |
| Glass bottle vases | Fragile bottles should be removed before freezing weather and strong wind. | Neck holders must fit each bottle without squeezing the glass. | Refresh cut flower water and wash the bottles. | A small display is manageable, with frequent flower replacement. |
Where to Start
Start with the framed bottles, the chair back flower box, or a small hexagon shelf collection. The bottles let you experiment with spacing before committing to permanent planting. A chair back gives a discarded object a clear decorative job, while hexagon shelves make it easy to see whether the pots have enough breathing room. Save broad mosaics and working fountains for a wall you expect to keep. For more objects to repurpose, explore these vintage garden decorating projects; for the seating and planting around the wall, consider these corner garden layouts.
Leave a Reply