

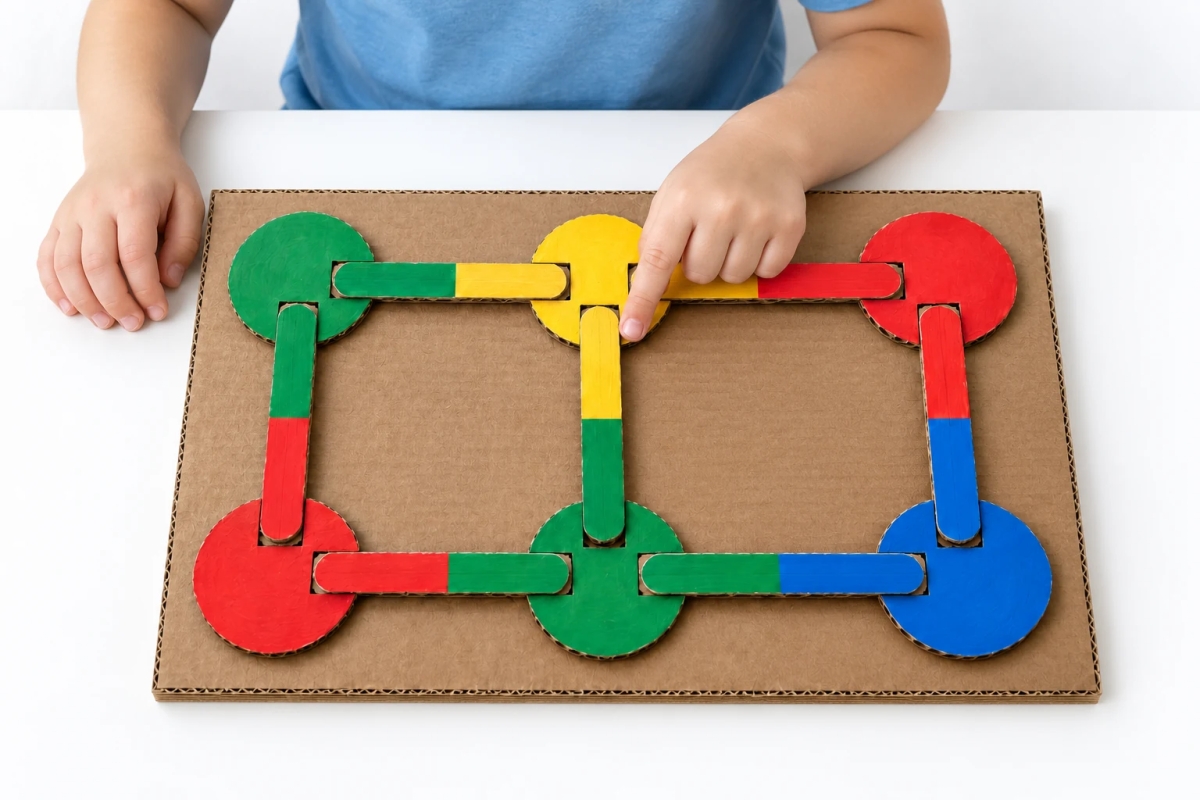
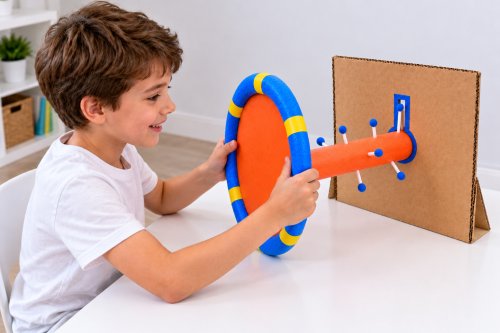
A cardboard base, six colored circles, and seven sticks painted in two colors become a reusable color matching puzzle for kids. Each stick bridges two circles, and both painted ends must match the colors they touch. Make it together in six steps, then take turns filling in the two connected squares. The activity offers a playful way to practice careful finger movements, visual matching, and checking a choice before trying again.
Table of Contents
- What This Game Is
- Materials and Budget
- Plan the Matching Layout
- 1. Cut the Cardboard Pieces
- 2. Cut the Inward Notches
- 3. Paint the Six Circles
- 4. Paint Seven Sticks in Two Colors
- 5. Glue the Circles Down
- 6. Fit and Check Every Stick
- The Finished Color Match Board
- How to Play Together
- Skills This Activity Can Support
- Fit, Storage, and Small Fixes
What This Game Is
The circles stay glued to the base; the sticks lift out for each new round. Two sticks connect the top row, two connect the bottom row, and three run vertically. There are no moving wheels or hidden fasteners. The challenge is finding the correct pair of colors and turning the stick so each end reaches its matching circle.
Suggested play age: approximately 4 to 7, with adult supervision and adjustments for the child. Active making time: allow about 45 to 60 minutes, plus drying. First play session: try 10 to 15 minutes, following the child's interest. These are planning estimates, not measured completion times.
Plan separate making and playing sessions. Crayola's painted craft stick project allows 1 to 2 hours between paint coats and for glue steps. Your products, coat thickness, and room conditions decide how long you wait; follow their labels and let everything dry fully.
Materials and Budget
- Clean, dry corrugated cardboard: one base about 46 × 28 cm (18.1 × 11 inches), plus enough for six 8 cm (3.15 inch) circles.
- Seven smooth jumbo wooden craft sticks, approximately 15 × 1.8 cm (5.9 × 0.7 inches), all the same size.
- Washable tempera paint made for children, in red, yellow, green, and blue.
- White PVA school glue, a small flat paintbrush, a palette or reusable lid, and protective paper.
- Pencil, ruler, compass or circle template, scissors, and a craft knife for adult use with a cutting mat.
U.S. shopping estimate, checked October 28, 2026: a pack of 75 jumbo sticks was listed at $5.12, a 4 ounce bottle of school glue at $1.19, and a set of five brushes at $2.50. The washable paint set with 10 colors showed no price when we checked, so add the price you see locally. Without the paint, those three packs come to about $8.81, with cardboard reused and cutting tools already owned. Tax, shipping, and local price differences are extra. You use only seven sticks and part of the paint and glue, leaving supplies for other projects.
Adult preparation: an adult should handle cardboard cutting and the craft knife. Let children paint and play with the finished pieces when they are ready. Check for splinters, cracked sticks, loose cardboard, and flaking paint before each session; replace damaged pieces. This is a supervised activity for children who do not mouth the materials.
Plan the Matching Layout
Keep the board facing the same way throughout assembly. The top row is green, yellow, red; the bottom row is red, green, blue. Four corner circles need two notches facing inward each. The two middle circles need three: left, right, and toward the opposite row. Leave the outer edges uncut.
For the proposed 15 cm sticks, mark circle centers 18 cm apart horizontally and vertically. On a 46 × 28 cm base, the three column centers are 5, 23, and 41 cm from the left edge; the two row centers are 5 and 23 cm from the top. An 8 cm circle with notches 2.5 cm deep leaves each stick tip 1.5 cm from the circle's center. That is why a 15 cm stick spans centers 18 cm apart. If your sticks differ in length, adjust the spacing before gluing.
1. Cut the Cardboard Pieces
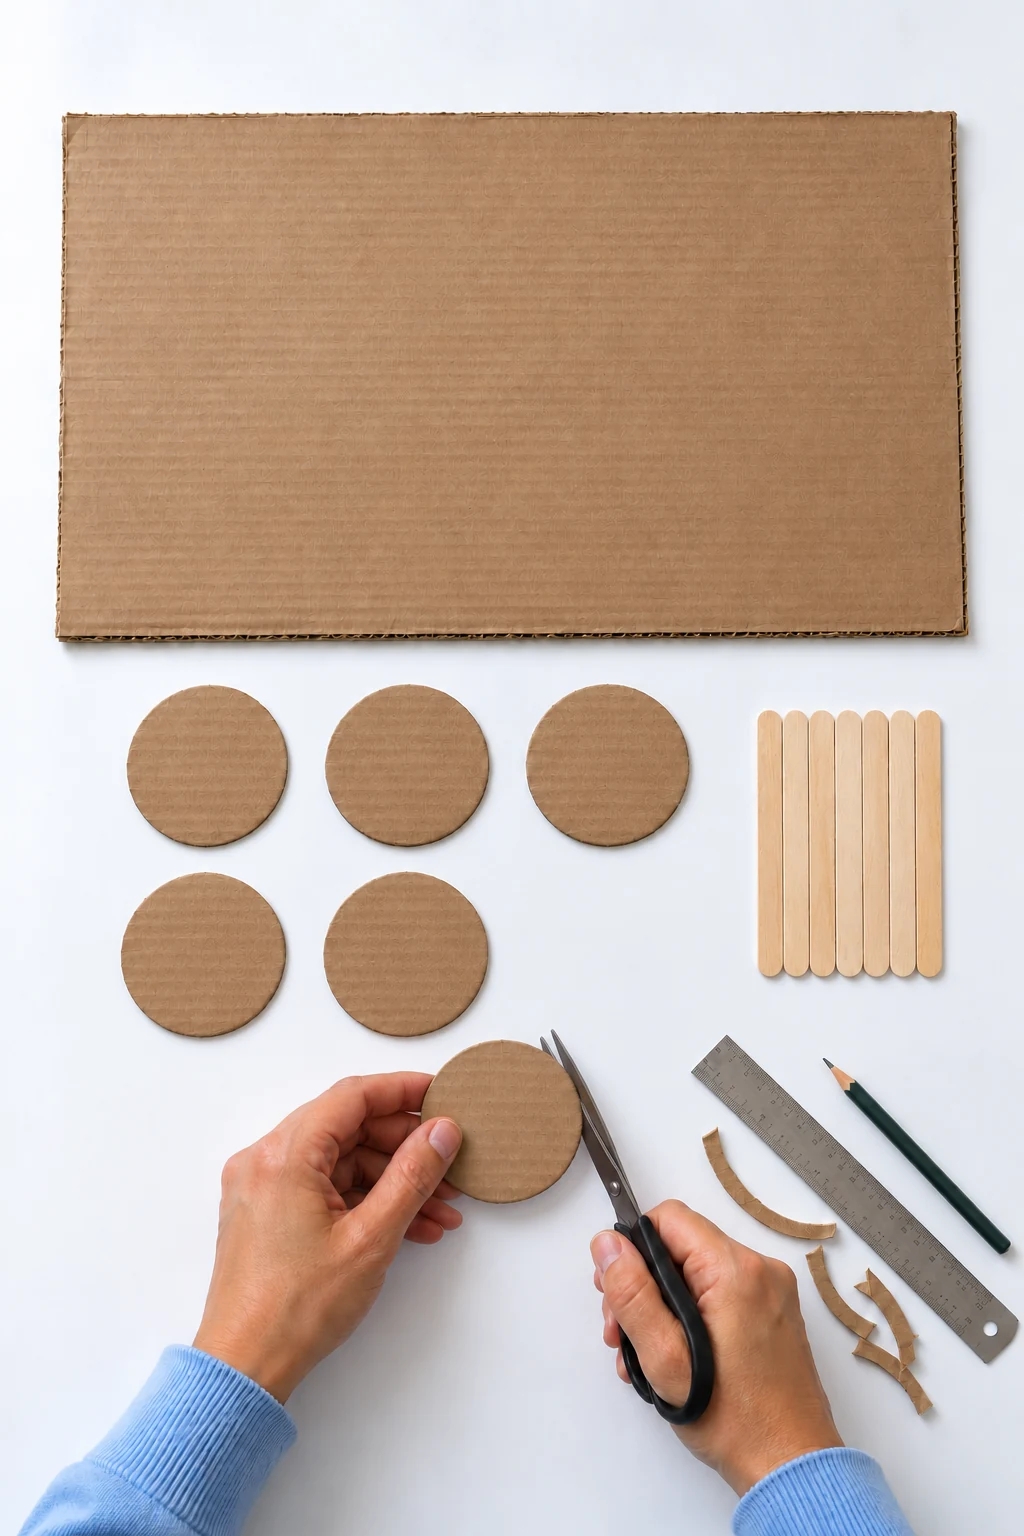
Cut the rectangular base and six equal circles. Use a compass or trace an 8 cm template so the pieces match. Keep the base flat and trim rough circle edges. Count six circles in total and set aside seven identical wooden sticks.
2. Cut the Inward Notches
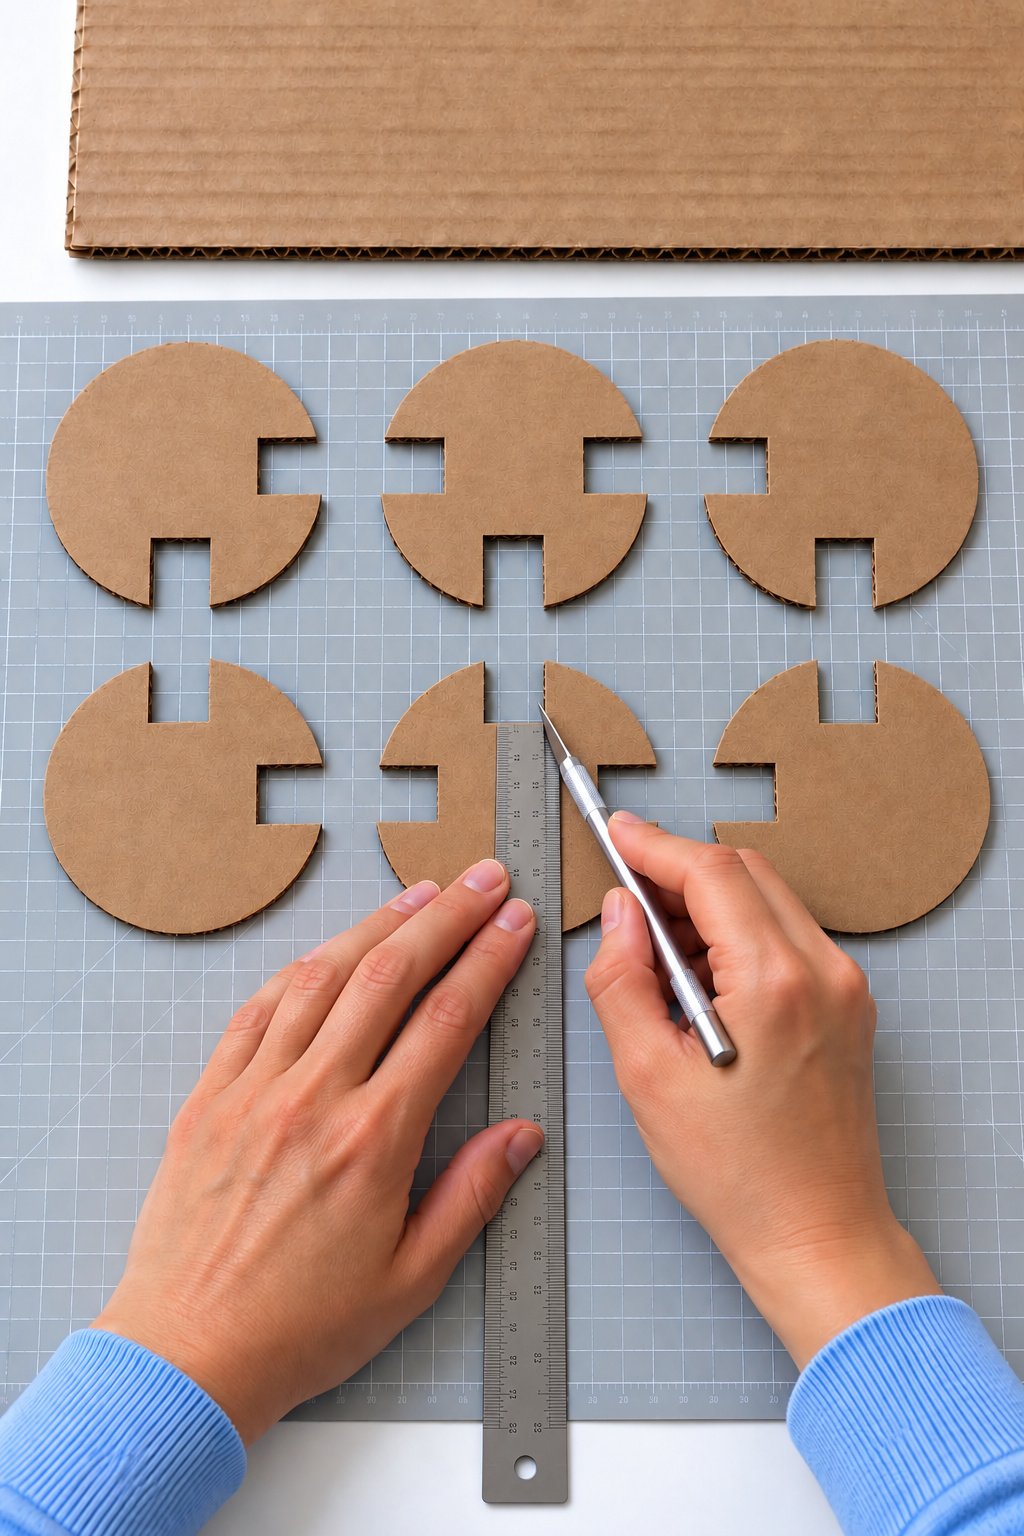
Arrange the circles in two rows of three. Mark each inward notch about 2 cm wide and 2.5 cm deep, then have an adult cut it through the cardboard. Keep the center intact. Test the fit with one of your sticks: it should drop into the notch with slight clearance, without bending or forcing the cardboard.
3. Paint the Six Circles
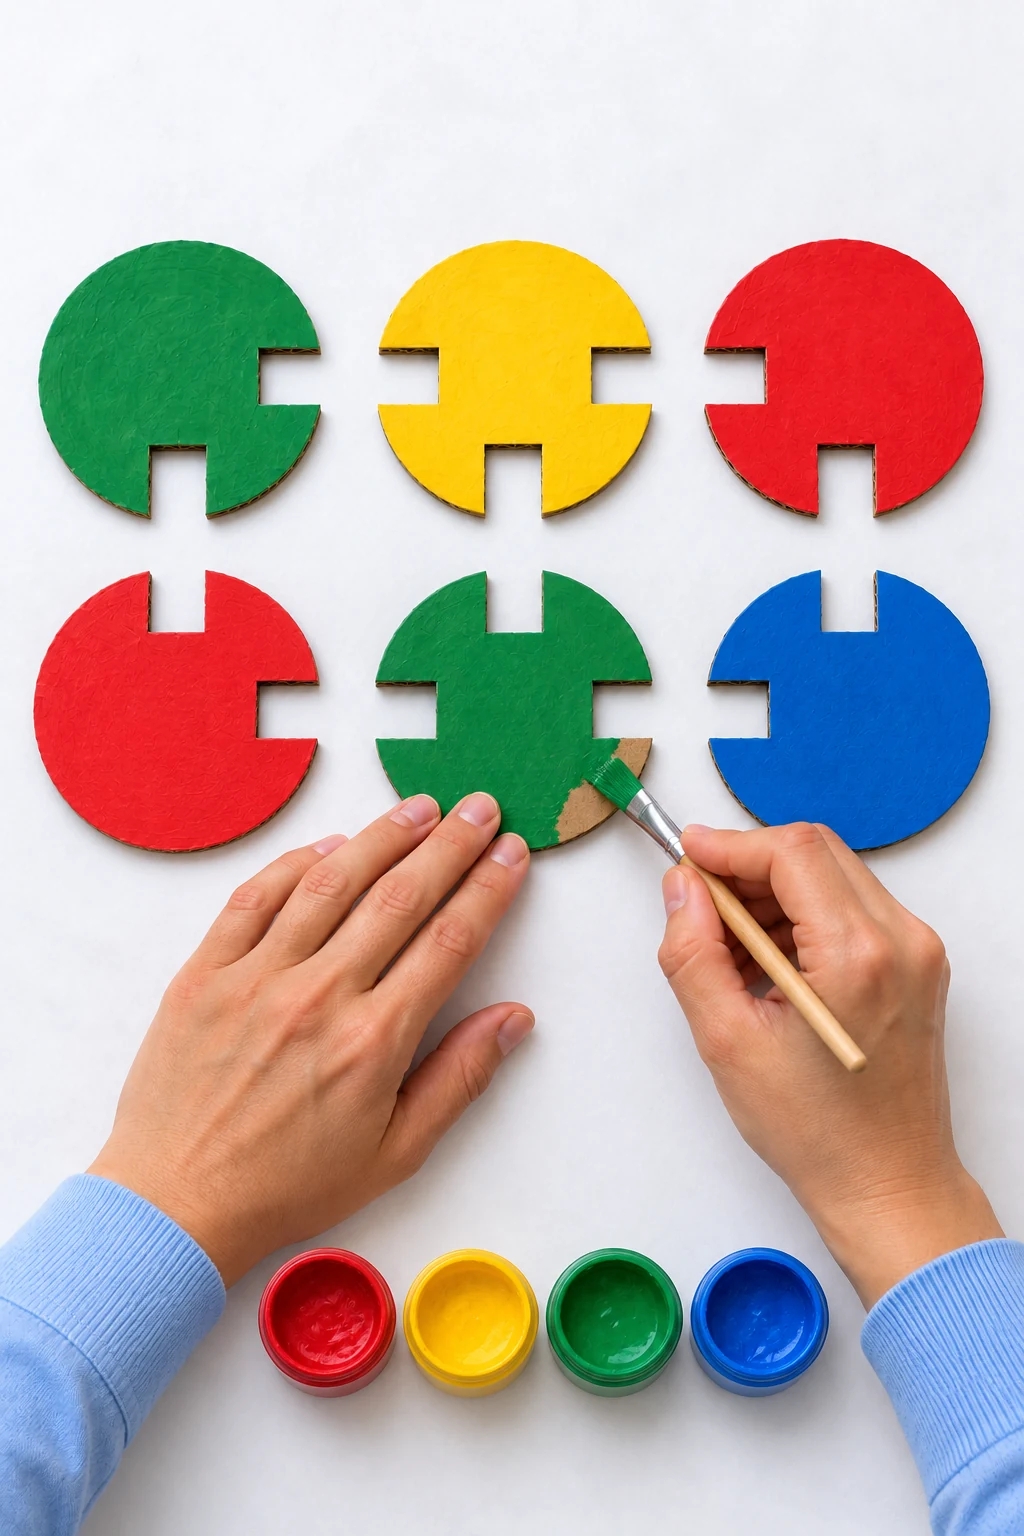
Paint the top row green, yellow, and red, then the bottom row red, green, and blue. Keep the cut edges and notches clear of paint buildup. Children can help with a small flat brush. Let the first coat dry before deciding whether a second thin coat is needed.
4. Paint Seven Sticks in Two Colors
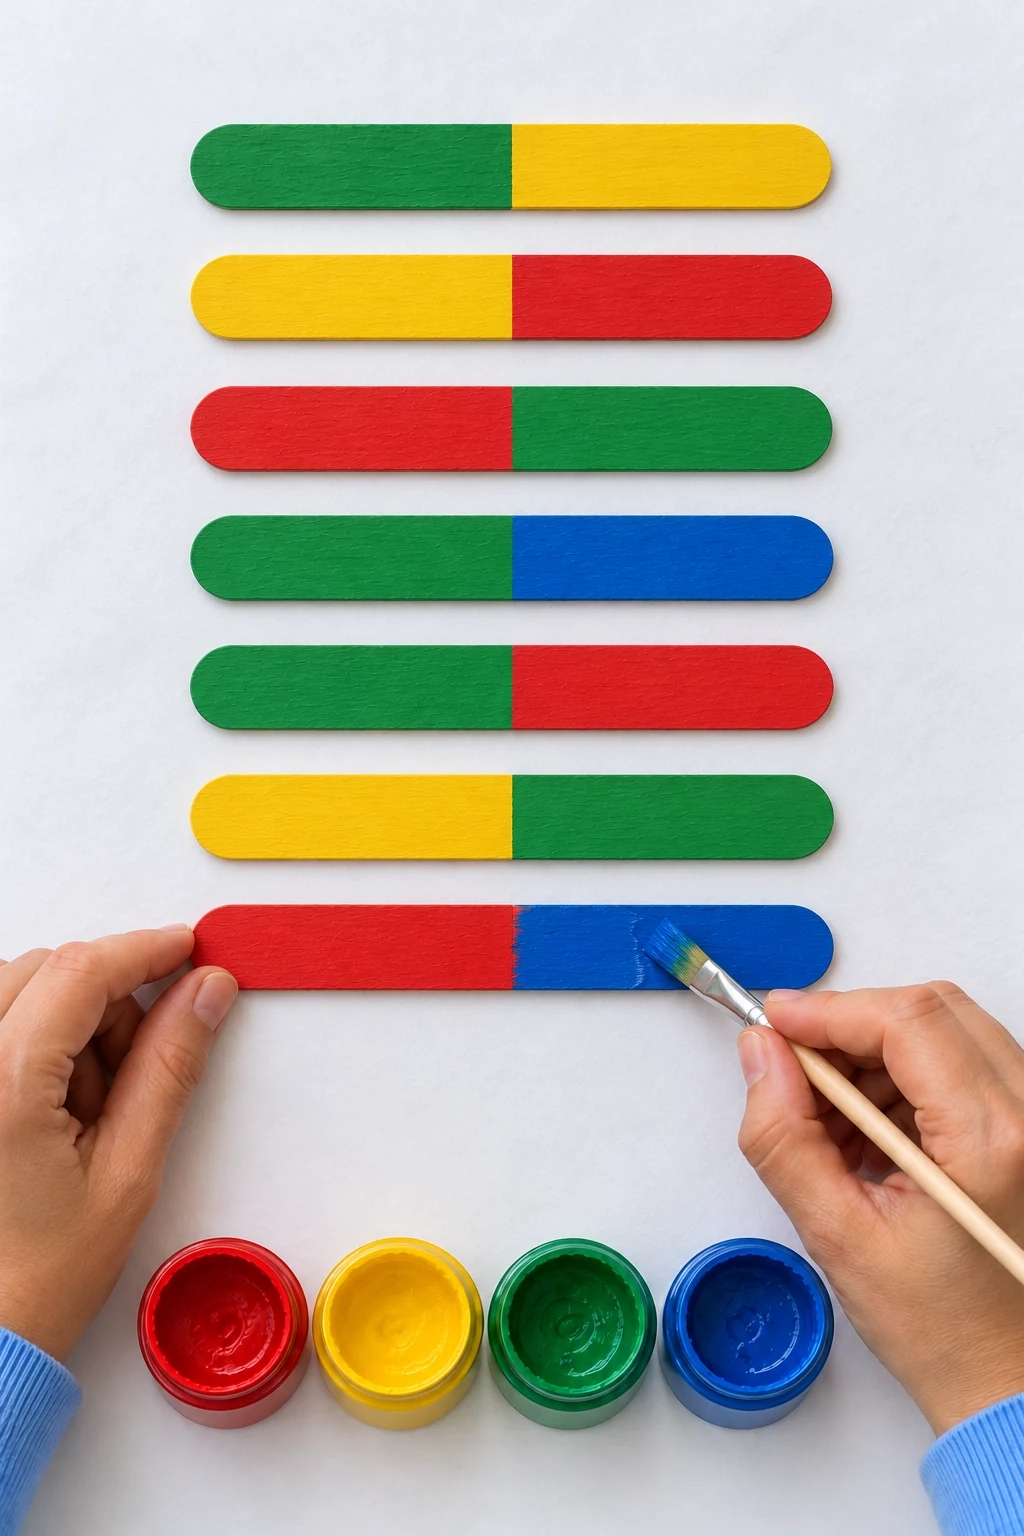
Mark each stick's midpoint lightly, then paint two equal halves. Paint the seven pairs as green and yellow, yellow and red, red and green, green and blue, green and red, yellow and green, and red and blue. These correspond to the four horizontal links followed by the three vertical links. Let one color dry before painting beside it, and dry all pieces fully.
5. Glue the Circles Down
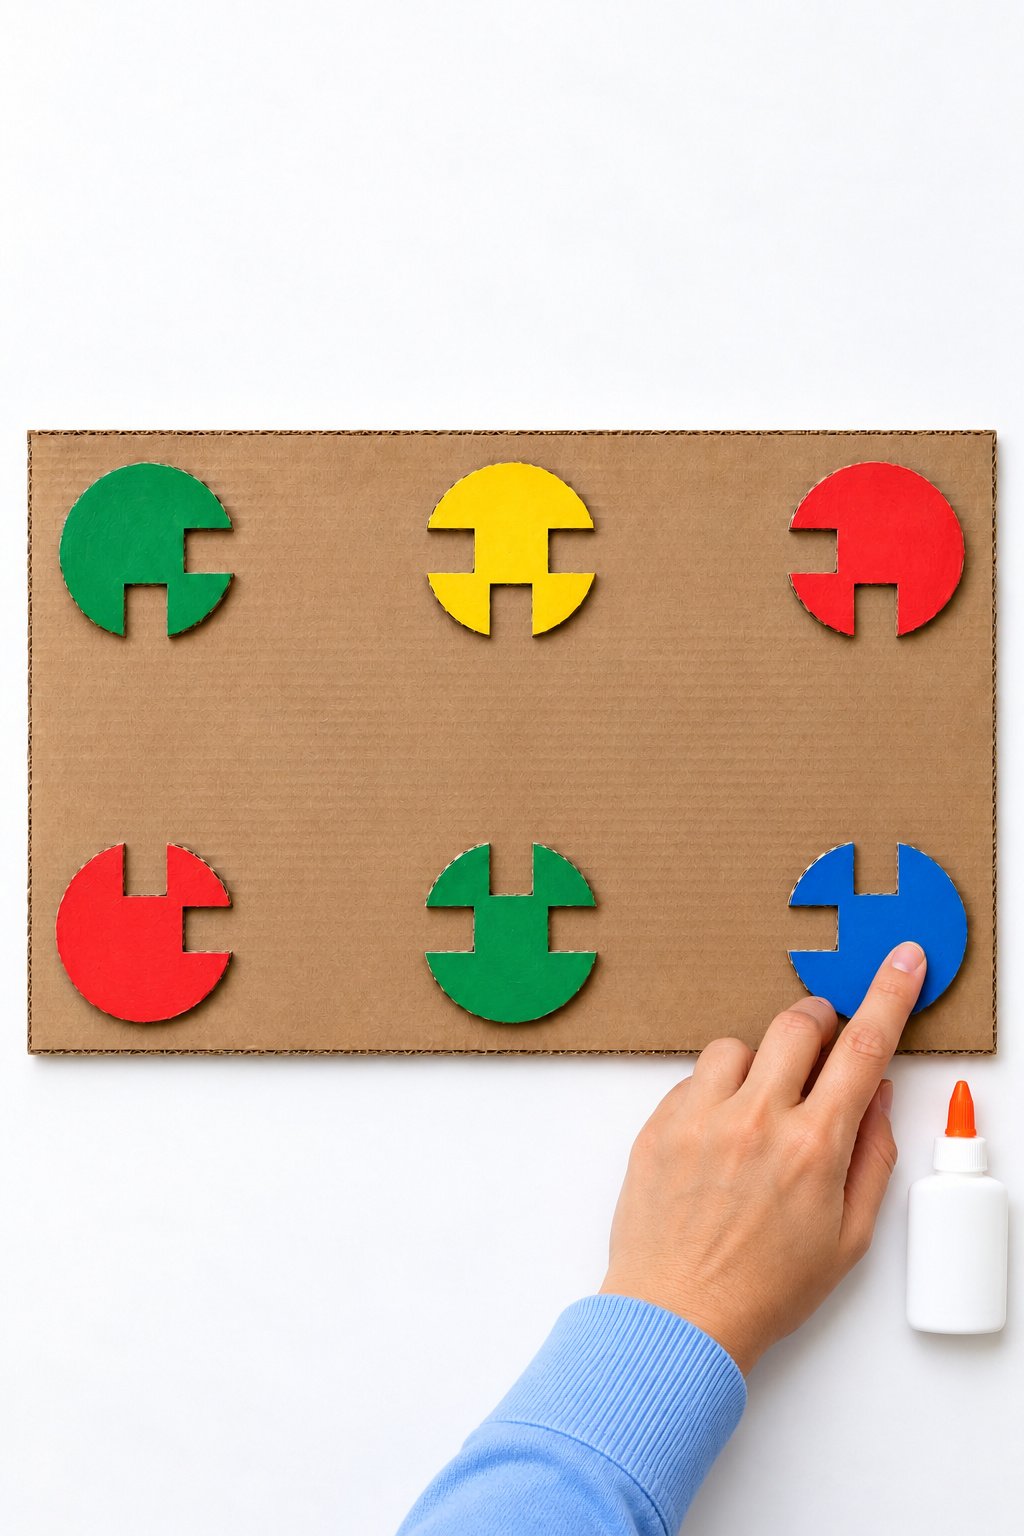
Before using glue, lay out all six circles and test all seven sticks together. Adjust the centers until every tip fits comfortably. Remove the sticks, spread a thin layer of PVA beneath each circle, and press it onto the base. Keep glue out of the notches. Let the assembly dry fully. The sticks remain removable.
6. Fit and Check Every Stick
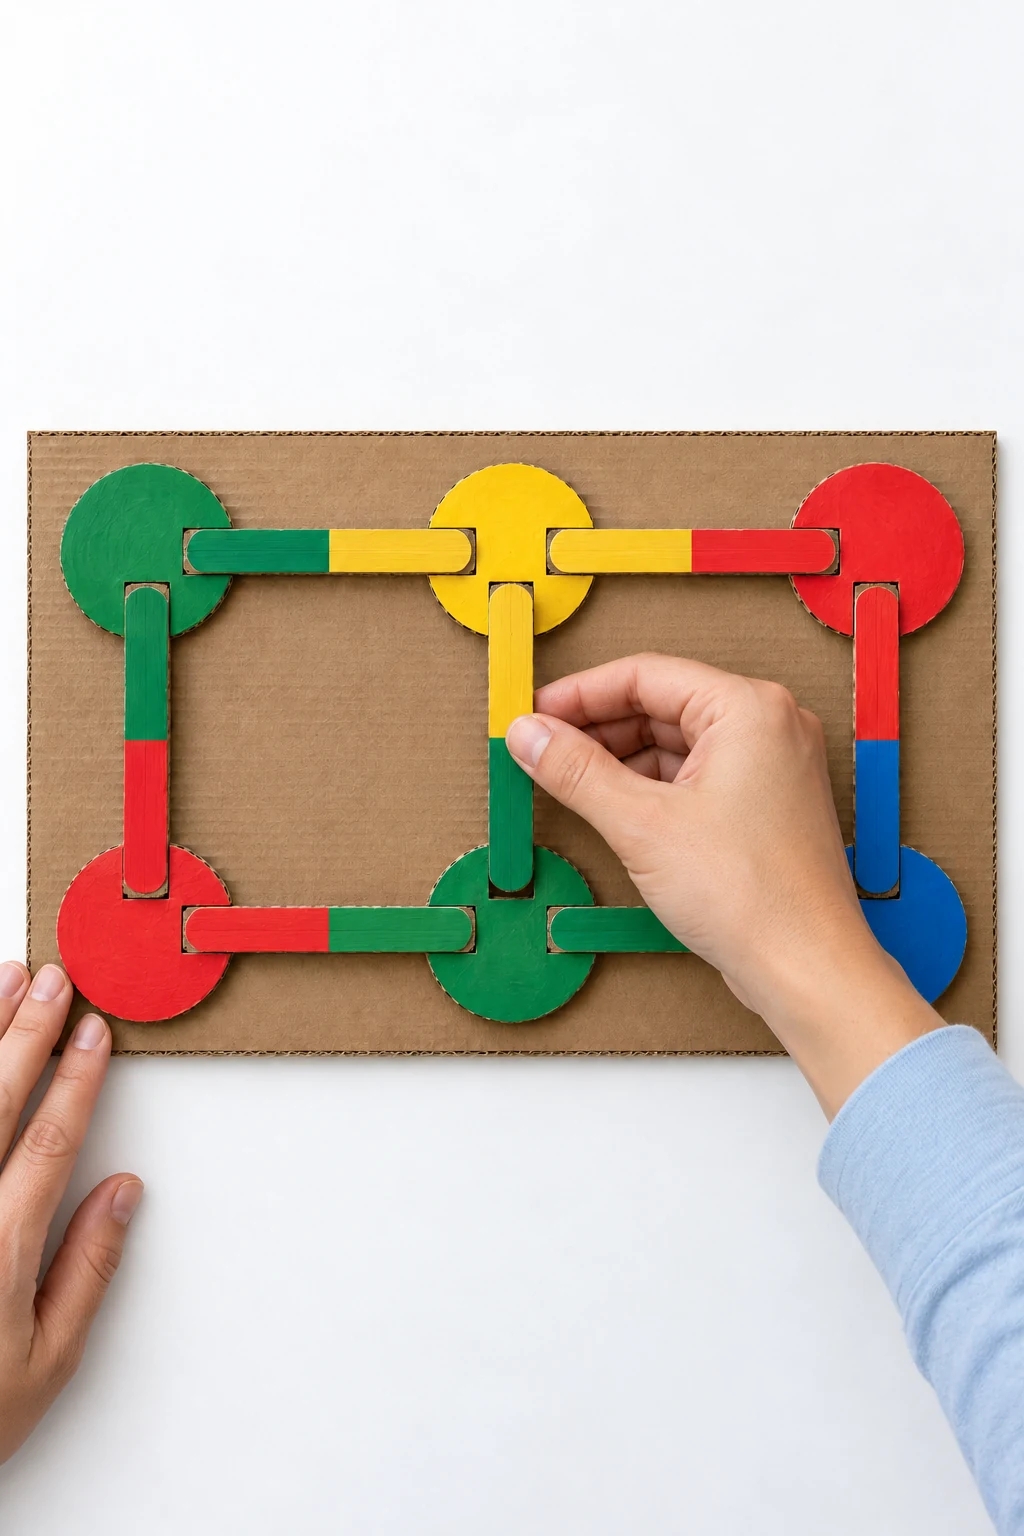
Fit the top horizontal links green to yellow and yellow to red. Below, fit red to green and green to blue. Add the vertical links: green over red on the left, yellow over green in the middle, and red over blue on the right. Check both ends of every stick; matching only one end is not enough.
The Finished Color Match Board
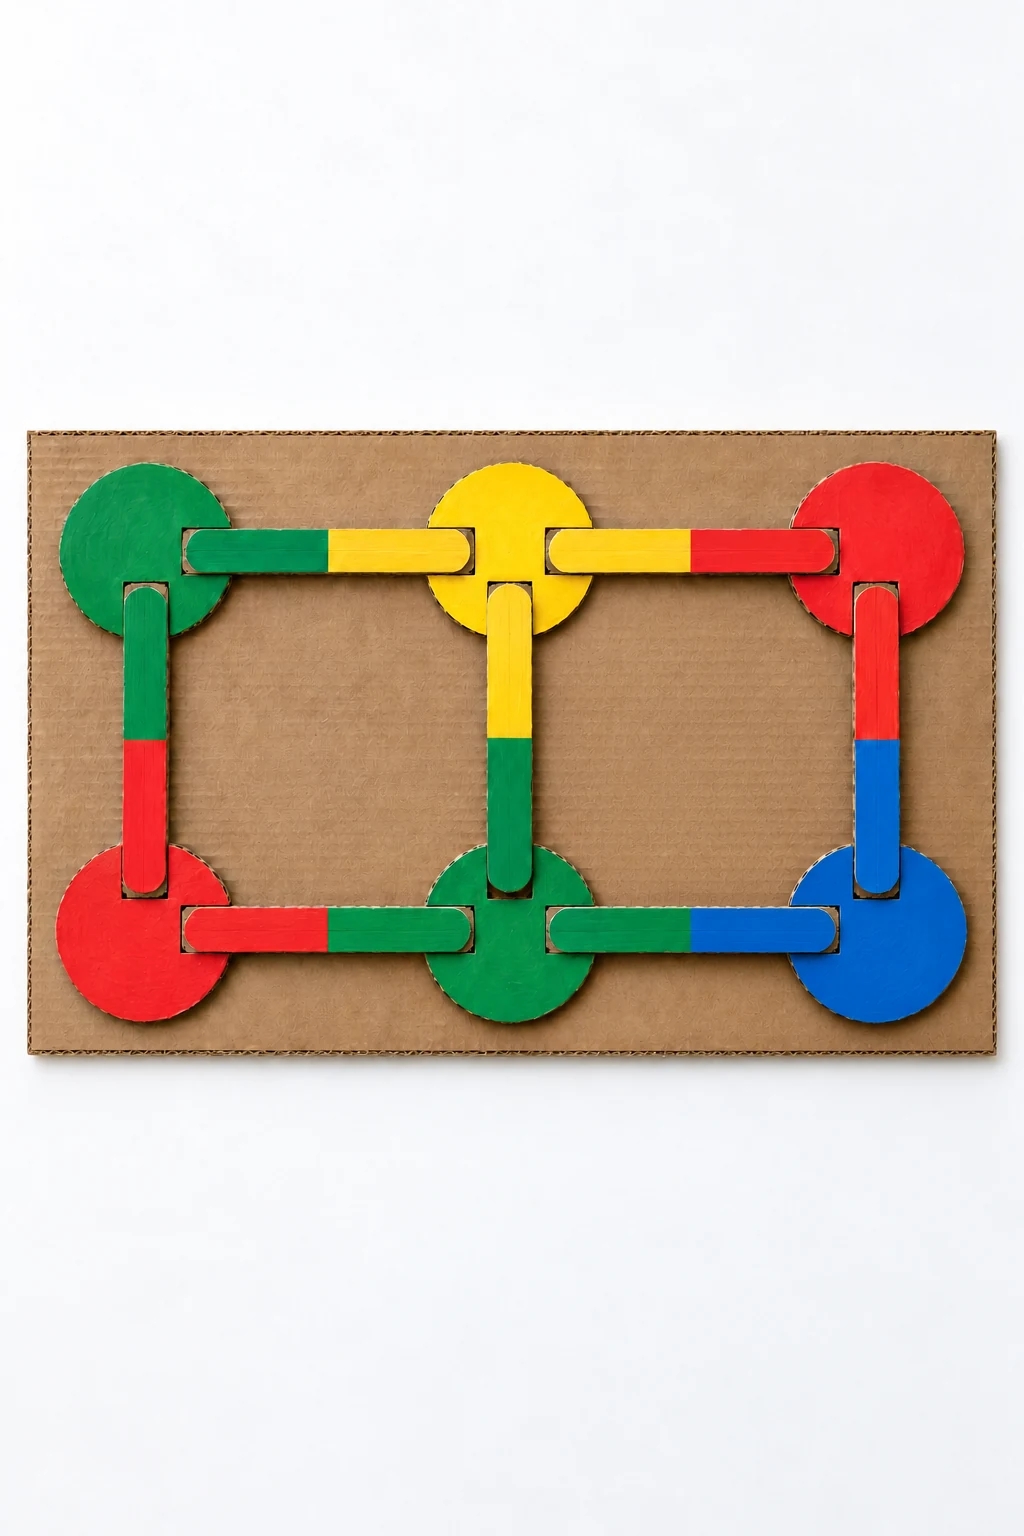
The finished puzzle forms two neighboring squares sharing a middle link. Count six fixed circles, seven removable sticks, and fourteen matching ends. Take a quick reference picture of your own finished board before lifting the sticks out for play.
How to Play Together
Begin with the finished board and invite the child to lift out two sticks. Name the two colors on one piece, find the matching circles, and place it back. Ask, “What happens if we turn it around?” Give time to look at both ends before helping.
For a full round, put all seven sticks beside the board and take turns choosing one. A player places a stick only when both ends match. If one end is wrong, lift it out and try another space. Work together to fill the board rather than racing at first.
For another round, remove one link while the child looks away and ask which color pair is missing. You can also ask the child to describe a route using color words. Keep sessions short and stop while the activity is still enjoyable. For a different family session, browse these games to play at home or make a paper cup dragon with a moving mouth.
Skills This Activity Can Support
Picking up, turning, and placing the sticks gives children opportunities to practice controlled finger movements and hand and eye coordination. Comparing two colored ends can also encourage visual matching, attention to both conditions, and trying a different solution. Taking turns creates a simple reason to explain a choice and listen to someone else's idea.
These are opportunities for practice, not guaranteed developmental outcomes. NAEYC's fine motor guidance for families includes painting, puzzles, pegboards, and board games among activities that offer fine motor practice; it does not evaluate this specific homemade game.
Fit, Storage, and Small Fixes
A stick will not reach: check its length and the distance between the two notch ends before pressing it down. Move the circles during the dry fit, rather than bending the wood. A slot feels tight: an adult can trim a little from its sides; avoid widening the solid center. A circle lifts: stop play, reglue it, and let it dry fully.
Store the board flat in a dry place and keep the seven sticks in a small labeled bag. Washable tempera and corrugated cardboard should stay away from water.
Leave a Reply