

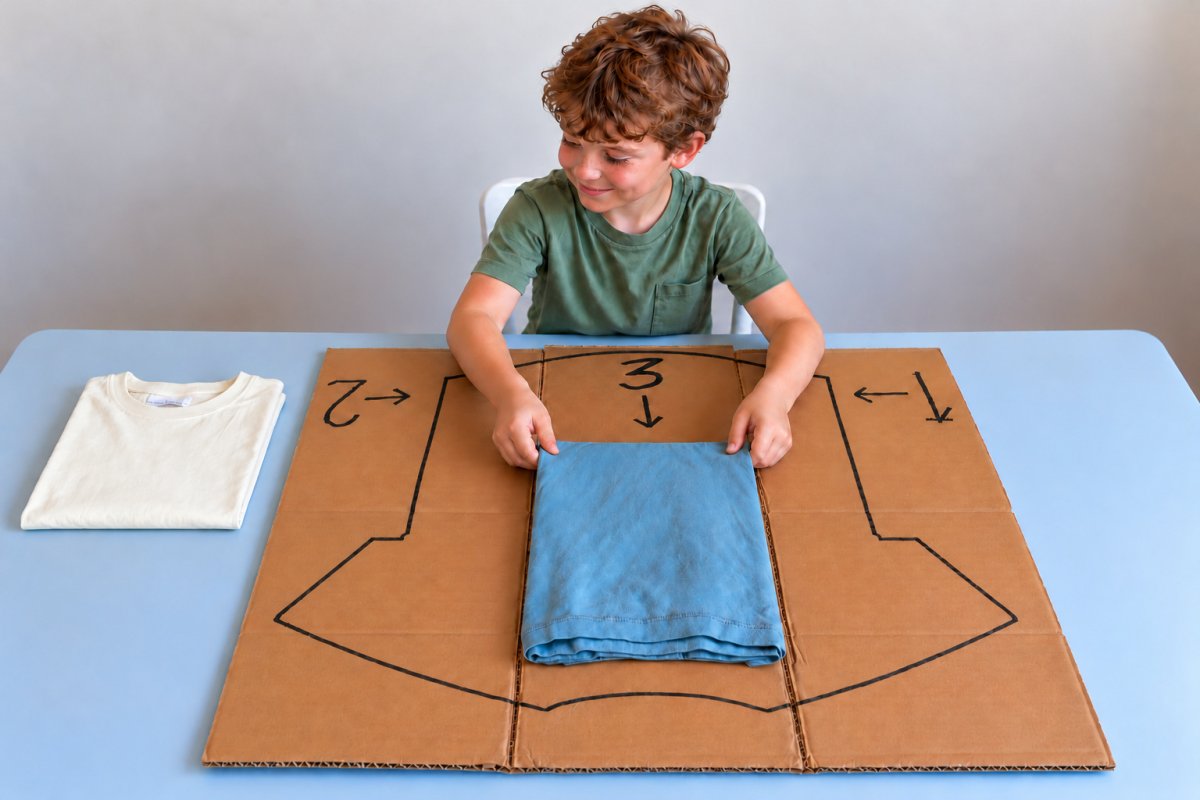
A cardboard shirt folding board turns a small laundry task into a simple activity for kids. Made from one flattened box, it uses two side panels and a center flap to fold a shirt into a compact rectangle. An adult prepares the cutting and fold lines, then the child follows the numbered moves. The shirt itself provides the sizing guide, so the board fits the clothes used for practice. Choose lightweight shirts of a similar size for the first few turns.
Table of Contents
- Make Folding a Short Activity
- Materials and Preparation
- Step 1 Place the Shirt
- Step 2 Trace the Outline
- Step 3 Fold Both Sides In
- Step 4 Mark the Right Edge
- Step 5 Mark the Left Edge
- Step 6 Cut the Right Slit
- Step 7 Cut the Left Slit
- Step 8 Check the Center Flap
- Step 9 Form the Panel Folds
- Step 10 Set Up the Board
- Step 11 Fold Panel One
- Step 12 Fold Panel Two
- Step 13 Make the Final Fold
- Step 14 Lift the Finished Shirt
- Supply Pack Prices in USD
- Safety Before Each Turn
Make Folding a Short Activity
Demonstrate one complete turn, saying “one, two, three” as each panel moves. Then let the child place the next shirt, follow the arrows and put the folded result beside the board. Matching edges, lifting panels and keeping the fabric in place give practice in using both hands together, following a sequence and handling clothing. This can contribute to confidence with an everyday routine. Keep the focus on participation rather than speed or perfectly straight folds.
For a different tabletop activity afterward, try the bead threading bug for kids.
Materials and Preparation
- One large, clean sheet of corrugated cardboard from a flattened box
- A short sleeved shirt to use as the template
- Another shirt of a similar size for folding practice
- A black marker
- A sharpened pencil
- A retractable utility knife for adult use
Allow approximately 20 to 30 minutes for adult preparation and 5 to 10 minutes for a first practice session. These are planning estimates; thicker cardboard and adjustments can take longer. Choose cardboard that lies flat and has enough space around the spread shirt.
An adult must complete every cut and score and put the knife away before the child begins.
Step 1 Place the Shirt
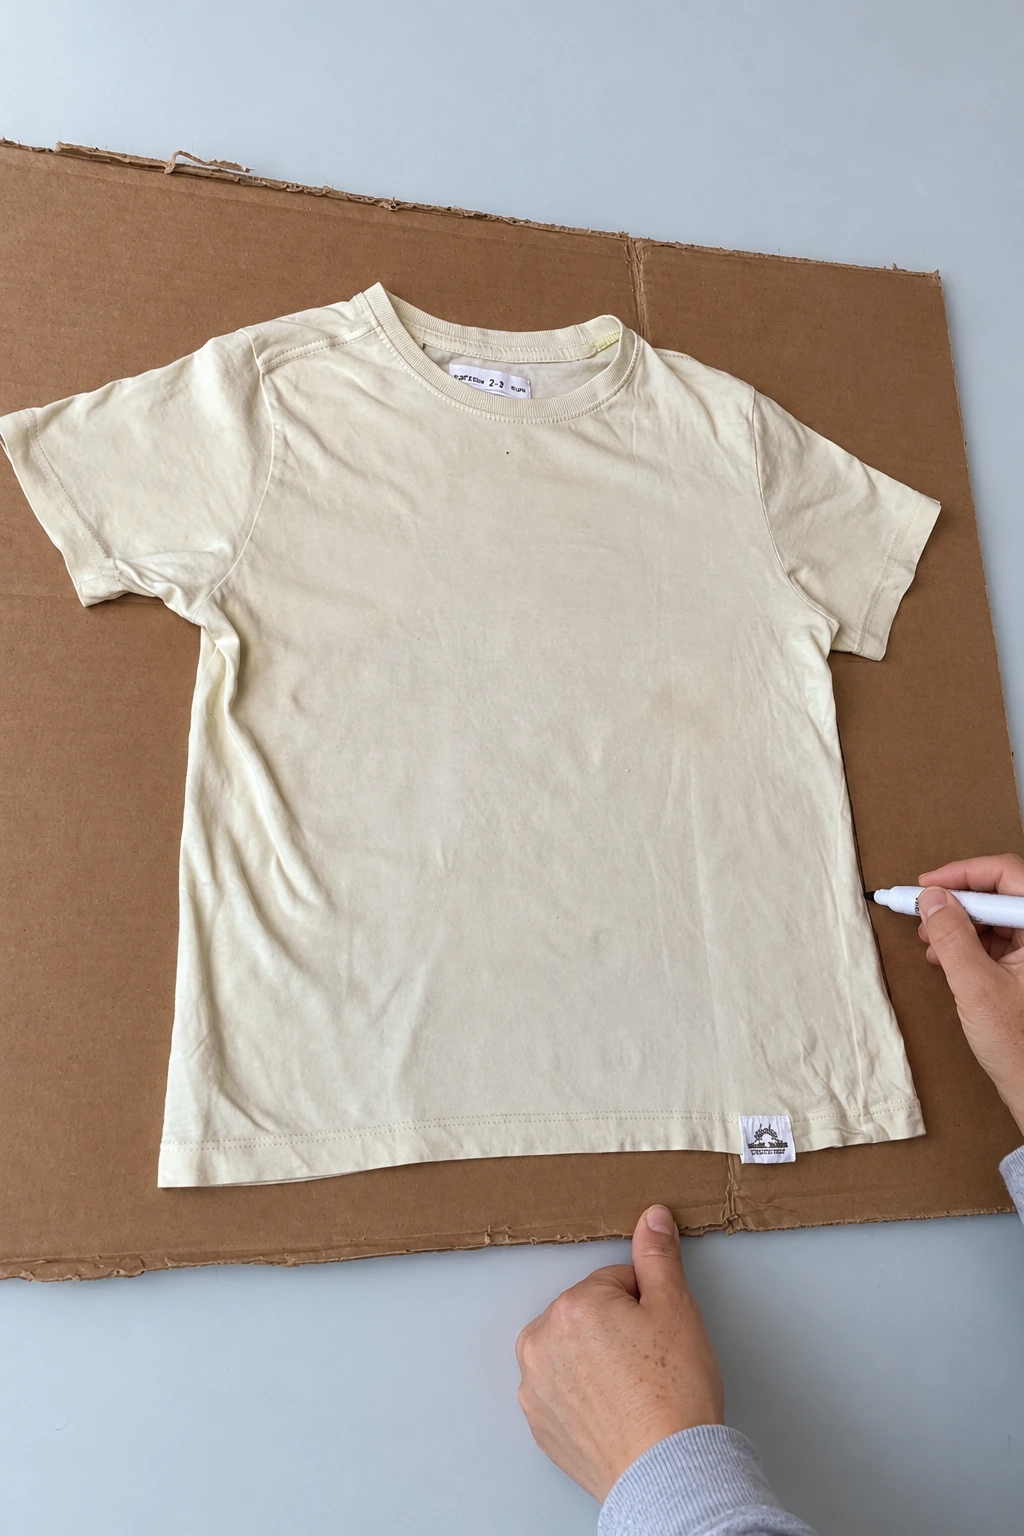
Lay a clean, short sleeved shirt flat on a large rectangular sheet of corrugated cardboard. Spread the sleeves and smooth the fabric without stretching it. Leave cardboard beyond the neckline, sleeves and hem so the whole outline fits. This shirt determines the size of the board.
Step 2 Trace the Outline
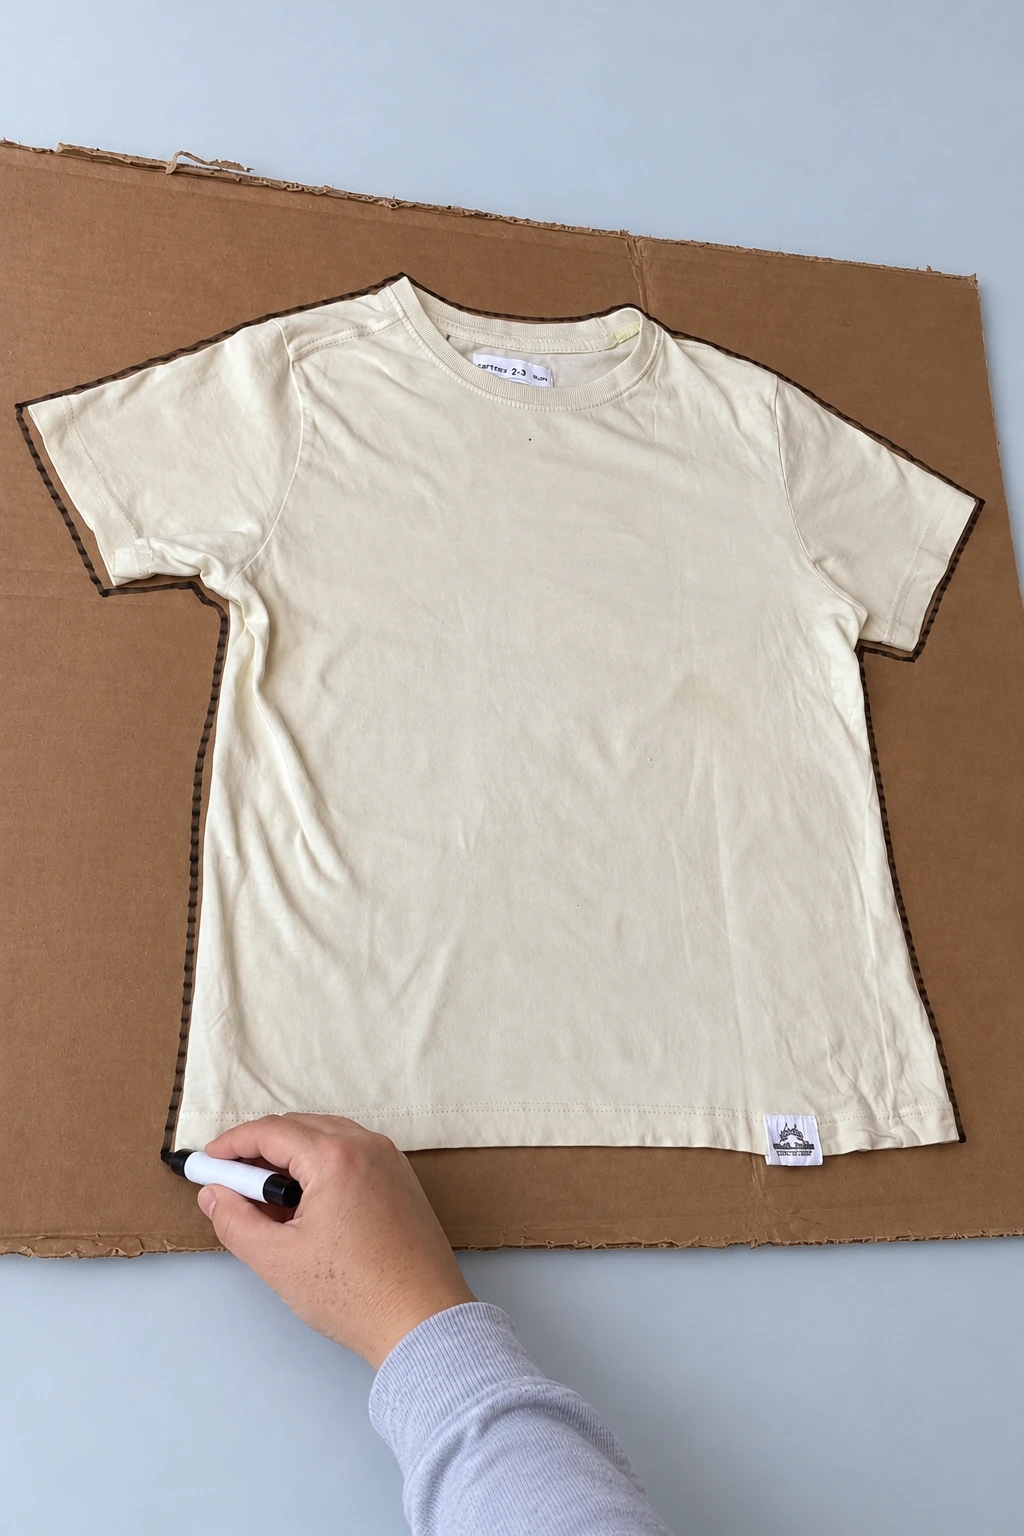
Draw around the shirt with the black marker, following the shoulders, sleeves, sides and hem. Keep the tip on the cardboard just outside the fabric. Leave the cardboard rectangular: the shirt outline is a placement guide, not a shape to cut out.
Step 3 Fold Both Sides In
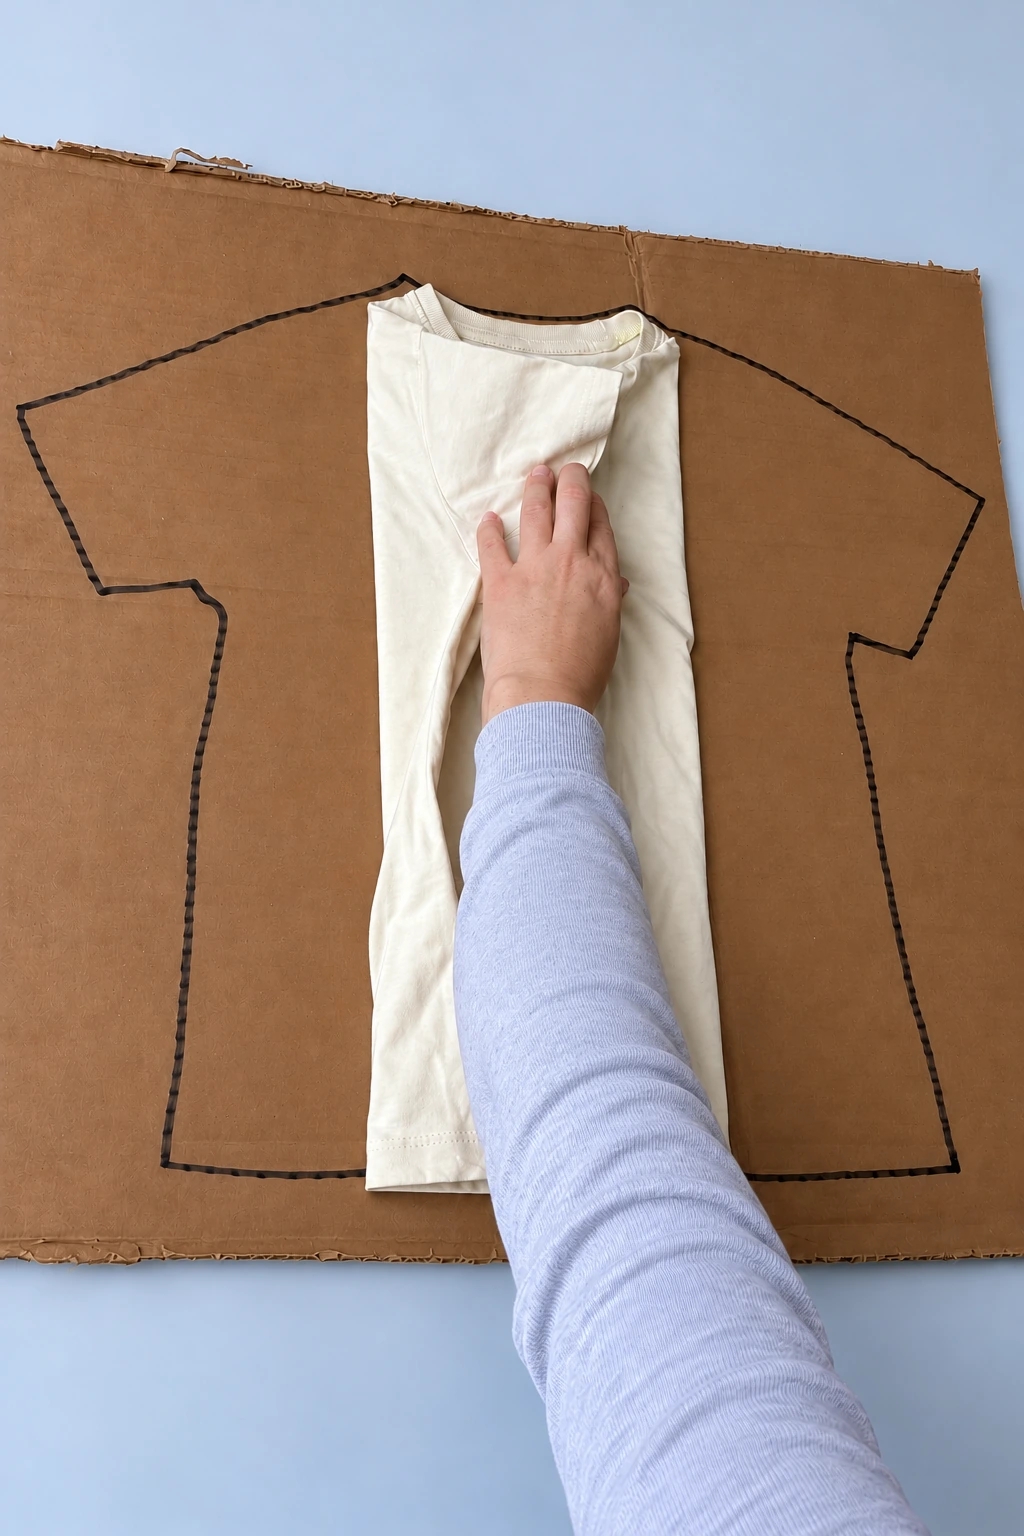
Fold the sleeves and sides of the shirt inward to make a long, narrow rectangle. Keep it centered within the drawn outline, with the neckline and hem at their original ends. Smooth the layers so both folded edges can guide the panel markings.
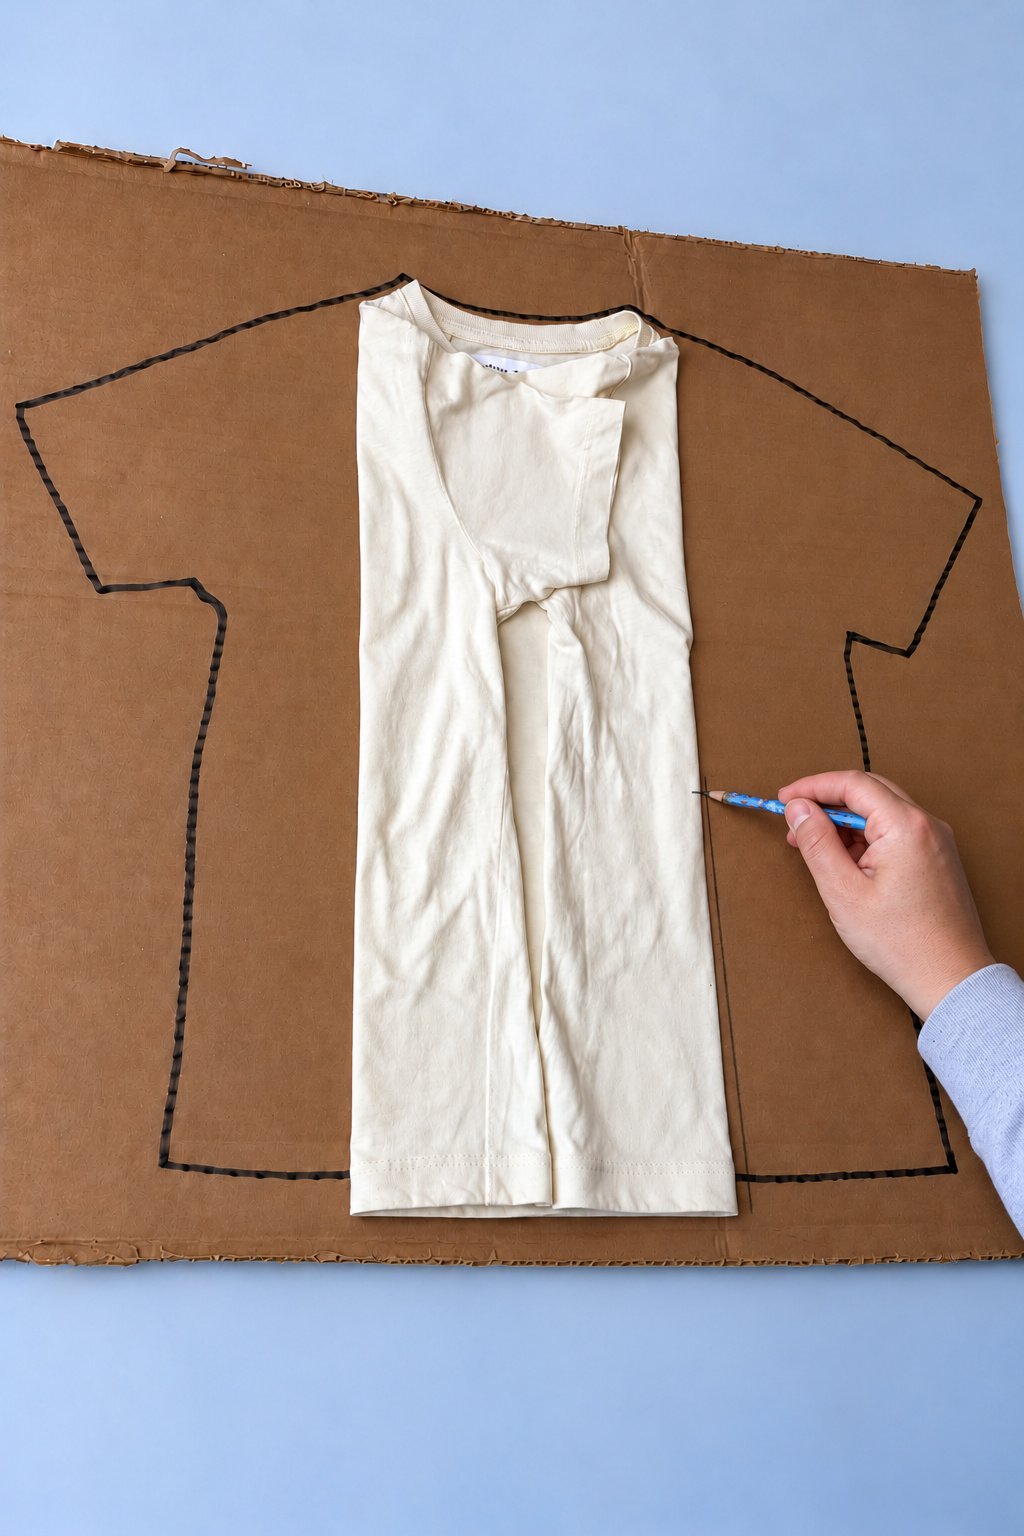
Step 4 Mark the Right Edge
Run the pencil beside the right edge of the folded shirt to mark the inner boundary of the right panel. Extend the guide toward the cardboard edges. Add a small stop mark about halfway along the shirt body; the lower slit will end here.
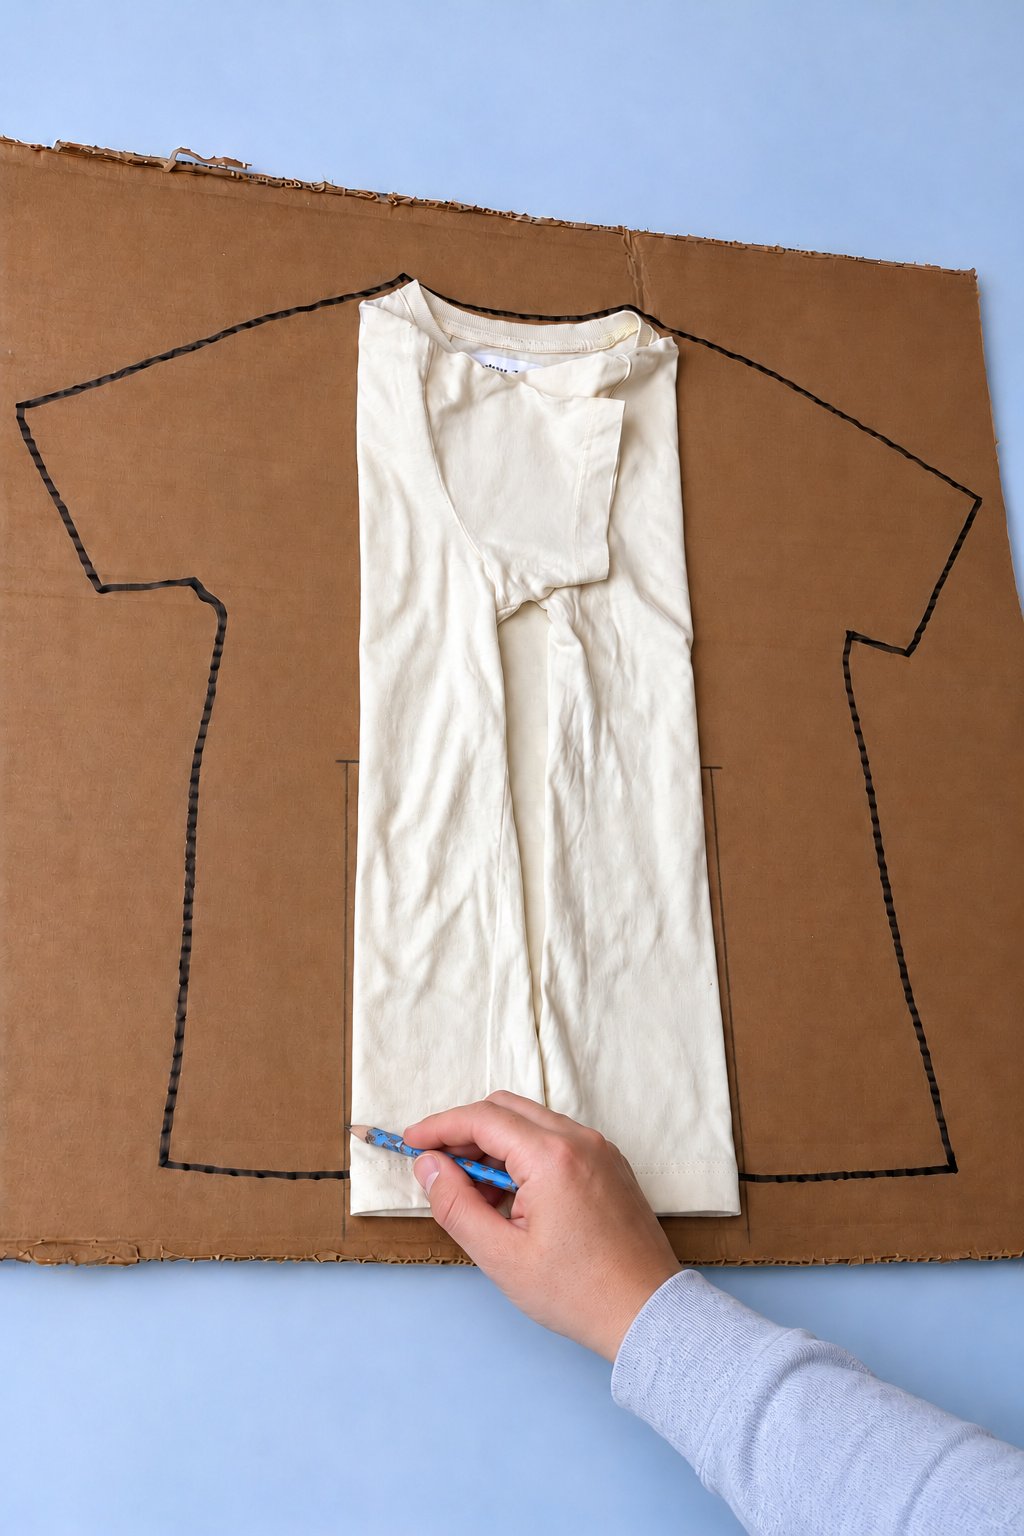
Step 5 Mark the Left Edge
Mark the left folded edge in the same way. Keep the two pencil guides parallel and add a matching stop mark at the same height. The space between these lines becomes the center strip. Check that it follows the folded shirt width before cutting.
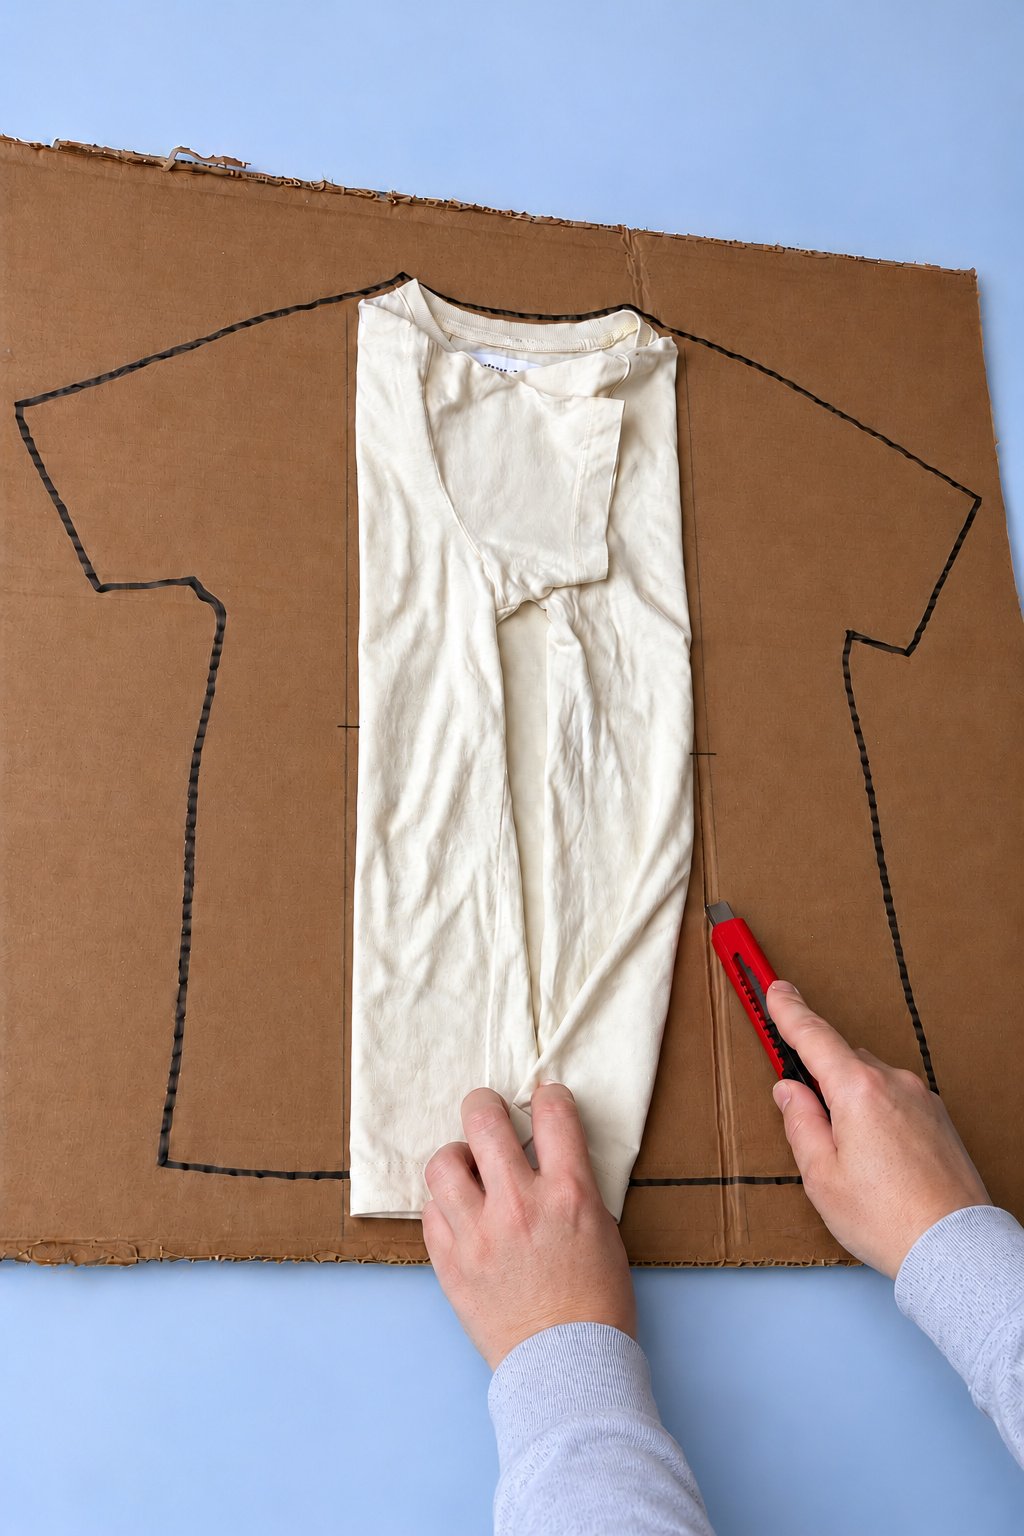
Step 6 Cut the Right Slit
An adult cuts along the right inner guide, starting at the cardboard edge below the hem and stopping at the halfway mark. Move the fabric clear of the blade and keep the holding hand beside the cutting path. Use controlled passes on a protected cutting surface. Do not continue the slit to the neckline end.
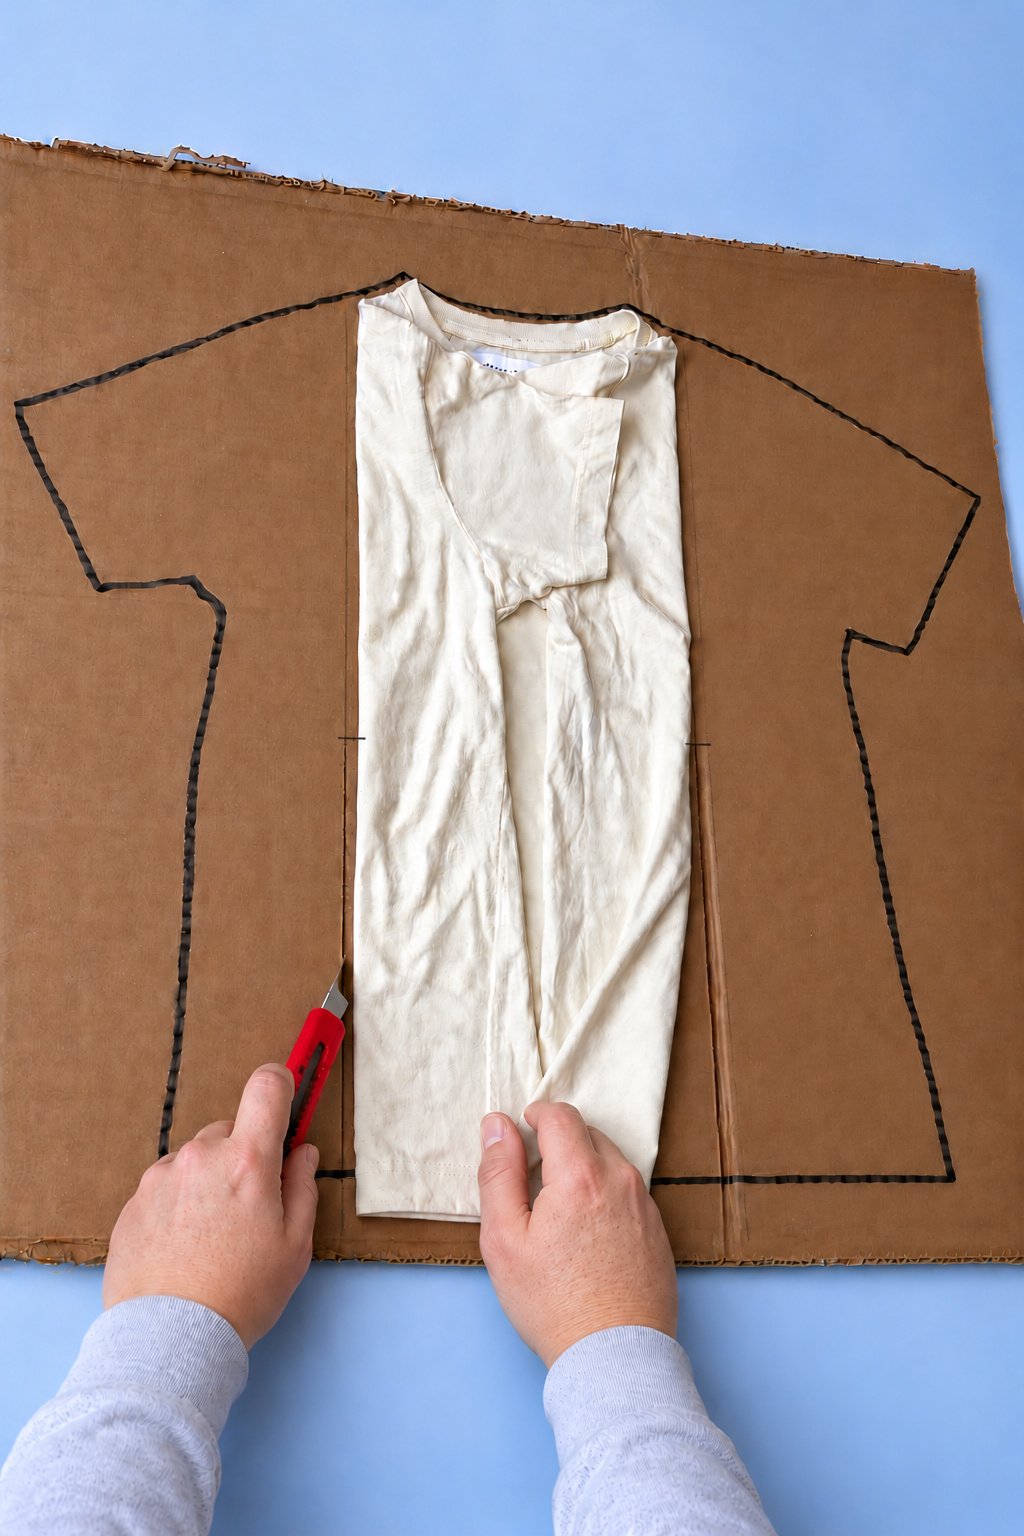
Step 7 Cut the Left Slit
Make the matching slit along the left inner guide, again working from the outer cardboard edge to the stop mark. Both slits should end at the same level. Keep the cardboard beyond their endpoints intact so the center flap remains connected to the board.
Step 8 Check the Center Flap
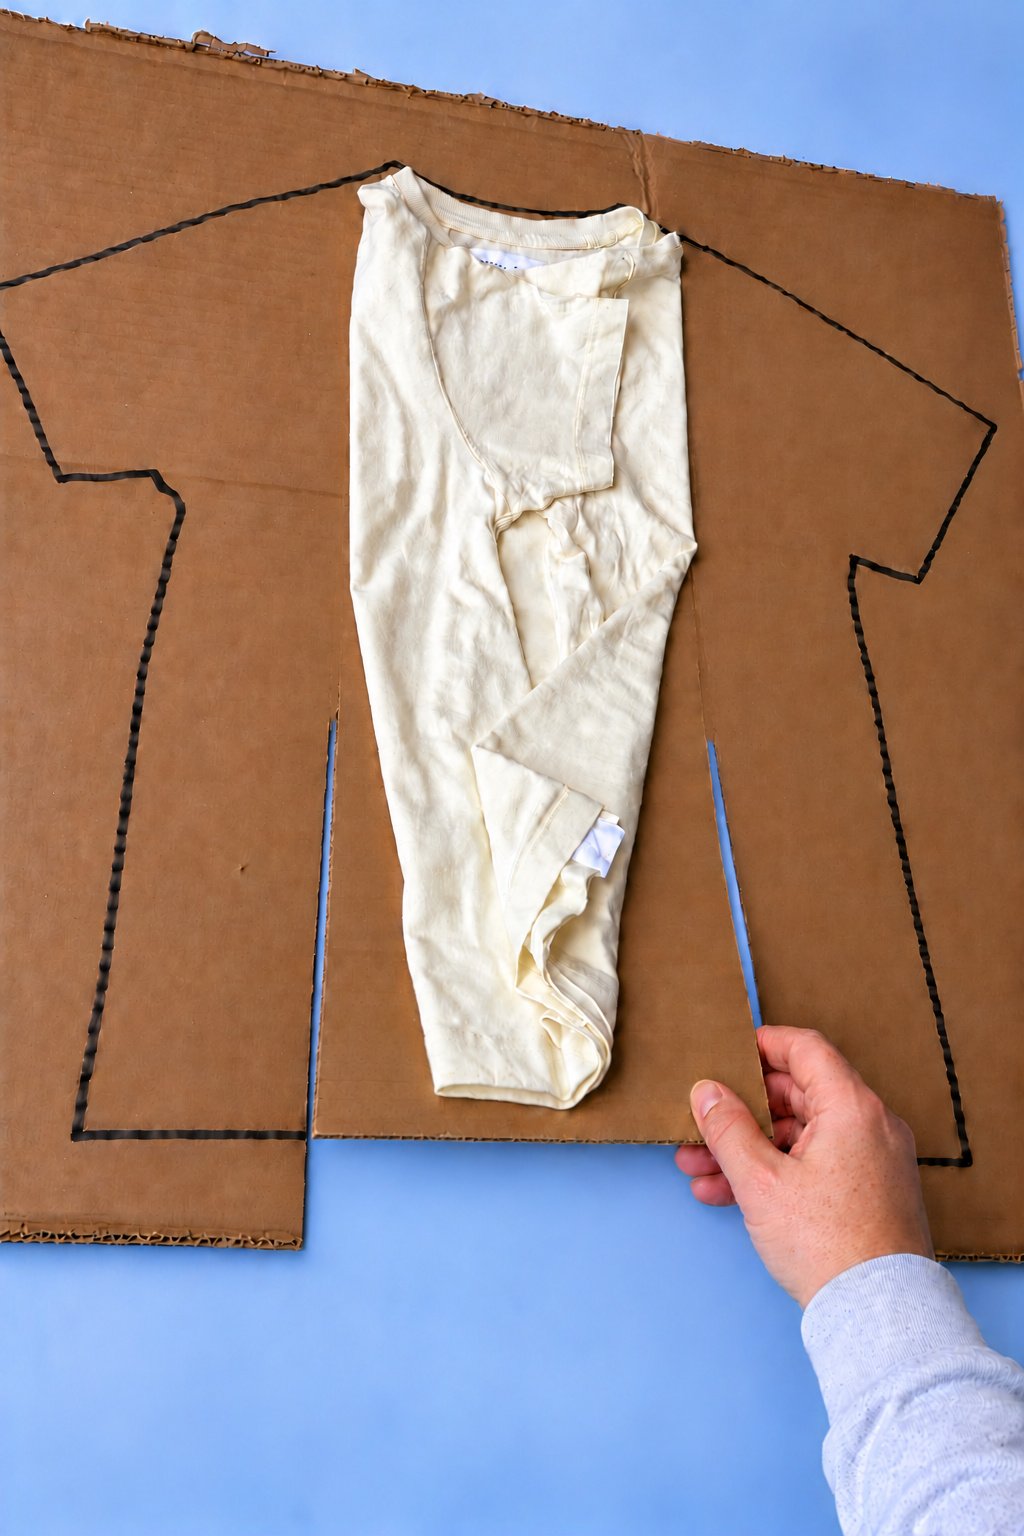
Gently lift the cardboard section between the two slits. Its lower edge should rise freely while its upper end stays attached. The opening must reach the outer edge of the sheet. Lower the flap again. If it catches, an adult should check the cuts rather than pull until the cardboard tears.
Step 9 Form the Panel Folds
Fold the shirt hem upward toward the neckline to check the final folded length. Use its edges to locate the side folds and the crosswise center hinge. With the fabric clear, an adult lightly scores the remaining side guides through the outer paper only, leaving the backing intact. Gently bend the side panels and center flap by hand, then open them flat. None of the panels should detach.
Step 10 Set Up the Board
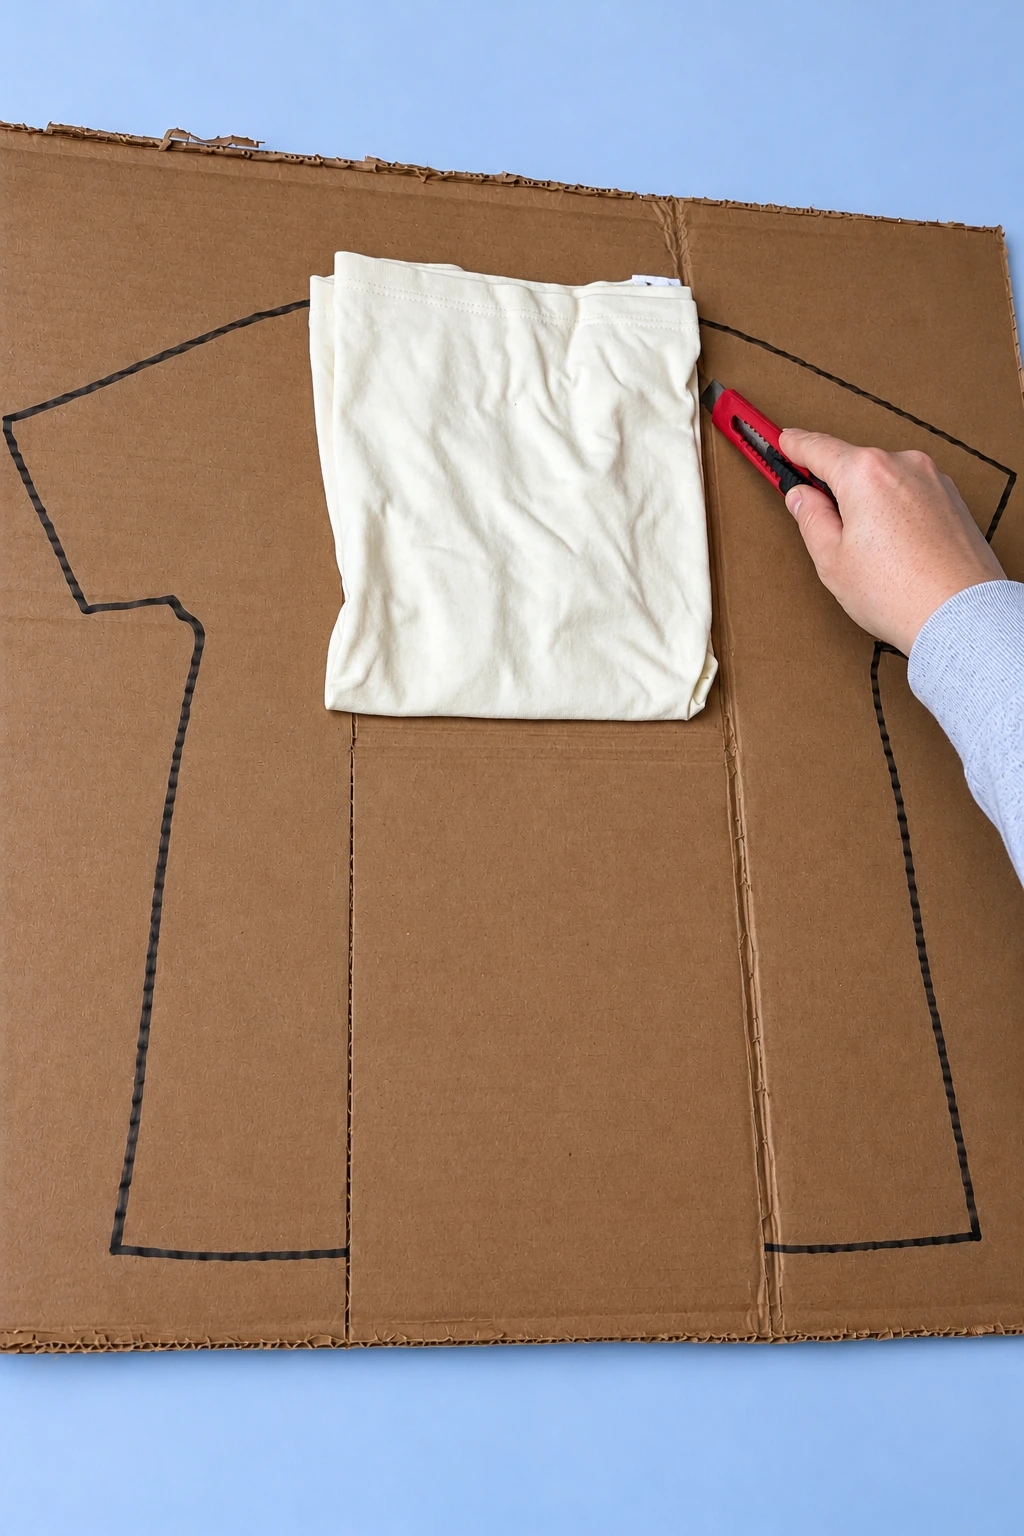
Turn the board so the hem end is nearest the child. Number the panels as viewed in the photographs: right panel 1, left panel 2 and center flap 3. Draw the side arrows inward and the center arrow toward the neckline end. Let the ink dry. Lay a similar sized shirt face down inside the outline, with its hem nearest the child and collar toward the front.
Step 11 Fold Panel One
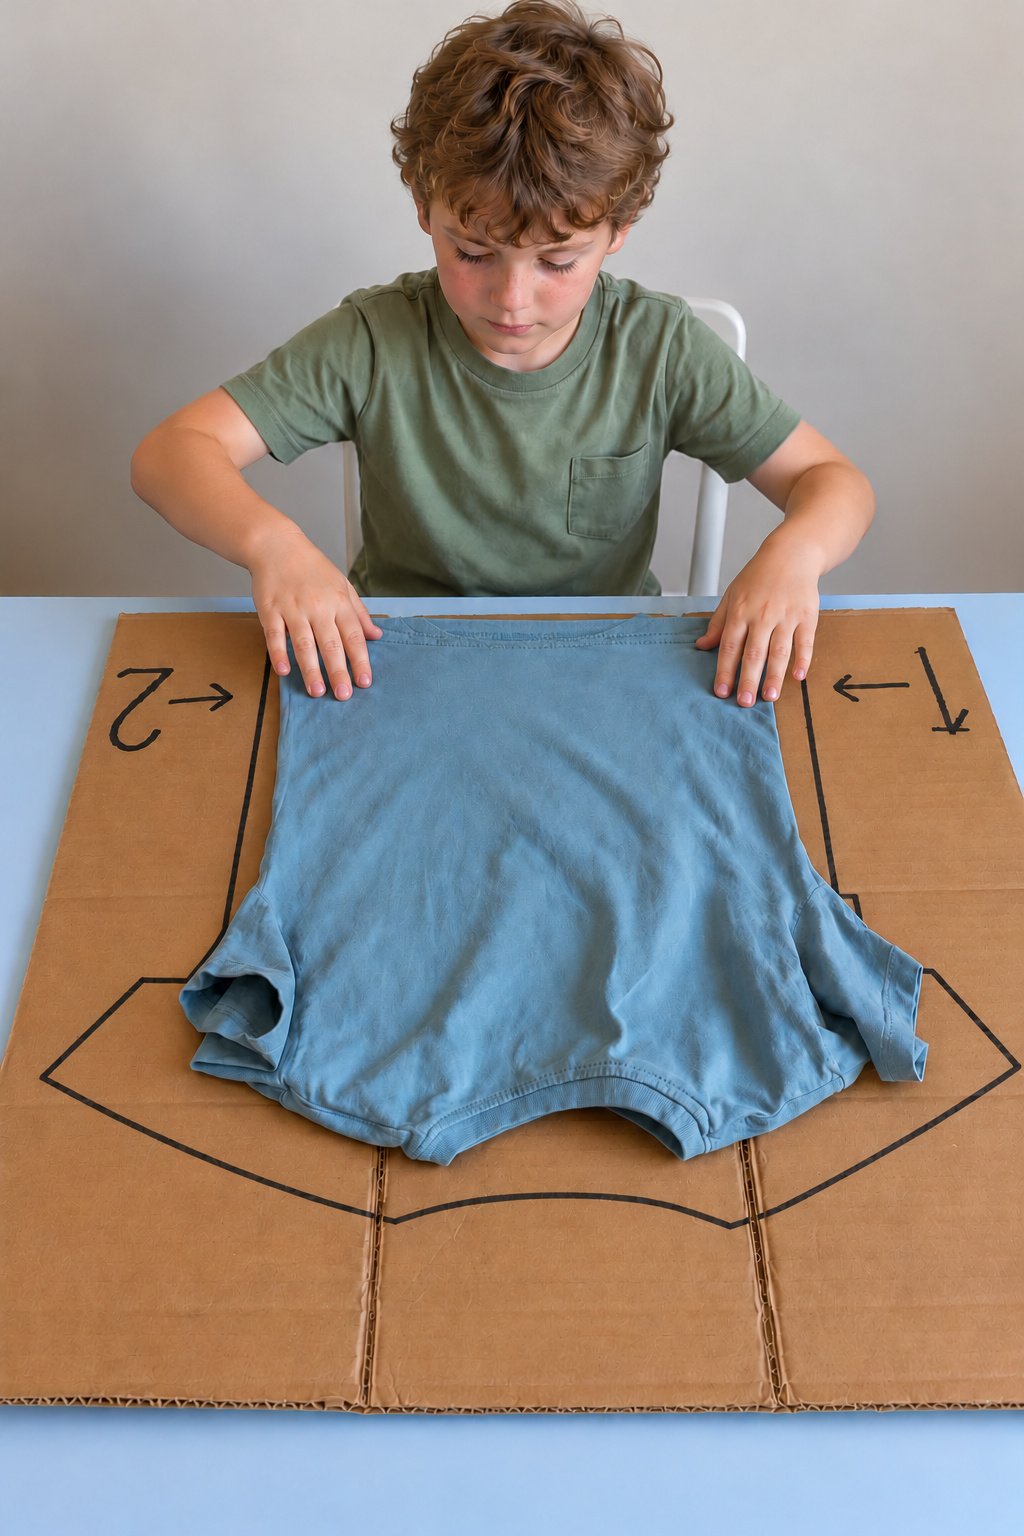
Lift the panel marked 1 and swing it inward over the shirt. The cardboard carries that sleeve and side toward the middle. Press gently, then return the panel to its open position while leaving the fabric folded. The child can use one hand to steady the board and the other to move the flap.
Step 12 Fold Panel Two
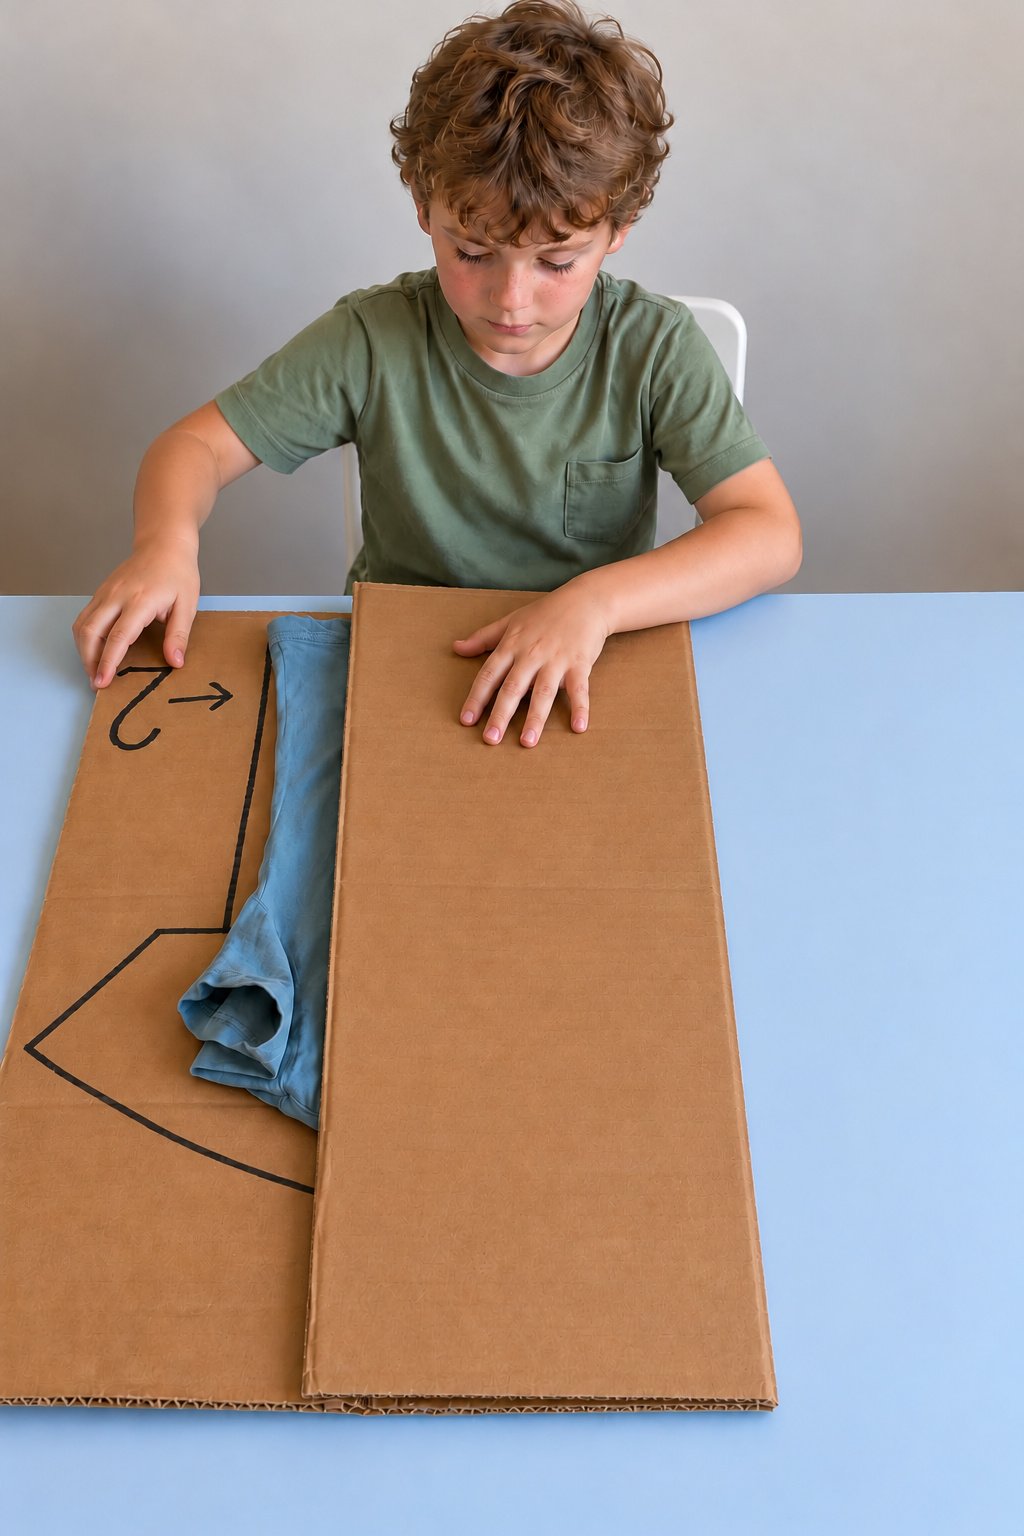
Bring the panel marked 2 across the center to fold the other sleeve and side inward. Open that panel again without pulling the fabric back out. The shirt should now form a narrow strip along the middle. Smooth a trapped sleeve before moving on to the last fold.
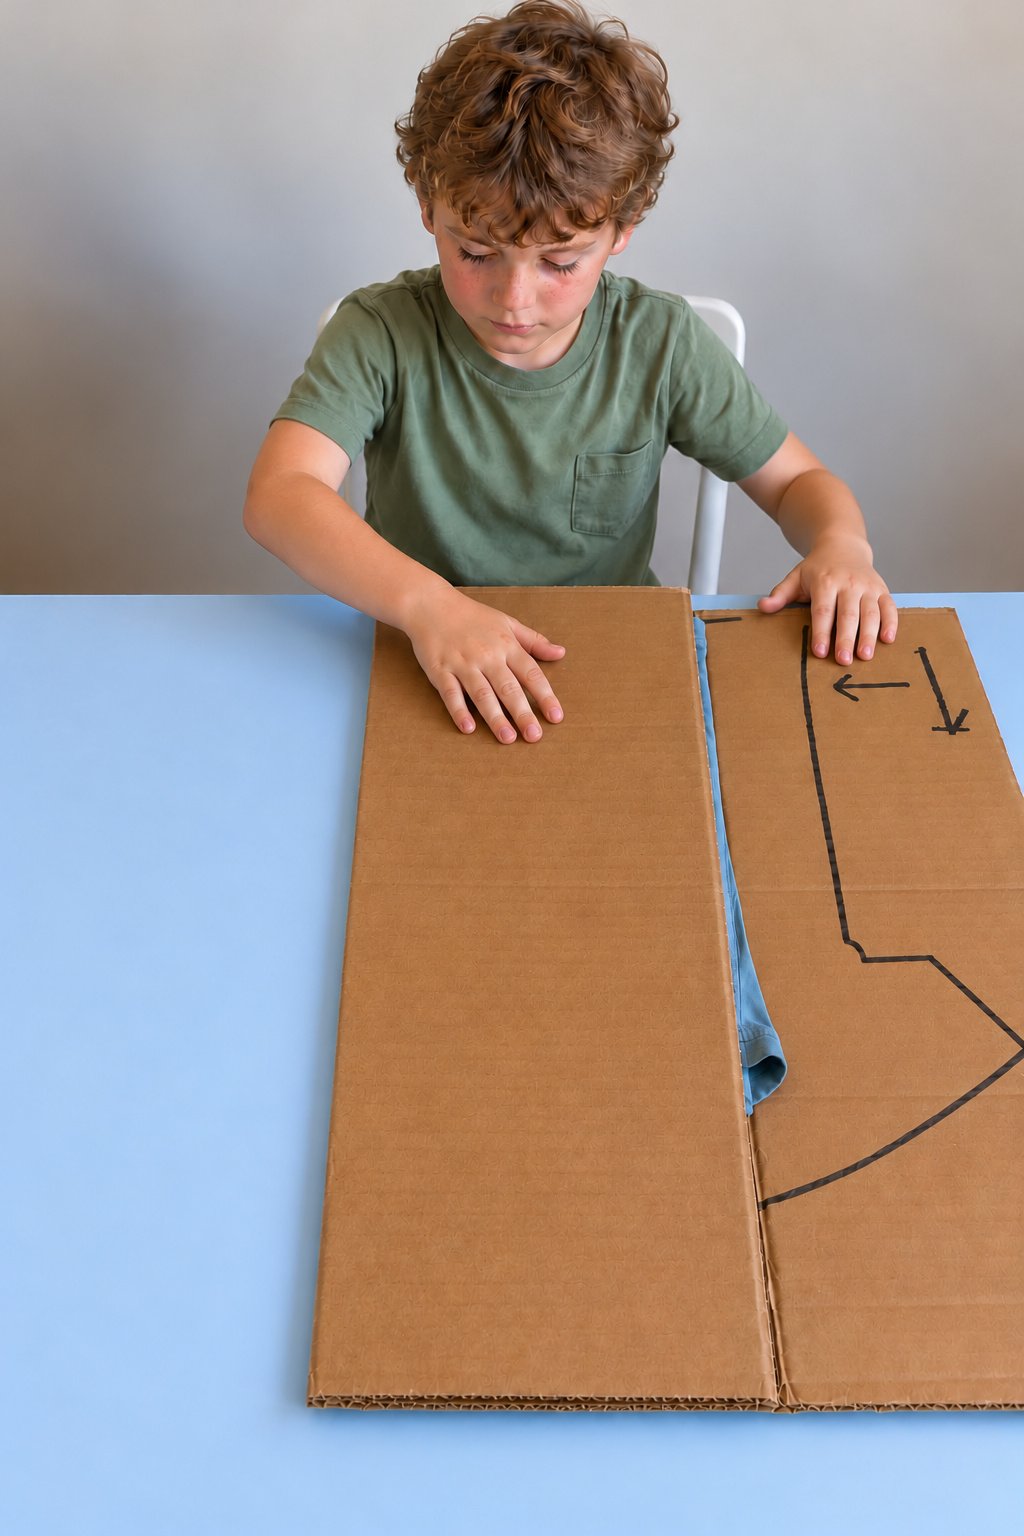
Step 13 Make the Final Fold
Lift the center flap marked 3, which is closest to the child, and fold it forward over the fixed center section. This brings the hem toward the neckline. Press lightly, then lift the flap back up and return it to its starting position, leaving the folded shirt on the board.
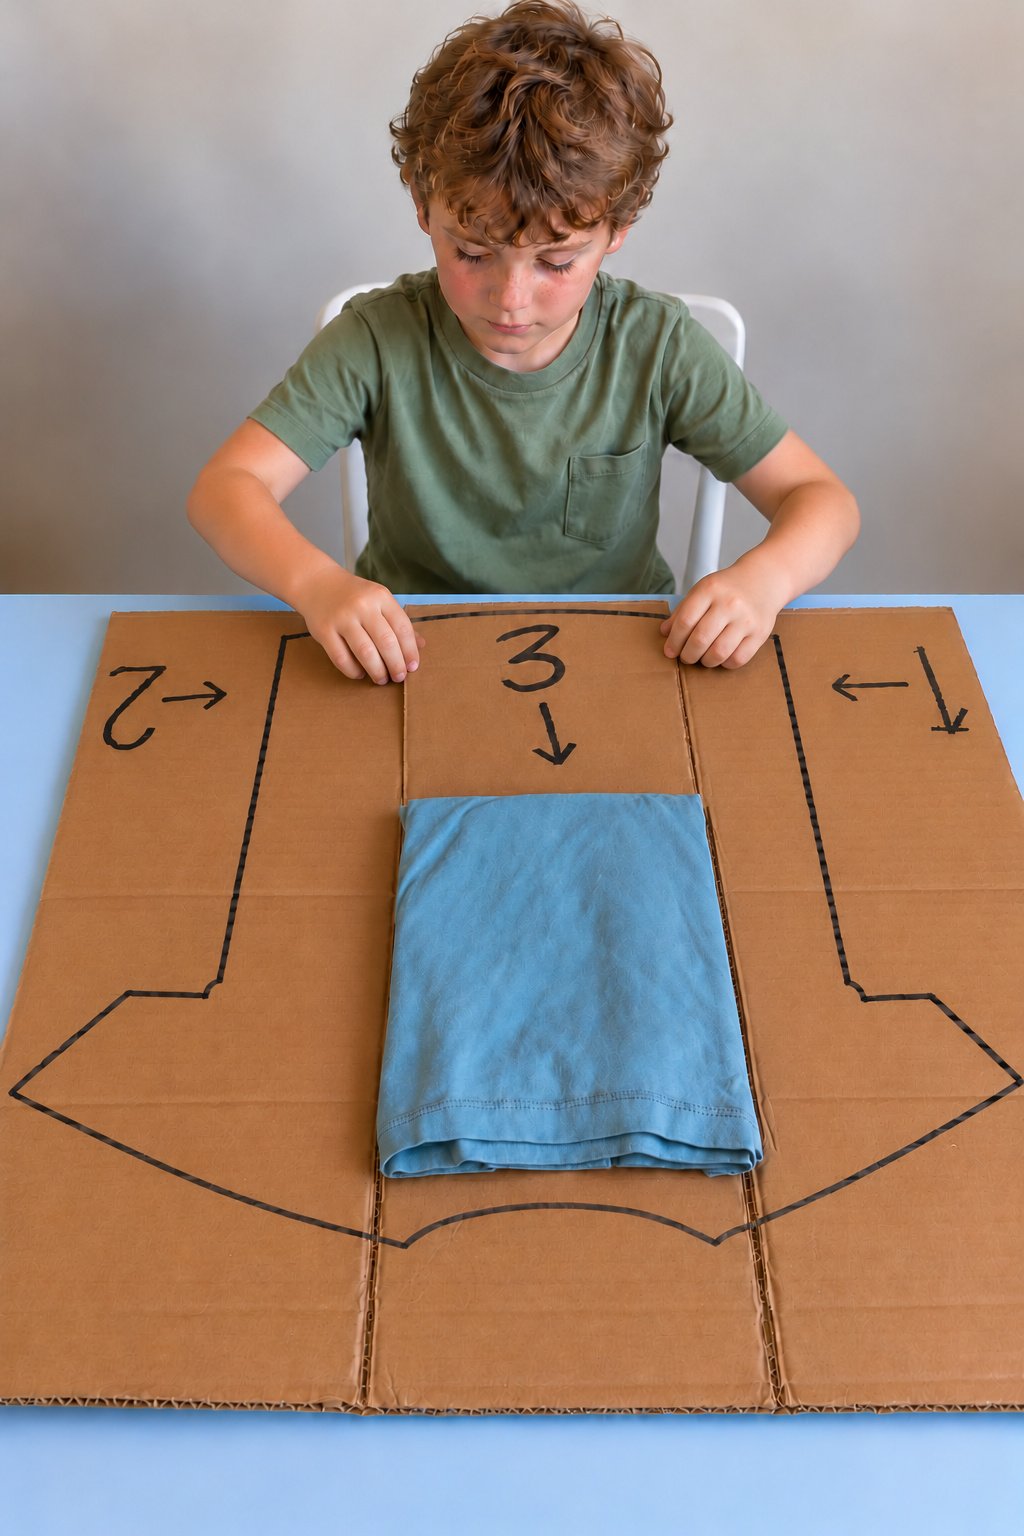
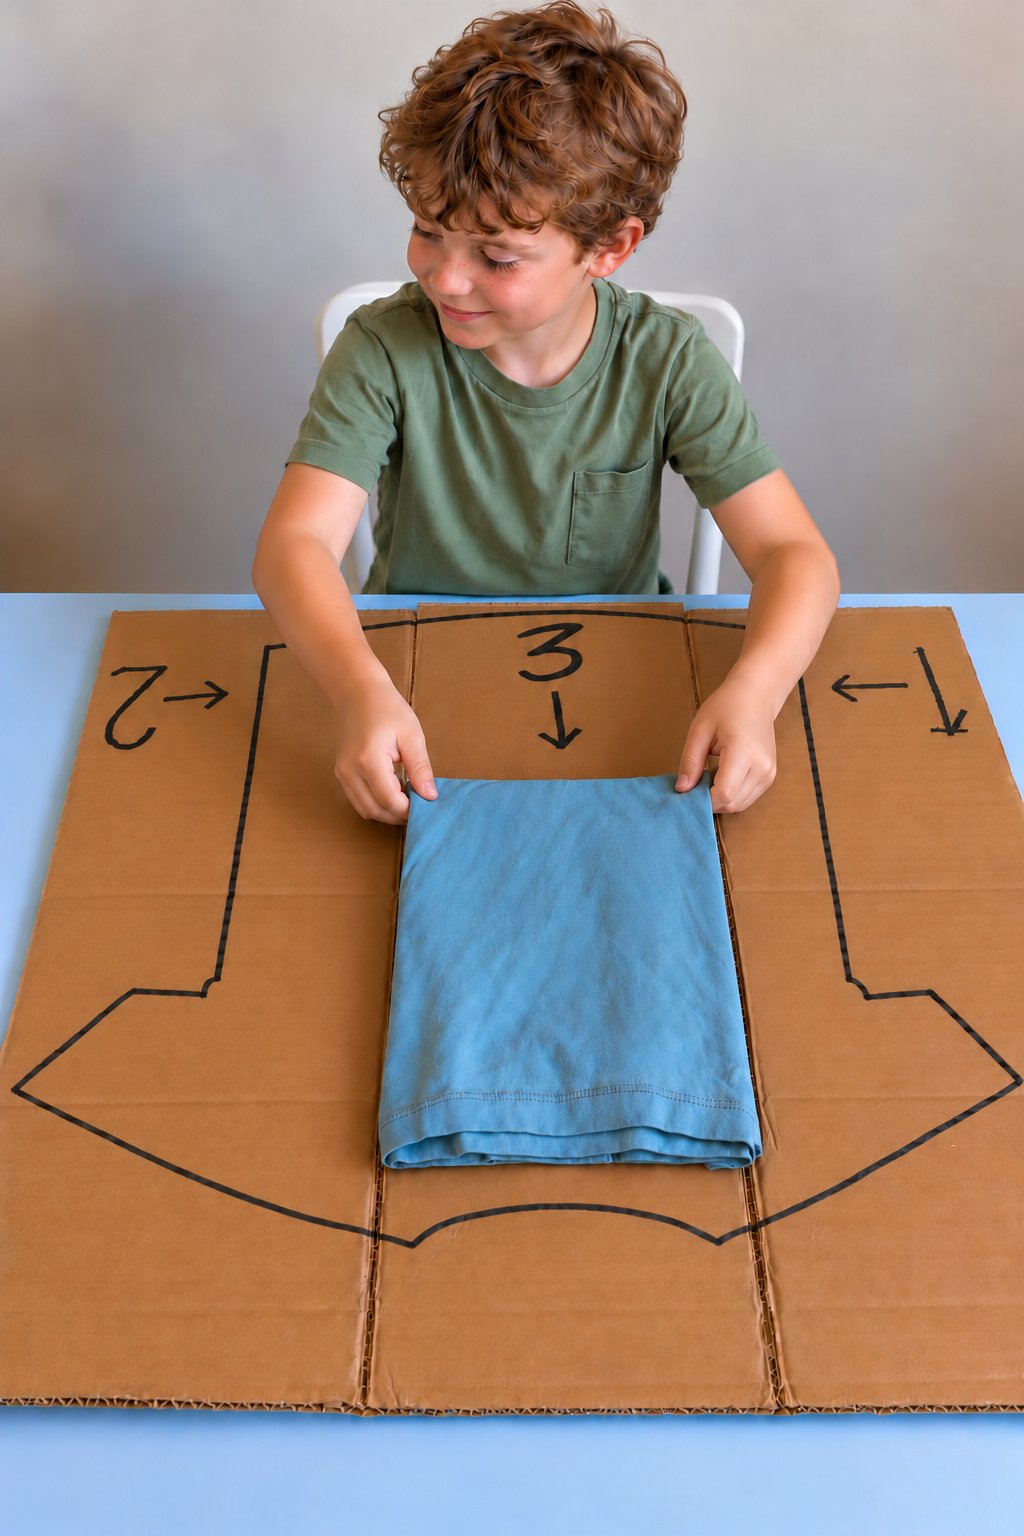
Step 14 Lift the Finished Shirt
With all three panels open, lift the folded shirt by its upper corners and place it beside the board. Try a second shirt of a similar size using the same sequence. If the result spreads apart, check the starting position and flatten the sleeves before repeating the folds.
Supply Pack Prices in USD
Comparable supplies checked on October 30, 2026. Full pack prices are shown; tax and delivery are excluded. Prices can vary by store.
| Supply | Price |
|---|---|
| Reused cardboard box | $0.00 |
| Shirts already owned | $0.00 |
| Pen+Gear black chisel tip markers, 2 count | $1.00 |
| Pen+Gear sharpened wood pencils, 24 count | $2.54 |
| Hyper Tough snap blade knife set, 2 pieces | $3.33 |
| Total with reused cardboard and existing shirts | $6.87 |
Safety Before Each Turn
- Adults handle the utility knife, scoring and any later repairs. Cut on a protected surface, keep fingers and fabric away from the blade, then retract and store it out of reach.
- Check reused cardboard for staples, sharp edges, dirt and loose pieces before starting.
- Use the marker in a ventilated space, let the ink dry and keep its cap away from young children.
- Place the board on a stable table within comfortable reach. Guide the child to hold panel edges without putting fingers beneath the folds.
- Supervise the activity. Stop using the board if a hinge tears, an edge becomes sharp or the cardboard gets wet and soft.
Leave a Reply