

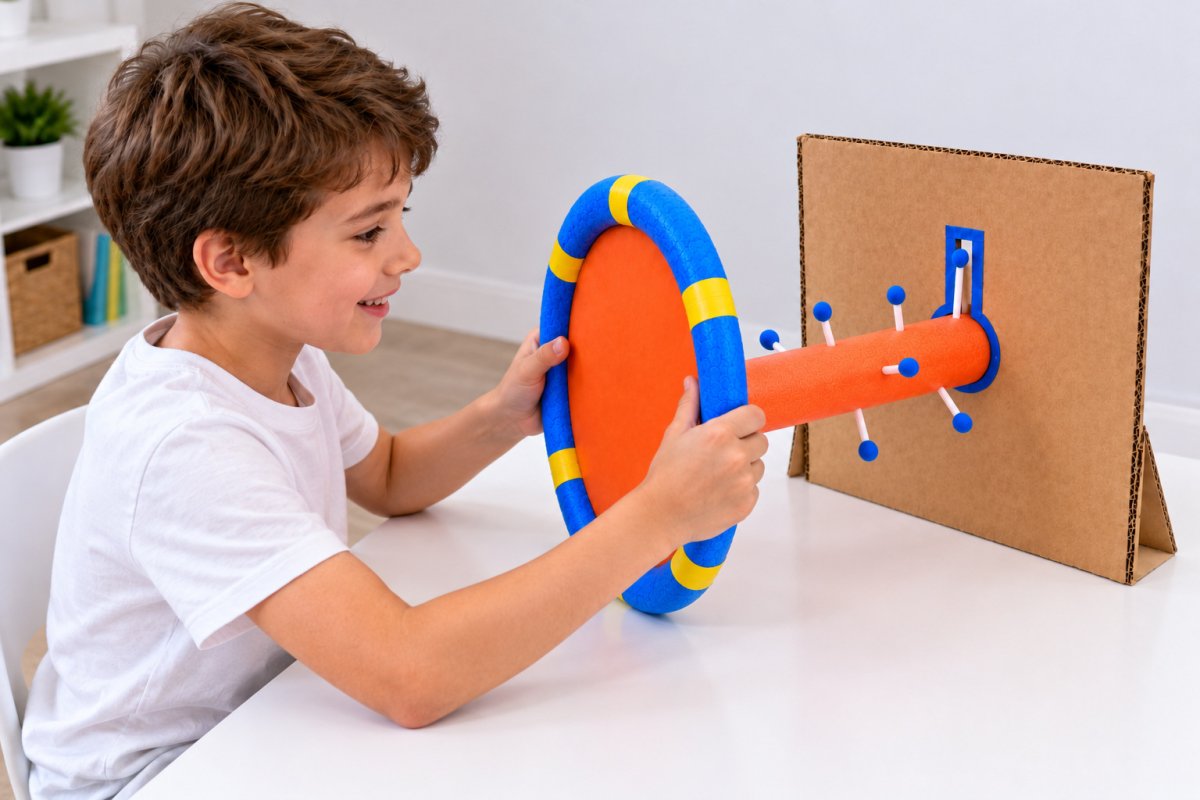
Make an indoor activity for kids with a cardboard box and two pool noodles. In this steering wheel game, children turn a blue foam wheel to guide an orange shaft and its nine small pegs through a cardboard opening. Each peg needs to point upward before it can pass through the narrow slot.
An adult builds the game, then children play with supervision, taking turns steering, counting pegs, and giving simple direction clues. The 23 steps below show how to make the orange wheel center, five yellow rim straps, glued rear supports, and direct shaft connection for this tabletop kids’ activity.
Before assembling the wheel, test the adhesive meant for foam and paper on scraps of your own noodle and covered cardboard. Adjust the approximate measurements below to fit the noodles you have.
Table of Contents
- Kids’ Activity: Time, Cost, and Adult Help
- Materials and Tools
- Check the Fit Before Cutting
- 1. Lay Out the Supplies
- 2. Cut the Cardboard Panel
- 3. Draw One Keyhole Opening
- 4. Cut Out the Keyhole
- 5. Cover the Cut Edges
- 6. Cut Two Rear Supports
- 7. Glue the Supports Behind
- 8. Cut Matching Wheel Disks
- 9. Spread Glue Between Layers
- 10. Align and Press the Disks
- 11. Trim the Orange Paper Tabs
- 12. Glue and Fold the Cover
- 13. Cover the Reverse Face
- 14. Cut the Foam Pieces
- 15. Roll the Internal Connector
- 16. Join the Blue Ring Ends
- 17. Anchor the First Rim Strap
- 18. Finish Five Yellow Straps
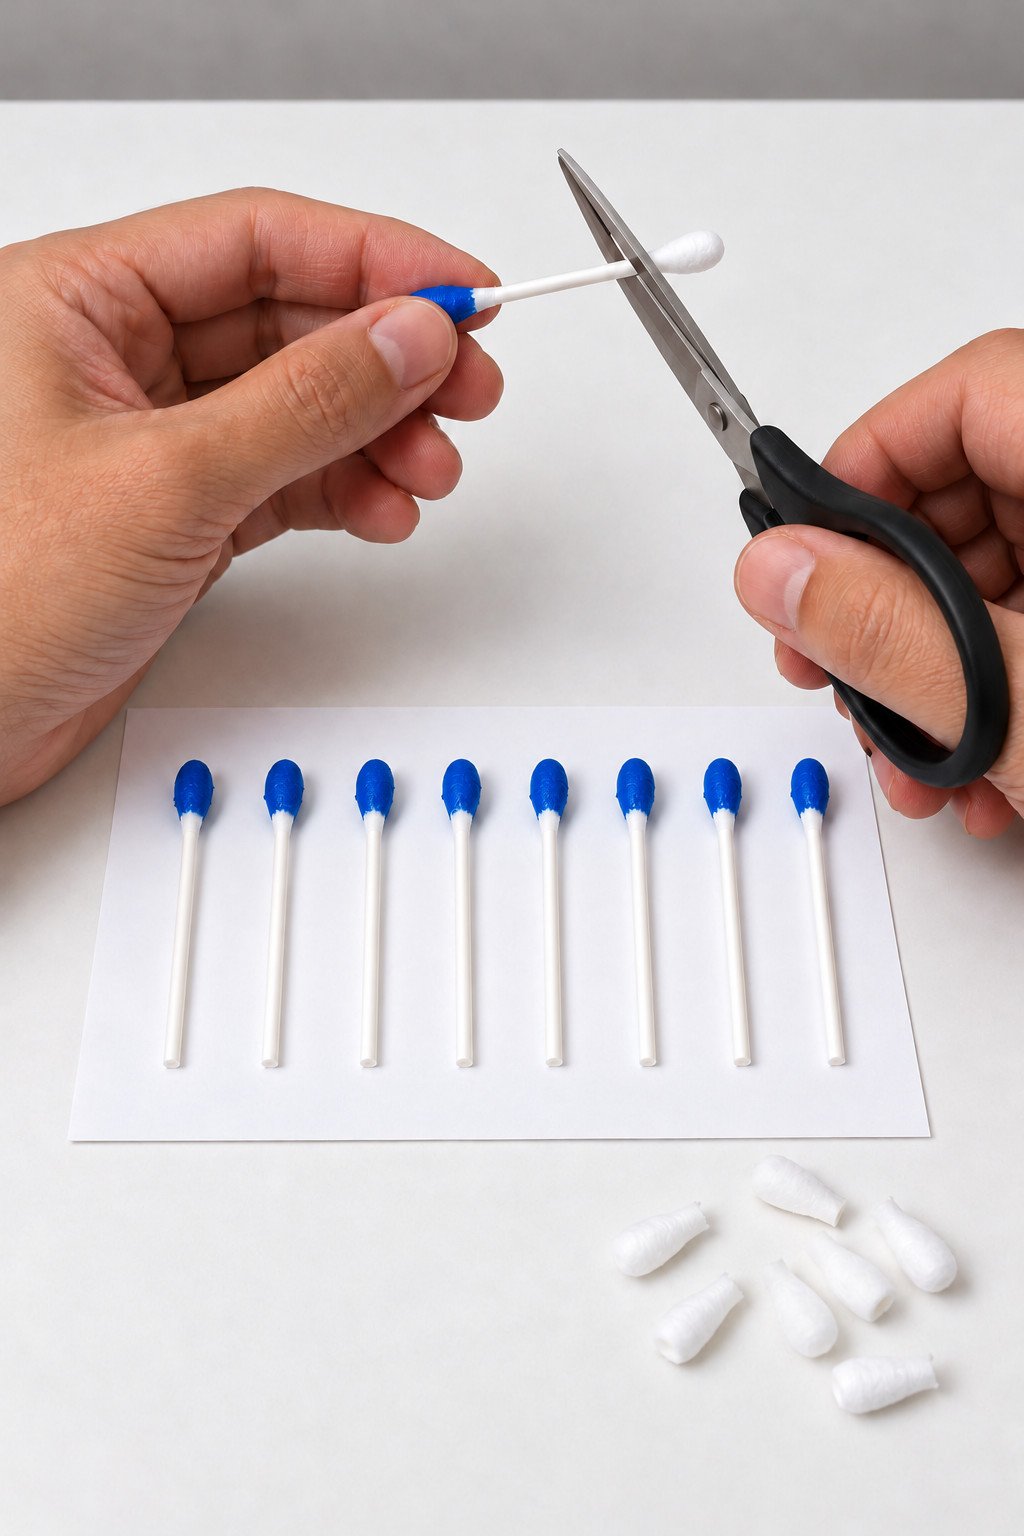
- 19. Paint Nine Cotton Tips
- 20. Trim the Swab Pegs
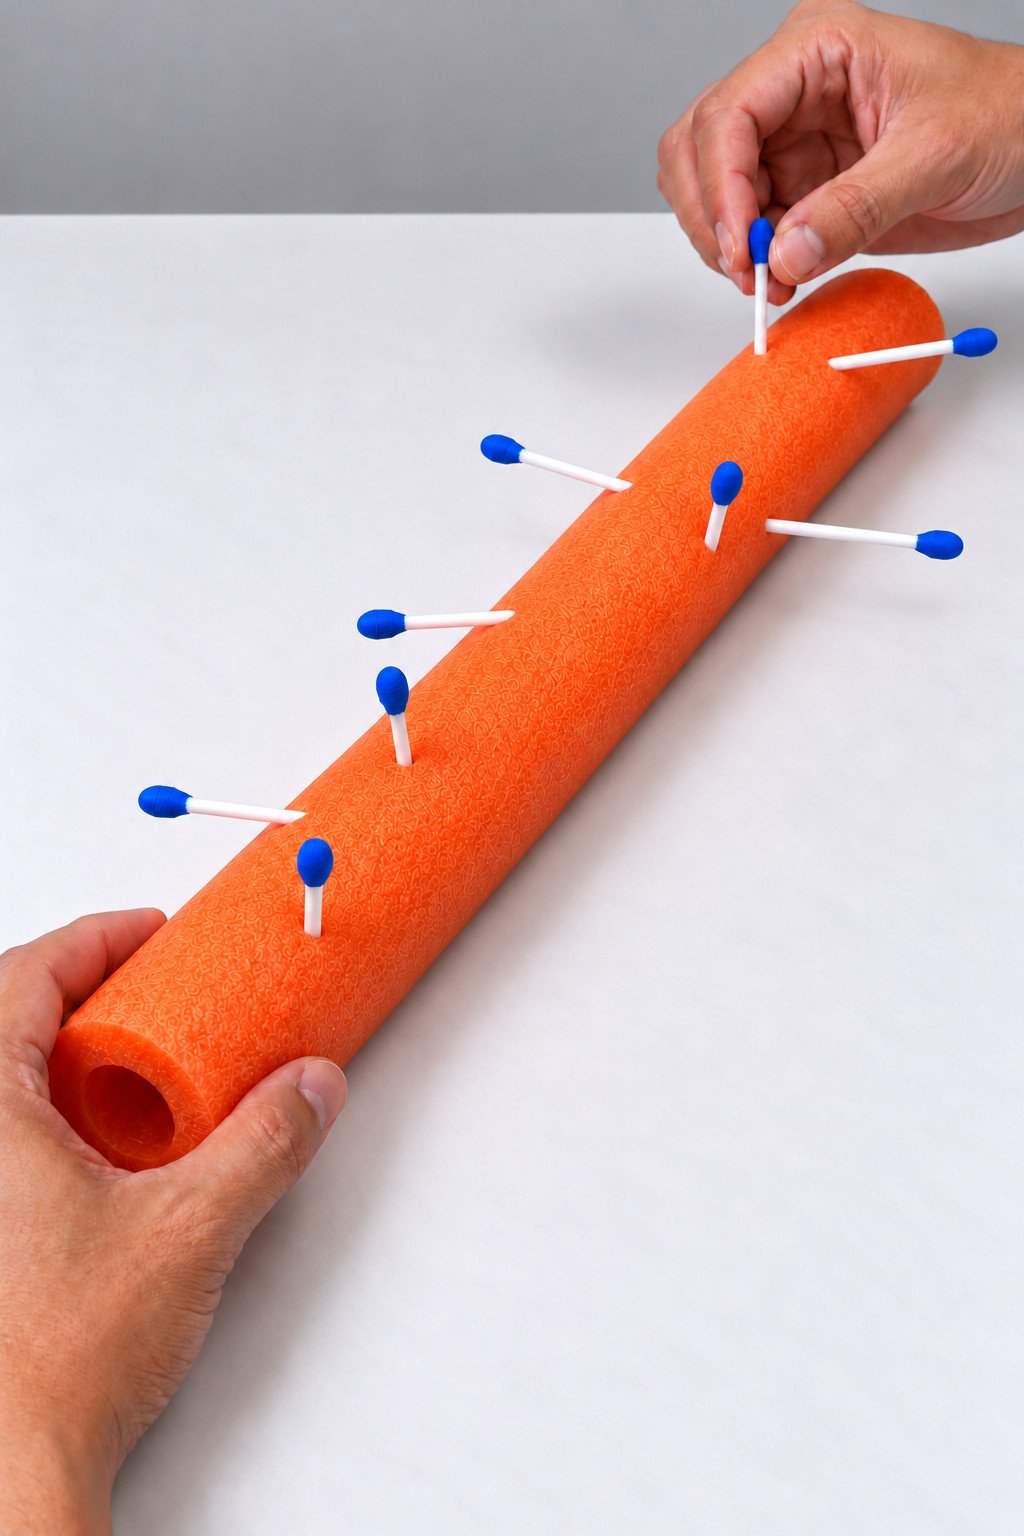
- 21. Insert Nine Staggered Pegs
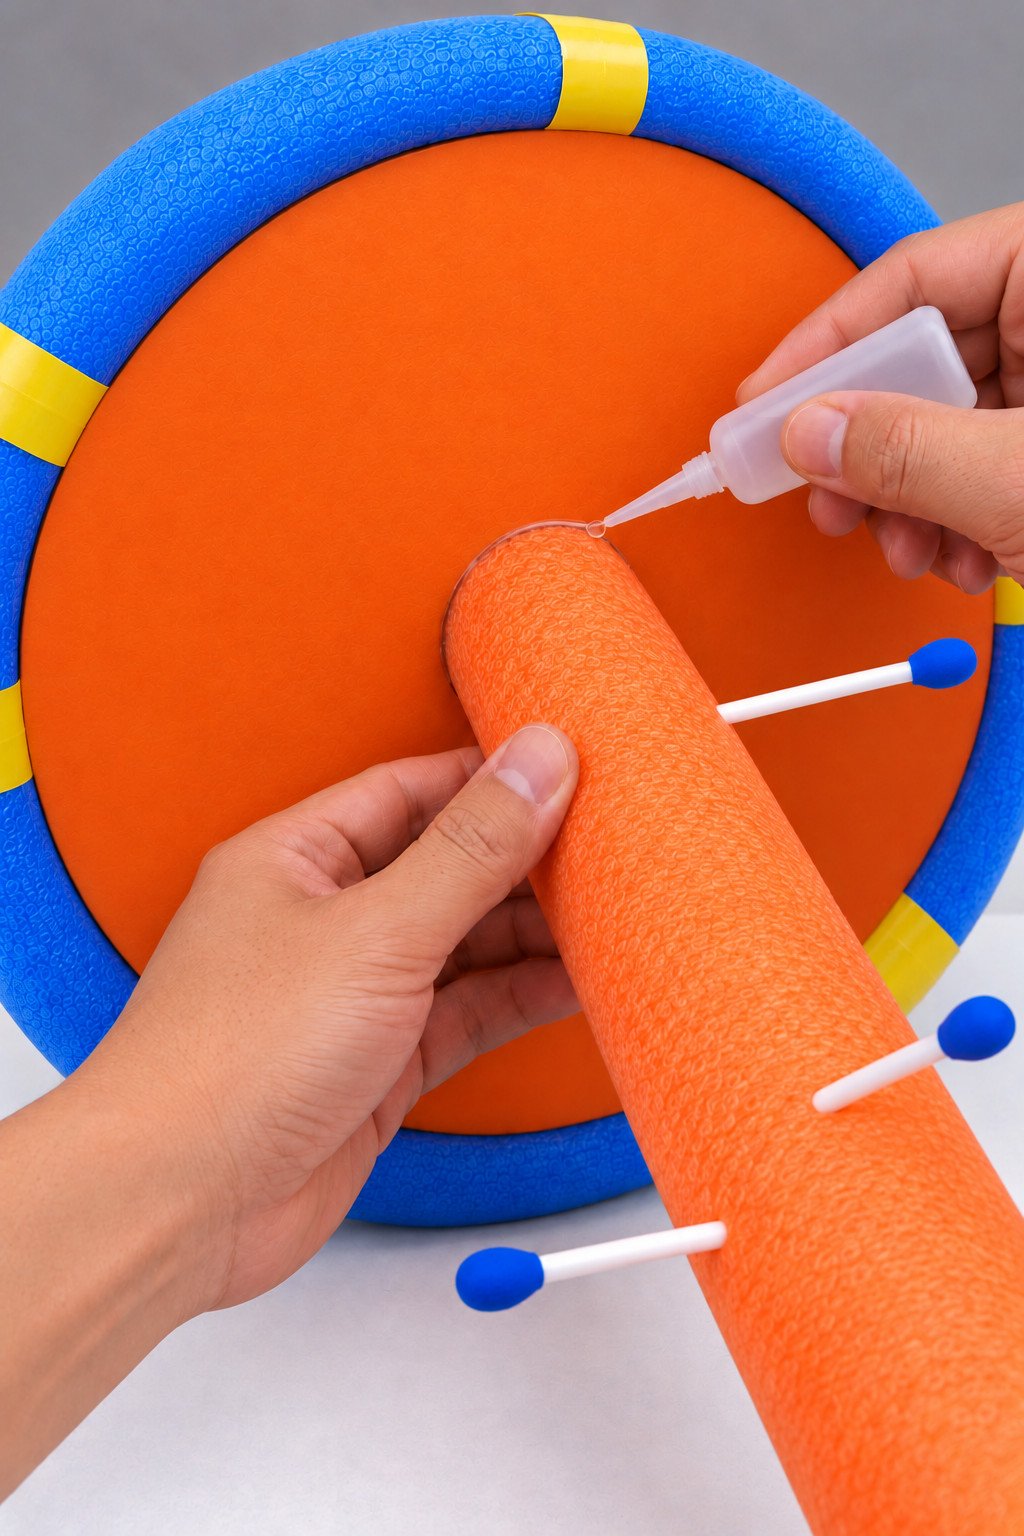
- 22. Glue the Shaft Directly
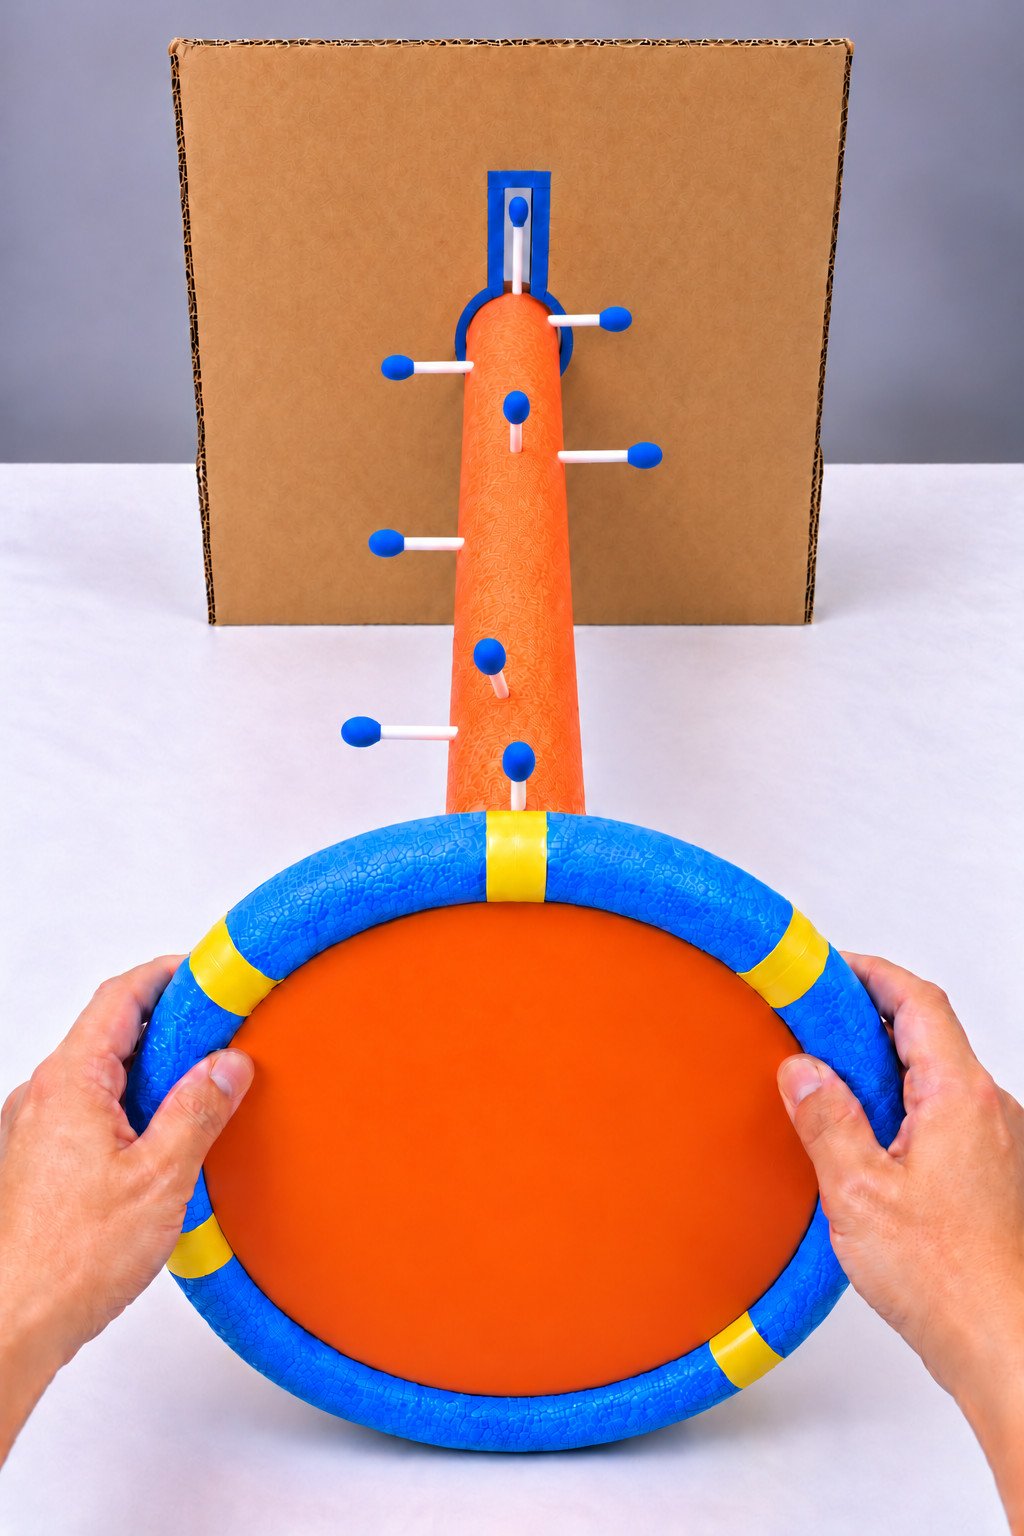
- 23. Assemble the Finished Game
- How to Use This Kids’ Indoor Activity
- Fix Snags Before Playing
- More Cardboard Craft Ideas
Kids’ Activity: Time, Cost, and Adult Help
Allow an estimated 60 to 90 minutes of active adult assembly, plus paint drying and the full cure time on each adhesive label. Plan to finish the glue work the day before playing. Children can help choose colors, count the nine pegs, and decorate spare cardboard; an adult should handle blades, trimmed stems, and the foam adhesive.
For U.S. shopping, budget approximately $20 to $30 before tax and shipping when buying the basic supplies and reusing cardboard and tools. If paper, tape, paint, swabs, and white glue are already available, set aside roughly $8 to $15 for inexpensive noodles and a plastics bonding kit. These are planning ranges, not a guaranteed shopping cart.
Prices checked October 28, 2026 included a 47 inch pool noodle at $1.25, yellow Duck tape at $3.50, and a Loctite Plastics Bonding System at $4.98. Allow extra for a blue tape roll, paper, paint, swabs, and PVA glue. Noodle size, color, stock, and adhesive choice can change the total.
Materials and Tools
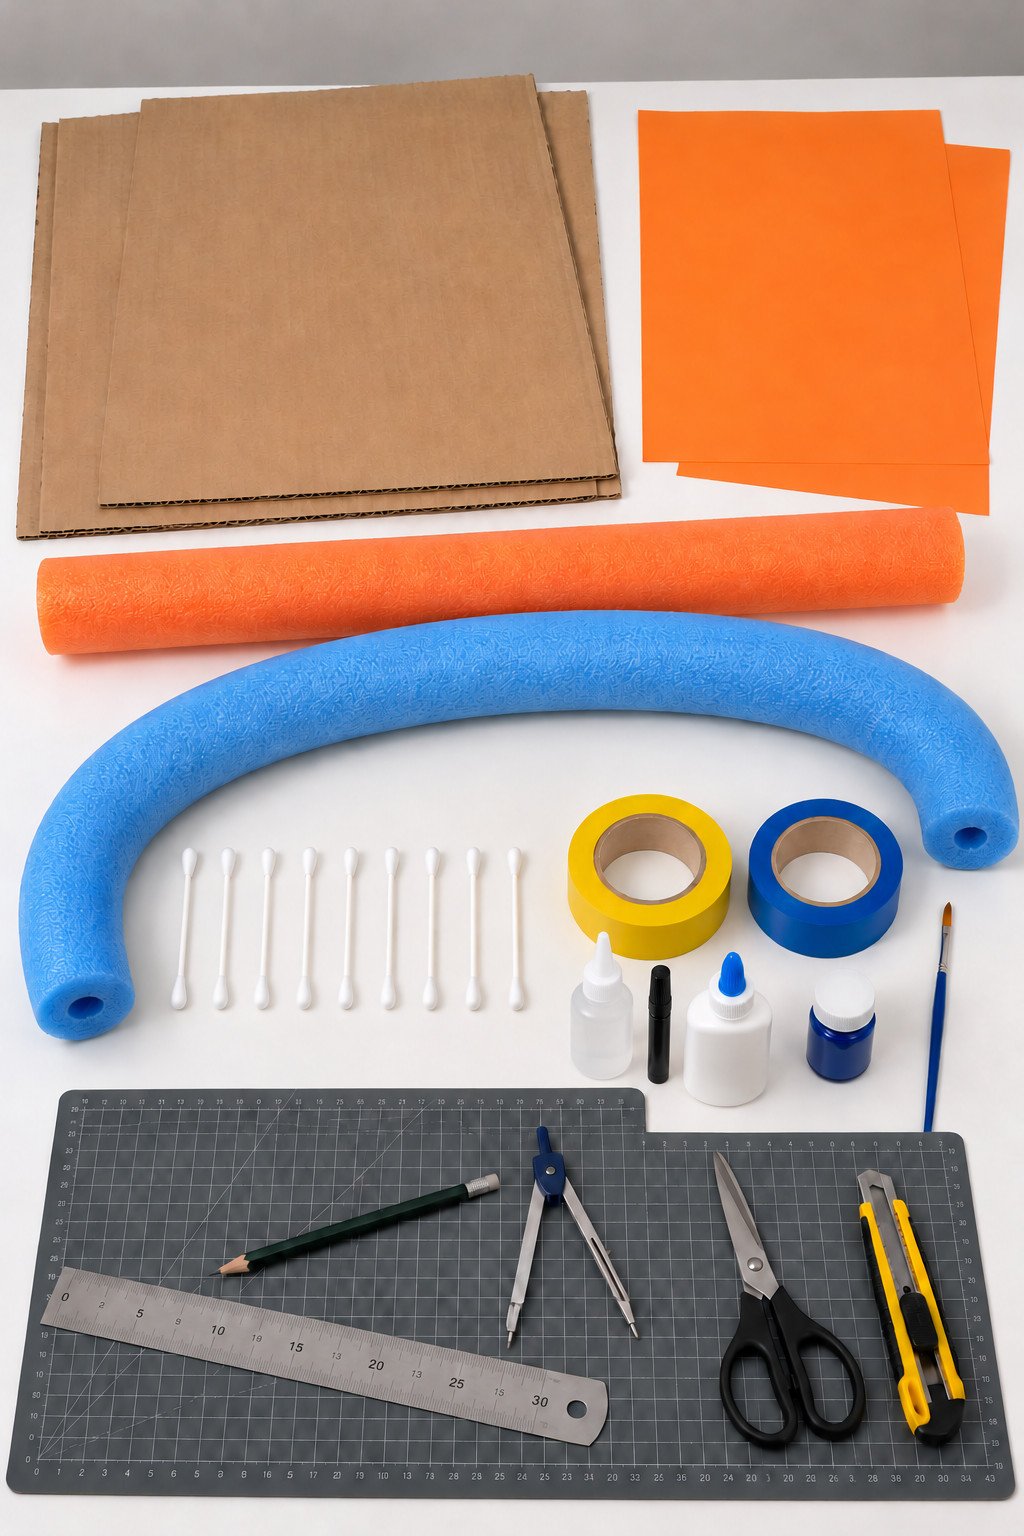
- Sturdy corrugated cardboard for one panel, two wheel disks, two triangular supports, and a small rolled connector.
- One blue hollow pool noodle, about 2 inches (5 cm) thick, and one orange noodle, about 2⅜ inches (6 cm) thick.
- Orange paper: two pieces about 14 inches (35 cm) square. Choose uncoated paper.
- Blue and yellow craft tape; narrow strips around ¾ inch (2 cm) wide are convenient.
- Nine cotton swabs with firm paper stems, blue acrylic craft paint, and a small brush.
- PVA craft glue for paper and cardboard, plus a separate adhesive rated for both the foam noodle and the paper covered cardboard.
- Pencil, ruler, compass or round template, scissors, craft knife, cutting mat, and a protected work surface.
Choose the foam adhesive first. Pool noodles may use polyethylene (PE), which ordinary white craft glue may not bond. Henkel's plastics bonding data sheet lists PE and cardboard, but excludes polystyrene foam and foam rubber and is not meant for repairs that need high flexibility. A listing like this does not guarantee a bond on every foam noodle. Identify the material, follow the selected product's instructions, and test a cured scrap joint. Keep cyanoacrylate adhesive away from the cotton tips.
Check the Fit Before Cutting
Size the round opening to the orange shaft so it closely surrounds the foam. For a 2⅜ inch (6 cm) shaft, start with a finished, taped opening about 6.1 to 6.2 cm (about 2.4 inches) across. That leaves only 1 to 2 mm of total clearance across the diameter, not 1 to 2 mm on each side. Adjust this target to fit your noodle.
Trace the shaft itself, cut conservatively, and trim only enough for it to slide and turn without squeezing the foam. Account for the blue tape before making the final fit. The upper slot stays open above the shaft and must clear the painted cotton tip.
1. Lay Out the Supplies
Sort the cardboard, two noodles, orange paper, colored tape, nine swabs, paint, and two types of glue. Put a cutting mat under the cardboard. Keep the orange shaft and blue rim materials separate so their colors stay consistent throughout the build.
2. Cut the Cardboard Panel
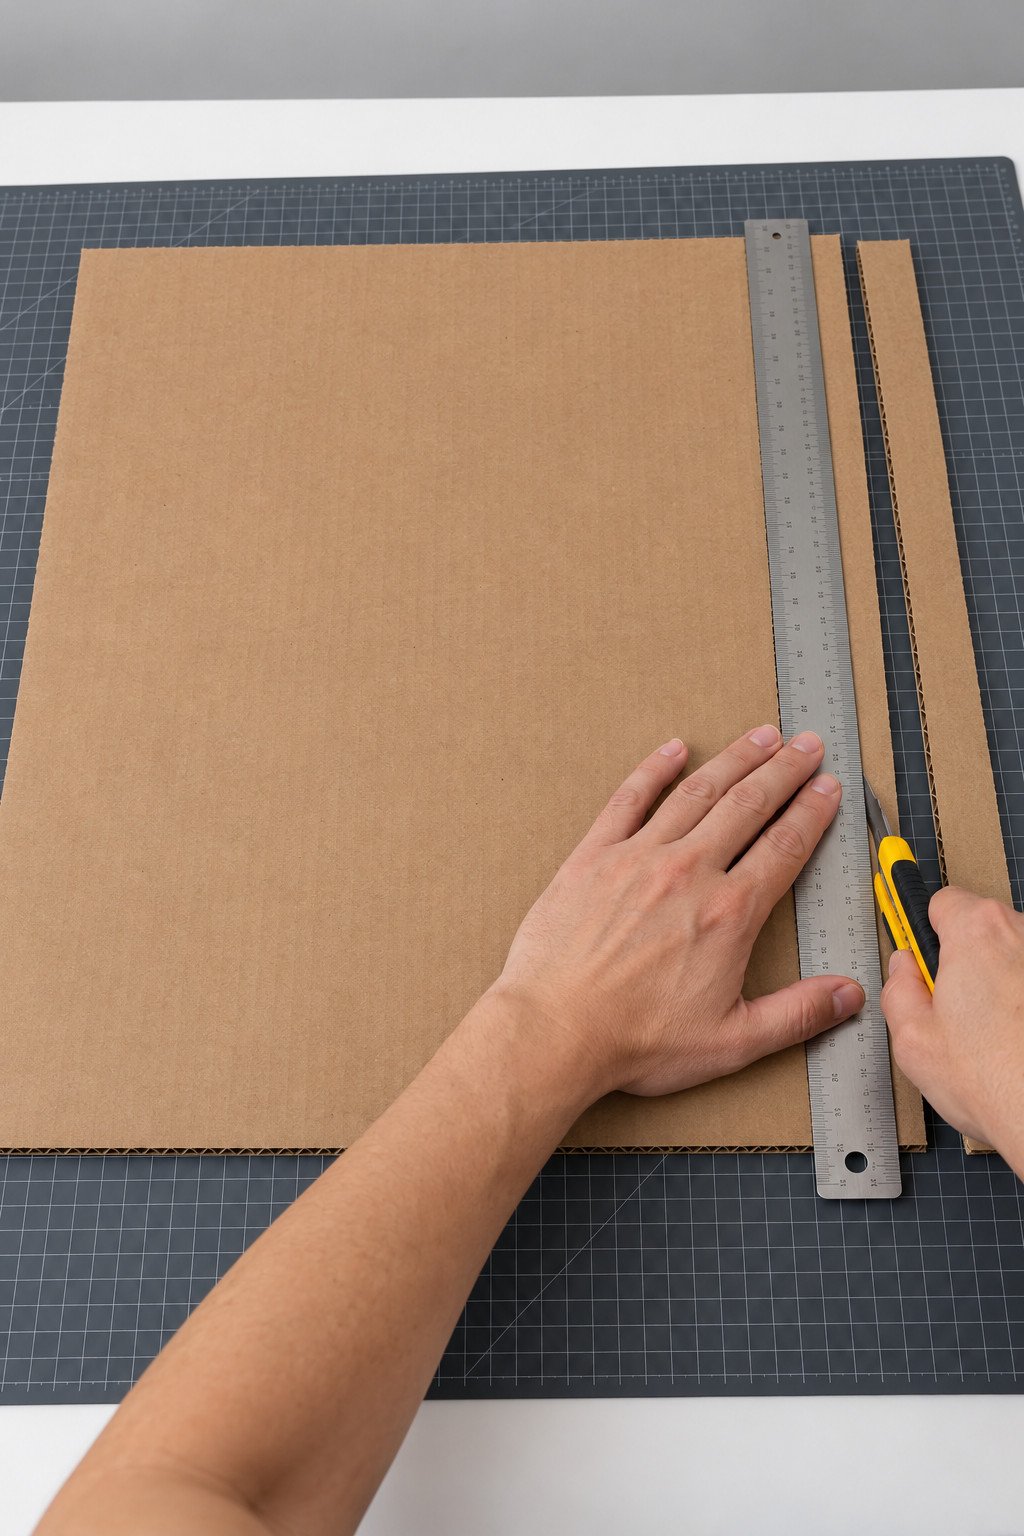
Mark a rectangle about 16 × 18 inches (40 × 45 cm) on sturdy cardboard. Hold the ruler firmly and cut beside its edge on the mat. Make several controlled passes rather than forcing the blade through the cardboard at once.
3. Draw One Keyhole Opening
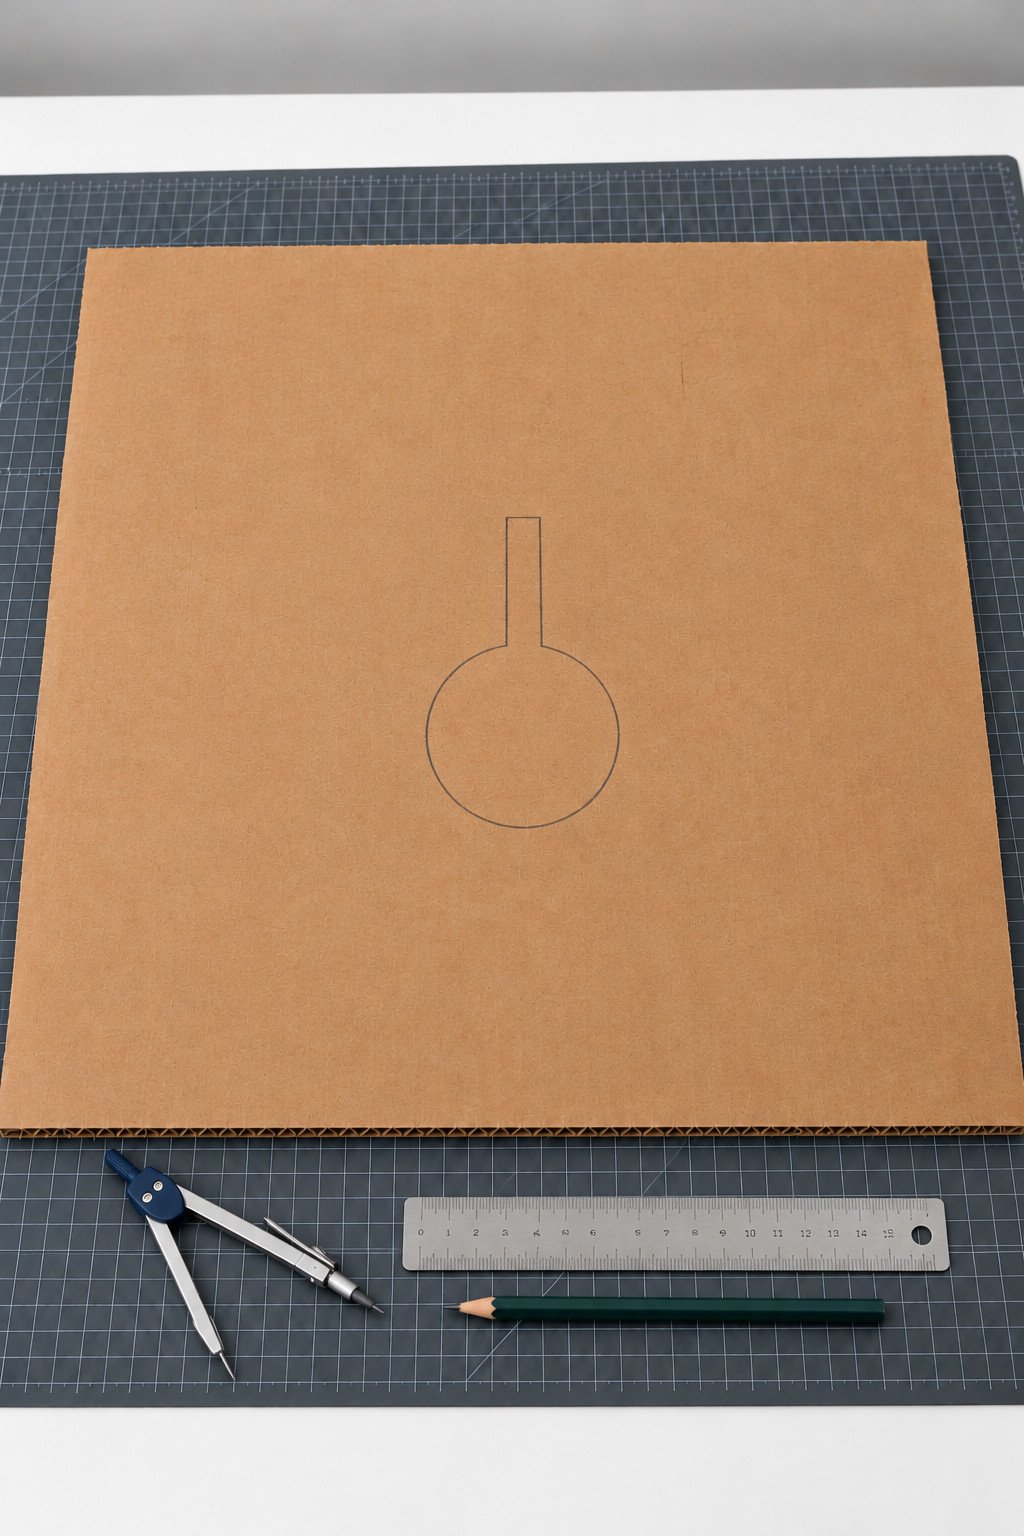
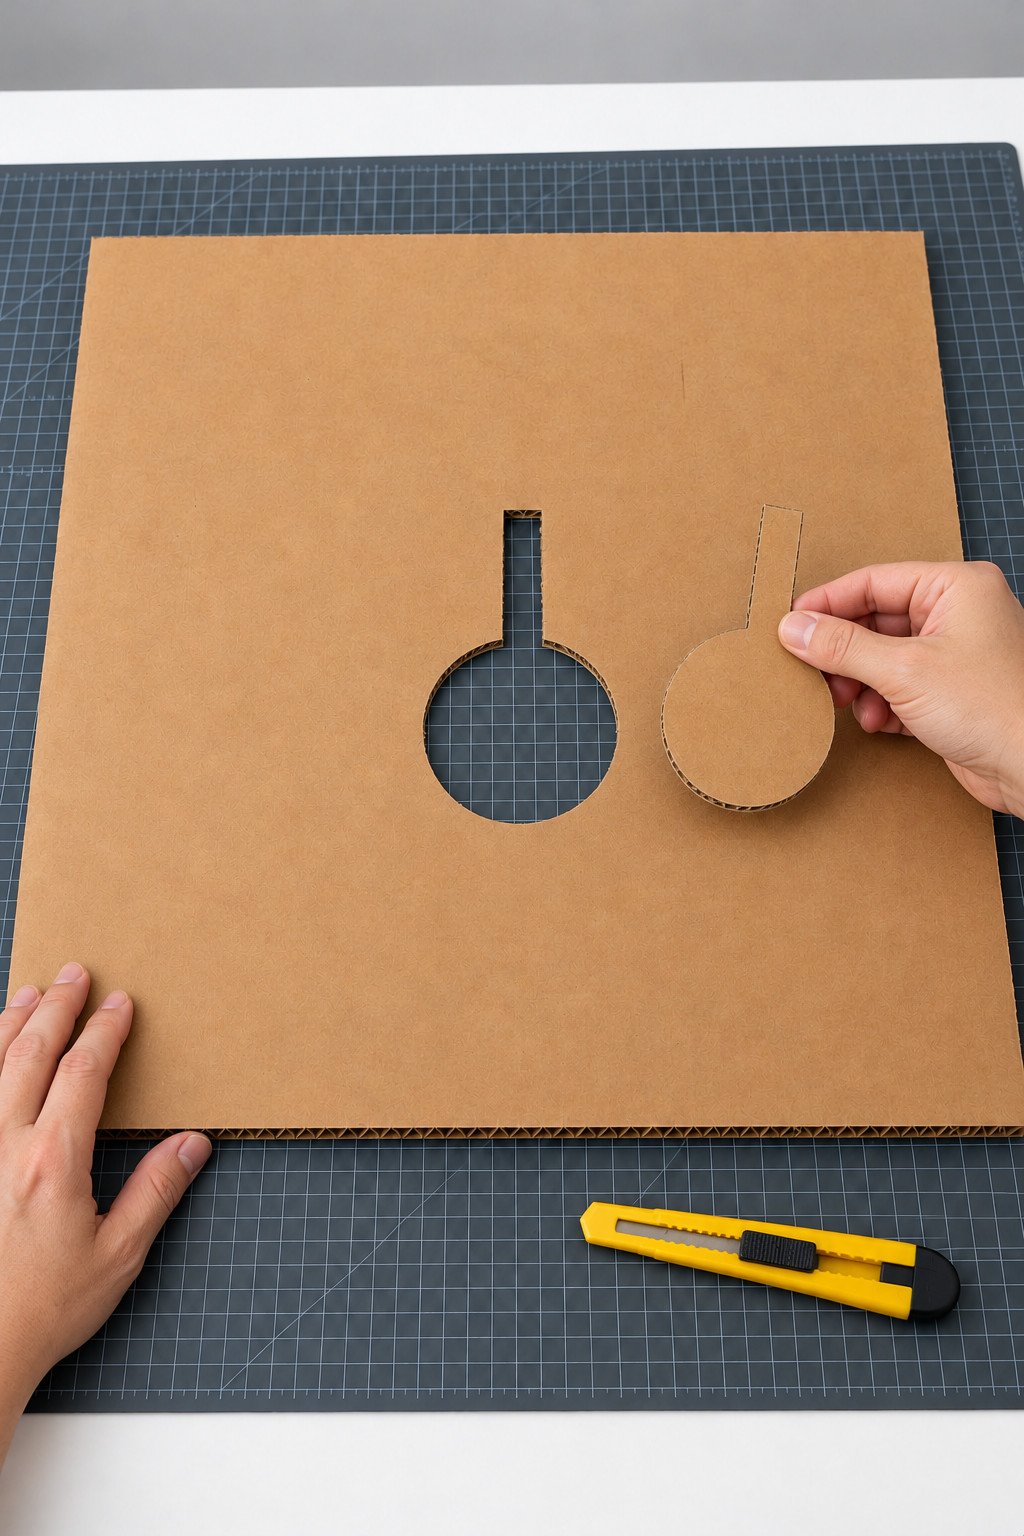
Trace the orange shaft near the panel’s lower middle. Allow for a close sliding fit after taping: about 2.4 inches (6.1 to 6.2 cm) finished diameter for a shaft about 2⅜ inches (6 cm) thick. Add a centered slot about ½ inch (1.3 cm) wide rising 2¾ inches (7 cm) above the circle. Use the ruler to keep both slot lines straight.
4. Cut Out the Keyhole
Cut along the circle and the two slot edges. Remove the center as one piece, then trim any torn fibers. Test the unpegged orange noodle. Trim only enough to allow smooth turning and sliding, keeping the round edge close to the foam instead of leaving a wide gap.
5. Cover the Cut Edges
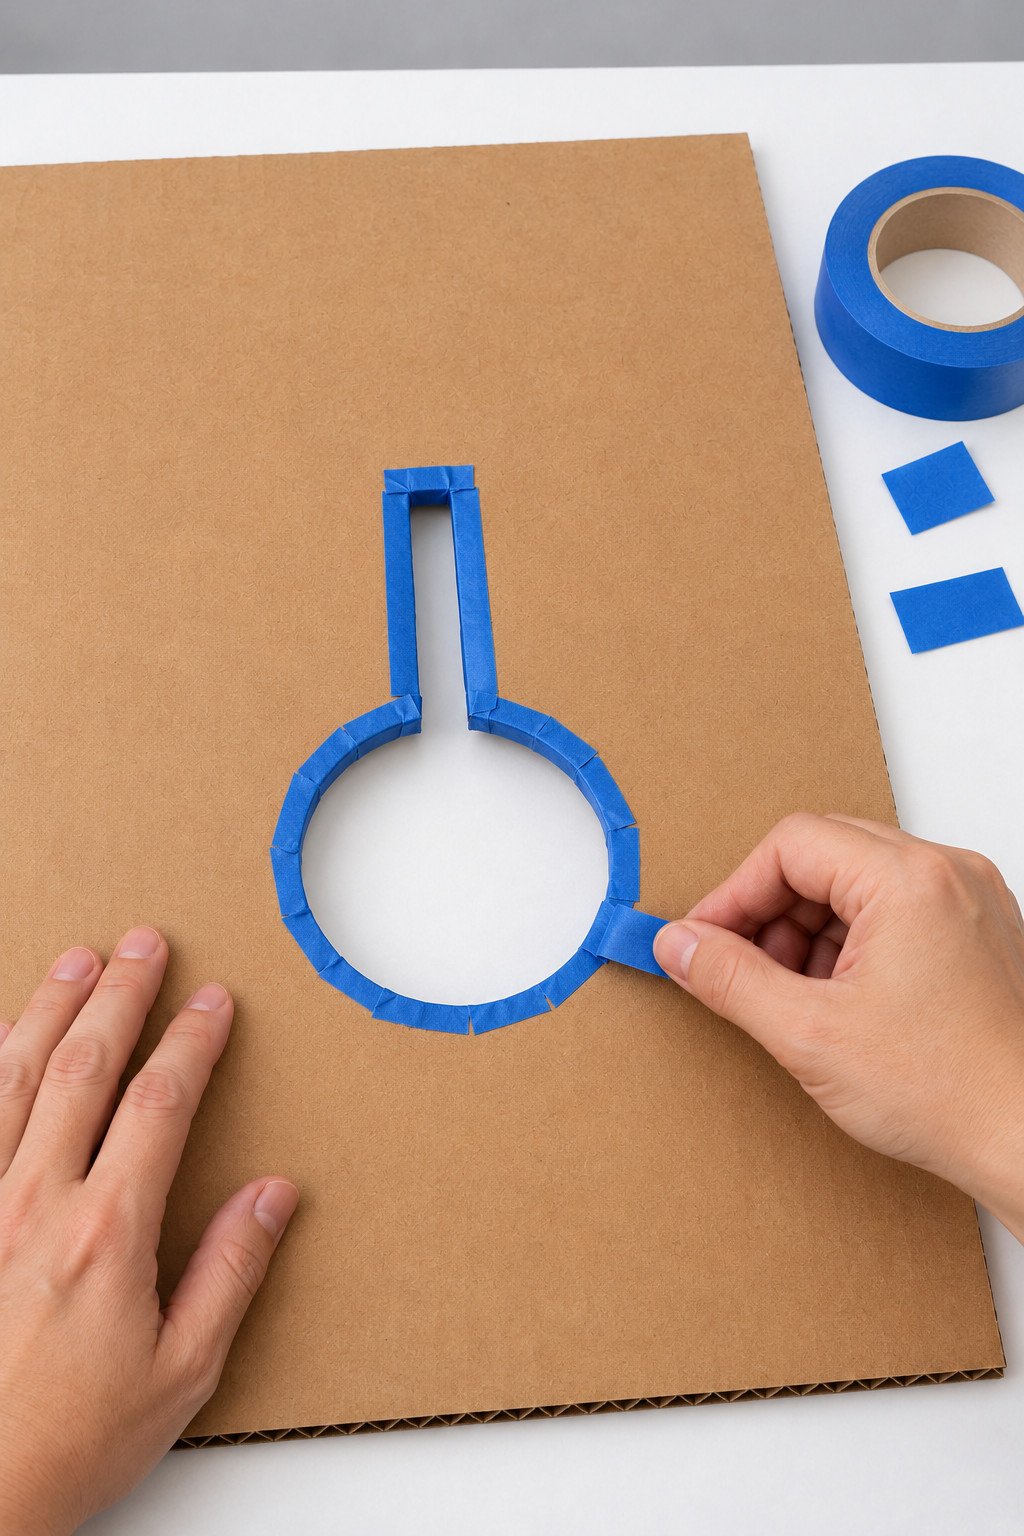
Apply short blue tape strips around the circular edge and longer strips along the slot. Fold the tape flat over the raw edges. Test the shaft again: the finished opening should closely surround it while allowing easy turning and sliding. Trim and tape again at any tight spot, keeping the upper slot clear.
6. Cut Two Rear Supports
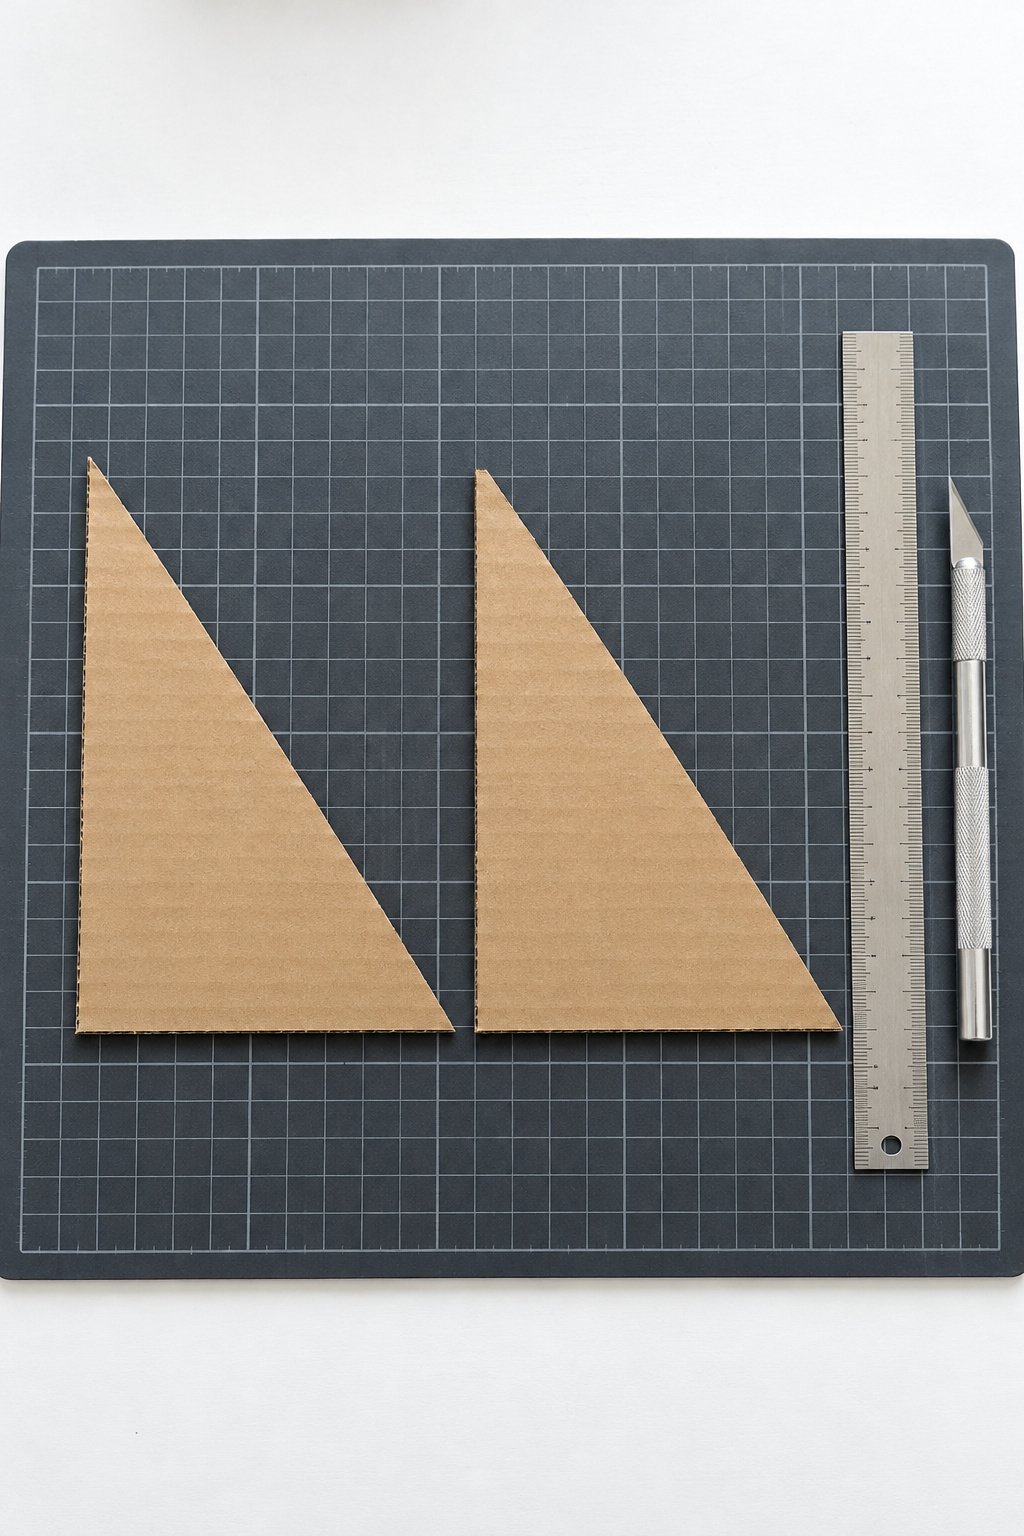
Draw and cut two matching right triangles with bases about 6 inches (15 cm) long and heights about 8 inches (20 cm). Give each a straight base and vertical back edge so both supports can sit evenly behind the panel.
7. Glue the Supports Behind
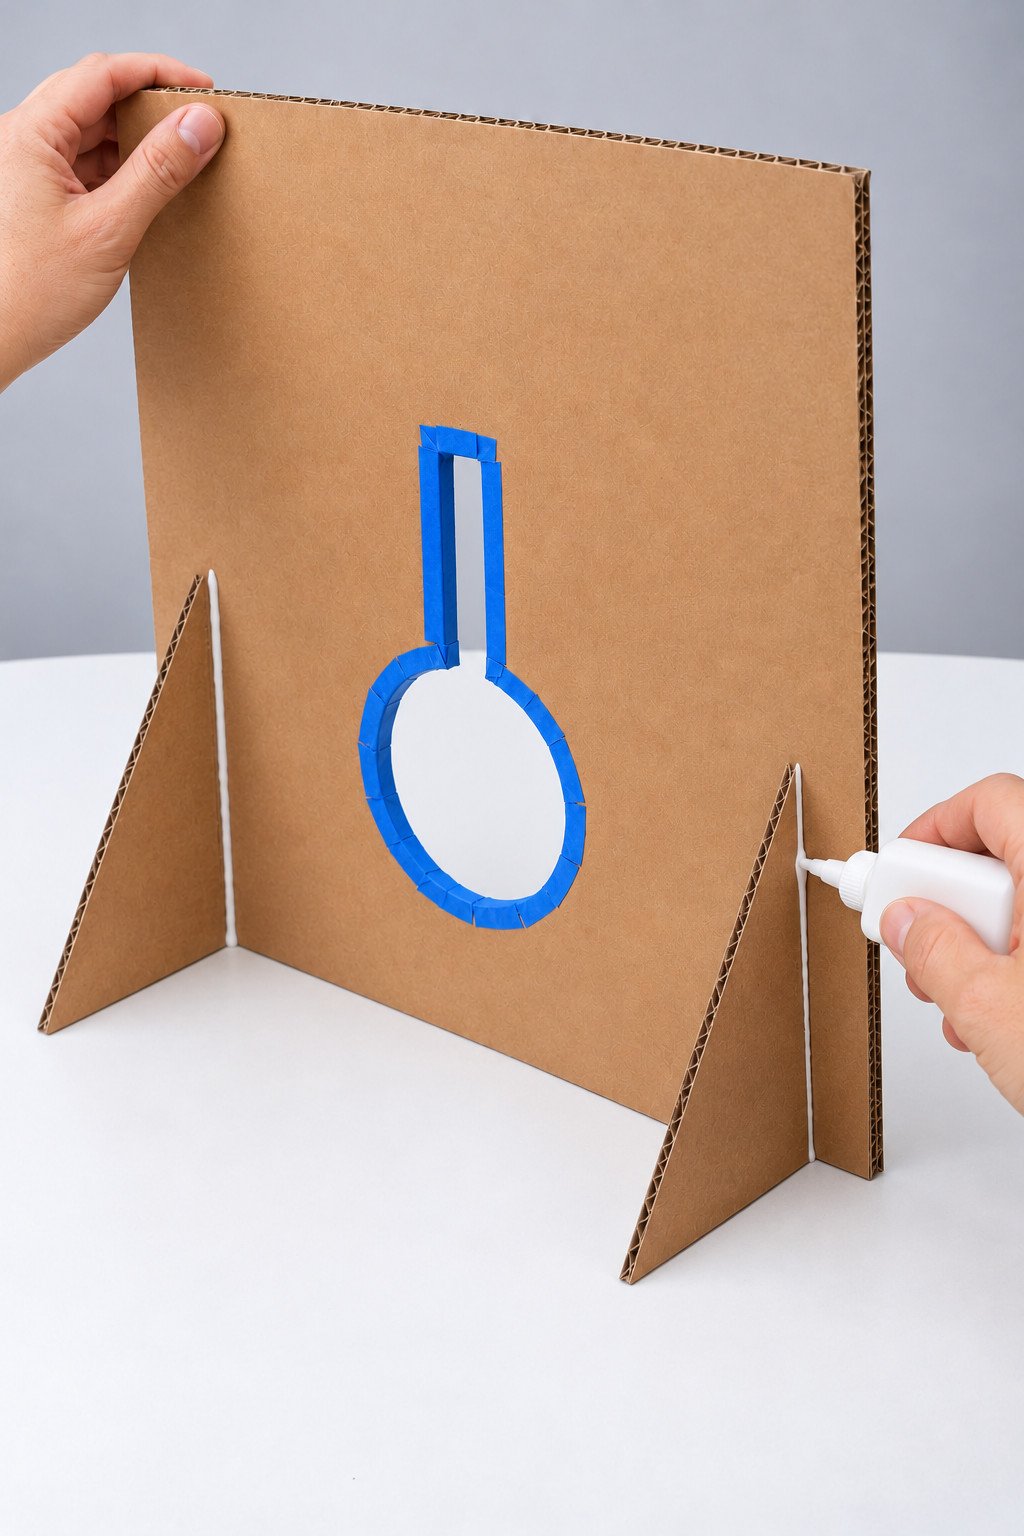
Apply PVA glue along each triangle’s vertical contact edge. Press the triangles perpendicular to the back of the panel near its sides, with their bases level with the panel’s bottom edge. Add a small glue fillet at each seam and brace the pieces until dry. The feet rest freely on the table.
8. Cut Matching Wheel Disks
Draw two cardboard circles about 12¼ inches (31 cm) in diameter. Cut both and place one over the other to check the edges. These layers form a solid wheel center; do not cut a shaft hole through them.
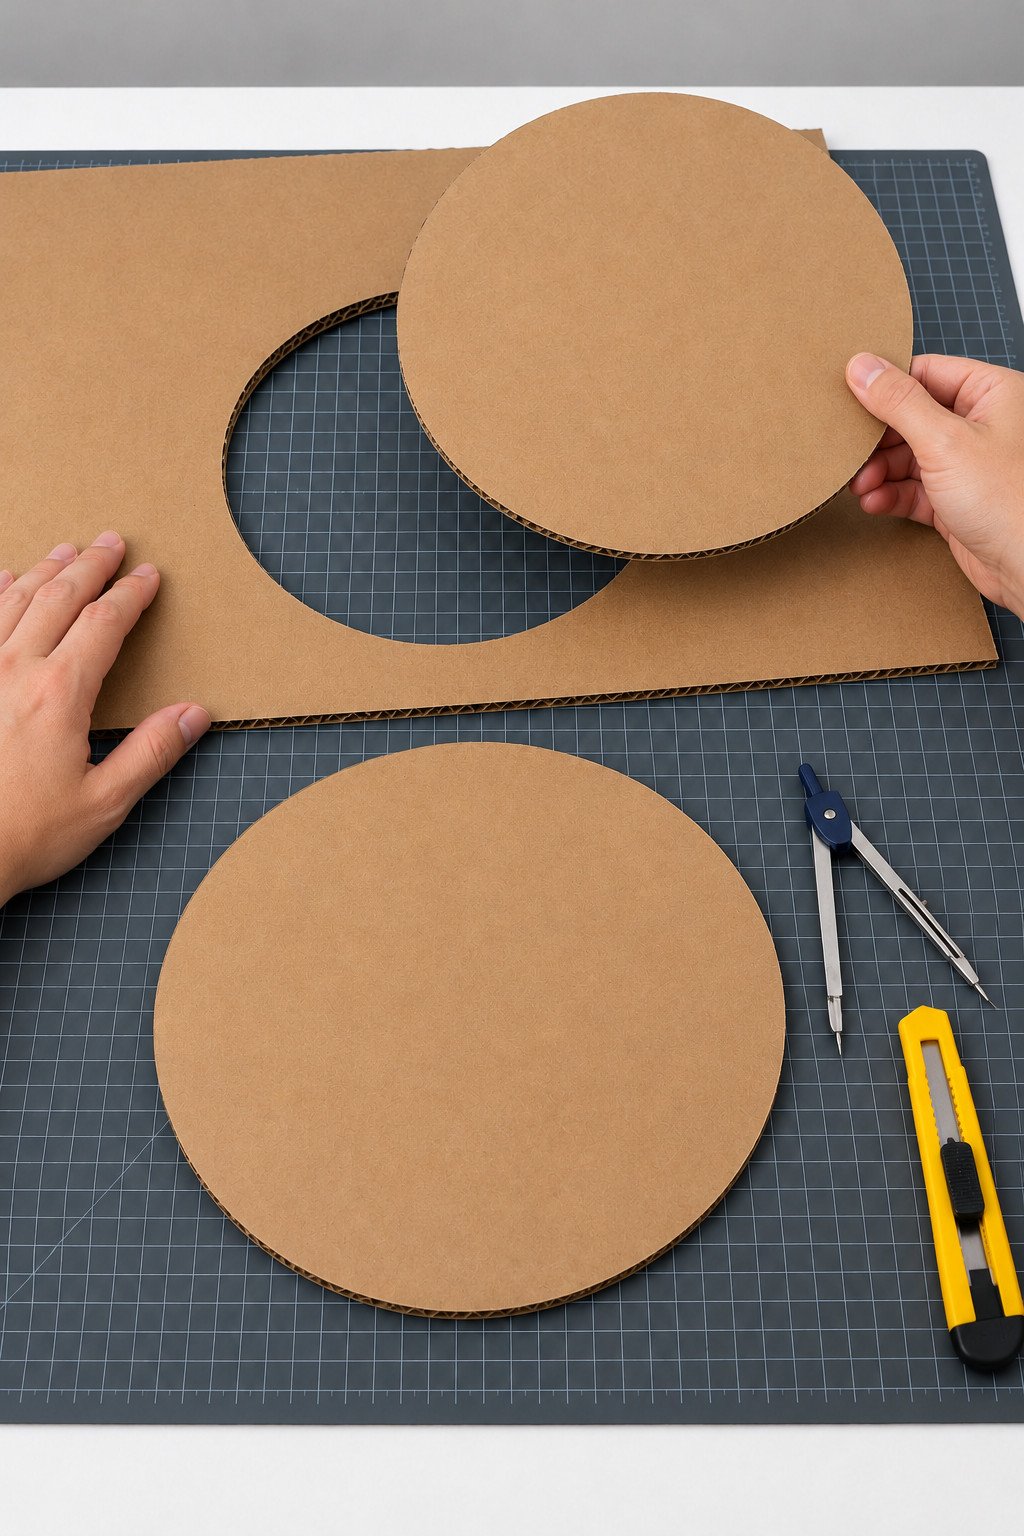
9. Spread Glue Between Layers
Squeeze a thin spiral of PVA glue over one cardboard disk, working from the center to just inside the edge. Keep the bead thin so it spreads evenly under pressure without flooding the surface. If the cardboard has a clear flute direction, rotate the second disk a quarter turn before joining the layers.
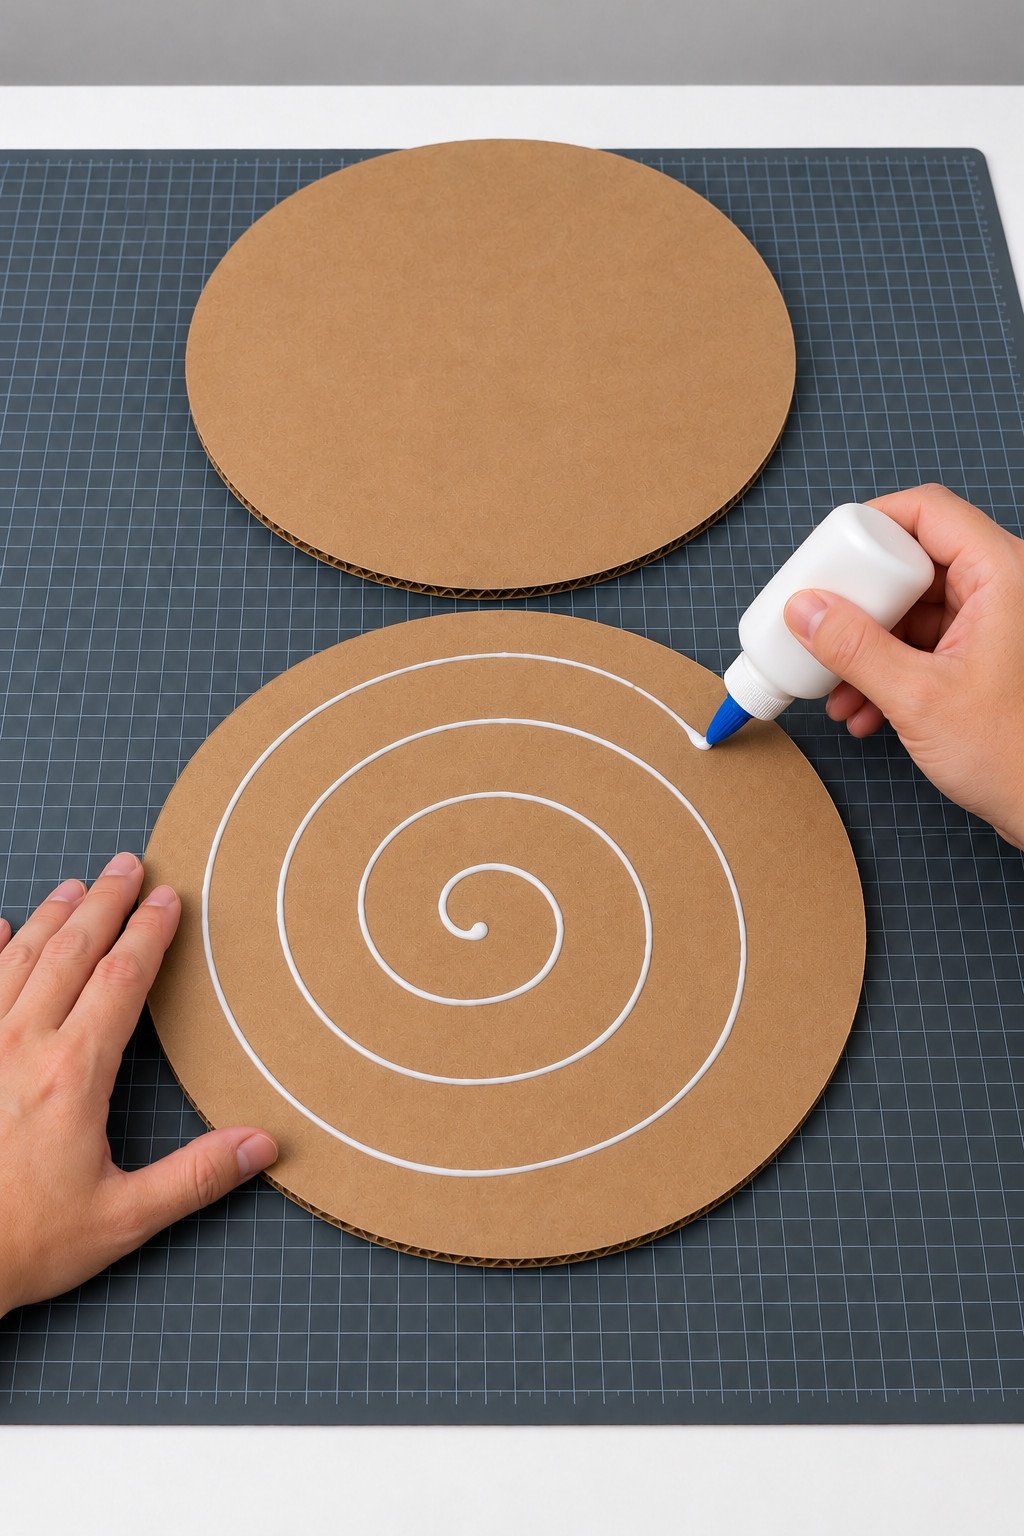
10. Align and Press the Disks
Lower the second disk onto the glue and align the circular edges. Press from the center outward. Place the stack under a flat board with light weights and let the glue dry according to its label before covering it.
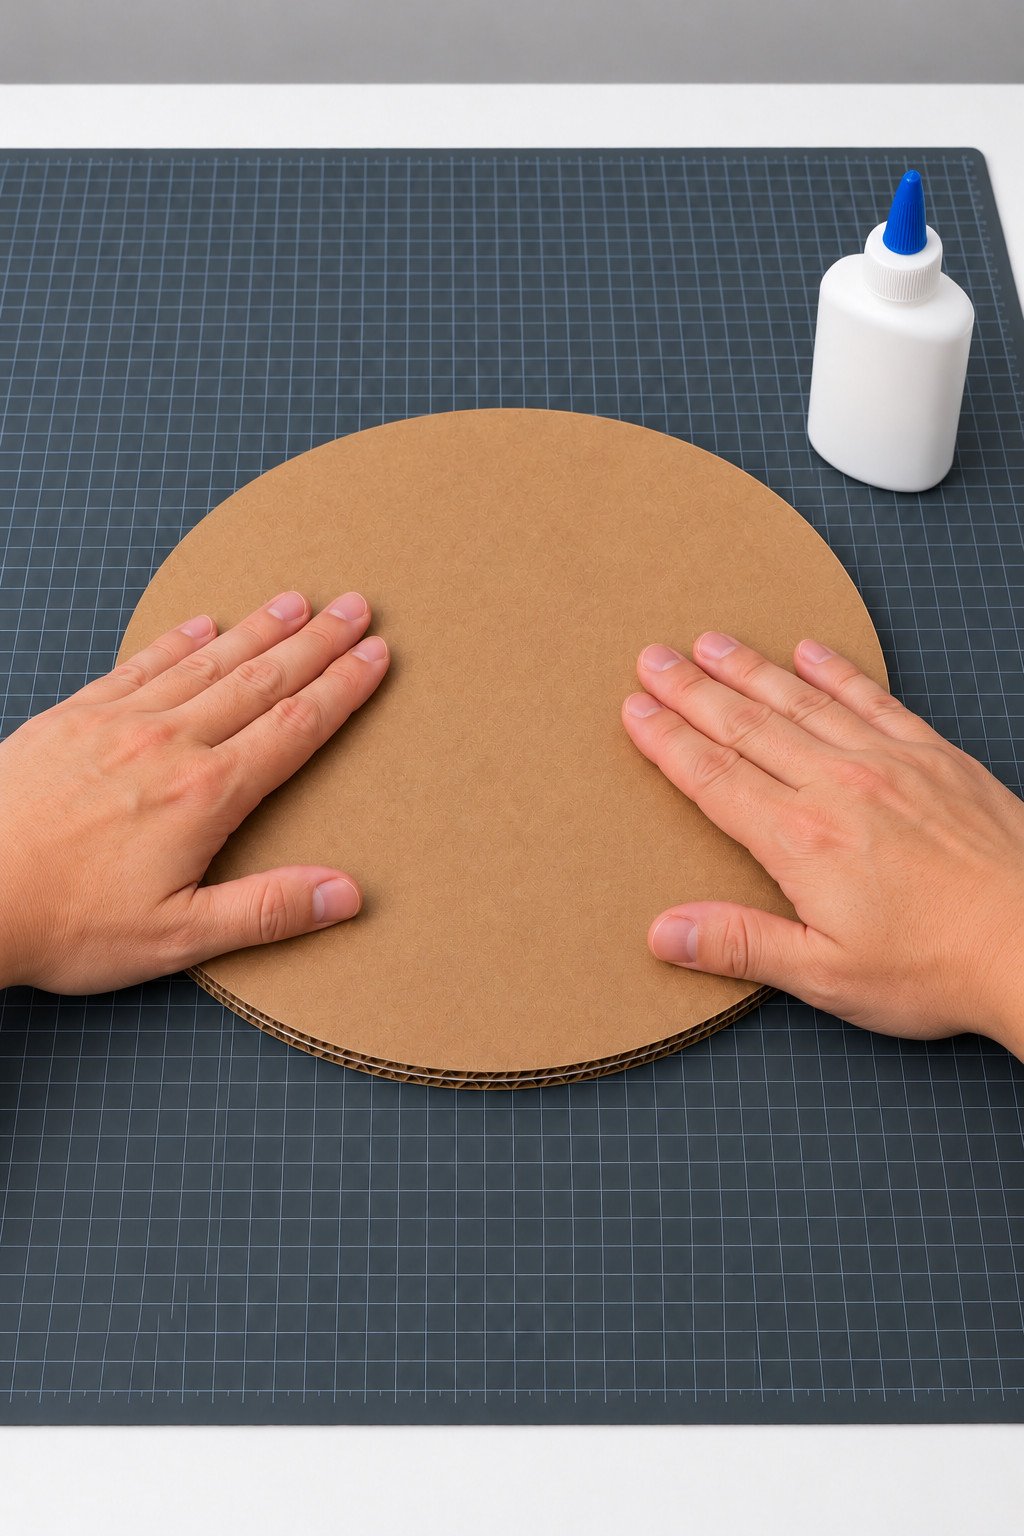
11. Trim the Orange Paper Tabs
Center the dry disk on orange paper and trace its edge. Cut around it with an extra margin of about ⅝ inch (1.5 cm). Snip the margin into tabs, stopping at the traced circle so the front covering stays intact.
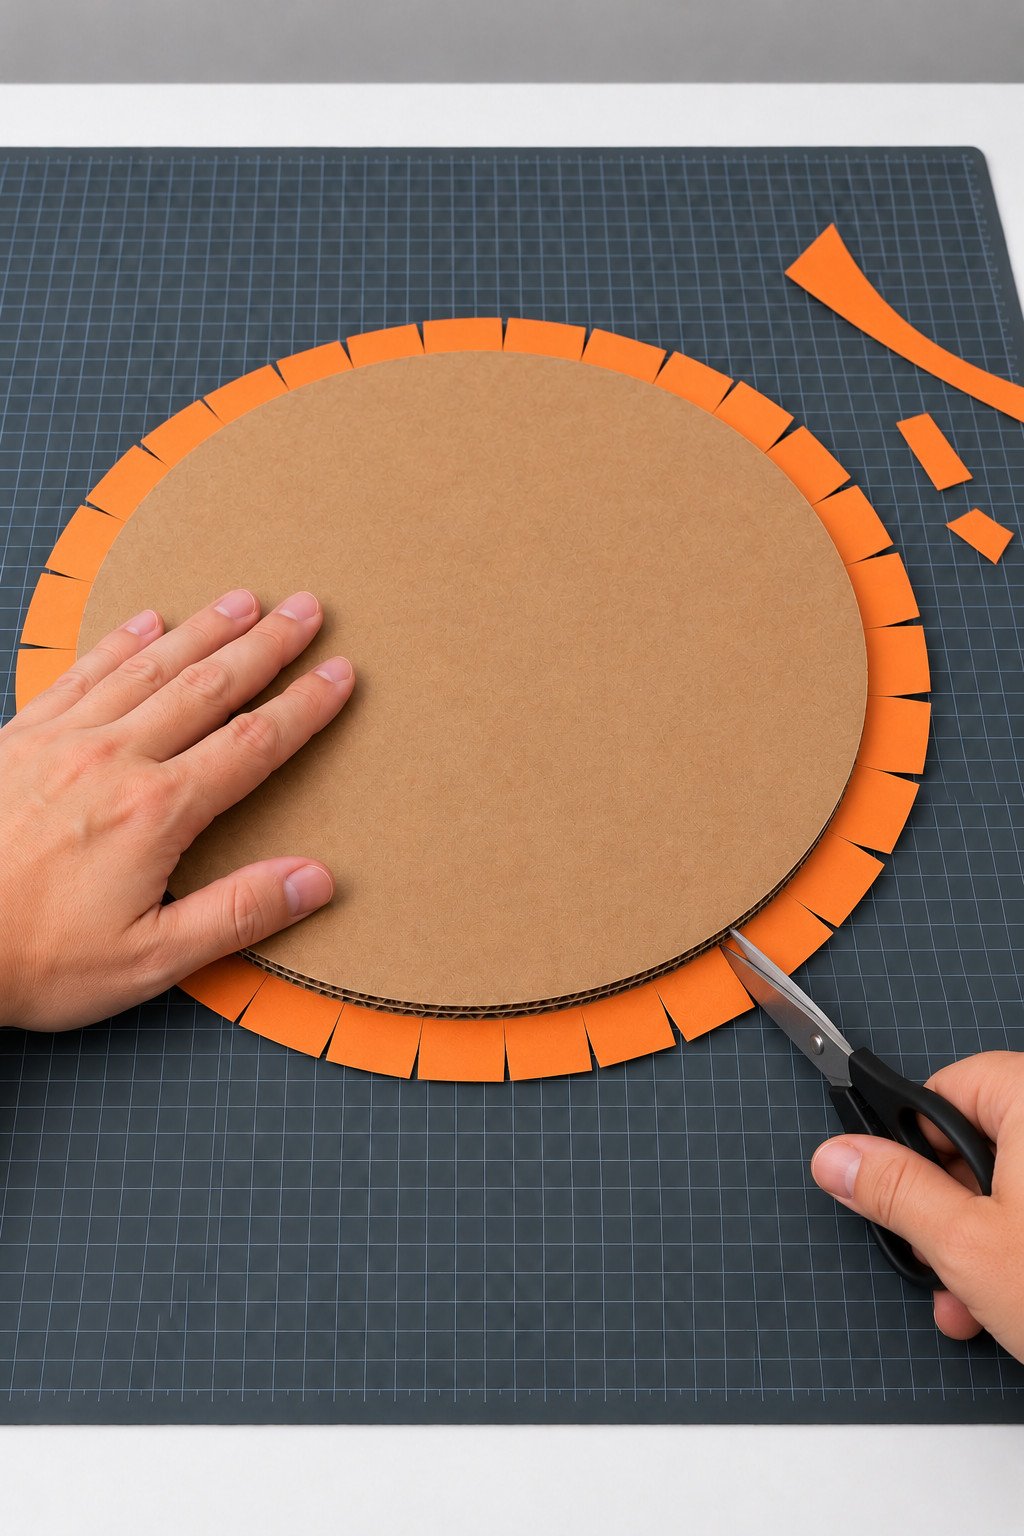
12. Glue and Fold the Cover
Apply a thin coat of PVA to one face of the disk and smooth it onto the paper center. Turn it over. Glue the tabs and fold them snugly over the cardboard edge, overlapping them neatly on the back.
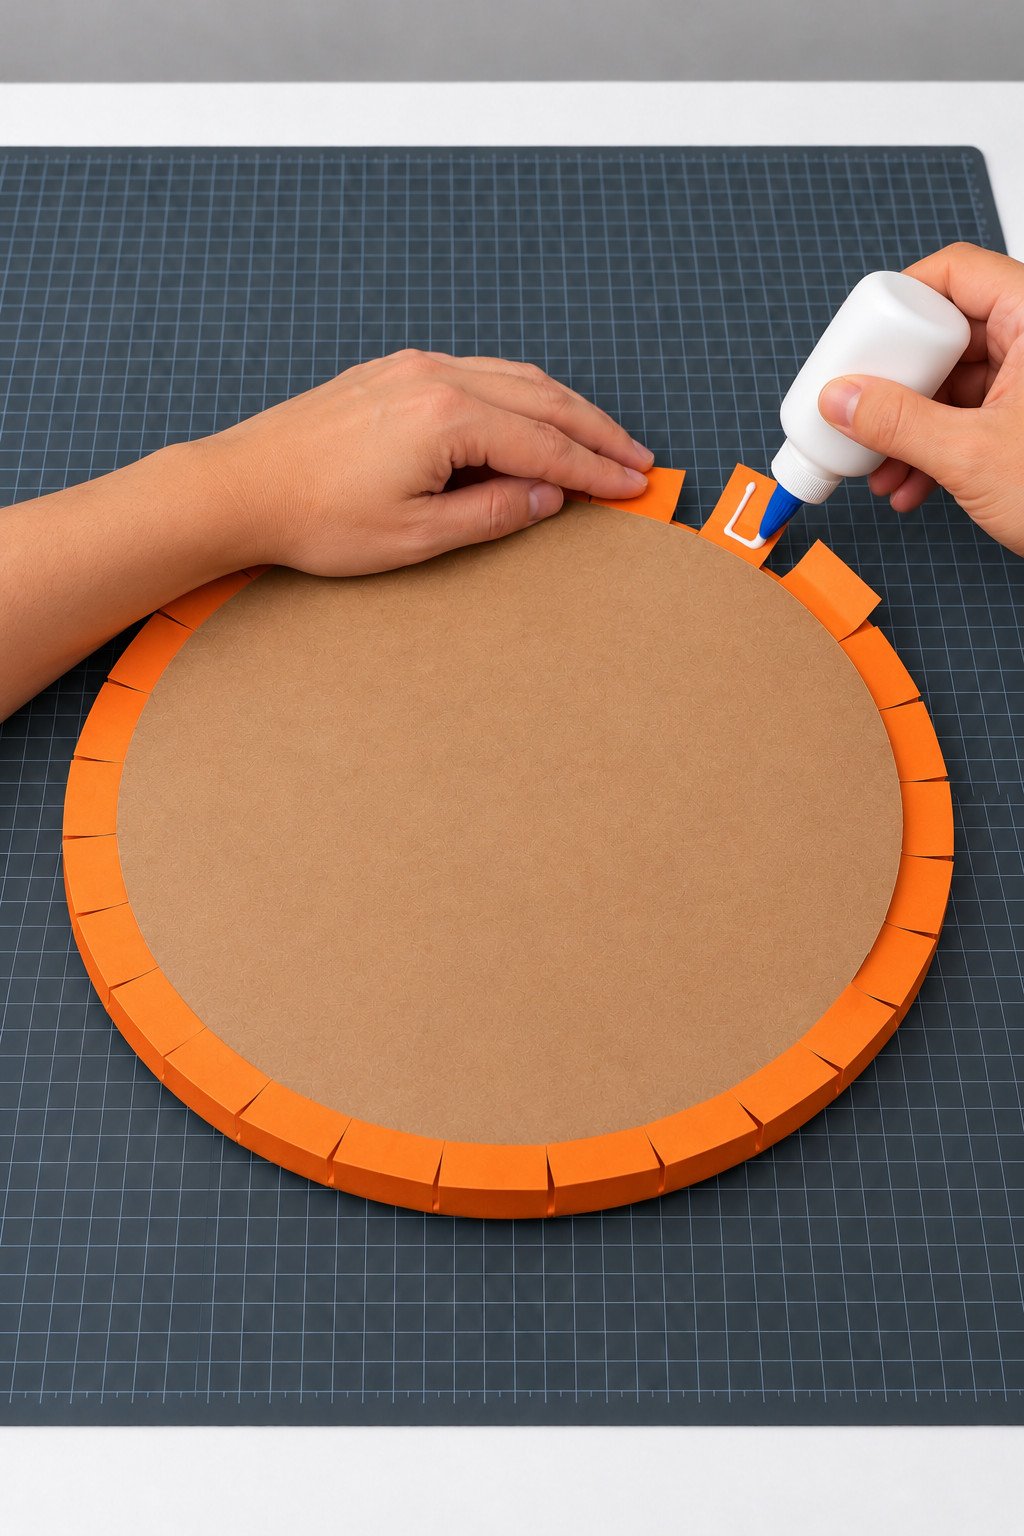
13. Cover the Reverse Face
Cut a second orange paper circle slightly smaller than the cardboard disk. Glue it over the folded tabs and smooth it flat. Let both faces dry. Mark the center lightly on the face that will receive the orange shaft.
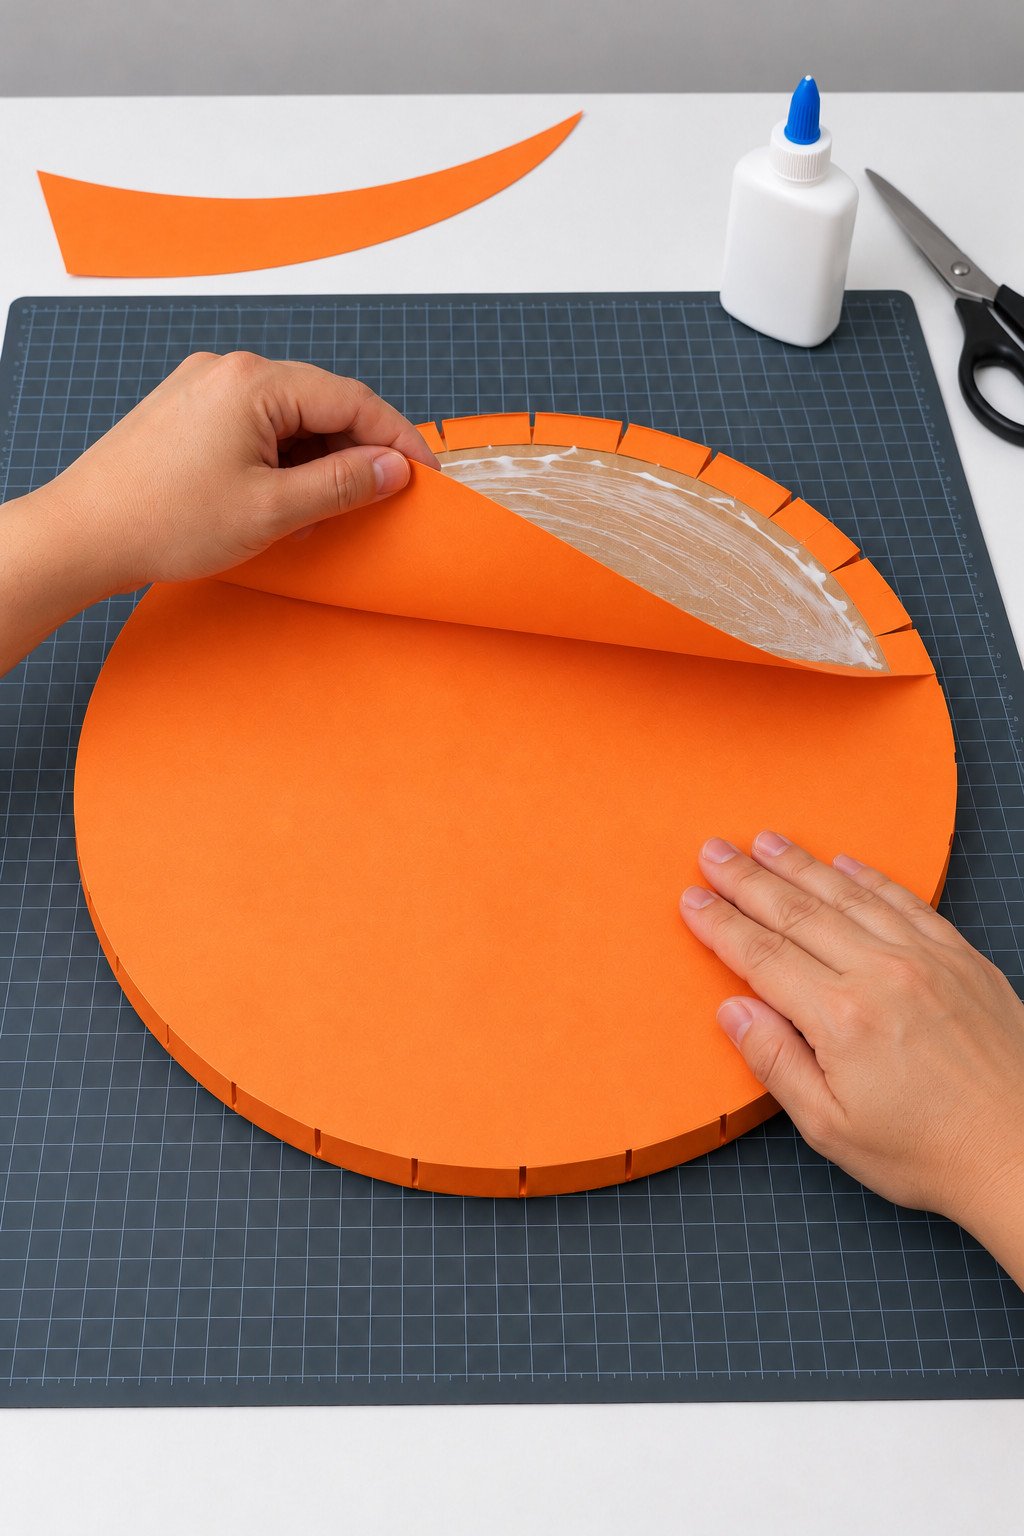
14. Cut the Foam Pieces
Cut the blue noodle to roughly 36¼ inches (92 cm), giving a ring about 13½ inches (34 cm) across with a noodle 2 inches thick. Cut the orange shaft to about 25½ inches (65 cm). Make square end cuts. Adjust the blue length if your noodle thickness differs.
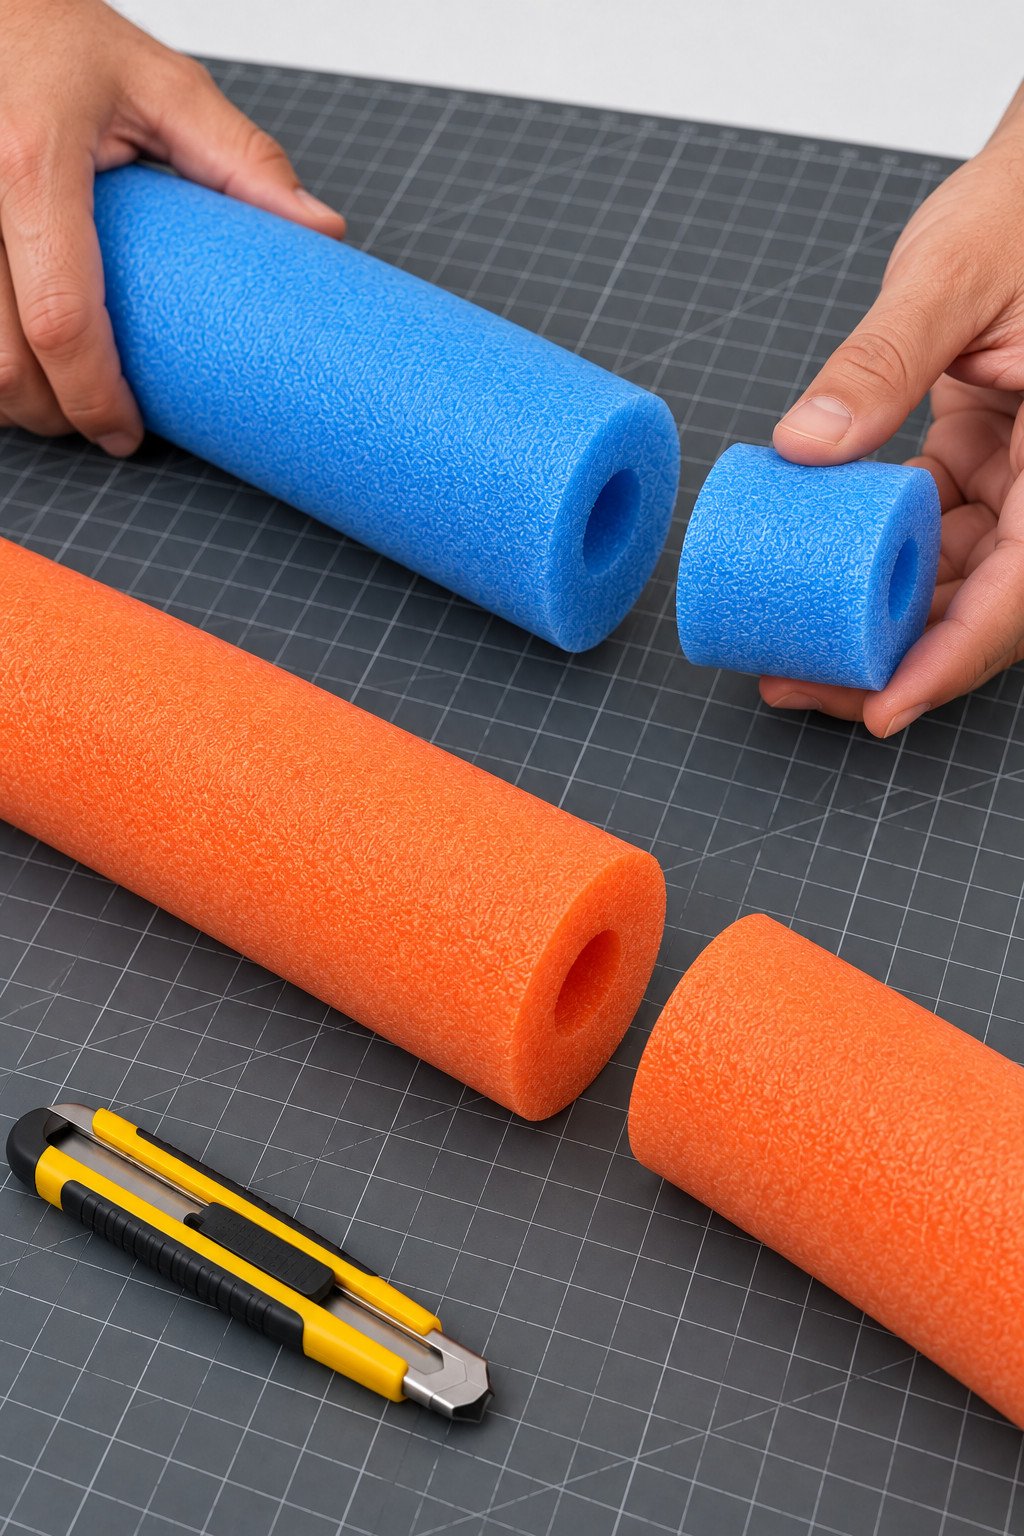
15. Roll the Internal Connector
Roll a small cardboard strip into a firm tube about 2⅜ inches (6 cm) long. Size its diameter to fit snugly inside the blue noodle’s bore. Glue the rolled cardboard closed with a line of PVA and let it dry; this connector belongs inside the rim, not around the orange shaft.
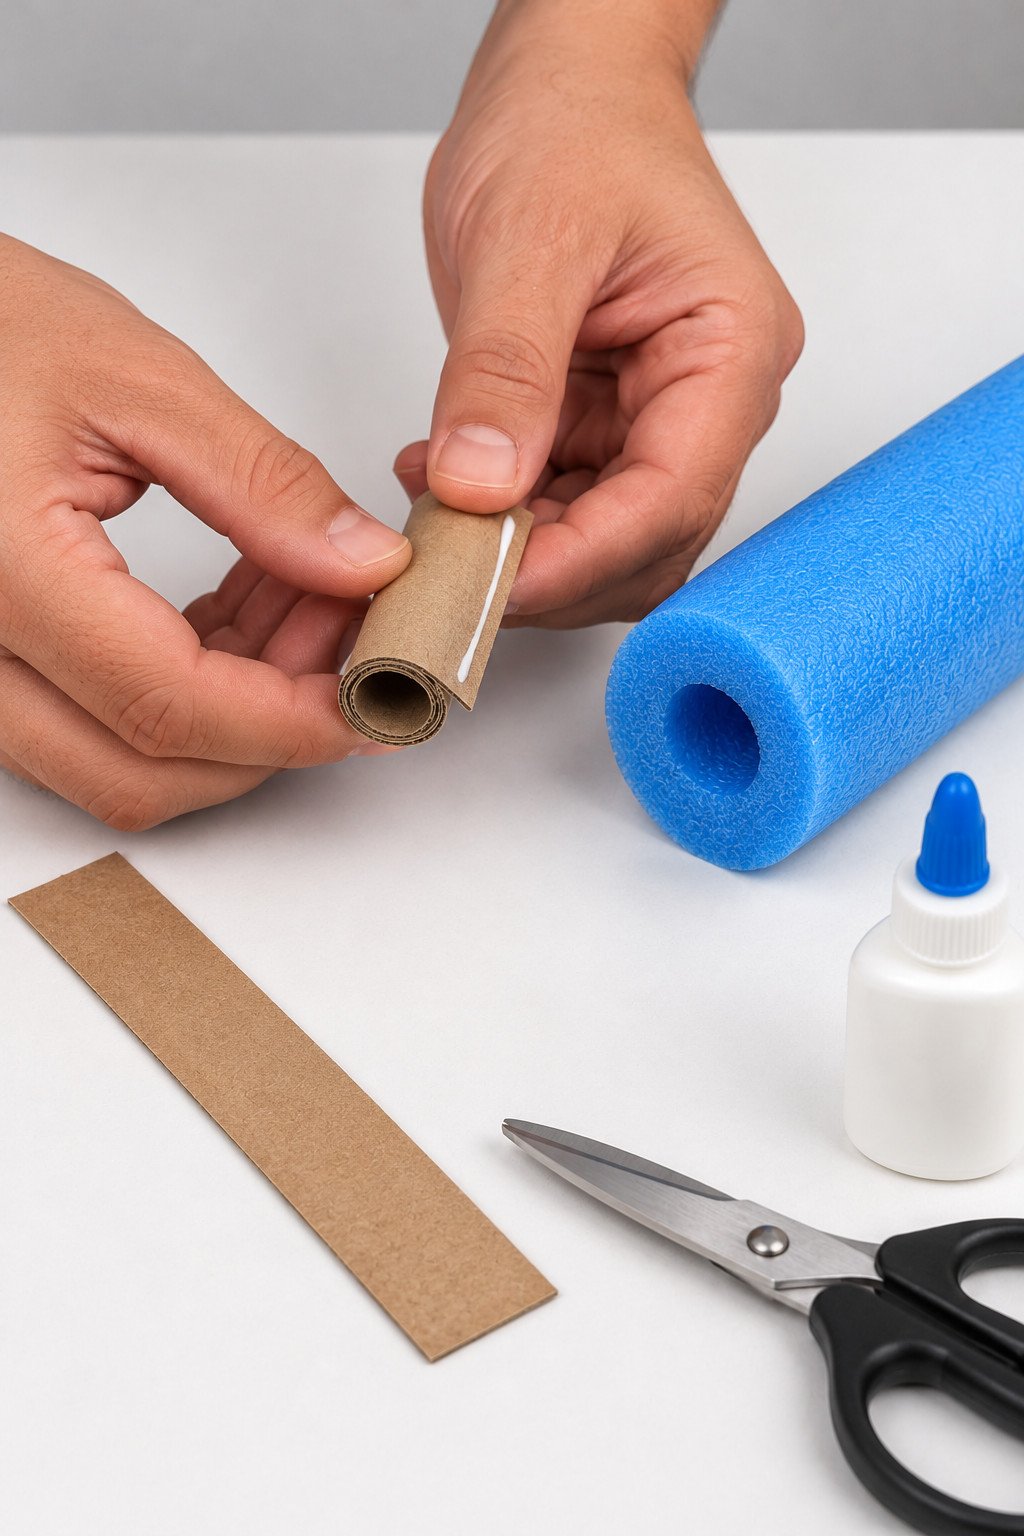
16. Join the Blue Ring Ends
Slide half the cardboard connector into one blue end. Bend the noodle into a circle and slide the other end onto the exposed half. Bring the foam ends together without crushing them. Center the ring over the orange disk and place the seam where a yellow strap will cover it.
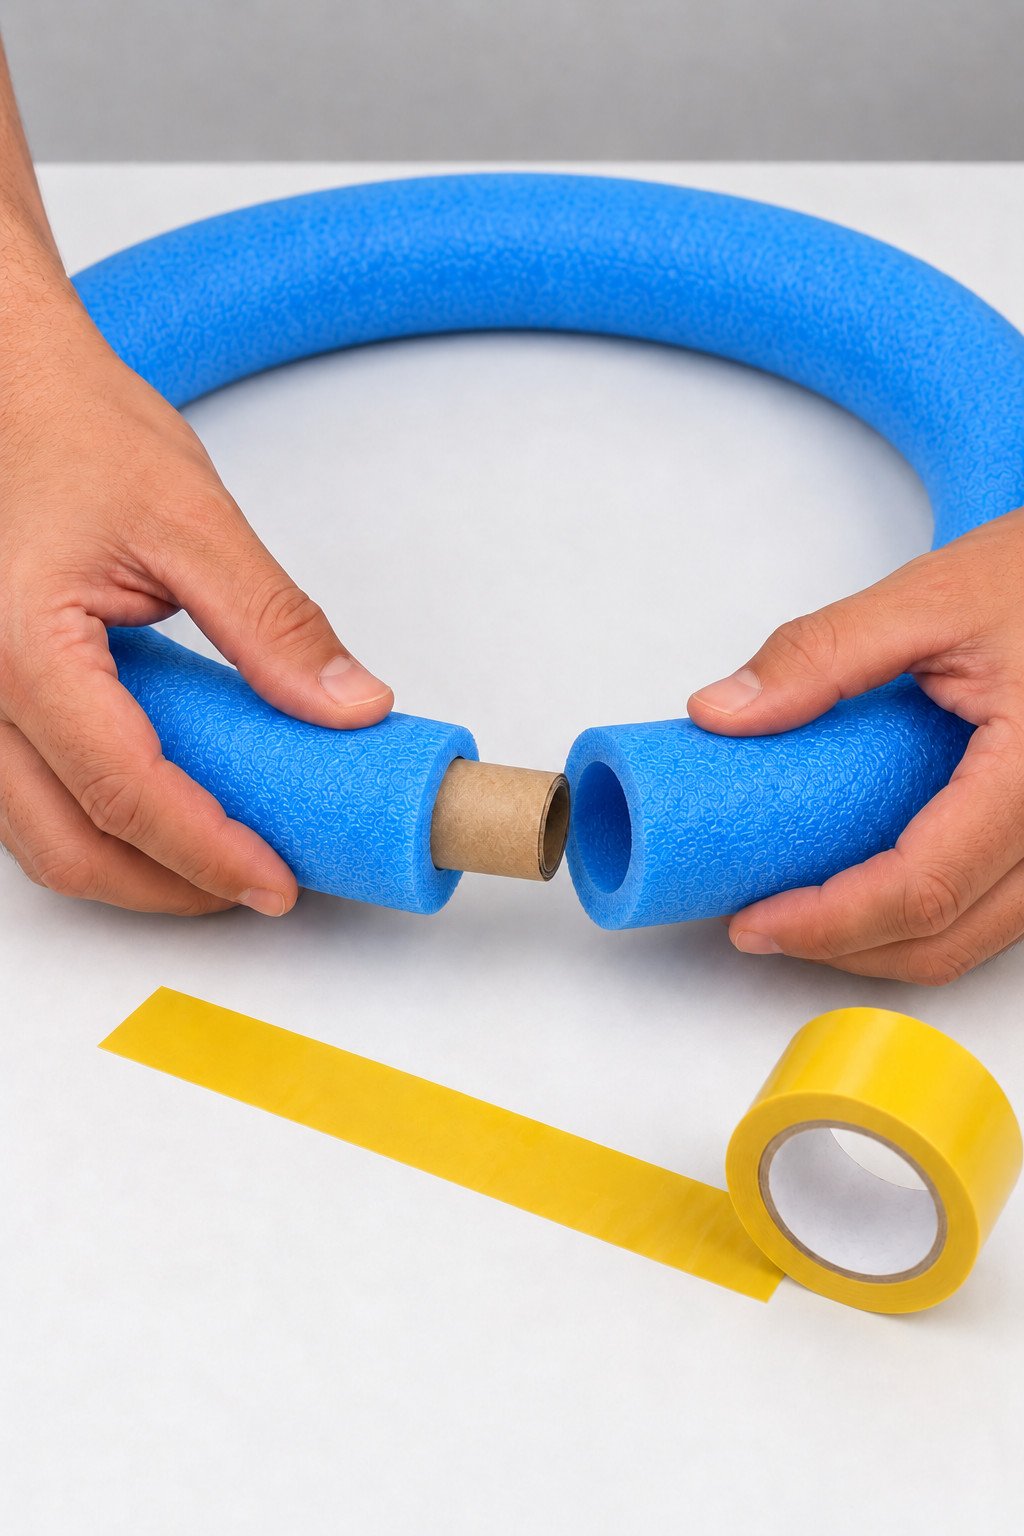
17. Anchor the First Rim Strap
Turn the wheel over. Run one yellow tape strip around the blue foam at its seam and anchor both ends securely on the cardboard reverse, crossing the disk edge. The tape must grip the disk as well as the foam so the orange center cannot fall out.
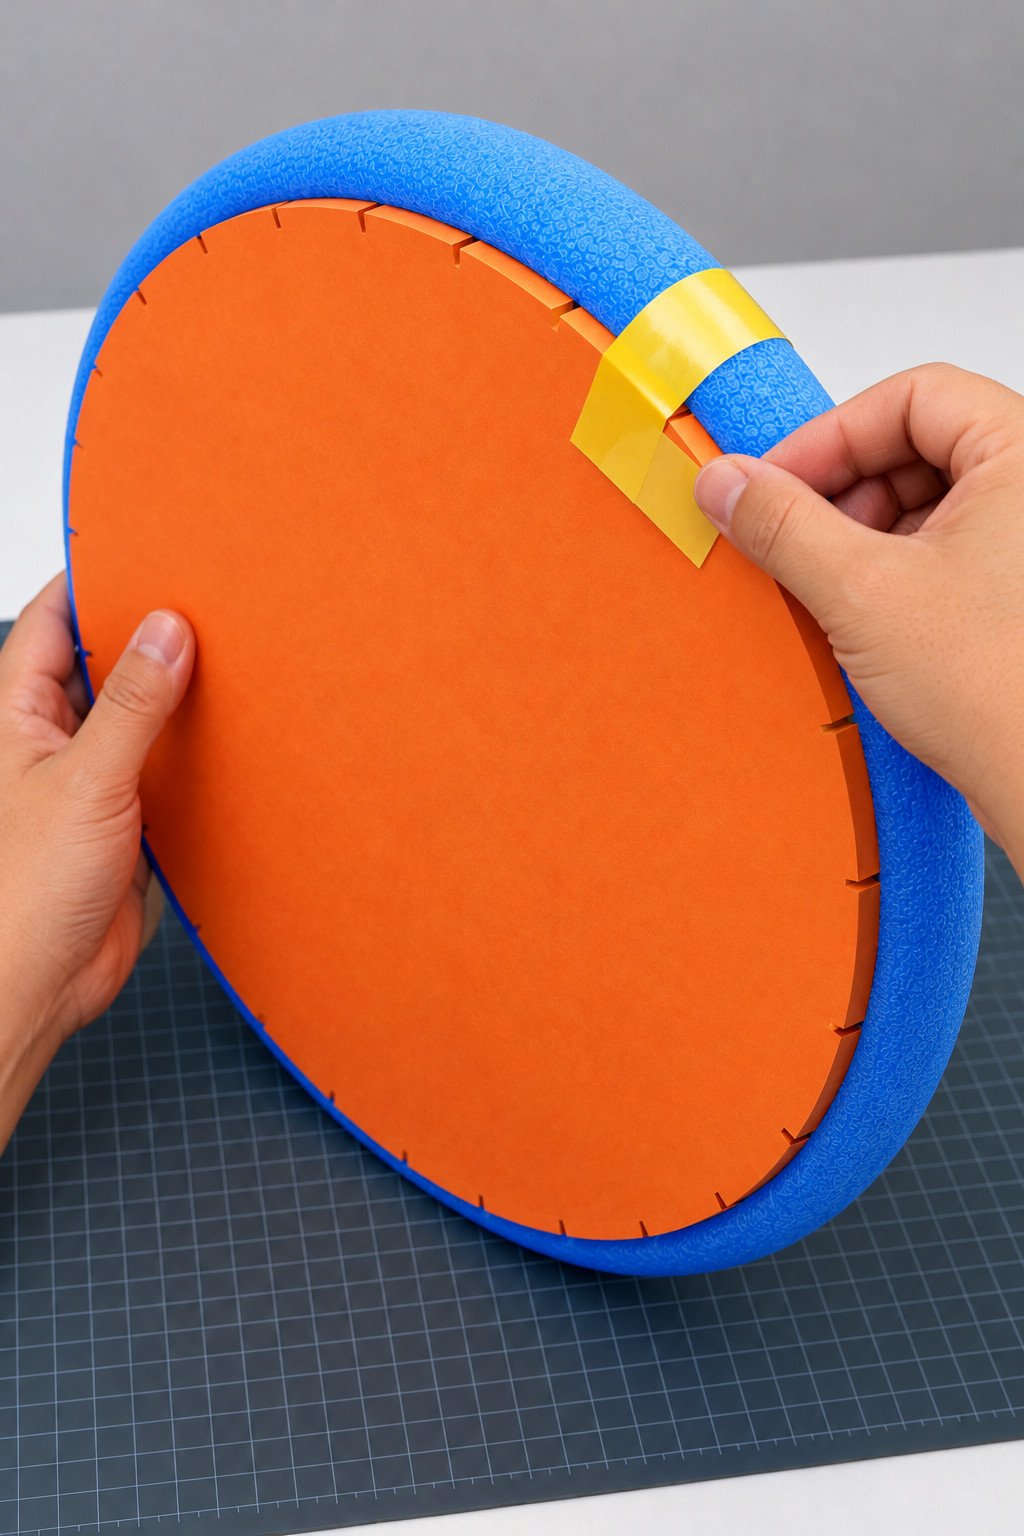
18. Finish Five Yellow Straps
Add four more yellow straps around the rim and disk edge, spaced around the circle. Press their ends firmly onto the reverse face. Turn the wheel over and count five visible yellow bands. Gently check that the disk and foam turn together.
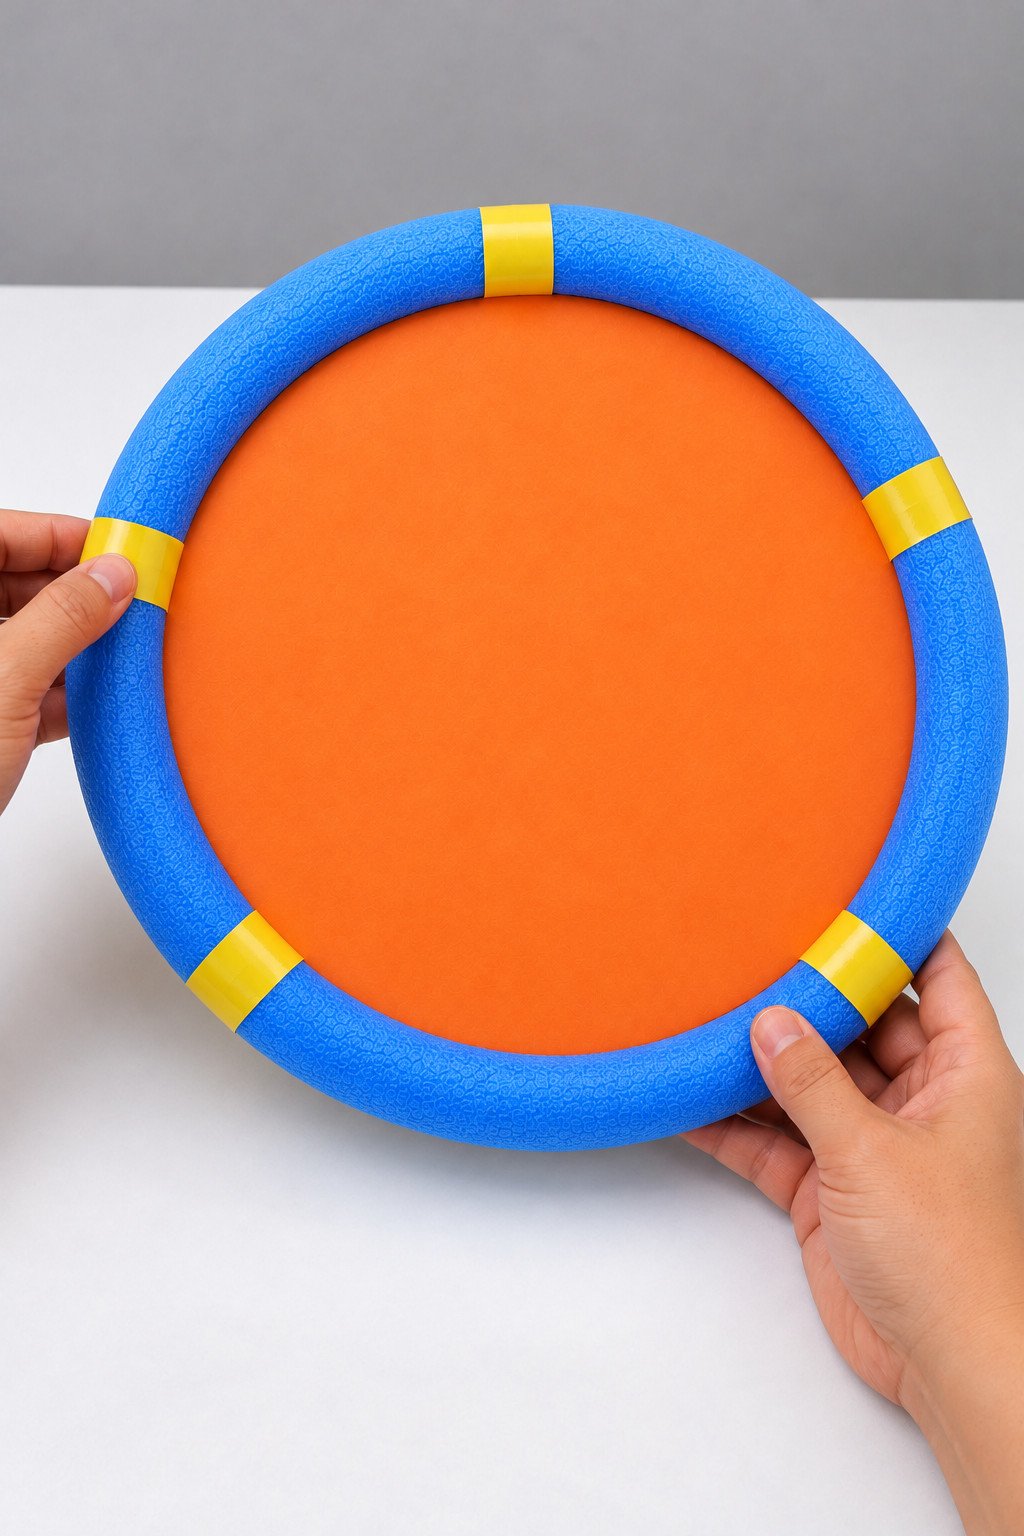
19. Paint Nine Cotton Tips
Set out nine swabs. Paint only one cotton head on each swab blue, using a light coat that leaves a compact tip. Keep the opposite end unpainted. Place the swabs on a protected surface and let the paint dry fully before trimming.
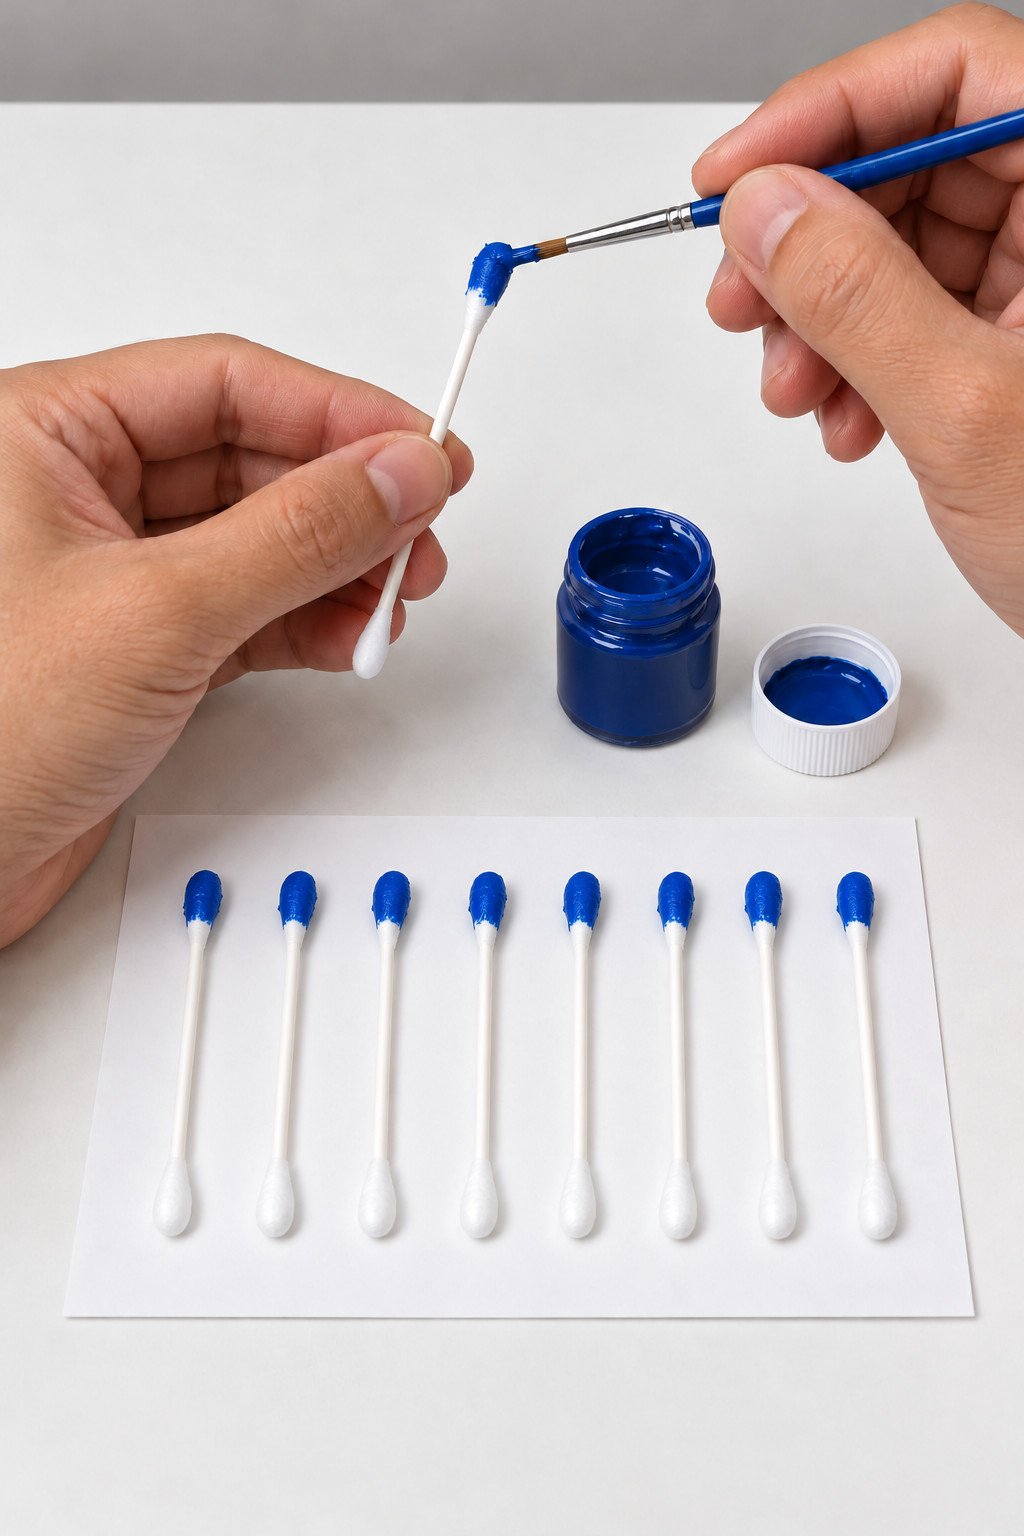
20. Trim the Swab Pegs
Snip off only the unpainted cotton head, preserving the long white stem. Aim for a peg about 2¾ inches (7 cm) long with a single cotton tip, enough to leave roughly 2 to 2⅜ inches (5 to 6 cm) exposed after insertion. Keep cut ends blunt, collect the offcuts, and count nine pegs with blue tips.
21. Insert Nine Staggered Pegs
Leave about 4 inches (10 cm) clear at the leading end. Place nine entry points at unequal intervals and on different faces around the shaft. Push each stem straight into the foam about ⅜ to ⅝ inch (1 to 1.5 cm), radially at 90 degrees to the shaft’s length. Keep roughly 2 to 2⅜ inches (5 to 6 cm) exposed; avoid leaning or intersecting stems.
22. Glue the Shaft Directly
Stand the wheel on its rim with the mounting face toward you and test the shaft position squarely over its center mark before gluing. Use the foam adhesive that passed your scrap test. Prepare the mating surfaces as its label requires, apply adhesive to the contact face, press the flat shaft end directly onto the orange center, and run a thin bead around the seam. Support the shaft level through the full cure.
23. Assemble the Finished Game
After every joint has fully cured, stand the panel on its glued rear braces. Feed the clear leading end of the shaft into the round opening. Turn the wheel to point the first peg upward and gently guide it through the slot. Check all nine pegs in sequence before offering the game to a child.
How to Use This Kids’ Indoor Activity
Set the panel on a stable table with space behind it for the shaft to travel. One player holds the wheel with both hands. A nearby adult steadies the panel without blocking the opening. The goal is to guide all nine pegs through by turning and sliding gently.
- Look: Find the next peg before it reaches the panel.
- Turn: Rotate the wheel until that peg points toward the upper slot.
- Slide: Move the shaft forward only when the peg clears the opening.
- Count: Count each successful pass, then repeat for the next peg.
For a simple children’s activity session, try rounds of three to five minutes and let kids take turns being the “driver” and the “navigator.” Use prompts such as “turn clockwise” and “a little to the left,” or count the pegs together. Keep the first rounds untimed. For another indoor activity after this one, try these family games to play at home.
To reset, work backward slowly, turning each peg toward the slot as it returns. Never yank the shaft through. Stop if a peg loosens, a support bends, or the wheel joint begins to peel. This activity contains small removable parts and should not be given to children who still put objects in their mouths; keep an adult nearby throughout play.
Fix Snags Before Playing
- Shaft rubs: Check for tape folds or a round opening that is too tight. Enlarge the opening and cover the edge with fresh tape as needed.
- Peg will not pass: Check the slot width and height against a painted blue tip, then align the peg fully upward.
- Panel tips: Check that both brace bases sit flat and that their glued seams have dried. Steady the panel during play.
- Wheel separates: Stop using it. Recheck the foam type, the paper surface, whether the adhesive is rated for both, and the cure instructions before rebuilding the joint.
For the example Loctite kit, the manufacturer calls for an activator on difficult plastics, a 60 second wait before applying adhesive, and a full cure of 12 to 24 hours. Follow the current label for the surfaces in your own kit; PVA is reserved here for paper and cardboard. A quick initial set is not the same as a bond ready for play.
More Cardboard Craft Ideas
Save clean offcuts for a second project. The DIY cardboard toy ideas and easy kids’ crafts with everyday materials offer more ways to plan an afternoon around supplies already at home.

Leave a Reply