How to Make a Whimsical Tin Can Fairy House Tower

How to Make a Whimsical Tin Can Fairy House Tower

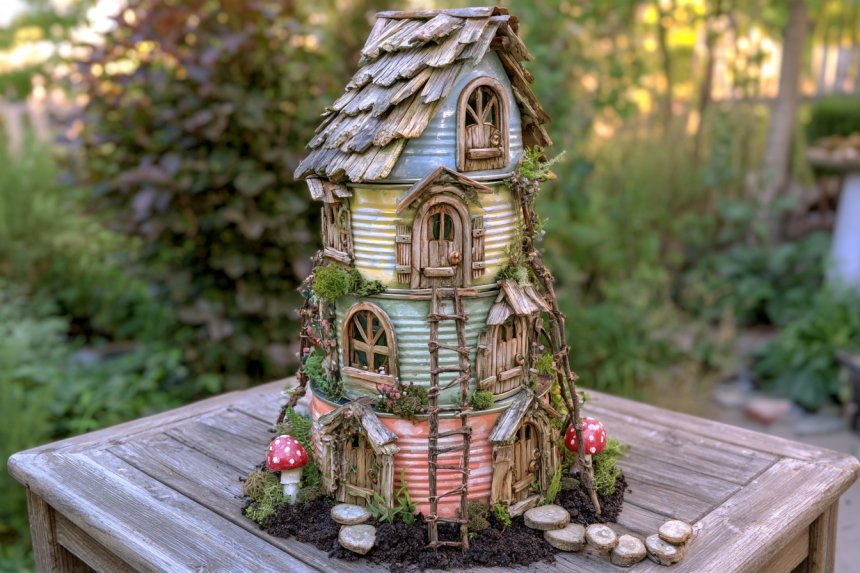
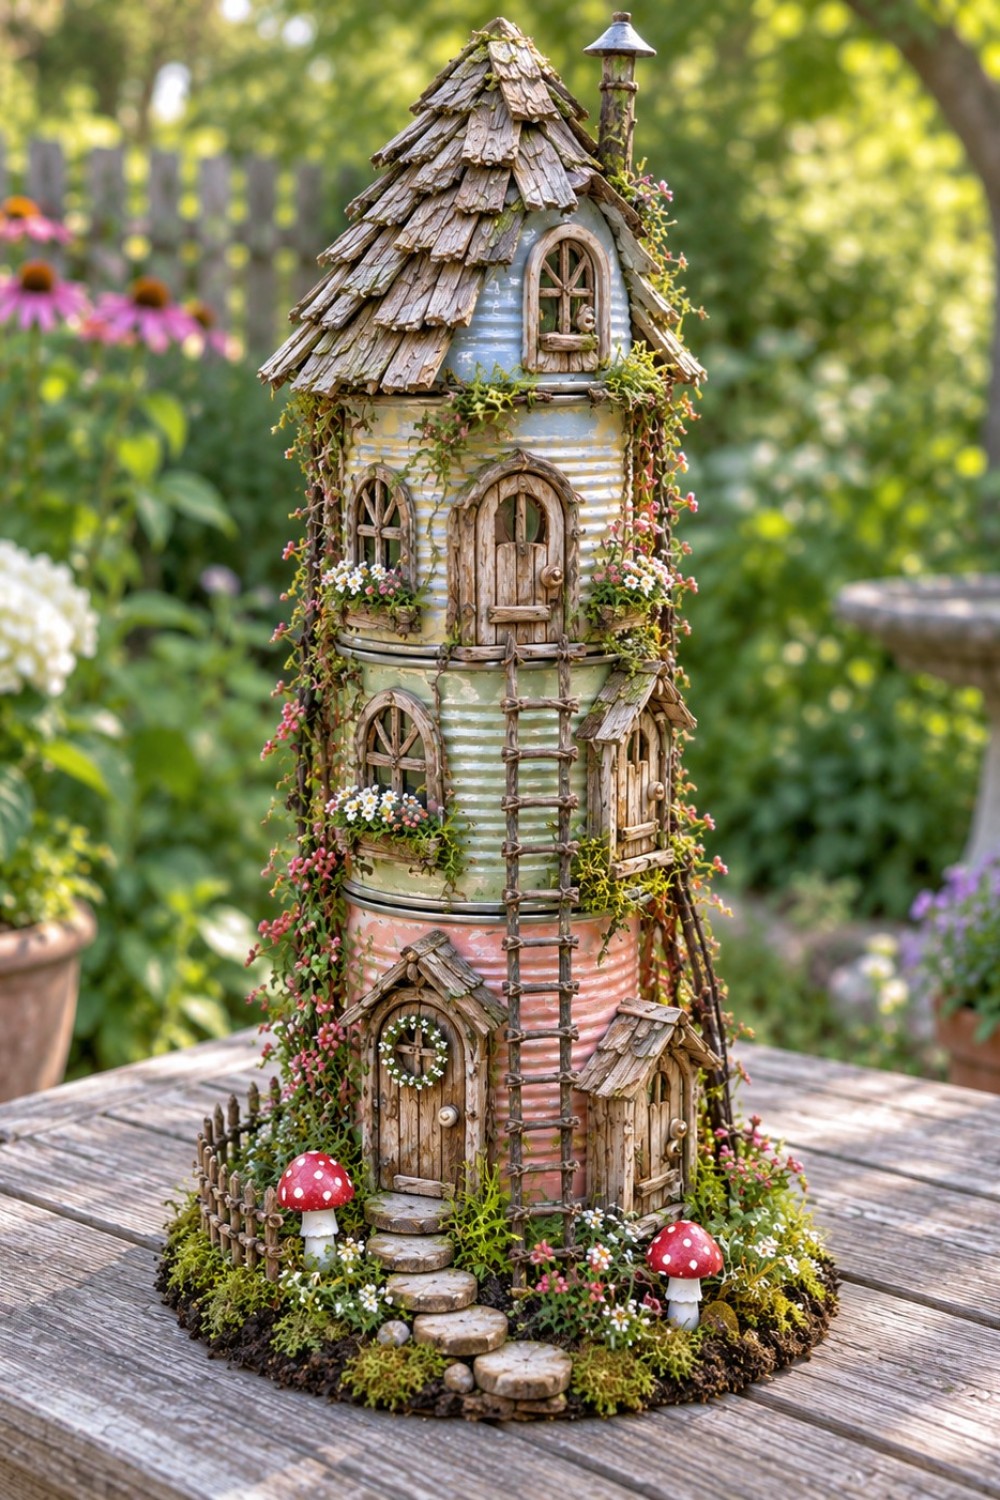
A tin can fairy house tower turns simple recycled containers into a tall miniature garden feature without requiring a large planter or complicated woodworking. The cans provide the main structure, while soft paint, handmade doors, natural bark, twigs, moss, and small stones gradually disguise the metal and create the appearance of a tiny woodland home.

The design works particularly well on a garden table, sheltered patio, porch, or decorative plant display because it builds upward instead of occupying a wide surface. Stability matters more than perfect symmetry. The lower containers should carry most of the visual weight, while progressively smaller levels create a natural taper toward the roof.

This project is decorative. It should remain light, stable, and positioned where it is unlikely to be knocked over.

Step 1: Gather and Prepare the Materials

Gather And Prepare The Materials

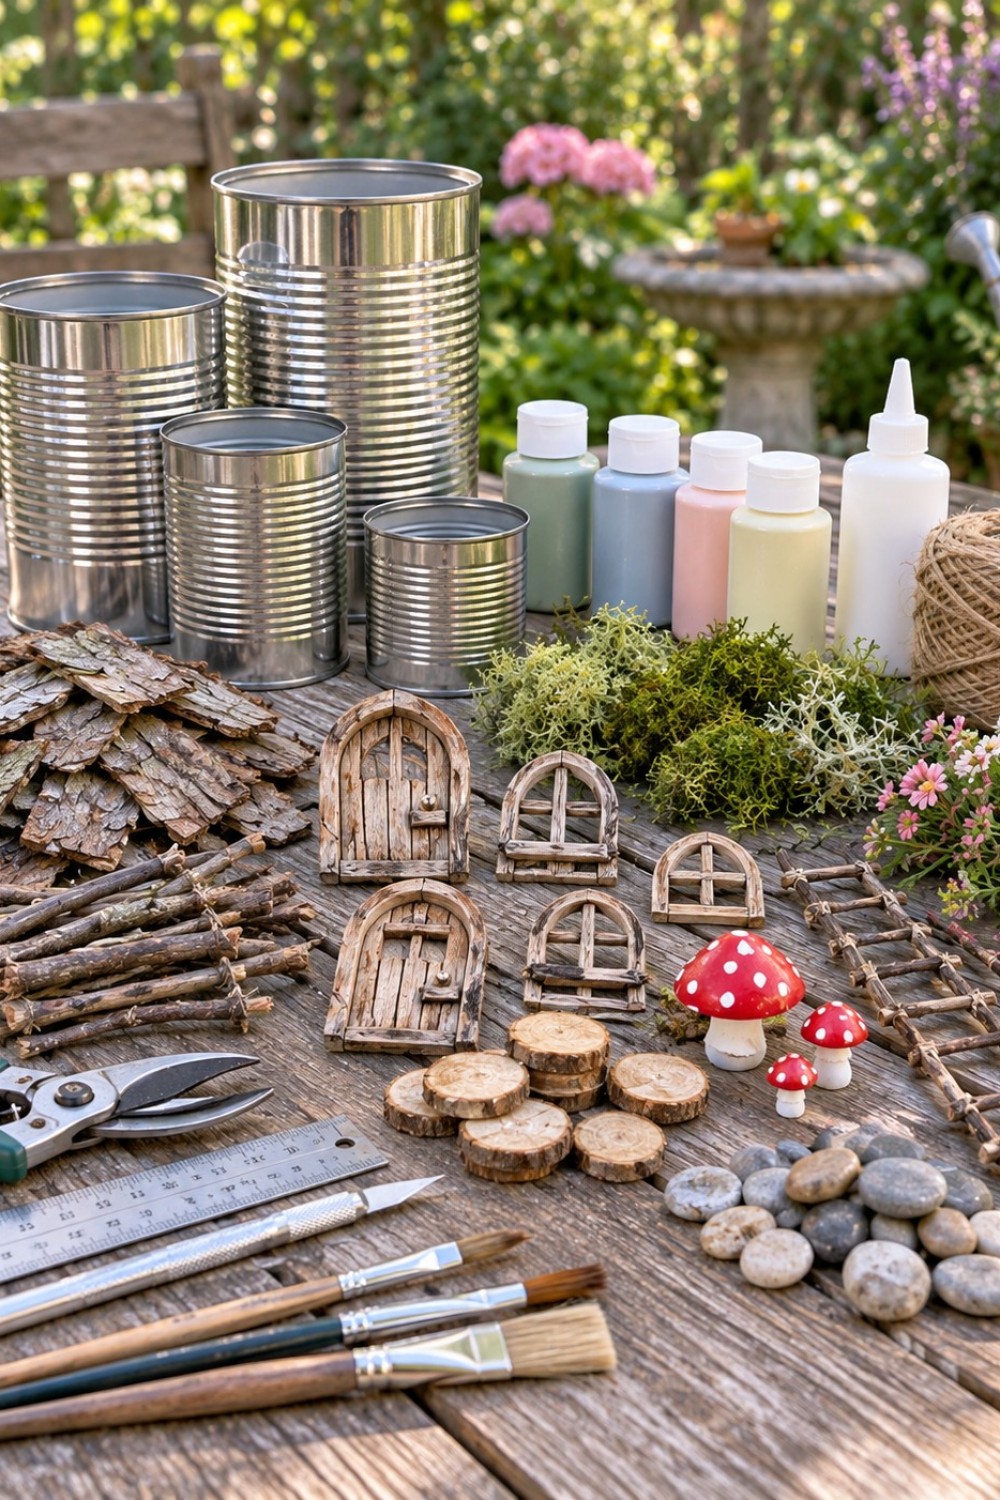
Start by collecting the structural materials before working on the decorative details. Using cans in several sizes creates the gradual narrowing shape that gives the tower its cottage like proportions.

You will need:

  • Three or four clean tin cans in different sizes
  • Metal compatible primer if required by your paint
  • Exterior compatible craft paint
  • Strong adhesive suitable for metal and wood
  • Thin bark pieces
  • Small dry twigs
  • Narrow pieces of lightweight wood
  • Moss
  • Small pebbles
  • Thin wood slices
  • Miniature flowers or suitable small plants
  • Lightweight miniature mushrooms
  • A wood slice or another rigid base
  • Twine for small ladder joints if desired

Useful tools include small paintbrushes, sandpaper, pruning shears, ruler, pencil, craft knife, protective gloves, and clamps where useful.

Clean the cans thoroughly and remove the labels and adhesive residue. Any remaining grease can interfere with paint adhesion.

Inspect the metal rims carefully. Sharp edges should be safely flattened, covered, or removed before construction begins. Wear appropriate gloves while handling unfinished metal.

The natural materials also deserve some preparation. Choose dry bark that is still firm enough to hold its shape and twigs that are straight enough for ladders and frames. Brittle or decaying material may break once the tower is moved.

Step 2: Paint and Stack the Cans

Paint And Stack The Cans

Lightly prepare glossy metal surfaces according to the requirements of the primer and paint you are using. A gentle sanding can sometimes improve adhesion, but the product instructions should determine the correct surface preparation.

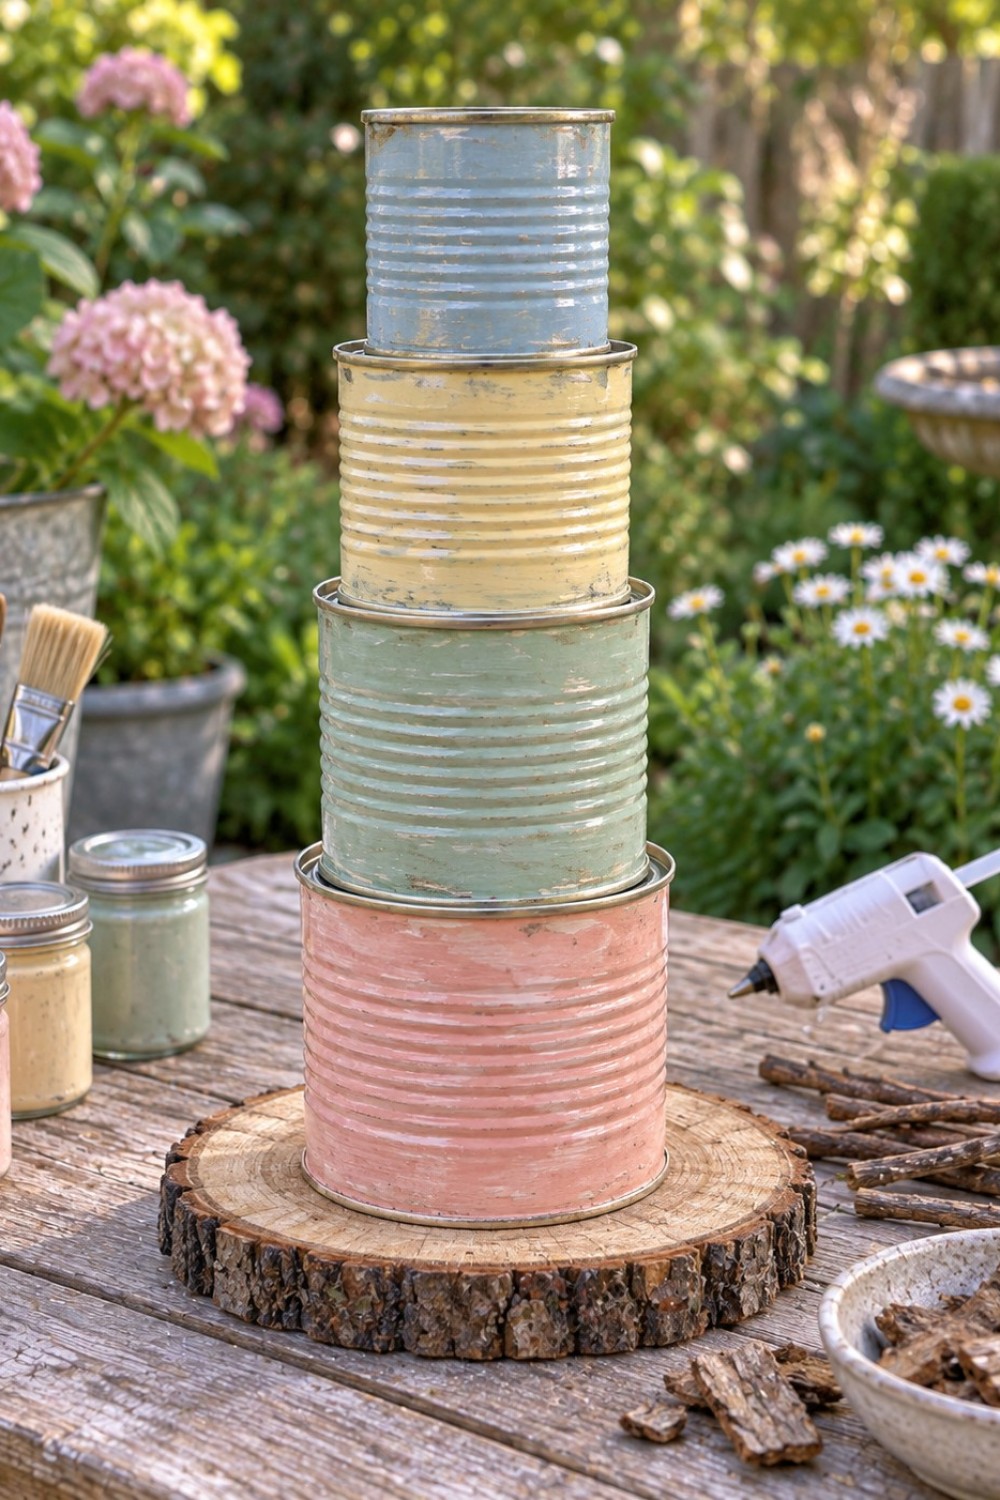
Paint each can separately rather than assembling the tower first. Using related but different colors helps define each floor.

Soft combinations such as faded coral, muted green, pale yellow, and dusty blue work particularly well because they contrast gently with bark, twigs, and moss.

Let the coatings dry for the period specified by the manufacturer. Paint that feels dry to the touch may not yet be ready for heavy handling or adhesive.

Once the surfaces are ready, place the widest can at the bottom and progressively smaller cans above it.

Before applying adhesive, assemble the entire tower temporarily and inspect it from several directions. The upper levels should remain reasonably centered over the base.

A small difference in diameter between floors creates useful ledges where moss, miniature plants, or decorative trim can later be positioned.

Secure the cans one level at a time with an adhesive intended for the materials involved. Give each connection sufficient curing time before loading another level above it.

Mounting the bottom container onto a broad wood slice gives the project a more finished base and can improve stability. If the tower rocks when gently touched, correct the structure before decorating it.

Step 3: Build the Doors, Windows, Ladders, and Roof

Build The Doors, Windows, Ladders, And Roof

This stage creates most of the character.

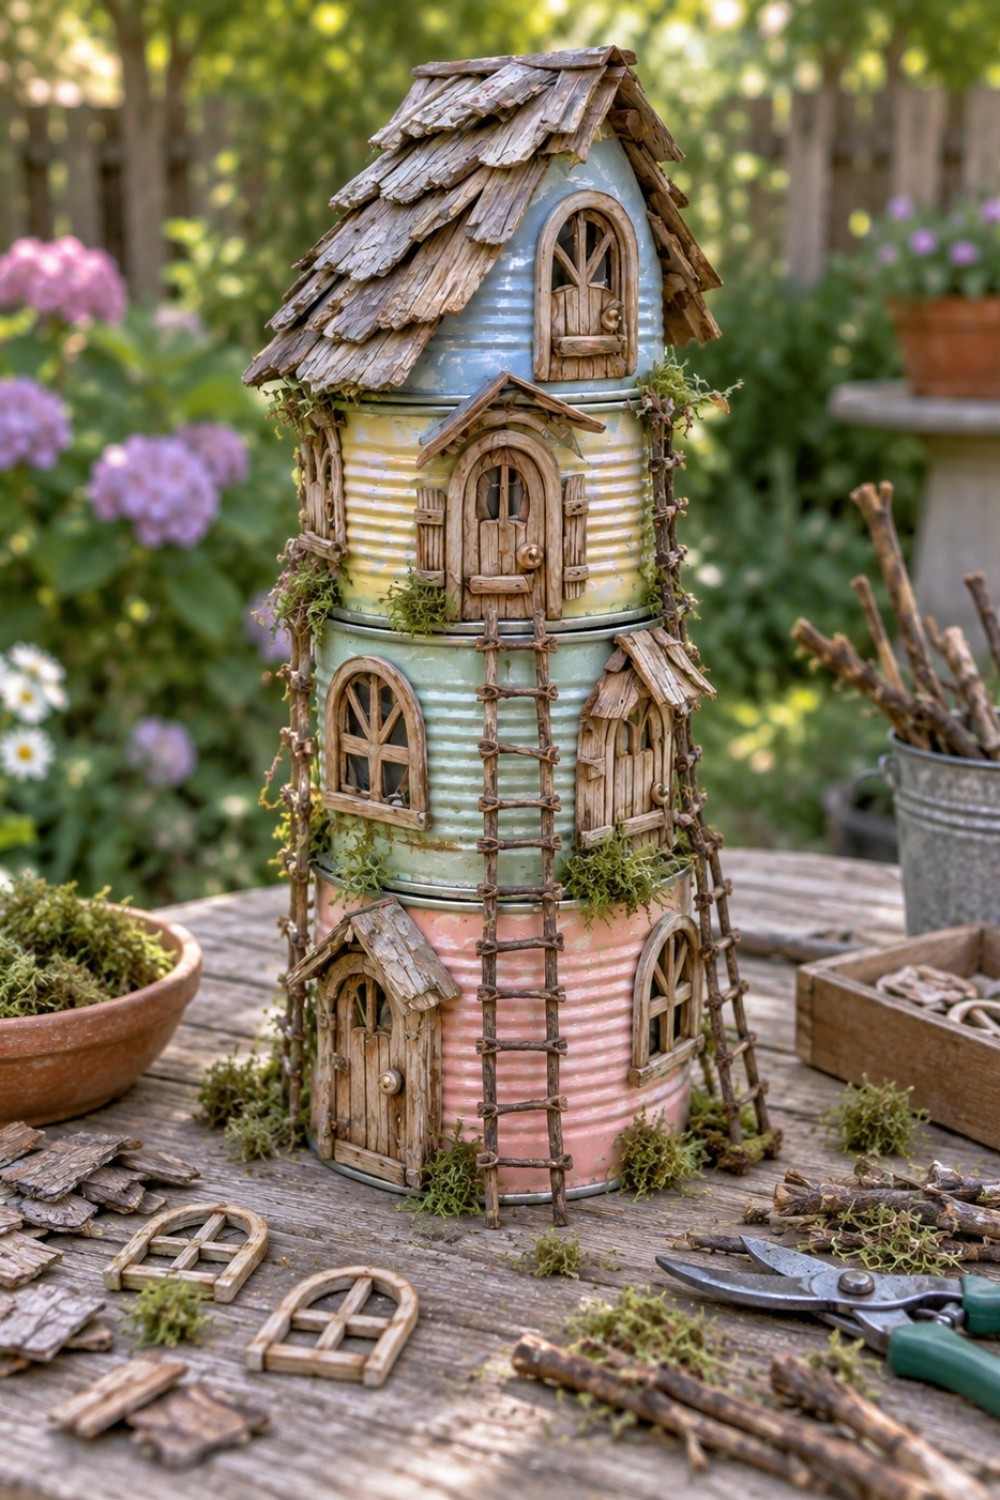
Begin with the doors. Thin wood strips, bark, or lightweight craft wood can be arranged vertically and surrounded by a slightly irregular frame. Rounded tops work especially well because they contrast with the straight horizontal ridges of the cans.

Add small windows to the other levels using the same wood tone. Keeping the doors, frames, and windows within a consistent material family helps several differently painted cans feel like one building.

Avoid making every opening identical. A larger door on the lower floor, a smaller doorway in the middle, and an arched window near the top create a more convincing hierarchy.

Make the Twig Ladders

Choose two thin twigs of similar thickness for the side rails. Cut several shorter pieces for the rungs.

Lay the ladder flat before bonding the pieces together. You can use small amounts of suitable adhesive and add fine twine around the joints when you want a more handcrafted appearance.

Position the ladder so that it visually connects two meaningful points, such as a doorway and the level above it.

Build the Bark Roof

The roof should remain light because heavy decoration at the top makes a narrow tower easier to tip.

Arrange small bark sections in overlapping rows. Begin near the lower edge of the roof and work upward, allowing each row to cover part of the attachment line beneath it.

Irregular bark edges are useful here. The roof does not need to be perfectly symmetrical to look intentional.

Add small amounts of moss around windows, doors, and the junctions between the cans. These patches soften transitions without hiding the underlying architecture.

Step 4: Finish the Miniature Garden

Finish The Miniature Garden

Treat the base as a miniature landscape rather than filling every available space with decoration.

Start with moss around the lower level. Place it in irregular patches so parts of the base and painted metal remain visible.

Create a small walkway using flat pebbles or wood slices leading toward the main entrance. A clearly defined path gives the eye somewhere to enter the scene and makes the front door a stronger focal point.

Add miniature flowers near the path and around lower openings. Keep the plant material in scale with the house. Large leaves can overwhelm tiny doors and windows, while smaller foliage makes the building appear more substantial.

A few red and white miniature mushrooms can add contrast near the base, but they work best as accents rather than repeated decorations across every floor.

Small moss patches can also be placed around window ledges and beneath roof sections. Avoid covering structural joints that may need inspection or repair later.

If you want to use live planting material, keep the roots and moist growing medium in an appropriate small container rather than packing damp soil directly against the wood and metal components. This makes watering easier and reduces continuous moisture exposure.

Add the Final Garden Character

Once the major elements are in place, step back and inspect the tower as a complete composition.

The strongest visual line should run from the pathway at the bottom, toward the main entrance, and then upward through the ladders, doors, and roof. If one side feels noticeably heavier, moving a small plant or removing an oversized decoration may be more effective than adding another ornament.

The pastel colors keep the metal structure visible without allowing it to dominate. Weathered wood adds warmth, while green moss connects the structure to its garden setting.

This combination is also useful from a maintenance perspective because individual decorative elements can be replaced without rebuilding the entire tower.

Common Problems to Avoid

A leaning tower usually comes from poorly centered cans or an unstable base. Correct the structural alignment instead of trying to counterbalance it with heavy stones or decorations.

Peeling paint often indicates poor surface preparation or an incompatible coating system. Clean the metal carefully and follow the preparation instructions for the specific primer and paint you select.

Loose bark, doors, or ladders can occur when decorative pieces are attached before the adhesive has adequately cured. Allow the required bonding time before handling the structure.

Another common problem is excessive decoration. When moss, flowers, ladders, doors, mushrooms, and stones compete for attention everywhere, the handmade architecture becomes difficult to see. Leaving some painted metal exposed keeps the design visually balanced.

Outdoor Care and Durability

A sheltered position will generally extend the life of the tower. Heavy rain, strong sunlight, and repeated temperature changes can affect paint, adhesives, moss, and natural bark at different rates.

Periodically check:

  • Bark roof pieces for movement
  • Twig ladders for loose joints
  • Painted surfaces for scratches
  • Moss for deterioration
  • Metal for early corrosion
  • The base for rocking or moisture damage

Loose decorative materials can usually be replaced individually.

If the paint becomes damaged, clean the affected area and use a compatible touch up coating rather than simply covering rust or flaking material.

Natural bark and twigs may gradually weather. Slight aging can suit this type of project, but soft, cracked, or unstable pieces should be replaced.

Why This Fairy House Design Works

The structure uses height efficiently. The wider bottom floor creates visual stability, while smaller upper levels gradually lead the eye toward the pitched bark roof.

It also relies on three clearly different textures.

Painted metal provides structure. Weathered wood gives the tower its miniature architecture. Moss, flowers, and stone connect that architecture to the garden.

Repeating these materials across the floors creates consistency without making every level identical. The result is a compact recycled craft that can still contain plenty of detail without needing a large footprint.

Share

What's Your Reaction?

Like Like 0
Dislike Dislike 0
Love Love 0
Funny Funny 0
Angry Angry 0
Sad Sad 0
Wow Wow 0