
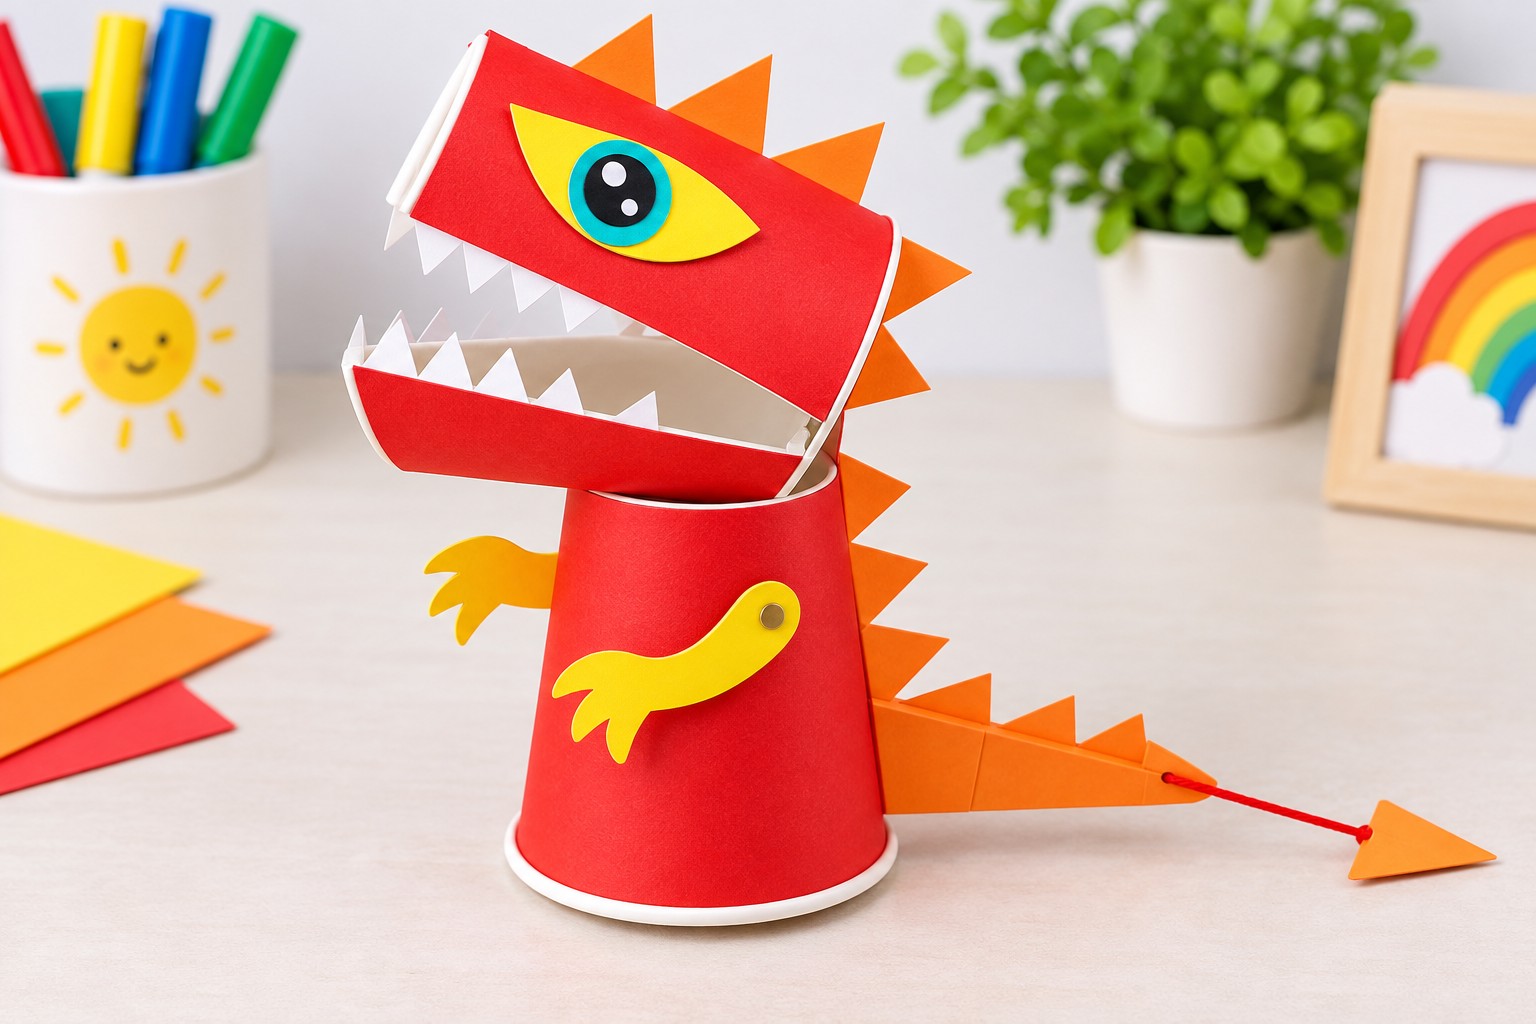
Two ordinary paper cups can become a surprisingly playful dragon when a simple pull string is added between the head and body. This kids craft combines cutting, paper shaping, decorating, and a basic moving mechanism, so the finished project is more than a display piece. Pulling the dragon's tail makes its head move and encourages the mouth to open, giving children an interactive handmade toy once the construction is complete. This version uses red cups with golden yellow details, turquoise eyes, orange accents, and bright white teeth to give the original cup craft a completely different character. Because several steps involve scissors and making small holes in the cups, an adult should handle the cutting and piercing stages. For a simpler paper animal project to make alongside the dragon, explore this paper snail craft tutorial.
Table of Contents
- Project Preview
- Materials You Will Need
- 1. Prepare the Dragon Head Cup
- 2. Split the Cup Into Two Jaws
- 3. Test the Mouth Movement
- 4. Add the Pull Cord
- 5. Connect the Head to the Body
- 6. Give the Dragon a New Face
- 7. Add Arms and Back Spikes
- 8. Turn the Cord Into a Dragon Tail
- Finishing the Moving Dragon
- Safety Note
Project Preview
Materials You Will Need
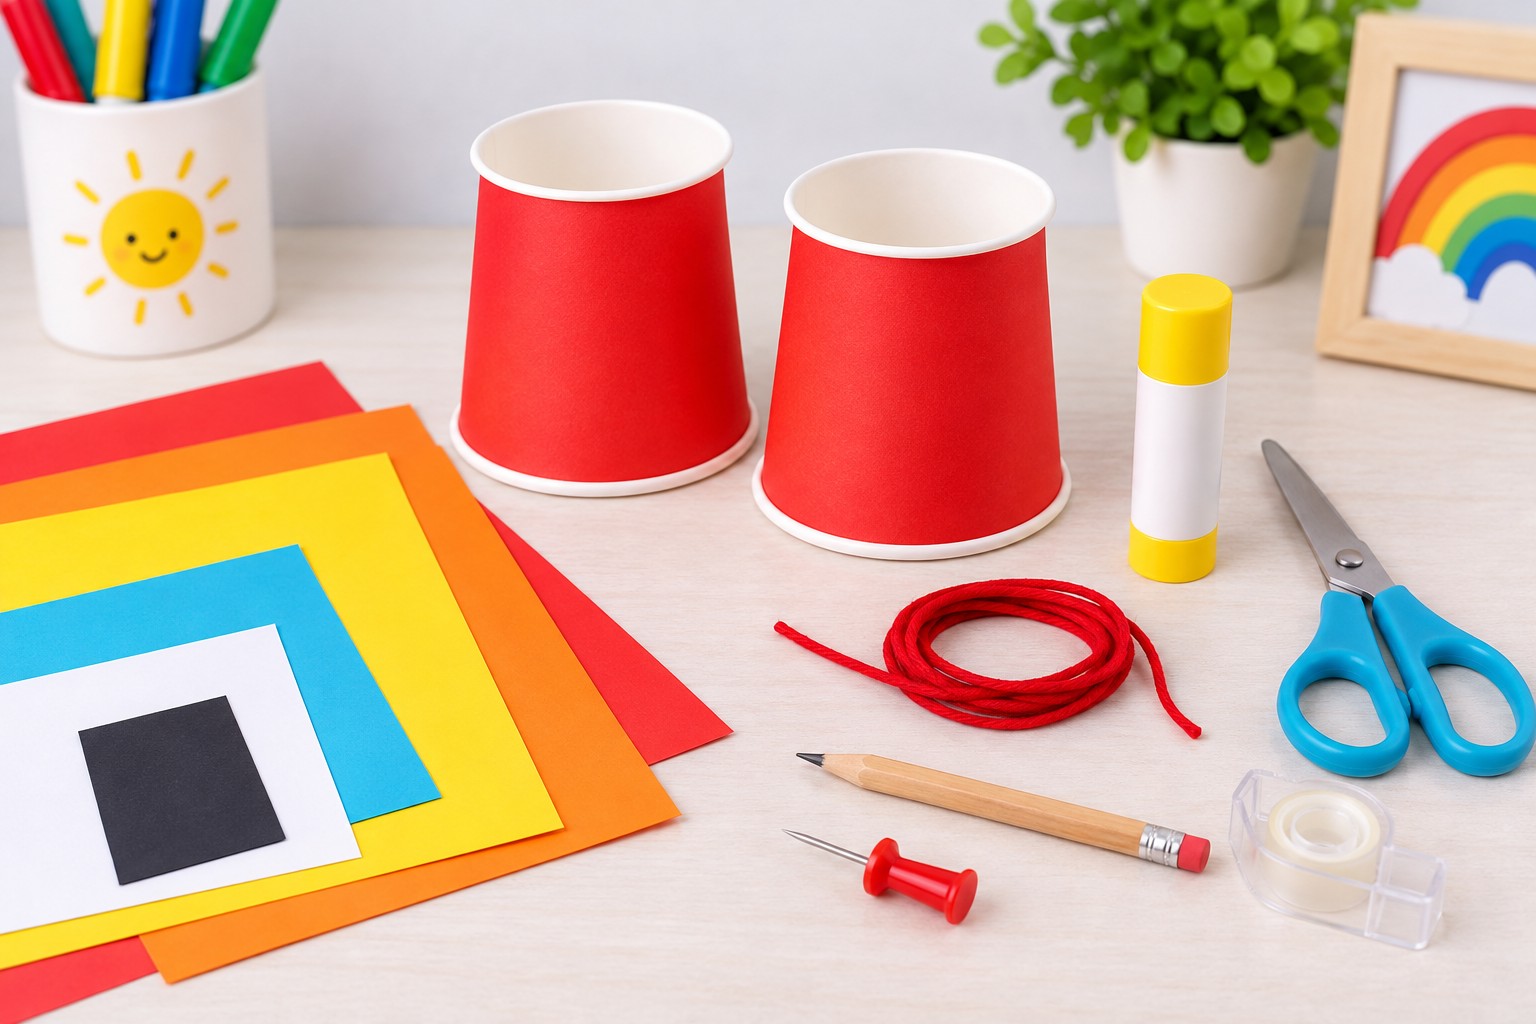
For one dragon, prepare:
- 2 matching red paper cups, approximately 8 to 10 oz
- Yellow cardstock
- Orange cardstock
- Turquoise or blue cardstock
- White cardstock
- Black cardstock or a black marker
- Approximately 50 to 60 cm of cotton cord or sturdy yarn
- Glue stick or child safe craft glue
- Scissors
- Pencil
- Push pin, awl, or pointed craft tool for making holes
- Small piece of clear tape for reinforcing the cord if needed
Paper cups are preferable to hard plastic cups because their walls are easier to cut and flex. Choose cups that are firm enough to hold their shape when handled but not so thick that the mouth section becomes difficult to move.
1. Prepare the Dragon Head Cup
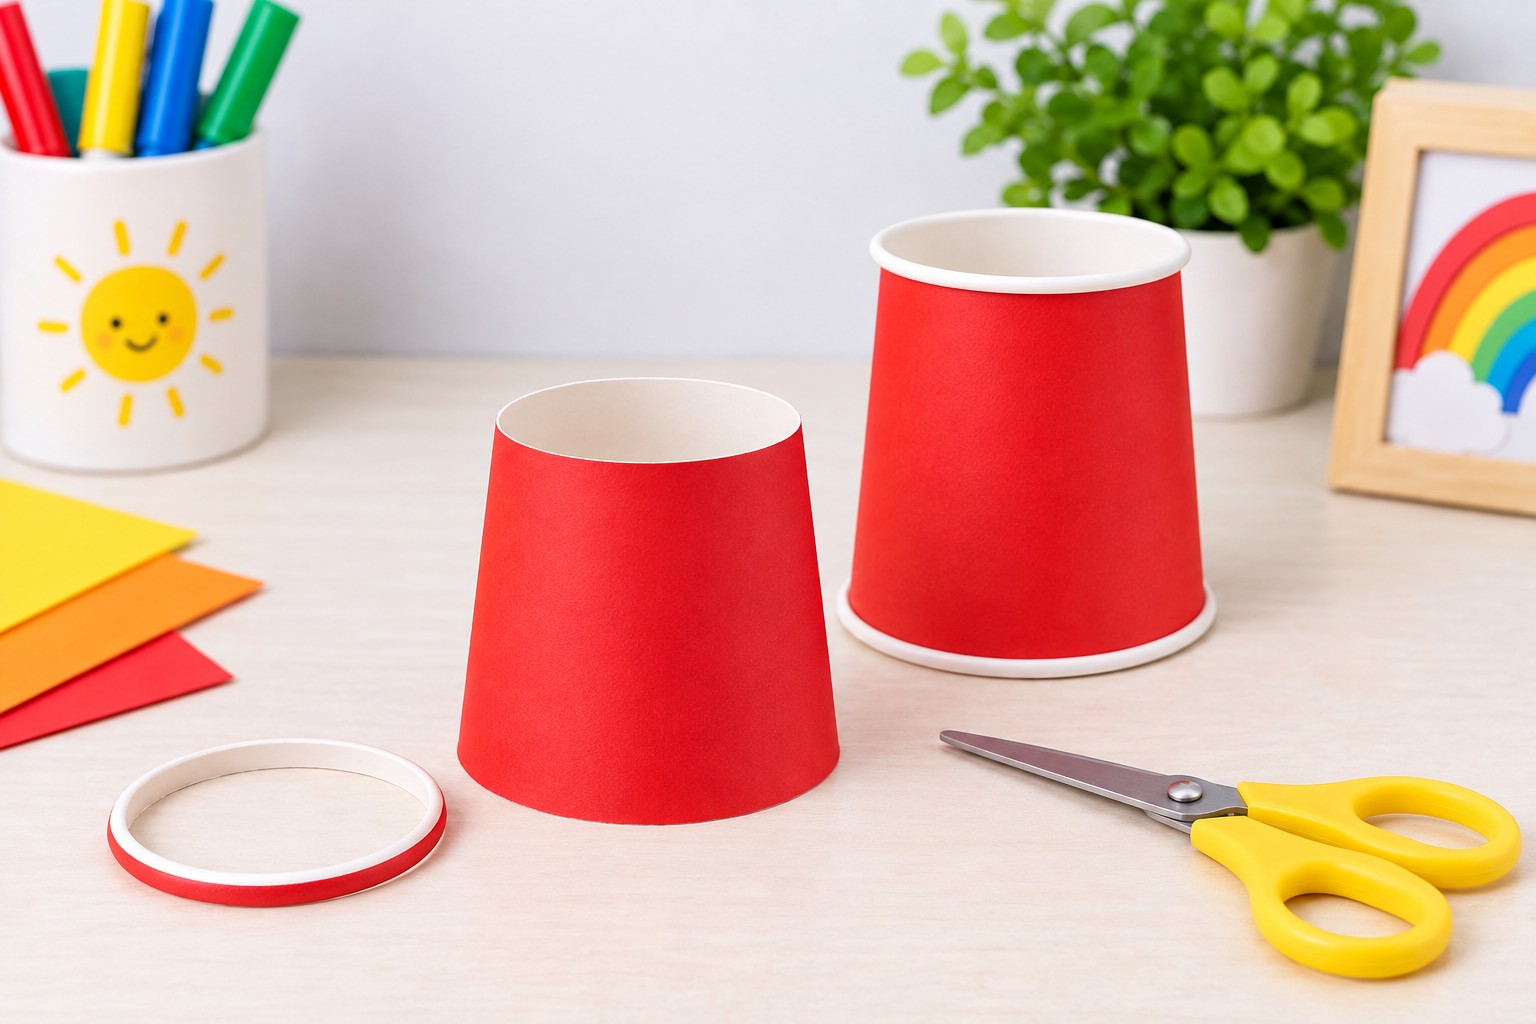
Set one red cup aside for the body and use the second cup for the dragon's head. The head cup needs to become flexible enough to form an upper and lower jaw.
Begin by removing the rolled rim around the large open end of the cup. An adult should do this part because the scissors need to cut close to the rim. Work slowly around the circumference rather than trying to remove the rim in one large cut.
Once the rim has been removed, check the edge with your fingers. Trim any sharp or uneven paper points. The newly cut opening will eventually form the front of the dragon's snout, while the closed circular bottom of the cup will remain at the back of the head.
Do not cut away the circular bottom. It plays an important role in keeping the two jaw sections connected.
2. Split the Cup Into Two Jaws
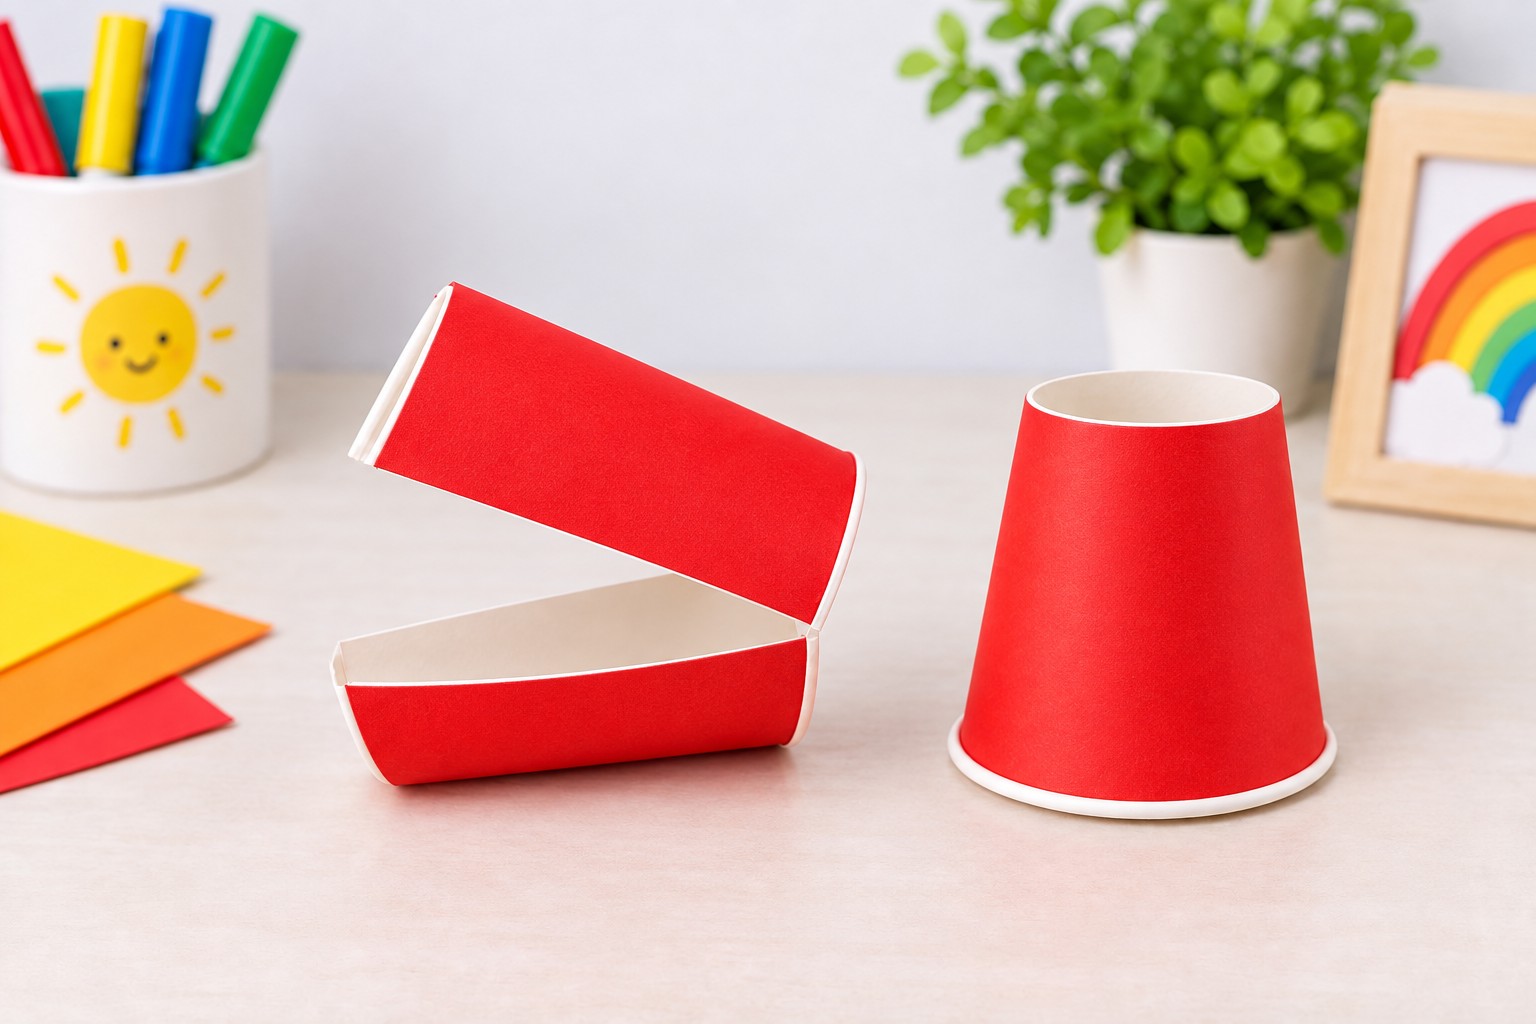
Hold the head cup sideways and make one straight cut from the newly trimmed opening toward the closed bottom. Stop when you reach the edge of the circular base.
Rotate the cup 180 degrees and make a second cut directly opposite the first one. Again, stop before cutting through the circular bottom.
These two cuts divide the cup wall into two large flexible panels. Gently open them apart. One panel will become the upper jaw and the other will become the lower jaw.
The cup should now open somewhat like a large paper mouth while the circular base continues to connect both pieces at the back.
Flex each panel a few times without sharply creasing it. The goal is to make the paper move more easily while still allowing the cup to return toward its original cylindrical shape.
3. Test the Mouth Movement
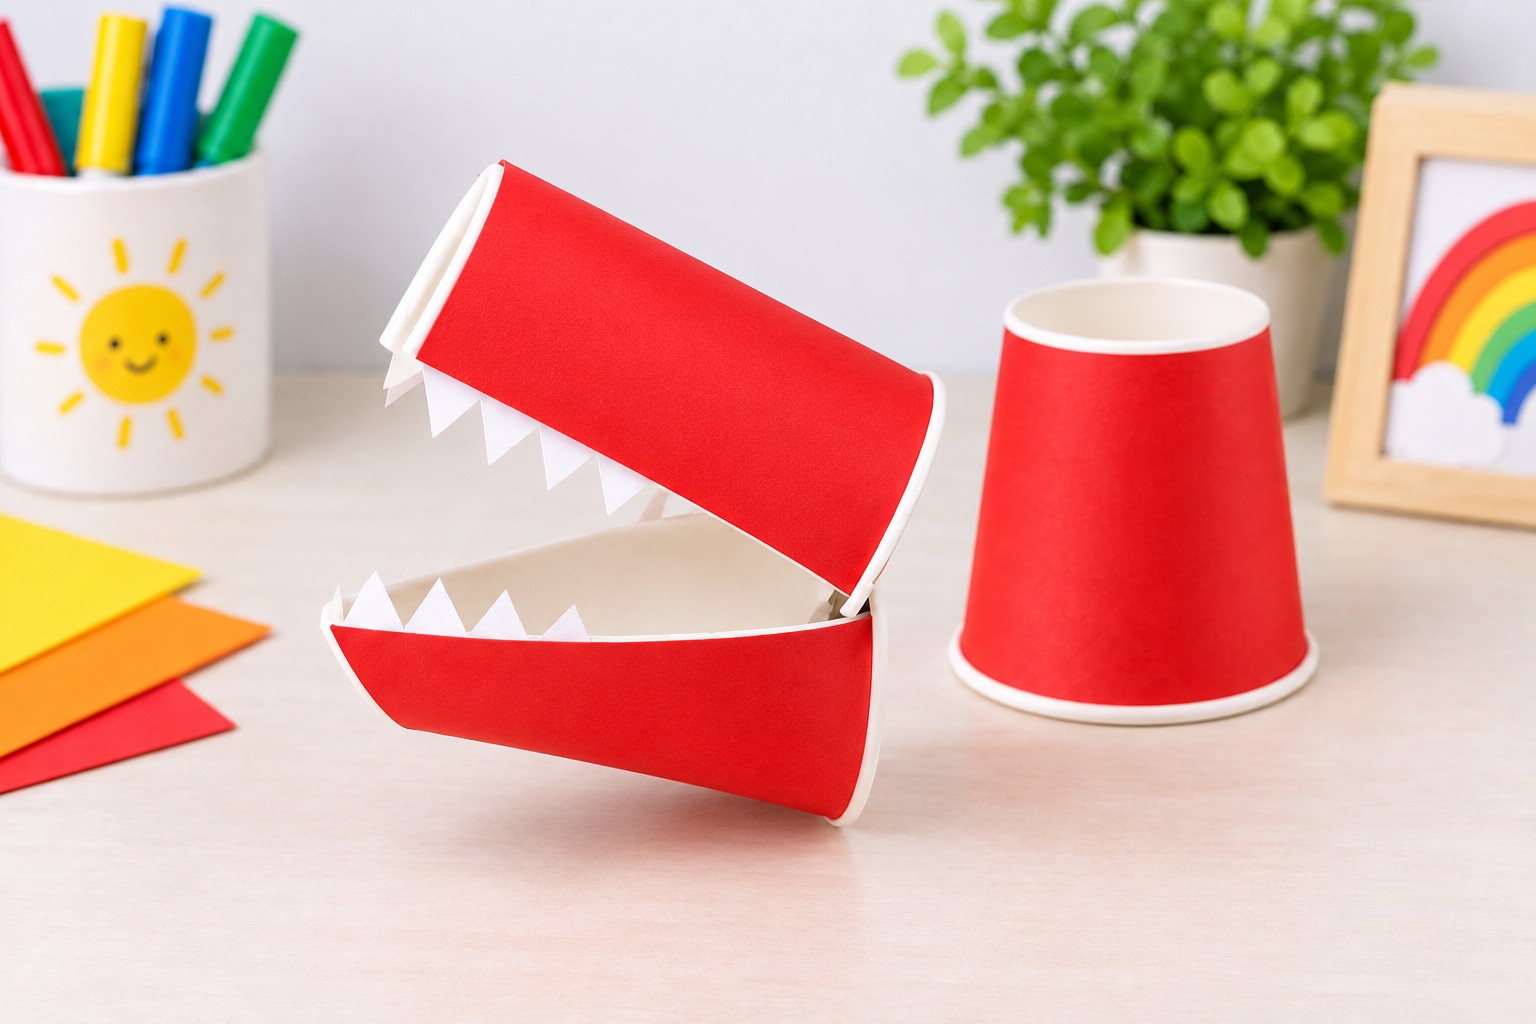
Before adding the eyes or teeth, test the moving section.
Place the head horizontally with the open end facing forward. Lift the upper panel while holding the lower panel. The mouth should open easily without tearing near the circular base.
If one side feels considerably tighter than the other, check whether the two side cuts are approximately the same length. A short cut can restrict the movement.
Avoid extending either cut into the closed base. The narrow areas beside the base effectively act as flexible hinges, and weakening them too much may cause the head to tear after repeated use.
This small movement test is worth doing before decoration because repairing the cup becomes more difficult once several cardstock pieces have been glued to it.
4. Add the Pull Cord
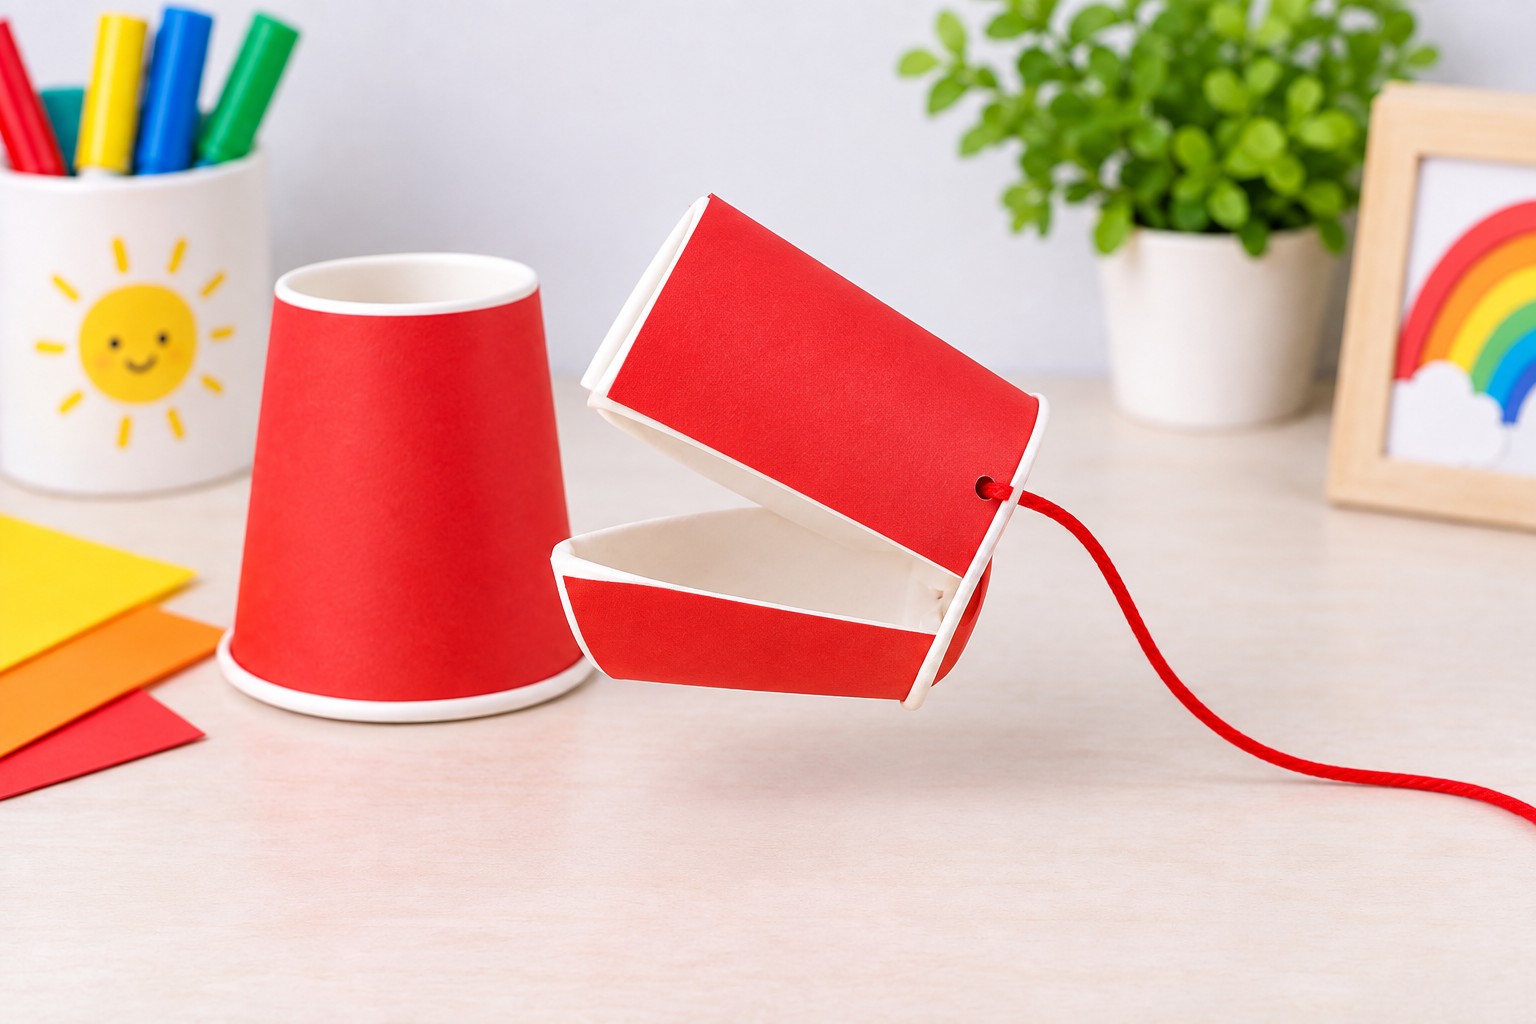
The moving mechanism uses a piece of cord running from the head through the body.
An adult should make a small hole near the edge of the circular base at the rear of the dragon's head. Keep the hole only slightly larger than the cord.
Thread one end of the cord through the hole. Secure it inside the head with a firm double knot. If the paper feels thin, place a small piece of tape around the hole before tying the cord. This distributes the pulling force across a larger area and reduces the chance of the cord tearing through the cup.
Leave roughly 40 to 50 cm of cord extending from the back of the head. Do not trim it yet because the final length will be adjusted after the head and body are positioned together.
5. Connect the Head to the Body
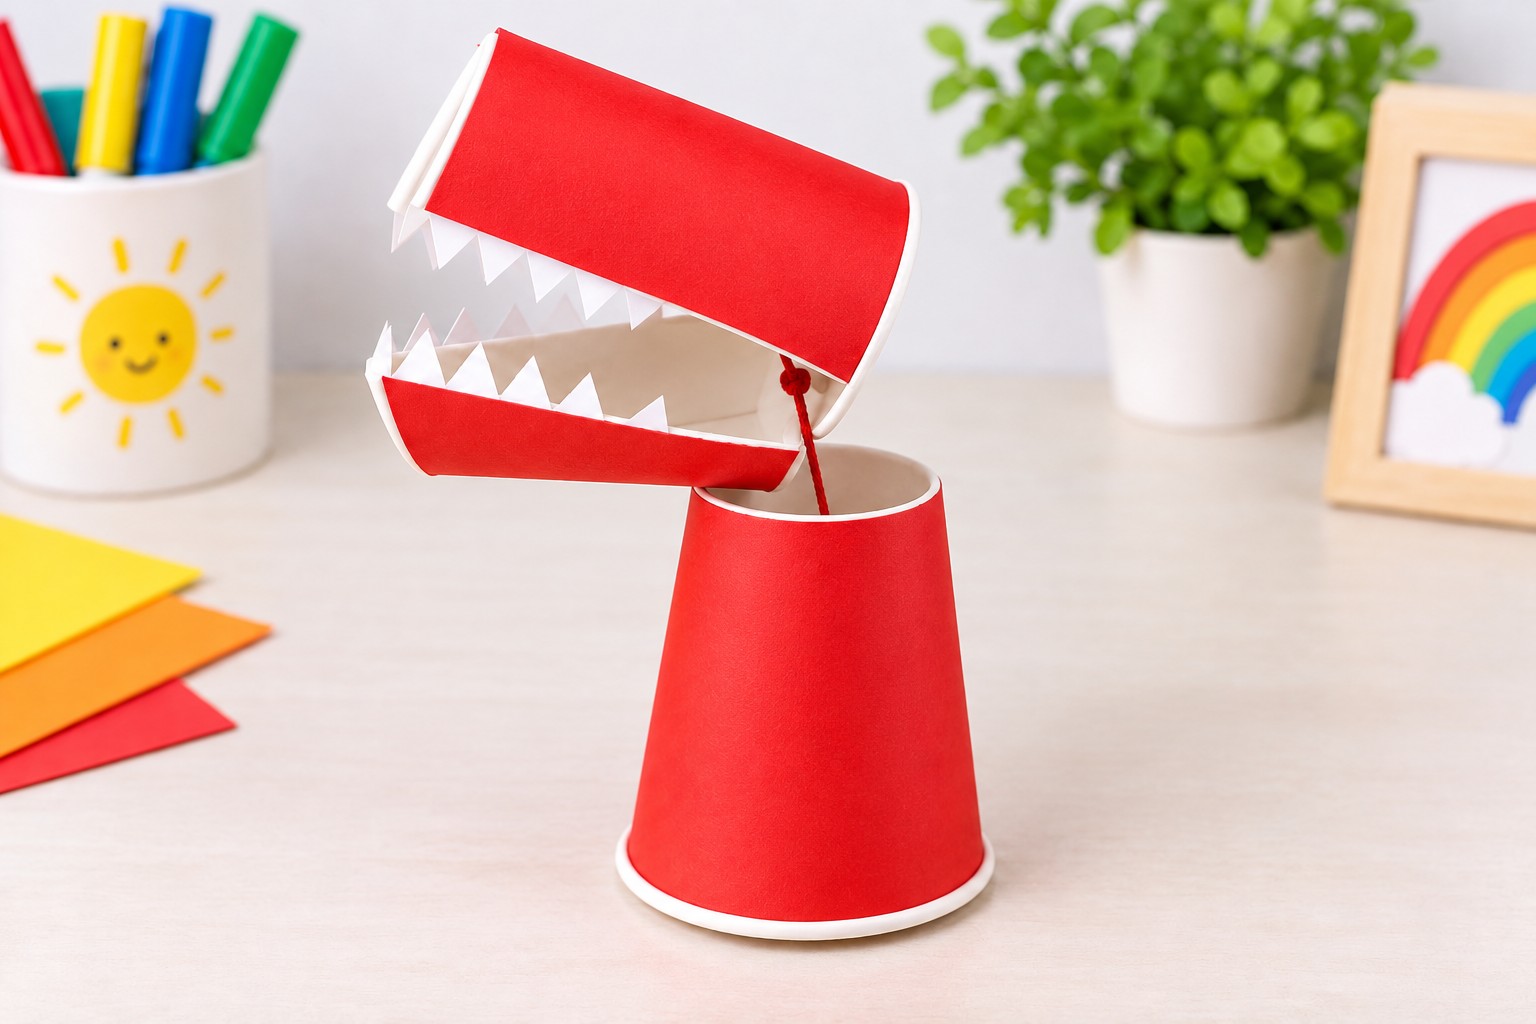
Turn the second red paper cup upside down so its large opening rests on the work surface. The closed bottom now becomes the top of the dragon's body.
Place the finished head horizontally above it. The lower jaw should rest lightly against the top portion of the body while the snout points forward.
Make another small hole in the upper side of the body cup, close to the rear of the dragon. Feed the free cord from the head through this hole and pull it out through the side of the cup.
Now test the mechanism before decorating anything else.
Hold the body with one hand and gently pull the free end of the cord with the other. The tension should make the head tilt and encourage the mouth to open. Release the cord and allow the head to settle back.
Do not pull forcefully. This is a lightweight paper mechanism rather than a rigid mechanical hinge.
6. Give the Dragon a New Face
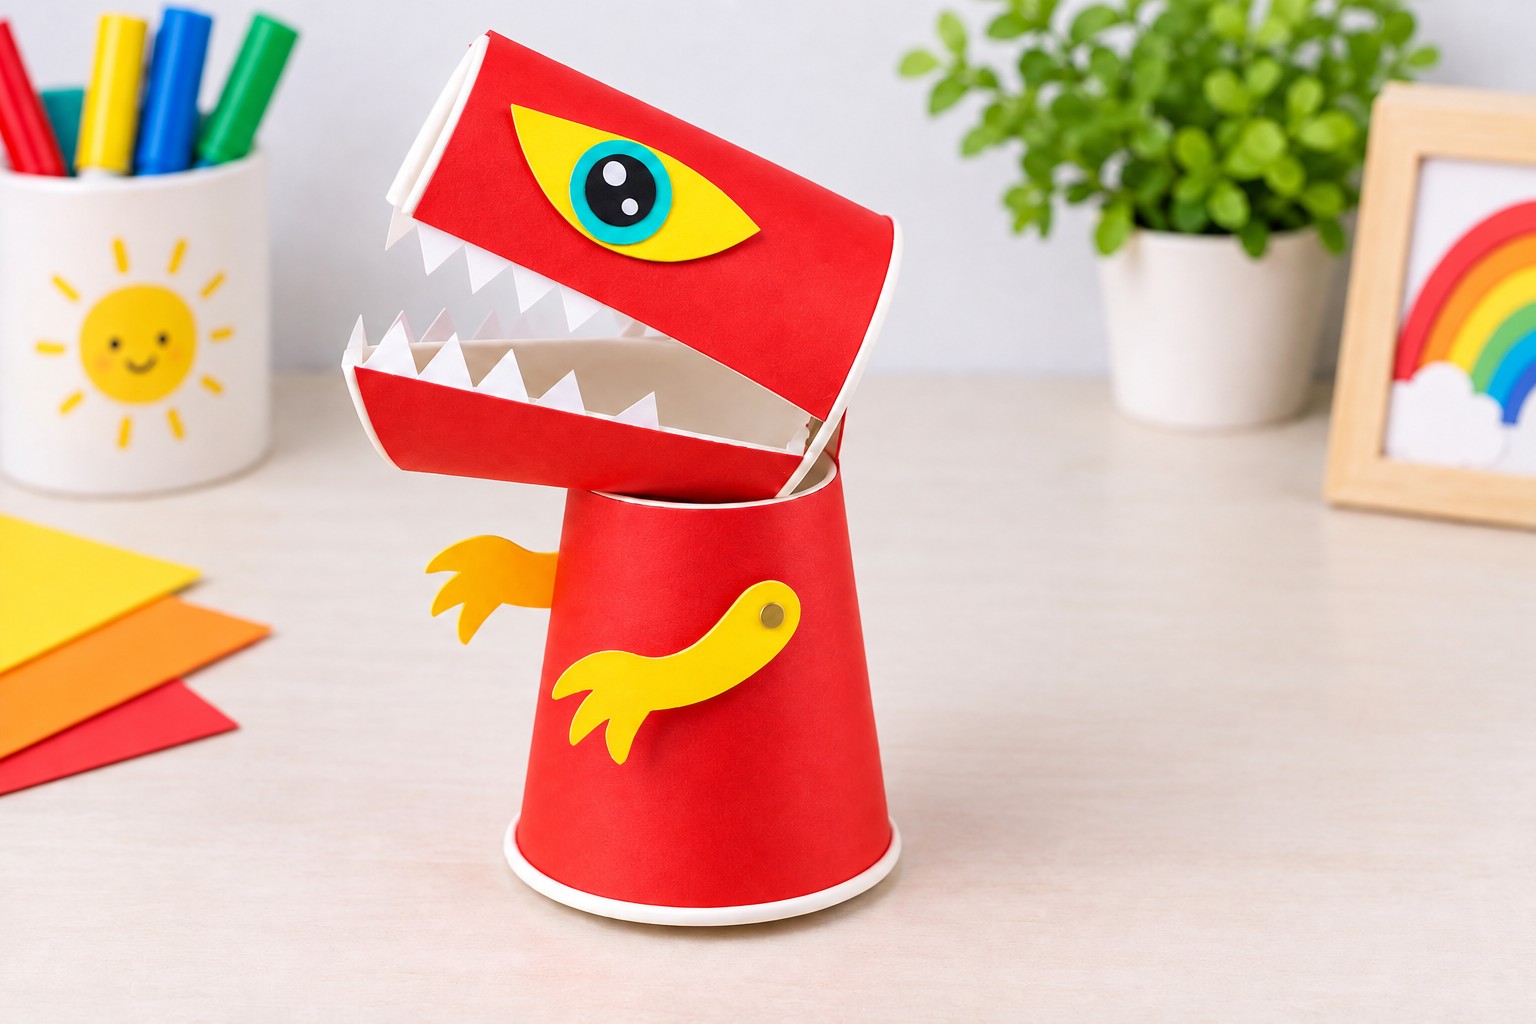
The video uses a green dragon with yellow and black facial details. For this version, create a more colorful red dragon.
Cut two almond shaped pieces from yellow cardstock for the eye areas. Add smaller turquoise circles or ovals for the irises, followed by black pupils and tiny white highlights.
Position the eyes toward the upper rear portion of the head rather than directly above the snout. This gives the dragon a slightly more expressive face and also keeps the decorations away from the moving jaw edges.
For the teeth, cut narrow strips of white cardstock and trim one edge into small triangular points. Glue one strip along the upper jaw and another along the lower jaw.
Keep glue away from the flexible side hinges and allow everything to dry before repeatedly opening the mouth.
7. Add Arms and Back Spikes
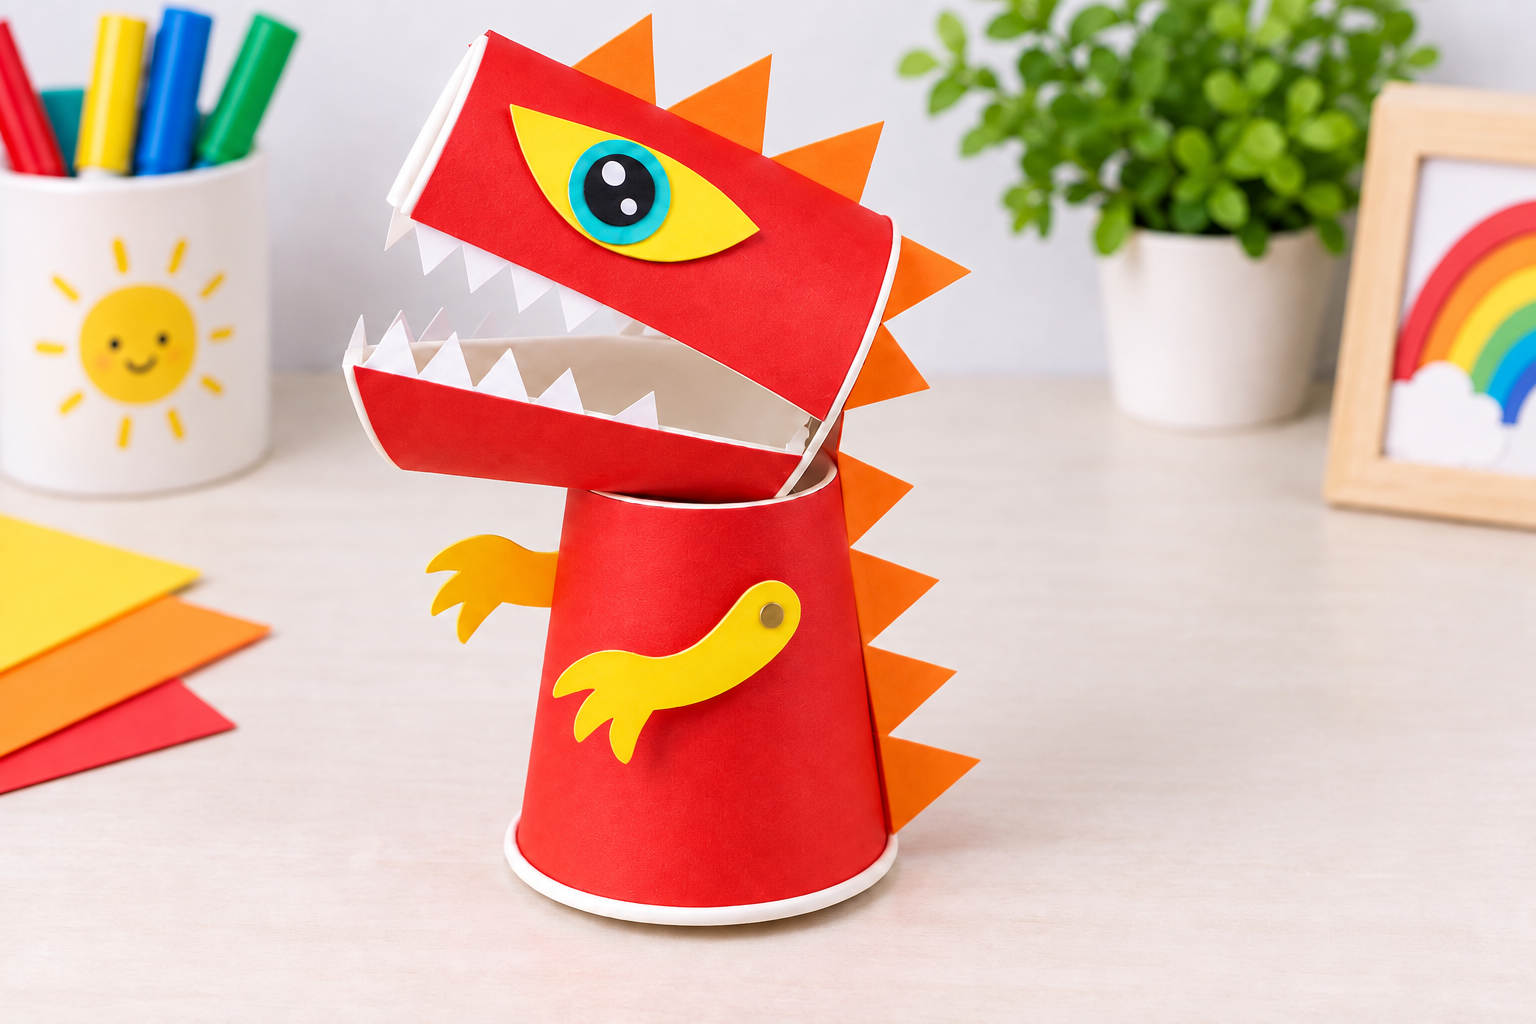
Cut two simple curved arms from yellow cardstock. They can have rounded ends instead of detailed fingers, which keeps the craft easier for children to assemble.
Glue one arm to each side of the body.
Next, cut a long strip of orange cardstock and create a row of triangular points along one edge. This will form the dragon's back spikes.
Attach the strip vertically along the rear of the body. Continue the spike motif onto a separate tail piece if you want the dragon to look more coordinated from head to tail.
Using orange spikes against a red body provides stronger contrast than repeating the same colors used in the original green version.
8. Turn the Cord Into a Dragon Tail
Instead of leaving the pull cord exposed, turn it into part of the design.
Cut a long tapered tail from orange cardstock. Make it wider where it meets the body and narrower toward the tip. Small yellow triangles can be added along one edge to continue the dragon's spines.
Secure the free end of the cord to the underside of the cardstock tail with a strong knot and a small piece of tape. The paper tail should now work as the handle for the moving mechanism.
Pull it gently backward. The dragon's mouth should open. Move the tail forward again and the head should settle toward its closed position.
If the movement is too small, slightly shorten the usable cord. If the mouth remains open when the tail is released, give the cord a little more slack.
Make adjustments a few millimeters at a time rather than making a large change immediately.
Finishing the Moving Dragon
Once the mechanism works smoothly, check every glued decoration and trim any loose paper edges. The finished dragon should have a red cup body, red movable head, golden yellow eye panels, turquoise eyes, white teeth, yellow arms, and orange back spikes and tail .
Children can use the finished craft for pretend play, puppet activities, storytelling, or a dinosaur and dragon themed craft session. Several dragons can also be made with different color combinations so each child creates a distinct character rather than producing identical projects.
Try combinations such as dark blue with lime details, purple with orange spikes, or yellow with red accents. The important part is keeping the head construction and pull mechanism functional while allowing the decorative elements to change.
Safety Note
This project is best completed with adult supervision . Adults should remove the cup rim, make the long structural cuts, and create the cord holes. Keep pointed tools away from children, and avoid leaving long loose cord around very young children. The completed craft should be treated as a handmade activity toy rather than a durable commercial toy.

Leave a Reply