
These 25 sketchbook cover ideas range from flat paper compositions to embroidered pockets and miniature scenes. Gothic, celestial, comic and cottage themes offer different ways to express your interests. The making guide explains material choices, layering, fabric fitting and detachable details, while the designs help you decide what belongs on a book carried every day and what needs protected desk use.
Table of Contents
- Let Your Drawing Routine Choose the Cover
- Gather Materials for Your Chosen Method
- Build the Cover in Layers
- Try the Fit Before Adding Raised Details
- Use the Making Sequence with These 25 Cover Ideas
- 1. Romantic Gothic Paper Layers
- 2. Pastel Celestial Art with Detachable Charms
- 3. Comic Graphics Built Around Your Own Characters
- 4. Burgundy, Lace, and Victorian Ornament
- 5. A Portrait Framed by Dark Floral Details
- 6. Pink Pop Motifs with a Y2K Mood
- 7. A Literary Portrait with Dark Academia Layers
- 8. A Halloween Theme You Can Refresh
- 9. An Aged Paper Look for an Archive Inspired Book
- 10. A Burgundy Ribbon Closure as the Main Feature
- 11. Fairycore Illustration Cards with a Lace Border
- 12. A Celestial Collage with a Star Outline
- 13. A Gothic Fabric Pocket for Reference Cards
- 14. Denim Patchwork with a Salvaged Pocket
- 15. Lavender Denim with Moon Embroidery
- 16. A Bunny Pocket with Cottage Floral Stitching
- 17. A Mini Sewing Studio on a Removable Panel
- 18. A Fashion Atelier Built from Fabric Swatches
- 19. A Pointed Gothic Window with Roses
- 20. A Storybook Window Above a Stitched Garden
- 21. A Cottage Window with Crochet Flower Boxes
- 22. A Secret Garden Gate with Climbing Roses
- 23. A Vintage Vanity with a Mirror Style Center
- 24. A Carousel Scene with a Small Ticket Pocket
- 25. A Perfume Vanity with Changeable Floral Cards
- Check the Finished Cover in Everyday Use
- A Few Choices Worth Settling Before You Begin
Let Your Drawing Routine Choose the Cover
Open the sketchbook as you normally draw before planning the decoration. A cover that folds beneath the pages needs a flat surface or a removable layer. Paper collage suits frequent carrying; an embroidered sleeve can be reused; a pocket holds a few reference cards; a raised scene requires protected storage.
Measure the actual boards and closed spine, then make a paper template with inner flaps and the seam allowances your sewing method requires. Try it open and closed. A removable sleeve preserves the original cover; glue, seams and fittings must remain clear of hinges and spiral openings.
Gather Materials for Your Chosen Method
For paper work, gather suitable prints or drawings, scissors, a ruler, pencil and compatible adhesive. Use a mat for knife cuts. Test ink and paper with the intended finish before application, and represent important photographs or documents with copies.
Textile covers need fabric, thread and an appropriate needle, with a hoop for separate embroidery. Wash and press suitable fabric as its care instructions allow. Charms require suitable chain, rings, two pliers and a reinforced attachment point. Choose only the supplies your design uses.
Build the Cover in Layers
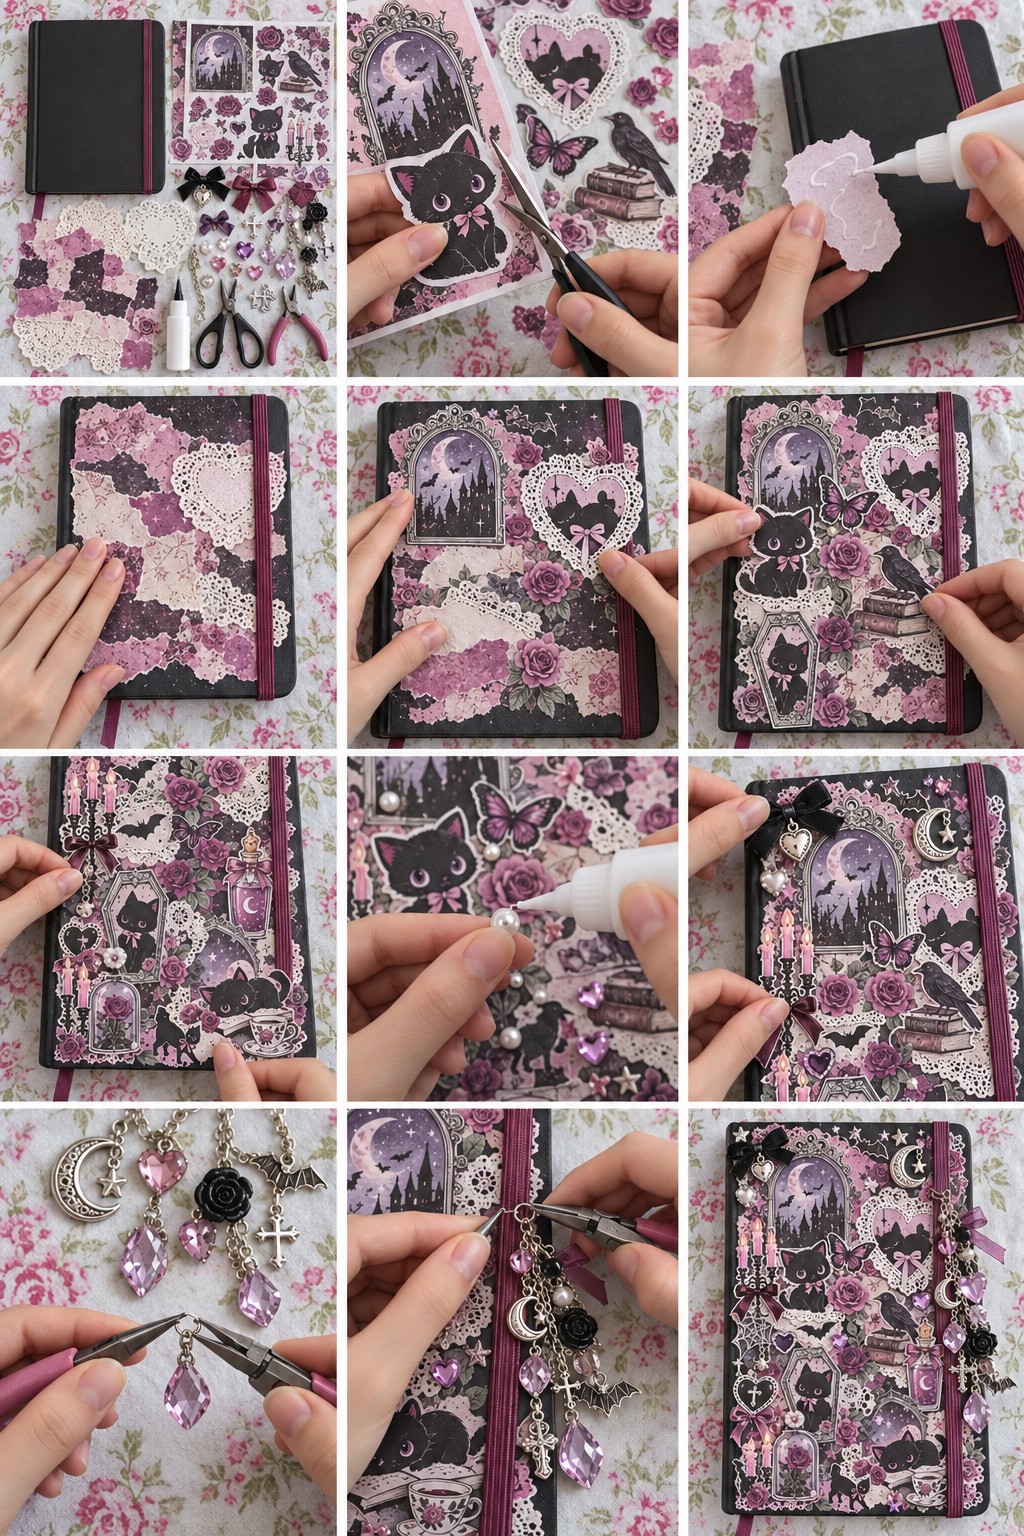
The making stages show cutting, adhesive applied to the paper backs, broad background layers, larger illustrations and finally small accents and charm connections. Follow that order across the paper designs. Arrange everything without glue and record the layout, checking that the closure does not cover the focal image.
Use the adhesive layer and smoothing method specified for the paper product. With a suitable decoupage system, smooth from the center toward the edges before adding raised pieces. Test other materials separately and keep adhesive on hidden contact faces. Follow drying and curing instructions before stacking or carrying the book.
For sewn designs, finish embroidery and pockets before fitting the sleeve. Stitch the pocket sides and lower edge while leaving its opening free, then test it with the intended cards. Sew crochet trim to the fabric layer while flat. Fitted inner flaps should hold the boards without binding the pages.
Try the Fit Before Adding Raised Details
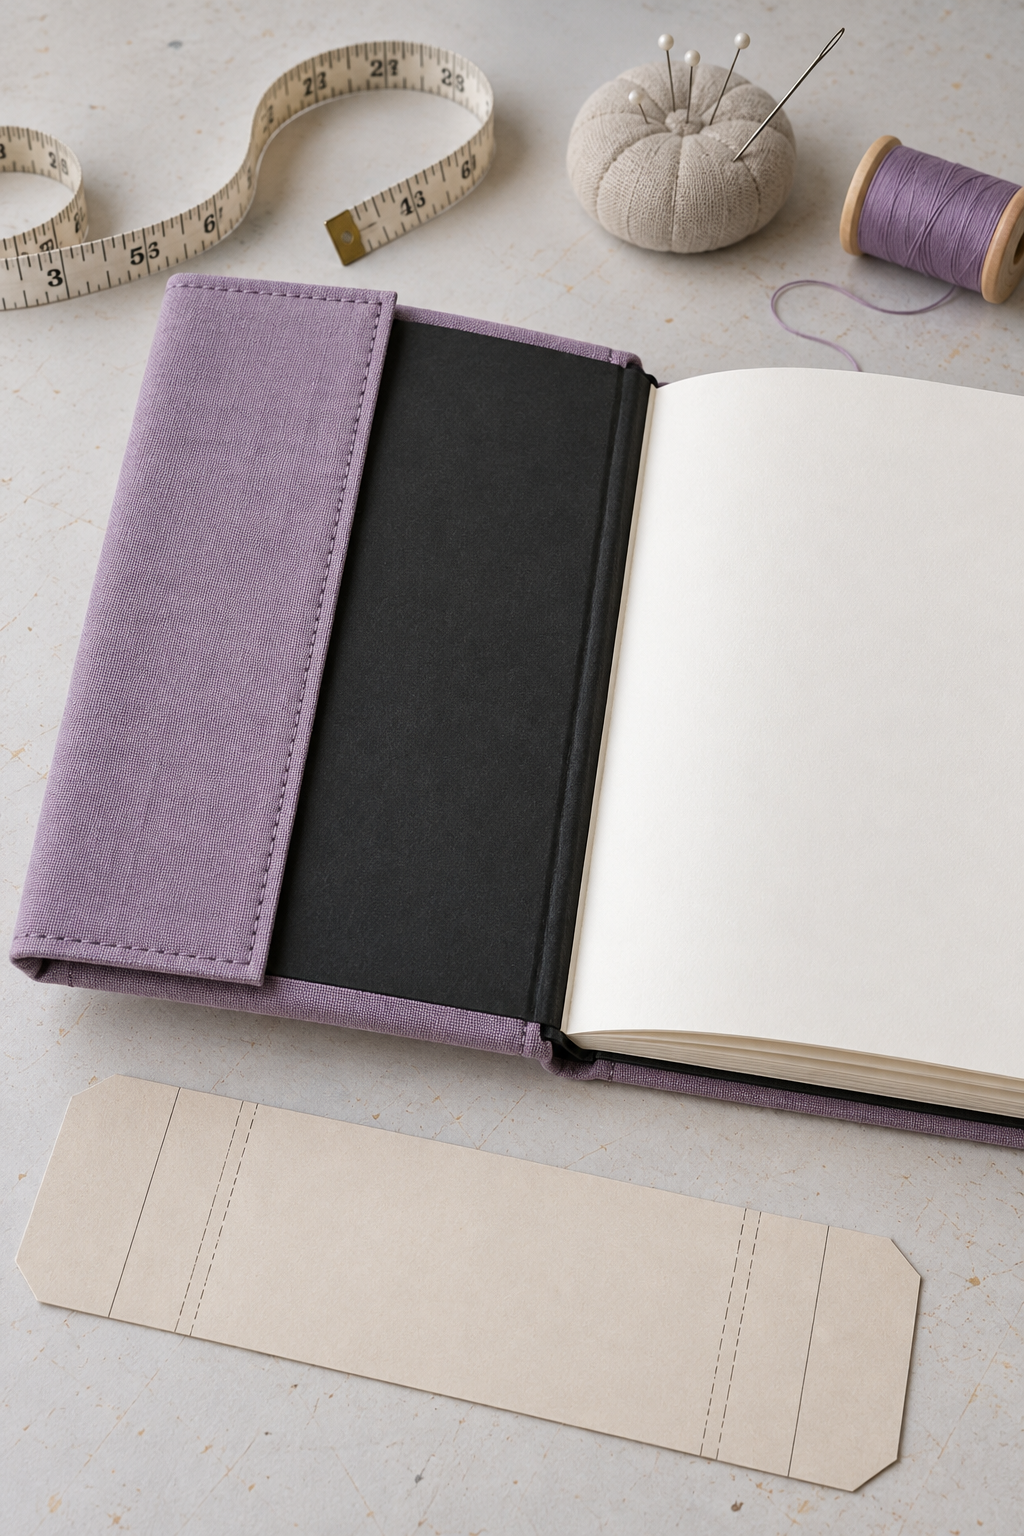
The plain trial sleeve lets you check movement before adding elaborate decoration. Leave sturdy fabric margins for handling. In designs 17 through 25, remove the sleeve by those cloth edges, not by pulling the cabinet, window, mirror ornament or flowers. Store the removed layer without crushing its raised pieces.
Make charm clusters separately. Twist connecting ring ends sideways with two pliers, then close them into alignment; do not pull the ring outward. Use a reinforced loop or suitable removable closure rather than assuming the original elastic supports hanging pieces. Remove the cluster before tight packing or drawing.
You can also download the PDF of the stickers you can put on your book cover here. https://drive.google.com/file/d/1LxNw7rD45tNwDrZKSUizACgRV1_ygLsr/view
Use the Making Sequence with These 25 Cover Ideas
Use this making sequence with the 25 ideas below, adapting the attachment method to paper, fabric or crochet. Retain a theme with flatter motifs for daily carrying, or build a removable panel for protected desk use. One personal drawing or meaningful color can establish the design without every embellishment shown.
1. Romantic Gothic Paper Layers
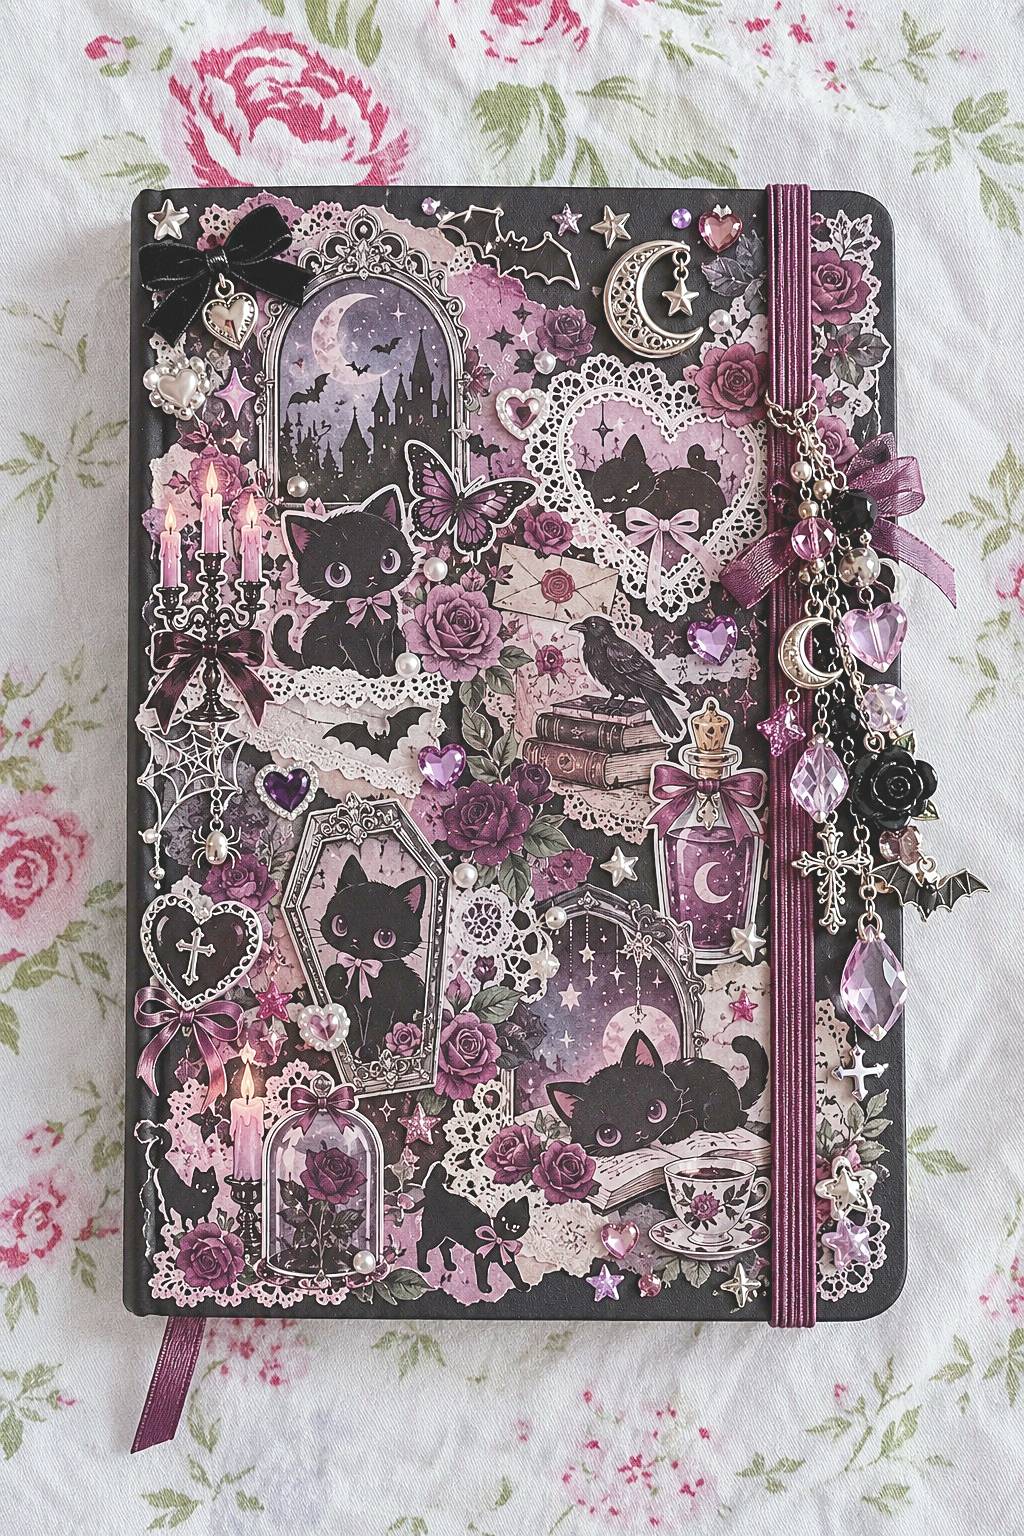
A black, plum, and dusty pink palette connects moons, roses, cats, and ornamental frames without making every piece identical. Choose one larger motif as the focal point, then use smaller paper shapes to link the surrounding areas. Lace introduces texture, while a limited number of jewel accents gives the cover a more decorative finish.
Arrange the collage without adhesive first and photograph the layout for reference. Keep frequently handled corners mostly flat. For a book carried daily, reproduce the lace effect with printed paper and place any dangling ornaments on a removable closure rather than fixing them along the outer edge. Attach the broad paper background first, then the main motifs, smoothing each flat layer before fitting lace or jewel details.
2. Pastel Celestial Art with Detachable Charms
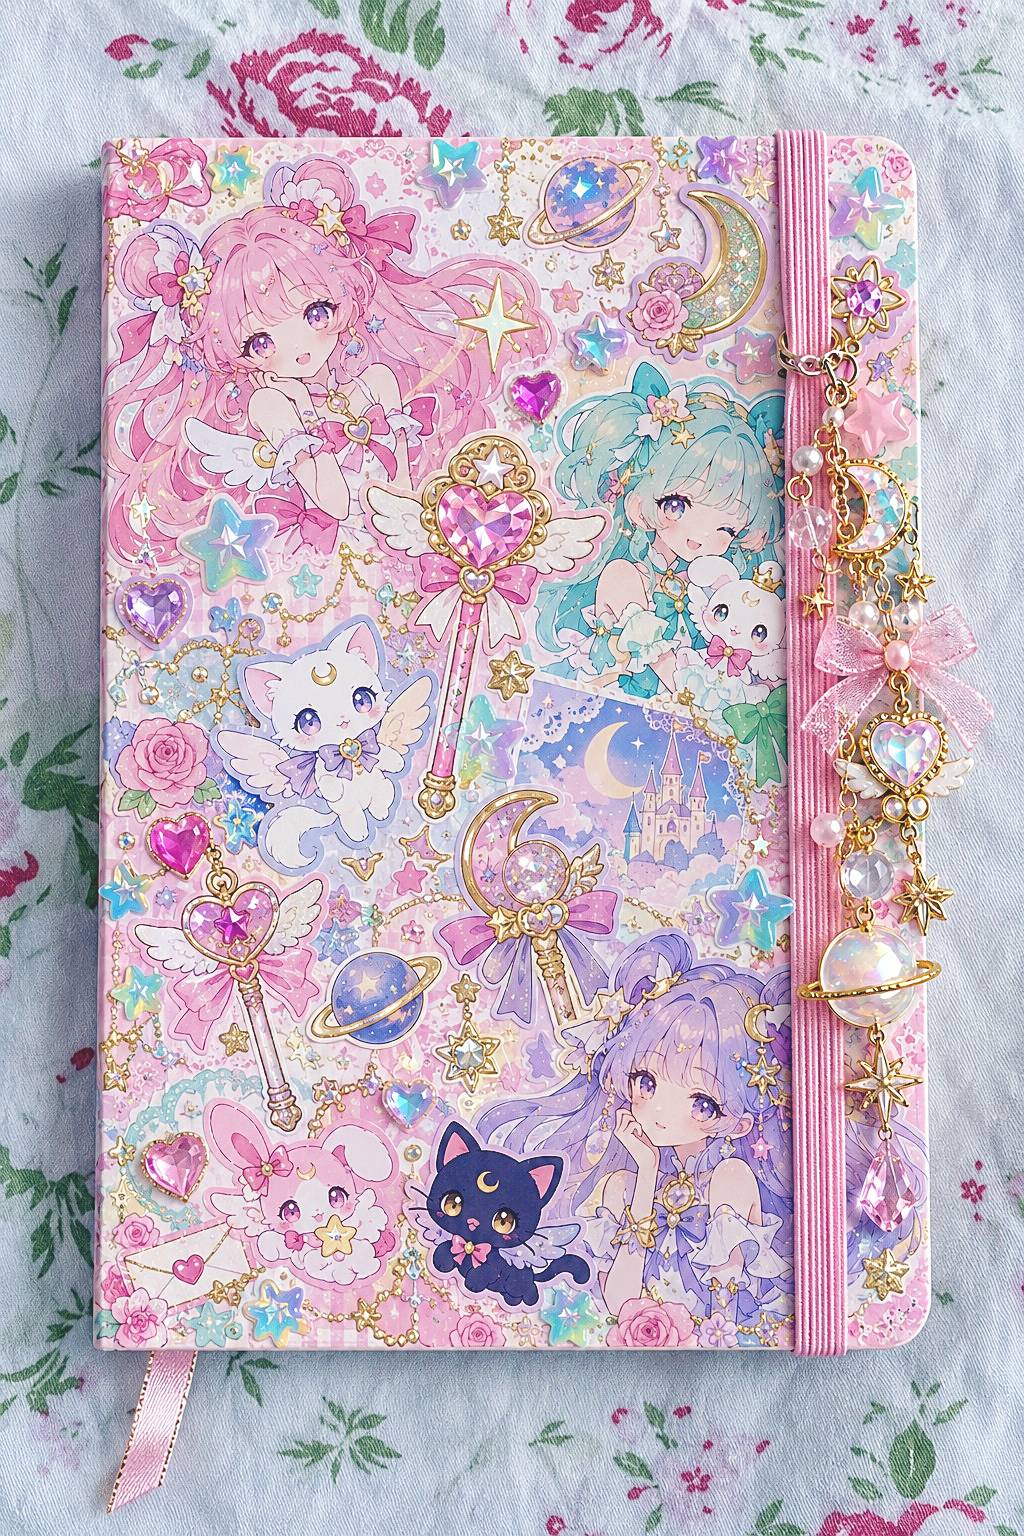
Pastel character drawings, stars, crescents, and jewel like motifs create a celestial cover with a lively surface. Give the illustrations the main space and group reflective details in a few areas. A repeated lavender, pink, and pale blue palette helps the smaller motifs belong to the same composition.
Keep the permanent layer thin if the sketchbook goes into a backpack. Add lightweight charms to a detachable clasp on a closure made for the book, checking that it does not pull the cover out of shape. Remove the charm cluster before drawing or packing the sketchbook tightly beside other supplies. Hold the reinforced loop when removing its clasp.
3. Comic Graphics Built Around Your Own Characters
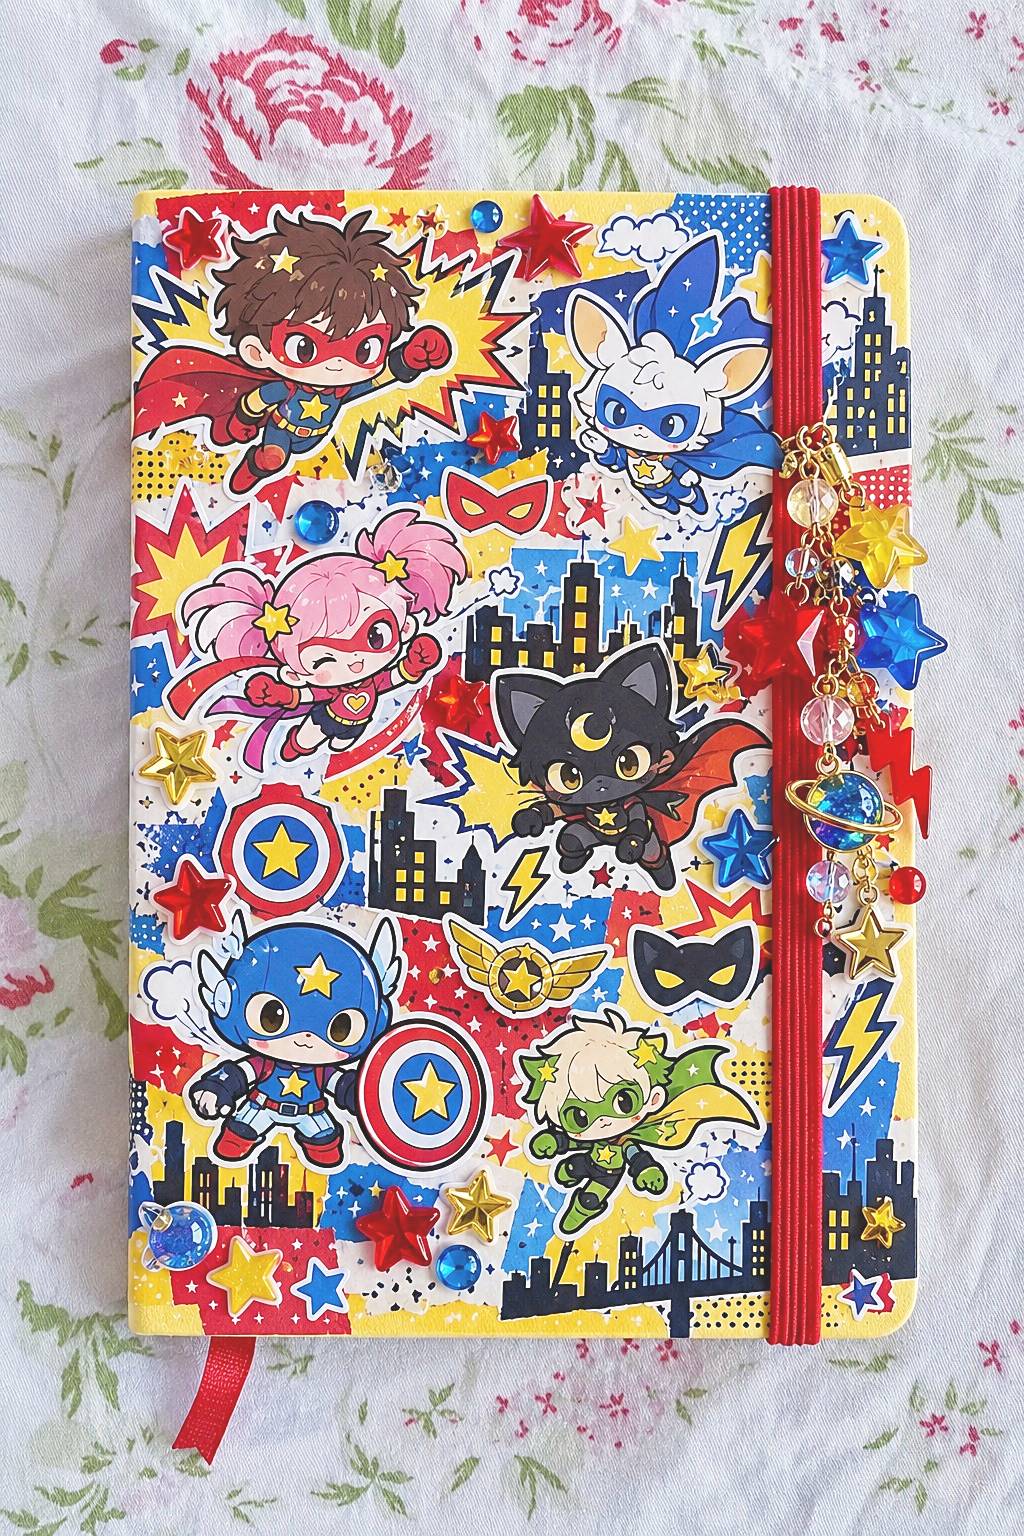
Bright red, blue, and yellow work with black outlines, lightning shapes, and halftone patterns to give a cover comic book energy. Use your own character, emblem, or short illustrated story as the main subject. Repeat a few graphic shapes rather than filling every remaining gap with another competing image.
Make a paper layout that leaves the focal illustration visible when the closure is in place. If you intend to brush a finish over printed artwork, test the printing method on a spare piece first. Keep the finished surface flat so the sketchbook can be used comfortably on a desk or lap.
4. Burgundy, Lace, and Victorian Ornament
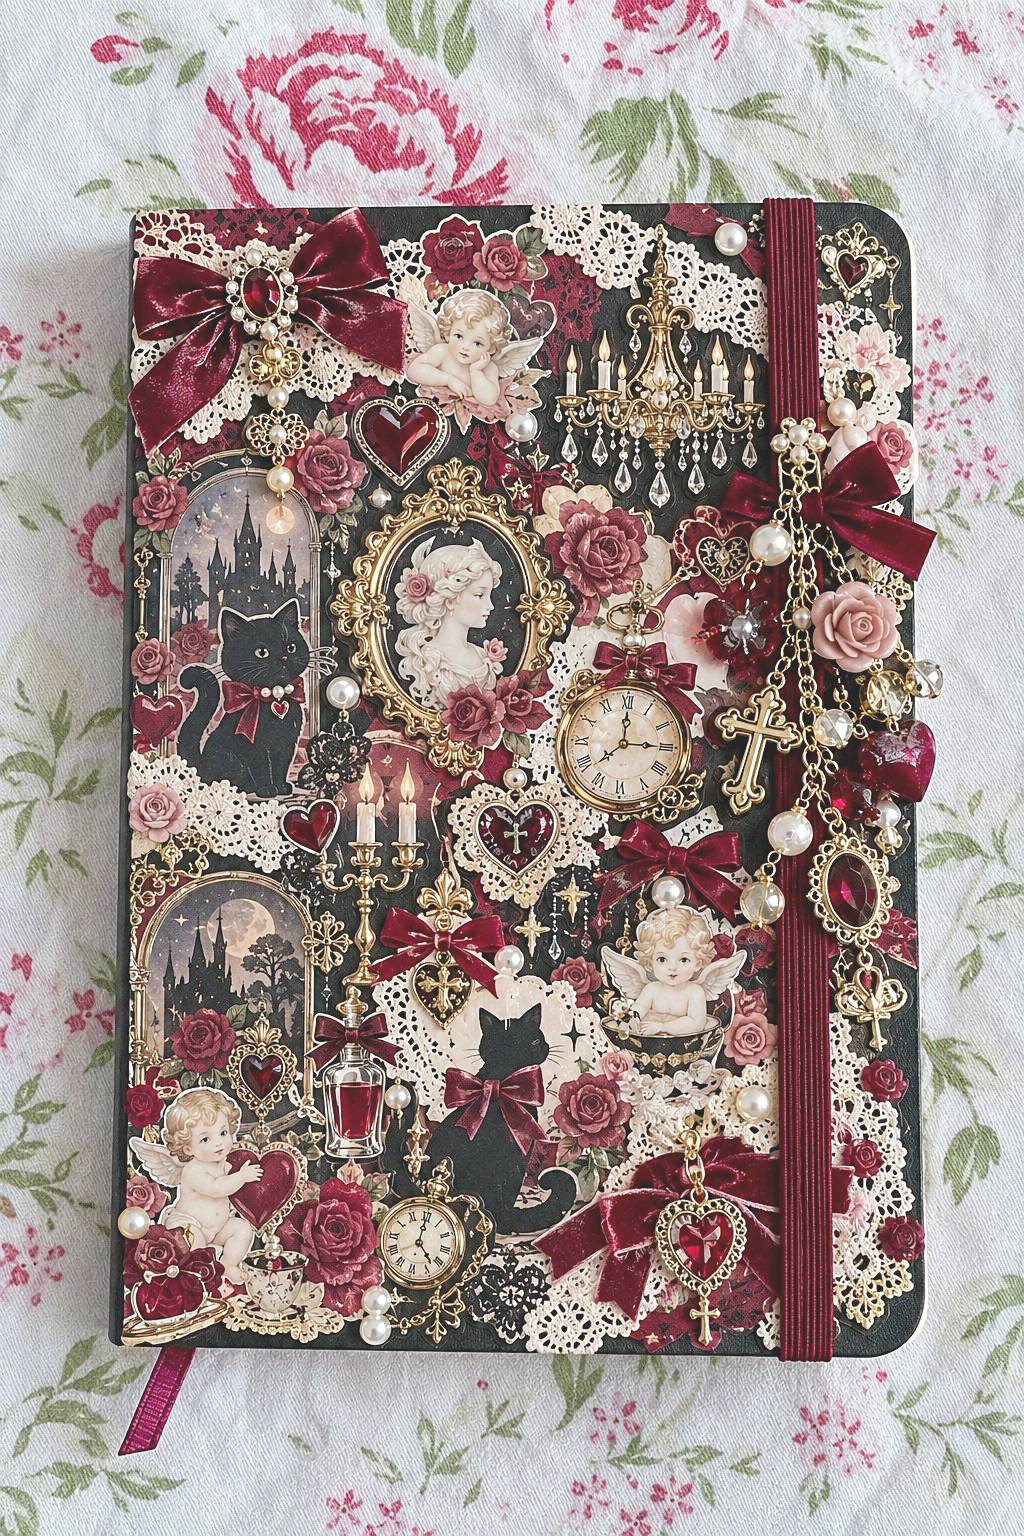
Burgundy gives black lace, pale portraits, roses, and gold toned details a consistent background. Place the largest illustration first, then connect smaller elements with repeated floral shapes. Velvet ribbon adds a different texture from paper and can create a strong vertical line across the cover.
Choose either a mostly flat everyday version or a more elaborate desk version before attaching trim. Test the ribbon position through the book's full opening movement. Short, securely attached pearl clusters are easier to manage than loose strands, especially beside the hinge or page turning edge. Stitch ribbon and lace onto a separate sleeve before fitting it.
5. A Portrait Framed by Dark Floral Details
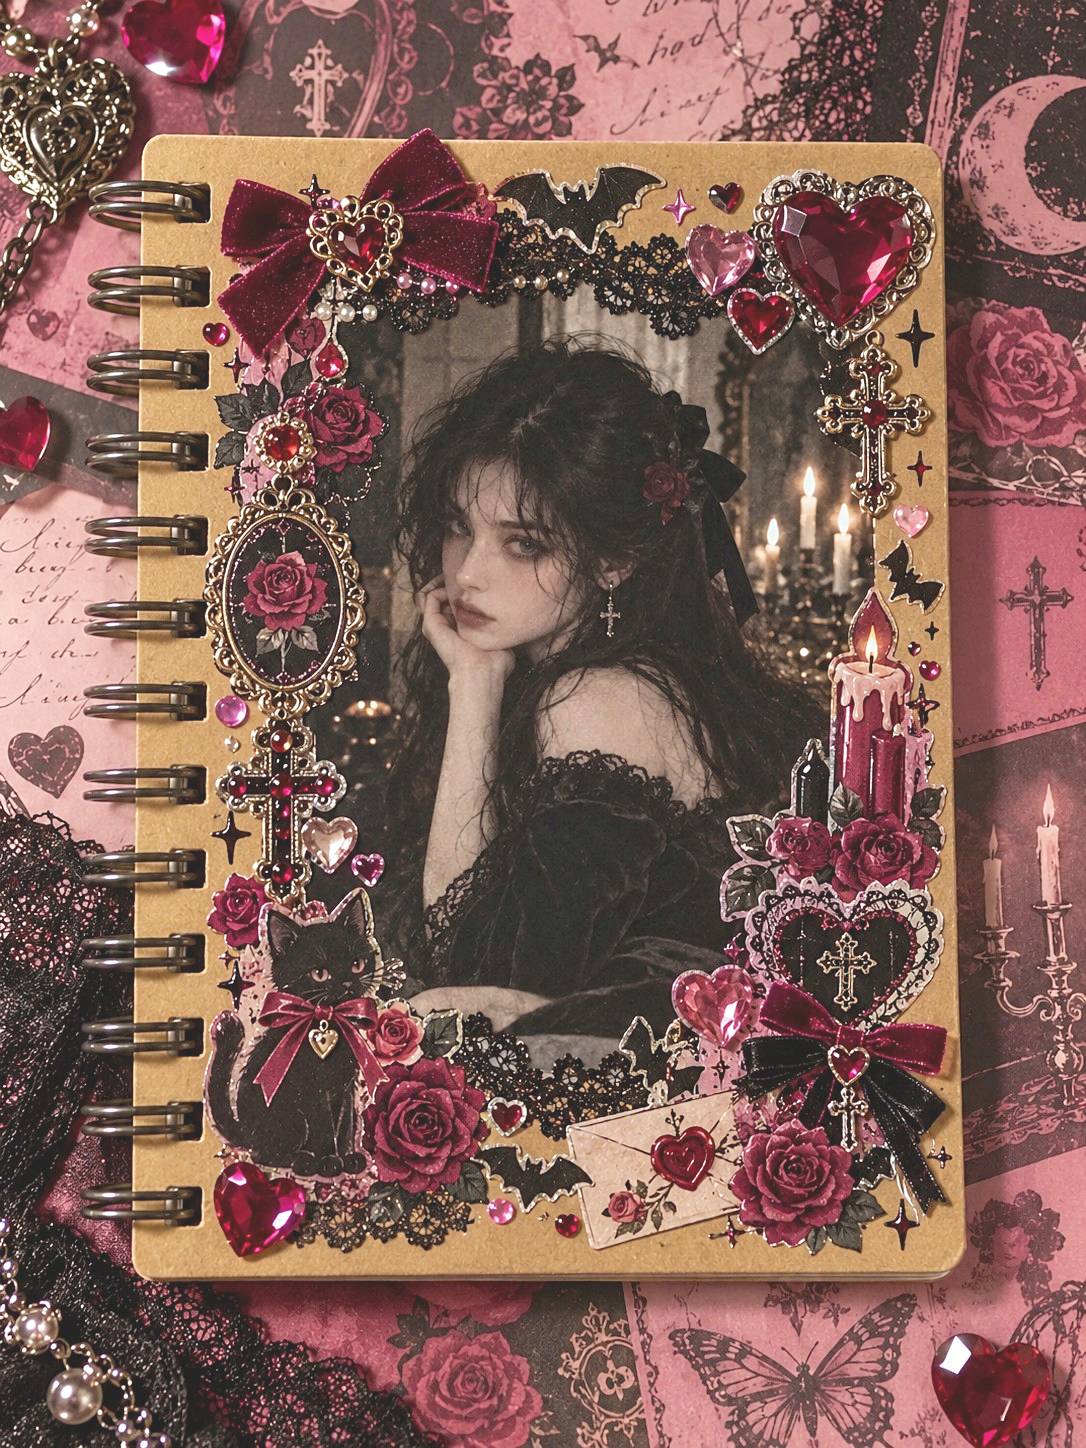
A portrait led composition feels personal because one image carries the story. Surround an original illustration or a photograph you can use with a narrow frame of roses, lace, and selected jewel accents. A kraft colored base provides a warm contrast to burgundy and black without requiring another pattern.
For a spiral sketchbook, keep every layer clear of the holes and moving loops. Mount the portrait flat before adding the border. If you want to change the central image later, use a properly sized photo pocket as an optional alternative and check that its opening remains accessible after the trim is attached. Smooth the portrait and surrounding flat paper before attaching raised roses or other trim.
6. Pink Pop Motifs with a Y2K Mood

Cherries, butterflies, phone illustrations, metallic stars, and glossy hearts can surround a fashion portrait in a pink pop composition. Let the central image occupy enough space to remain recognizable. Repeat silver or pale pink highlights to connect the accessories instead of introducing a different finish for every motif.
Use flat stickers or cut paper shapes for the main decoration. Reserve raised gems for a book that has protected storage, or replace them with printed jewel motifs for regular travel. Before finishing, check that the decorated cover still slides into its usual pouch without forcing or catching. Keep the binding edge free.
7. A Literary Portrait with Dark Academia Layers
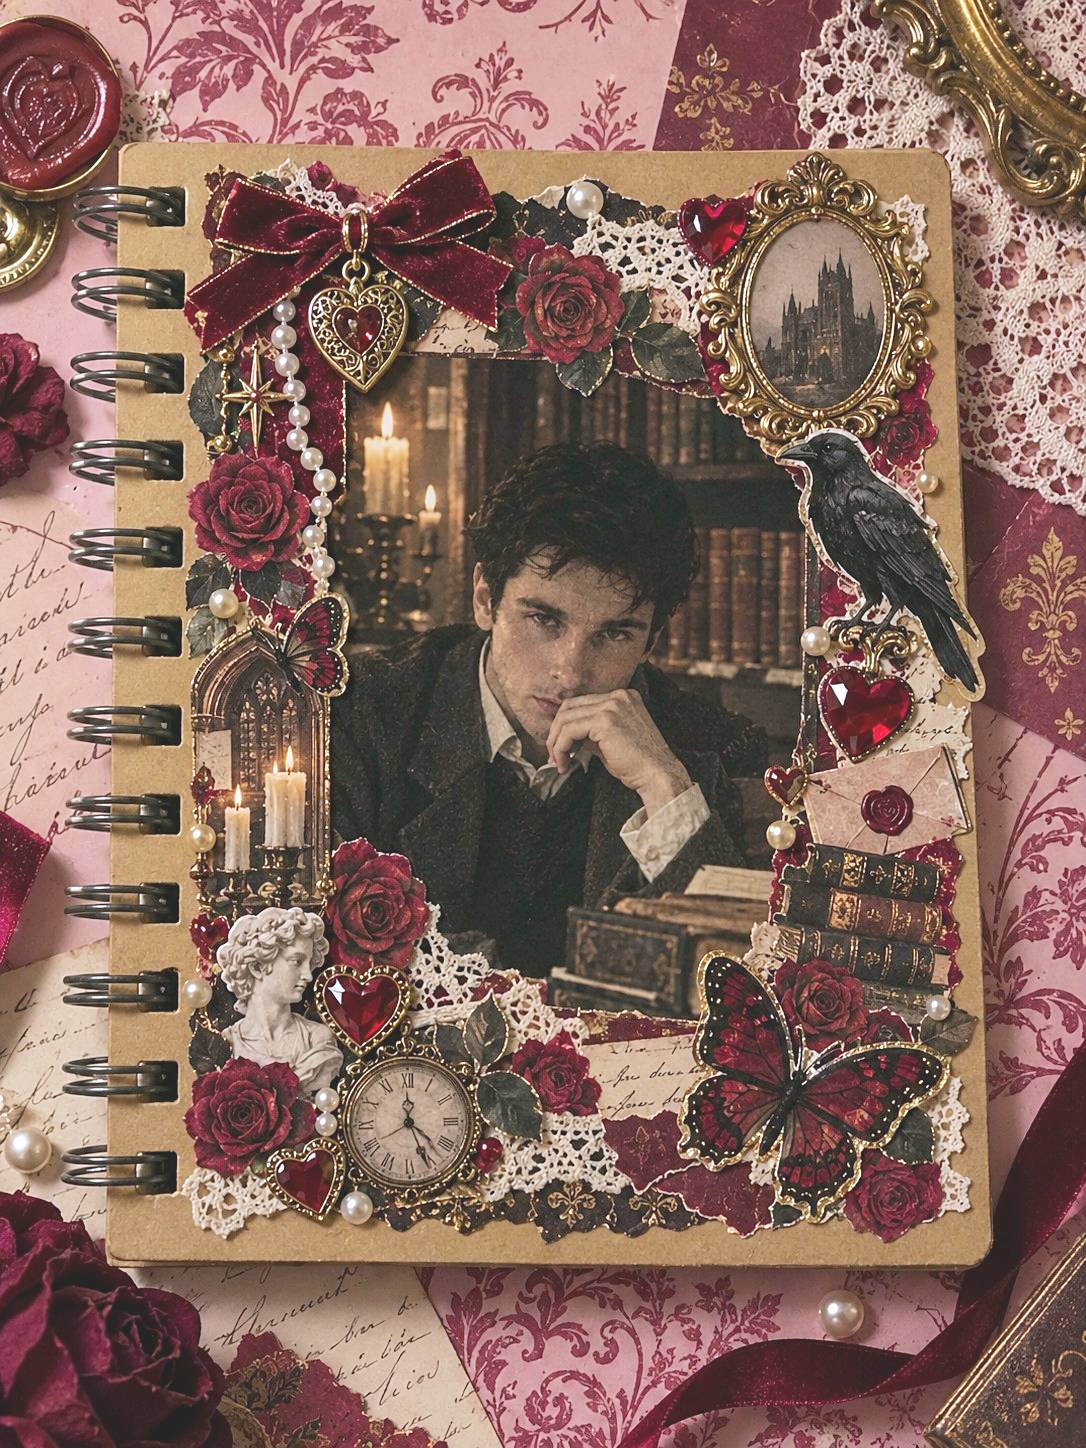
A portrait, library imagery, aged paper prints, and burgundy flowers create a literary theme. Choose a specific interest, such as architecture, astronomy, or a favorite period of illustration, to guide the supporting pieces. Torn edges can soften the composition while a limited cream, brown, and wine palette keeps it coherent.
Use copies or personal drawings for the paper layers and keep important faces or details uncovered. Add a separate ribbon bookmark only where the binding and cover construction allow it. If the sketchbook folds back, check that any attached ornament does not become a pressure point beneath the drawing pages.
8. A Halloween Theme You Can Refresh
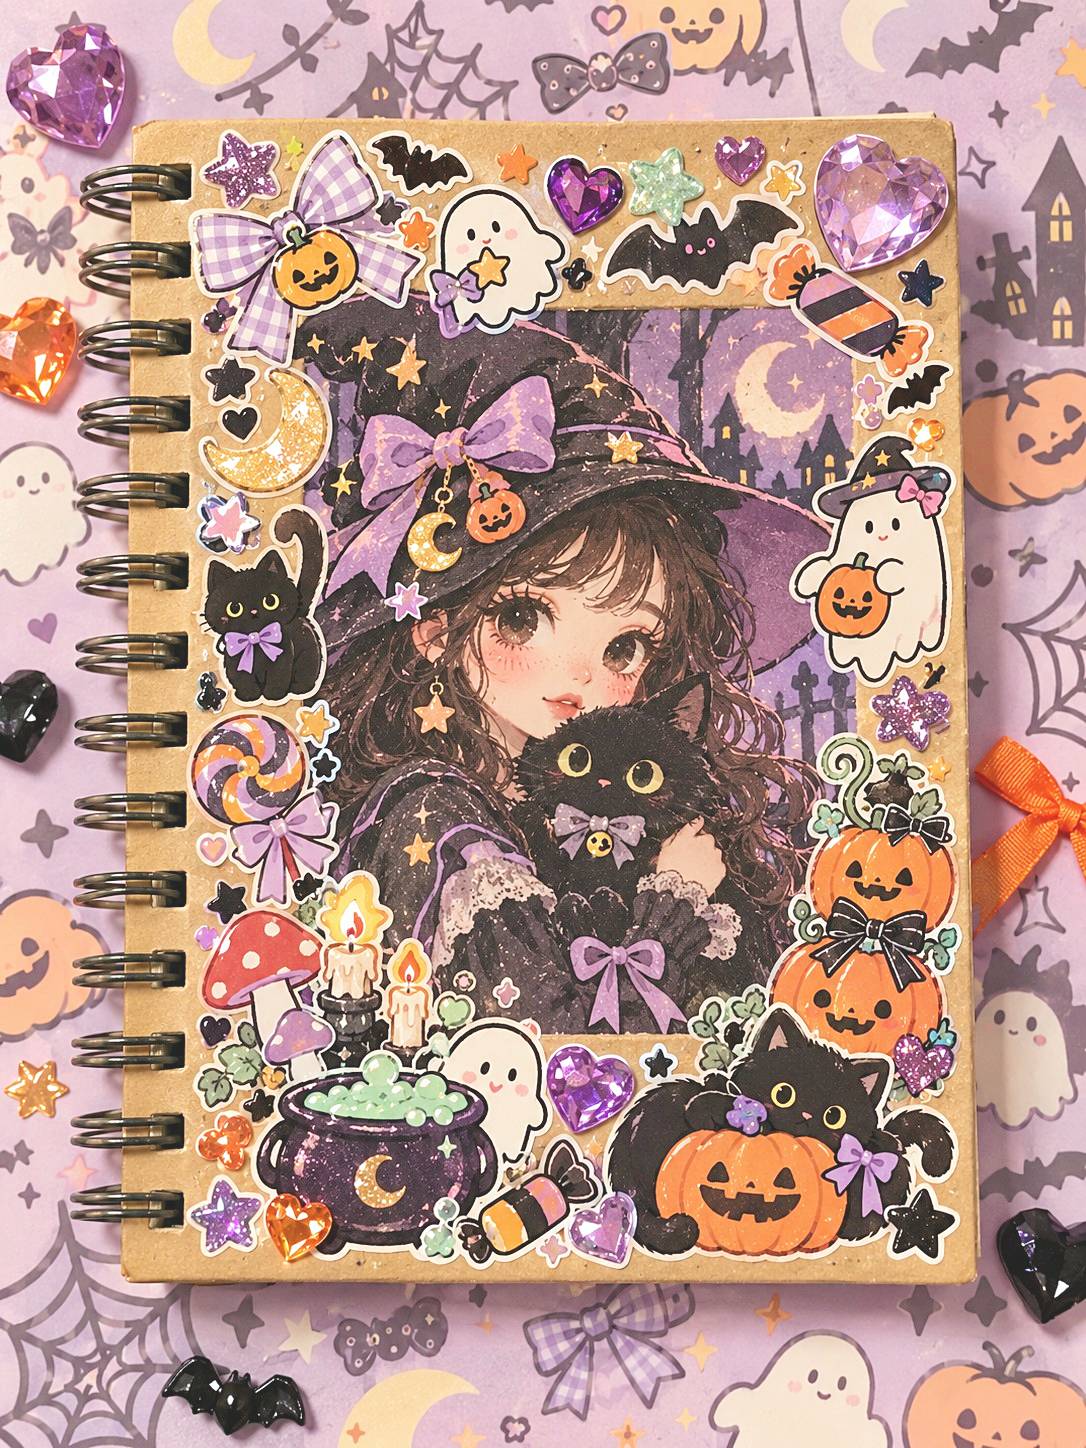
A friendly witch, cat, or ghost can anchor a seasonal cover, with pumpkins, bats, and stars providing smaller accents. Lavender and cream offer a lighter background for orange and black. Keeping the main drawing larger than the surrounding shapes helps the cover remain readable despite its playful detail.
Put seasonal artwork on a removable paper jacket or changeable card rather than repeatedly peeling pieces from the original cover. Flat glitter effect paper supplies sparkle without loose particles. Keep any decorative bow on the jacket itself and test whether it obstructs the spiral when the cover turns. Keep the jacket flaps clear of page corners.
9. An Aged Paper Look for an Archive Inspired Book
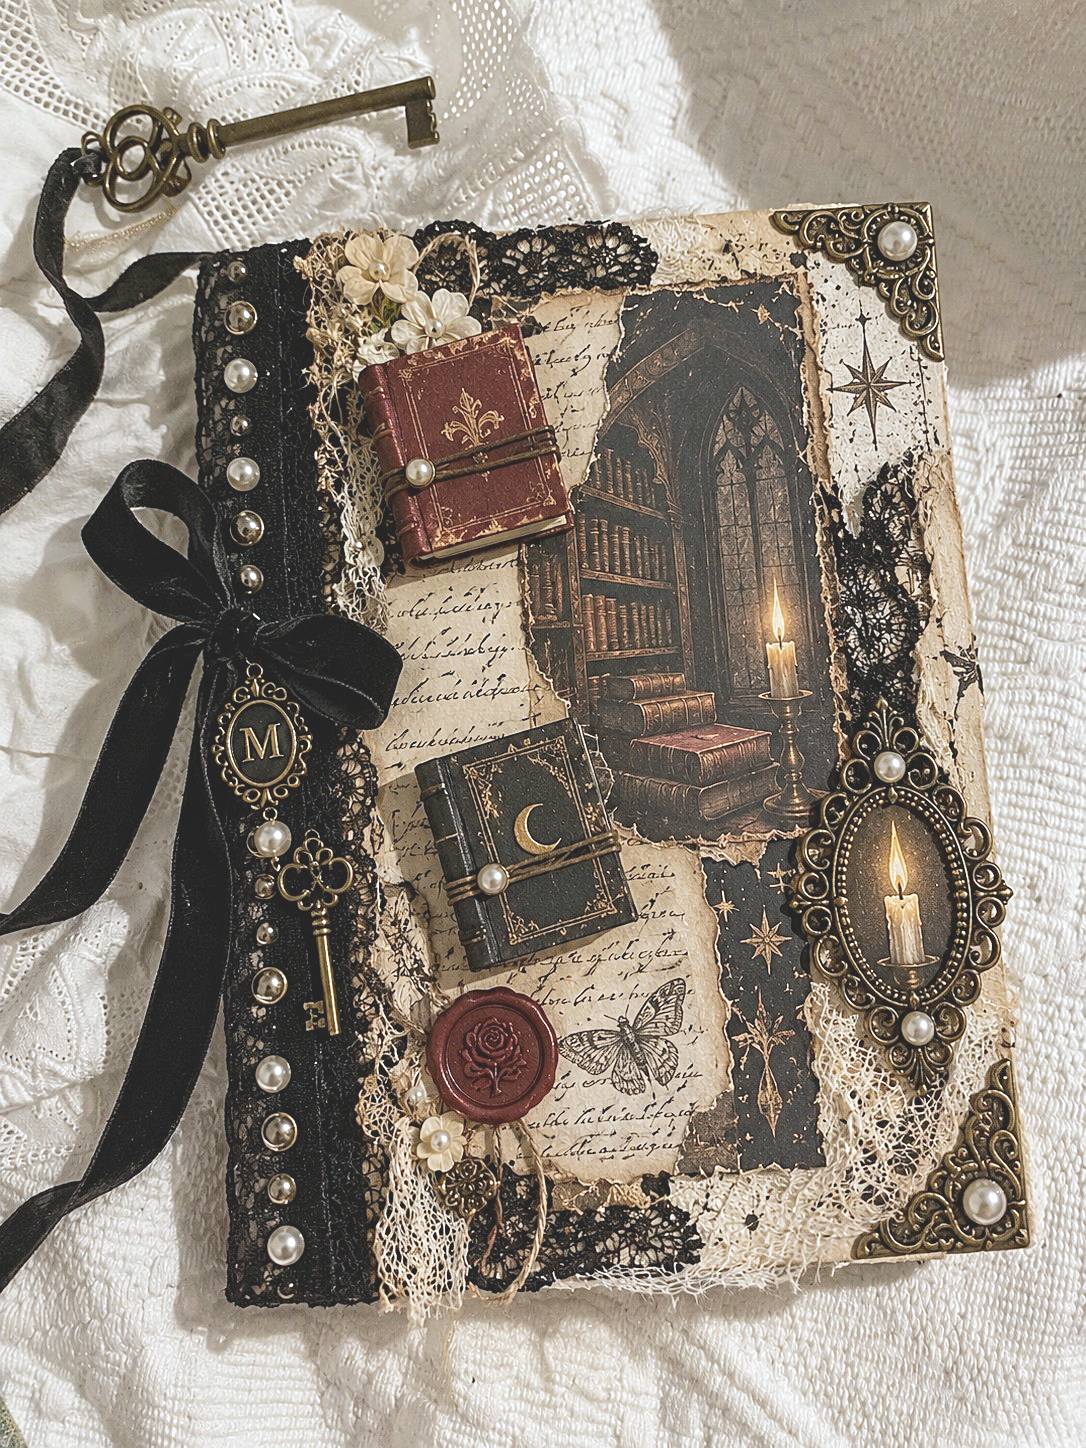
Cream and brown paper layers, botanical fragments, miniature book imagery, and a dark architectural panel suggest an old personal archive. The composition benefits from a balance of text like texture and plain areas. Use digitally aged prints if you want the appearance without wetting the sketchbook or staining its pages. Fix the flat background papers and architectural image first, smoothing them before adding the miniature book details and corner ornaments. Related vintage scrapbook layering ideas explore how personal drawings, botanical pieces and paper textures can work together.
The aged appearance is a style choice, not evidence that the materials are archival. For meaningful photographs or documents, decorate with copies and store the originals separately. If adding corner protectors, choose a size compatible with the cover thickness and check for sharp edges or interference with closing.
10. A Burgundy Ribbon Closure as the Main Feature
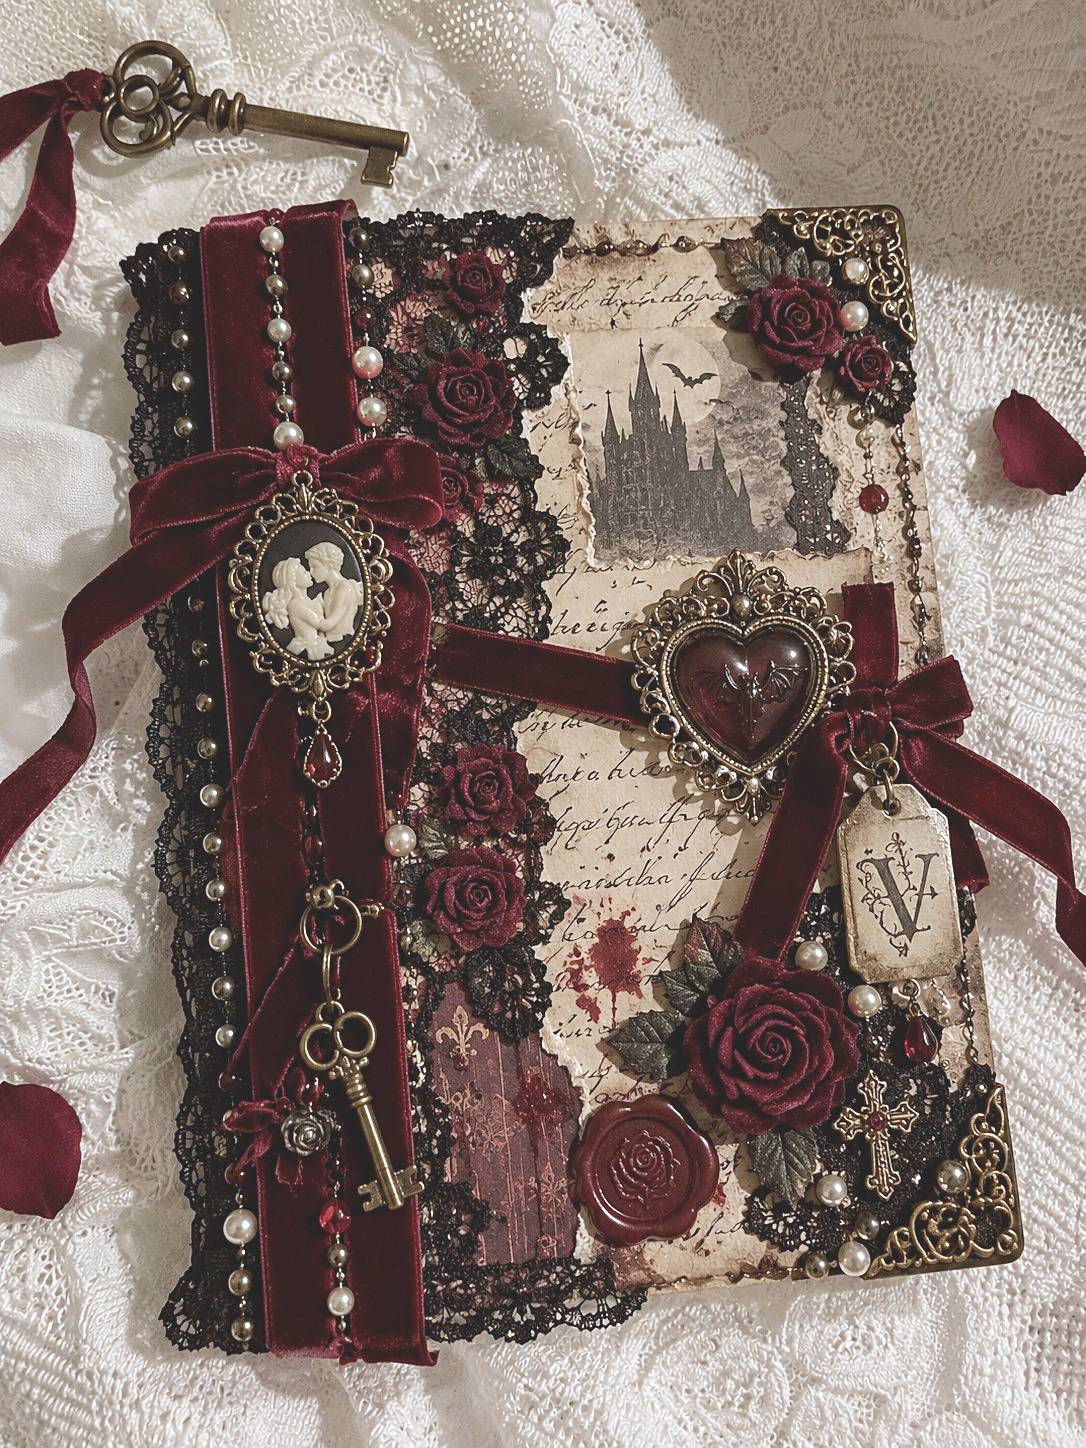
Crossed burgundy ribbons give a parchment toned cover a clear structure. A cameo, heart, or small floral cluster can mark their meeting point, while black lace adds contrast along one side. Keeping the ribbon arrangement prominent helps this design differ from a cover built around a central portrait.
Decide whether the ribbons are decoration or a working closure. A closure needs enough length to untie easily and should not be glued across a moving hinge. Test the arrangement with the book closed before securing it, then check that the released ribbons can be moved away from the drawing surface. Finish ribbon ends neatly to limit fraying.
11. Fairycore Illustration Cards with a Lace Border
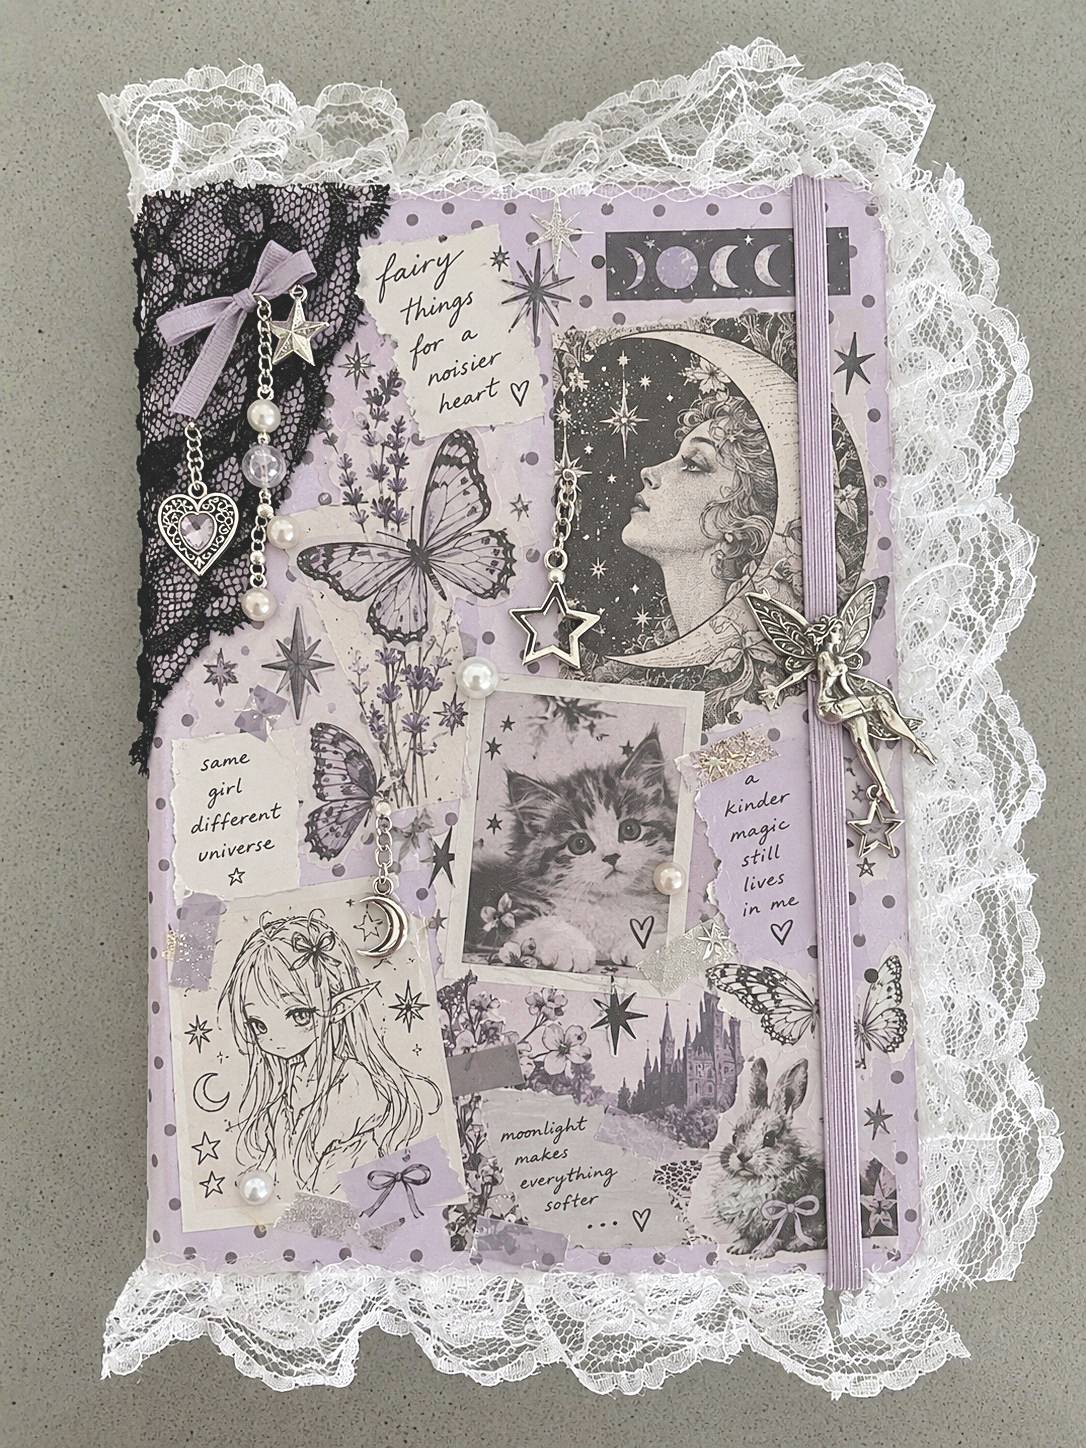
Small character drawings, butterfly studies, moon imagery, and handwritten notes can form a fairycore inspiration board. Lavender and ivory keep the background gentle, while a little dark lace defines one corner. Vary the card sizes so the collage has a focal point instead of becoming an even grid.
Choose a changeable paper jacket or fabric sleeve if you expect to add new drawings. Secure lace to the backing rather than letting it extend loosely into the hinge. For regular bag use, keep the outer border close to the cover outline and replace long dangling pieces with short stitched details. Finish exposed fabric edges before fitting the sleeve.
12. A Celestial Collage with a Star Outline
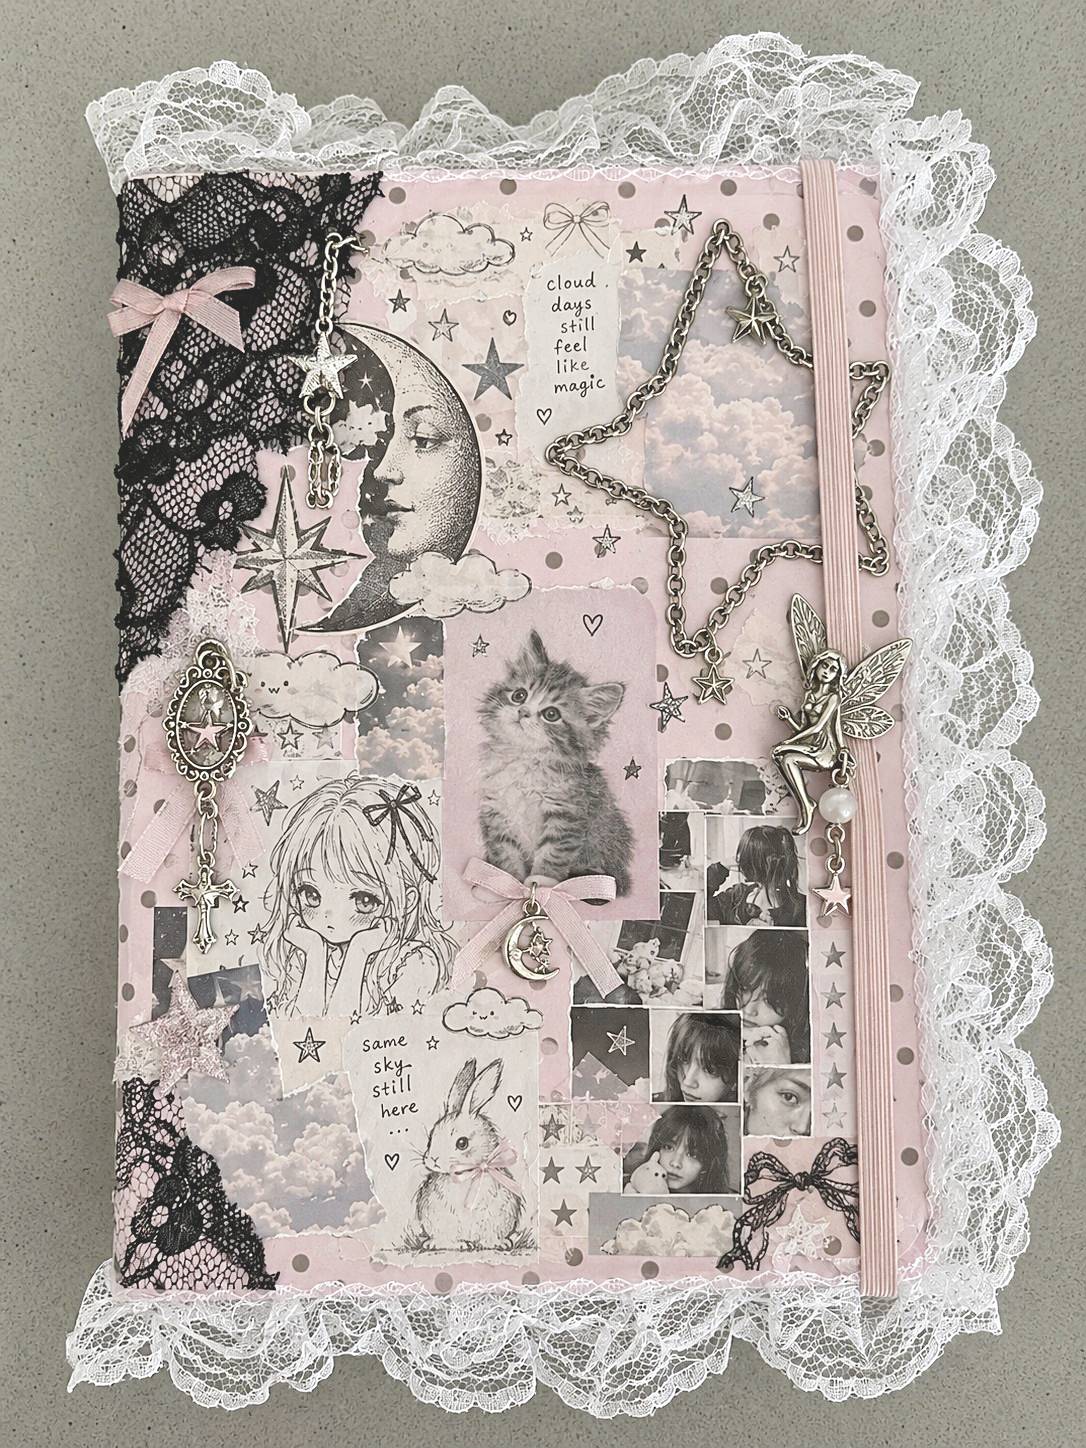
A star outline gives pale pink paper, moon portraits, animal sketches, and handwritten fragments a shared focal detail. Let one illustration remain slightly larger than the others. The star can connect separate pieces without needing additional color, especially when its metallic tone is repeated in a few small accents.
For a flat cover, draw the outline with a suitable metallic pen or cut it from foil effect paper. A real chain creates more texture but needs secure attachment and protected handling. Place it on a removable decorative layer if the sketchbook's front cover must fold beneath the pages during use.
13. A Gothic Fabric Pocket for Reference Cards
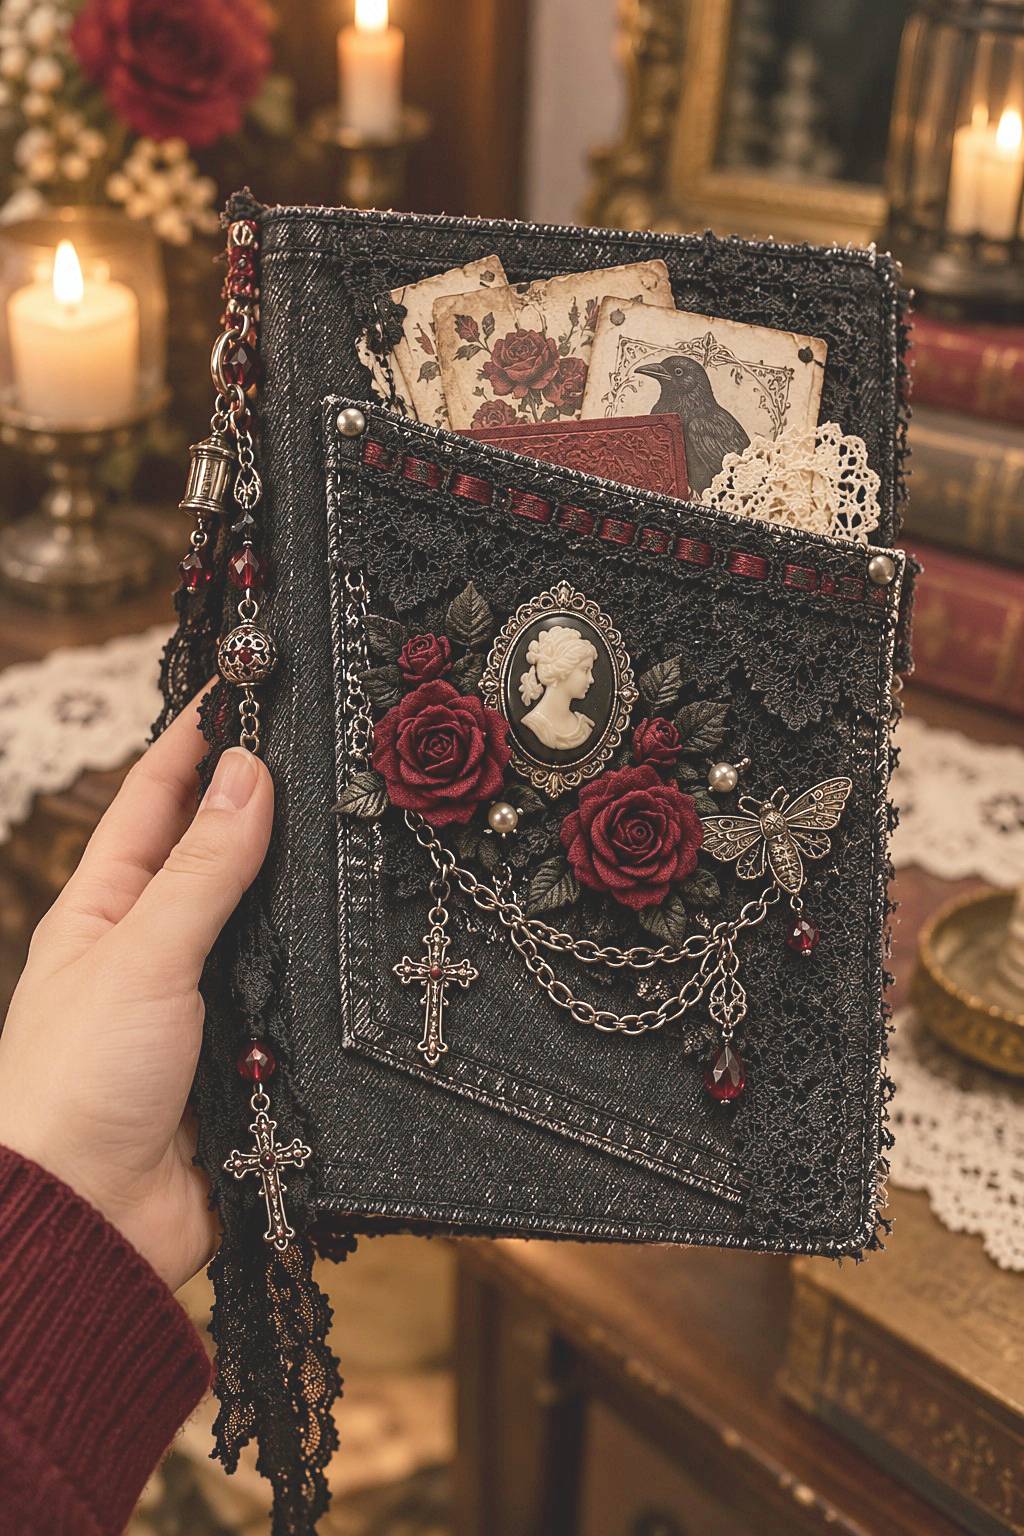
A black textured sleeve with a front pocket combines gothic decoration with useful storage. Burgundy roses, a cameo, and a short chain can sit on the pocket front while reference cards remain visible above the opening. Keep the pocket's upper edge simple enough that cards slide in without catching.
Measure the intended contents before cutting. As a planning example, a 9 cm wide card might suit a 10 cm finished pocket; seam allowances are additional, and thicker contents need more ease. Attach embroidery and trim before stitching the pocket to the sleeve, then test insertion with a paper mock up.
14. Denim Patchwork with a Salvaged Pocket
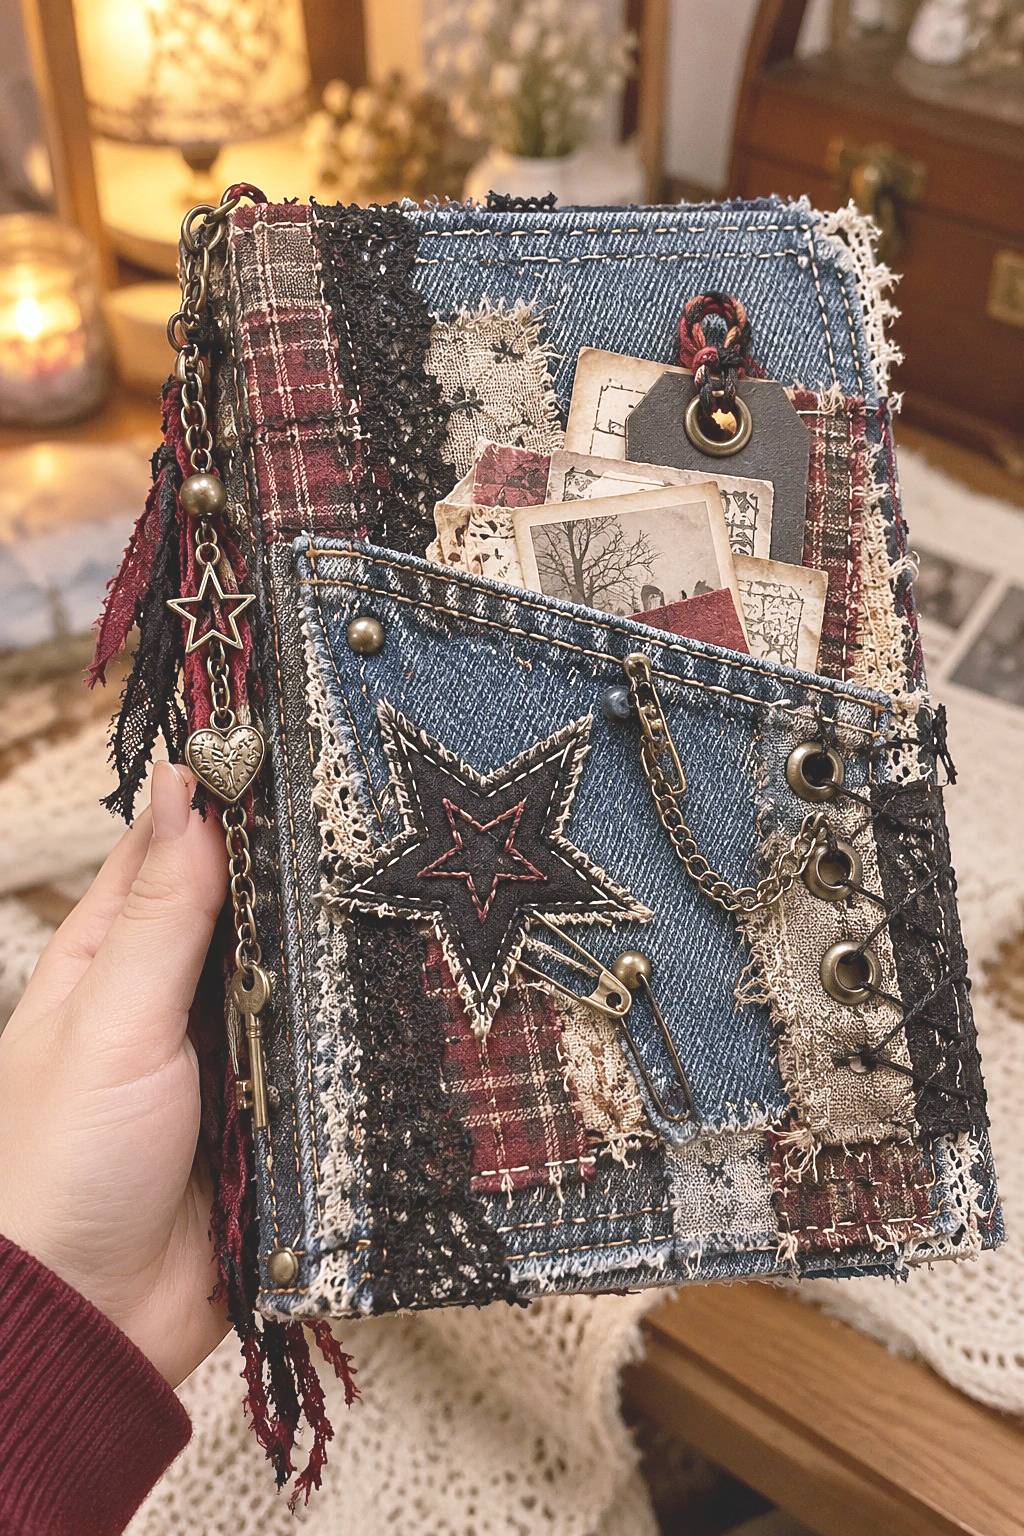
Different denim upcycling ideas tones, plaid scraps, visible stitching, and a salvaged jeans pocket create a cover with an upcycled character. Let the worn fabric supply much of the pattern. Place the pocket where its opening remains accessible, and use smaller patches to balance the surrounding space. Choose sound pocket fabric rather than a worn section that tears around the stitches. These denim upcycling ideas also include a separate protective carrying sleeve; that serves a different purpose from the decorative cover fitted to this book.
Remove bulky waistband sections or seams that prevent the sleeve from sitting comfortably. Assemble and stitch the patchwork before fitting it to the book. Finish the handled edges, and keep contents thin; a pocket filled with tools can distort the cover and press against other items in a bag.
15. Lavender Denim with Moon Embroidery
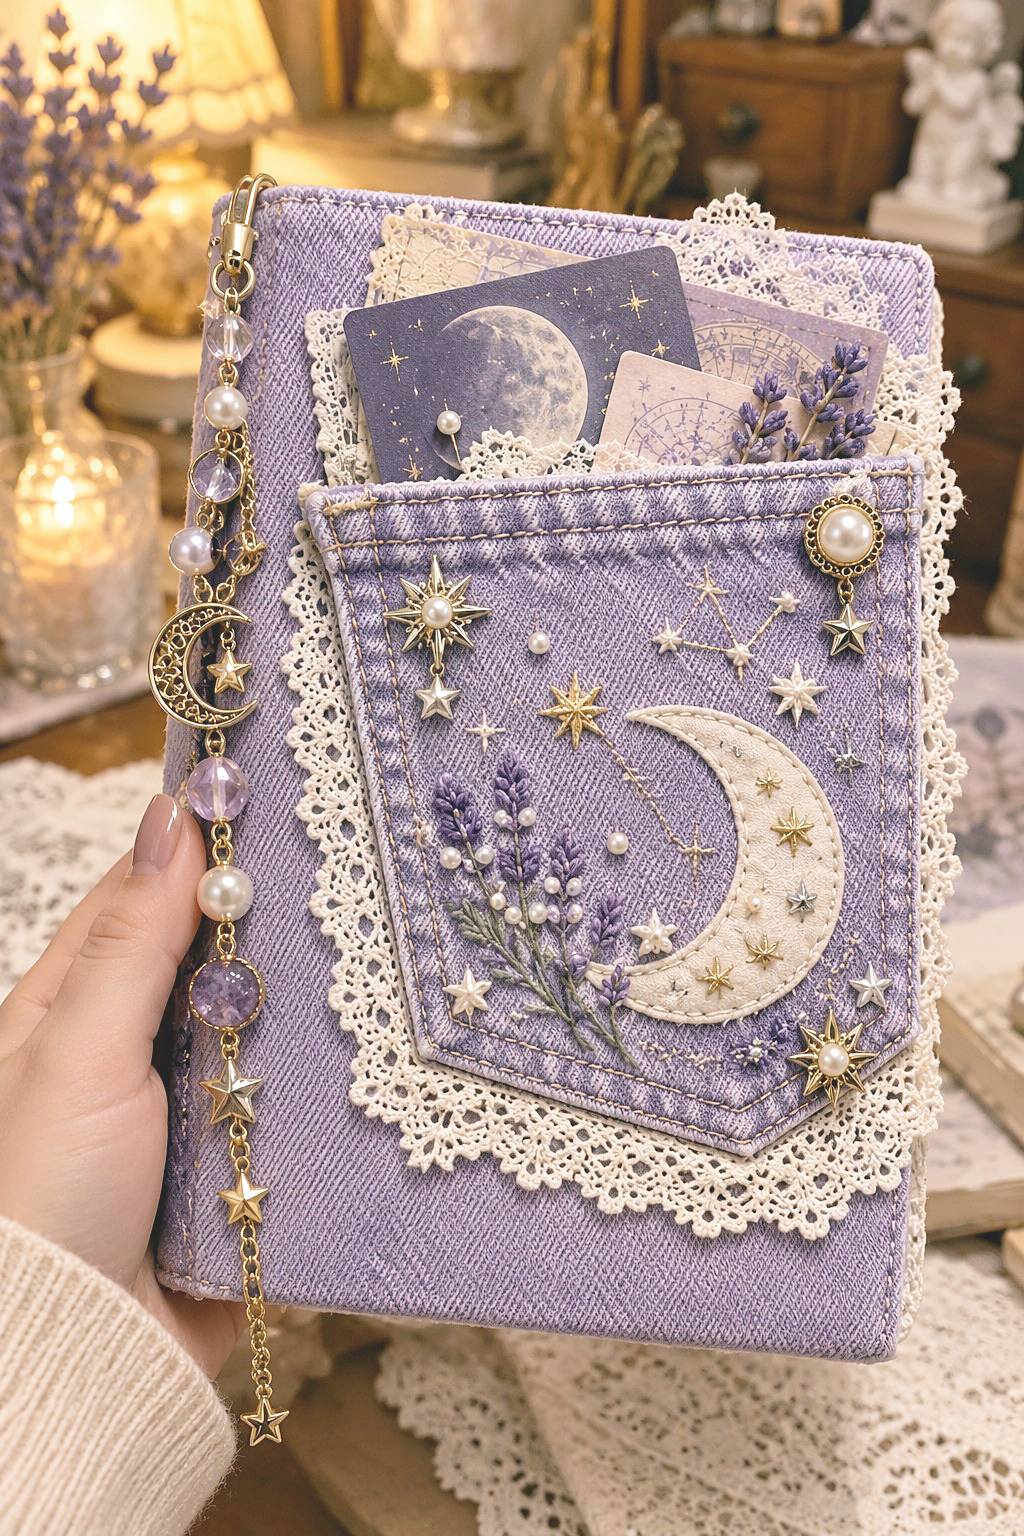
Lavender denim gives a practical pocket a softer celestial theme. A crescent, small stars, and pale stitching can decorate the front, while cream lace frames the fixed sides. Cards showing color palettes or moon studies connect the pocket's contents with the embroidery.
Embroider the separate pocket panel before joining it to the sleeve so the needle does not close the storage space. Add any beads with secure stitching and a fabric backing where needed. Place detachable ornaments on a reinforced side loop, then check that their weight does not pull the sleeve away from the book. Reinforce the pocket's upper corners.
16. A Bunny Pocket with Cottage Floral Stitching
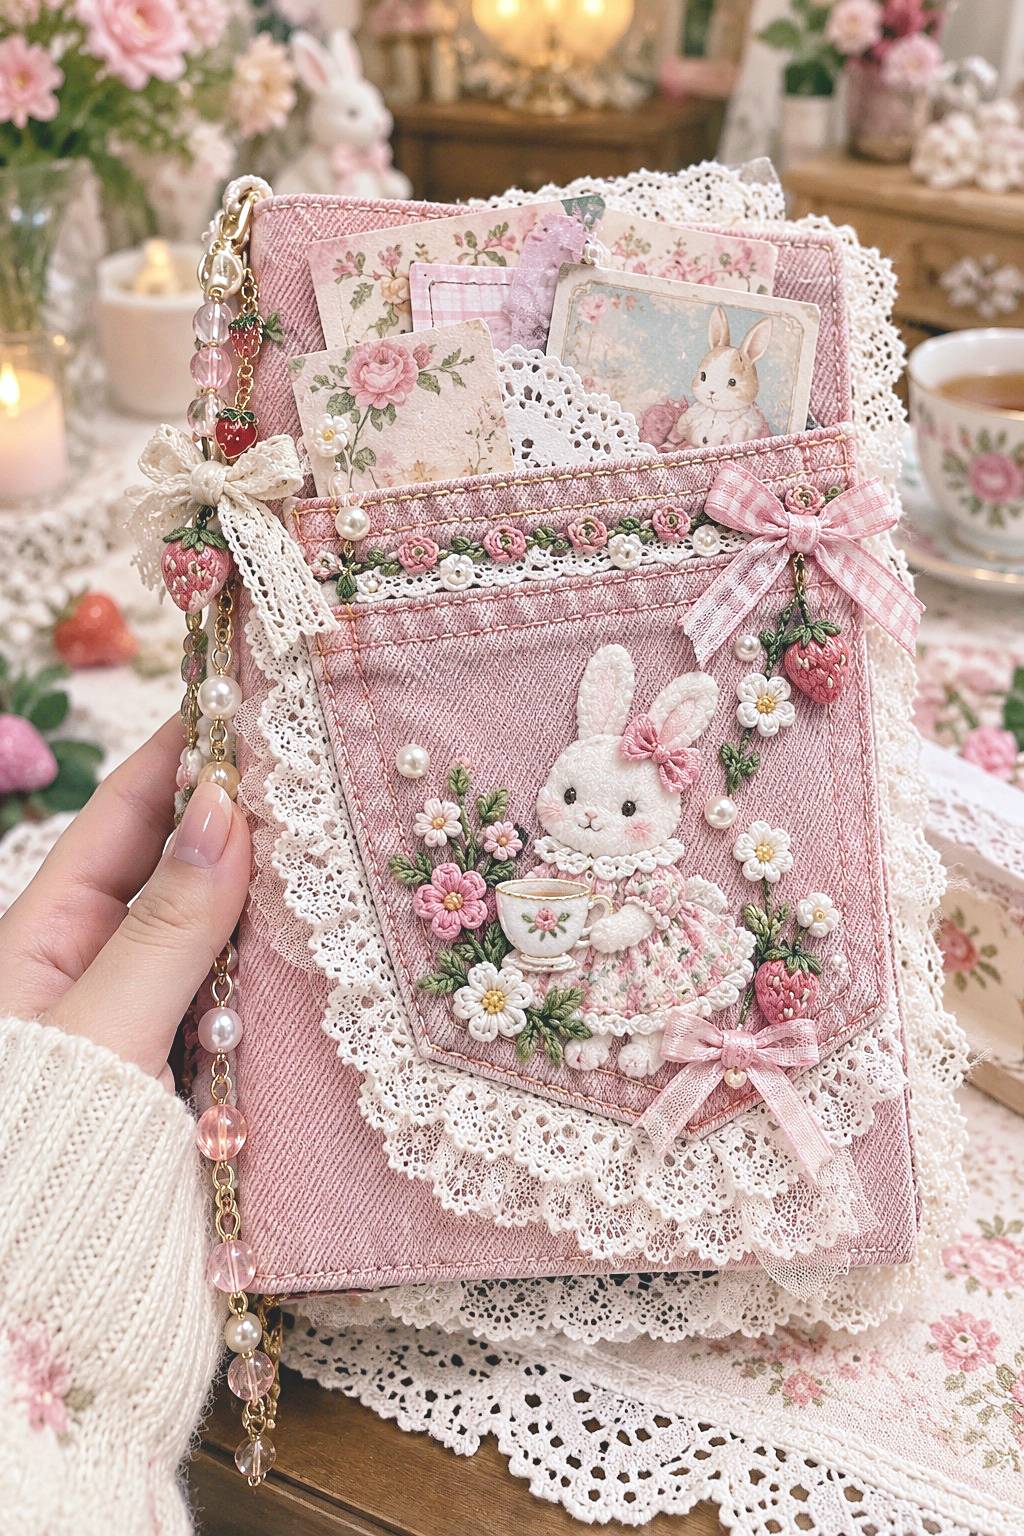
A stitched bunny, small daisies, and strawberry details create a cottage theme on dusty pink fabric. Short sections of gingham and lace frame the pocket without taking attention from the main embroidery. This design works particularly well when the stored cards carry the same botanical or illustration theme.
Make the pocket on a separate panel and test its finished depth against the cards. Keep stitching clear of the opening, and reinforce the upper corners where insertion creates strain. Use bows sparingly if the book travels often, choosing short, fixed fabric details that do not snag on neighboring supplies. Keep embroidery threads securely finished on the back.
17. A Mini Sewing Studio on a Removable Panel
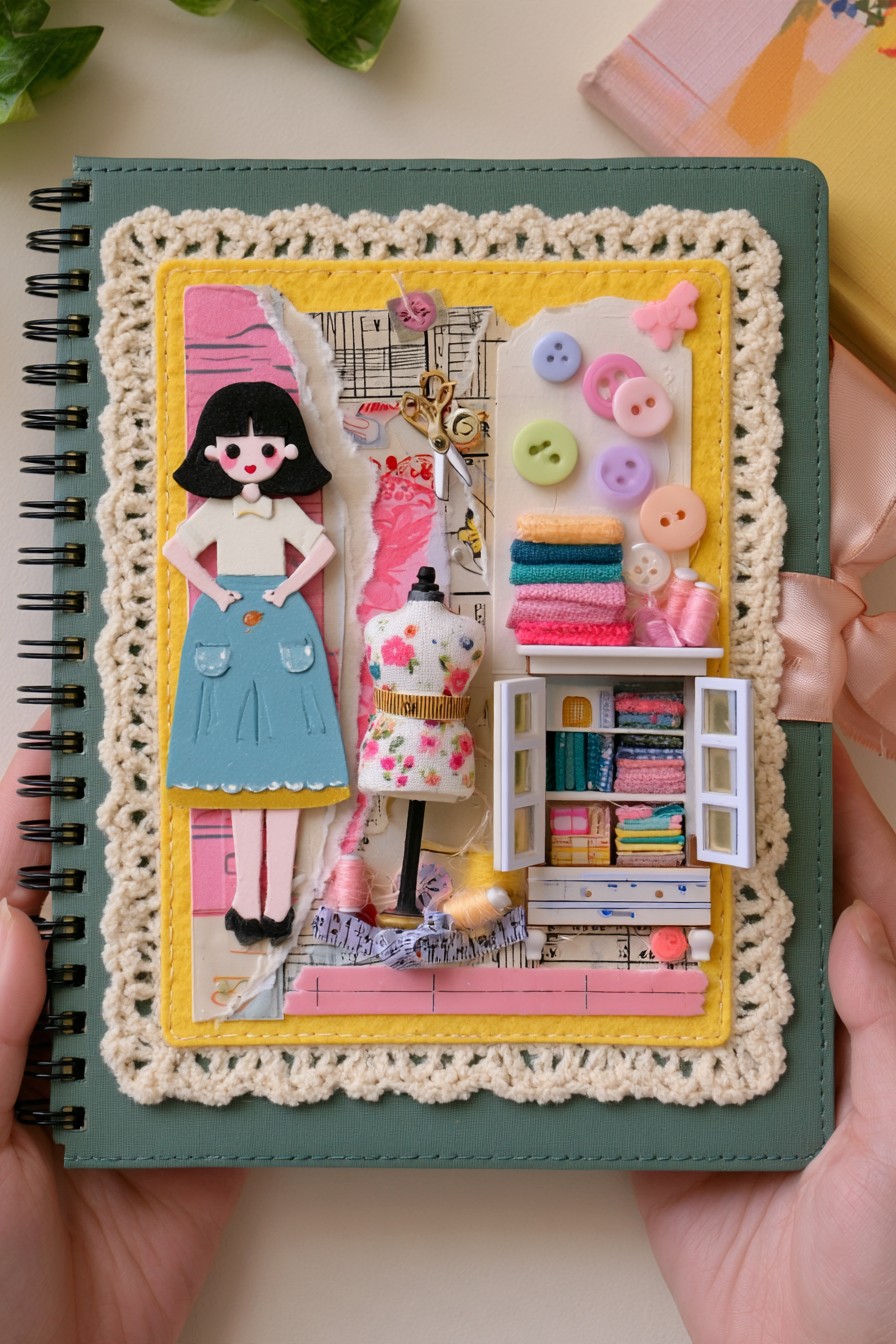
A dress form, folded fabric, colorful buttons, and a tiny cabinet can turn the cover into a sewing room scene. Use a rectangular backing panel to organize the details and a narrow crochet border to define its edge. A dark green base gives the smaller pastel pieces a clear background.
The miniature version suits protected desk use better than a tightly packed bag. For daily drawing, simplify the cabinet and spools into stitched or felt shapes. Attach the scene to a removable sleeve so you can take it off when the spiral cover folds underneath the pages or the raised surface makes the book rock.
18. A Fashion Atelier Built from Fabric Swatches
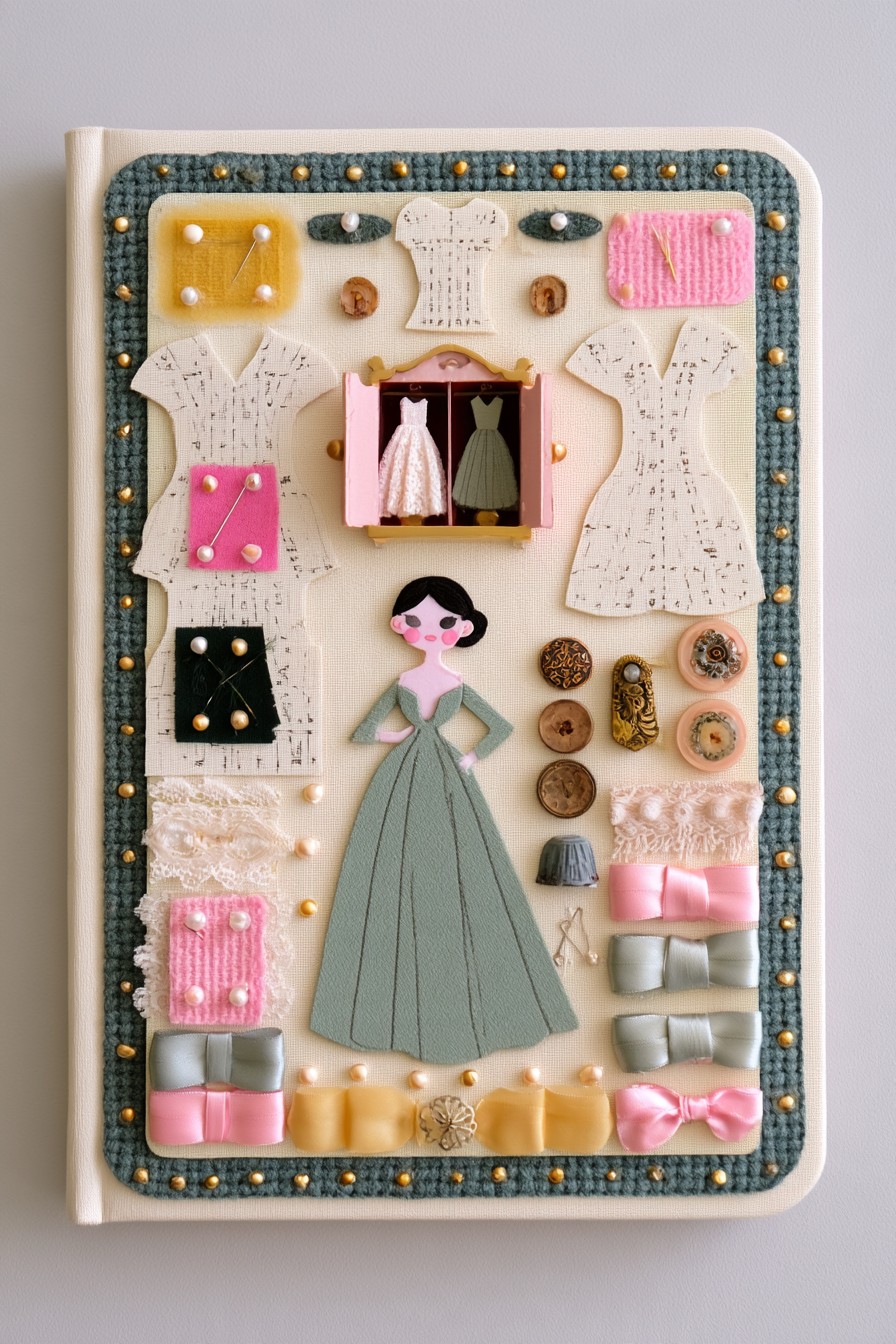
A central dress silhouette gives buttons, lace samples, thread colors, and pattern inspired shapes a purpose. Choose a palette around the garment, such as sage, blush, and cream. This makes the cover feel like a fashion project board rather than a collection of unrelated sewing accessories.
Use thin swatches and felt silhouettes for a portable version. Sew small attachments onto a separate fabric panel, securing their backs before assembly. If you prefer actual miniature spools or a raised cabinet, reserve the cover for protected use and check that its added weight does not strain the binding. Leave a firm fabric margin for gripping during removal.
19. A Pointed Gothic Window with Roses
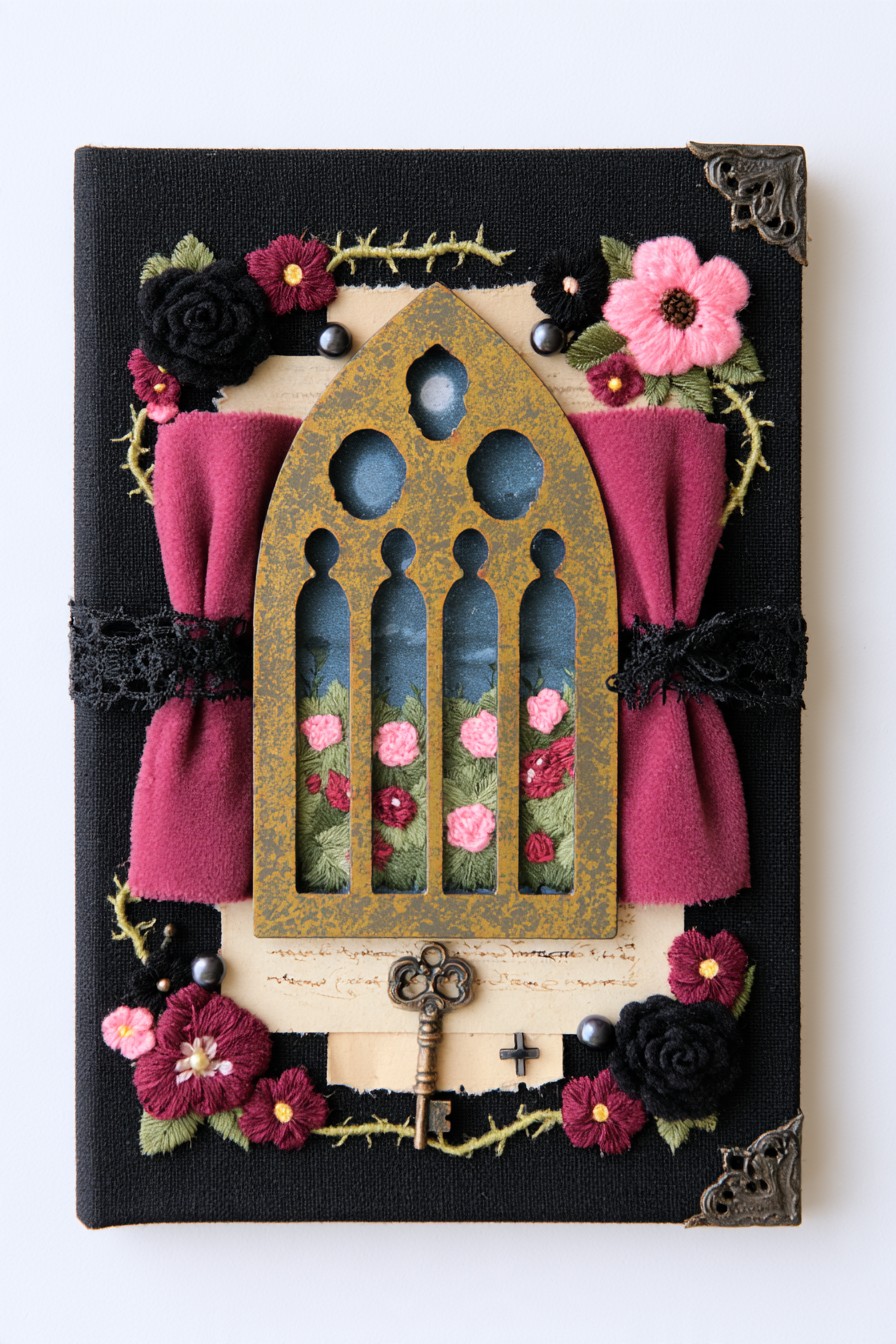
A pointed arch, dark backing, burgundy side panels, and embroidered roses create a Gothic window composition. The arch provides the structure, while gold accents and floral stitching soften its edges. Keep the central openings simple enough that the backing and flowers remain visible.
Make the arch from lightweight material suited to your cutting tools. Test a paper pattern before cutting the final piece, and use a cutting mat for any craft knife work. Thin cardstock can replace a raised frame for everyday use; it preserves the window motif while reducing pressure beneath the pages. Leave the lower fabric edge accessible beneath the arch.
20. A Storybook Window Above a Stitched Garden
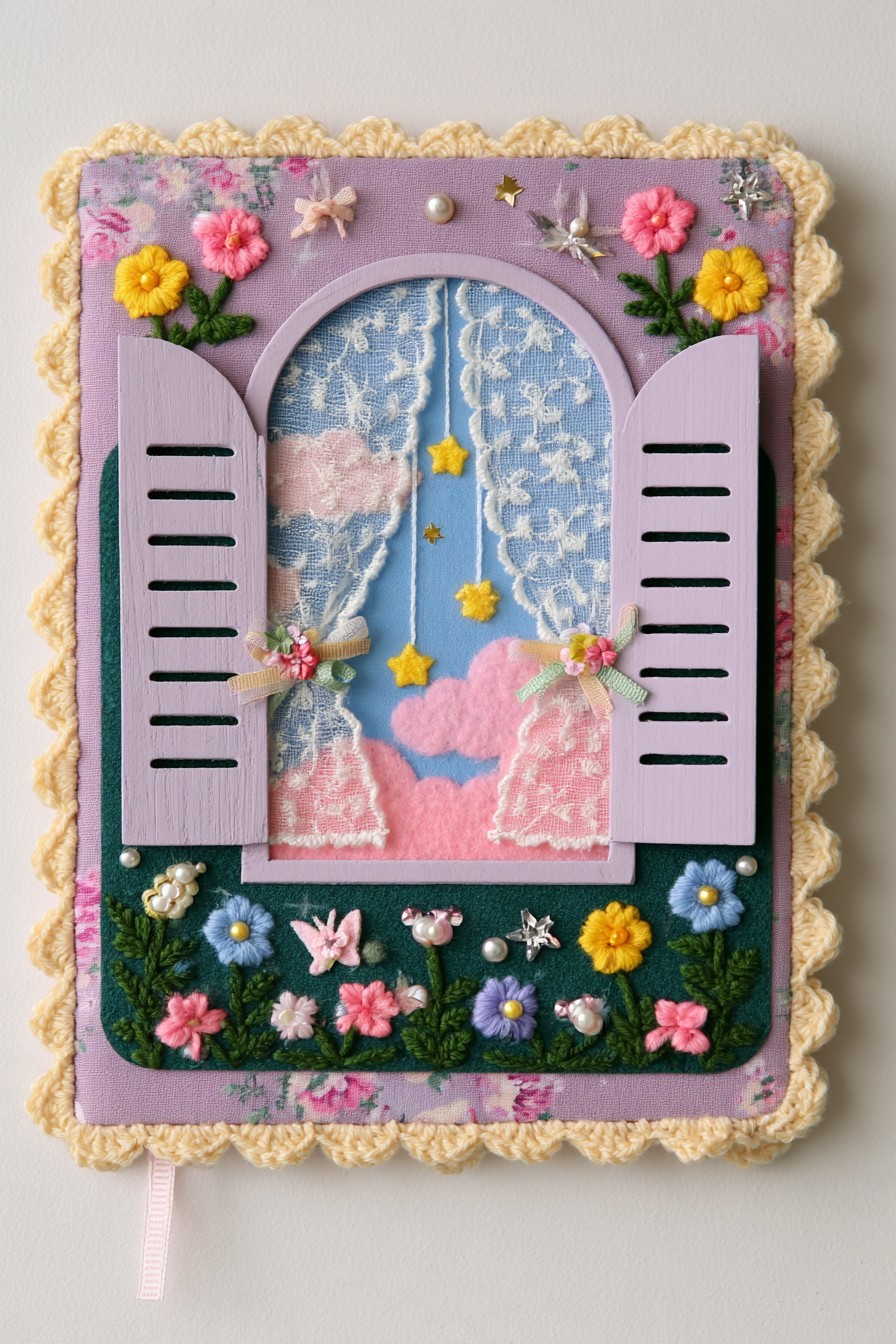
Lavender shutters frame a soft blue and pink center, with a stitched garden along the bottom. The window gives the cover a clear upper focal point, while small flowers add a separate band of detail. A narrow pale border connects the scene to the book's outline.
Choose fixed shutters if you want a simpler construction with fewer moving parts. Assemble the embroidered panel first, then attach the frame to an appropriate backing. If the cover needs to lie underneath the book during drawing, use flat shutter shapes or a removable sleeve rather than projecting hardware. Keep shutter edges within the main panel.
21. A Cottage Window with Crochet Flower Boxes
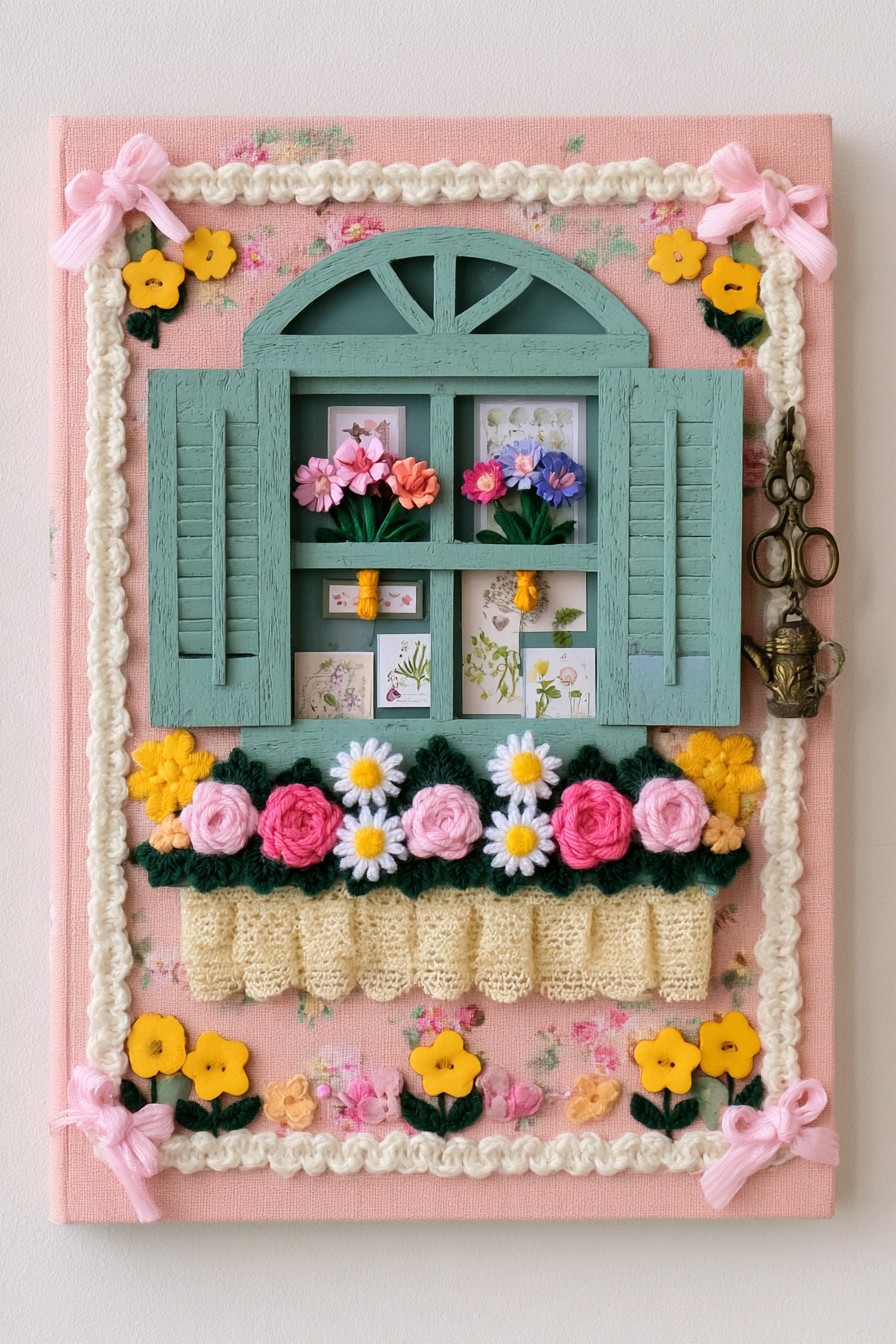
Sage shutters, small botanical cards, and a row of crochet flowers create a cottage window on pink fabric. The flower box introduces a soft raised layer, while the window keeps the composition organized. Repeat a few flower colors around the border to connect the upper and lower sections.
Sew crochet pieces to the fabric backing before fitting the cover. Keep the lower flower row shallow if the book will be handled regularly, and check for loops that could catch. Printed flowers or small stitched blossoms offer a flatter variation while preserving the cottage window arrangement. Finish yarn ends on the panel's reverse.
22. A Secret Garden Gate with Climbing Roses
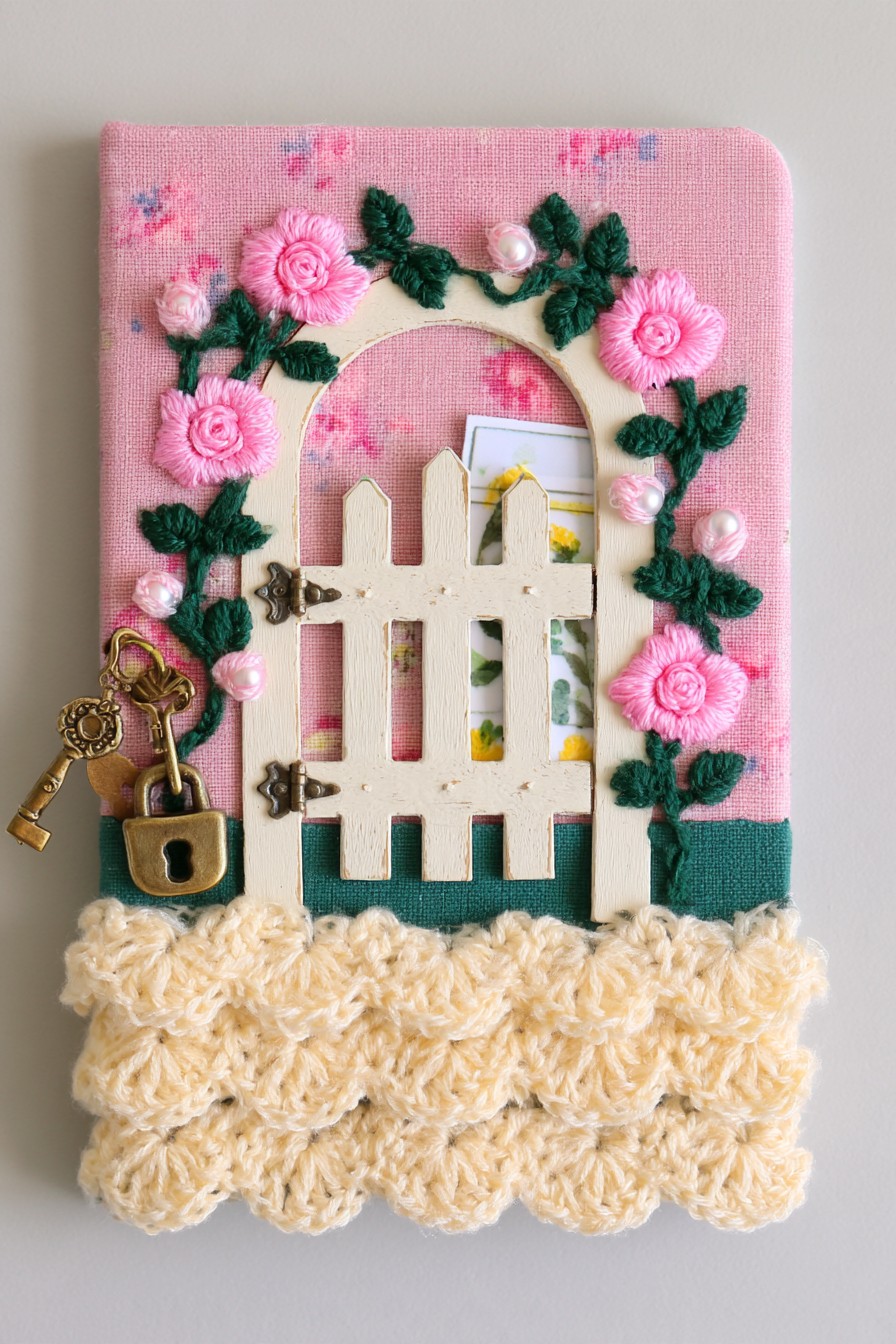
An ivory gate and arch create an entrance into a small garden scene. Pink roses and green stitching can climb around the frame, while a cream crochet band suggests dense planting below. A card visible behind the gate gives the central opening another layer of interest.
Decide whether the gate is fixed decoration or part of a card pocket before attaching it. Keep the insertion route clear if storage is intended. A lightweight key motif can be stitched beside the frame; use a detachable charm for a metal version so it can be removed during travel and drawing. Pull the card rather than its gate trim.
23. A Vintage Vanity with a Mirror Style Center
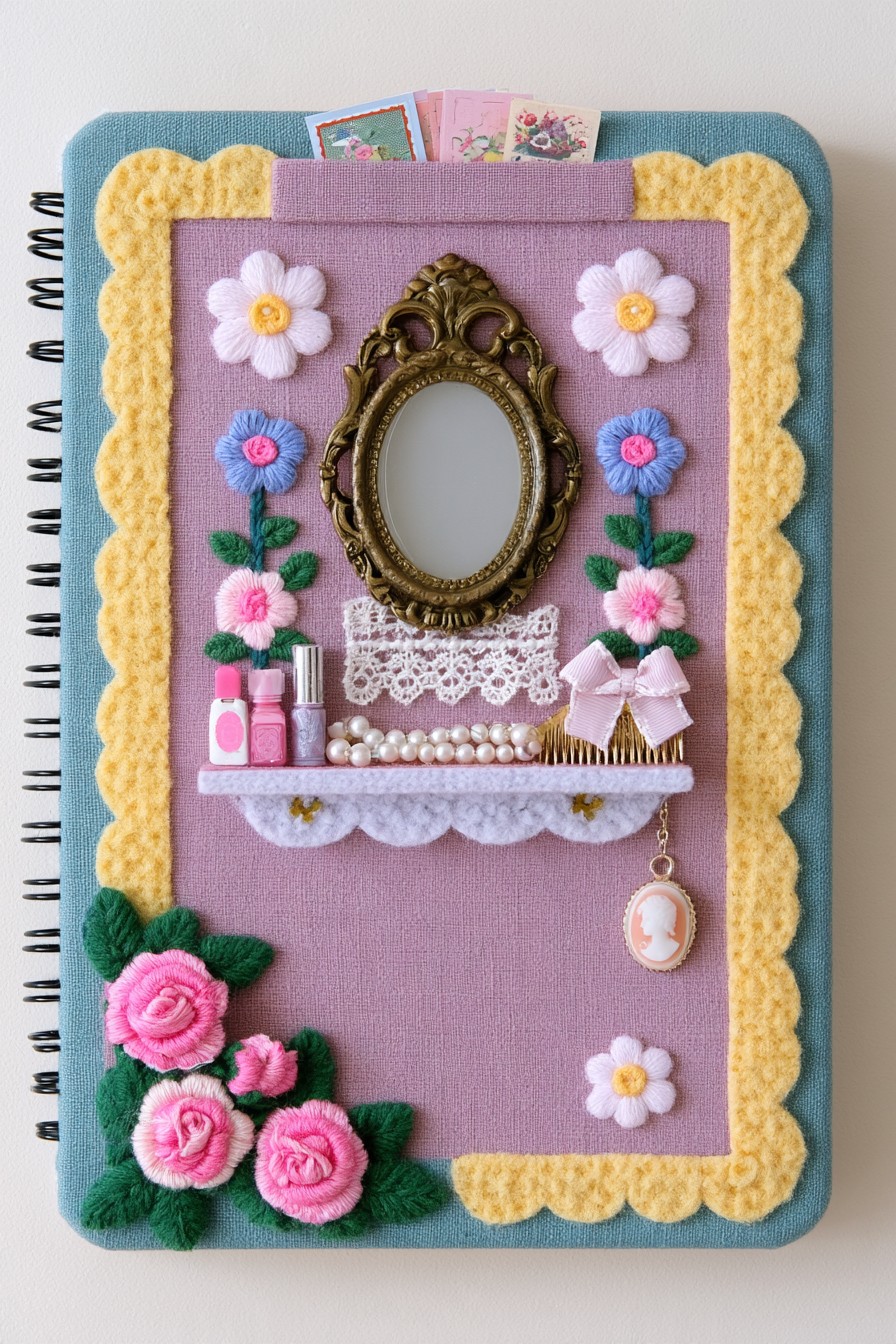
An oval mirror style center, embroidered flowers, and a narrow vanity shelf create a decorative scene on a lavender panel. A top pocket can hold a few color cards, while crochet edging frames the whole arrangement. Keeping the mirror area open helps the composition remain clear despite its small accessories.
Choose lightweight mirror effect sheet or an acrylic insert suitable for the project, with finished edges and a compatible attachment method. Support it on firm backing. Replace the raised shelf with a flat stitched shape for regular use, and remove the decorative sleeve whenever it prevents the sketchbook from resting steadily.
24. A Carousel Scene with a Small Ticket Pocket
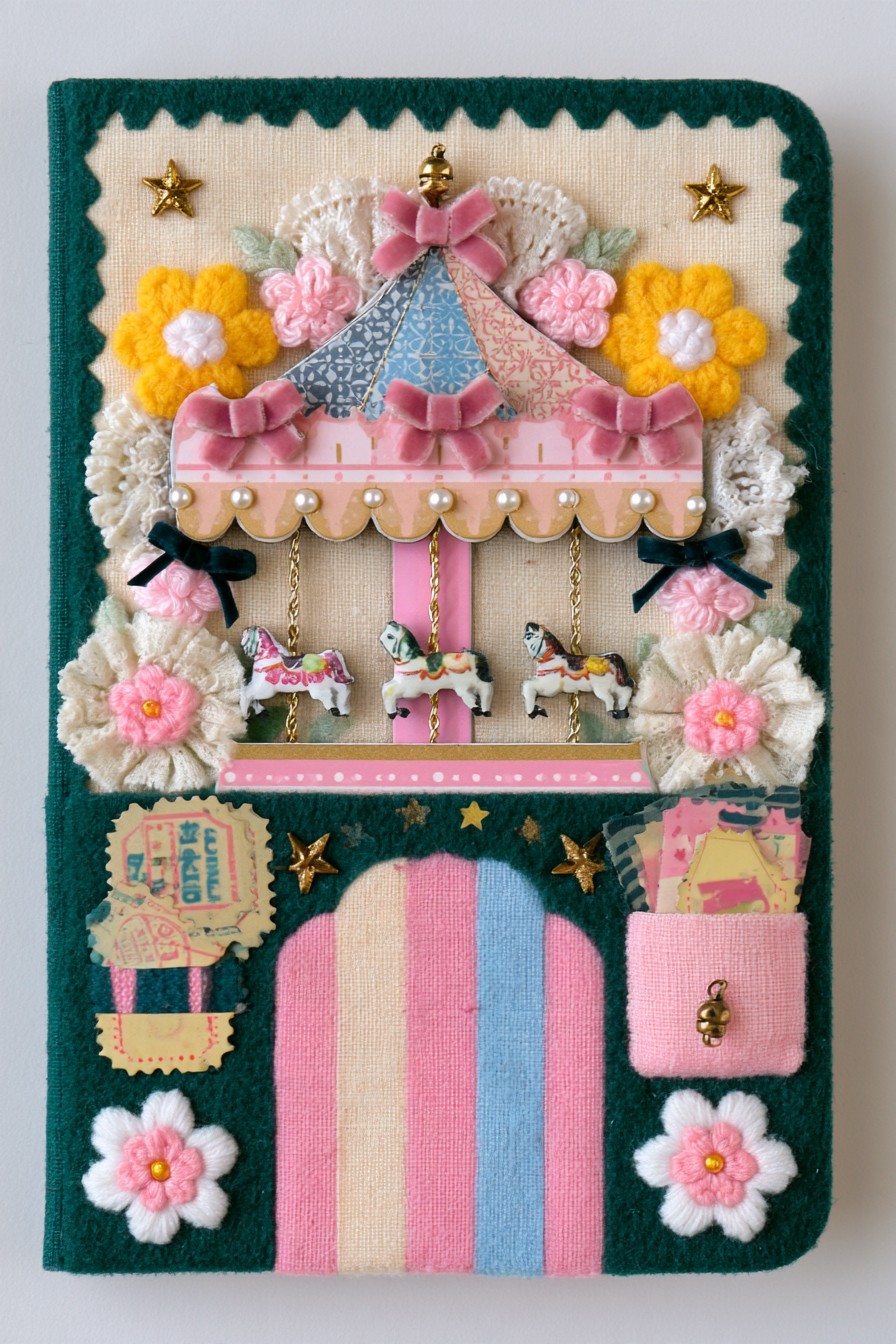
A striped canopy, tiny horse figures, and pastel flowers give this cover a fairground theme. Deep teal fabric makes cream, pink, blue, and yellow details stand out. A small side pocket can hold ticket shaped notes, tying useful storage to the subject of the scene.
Choose flat felt horses and stitched lines for a cover carried daily. Raised miniature figures need protected storage and an attachment method appropriate to their material. Keep the pocket separate from the carousel structure so inserting a note does not pull on the decoration, and check the sleeve's fit after the scene is assembled. Leave the side pocket's gripping space uncovered.
25. A Perfume Vanity with Changeable Floral Cards
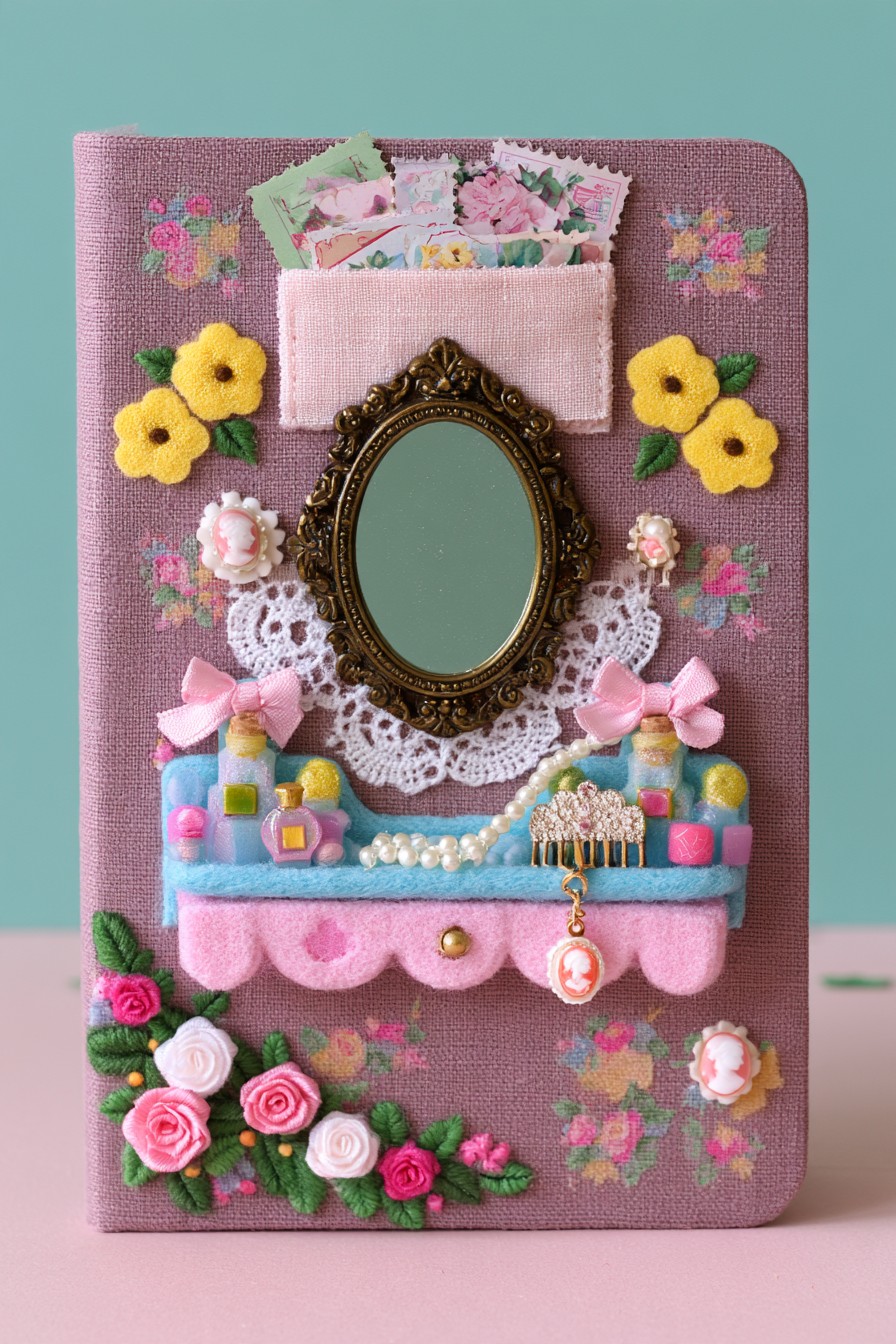
A mauve fabric background, oval mirror style detail, small perfume motifs, and embroidered flowers create a personal vanity theme. The pocket at the top provides space for rotating floral cards. Use the card colors to guide the surrounding embroidery so new inserts still work with the fixed decoration.
For a lighter variation, stitch or cut the perfume bottles from felt and represent the shelf with a flat fabric strip. Keep card contents limited so the pocket does not pull forward. A removable sleeve allows the decorated panel to be stored separately when the sketchbook travels or folds back for drawing.
Check the Finished Cover in Everyday Use
After the specified curing period, open and close the book in your usual drawing positions. Check the hinge, spiral and page edges, then place it on your drawing surface. If projecting decoration makes it rock, remove the sleeve or simplify those pieces. Insert the intended cards into the pockets and check closing without bending or overloading the cover.
Inspect paper edges and attachment points before putting the book in its usual bag or pouch. Repair lifting sections and remove charms that snag or press into nearby supplies. A clear coating does not automatically make the cover waterproof. For fabric assemblies, check the care compatibility of thread, trim and attachments as well as the base cloth; removable does not mean machine washable.
A Few Choices Worth Settling Before You Begin
For a softcover sketchbook: Keep permanent decoration light and flexible. A rigid miniature panel can resist the cover's movement, so a removable jacket or sleeve is a better way to introduce that theme.
For a reusable embroidered cover: Retain the fitting template. Similar paper size is not enough; compare board dimensions and spine thickness, then try the new book both open and closed.
For frequent carrying: Favor thin paper layers, shallow stitching and lightly filled pockets. Use a separate protective pouch when appropriate and give any raised panel its own protected storage while you travel or draw.

Leave a Reply