

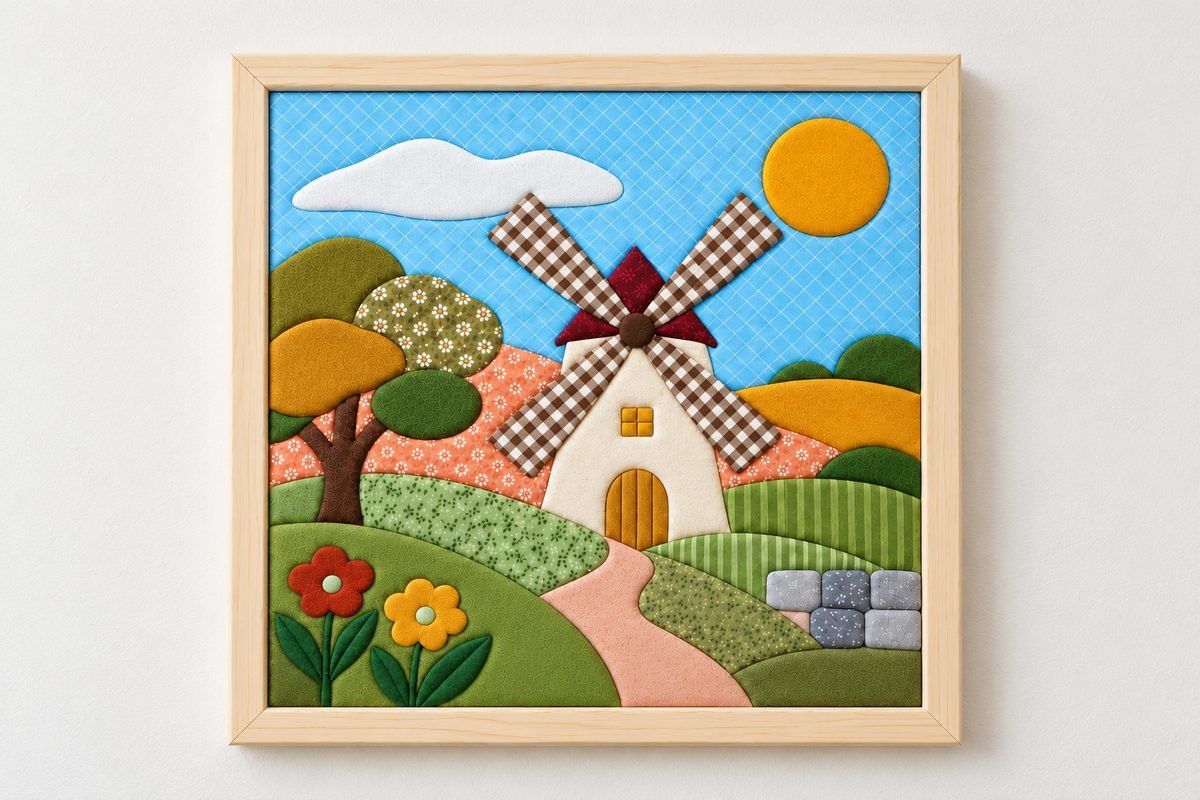
Gingham sails, a mustard sun and green fields turn this windmill into a small fabric picture for a wall. The cotton sits on a scored foam panel, with each raw edge tucked into a cut, so the design needs no stitching. The guide uses a 24 cm square panel and includes 11 printable patterns. Start with Windmill Garden, or choose one of ten other designs from the A3 and tiled A4 files.
Time and size: Plan about 4 to 6 hours of active work for the detailed windmill, spread over sessions if needed. This is a planning allowance, not a measured completion time. The artwork starts with a 24 x 24 cm foam panel, about 25 mm thick; the frame adds to its outside dimensions. Allow any adhesive setting time required by its label.
This is an adult craft involving a sharp knife. Before working on the full panel, test a shallow cut and two fabric edges in a shared channel on spare foam. Check the narrow stem and window sections too. The foam should hold the fabric without crumbling or requiring heavy pressure.
Choose a design and download the PDF patterns. Print and check the scale before preparing the foam.
Table of Contents
- Step 1. Gather Supplies and Match Sizes
- Step 2. Cover the Foam with Tape
- Step 3. Score the Pattern Through the Paper
- Step 4. Lift the Paper and Check the Cuts
- Step 5. Cut Cotton with a Tucking Margin
- Step 6. Place the Mustard Sun
- Step 7. Tuck the Edges in Short Sections
- Step 8. Add the Cloud and Blue Sky
- Step 9. Fill the Tree and Distant Fields
- Step 10. Complete the Windmill
- Step 11. Finish the Garden and Outer Edges
- Step 12. Secure the Panel in Its Frame
- Display the Finished Windmill
- Download the 11 PDF Patterns
- Fix Loose Edges and Wrinkles
- Calculate the Materials Cost
- Work Safely and Hang Securely
Step 1. Gather Supplies and Match Sizes
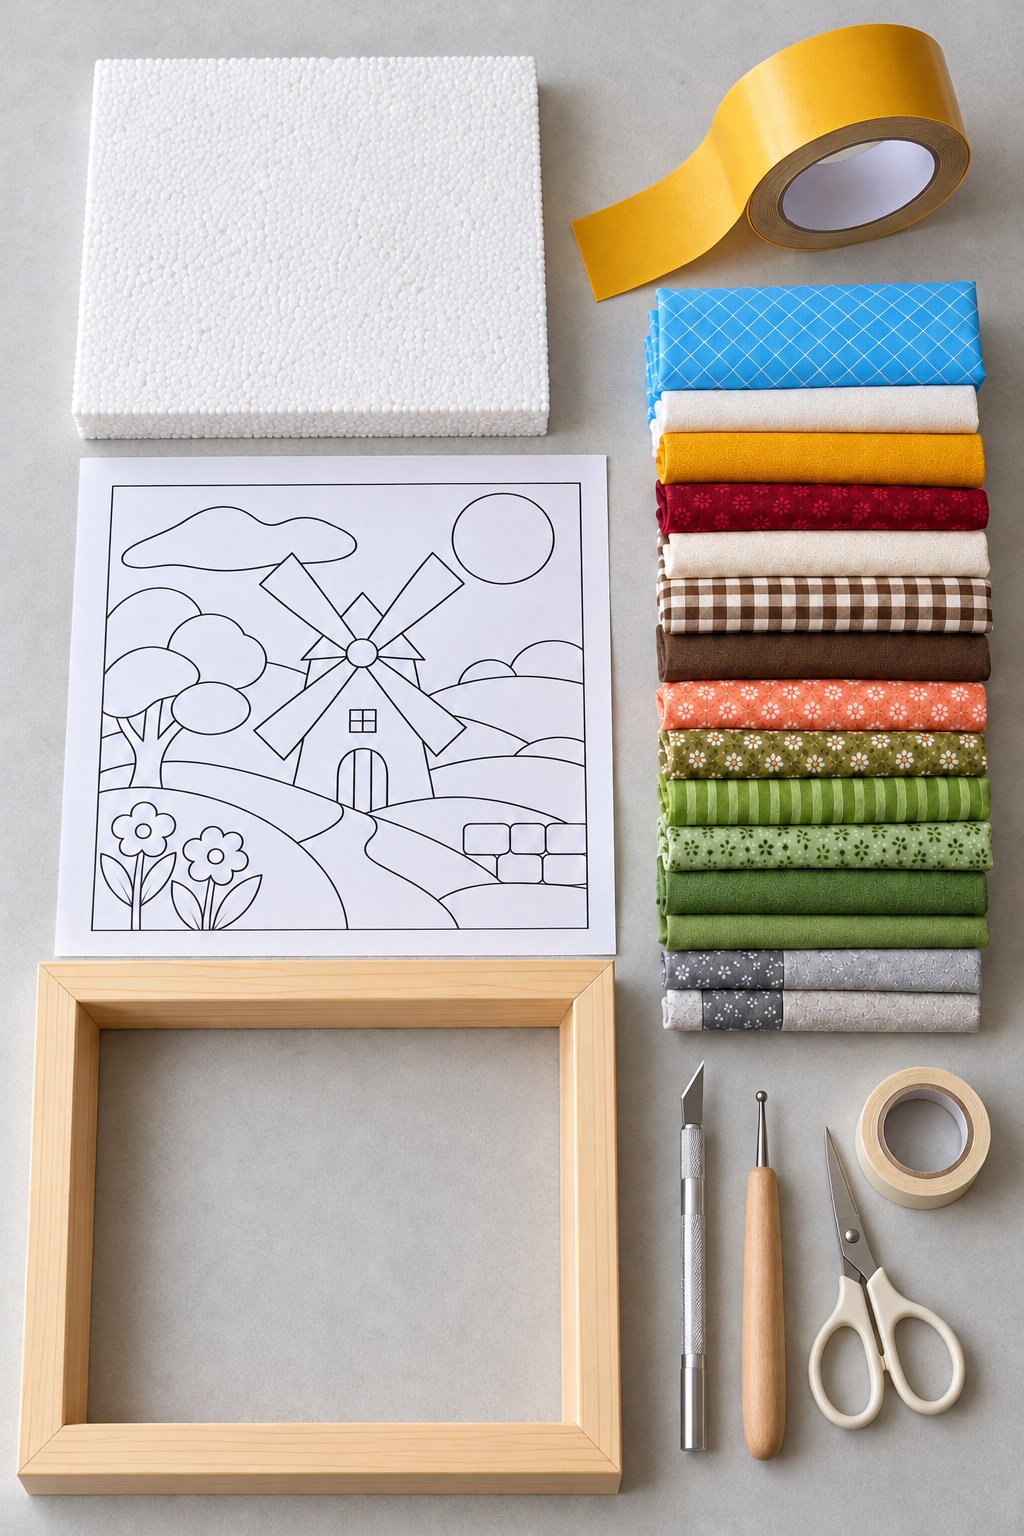
Choose the frame before cutting the foam. Measure the usable rear recess, the visible opening at the front and the space beneath the closed backing. A frame's advertised picture size does not tell you all three measurements. This version needs a rear recess that accepts a 24 cm square panel and at least 30 mm of usable depth for the 25 mm foam, cloth and backing. Check that the front lip conceals the raw outside fabric edges without hiding a detail you want to show.
- One firm white polystyrene craft foam panel, 24 x 24 cm and about 25 mm thick, plus an offcut for testing. Choose a fine, stable surface that passes the cutting test.
- Thin, flat double sided adhesive tape suitable for the foam and fabric, about 50 mm wide. Five strips, each 24 cm long, use 1.2 m before extra for testing and waste. The yellow material in the images is the removable liner; its color is not a product specification.
- Two matching prints of pattern 01 and a small amount of masking tape.
- A ruler, precision craft knife, cutting mat, sharp fabric scissors and a blunt fabric tucking tool. A smooth rounded metal tip or a small blunt spatula can guide the edges.
- Thin cotton in blue with a white diamond grid, white, mustard, burgundy, cream, brown and cream gingham, brown, peach floral, olive, green floral and striped prints, plain green and two grays. Allow a blue piece at least 25 cm square for cutting the sky shapes, with other scraps large enough for their templates and tucking margins.
- A deep wooden box frame, a rigid backing that closes behind the panel, retaining fittings and hanging hardware rated for the completed frame.
Press wrinkled cotton before cutting it. Use the same version of the windmill pattern for the scored outlines and the fabric templates. In Electric Quilt's kinusaiga tutorial, the maker measures the frame's inner space before preparing the board, which is the useful measurement to check here too.
Step 2. Cover the Foam with Tape
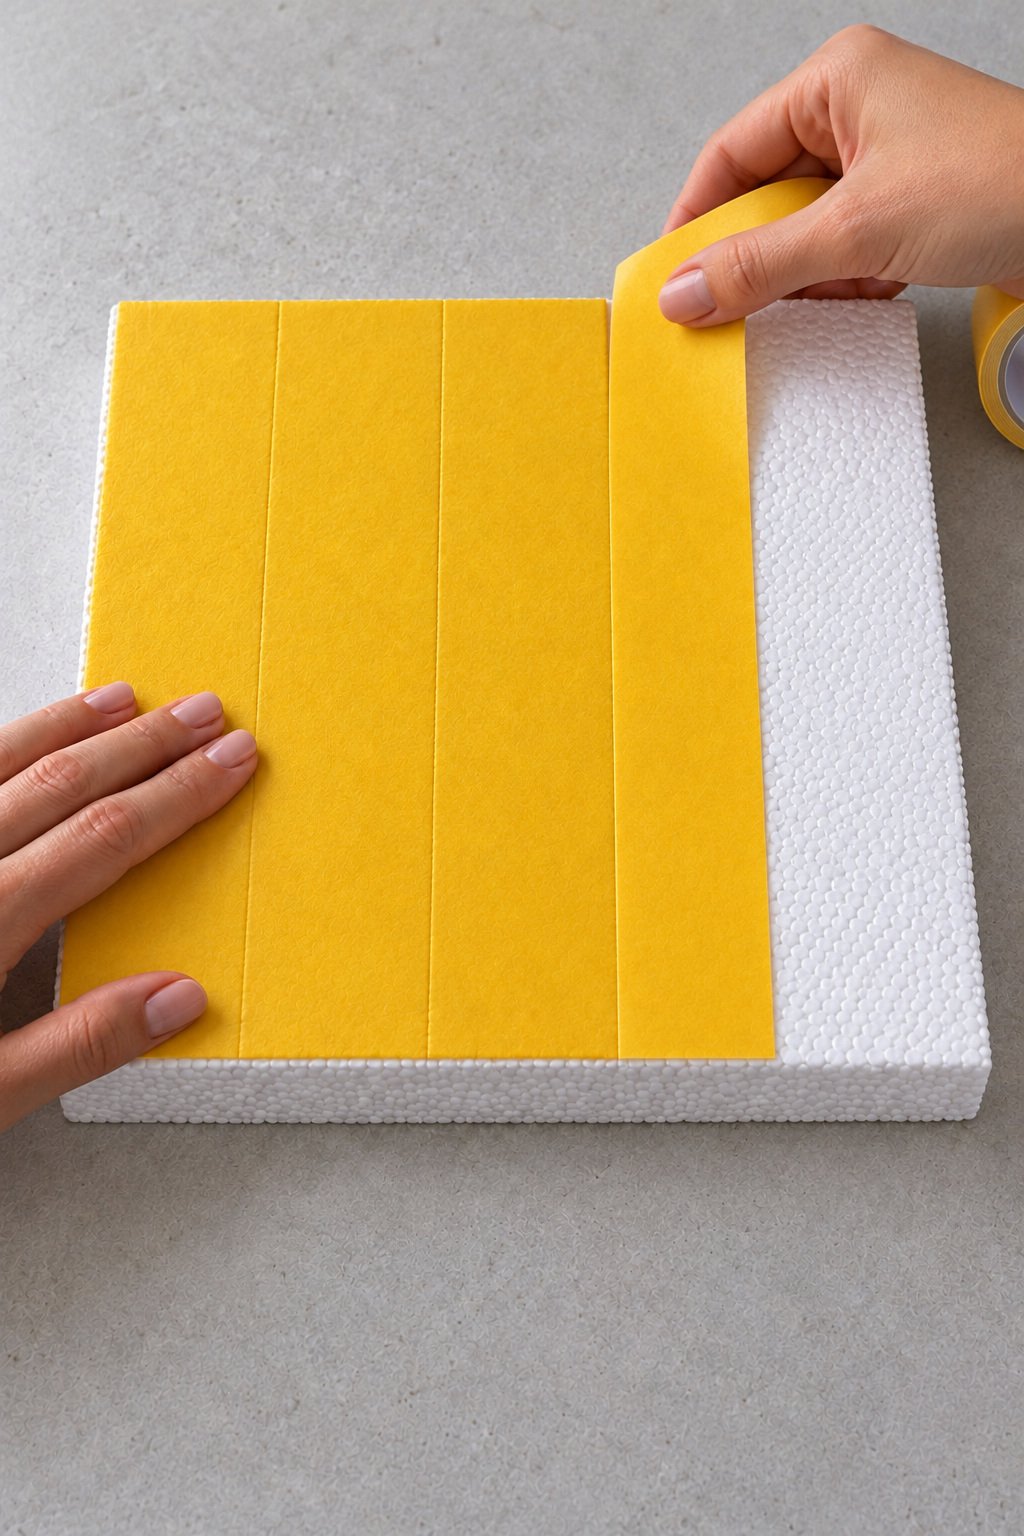
Cut five tape strips, each 24 cm long. Lay them from the top edge to the bottom edge of the panel, with their long edges meeting neatly. Four 50 mm strips cover 20 cm; trim the fifth to the remaining 4 cm width. Keep the surface level, with no raised overlaps or exposed gaps.
Press each strip from the middle outward and trim its ends flush with the foam. Leave the top liner in place. It protects the adhesive while you score the picture and will be removed one region at a time.
Step 3. Score the Pattern Through the Paper
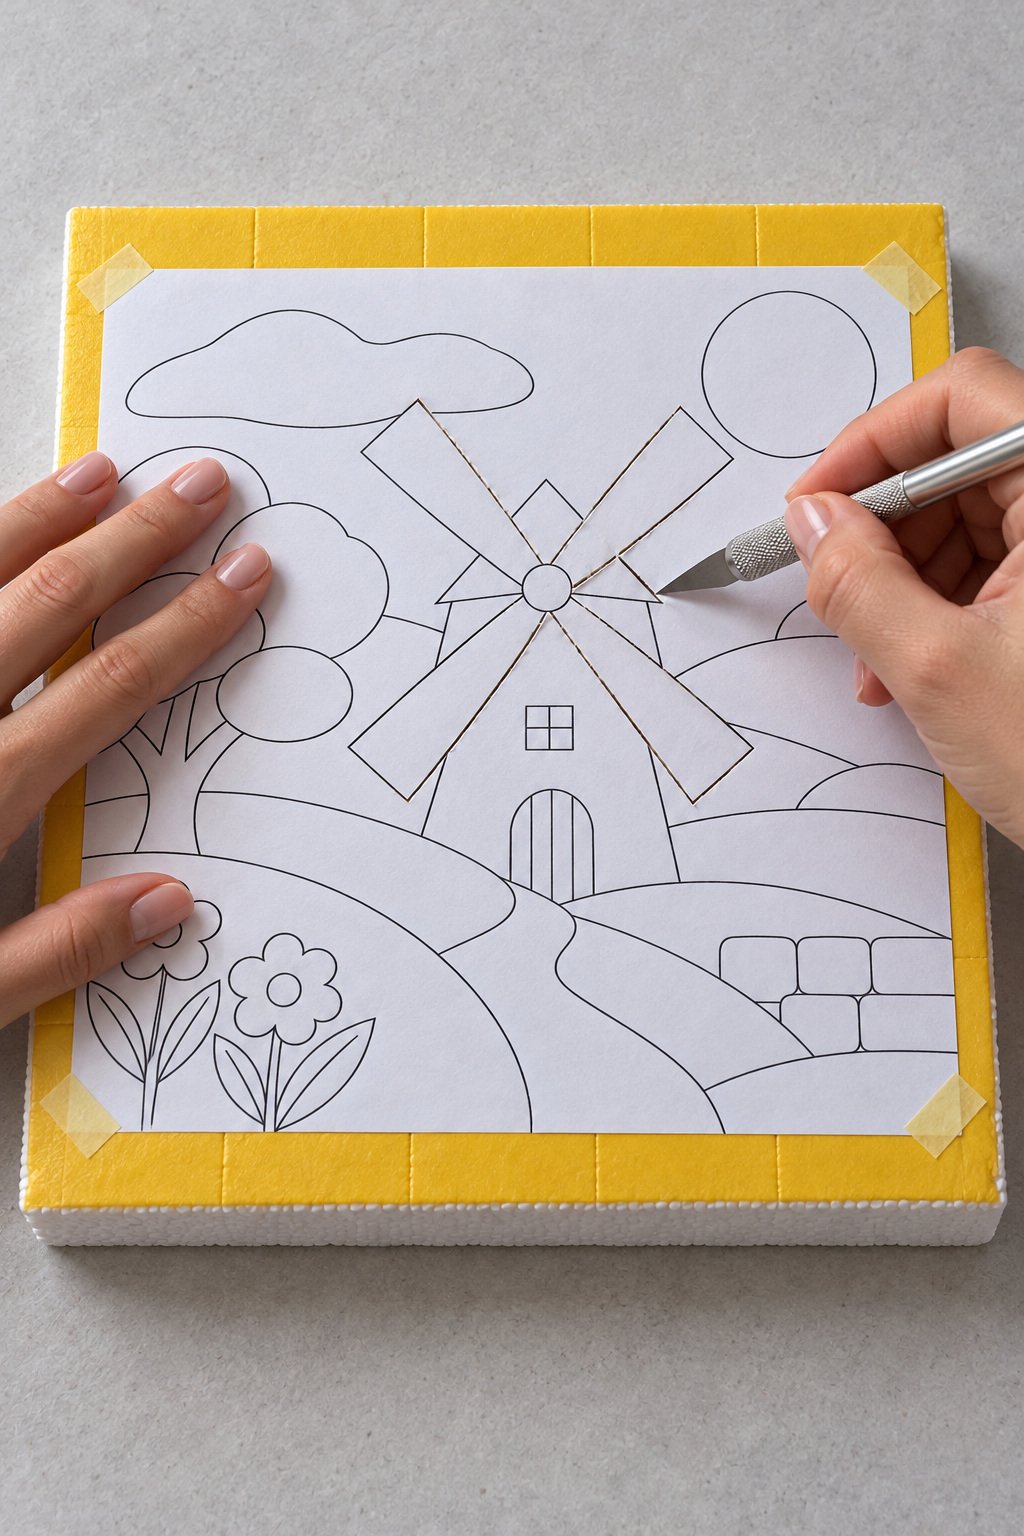
Check the printed 50 mm scale line, then align the pattern's 240 mm outside square with the foam. Hold the paper at its corners with masking tape. Keep the knife upright and use short, light passes to cut through the paper and adhesive, then score about 5 mm into the foam. Use the depth that worked on your offcut; the blade must stay well above the back of the panel.
Trace the actual motif boundaries, including the tree branches, four sails, window panes, door divisions, six stones and two flowers. The checks, stripes and tiny floral marks belong to the cotton print and need no extra cuts. Support the panel on the cutting mat and keep your free hand outside the blade path.
Step 4. Lift the Paper and Check the Cuts
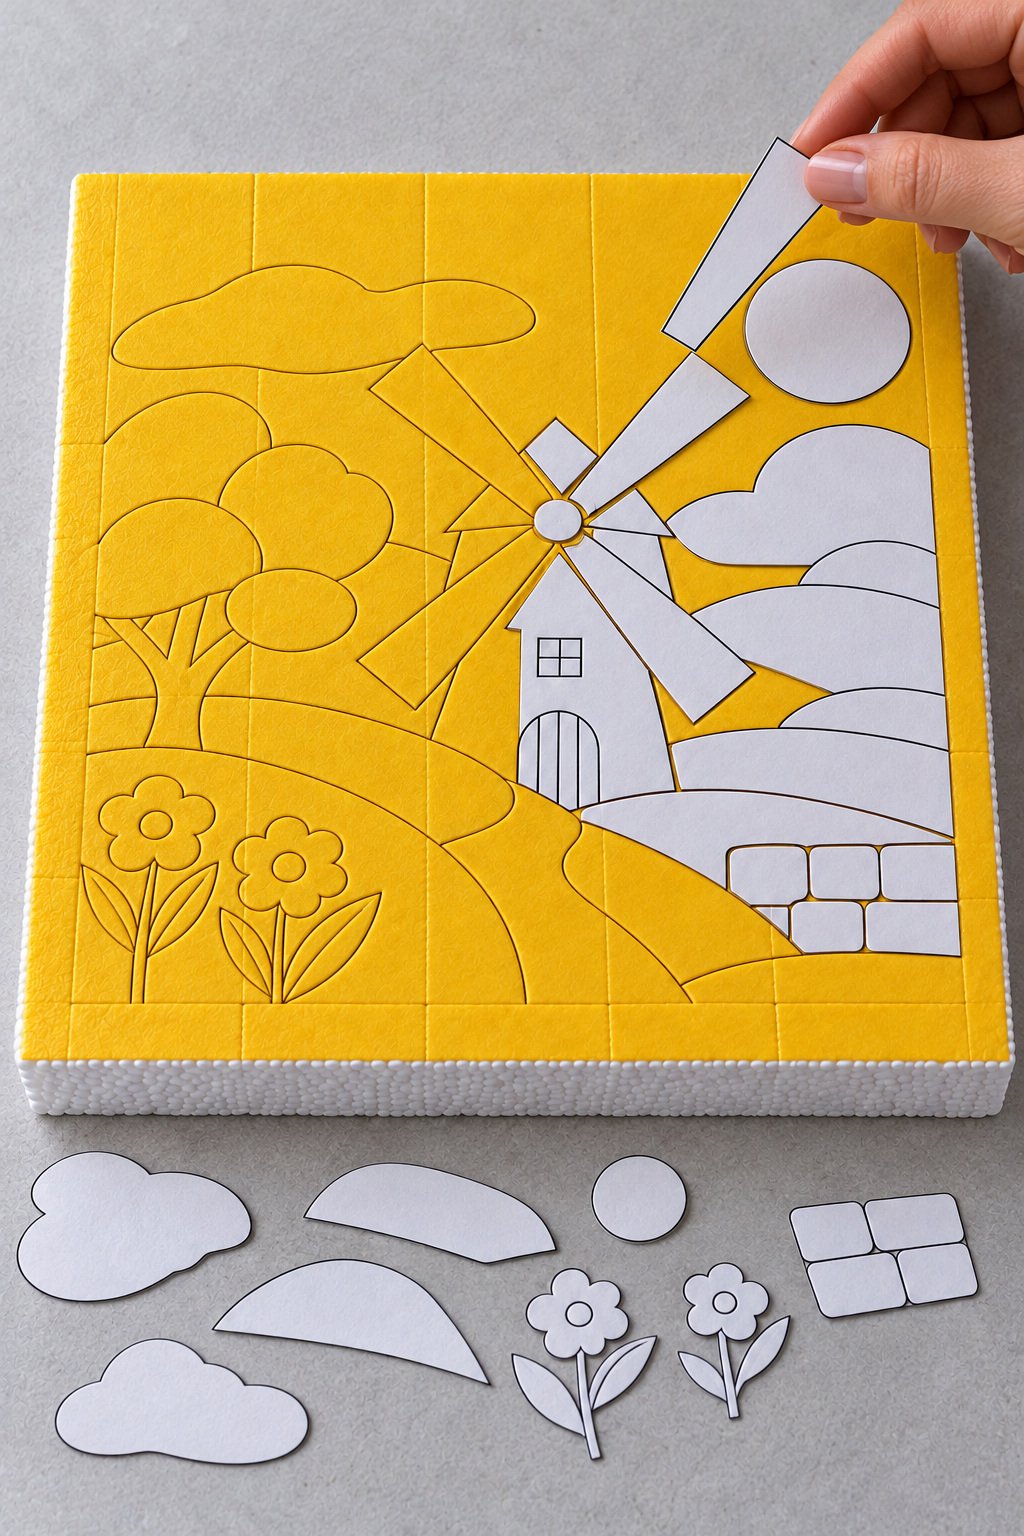
Lift the separated paper shapes gently. Use your fingertips wherever a corner is loose, and set the knife down while clearing paper away. Every design line should remain visible in the yellow liner as a narrow, continuous cut.
Look across the surface from a low angle. Recut a missed section with a light pass before adding fabric. Keep the liner in place, and check that the narrow foam areas around stems and window panes remain intact. Use the untouched second print for cutting the fabric templates.
Step 5. Cut Cotton with a Tucking Margin
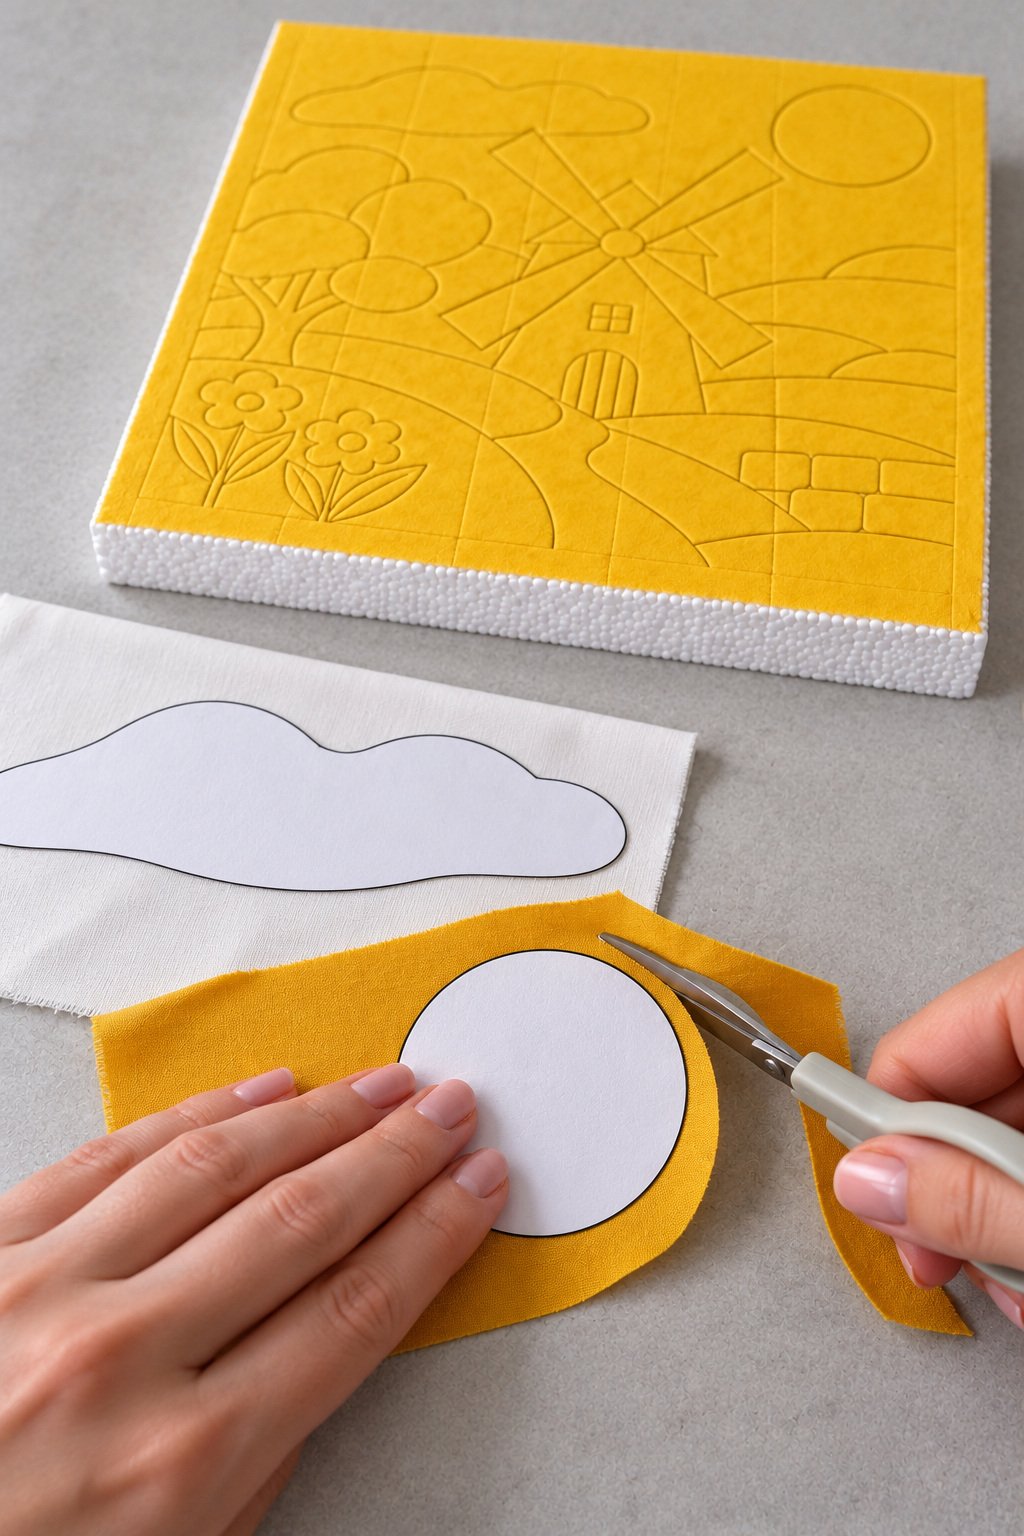
Cut the second paper pattern into its separate regions. Hold each shape on its cotton and cut about 5 mm beyond the paper edge. That extra cloth goes into the channel, so the printed line represents the finished shape, not the fabric's cutting edge.
For an opening inside the blue sky piece, leave the same 5 mm of fabric projecting into the paper opening. The hole in the fabric will therefore be smaller than the hole in the paper template. Keep about 5 mm beyond the outside panel border as well; it will be trimmed in step 11. Clip only within the spare allowance around tight curves, keeping the finished outline intact.
Step 6. Place the Mustard Sun
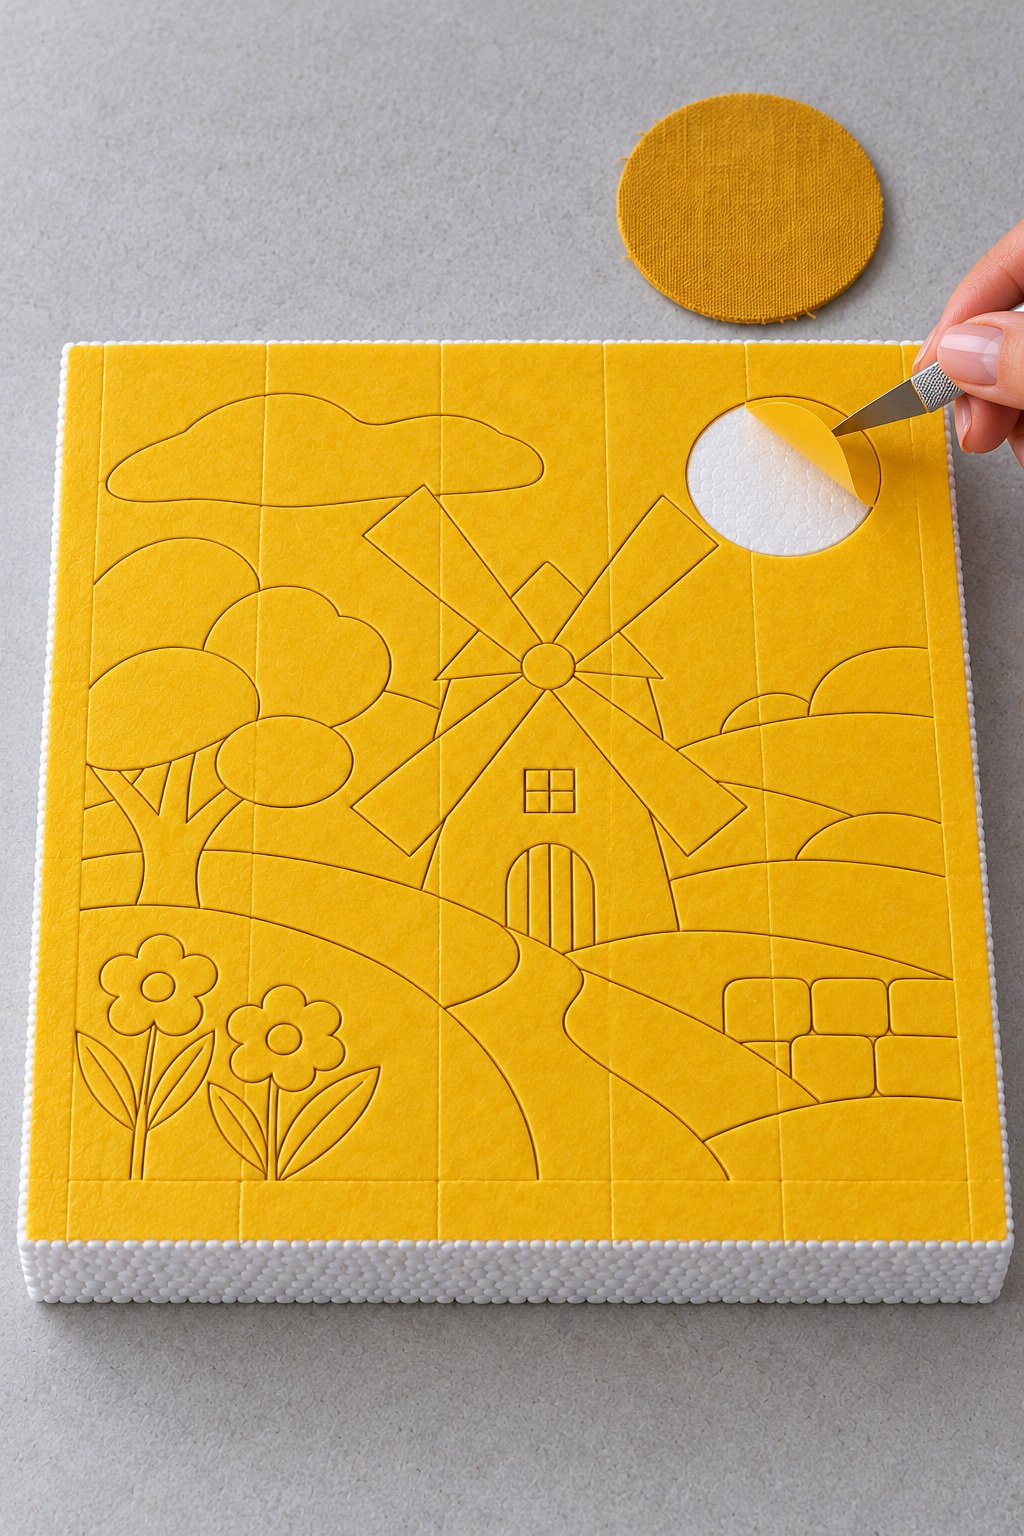
Lift the liner inside the sun circle, leaving neighboring regions covered. If a small corner needs the knife tip to start it, keep the other hand clear and set the blade down as soon as the corner lifts.
Center the mustard cotton over the exposed adhesive, with its margin extending evenly past the circle. Press the middle gently. Keeping the rest of the liner on the board lets you handle the panel without sticking loose fabric to areas that are still unfinished.
Step 7. Tuck the Edges in Short Sections
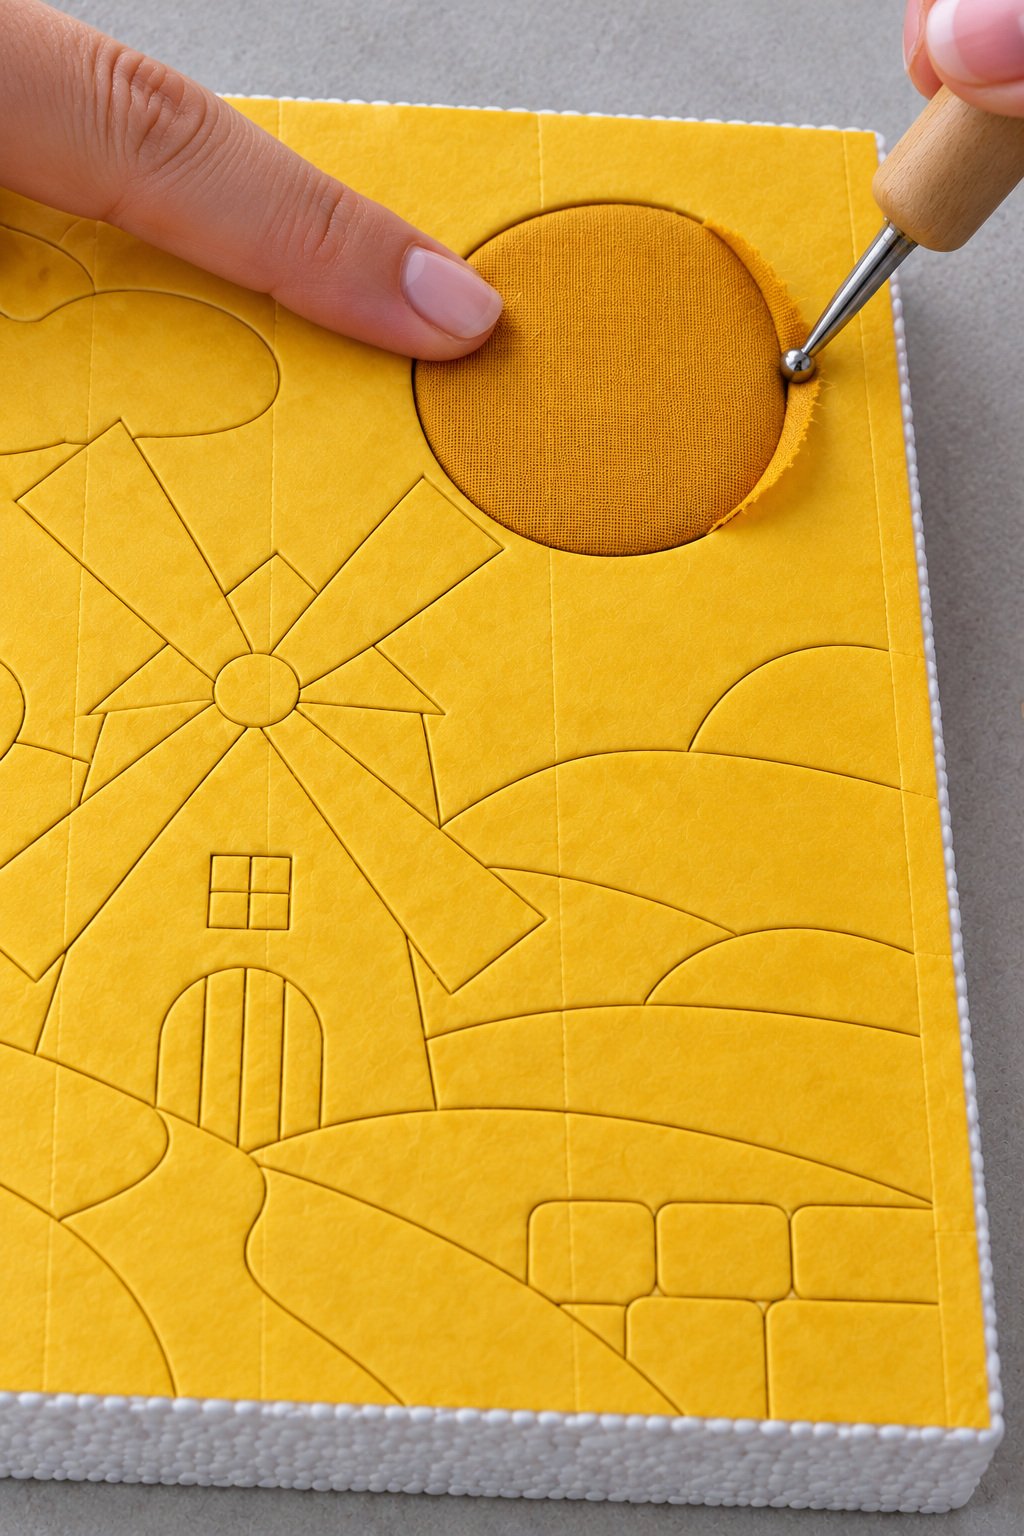
Hold the sun fabric flat and guide its spare edge into the cut with the blunt tool. Work a few millimeters at a time, using light, repeated pressure around the circle. Keep the cotton smooth across the face instead of stretching it toward the channel.
If a fold builds up, lift that short section, trim a little surplus cloth off the board and tuck again. Stop if the foam starts to tear. Rebecca Mae Designs' fabric tucking guide shows the same basic combination of adhesive beneath the fabric and tucked borders around each region.
Step 8. Add the Cloud and Blue Sky
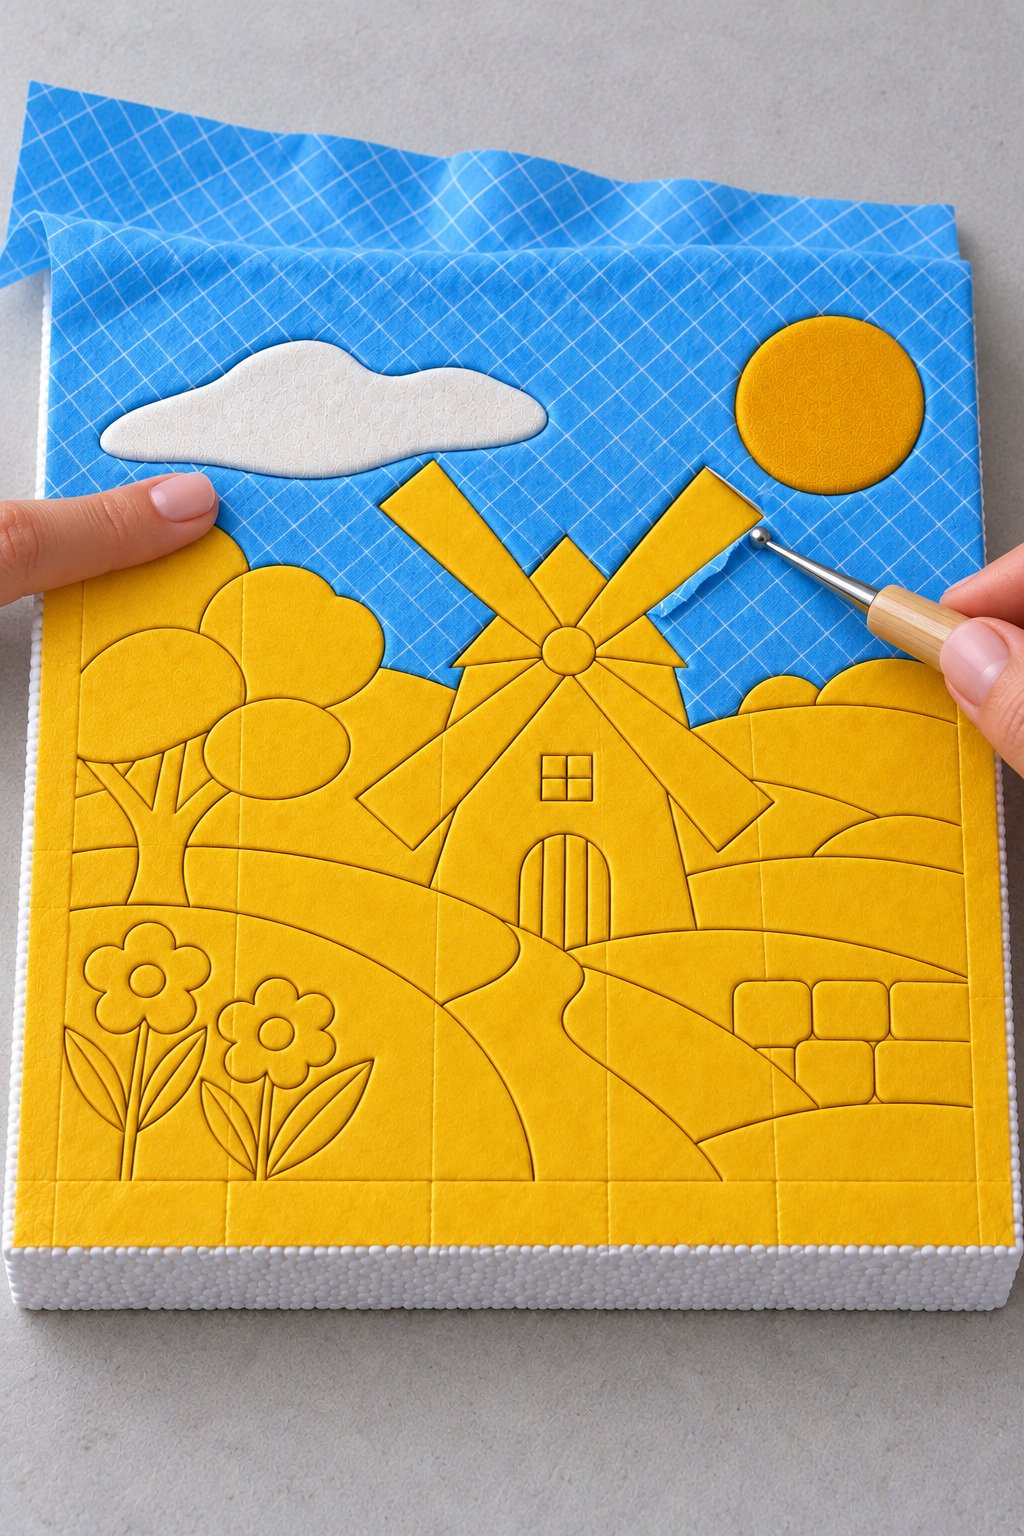
Fill the white cloud with the same peel, press and tuck sequence. Position the blue sky piece against the remaining paper guide before exposing a large sticky area. Start near the sun and cloud, then reveal more liner gradually as you lower the cotton around the windmill outline.
Guide the inner margins around the sails in short sections. Keep the white diamond grid straight across the flat background, allowing it to end at each motif boundary. Trim a crowded margin off the board and tuck it again. Leave the overhang at the outer panel edge loose until step 11.
Step 9. Fill the Tree and Distant Fields
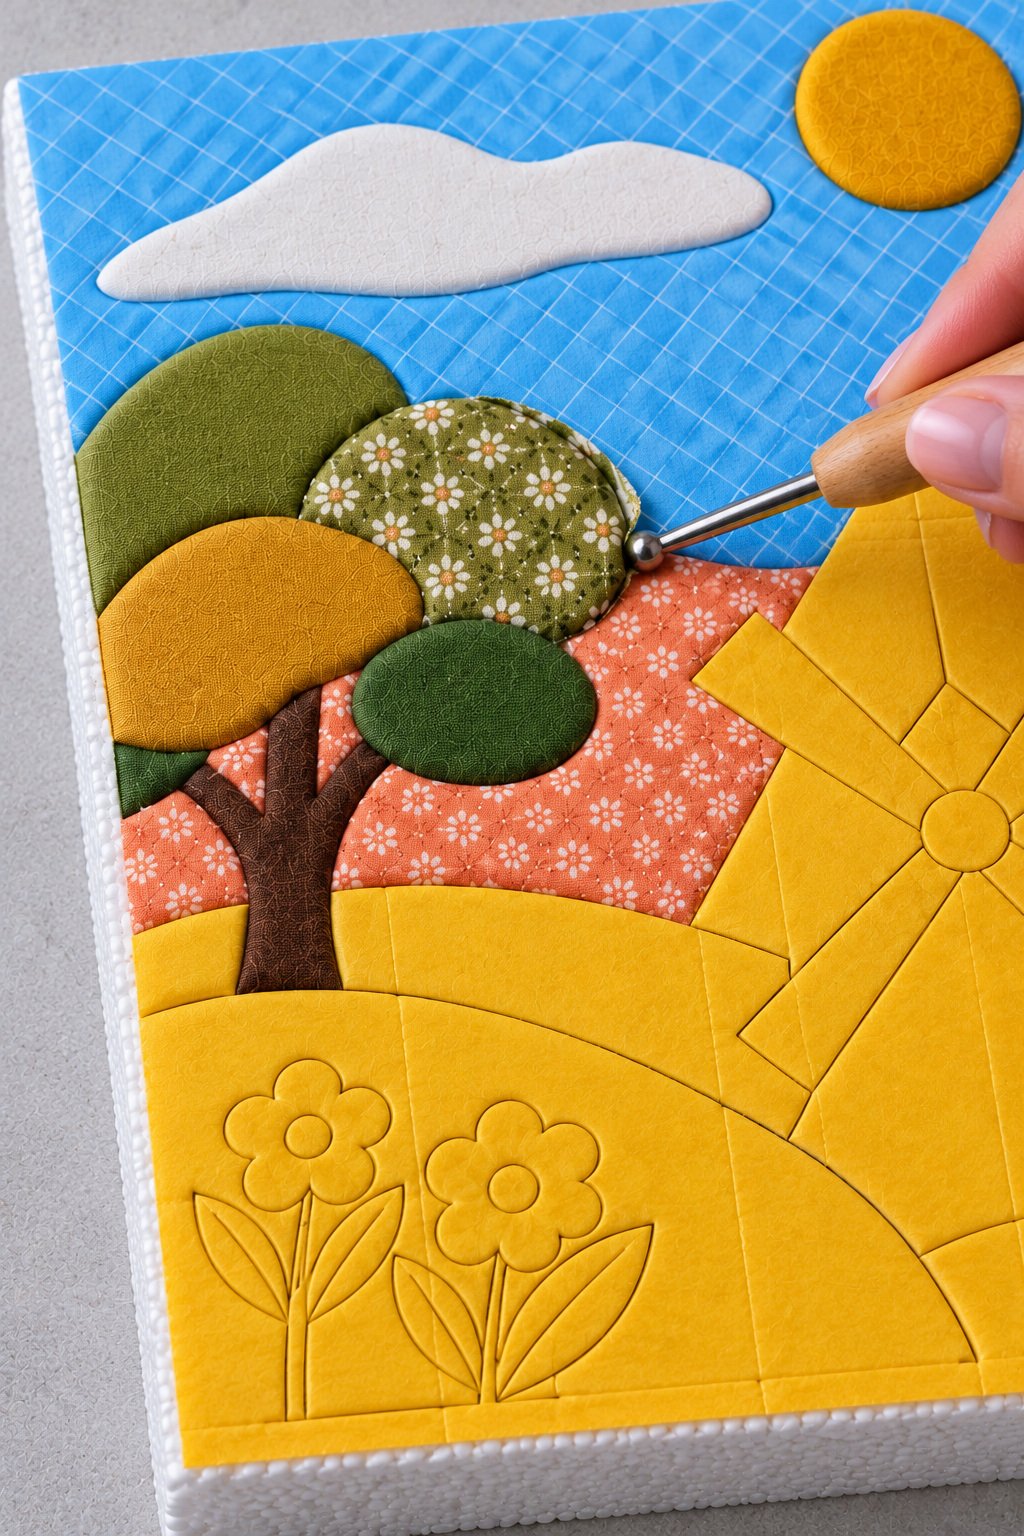
Fill the peach floral field and the distant mustard hill, then the branching brown tree trunk. Add its four canopy patches in their pattern positions: rear olive, small floral print, mustard and dark green. Work one outlined region at a time so the next piece stays clean and easy to identify.
At a shared boundary, tuck the first fabric edge before adding its neighbor. Keep both margins thin enough to fit the same channel. If the join feels packed, ease out a short section and remove surplus cloth instead of pushing harder against the foam.
Step 10. Complete the Windmill

Fill the cream tower and burgundy roof, followed by the mustard door and four window panes. The two internal door cuts make three vertical panels. Keep those small allowances modest and stop if the foam between the cuts begins to break away.
Place the four brown and cream gingham sails with their checks running neatly along each blade. Tuck the long sides first and finish the narrow ends beside the center. Add the round brown hub last. Its separate circle closes the center of the design without leaving loose cloth over neighboring regions.
Step 11. Finish the Garden and Outer Edges
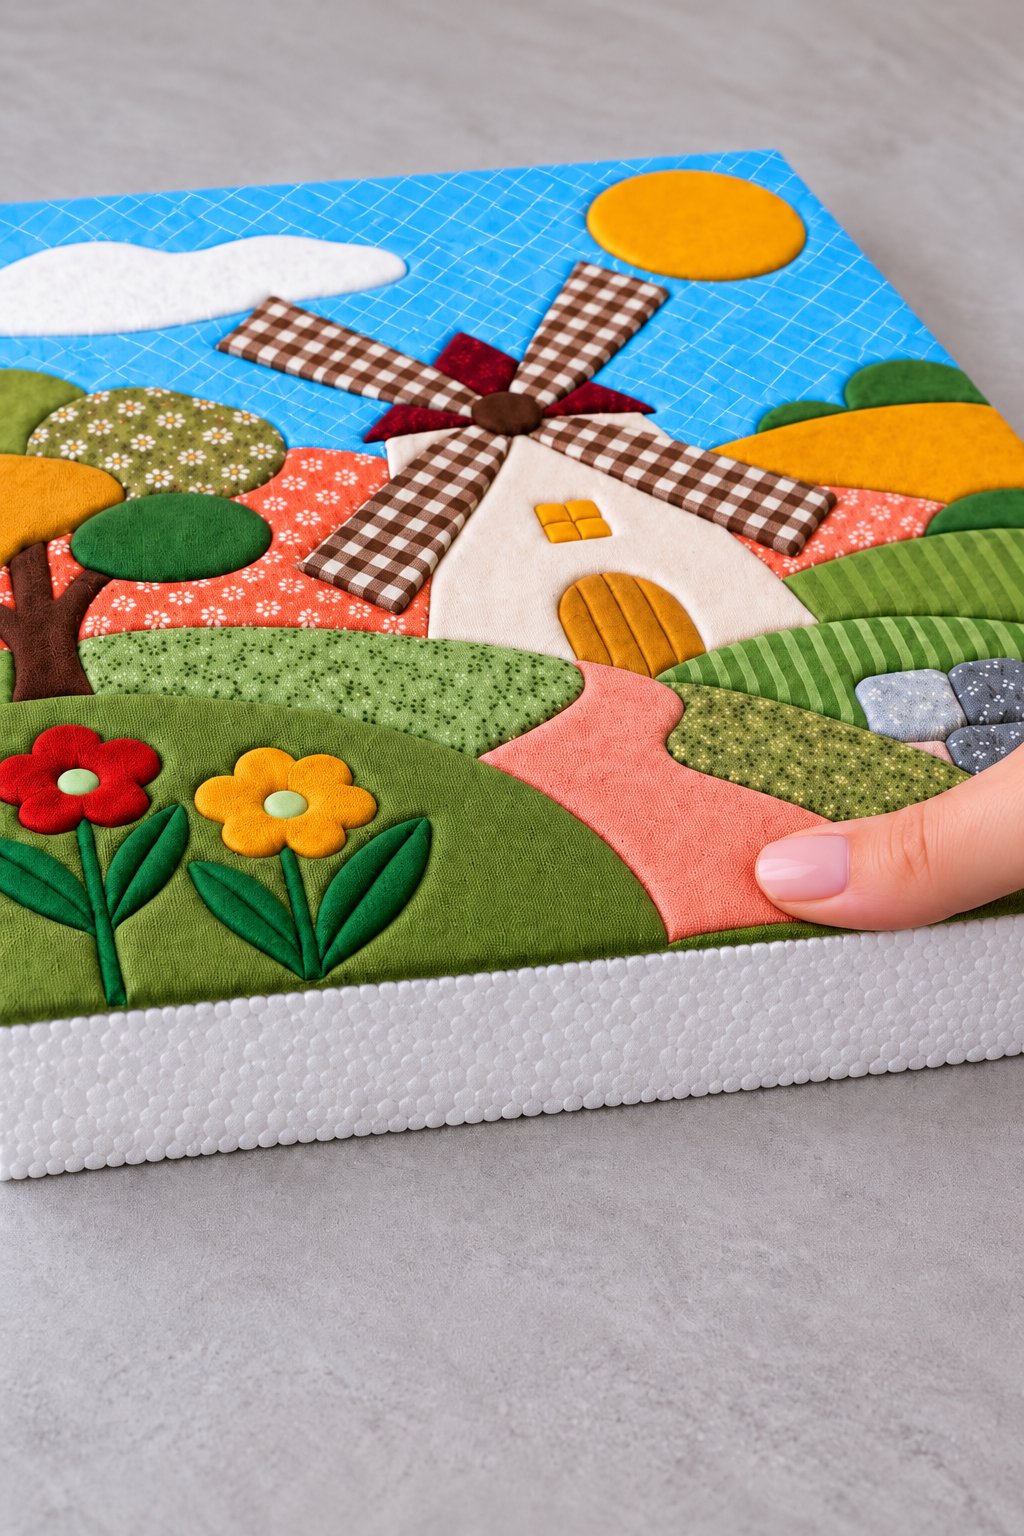
Complete the remaining green fields and the peach path, then the six gray stones. Fill the two flower stems, their four leaves, and the red and mustard flowers with pale green centers. Keep each small piece aligned with its own outline.
Lift the loose fabric beyond the panel edge and trim it off the foam with scissors. Press the trimmed top edges onto the adhesive so the cotton ends flush with the top face. Leave the white foam sides bare for the frame to enclose. Check for lifted cloth, exposed liner and gaps before framing.
Step 12. Secure the Panel in Its Frame
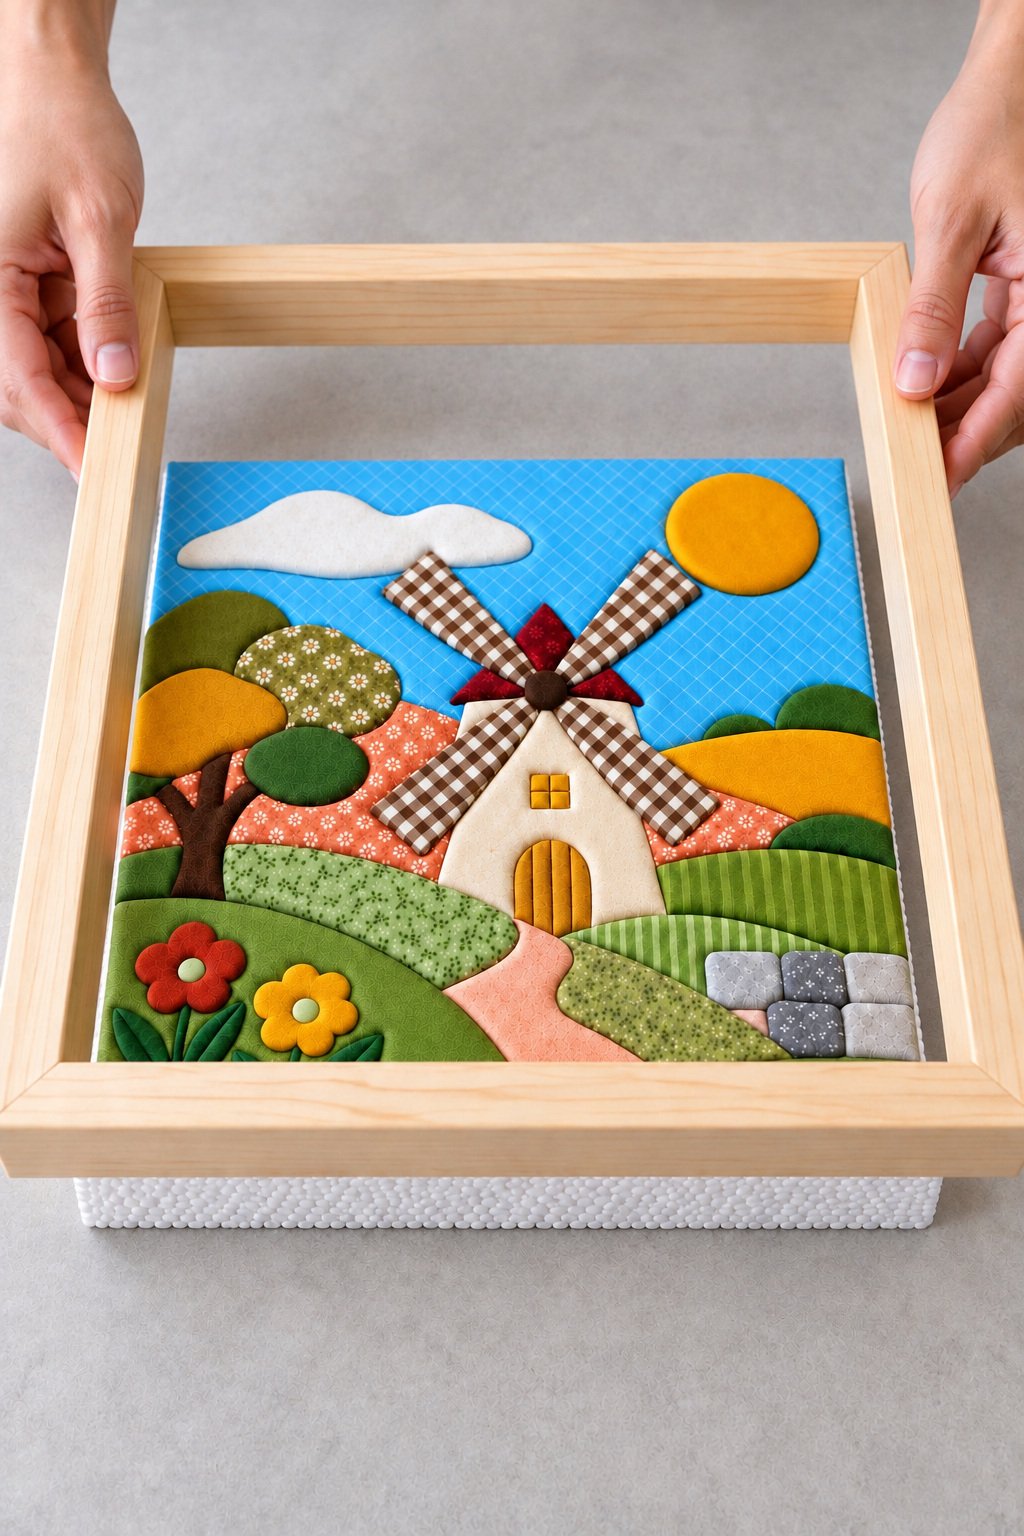
Place the finished panel face up on a clean table and lower the correctly sized box frame over it. The front lip should conceal the outside raw edges. Keep the front clear of the raised fabric details.
Support the frame and panel together, turn them onto a soft cloth and fit the rigid backing. Close the retaining fittings without compressing the picture. The back should close normally and the panel should stay still when the frame is lifted. If it does not fit, use a frame with sufficient recess depth. Attach hanging hardware to the wooden frame, using its intended mounting points.
Display the Finished Windmill
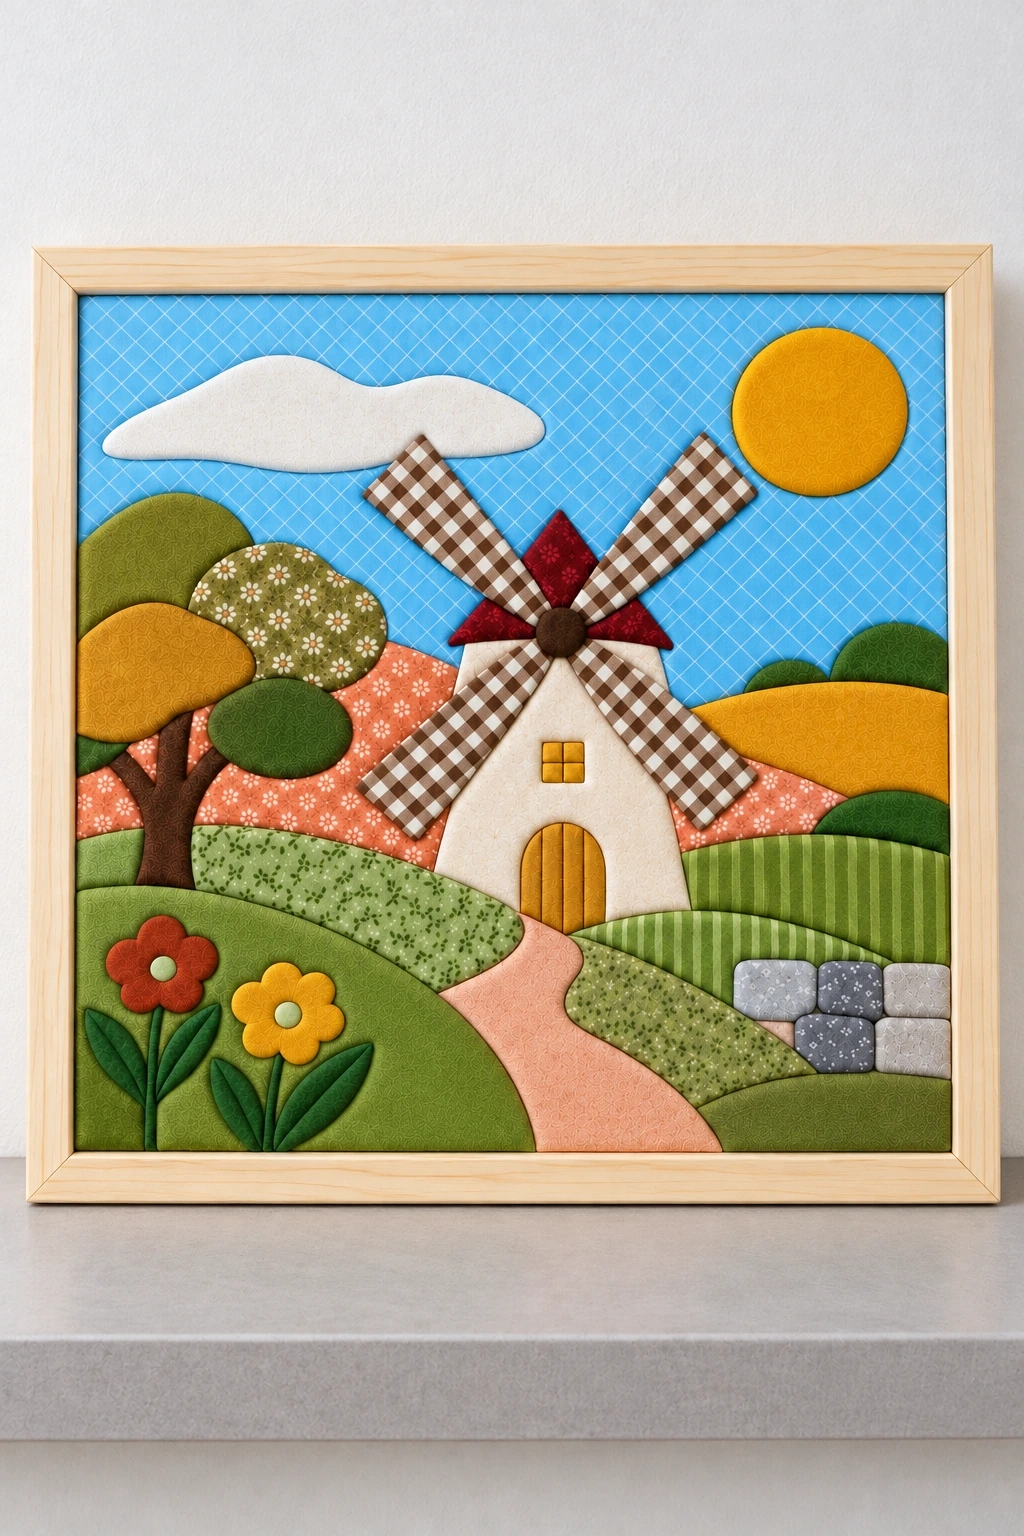
Hang the picture on a dry indoor wall where the texture can be seen at close range. A pale wooden frame sits comfortably beside the small floral prints and gingham. These cottagecore wall projects offer related display ideas, including fabric and botanical pieces. For another type of make, browse the DIY project collection.
Download the 11 PDF Patterns
Download the 11 Patterns for A3
Download the 11 Patterns as A4 Tiles
The files contain the windmill pattern and ten alternative designs. The lines show the finished shapes; add the fabric margin from step 5 when cutting cotton. Choose one design, then print it twice so the transfer copy and fabric templates have the same scale.
| Design | A3 page | A4 pages |
|---|---|---|
| 01. Windmill Garden | 1 | 1 to 4 |
| 02. Lighthouse by the Sea | 2 | 5 to 8 |
| 03. Cottage and Garden Gate | 3 | 9 to 12 |
| 04. Hot Air Balloon over Hills | 4 | 13 to 16 |
| 05. Teapot Full of Flowers | 5 | 17 to 20 |
| 06. Cat in an Arched Window | 6 | 21 to 24 |
| 07. Sailboat on Rolling Waves | 7 | 25 to 28 |
| 08. Sleeping Fox under the Moon | 8 | 29 to 32 |
| 09. Tulips in a Garden Jug | 9 | 33 to 36 |
| 10. Lemons on a Curved Branch | 10 | 37 to 40 |
| 11. Mountain Lake and Pine | 11 | 41 to 44 |
A3 printing: Select A3 paper and 100% or Actual Size. Turn off Fit, Shrink and borderless enlargement. Each page carries one complete 240 x 240 mm design; print only the chosen page.
A4 printing: Print the four consecutive pages for your design at 100% or Actual Size on A4 paper. Arrange A and B across the top, with C and D below. Trim blank paper as needed, align the repeated outlines across the 9.6 mm overlap and tape the joins on the back. The newly drawn windmill tiles show only the true outside border, so an artificial crop box will not become an extra line through the picture.
Check before cutting: The scale line must measure 50 mm, and the completed outside square must measure 240 x 240 mm. Correct the print settings if either measurement is wrong. A second windmill copy needs one more A3 sheet or four more A4 sheets. If you resize a pattern for another frame, resize both copies and the foam together.
Fix Loose Edges and Wrinkles
- An edge lifts: Check that enough cotton reaches the cut. Replace a piece that is too small with a larger one.
- A join is bulky: Ease the fabric out a short section at a time, trim surplus allowance and tuck again with light pressure.
- A region puckers: Release the nearest edge and smooth gently. If the adhesive grips permanently, replace the affected piece rather than pulling the fabric out of shape.
- The foam crumbles: Stop tucking that section. Recheck the foam and tool on an offcut before continuing; a broken narrow strip will not be repaired by adding pressure.
- The frame will not close: Recheck usable recess depth with the backing in place. Choose a suitable frame instead of forcing its fittings against the panel.
Calculate the Materials Cost
Use your actual pack sizes and local prices for this project. A single budget range can hide the difference between using supplies already in a drawer and buying a frame, tools and full packs for the first time.
| Supply | Quantity to allow | How to record the cost |
|---|---|---|
| Foam | One 24 x 24 x 2.5 cm panel, plus a test offcut | Record the panel price, or the larger board's purchase price if that is what you need to buy. |
| 50 mm adhesive tape | Five 24 cm strips, plus testing and waste | The basic strips use 1.2 m. Divide 1.2 by your roll length in meters, then multiply by its price for the used portion. |
| Cotton | The template pieces with about 5 mm extra at each edge | Reused scraps can mean no new cash outlay. For new cuts, include the minimum lengths or packs you actually buy. |
| Frame and fittings | One deep frame with backing and suitable hardware | Use its actual price after checking the rear recess and depth. |
| Printing and masking tape | Two A3 pages or eight A4 pages for the windmill, plus fixing tape | Include your printing charge and the tape used. |
For example, 1.2 m uses 12% of a 10 m tape roll before testing and waste, so its portion cost is 0.12 multiplied by that roll's price. Buying the roll still costs the full amount at checkout. Add the frame, foam, cotton and printing you need to buy, then any missing tools, tax and delivery. Keep that shopping total separate from the value of the small material portions used in one picture.
Work Safely and Hang Securely
- An adult should handle the knife. Work on a stable cutting mat, cut away from your body, keep fingers outside the blade path and cap the blade between sessions.
- Use the blunt tool for tucking cotton. Keep cuts shallow and use light pressure around narrow foam sections.
- Test adhesive compatibility on spare foam and follow its label. Keep the foam and cotton away from flames, heaters and hot tools.
- Handle and store any removed frame glazing safely. The finished picture in this guide uses a deep frame without glass against the fabric.
- Choose wall fixings for the completed frame's weight and your wall material. Use the frame's intended hanging points; the foam itself is not a fixing point.
Dust the cotton gently with a soft brush. Keep the picture dry and out of strong direct sunlight. Washing or soaking can affect the fabric, foam and adhesive.

Leave a Reply