
A window can become a piece of art without losing its connection to the view outside. A colored border, a loose trail of leaves, or one carefully placed bird can change how the opening feels. Start with the glass painting method below, then use the 23 designs that follow to choose a palette and composition for your home.
Table of Contents
- How to Create a Stained Glass Effect with Glass Paint
- Step 1: Choose a Small Panel and Compatible Materials
- Step 2: Clean the Glass and Secure Your Pattern
- Step 3: Draw Continuous Raised Outlines
- Step 4: Fill the Sections with Transparent Color
- Step 5: Allow Full Curing Before Display
- 23 Window Designs to Inspire Your Pattern
- 1. Leafy Branches with Red Berry Accents
- 2. A Sunburst That Rises from the Sill
- 3. A Crescent Moon Among Diamond Stars
- 4. An Asymmetric Mosaic Around a Clear View
- 5. A Rectangular Border with a Diamond Center
- 6. Three Floral Panels with a Shared Rhythm
- 7. A Canopy of Falling Pastel Leaves
- 8. Honeycomb Geometry with Clusters of Warm Color
- 9. Sweeping Ribbons in Saturated Color
- 10. Vertical Strands of Abstract Beads
- 11. One Oversized Flower with Curling Petals
- 12. A Faceted Star with Long Geometric Rays
- 13. Tall Flowers Rising from a Dark Green Base
- 14. A Clear Cross Framed by Radiating Color
- 15. A White Dove with Open Wings
- 16. A Butterfly Defined by a Green Outline
- 17. A Candle Above a Colorful Mosaic Base
- 18. An Angel with Broad Wings and Golden Rays
- 19. A Clear Heart Surrounded by Color
- 20. Two Birds Among Broad Garden Blossoms
- 21. A Hummingbird Beside Cascading Fuchsia Blossoms
- 22. A Peacock Tail That Follows the Window Height
- 23. An Amber Owl in a Flowering Canopy
- Choose a Pattern That Fits Your Window
How to Create a Stained Glass Effect with Glass Paint
This project uses transparent glass paint and raised outlines on a small, separate panel. It creates a decorative stained glass effect without cutting colored glass or soldering joints. Traditional assembled stained glass involves different tools and construction skills. The later window designs offer pattern inspiration; this painting method produces a simpler surface decoration.
Step 1: Choose a Small Panel and Compatible Materials
Gather the following supplies before beginning:
- A small glass panel with professionally finished edges
- Transparent glass paints labeled for your surface and intended display conditions
- A raised glass outliner compatible with the paints
- A soft brush and the cleaning materials specified by the paint manufacturer
- A lint free cloth, a paper template, and masking tape
- A stable, protected work surface and a suitable display frame
For this method, choose a paint system that can harden without oven curing. Read the label before buying, since glass paints differ in preparation, cleanup, and curing requirements. Follow its ventilation and handling directions, particularly for products containing solvents. A few broad geometric sections are easier to manage than a detailed flower or bird.
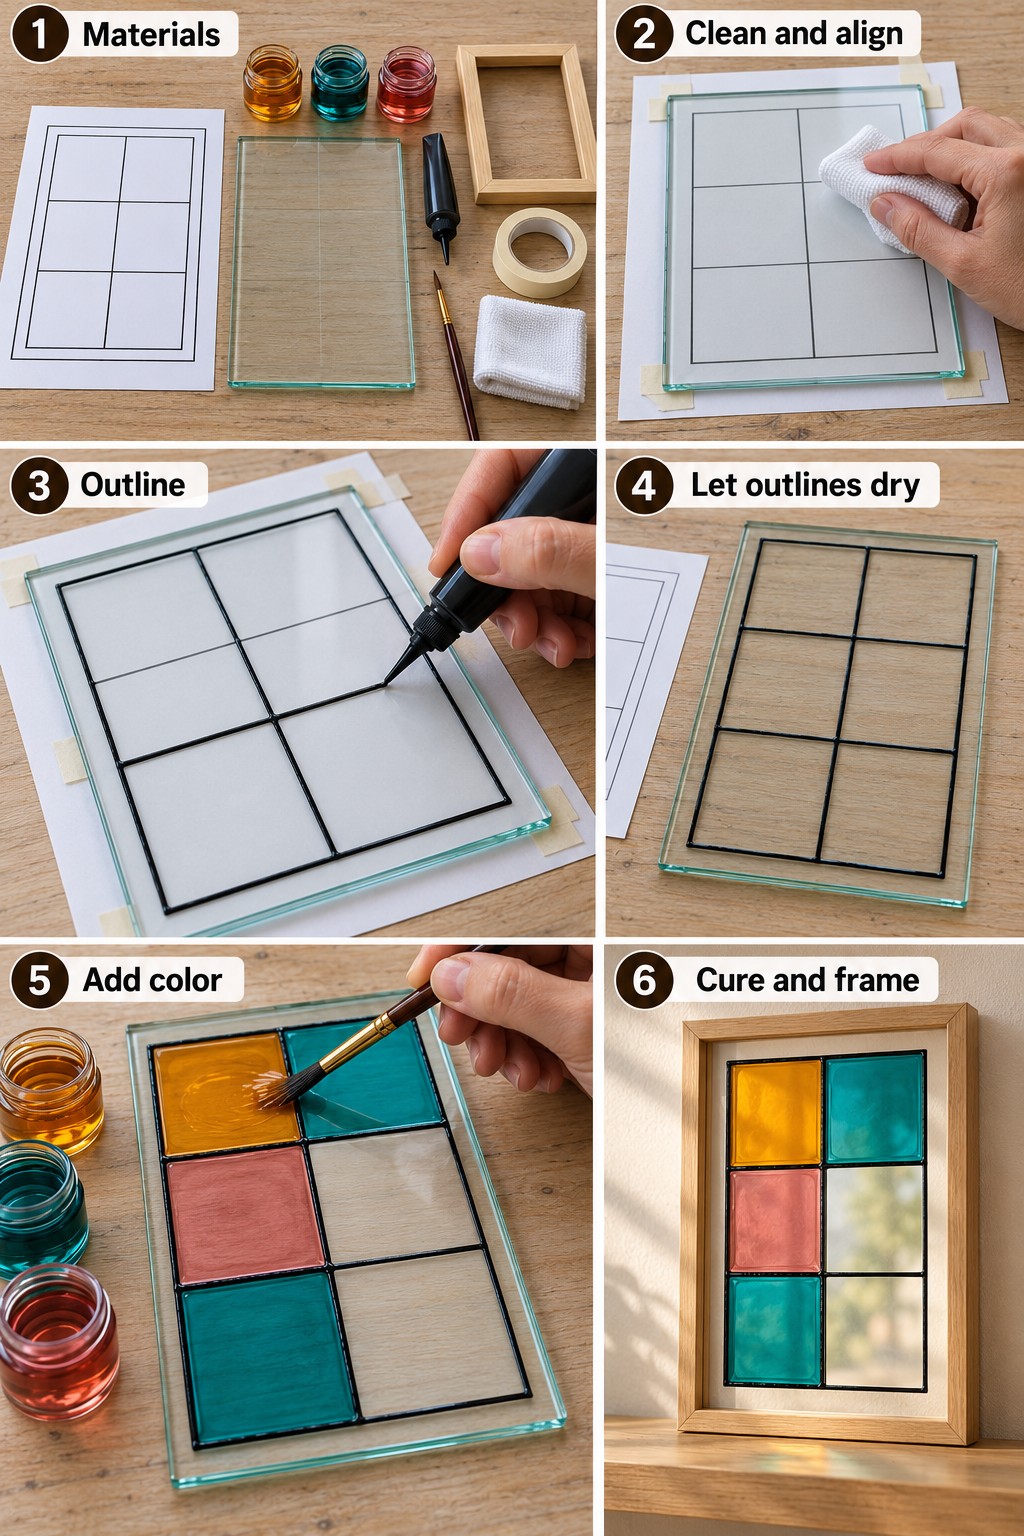
Step 2: Clean the Glass and Secure Your Pattern
Remove grease, dust, and fingerprints with the cleaner recommended for your paint system. Let the surface dry completely. Tape the template behind the panel, keeping the tape away from the area you will paint, and lay the glass flat. Avoid touching the cleaned face. Use the same six section geometric template for marking, outlining, and painting so the design remains consistent from start to finish.
Step 3: Draw Continuous Raised Outlines
Practice on a spare piece of the same surface to check the outliner’s flow. Follow the template with steady pressure, forming connected borders around the areas you intend to color. Check the joins for gaps before the outline dries. Let it set for the time specified by the manufacturer before adding paint; a line that looks firm may still be soft underneath.
Step 4: Fill the Sections with Transparent Color
Remove the template once the outline is ready. With the panel still flat, apply a small amount of paint inside each section and spread it as directed for that product. Avoid overfilling, which can make the color collect unevenly or pass over the outline. Leave selected areas unpainted if you want a clearer view through the design. Follow the recommended interval before any additional coat.
Step 5: Allow Full Curing Before Display
Leave the panel flat in a clean, ventilated place protected from dust and accidental contact. Use the product’s full curing instructions rather than judging readiness by touch alone. Once it is ready, secure it in a frame designed to hold the glass safely. Follow the paint maker’s cleaning guidance; do not assume the finish can withstand soaking, scraping, or abrasive cleaners.
A separate display panel lets you try the look before altering a window. If you want permanent glazing replaced or a heavy panel fitted to an opening, ask a qualified glazing professional about the frame and installation. Ordinary decorative paint should not be assumed suitable for outdoor exposure or every type of window.
23 Window Designs to Inspire Your Pattern
Choose the amount of view you want to retain before choosing the motif. Borders and scattered branches leave larger clear areas, while full floral scenes and radiating patterns make the artwork more prominent. For a small painting, borrow the main shape and palette from one of these ideas rather than trying to reproduce every division.
1. Leafy Branches with Red Berry Accents
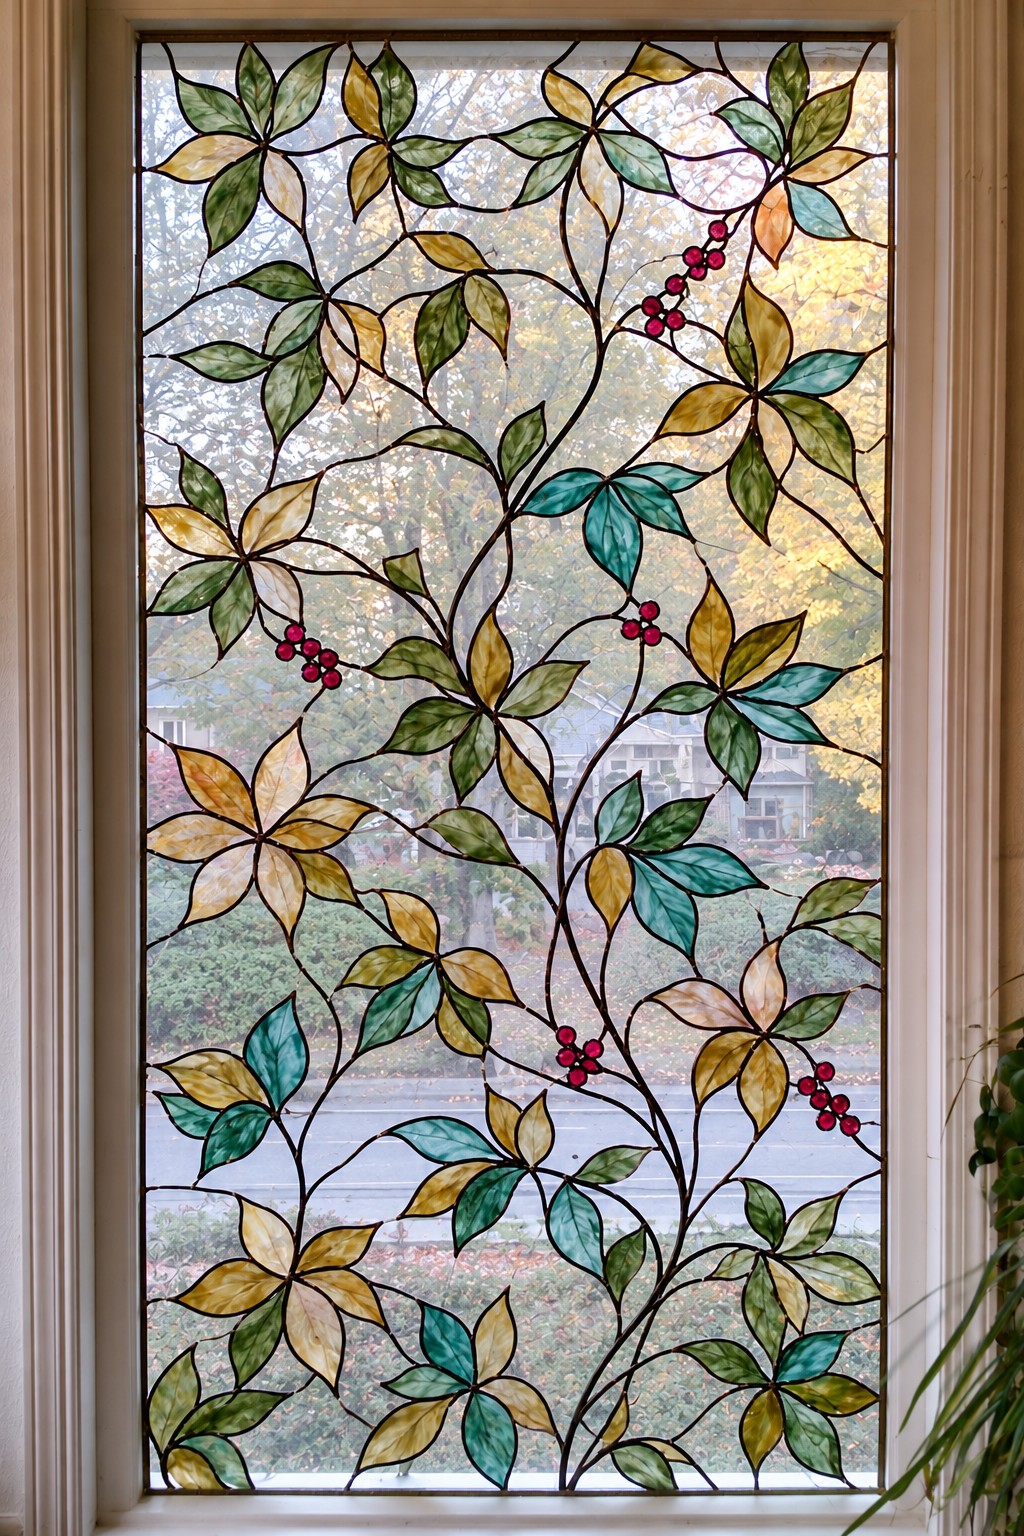
Slender branches wander across this panel, carrying olive, teal, and amber leaves with small clusters of red berries. The open spaces between the stems matter as much as the colored details: they let the garden beyond become part of the composition. Its appeal comes from that loose, natural rhythm rather than a perfectly mirrored pattern.
For a painted version, start with one branching stem and a few broad leaves. Add berries only after the main shapes are established. A restrained mix of greens and golds would complement timber furniture without requiring every accessory in the room to match.
2. A Sunburst That Rises from the Sill
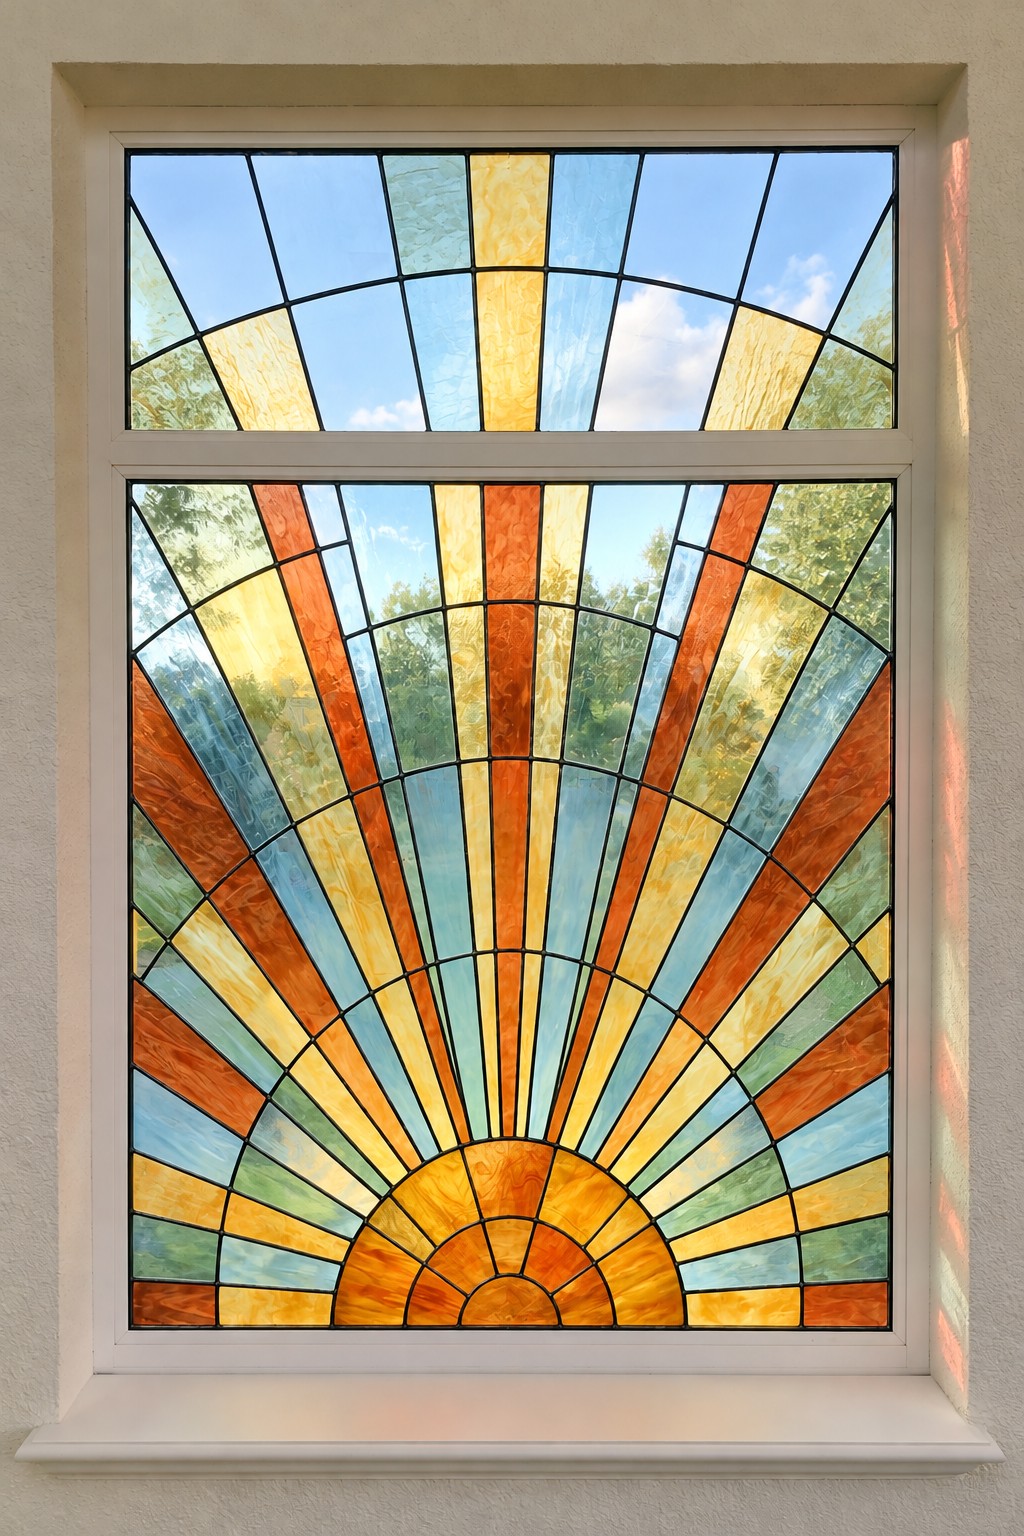
An amber semicircle sits at the bottom of the window, sending alternating orange, gold, and pale blue rays upward. Curved horizontal bands break the long wedges into smaller sections, giving the pattern more detail than a simple fan. The upper pane continues the radiating lines, so the whole opening reads as one composition.
If your window has a horizontal divider, plan the rays around it before choosing colors. A small painted panel can capture the same idea with fewer wedges and one curved band. Pale spaces between the warm tones help keep the sunburst from becoming a solid orange field.
3. A Crescent Moon Among Diamond Stars
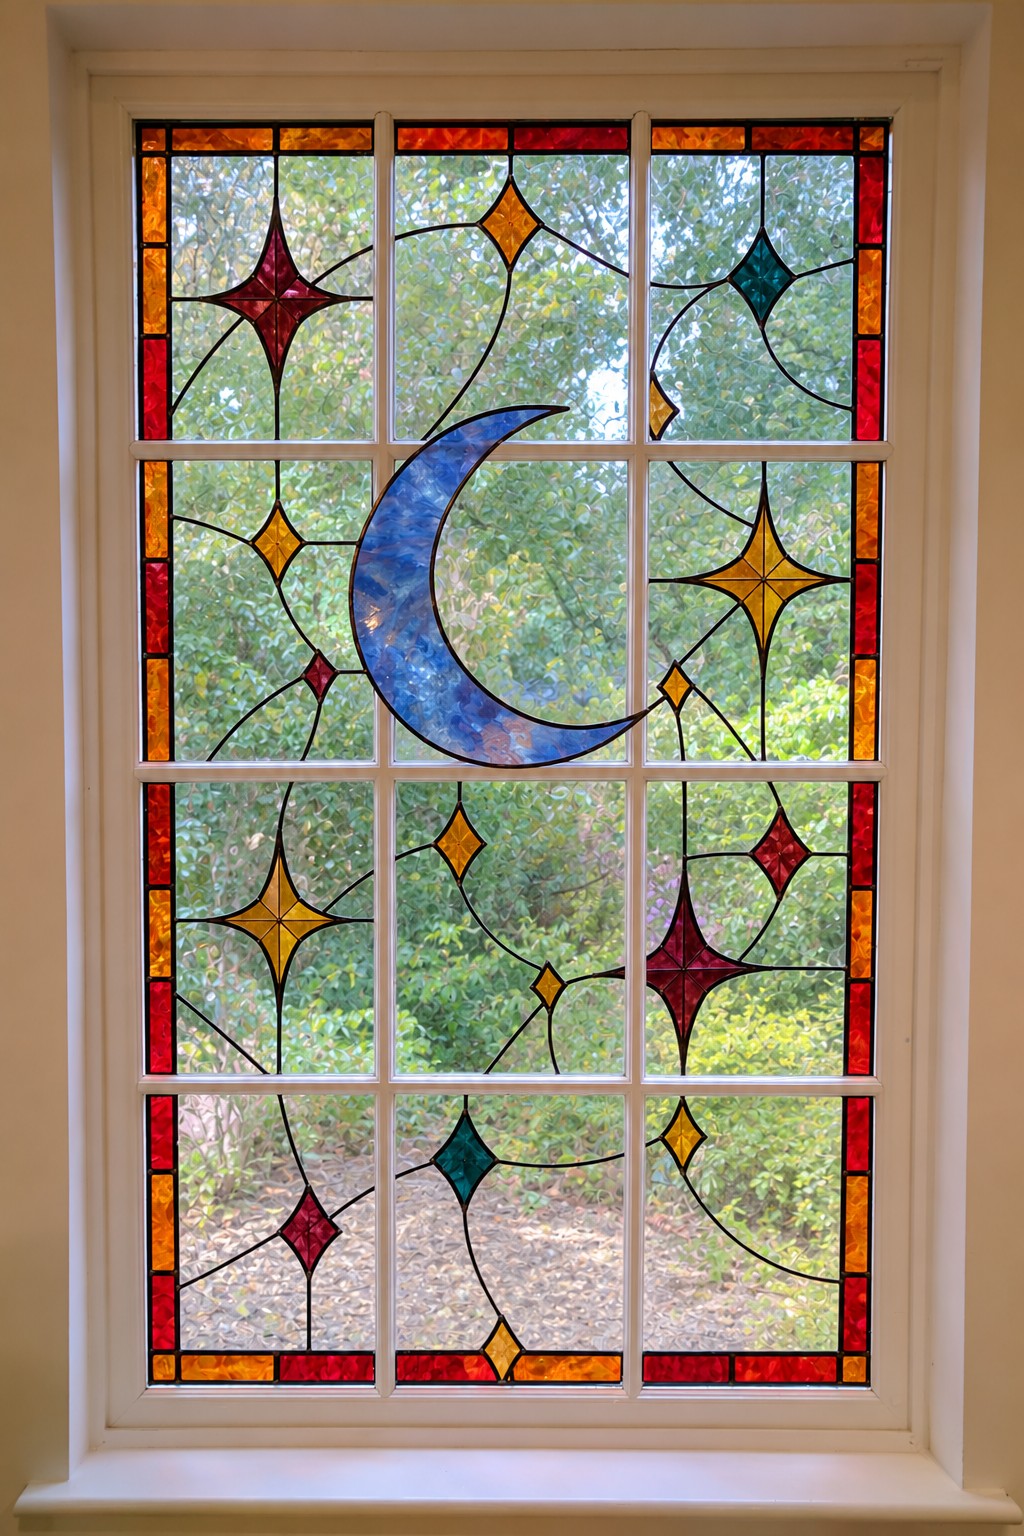
A blue crescent floats among elongated diamond stars in gold, burgundy, and teal. Most of the background remains visually open, which gives the celestial details room to stand out. The narrow red and amber border gathers these scattered motifs into a single framed scene.
Rather than filling every gap with another star, vary their sizes and leave generous space around the moon. For a compact panel, one crescent and three stars may be enough. This keeps the theme recognizable from across the room while avoiding a crowded pattern that only looks clear at close range.
4. An Asymmetric Mosaic Around a Clear View
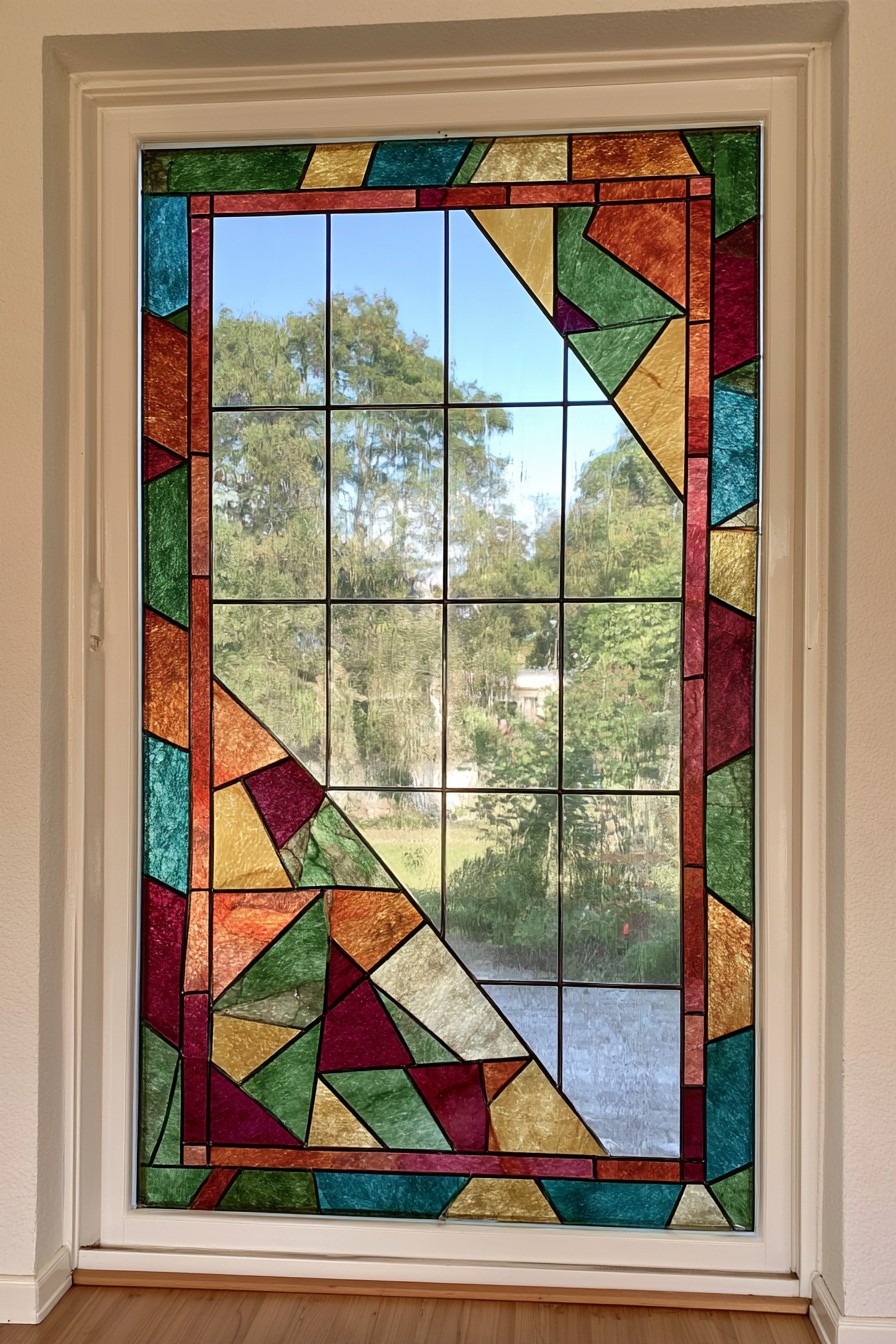
Angular blocks gather around the edges while a broad central area leaves the outdoor view visible. The upper right and lower left corners carry more of the mosaic detail, creating a diagonal balance without making the two sides identical. Burgundy, amber, and teal give the border a richer character than a single color could.
Borrow the layout when you want decoration around a view rather than across it. Sketch the clear center first, then build the colored shapes outward. Repeating two or three colors in opposite corners can connect an irregular pattern without turning it into a symmetrical frame.
5. A Rectangular Border with a Diamond Center
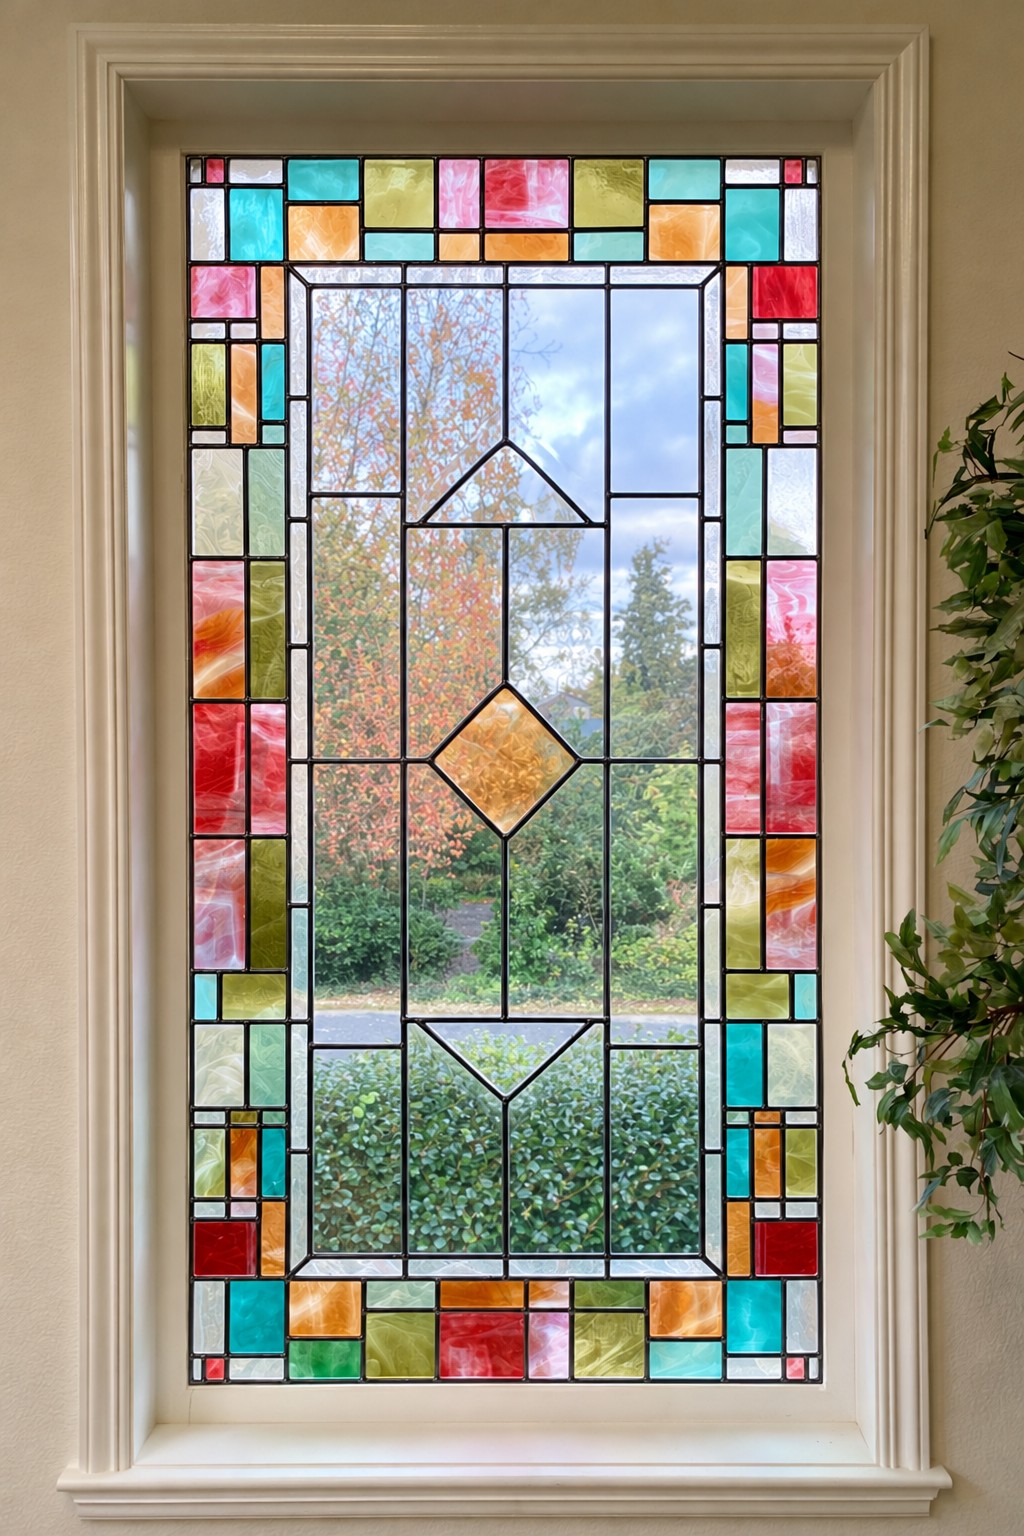
Small rectangles in aqua, coral, pink, and amber create a lively perimeter. Thin interior lines and a central amber diamond add structure to the otherwise open middle. Unlike the previous angular mosaic, this design relies on the steady rhythm of upright and horizontal blocks.
The border is a useful starting point for someone who enjoys orderly patterns. Keep the widths consistent on a paper template, then vary the colors within that framework. If the center looks too busy beside an existing window grid, omit some interior lines and let the colored perimeter do most of the decorative work.
6. Three Floral Panels with a Shared Rhythm
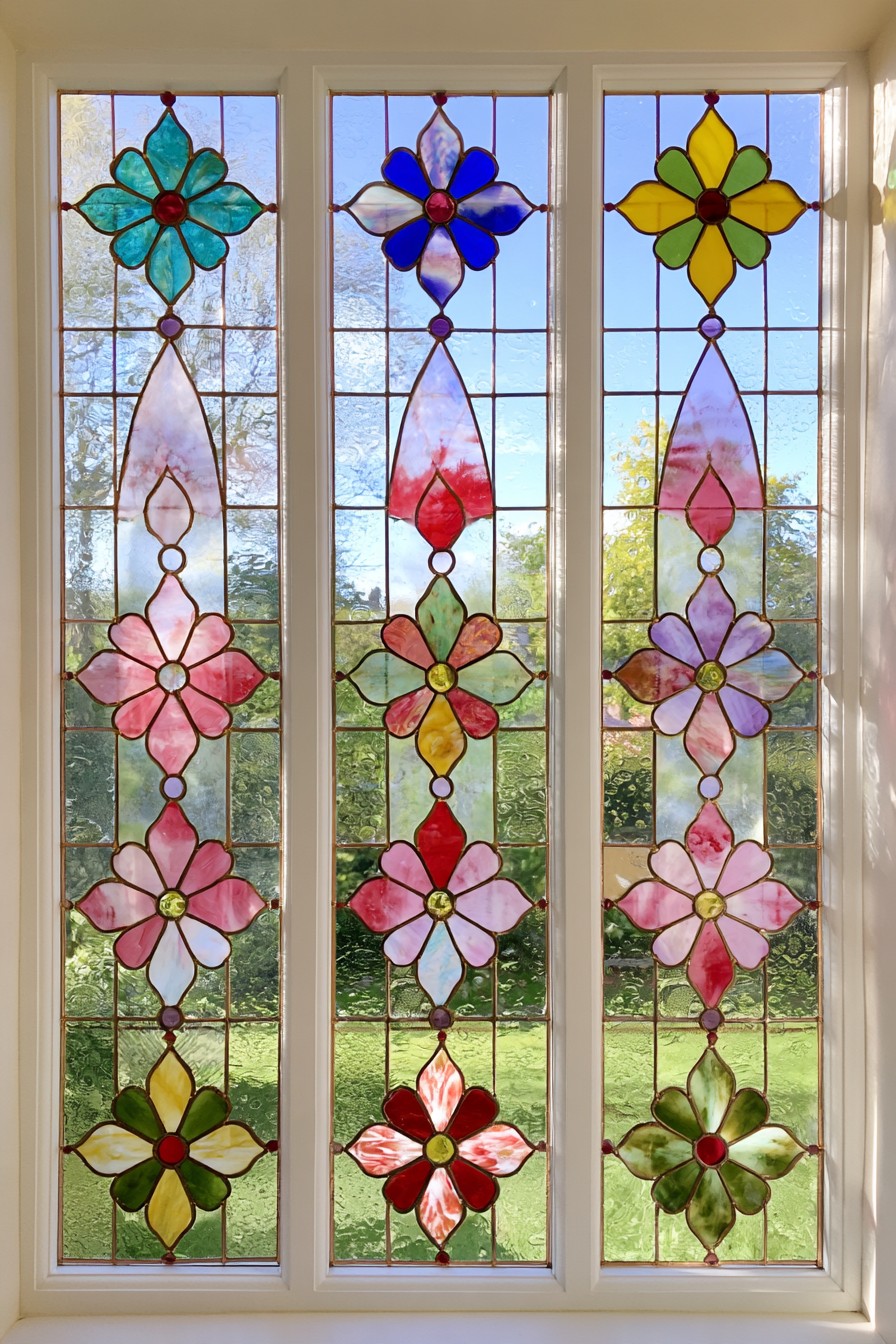
Three slender panels repeat a vertical sequence of flowers and connecting shapes. Their proportions stay similar, but the petal colors change from one panel to the next. That repetition makes the windows feel related without making them exact copies. Larger blossoms also remain legible within the narrow frames.
When planning adjacent panels, reuse the same template and adjust one dominant color in each. Align the main flowers at matching heights so the group feels deliberate. Small details can vary, but the shared spacing is what makes the arrangement convincing when all three windows are viewed together.
7. A Canopy of Falling Pastel Leaves
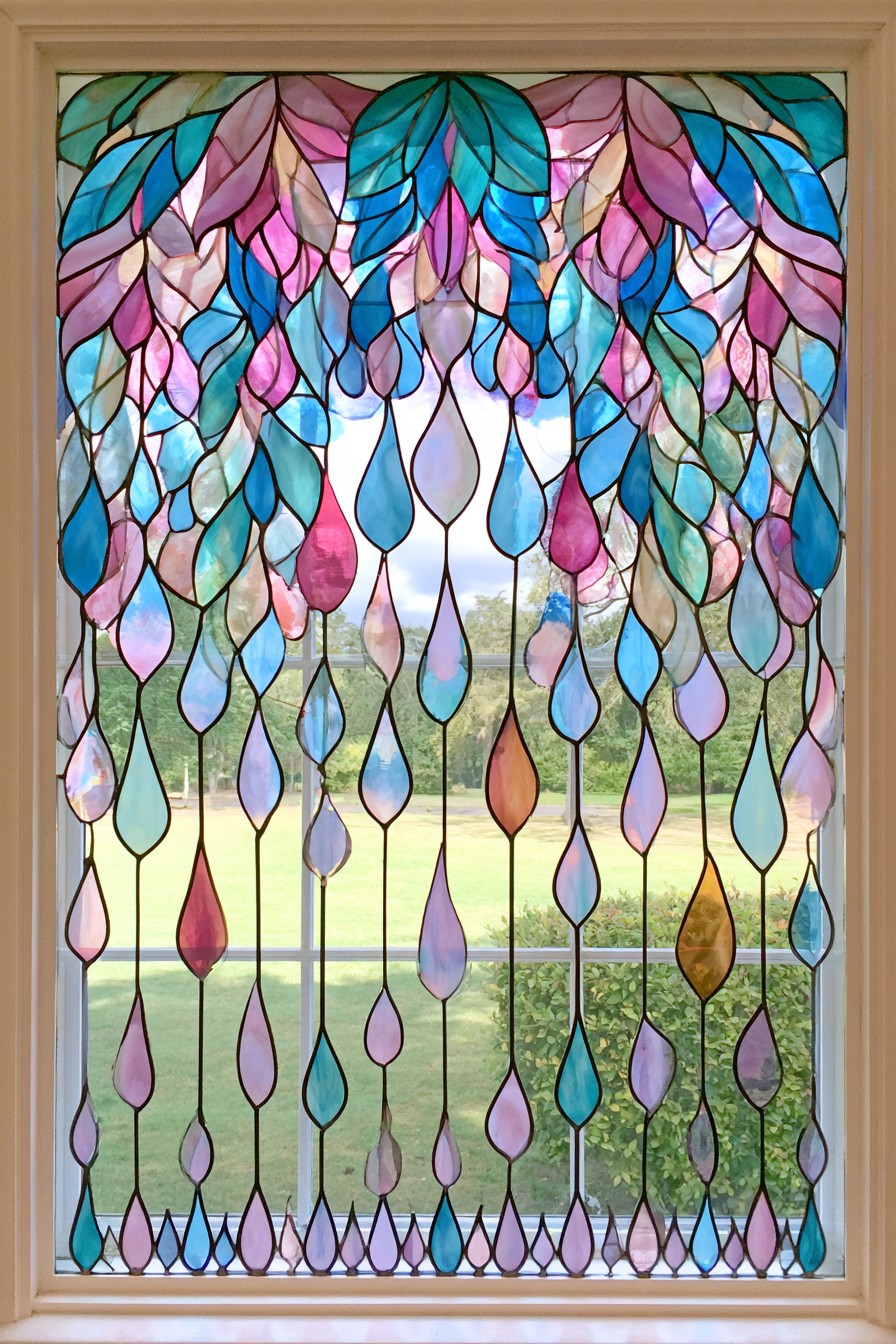
Overlapping leaf shapes collect at the top before thinning into long, suspended teardrops. Blue and teal introduce depth, while pink and lavender soften the canopy. The gradual change in density is the key feature: a richly patterned upper area gives way to more visible landscape below.
Use this approach when you prefer decoration above eye level. A simplified painting could have one row of broad leaves with just a few hanging drops. Resist extending every strand to the bottom; uneven lengths create the light, drifting movement that makes the original composition appealing.
8. Honeycomb Geometry with Clusters of Warm Color
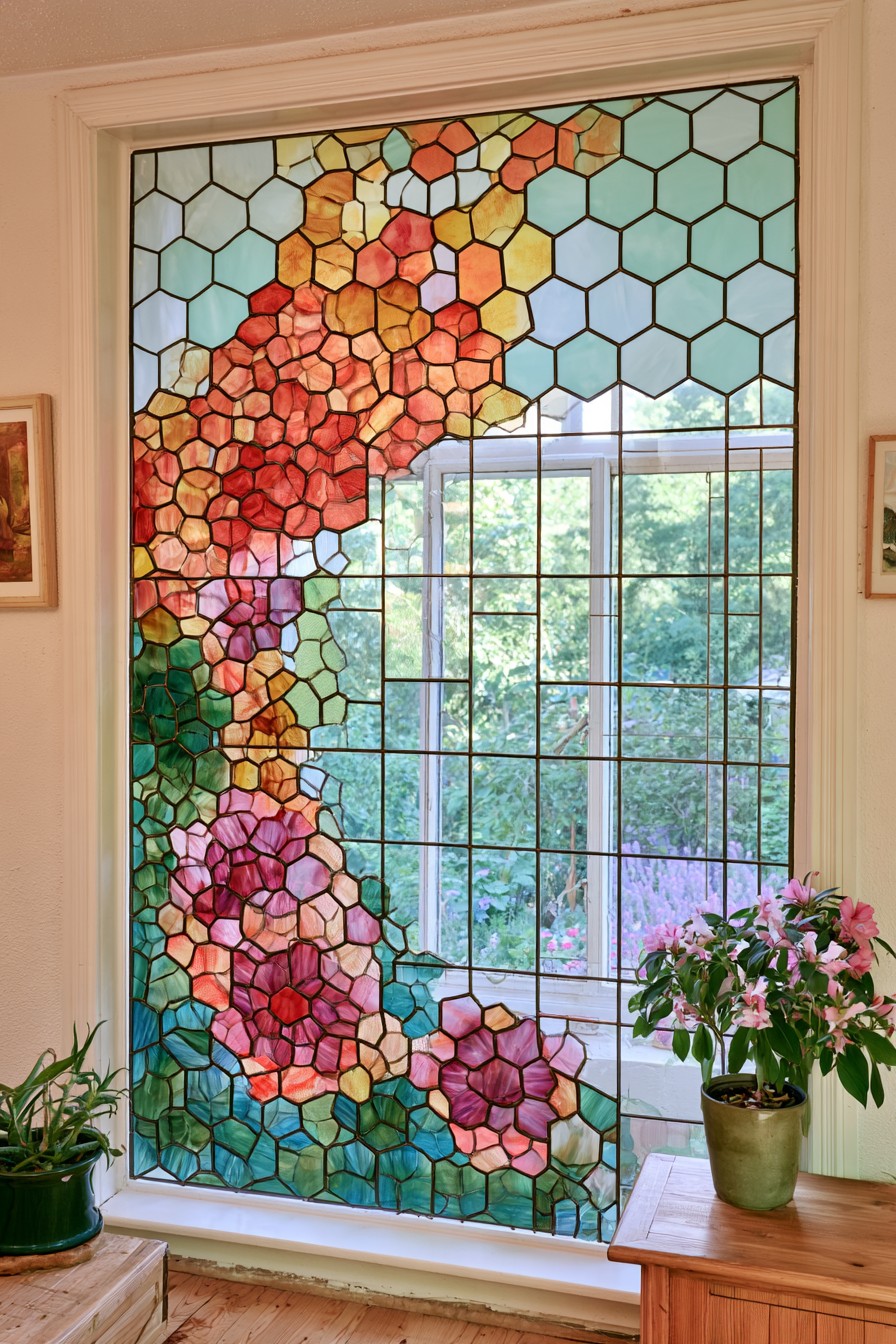
A field of hexagons becomes denser and warmer along the left side, where coral, amber, and purple clusters suggest abstract blossoms. Larger pale cells occupy the upper area, while the right center leaves more of the outside scene visible. Changes in scale make this more expressive than a uniform honeycomb grid.
For a manageable version, use hexagons of one size and create interest through color placement instead. Mark a loose curve of warm cells along one edge, leaving the rest pale or clear. This preserves the flowing silhouette without requiring the many tiny sections shown in the inspiration.
9. Sweeping Ribbons in Saturated Color
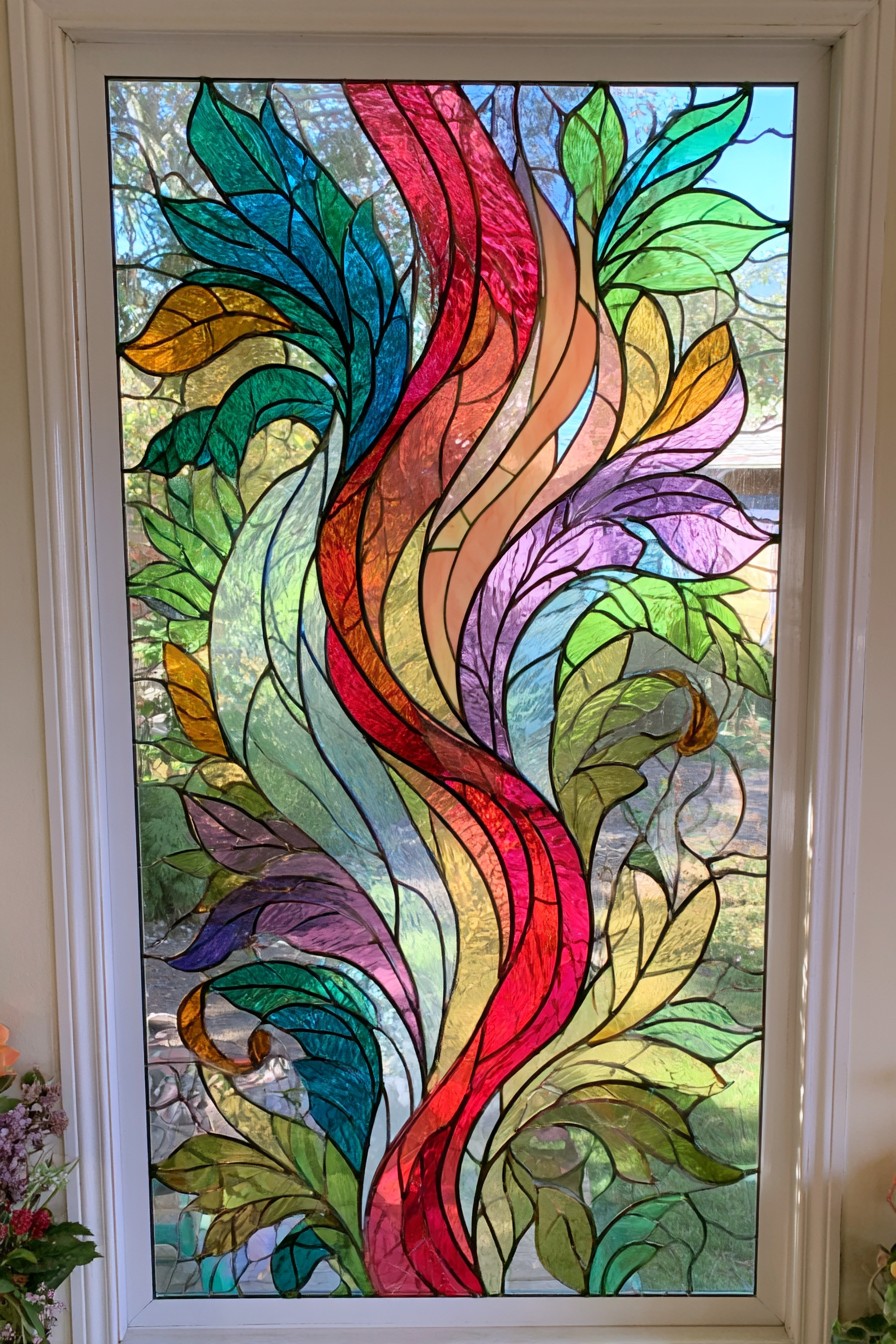
A red ribbon sweeps through the center, surrounded by curling bands of teal, emerald, violet, and gold. The lines behave more like flowing stems or fabric than separate geometric blocks. Because almost the whole panel carries color, it functions as a strong decorative feature rather than a subtle accent.
Choose one curve as the main route through your sketch and build the surrounding shapes around it. Too many equally prominent swirls can lose that sense of direction. In a room with patterned wallpaper or upholstery, a smaller version may be easier to place than a full window of similarly intense color.
10. Vertical Strands of Abstract Beads
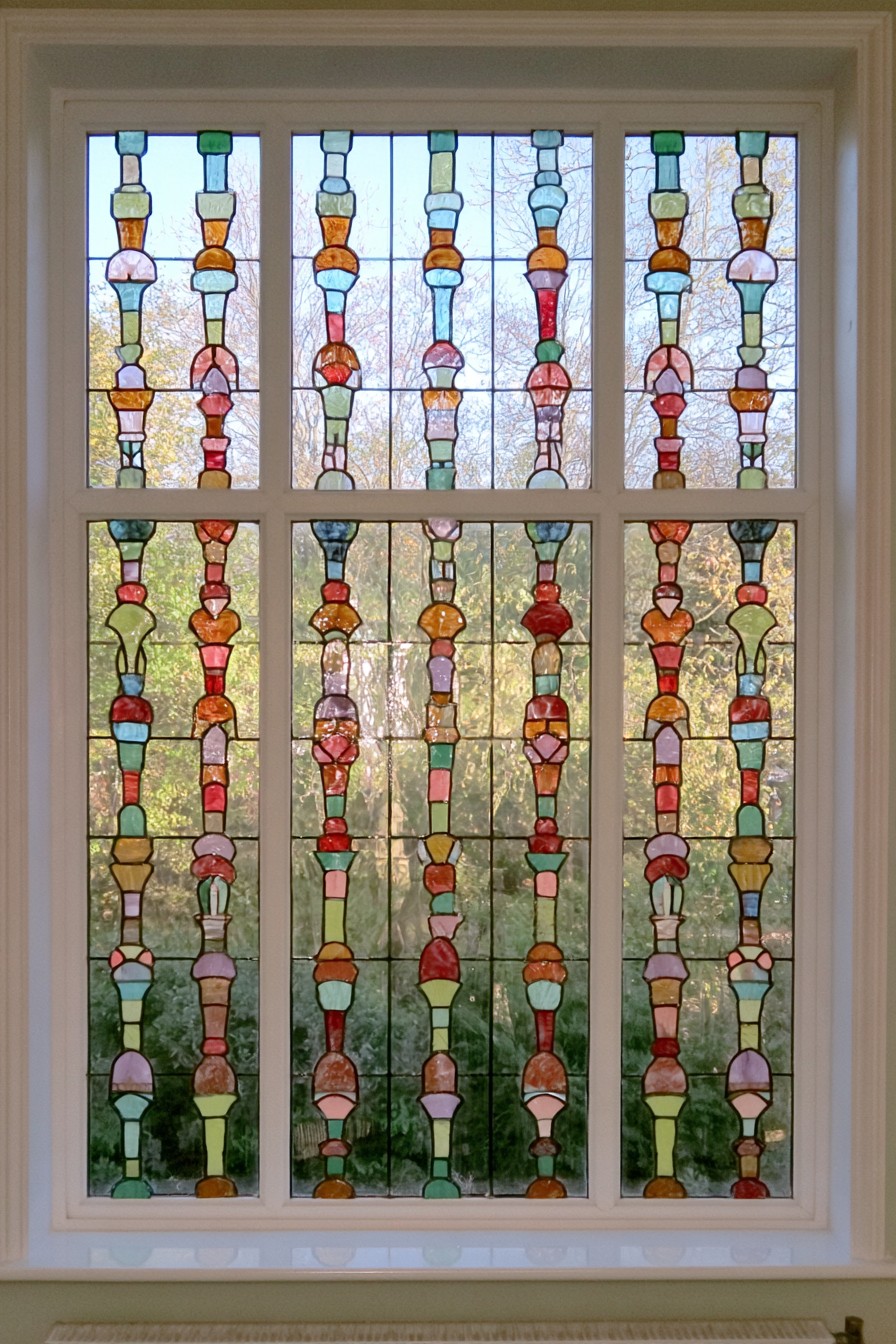
Narrow columns of rounded and angular shapes resemble strings of beads. Coral, pale blue, green, amber, and lavender repeat across the opening, but the clear gaps between the strands keep the arrangement visually light. A horizontal frame divides the window without hiding the overall vertical rhythm.
Make the spacing between columns consistent before varying their internal shapes. For painting, replace the smallest bead details with simple squares, circles, or short rectangles. A limited sequence repeated across the template will look more coherent than a different miniature pattern in every strand.
11. One Oversized Flower with Curling Petals
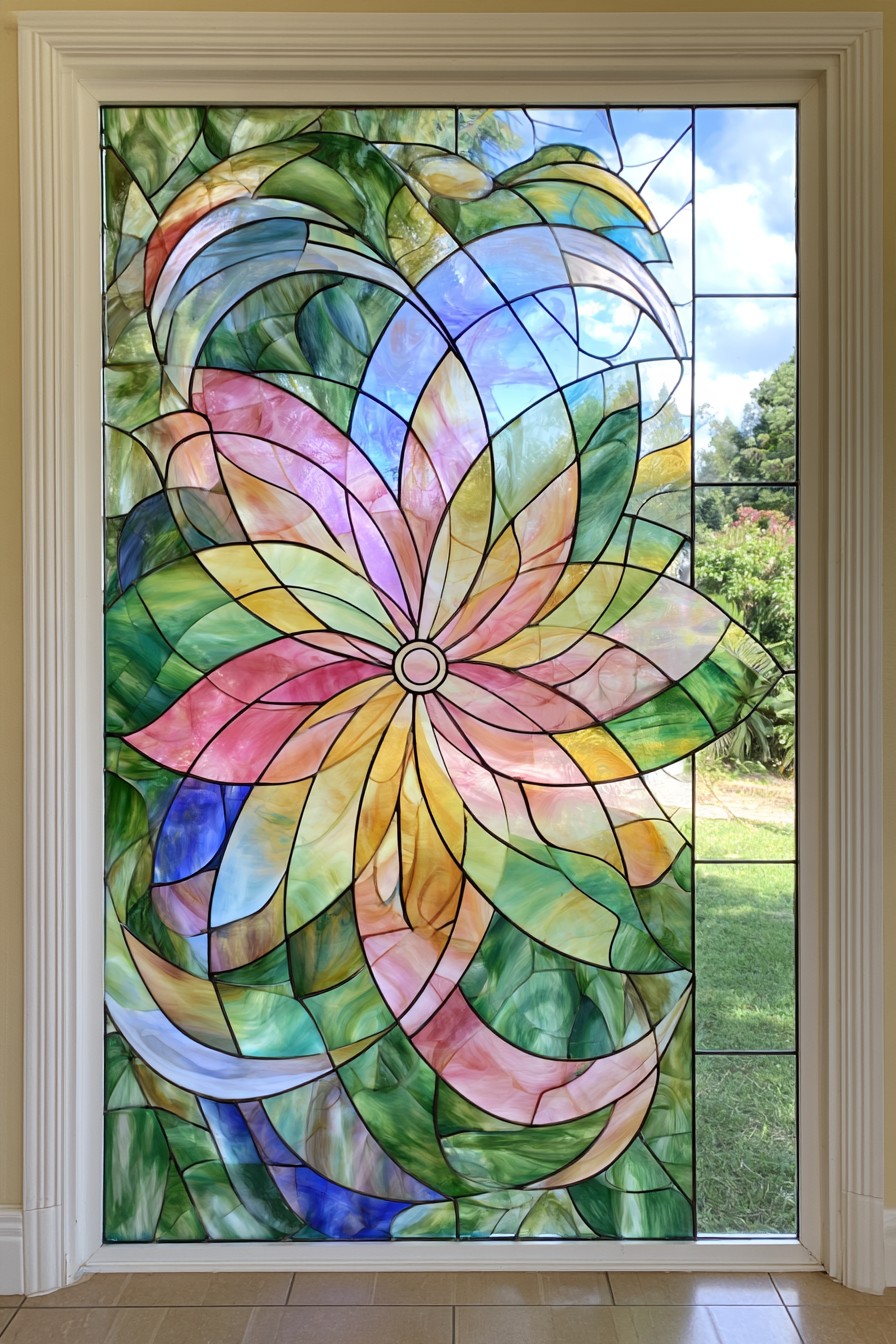
A single expansive flower fills the panel with curling petals and surrounding green shapes. Its small circular center anchors the composition while pastel pink, blue, and yellow bands extend outward. The overlapping curves make the bloom feel almost abstract, so it does not depend on accurately depicting a particular flower species.
Scale is the lesson here. One large motif can carry a window more clearly than many tiny blossoms. If you adapt it to paint, reduce the number of nested curves and keep the central circle slightly off center. Broad petals give you room to practice an even application of transparent color.
12. A Faceted Star with Long Geometric Rays
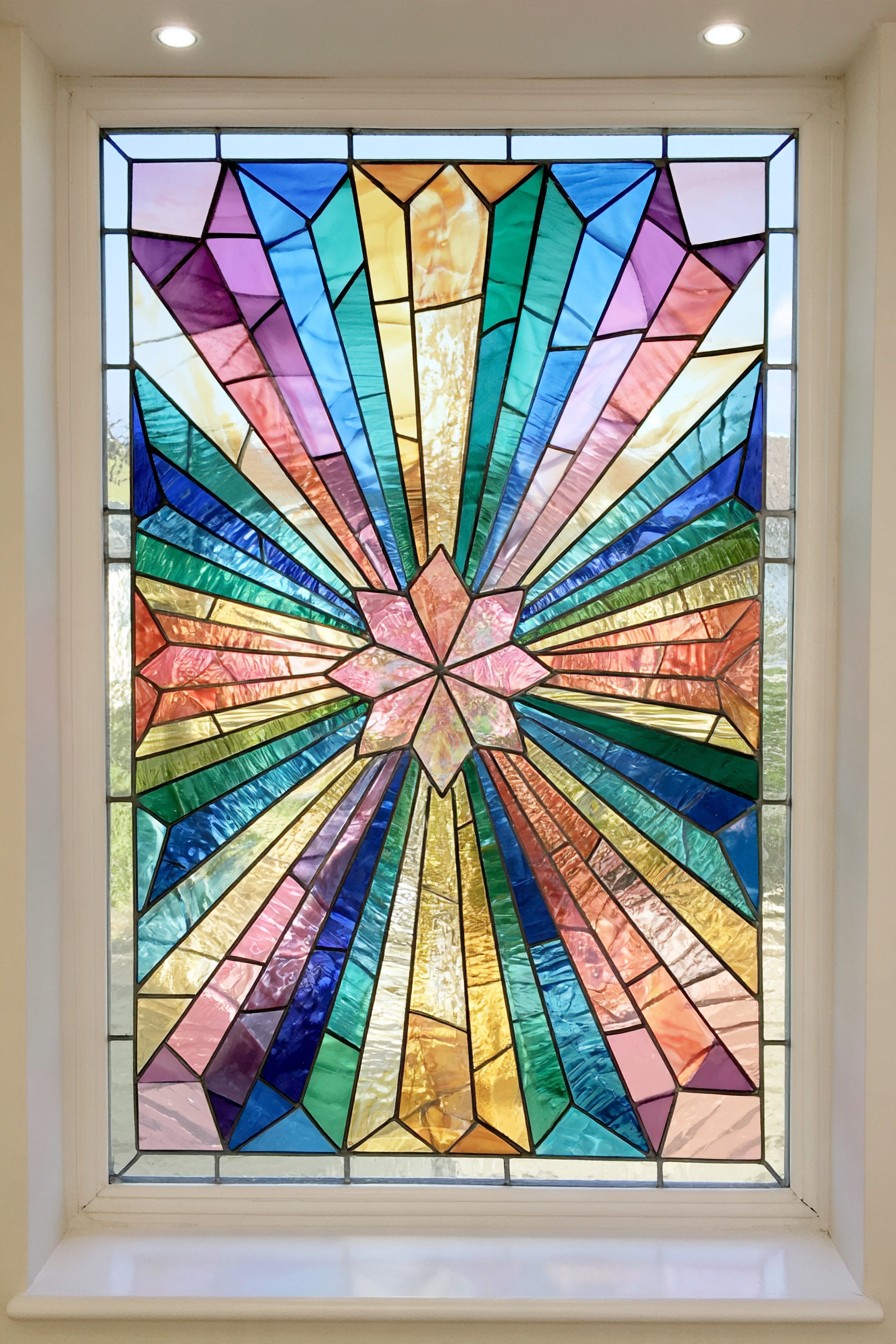
A pink star near the lower middle sends sharp rays toward every edge. Turquoise, cobalt, amber, and violet segments alternate between lighter areas, creating a more angular effect than the rounded sunburst. Small facets near the perimeter finish the pattern without competing with its central point.
Draw the star first, then extend a few main rays to the frame. Add subdivisions only where they help the composition. On a small panel, very narrow wedges leave little room for a brush, so fewer broad rays are a more practical interpretation of this intricate design.
13. Tall Flowers Rising from a Dark Green Base
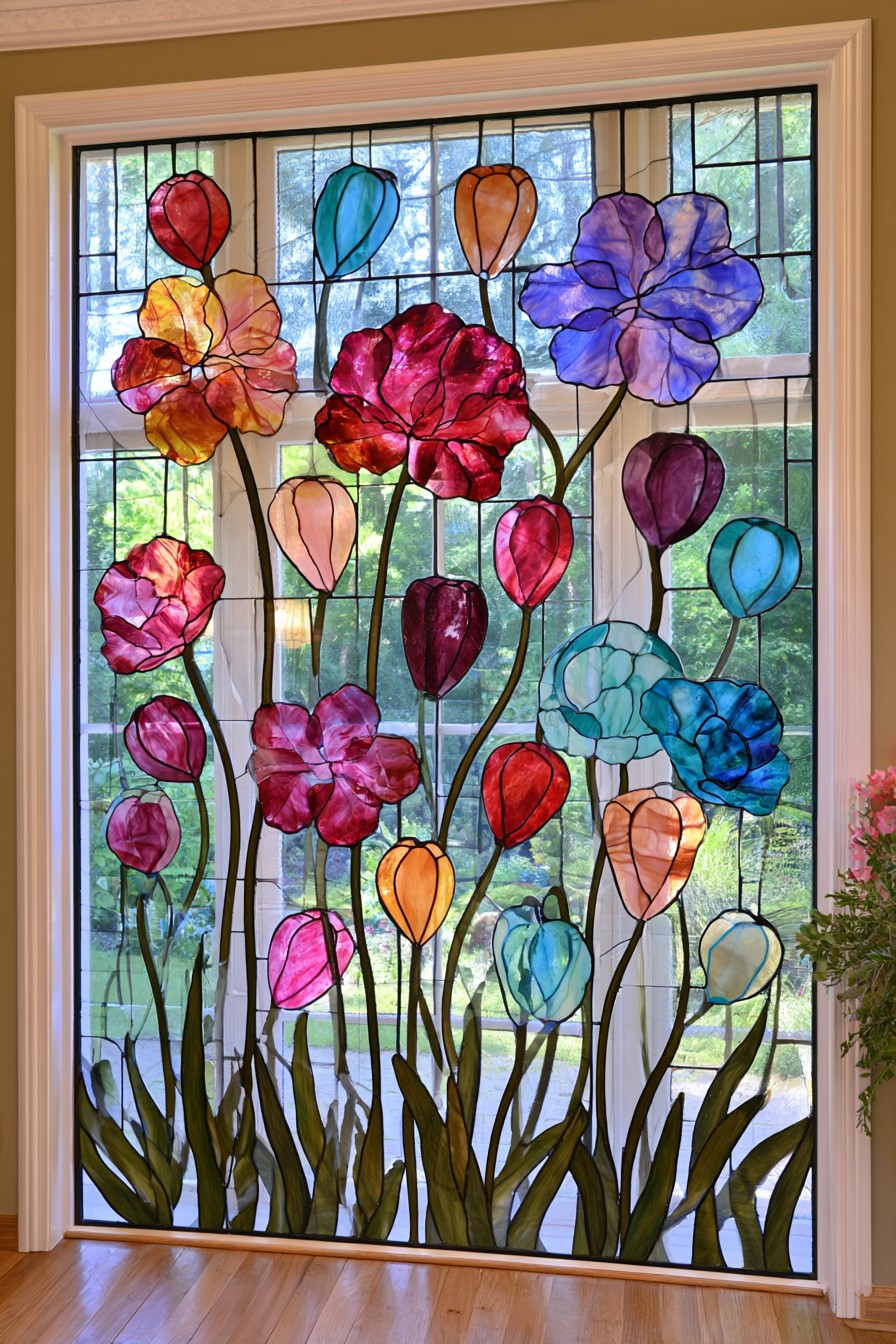
Red, violet, orange, and blue blossoms rise on slender stems above a dense green base. Open flowers alternate with oval buds, making the arrangement feel like a garden at different stages of growth. The varied heights create a lively skyline, while the darker foliage grounds the bright upper section.
Begin a simplified template with three stems of different heights. Give one a large flower and the others smaller buds so they do not compete equally for attention. Leave space between the upper stems, and concentrate the leaf detail nearer the bottom to retain the upward movement.
14. A Clear Cross Framed by Radiating Color
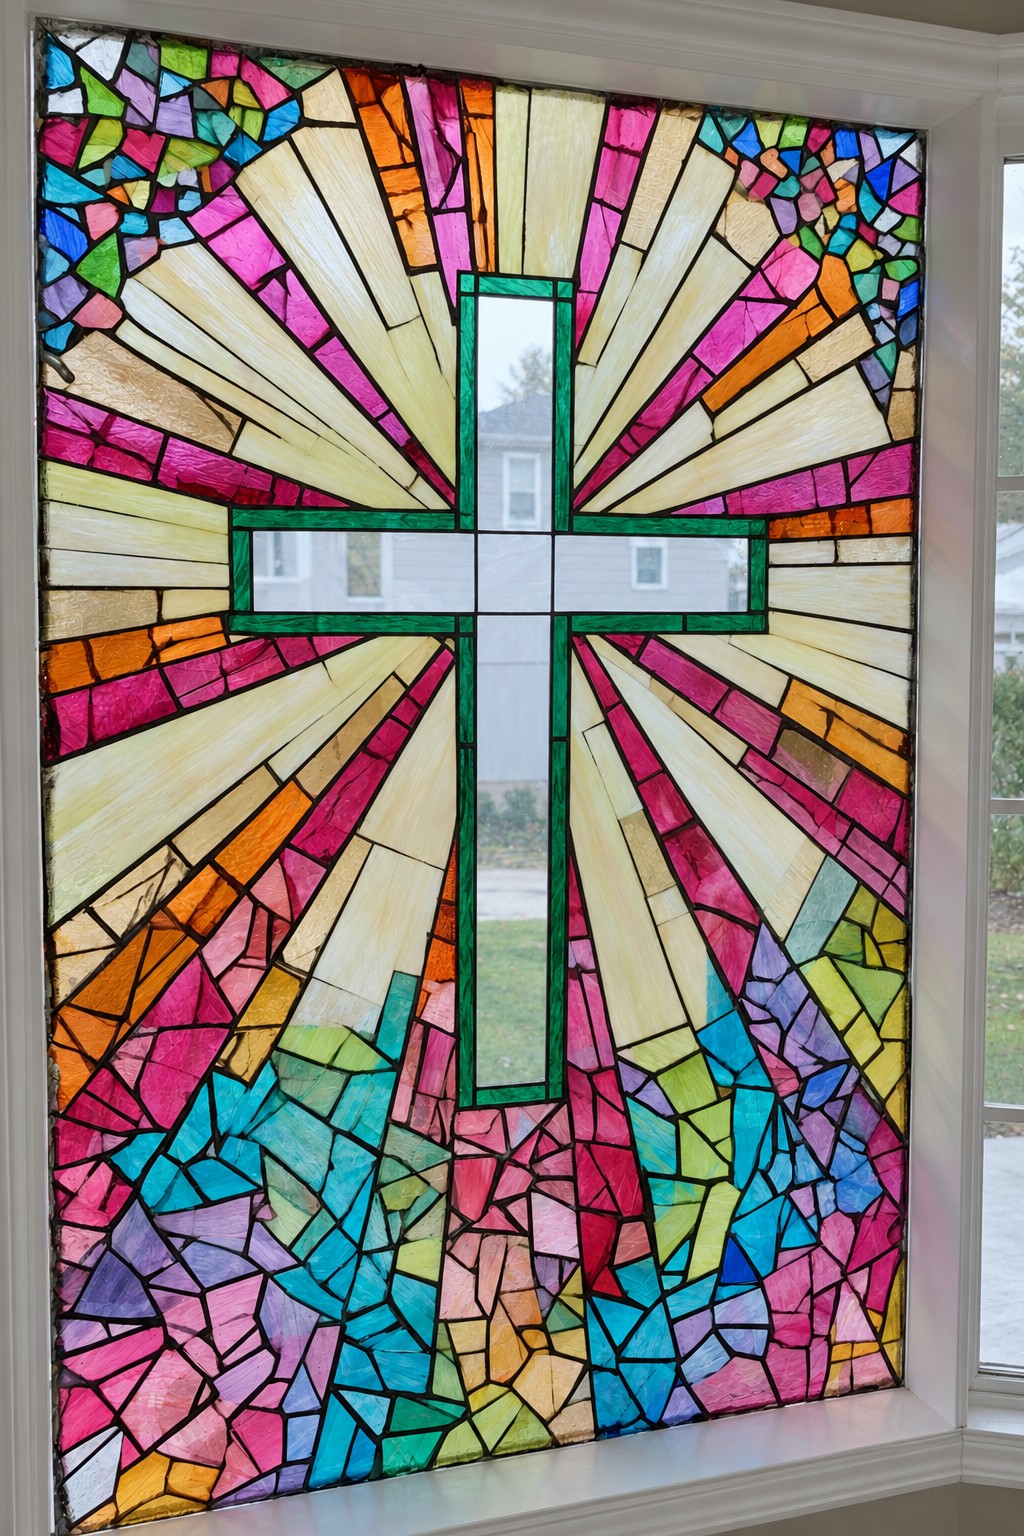
The cross is defined by a dark green border around a largely clear center. Pale cream rays fan outward, separated by vivid pink and orange accents. More fragmented blue, turquoise, and violet shapes gather at the edges. This contrast makes the central symbol readable despite the many surrounding pieces.
For a devotional space, consider which sightline should lead directly to the cross. A painted adaptation can use a plain outline and just a handful of rays. Keeping the central shape clear is part of the visual idea; filling it with additional motifs would change the emphasis substantially.
15. A White Dove with Open Wings
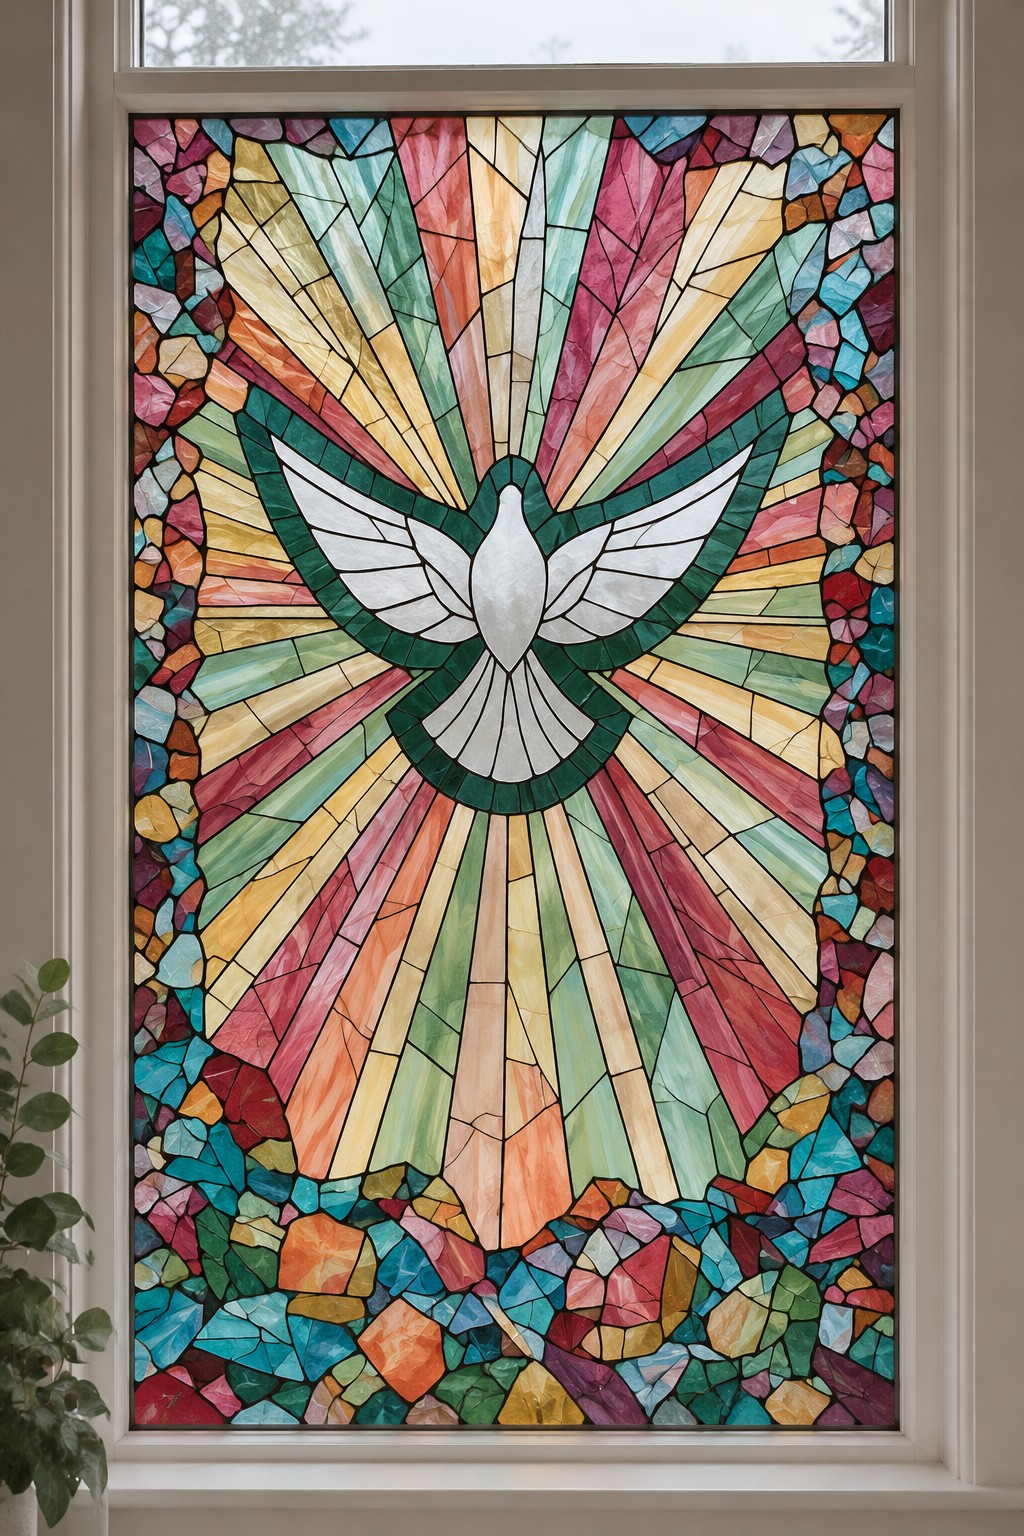
A white dove spreads its wings across a field of pale gold, coral, and green rays. The darker outline separates the bird from the background, while the mosaic perimeter adds color around the quieter center. The broad wing shape is more important to the composition than the individual feather lines.
If you choose this motif for its personal or spiritual meaning, keep the silhouette simple enough to recognize at a distance. A small painted panel can suggest feathers with a few curved divisions. Use stronger colors at the border rather than inside every wing section to preserve the dove as the focal point.
16. A Butterfly Defined by a Green Outline
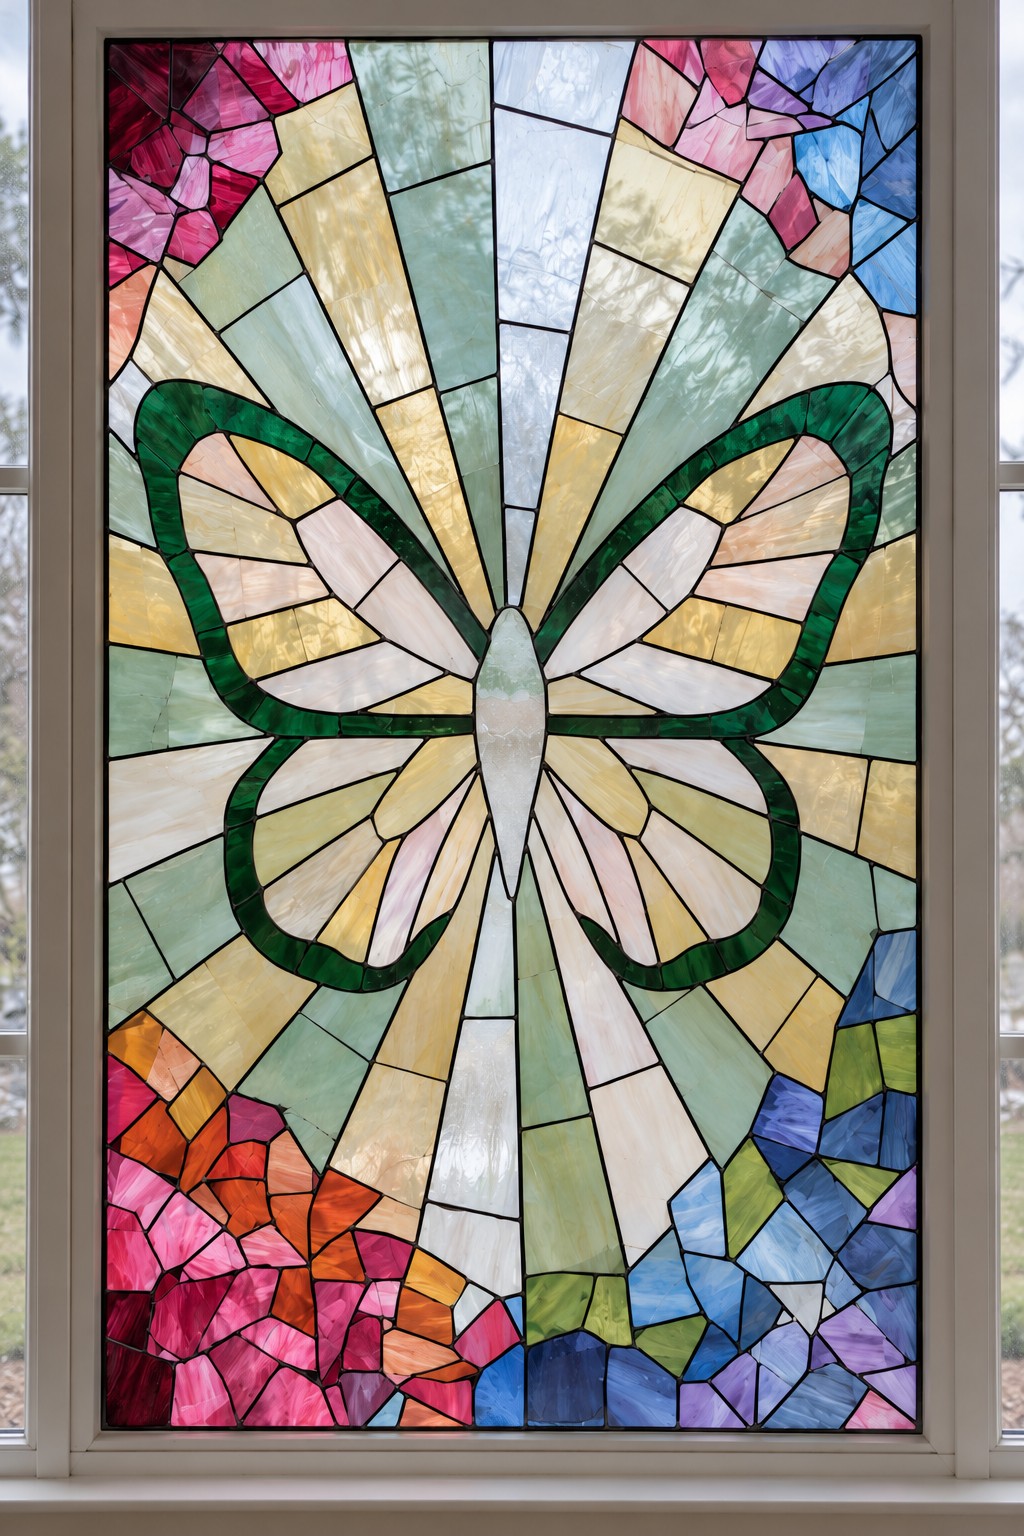
Pale wing sections sit inside a thick green butterfly outline. Cream and muted green rays extend behind it, while pink, blue, and violet pieces gather near the corners. The butterfly remains distinct because its perimeter is much darker than most of the surrounding pattern.
Fold a paper sketch down the middle to check the wing proportions before transferring it to glass. Exact color symmetry is optional, but the two sides should feel balanced. For an early painting project, a plain background will let you concentrate on the curved wing edges without also managing a complex radiating pattern.
17. A Candle Above a Colorful Mosaic Base
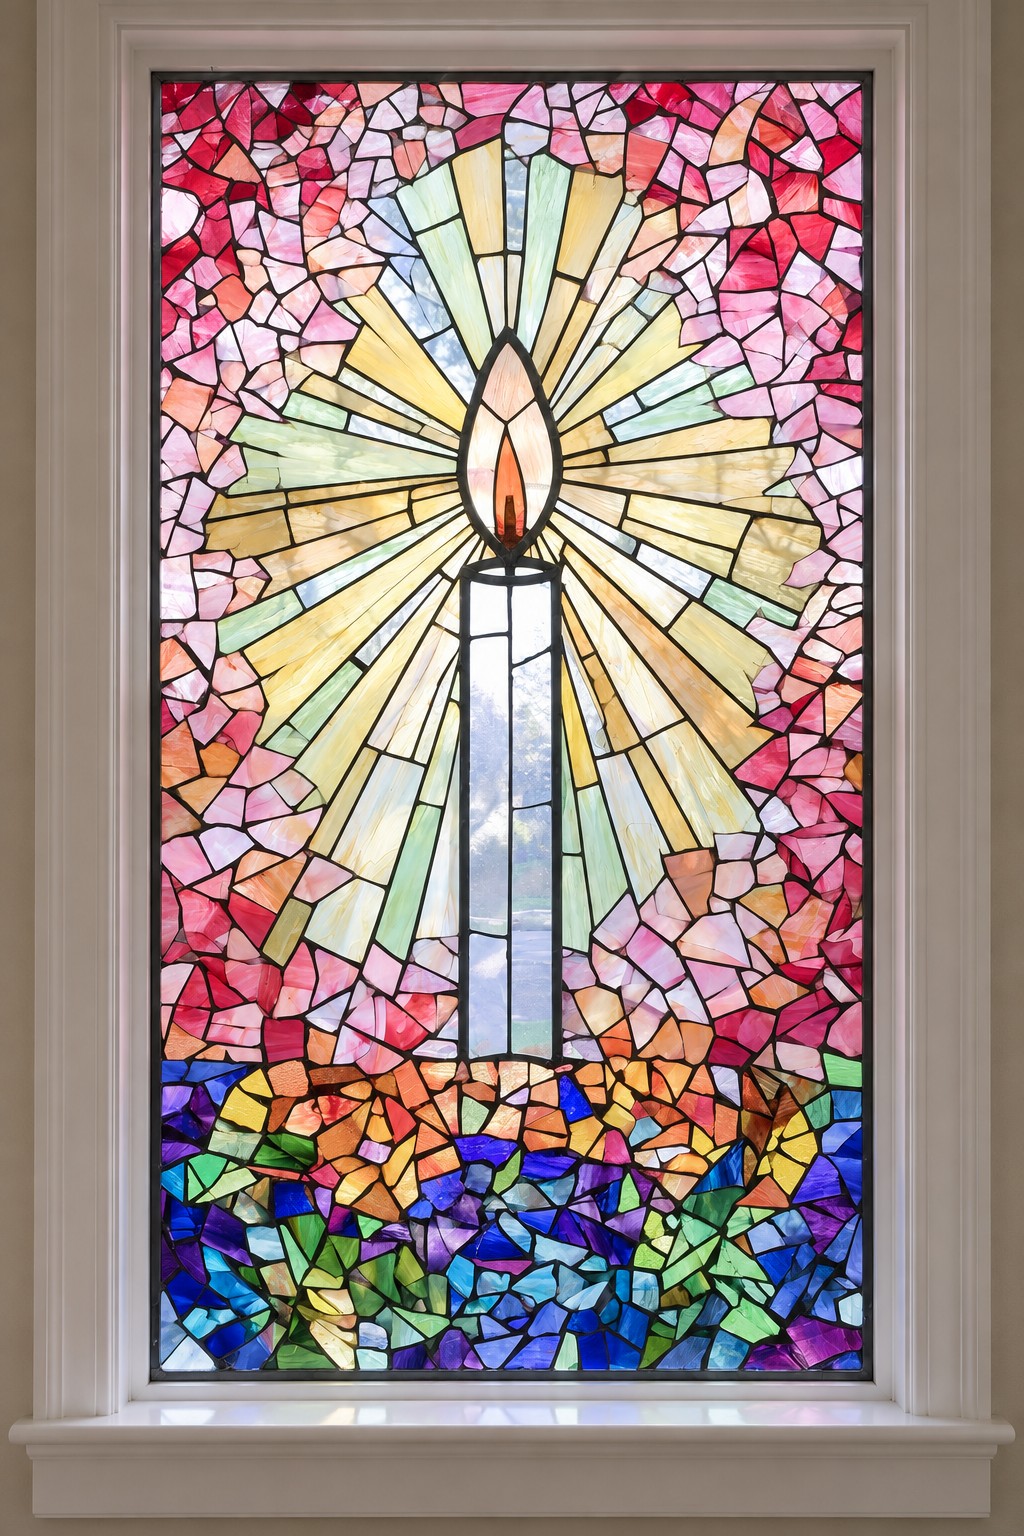
A slender candle rises above a dense band of blue, green, and violet mosaic shapes. Yellow and cream rays spread from the flame, while pink and coral sections surround the upper edges. The relatively clear candle body forms a quiet vertical line through the busy background.
Place the brightest colors around the flame if you want the same visual focus. A simple rectangle, a curved flame, and a few outward lines can carry the idea on a modest panel. The light is represented by the pattern; the candle motif does not need a real flame or an illuminated fixture behind it.
18. An Angel with Broad Wings and Golden Rays
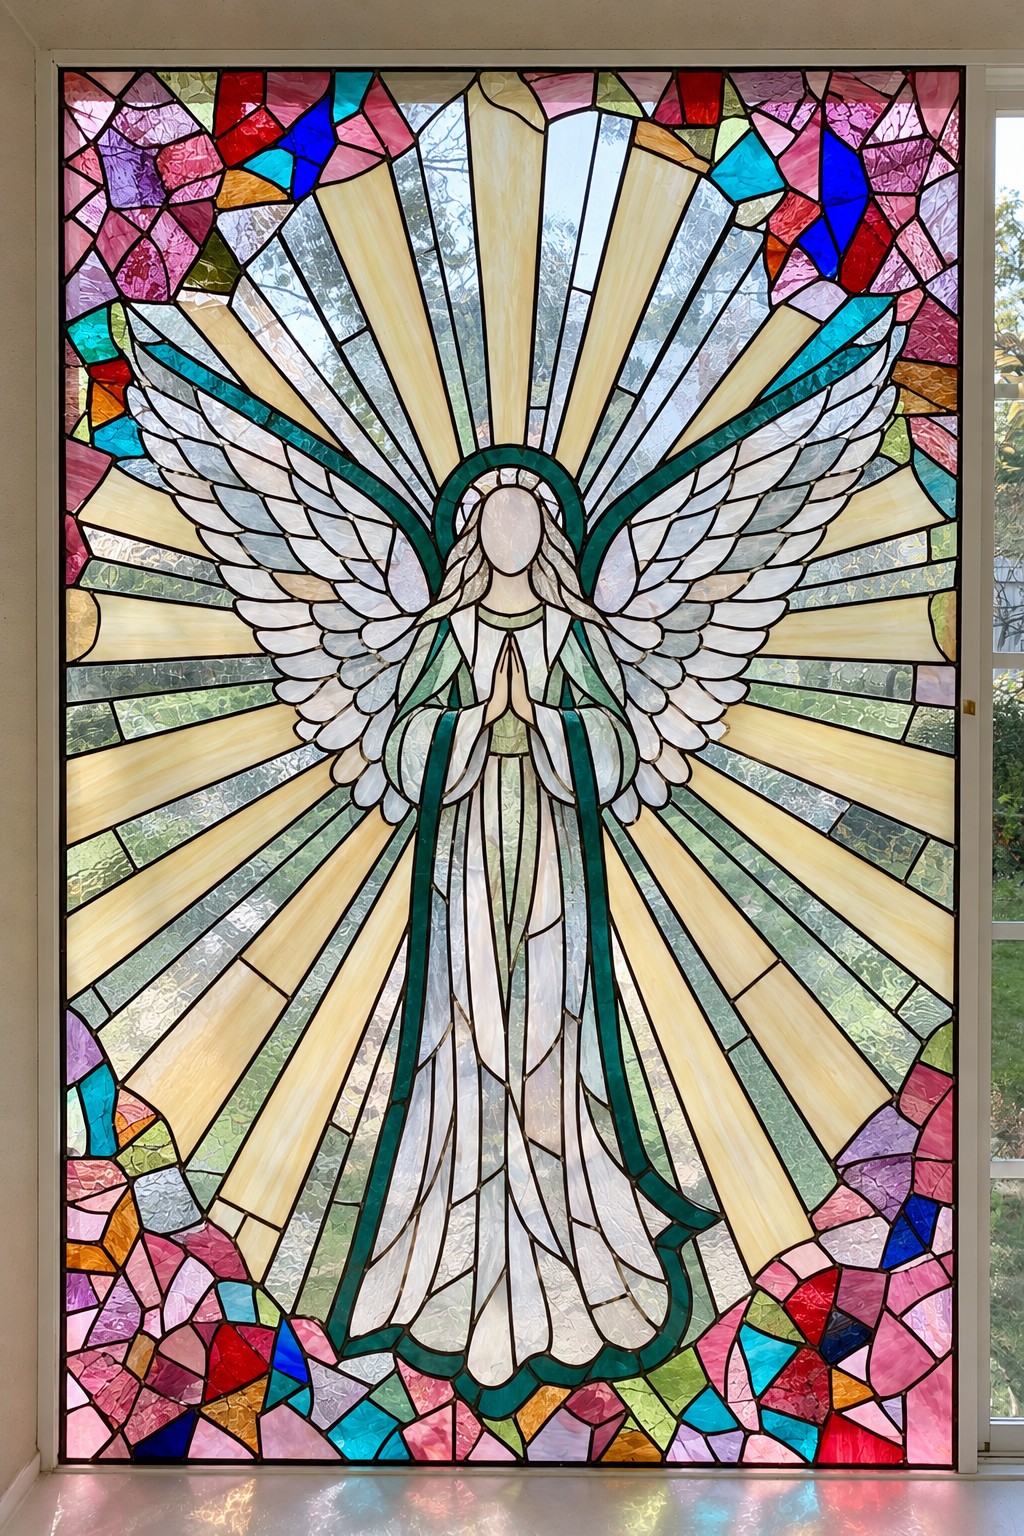
Wide wings and a long pale robe give this angel a strong central silhouette. Cream and gold rays stretch toward the frame, with brighter mosaic pieces concentrated at the perimeter. Repeated feather divisions add detail, but the calm central figure remains the organizing element.
For a commissioned piece, begin with the figure’s proportions and the meaning you want the artwork to carry. For a painted interpretation, simplify the feather pattern rather than squeezing every visible line into a small surface. Keep the robe pale if you want it to remain distinct from the stronger greens around its outline.
19. A Clear Heart Surrounded by Color
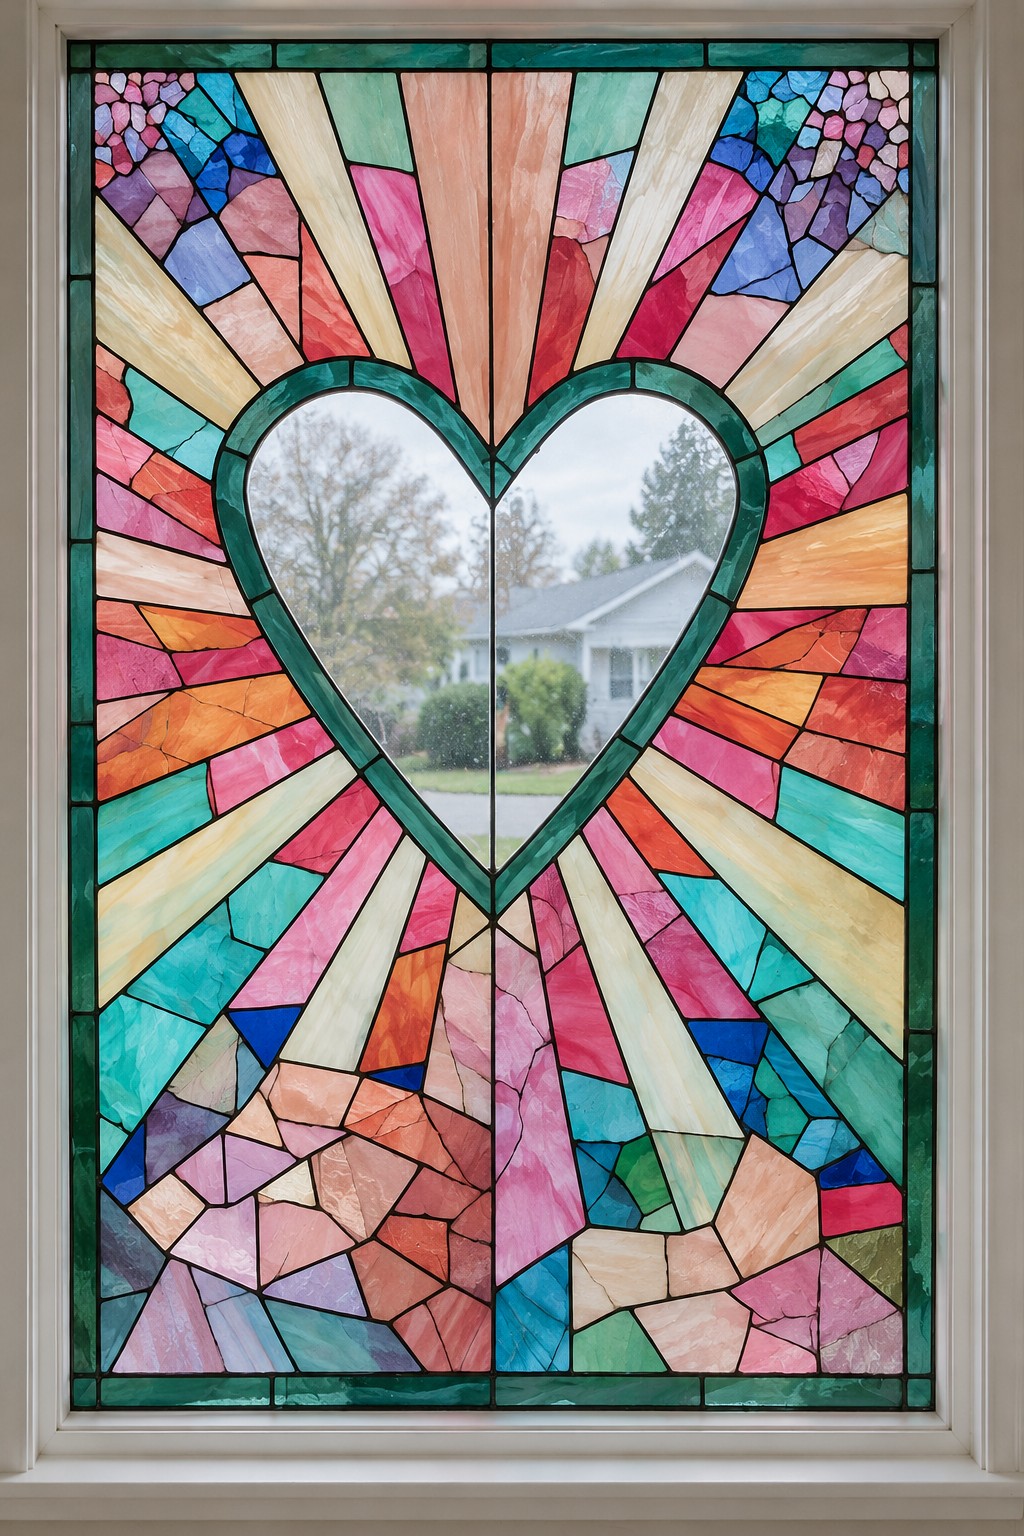
A transparent heart shaped center frames the outdoor scene, surrounded by a green outline and bands of coral, pink, turquoise, and cream. Smaller angular pieces fill the lower corners. The heart is a clear section within the design, rather than an open hole in the window.
This is a useful layout when both a personal symbol and an outside view matter. Draw the heart at the size you want the view to occupy, then arrange the surrounding colors. A restrained border can make the motif feel intimate, while the full radiating treatment shown here creates a much stronger statement.
20. Two Birds Among Broad Garden Blossoms
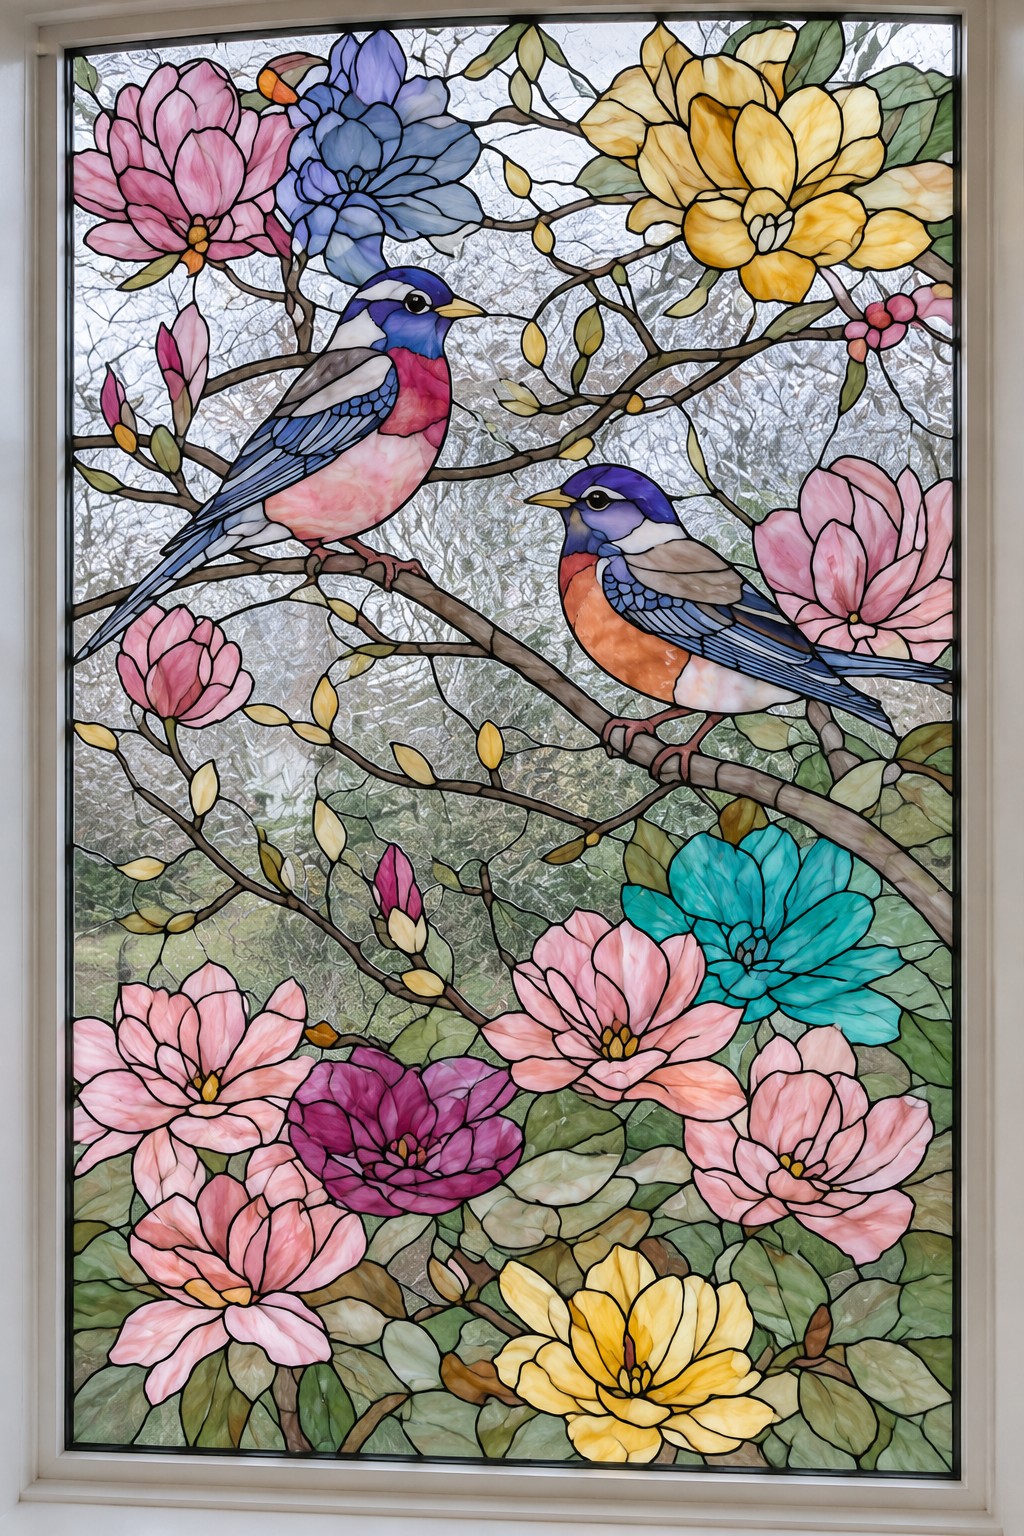
Two birds perch at different heights among large pink, yellow, blue, and turquoise flowers. Their darker heads and wings give the eye a resting point within the floral detail. Branches connect the birds to the blossoms, turning separate decorative elements into one continuous garden scene.
Before choosing colors, map the two bird silhouettes and the main branch. Leave a small gap around each head so it does not disappear against a flower. For a simpler painted composition, use one bird and two broad blooms, preserving the relationship between the subjects while reducing the fine detail.
21. A Hummingbird Beside Cascading Fuchsia Blossoms
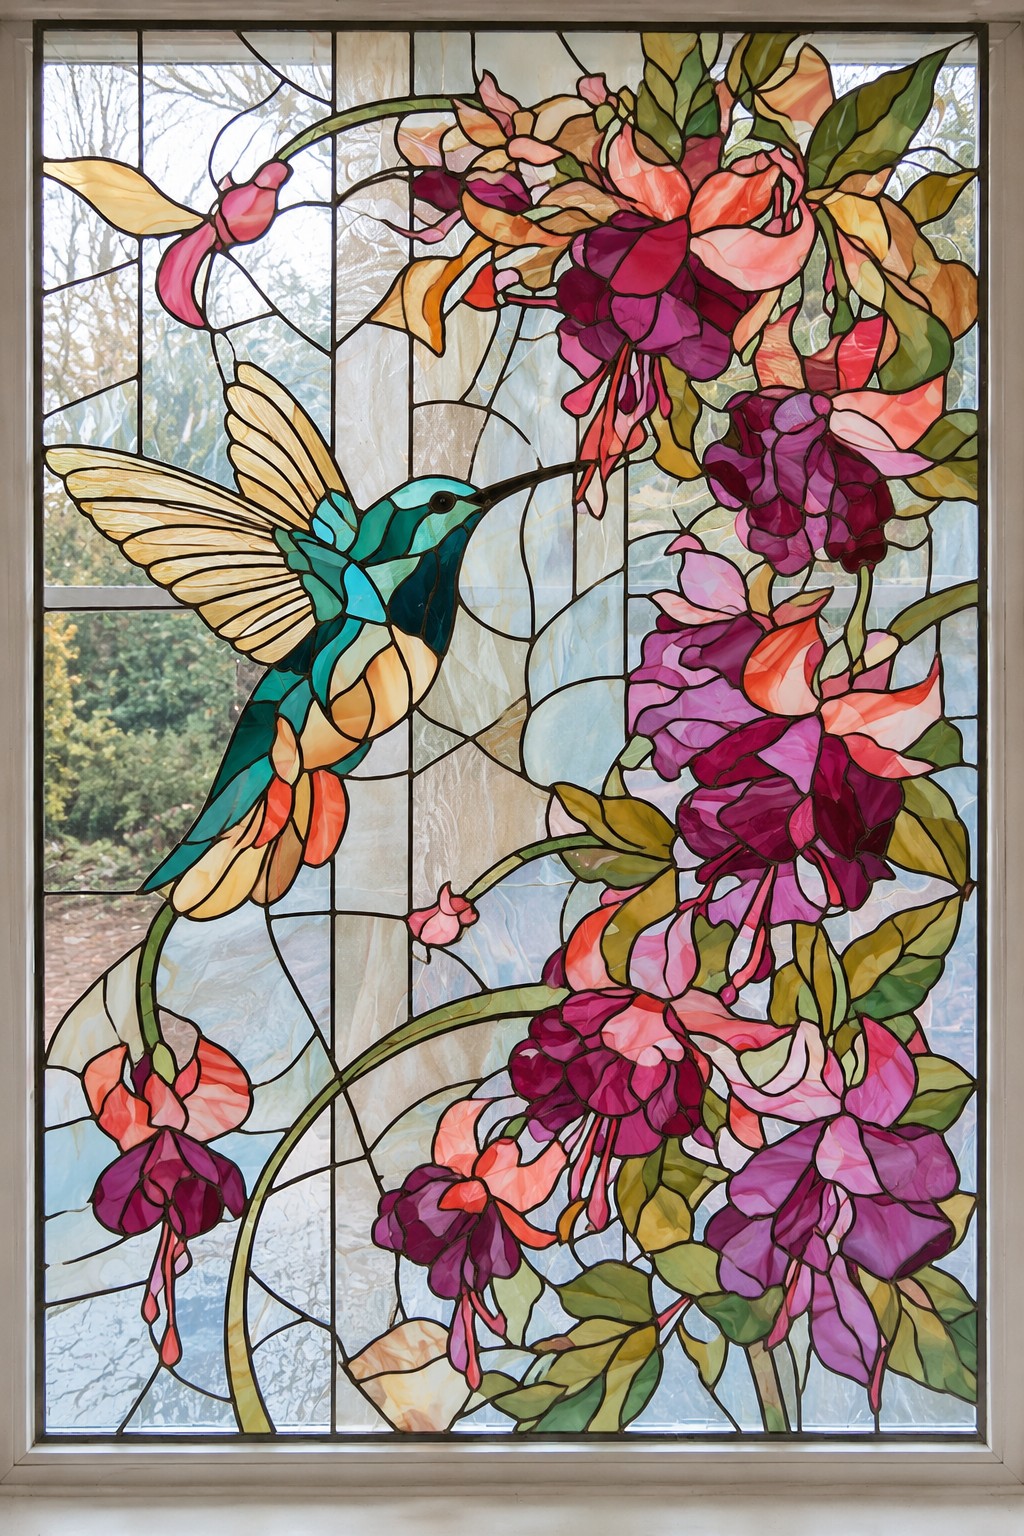
A teal hummingbird hovers beside hanging blossoms in pink, coral, and purple. Pale golden wings contrast with its deeper body color, and the flower stems curve around the bird without enclosing it completely. The gap between the beak and the flowers gives the scene its sense of suspended movement.
Keep that small interaction visible when adapting the design. Position the bird first and arrange the flowers around its approach, rather than scattering them evenly. Enlarging the wings and reducing the number of blossoms can make the subject clearer in a compact panel or a simplified glass painting.
22. A Peacock Tail That Follows the Window Height
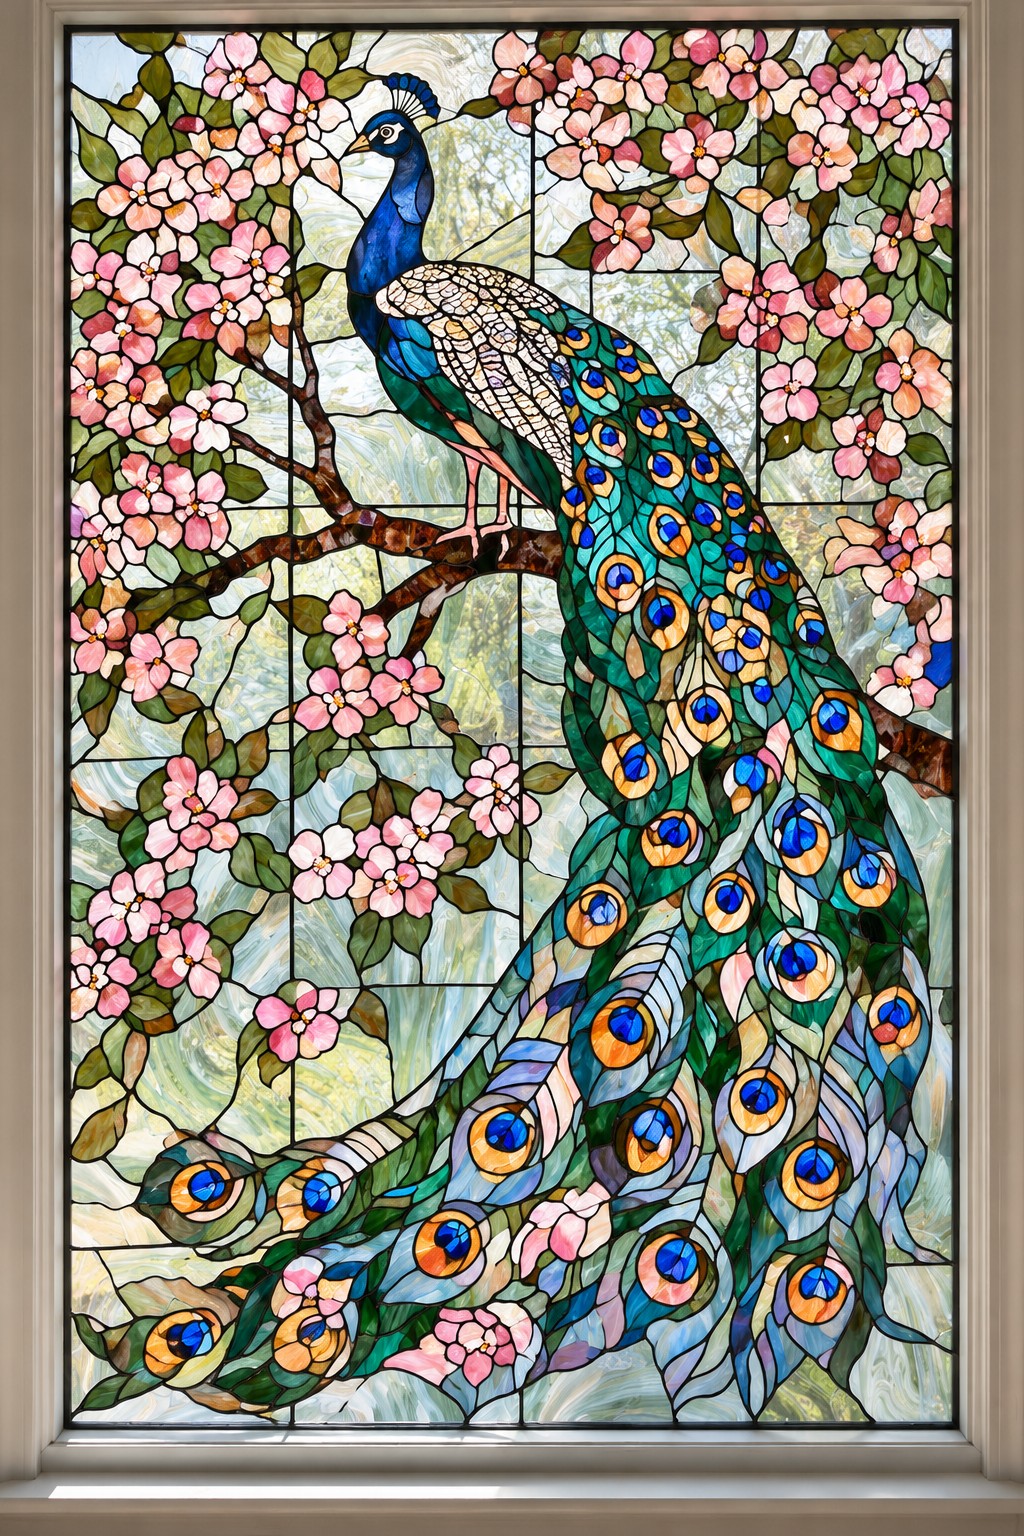
A blue peacock stands high on a branch, with its long tail sweeping down through most of the panel. Repeated eye markings in green, blue, and gold draw attention along that curve. Small pink blossoms frame the bird without hiding the shape of the tail.
The tall format is integral to this idea. Cropping the design into a short, wide opening would change its proportions, so consider a separate vertical display panel instead. For painting, use fewer enlarged feather markings. Preserving the tail’s overall sweep will communicate the subject more effectively than attempting every tiny detail.
23. An Amber Owl in a Flowering Canopy
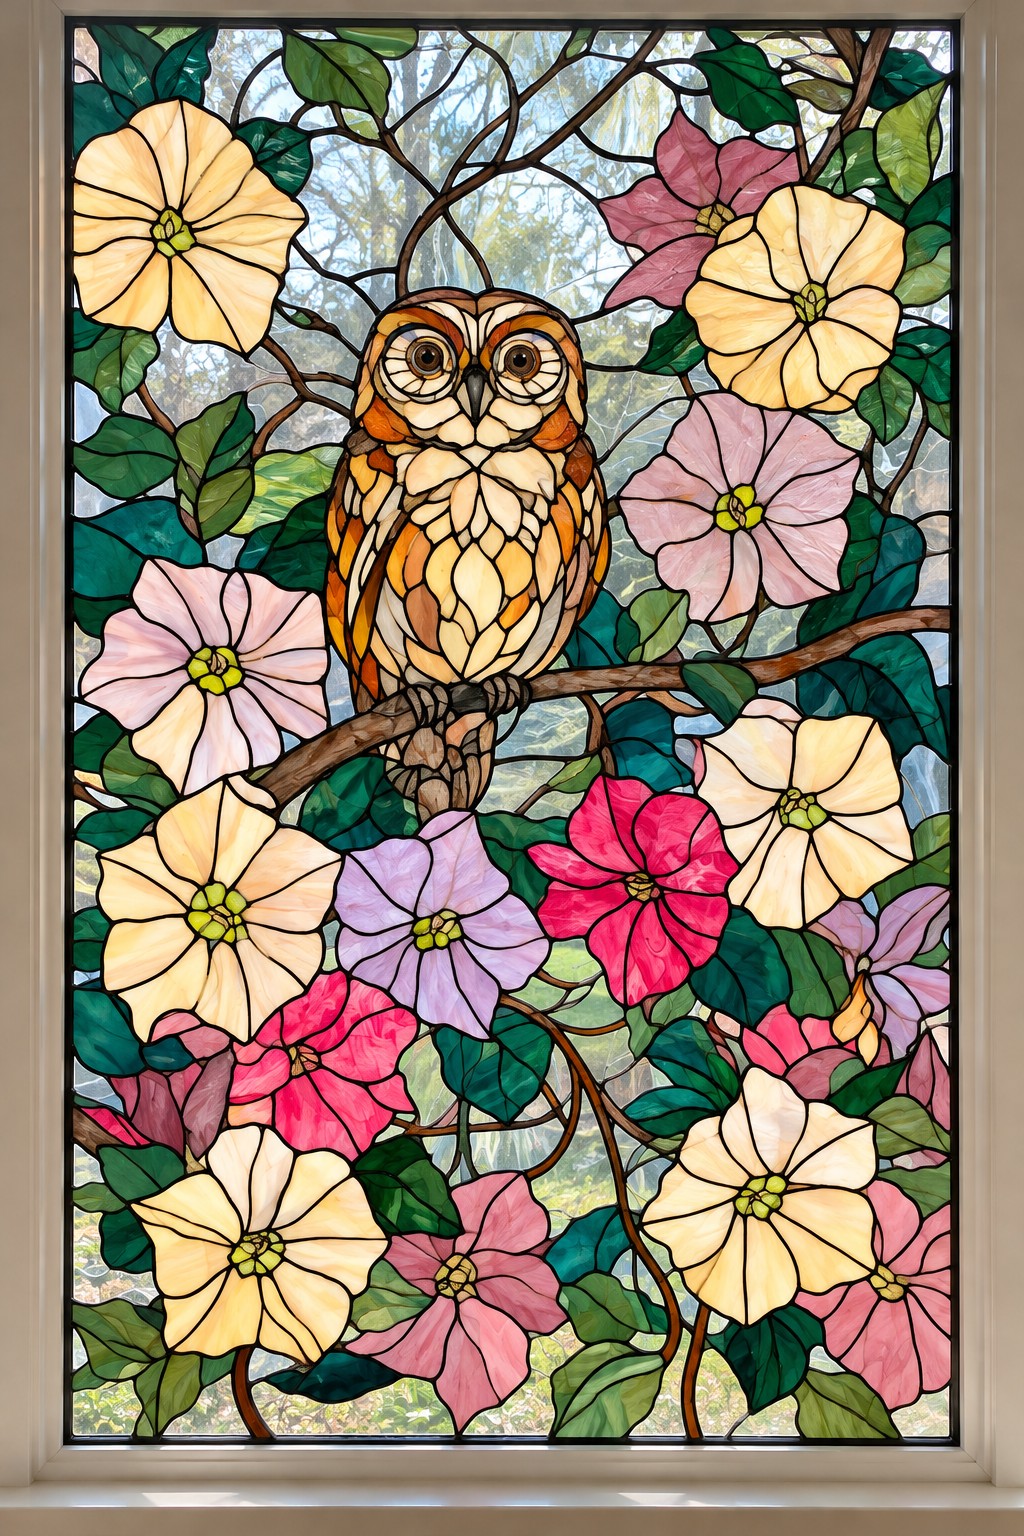
An amber and cream owl looks outward from a branch surrounded by broad yellow, pink, lavender, and magenta blooms. Rounded eyes and warm plumage separate it from the cooler green foliage. Unlike the airy berry branches in the first idea, this composition uses a dense canopy to give the bird a sheltered, storybook setting.
Make the owl’s face the clearest part of your template. Large flower shapes can frame it, but branches should not cross the eyes or obscure the outline. Reducing the surrounding blooms is a useful way to retain the character of the scene on a smaller surface.
Choose a Pattern That Fits Your Window
Before painting, place a full size paper sketch against the opening and view it from your usual seat or doorway. Check whether a frame divider cuts through the main subject and whether the clear areas preserve the view you care about. Test your colors on a spare panel and examine them in daylight once cured. Start with a simplified design that suits the surface you have, then add complexity as your control of the materials improves. If privacy is the main concern, assess the view from outside with the room lit after dark. A decorative painted pattern may leave clear sightlines; use a suitable curtain or privacy treatment where screening is needed.

Leave a Reply