
Olive cabinetry, orange upholstery, and warm wood can give a kitchen a relaxed retro mood. The most useful combinations leave room for cooking, cleaning, and sitting together. These eleven ideas examine the visible details, then suggest ways to adapt them without letting a period look dictate how your kitchen functions.
Choose the feature you would most enjoy living with: a cabinet color, a patterned surface, or a place to sit over breakfast. Let that decision guide the other finishes. A kitchen with a graphic floor may need less pattern on its walls, while plain cabinetry can support a more expressive backsplash. Keep the appliances and fittings appropriate for current use; a retro atmosphere does not depend on retaining old equipment.
Table of Contents
- 1. Divide the Cabinetry Between Olive and Warm Wood
- 2. Let a Circular Tile Motif Frame the Range
- 3. Give Wood Cabinetry a Contrasting Island
- 4. Build a Breakfast Nook Around a Pedestal Table
- 5. Set Terracotta Checks Beneath Olive Cabinets
- 6. Echo Rounded Cupboards in the Island Shape
- 7. Arrange Colorful Ceramics Across Two Open Shelves
- 8. Warm the Upper Cabinets with Yellow Green Glass
- 9. Make the Pantry Colorful Without Losing Track of Food
- 10. Repeat Burnt Orange Across a Comfortable Seating Group
- 11. Keep Soft Cabinet Colors and Improve What Lies Behind Them
1. Divide the Cabinetry Between Olive and Warm Wood
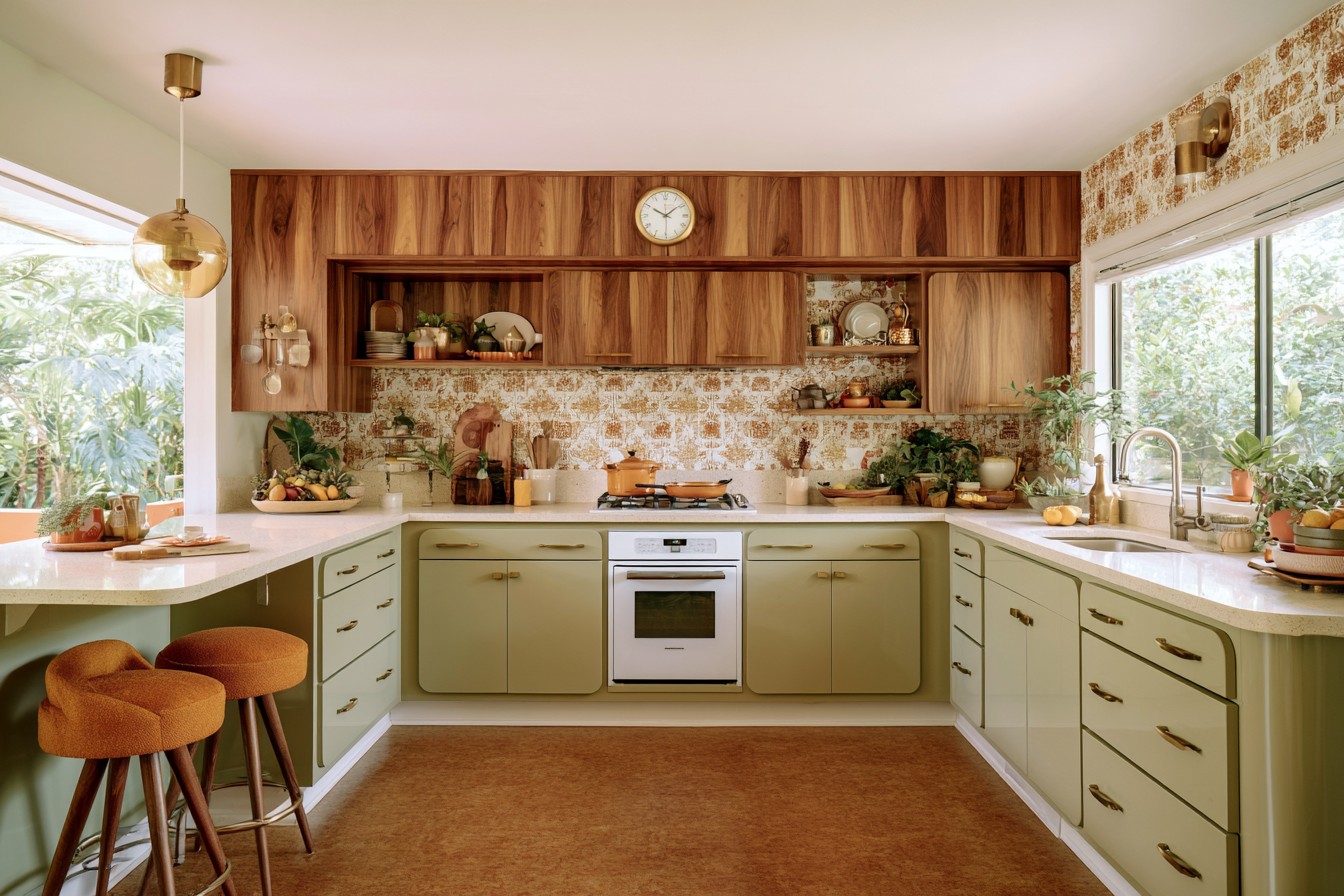
Olive lower cabinets give this kitchen its first impression of color, while the upper cupboards draw attention to vertical wood grain. Pale counters run around the room and keep those two finishes apart. Recessed open shelves add places for a few objects without turning the entire upper wall into a display. Orange stools at the left introduce a warmer note on a smaller scale than the cabinetry.
Use the existing wood as your starting point if it is in good condition. Compare green samples beside it and the countertop, since a yellow olive will produce a different combination from a gray sage. View the samples under both daylight and the lights used for cooking. If repainting lower cabinets, check the door material, hinges, and surface preparation required for the chosen coating. Keeping sound upper cupboards can preserve the room's character while limiting the work to one part of the kitchen.
2. Let a Circular Tile Motif Frame the Range
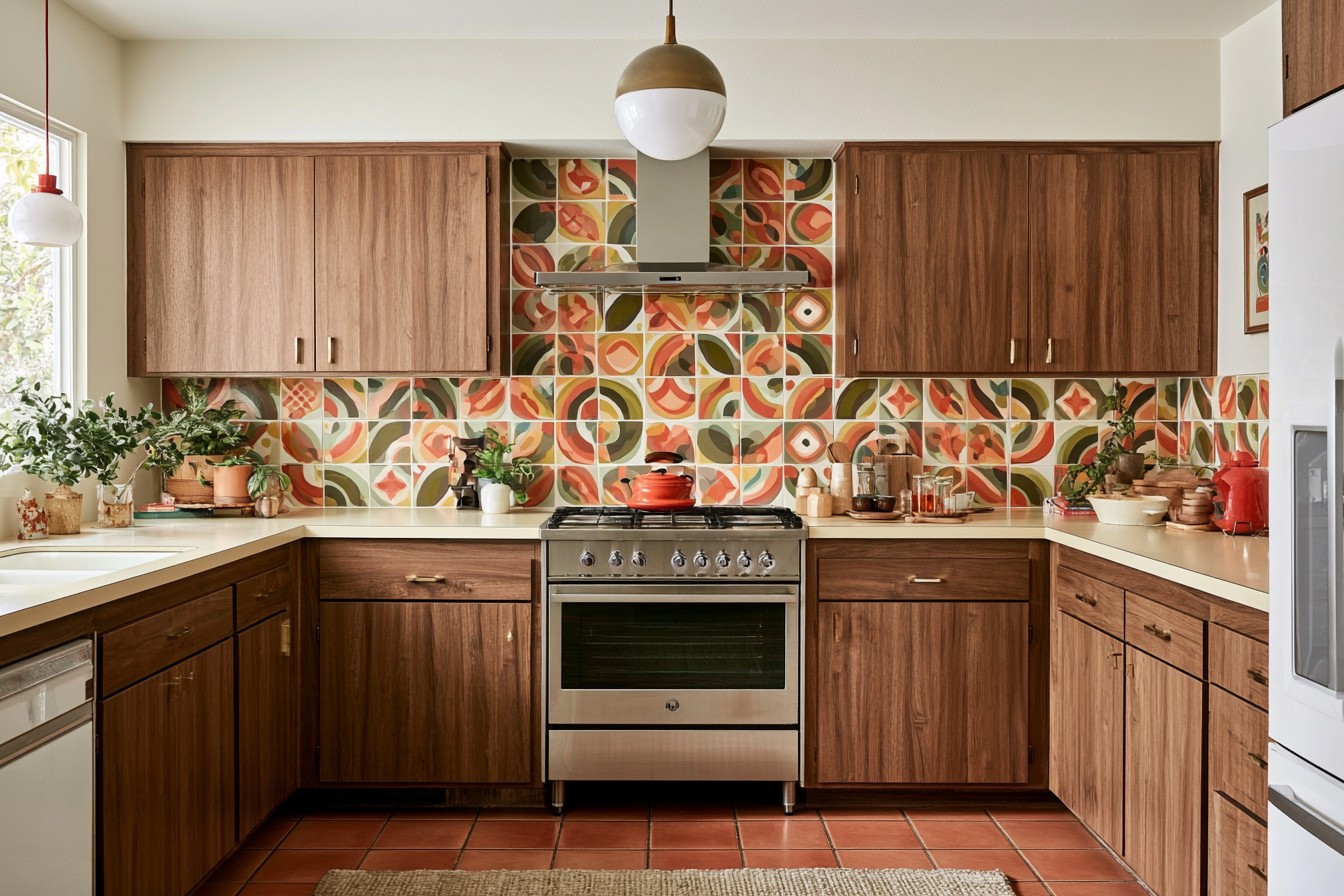
The backsplash becomes the focal point through repeated circles and leaflike shapes in orange, olive, and cream. It continues below the wood cabinets and rises behind the hood, linking the cooking area to the surrounding counter. Simple cabinet doors leave the motif readable. The slim metal hood and pale globe pendant provide a pause between the patterned tiles and the broad areas of timber.
Before ordering, map the repeat around the hood, outlets, and corners rather than calculating tile quantities alone. A strong circular design can look quite different when the final row is cut through its center. Ask the supplier for a sample of the actual finish and guidance on use behind your cooking appliance. Consider grout color alongside cleaning requirements. If a full backsplash would dominate your kitchen, restrict the motif to the range area and use a coordinating plain tile on the adjoining runs.
3. Give Wood Cabinetry a Contrasting Island
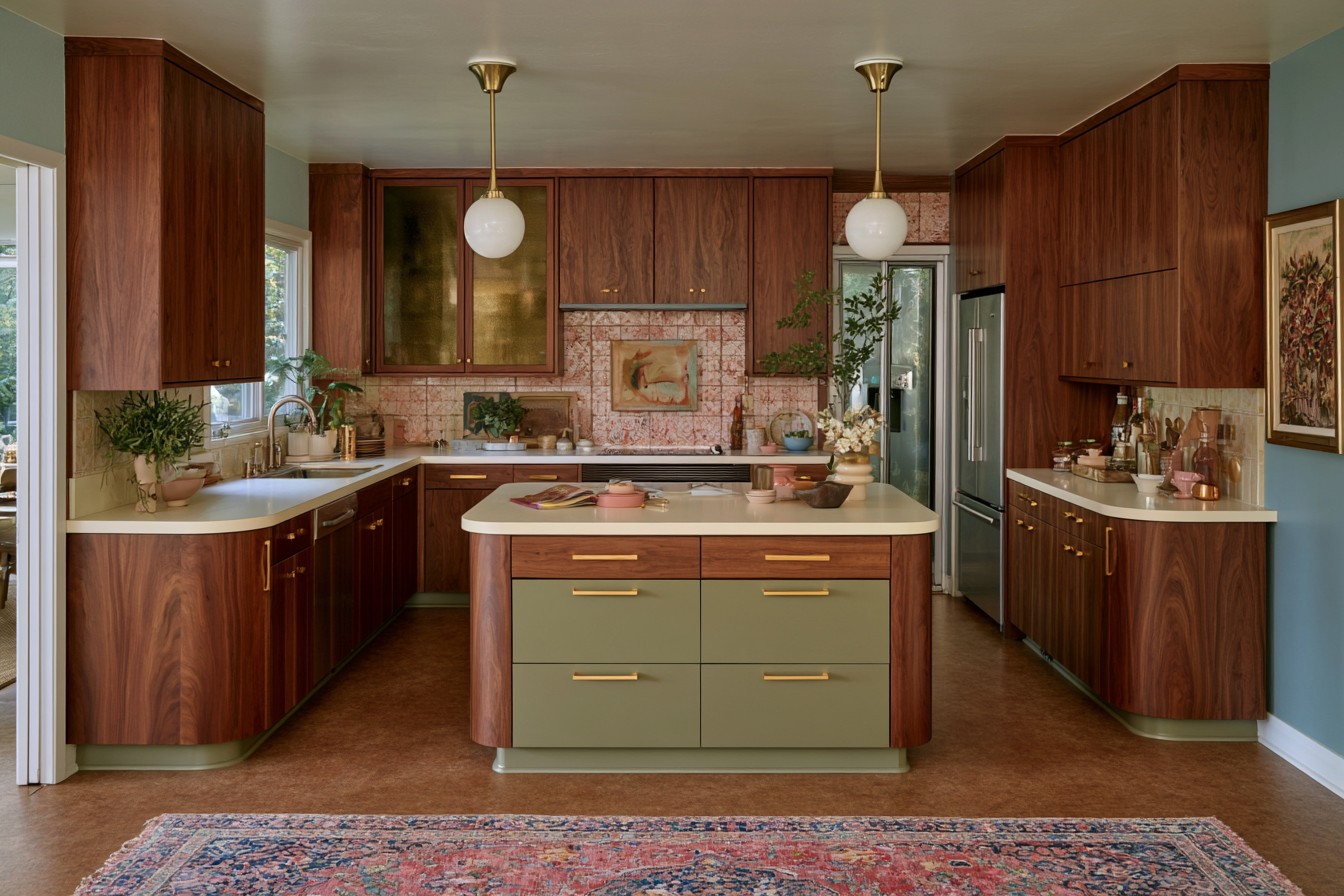
Wood cabinetry surrounds this room, but the olive island interrupts the repetition at its center. A pale worktop keeps the island from becoming another dark mass, and the rounded timber corners connect it back to the perimeter cabinets. Globe pendants continue the softer shapes overhead. This is a useful example of introducing color to a kitchen where the wood already has enough presence.
Choose the island finish against a large sample of the cabinet front, including its grain and sheen. Recreate the walnut palette with solid timber, veneer, or a suitable printed finish, choosing a cabinet product with documented construction and care requirements. Select the construction for your budget and expected wear. If updating an existing island, verify that its cabinet boxes are sound before investing in new fronts. Comfortable handles and appropriate hinges can make a modest exterior refresh more satisfying to use than a finish change alone.
4. Build a Breakfast Nook Around a Pedestal Table
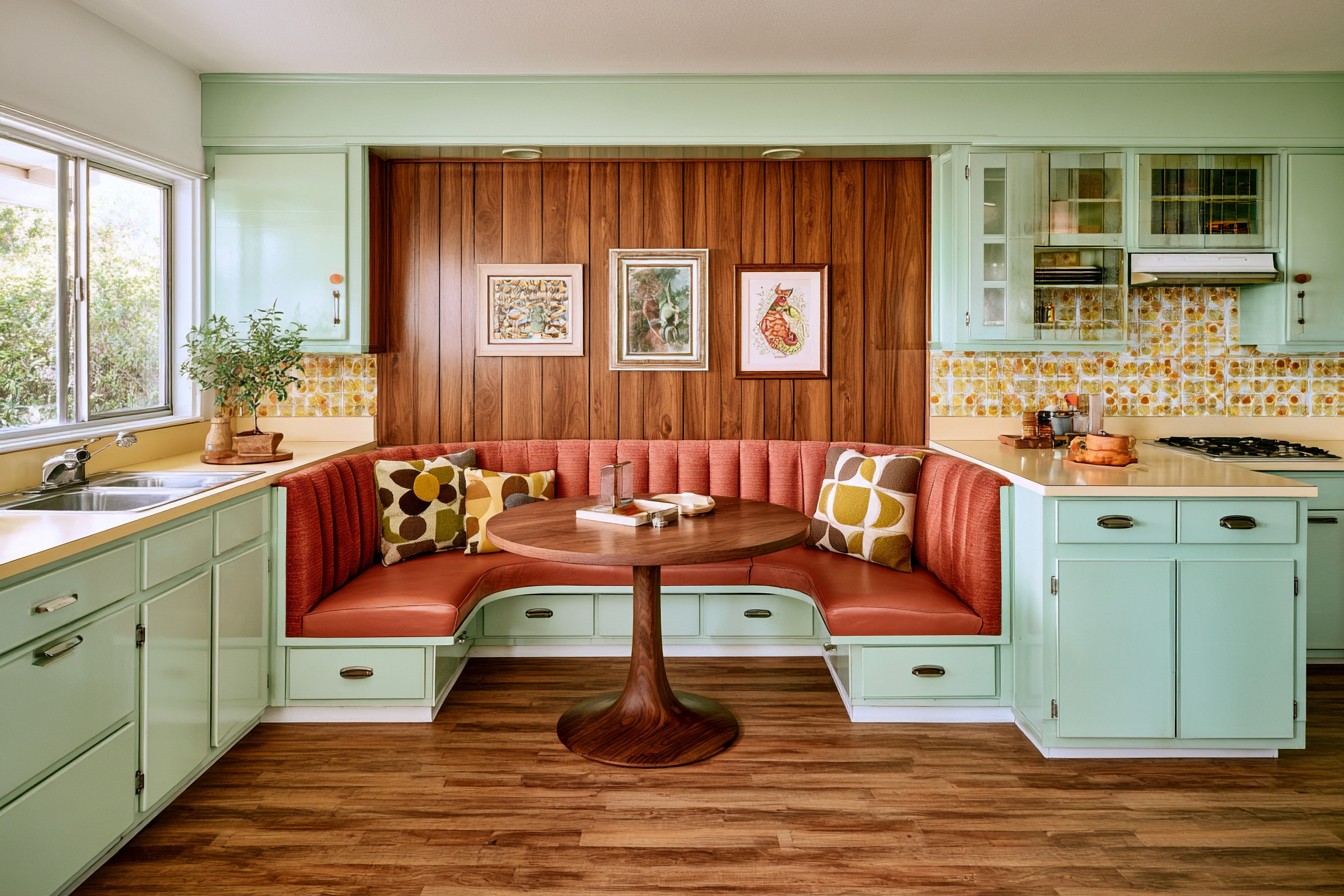
The breakfast seating fills the space between two cabinet runs, with orange upholstery wrapping around a round wood table. A pedestal base avoids corner legs inside the bench area, though the whole arrangement still needs to be sized for easy entry. Wood paneling gives the nook its own backdrop. Mint cabinetry continues around the seat bases, making the dining corner feel integrated rather than added afterward.
Mock up the table diameter and bench depth before designing the joinery. Check how people slide into the back seats and whether seated diners will obstruct nearby kitchen work. The drawers shown beneath the benches also need space to open; the table base and a diner's feet may affect access. Choose cushion covers or upholstery with a cleaning method that suits frequent meals. A single corner bench and smaller table may capture the same sociable character when a full U shaped arrangement would make the room cramped.
5. Set Terracotta Checks Beneath Olive Cabinets
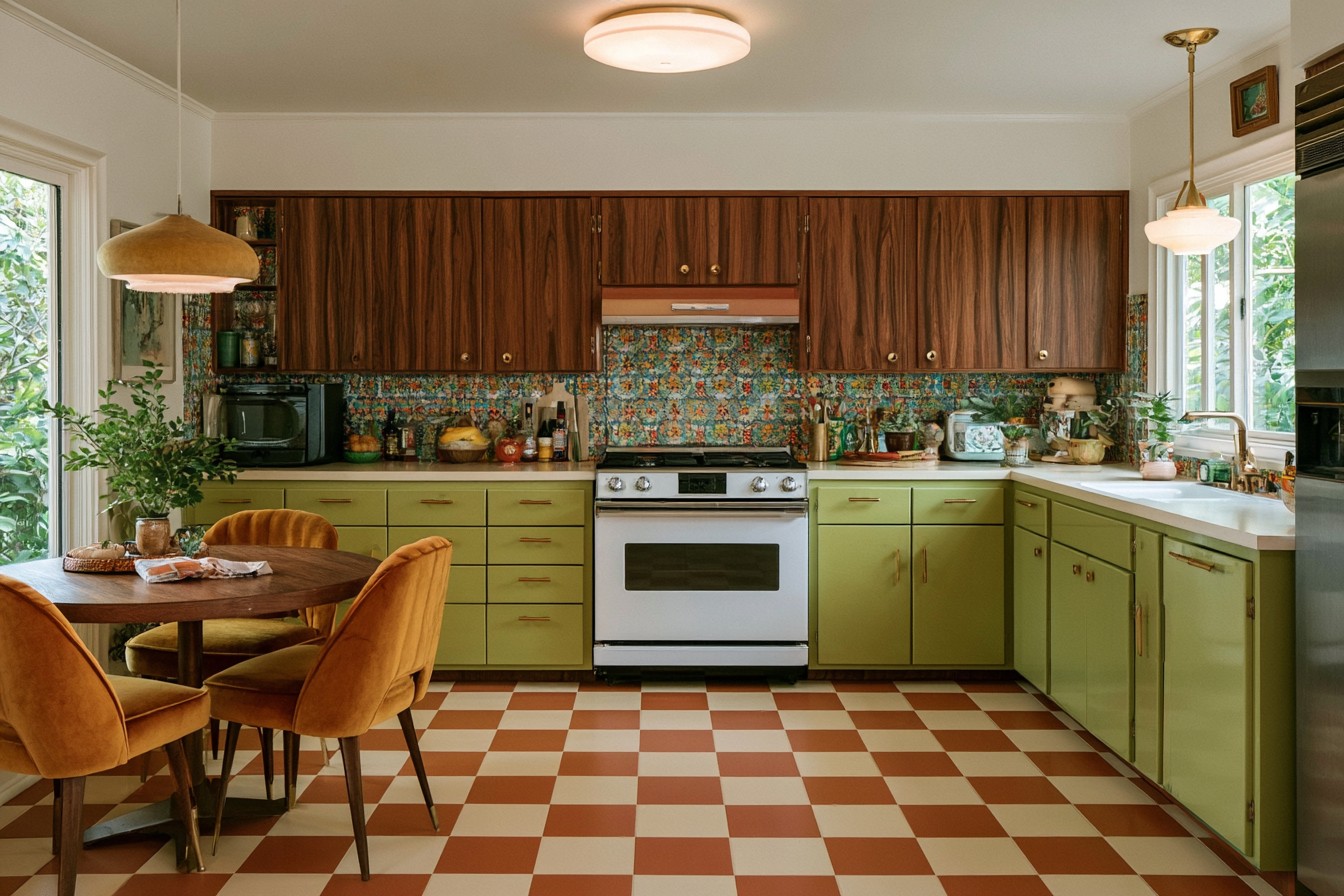
Large terracotta and cream squares make the floor an active part of this palette. The warm checks connect the golden dining chairs to the wood cabinetry, while the cream squares echo the pale counter and upper walls. A densely patterned backsplash is also present, so this example has considerably more visual activity than the kitchens with plain flooring. That combination may suit someone who enjoys a lively room, but it is not essential to the look.
Choose which pattern you want to notice first. Keeping a similar checkerboard floor while simplifying the backsplash can make the same colors feel calmer. Lay out a few full size squares to judge their scale from the doorway and beside the cabinets. Compare kitchen suitable tile, resilient flooring, and other specified products by their installation, traction, and maintenance requirements. Plan the grid against the main cabinet line so the pattern does not appear to drift across the room.
6. Echo Rounded Cupboards in the Island Shape
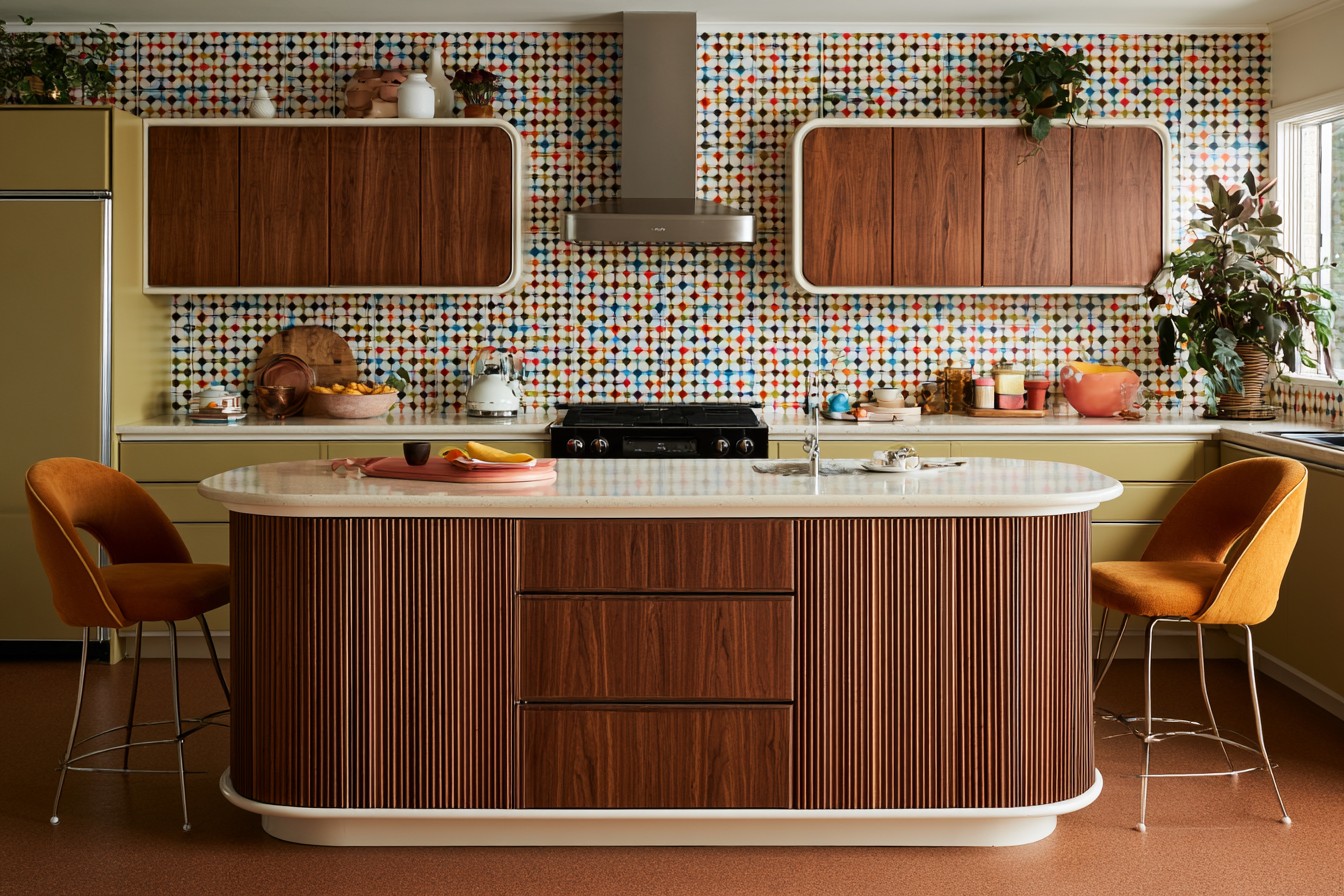
Curves appear at several scales here. The island has rounded ends, the upper cupboards sit within cream outlines with softened corners, and the stools bring curved backs to the seating. A finely repeated geometric pattern covers the wall behind them. The broad pale countertop separates that fine pattern from the darker island front, keeping the central furniture legible.
Start with the island's jobs before specifying its curves. Decide which side needs drawers, which side needs knee space, and where people will pass when a stool is occupied. Mark the footprint and test nearby cupboard and appliance doors in their open positions. Rounded corners soften the outline but do not compensate for an overcrowded aisle. Ask the cabinet maker how the curved end will be built and what storage it leaves inside. If custom joinery is beyond the project scope, a rectangular island with a gently rounded countertop can offer a simpler variation.
7. Arrange Colorful Ceramics Across Two Open Shelves
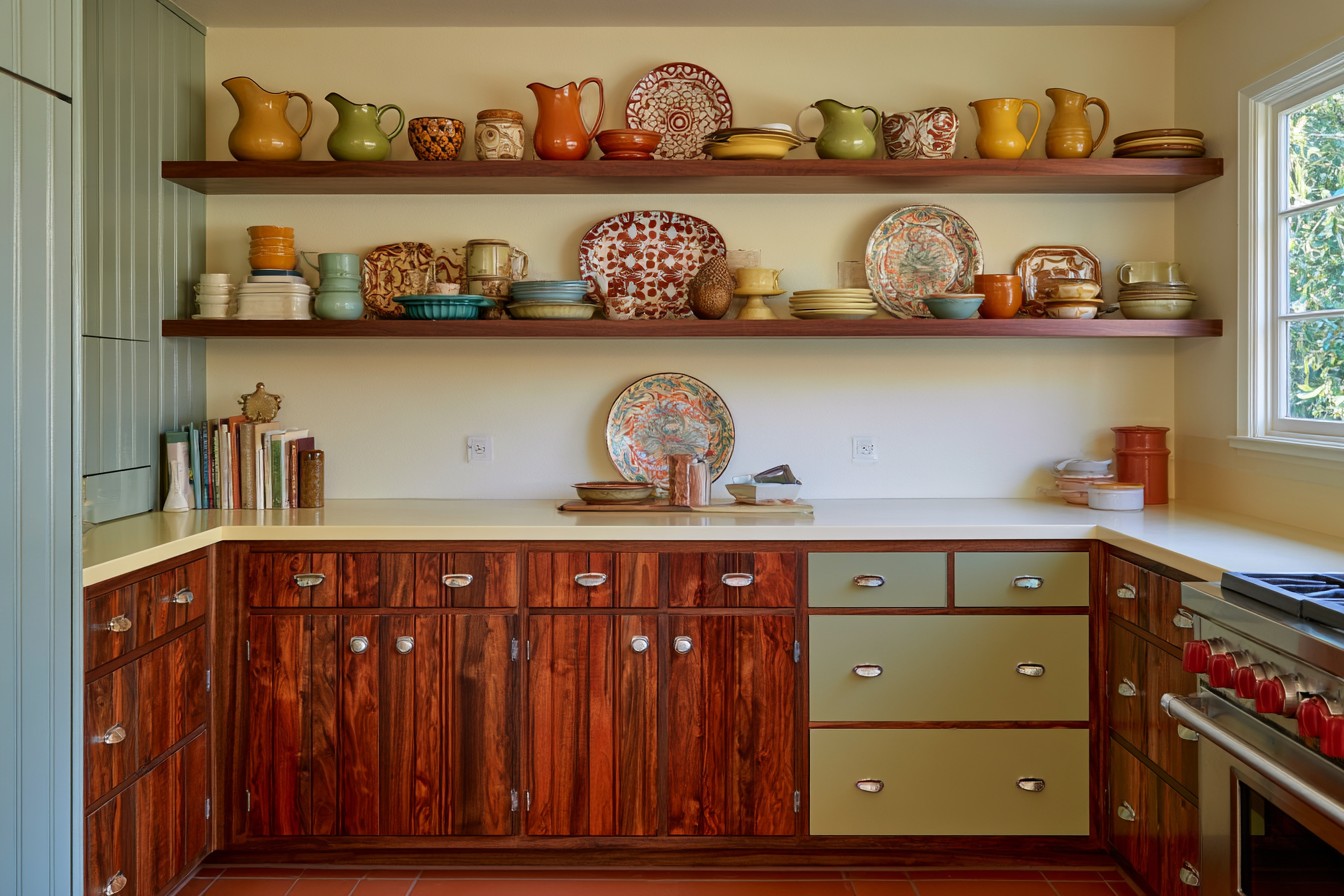
Pitchers and cups bring yellow, orange, turquoise, and green into this shelf display. Larger patterned plates sit behind smaller pieces, creating variation without needing a separate artwork above the counter. The cream wall helps their outlines stand out. Lower cupboards keep much of the kitchen storage enclosed, so the open shelves can remain selective rather than carrying everything the household owns.
Choose a group you can lift down and clean comfortably, then space it so each piece is accessible. Match the shelf supports and wall fixings to the intended load, and use suitable plate supports for upright displays. Check vintage ceramics before treating them as serving ware: some older glazes and decorations can release lead into food or drink. If reliable evidence of food suitability is unavailable, keep the piece for display. New ceramics in similar shapes and colors can provide the same effect for cups and bowls that will be used every day.
8. Warm the Upper Cabinets with Yellow Green Glass
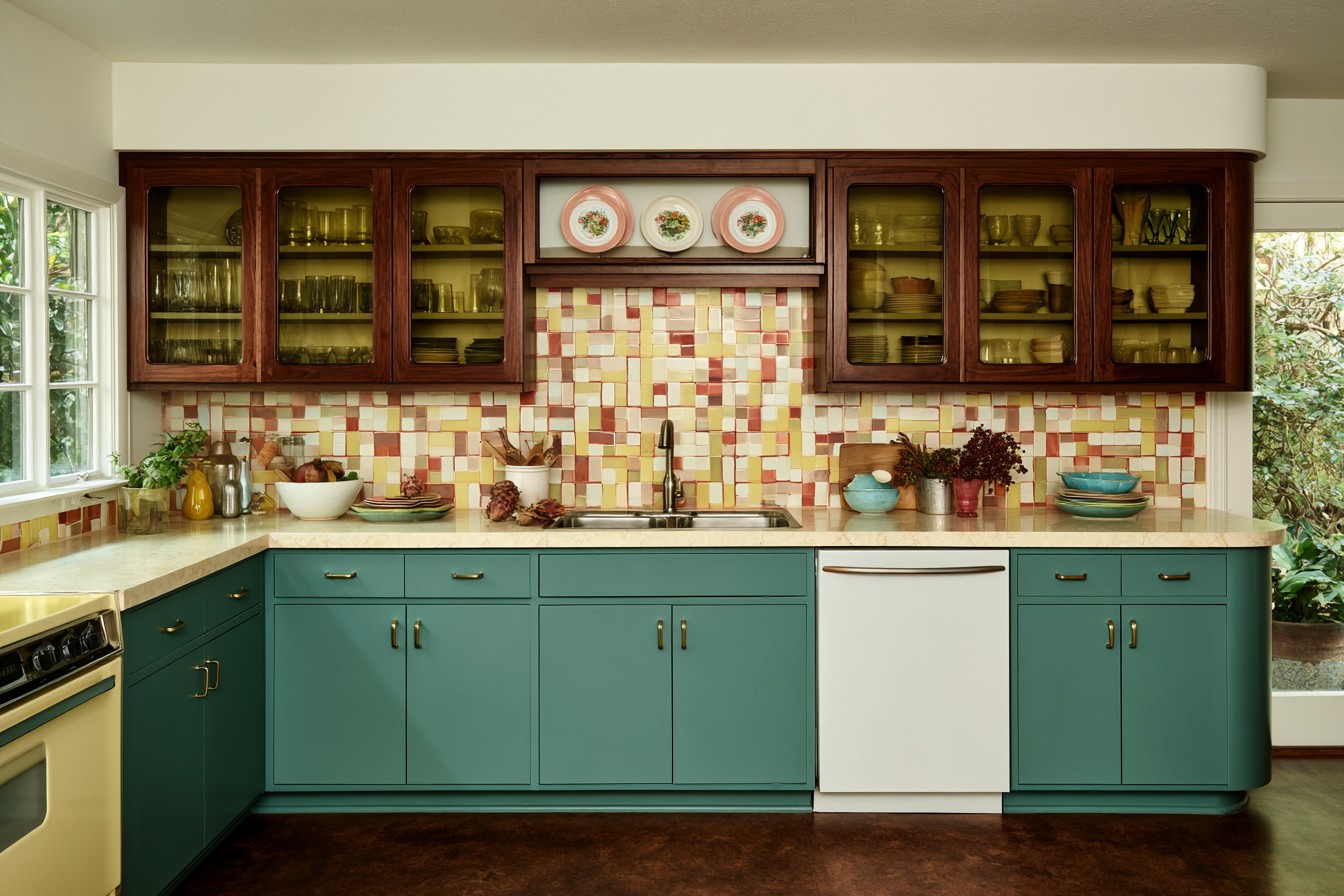
The upper cabinet glass has a yellow green tint rather than a dark gray finish. Glassware and stacked plates remain visible behind it, with their colors influenced by the glazing. Wood frames add warmth, while teal lower cupboards give the room a cooler counterpoint. Pink, cream, and yellow backsplash tiles connect the two levels without repeating either cabinet color exactly.
View a glazing sample with the cupboard contents behind it before choosing a tint. A finish that looks attractive on its own may change the appearance of white plates or colorful mugs more than expected. Decide whether the cabinet is primarily a display or everyday storage, since that affects how much visibility you want. For replacement doors, confirm that the frame, hinges, and glazing specification are suitable for the cabinet. Restricting tinted glass to one pair of doors can introduce this detail while retaining more concealed storage elsewhere.
9. Make the Pantry Colorful Without Losing Track of Food
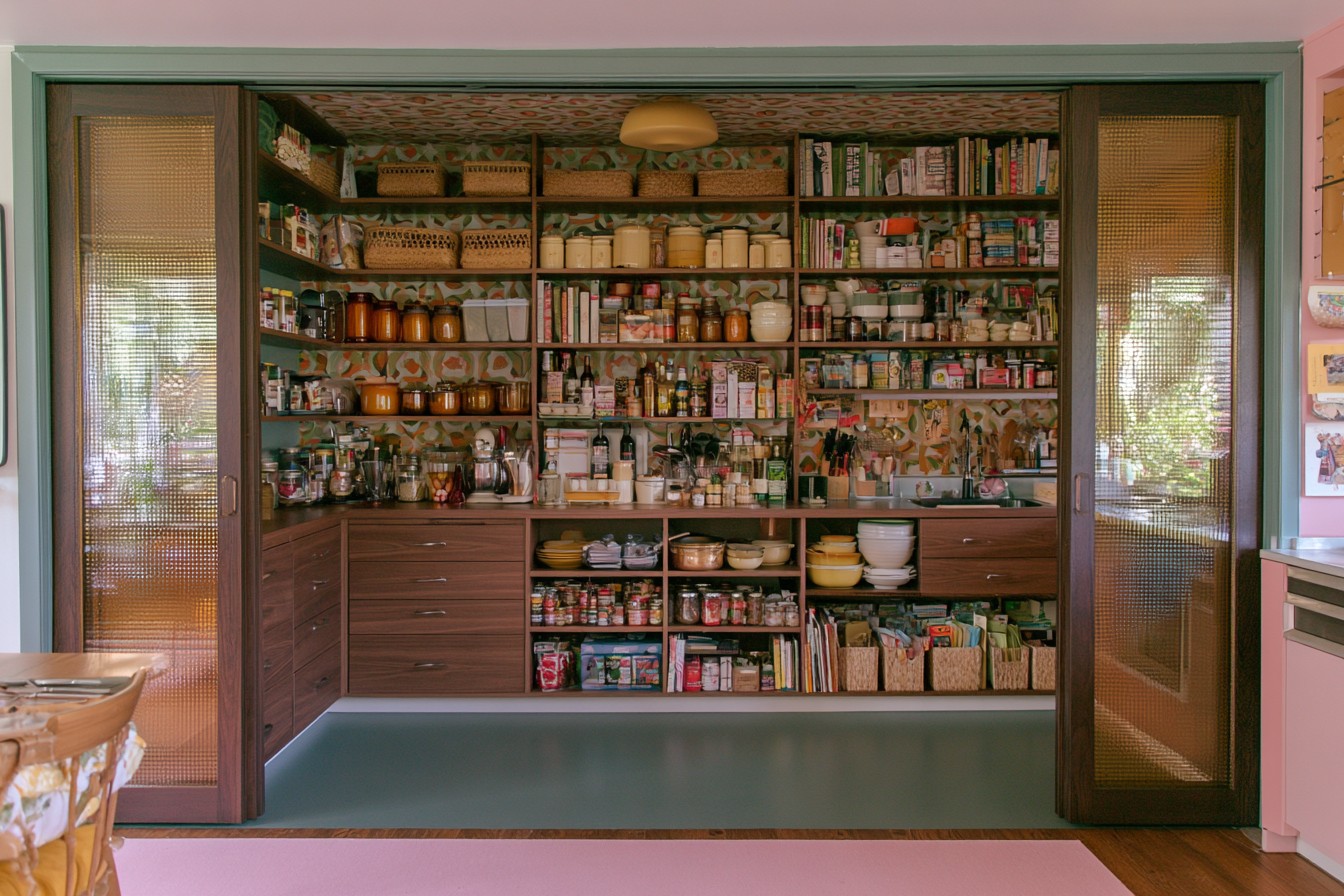
This pantry uses its enclosed setting for a dense mix of color and storage. Pattern continues across the walls and ceiling, while wood shelves hold jars, baskets, tins, and cookbooks. Drawers below the counter offer a quieter area within the display. Amber textured panels frame the opening, giving the pantry a distinct identity beside the surrounding pink and green finishes.
Borrow the warmth without feeling obliged to fill every shelf. Group cooking staples by use and keep labels visible, with newer supplies behind older ones so they are easier to rotate. When transferring food into suitable containers, retain the product name, storage instructions, and date information. Shallow rows or small risers can help prevent a jar from disappearing behind several others. Check that baskets lift out freely and that drawers open without interrupting the entrance. A smaller amount of patterned backing can provide the same character if full coverage would make the contents harder to see.
10. Repeat Burnt Orange Across a Comfortable Seating Group
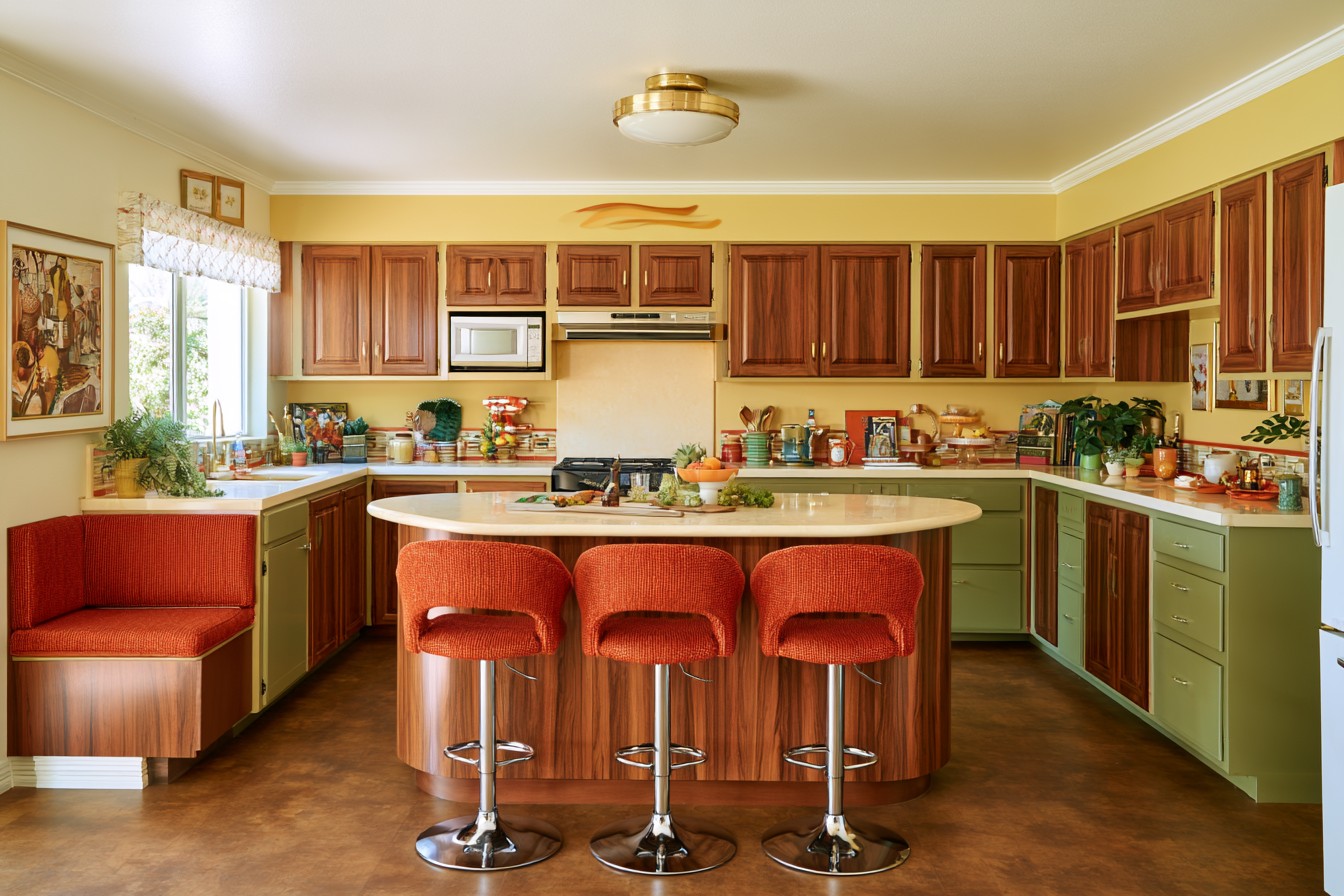
Three orange stools form a clear color group across the front of this island. Their textured upholstery contrasts with the smooth chrome bases, while a matching bench at the left repeats the color beyond the central seating. Wood cabinets and a pale oval countertop keep the arrangement warm without making every surface orange. The room's strongest accents are also the places where someone would sit.
Select stool height for the finished countertop and measure the gap between the seat and its underside. Test back support, the footrest position, and the stability of the base before buying several matching seats. Space the stools so people can sit and get up without having to move a neighbor's chair. Ask about fabric cleaning and replacement options if this will be the main breakfast spot. In a smaller kitchen, two orange stools may have enough impact; adding a matching bench is only worthwhile if it serves a useful seating position.
11. Keep Soft Cabinet Colors and Improve What Lies Behind Them
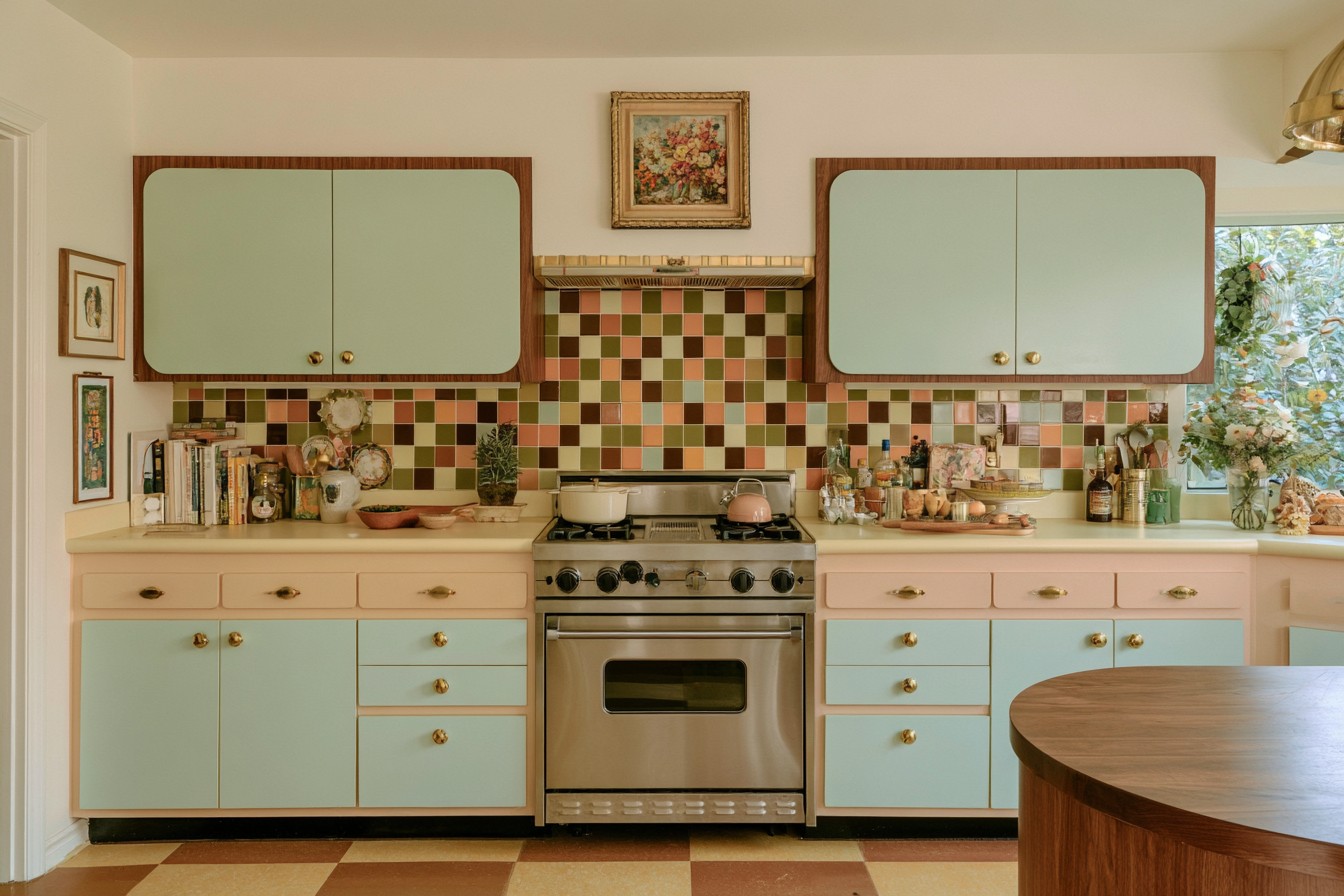
Mint doors and peach drawer fronts make this kitchen lighter than the wood dominated examples. Rounded upper door corners sit inside rectangular timber frames, while small square tiles introduce olive, orange, brown, and cream around the range. The mix of colors comes from clearly defined surfaces rather than a scattering of accessories. Internal storage is not visible, so any upgrades behind the fronts would need to be planned separately.
List the items each cupboard must hold before choosing organizers. A pan drawer needs different space from a cupboard for tall bottles or a shelf for serving platters. Check the interior dimensions, hinge positions, and opening width before ordering a pullout insert. If retaining the cabinet fronts, inspect the structure and hardware first; cosmetic work will not resolve damaged boxes or misaligned doors. Keep the retro palette while selecting serviceable appliances, useful task lighting, and ventilation appropriate to the cooking setup. Those choices support daily use without changing the visual theme. To support everyday use alongside the retro palette, compare these kitchen cabinet lighting ideas when planning work surface illumination.
The most rewarding starting point is usually the detail you already like: sound wood cabinets, an olive finish, a patterned tile, or a comfortable dining corner. Develop the room around that feature and leave enough clear workspace for an ordinary meal. Color and nostalgia have more staying power when the kitchen remains convenient to use.

Leave a Reply