
These 30 small wood projects give everyday belongings a place, from spices and utensils to towels, phones, books and plants. Alongside the design ideas, you will find illustrated making stages, guidance on materials and tools, and practical checks for fitting, finishing and wall mounting. Some pieces organize a counter; others use a corner or wall. Start with the object you want to store, then choose a design that fits your space and woodworking experience.
Table of Contents
- Choose the Storage Problem First
- Materials and Tools for Small Wood Organizers
- From Measured Parts to a Finished Organizer
- Finish and Mount for the Room Where It Will Be Used
- Apply These Making Methods to the 30 Ideas
- 1. Rounded Plywood Side Table with Book Storage
- 2. Arched Wall Organizer with Pegs and Shelves
- 3. Sofa Arm Tray with a Cup Opening
- 4. Propagation Stand with Removable Glass Tubes
- 5. Folding Display Stand for Art and Cards
- 6. Three Tier Wooden Step Stool
- 7. Wall Mounted Towel Rack with a Storage Shelf
- 8. Round Coffee Table with an Interlocking Base
- 9. Wall Bookshelf with an Art Display Panel
- 10. Freestanding Paper Towel Holder
- 11. Tall Bathroom Storage Tower
- 12. Curved Stand for Headphones
- 13. Tiered Corner Stand for Plants
- 14. Tissue Box Cover with a Painted Detail
- 15. Raised Feeding Station for Two Pet Bowls
- 16. Divided Organizer for Cooking Utensils
- 17. Charging Station with Valet Tray
- 18. Freestanding Hand Towel Stand
- 19. Bag Display Tree with Staggered Pegs
- 20. Vertical Organizer for Cutting Boards
- 21. C Shaped Sofa Table for Small Living Rooms
- 22. Tiered Display Rack for Toy Cars
- 23. Wooden Centerpiece Tray with Candle Positions
- 24. Tiered Bathroom Organizer for Small Supplies
- 25. Wall Wine Rack with Wooden Peg Supports
- 26. Freestanding Stand for a Guitar
- 27. Kitchen Organizer for Boards and Spices
- 28. Rustic Bathroom Shelf for Everyday Items
- 29. Tiered Spice Rack with Open Compartments
- 30. Vanity Organizer with Shelves and a Small Drawer
- Keep the Finished Piece Easy to Use
Choose the Storage Problem First
For kitchen storage, compare ideas 16, 20, 27 and 29. Bathroom options include 7, 10, 11, 18, 24 and 28, while 12 and 17 suit a desk. Idea 13 uses a corner for plants. A tissue cover or small display stand offers a limited first project; tables, tall towers and a step stool require more detailed construction planning. The photographs provide proportions and layout inspiration, rather than dimensions or verified load capacities.
Materials and Tools for Small Wood Organizers
Choose straight, sound boards for rails and supports, and suitable plywood for broad panels or shaped shelves. Thickness depends on the span, connections and intended load. Reject split pieces and loose panel layers. Check reclaimed wood for hidden metal and assess unknown old finishes before cutting or sanding them. A decorative finish cannot repair a weak joint or make unsuitable board resistant to repeated water exposure.
A tape measure, pencil and square handle layout; clamps hold work during cutting and assembly. A saw suited to the cut, a drill with appropriate bits, a screwdriver, and sanding tools cover many projects. Curves may call for a jigsaw; repeated straight cuts may be easier to have prepared by a timber supplier. Add wood adhesive, screws, brackets or dowels only as required by the chosen construction plan. Use eye protection, appropriate dust control and the tools' safety instructions.
From Measured Parts to a Finished Organizer
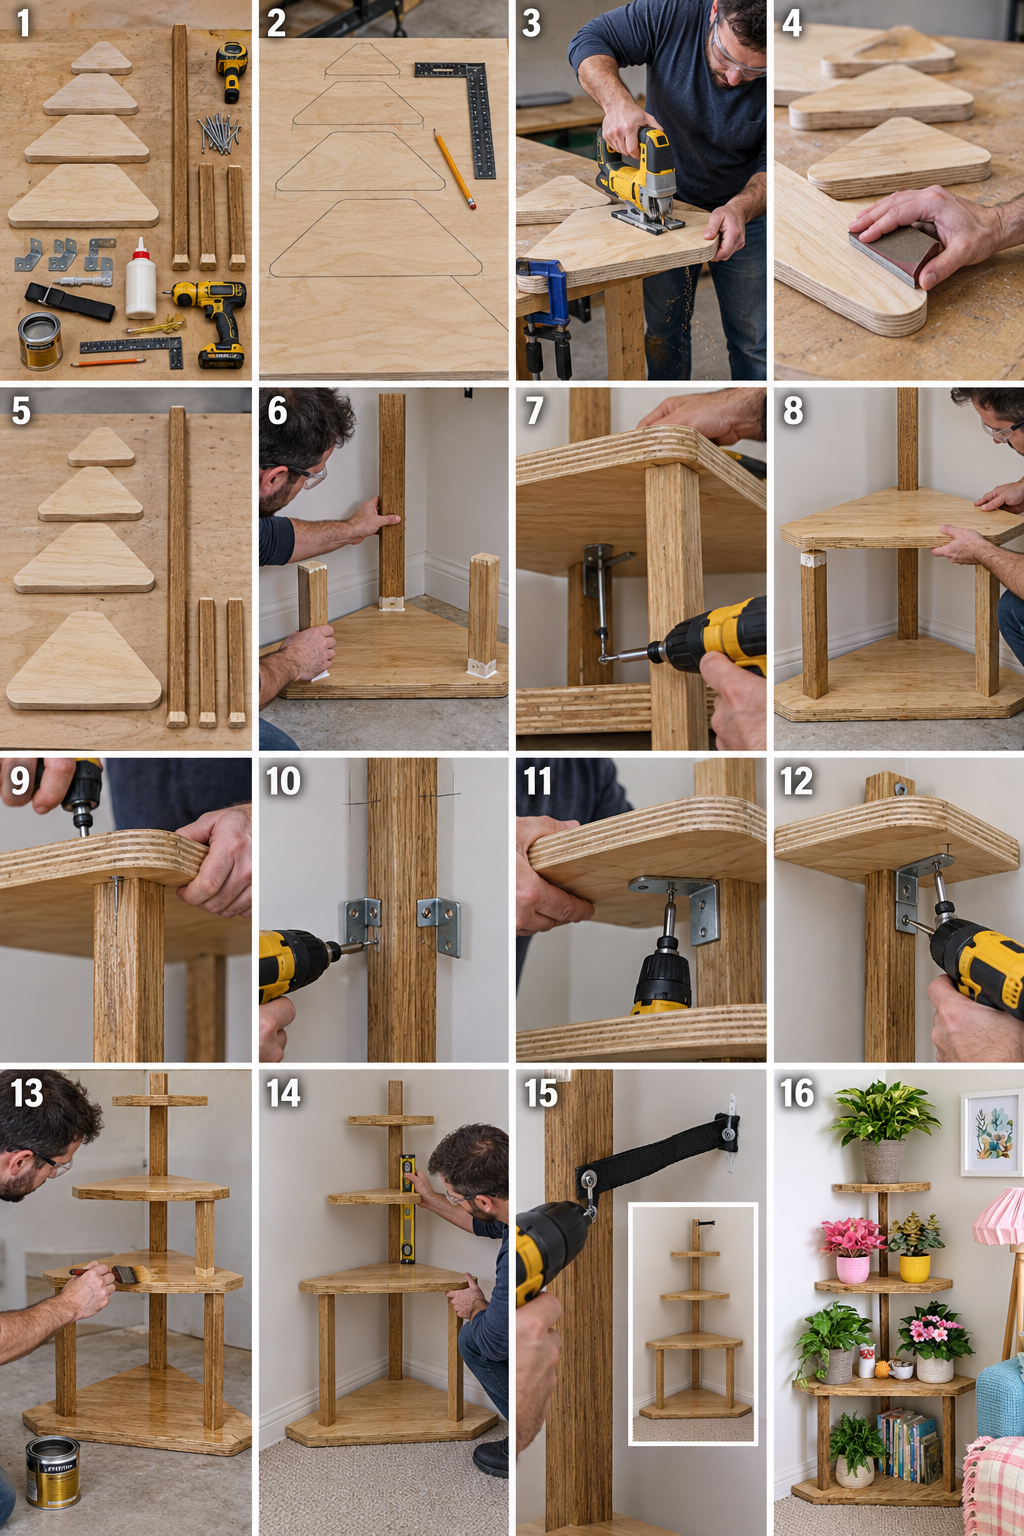
The making stages show shapes marked on plywood, curved parts cut with a jigsaw, edges smoothed, and shelves assembled with upright supports and metal brackets. Later steps show finishing, checking alignment and adding a wall restraint. Use that sequence as a guide to organizing the work across this collection. Size the plant stand's supports and hardware for the combined weight of its filled pots and the dimensions of your own build.
Measure the items first, including their handles, lids and the space needed to lift them out. Draw the outside dimensions and usable openings separately, allowing for panel thickness. Mark matching parts from a common reference, clamp the work securely, and keep hands clear of the cutting path. Smooth exposed edges, then assemble the parts without glue to check the fit, squareness and access before committing to the connections.
Select each connection for its task: a divider positions objects, a shelf joint transfers their weight, and a wall fitting carries the complete unit. Prepare adhesive contact surfaces as its instructions require; pilot holes and fastener sizes must suit the material. Clamping time and full adhesive cure are separate stages. Follow the chosen product's requirements before loading the piece, and finish areas that will be difficult to reach after assembly when the construction permits.
Finish and Mount for the Room Where It Will Be Used
In a bathroom, protect exposed edges and provide removable trays beneath wet supplies. In a kitchen, choose a finish appropriate to the expected cleaning and any intended food contact; storing a cutting board does not make the organizer a food preparation surface. Try a finish on an offcut to judge its color and feel. Observe its ventilation, recoating and return to use instructions, including full cure where specified.
For suspended storage, identify the wall construction and select a complete mounting system for the organizer plus its contents. Check for concealed services before drilling. A fitting that restrains a floor standing tower from tipping has a different job from one that supports a shelf's entire weight. Keep mounting points accessible for inspection, and seek installation advice when the substrate or fixing requirements are uncertain.
Apply These Making Methods to the 30 Ideas
With measuring, shaping, fitting and finishing in mind, use the following designs to choose your own organizer. Change shelf spacing to match your jars, rail length to suit a towel, or compartments to fit your daily tools. Retain the appearance you like while planning the joints and support for that particular use. Start with one useful piece and a measured plan, then bring the same wood tone or painted detail into another room.
1. Rounded Plywood Side Table with Book Storage
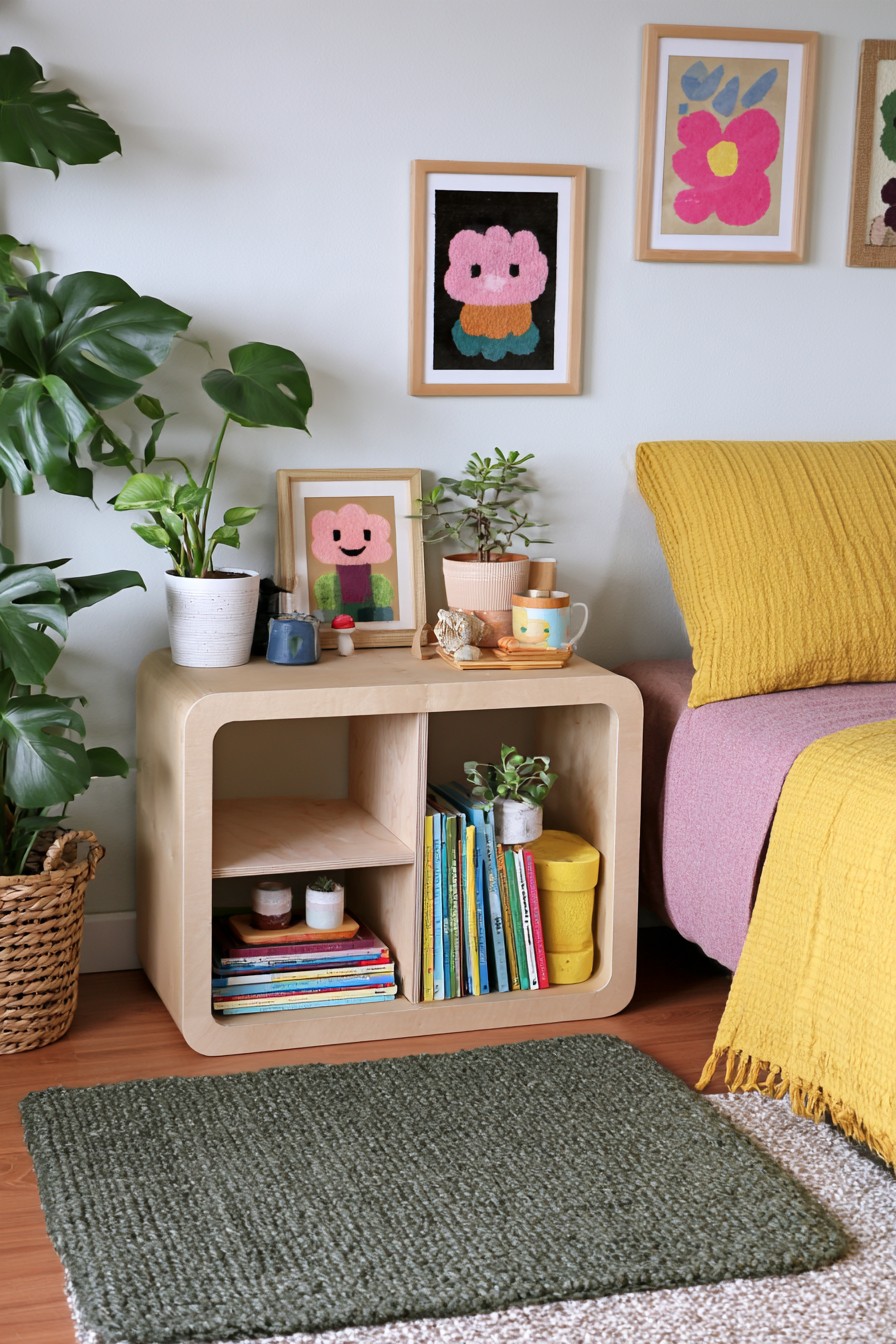
A side table with an open book compartment can keep current reading close to a sofa without adding a separate shelf. Rounded corners soften the outline and make the piece easier to move around in a compact room. Measure the height of the nearby seat before deciding on the tabletop position, then allow enough opening height for the books you actually use.
Plywood is useful for broad, consistent panels, but visible edges need careful finishing. Plan the panel joints and base so the table remains steady when a book is removed or an object is placed near one side. This is a furniture project, so a measured cutting and assembly plan matters more than the simplicity of its appearance.
2. Arched Wall Organizer with Pegs and Shelves
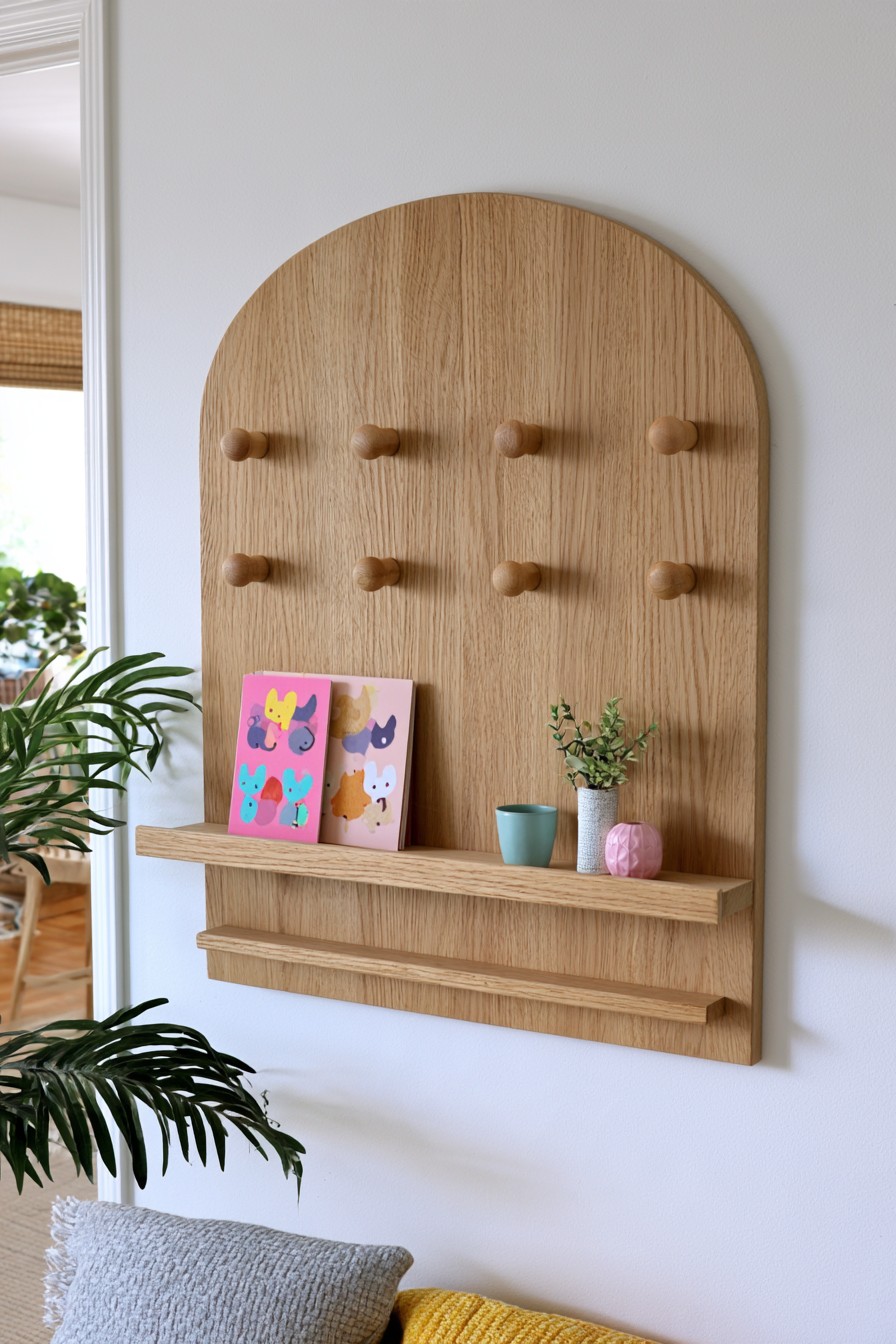
An arched organizer can combine a landing place for keys and small bags with shallow display space. Decide which items belong on pegs and which need a shelf before laying out the front panel. Leave enough distance between pegs for hanging items to be removed independently, and keep shelves shallow enough that their contents do not crowd a hallway.
The wall connection must suit both the wall material and the total expected load. Fix decorative pegs into a substantial backing rather than a thin face layer alone. Sand the arch and exposed edges smooth, especially where someone may brush against the organizer while walking past. For a related organizer made with suitable salvaged boards, see the entryway project in these reclaimed wood DIY projects. Check reused boards for hidden fasteners and unknown coatings before bringing them indoors.
3. Sofa Arm Tray with a Cup Opening
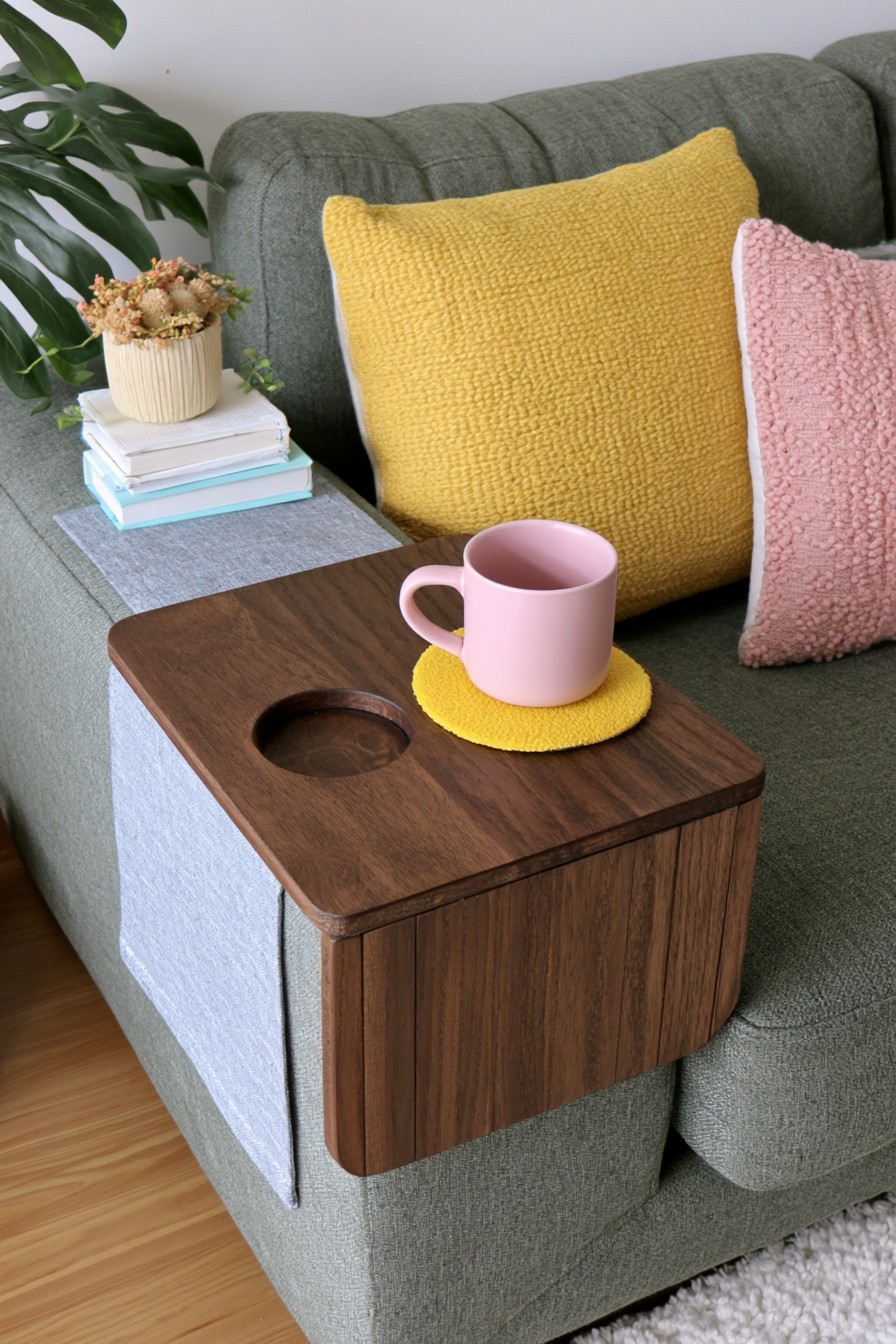
A sofa arm tray provides a small surface for a drink or remote when there is no room for a side table. The fit depends on the actual armrest: a tray intended for a broad, flat arm may rock on a rounded upholstered one. Make a cardboard pattern first to check its width and how the side pieces meet the sofa.
A cup opening should suit the containers used at home without allowing them to tip through. Smooth the cut edge and choose a finish that can be wiped after spills. A soft, nonslip underside can protect the upholstery, but the tray should still be removed before anyone sits or leans on it.
4. Propagation Stand with Removable Glass Tubes
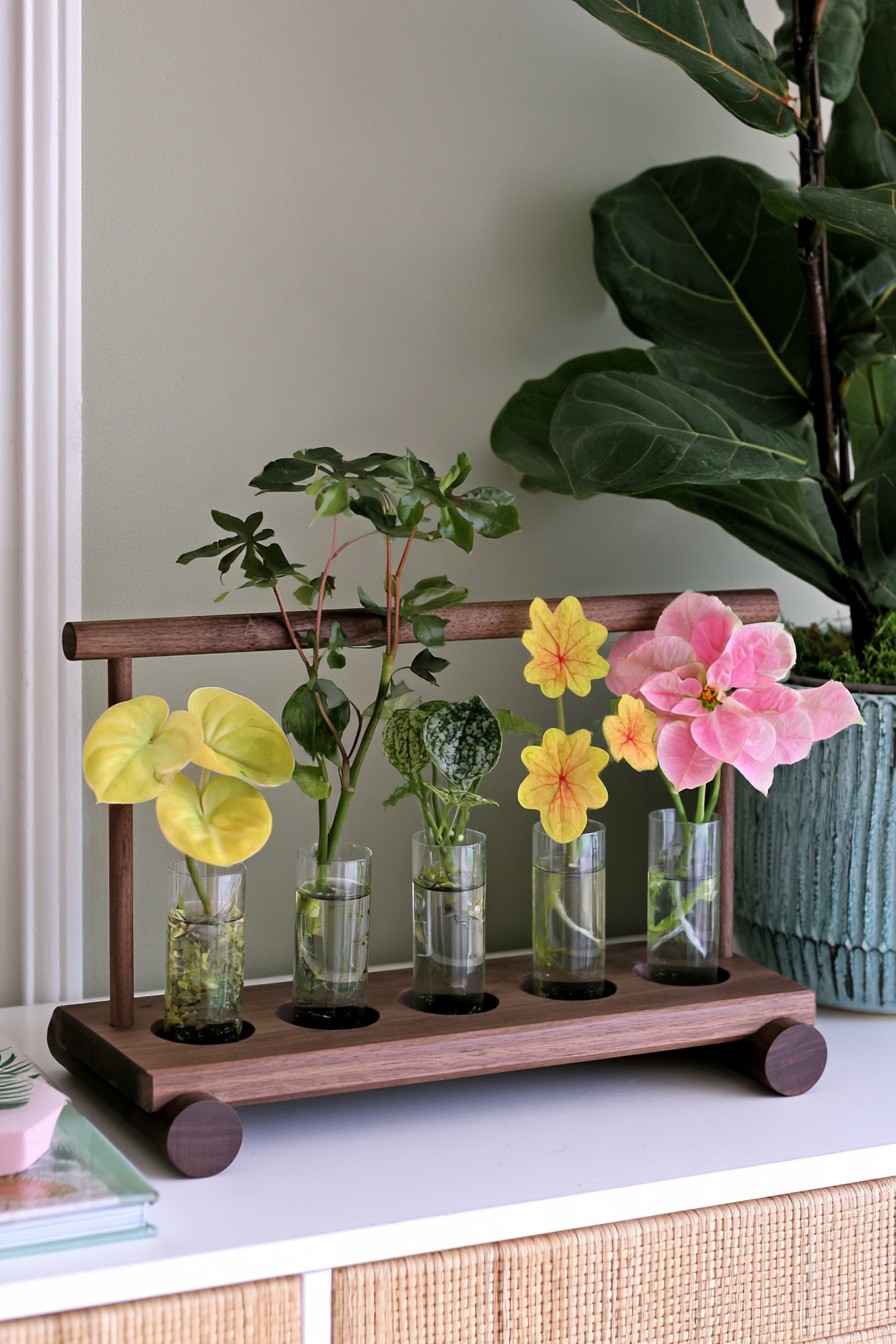
A propagation stand displays individual cuttings while keeping their water containers in one organized row. Plan the holes around the tubes you have, including any wider lip at the top. The tubes should lift out easily for cleaning and water changes without scraping against unfinished wood.
Keep the wooden frame away from standing water and use a finish appropriate for occasional splashes. A broad base helps prevent the display from tipping as stems grow to different lengths. If the stand sits on a delicate surface, add protective pads beneath it and check for drips after refilling. Choose plants suited to water propagation and keep separate tubes accessible, so one cutting can be removed without dismantling the row.
5. Folding Display Stand for Art and Cards
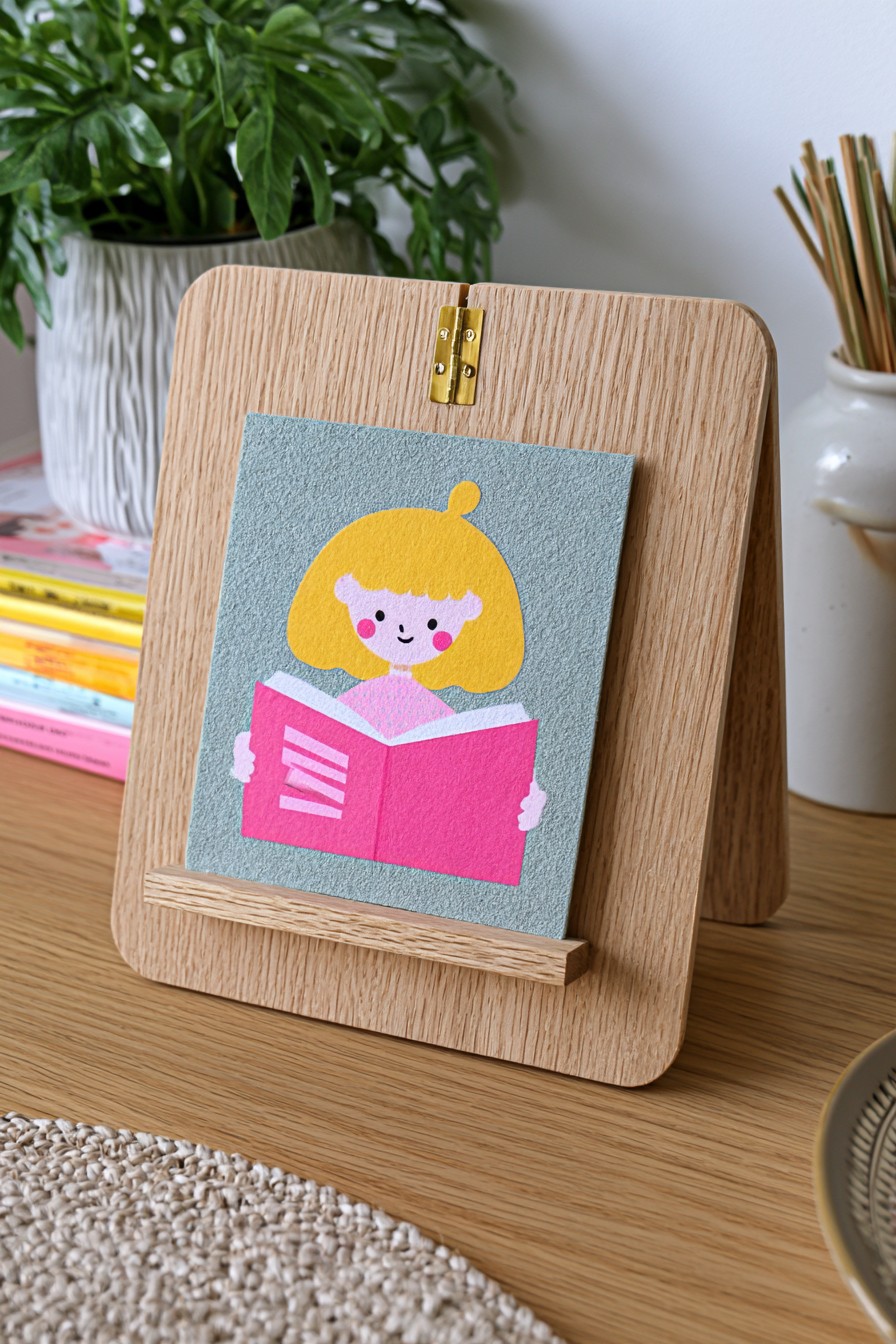
The two hinged wooden panels frame a small print, with a front ledge supporting its lower edge. This is a useful way to rotate postcards, illustrations or family photo copies on a desk. Decide how much of the image the ledge may cover and whether the stand will be viewed from a seated position. A paper mockup helps compare the panel proportions before cutting.
To adapt the appearance, plan how the panels hold their display angle and how the artwork stays on the ledge. Secure the rear connections while they remain accessible, then check alignment before adding the decorative front. Choose hinges and any opening restraint for the actual design, recess or position hardware so it does not scratch the shelf, and check that folding the piece will not trap the displayed paper.
6. Three Tier Wooden Step Stool
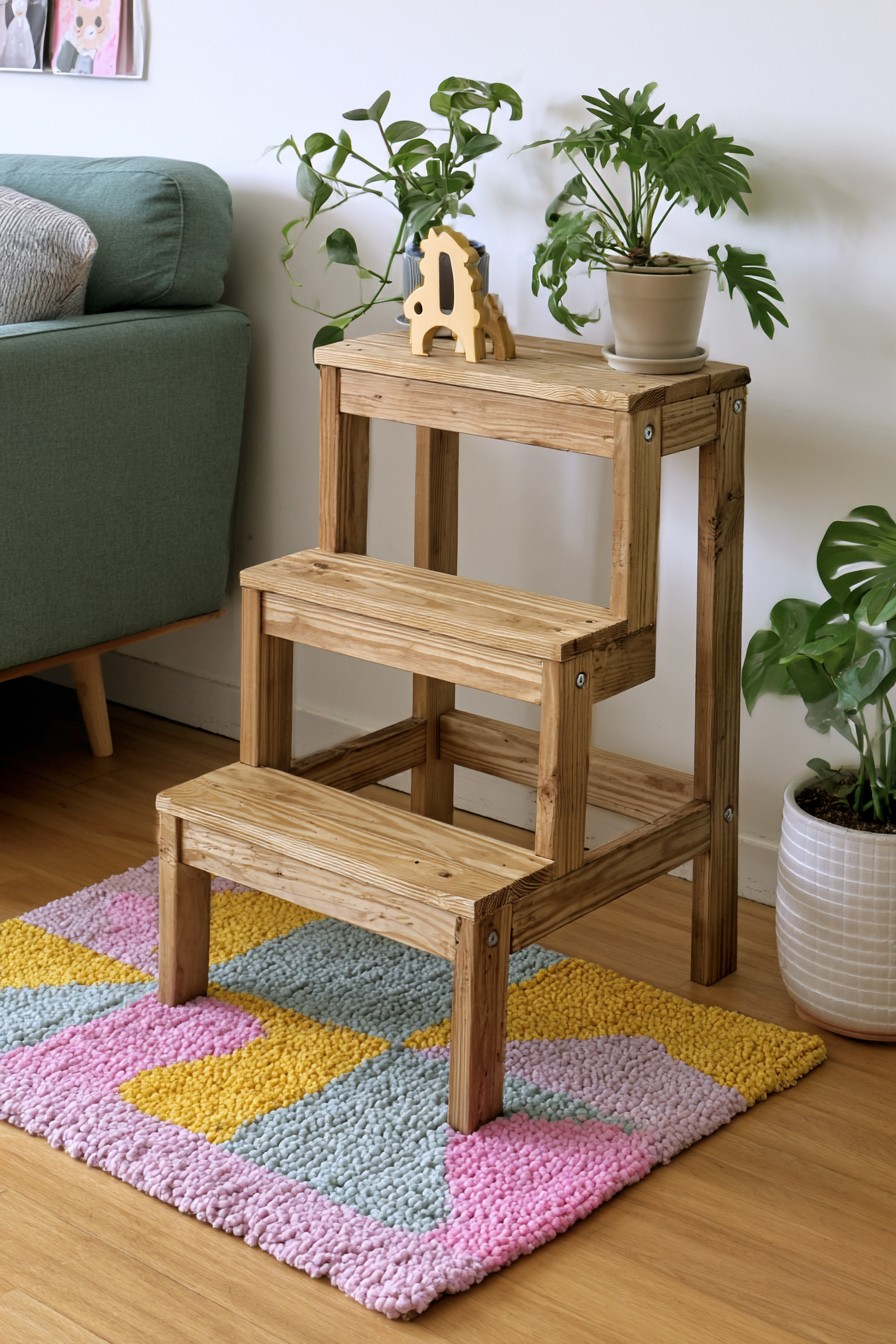
A step stool can make high storage reachable, but it is not a suitable project to improvise from an attractive image. Three tiers introduce repeated weight transfer, side movement, and a greater fall distance than a small single step. A safe version needs a measured structural design, appropriate materials and joints, stable footing, and a suitable tread surface.
Choose a proven plan that states its intended load and construction requirements, or purchase a stool designed for the user. Do not treat decorative screws, thin plywood, or glue alone as evidence that the structure can carry a person. Inspect the finished stool regularly and keep it off uneven or slippery floors.
7. Wall Mounted Towel Rack with a Storage Shelf
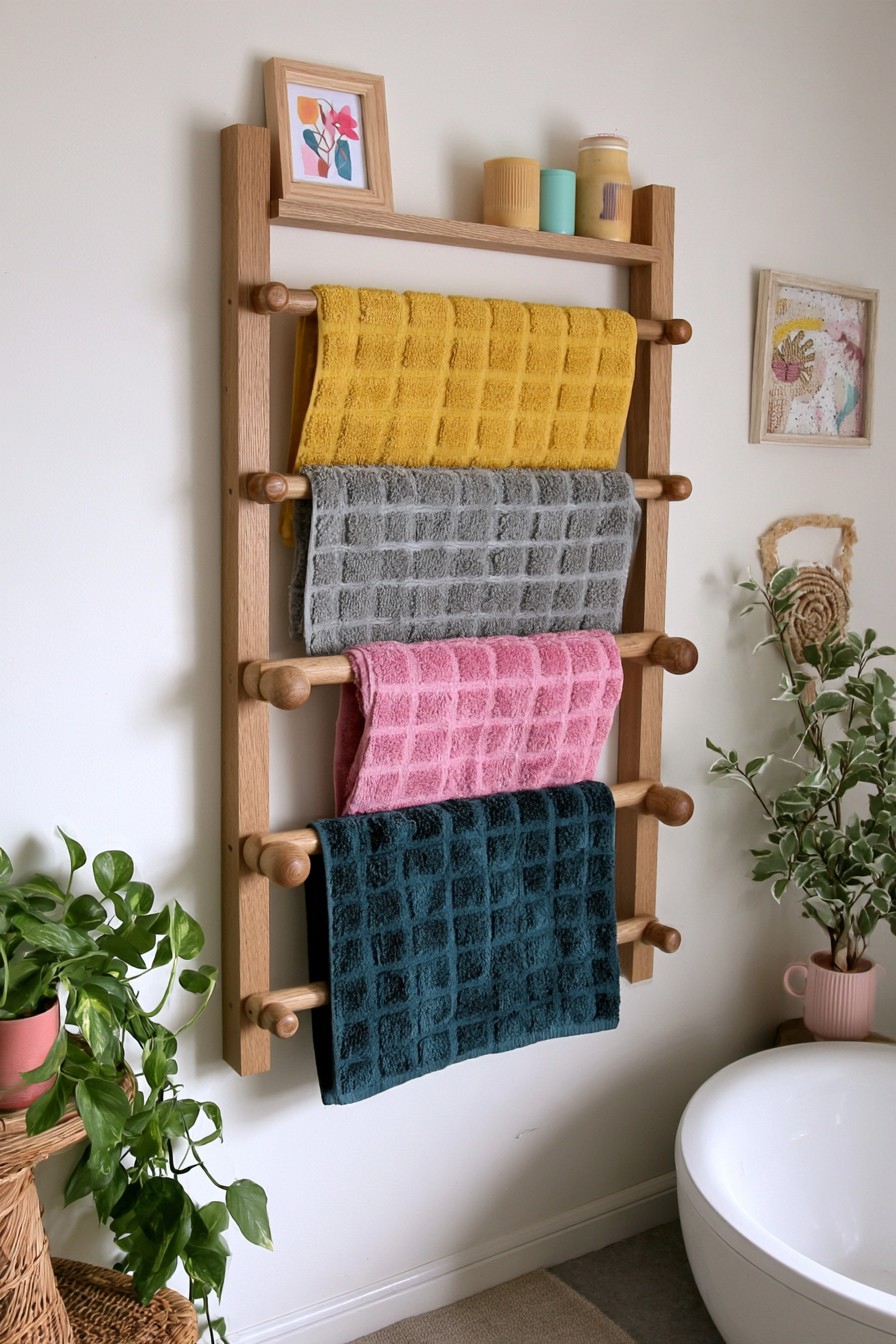
A towel rack with an upper shelf can keep clean towels above the ones in daily use. Place the rail where a damp towel has room to hang freely instead of folding against the wall or the shelf below. Keep the upper surface reserved for lightweight items so the rack remains easy to use and clean.
Bathrooms expose wood and hardware to repeated moisture. Seal the exposed surfaces, avoid water trapping joints, and select fixings suited to the wall and expected load. A rack mounted near a shower may need different materials from one in a dry powder room. The pictured rack has several rails; compare the actual folded towel thickness with each gap before committing to their positions.
8. Round Coffee Table with an Interlocking Base
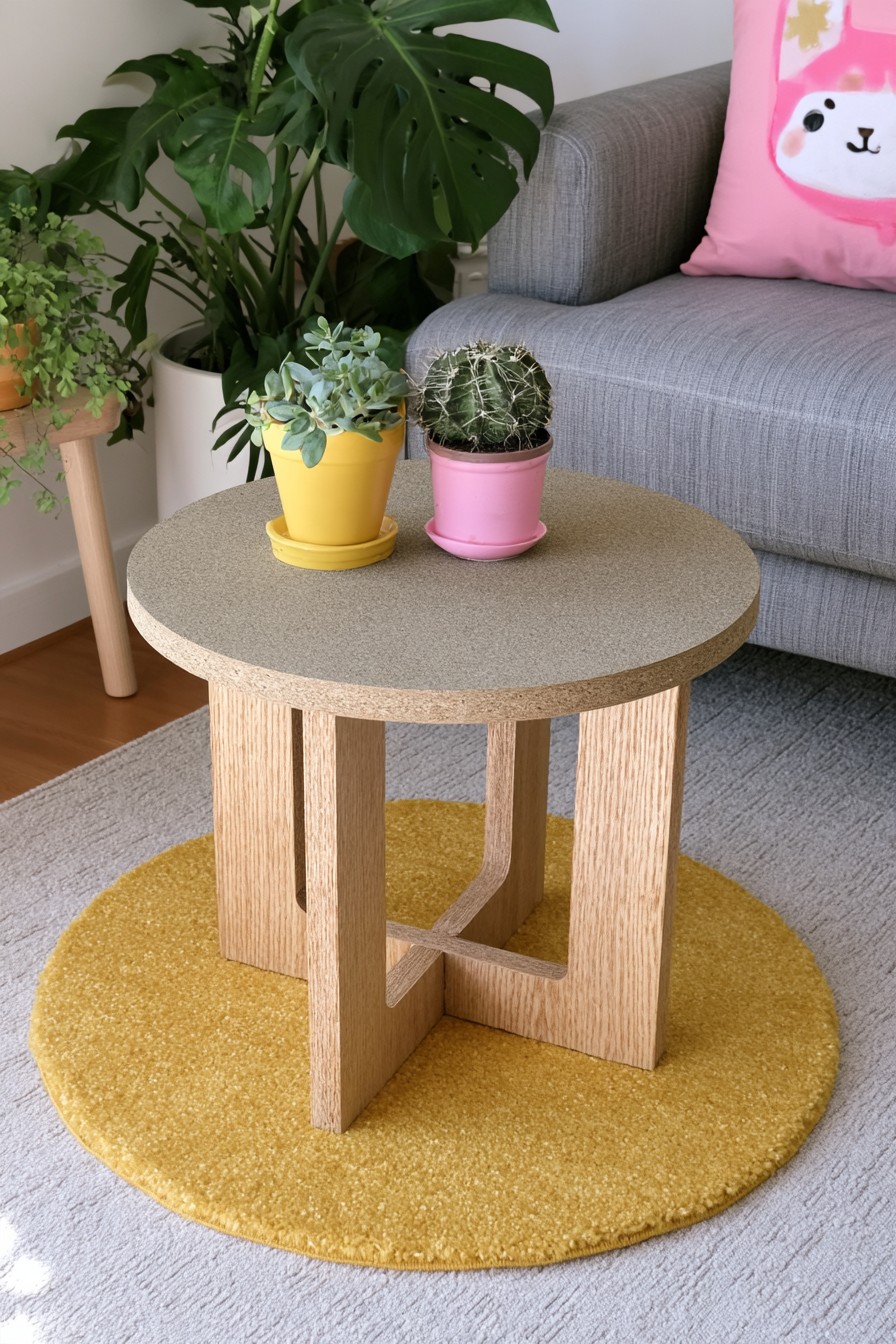
An interlocking base can give a round coffee table visual interest without filling the space beneath it with solid panels. The tabletop diameter should leave comfortable movement around the seating, while the base must remain broad enough to support objects placed near the edge.
Interlocking pieces require accurately cut slots and a material thickness that matches the plan. Test the fit before applying a finish; a loose joint can make the table sway, while an overly tight one may damage the panels. If the design comes apart for storage, use a secure method of fixing the top to the assembled base.
9. Wall Bookshelf with an Art Display Panel
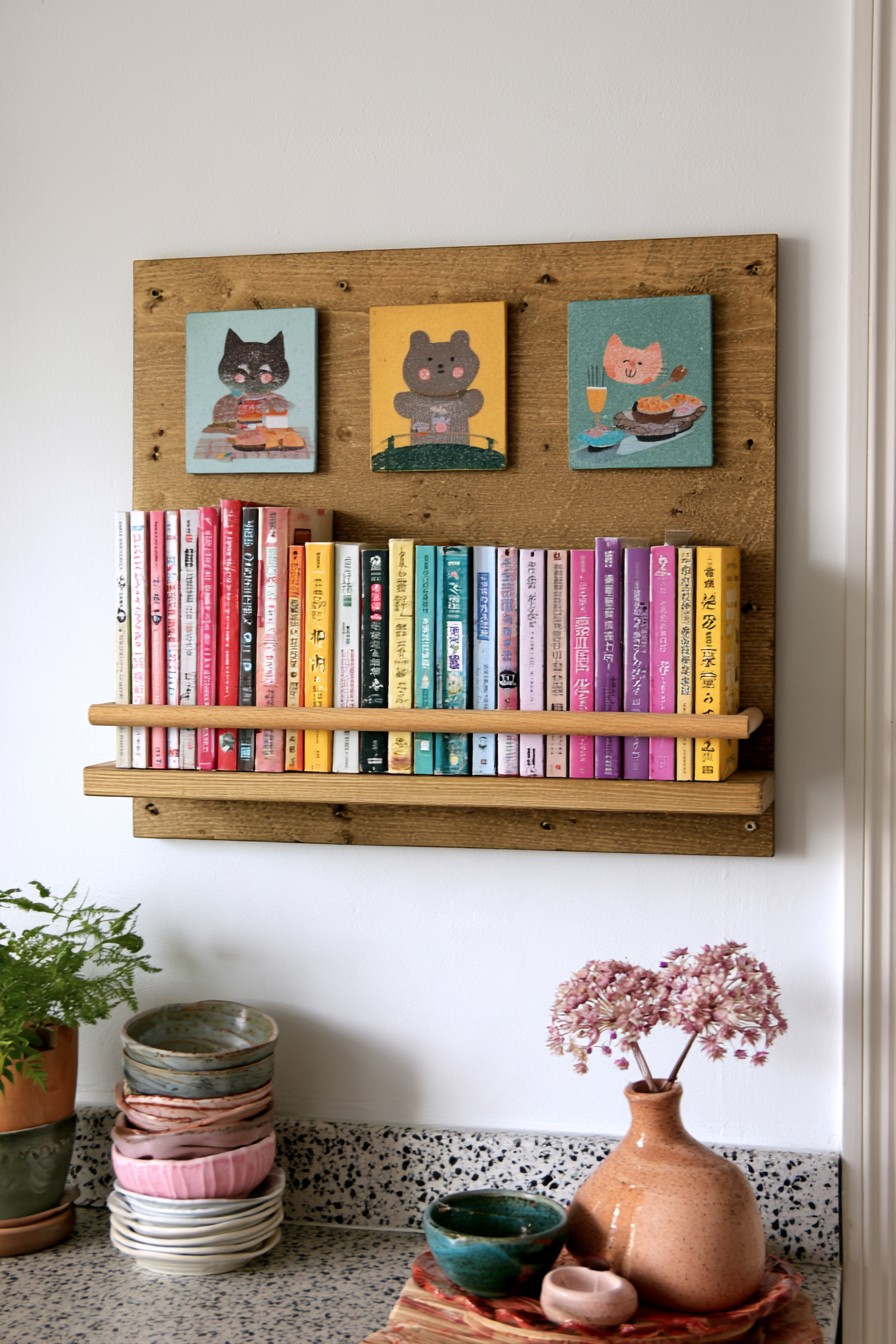
A combined bookshelf and art panel gives books a home while keeping a changing display in the same area. Decide how many books the shelf will hold before setting its depth and spacing. A narrow picture ledge and a book shelf have different load requirements, even when they share the same outer frame.
Attach the unit to suitable structural points with fixings chosen for the wall. Keep heavier books low if the design has multiple levels. A removable display panel is useful when artwork changes often, but its clips or fasteners should not weaken the shelf's main connections. Keep the retaining rail low enough to reveal book spines or covers while still holding the chosen books in position.
10. Freestanding Paper Towel Holder
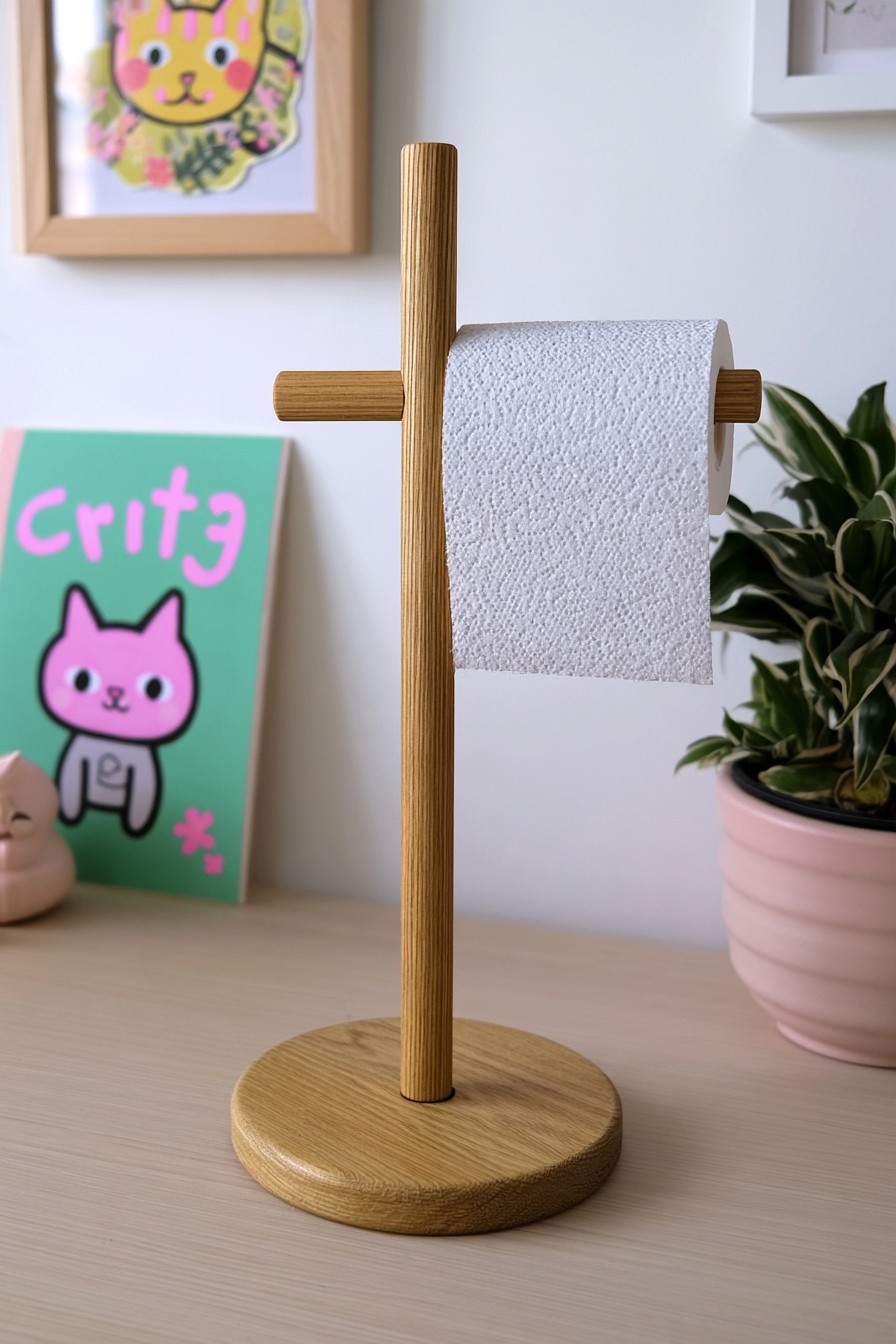
The upright post and horizontal arm hold a paper towel roll above a circular wooden base. This movable design can sit near a kitchen preparation area or provide paper towels in a bathroom without drilling into the wall. Measure the roll you buy, allowing space for its width, diameter and replacement. Position the stand where a sheet can be pulled without reaching across water or hot cookware.
The base and post connection must resist the sideways pull used to tear off a sheet. Try the layout with a full roll before choosing the base proportions. Keep contact edges smooth, protect the underside from counter moisture, and use pads compatible with the surface. An accessible arm end makes refilling straightforward; its connection should stay secure through repeated changes.
11. Tall Bathroom Storage Tower
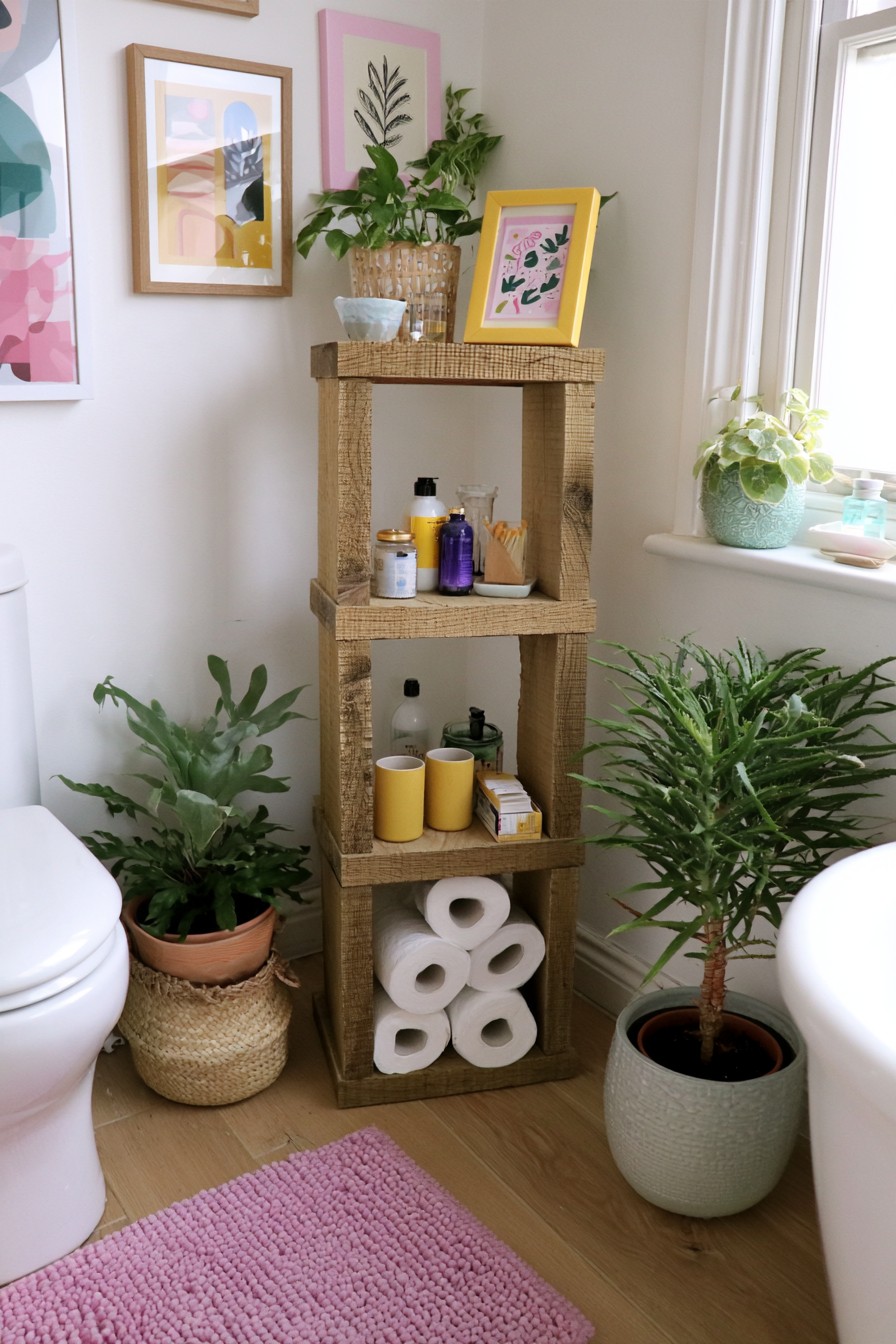
A narrow storage tower can hold towels and everyday supplies where a wide cabinet would obstruct movement. Measure the door swing, sink access, and floor area before choosing its height and depth. Open shelves work well for frequently used items, while baskets can keep smaller products from making the unit appear cluttered.
A tall, narrow cabinet can tip when pulled or climbed. Secure it to a suitable wall and place heavier supplies lower down. Moisture resistant finishing and a base that allows cleaning beneath or around it will help the tower remain practical in a bathroom. Measure baskets with their handles included, so a filled basket can slide out without catching the frame above it.
12. Curved Stand for Headphones
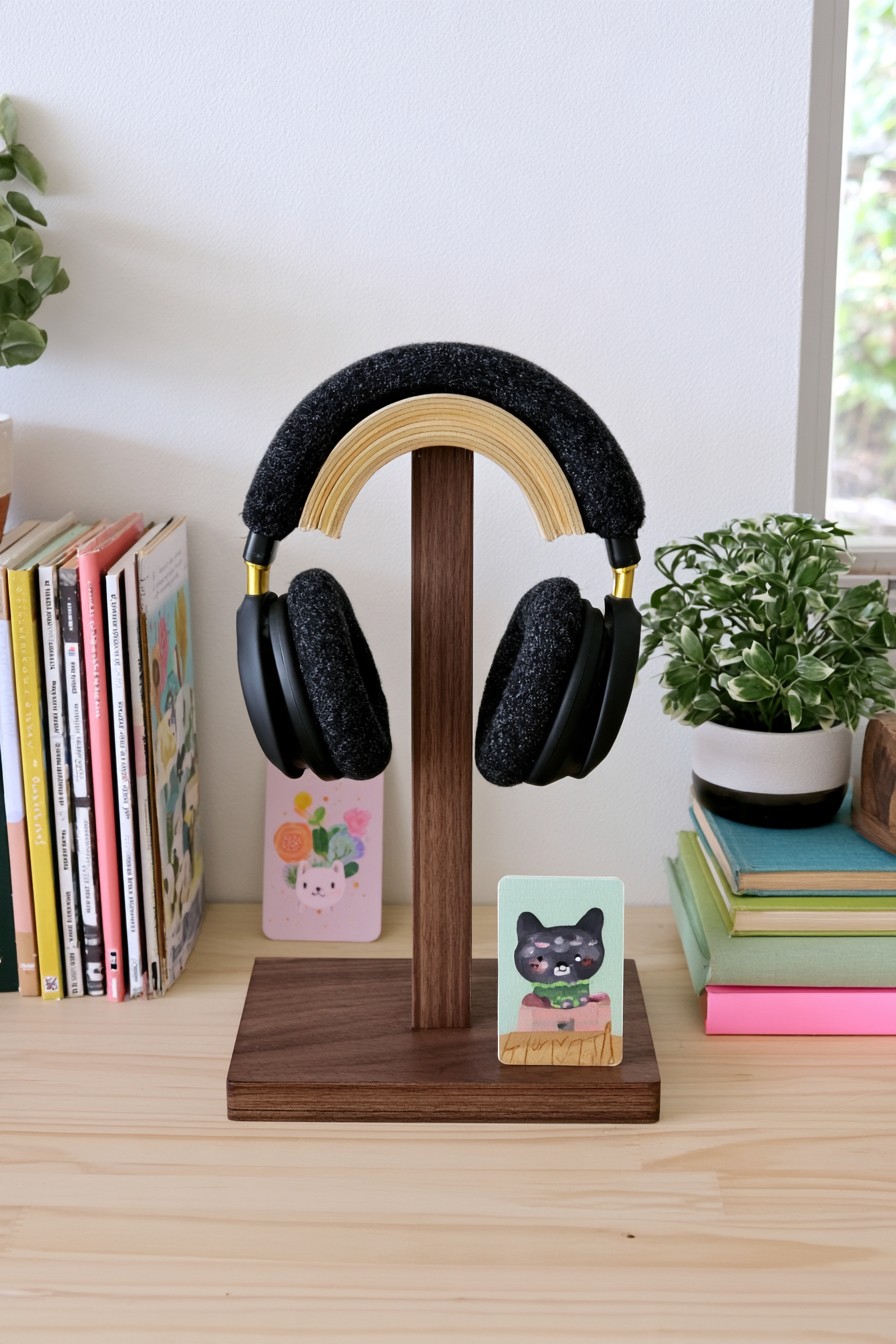
A headphone stand clears desk space while giving the headband a predictable resting place. A broad, smooth upper curve distributes contact better than a narrow peg. Make the support tall enough for the ear cups to hang without touching the base or folding awkwardly.
Balance the stand with the actual headphones before final assembly. A heavy pair may pull a narrow base forward. Sand every contact surface and use a finish that will not feel rough against the headband. If a cable remains attached, include a loose place to gather it without bending the connector. Use a full size paper profile to compare the headband curve before shaping the wood, allowing for any padding added later.
13. Tiered Corner Stand for Plants
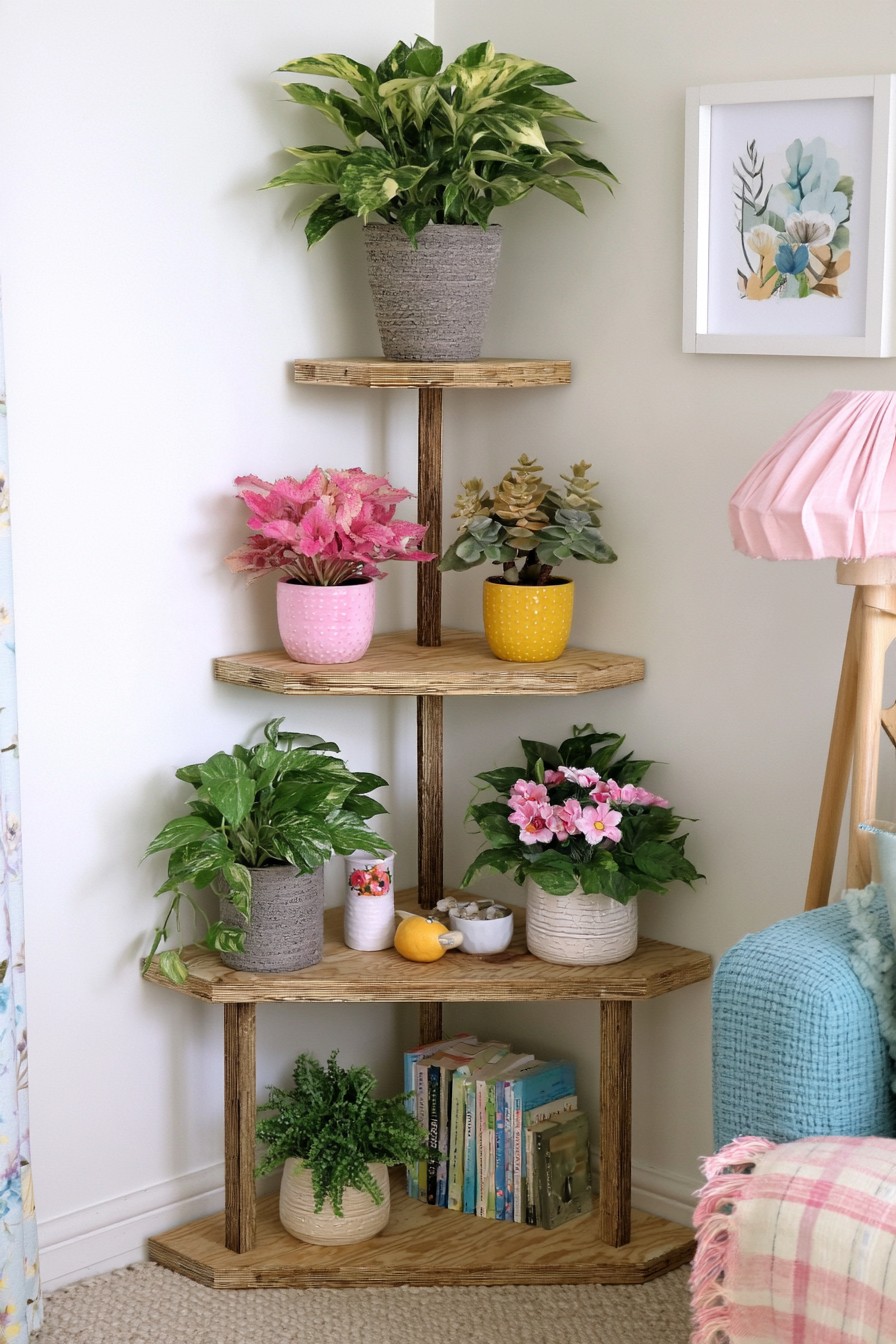
Triangular shelves stack plants vertically in a corner, with books occupying the open lowest space. The stepped outline lets smaller plants remain visible beneath the taller specimen. Choose this layout where the plants receive suitable light and where pots can be lifted out without brushing the wall or nearby seating. Set shelf gaps around mature foliage, rather than the height of the pots alone.
Plan platform supports for containers filled with wet growing medium, and keep heavier pots low. Saucers or removable trays help catch drips while allowing the wood beneath them to be checked and dried. Compare these tiered wooden plant stand ideas for related layout decisions. A tall stand also needs an appropriate restraint where tipping is a concern; that restraint complements the shelf structure.
14. Tissue Box Cover with a Painted Detail
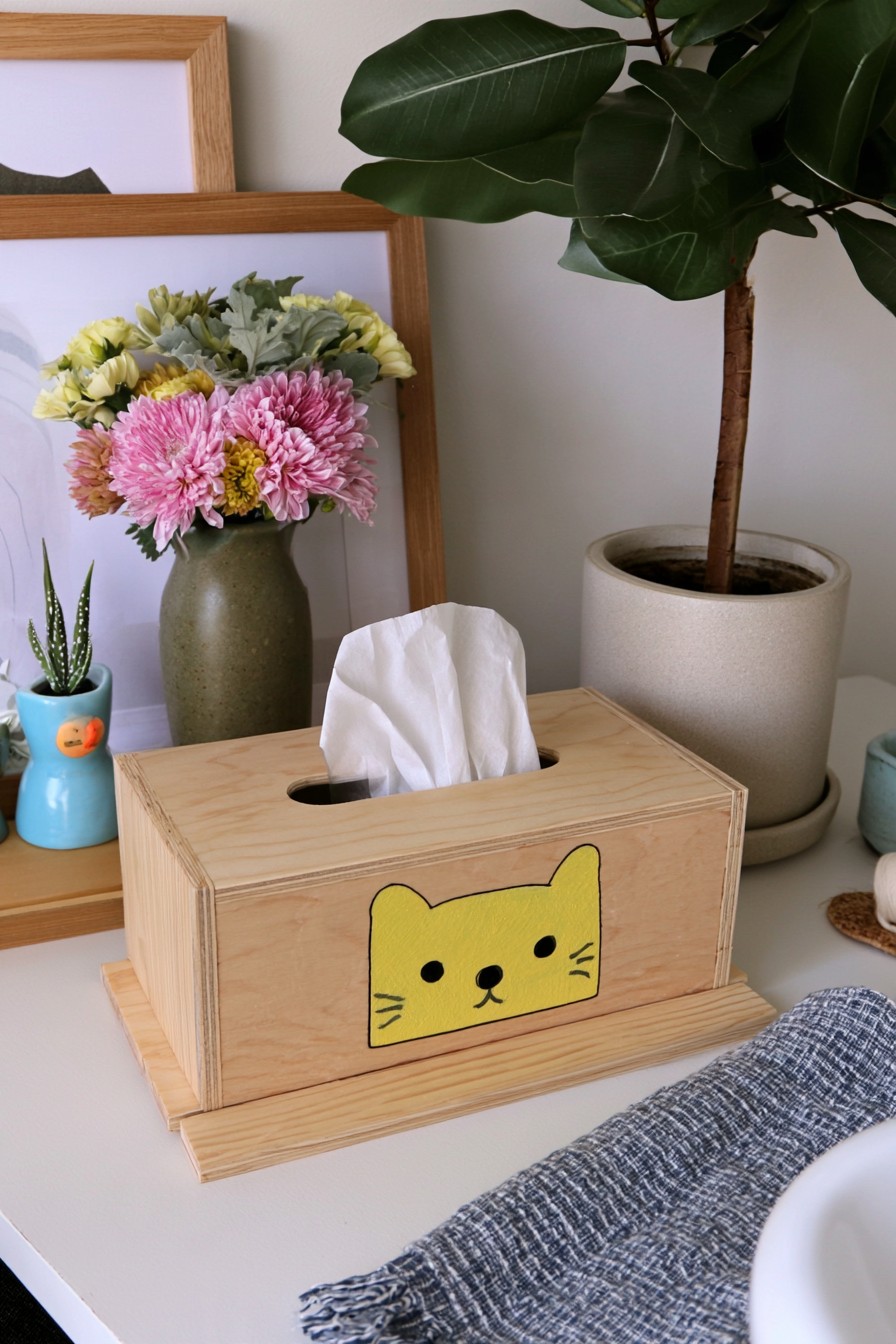
A tissue box cover is a small project for practicing accurate cuts and a clean finish. Measure the brand and box size used at home before choosing the interior dimensions. The opening should let tissues pull through without tearing, and the cover should lift off or open easily when the box needs replacing.
Thin wood can keep the piece light, provided its corners are joined neatly. Test the removable panel before painting so layers of finish do not make the fit too tight. A restrained painted detail can connect the cover to the room without hiding the grain or complicating cleaning.
15. Raised Feeding Station for Two Pet Bowls
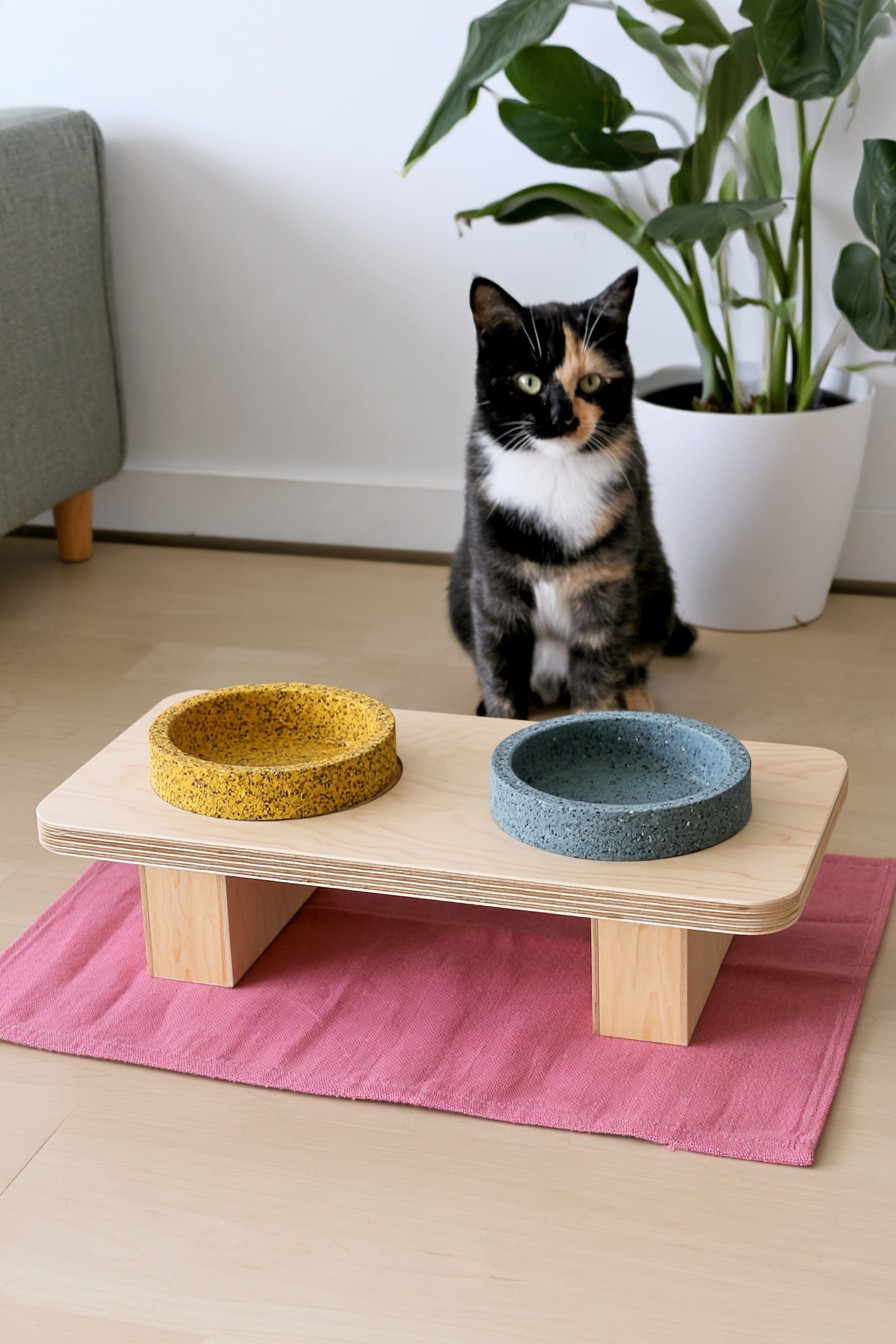
A feeding station can keep two bowls in one place and make the floor beneath them easier to define. Start with removable bowls so they can be washed separately. Measure each bowl beneath its rim before cutting openings; the rim must rest securely while still allowing the bowl to lift out.
Select the station's height according to the pet's needs rather than assuming one raised position suits every animal. Seal surfaces exposed to splashes and food, and check that the base will not slide during use. Keep coatings and adhesives away from surfaces the pet may chew or lick. Try the bowl removal motion before fastening the top, including access for fingers beneath the rims.
16. Divided Organizer for Cooking Utensils
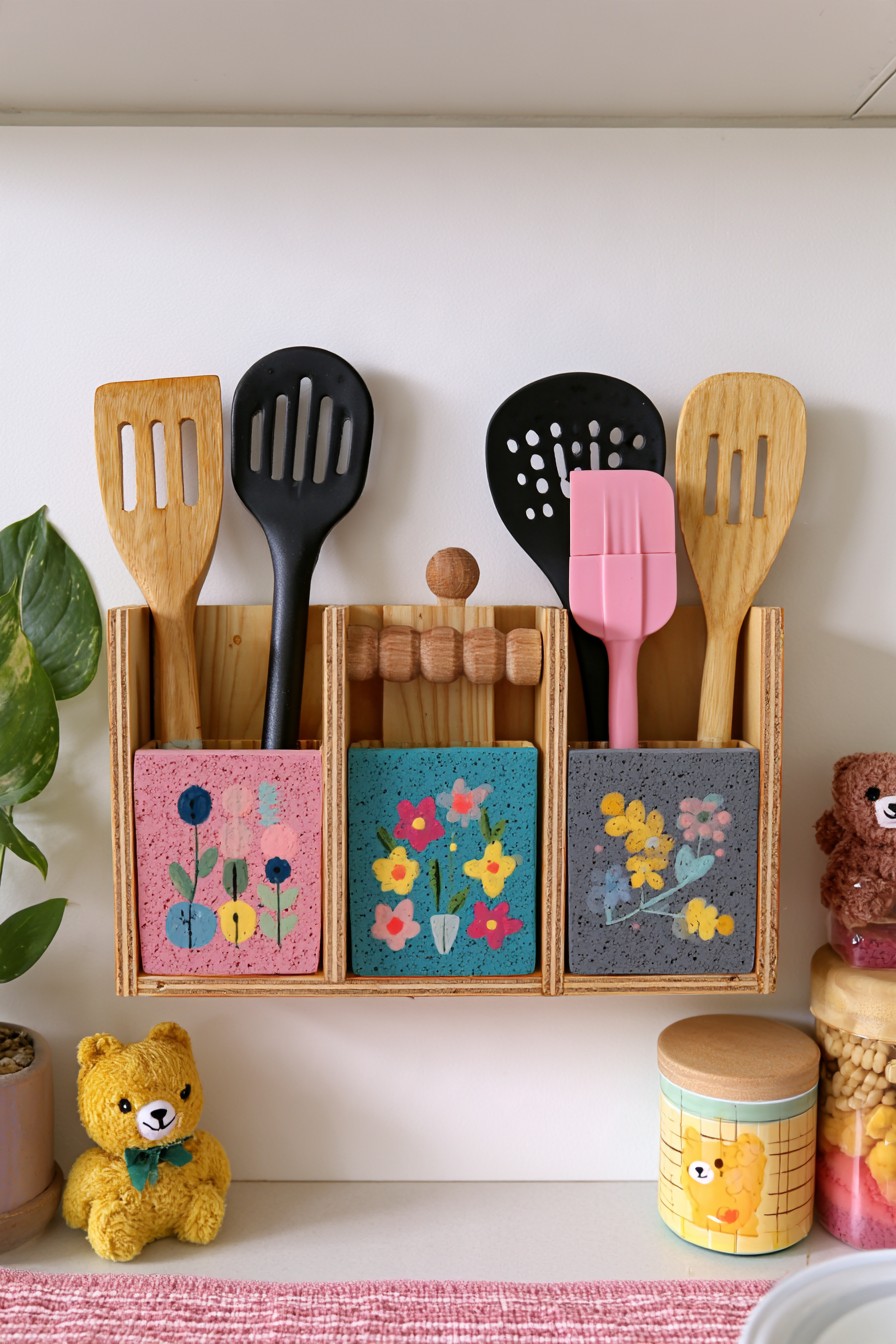
Three decorated compartments separate cooking utensils, with a taller central section for smaller tools. This arrangement is useful when spoons and spatulas regularly disappear into a crowded container. Measure handle lengths and compartment depths so each tool can be recognized and lifted independently. Keep the organizer near preparation work while leaving room to wipe the counter and avoiding direct cooktop heat or grease.
A freestanding version needs a stable base; a wall mounted adaptation needs fixings that carry the filled organizer. Use the flat back for a suitable mounting bracket, securing it into sound structure before loading the shelves. Plan washable removable inserts where useful, keeping their edges accessible for lifting out. Return dry utensils to the compartments, and leave access to the lower corners where crumbs can collect.
17. Charging Station with Valet Tray
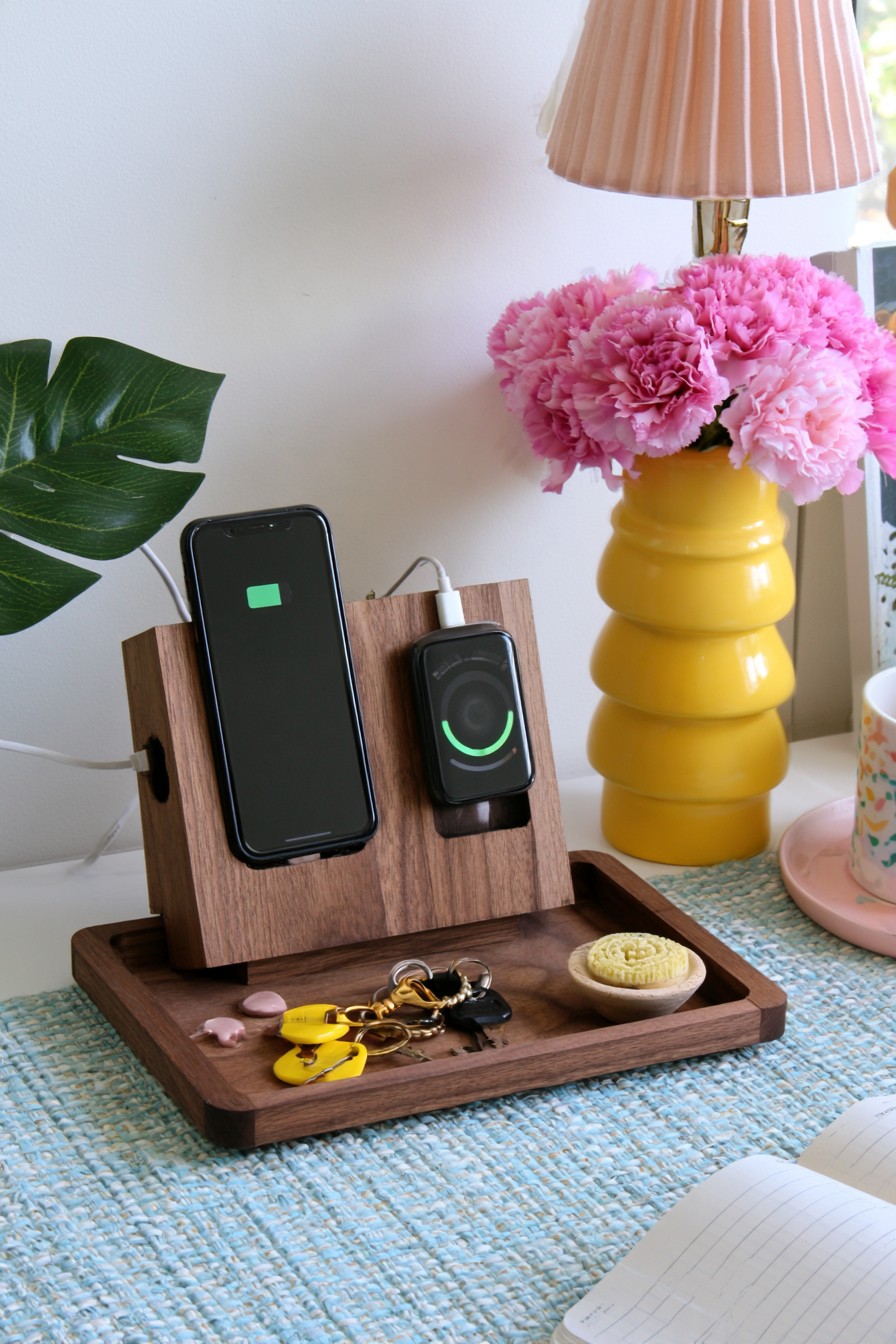
A charging station can give a phone, keys, and small daily items one landing place. Decide where the cable enters before cutting a slot, and check that the phone can stand at a useful angle while connected. Keep the tray shallow enough that small objects remain easy to see.
Use a manufacturer approved charging device rather than building electrical components into the wood. Do not enclose an adapter where heat cannot dissipate or route a cable through a sharp unfinished opening. A smooth channel and access to unplug the device make the station easier to maintain. Check the fit with the phone in its usual case, including clearance around the cable connector and any side buttons.
18. Freestanding Hand Towel Stand
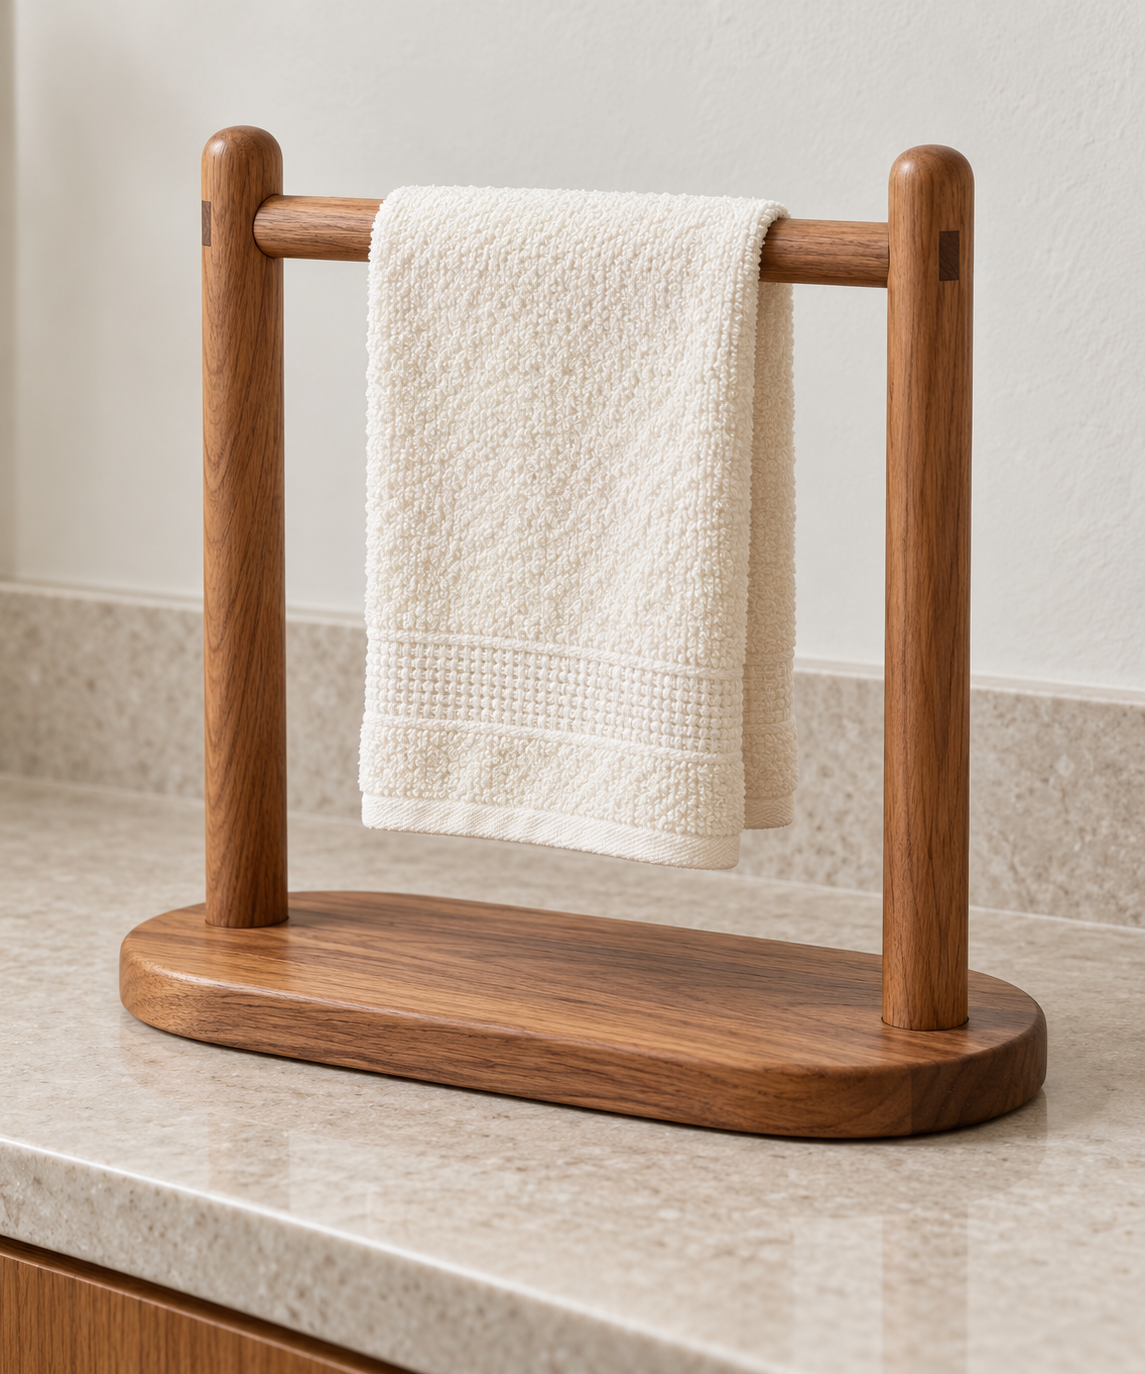
A horizontal wooden rail between two rounded uprights gives a hand towel a place to dry beside a sink. The oval base defines a compact countertop footprint, while the open center leaves the hanging fabric clear of the stand. Measure a folded hand towel and the available counter depth first. The rail needs enough height for the towel to hang above the base, with room around it for air circulation.
Build the rail, uprights and base as connected parts of one stable frame. Check the stand in its intended position, including how it responds when a towel is taken from one side. Choose a finish suited to occasional splashes, dry water from the base promptly, and keep the stand away from persistent wet areas. Lift it regularly to clean and dry the counter underneath.
19. Bag Display Tree with Staggered Pegs
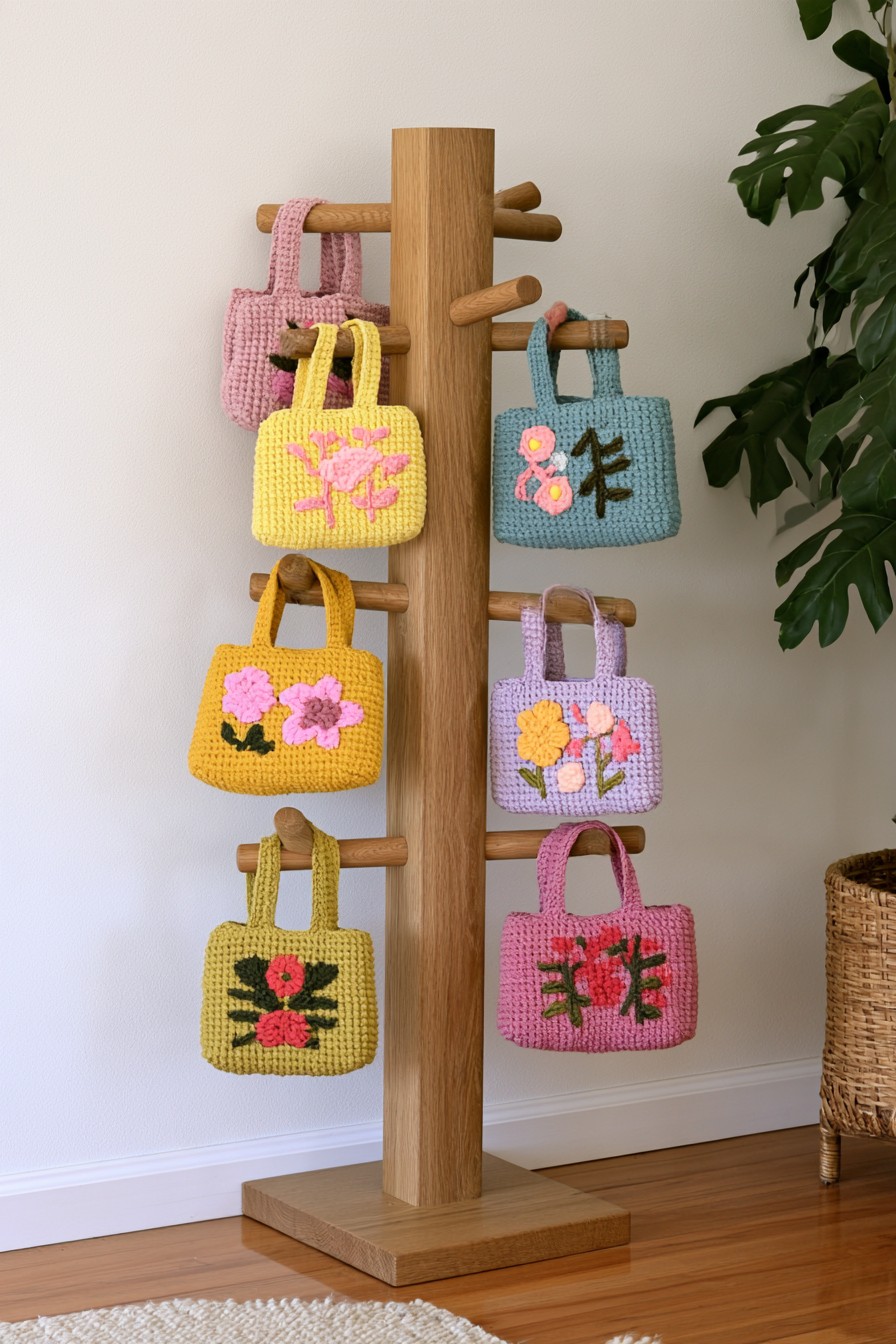
A display tree keeps frequently used bags visible near an entry or wardrobe. Staggering the pegs helps bags hang without covering one another and makes it easier to remove a single item. Plan around the longest straps and the floor space needed when bags are full.
A loaded bag can pull strongly to one side. Keep heavier items low, use secure peg connections, and choose a base suited to uneven loading. In a narrow walkway or a household with young children, a wall mounted alternative may be easier to secure and less likely to be knocked over. A soft bag handle may need a wider contact area than a rigid strap; choose peg shapes accordingly.
20. Vertical Organizer for Cutting Boards
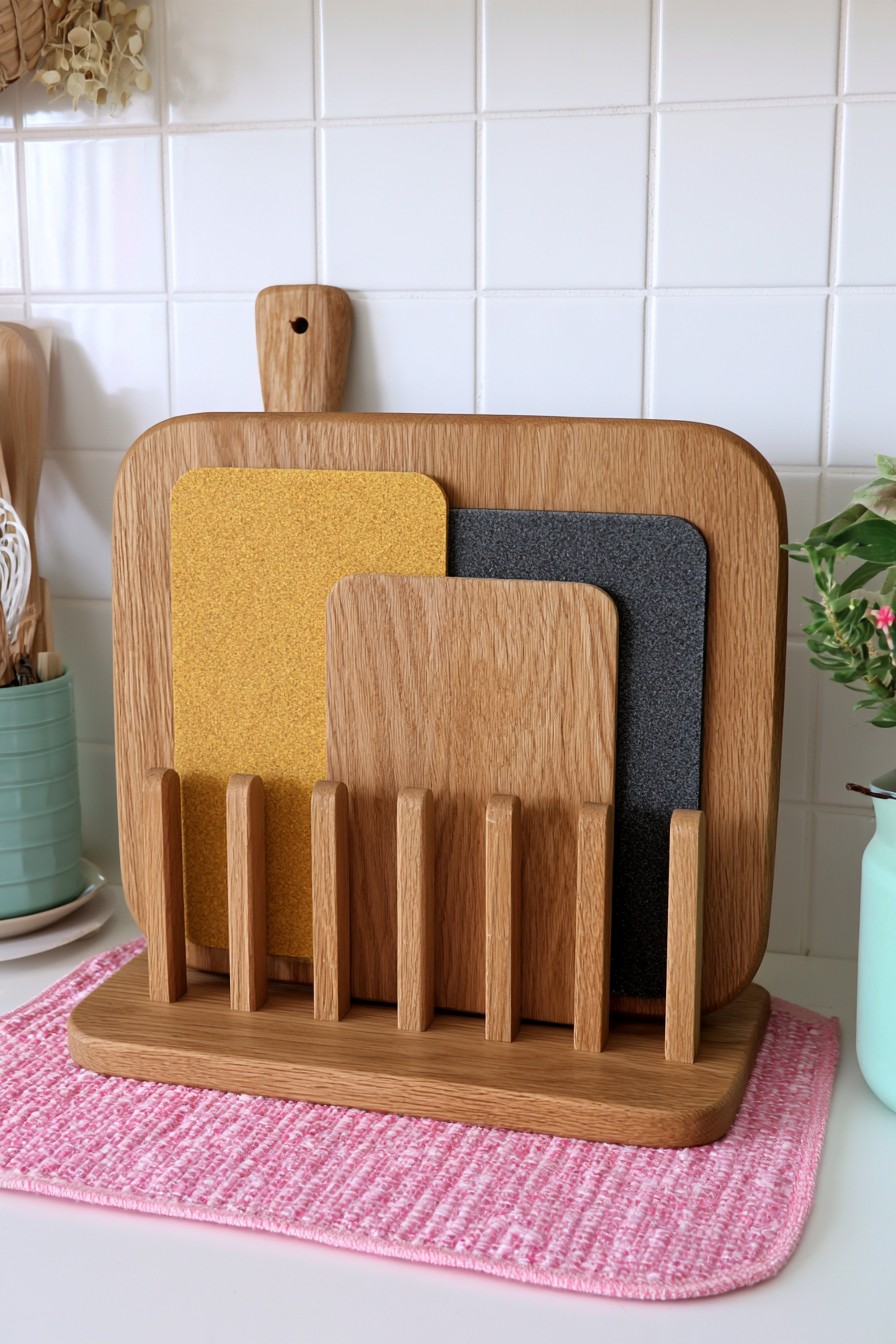
A vertical organizer gives each cutting board a separate place to dry and be retrieved. Measure the thickest board before spacing the dividers, and leave enough room to grip a board without scraping it against the wood. An open design can be easier to clean than a deep closed slot.
Keep the organizer away from constant standing water and protect the surface beneath it from drips. The rack itself is storage, not a cutting surface, so choose finishes for cleaning and moisture resistance. Check that the base remains steady when only one heavy board is left at an outer position.
21. C Shaped Sofa Table for Small Living Rooms
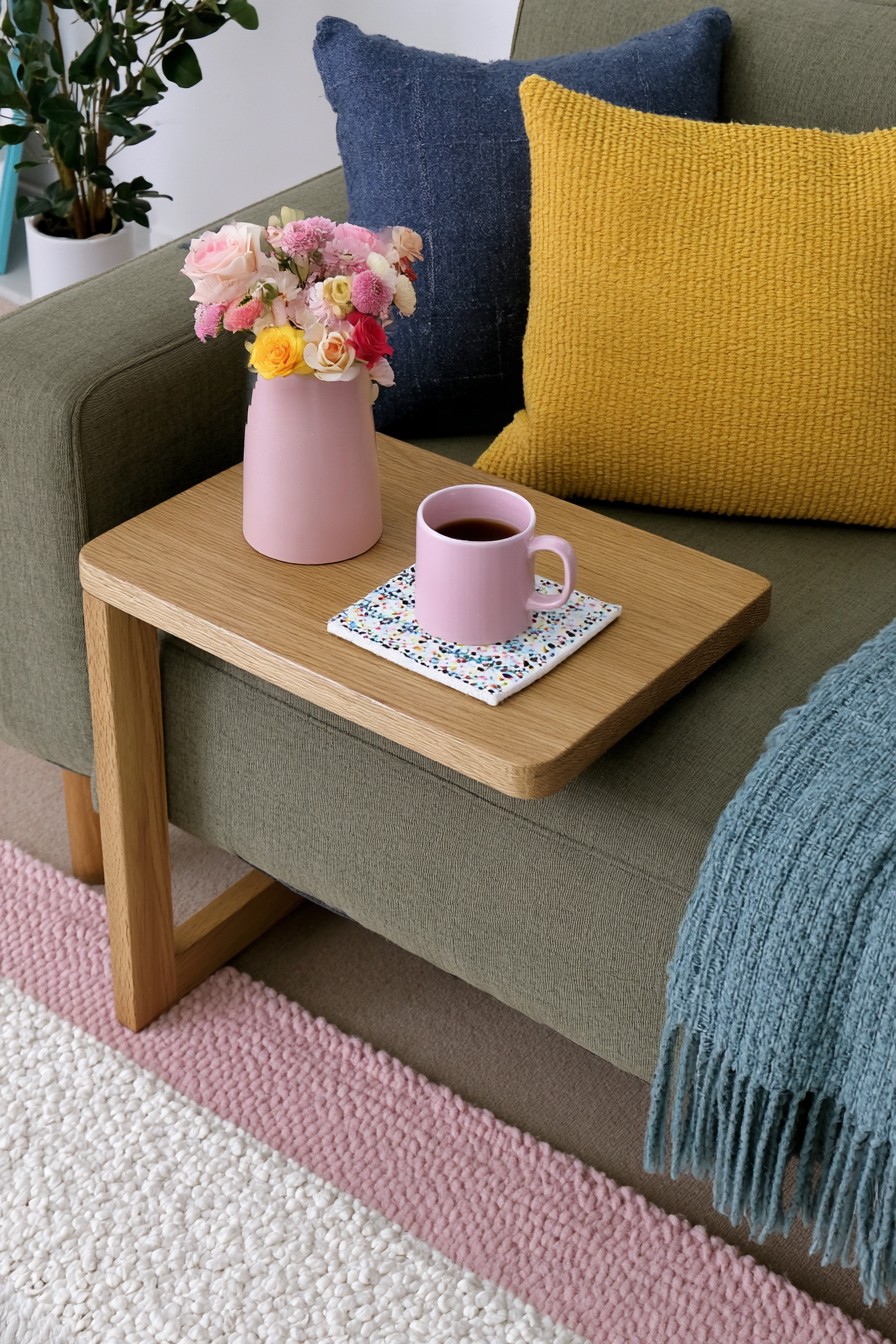
A C shaped table can bring a laptop, book, or drink closer to a seat without requiring a full side table. Measure the clearance under the sofa and the height of its arm before planning the frame. The lower part needs to slide in easily without catching on the floor or furniture legs.
The extended top creates leverage when weight is placed near its outer edge. Plan the base, joints, and intended load together, then check stability on the actual flooring. A narrow decorative version may suit a cup and book but not heavier equipment. Mark the preferred top position while sitting normally, so the table comes within reach without pressing against the upholstery.
22. Tiered Display Rack for Toy Cars
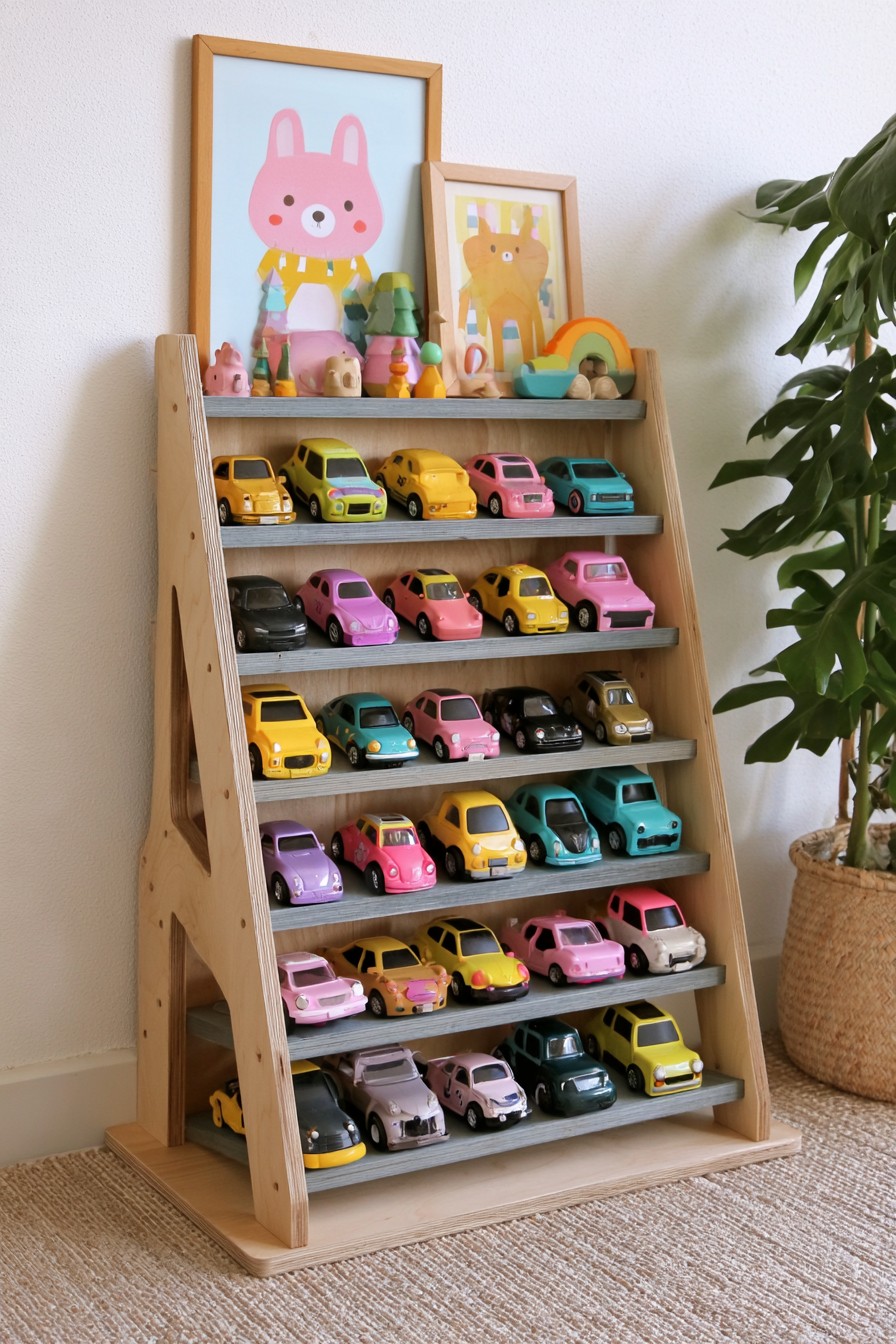
A toy car display can turn a collection into storage children can use independently. Shallow rows let each vehicle remain visible, while a slight front stop can help prevent cars from rolling off. Measure the largest vehicles in the collection before fixing the space between levels.
Mount a wall rack with suitable fixings or give a freestanding version a stable base and secure it where needed. Sand edges that children will touch and keep the lowest rows accessible. If younger children share the room, follow the toy makers' age guidance for small vehicles and detachable parts. For this stepped display, check access to the rear rows before deciding how many tiers the collection needs.
23. Wooden Centerpiece Tray with Candle Positions
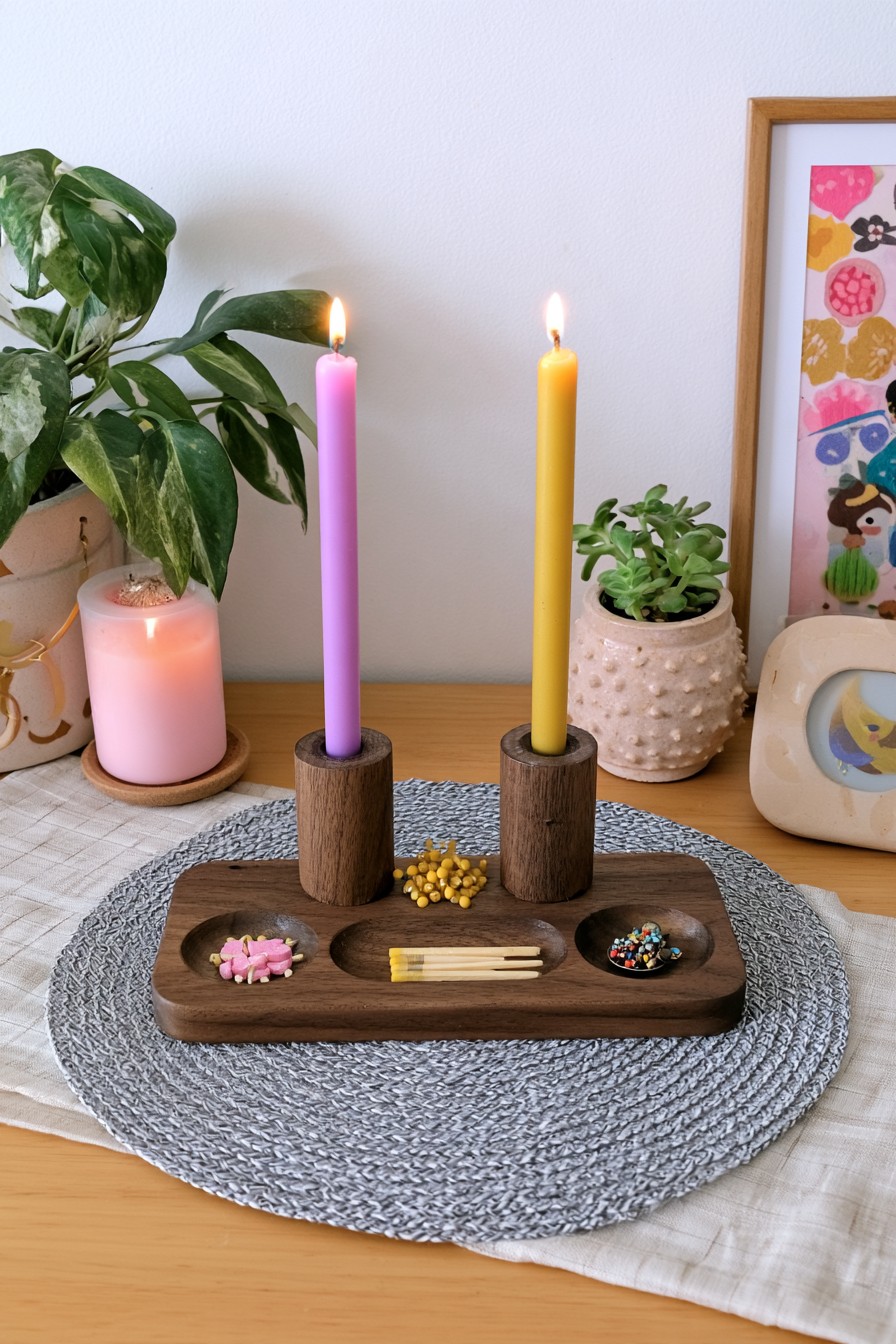
The wooden tray groups two tall candle positions with shallow wells for small decorative pieces. Its long outline suits a table where one centerpiece should leave space for dishes and conversation. For this wooden candle arrangement, use flameless candles and keep real flames away from the timber and surrounding decorations.
For a similar wooden arrangement, choose battery operated flameless candles and plan access to their controls. Keep small decorative objects in the separate wells, with no loose material obstructing the candle bases. If real candles are used elsewhere in the arrangement, select stable holders intended for that use and maintain the required separation from combustible materials. Wood and nearby textiles remain combustible; a decorative recess is not evidence of a suitable candle holder.
24. Tiered Bathroom Organizer for Small Supplies
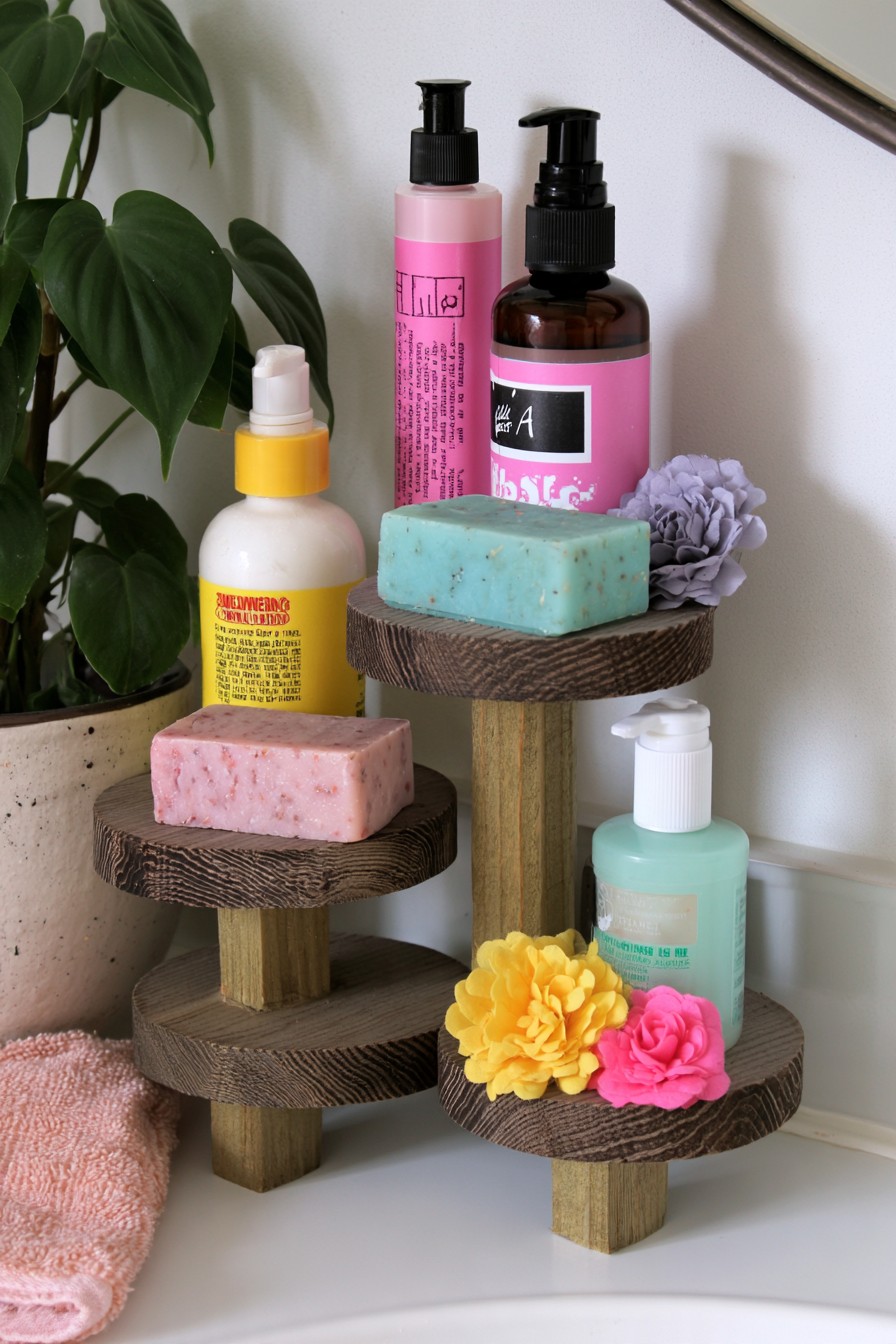
A tiered organizer can keep soaps and small toiletries visible without spreading them across the vanity. Put frequently used items on the easiest level to reach and leave enough vertical clearance for bottles. A compact footprint matters more than adding another shelf that makes the unit difficult to clean.
Wet soap and dripping containers can damage unprotected wood. Use removable trays or liners where practical and finish exposed surfaces for the bathroom's moisture level. Avoid placing the organizer where it interferes with the sink, mirror, or routine wiping of the counter. Try the layout with the actual pump bottles; pressing a dispenser should not make the stand rock or block the hand above it.
25. Wall Wine Rack with Wooden Peg Supports
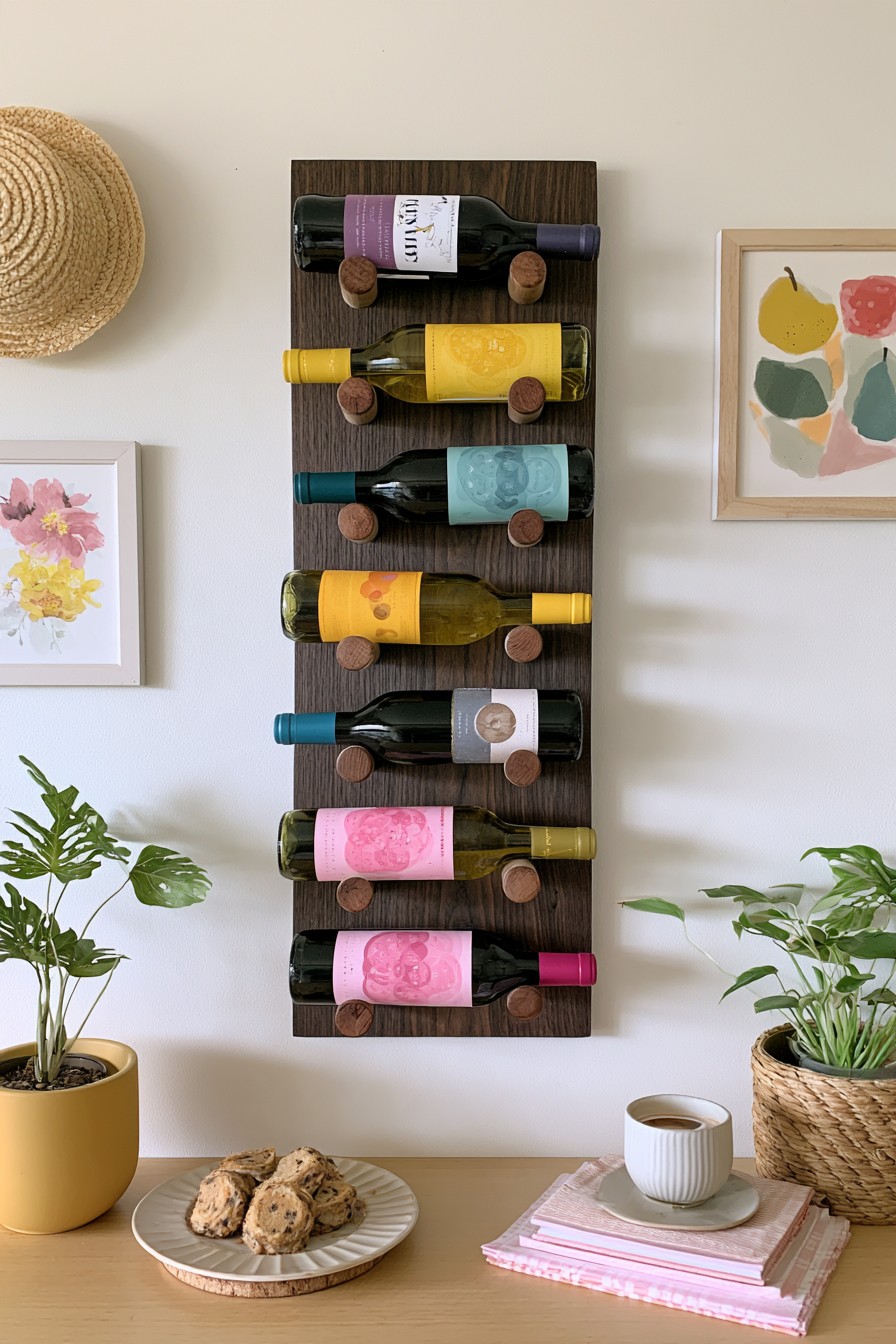
A peg supported wine rack keeps bottles visible while using wall space instead of a cabinet. Plan the spacing around the bottle shapes that will actually be stored. The supports need to contact each bottle securely so a small movement nearby cannot dislodge it.
Filled glass bottles create a substantial wall load. Select suitable backing, peg connections, and wall anchors for the full rack rather than an empty display. Keep it away from heat and direct disturbance, and avoid mounting breakable bottles where they could fall onto a frequently used seat or walkway. Bottle orientation also depends on the drink and closure. Reserve horizontal positions for products suitable for that storage arrangement.
26. Freestanding Stand for a Guitar
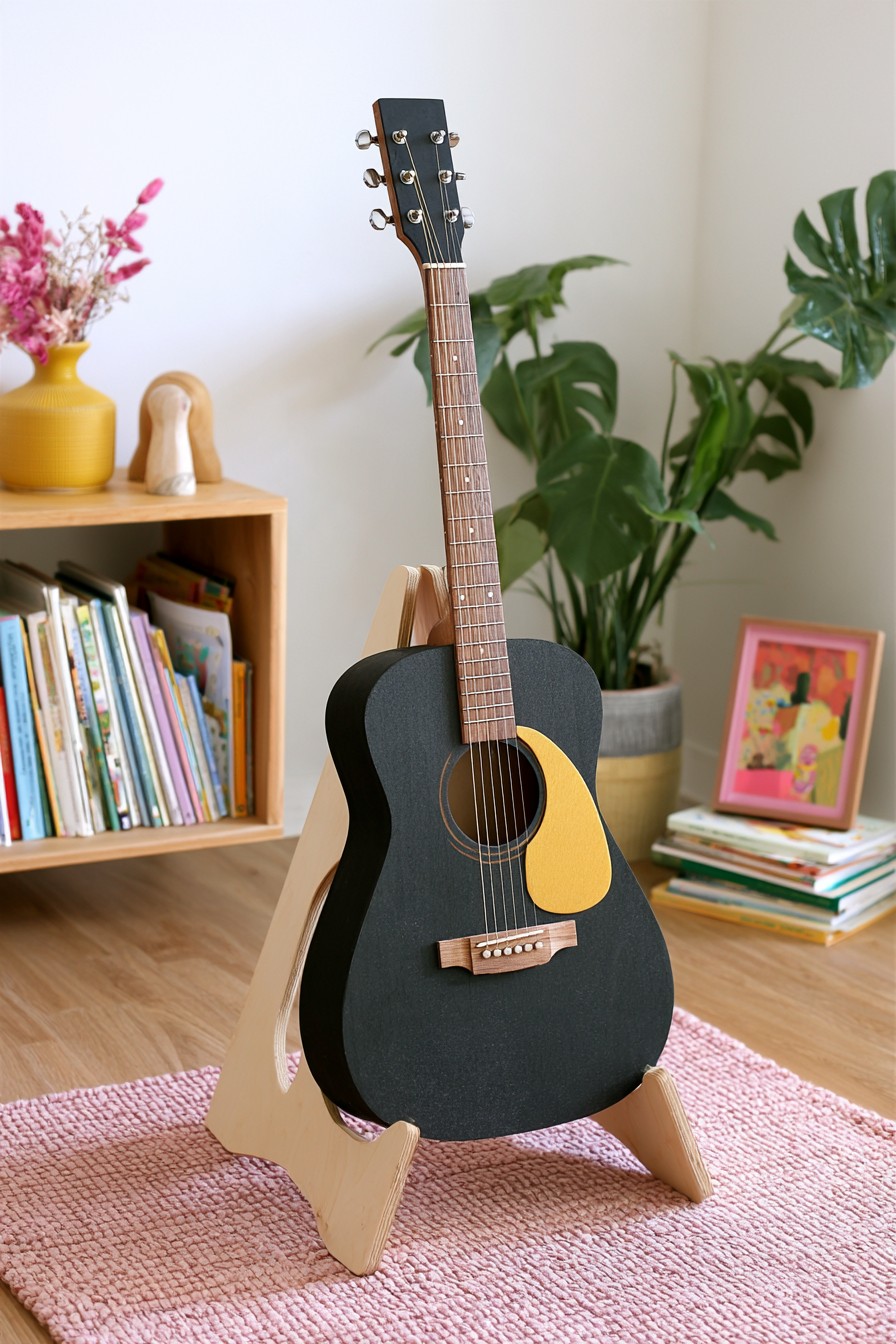
A guitar stand makes an instrument accessible while giving it a defined place in the room. Start with the instrument's actual body shape and balance point; a support that suits one guitar may not suit another. The base should remain stable when the instrument is lifted out from one side.
Pad the contact areas with a material compatible with the instrument's finish, and keep hard fasteners away from the body and neck. Test the instrument's seated position carefully before relying on the stand for routine storage. A wall hook or commercial stand may be preferable where floor space or stability is limited.
27. Kitchen Organizer for Boards and Spices
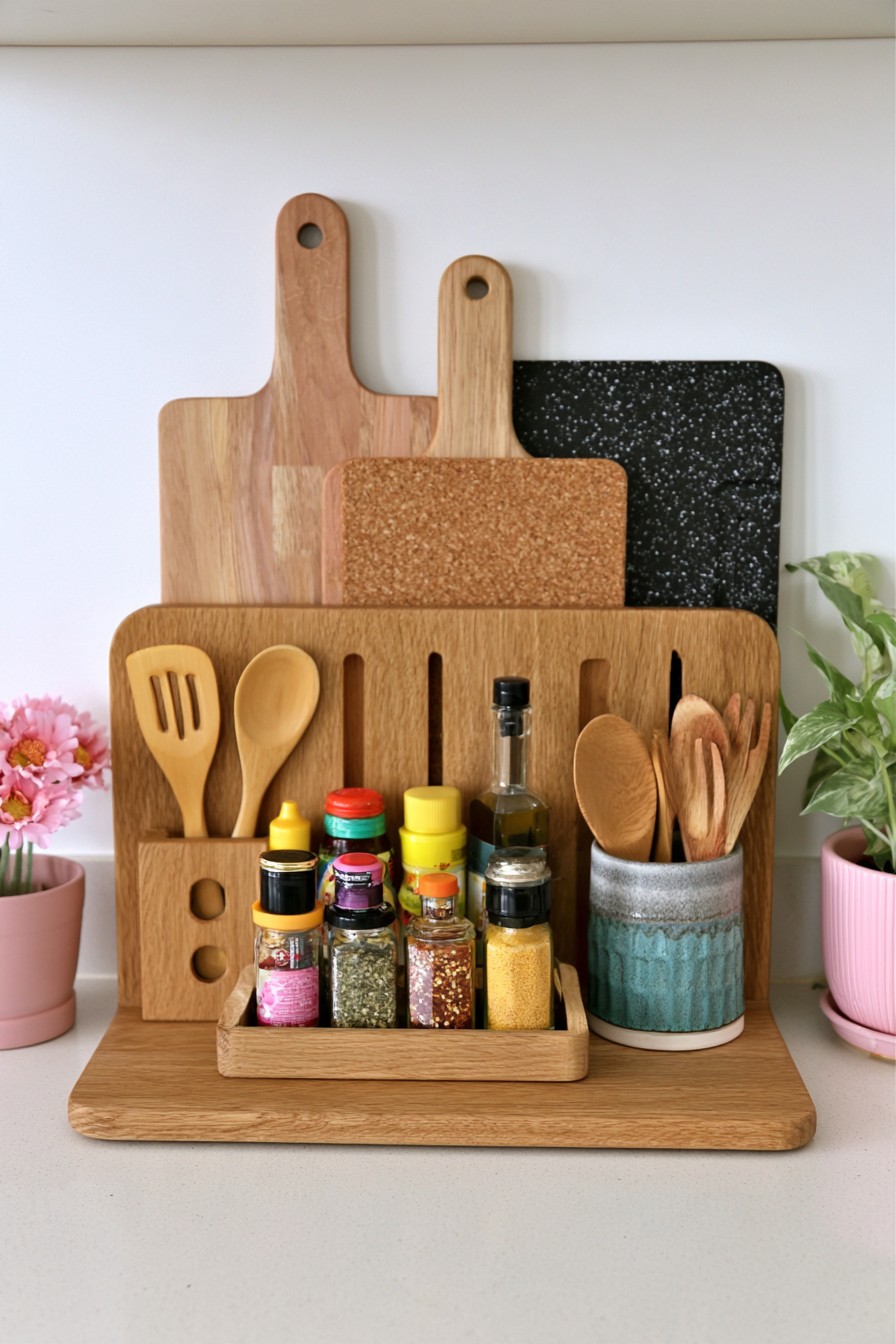
Tall boards form the back row, while spices occupy a shallow front tray and utensils sit in separate side spaces. This brings several preparation tools into one station without giving them identical compartments. Use the tallest board, widest jar and longest handle to plan the openings. Keep a clear handhold above each board so it can be lifted without knocking the spice jars.
The front tray can be planned as a removable part for cleaning, while the rear dividers keep boards upright. Position the finished piece away from direct cooking heat, steam and sink splashes. Let washed boards dry before returning them, and leave access to the surfaces beneath the containers. This layout is most useful when its footprint replaces several scattered holders rather than occupying an additional preparation area.
28. Rustic Bathroom Shelf for Everyday Items
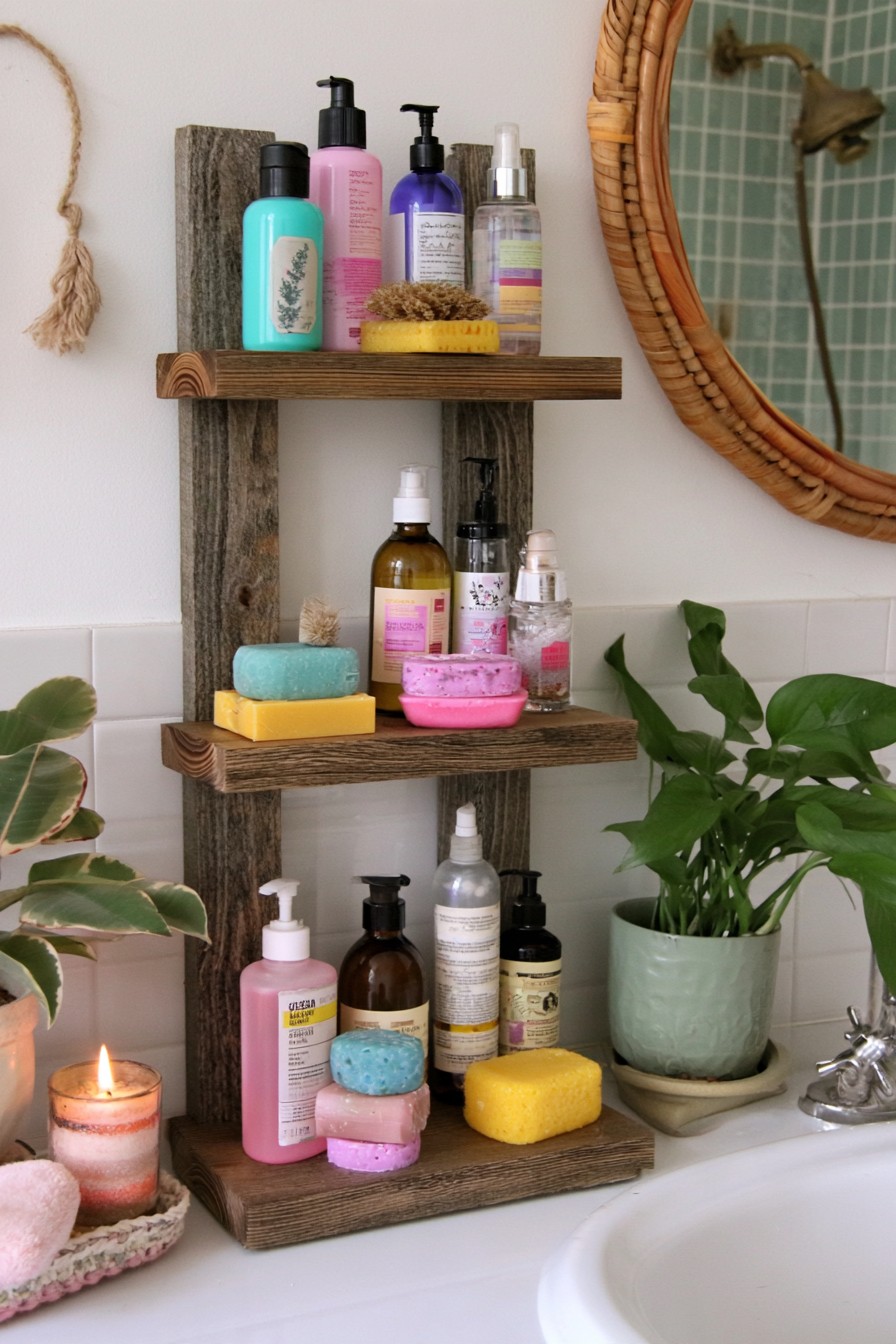
A rustic shelf adds warm texture to a bathroom while holding products that need to be close at hand. Choose its depth according to the bottles and folded items it will support, then check that it will not obstruct movement near the sink or door. A few useful objects will make the surface easier to maintain than a tightly packed display.
Seal the wood for its exposure to moisture and use fixings appropriate to the wall and expected load. Avoid relying on decorative brackets alone for heavy bottles. Leave enough clearance beneath the shelf to clean the wall and surrounding surfaces.
29. Tiered Spice Rack with Open Compartments
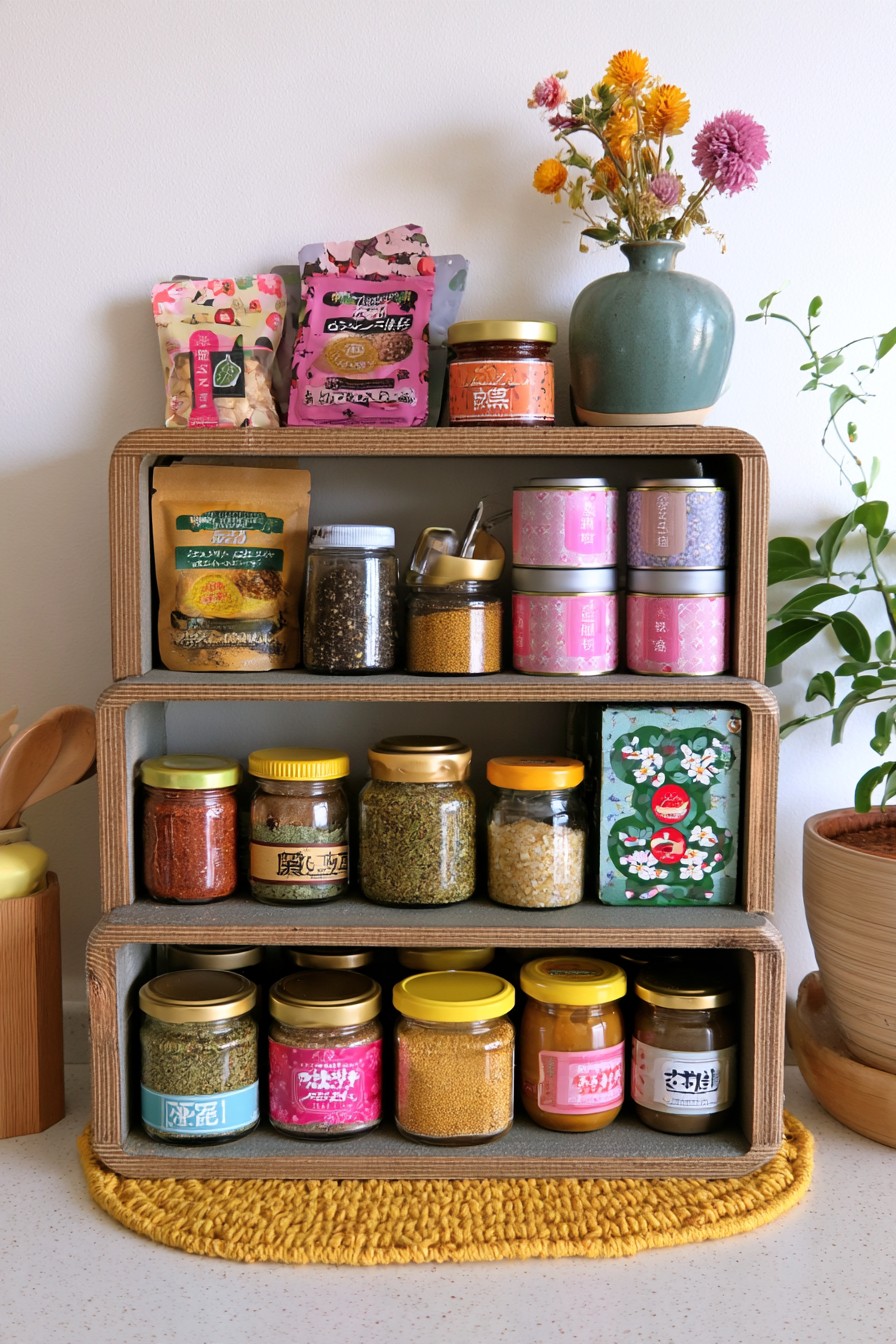
A tiered rack makes jars at the back easier to see than a single flat shelf. Arrange the levels around the containers already owned instead of assuming every spice jar has the same height. Keep frequently used seasonings near the front and leave enough finger space to lift each jar cleanly.
Decide whether the rack will sit inside a cabinet or on the counter before determining its depth. In a cabinet, check the door clearance; on a counter, avoid placing it close to heat or steam. A washable finish helps manage small spills without making the wood difficult to maintain.
30. Vanity Organizer with Shelves and a Small Drawer
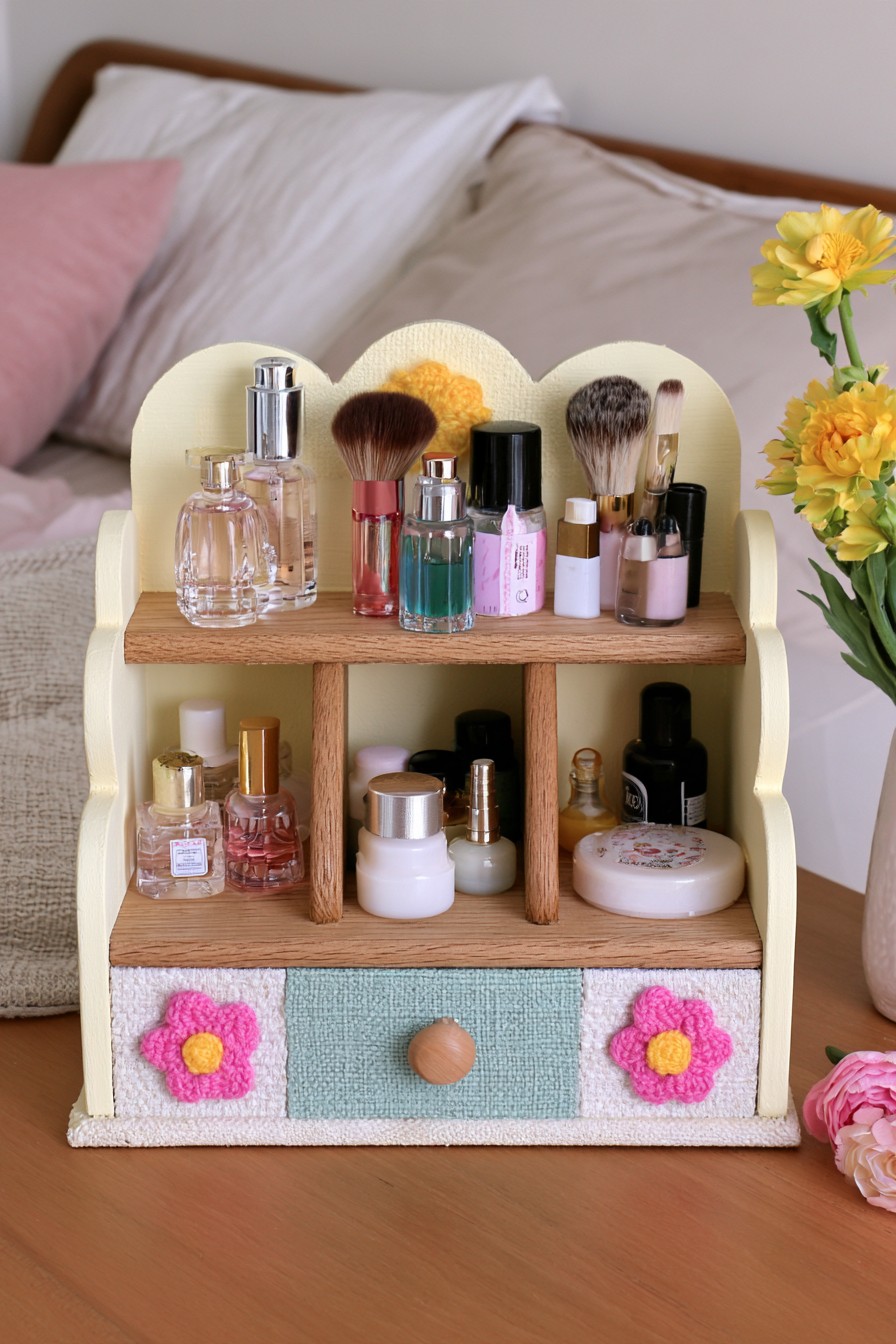
A vanity organizer works best when open shelves hold items used every day and the drawer contains smaller pieces that would otherwise scatter. Measure the tallest bottles and the available space beneath any mirror before choosing the shelf positions. A drawer that can be removed for cleaning is especially useful for makeup tools or hair accessories.
Use smooth drawer runners or carefully fitted wooden guides so opening the drawer does not pull the whole unit forward. Protect the wood from spills and wipeable products, and keep heavy bottles on lower shelves. The finished piece should simplify the daily routine rather than create more compartments than the collection needs.
Keep the Finished Piece Easy to Use
Before loading an organizer, check that the specified adhesive and finish stages are complete, its connections are secure, and every item can be retrieved without upsetting the rest. Leave access for cleaning beneath pots, trays and bottles. A smaller piece that solves one daily problem is often more useful than extra shelves that become difficult to reach. Recheck joints and mounting points when the contents or their weight change.


Leave a Reply