
A few bends can turn wire into a branch, a basket rim, or the outline of a miniature house. These 15 metal and wirework decor ideas combine copper-colored frames, textured metal accents, beads, and textiles for wall displays and useful household objects. Begin with the botanical arch video and the making methods below, then explore the collection. The video offers a visual construction reference; the designs provide adaptation guidance, with separate considerations for pieces that hold weight or surround a light source.
Table of Contents
- How to Turn Wire, Beads, and Metal into Home Decor
- Choose the Object Before Choosing the Wire
- Hand Tools and What Each One Does
- Shape First, Join Second, Decorate Last
- Check the Finished Piece for Its Intended Use
- Find a Design
- 15 Metal and Wirework Designs to Explore
- 1. Sculptural Copper Wire Branch with Textured Leaves
- 2. Copper Hoop Floral Wall Accent
- 3. Hammered Brass Hanging Mobile with Geometric Charms
- 4. Decorative Wire-Wrapped Bookends with Metal Roses
- 5. Copper Wire Catchall Basket with Beaded Lattice
- 6. Woven Copper Wire Tray with Beaded Mesh Base
- 7. Botanical Copper Wire Arch for Wall Decor
- 8. Mini Copper Grid Houses with Mixed-Media Details
- 9. Sunburst Copper Wire Wall Medallions
- 10. Copper Wire Pendant Shade with Woven Textile Panels
- 11. Copper Wire Wall Rack with Decorative Hooks
- 12. Copper Wire Plant Stand with Wrapped Legs
- 13. Sculptural Wire Bottle Holder with Textile Accents
- 14. Hanging Copper Wire Fruit Basket with Woven Netting
- 15. Copper Wire Test Tube Vase Stand
- Keep the Materials Accessible for Care
How to Turn Wire, Beads, and Metal into Home Decor
The video follows a pointed arch from loose wire and leaf pieces to a decorated frame. The sequence introduces the main outline, vertical members, curved crosspieces, wrapped intersections, scrolling accents, and leaves around the edge. It then adds green botanical details. Use it to understand the order of assembly and the relationship between thick framing material and finer binding wire. It does not supply measured cuts, wire specifications, or a mounting design for every project in this collection.
Choose the Object Before Choosing the Wire
Sketch the finished outline at its intended size. Mark the joints, decoration positions, and how the piece will stand or hang. A flat wall ornament needs a different frame from a plant stand carrying a watered pot. For decorative framing, compare the diameter and temper of the wire: a softer wire bends easily, while a firmer material resists reshaping. Fine wrapping wire is useful for bindings and beads but is not a substitute for the structure beneath it. Choose copper wire or a copper colored alternative using its stated alloy and coating, then select tools and finishes for that material. For smaller wirework projects where neat bends and connections are especially visible, explore these copper jewelry projects.
Buy a small amount first and make a sample joint using the actual materials. Check that beads slide onto the chosen wire and that a wrapped intersection holds its position. Repeated bending hardens metal and can eventually cause cracking; plan bends on paper so a section needs fewer corrections. For bookends, stands, suspended baskets, and bottle holders, select an existing purpose-made supporting structure when the load-bearing design is beyond your experience.
Hand Tools and What Each One Does
Use cutters rated for the material and thickness being cut. Round-nose pliers form small loops; chain-nose pliers grip binding wire and close tucked ends; flat-nose pliers help establish corners. Nylon-jaw pliers protect delicate finishes during straightening. A smooth mandrel provides a repeatable curve for rings, petals, and collars. Keep a ruler, a paper template, and a fine file nearby. Wear eye protection when cutting and keep the cut end controlled so it cannot spring away.
Leaf blanks need a separate approach. Ready-cut, pre-punched metal shapes reduce the equipment required. If cutting your own sheet, choose metal shears or a jeweler's saw matched to its thickness, then remove burrs before assembly. A texturing hammer and steel block can create marks on compatible bare metal; try a scrap first. Hammering may damage coatings, and neither hammering nor extra decorative wrapping proves a household structure can carry its intended load.
Shape First, Join Second, Decorate Last
Follow the arch's assembly logic: establish the outer outline, position the interior members, and check the alignment before fastening details. To bind a crossing, hold both wires in place, wind finer wire snugly around the connection, and finish the cut tail against the frame. For a repeated grid, mark the spacing on a template and work across the frame in stages. Excessive pulling can distort the perimeter, so check its shape as the weaving grows.
Attach pierced leaves through their holes using small wire links or wraps. Thread beads before closing their retaining loops, leaving enough room to complete the connection without crushing the bead. For fabric panels, stitch or lace the edges around frame members and keep the textile removable where cleaning matters. Adhesive can fix a compatible decorative detail according to its product instructions, but glue is not a replacement for structural joints. Soldering and welding need material-specific equipment and training; the wrapped approach here offers a way to explore decoration without adding a hot joining process.
Check the Finished Piece for Its Intended Use
Look for projecting tails, rough sheet edges, loose beads, and connections that rotate unexpectedly. Keep cut ends away from surfaces that people handle and away from fabric contact points. Wall and ceiling fixings must suit the wall construction and total hanging weight. For functional pieces, consider the contents as well as the object itself: a pot becomes heavier after watering, a basket fills, and a bottle moves as it is removed. Decorative craft wire should not be assigned an unverified load rating.
For a light-fitting adaptation, the shade, mounting parts, materials, and clearances must meet the fixture manufacturer's requirements; electrical work belongs with a qualified professional. A textile-covered wire sculpture can stay entirely decorative when those conditions cannot be established. Finish choices also depend on actual metal composition. Keep mixed-metal pieces dry after cleaning and check the finish manufacturer's care directions before applying polish or a protective coating.
15 Metal and Wirework Designs to Explore
The collection moves from flat ornaments to woven containers and supporting frames. Each explanation identifies the design feature that makes the piece distinct and a practical route for adapting it. The methods below guide material choices and assembly planning; functional stands, suspension systems, and lighting need specifications appropriate to their actual use. Start with a decorative wall piece if you want to practice shaping and wrapping before considering an object that carries weight.
1. Sculptural Copper Wire Branch with Textured Leaves
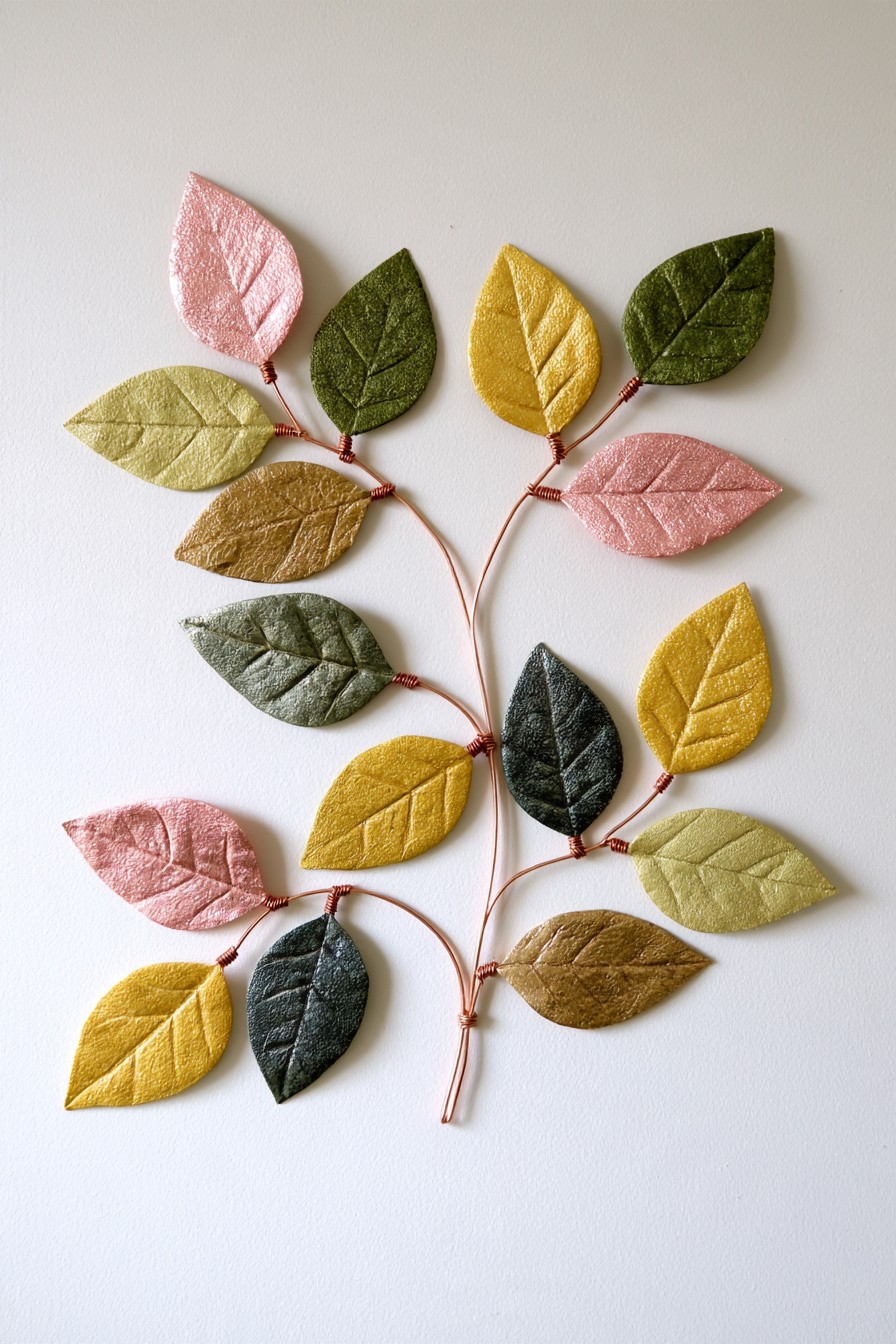
Pink, mustard, olive, and charcoal leaves spread along a branching wire stem, giving this wall accent a broad, airy silhouette. The leaf veins carry much of the detail, so the space between branches matters as much as the number of leaves. It works above a narrow console or beside a doorway where a rectangular frame would feel heavy. Plan the branch direction against the available wall space before making individual leaves.
Shape the main stem on a full-size paper outline, then attach smaller branches with finer binding wire. Use pre-cut leaf blanks for a simpler version, lightly texturing and coloring them with products intended for the chosen metal. Add a hole near each leaf base and fasten it to the stem with a compact wrap. Turn sharp tails toward the back, then check that the leaves cannot rotate into one another.
2. Copper Hoop Floral Wall Accent
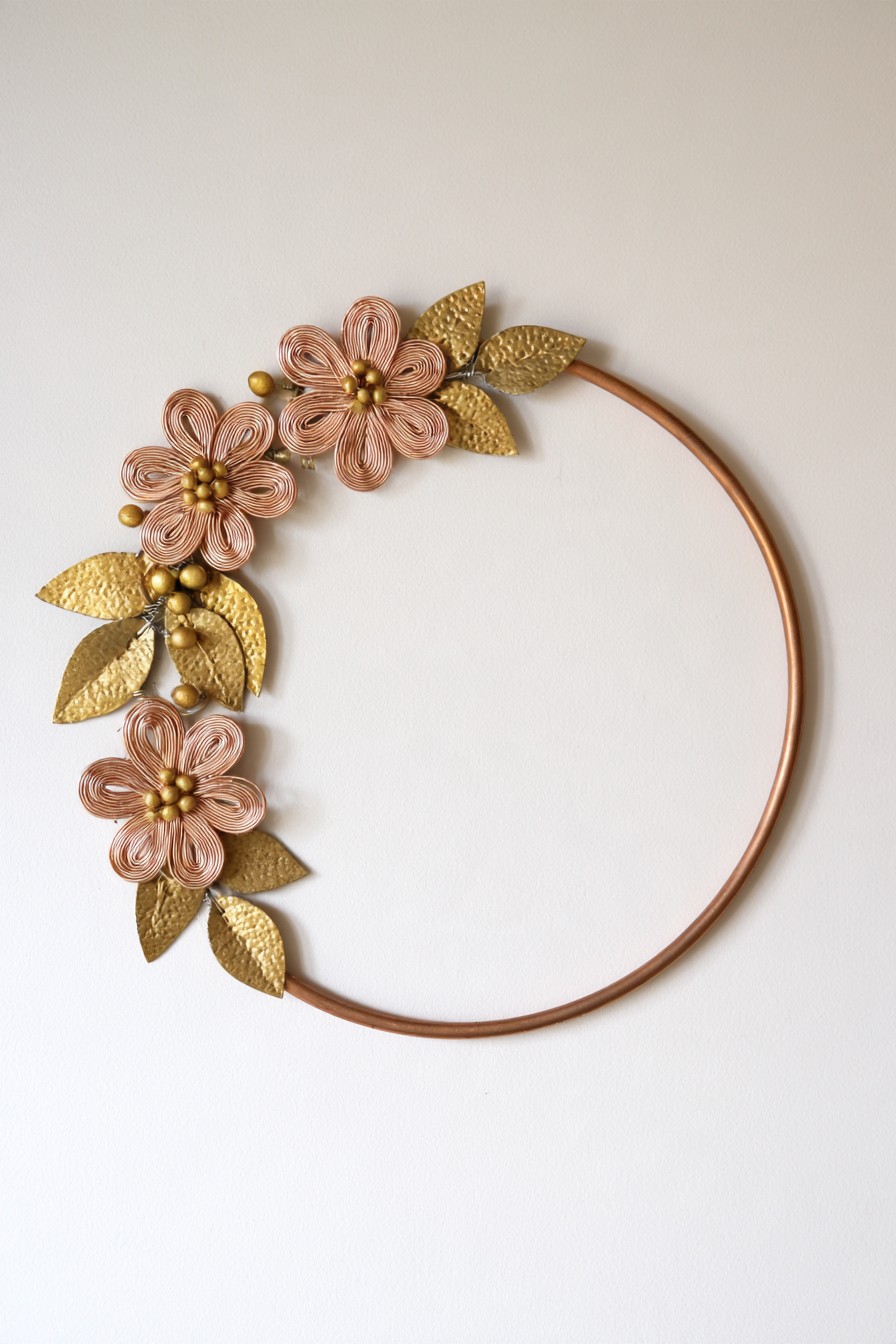
The hoop keeps its center open while flowers and golden leaves occupy one side. This asymmetry makes the piece feel closer to a floral wreath than a solid metal plaque. Small bead clusters draw attention to the flower centers, and the repeated petal loops connect the soft shapes with the circular outline. It is a useful option for a small wall that needs a single ornament with a clear boundary.
Begin with a rigid ready-made hoop so the foundation is already round. Form each flower's petals around the same mandrel, bringing their ends together at the center. Secure a bead cluster there with a separate wire, then bind the completed flowers to the hoop. Fit the leaves between flowers after their positions are settled. Keep the mounting connection on the main hoop; flower stems and petal loops serve as decoration. Check the arrangement upright because the decorated side shifts its balance.
3. Hammered Brass Hanging Mobile with Geometric Charms
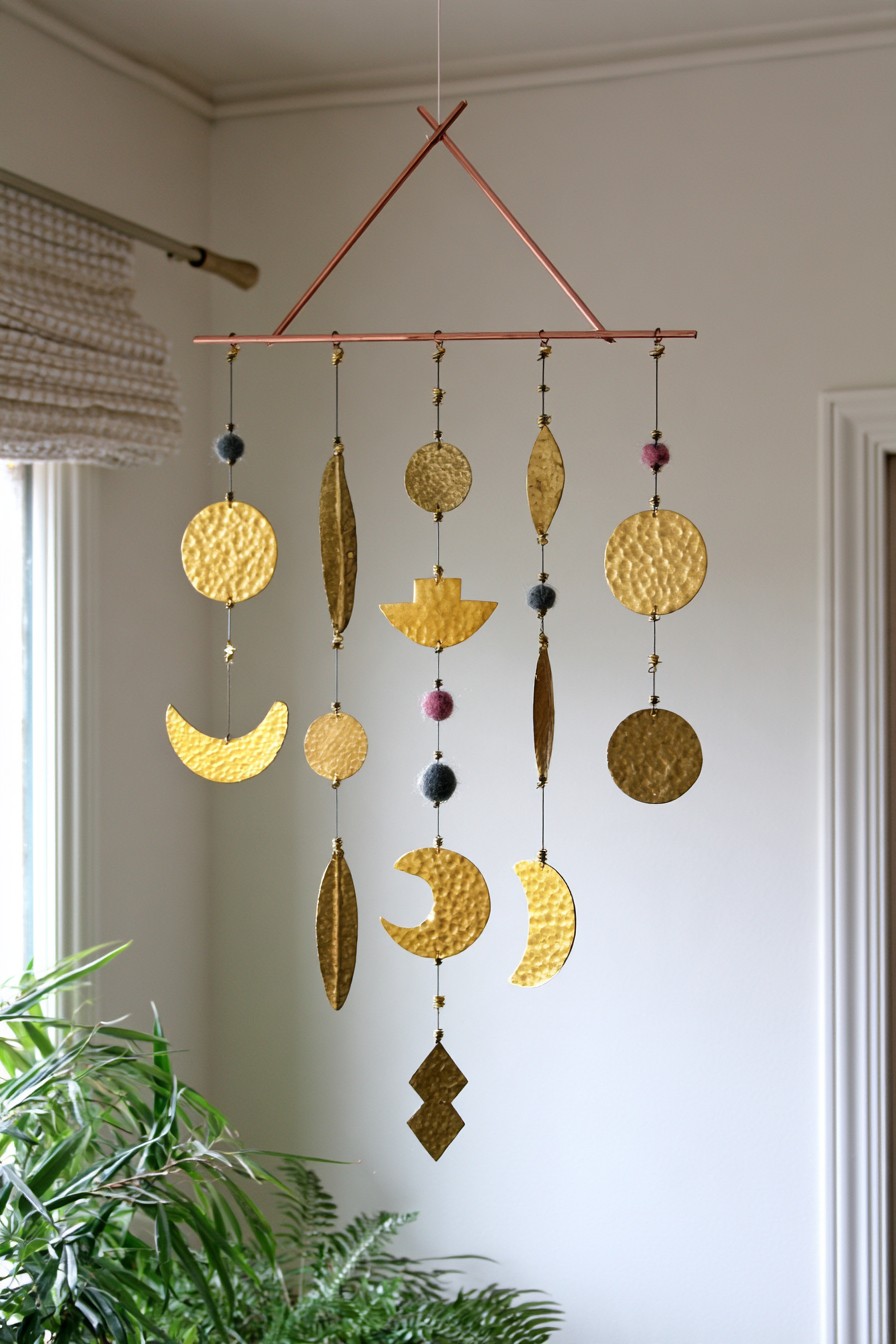
Circles, crescents, narrow leaves, and angular charms hang at staggered heights beneath a triangular support. Dark and pink beads interrupt the metallic strands, providing small points of contrast without filling the open spaces. The mobile suits a quiet corner with room for movement, where individual shapes can turn without striking a wall or neighboring object. Its changing silhouette is the appeal, so tightly packed strands would diminish the effect.
Use prepared metal charms with smooth holes, or finish and pierce your own blanks before stringing them. Lay the strands flat to compare their lengths, then connect them to a firm horizontal bar with closed links. Adjust the balance while it hangs temporarily from a controlled work support. Check movement as well as appearance: neighboring charms need clearance when turning. Use a rated overhead attachment and keep the mobile away from children's reach; it is room decoration, not a crib mobile.
4. Decorative Wire-Wrapped Bookends with Metal Roses
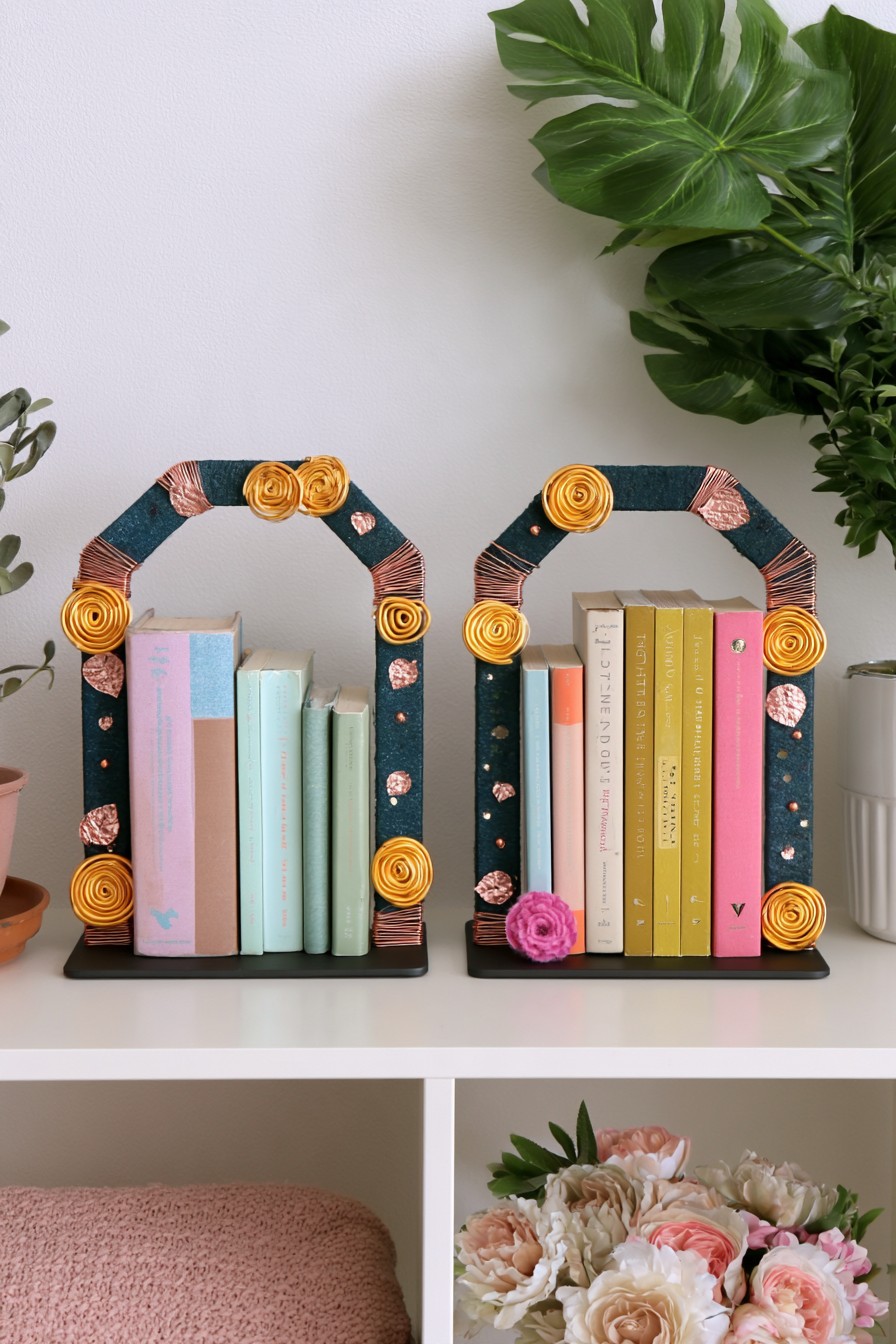
Dark fabric-covered arches, copper-colored wraps, and small spiral roses frame two groups of books. The textile softens the outline, while repeated gold flowers give the pair a related appearance even though their decoration differs. This combination works well on an open shelf where the ends of a book collection are visible. Keeping the central openings clear lets the books remain the main subject.
For a usable version, decorate stable bookends with a base that extends beneath the books. Use suitably sized supporting plates to hold the books, attaching the ornamental arches to those structural pieces. Wrap narrow fabric strips around the visible upper structure, fastening their ends on the back. Roll fine wire into shallow spirals using pliers and attach them as flowers, with small leaves between selected wraps. Keep adornments clear of book covers and shelf contact surfaces. Check that the finished pair resists sliding before arranging the books.
5. Copper Wire Catchall Basket with Beaded Lattice
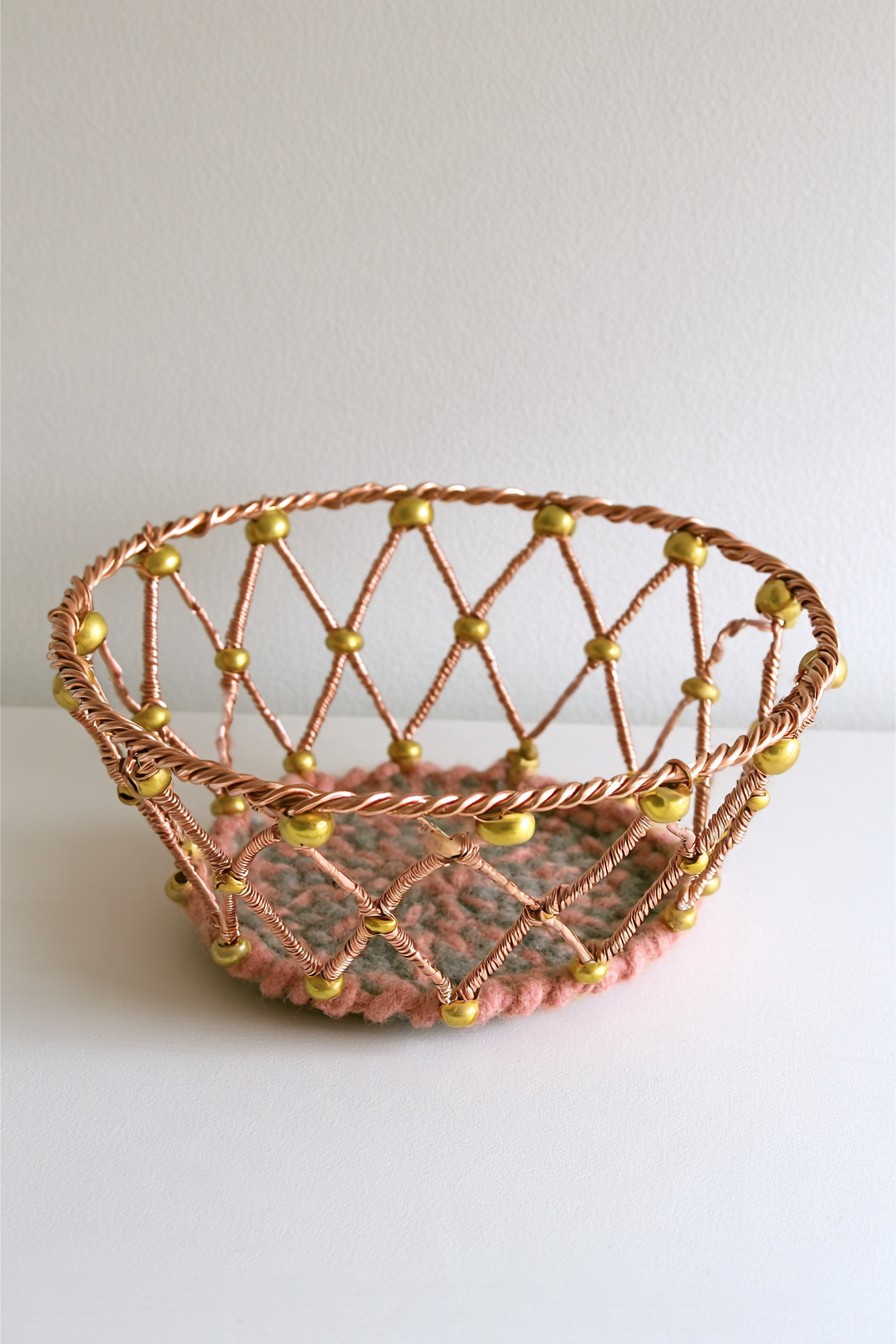
A deep circular basket uses diagonal wire sections to form diamonds between its rim and lower edge. Gold beads emphasize intersections, while a soft insert covers the bottom. The open sides make this a good catchall for a few visible everyday items instead of an opaque storage box. Its depth distinguishes it from the shallow tray that follows: keys and bracelets stay grouped inside the rim.
Start with two firm rings and position vertical or diagonal side members around a spacing template. Bind them at the rings, checking the basket upright as you work so it does not lean. Place beads during assembly where their holes allow secure retention; use a separate beaded tie if a structural crossing cannot pass through them. Cut a removable felt or woven liner to fit the base and secure it through small stitched tabs. Treat the basket as tabletop storage for lightweight belongings, keeping the liner accessible for cleaning.
6. Woven Copper Wire Tray with Beaded Mesh Base
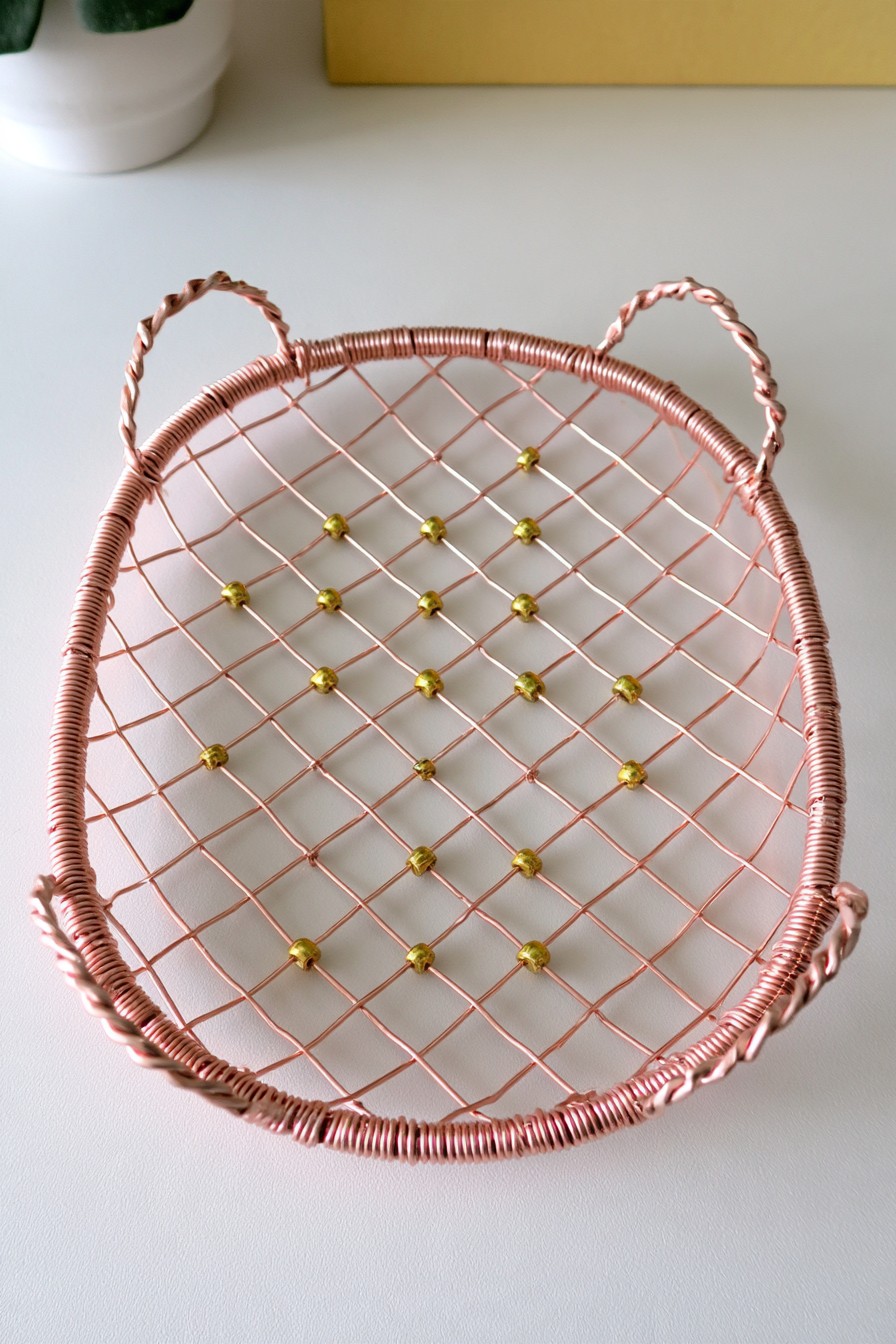
The shallow oval tray exposes a crossing wire grid beneath scattered gold beads. Its wrapped rim and curved handles create a continuous outline, making it suited to gathering correspondence, folded cloths, or small craft accessories on a desk. Unlike the deeper basket, it gives a quick view of everything across a single level. The open grid also means narrow objects need a liner or a separate small container.
Form the perimeter around an oval template and establish the handle positions before weaving. Add one set of parallel wires across the opening, followed by the crossing set, fastening each end around the rim. Work with light, consistent tension to avoid pulling the oval inward. Beads can sit on selected wires or short decorative ties without obstructing the base. If the handle connections are decorative, lift the tray by its supported underside; handles that look substantial are not evidence of carrying capacity. Keep this piece away from direct food contact unless its materials are documented for that use.
7. Botanical Copper Wire Arch for Wall Decor
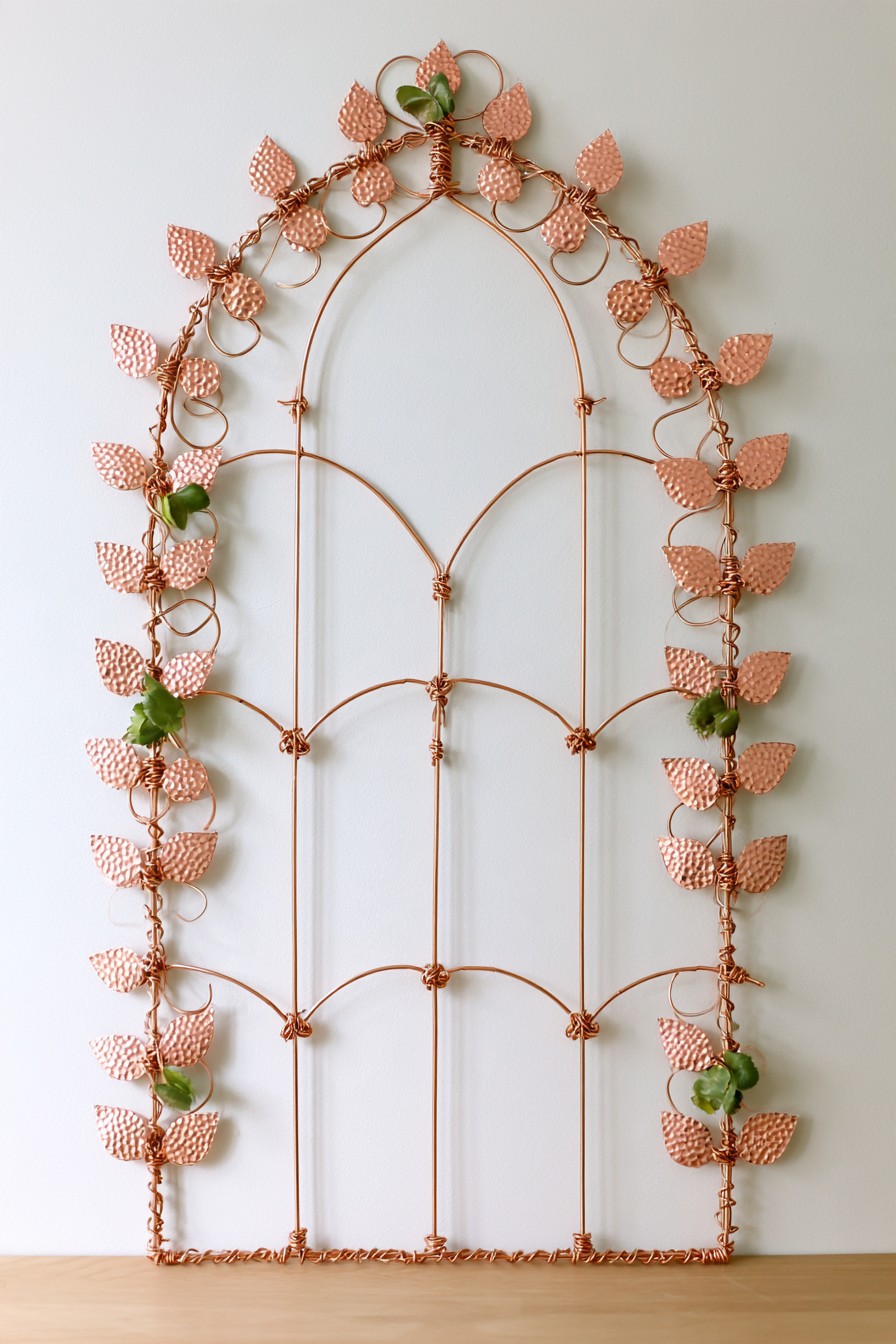
The tall pointed arch combines straight uprights with paired curves, then softens its perimeter with small textured leaves and scrolling wire. It has the appearance of a botanical window outline, so it can fill a narrow wall without becoming a dense panel. Green accents add a second layer of foliage, but the arched geometry remains recognizable between them. This is the collection's closest match to the video construction reference.
Draw the arch and interior divisions first, using the outline to check both sides before binding the joints. Form matching curved pieces around the same template, then fasten them where they meet the uprights. Add perimeter scrolls and pre-finished leaves after the frame holds its shape. Attach artificial greenery with removable ties if you want the green layer without plant care; living stems need a separate growing container and appropriate support. Hang the frame from purpose-made fixings, leaving its decorative wires free of mounting duty.
8. Mini Copper Grid Houses with Mixed-Media Details
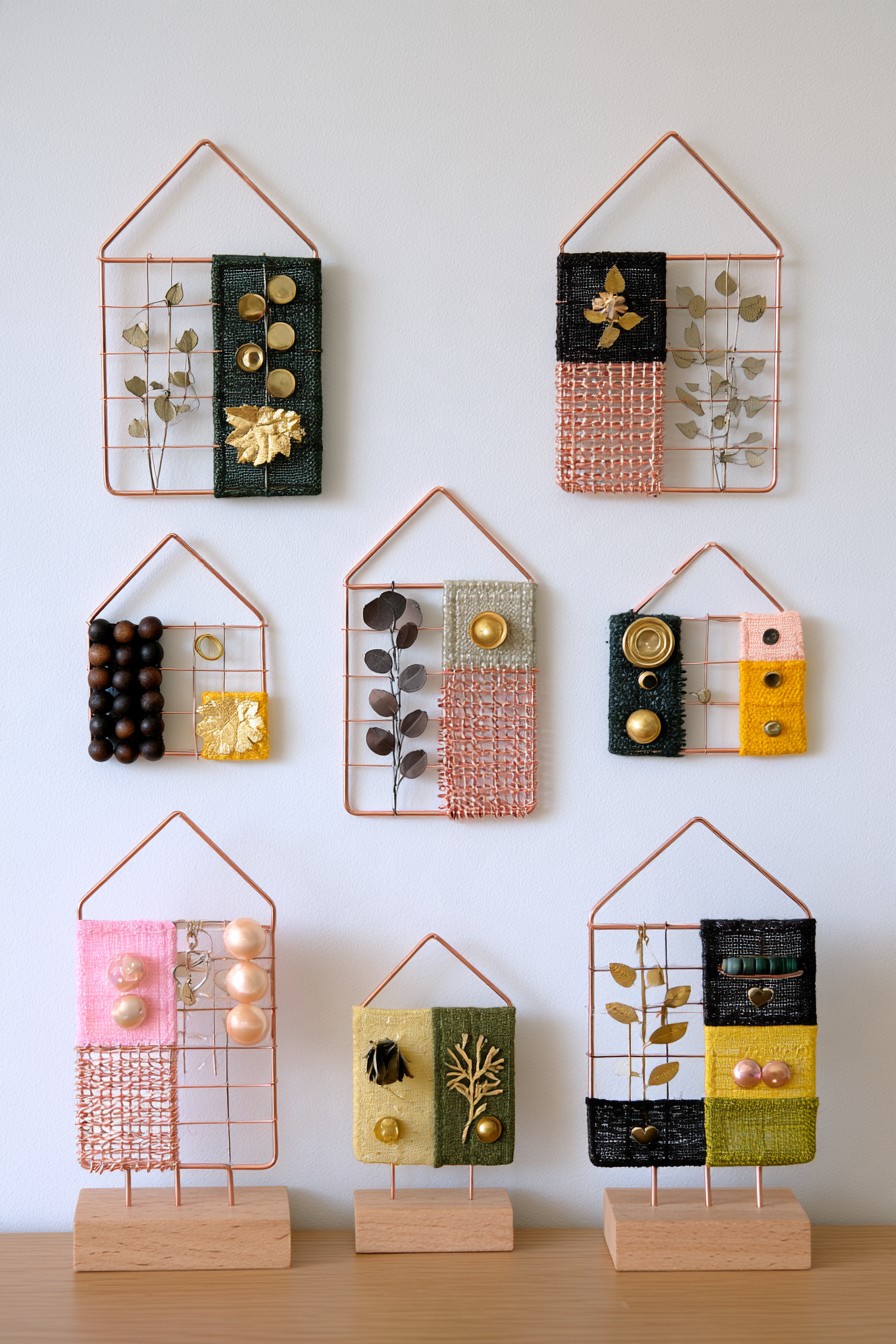
House outlines divide into small grid compartments containing fabric, beads, leaf motifs, and metallic accents. Some pieces hang directly on the wall while three stand on wooden blocks. The repeated roof shape joins these varied surfaces into a collection, making the design appealing for a craft room or shelf display. Mixing one dense textile area with an open grid allows each little house to retain its silhouette.
Draw one roof-and-body template and use it for several frames. Add grid members before threading beads or lacing fabric onto individual cells. For standing houses, plan the projecting lower wire ends to match holes in a wooden base; the base must hold the frame without leaning. Drill only after checking the spacing, and use an attachment method suited to the wire and wood. Keep heavy ornaments low within the frame. A small collection with different infill patterns provides variation without requiring a different construction method for every house.
9. Sunburst Copper Wire Wall Medallions
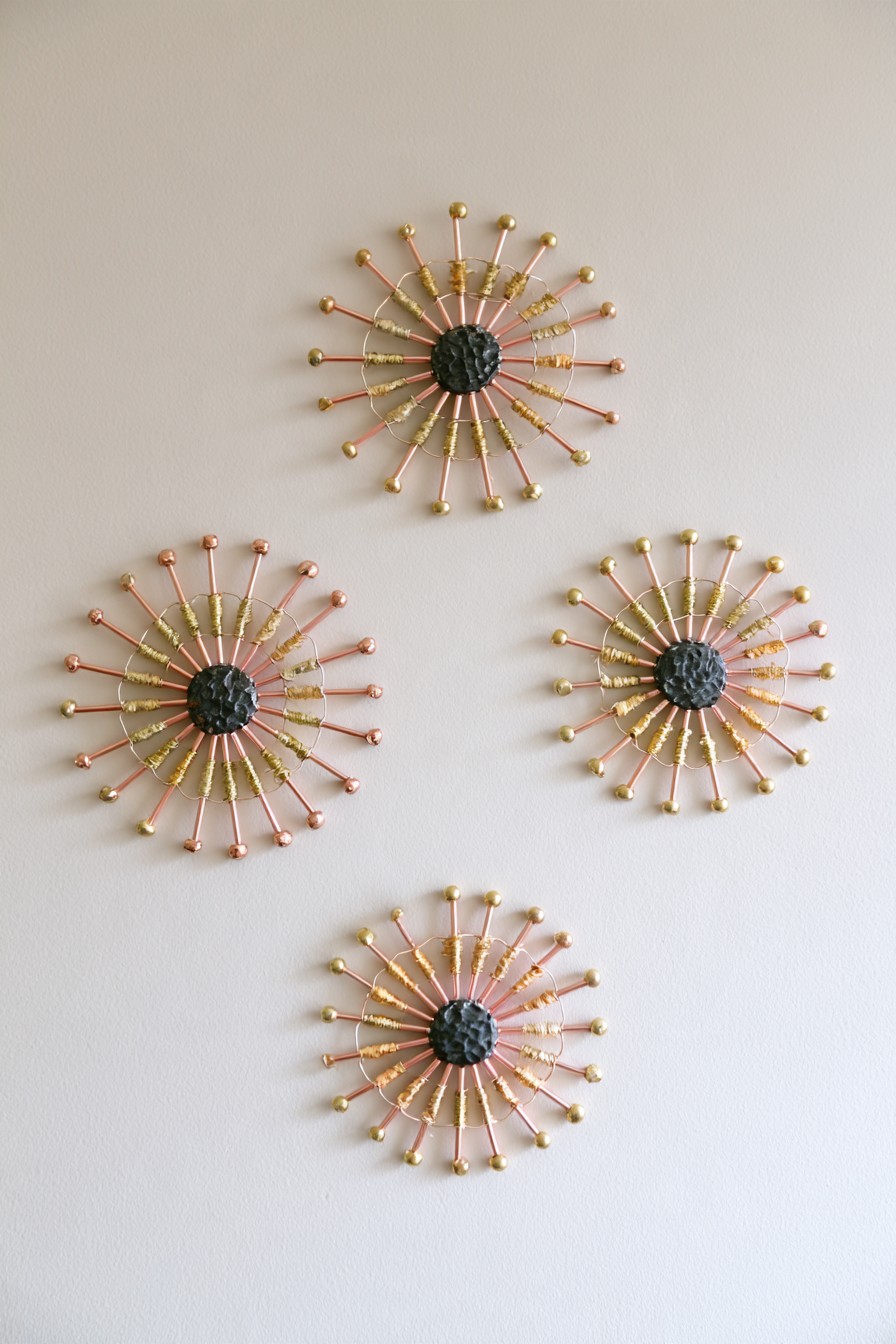
Four radial medallions use beaded wire spokes around dark textured centers. Their different sizes produce a loose wall arrangement with room between each circle, offering an alternative to one large statement piece. The gold tips define the circumference, while wrapped inner sections make the spokes appear richer near the center. A narrow wall can take one medallion; a broader surface can accommodate the group without changing the individual pattern.
Mark equal spoke intervals on a circular paper guide. Attach the spokes to a firm central backing or ring, then cover that connection area with the chosen decorative center. Thread tip beads onto the spokes and retain them with closed end loops that are large enough to prevent slipping through the holes. The beads should not rely on friction alone. Arrange the finished pieces on paper before transferring their positions to the wall. Keep projecting tips smooth, particularly when the display is near a frequently used passage.
10. Copper Wire Pendant Shade with Woven Textile Panels
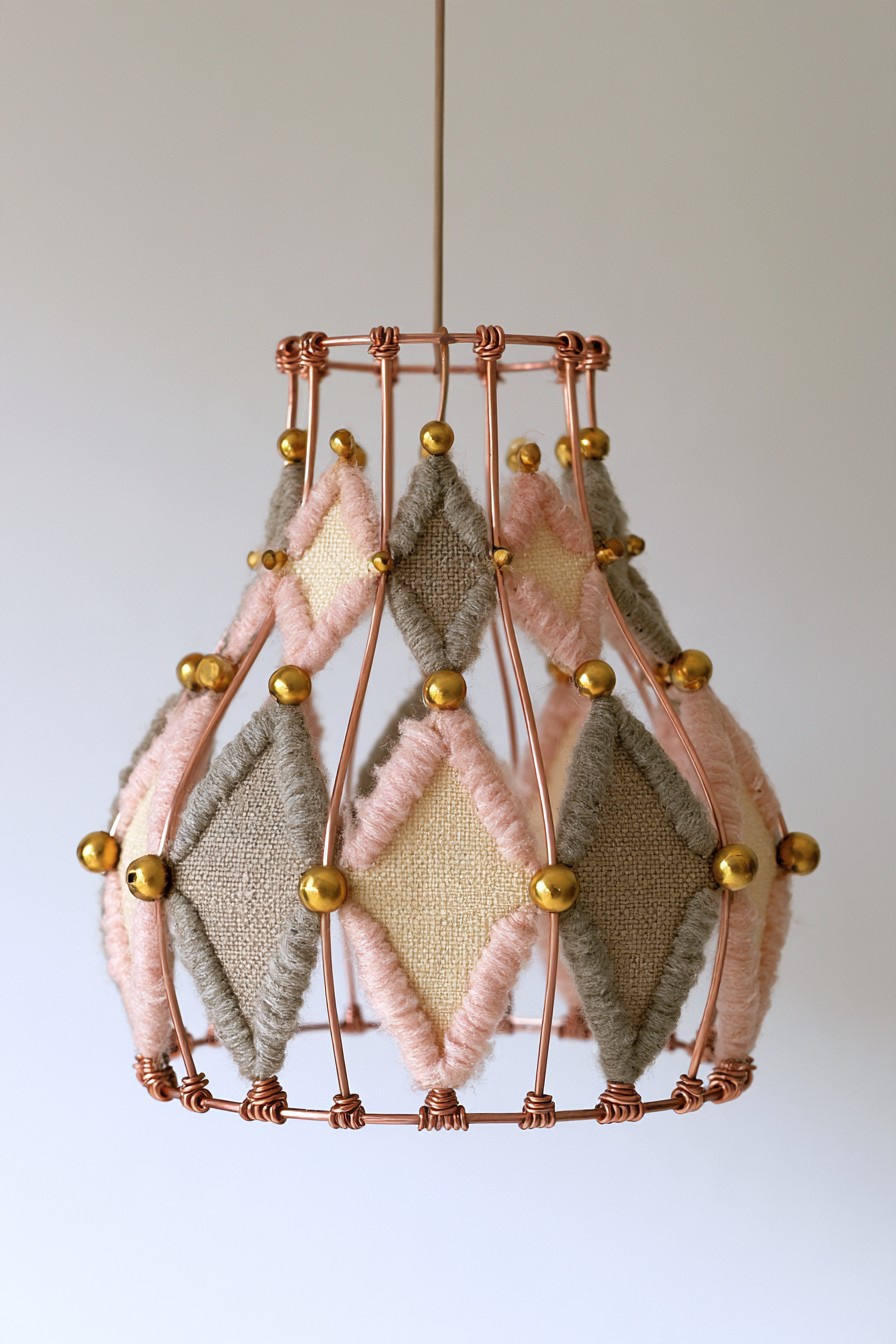
Soft pink, cream, and olive diamond panels sit between ribs of a rounded hanging frame. Gold beads emphasize panel corners, allowing the open copper-colored structure to remain visible between textile sections. This combination creates a tactile focal point above a decorative corner. Its fabric texture is the distinguishing feature, and it also makes the intended use essential: a hanging sculpture and an operational lampshade have different requirements.
For a decorative sculpture, start with a firm frame and make matching panels on a small weaving template. Lace them onto the ribs at their corners, adjusting each attachment so the frame stays evenly balanced. Keep the hanging point connected to the supporting frame. To reproduce the appearance as a working pendant light, choose a compatible, purpose-made shade assembly and materials approved for that fixture, following its clearances and lamp limits. Use only a fabric and shade assembly compatible with the chosen fitting, including its bulb limits, ventilation, and clearances. Leave electrical fittings and wiring to a qualified professional.
11. Copper Wire Wall Rack with Decorative Hooks
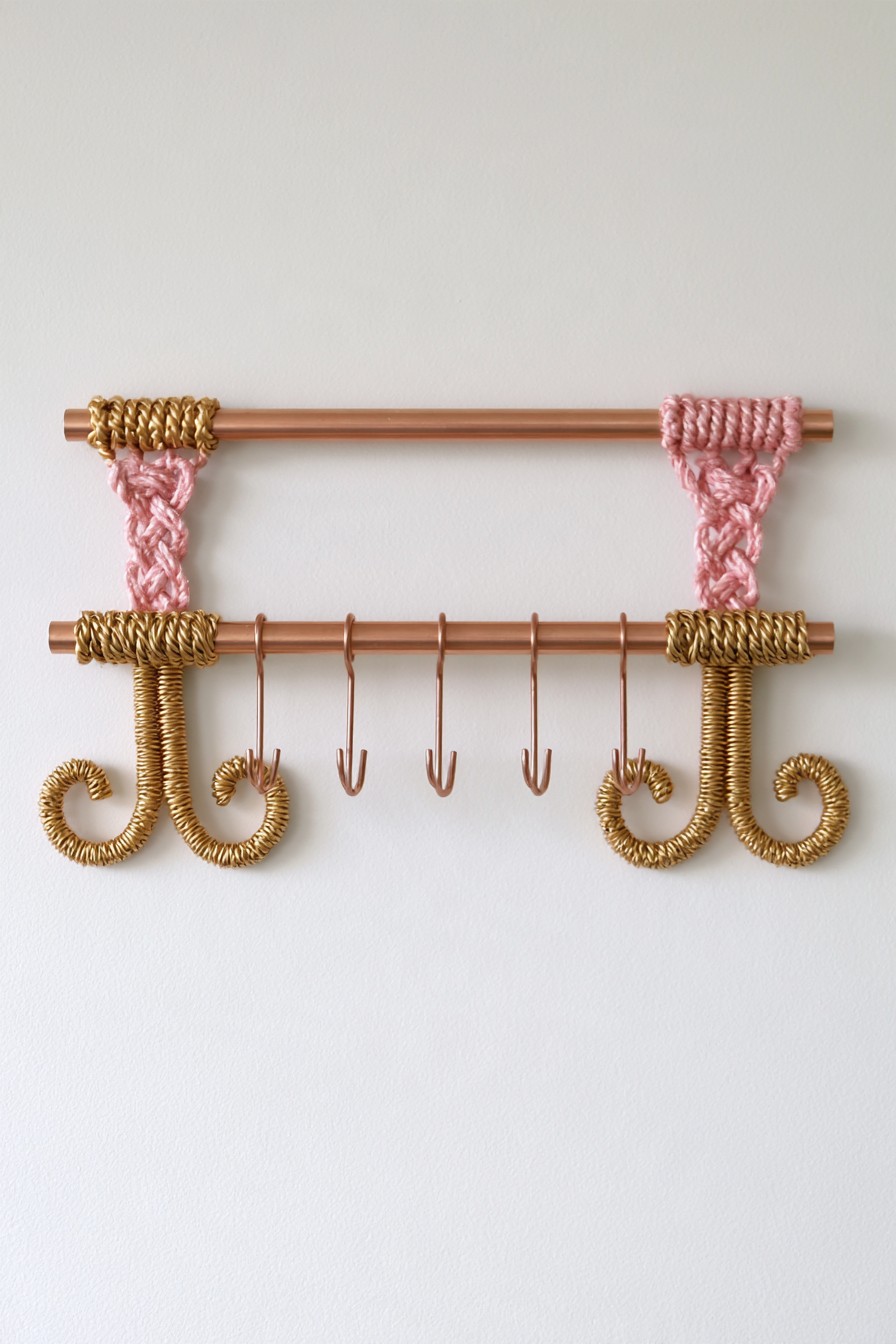
Two horizontal bars connect through pink woven supports, with golden wraps at the joints and curled details below. A row of slender hooks provides a repeated line across the lower bar. The combination suits a dressing area for necklaces or a work corner for light accessories, keeping them separated and easy to reach. The textile supports contribute to its character, but their decorative appearance should not be mistaken for a documented structural connection.
Adapt the design around a rigid rack whose rails and wall attachments match the intended contents. Add the pink weaving and metallic coils as decorative layers without hiding access to the actual fixings. Form smooth hooks around a mandrel and space them to suit the items you plan to hang, checking whether the chosen wire holds its shape. Finish the hook tips with closed curves. Keep damp tools and heavy bags on storage designed for them, and remove the hanging items periodically to inspect the supporting connections.
12. Copper Wire Plant Stand with Wrapped Legs
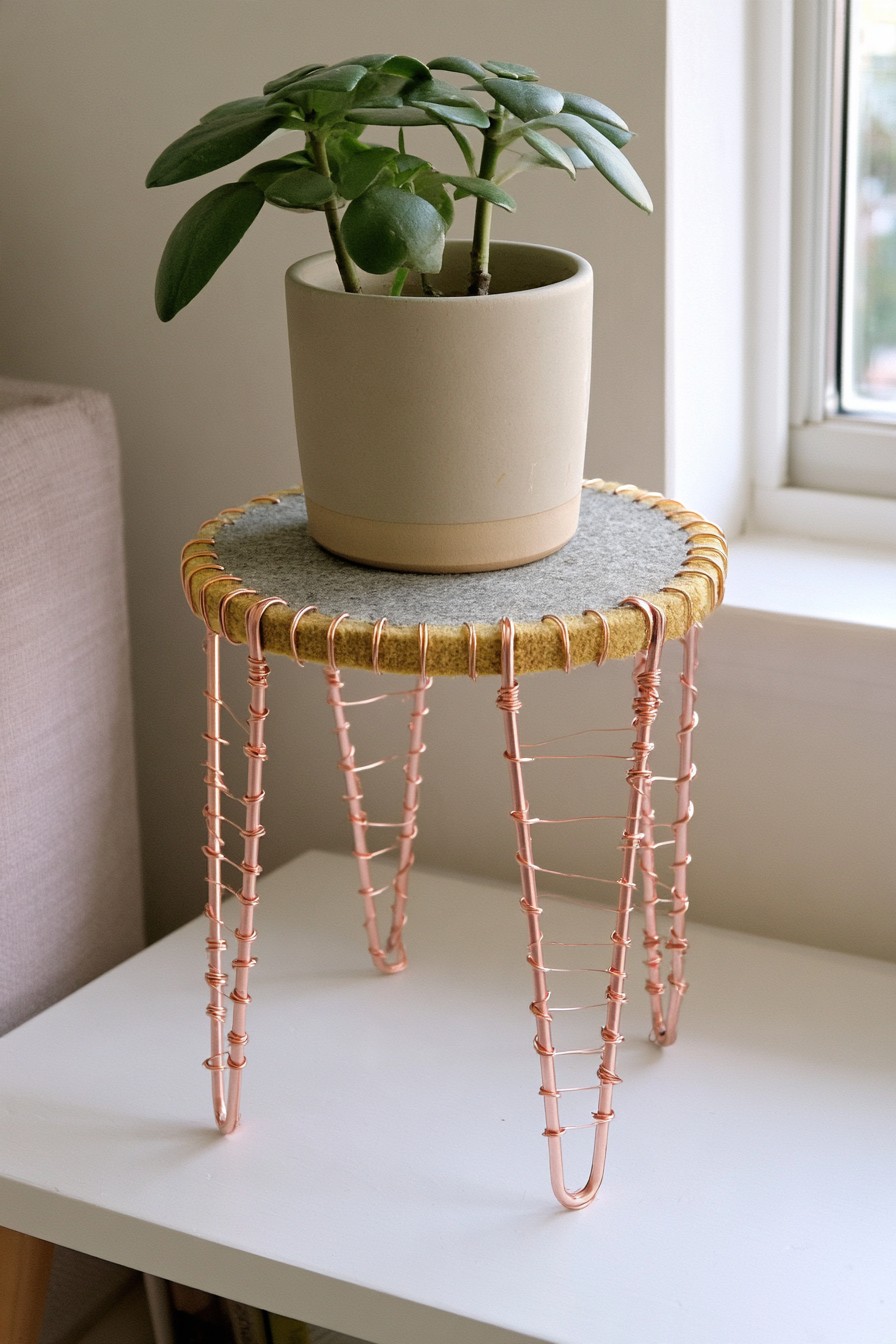
A gray circular top with a golden wrapped edge rises above slender pink U-shaped leg sections. Fine ties give the legs a repeated texture, while the open underside keeps the stand visually light beside a window. The neutral top separates the planter from the warm metal colors. This look suits a small plant display, but the pot and wet growing medium determine the real weight the frame must carry.
Choose a stable plant stand with a documented capacity as the supporting structure, then reproduce the wrapping and top finish on it. If designing the metal stand from scratch, leg geometry, joints, platform attachment, and resistance to sideways movement require more than decorative bindings. A flat protective pad can prevent pot scratches without addressing those structural questions. Keep a watertight saucer beneath the planter and lift it out for watering or inspection. Match the top size to the pot footprint so the planter rests securely without hanging beyond its support.
13. Sculptural Wire Bottle Holder with Textile Accents

A horizontal bottle rests in dark padded curves above crossed copper-colored supports and a rectangular base. Mustard textile sections beneath the black padding add contrast at the contact points. This is a compact display for a sideboard where a single bottle can read as part of the decor. The repeated cradle shapes draw the eye along the bottle while the base defines a clear footprint.
Use an existing bottle holder designed for the size and weight of the intended bottle, then wrap its contact areas with securely fastened padding. Add textile accents where they cannot interfere with inserting or removing the bottle. A scratch-resistant surface protects the glass, but padding cannot correct an unstable stand. Check the base on the actual furniture surface and keep the bottle supported as you place it into the holder. Avoid positioning the display at an exposed edge, and keep loose fabric ends away from any moving contact point.
14. Hanging Copper Wire Fruit Basket with Woven Netting
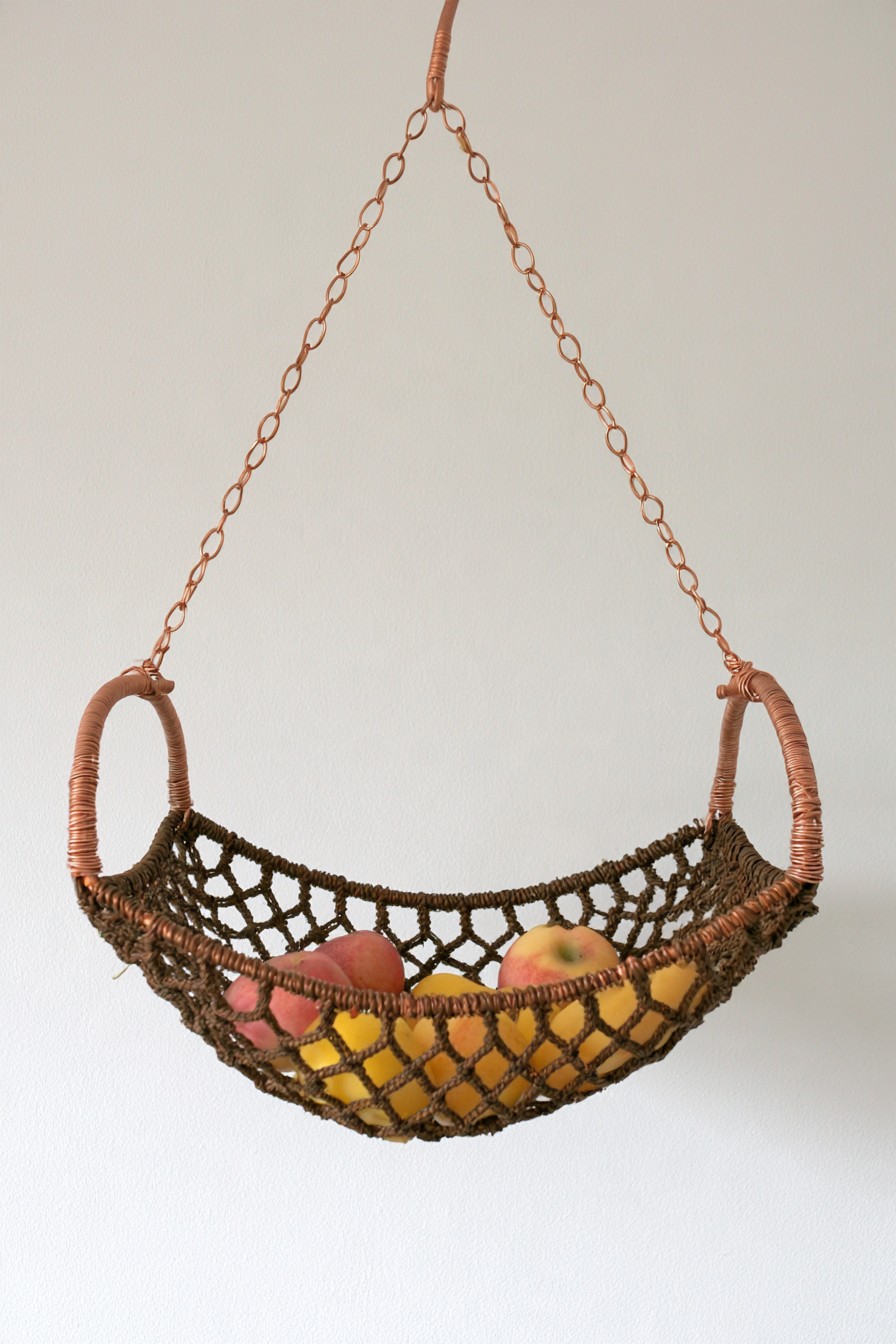
Dark woven netting hangs below a copper-colored rim, suspended by two chains that meet above the basket. The shallow cradle exposes the fruit and provides an airy alternative to a solid countertop bowl. Wrapped side sections tie the rim visually to the suspension, while the dark mesh gives the contents a distinct backdrop. This idea is most useful where the basket remains easy to reach for filling and cleaning.
Choose a load-rated hanging basket and suspension set, then apply decorative wrapping without covering its inspection points. If replacing the liner, use a washable material appropriate for contact with the intended contents and check that its openings retain smaller fruit. A handmade decorative net is not automatically an adequate load-bearing replacement. Match the chain arrangement to the basket's attachment points and keep it level. The building fixing, suspension, rim, and liner all need to support the full basket; decorative links cannot be assigned a capacity from their appearance.
15. Copper Wire Test Tube Vase Stand
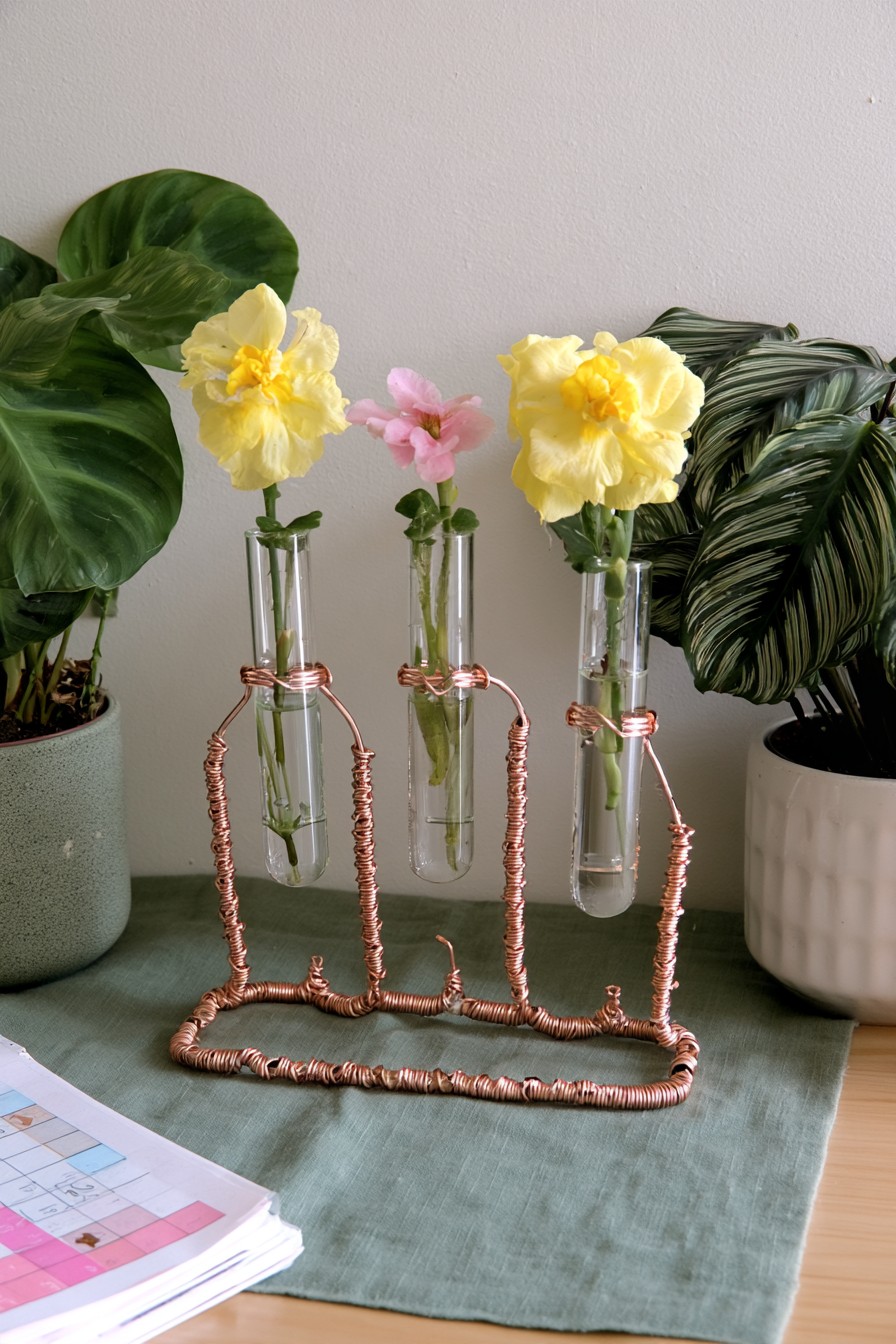
Three narrow glass tubes sit at different positions within a rectangular wire base. Wrapped posts and curved collars keep the copper-colored outline visible around the flowers, creating a small arrangement that feels lighter than a single vase. Individual stems suit a desk, shelf, or dining sideboard where the holder can remain within easy reach. Its practical advantage is that each tube can be removed and refreshed separately.
Size the frame from the actual tubes before bending the supports. Use a smooth mandrel to form close-fitting collars, leaving enough clearance to remove the glass without forcing it. Include lower support for each tube; an upper collar alone may allow a straight-sided tube to slip through. Bind the posts to a firm base and check that it lies flat. Finish wire ends away from the glass, then remove the tubes to change the water. Keep the display clear of busy edges where a passing object could catch a flower stem.
Keep the Materials Accessible for Care
Dust open wirework with a soft brush and remove textile inserts for cleaning according to their material instructions. Dry metal after any permitted damp cleaning, and avoid polishing coated or mixed-metal details with an unspecified cleaner. Inspect handled pieces for loosened wraps, and suspended objects for changes at their links and fixings. Removable flowers, liners, and glass tubes make routine care easier without dismantling the entire display.



Leave a Reply