
A white fabric ghost wearing a black witch hat brings a playful Halloween detail to an indoor display. This project combines a lightweight covered head, flowing fabric and a small wooden swing, with optional battery lights underneath. The key is preparing the ghost completely before hanging it above the board.
Prepare the fabric-covered head on its own hanging cord and fit any lights while it is still on the table. Suspend the wooden board separately, then tie the fabric sides to the ropes to form the raised arms. This keeps the head and board connections accessible during assembly.
Table of Contents
- Tutorial
- 1. Gather the Materials and Plan the Display
- 2. Prepare the Board and Its Two Ropes
- 3. Make the Head and Its Independent Hanging Cord
- 4. Drape and Secure the White Fabric
- 5. Thread the Cord Through the Witch Hat
- 6. Add Two Simple Felt Eyes
- 7. Fit the Optional Lights While the Ghost Is on the Table
- 8. Hang the Prepared Ghost and Board Separately
- 9. Attach the Fabric Sides to Form Raised Arms
- 10. Balance the Folds and Check the Finished Display
Tutorial
1. Gather the Materials and Plan the Display
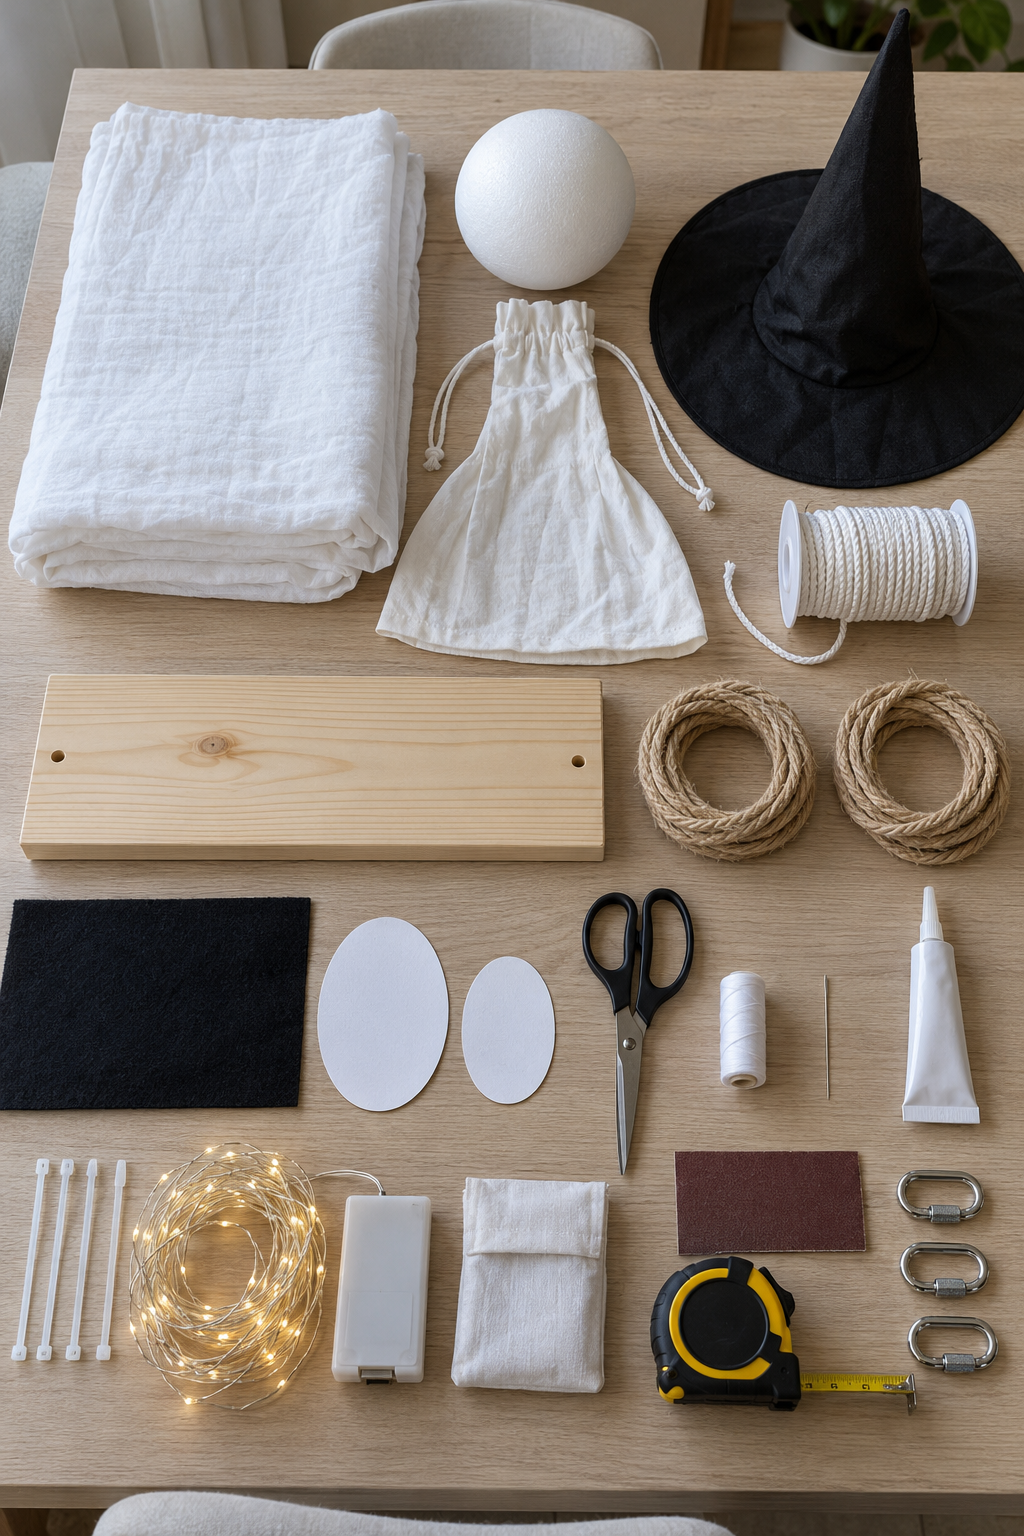
A lightweight sheet, a rounded head and a pointed hat create the ghost’s outline. The wooden seat hangs separately beneath it. Before cutting anything, measure the display space and choose an indoor position away from doors, walking routes, heaters and places where children or pets could pull the cords.
| Material | Suggested starting size or quantity |
|---|---|
| Lightweight white cotton fabric | About 150 × 180 cm; use a hemmed piece if possible |
| Foam sphere and strong cotton drawstring bag | One 15 cm sphere; a bag large enough to enclose it completely |
| White braided suspension cord | About 3 mm thick; start with 1.5–2 m and adjust to the mounting height |
| Plain black fabric witch hat | Approximately 30 cm tall with a 30–35 cm brim; opening must fit the covered head |
| Sound, unfinished wooden board | Approximately 45 × 18 × 2–3 cm; two predrilled holes near the short ends |
| Tan twisted rope | Two equal lengths of about 2 m, approximately 6 mm thick |
| Black felt | Enough for two oval eyes, approximately 3 × 4 cm each |
| Small accessories | Fabric glue, white thread, needle, fabric scraps, two reusable cable ties, scissors, measuring tape and fine sandpaper |
| Mounting hardware | Three properly installed, suitable load-rated anchor points and closed connectors |
| Optional lighting | A small battery-operated LED string suitable for decorative use with fabric, its batteries, and a cotton pocket for the battery box |
These are example dimensions for this adaptation, not measurements supplied by the video. Choose cord, rope and hardware for the actual assembled weight. The head and hat sizes must work together: test their fit before starting.
Construction principle: the white center cord supports the ghost through its fabric head pouch. The two tan ropes support only the wooden board. The hat, LED wire and side fabric ties are not load-bearing supports. This is a hanging decoration, never a seat or a children’s swing.
2. Prepare the Board and Its Two Ropes
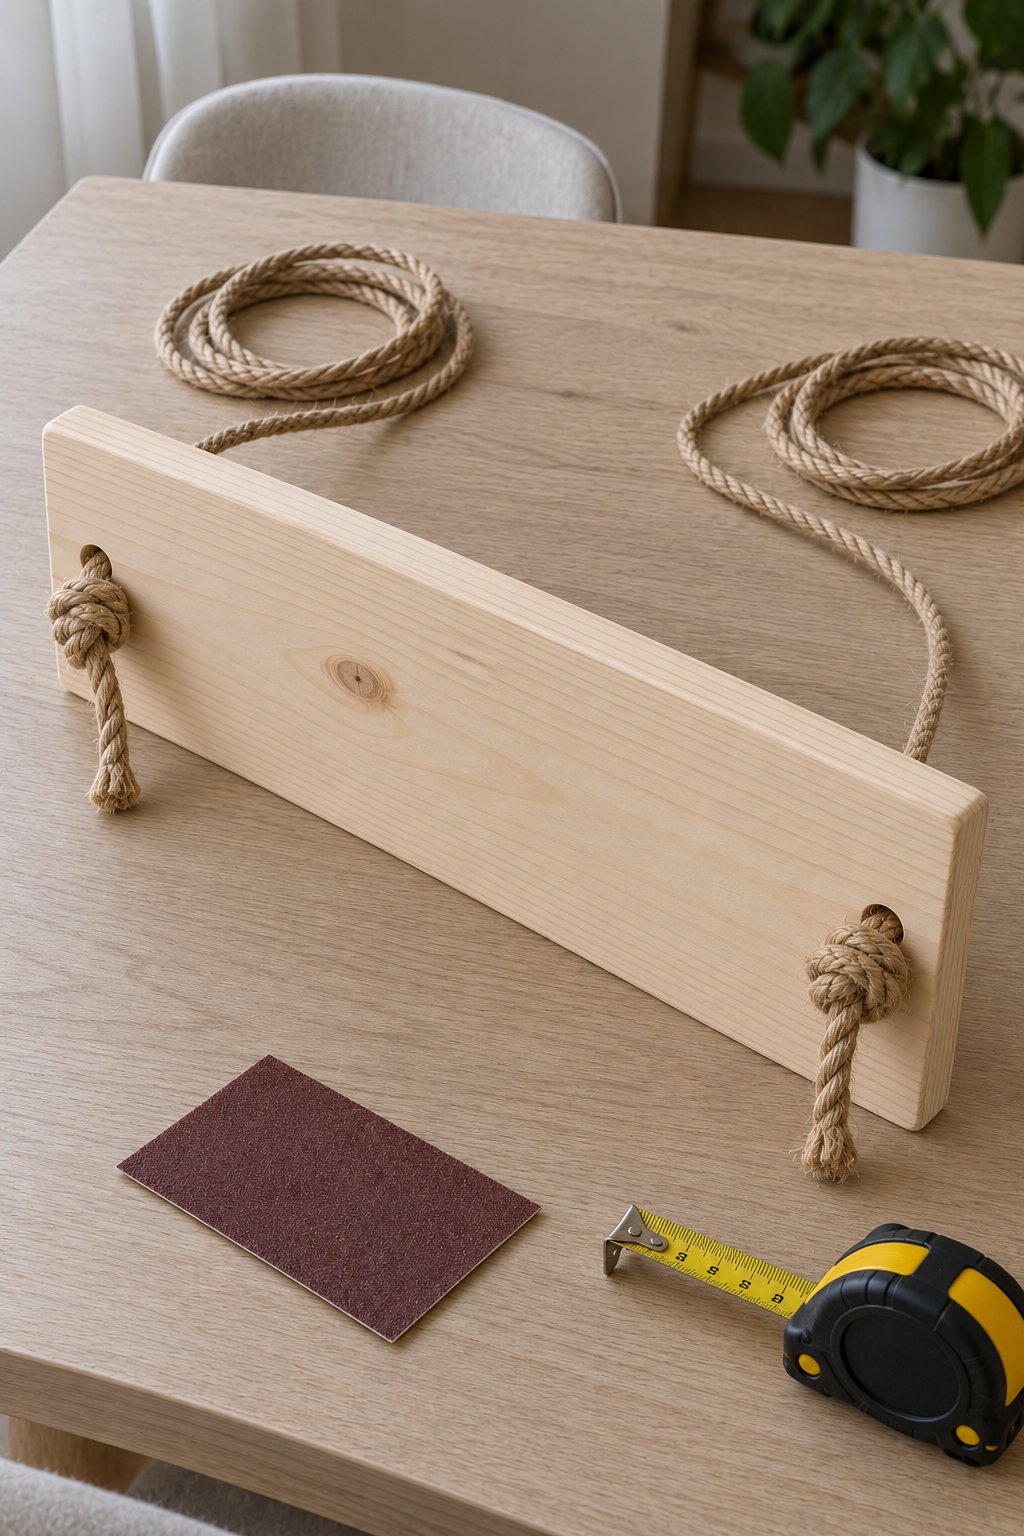
Sand the board’s edges, corners and hole rims until they feel smooth. Use a predrilled board, or have the holes drilled with the board clamped on a backing block. For 6 mm rope, holes around 8 mm offer a starting point; check the actual rope fit. Position each hole on the board’s front-to-back centerline, roughly 3 cm in from its short end.
Pass one rope down through each hole. Tie a bulky double-overhand stopper knot underneath, leaving roughly 8–10 cm of tail. Each tightened knot must be too large to pass through its hole. Pull the ropes upward while the board is supported to seat both knots against the underside.
Leave the upper rope lengths generous for later adjustment. Set the finished board aside while you build the entire ghost on the table.
Check: both ropes pass through real holes and have secure knots below the wood; neither relies on glue or an attachment to the white sheet.
3. Make the Head and Its Independent Hanging Cord
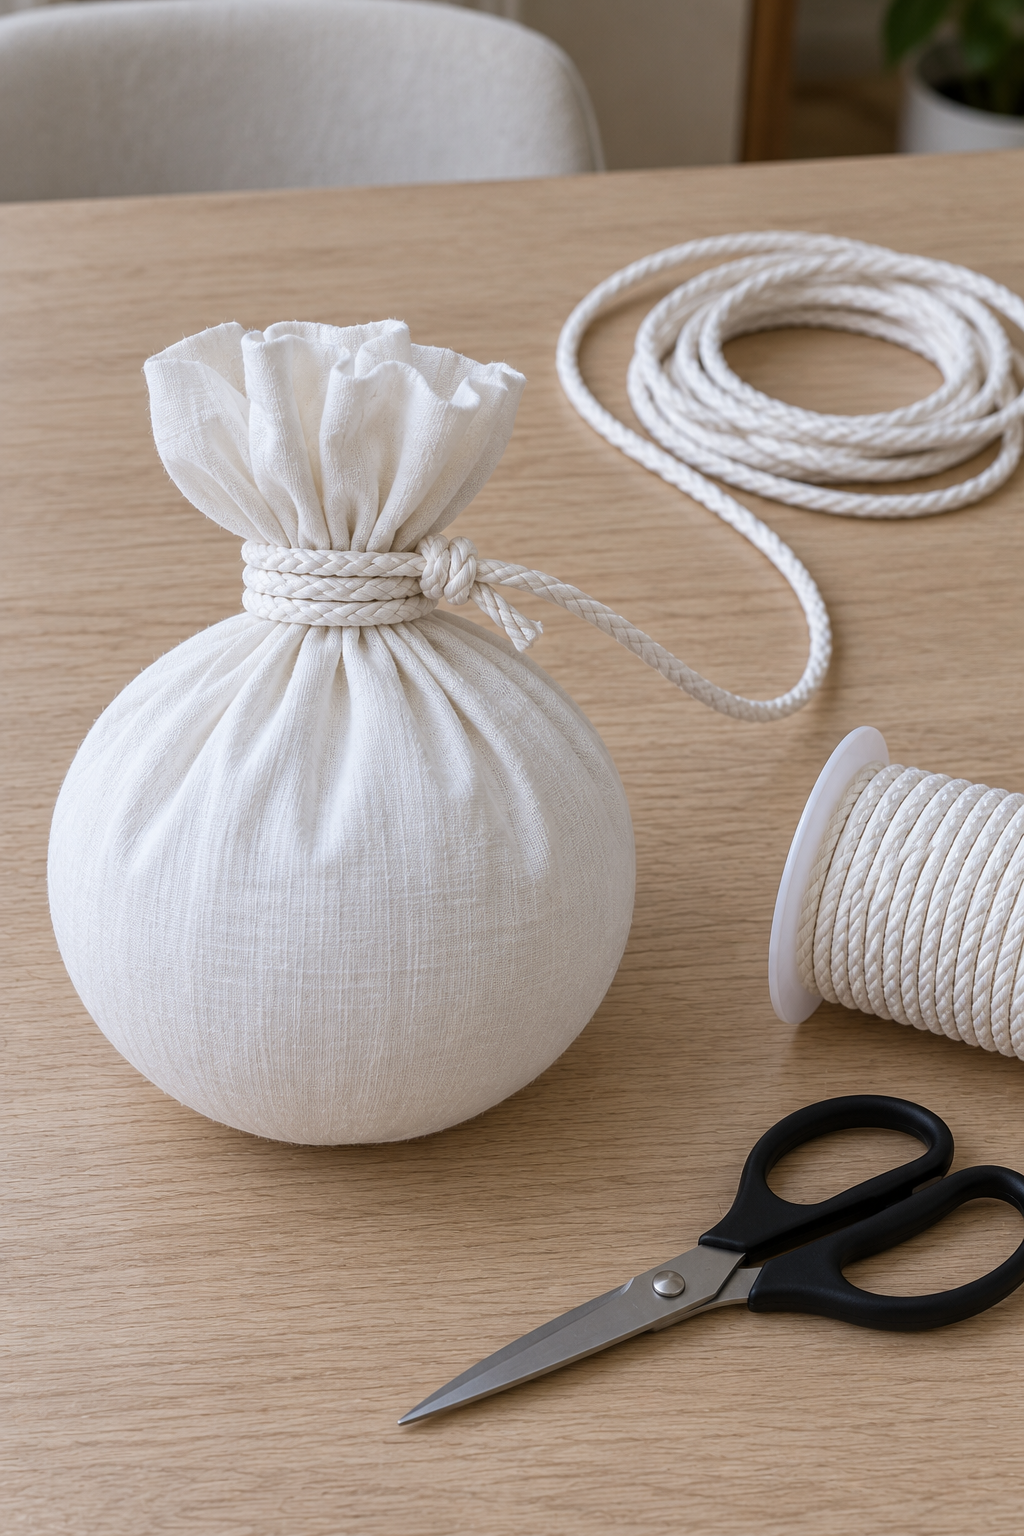
Place the foam sphere inside the cotton bag. Position the bag’s opening at the top, pull the drawstrings closed and tie them securely. The bag must cradle the entire underside of the sphere so the fabric, rather than a screw pushed into foam, carries the head.
Wrap the separate white suspension cord twice around the gathered bag neck, below the wider gathered rim. Secure it with two half hitches, tighten them carefully and leave a short tail. Add several strong stitches through the gathered pouch fabric around the cord wraps to keep the attachment from migrating. Keep the long working end free.
Lift the head just above the table by this cord and check for slipping or opening seams. The attachment must hold before you cover it. Fold the excess gathered fabric down neatly so it will fit inside the hat.
Check: the long cord is attached to the head pouch, not merely tied to the hat.
4. Drape and Secure the White Fabric
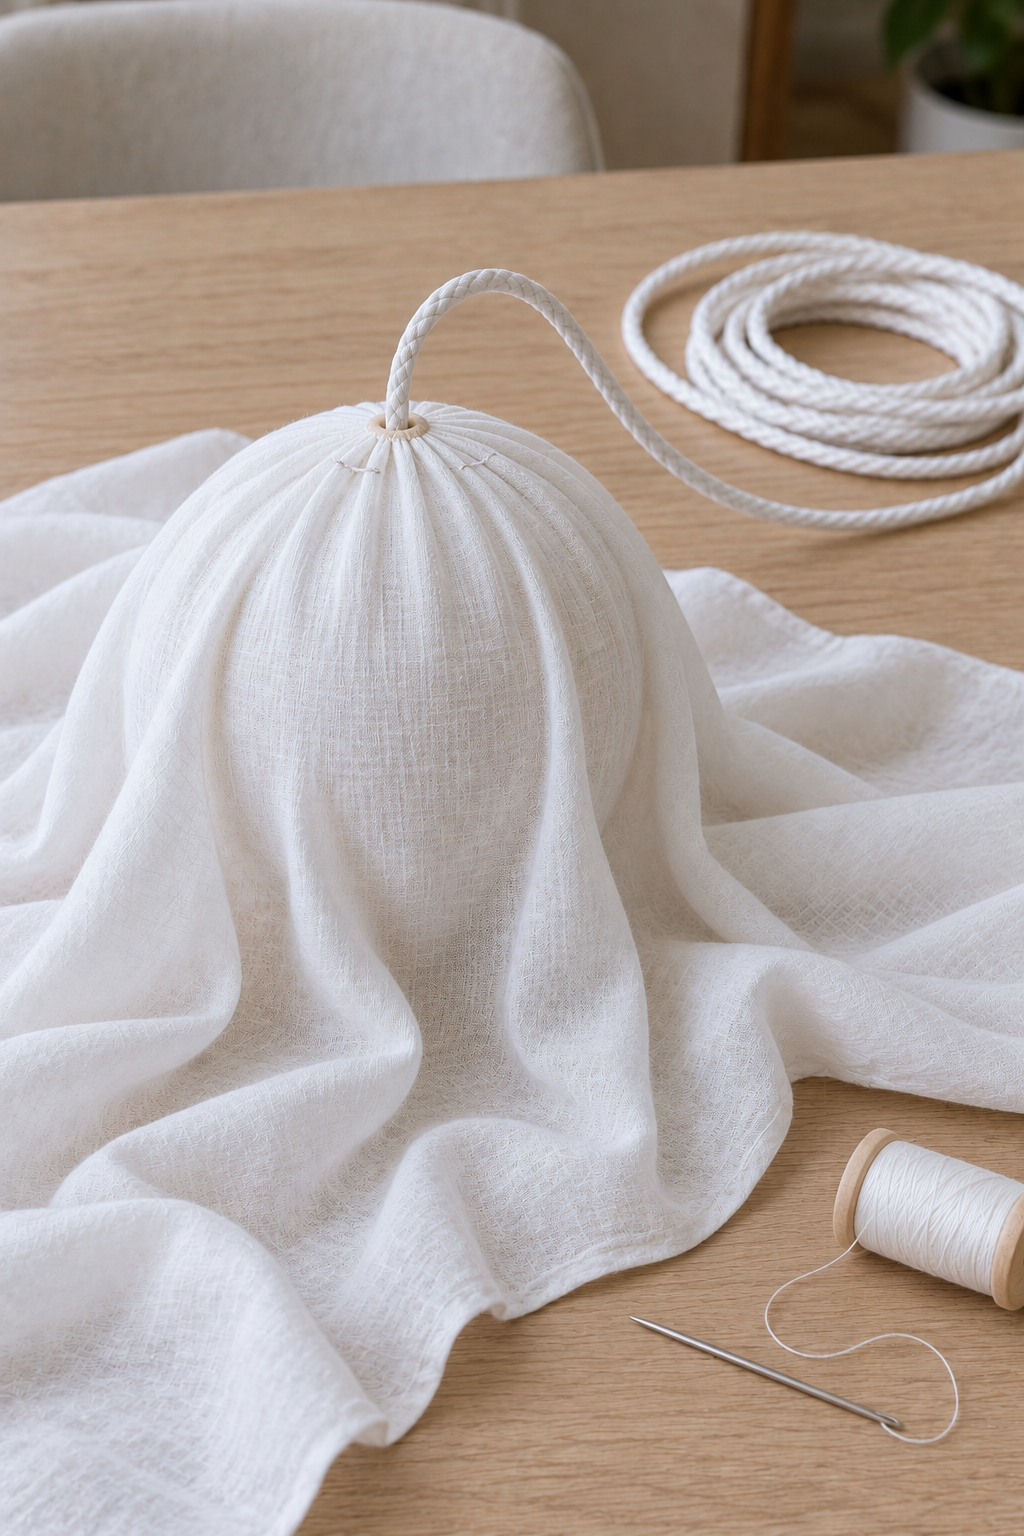
Fold the white sheet in half in both directions to find its center. Make a small reinforced opening there, just large enough for the suspension cord. Hand-stitch the opening’s edge to reduce fraying; keep it small rather than cutting a large slit.
Feed the cord’s free end through the opening from underneath. Lower the sheet over the head and arrange the fabric so the crown is rounded and the front falls smoothly. Keep the body loose; cinching fabric tightly under the sphere produces a neck instead of a flowing ghost silhouette.
Add a few small stitches at the back of the crown, catching the outer sheet and the cotton head pouch without sewing the suspension cord in place. These stitches help prevent the sheet rotating around the head.
Check: the cord emerges at the crown’s center and remains long enough to pass through the hat and reach the overhead anchor.
5. Thread the Cord Through the Witch Hat
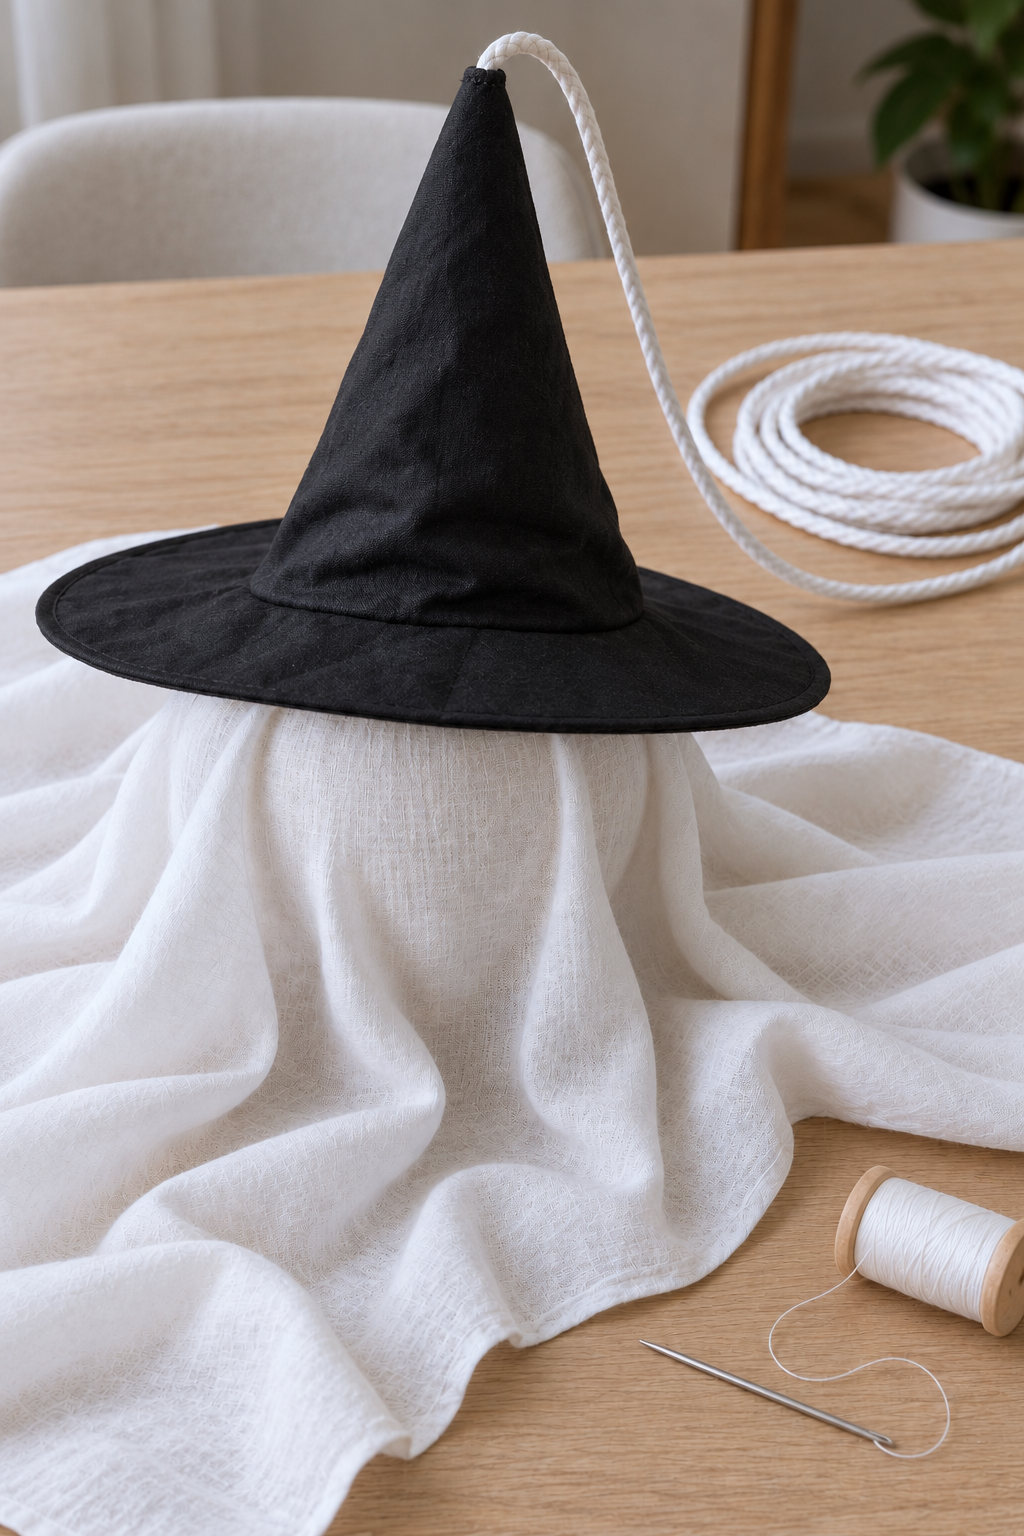
Open a tiny hole at the very tip of the hat and reinforce its edge with small stitches. Pass the long white cord into the hat through its normal head opening, up the inside of the cone, and out through the tip. A blunt threading needle or cord threader can help guide it.
Slide the hat down onto the covered head while keeping the cord free. The brim should rest naturally around the head rather than hang from the tip. If the hat opening is too large, stitch a soft fabric band inside it to improve the fit.
Use three or four small stitches around the inner hat band to attach it to the sheet and head pouch. Avoid relying on a glued hat tip to support the ghost. Leave the suspension cord untrimmed until the final hanging height is established.
Check: the cord exits the center of the pointed tip, continues inside to the head, and does not run visibly across the face.
6. Add Two Simple Felt Eyes
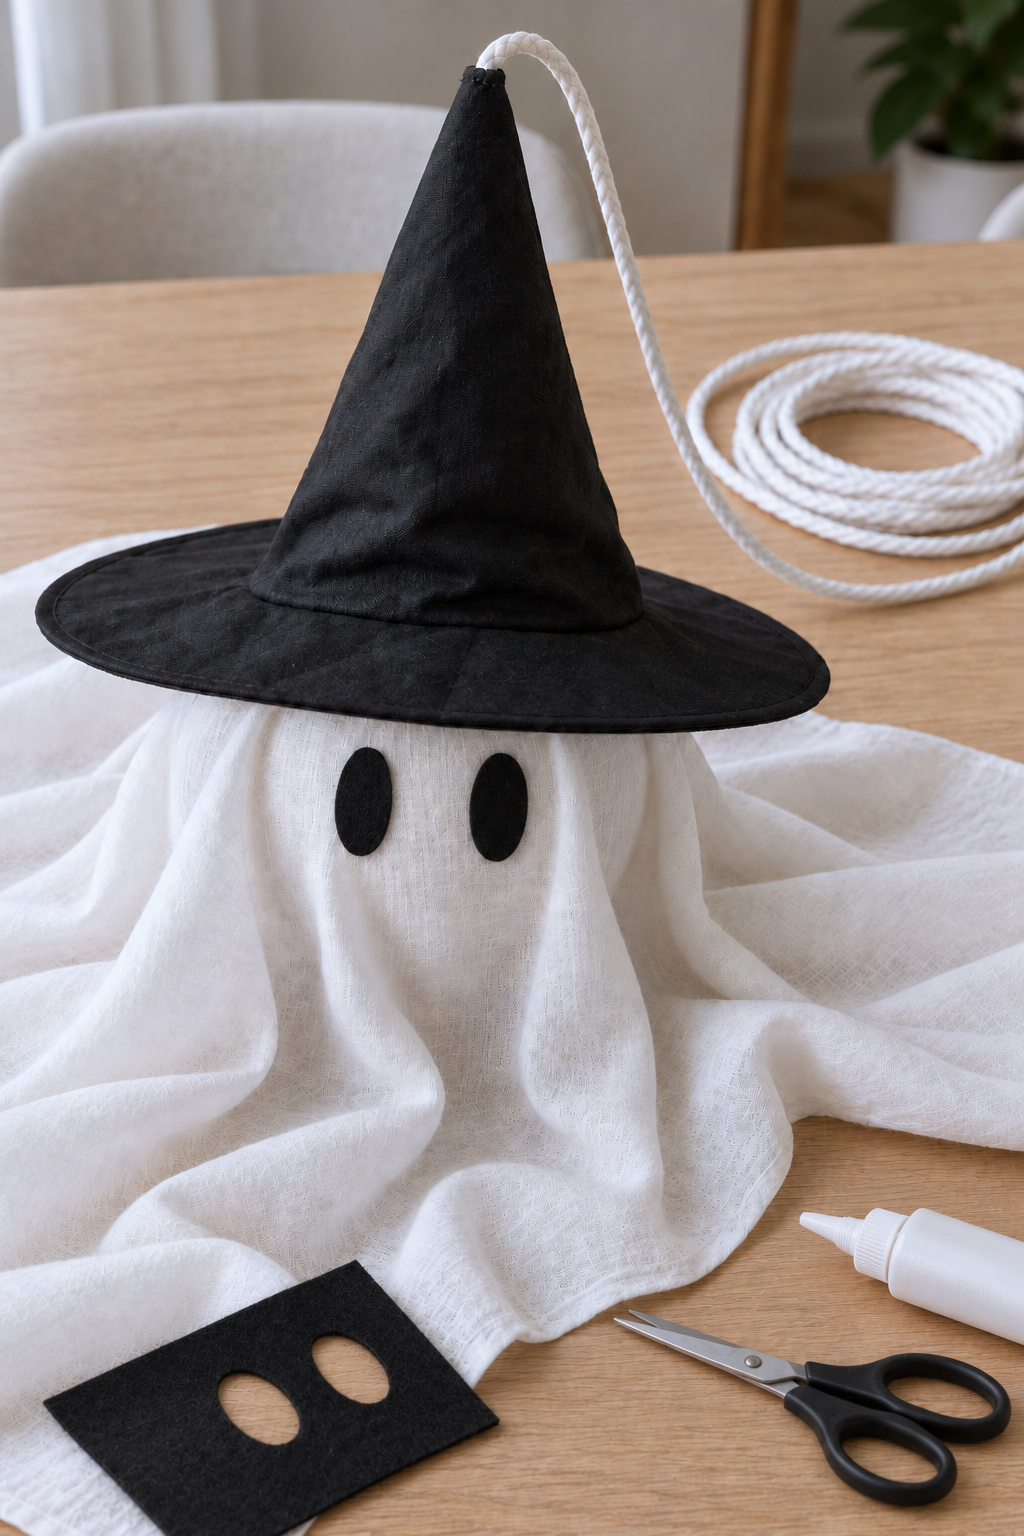
Cut two similar vertical ovals from black felt. Position them on the smooth front of the head, below the brim, leaving enough space between them for the eyes to remain distinct when the sheet hangs.
Check their position with the head upright before applying glue. Keep each oval away from a deep fold, which can hide part of the eye or make it appear uneven. Apply a thin layer of fabric glue suitable for both materials and allow it to dry for the time stated on the product. A few small stitches are an alternative.
The face needs only the two eyes. Keeping the features simple preserves the soft ghost shape and leaves the hat as the main decorative detail.
7. Fit the Optional Lights While the Ghost Is on the Table
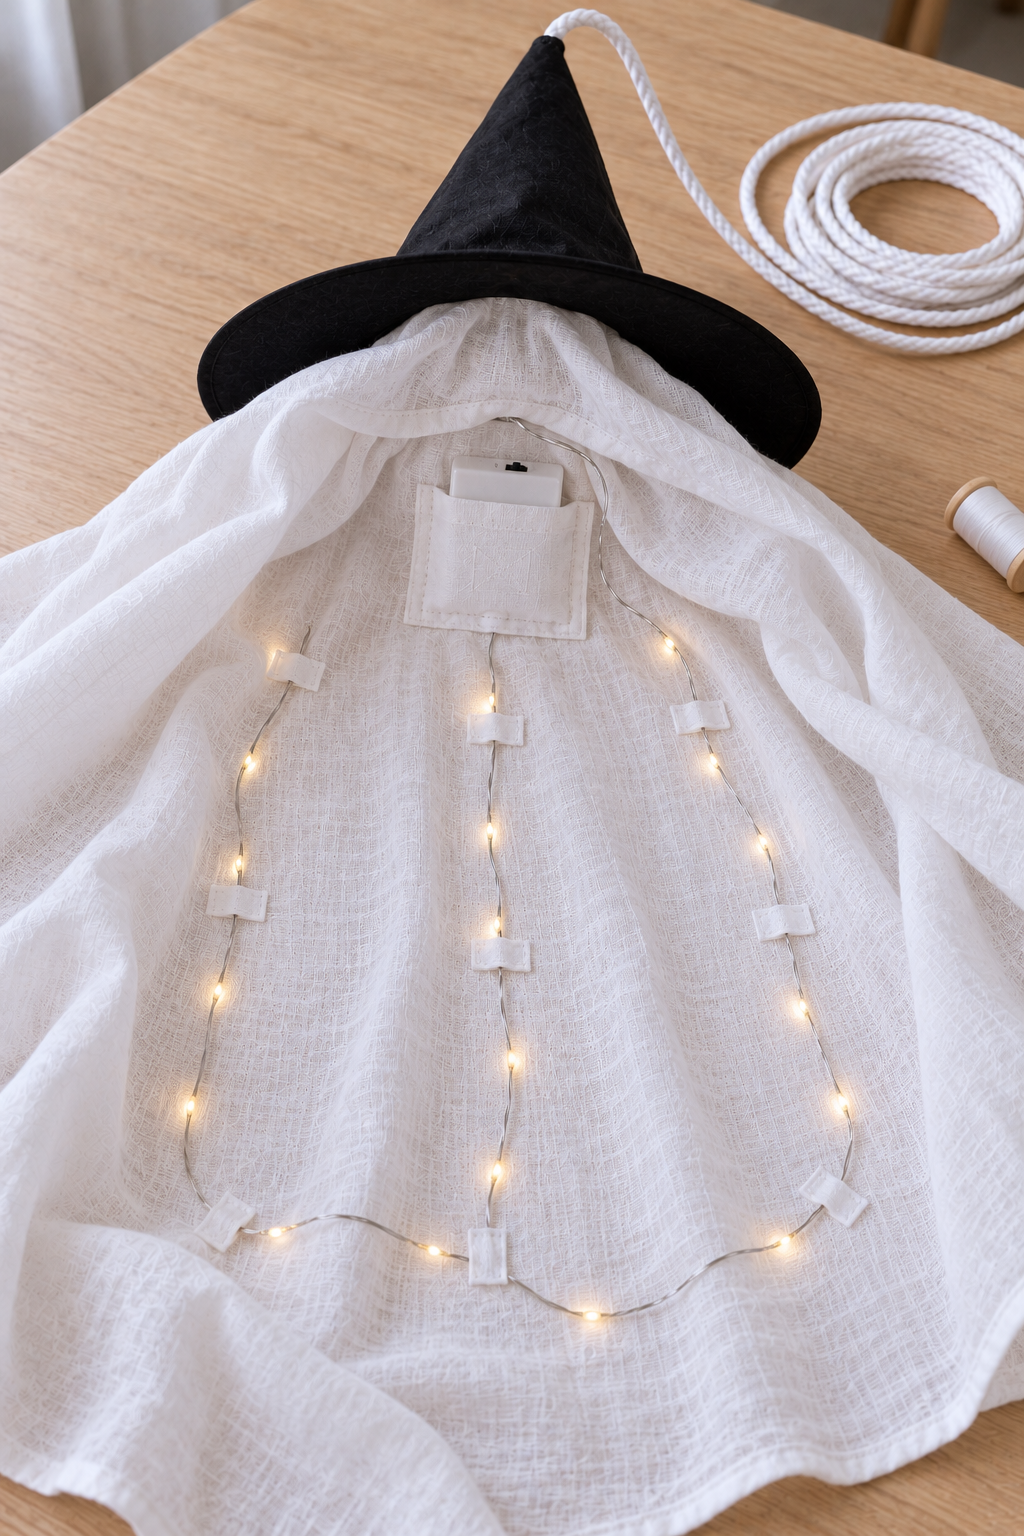
Once the eyes are secure, support the head and hat gently on the table and open the rear folds to expose the sheet’s inner surface. Test the LED string, then switch it off before arranging it.
Run the wire in broad, loose curves down the inner fabric, spreading the lights rather than leaving them in a tight coil. Sew small fabric tabs to the sheet and pass the wire beneath them. Do not stitch through, staple or sharply bend the wire. Keep the lit section away from the face if you want the eyes to remain clearly defined.
Sew a small battery pocket onto a reinforced area of the inner upper back, near the head. Support the closed battery box in this pocket, with its switch and battery access reachable. Leave slack where the wire exits the box; the lead must not carry the box’s weight.
Use only a suitable battery LED product according to its instructions, keeping any required ventilation clear. If the instructions prohibit covering it with fabric, omit the lights. Never place candles or hot bulbs inside the ghost.
8. Hang the Prepared Ghost and Board Separately
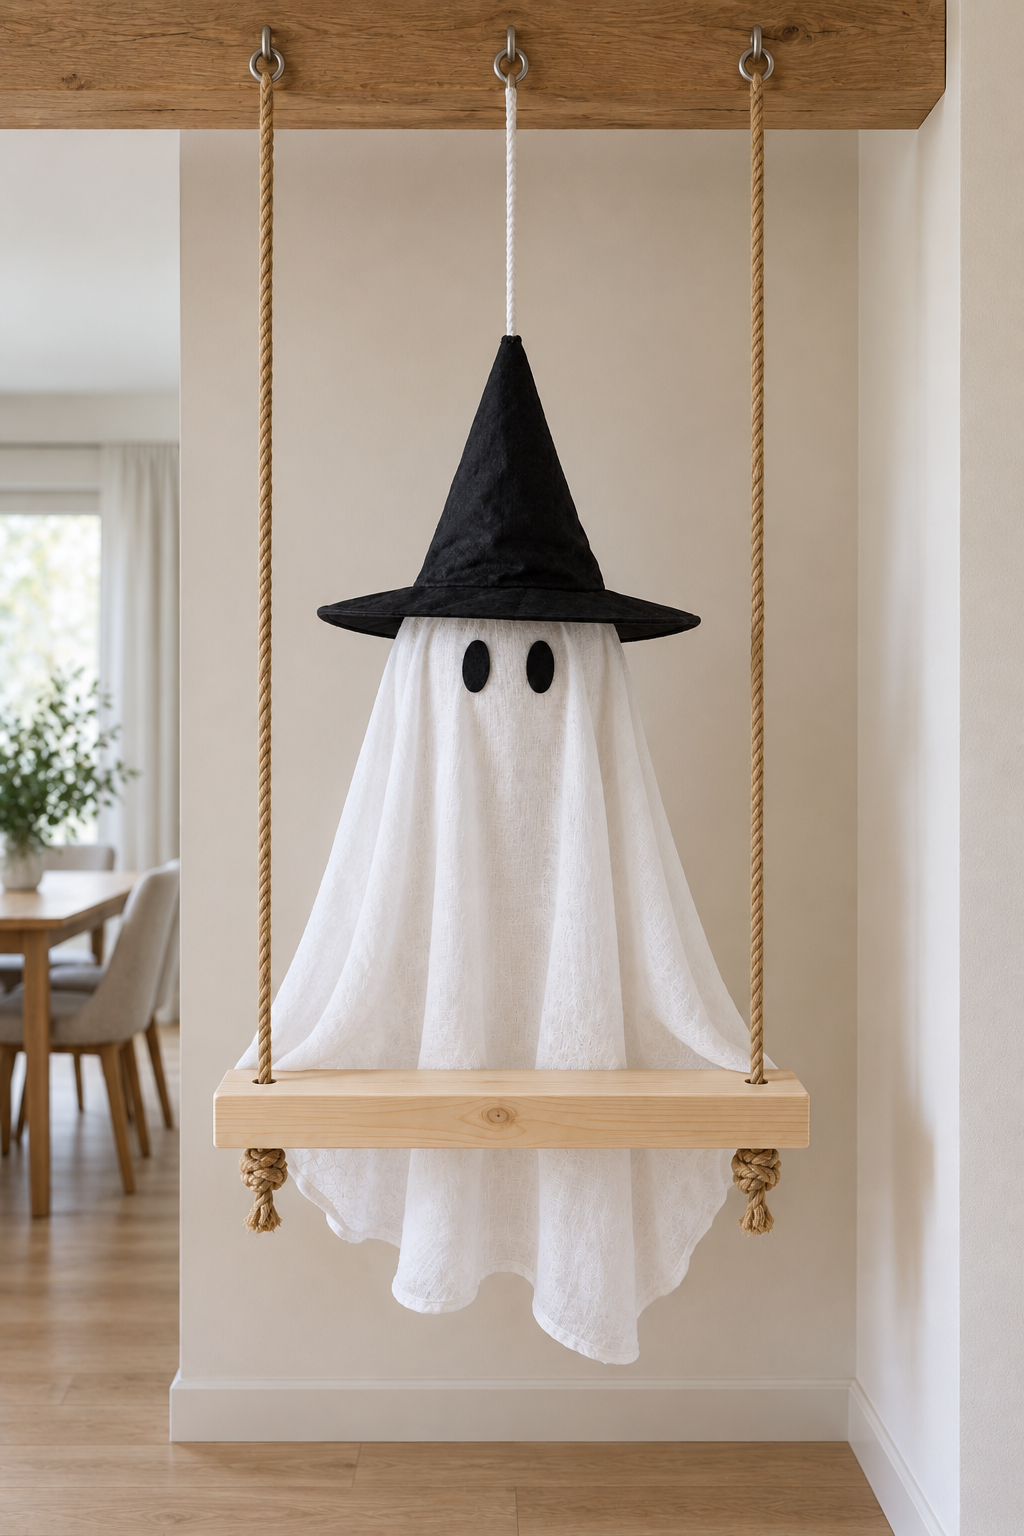
Use three suitable anchor points in a sound supporting structure: one centered over the ghost and two aligned with the board’s rope holes. Anchor type and installation depend on the actual structure and load; decorative trim, adhesive hooks and a curtain rod are not substitutes for a suitable support.
Support the board while connecting its two ropes to the outer anchors. Secure the upper ends with properly tightened fixed loops, such as figure-eight loops, and closed connectors. Adjust until the board sits level. Then attach the prepared ghost’s white cord to the middle anchor and gradually let it take the ghost’s weight.
Set the height so the sheet falls behind the board and a little fabric can extend below it. The ghost should appear to sit on the swing while actually hanging independently. Keep the fabric clear of the floor.
Check: with the side fabric still loose, the head stays supported and the board remains level. Correct any slipping attachment before proceeding.
9. Attach the Fabric Sides to Form Raised Arms
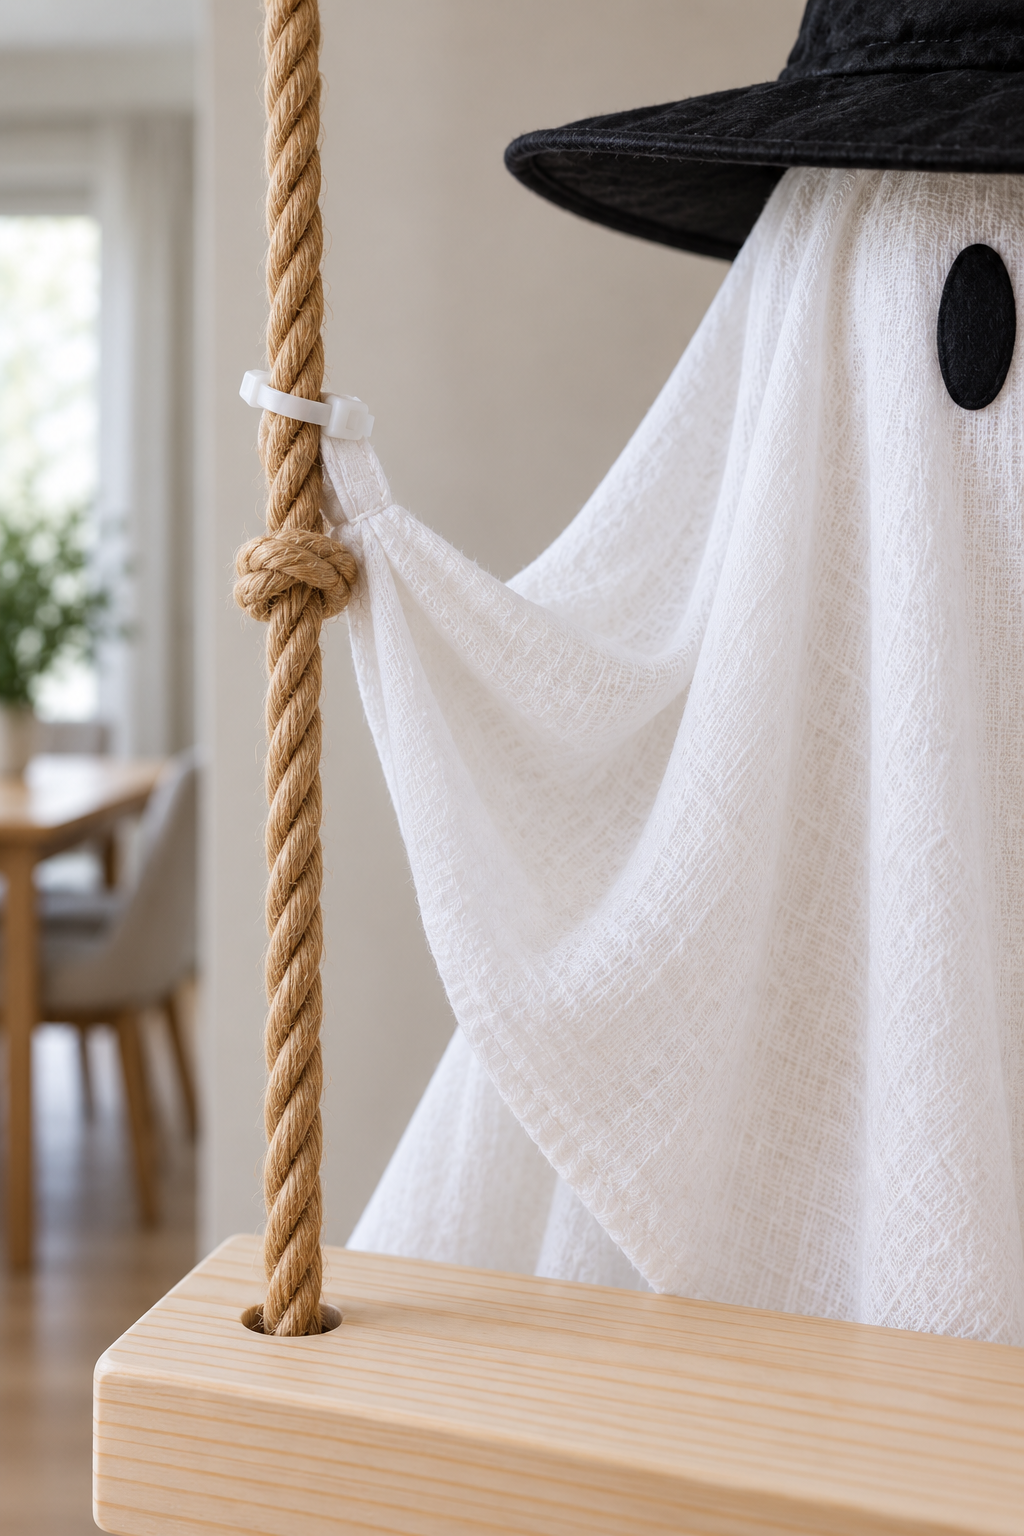
Select matching points along the left and right edges of the sheet. Lift them toward the side ropes until the folds suggest relaxed raised arms. The exact height depends on the fabric; start around 25–35 cm above the board, then adjust without pulling the head sideways.
Temporarily lower the decoration to working height as needed. Reinforce each selected fabric point with a small patch and sew on a short folded fabric loop. Pass a reusable cable tie through that loop and around the adjacent rope. Close it loosely enough to avoid crushing or tearing the cloth, and tuck the tail behind.
A stopper knot immediately below each attachment can keep it from sliding. To add or reposition these knots, support the board, release the upper rope connections as needed and retie them before rehanging. Recheck the board’s level afterward because the added knots consume rope length.
Check: both fabric arms retain slack. These side attachments shape the sheet; they must not become the main support for the ghost.
10. Balance the Folds and Check the Finished Display
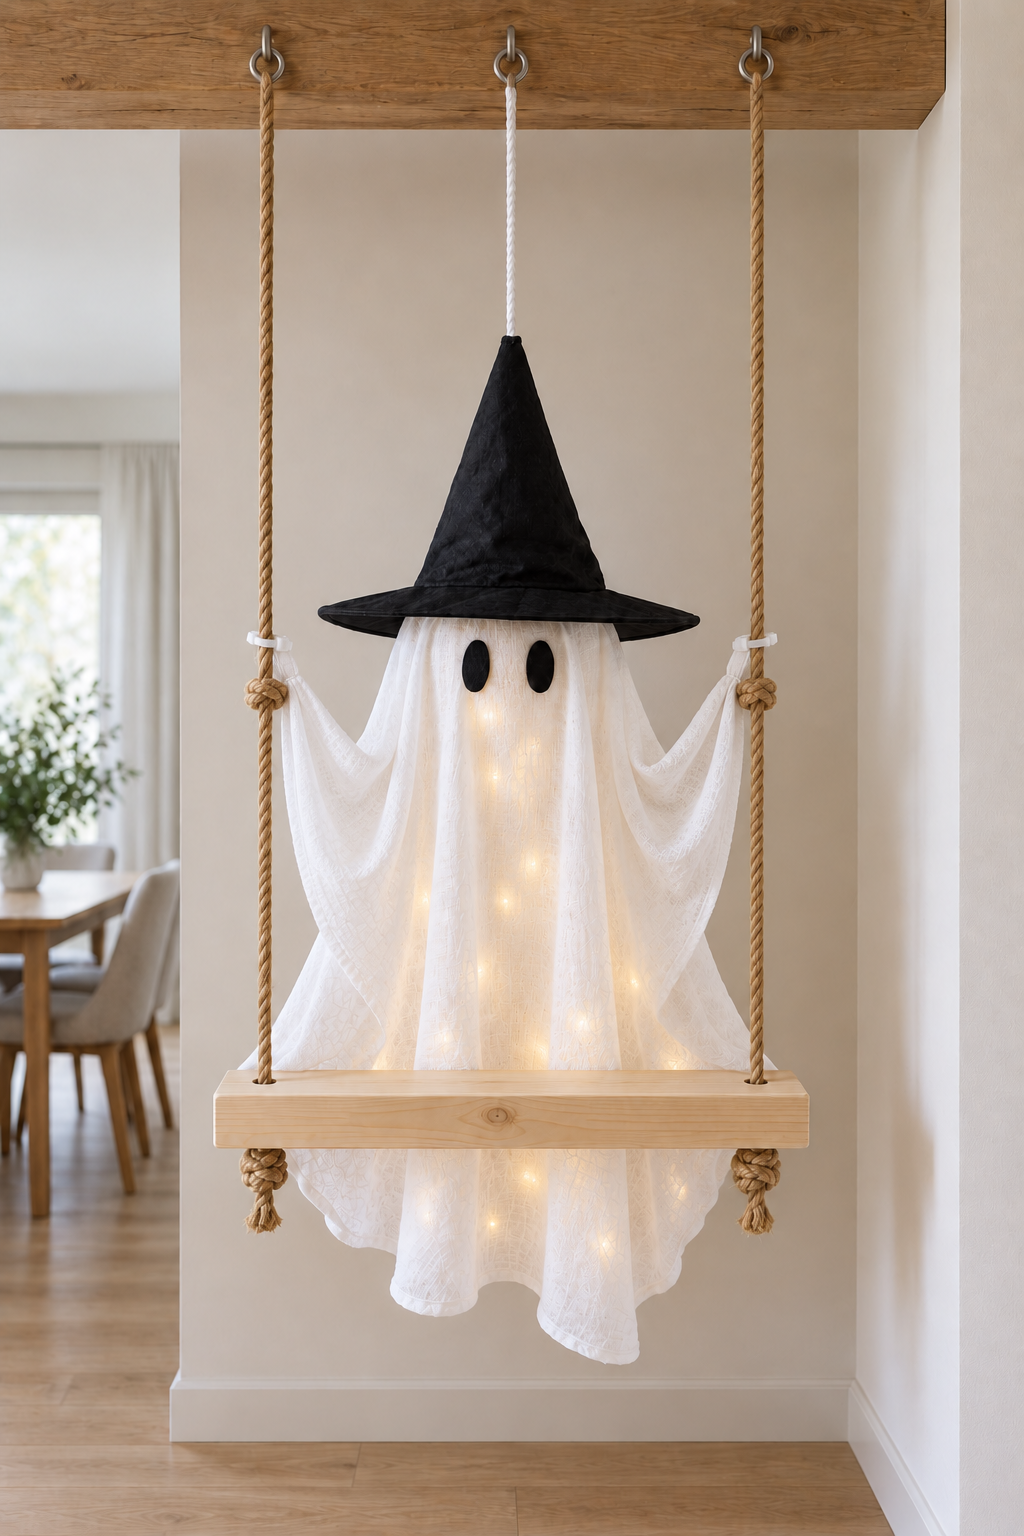
Arrange the front folds so both eyes remain visible and the board’s front edge is clear. Hide the battery pocket behind the fabric without obstructing its switch. If lights are fitted, turn them on and check that their wire remains loose inside the drape.
Check every upper connection, the two knots under the board, the head-pouch fastening and the hat stitches. Watch for fabric creep, rope slip or a tilted seat during an initial supervised display. Keep the finished decoration out of reach and switch the lights off when unattended.
If the head turns: first loosen any side attachment that pulls unevenly, then adjust the crown stitches securing the sheet to the head pouch. If the hat slips: improve the fit at its inner band and add small securing stitches. If the board tilts: support it while adjusting the rope lengths; do not use the ghost fabric to pull it level. If the lights look crowded: lower the decoration and spread the wire more evenly.
This cotton, wood and battery-light version is intended for a dry indoor setting. A sheltered outdoor adaptation still requires materials, lighting and mounting hardware appropriate to the actual exposure. For storage, remove the batteries, disconnect the three hanging lines and fold the fabric loosely around the head. To coordinate the swing with the surrounding entrance or garden, explore these outdoor Halloween decor ideas and leave the approach clear.


Leave a Reply