
An old tire can become a flower filled garden feature, a place to store muddy tools, or a decorative surround for a useful piece of furniture. The strongest ideas give the tire a clear purpose while keeping its familiar circular shape and tread visible. A painted face adds character to a simple planter, wooden shelves turn an upright tire into storage, and a carefully built timber frame opens up more ambitious furniture possibilities.
Choose from 24 tire projects, including painted planters, a hose cabinet, a rolling storage table and a timber-framed garden bench. Three designs reuse bicycle wheels with their tires attached. Start with the planter workflow, then choose the joinery, drainage and supports needed for your intended use.
Table of Contents
- What You Need Before Starting a Tire Project
- Prepare the Tire and Plan Its Support
- Make a Simple Tire Planter in Four Clear Steps
- 1. Turn Three Upright Tires into Giant Garden Flowers
- 2. Hide a Garden Hose inside a Tire Cabinet
- 3. Arrange Four Tire Planters as Butterfly Wings
- 4. Build a Rolling Tire Storage Table with a Wooden Lid
- 5. Add a Daisy Cushion to a Tire Footstool
- 6. Create a Sage Green Wall Pocket for Begonias
- 7. Make a Crescent Moon with a Hanging Wooden Star
- 8. Organize Slippers on Circular Tire Shelves
- 9. Keep Long Garden Tools in a Stacked Tire Stand
- 10. Display Flowerpots on a Bicycle Wheel Stand
- 11. Store Rolled Towels in a Cream Tire Shelf
- 12. Line a Garden Edge with a Tire Caterpillar
- 13. Frame Yellow Pansies with a Wooden Petal Flower
- 14. Paint a Smiling Face on a Low Tire Planter
- 15. Give a Tire Planter a Sleepy Ginger Cat Face
- 16. Turn an Upright Tire into an Owl Flower Pocket
- 17. Use Curved Tire Pockets for Small Garden Supplies
- 18. Make an Umbrella Trellis from a Bicycle Wheel
- 19. Hang a Bicycle Wheel Drying Rack under Cover
- 20. Group Seven Small Tires into a Wall Garden
- 21. Add Tire Ring Armrests to a Wooden Garden Bench
- 22. Lay Out a Compass Flower Bed with Five Tires
- 23. Fit a Fold Down Potting Shelf inside a Tire Frame
- 24. Fan Five Tire Planters into a Peacock Tail
- Keep Your Tire Projects Useful through the Seasons
- Common Questions about Tire Recycling Projects
- Which project is easiest for a beginner?
- Can you plant flowers directly inside a tire?
- Will ordinary craft paint work on rubber?
- Can a tire alone support a seat or hanging display?
What You Need Before Starting a Tire Project
Begin with a tire you own or have permission to collect. Choose one without protruding steel, crumbling rubber, or contamination that ordinary cleaning cannot remove. A worn tread is part of the recycled appearance, but loose reinforcement and badly damaged rubber are reasons to send the tire to an appropriate collection service instead.
- A stiff cleaning brush, mild detergent, water, and a cloth for drying.
- Work gloves, eye protection, a tape measure, and a pencil for marking fittings.
- For painted designs, a coating system specifically approved by its manufacturer for rubber and the intended indoor or outdoor setting.
- For planters, removable containers with drainage holes, container potting mix, and flowers suited to the available light.
- For storage and furniture, sound timber or suitable plywood, brackets, bolts, broad washers, and hardware selected for the expected load.
- For upholstered pieces, a removable cushion and fabric appropriate to where the item will be used.
Measure the opening before buying pots, cutting shelves, or ordering a circular lid. Tires with similar outside diameters can have different openings and depths. Make a cardboard template for wooden inserts and test it in place before cutting the final material.
Prepare the Tire and Plan Its Support
Scrub dirt from the tread and both sidewalls, rinse away detergent, and turn the tire several times to empty trapped water. Let the inner cavity dry completely. If the design will come indoors, check the cleaned tire for persistent odor and residue before adding fabric or placing it against finished surfaces. Keep it outdoors if either remains.
For a painted project, follow the coating manufacturer's preparation, ventilation, drying, and curing instructions. Test adhesion on a small area first. Paint intended for a wall or wooden fence is not automatically suitable for flexible rubber. Avoid grinding the tire to prepare it, and do not use heat or flame to change its shape.
Keep beginner projects uncut. Car tires contain reinforcement, and cutting can expose sharp metal. Designs with shaped openings or separate tread sections are better undertaken with experienced fabrication help. Cover exposed cut edges with suitable protective trim, and collect offcuts rather than leaving them in garden soil.
A tire can provide a decorative outline, but the load needs a dependable support system. Furniture requires a rigid frame. Wall displays need fixings appropriate to the actual masonry, studs, or fence structure, allowing for wet potting mix as well as the tire itself. Thin siding and individual fence boards should not be assumed capable of supporting a heavy display.
Make a Simple Tire Planter in Four Clear Steps
A single tire laid flat around a removable flowerpot is a practical starting point. It introduces the same cleaning, finishing, and drainage decisions used in many of the decorative garden ideas below.
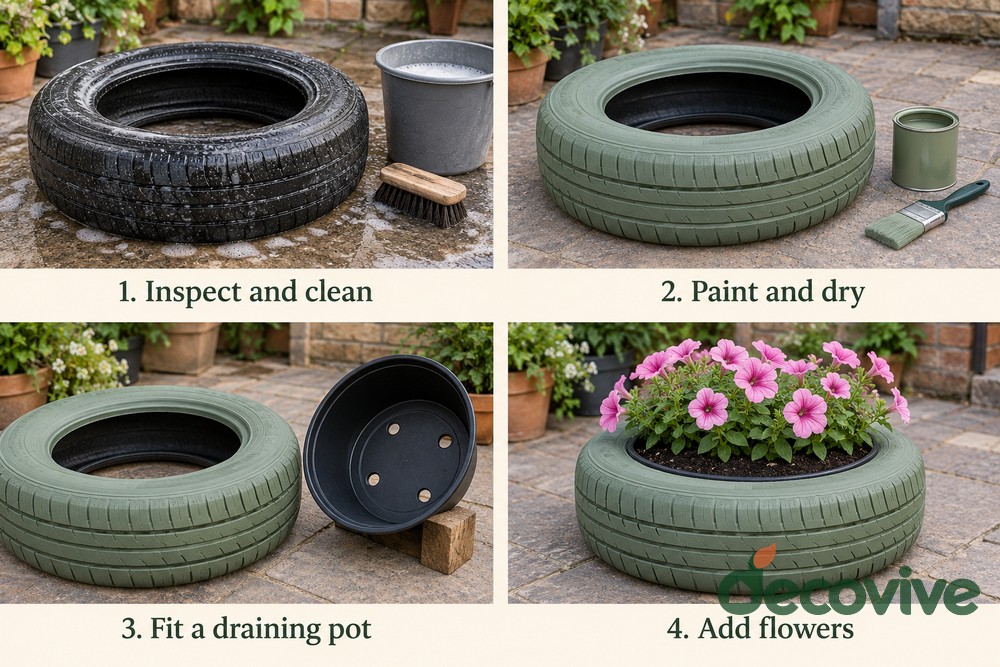 Illustrated workflow for an uncut tire surround with a removable flowerpot.
- Inspect and clean. Check the tire, scrub it thoroughly, and drain its internal cavity. Allow it to dry before applying any finish.
- Paint and dry. If you want color, apply a rubber compatible coating according to its instructions. Leave the tread texture readable and allow the finish to cure before assembly.
- Fit a draining pot. Choose a removable pot that fits the central opening. Support it securely on small pot feet or suitable blocks where necessary, keeping its drainage holes clear. The tire should not become a closed reservoir beneath it.
- Add flowers. Fill the pot with container mix and plant at the depth recommended for your flowers. Water, observe where the excess goes, and empty any water caught in the tire cavity.
Use the tire planters in this collection for ornamental flowers. For vegetables, herbs, and other edible crops, choose containers intended for growing food rather than planting directly in an old tire. A separate pot is a useful construction choice, but it should not be presented as proof that an old tire is food safe. Keep tire projects away from grills, fire pits, and other heat sources.
1. Turn Three Upright Tires into Giant Garden Flowers
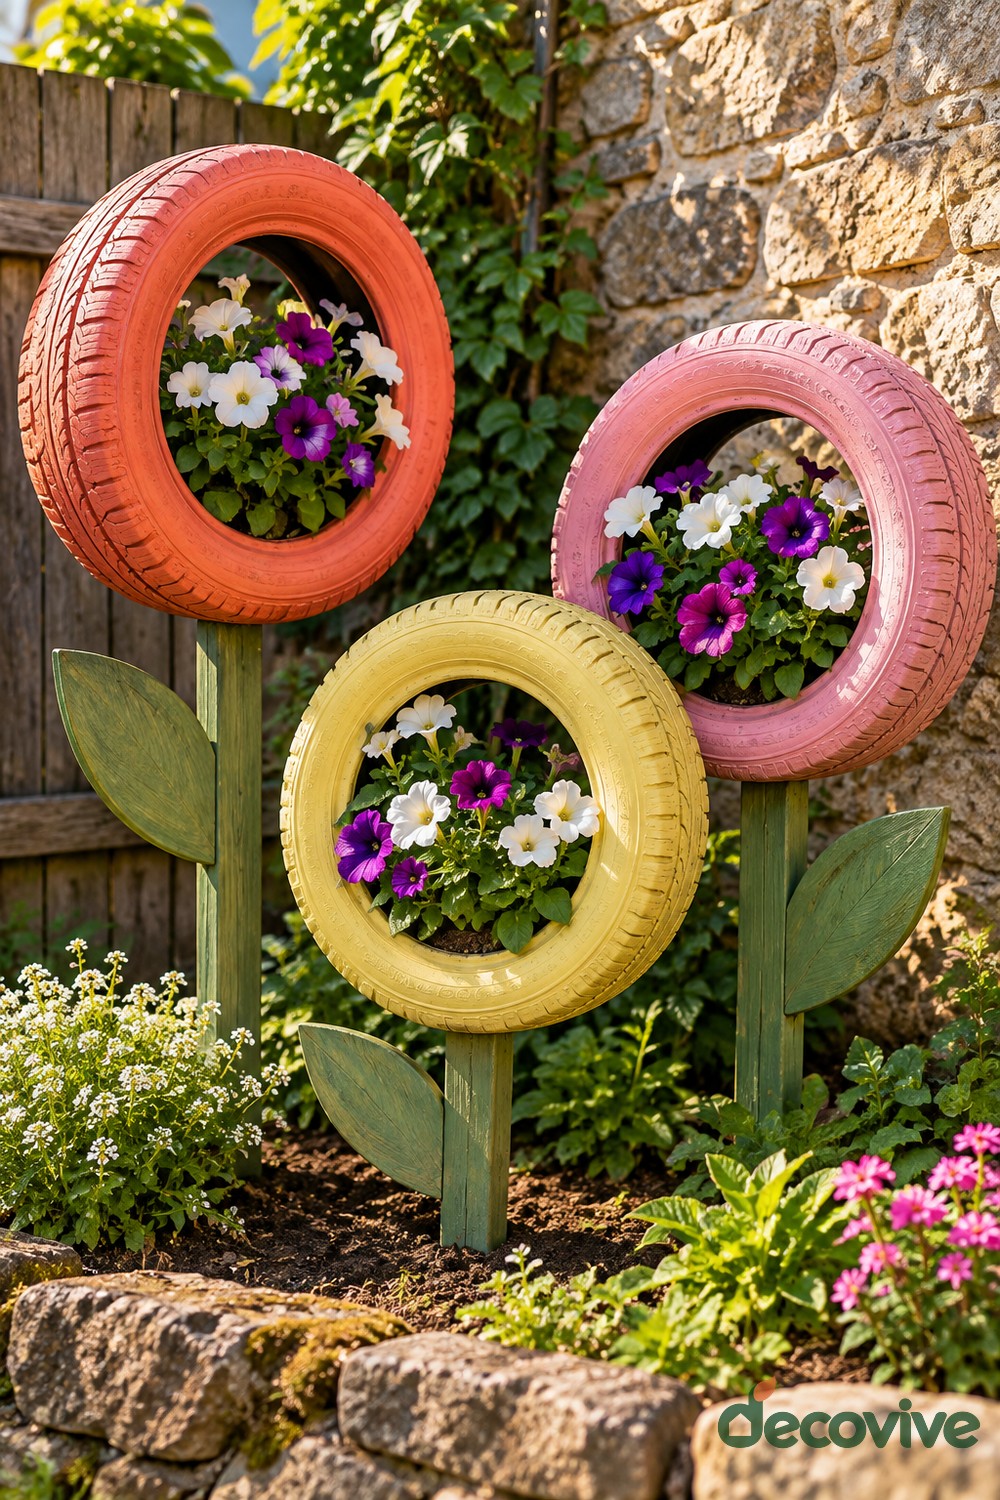
Three differently colored tire rings create oversized flowers above a low garden bed. Coral, pink, and yellow frames surround white and purple petunias, while green timber stems and broad wooden leaves complete the shape. Varying the heights gives each flower its own space.
Build each stem as a properly anchored post and attach the tire with brackets and broad washers. Fit a supported planting pocket inside the lower opening, with drainage directed away from the timber. Keep the flowers low enough to reveal the painted ring. The wooden leaves are decorative additions, so round their edges and attach them securely after the posts are stable.
2. Hide a Garden Hose inside a Tire Cabinet
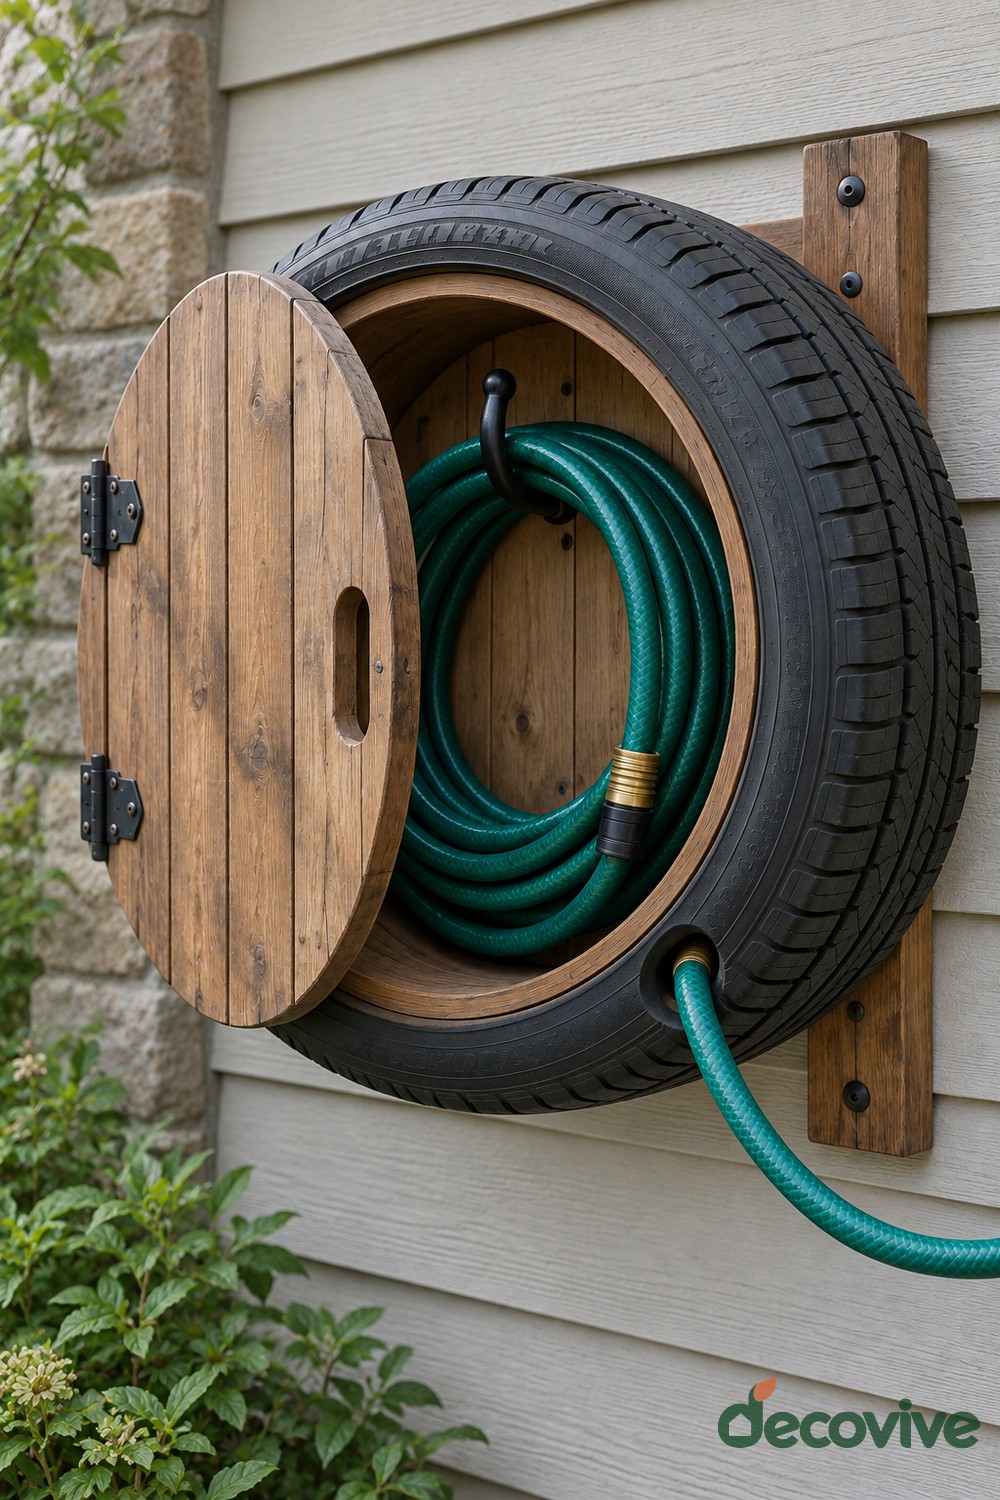
A black tire forms the outer shell of a circular hose cabinet. A wooden back, a simple internal hook, and a hinged timber door turn the ring into an organized spot beside the garden tap. The hose exits through a protected opening near the lower edge.
Build and mount the wooden cabinet first, attaching the hose hook and door hinges to timber. Size the compartment around your loosely coiled hose, allowing the door to close without pinching it. Protect the exit with a smooth sleeve or grommet, and provide ventilation and a route for drips. This is a storage cabinet rather than a winding reel.
3. Arrange Four Tire Planters as Butterfly Wings
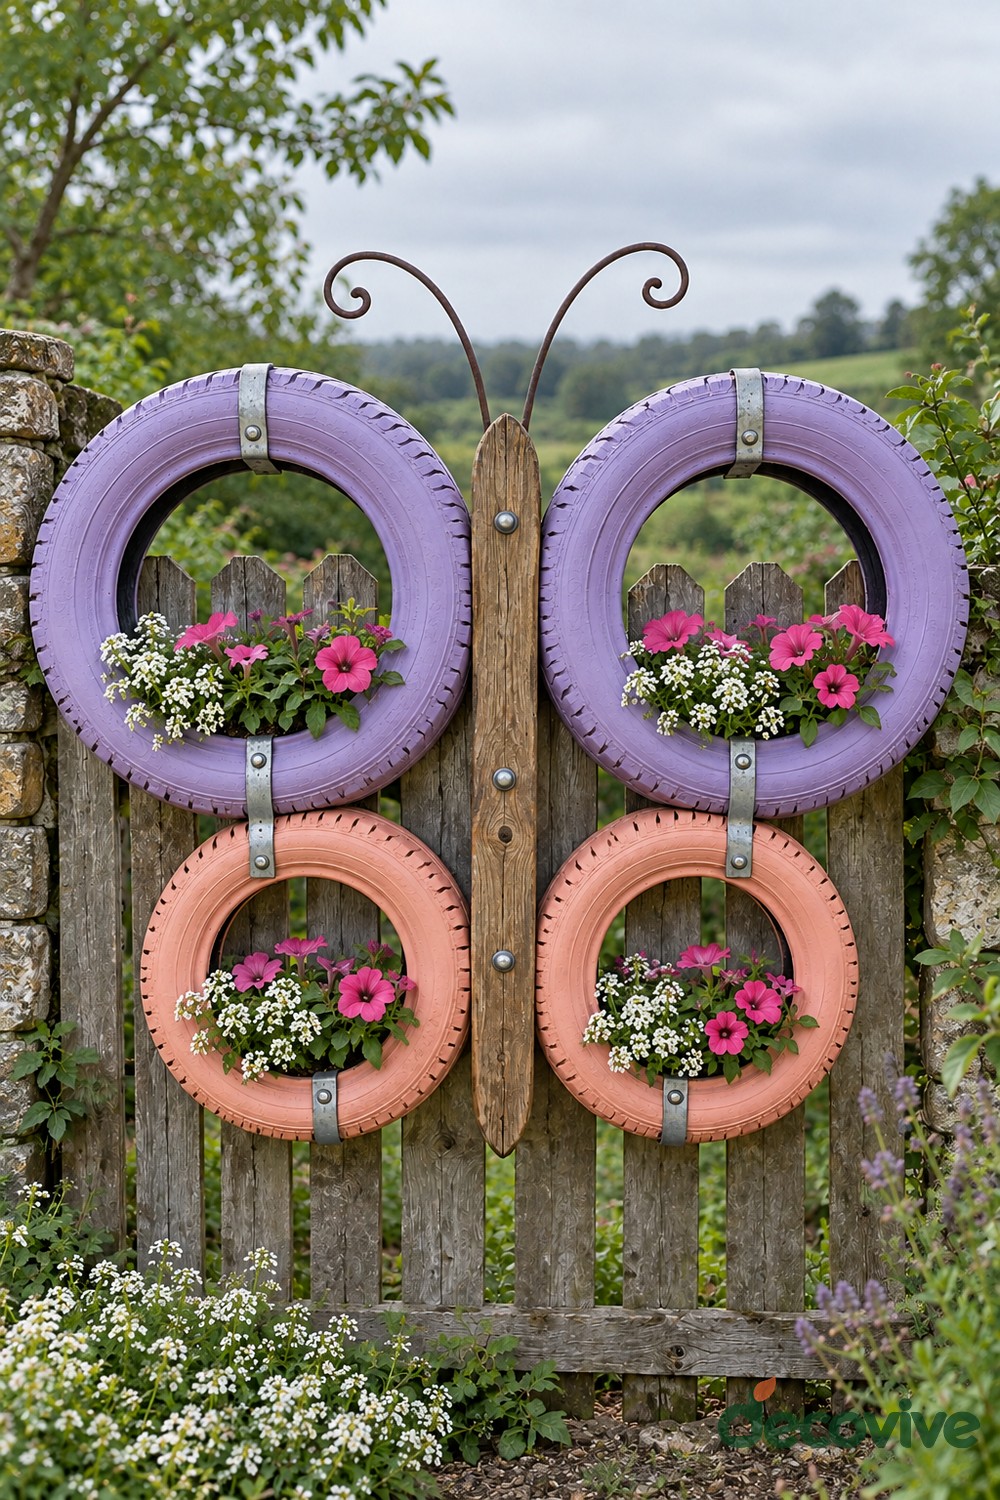
Two larger lavender tires above two smaller peach tires create a butterfly silhouette against a wooden fence. A narrow timber body draws the wings together, and curled metal antennae finish the outline. Pink flowers and small white blossoms repeat across all four openings.
Lay out the wing arrangement on the ground before fixing it to a substantial backing frame. Support every ring and planting pocket independently; connecting straps between tires should not be the only load path. Attach the backing to sound posts or another suitable structure. Leave the upper portions of the wing openings clear so the butterfly remains recognizable as the flowers grow.
4. Build a Rolling Tire Storage Table with a Wooden Lid
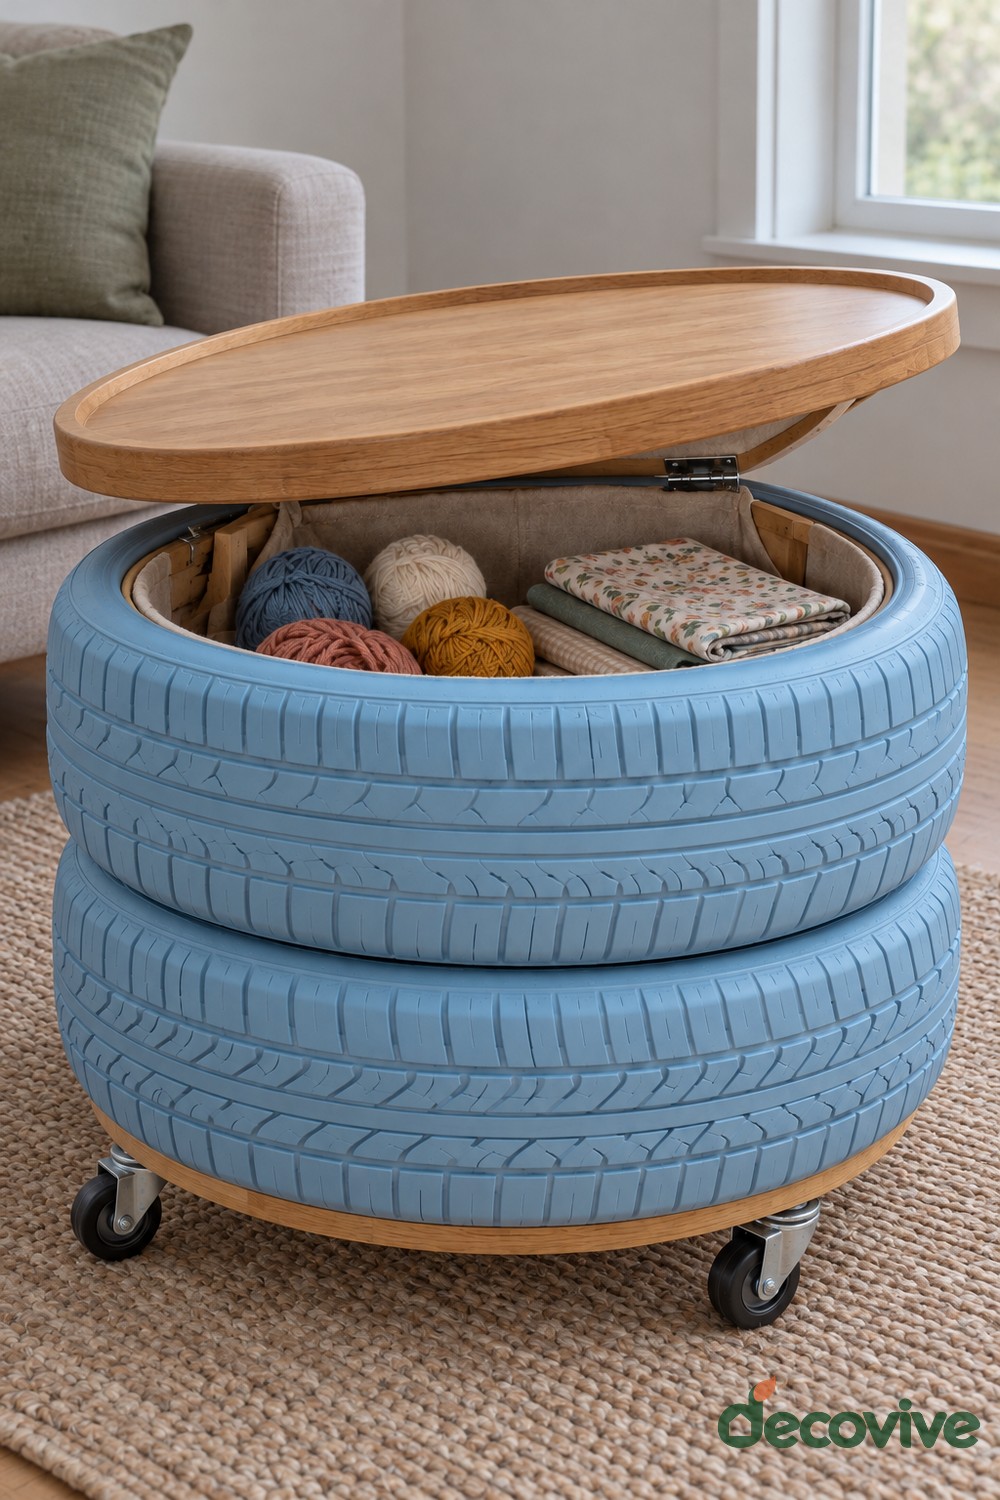
Two blue tires surround a lined storage compartment beneath a round wooden lid. Small casters make the table movable, while the raised edge of the lid gives the top the appearance of a serving tray. Yarn and folded fabric fit within the central space.
Use a rigid wooden base and internal frame to carry the lid, hinges, and caster fixings. Join the tires to this structure so they cannot shift apart. Add a removable liner and a lid stay that prevents sudden closing. Locking casters help keep the table still during use. Keep it for light storage and tabletop use unless a furniture professional has assessed it for seating.
5. Add a Daisy Cushion to a Tire Footstool
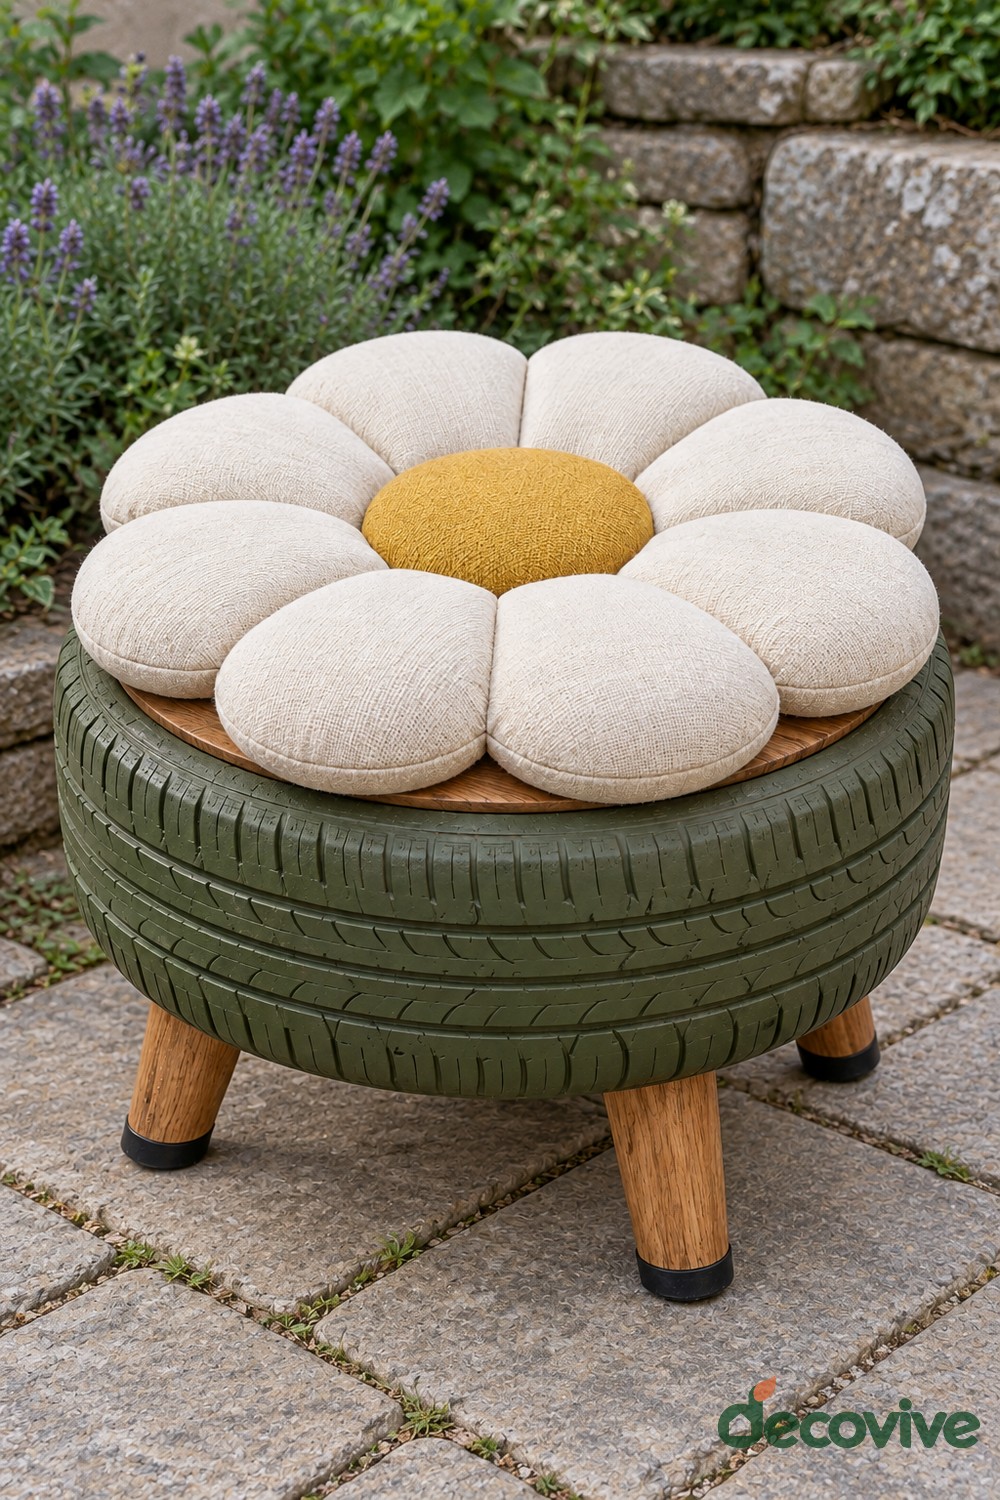
A ring of cream upholstered petals around a mustard center gives this olive green footstool a cheerful daisy top. The tire stays visible beneath the cushion, and short wooden legs lift it away from the paving.
Shape the cushion on a circular wooden platform and attach the legs to a rigid base with proper furniture fittings. Internal supports should transfer the load between the top and the legs rather than relying on flexible rubber. Sew the petal cushions to a common removable cover so they stay aligned. Use the piece in a sheltered spot and bring the cushion inside when the weather changes. Treat it as a footrest unless its frame is designed for seating.
6. Create a Sage Green Wall Pocket for Begonias
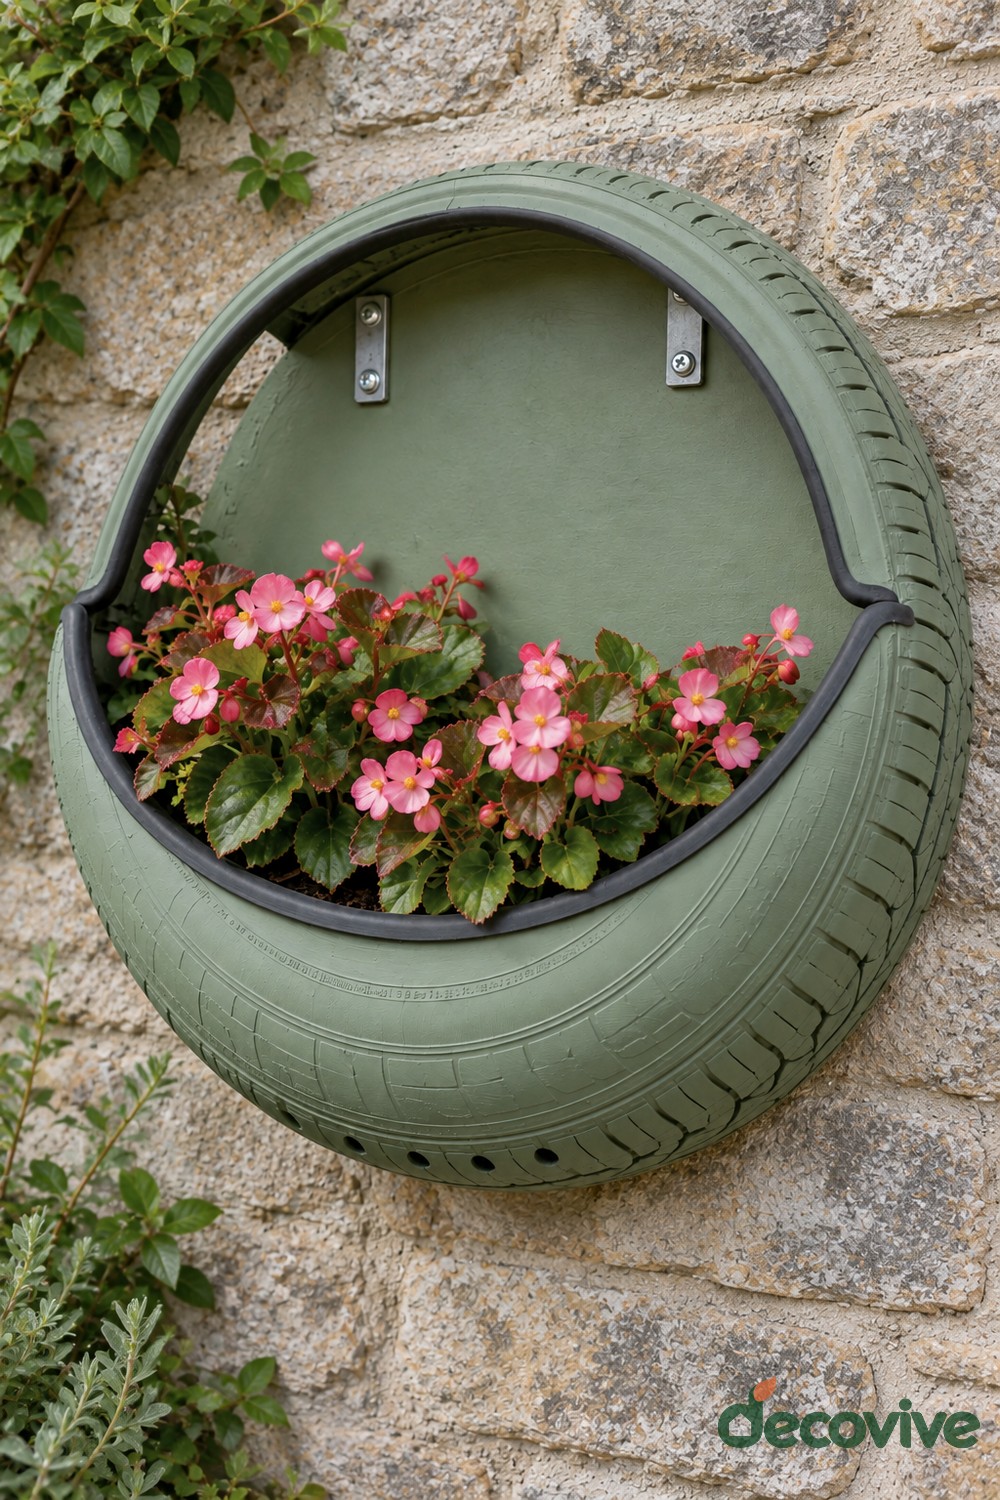
A shaped tire opening and matching sage backing give this wall planter a quiet, rounded profile. Pink begonias occupy the lower pocket, leaving the upper section open and showing the bracketed construction.
Reproducing the shaped opening calls for experienced tire cutting and protected edges. For a simpler variation, retain the whole tire and place a supported half pot in its lower opening. Mount the backing securely to the wall, provide a removable planting container, and keep drainage away from the backing board. Choose a begonia variety suitable for the light at that particular wall, since requirements vary between types.
7. Make a Crescent Moon with a Hanging Wooden Star
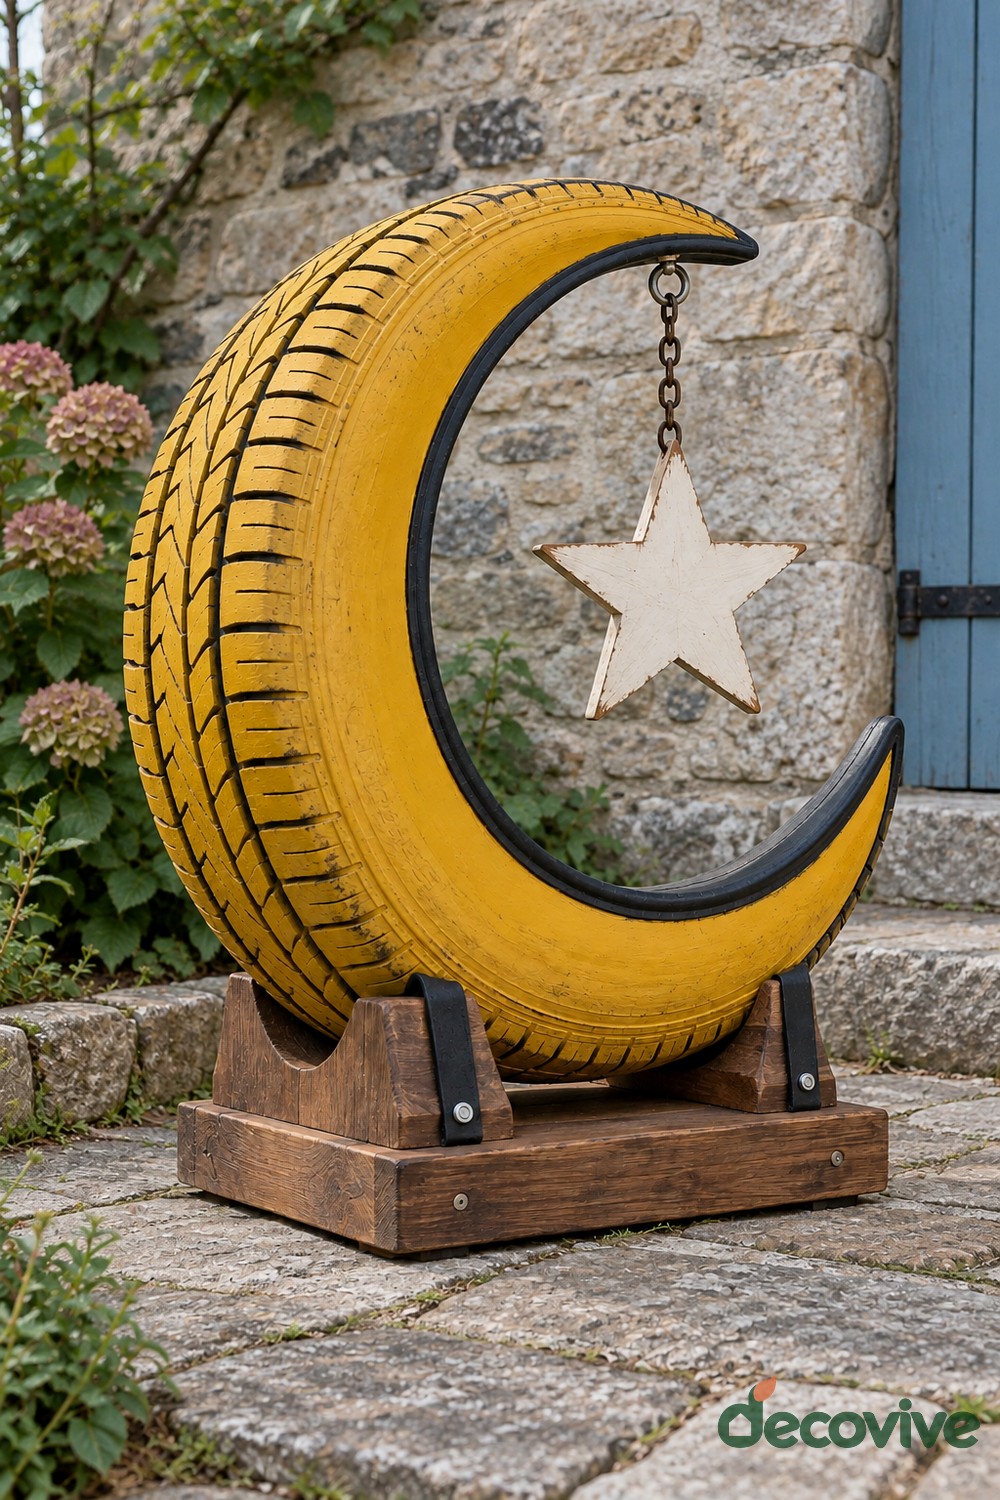
A yellow crescent cut from a tire becomes a sculptural garden ornament with a small wooden star hanging inside. Dark edge trim defines the curved opening, and a timber cradle holds the moon upright.
This is a fabrication project rather than a simple painting idea. The cut rubber needs reinforcement, fully protected edges, and a firm connection to the base. Suspend a lightweight star from hardware attached to that reinforcement. Keep the chain short enough to prevent the star from striking the crescent in a breeze, and use the ornament in a sheltered location. The broad wooden base should resist tipping without depending on the flexibility of the tire.
8. Organize Slippers on Circular Tire Shelves
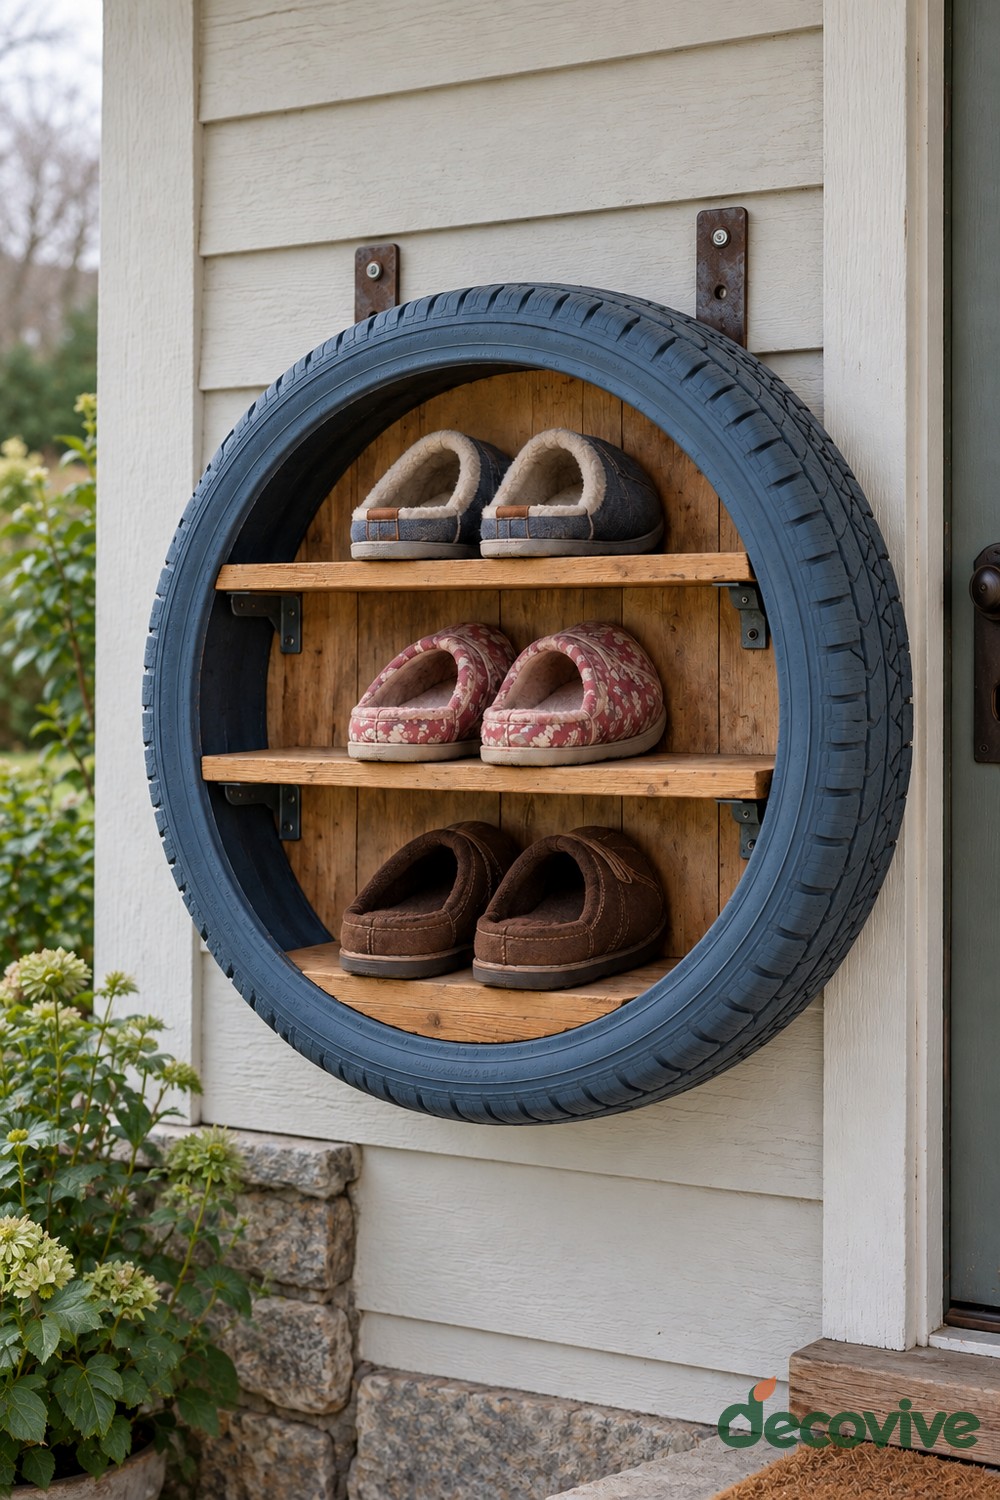
A muted blue tire frames three levels of wooden shelving for slippers near an entrance. The round shape makes a small shoe station feel deliberate, while the open front keeps each pair easy to reach.
Measure your footwear before spacing the shelves. Attach shelf brackets to a solid wooden back, then secure that back to an appropriate wall structure. The tire acts as a border around the shelving unit. Sand the shelf edges and leave enough clearance to lift shoes out without scraping them against rubber. A covered porch or utility entrance suits this arrangement better than an exposed wall where soft footwear would collect rain.
9. Keep Long Garden Tools in a Stacked Tire Stand
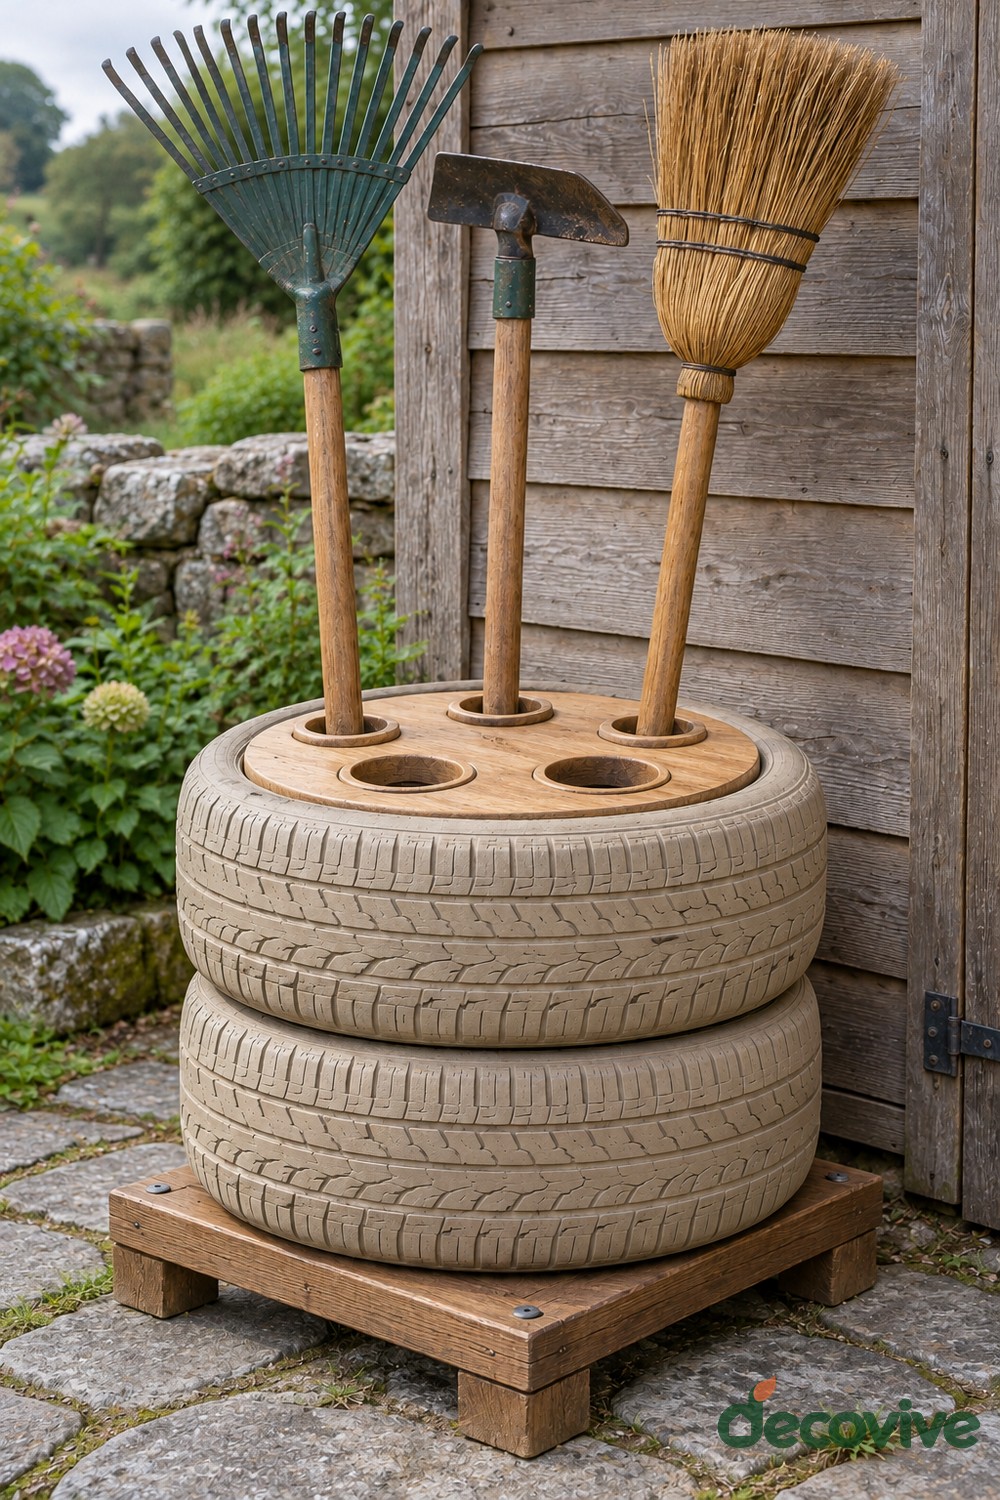
Two beige tires conceal the lower part of a freestanding tool organizer. Individual holes in a round wooden top separate a rake, hoe, and broom, while a raised square base keeps the unit away from damp paving.
Create matching handle guides inside the stand so tools cannot slide sideways into the rubber cavity. Space the top holes according to the largest tool heads, not just the handle widths. Use a broad, braced timber base and anchor the stand if tall tools make it unstable. Keep sharp heads turned away from the access route. Store the organizer under cover and allow moisture on tool handles to dry before putting them away.
10. Display Flowerpots on a Bicycle Wheel Stand
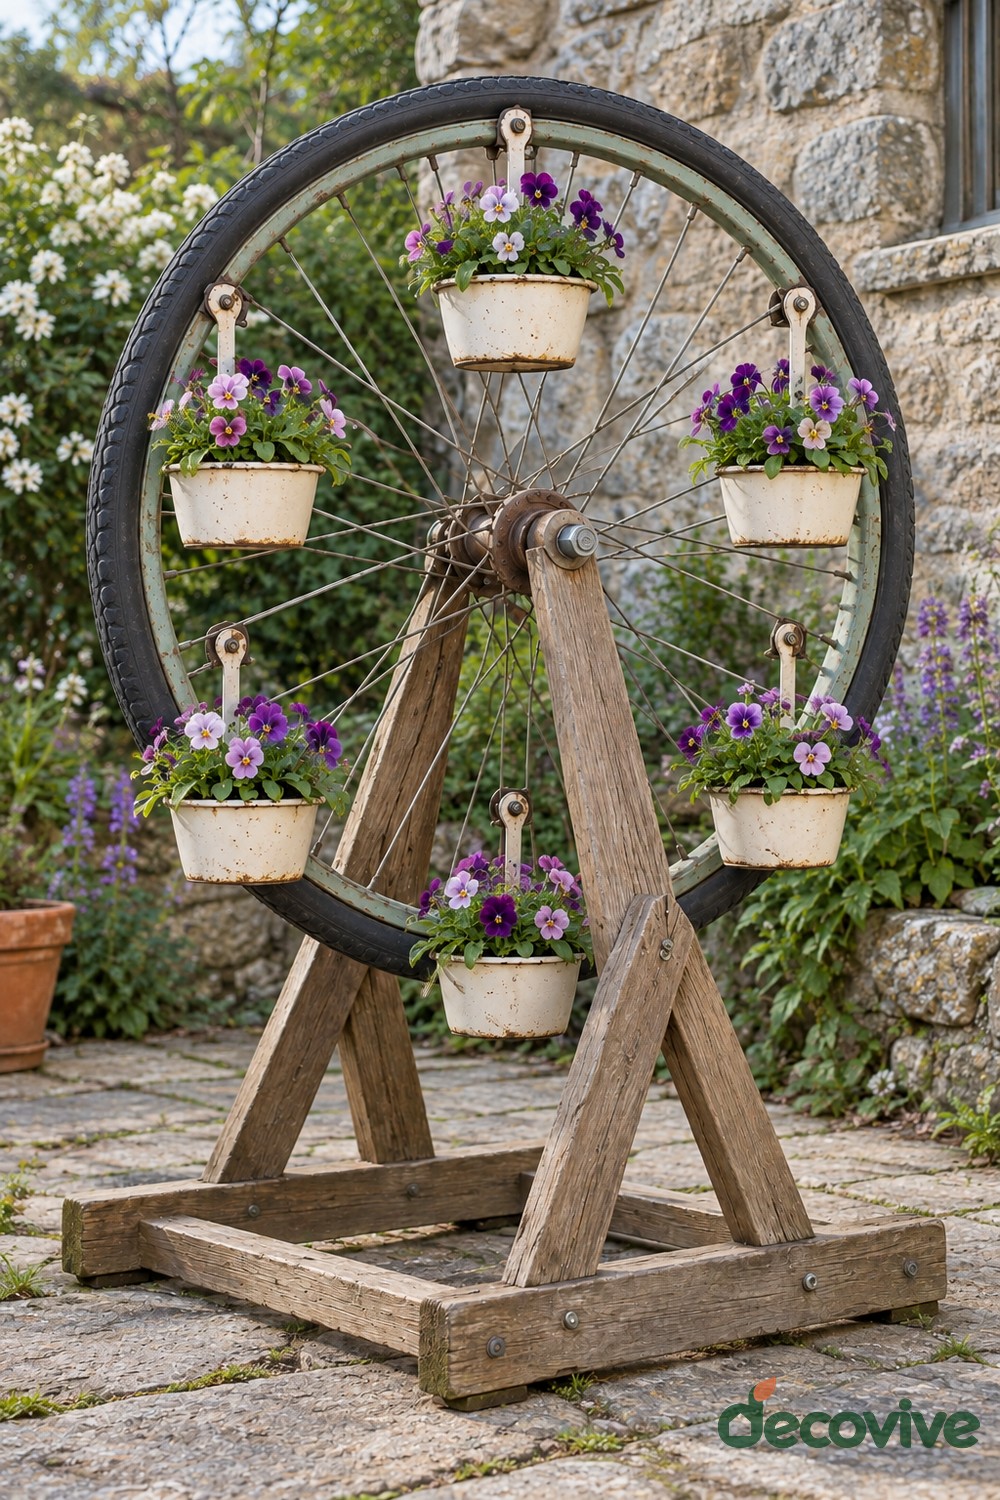
A complete bicycle wheel becomes a miniature fairground style flower display. Six small cream pots hang around the rim, and a braced timber stand supports the central hub. The narrow bicycle tire provides a lighter outline than a car tire.
Use secure pot holders attached to the metal rim rather than loading the spokes. Support the hub between suitable uprights and lock the wheel in position for a stationary display. Check the weight with the pots watered, and anchor the base against tipping. The fairground appearance is decorative; making a safely rotating version would require a separate mechanical design.
11. Store Rolled Towels in a Cream Tire Shelf
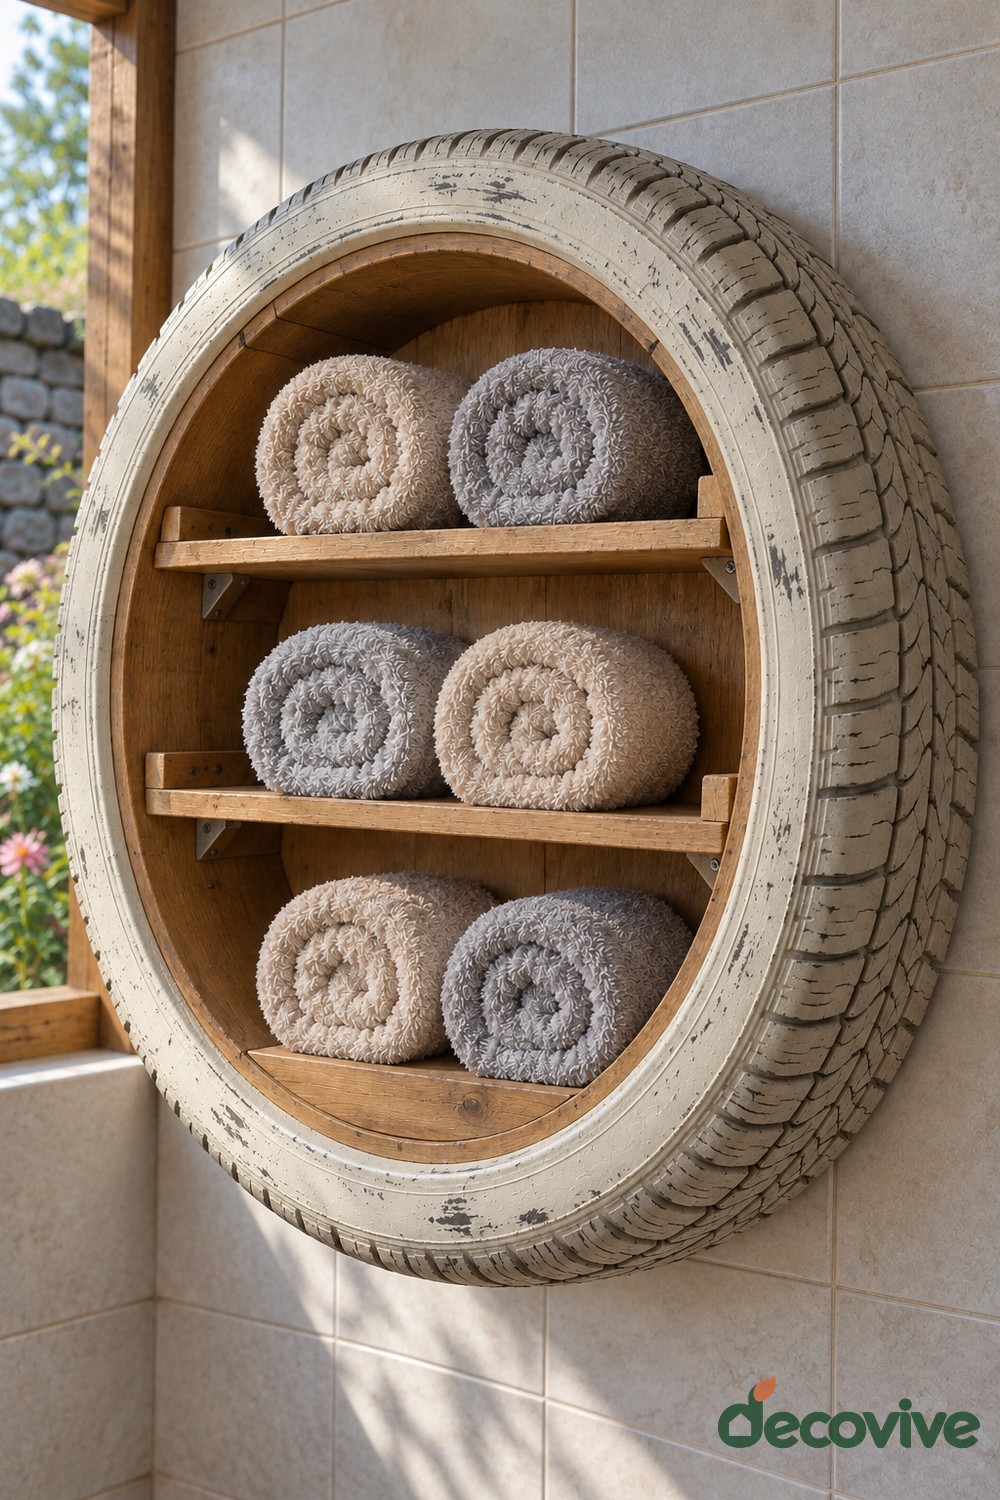
A cream tire surround softens a circular towel shelf, while warm wood and alternating gray and ivory rolls keep the interior calm. Short front rails help the towels stay in position.
Build the shelves as a timber unit with a backing panel, then mount the unit independently of the tire. Make the shelf depth fit your rolled towels and seal the wood for occasional humidity. Use only a thoroughly cleaned tire without persistent odor or residue, and keep the piece outside the shower splash area. Store dry towels here; damp rolls packed into a small compartment will not air well.
12. Line a Garden Edge with a Tire Caterpillar
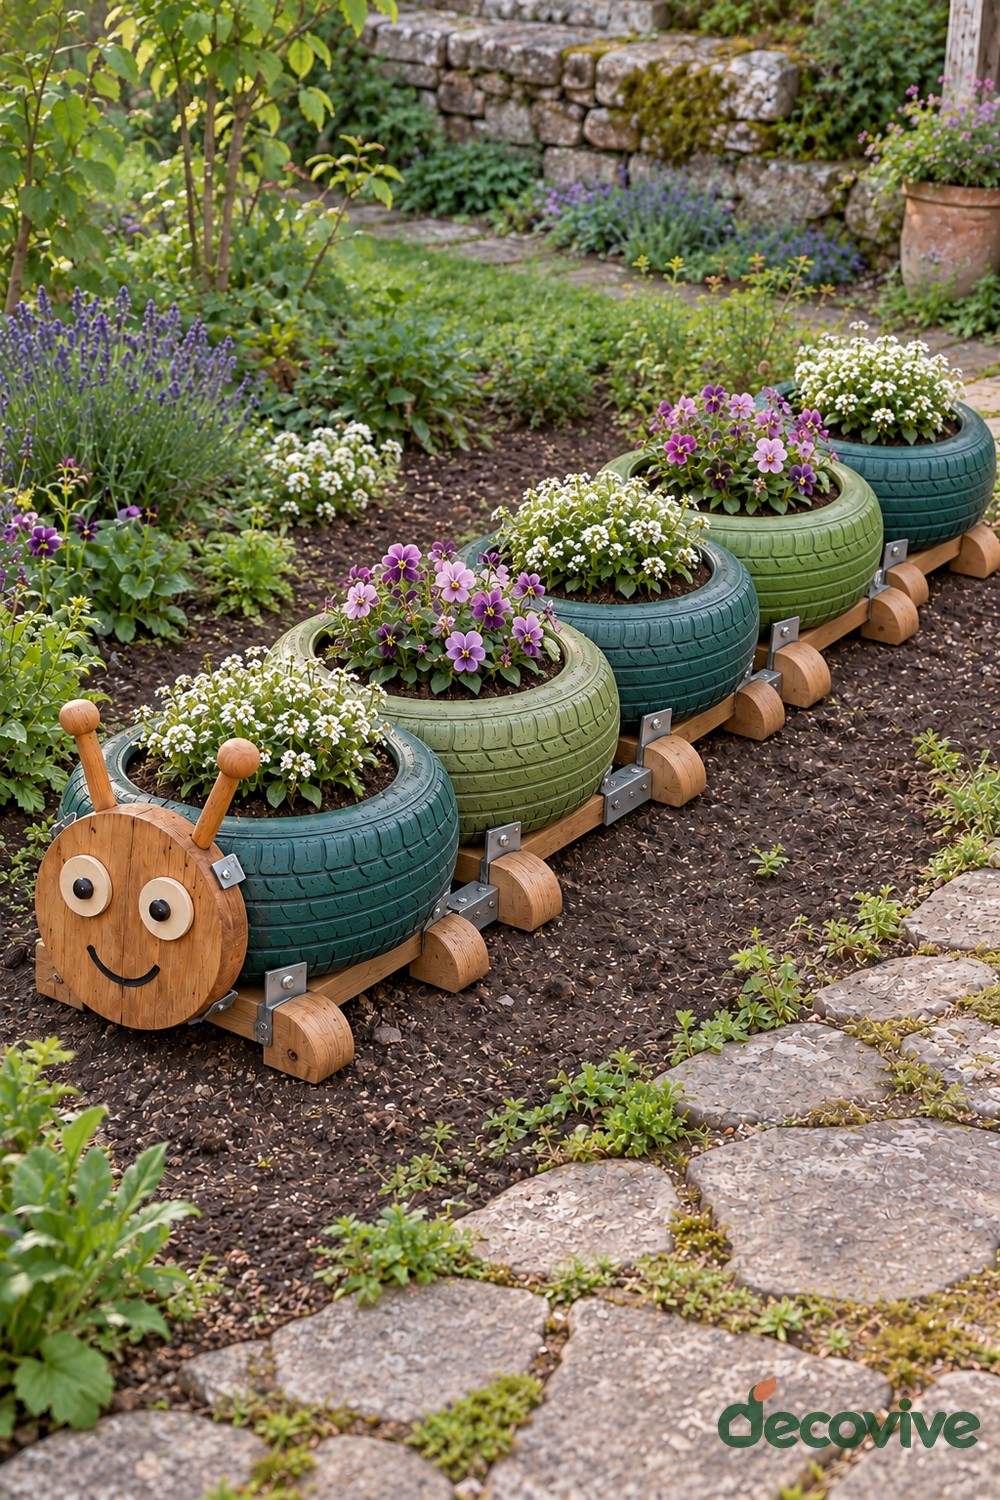
Five low tire planters form a friendly caterpillar along the edge of a flower bed. Alternating teal and green rings hold white blossoms and purple flowers. A round wooden face, two antennae, and repeated wooden feet make the row read as one character.
Build the timber supports on level ground and secure each ring so it stays in position. Place a removable draining pot inside each tire and leave access for lifting it out. Round the head, antennae, and feet, and keep all hardware ends covered. Position the caterpillar beside the path with the feet clear of walking space. It is a decorative planter, not climbing equipment.
13. Frame Yellow Pansies with a Wooden Petal Flower
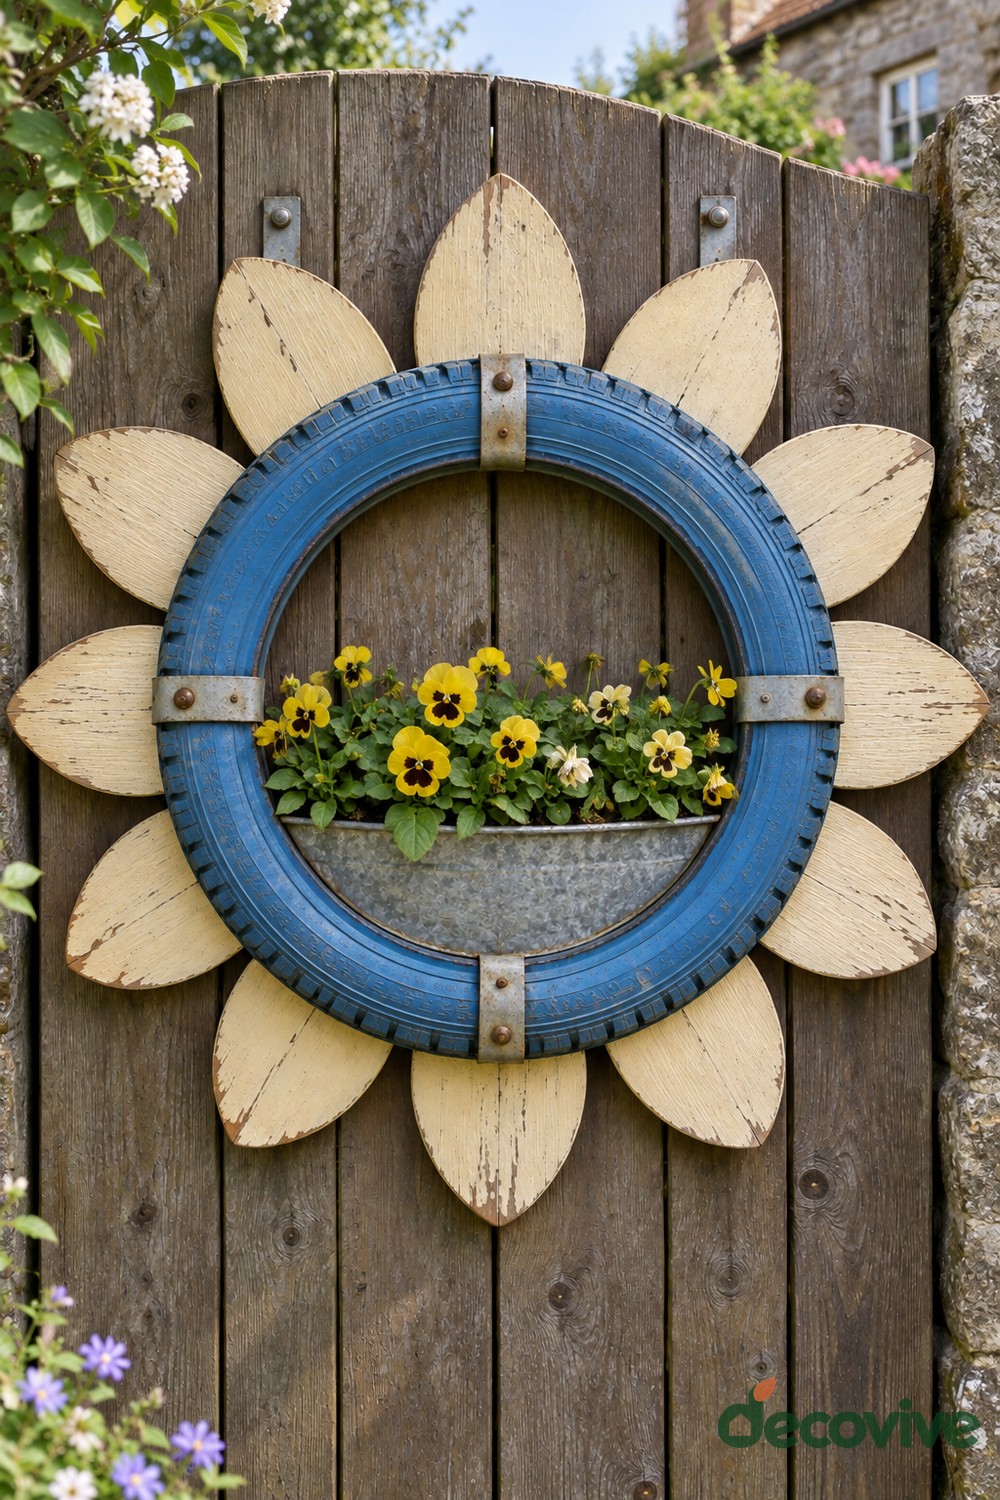
A blue tire provides the center ring for an oversized flower with cream wooden petals. A shallow galvanized pocket rests within the lower opening, bringing yellow pansies into the center without hiding the circular outline.
Cut a full size cardboard petal first, then use it to plan the spacing around a backing ring. Attach the wooden petals to that backing before installing the tire. Support the metal pocket on its own bracket and give its inner pot an unobstructed drainage route. For another approach to reclaimed garden materials, explore these wine barrel projects for home and garden.
14. Paint a Smiling Face on a Low Tire Planter
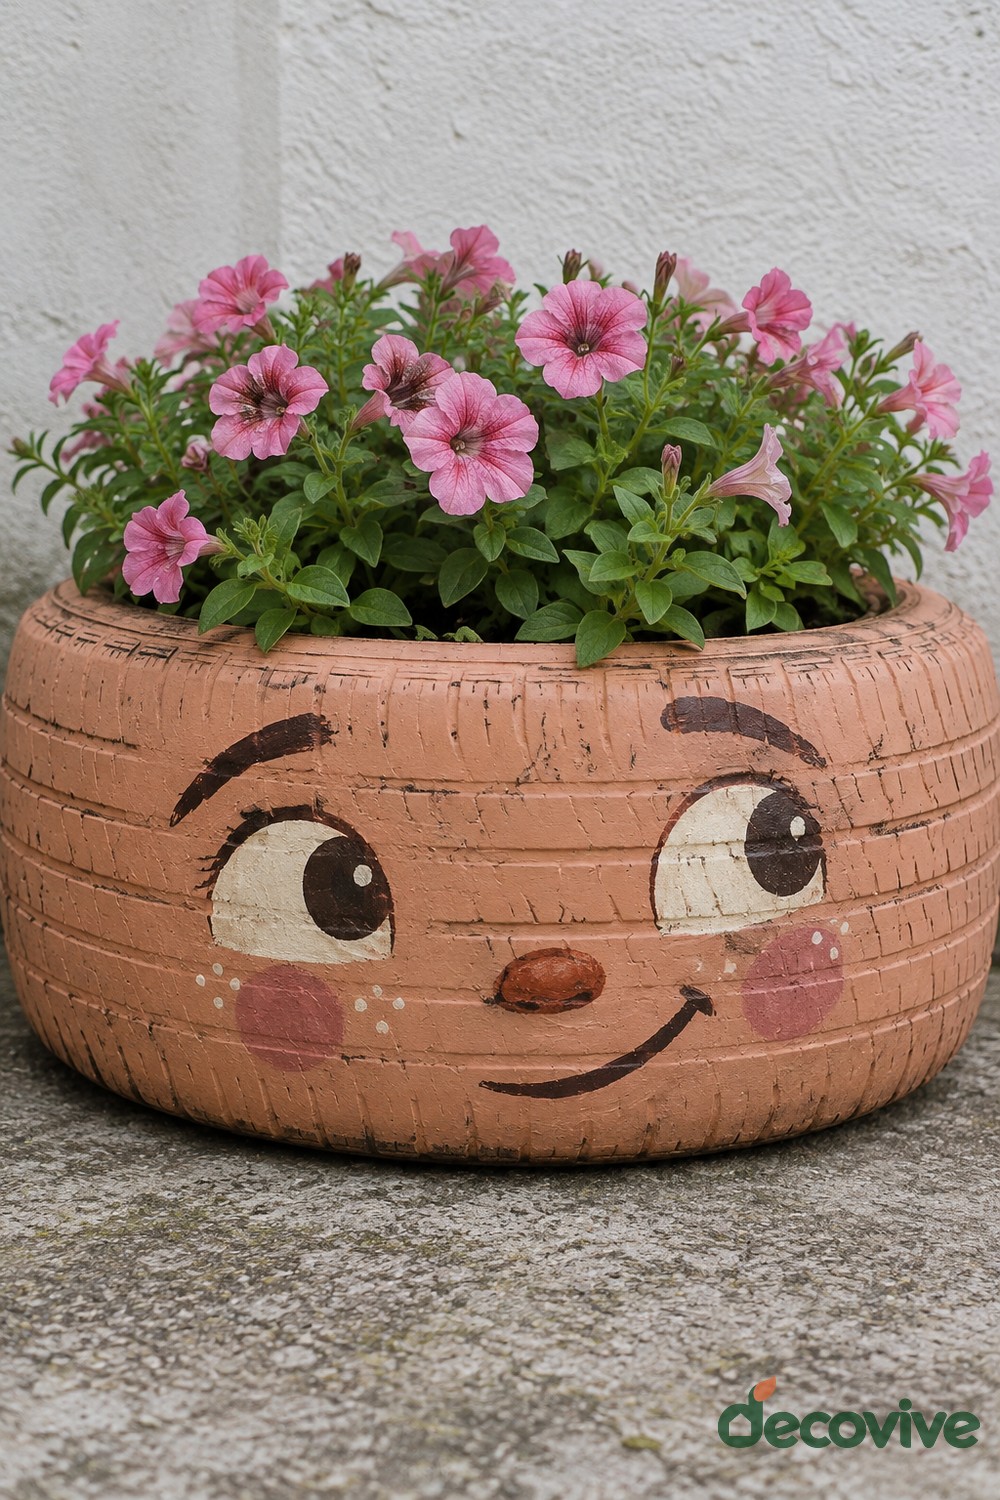
Pink petunias become a playful crown above a peach colored planter face. Large eyes, arched eyebrows, rosy cheeks, and a curved smile are enough to give the tire personality without adding separate sculptural parts.
Sketch the face on paper, then mark the eye positions around the tire's curved front. Apply the base color first and let each detail dry before painting the next. Preserve the tread lines as part of the handmade finish. Fit a removable flowerpot and keep the petunias trimmed enough to reveal the eyes. Set the planter on a stable surface with an open drainage route underneath.
15. Give a Tire Planter a Sleepy Ginger Cat Face
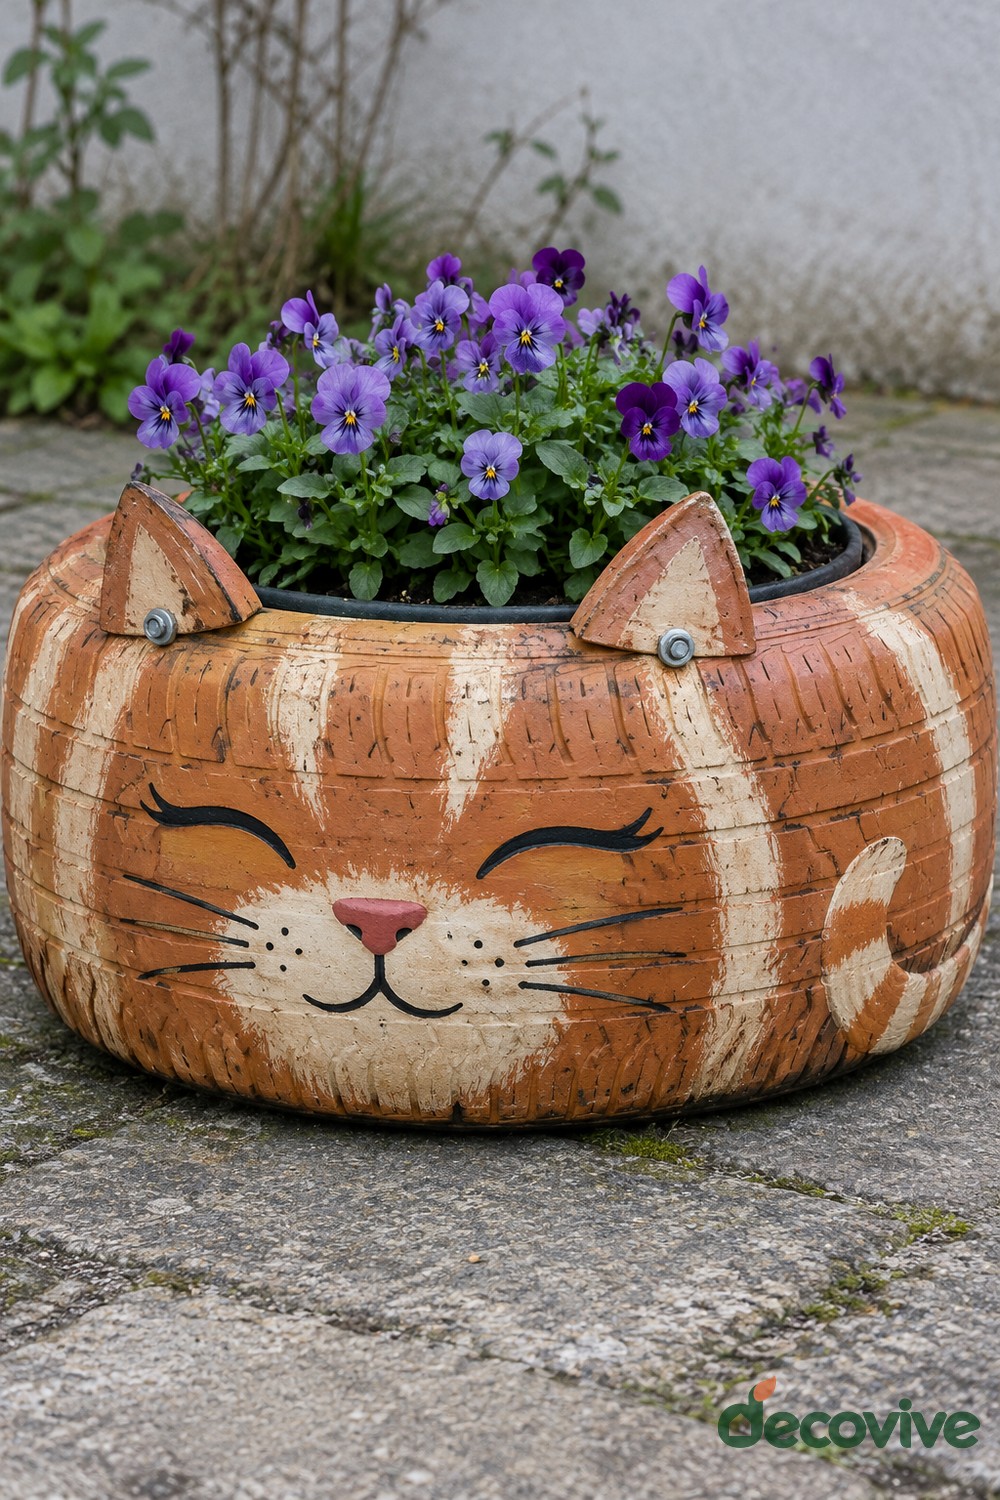
Closed eyes and a tiny pink nose give this orange and cream planter a sleepy expression. Two triangular wooden ears rise just above the rim, while purple violas contrast with the warm painted stripes.
Make the ears from smooth exterior suitable timber, soften their points, and attach them with bolts and broad washers. Keep fixings clear of the removable pot. Paint the cream muzzle before adding the nose and fine black whiskers, using a small brush that follows the sidewall texture. The ears should remain visible above the flowers. Leave the tire recognizable rather than filling its tread grooves with a thick decorative coating.
16. Turn an Upright Tire into an Owl Flower Pocket
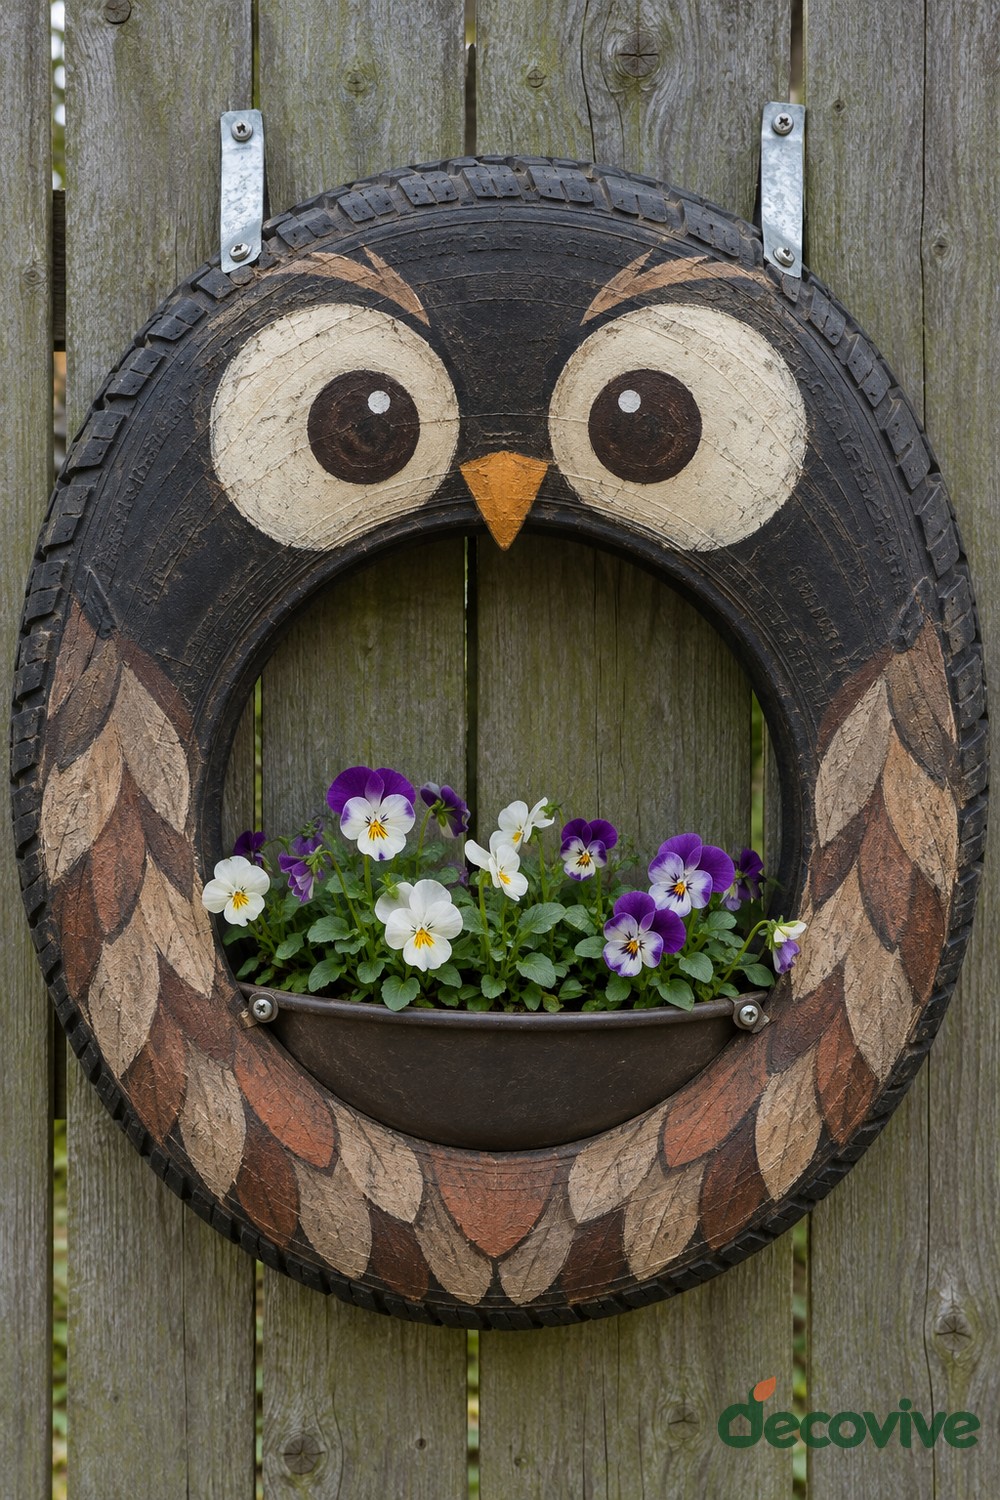
Two broad cream eyes transform the top of an upright tire into an owl's face. An orange triangular beak and overlapping brown feather shapes connect the expression to a small flower pocket below.
Paint the eyes first so the design has a clear focal point. Add the feathers in loose rows around the sidewalls, letting some black rubber show between them. Mount the tire on a substantial backing and support the planting pocket from that structure. A removable liner makes the small compartment easier to water and refresh. Keep the pocket low in the opening so foliage does not hide the beak or cover the painted eyes.
17. Use Curved Tire Pockets for Small Garden Supplies
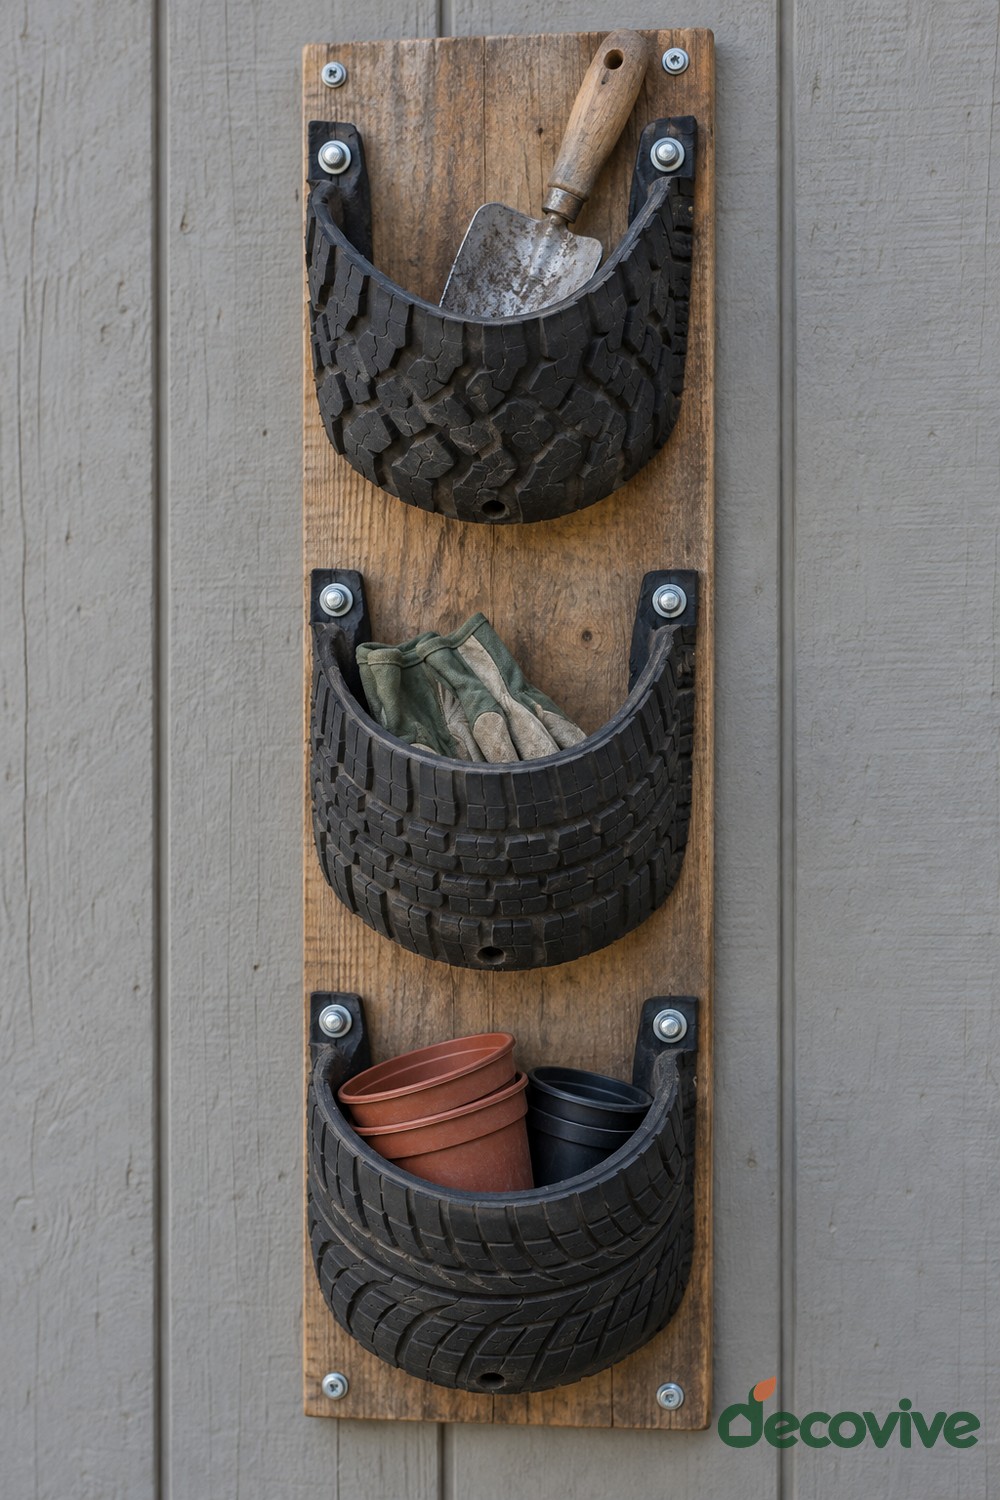
Three curved rubber pockets use the original tread as a textured front. Mounted on a timber board, they separate a hand trowel, gardening gloves, and spare nursery pots in a narrow strip of shed wall.
Use professionally prepared tire sections with protected cut edges. Bolt both ends of each pocket through the board with broad washers, and support the bottoms where necessary to prevent small items falling behind them. Provide drainage at the lowest points if the organizer is exposed to weather. Keep sharp tool edges covered and avoid overfilling the pockets. For further compact storage inspiration, these repurposed wine rack ideas offer useful ways to arrange everyday supplies.
18. Make an Umbrella Trellis from a Bicycle Wheel
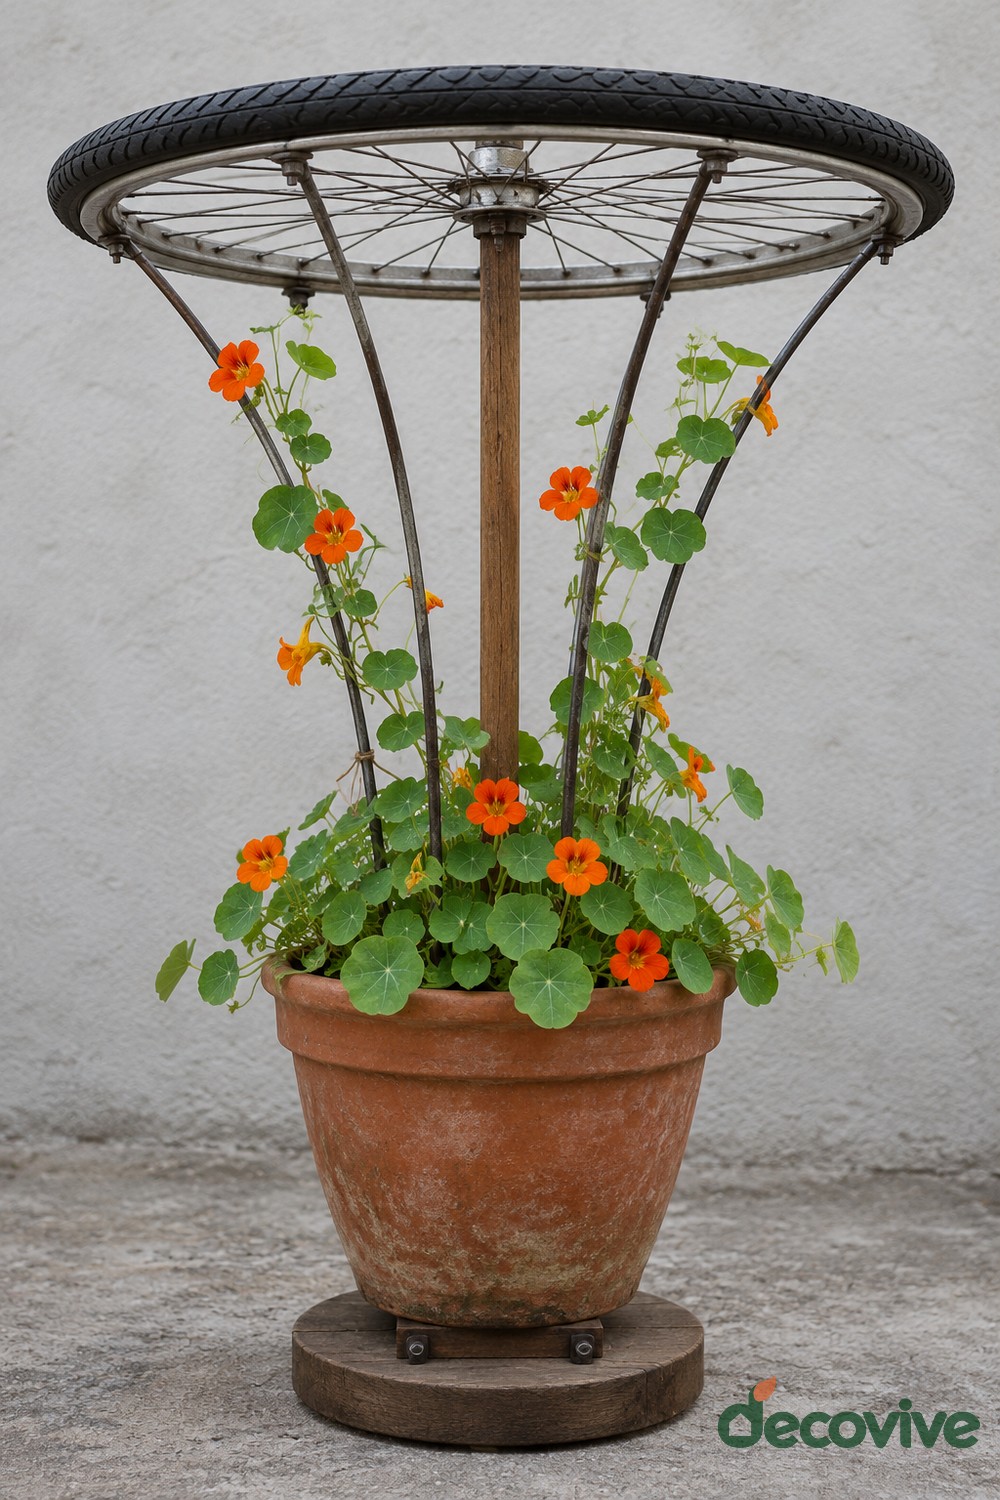
A horizontal bicycle wheel creates an umbrella shaped top above a terracotta pot. A central timber post carries the hub, and sloping supports lead upward from the pot toward the rim. Orange trailing nasturtiums soften the framework.
Mount the center post to a rigid base behind or beneath the pot so the clay rim does not carry the framework. Fix the wheel through its hub and secure the sloping supports to the metal rim. Select a trailing nasturtium variety and gently tie its stems as they lengthen. This design offers a framework for flowers; the open wheel is not a rain canopy or a source of substantial shade.
19. Hang a Bicycle Wheel Drying Rack under Cover
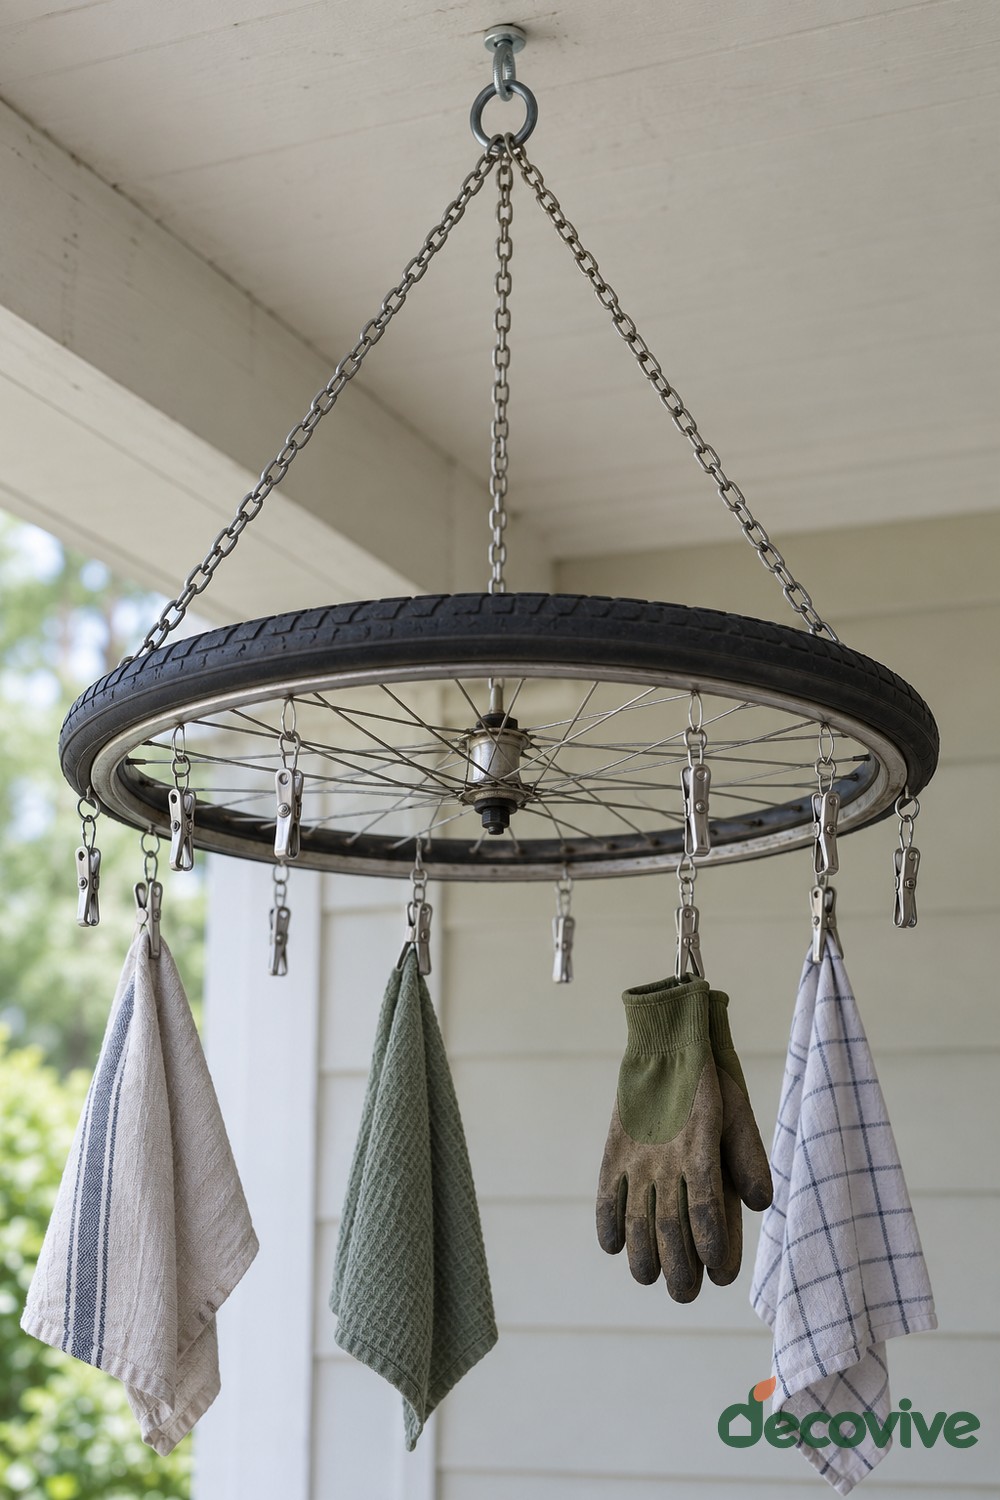
A bicycle wheel suspended horizontally provides a circular drying rack for small cloths and gardening gloves. Short hanging clips make the most of the rim while leaving air space between the items.
Connect three equally spaced suspension chains to the metal rim and join them at a secure top fitting. Mount the overhead hardware into a structural beam, allowing for the weight of wet items. Check the rim and spokes for sharp ends and remove any tire that sheds residue. Keep the rack in a sheltered utility area with room below it, and use lightweight items spread evenly around the circle. This is a small drying station, not a support for heavy tools.
20. Group Seven Small Tires into a Wall Garden
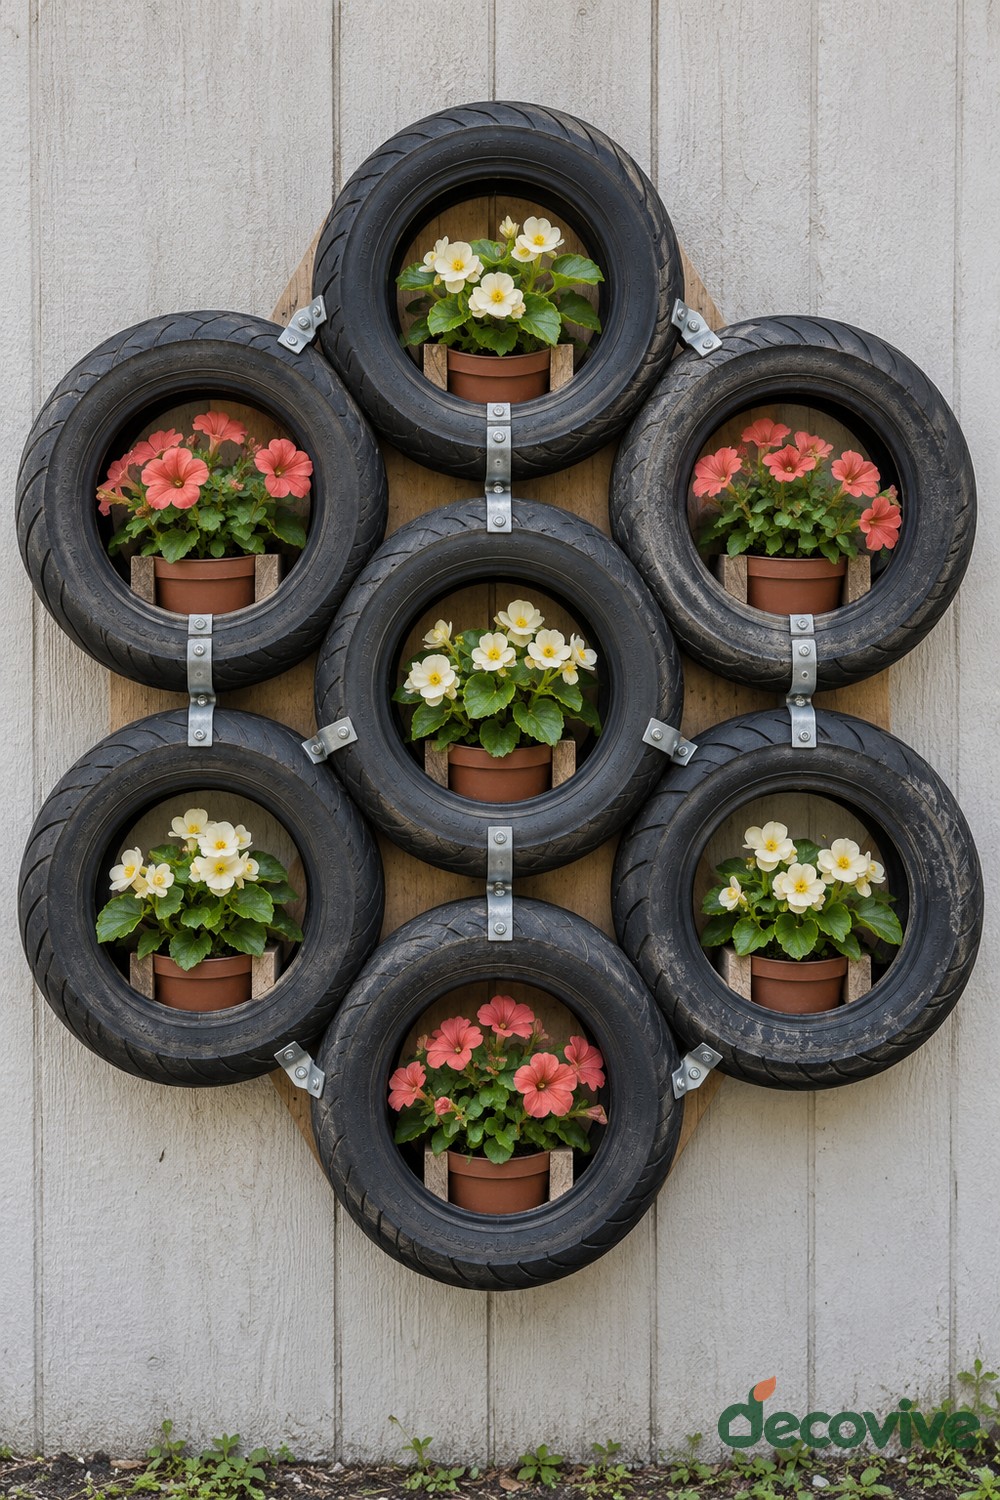
Seven small tire rings form a compact wall garden with a repeating rhythm of cream and coral blooms. Individual pots remain visible inside the openings, making the planting arrangement easy to change.
Build the backing and pot shelves as one properly supported unit. Attach each tire to the backing rather than relying on neighboring rings and decorative joining straps. Choose pots that lift out without catching their foliage on the tire edges. Check the fully watered weight before selecting wall fixings, and leave room for runoff behind and below the display. Matching pot sizes help the composition look orderly even when the flowers change with the season.
21. Add Tire Ring Armrests to a Wooden Garden Bench
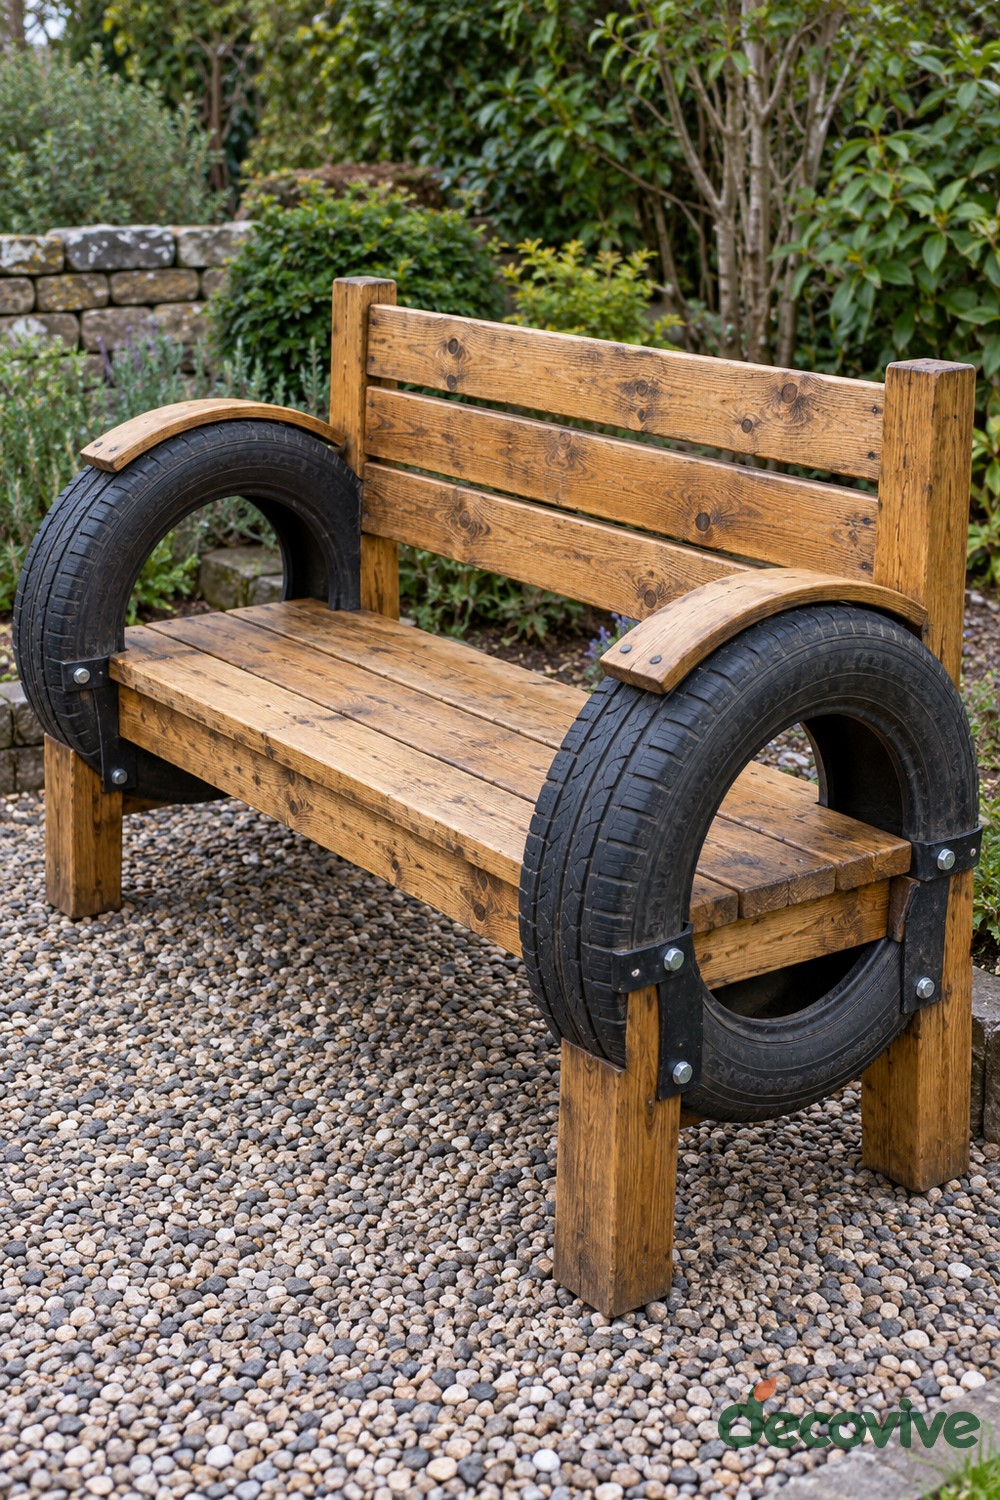
A timber bench gains a distinctive outline from two upright tire rings positioned at its ends. Curved wooden caps provide smooth armrest surfaces, while the exposed rubber adds a darker border to the warm wooden seat and back.
Start with a bench frame designed to support seated people independently of the tires. Attach the rings as decorative side elements, keeping the seat rails, legs, and back properly joined and braced. Bolt the armrest caps to supporting timber rather than relying on screws into rubber. Sand all contact surfaces and cover exposed bolt ends. Use sound timber and a competent furniture builder when the structure or its capacity is uncertain.
22. Lay Out a Compass Flower Bed with Five Tires
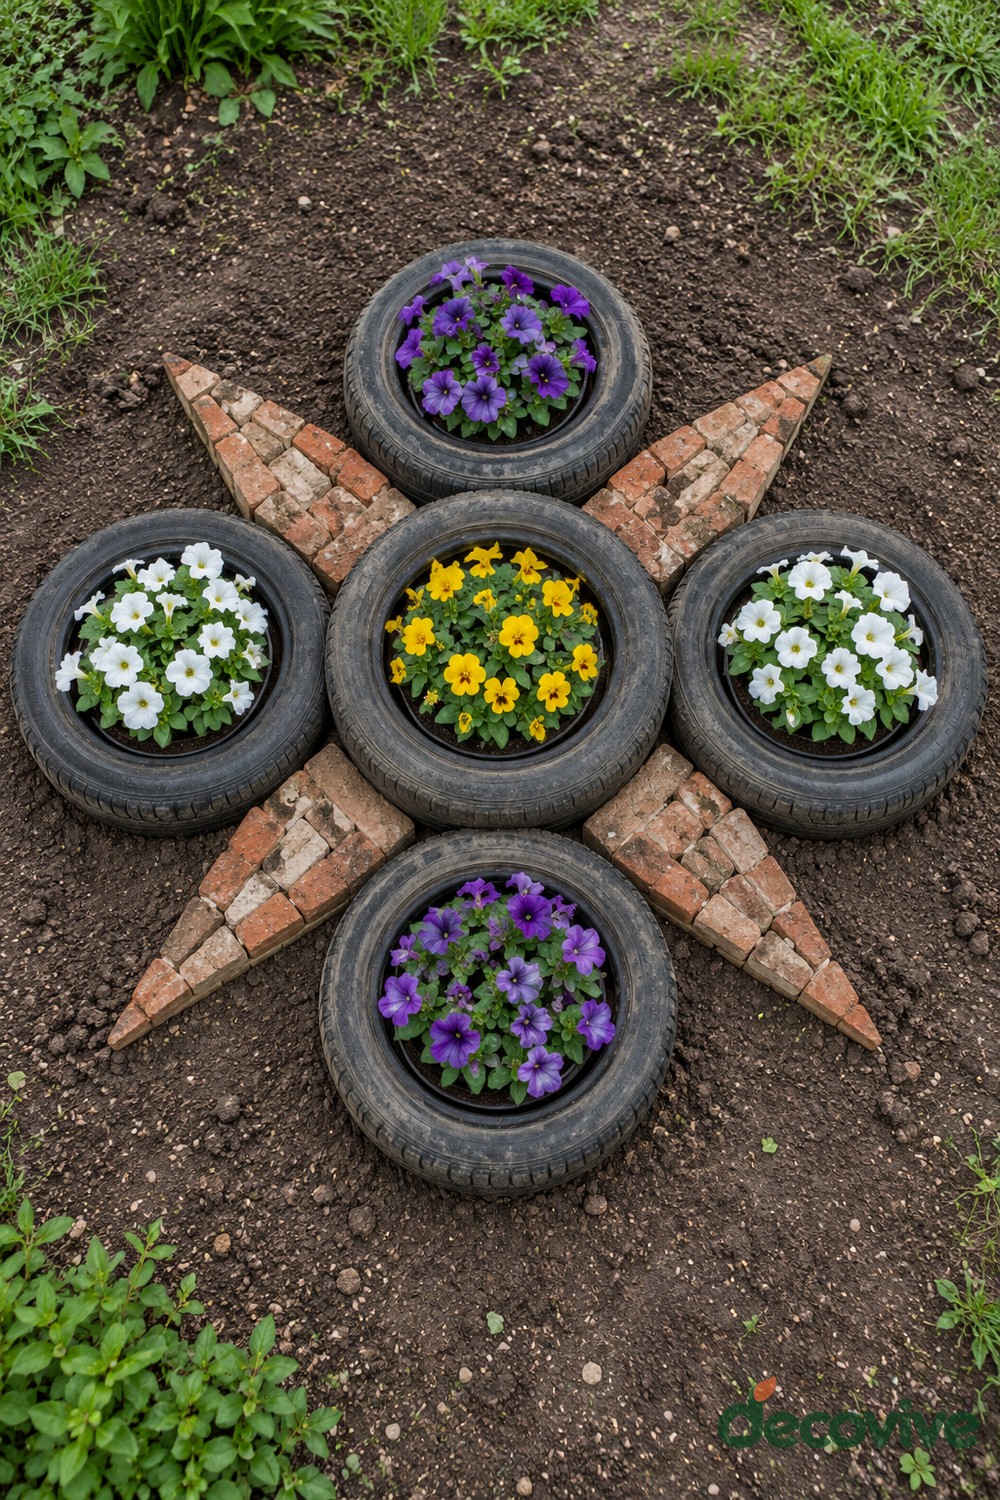
Five tires and four triangular brick points create a compass inspired pattern on a small patch of ground. Yellow flowers mark the center, white flowers sit at the sides, and purple flowers fill the upper and lower rings.
Arrange the empty tires first, measuring from the central ring to keep the pattern balanced. Build the brick points on a firm, level bed so loose pieces cannot rock or expose sharp corners. Add removable draining pots to the tire openings and leave access around the design for maintenance. Keep this feature outside the walking route. Repeating one flower color in opposite positions makes the geometry easy to read.
23. Fit a Fold Down Potting Shelf inside a Tire Frame
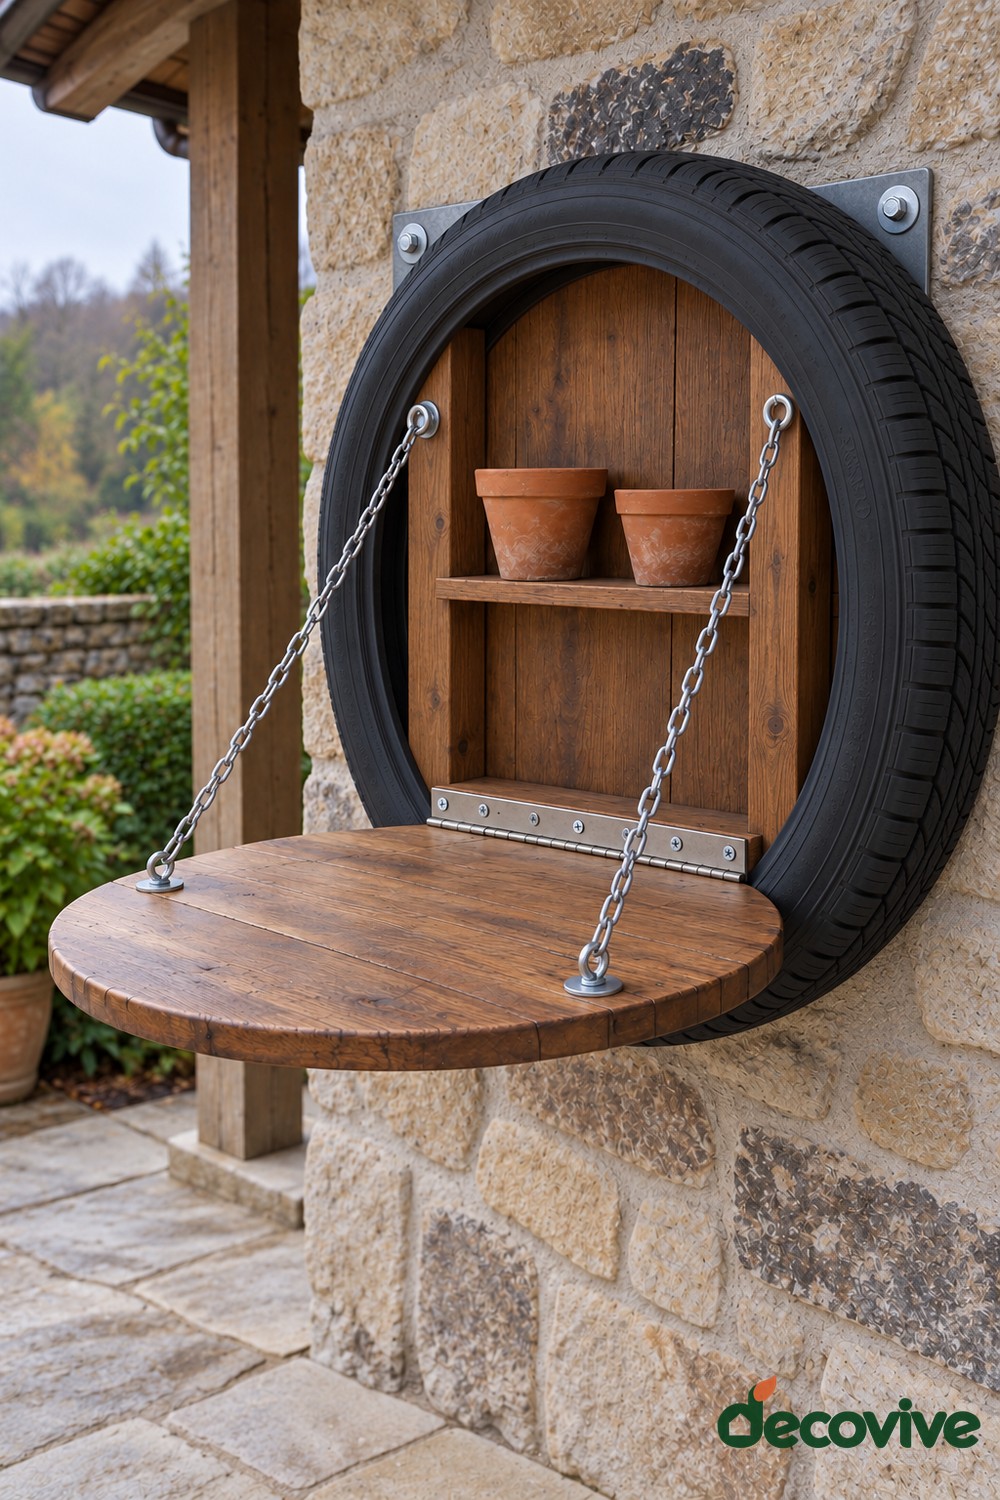
A circular wooden door folds down to create a small working ledge beneath a shelf of empty terracotta pots. The black tire frames the cabinet, and two chains hold the open door level.
Build a stout timber cabinet and fix it securely to suitable masonry or structural framing. Attach the hinge and both upper chain anchors to solid wood, with the tire serving as a decorative surround. Use hardware selected for the door and its intended light working load, and fit a positive latch for the closed position. Keep the shelf for small pots and hand tools. Do not sit, stand, or lean heavily on it.
24. Fan Five Tire Planters into a Peacock Tail
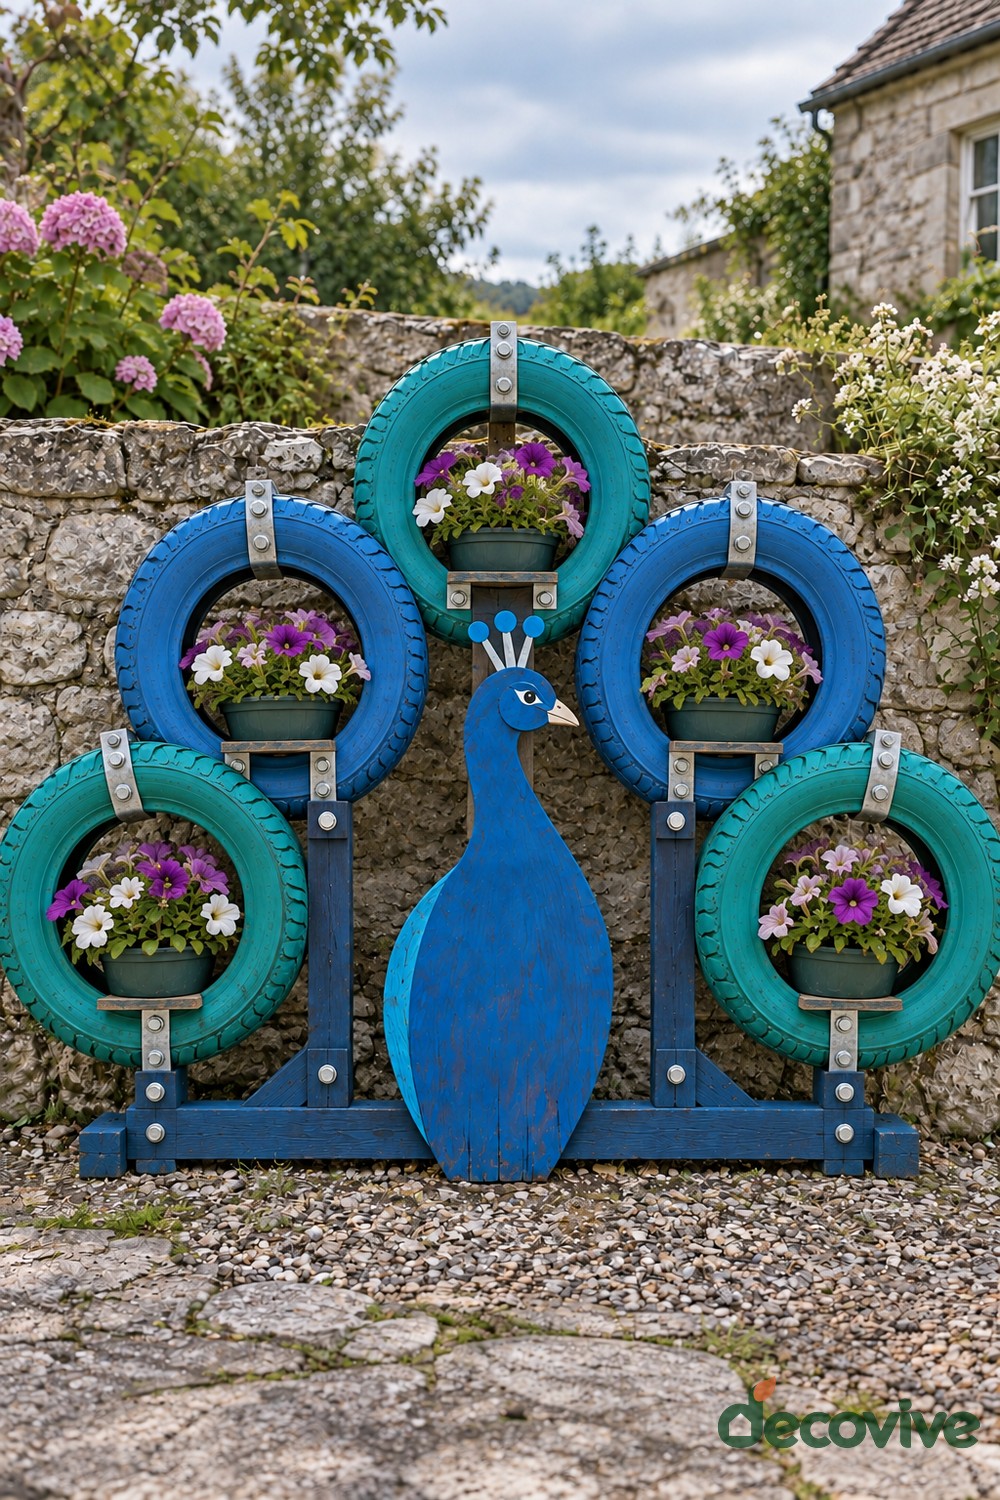
Five blue and turquoise tires spread around a flat wooden peacock to form a fan shaped tail. Separate flowerpots sit inside the rings, and the visible timber posts and metal brackets give the sculpture a clear handmade structure.
Set out the fan on the ground and build a braced frame behind it. Provide a shelf and secure fixing for every tire and pot, then anchor the frame to a suitable base or supporting structure. Attach the peacock body after the tail is stable, keeping its narrow neck and crest clear of the access route. Repeating purple and white flowers ties the five planting pockets together without hiding their round outlines.
Keep Your Tire Projects Useful through the Seasons
After rain and watering, check the inside curve of every outdoor tire for trapped water. Drain it promptly and adjust the arrangement if the same pocket keeps filling. Inspect hidden cavities as well as the visible flowerpots. Keep pot drainage holes clear; adding a layer of stones does not replace a functioning outlet.
Watch containers during hot weather, particularly those surrounded by dark rubber or placed against a sunny wall. Check the potting mix rather than following a fixed watering schedule, and move removable pots if their location becomes unsuitable. Follow the care instructions for the flower variety you choose.
Check bolts, brackets, chain connections, timber joints, and protective edge trim at the start of each season and after moving a project. Stop using a piece if its supports loosen or its rubber begins to break apart. Replace worn removable parts and take unusable tires to an approved local collection point. Choose a manageable design that you can clean, repair, and eventually dismantle.
Common Questions about Tire Recycling Projects
Which project is easiest for a beginner?
A single uncut tire placed flat around a removable ornamental flowerpot involves the fewest construction decisions. Painting is optional, and the pot can be lifted out for watering or seasonal changes. Wall mounted displays, furniture, and cut tire sculptures need more planning and appropriate skills.
Can you plant flowers directly inside a tire?
Some designs use the tire cavity as the planting space, but this collection recommends separate draining pots. They simplify repotting, make the growing medium easier to manage, and allow you to inspect the tire for trapped water. Match the pot depth and volume to the flowers rather than squeezing a large plant into a shallow pocket.
Will ordinary craft paint work on rubber?
Adhesion and outdoor durability vary. Use a product whose manufacturer specifically permits the intended rubber application, follow its full preparation instructions, and test a small area first. A clear coating does not automatically make an unsuitable paint system durable.
Can a tire alone support a seat or hanging display?
Design the supporting frame and connections for the tire furniture's intended use and load. Build furniture around a properly designed rigid frame, and mount hanging projects with hardware and structural fixings appropriate to their complete weight. Include wet soil, s

Leave a Reply