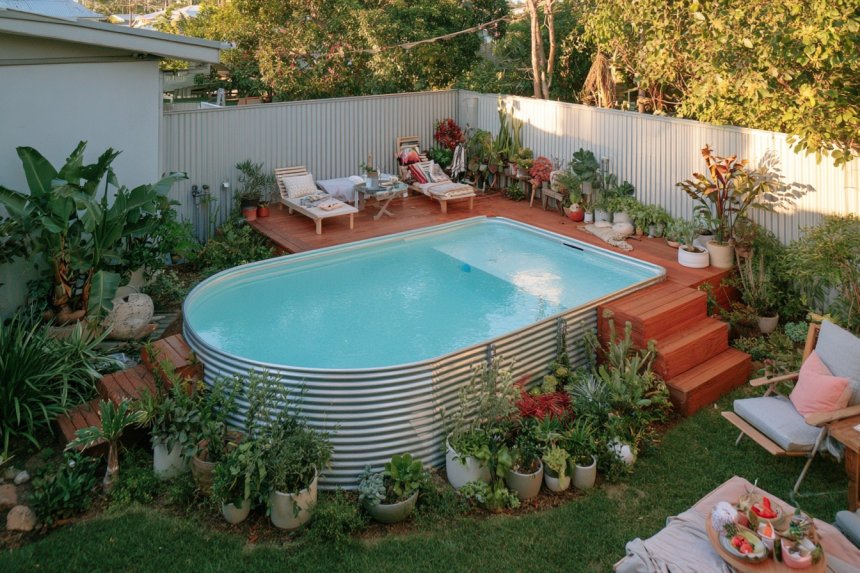
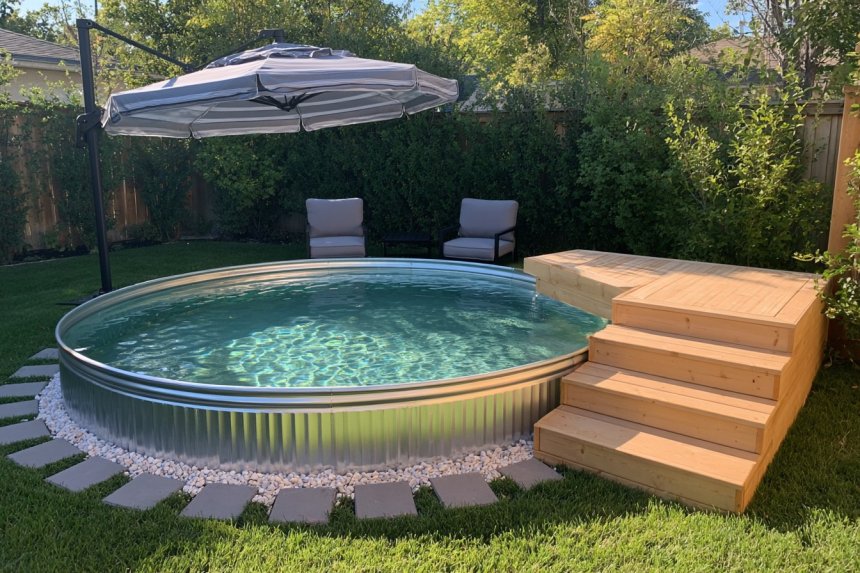
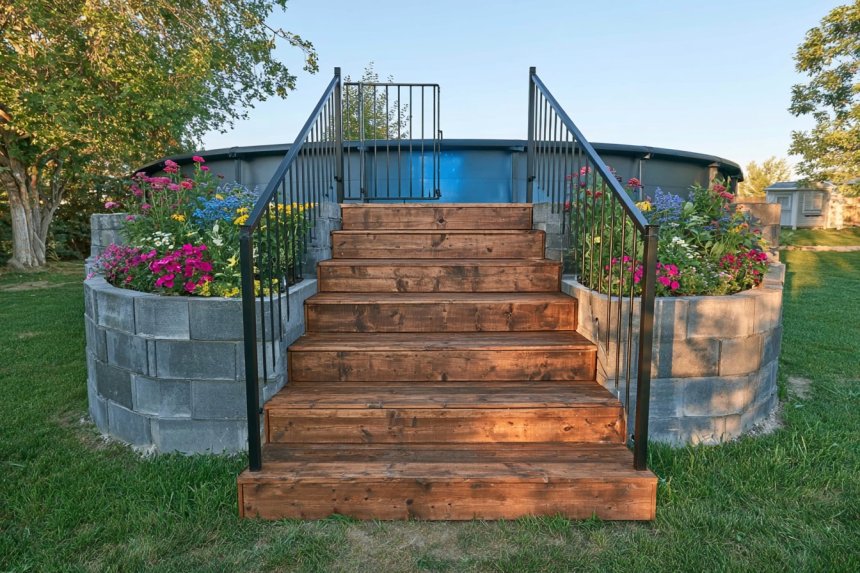
A round above ground pool can feel much more intentional when the surrounding construction is designed at the same time as the pool itself. In this project, the pool sits on a properly prepared base and is framed by dark planter boxes, white decorative stone, tropical foliage, colorful flowers, simple entry steps, and a large shade umbrella. The finished appearance is decorative, but the important work happens underneath: excavation depth, base compaction, level control, plumbing support, drainage, framing, and moisture resistant materials all affect long term performance. The eight stages below follow the visual build sequence so every construction image has a matching section in the article.
The dimensions below suit a typical round pool around 12 ft, 3.6 m, in diameter. Always use the pool manufacturer's installation instructions when they differ from these general construction dimensions.
1. Gather the Pool Materials
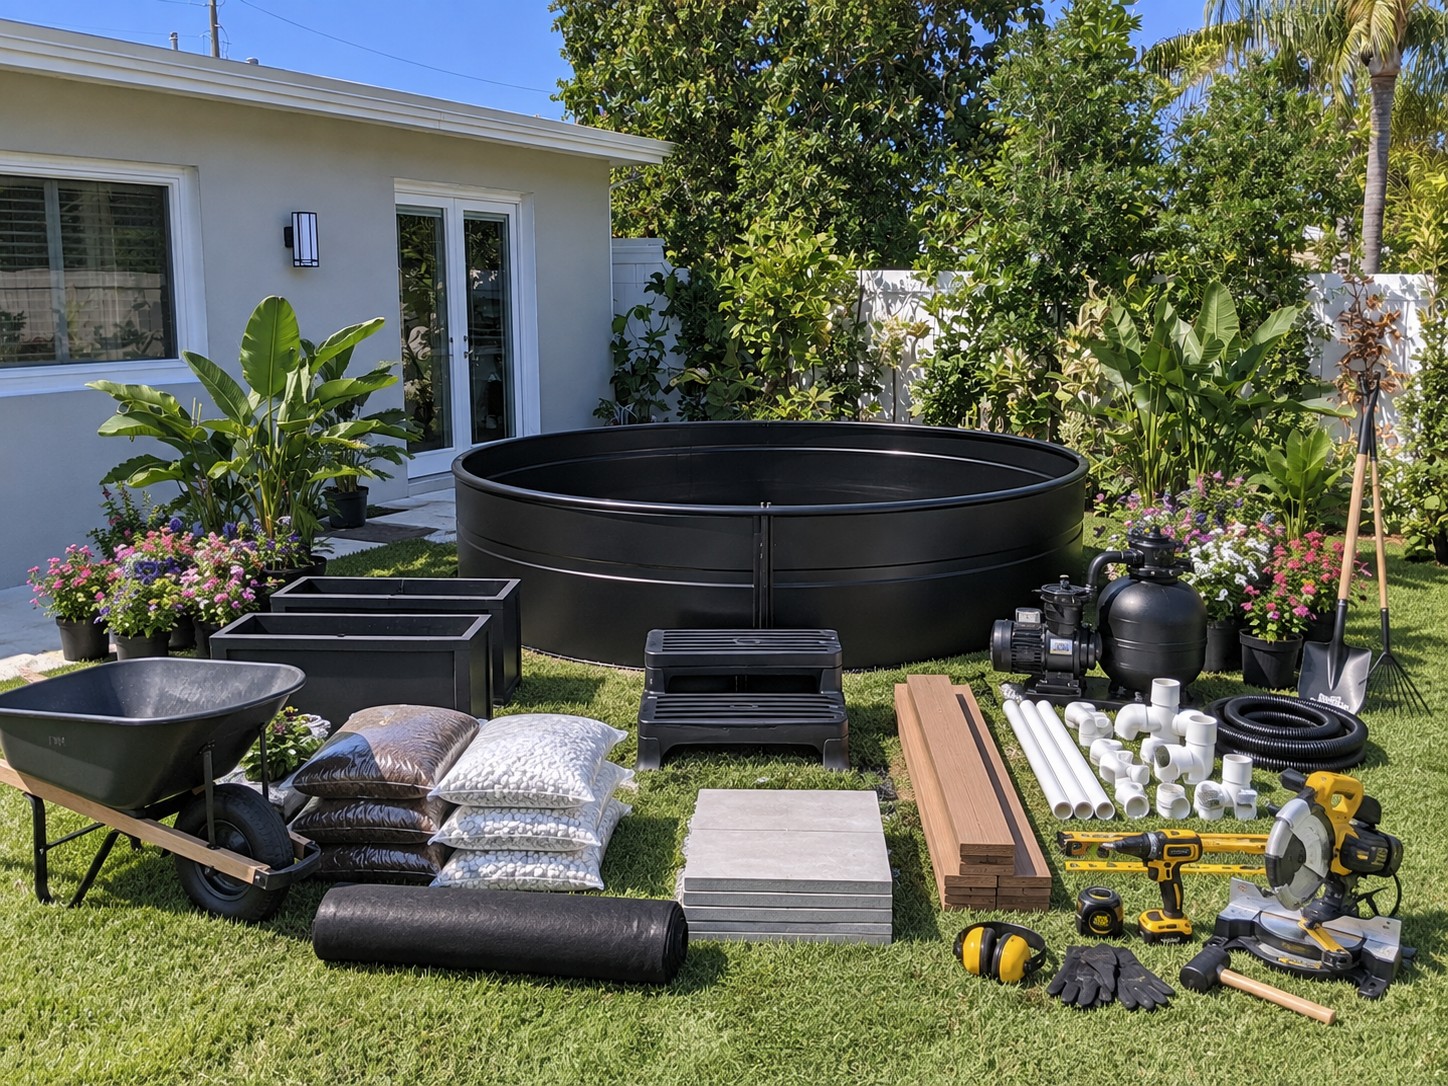
Start by placing every major component near the work area before removing any grass. This makes it easier to confirm that the pool, filtration system, plumbing, landscaping materials, and planter construction all work together.
For a setup similar to the one shown, prepare the following:
- Round above ground pool approximately 12 ft, 3.6 m, diameter
- Manufacturer approved liner and pool floor components
- Pool pump and sand or cartridge filter sized for the pool volume
- 1.5 in, 38 mm, or manufacturer specified PVC plumbing
- Matching elbows, unions, valves, hose adapters, primer, and solvent cement
- Crushed compactable aggregate, typically 3/4 in, 19 mm minus
- Landscape fabric or geotextile
- White decorative stone approximately 3/4 to 1.5 in, 20 to 40 mm
- Concrete or stone edging blocks
- Exterior planter boards or composite boards
- 2 x 4 in, 38 x 89 mm, pressure treated framing lumber
- Exterior structural screws around 3 in, 75 mm
- Corrosion resistant brackets where required
- Exterior planter liner or drainage membrane
- Potting soil suitable for the selected plants
- Tropical foliage and flowering plants
- Stable pool entry steps
- Shovel, rake, wheelbarrow, plate compactor, long level, tape measure, string line, cordless drill, impact driver, circular or miter saw, rubber mallet, clamps, gloves, eye protection, and hearing protection
The first image should show these components before construction starts so the reader can understand exactly what will be used later.
2. Mark and Excavate the Pool Area
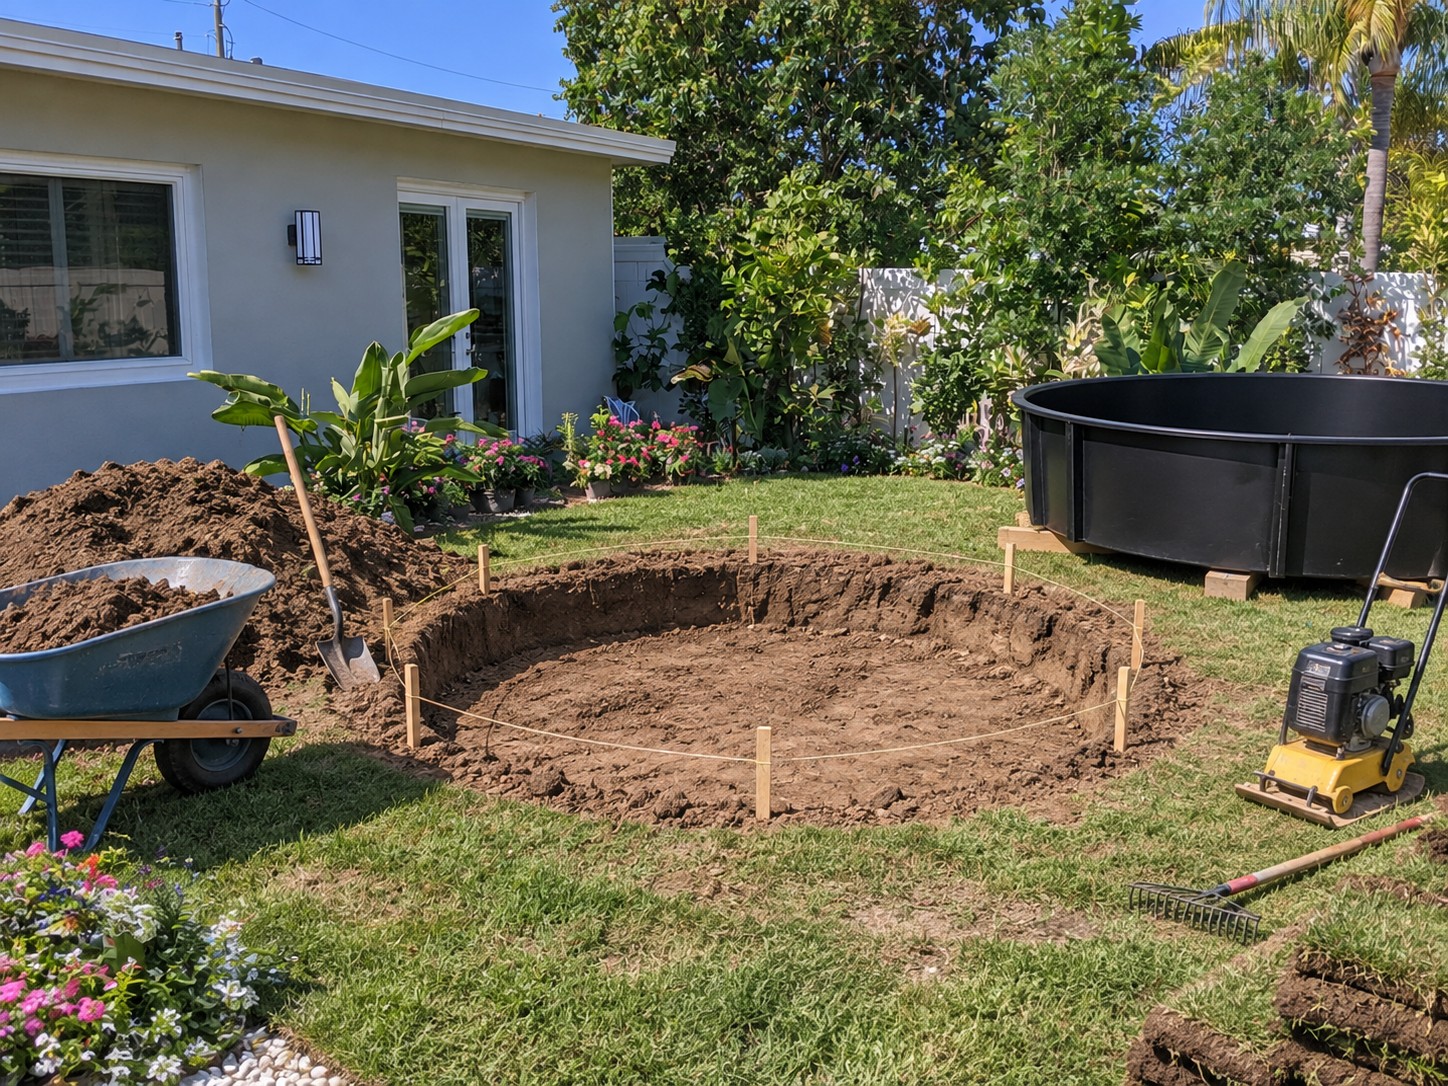
The second stage establishes the pool footprint.
Do not automatically excavate the full depth shown in decorative examples. Many above ground pool manufacturers require the wall to remain fully exposed and do not allow the pool to be buried. If the manufacturer does not permit recessing, remove only the sod and soft organic topsoil needed to create a level structural pad.
For many residential lawns, this means removing approximately 3 to 6 in, 75 to 150 mm, of sod and loose soil. Dig down from the highest point instead of building the low side up with loose soil.
Mark a circle slightly larger than the pool. For a 12 ft pool, a working diameter of approximately 14 to 15 ft, 4.3 to 4.6 m, leaves room for leveling, perimeter stone, and installation access.
Drive a temporary center stake and use a measured string to mark the circumference.
Check for buried utilities before digging.
Once the sod is removed, scrape away loose soil until the subgrade is firm. Avoid leaving soft pockets beneath the future pool.
3. Compact the Structural Base
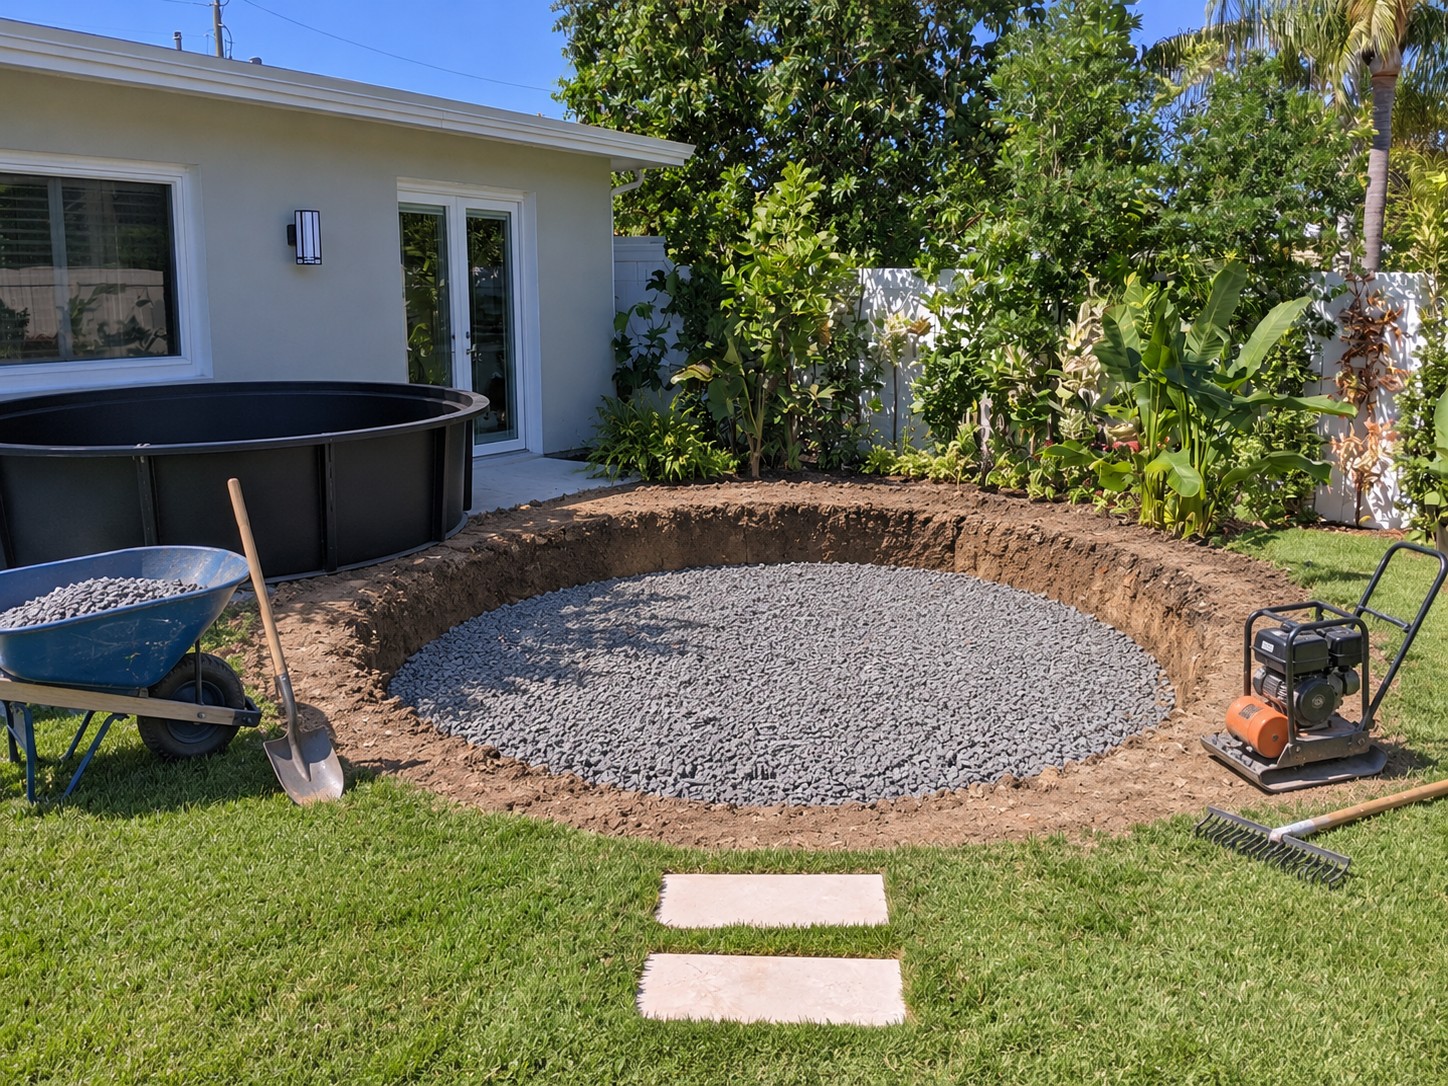
A level base is one of the most important parts of the project because thousands of pounds of water will sit above it.
Install a geotextile separator over unstable soil if local conditions require it. Then add 4 to 6 in, 100 to 150 mm, of compactable crushed aggregate where the pool manufacturer and site conditions allow a gravel structural base.
Do not place the entire depth in one loose layer.
Spread the aggregate in approximately 2 to 3 in, 50 to 75 mm, lifts. Lightly condition the aggregate if necessary and compact each lift with a plate compactor before adding the next.
Move the compactor across the entire circle several times, changing direction between passes.
Use a long straightedge and level, or preferably a rotary laser level, to check the finished elevation at several points around the circle.
For the final pool surface, follow the manufacturer's required base material. Some systems require sand, foam, pavers beneath posts, or another specific foundation above the compacted subbase.
Do not substitute decorative pea gravel for structural base material. Rounded gravel does not compact as reliably as angular crushed aggregate.
4. Set and Level the Pool
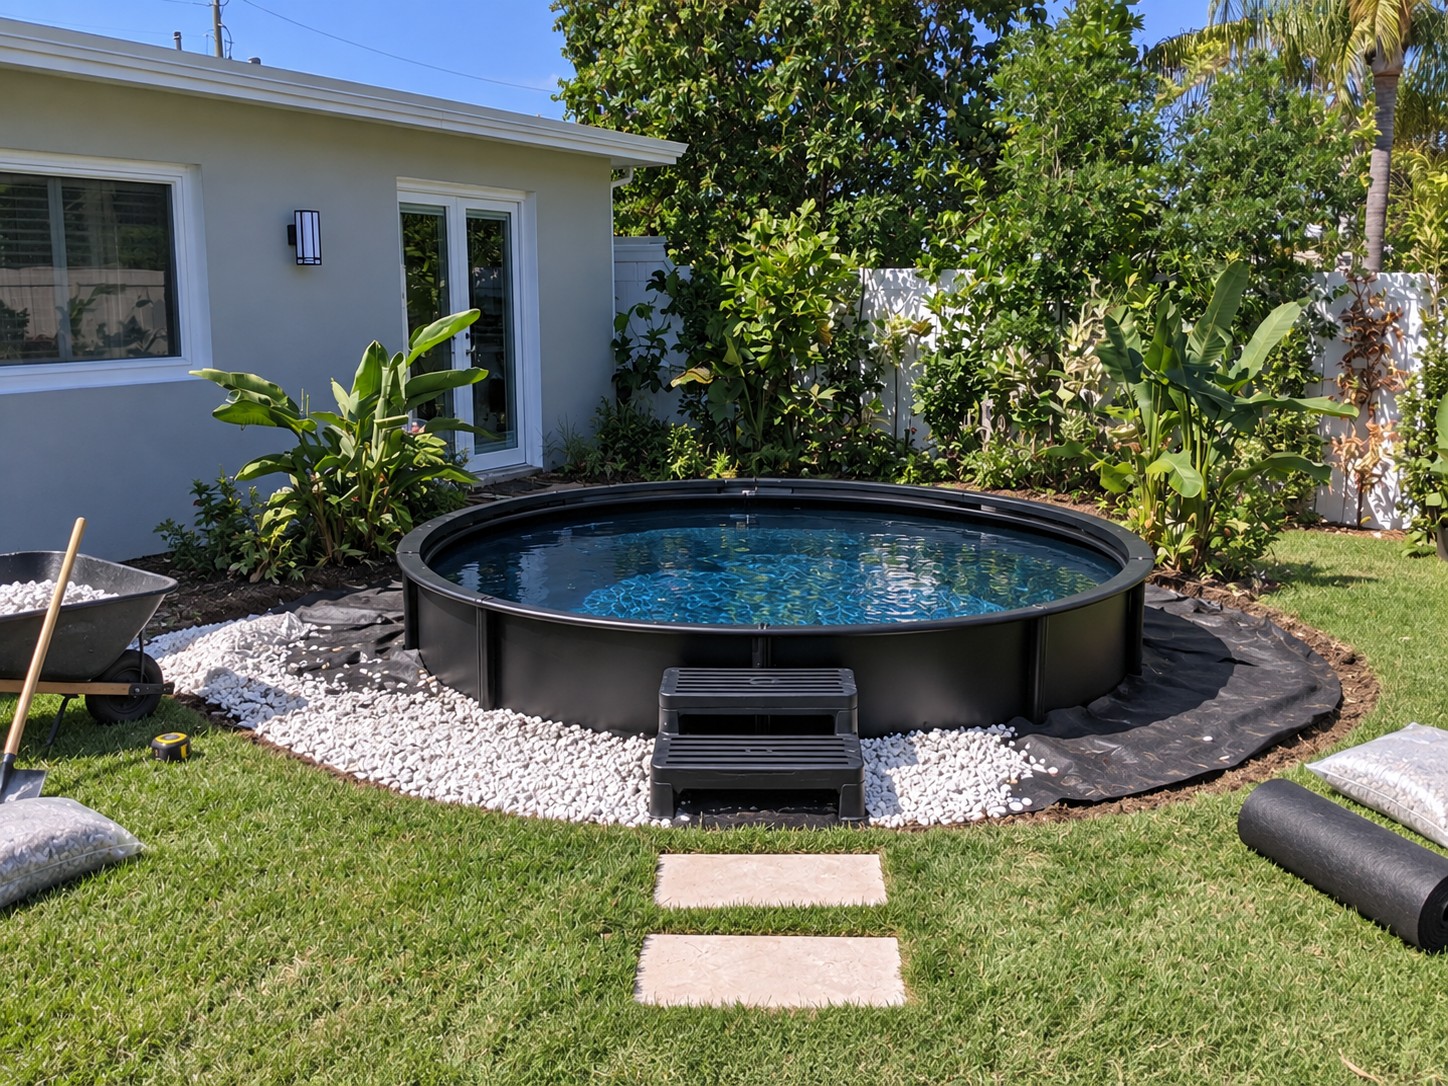
Once the foundation is complete, assemble the pool exactly according to the manufacturer's instructions.
Position the wall or frame on the prepared surface without dragging components across sharp stone. If the system uses individual support legs or posts, install the required concrete pavers underneath them. Pavers should sit flush with the surrounding base rather than being placed loosely on top.
Use pavers large enough to fully support each leg. A typical support pad may be approximately 12 x 12 in, 300 x 300 mm, although the pool manufacturer should determine the final size.
Recheck the top rail continuously during assembly.
Measure the rim at several locations using a laser or water level. A small error at the beginning becomes much more obvious after the pool is filled.
Never attempt to level a filled pool by lifting one side.
Install the entry steps only after the pool shell is stable. Steps should sit on a firm base and should not push against the pool wall.
Begin filling slowly while checking the liner for folds and verifying that the structure remains centered.
5. Connect Pump and Filtration
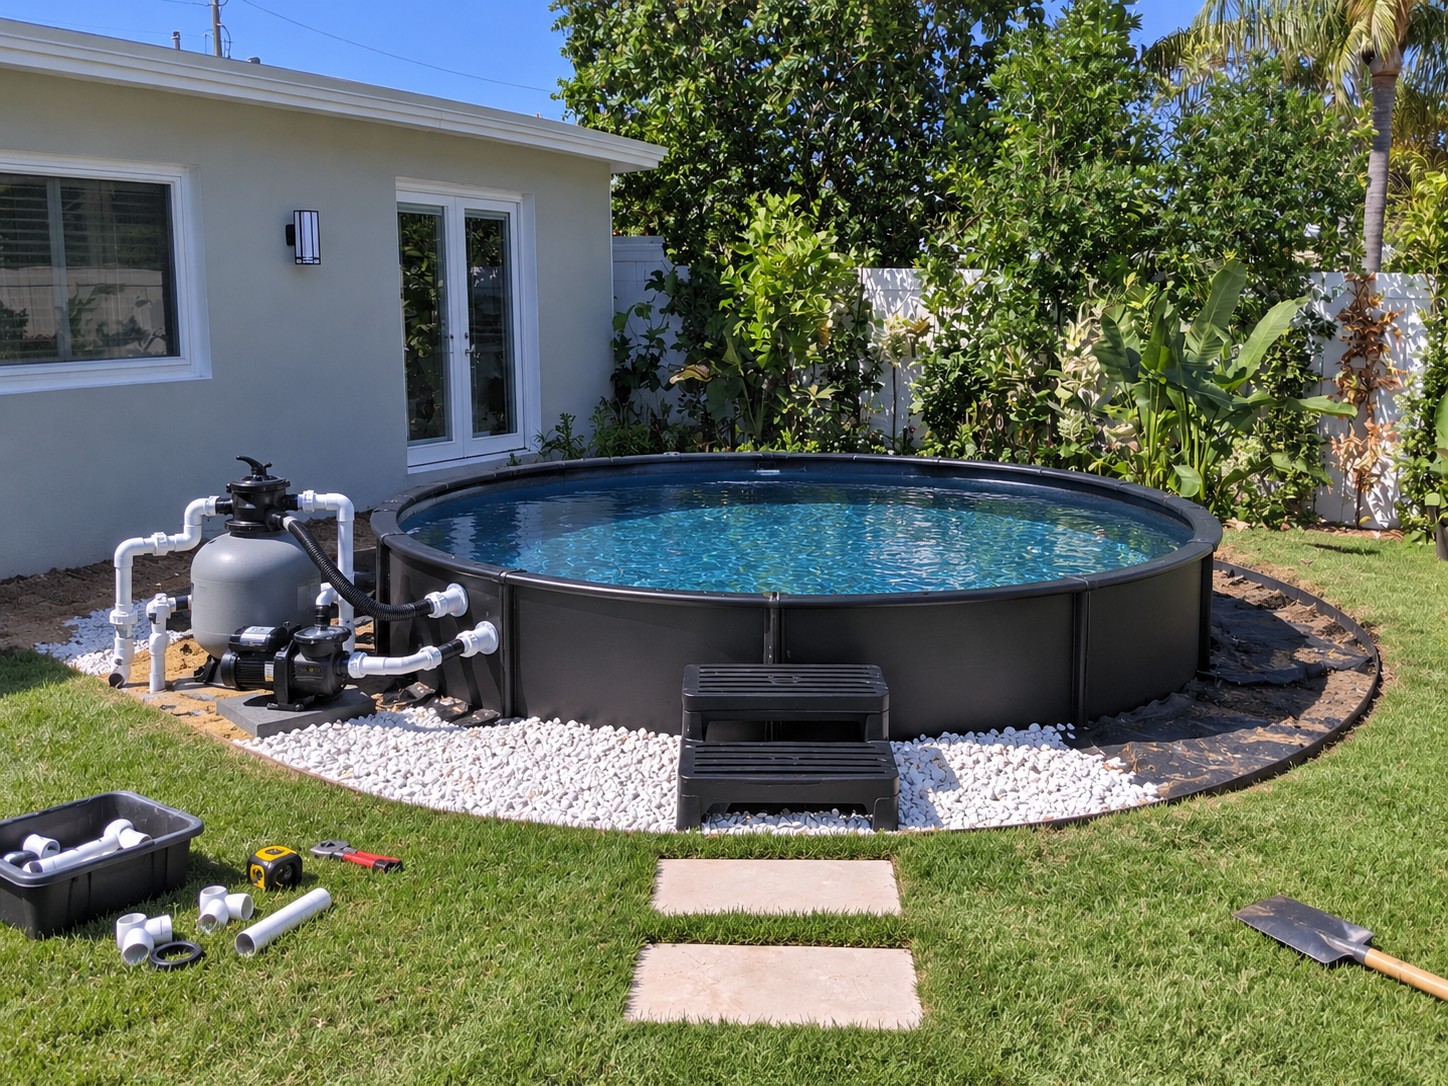
The fifth construction stage focuses on circulation.
Mount the pump and filter on a solid, level equipment pad rather than directly on lawn. A concrete equipment pad approximately 24 x 36 in, 600 x 900 mm, is suitable for many compact systems, but actual equipment dimensions should determine the finished size.
Keep the equipment accessible for cleaning and winterization.
Connect the pool outlet to the pump intake and connect the pump discharge to the filter according to the manufacturer's hydraulic diagram. Use the plumbing diameter required by the equipment, commonly around 1.5 in, 38 mm, for small residential above ground systems.
Where rigid PVC is used, dry fit the entire route first.
Keep unnecessary elbows to a minimum. Use unions near the pump and filter so components can be removed without cutting pipe later.
Prime and solvent weld PVC using products compatible with the selected pipe.
Support long horizontal pipe runs instead of allowing them to hang from the pool fittings.
Electrical pool equipment should use appropriately rated outdoor circuits and required ground fault protection. Pool bonding, grounding, receptacle location, and electrical separation requirements vary by jurisdiction, so qualified electrical work is important around water.
6. Build the Planter Frames
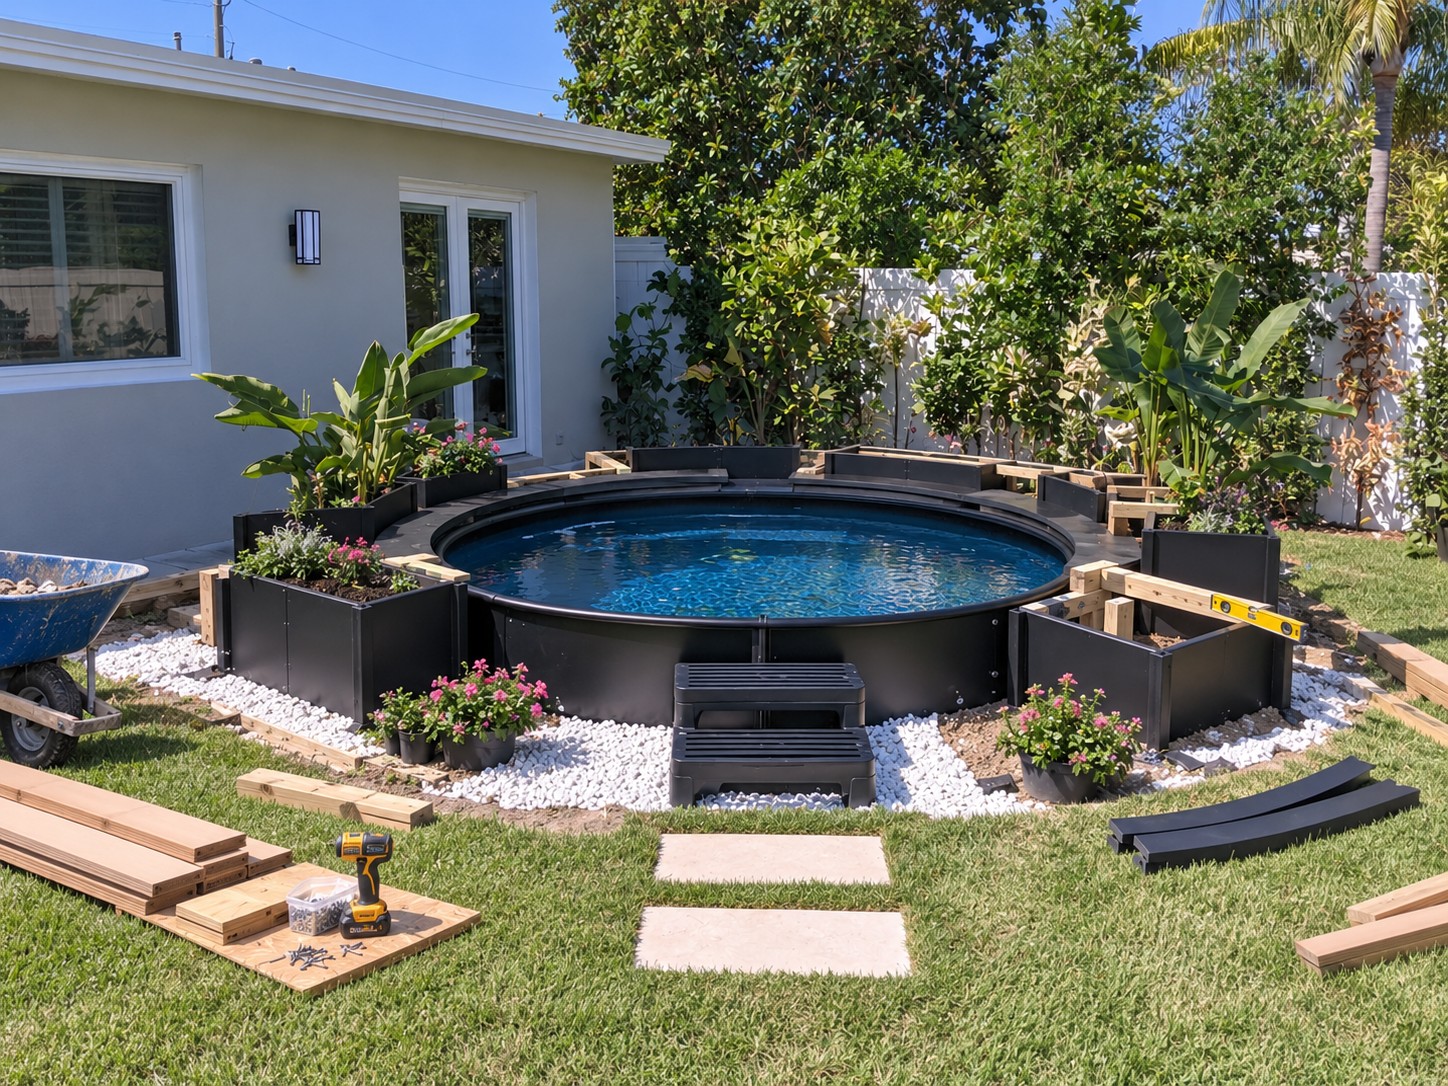
The surrounding planters help visually integrate the pool into the garden, but they should remain independent of the pool wall.
Do not fasten planter framing directly to thin metal or resin pool panels unless the manufacturer specifically provides an attachment system.
For rectangular planter structures similar to the images, a practical framework can use 2 x 4 in, 38 x 89 mm, pressure treated lumber with framing members approximately 16 in, 400 mm, on center where additional support is needed.
Cut framing with a miter saw or circular saw and check every box for square by measuring diagonally.
Fasten structural joints using 3 in, 75 mm, exterior structural screws rather than interior screws.
Exterior composite boards or rot resistant timber can be attached over the frame. Follow the board manufacturer's fastening and expansion requirements.
Do not place wet soil directly against untreated timber.
Line the inside of each planter with an appropriate drainage membrane while keeping drainage openings at the bottom. The planters should drain away from the pool foundation rather than holding water against it.
Leave enough clearance between the planter structure and pool wall for inspection and maintenance.
7. Add Stone and Planting
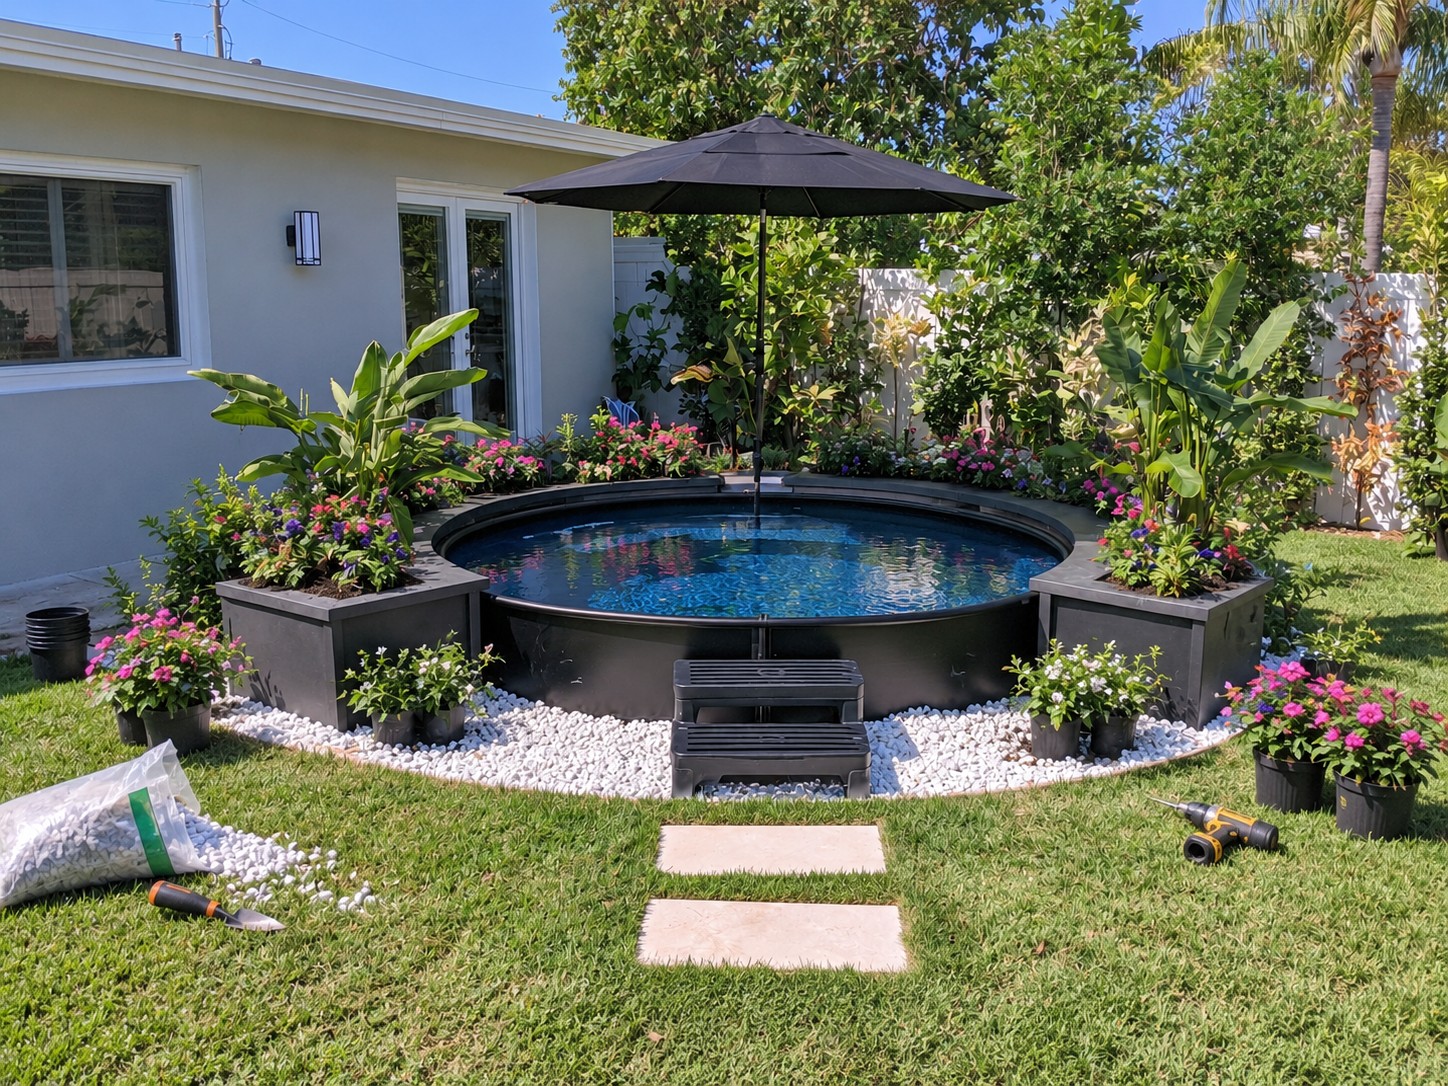
The seventh image should still show an active installation rather than a completely finished backyard.
Extend landscape fabric around the pool without trapping water against the pool wall. Cut the membrane neatly around equipment pads, planters, and access points.
Spread approximately 2 to 3 in, 50 to 75 mm, of white decorative stone over the fabric. Keep the gravel layer even rather than building deep piles against the pool structure.
Use a rigid edge between the lawn and gravel to prevent stone from migrating into the grass.
Fill the planters with a free draining planting mix. Leave approximately 1 to 2 in, 25 to 50 mm, below the planter rim so irrigation water does not wash soil over the sides.
Position taller tropical foliage toward the back and sides of the pool, leaving the front access area open.
Use lower flowering plants around the perimeter to soften the transition between the dark pool wall and white stone.
Consider mature plant size rather than nursery pot size. Large tropical plants should have enough room to expand without blocking pool access, pumps, valves, or the entry steps.
Avoid plants that produce heavy leaf drop immediately beside the water because they can increase filtration maintenance.
8. Finish the Pool Garden
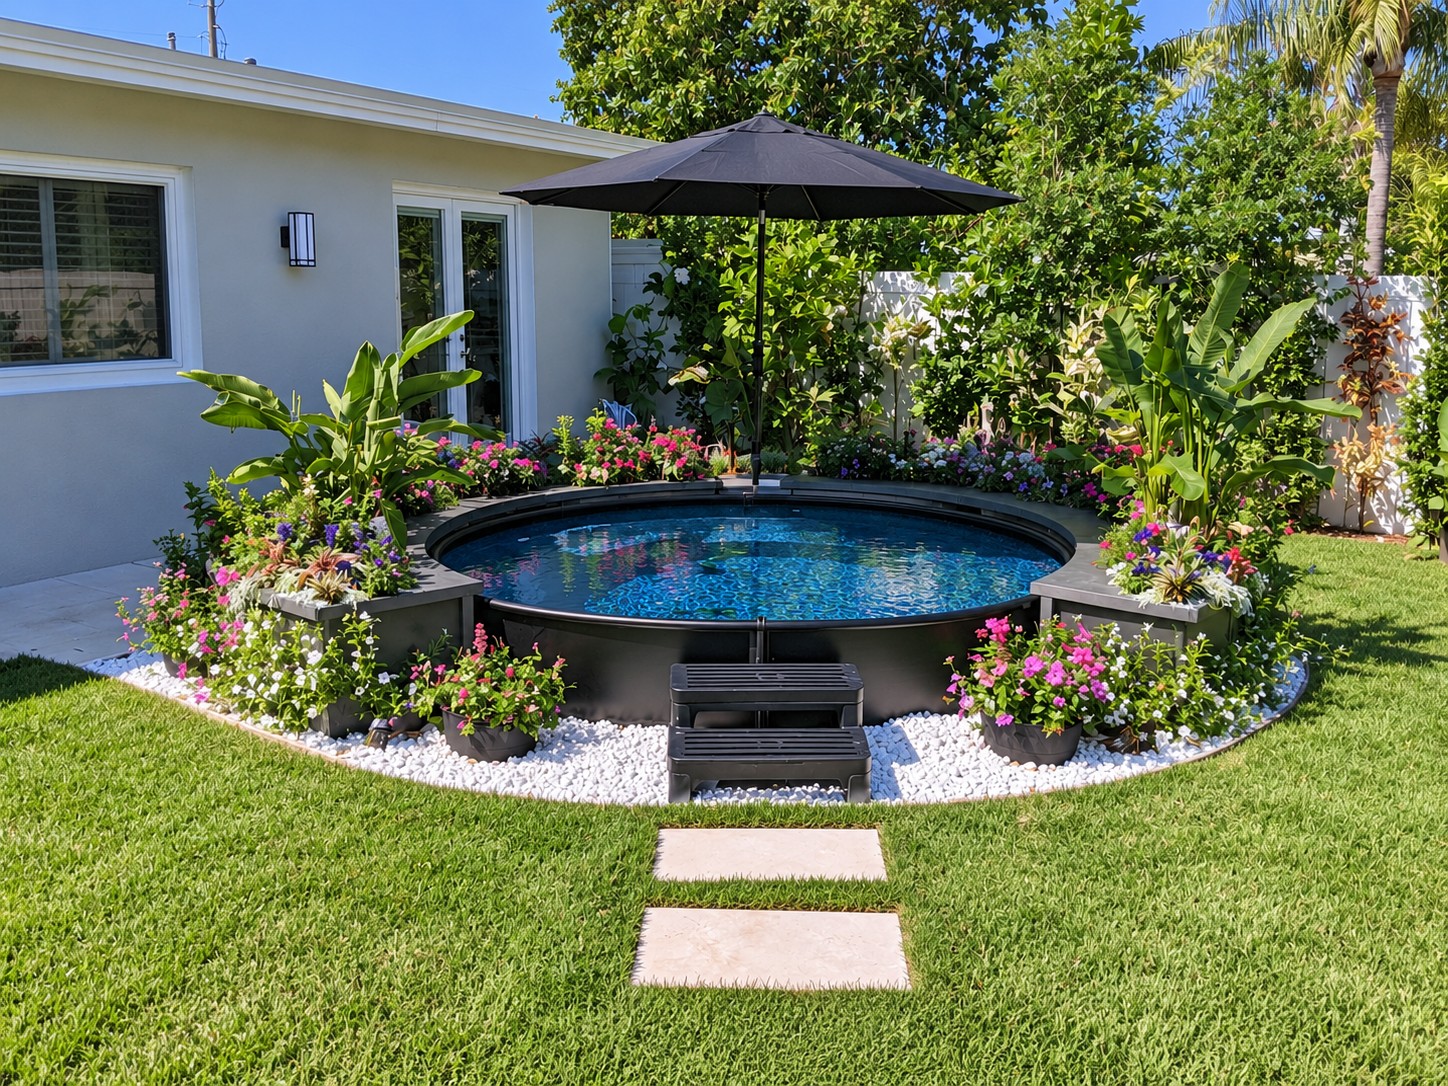
The final image should be the only photograph that looks completely finished.
Remove construction tools, spare boards, stone bags, soil containers, and temporary materials. Complete the white stone border and clean the pool edge.
The dark planter structures can now be filled with the final tropical and flowering arrangement.
Place the pool steps at the main approach and keep the route to them clear.
A few large stepping stones through the lawn can create a dry walking route and reduce repeated traffic across the grass. Set each paver on a firm bed so it does not wobble.
The umbrella shown in the final design should have its own properly weighted or anchored base. Do not depend on the pool structure or planter boxes to keep it upright in wind.
Maintain clear access to the filtration system even if decorative planting is added nearby.
The finished design works because the hardscape is restrained. Black pool walls and planters visually connect with one another, white stone creates contrast, and the planting provides most of the color.
Drainage Matters Around the Pool
Even though decorative gravel surrounds the pool, the area still needs controlled drainage.
Finish the surrounding grade so rainfall and irrigation move away from both the house and pool foundation. Avoid creating a depressed ring that collects water around the wall.
If runoff naturally flows toward the pool, consider a shallow swale, channel drain, or another drainage solution appropriate for the site.
Planter drainage also matters. Excess water should exit the planters without washing soil into the white stone.
Inspect the gravel periodically because soil, leaves, and organic material eventually accumulate between the stones. Removing debris before it decomposes helps preserve the bright finished appearance.
Pool Safety and Maintenance
A landscaped above ground pool still needs to be treated as a swimming pool.
Check applicable local requirements for barriers, fencing, gates, ladders, covers, alarms, and access control. Removable or locking entry steps may be appropriate where unauthorized access is a concern.
Maintain the water according to the filtration and sanitation system used with the pool.
Check hoses, unions, skimmer connections, and equipment pads regularly for leaks.
Inspect planter framing for moisture damage, loose fasteners, and movement. Wood components near pool water benefit from exterior rated materials and regular maintenance.
At the start of each swimming season, confirm that the pool remains level. Unexpected settlement can indicate that the underlying base has moved and should be investigated before continued use.
A successful installation is not only about hiding an above ground pool behind landscaping. The compacted foundation, correctly supported pool, accessible plumbing, independent planter construction, reliable drainage, and controlled entry area are what allow the finished tropical setting to remain practical as well as decorative.


 Like
0
Like
0
 Dislike
0
Dislike
0
 Love
0
Love
0
 Funny
0
Funny
0
 Angry
0
Angry
0
 Sad
0
Sad
0
 Wow
0
Wow
0