
Sort shells by size, weight and contact surface before choosing a project. A broad shell can anchor a tray border; lighter pieces suit clips, hanging details or a stitched cushion. Fourteen designs and a pastel tray video explain arrangement, preparation and attachments for coastal accessories used around the home.
Table of Contents
- Making Seashell Decor: Choose the Project and Prepare the Materials
- Start with Where the Piece Will Be Used
- Select and Clean the Shells
- Gather Tools for the Method You Choose
- Arrange the Details Before Fixing Them
- Keep Decoration Separate from Structure
- Video Example: Arrange a Pastel Shell Border
- Find a Seashell Craft
- 14 Seashell Designs to Make Your Own
- 1. Pastel Seashell Decorative Tray
- 2. Seashell and Rope Wall Hanging
- 3. Layered Seashell and Tassel Garland
- 4. Seashell Mosaic Coastal Planter
- 5. Handmade Seashell Decorative Clips
- 6. Seashell Curtain Ring Decorations
- 7. Seashell-Inspired Wall Hooks
- 8. Seashell Macramé Hanging Planter
- 9. Seashell Embroidered Coastal Pillow
- 10. Seashell Curtain Topper with Braided Rope
- 11. Seashell Wall Sconce Art
- 12. Seashell Garden Stakes with Floral Details
- 13. Seashell-Wrapped Coastal Side Tables
- 14. Driftwood and Seashell Sculpture
- Keep the Finished Craft Easy to Care For
Making Seashell Decor: Choose the Project and Prepare the Materials
Start with Where the Piece Will Be Used
Choose a location and purpose before sorting the shells. A dry shelf ornament can use a different attachment from a planter exterior that may become damp. A curtain accessory must move without snagging, while a tray needs a clear resting surface. Measure the available area and consider the depth of the decoration as well as its width. Shells can project farther than expected from a narrow frame or furniture leg.
For an approachable first project, decorate a firm tray or make a small clip using lightweight shells. Rope hangings introduce balance and connection choices; plant hangers and furniture require a separate supporting structure. Embroidery is a useful option for cushions because it recreates shell shapes without rigid edges. Select a project whose preparation, curing, cleaning, and mounting requirements fit the time and tools you have available.
Select and Clean the Shells
Check local collecting rules before taking beach material, and leave occupied shells where they are. Prepared craft shells can be easier to match in size, although they still need inspection. Sort by weight, curvature, and available contact area. Reject sharp chips and weak edges where a piece will be handled. A shell that sits neatly on a flat panel may rock on a curved pot, so compare it with the actual base before deciding on its position.
For empty shells with ordinary surface dirt, begin with a gentle wash in mild soapy water and a soft brush, then rinse and let them dry completely, including the inner recesses. Purchase prepared material when residual organic matter or odor makes cleaning uncertain. Avoid one harsh cleaning recipe for every shell type, especially acids that can damage the shell surface. If painting, try the chosen coating on a spare piece and let it dry before handling or bonding.
Gather Tools for the Method You Choose
A ruler, pencil, paper layout, soft brush, tweezers, and a small paintbrush cover much of the preparation for a tray or mosaic band. Use a protected work surface and a shallow container to keep tiny pieces together. Scissors and a needle help with tassels, fabric motifs, and removable liners. Small pliers and wire cutters are useful for retaining loops. Select adhesive from the actual shell, backing, and use conditions, with any applicator, gloves, and ventilation required by its instructions.
Pre-drilled shell components simplify hanging designs. If a project requires new holes, use shell-appropriate equipment and a supported workpiece, following the tool's directions for dust control, cooling, and protection. Eye protection and control of shell dust matter because brittle material can chip. Keep water away from electrical equipment that is not designed for that process. Check each shell's thickness and condition, then choose a suitable bit and controlled drilling method for that shell.
Arrange the Details Before Fixing Them
Set the largest shells in place without adhesive and check their spacing. Repeat a shape or color to organize the composition, then use smaller pieces only where they improve the outline. On a circular rim, compare the pattern all the way around before fixing the first section. On a hanging piece, assess the arrangement vertically as well as flat on the table, since weight changes how strands sit.
Keep the intended contact areas clean and dry. Apply the chosen adhesive to concealed contact points, position the shell, and support it without crushing its thin edges. Work in manageable sections on a curved surface. Follow the product's mixing and holding instructions where applicable, and wait for full cure before moving or loading the piece. A small amount of adhesive that has stopped feeling tacky may still be far from its final strength.
Keep Decoration Separate from Structure
Hooks, curtain rods, plant supports, table joints, and wall fixings need appropriate mechanical connections. Let the specified metal fittings carry the load, adding shells and cord only as decoration around them. For a hanging planter, account for the pot, wet growing medium, and plant. For a sconce, use a lighting-approved arrangement and retain access to its electrical and mounting parts. A decorative shell frame does not make an altered light fixture suitable for use.
Plan for removal and cleaning before assembly. A flower or plant container should keep water away from decoration; a cushion cover needs care instructions for its embroidery and beads. Treat painted or glued trays as accessory holders unless all relevant surfaces are documented for the intended food use. Place small loose parts beyond young children's reach, and keep looped hanging cords inaccessible. These choices determine how practical the craft will be after its first display.
Video Example: Arrange a Pastel Shell Border
The video begins with a plain shallow plate, pastel shells, small pale accents, brushes, tweezers, and adhesive. A brush adds a narrow aqua band near the inner rim. Adhesive is applied to the back of a shell before it is pressed into place, and the larger scallops are arranged around the edge. Tweezers then place small pieces in the gaps, preserving a plain center. This illustrates a useful general sequence: prepare the base, establish the main pattern, then refine the spaces between its larger elements.
For your version, let the painted band dry according to its product instructions before bonding nearby pieces. Test the shell layout against the actual plate diameter so the final gap does not force an oversized or cramped detail. Keep adhesive on the hidden contact area and use temporary support if a shell slides on the curved edge. The clip compresses the process; allow the full curing period specified by your adhesive before using the tray. Keep the decorated shell surface out of direct food contact unless the complete finished piece is specified for that use.
14 Seashell Designs to Make Your Own
These projects use the shell motif in different ways: as a border, a suspended accent, a repeated furniture detail, or a stitched surface. Choose by how the object will be handled as well as how it looks. Each explanation connects its visible design with preparation and assembly choices. The photos show design possibilities; measured cuts, hidden connections, and capacities must be determined for the actual materials you use.
1. Pastel Seashell Decorative Tray
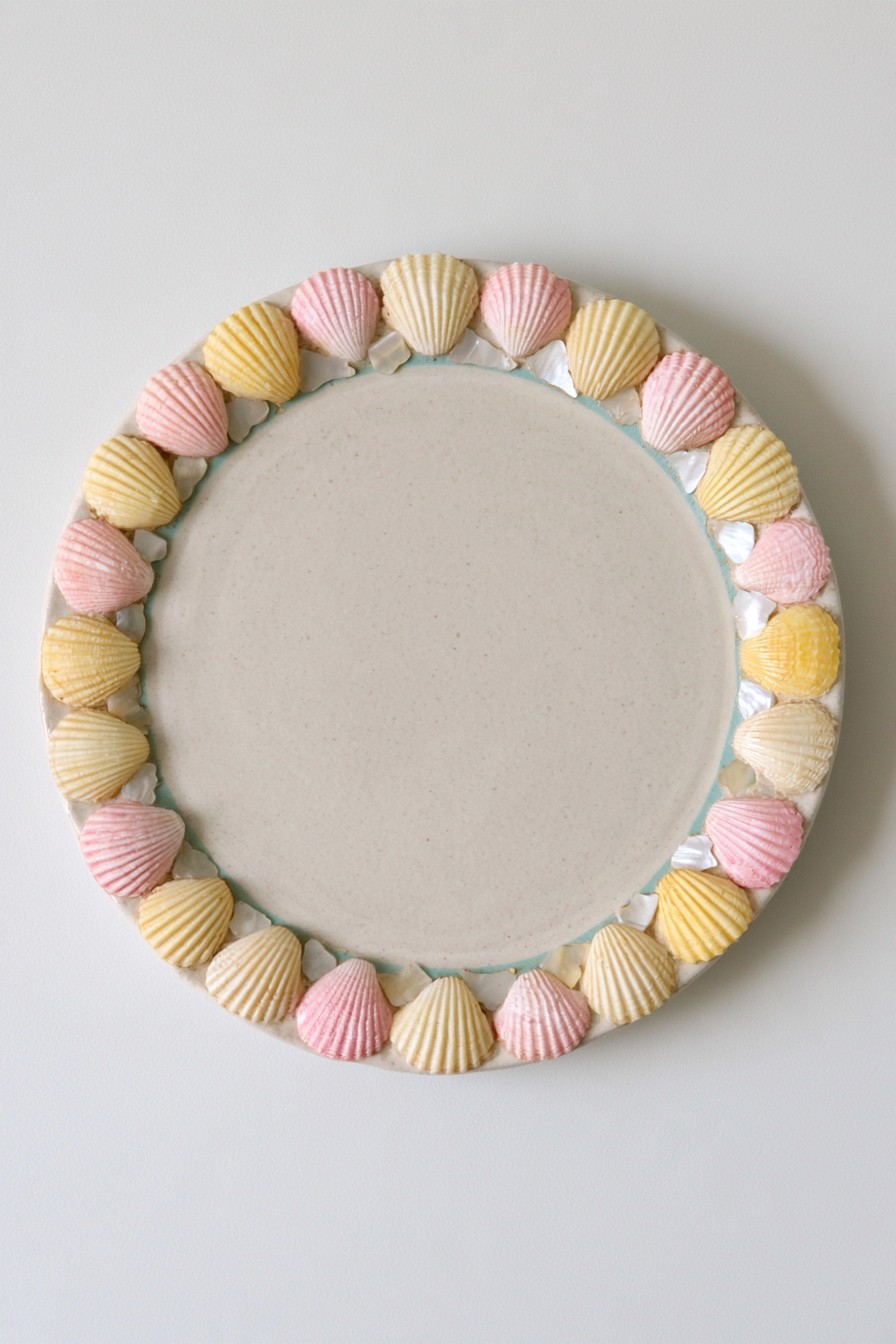
Pink, cream, and yellow scallops form a continuous edge around a pale center, with small pearly pieces between them and a narrow aqua line inside the border. The clear center makes this a useful accessory tray for a dressing table. It is also the closest match to the video: the large shell shapes create the rhythm, while the smaller pieces finish the joins without turning the whole surface into a mosaic.
Use a firm shallow plate or tray and compare the complete shell sequence before attaching it. Paint the inner accent band first and allow it to dry. Bond each scallop at concealed contact points, keeping its lower edge outside the area where objects will rest. Fill only the gaps that need a visual transition. Once the adhesive is fully cured, check for projecting chips before setting down jewelry. Keep it for decorative storage unless its materials are verified for the intended food use.
2. Seashell and Rope Wall Hanging
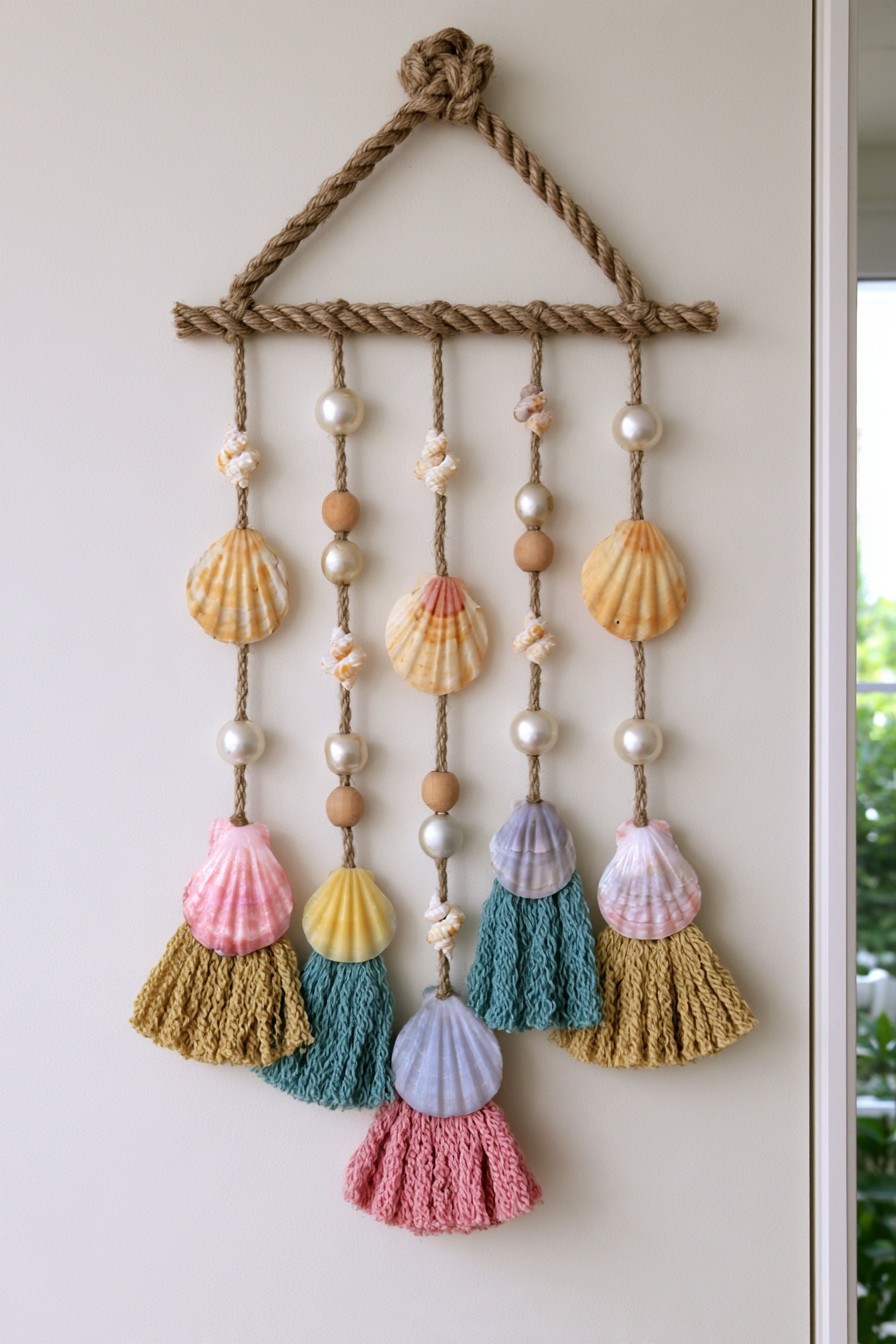
A rope-framed hanging suspends narrow vertical strands of shells and beads, finishing in yellow, teal, and pink tassels. The longest central drop gives it a pointed lower outline, while the horizontal top keeps the strands organized. This compact format suits a narrow wall beside a console or window. The tassels supply the soft texture; the shells appear as separate accents above them rather than a solid shell curtain.
Build the upper support and lay out the strand lengths before adding embellishments. Pre-drilled shells or secure retaining loops make their positions easier to control. Thread beads and tie spacing knots so adjacent elements cannot slide into a cluster. Compare the hanging shape as you work, because a heavier central strand can change the balance. Secure the finished support to appropriate wall hardware and keep the trailing cords out of reach of children. Dust the tassels separately from the more fragile shells.
3. Layered Seashell and Tassel Garland
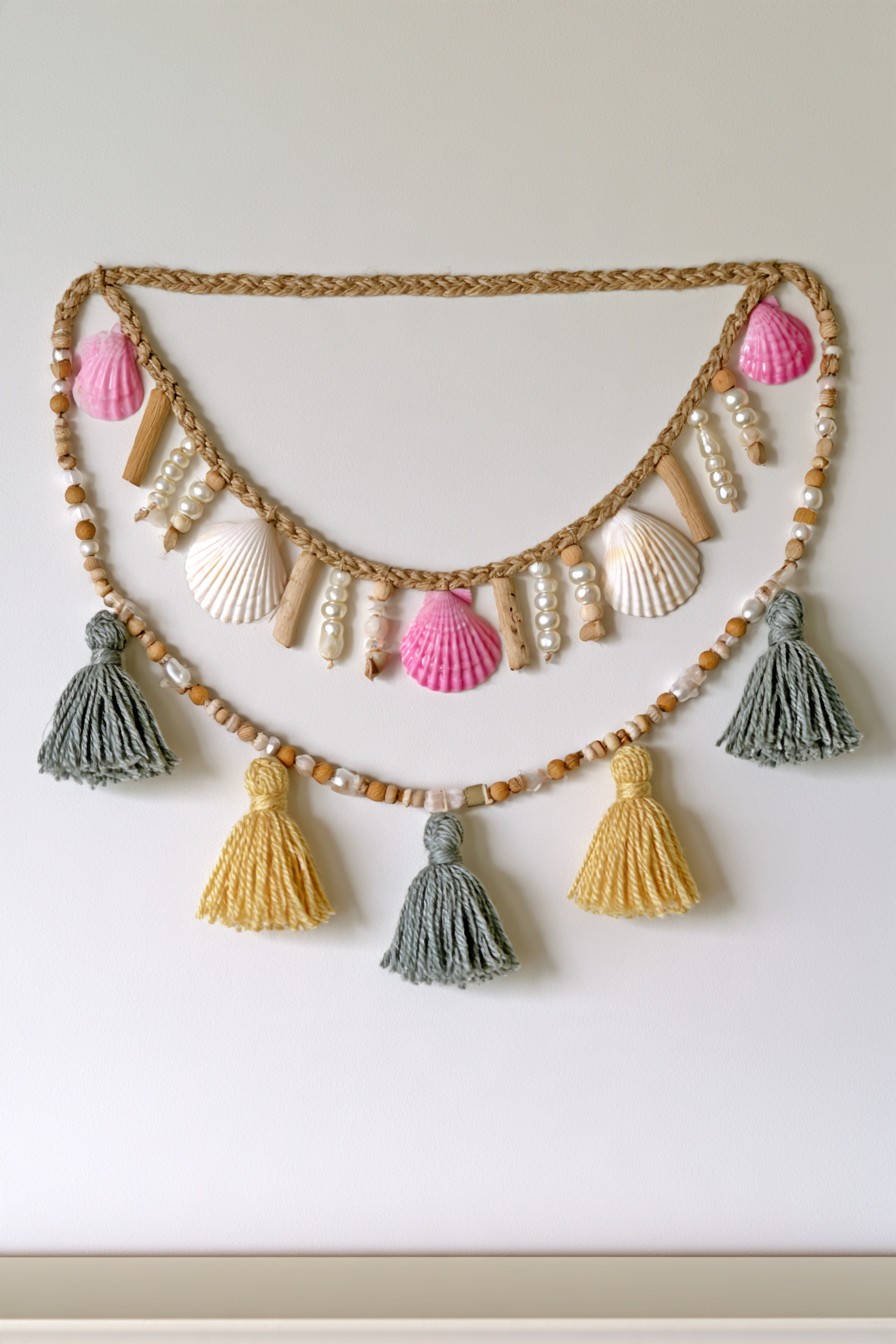
Two curved strands create a broad garland with different jobs: the upper curve carries shells and short bead drops, while the lower curve brings smaller beads and larger tassels. Pink shells mark a few focal positions against quieter cream tones. The layered curves make this better suited to a wide wall or shelf backdrop than the narrow hanging above. Open space between the curves is essential to its readable silhouette.
Measure the width between the fixing points and lay out both strands at their intended drop. Add the upper shell groups first, then set the lower tassel positions so they do not collide with those above. Secure beads with knots or closed connections instead of relying on tight holes alone. Use a support cord and fixings appropriate to the completed weight. Keep the curves clear of frequently handled objects, and make the ends removable so the garland can be lifted down without pulling on its ornaments.
4. Seashell Mosaic Coastal Planter
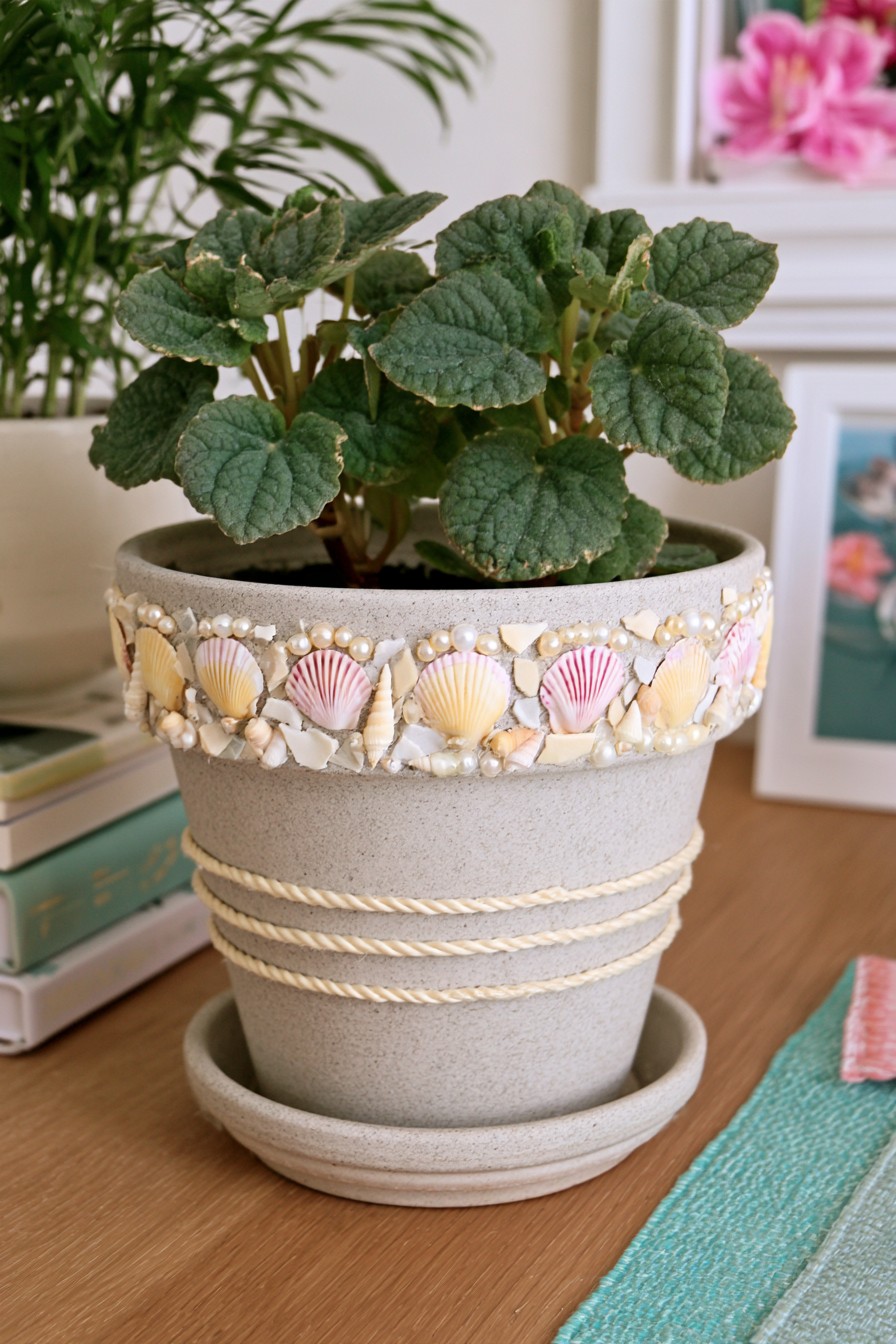
A narrow pastel shell band wraps the upper part of a neutral pot, with pale fragments and bead-like accents filling the spaces. Three rope lines around the lower section give the design another repeated texture. The undecorated area between them keeps the plant from competing with a fully covered container. It is a useful way to update a planter whose basic shape already works for the plant.
Fit the largest shells to the curved exterior first and mark the band height before bonding. Choose an adhesive compatible with the pot finish and the expected moisture exposure. Keep the pot opening, drainage route, and saucer accessible, and attach the rope outside any surface where water routinely collects. A removable growing pot inside a decorated outer container can simplify care; empty collected water after watering. Let every coating and bond cure before returning the plant, then clean around the mosaic gently instead of immersing the decorated container.
5. Handmade Seashell Decorative Clips
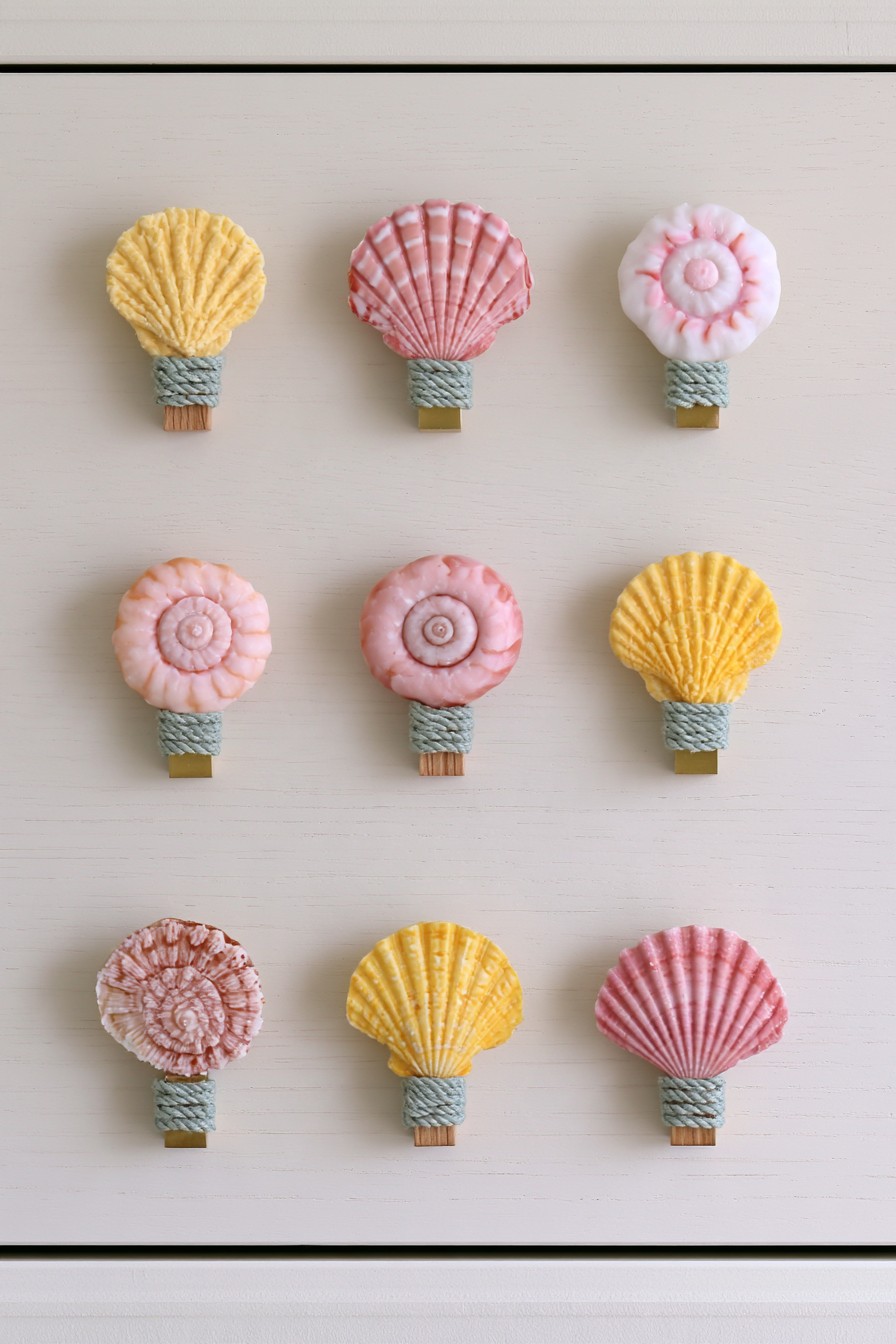
Small scallop and spiral forms sit above short, cord-wrapped bases in a coordinated pink, yellow, and cream set. Their repeated size makes the shells feel like usable accessories rather than loose collectibles. The arrangement offers a good starting point for clips that hold lightweight cards, labels, or photos. The shell supplies the character, while the underlying clip must remain easy to grip and operate.
Choose a light shell with a contact area that matches the clip's fixed outer surface. Dry-fit it while opening the clip to check that it does not obstruct the hinge or jaws. Apply a material-compatible adhesive at the hidden joint and support the shell until the product's full cure is complete. Finish the cord wrapping clear of the mechanism. Secure the shells to the board with fittings or adhesive compatible with both surfaces and the expected handling. Keep small detachable components outside children's reach.
6. Seashell Curtain Ring Decorations
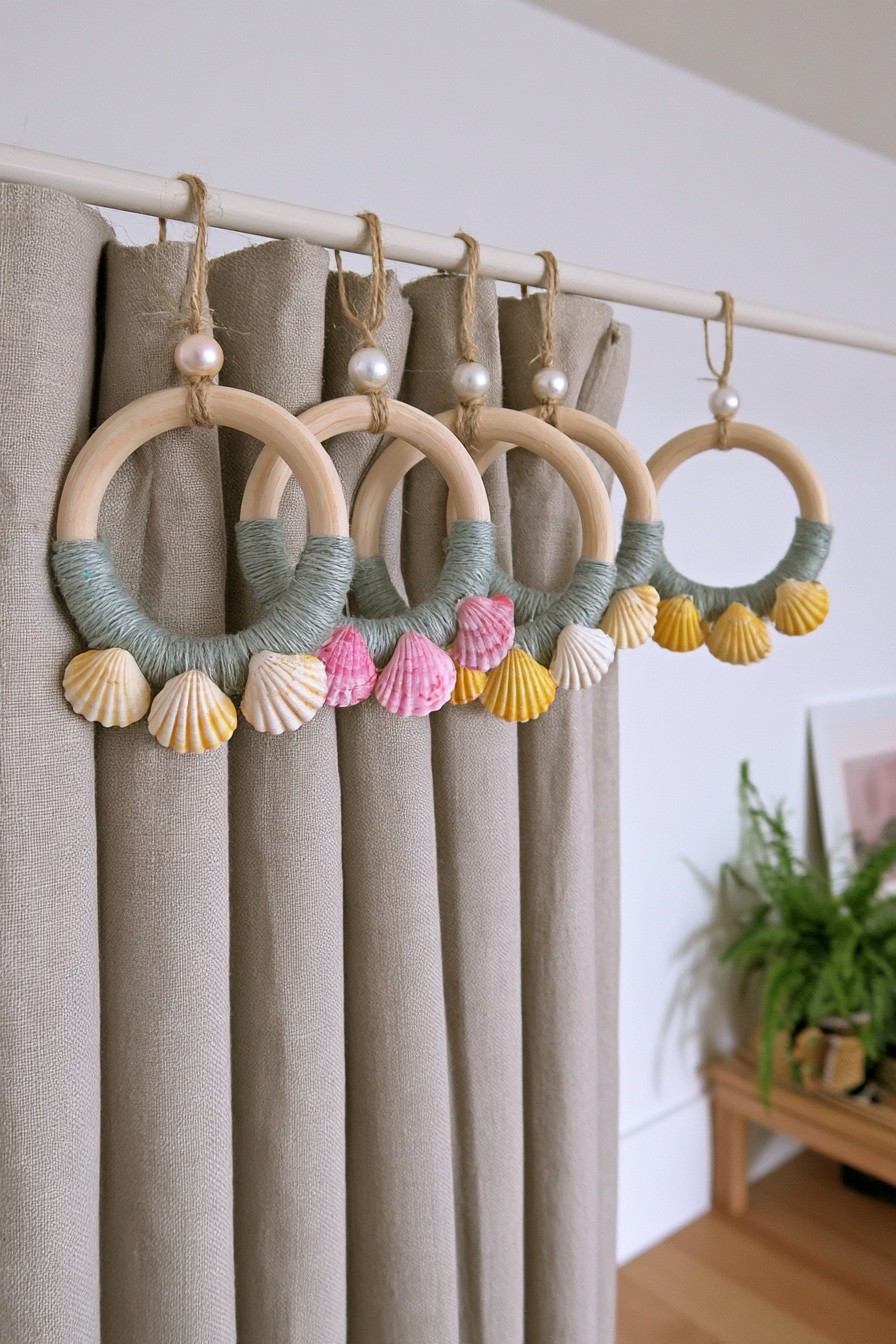
Wooden rings wrapped along their lower arcs with muted blue-green cord carry small pastel shells. Pearly beads appear on the short hanging connectors above them. The repeated ring outline gives this curtain decoration a calmer rhythm than a long tassel garland. It works where the natural wood can remain visible and the shell clusters add a modest amount of texture near the top of a plain curtain. For companion pieces made with other natural textures, explore these natural material decor ideas and keep one material as the main feature of the display.
Use existing curtain hardware for the curtain's weight, with these embellished rings serving as separate ornaments unless their product design specifically includes a supporting role. Wrap each lower arc to a similar depth, then arrange proportionate shells across it. Keep the decoration off moving contact points and check the curtain through its full opening range. Make the ornaments removable for laundering. Fine retaining connections should be smooth on the fabric-facing side, and any decorative cord loops need to remain inaccessible to young children.
7. Seashell-Inspired Wall Hooks
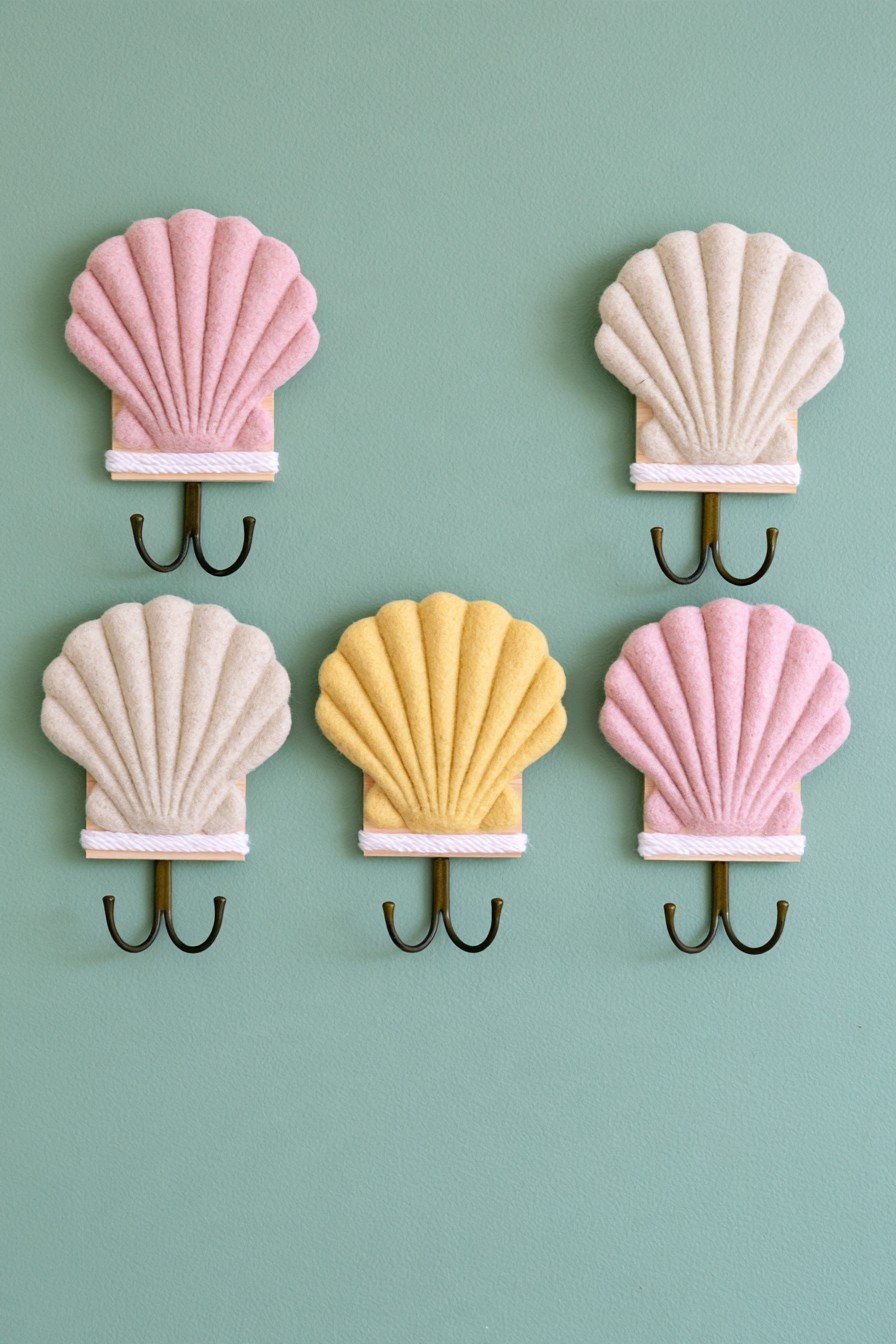
Large scallop-shaped plaques sit above double hooks in a loose grid, alternating pink, cream, and yellow. Their strong relief makes the shell motif legible even when the hooks are empty. This is a storage accent for a wall where a few light accessories can hang separately. The plaque is the visual backdrop; the actual metal hook and its wall attachment provide the function.
Recreate the relief with a prepared shell-shaped plaque or a lightweight molded form when a thin natural shell cannot accommodate the design. Mount the hook through a supporting assembly appropriate to the wall and intended load. Add the decorative plaque without hiding access to the mounting points. Space the units using the width of the hanging items, not just the plaques themselves. Follow the hook and wall fixing specifications for the intended load, keeping the shell shaped cover decorative. Check for edges that could catch fabric when items are lifted off.
8. Seashell Macramé Hanging Planter
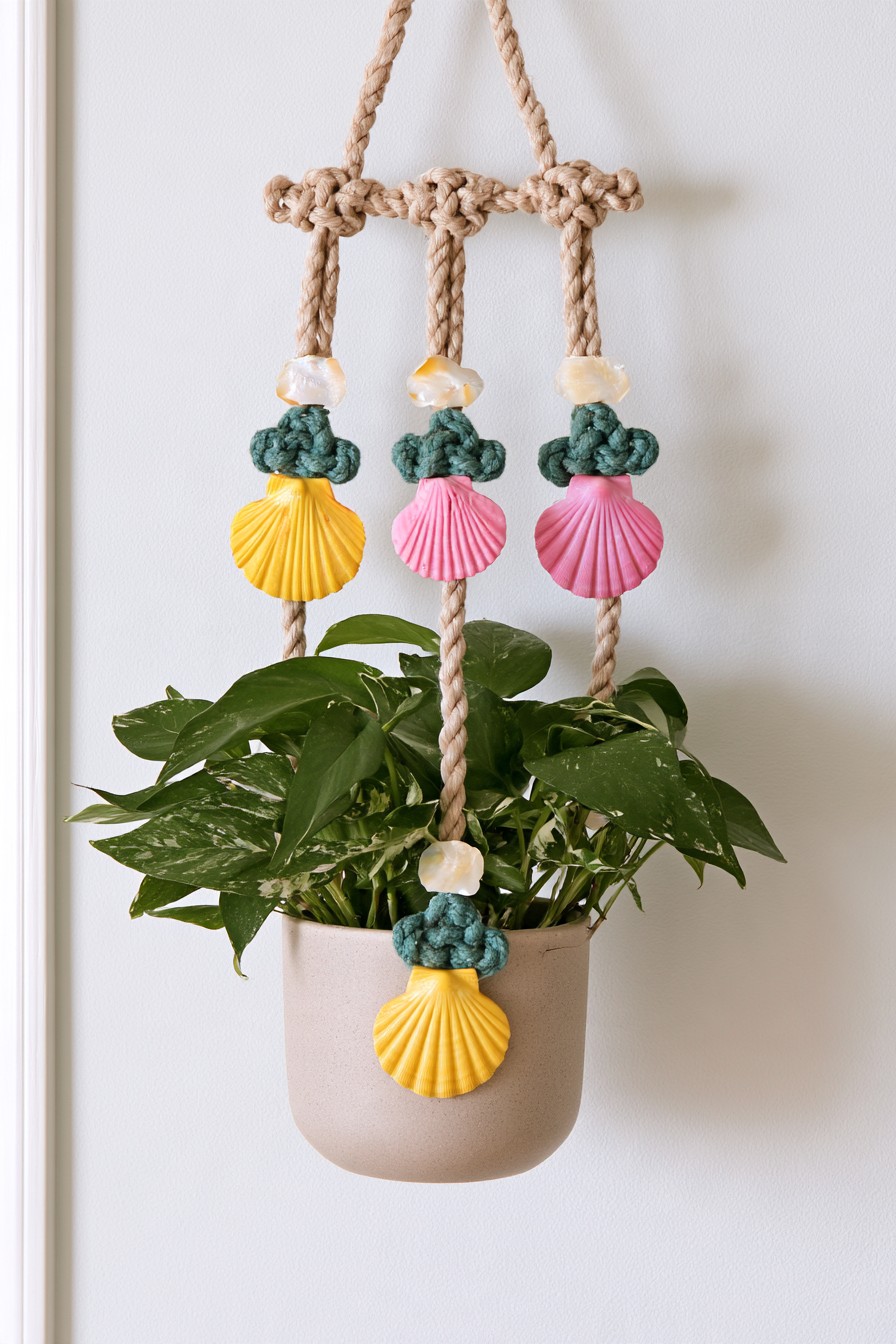
Thick knotted cord encloses a plain pot, with large pink and yellow scallops spaced along the hanging lines. Green knot clusters and pale accents connect the shell colors with the foliage. This is a plant display first and a coastal ornament second: the shell details draw attention to the vertical supports without replacing them. It suits a position where the pot can be removed or reached for routine care.
Start with a purpose-made hanger suitable for the pot and its full watered weight. Add the shells to low-stress decorative sections using secure, smooth retaining attachments, keeping them away from the knots that support the pot. Check that embellishments cannot rub against stems or interfere with lifting out the container. Use an appropriate overhead fixing and follow the hanger's instructions. Keep drainage water from collecting in the outer pot and inspect the cord for wear where the ornaments contact it. Shell decoration should never be the planter's suspension connection.
9. Seashell Embroidered Coastal Pillow
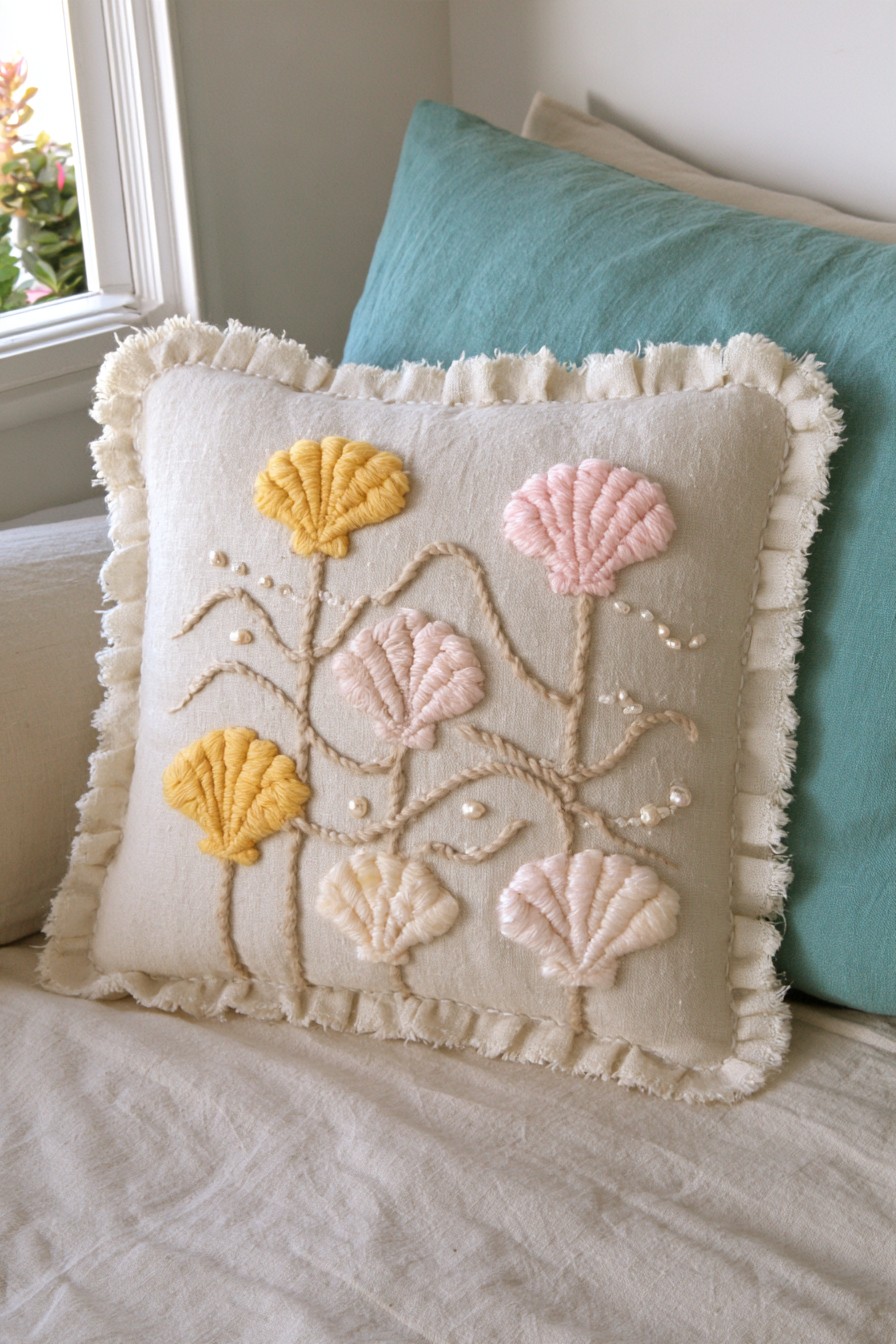
Raised yarn forms trace scallop shells across a pale cushion, linked by thin stitched curves and small pearly accents. The fringed edge continues the soft texture, making this a comfortable-looking interpretation of coastal decor without gluing brittle shells to fabric. The different motif sizes keep the pattern from becoming a strict repeat. It suits a sofa or reading seat where shell shape matters more than the actual material.
Draw the motif positions on a removable cover and use a stitch or yarn couching method compatible with its fabric. Work the outlines and fillings before adding small embellishments. For a cushion used against the body, omit hard beads from pressure areas or replace them with stitched dots. Keep the reverse side neatly finished so the insert slides in easily. Check the care requirements of the yarn, cover, and any remaining beads together; removable does not automatically mean machine washable.
10. Seashell Curtain Topper with Braided Rope
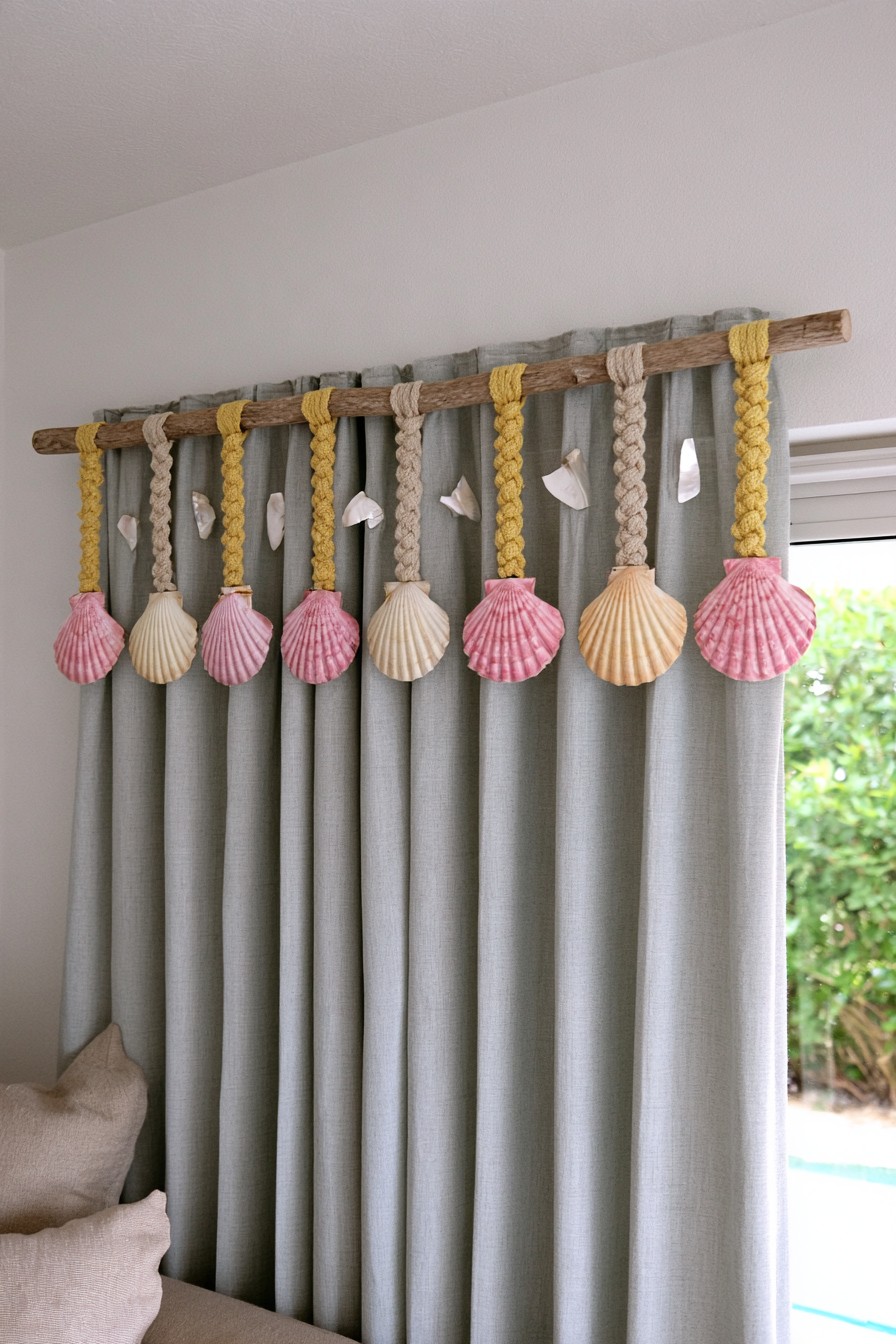
A straight wooden upper support carries evenly spaced braided drops ending in pastel scallops. The decoration forms a horizontal border above the curtain, with a few pale hanging accents between the larger shells. Its regular spacing differs from the curved garland: the effect is a row of repeated vertical markers. It works best with simple curtain fabric that lets the changing shell colors remain visible.
Space the shell drops along a secure accessory rail, independently of the curtain’s support. Match their weights and keep them clear of the curtain’s travel. Make the border removable for dusting, keep looped cords inaccessible and open the curtain fully to check for catching before finishing.
11. Seashell Wall Sconce Art
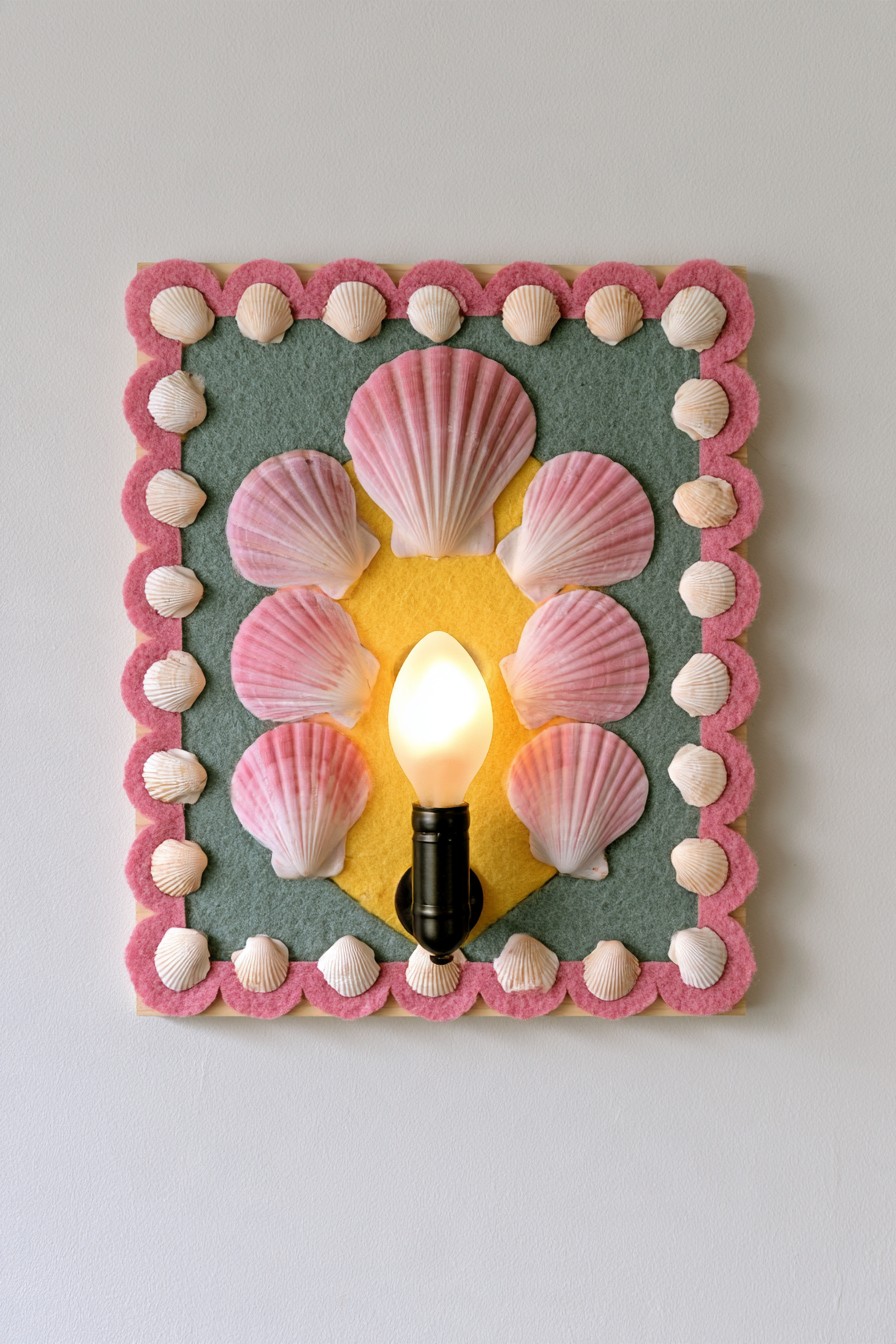
Pink scallops fan around a central exposed lamp on a rectangular panel. Small pale shells follow the outer edge, with a pink scalloped border framing a green textured background. The composition reads as layered wall art as much as lighting. Its symmetry gives the fixture a defined visual setting, but the nearby textile-like surfaces and decorative bonds make the lighting configuration an essential part of the design decision.
For a working version, use a lighting-approved fixture and decoration arrangement assessed for its required clearances, heat, ventilation, and mounting. Keep access to the socket and electrical connections unobstructed, and leave wiring or alterations to a qualified professional. A low-heat lamp is not enough to validate an improvised panel. To reproduce the shell composition without those requirements, make a non-electrical wall ornament with a decorative center. Build the fan and outer border on a firm backing and connect its hanger to that backing.
12. Seashell Garden Stakes with Floral Details
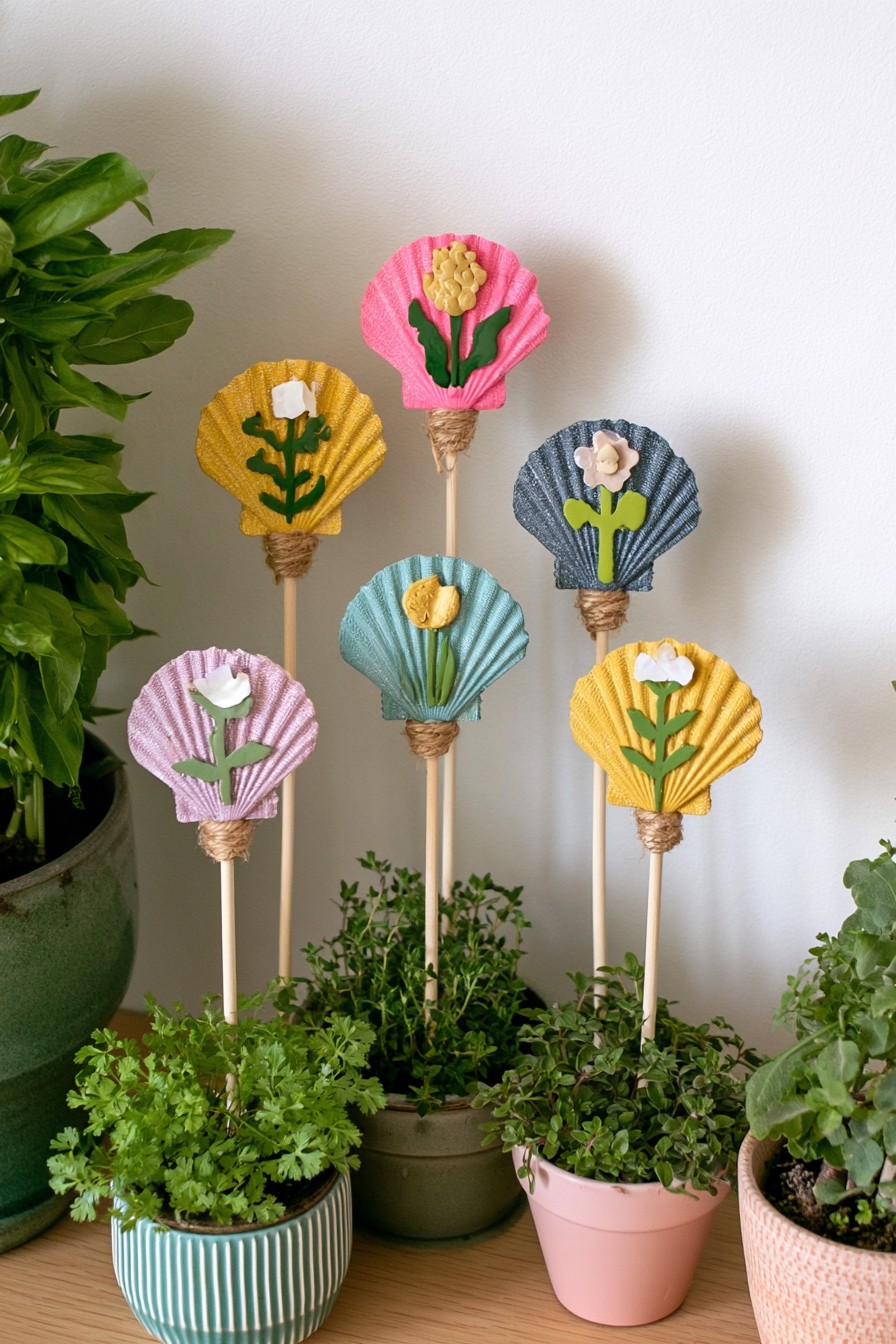
Scallop shapes in pink, mustard, blue, teal, and lavender rise above small pots on slender stakes. Raised flowers and green stems turn each shell into a miniature floral sign. Different heights help the ornaments stay visible among foliage. These are decorative plant accents rather than identification labels, so a single coordinated set can be moved between containers as the plants grow.
Choose shells or prepared shell-shaped blanks with enough contact area for the stake. Attach the floral details before joining the shell to a firm support, then finish the junction with a small cord wrap. Keep the wrap outside the soil-contact section. Match paint, adhesive, and protective finish to the expected exposure; a clear coating does not automatically make an indoor craft weatherproof. Use stakes intended for damp growing media if they will stay in pots, and position them where their ends and embellishments do not press into leaves.
13. Seashell-Wrapped Coastal Side Tables
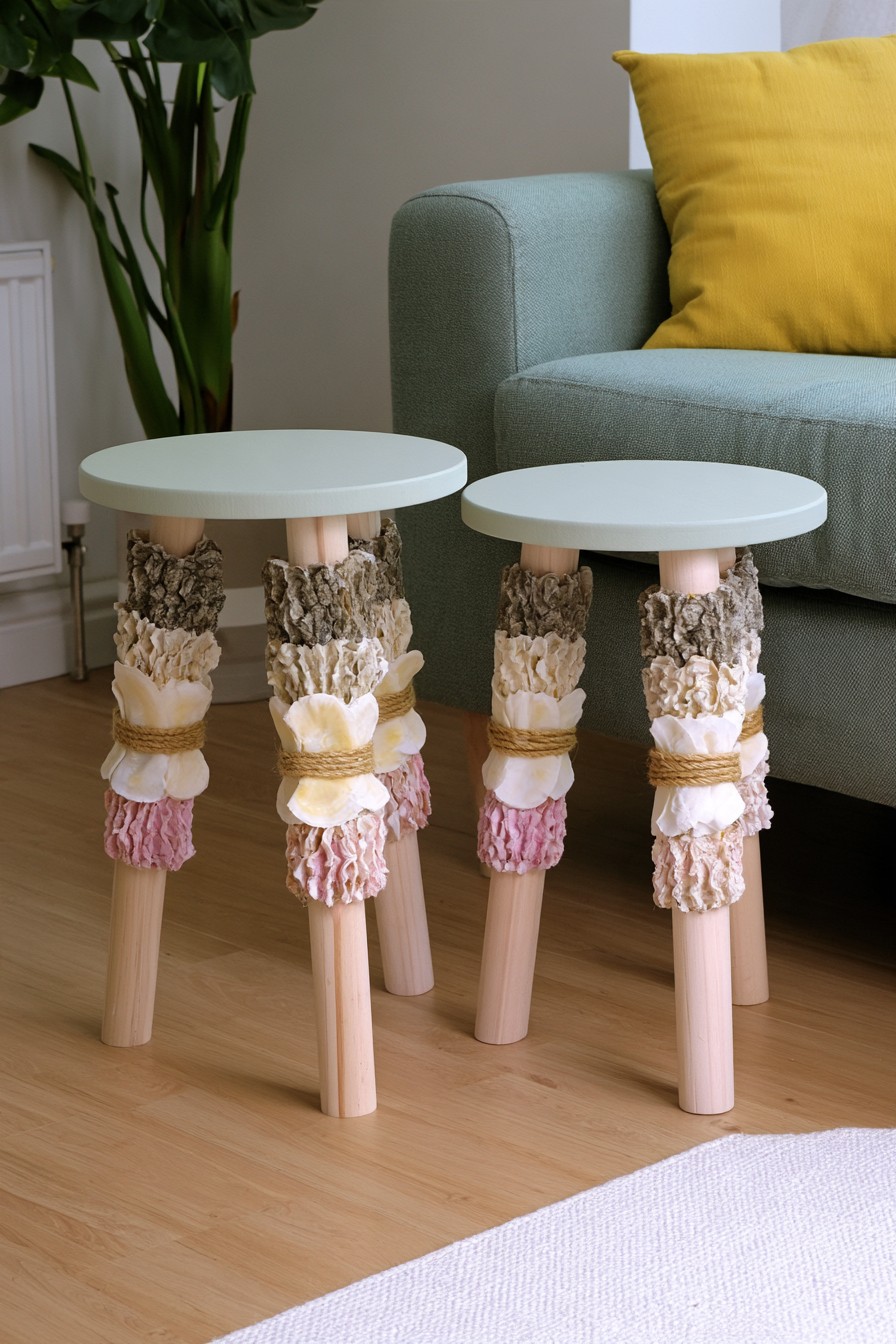
Two small tables retain plain aqua tops and clear wooden floor-contact points, while stacked shell-like textures, rope bands, and fringed details decorate their legs. The contrast between usable surface and ornate supports is the main design choice. This interpretation brings coastal texture into furniture without covering the place where cups or books rest. It is best suited to a position where the leg decoration can remain clear of frequent brushing or snagging.
Begin with stable finished tables and plan the decoration around accessible joints. Apply lightweight shell groups or shell-inspired surface pieces without drilling or weakening structural parts. Keep the attachments away from adjustment points and fasteners that need future inspection. Wrap rope only after checking its placement against nearby upholstery and clothing. The tables' load capacity comes from their original construction, not the added texture. Check that the decoration remains firmly attached during cleaning, and keep sharp fragments off surfaces touched when moving the furniture.
14. Driftwood and Seashell Sculpture
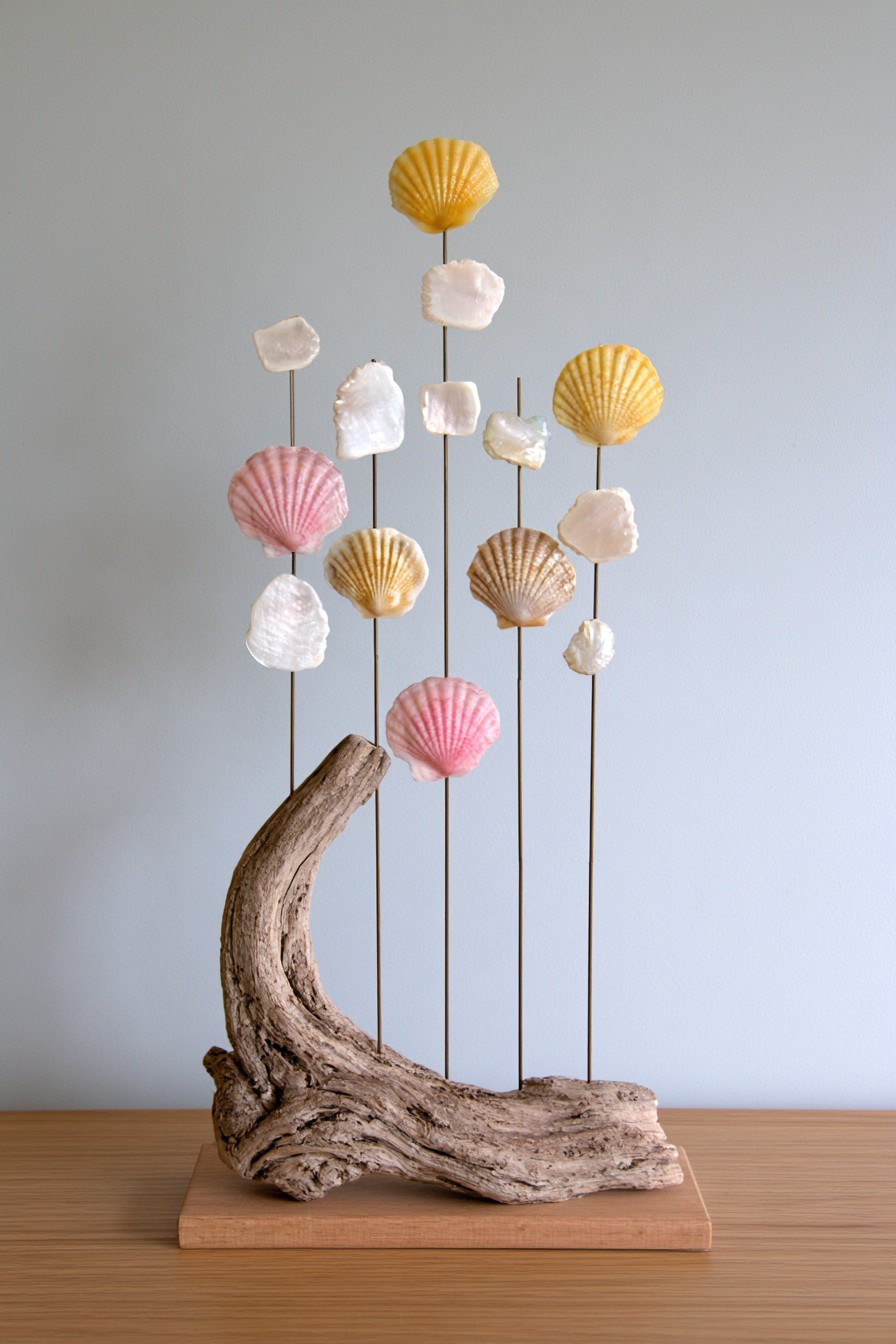
Fine vertical rods carry pink, yellow, and pale shells at staggered heights above a curved driftwood base. A rectangular platform beneath the wood provides a clear footprint and makes the asymmetrical arrangement easier to display. The shells appear almost botanical as their rounded shapes rise between the slim lines. It suits a protected console or shelf where individual shells can be seen without dense background decoration.
Position the rods on a paper layout and dry-fit the driftwood on its platform before joining either. Clamp the wood and drill for the chosen rod connection, then retain the rod with the appropriate mechanical fitting or specified joinery. Use a suitable fastening or bonding arrangement and allow it to cure before adding shells. Retain each shell with a secure concealed fitting, keeping lighter pieces high. Check the complete object's balance on its display surface and leave enough clearance that passing items cannot catch the rods.
Keep the Finished Craft Easy to Care For
Lift dust from shell ridges with a soft brush, supporting fragile attachments as you work. Remove fabric elements and growing containers for their own care. Avoid immersing a mixed-material craft unless every part and bond is intended for it. Before moving a piece, hold its supporting base rather than its shells or tassels. A loose ornament should be removed and its connection repaired before the object returns to regular use.


Leave a Reply