
These 20 repurposed old window ideas include botanical panels, photo boards, ceramic collections, plant shelves and garden flower displays. Alongside the inspiration, the making stages show ways to prepare a backing, arrange decorative layers and plan hanging hardware. You will also find advice on frame condition, tools, mounting and plant care. Begin with the purpose you need, then choose a frame whose shape and condition suit the work rather than trying to fit every object into its existing divisions.
Table of Contents
- Choose the New Purpose Before Changing the Frame
- Check the Old Window and Gather the Right Tools
- Prepare Inserts and Assemble the Decorative Layers
- Bring These Methods to the 20 Ideas
- 1. Glass Paned Garden Window with Floral Details
- 2. Botanical Old Window Wall Display
- 3. Arched Window Curiosity Display
- 4. Old Window Photo Display
- 5. Farmhouse Kitchen Window Shelf
- 6. Old Window Flower Box Wall Decor
- 7. Hanging Window Frames with Flower Boxes
- 8. Colorful Window Frame Succulent Garden Wall
- 9. Autumn Botanical Window Shelf
- 10. Cottage Window Box Garden on a Stone Wall
- 11. Rustic Window Frame with Cascading Greenery
- 12. Christmas Window Frame with Hanging Ornaments
- 13. Vintage Window Plate Display
- 14. Entryway Window Organizer with Hooks
- 15. Hanging Window Frame with a Flower Basket
- 16. Vintage Window Ceramic Cup Display
- 17. Miniature Plant Shelf in an Old Window
- 18. Old Window Moon Garden Display
- 19. Hanging Teacup Garden in a Vintage Window
- 20. Arched Old Window Plant Shelf
- Keep the Display Useful as Its Contents Change
Choose the New Purpose Before Changing the Frame
For a changeable paper display, compare ideas 2, 3 and 4. Ceramic collections need the ledges and independent supports discussed in 5, 13 and 16. Plant options range from a flower box to the individual pot spaces in 17 and the taller shelf openings in 20. A frame can remain a decorative backdrop while a separate structure carries the weight.
Check the Old Window and Gather the Right Tools
Inspect the wood, joints, glass and existing coating before starting. Do not sand or scrape unknown old paint without appropriate assessment and handling; older coatings may contain lead. Damaged panes and loose glazing need proper attention before the frame is displayed. A weathered appearance is a style choice, while unstable paint and weakened wood need a practical solution.
A tape measure, pencil, square and paper templates help plan openings and inserts. Depending on the design, add clamps, a suitable saw for new backing material, a drill and driver, and brushes. Select screws, brackets and wall fixings for their actual jobs. Choose adhesives for the two surfaces being joined, and paint or protective finishes for the intended indoor or outdoor conditions. Use suitable eye protection and follow tool and product instructions.
Prepare Inserts and Assemble the Decorative Layers
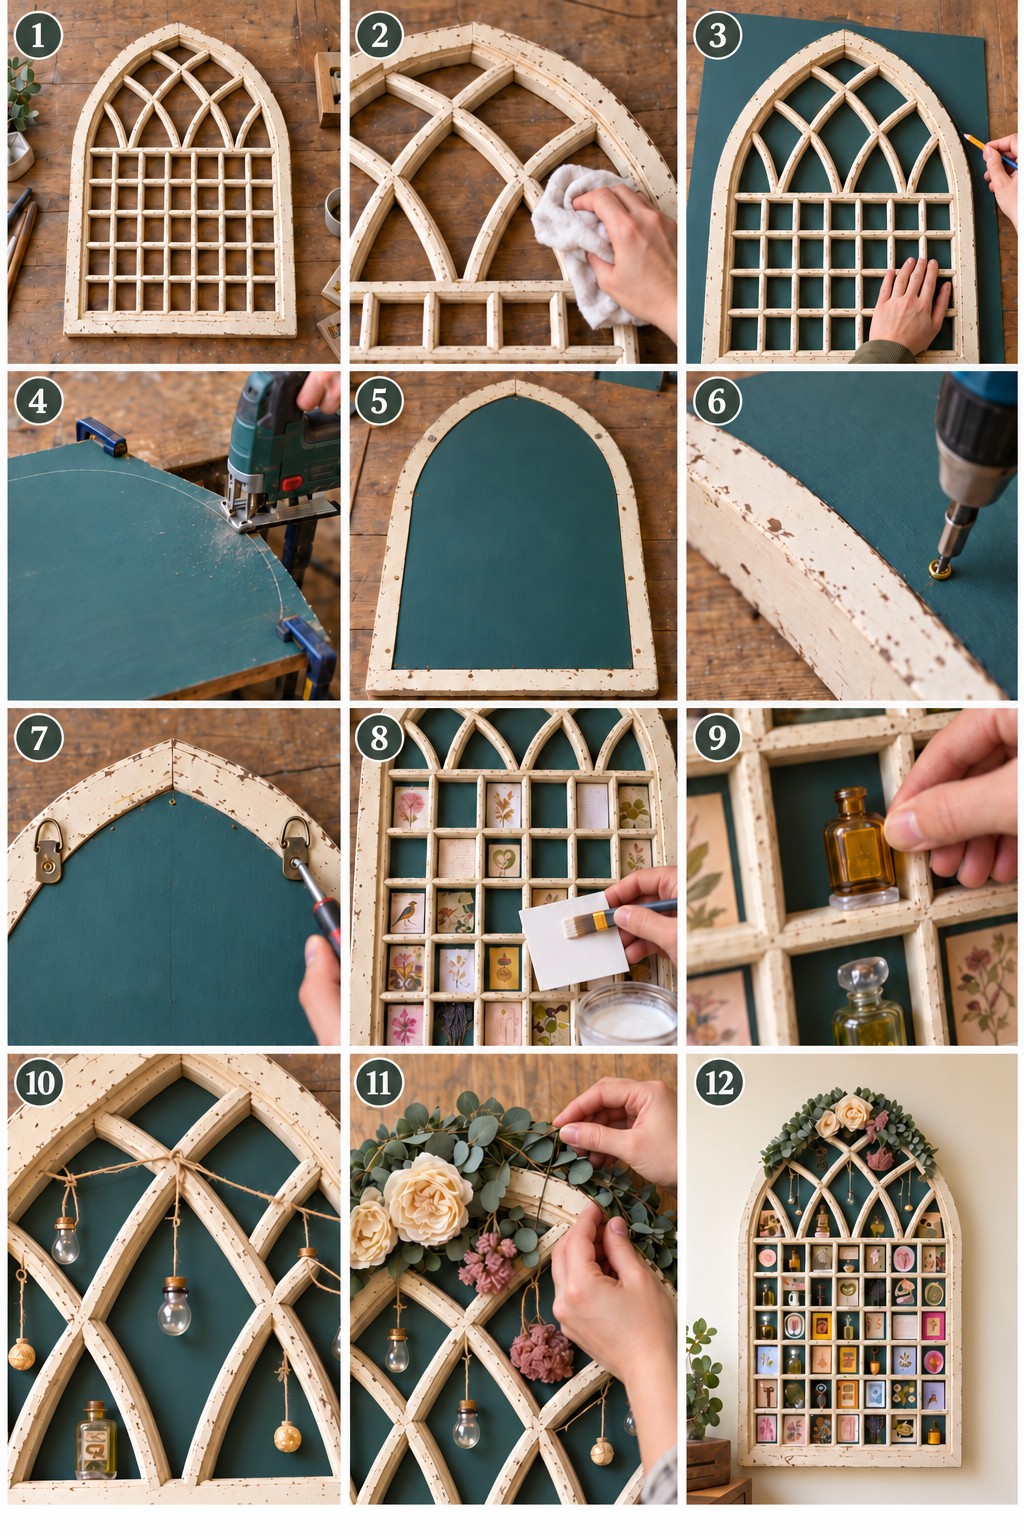
The making stages show a frame being wiped, its outline traced onto a backing and the new board cut to shape. The backing is fitted, hanging hardware added, and small images and objects arranged within the divisions. Use this order to plan the work across the collection. Cleaning in the illustration should follow any necessary assessment of the old coating.
Measure individual openings rather than assuming every pane space matches. Try inserts and ledges in position before fastening them, allowing for their thickness. Arrange paper and floral details while the work lies flat. Apply adhesive to hidden contact surfaces where suitable, keeping mounting points accessible. An insert holds decoration; a shelf connection must support its contents. Wait for the chosen coatings and adhesives to reach their specified readiness before assembling or loading the piece.
Bring These Methods to the 20 Ideas
Use the preparation and layout methods below to develop a window display that fits your room or garden. Choose removable panels for seasonal changes, added supports for objects, or separate containers for plants. Plan mounting for the complete weight, including glass, ceramics and wet pots. The following designs show how those choices change with the frame and its new purpose.
1. Glass Paned Garden Window with Floral Details
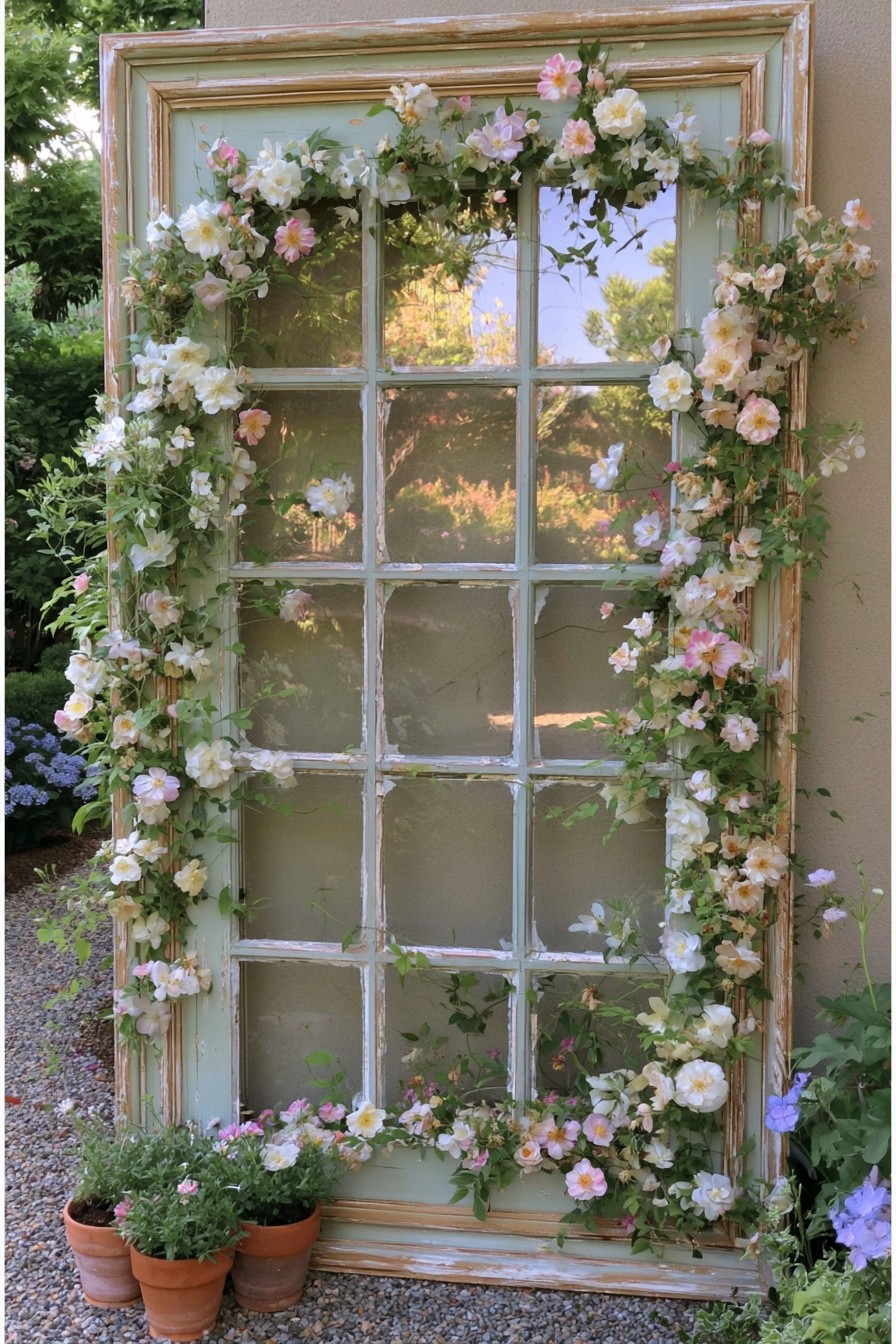
Glass remains in this tall divided window, with flowers arranged around the outer frame and across selected sections. It works as a garden decoration that reflects the surrounding planting and gives a border a vertical focal point. Choose artificial stems for a lasting dry display, or secure removable watertight containers if you prefer fresh flowers. Choose the material for the setting and how often you want to replace or maintain it.
Using the openings as a support for lightweight climbing plants is a different adaptation, with the glass removed appropriately first. Select a frame with sound joints and anchor it independently to a suitable wall or post. Leave access behind and around it for pruning and inspection. Consider the mature growth and weight of the chosen climber, keeping foliage from hiding all of the window outline.
2. Botanical Old Window Wall Display
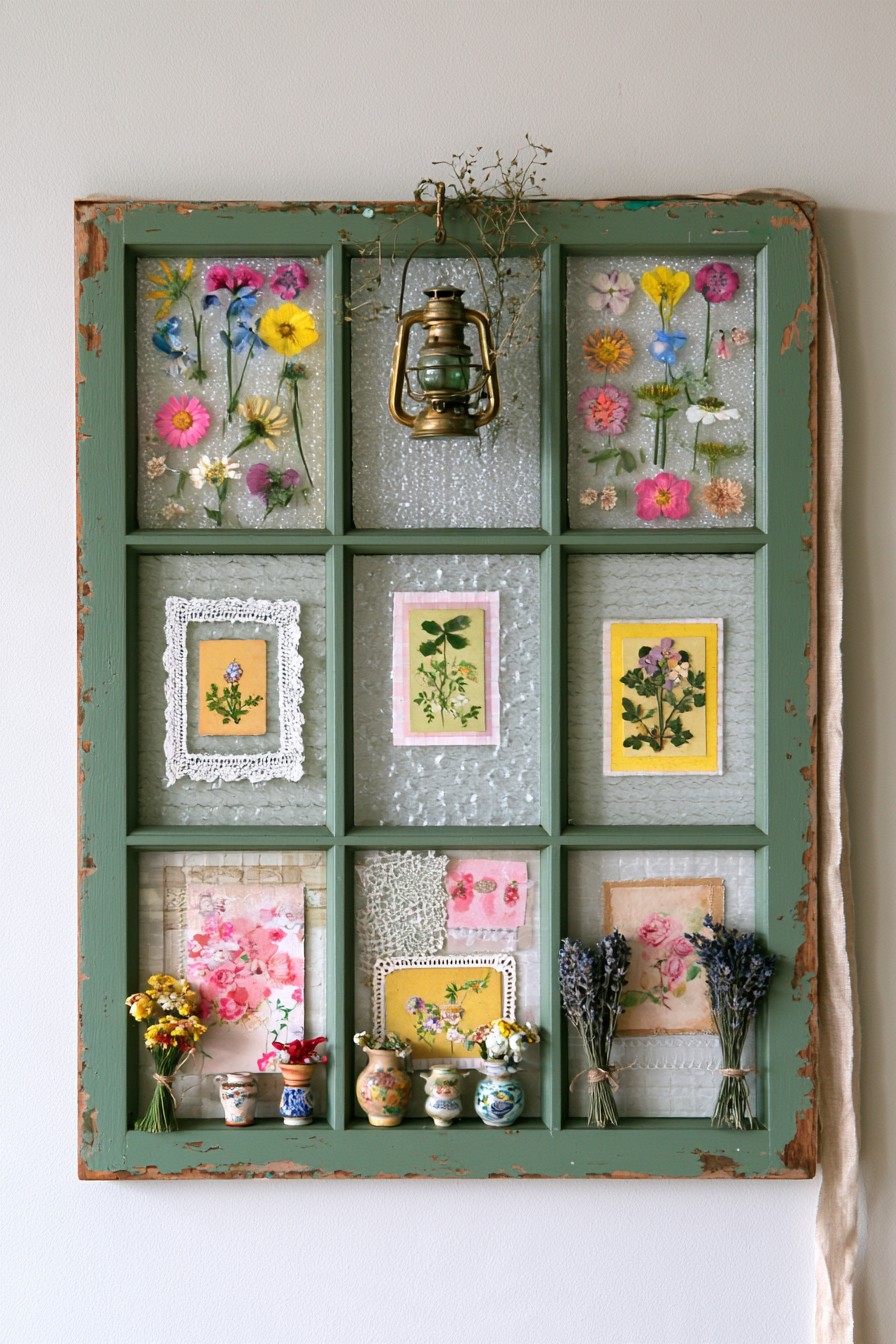
A green divided frame groups small botanical images, floral panels and a few decorative vessels. The repeated openings give delicate details a defined place, while the green finish connects them into one display. Use a limited palette and leave some sections quieter than others so the arrangement does not become a dense patchwork. This approach suits a craft room or reading corner where the contents can be appreciated closely.
Mount paper or fabric elements on removable backing panels to refresh the display without repeatedly handling the old wood. These floral panel ideas for divided frames offer related layout choices. Small vessels need properly supported ledges or suitable individual mounts; thin glazing bars remain decorative. Keep fragile botanical materials away from moisture and heat, and preserve access to remove panels for cleaning.
3. Arched Window Curiosity Display
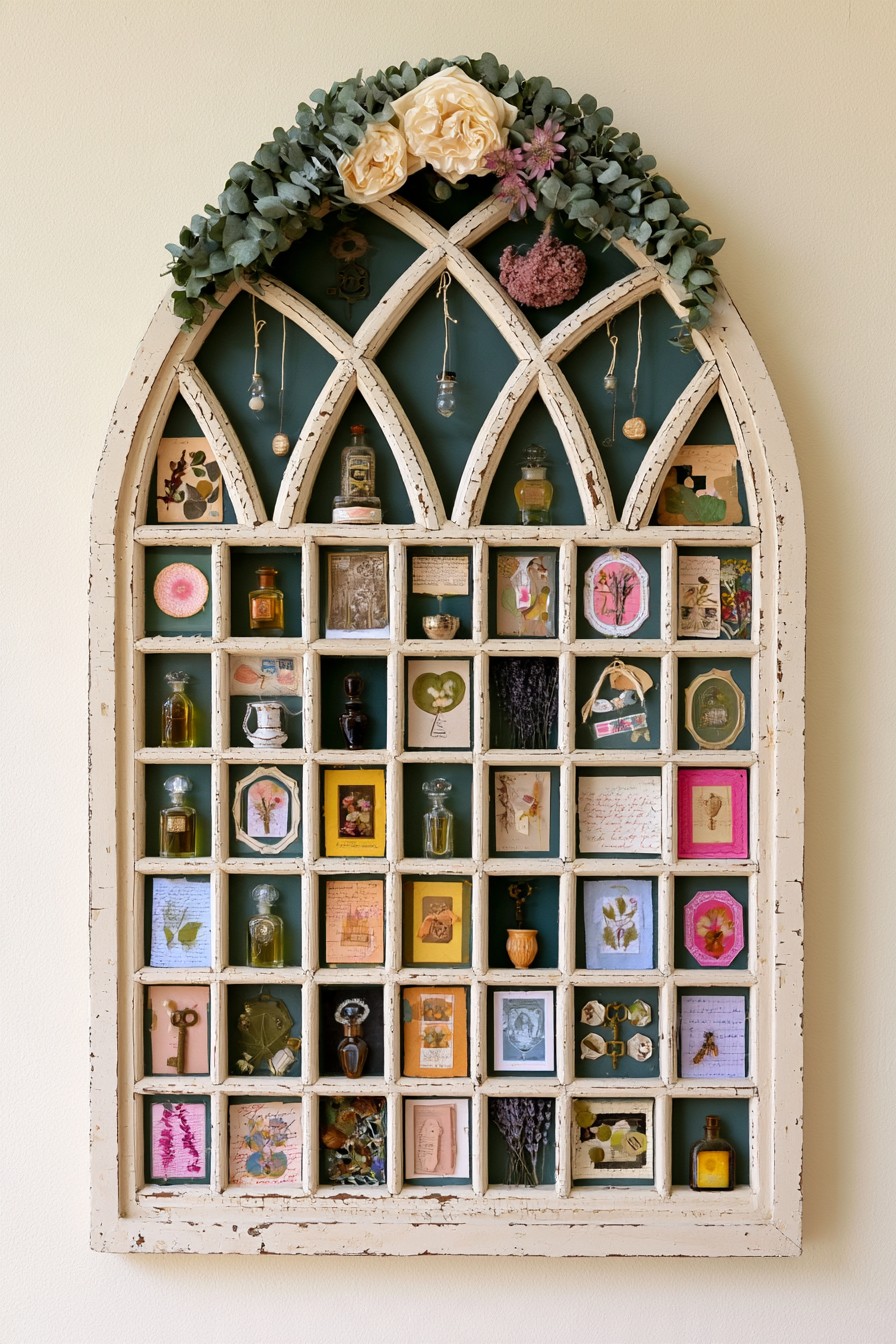
An arched frame gives miniature collections a defined shape. Small prints, notes, keys, and pressed flowers can occupy different sections, while a dark backing provides contrast against pale wood. Keeping the upper curve visible helps the architectural feature remain the focus.
Choose a few objects with a shared color or story instead of filling every opening. Bottles and other weighty keepsakes should rest on properly attached ledges rather than on the narrow original dividers. A removable backing also makes the arrangement easier to change as a collection grows. Prepare a paper layout of the small compartments before making inserts, allowing room to grip and lift each keepsake without disturbing its neighbors.
4. Old Window Photo Display
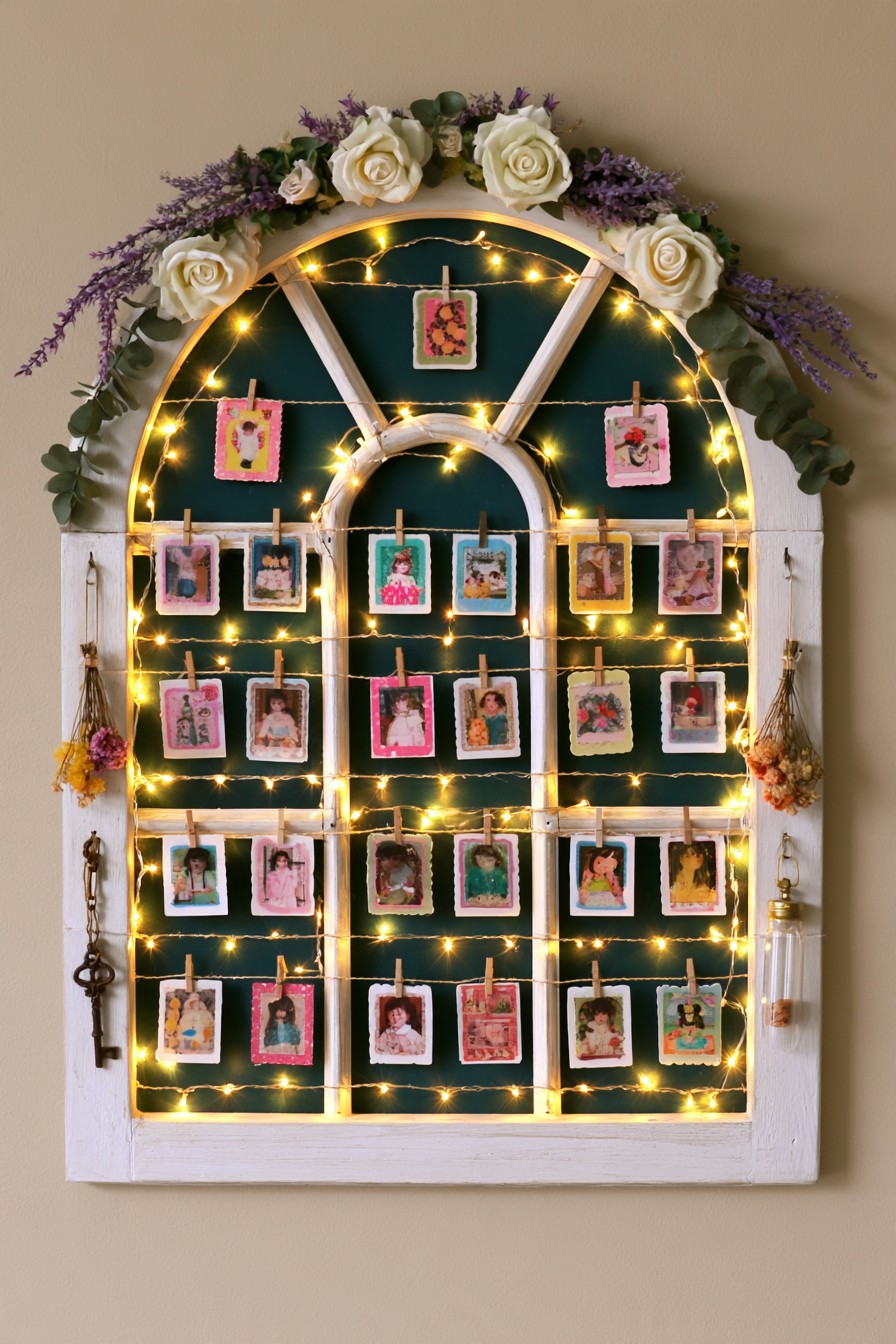
A repurposed window can give family photos, postcards, and small paper keepsakes a place together. Thin twine stretched across the open sections lets images be clipped on and changed easily. The arched top adds shape without requiring every photograph to fit an individual pane.
Attach the twine to the solid outer frame, keeping it clear of any glass. Arrange larger pictures first and leave room for new ones. If adding soft lighting, position it so it does not heat the photos or dried floral accents. This approach is useful for a display that changes throughout the year. Use copies of important photographs for a changeable decorative arrangement, and choose clips that hold the paper without leaving heavy pressure marks.
5. Farmhouse Kitchen Window Shelf
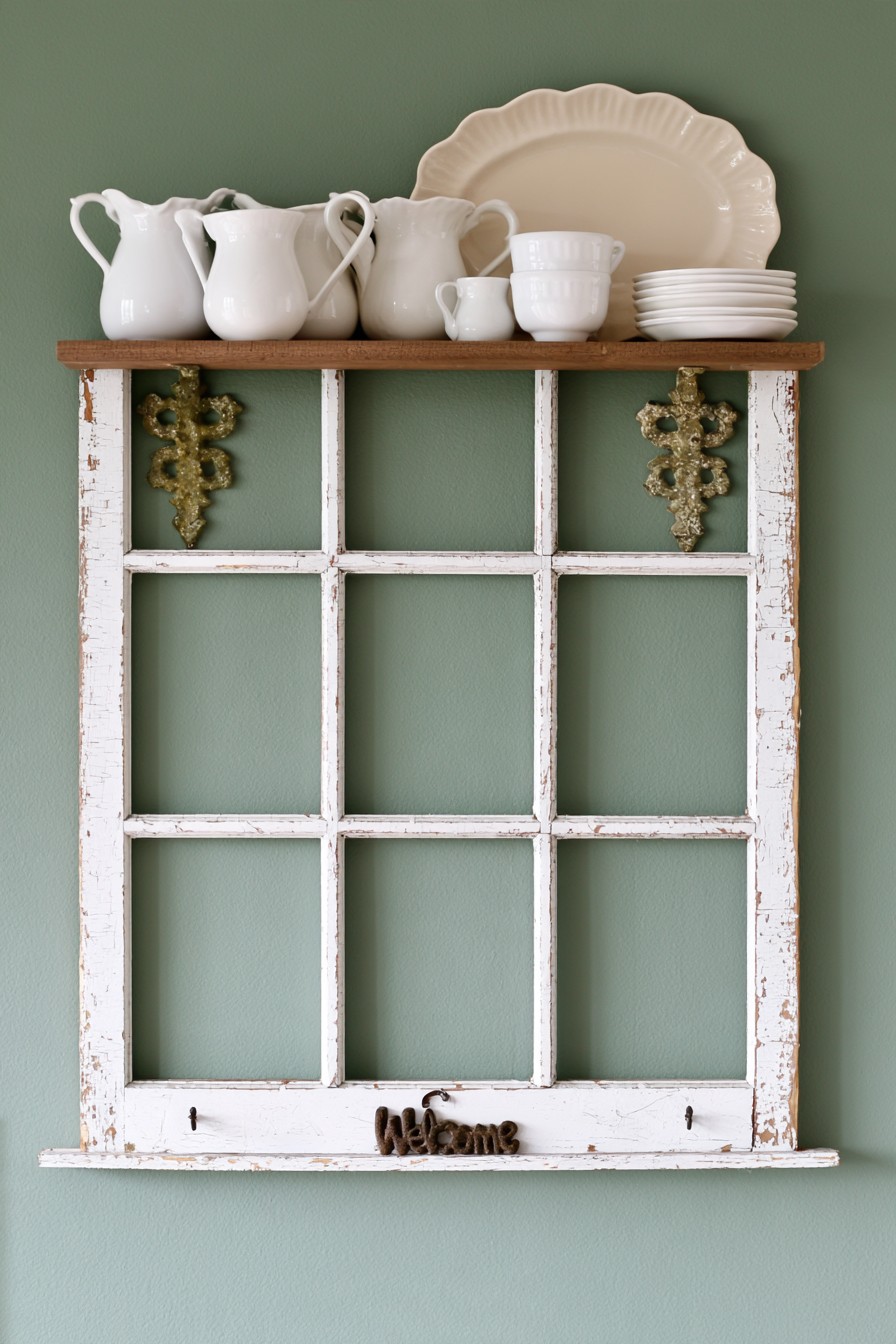
A wooden ledge added to an old window frame creates a kitchen display for a few pitchers, cups, or serving pieces. The open panes allow the wall color to show through, so the piece feels lighter than a solid cabinet. A restrained selection of ceramics keeps the reclaimed frame visible.
Fix the shelf and frame into suitable wall structure, accounting for the weight of the ceramics rather than the empty frame alone. Keep heavier items closer to the supports and use any lower hooks only for objects within their rated capacity. In a busy kitchen, position the display away from paths where it could be bumped. This example places the ceramic grouping on the upper ledge, so plan reach as well as depth before making the shelf.
6. Old Window Flower Box Wall Decor
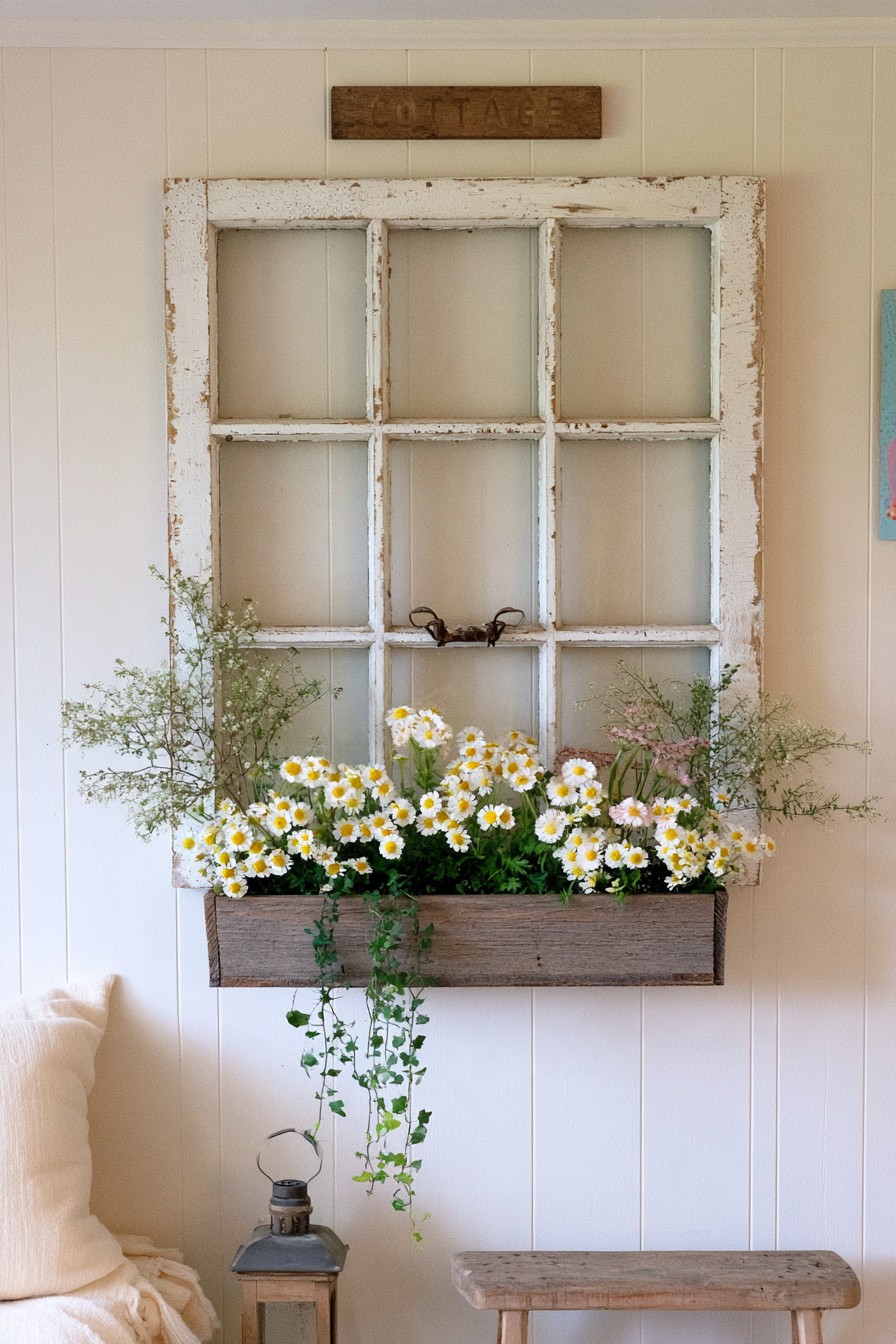
A flower box along the bottom of a salvaged frame introduces seasonal color while leaving the original openings visible. Upright blooms can fill the lower edge, with trailing greenery softening the sides. This arrangement brings planting to a narrow wall where a floor container might obstruct movement.
Use removable nursery pots or a lined box so wet soil does not rest directly against old wood. Check where excess water will go before mounting the piece, especially on an interior or painted wall. Leave the box accessible for watering and replacing spent plants. Compare the box depth with the filled pots first, leaving enough clearance to lift each one out without scraping its rim.
7. Hanging Window Frames with Flower Boxes
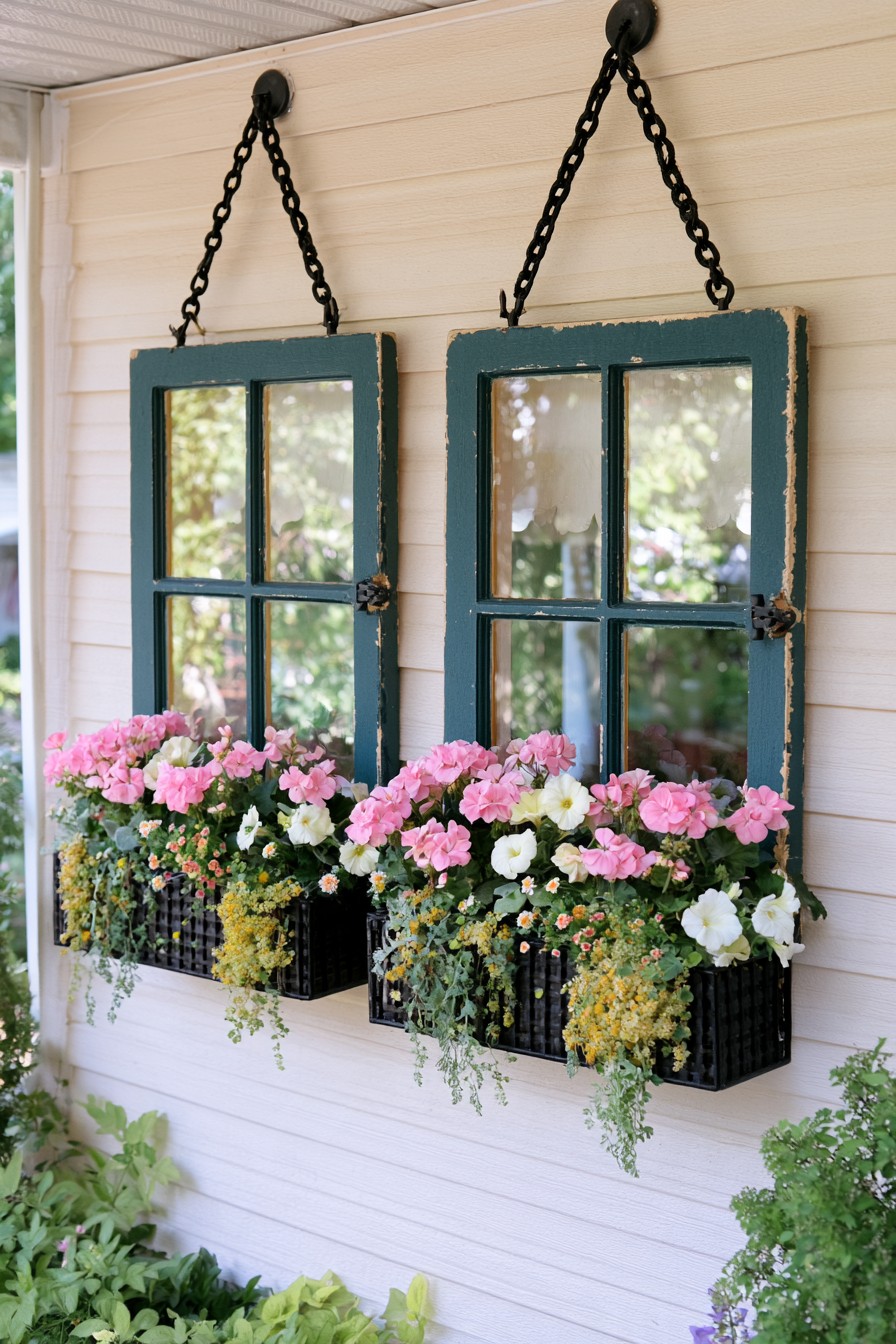
Two similar frames hung side by side can create a porch feature with the rhythm of real windows. Compact flower boxes add pink and white blooms beneath the weathered wood, while the suspended arrangement leaves the ground clear. A covered porch helps protect the frames and flowers from constant exposure.
Fasten chains to sound structural points and calculate the weight with wet soil, plants, and hardware included. Prevent the frames from swinging into a wall or walkway. If a frame still has glass, check its condition and whether removing it would make the hanging piece safer and lighter. For routine care, choose containers that can be taken out individually rather than watering high planters while standing beneath them.
8. Colorful Window Frame Succulent Garden Wall
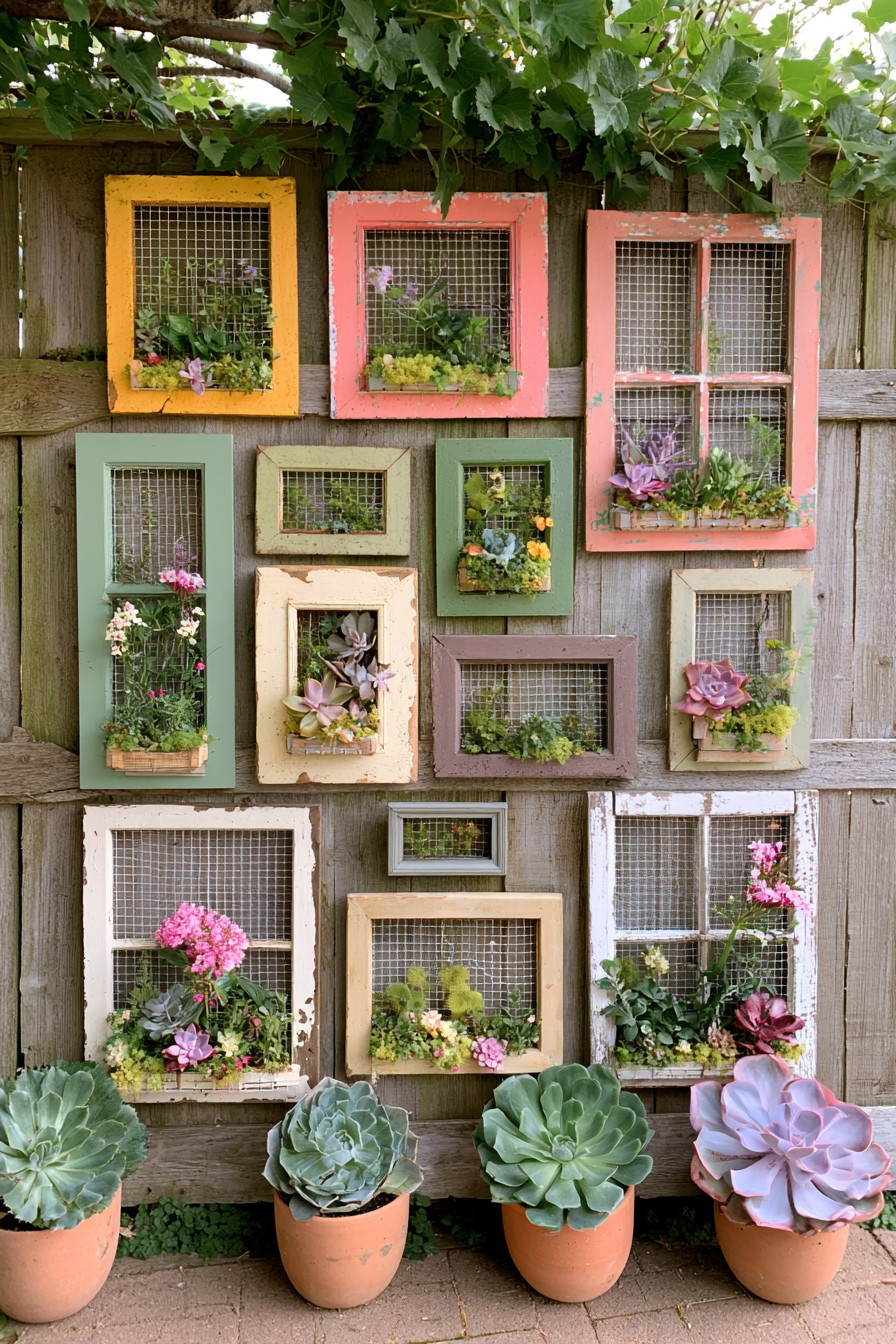
Pink, green, cream and yellow frames form a collected garden wall, with mesh, small planting areas and larger pots below. Succulent rosettes sit alongside flowering plants and trailing greenery. The different frame proportions give the arrangement its character, so the display can be reduced to a few pieces without losing the idea. Plan the wall layout before adding plants, leaving access to each container.
Choose plants for the available light, local conditions and the containers provided. Most succulents need good drainage, but their care varies by type. Plants sharing one container also need compatible watering requirements. Separate removable pots can bring different plant types into the same visual arrangement while allowing independent care. Support each frame and planted container appropriately, including wet weight, and check growth before it hides access to the fixings.
9. Autumn Botanical Window Shelf
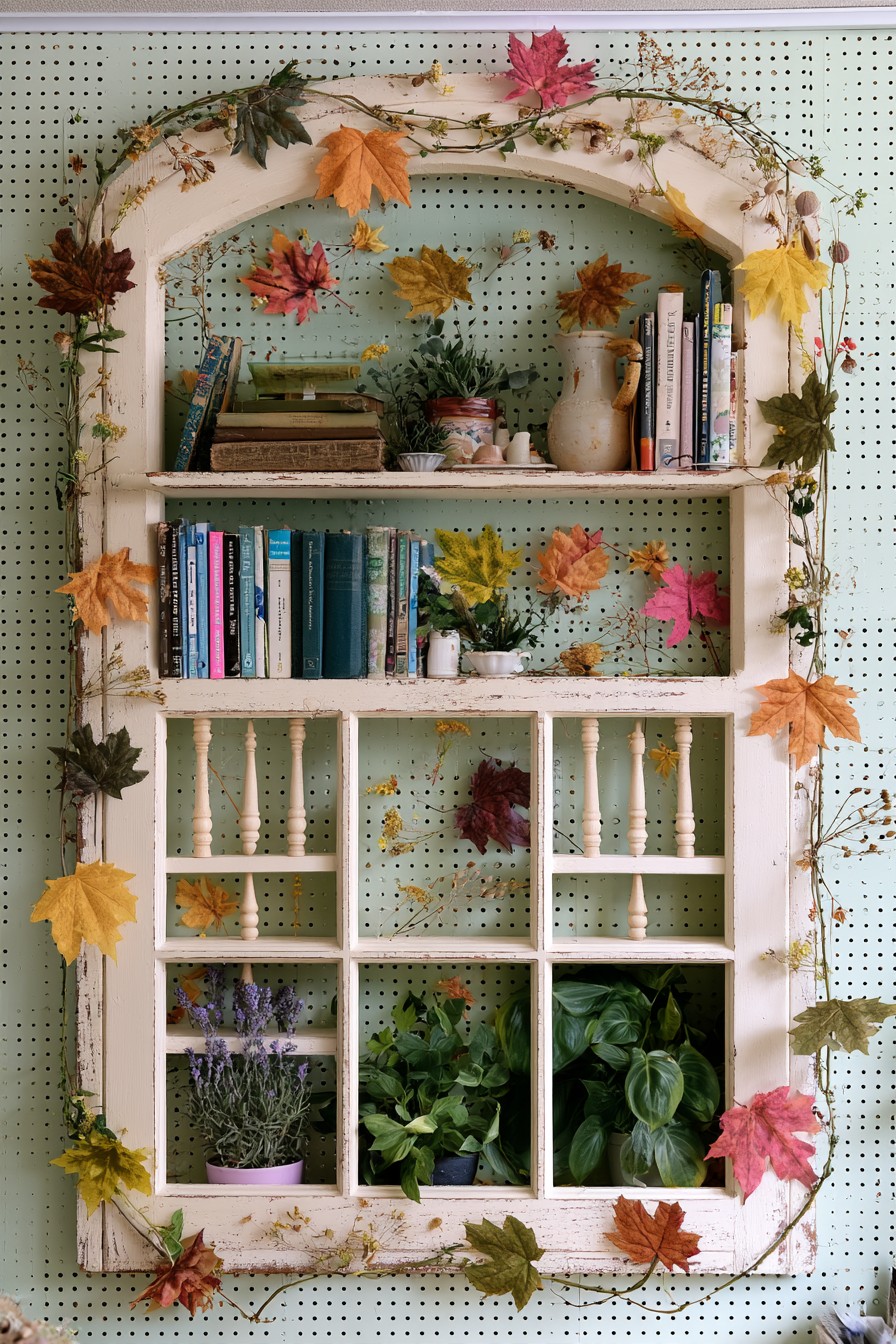
An arched window with added horizontal shelves offers a base for a seasonal display. Small pottery and books can remain throughout the year, while dried stems and autumn leaves change the mood without altering the frame. Trailing greenery softens the shelf edges and draws attention to the arch.
Keep frequently changed decorations on accessible shelves and secure any upper objects that could fall. Removable botanical bundles make seasonal updates easier than attaching foliage permanently to the wood. Leave part of the frame uncovered so it still reads as a repurposed window. Decide which items are seasonal and which stay in place, then leave the frequent changes within easy reach.
10. Cottage Window Box Garden on a Stone Wall
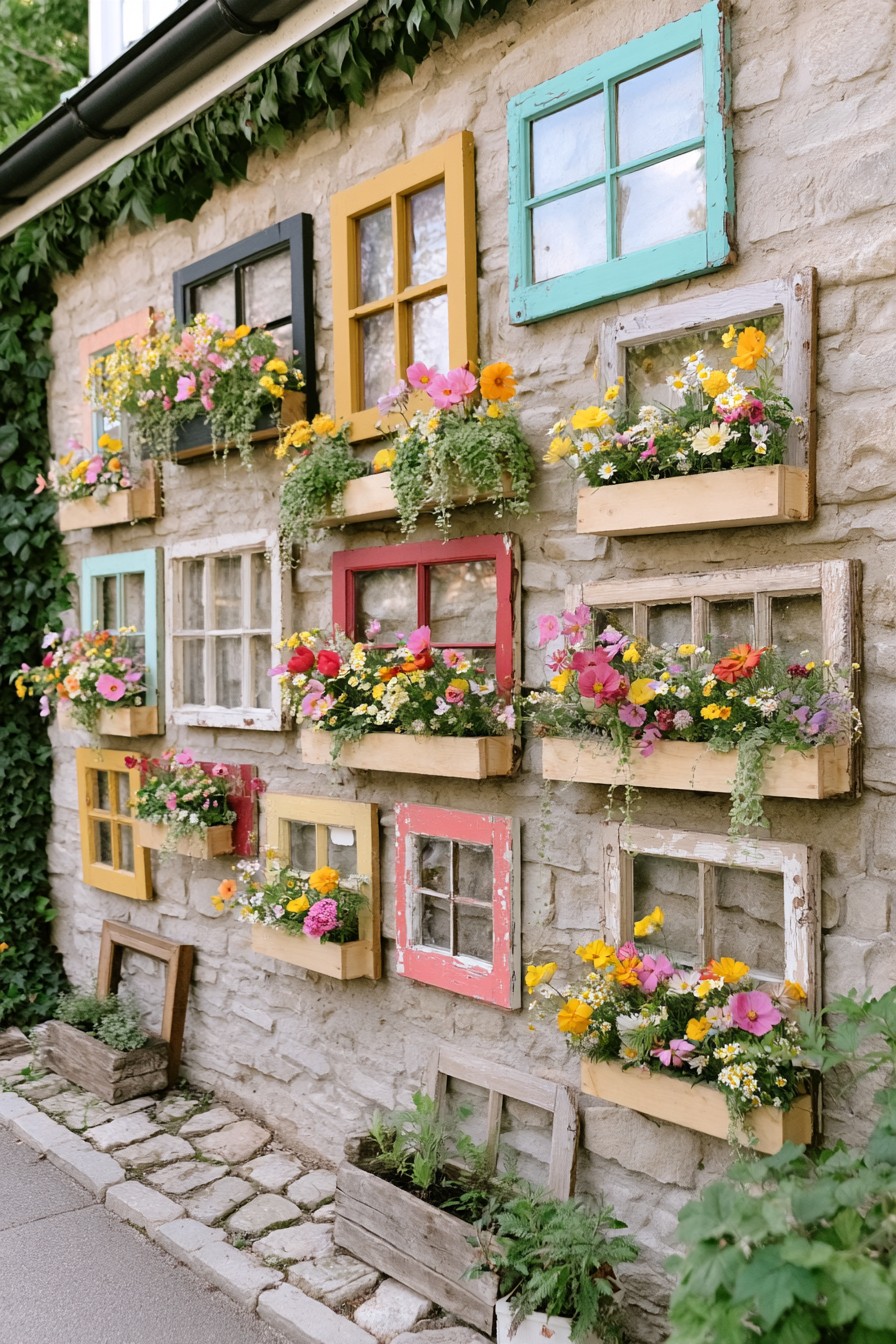
A group of salvaged frames can break up a broad stone wall with color and repeated shapes. Different sizes and weathered finishes give the display a collected cottage look, while flower boxes introduce seasonal planting. Varying the mounting heights creates movement across the masonry.
Plan the arrangement on the ground before drilling into stone. Use fixings appropriate to the wall and support the weight of wet planters independently where possible. Place draining containers so water does not remain trapped against the frames or create persistent staining on the stone. Leave space between frames to lift out planted containers and inspect the wall attachments after rain or seasonal changes.
11. Rustic Window Frame with Cascading Greenery
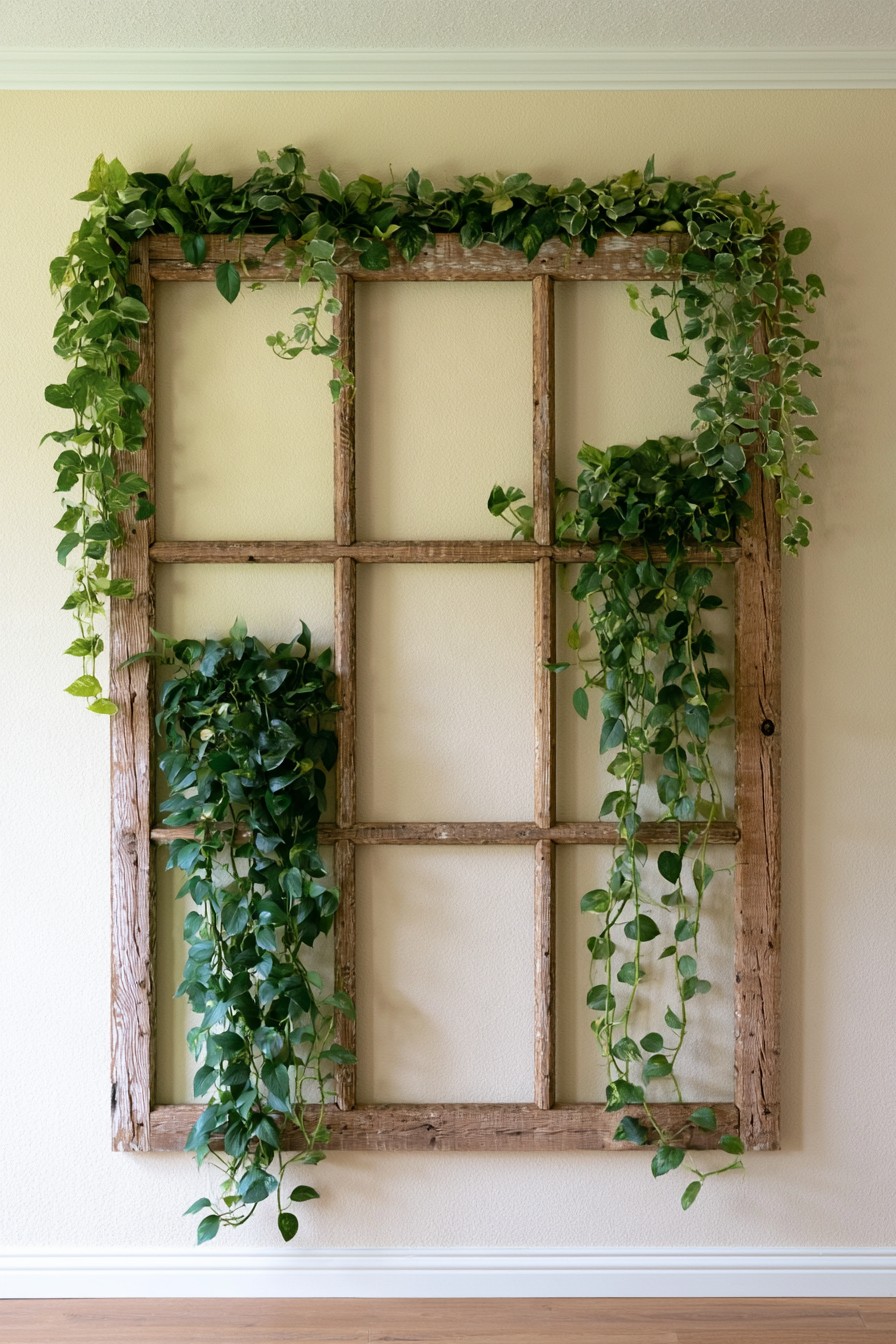
Trailing greenery follows the outer edges and selected divisions of this large rectangular window frame. Open sections keep the wall visible, allowing the wood to remain an architectural outline. This arrangement is useful when plants already have a suitable place nearby and the frame adds visual structure to their growth. Guide only selected stems across it, leaving enough plain areas to recognize the window shape.
Keep pots on an independently supported surface instead of balancing them on narrow glazing bars. These wooden plant stand ideas offer a related option for holding containers separately. Leave stems slack enough for each pot to be removed for watering and inspection. Select plants for the actual room light, and plan how mature growth will be trimmed before it reaches outlets, fixtures or furniture.
12. Christmas Window Frame with Hanging Ornaments
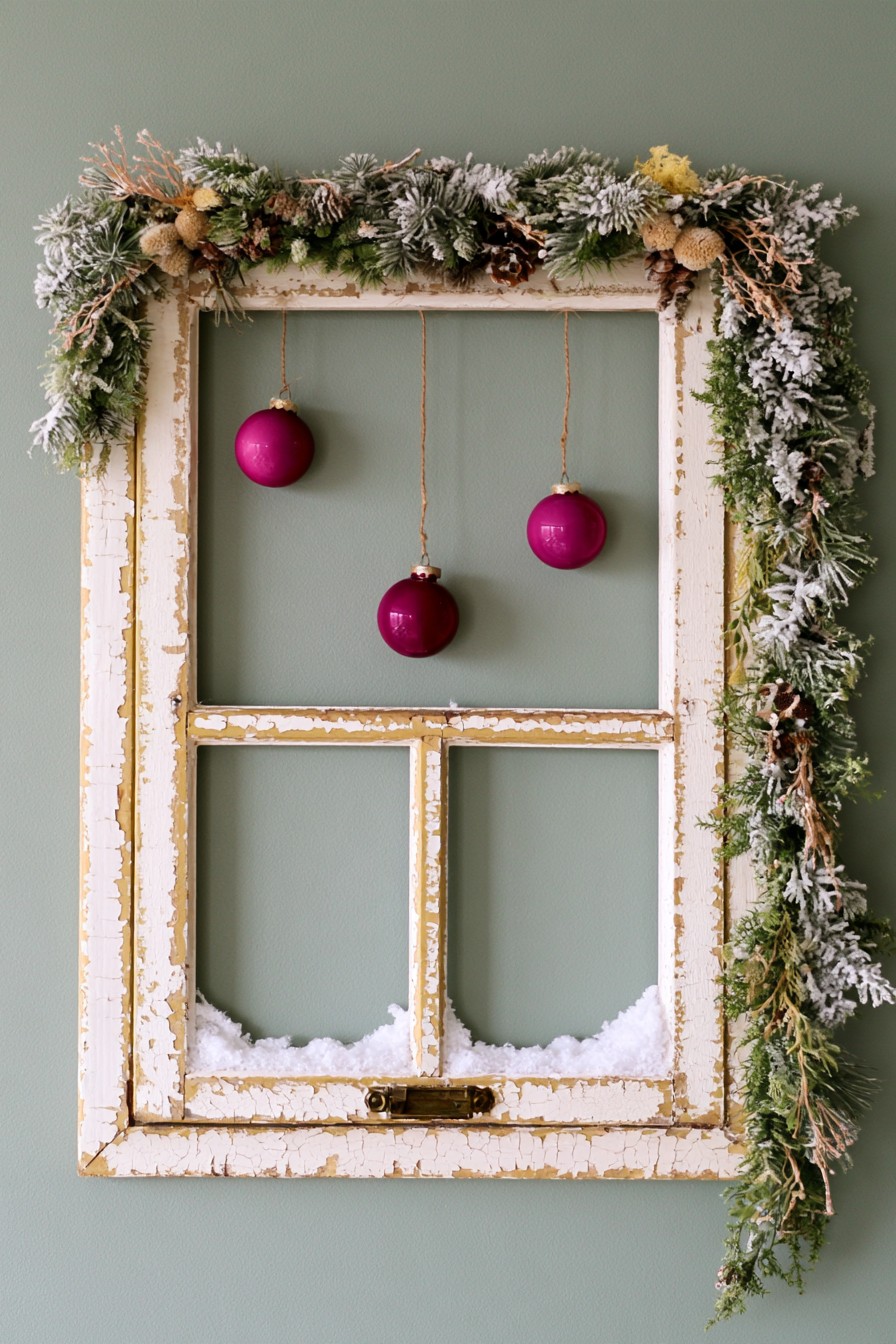
Red ornaments at different heights bring festive color into the open sections of a weathered frame. Greenery placed around one side and the upper edge creates an informal composition while leaving much of the original shape visible. Pinecones and frosted foliage can add texture without filling every opening.
Attach ornaments to sound points on the outer frame and choose lightweight, shatter resistant pieces where the display might be touched. Removable ties make the decorations easier to store and replace next season. Keep dried greenery away from heat sources and check that nothing hangs into a walkway. Set the ornament lengths while the frame lies flat so the lowest pieces remain inside the intended display area.
13. Vintage Window Plate Display
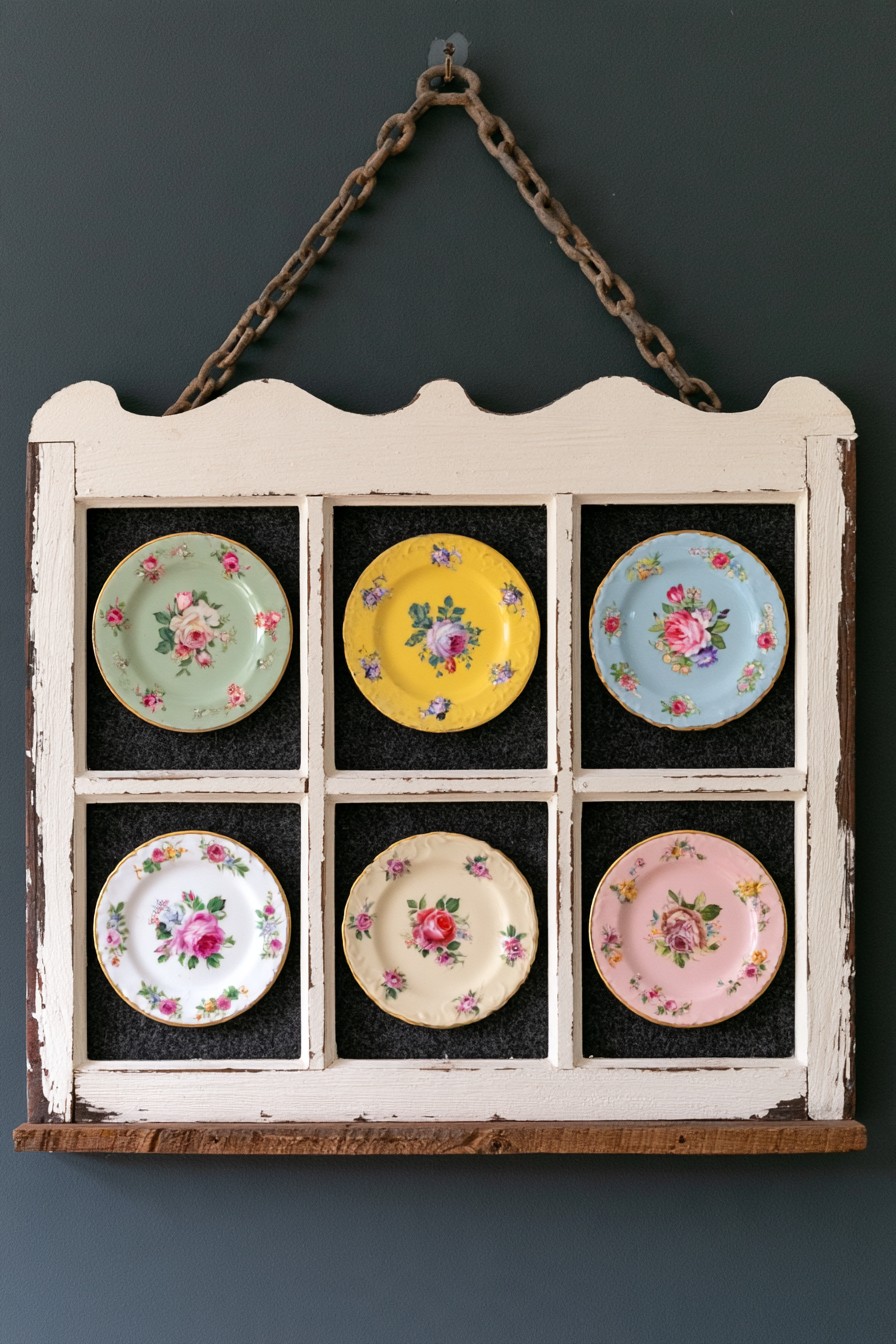
A divided frame can organize mismatched floral plates into a single collection. Each opening gives a plate visual space, while a dark backing brings out pale porcelain patterns. Keeping the distressed frame relatively simple lets the china provide most of the color.
Use plate mounts intended for ceramics and anchor the display to suitable wall structure. Do not rely on thin pane dividers or decorative adhesive to hold heavy plates. Before installation, arrange the collection on the floor to balance large and small patterns across the frame. Measure plate diameters and mount positions together, leaving enough space to remove one piece without touching the adjacent china.
14. Entryway Window Organizer with Hooks
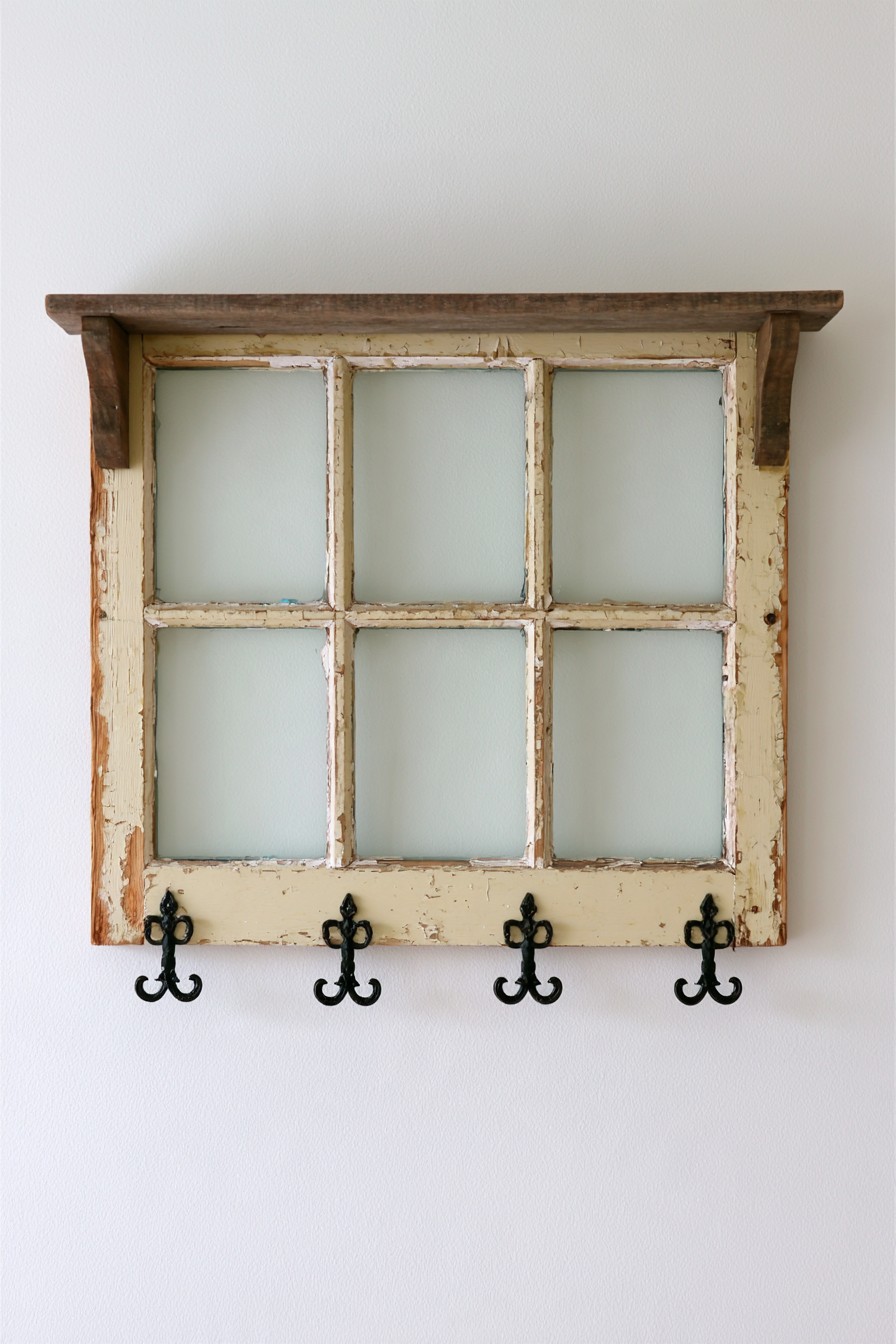
Four hooks beneath the divided center give this old window a useful entryway role. The upper wood forms a ledge, while the frame itself provides a decorative backdrop for hanging belongings. Decide whether the hooks will hold keys, hats or bags before choosing their spacing. A shallow arrangement is helpful on a small wall, provided hanging straps do not extend into the walking route.
Fasten hooks into sound wood and plan wall mounting for the expected loaded weight. If the upper ledge will hold a basket or other object, check its depth and support instead of treating the top trim as a working shelf automatically. Leave enough room to lift hanging items off independently. Glass, where retained, must be secure, and the frame should remain reachable for checking connections during routine use.
15. Hanging Window Frame with a Flower Basket
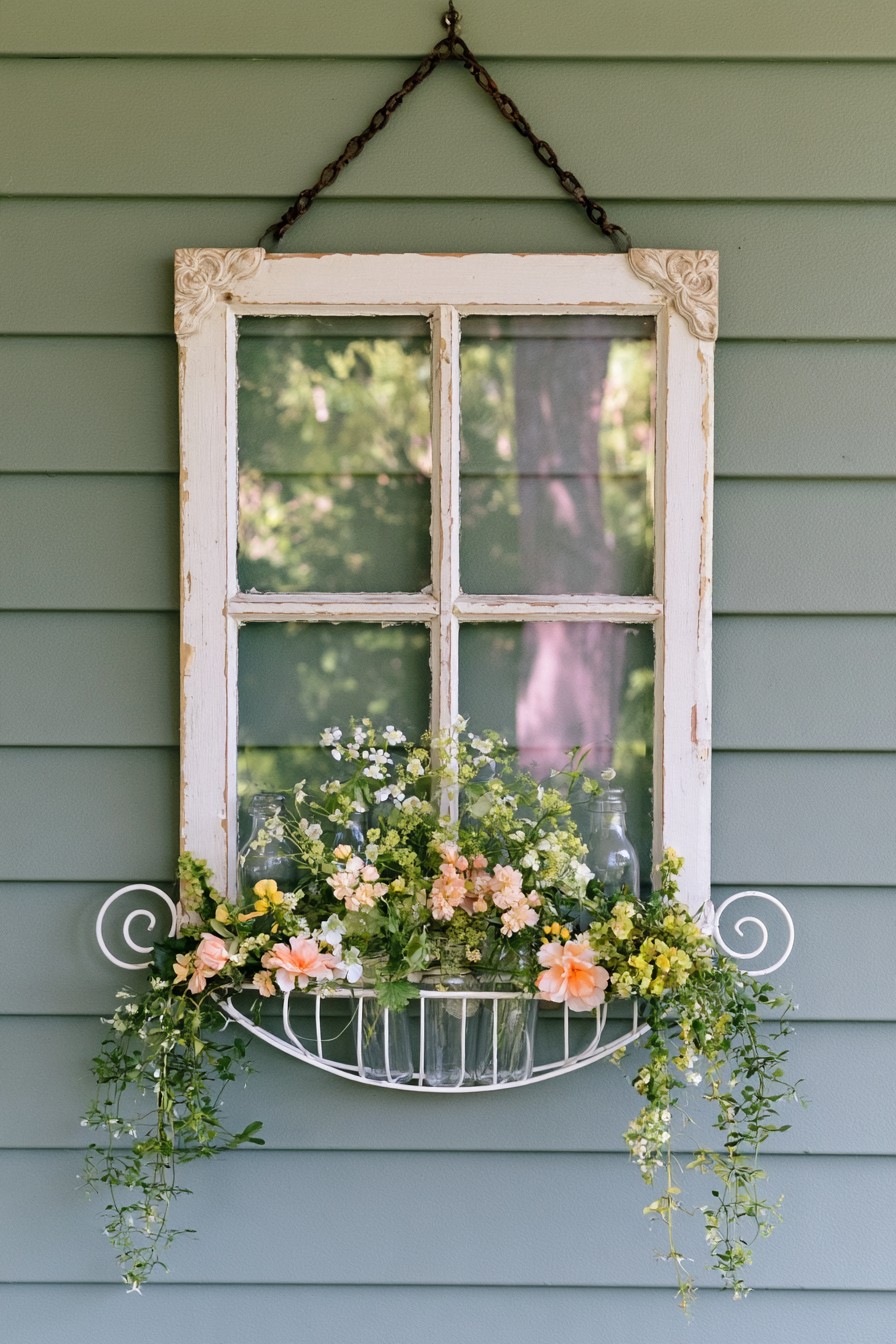
A small chain hung window keeps its glass while a curved wire basket adds flowers below the divided sections. The compact arrangement suits a sheltered porch wall where a floor container would occupy useful space. Plan the floral display so the lower feature remains accessible and does not obscure the whole frame. The photograph shows the finished arrangement, without establishing every container or support inside the basket.
For a fresh stem adaptation, secure removable bottle vases within a suitably supported basket so they cannot roll or slip. These floral bottle decorating ideas can carry the same style onto those vessels. Keep decoration clear of areas wetted during refilling. Choose hanging hardware for the complete wet weight and prevent the frame from swinging into a wall or walkway. Remove vessels individually for cleaning.
16. Vintage Window Ceramic Cup Display
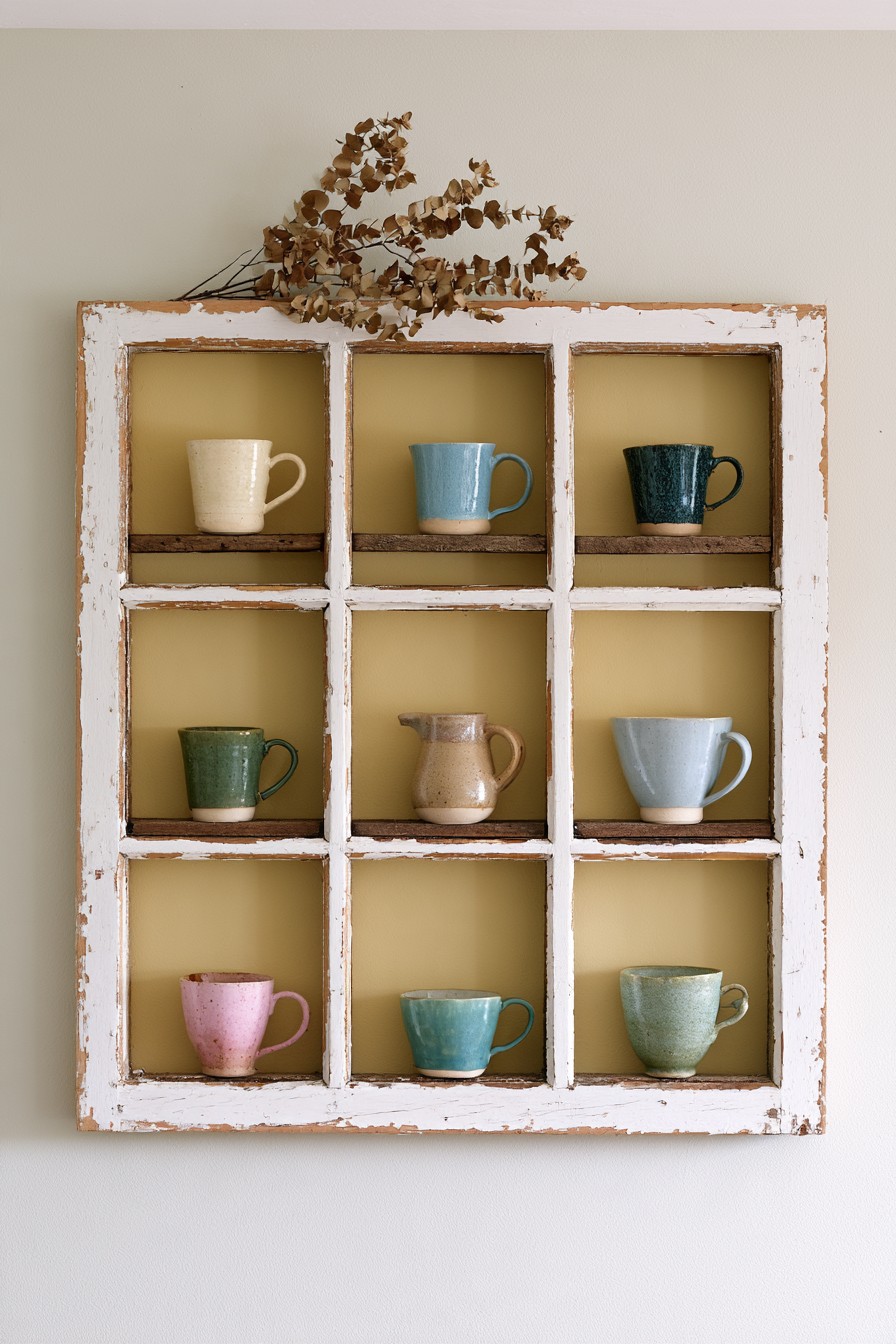
Narrow ledges across a divided frame can give favorite cups and small pitchers individual display spaces. A warm backing helps blue, green, and cream ceramics stand out, while the repeated openings keep a mixed collection orderly. This approach suits a dining area or breakfast nook where the pieces can be enjoyed regularly.
Build ledges deep and strong enough for the chosen cups, and consider a small front lip where pieces could be bumped. Support the shelves from sturdy frame members and mount the whole unit for the collection's weight. Leave room to lift each cup out without striking the divider above it. Measure a cup with its handle included, and check the removal motion against the sides and shelf above before fastening the ledges.
17. Miniature Plant Shelf in an Old Window
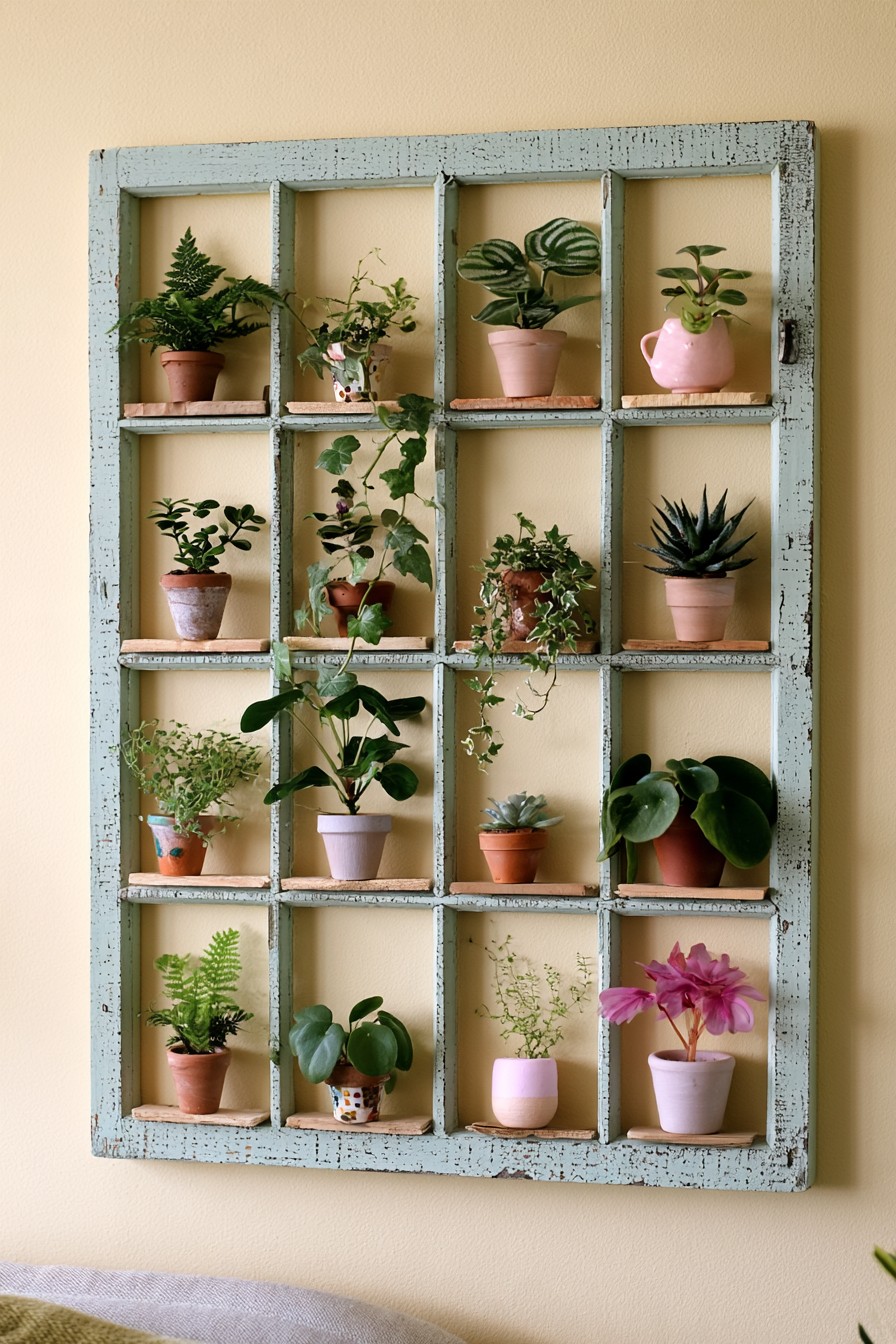
Each small opening in this rectangular frame gives a separate pot its own display space. The repeated grid is useful for organizing a collection of compact plants, with upright and trailing forms providing variety within similar compartments. Choose pot sizes around the usable depth and width of each added ledge. A plant that fits today may soon need a larger container or more space for its leaves.
Build the ledges and their connections for the filled pots, keeping the original pane dividers from becoming unverified supports. Select plants for the available light and use removable trays to protect wood from drips. Leave clearance above every pot so it lifts out without striking the next row. Unlike the broader openings in idea 20, this layout works best when each plant can remain comfortably within a relatively small individual space.
18. Old Window Moon Garden Display
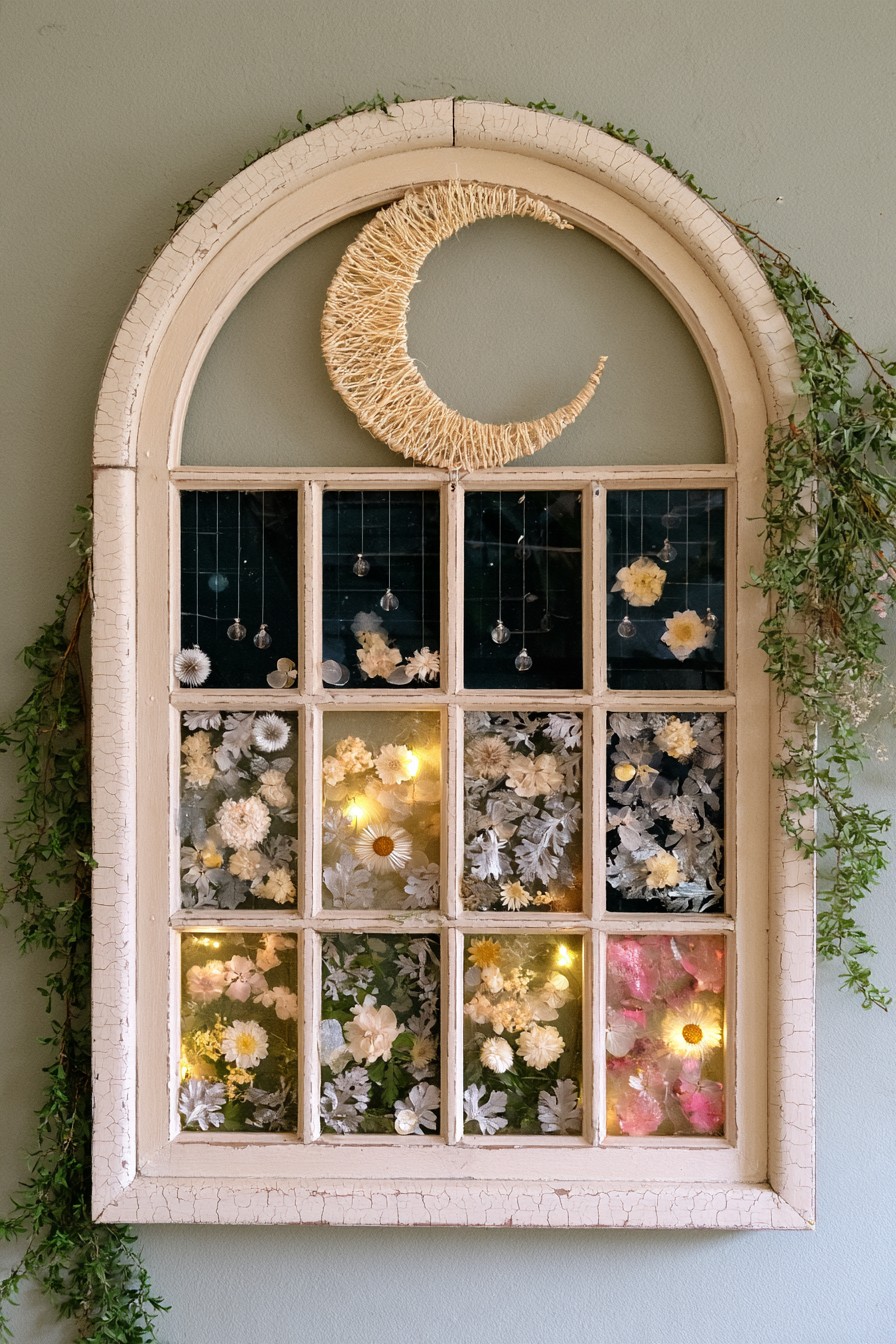
A woven crescent in the upper arch gives this old window a clear nighttime theme. Dried blooms and delicate greenery can occupy the lower sections, while a few hanging details create depth without hiding the frame. The arrangement brings botanical texture to a wall without requiring live plants.
Use removable ties or backing panels so dried materials can be replaced as they fade or collect dust. If adding illumination, select lighting that stays cool and keep it clear of dried foliage. The moon remains the focal point when the smaller ornaments are spaced rather than clustered together. Keep the crescent attachment independent of the lower inserts, allowing the botanical sections to be refreshed without dismantling the main motif.
19. Hanging Teacup Garden in a Vintage Window
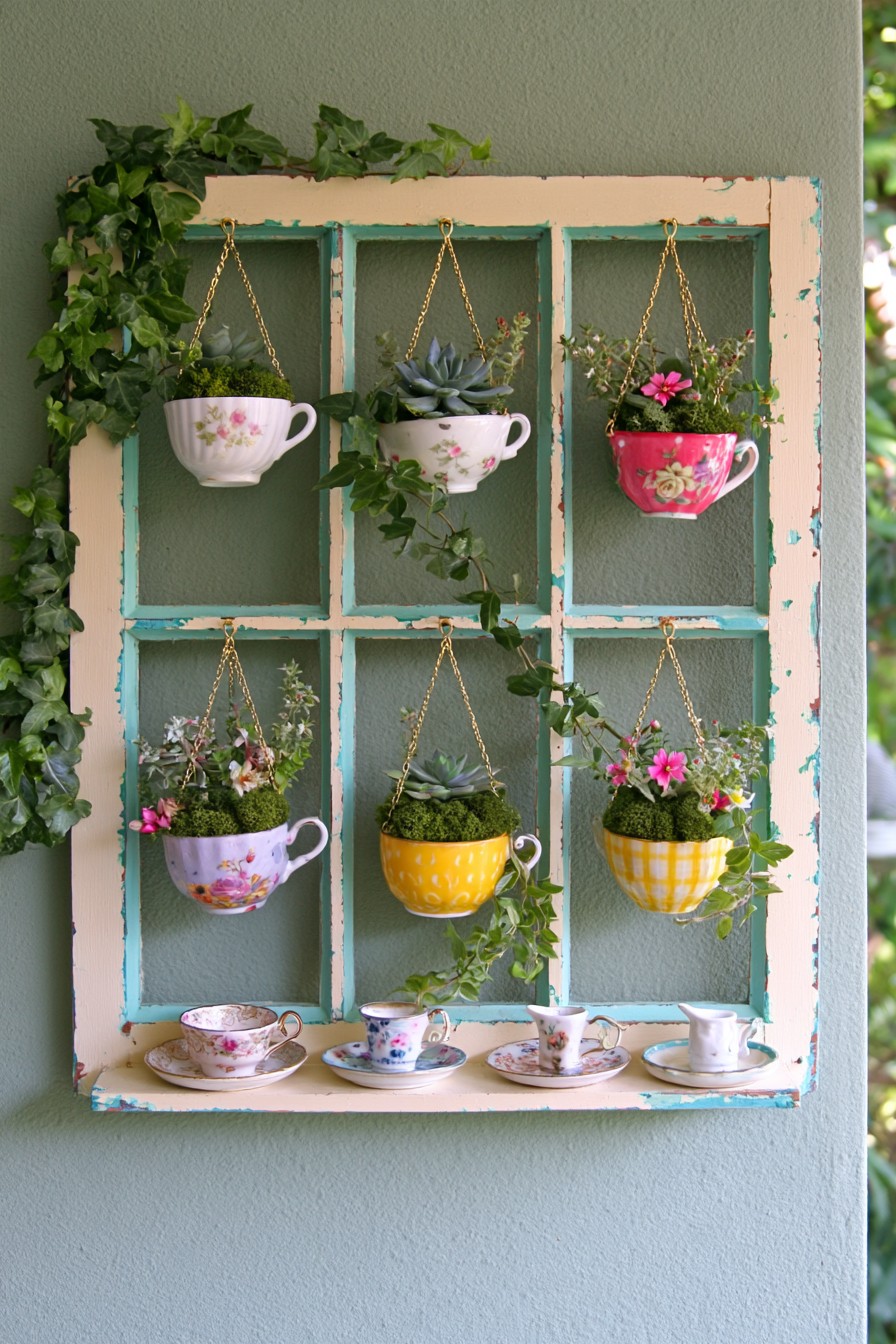
Hanging a different vintage teacup inside each opening turns a divided frame into a playful miniature garden. Floral china gives the display color even when the planting is simple. A lower ledge can hold matching saucers or a small pitcher without crowding the suspended cups.
Use secure cup holders or supports rather than relying on handles alone, and account for the added weight of water and planting material. For cups without drainage, consider cut stems or removable inner containers instead of planting directly in the china. A sheltered location helps protect delicate pieces from wind and weather. Select planting individually for each cup; similar looking vessels can differ in depth, and small inner pots may need frequent moisture checks.
20. Arched Old Window Plant Shelf
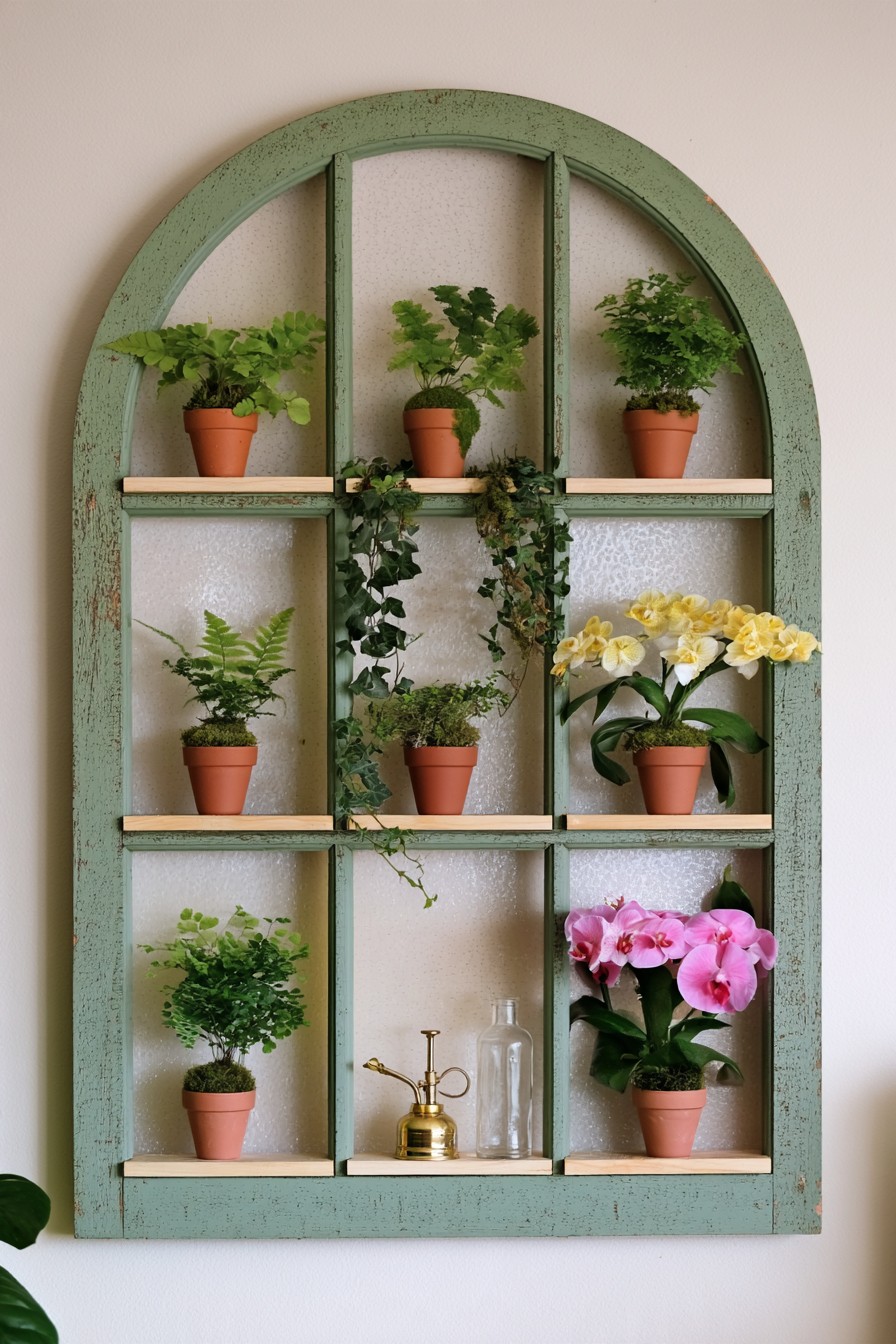
The arched green frame and horizontal shelves bring several plant heights into one wall display. Smaller upright pots fill the upper curve, while broader foliage and taller flowering forms occupy the lower sections. This layout gives more variation than a repeated grid of tiny openings. Choose the shelf gaps around the plants and pots together, preserving room for new leaves and the motion needed to lift a container out.
The arrangement suggests a miniature greenhouse visually, but it is an open plant shelf rather than a climate controlled enclosure. Select plants for the actual room light and humidity. Support shelves for their expected wet loads, protect them from water and remove pots for watering when practical. Keep trailing growth clear of the plants below, and leave each level reachable without leaning on the frame or its contents.
Keep the Display Useful as Its Contents Change
Check the frame, supports and mounting when you change the contents, especially when replacing dry decoration with ceramics or planted pots. Empty trays, dry wet surfaces and keep access to the connections clear. A removable insert or separate container makes seasonal updates easier. Let the window's outline remain visible, then give every added layer a practical way to be supported, reached and maintained.

Leave a Reply