
Seven hand-stitched felt daisies rise on wire stems from a terracotta pot. Pink, yellow, white and coral petals sit above layered green leaves, while moss conceals the stems’ support. Make the flowers separately so their sizes and positions can be adjusted before arranging the bouquet.
The construction uses two techniques throughout the project. Visible running stitches create the handmade outlines seen around the petals, flower centers, and leaves, while small amounts of felt glue are used at structural connection points. Sewing clips hold glued felt securely while it sets, and a foam insert inside the pot anchors the wire stems. The project is suitable for a confident beginner to intermediate maker and takes approximately 4 to 6 hours of active work , plus adhesive drying time.
Table of Contents
- Tutorial
- Materials and Tools
- Plan the Flower Sizes
- 1. Draw the Flower and Leaf Templates
- 2. Cut the Felt Petals and Leaves
- 3. Stitch and Shape the Petals
- 4. Assemble the Flower Heads
- 5. Make the Layered Felt Leaves
- 6. Build the Seven Flower Stems
- 7. Prepare the Terracotta Pot
- 8. Arrange the Flowers and Leaves
- 9. Balance and Secure the Finished Arrangement
- Tips for Cleaner Felt Flowers
- Care and Display
Tutorial
Materials and Tools
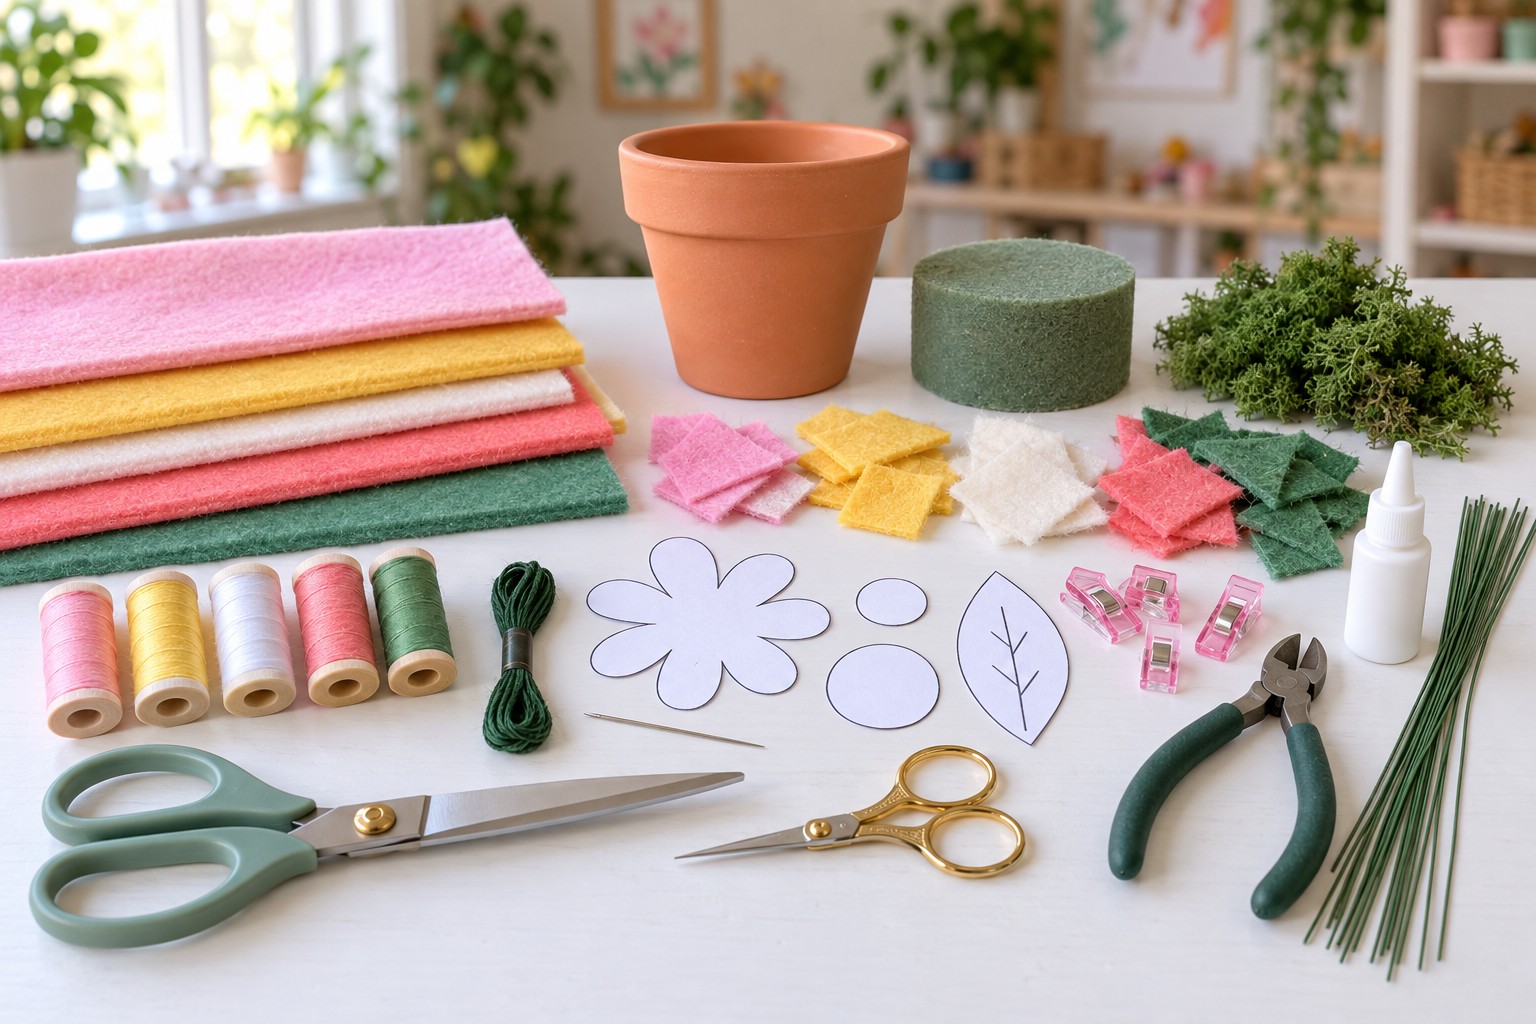
For the soft but structured appearance shown here, use felt approximately 1 to 1.5 mm thick . Wool-blend felt gives a particularly crisp edge, but firm polyester craft felt can also work.
You will need:
- Pink felt for two large flowers
- Yellow felt for two flowers and selected centers
- White or cream felt for two flowers
- Coral felt for one smaller flower
- Medium green felt for the leaves
- Small scraps of pink, yellow, and mustard felt for flower centers
- Matching pink, yellow, white, coral, and cream sewing thread
- Dark green embroidery floss for leaf veins
- Hand sewing needle
- Sharp fabric scissors
- Small embroidery scissors
- Paper or lightweight cardstock for templates
- Fabric marking pencil or removable marker
- Felt-safe fabric glue
- Foam-safe tacky craft glue
- Small sewing or craft clips
- Copper-colored or floral craft wire, approximately 20 to 22 gauge
- Wire cutters or small pliers
- One terracotta pot approximately 10 to 12 cm across the opening
- One foam ball or shaped floral foam insert that fits securely inside the pot
- Preserved or decorative moss
- Optional tweezers for positioning small felt pieces
The completed arrangement uses seven flowers and approximately 8 to 10 leaves , although one or two additional leaves can be added if the bouquet needs more coverage.
Plan the Flower Sizes
Two flower sizes make the arrangement look more natural.
For the larger flowers, aim for a finished diameter of approximately 9 to 11 cm . For the smaller flowers, approximately 7 to 8.5 cm works well.
A useful starting point is:
- Large petals: about 4 cm long × 2 cm wide
- Small petals: about 3.2 cm long × 1.7 cm wide
- Large center circles: about 3 to 3.5 cm across
- Small center circles: about 2.5 to 3 cm across
- Leaves: approximately 6 to 8 cm long × 2.5 to 3.5 cm wide
Each flower in this design uses eight petals .
The measurements do not need to be mathematically identical. Slight differences can make a handmade bouquet feel less rigid, but each petal pair within a single flower should remain reasonably consistent.
1. Draw the Flower and Leaf Templates
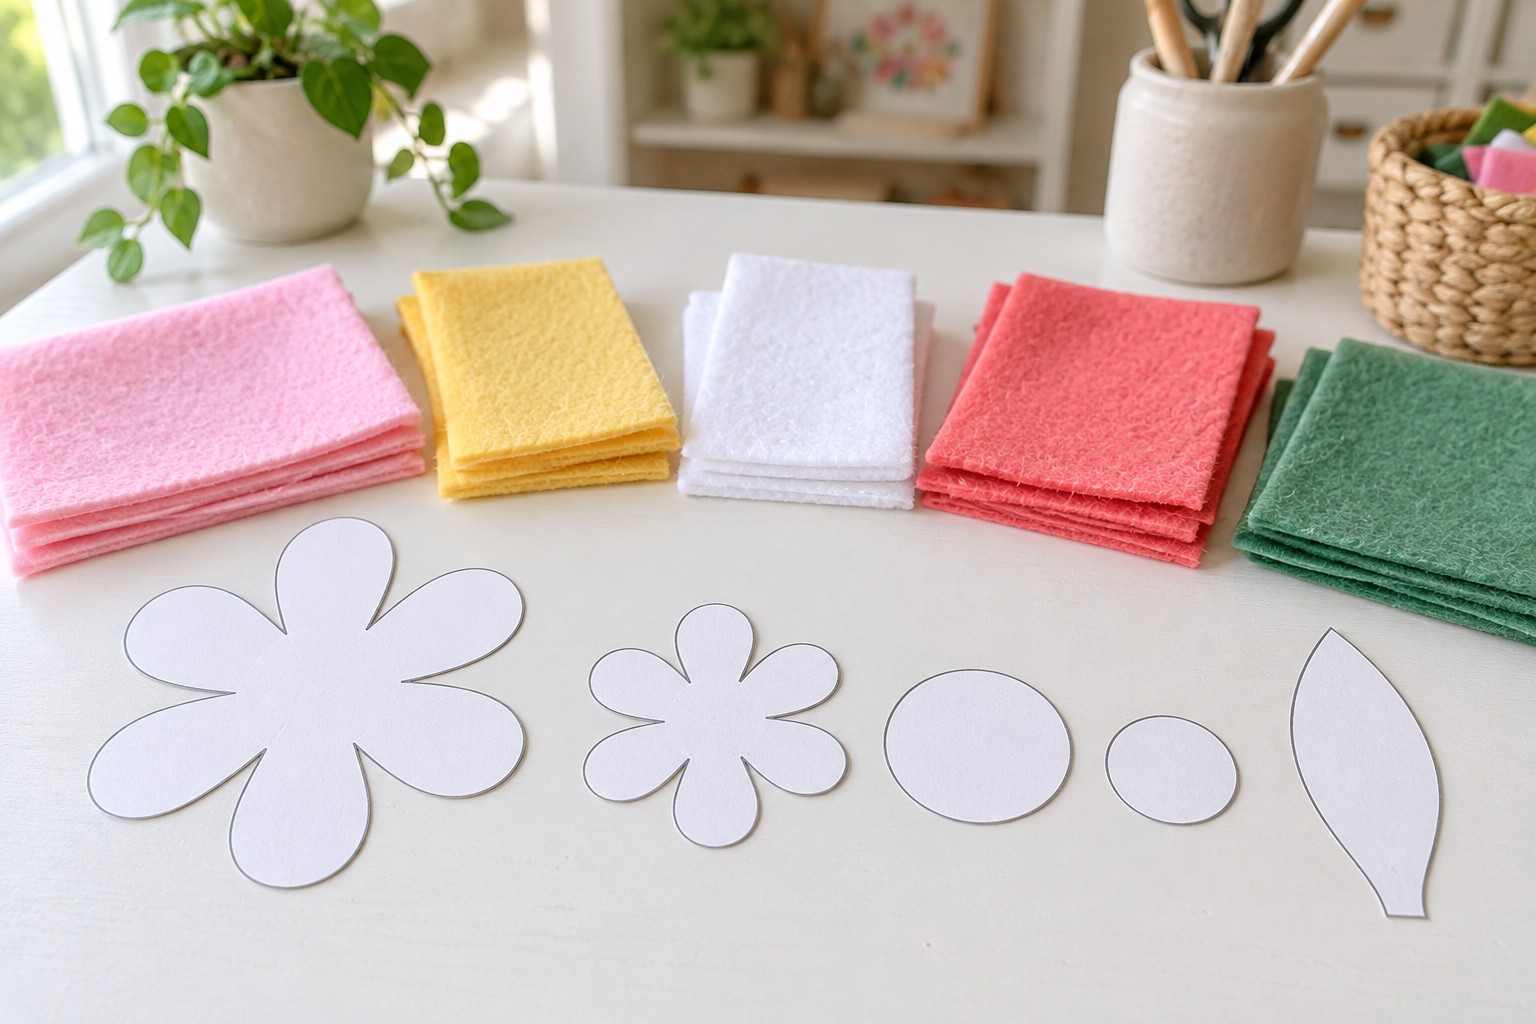
Start with cardstock templates for a large petal, a small petal, two sizes of circular flower centers, and one tapered leaf. A rounded teardrop or elongated oval works well for the petals. Keep the base slightly narrower than the tip so the petals can overlap neatly beneath the center disk.
For the bouquet shown here, plan seven flowers: two large pink flowers with yellow centers, one large yellow flower with a pink center, one large white flower with a mustard center, one smaller white flower with a mustard center, one coral flower with a yellow center, and one smaller yellow flower with a pink center.
Draw the leaf as a soft pointed oval rather than a sharply pointed spear shape. Before cutting the full set, place eight paper petals around one center circle. This simple layout test confirms that the petal width and center diameter work together before any felt is used.
2. Cut the Felt Petals and Leaves
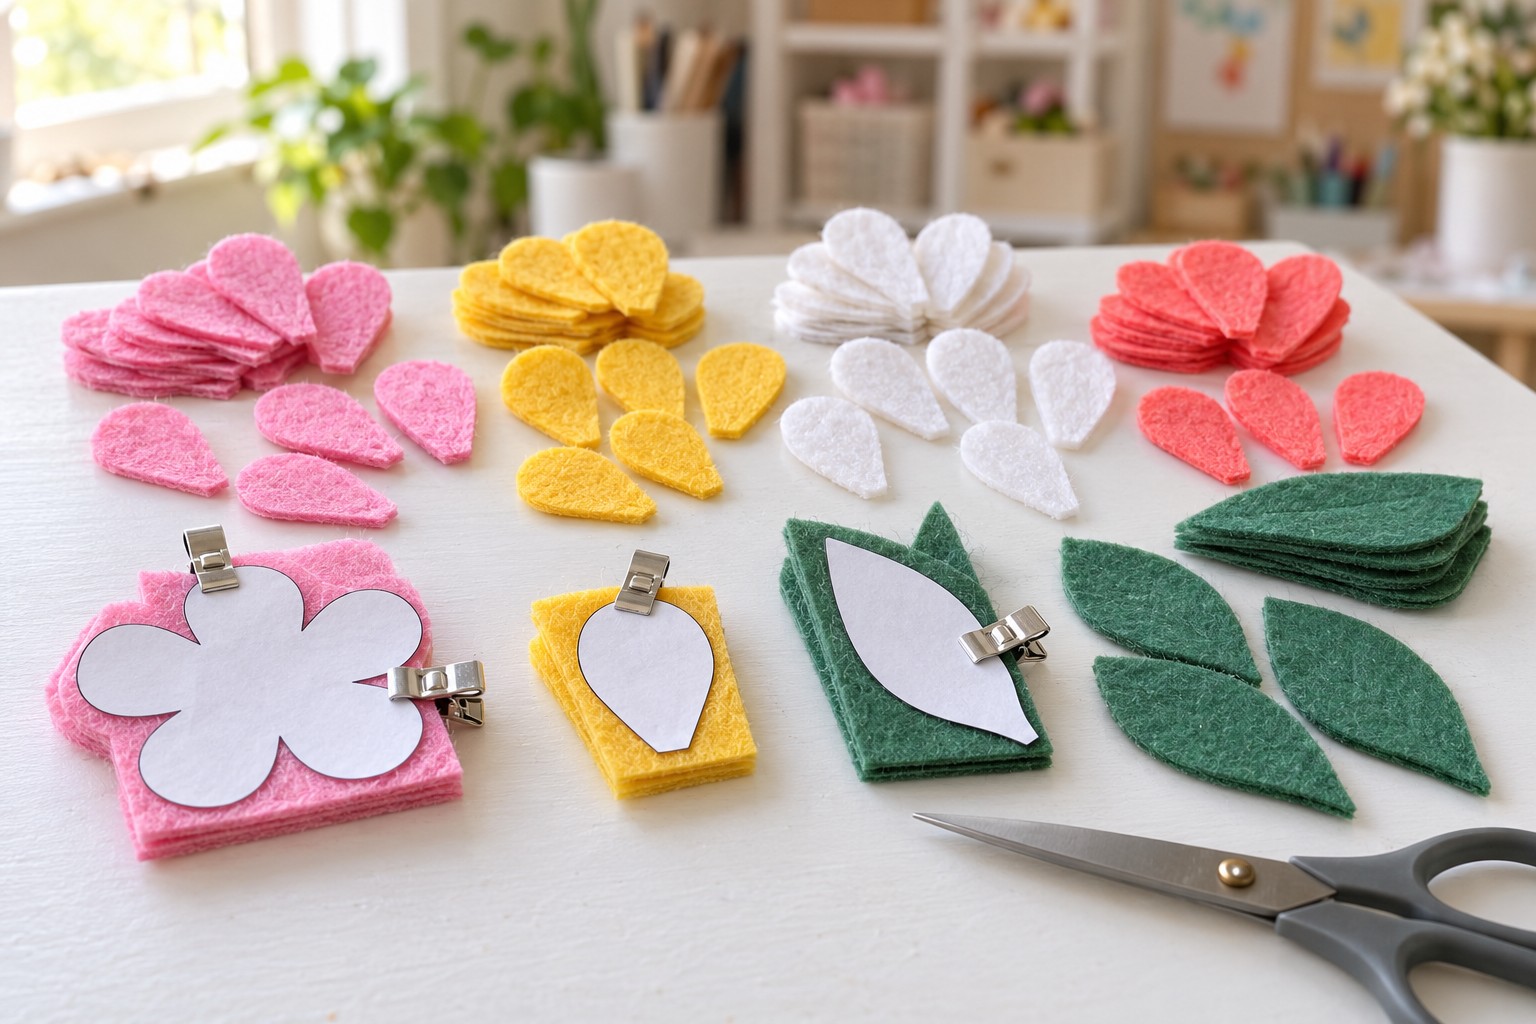
Trace the templates onto the appropriate felt colors and cut with sharp scissors. Rotate the felt while cutting curves rather than forcing the scissors around the shape.
For a more substantial stitched flower, use two matching felt pieces for every petal . Seven eight-petal flowers therefore require 56 finished petals, or 112 individual petal pieces. Cutting several layers at once is possible with thin felt, but only do this if the layers remain flat and do not shift.
Cut two center circles for every flower. One becomes the visible front center and the second hides the structural connections on the back.
For the leaves, cut approximately 8 to 10 matching pairs. Keeping the leaves double layered provides enough body to sit naturally on the wire stems.
Before sewing, group each flower into its own set of petals and center circles. This prevents similar pink, yellow, and coral pieces from being mixed during assembly.
3. Stitch and Shape the Petals
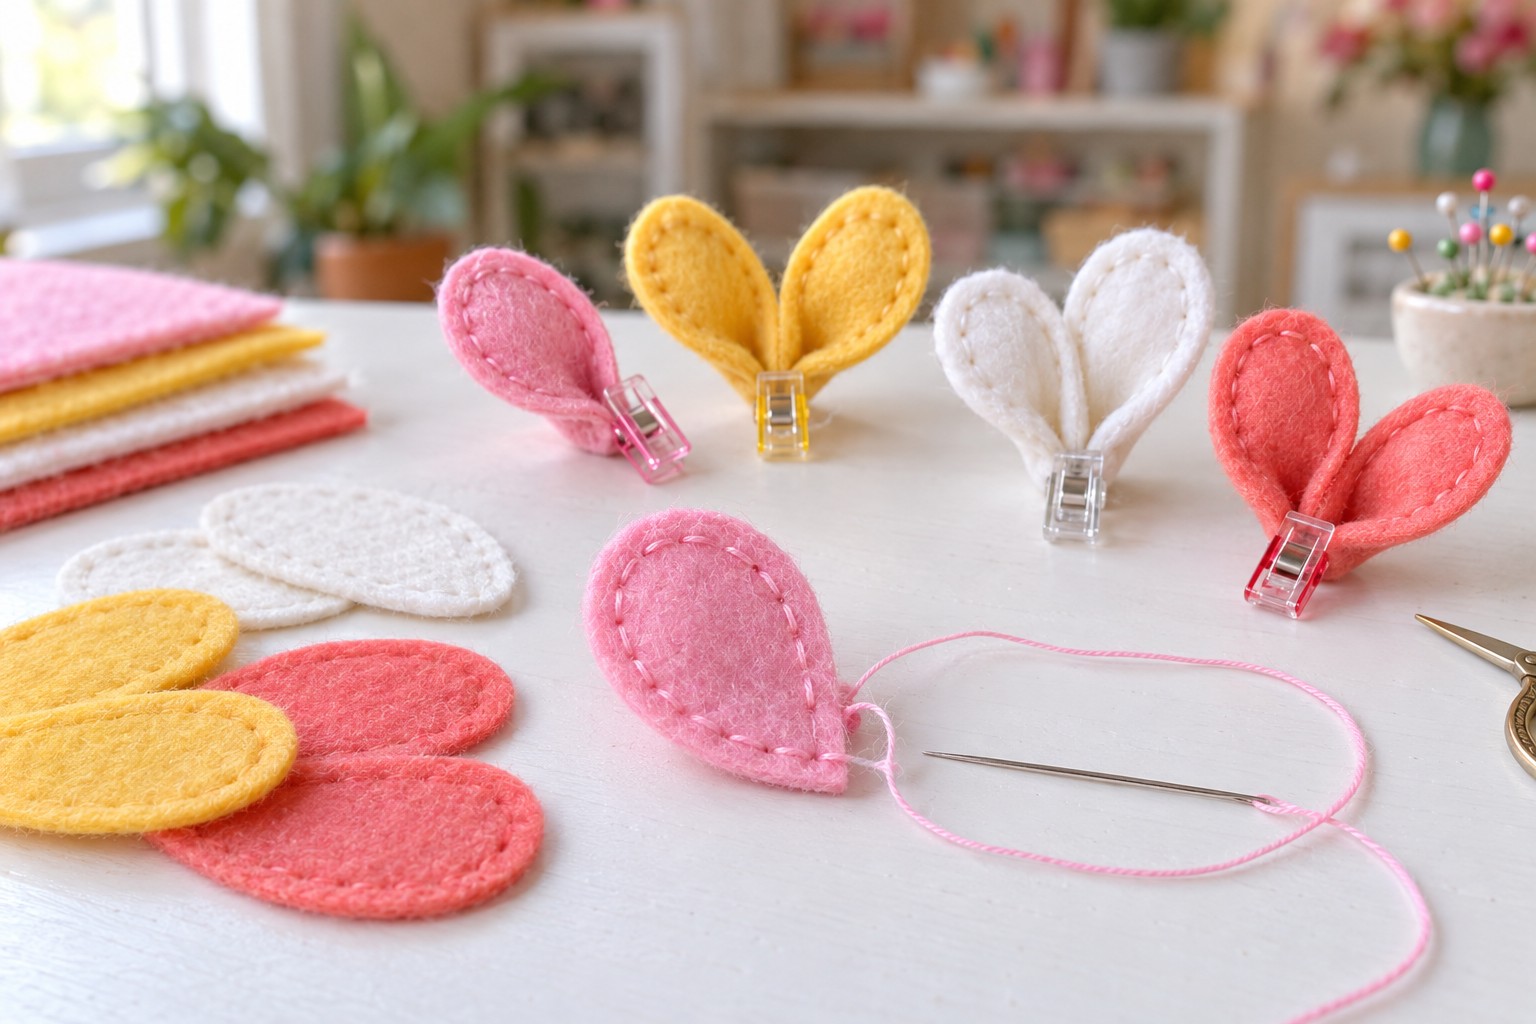
Place two matching petal pieces together and sew around the curved outer edge with small running stitches. Position the stitches approximately 2 to 3 mm from the cut edge and keep the spacing close to 3 to 4 mm .
Leave the narrow bottom section unstitched because this portion will eventually be hidden beneath the flower center.
After stitching, add a tiny amount of felt glue near the base of the petal. Bring the two lower sides slightly toward one another to create a gentle cup rather than leaving the petal completely flat.
Hold this pinch with a small sewing clip while the adhesive sets. The fold only needs to be a few millimeters deep. Too much overlap will make the finished flower look tightly closed.
Repeat this method across the petal set. The stitched edge provides the decorative handmade outline, while the glued pinch adds the dimensional shape that helps each flower stand away from its stem.
4. Assemble the Flower Heads
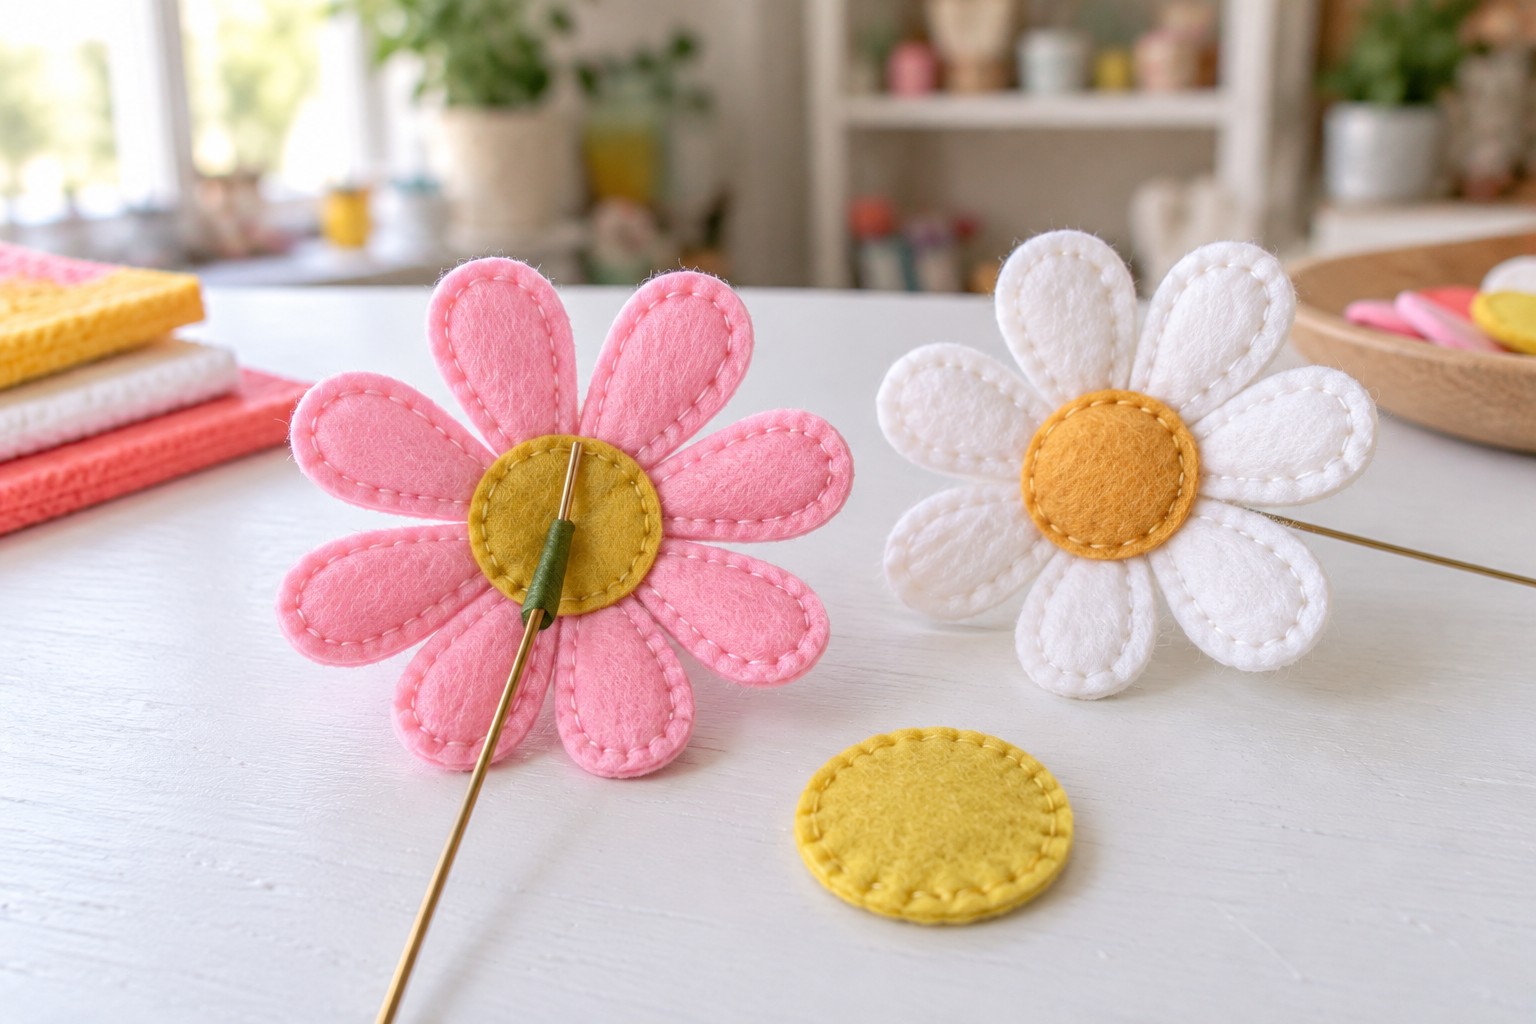
Place one felt center circle face down on the work surface. Arrange eight finished petals around it, overlapping the narrow bases slightly until the flower appears evenly spaced.
Apply a small amount of felt glue beneath each petal base rather than coating the entire center. Excess adhesive can soak through felt and create stiff, darker areas.
Cut a stem wire to the approximate height required for that flower. Allow around 2 to 3 cm of wire to extend onto the back of the flower head . Position this section across the center disk and secure it with felt glue.
Place the second center circle over the petal bases and wire connection, effectively sandwiching the structural area between the two felt circles. Use clips around the center if needed while the adhesive begins to set.
Finish by hand stitching around the visible front center circle. This creates the stitched round center seen in the finished bouquet while also adding mechanical reinforcement to the glued construction.
5. Make the Layered Felt Leaves
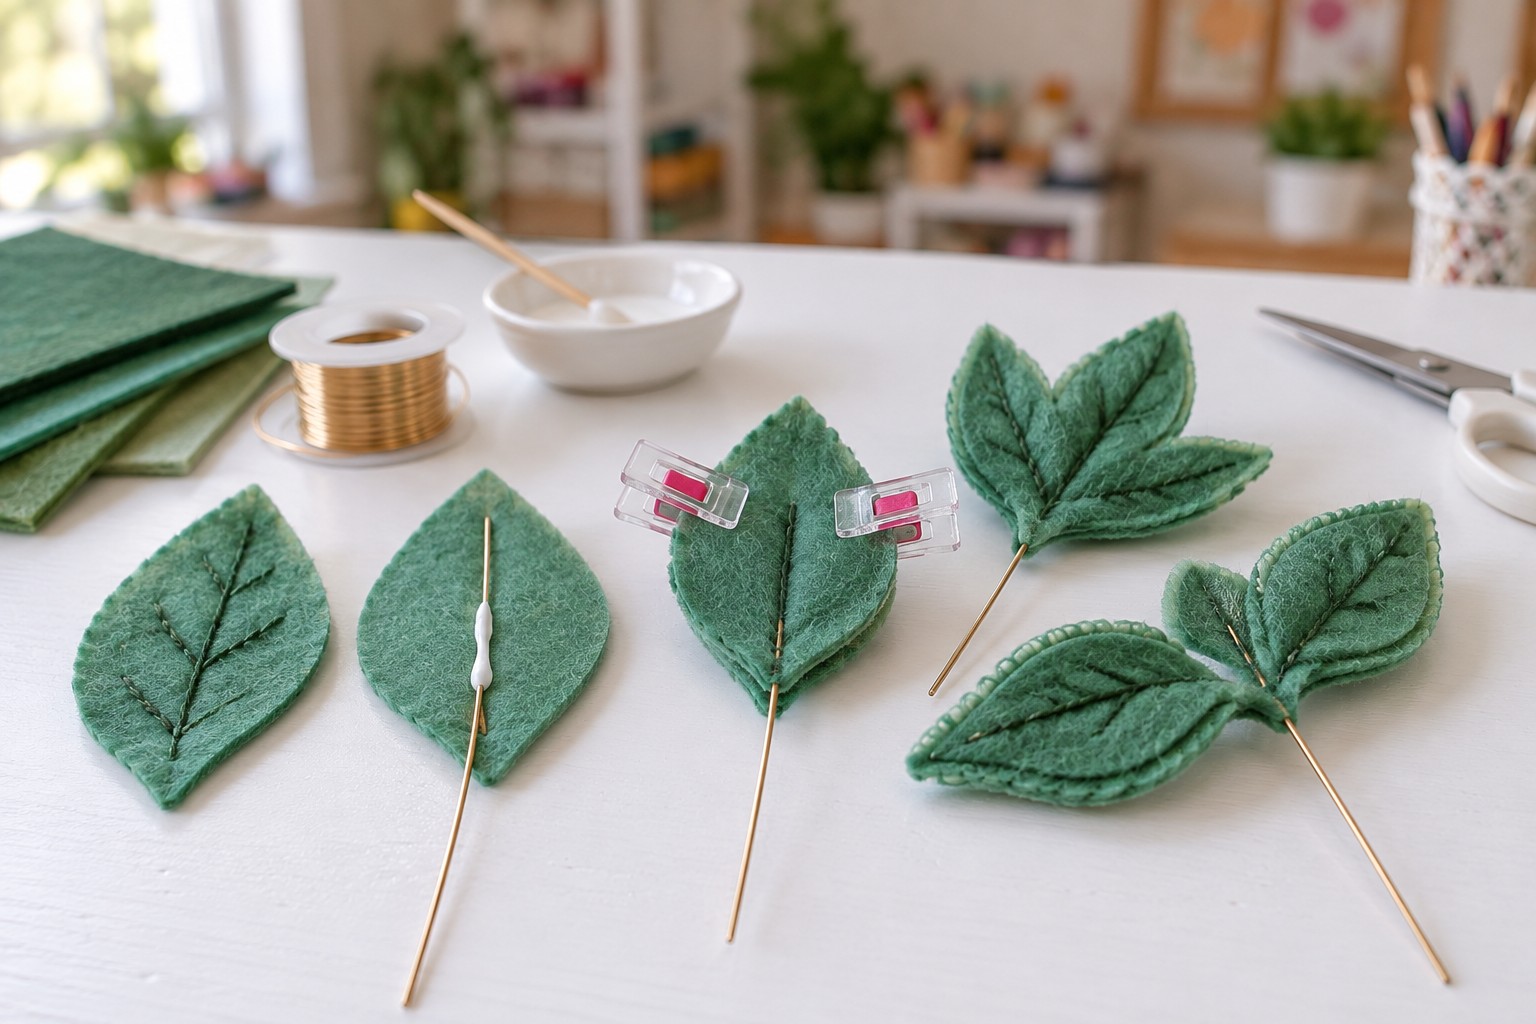
Before assembling each leaf pair, add the vein detail to the top layer.
Thread the needle with dark green embroidery floss and sew a simple central line from near the leaf base toward the tip. A slightly irregular running stitch works well because it gives the leaves a handmade botanical appearance. One or two short angled stitches can branch from the main vein if you want additional detail.
Cut short lengths of wire for the leaves. Position approximately 3 to 4 cm of wire along the back of the stitched leaf , starting at the base.
Apply a thin line of felt glue over the wire and place the matching plain leaf on the back. Pinch the leaf slightly along the central line to create a soft fold, then use clips to hold the two layers together while the adhesive sets.
Do not flatten every leaf identically. A few slightly curved or tilted leaves will help the fin
6. Build the Seven Flower Stems
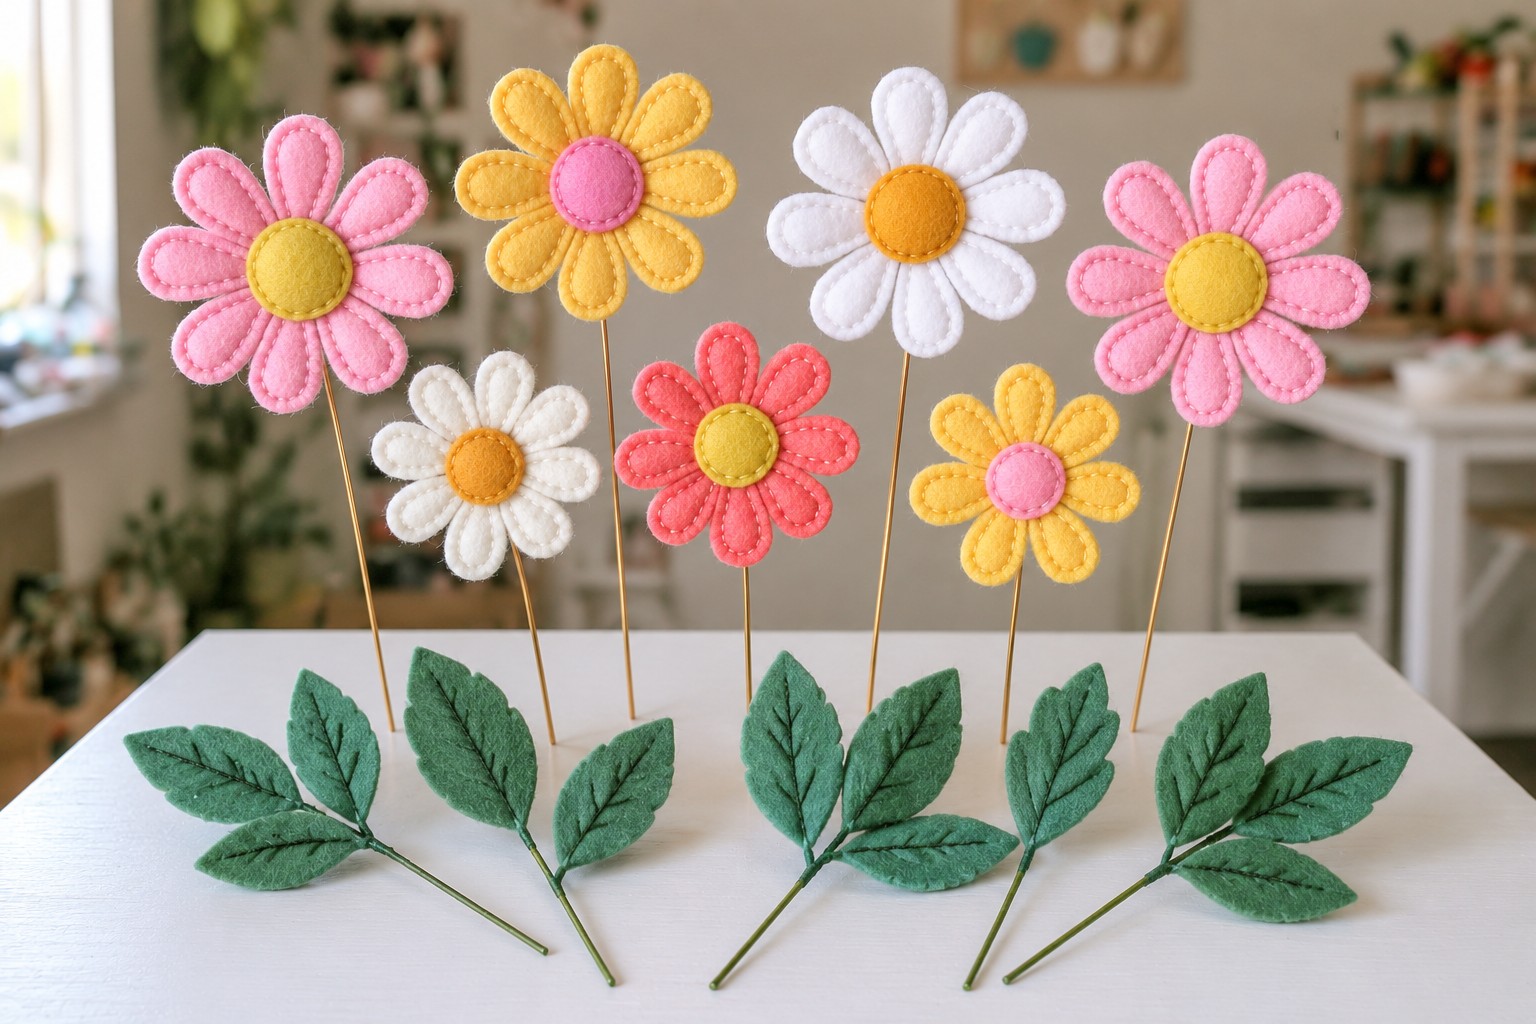
Prepare all seven flower heads before
Use different wire lengths instead of making every stem identical. A practical range is approximately:
- 28 to 32 cm for the tallest back flowers
- 23 to 27 cm for middle flowers
- 18 to 22 cm for the lower front flowers
Keep the upper pink, yellow, white, and pink flowers taller. The smaller white, coral, and yellow flowers should sit lower across the front.
Attach leaves either to independent shorter wire picks or position them alongside selected flower stems. Independent leaf wires provide more control because each leaf can be bent and rotated without disturbing a flower.
Before moving to the pot, place the stems loosely together in your hand. Check that the flowers do not hide one another and that the lower row fills the visual gap beneath the taller flowers.
7. Prepare the Terracotta Pot
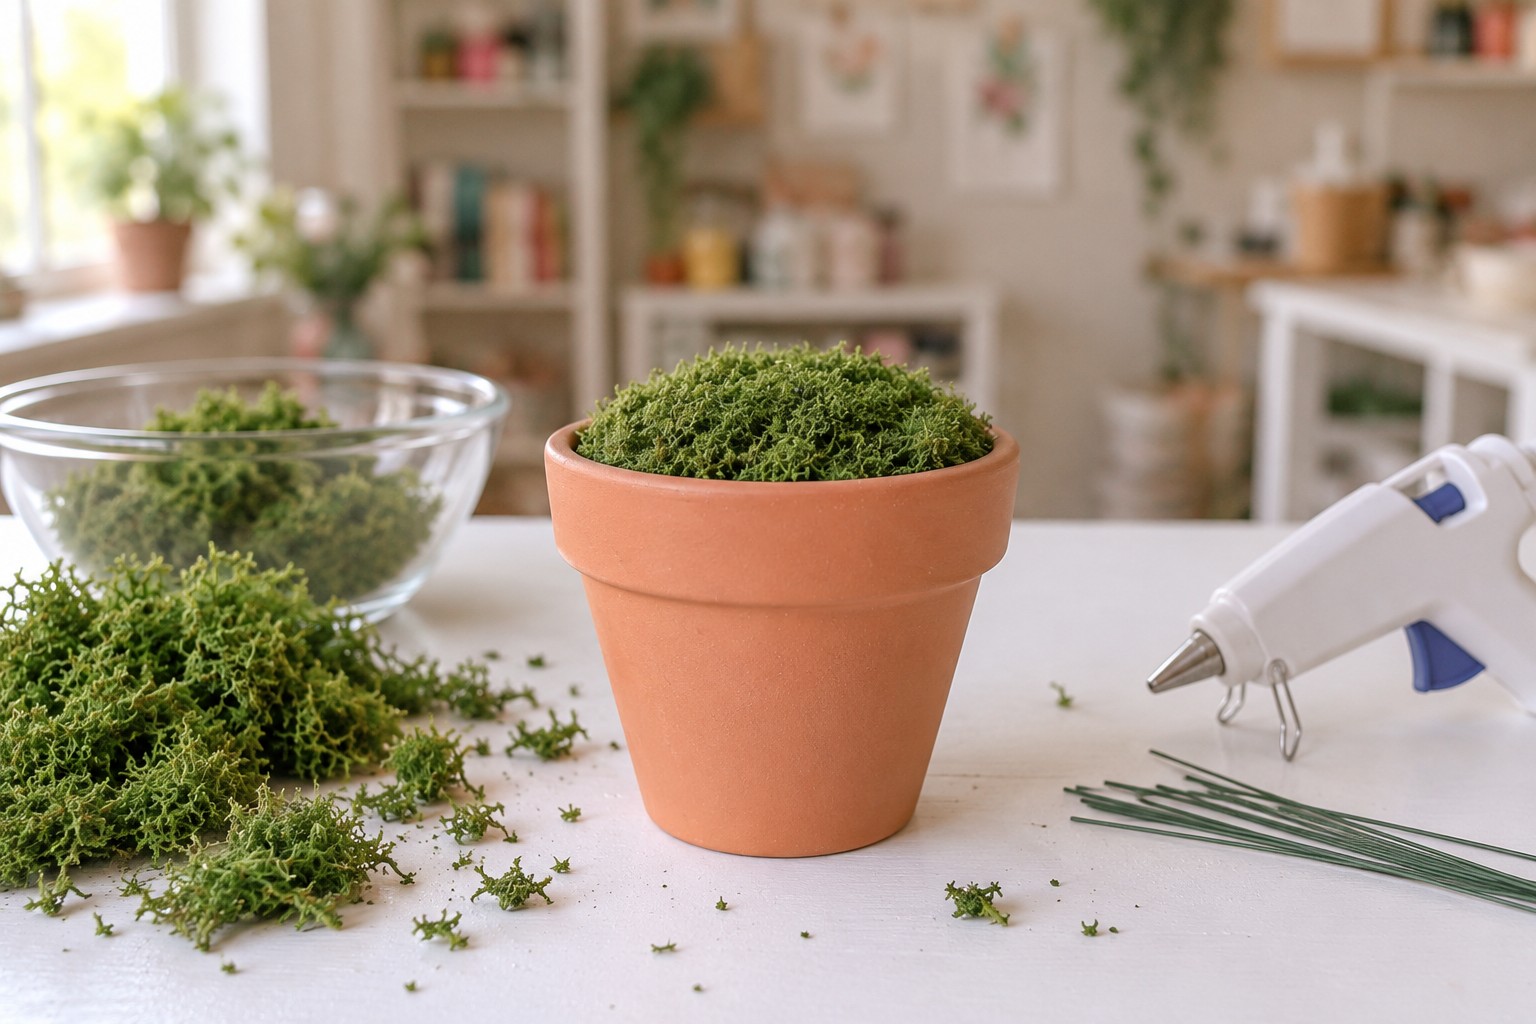
Choose a foam ball or piece of dense floral foam that fits snugly inside the terracotta pot.
Use a foam-safe tacky glue rather than a solvent-based adhesive. Some solvent adhesives can damage expanded foam, so check the product label before applying it.
Coat the lower portion of the foam lightly with adhesive and press it into the pot. The foam should sit firmly enough that inserting wire stems does not cause it to lift.
Once the foam is secure, cover the visible upper surface with decorative moss. Work in small pieces and press them around the foam until the white surface is hidden.
Do not create an excessively thick moss layer. The wire stems still need to penetrate through the moss and into the foam below.
Allow the base adhesive to develop enough hold before inserting the tallest flower stems.
8. Arrange the Flowers and Leaves
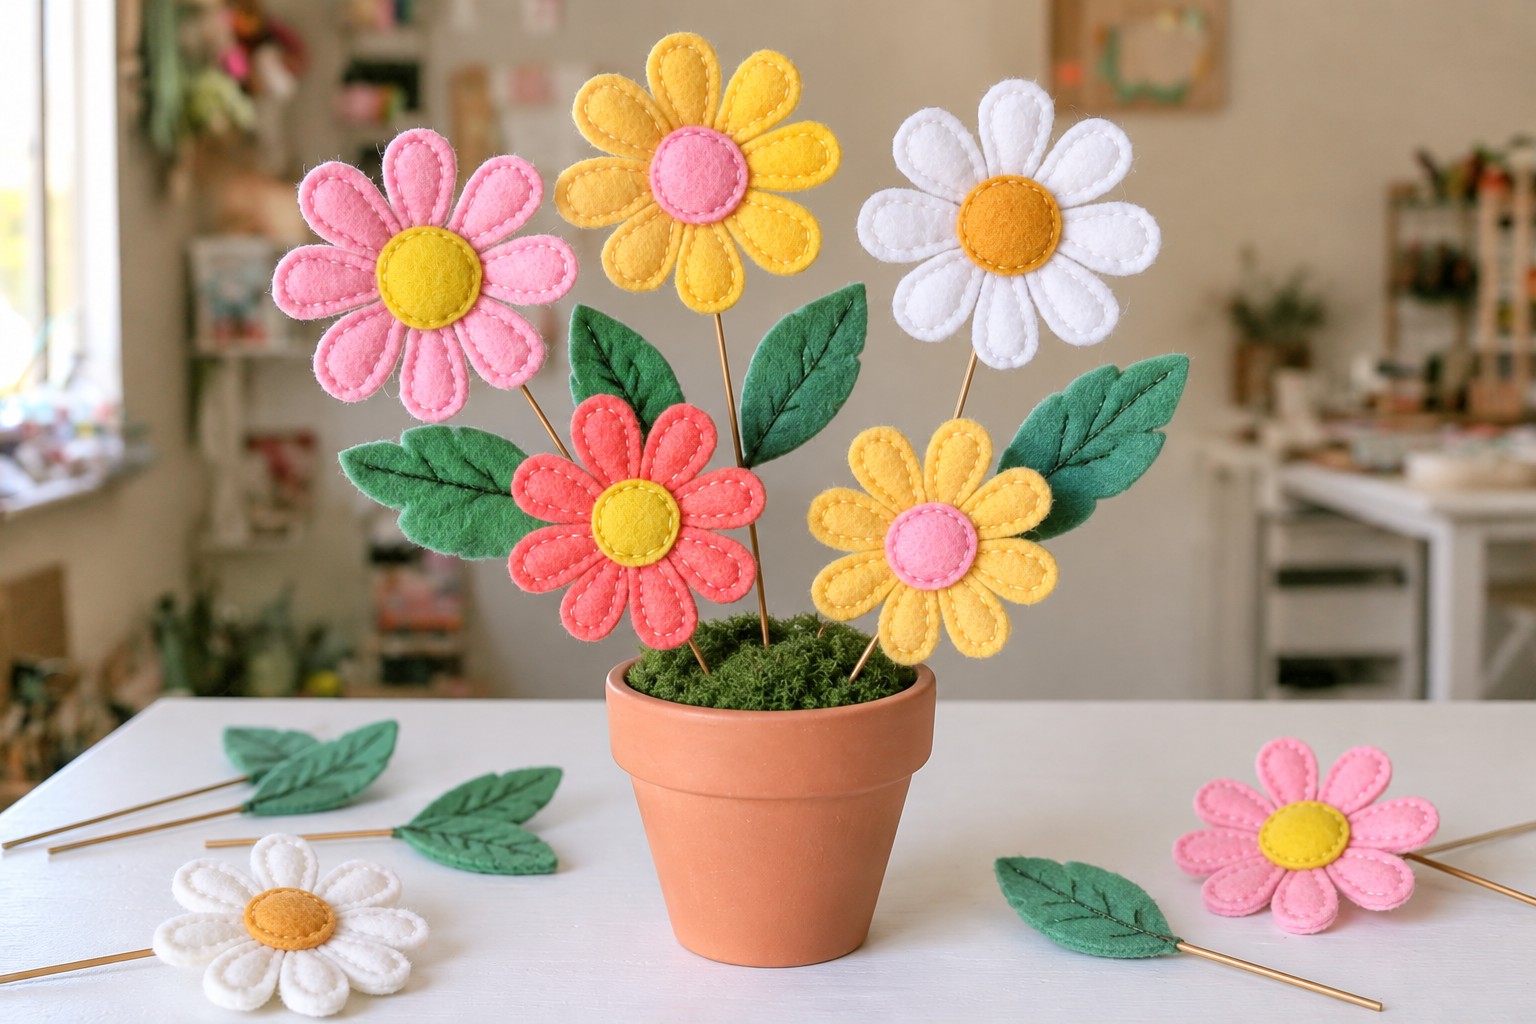
Begin with the four tallest flowers.
Place the large pink flower toward the left, the large yellow flower slightly left of center, the large white flower slightly right of center, and the second large pink flower toward the right.
Push each wire approximately 2 to 4 cm into the foam , depending on the density of the insert. If a stem feels unstable, increase the depth rather than enlarging the same hole repeatedly.
Add the three lower flowers next: the smaller white flower to the left, the coral flower near the center, and the smaller yellow flower toward the right.
Insert the leaves into the open spaces around and behind the flower heads. Use them to soften the spaces between stems rather than creating a continuous ring of greenery.
Gently bend the wire above the foam to angle flowers forward or outward. Avoid repeatedly bending the same point, which can weaken the wire.
9. Balance and Secure the Finished Arrangement
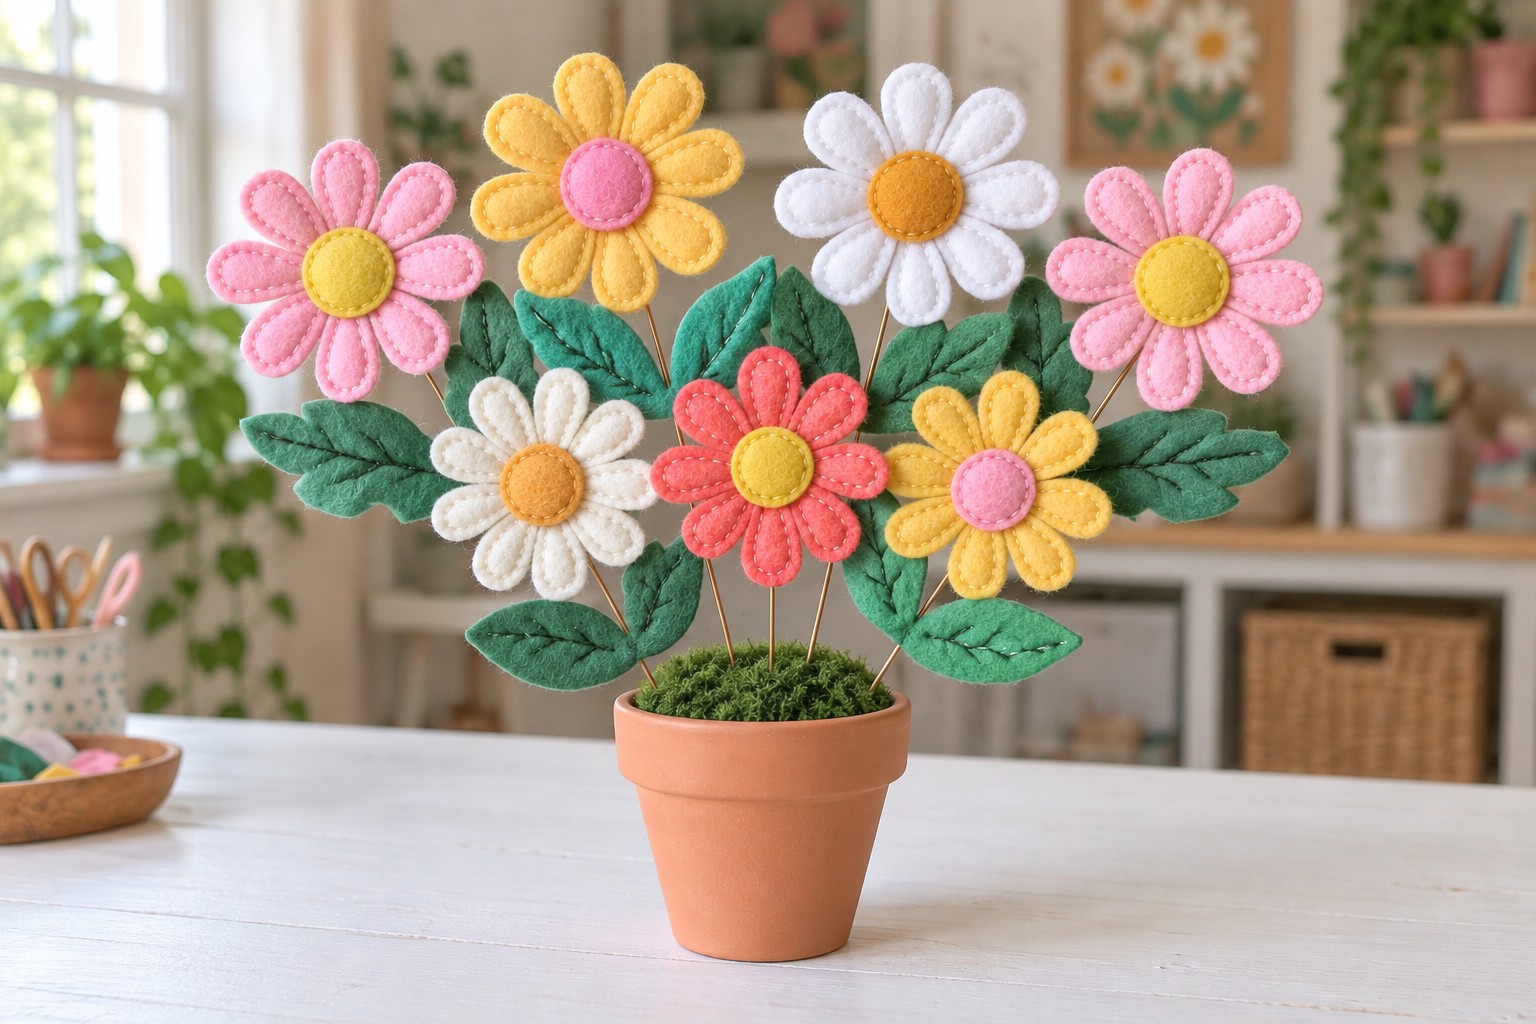
Rotate the pot slowly and view the arrangement from several angles.
The tallest flowers should form a loose upper arc rather than a perfectly straight line. The front flowers should sit low enough to create depth while still leaving the center of the bouquet open.
Adjust individual leaves so some point sideways and others angle upward. If a wire hole has become loose, add a very small amount of foam-safe tacky glue around the entry point and allow it to dry before moving the stem again.
Add small pieces of moss anywhere the foam remains visible. Keep the wire ends fully buried inside the foam so no sharp points remain accessible.
Finally, check each flower center, petal cluster, and leaf with a gentle touch. Loose felt should be reinforced with a few stitches or a small amount of felt glue. Let all adhesives cure according to their label instructions before moving the arrangement by the stems.
Tips for Cleaner Felt Flowers
Use the same petal template for every petal within a flower, but do not worry if separate flowers vary slightly. A small amount of variation works well in a mixed bouquet.
When using felt glue, apply less than you think you need. A thin bond at the hidden base is usually stronger and cleaner than saturating the entire felt surface.
Clips are particularly useful for the small folded areas. They keep the felt pinched into shape while allowing both hands to work on another component.
If a test petal curls or becomes stiff after drying, reduce the adhesive on the next one. Making one complete test petal before cutting and sewing the full set can save time.
For visible running stitches, keep the thread tension firm enough to hold both felt layers together but loose enough that the edge remains flat. For another small project using felt and visible stitching, explore this felt cat card holder tutorial.
Care and Display
Keep the finished felt flower pot indoors and away from prolonged moisture. Felt can collect dust, so use a soft brush, camera blower, or low-power handheld air blower to clean the petals rather than rubbing them.
If a petal becomes bent during storage, reshape it gently with your fingers. Avoid ironing the finished flowers because high heat can distort synthetic felt and damage adhesive.
Store the arrangement upright so the wire stems are not compressed. If a stem shifts over time, hold the foam steady while repositioning the wire instead of pulling on the flower head.
The finished piece works well on a craft-room shelf, desk, side table, or as a handmade floral display where fresh flowers would be impractical.


Leave a Reply