
13 Easy Plaster Carving Projects for Handmade Home Decor

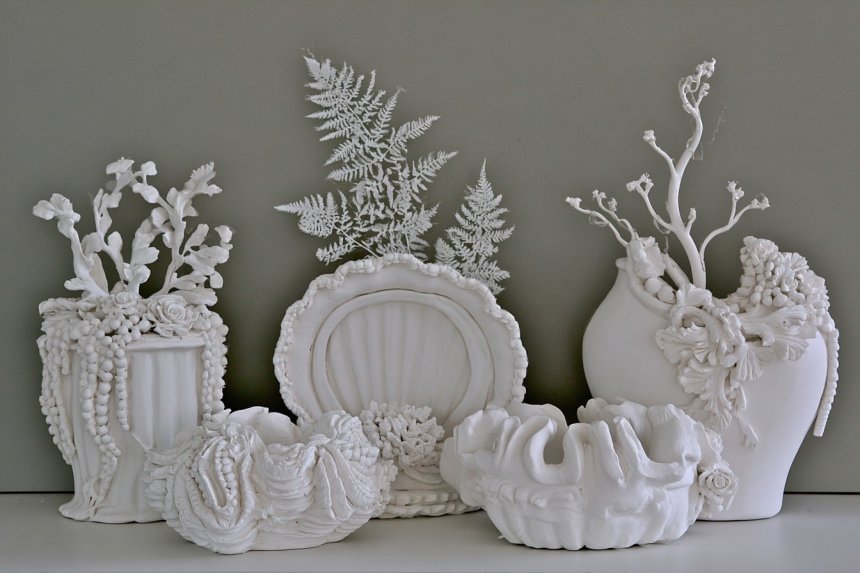
Plaster carving is an accessible way to create personalized wall decorations, tabletop accessories, and functional objects using affordable materials. Casting plaster or hobby plaster is suitable for most beginner projects. Carving is generally easier when the plaster has hardened enough to hold its shape but has not yet dried completely. Always follow the manufacturer’s recommended water ratio, wear a protective mask when sanding, and work in a well ventilated area. The following projects combine basic casting, carving, painting, and sealing techniques that can be adapted to different interior styles and experience levels.
1. Botanical Carved Plaster Wall Tiles
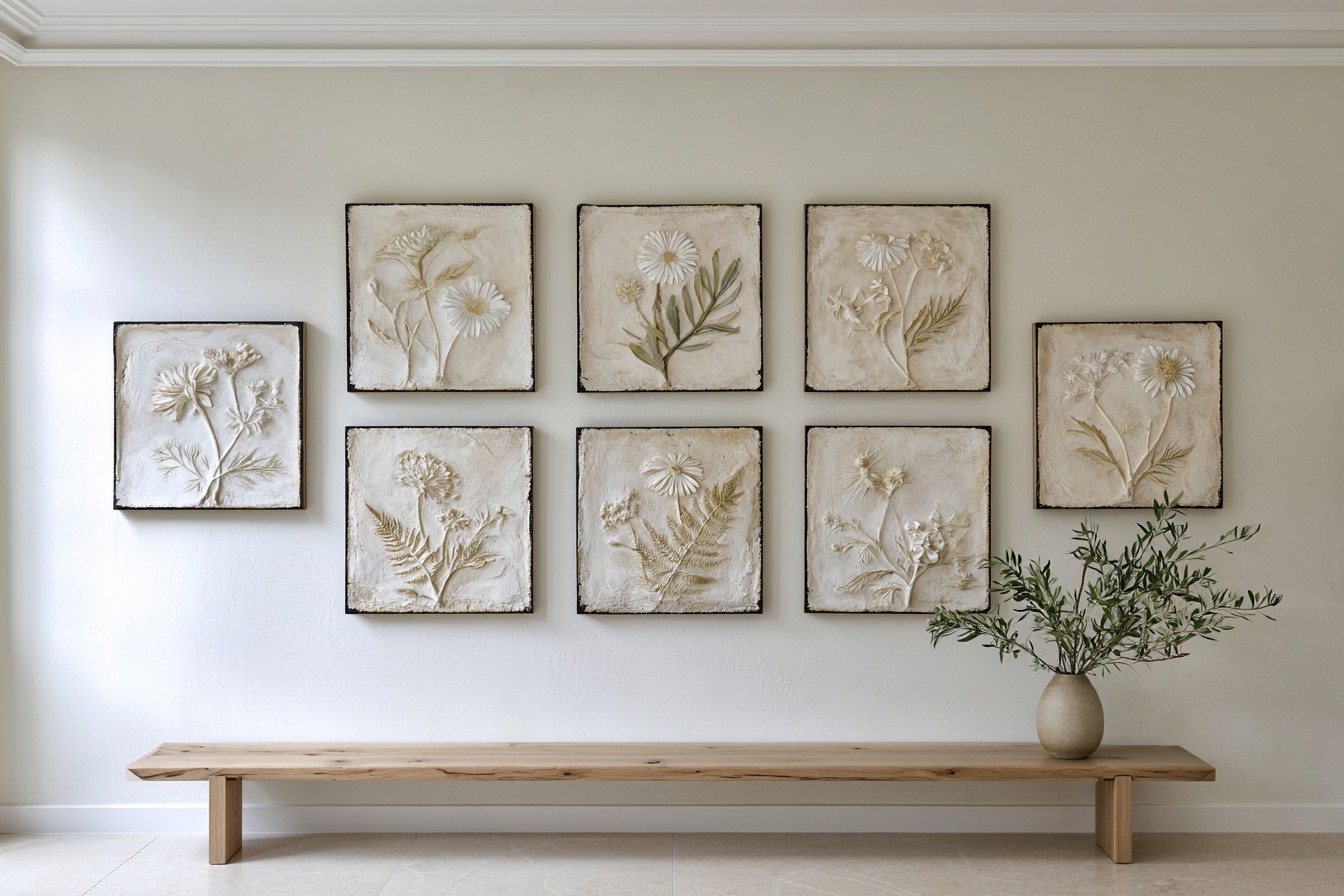
To create botanical wall tiles, gather hobby plaster, water, a square silicone mold, a mixing container, a spatula, a pencil, fine carving tools, sandpaper, and a water based protective sealer. Prepare the plaster according to the manufacturer’s instructions, pour it into the mold, and gently tap the mold against the work surface to release trapped air bubbles. Once the tile is firm enough to remove but still slightly damp, sketch daisies, fern leaves, olive branches, or wildflowers across the surface. Carve the outlines first, then gradually lower selected background areas to create a raised relief effect. Allow the tile to dry completely before sanding the edges and applying a protective finish. Display several coordinating tiles in an entryway, home office, bedroom, hallway, or above a console table.
2. Modern Arched Plaster Relief Panel
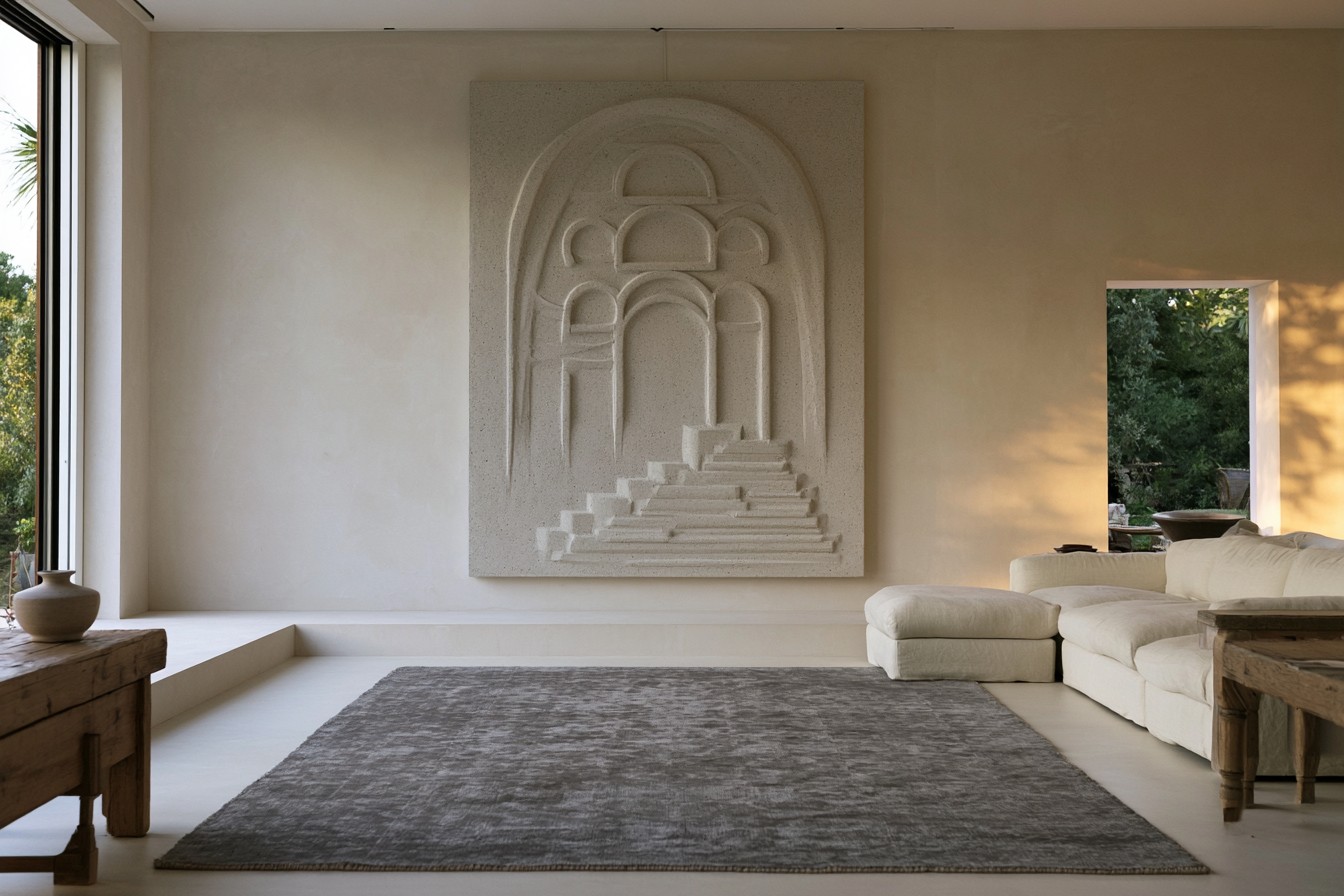
A modern relief panel can be created with a rectangular silicone mold, hobby plaster, water, a metal ruler, carving tools in several widths, sandpaper, acrylic paint, and a matte protective coating. Pour the prepared plaster into the mold and smooth the top using a flexible spatula. When the surface becomes firm enough to hold detailed lines, draw overlapping arches, semicircles, stepped shapes, or wide curved bands. Begin with shallow outlines before gradually deepening selected areas to produce dimensional shadows. Work from the outer sections toward the center to reduce the risk of breaking narrow details. Once completely dry, paint the panel in warm white, clay, sage green, sand, or muted terracotta. Add a secure hanging attachment to the back. The finished panel works well in a living room, hallway, stairway, bedroom, or minimalist workspace.
3. Floral Carved Plaster Jewelry Dish
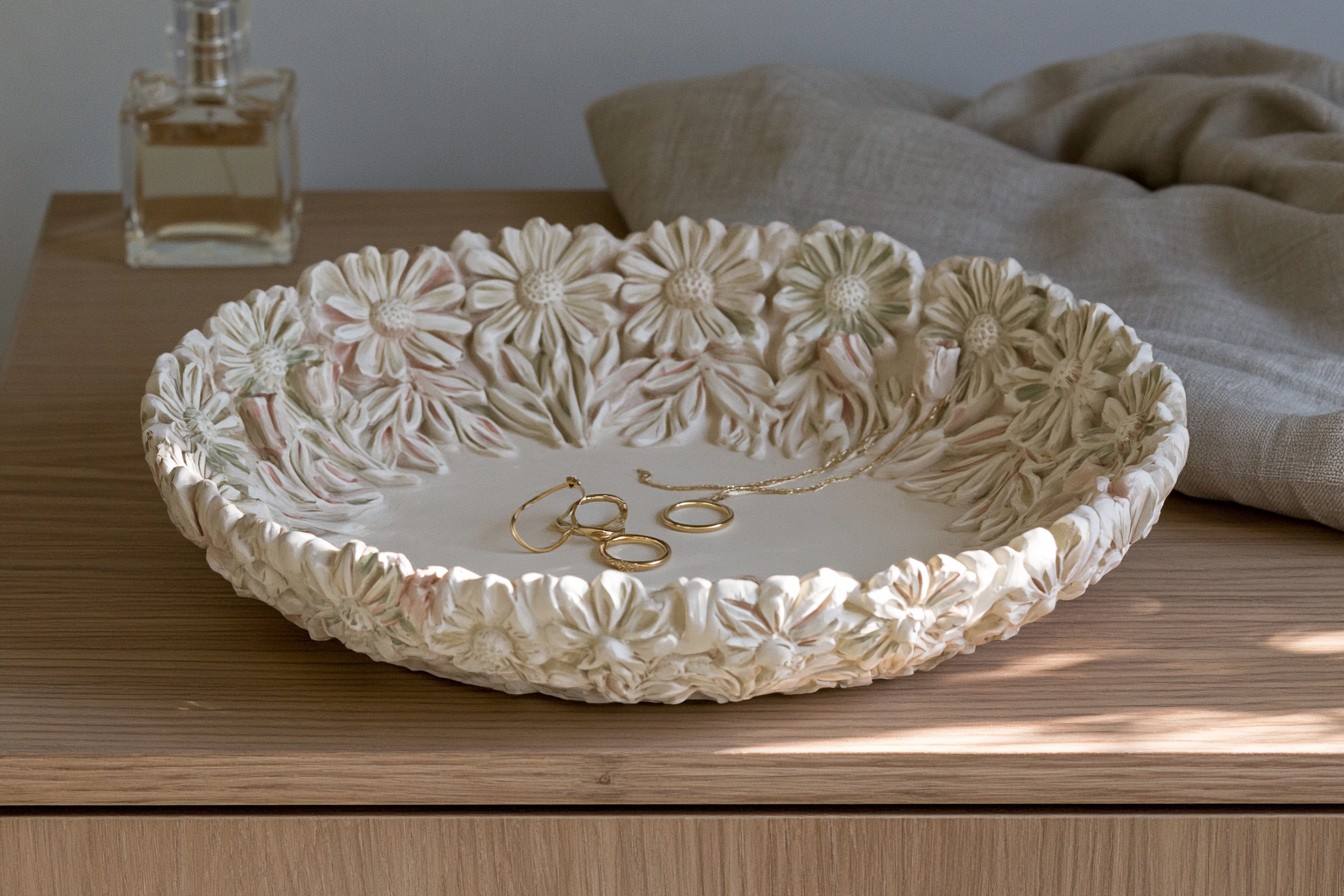
Create a practical jewelry dish using a shallow silicone bowl mold, fine casting plaster, a carving needle, a small file, sandpaper, acrylic paint, water based sealer, and felt for the bottom. Pour the mixed plaster into the mold and place it on a completely level surface so the finished dish will remain stable. Remove the piece when it is firm but not fully dry. Draw a border of small daisies, tulips, leaves, or simple scalloped petals around the rim. Carve shallow lines around each motif so the floral details appear slightly raised. Avoid making deep cuts in the center because this may weaken the thin base. After drying, smooth all rough areas, add subtle color to the carved details, and seal the surface with several thin coats. Place the dish on a nightstand, vanity, dresser, bathroom shelf, or entryway console.
4. Geometric Carved Plaster Coasters
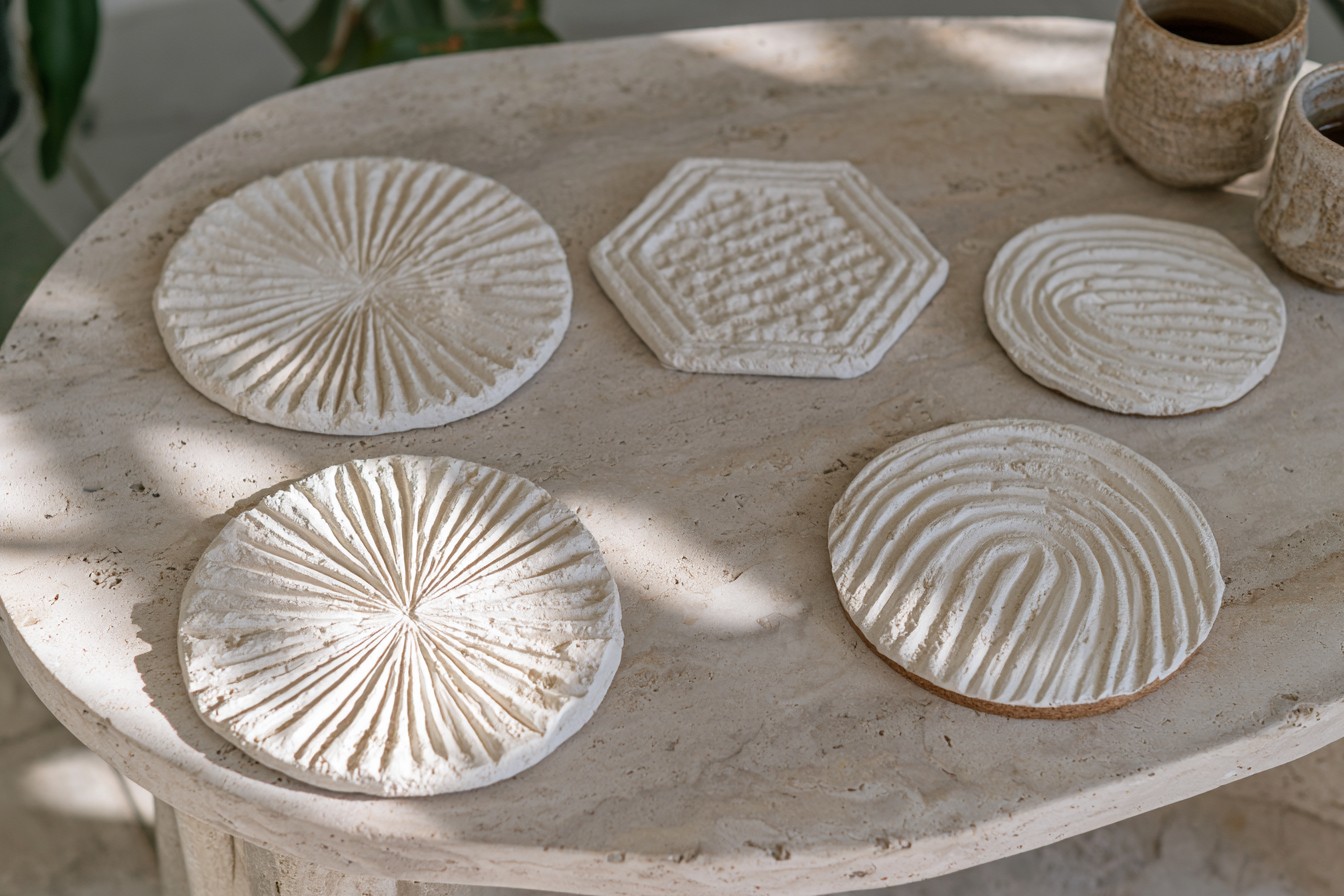
For a coordinated coaster set, gather circular or hexagonal silicone molds, hard casting plaster, a carving knife, ruler, compass, fine sandpaper, moisture resistant sealer, and a sheet of cork. Pour an equal amount of plaster into every mold so the coasters have consistent thickness. When they are firm but still workable, sketch sunburst patterns, checkerboard arrangements, curved lines, or simple Art Deco inspired shapes. Use a ruler to create evenly spaced grooves and avoid cutting too deeply, as excessively deep channels can weaken the pieces. Let the coasters dry completely before rounding the edges with fine sandpaper. Apply several thin coats of moisture resistant protection, including along the sides. Cut matching cork pieces and attach them underneath to prevent scratches. The finished coasters can be used on coffee tables, dining tables, desks, side tables, or entertaining trays.
5. Carved Plaster Picture Frame
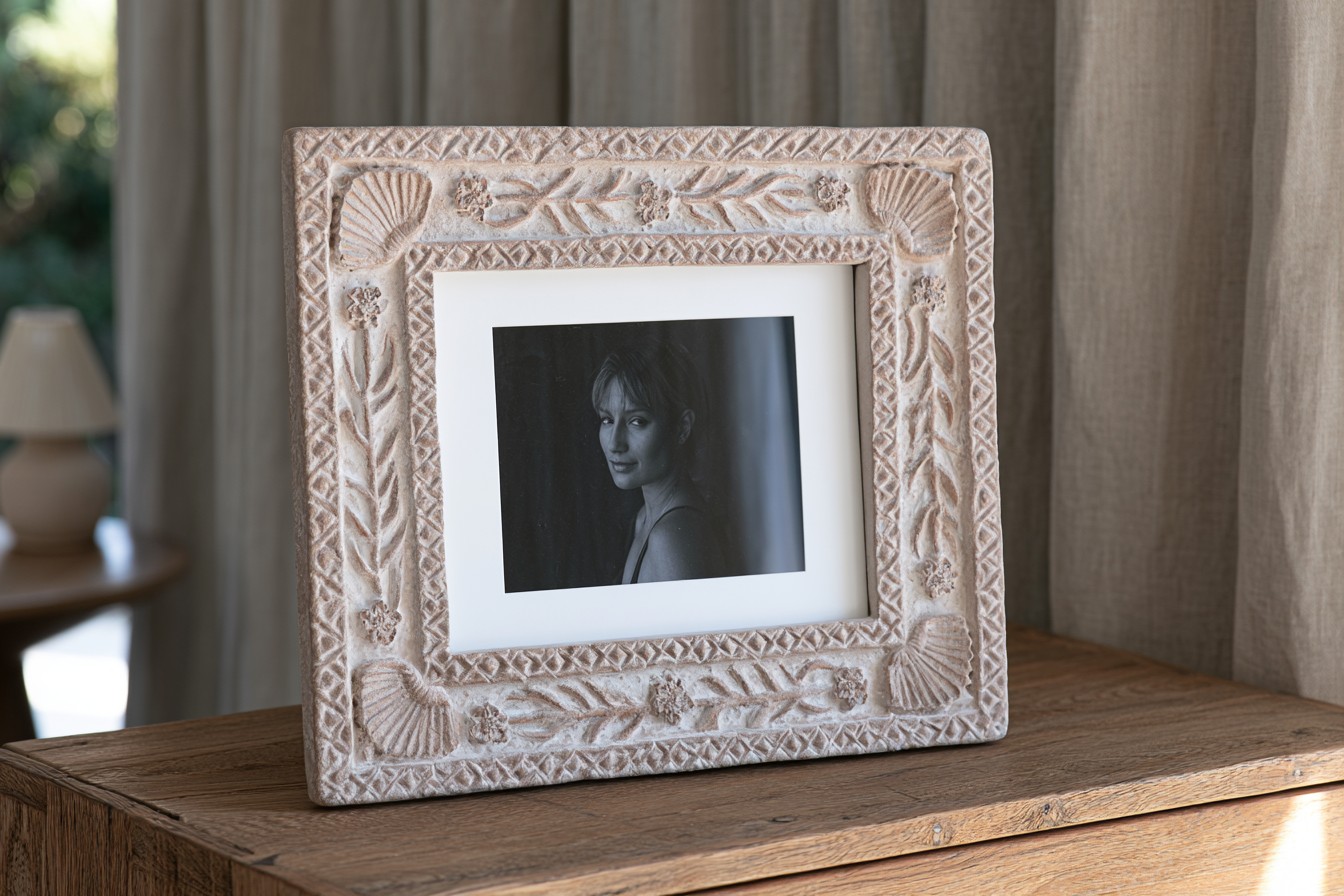
Transform a plain frame using a wooden frame base, plaster bandages or thick modeling plaster, a spatula, fine carving tools, sandpaper, primer, acrylic paint, and a clear protective finish. Remove the glass and backing before beginning. Lightly sand the wooden surface to give the plaster a slightly rough base to grip. Spread a thin and even layer of plaster across the front of the frame, keeping the inner opening clear. As the plaster begins to firm, carve tiny flowers, curved branches, geometric lines, fan shaped corners, or a repeating border. Keep the plaster layer relatively thin because heavy applications may crack or separate from the wood. Once dry, sand rough details and paint the frame in warm white, stone, muted green, or an aged finish. Display it on a dresser, nightstand, office desk, entryway console, or gallery wall.
6. Leaf Textured Decorative Box Lid
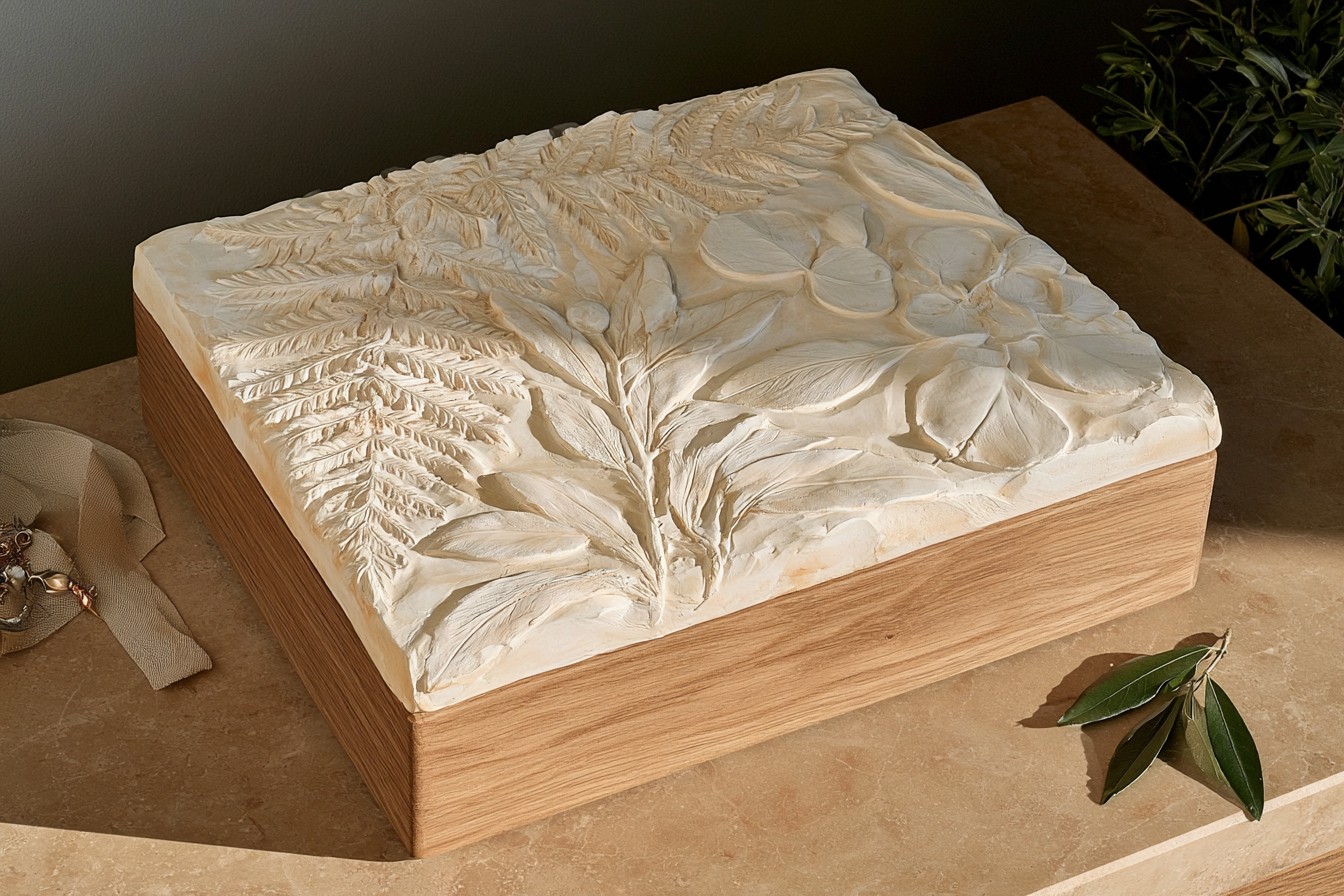
A simple wooden box can be upgraded with a hand carved plaster lid panel. You will need a lidded wooden box, a shallow silicone mold, hobby plaster, a spatula, fresh textured leaves, carving tools, fine sandpaper, strong mounting adhesive, acrylic paint, and protective coating. Prepare a plaster panel that matches the dimensions of the box lid. While the plaster remains soft, place the textured sides of the leaves against the surface and press gently. Carefully lift them away to reveal the natural impressions. If some veins are unclear, deepen them with a fine carving needle. Allow the panel to dry thoroughly before sanding its edges and attaching it to the lid with mounting adhesive. Paint the panel and box in coordinating shades. Use the finished container for jewelry, craft supplies, stationery, sewing tools, or other small objects on a vanity or office shelf.
7. Abstract Carved Plaster Bookends
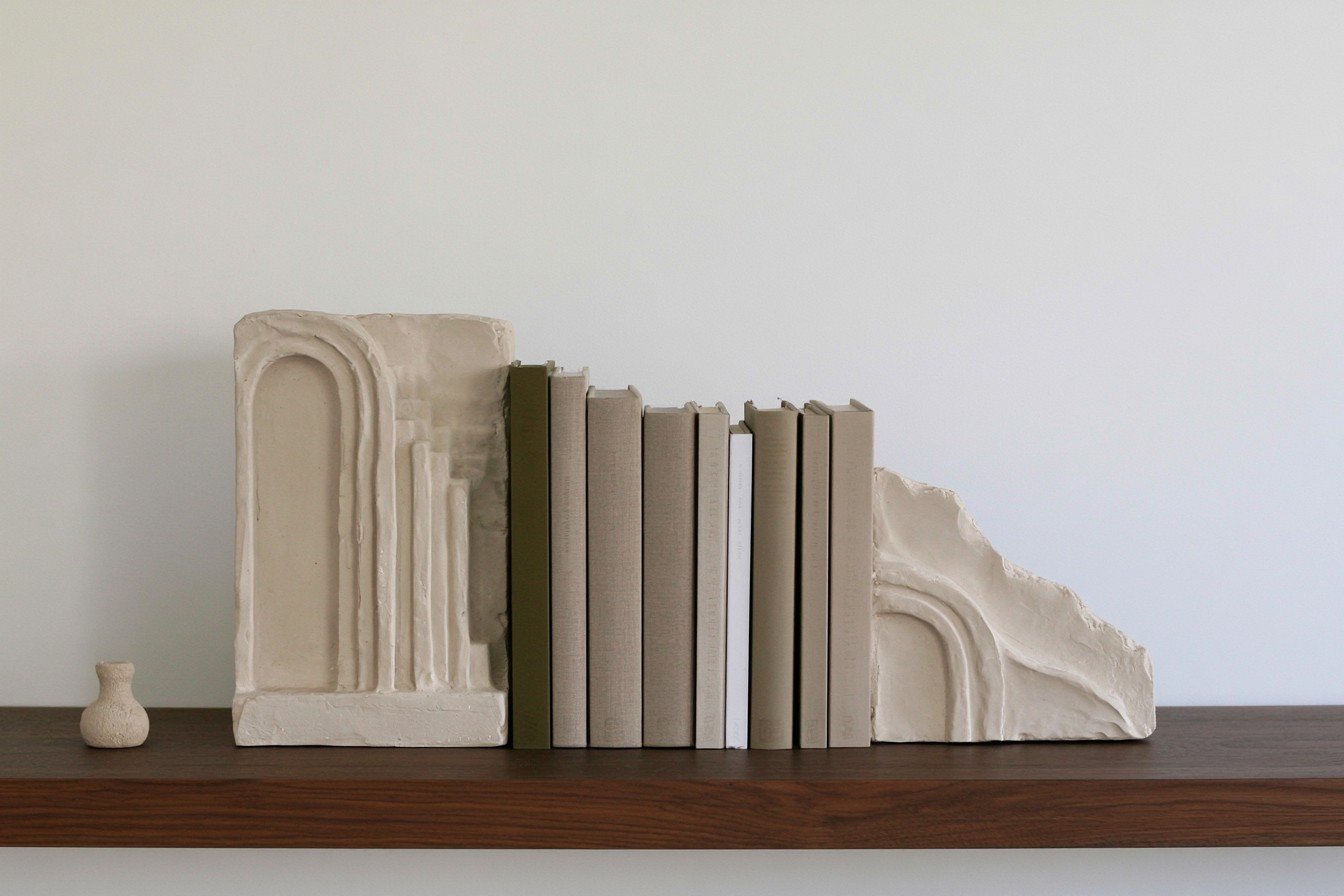
Make sculptural bookends with two matching molds, high strength casting plaster, carving chisels, a small file, sandpaper, felt pads, and matte protective sealer. Pour the plaster into thick molds to produce two solid blocks with enough weight to support several books. When the blocks become firm but remain slightly damp, draw asymmetrical arches, stepped lines, wide grooves, or smooth wave formations on their outer surfaces. Keep the inner sides flat because raised decorations may damage book covers or prevent books from standing properly. Carve small sections at a time and avoid weakening the corners. After the bookends have dried completely, flatten the bases and attach felt pads underneath to protect the shelf. Apply a matte sealer to reduce dust and surface wear. These decorative bookends are suitable for a home library, living room shelf, study, office, or bedroom bookcase.
8. Textured Plaster Planter Cover
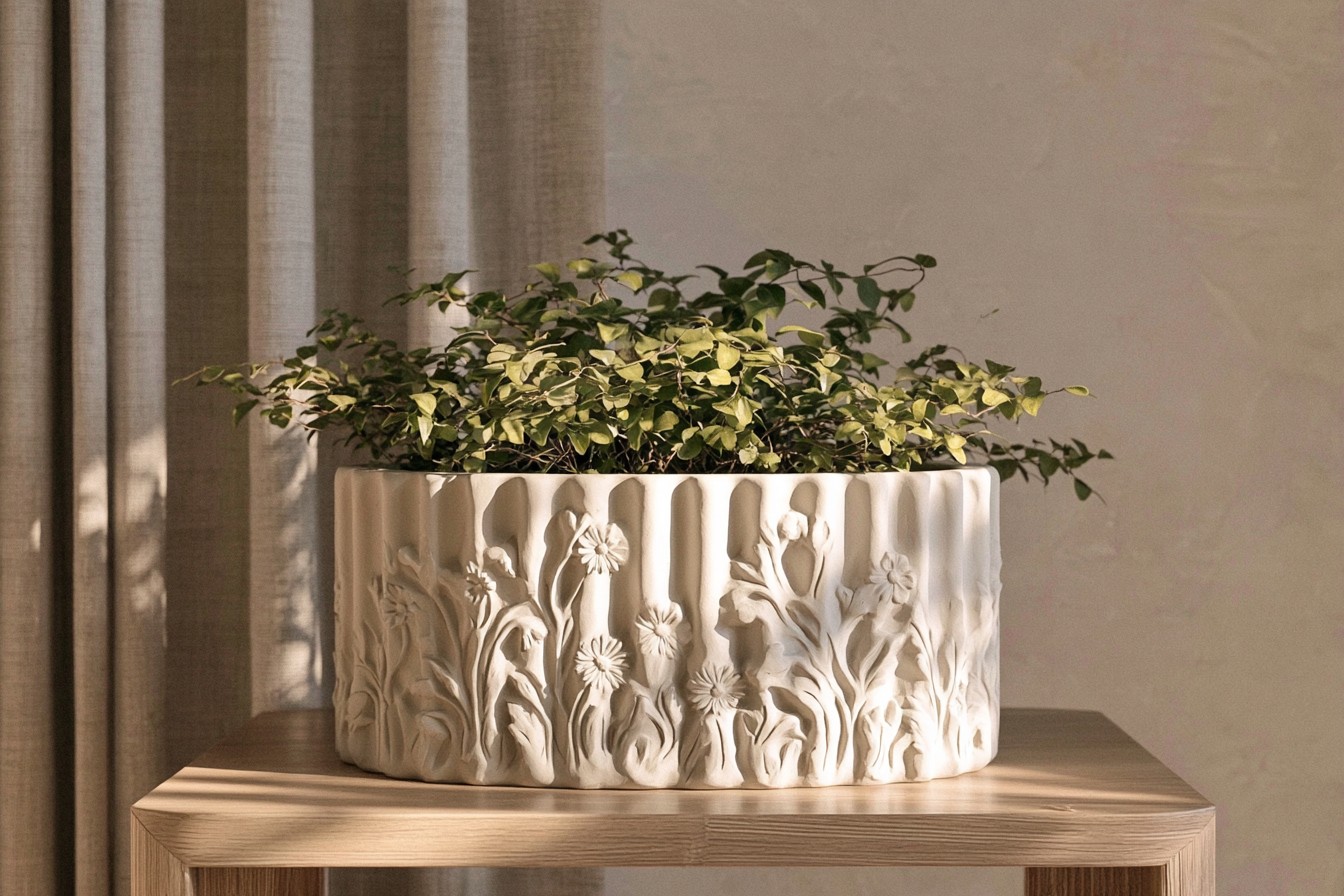
Because ordinary plaster may deteriorate after repeated contact with water, create a removable planter cover instead of planting directly inside it. Gather two plastic containers in different sizes, hobby plaster, mold release, carving tools, sandpaper, moisture resistant sealer, and furniture pads. Pour the plaster into the larger container, then position the smaller container in the center to form the interior opening. Once the piece can be removed safely, carve vertical grooves, botanical outlines, small daisies, or flowing organic patterns into its exterior. Allow it to dry completely before sealing the inside, outside, and bottom. Keep the plant inside a separate plastic nursery pot with drainage holes and remove it from the decorative cover before watering. Add pads underneath to protect the furniture. This design is suitable for a windowsill, desk, kitchen shelf, covered balcony, dresser, or living room plant display.
9. Carved Plaster Key Holder Panel
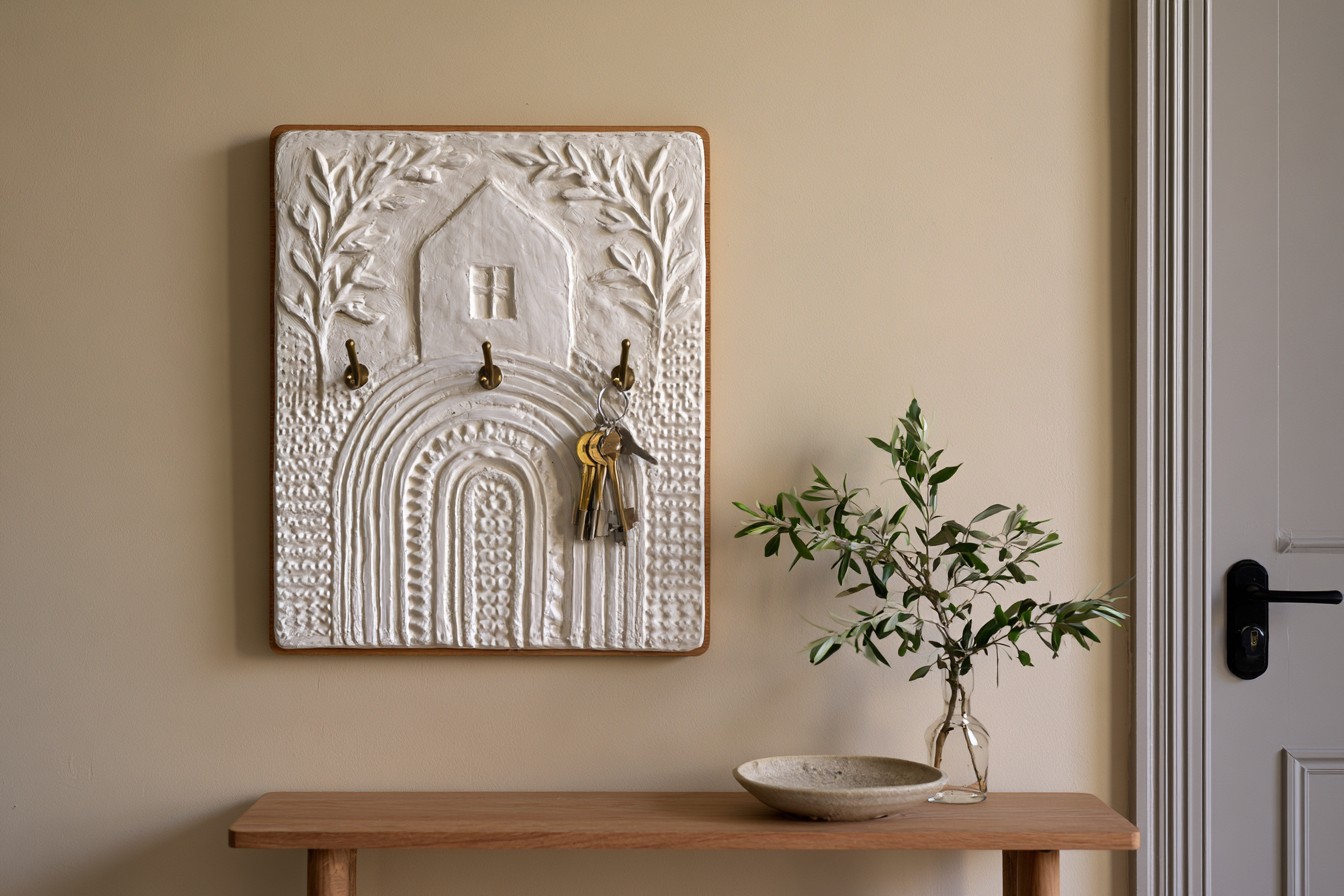
Organize an entryway with a plywood base, a thin plaster panel, silicone mold, carving tools, small metal hooks, screws, wall anchors, mounting adhesive, acrylic paint, and matte sealer. Begin by cutting a wooden backing that can be attached securely to the wall. Cast the decorative plaster section separately and mark the future hook positions while planning the design. Carve an abstract house silhouette, olive branches, arched lines, leaves, or repeating geometric patterns across the plaster surface. Instead of placing weight directly on the fragile plaster, install the metal hooks through the panel and into the supporting wood behind it. Attach the plaster securely to the plywood and apply a protective finish. Mount the completed holder near the front door, coat storage area, or entryway console. Use the hooks for keys and other lightweight accessories rather than heavy handbags, clothing, or filled shopping bags.
10. Carved Plaster Wall Clock
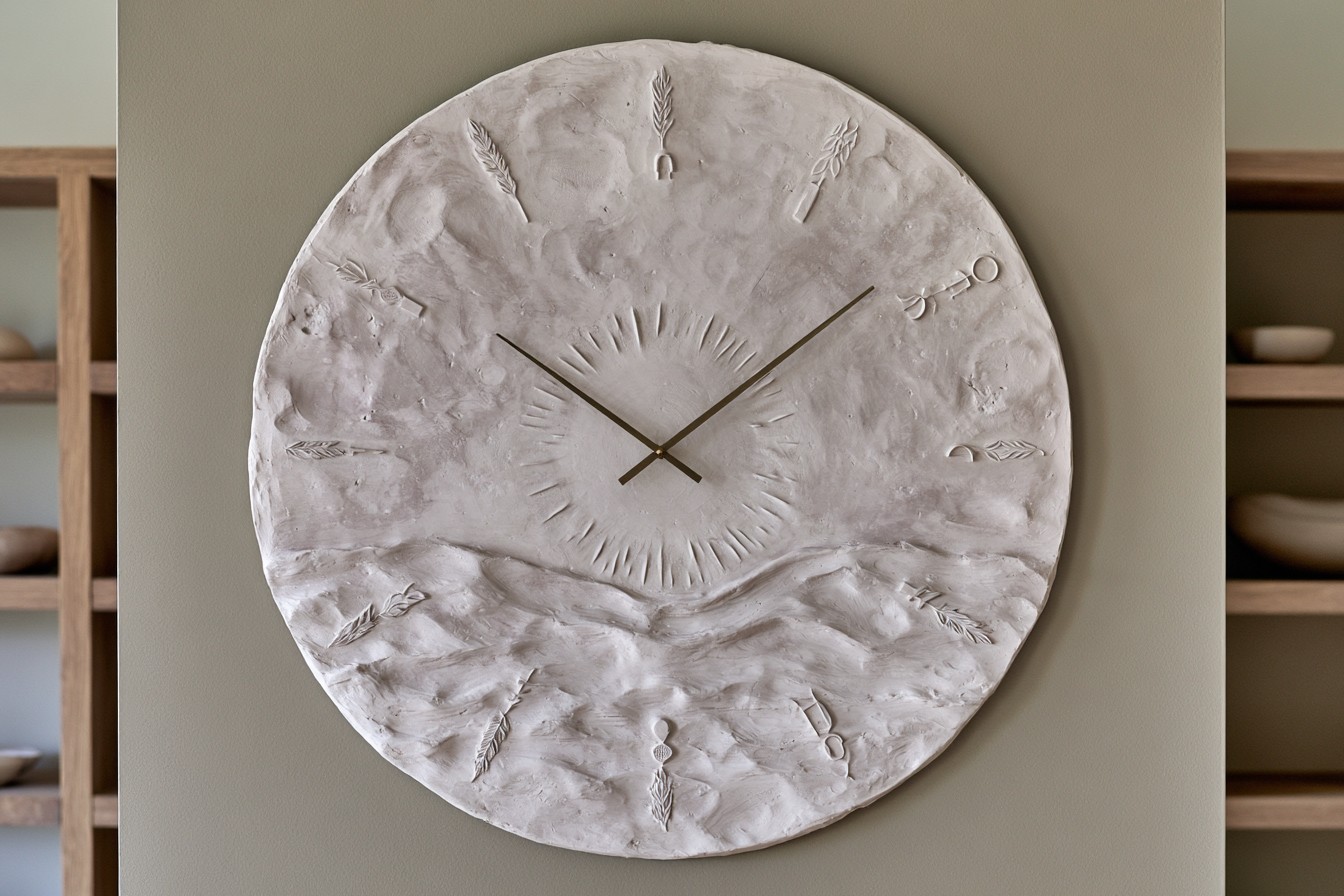
Design a functional wall clock with a round silicone mold, hard casting plaster, a clock mechanism, clock hands, a suitable drill bit, ruler, carving tools, sandpaper, acrylic paint, and surface sealer. Mark the center of the mold before pouring the plaster and keep the casting relatively thin to prevent the clock from becoming unnecessarily heavy. After removing the piece, carefully open the central hole required for the mechanism. Divide the face into equal sections with a ruler. Instead of traditional numbers, carve short lines, leaves, circles, arches, or small geometric symbols to mark the hours. Add a subtle sunburst, spiral, or wave design around the center without interfering with the movement of the hands. Once completely dry, sand and seal the clock before installing the mechanism. Display it in a kitchen, entryway, home office, bedroom, or simply decorated living room.
11. Outdoor Carved House Number Plaque
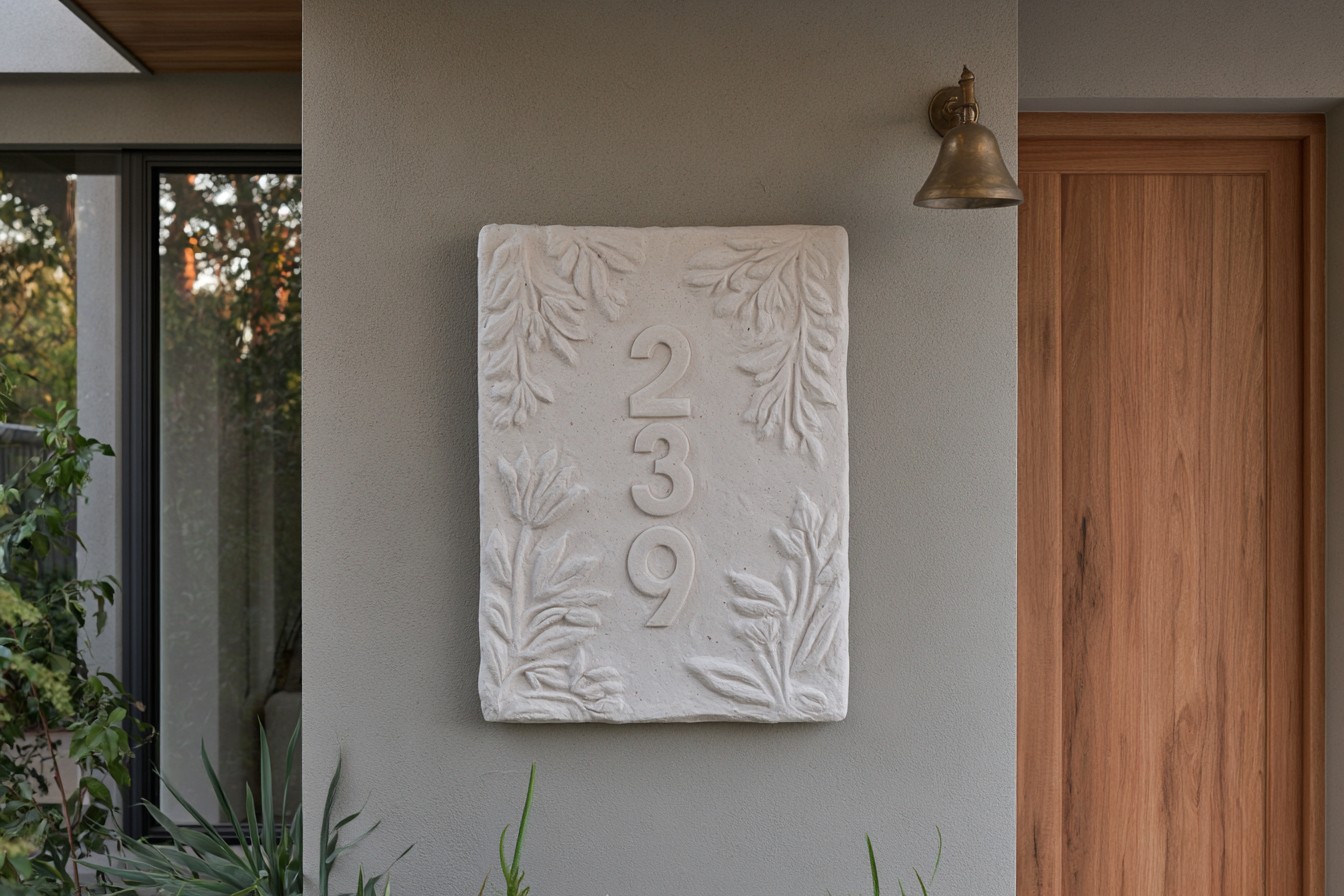
An outdoor house number plaque requires polymer modified exterior casting material rather than ordinary indoor hobby plaster. Other supplies include a rectangular mold, number stencils, carving tools, exterior paint, waterproof sealer, a mounting plate, and rust resistant hardware. Pour the prepared material into the mold and transfer the number outlines once the surface reaches a workable firmness. Carve around the numbers to leave them raised or cut the numbers directly into the surface. Keep the overall design simple so the address remains readable from a distance. Create strong contrast between the background and numbers using exterior grade paint. After the plaque has cured completely, protect the front, back, sides, and carved recesses with several coats of waterproof sealer. Install it in a sheltered location beside the front door, beneath a porch roof, near a garden entrance, or on a covered veranda wall.
12. Carved Plaster Furniture Knobs
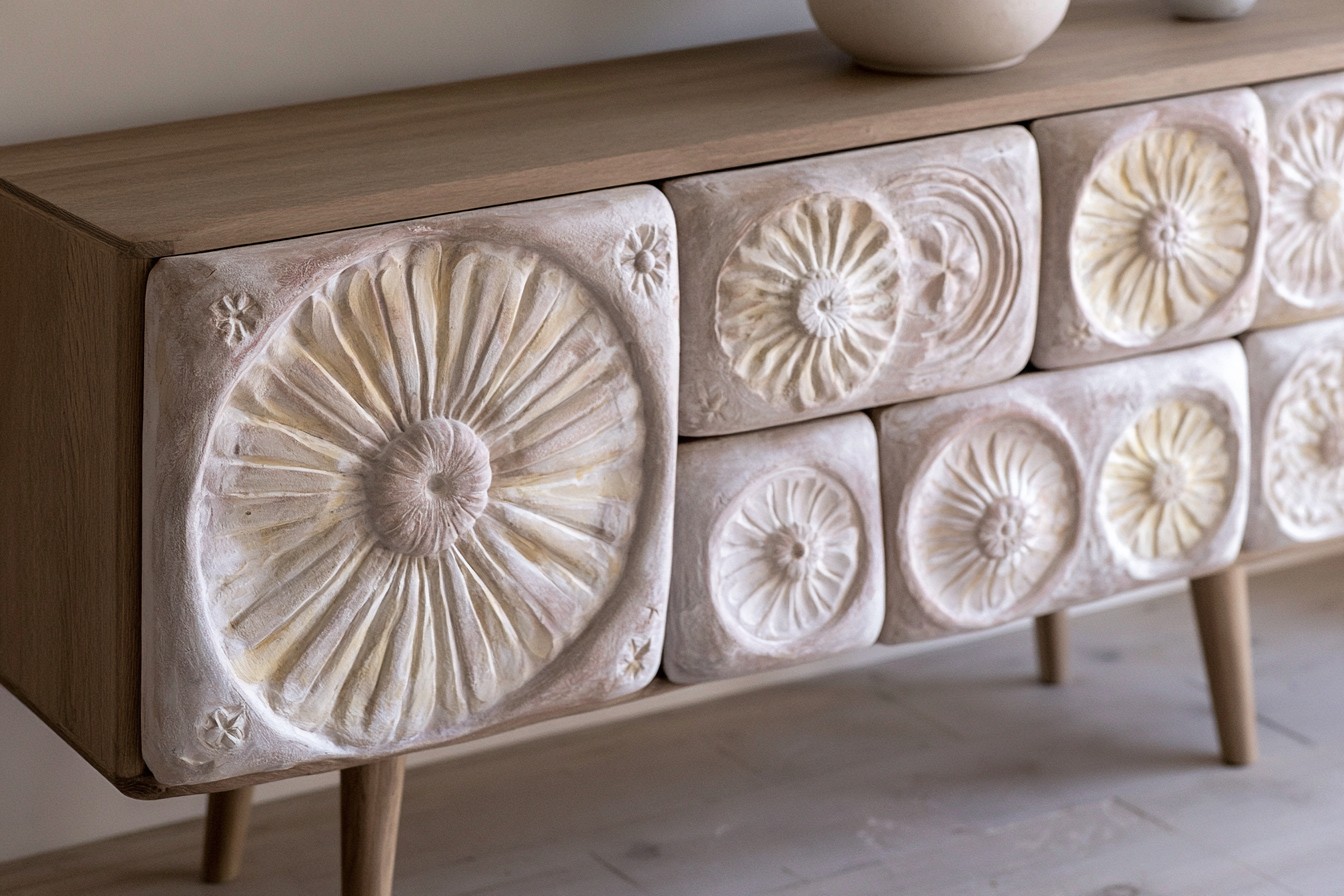
Personalize a small cabinet using hard casting plaster, miniature silicone molds, threaded knob inserts, suitable screws, strong adhesive, fine carving tools, sandpaper, acrylic paint, and durable protective coating. Position the threaded inserts carefully in the center of each mold while pouring the plaster. The concealed section should be wide or textured enough to prevent the insert from rotating after installation. Once the knobs are firm, carve small daisies, fan patterns, curved lines, stars, or simple geometric shapes across their fronts. Keep the edges thick and rounded because thin projections can break during everyday handling. Allow the knobs to cure completely before sanding, painting, and applying several protective coats. Test one knob before completing the entire set. These handmade pieces are best used on jewelry boxes, decorative drawers, small nightstands, craft cabinets, or lightly used console furniture rather than heavy kitchen cupboards.
13. Layered Abstract Plaster Sculpture
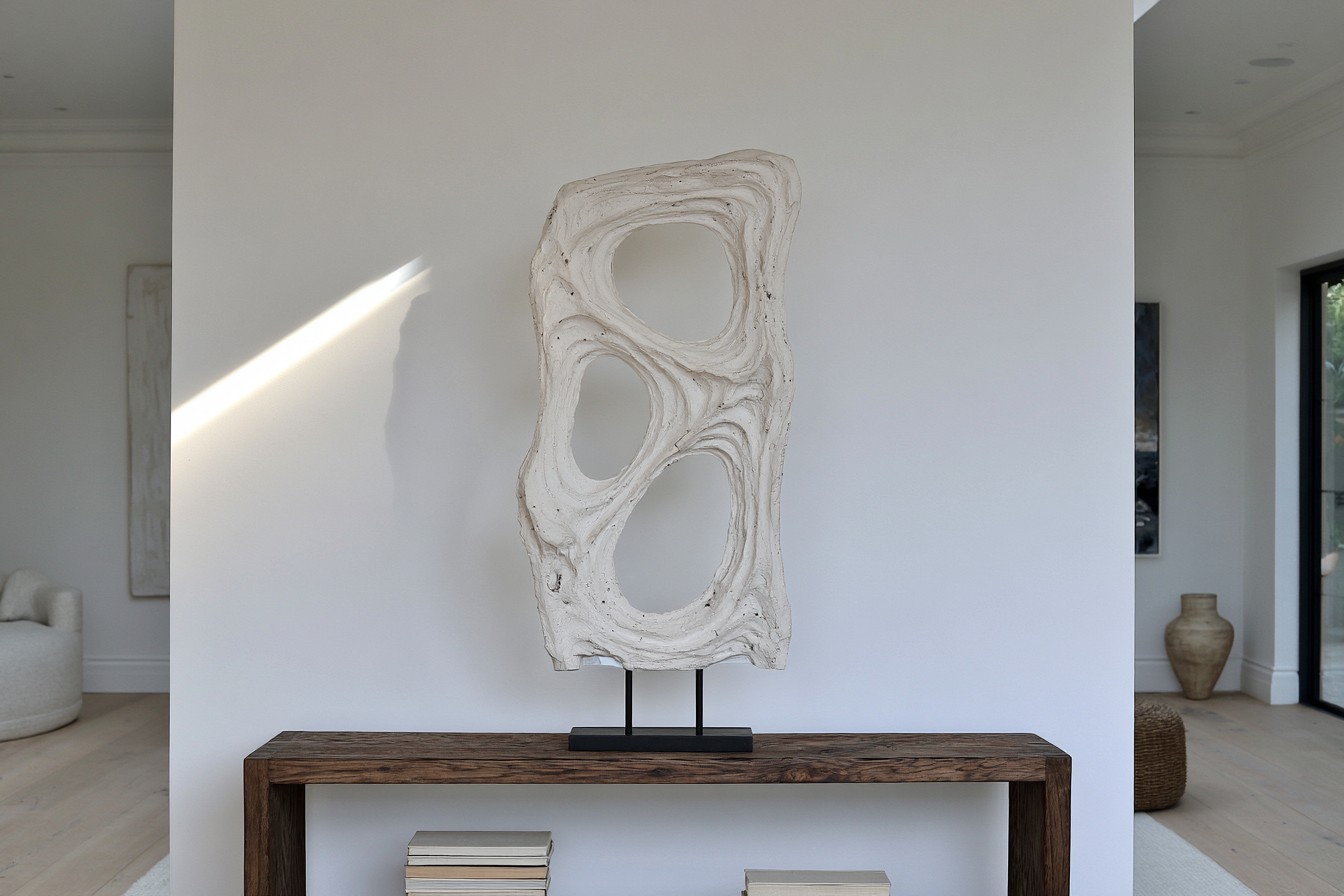
A beginner friendly tabletop sculpture can be made from a rectangular plaster block, pencil, carving chisels in several sizes, a small file, sandpaper, protective mask, felt, and matte sealer. Sketch overlapping curves, circular openings, softly stepped layers, or balanced asymmetrical shapes on every visible side of the block. Mark the areas that need to be removed before beginning. Carve away small portions gradually instead of trying to remove large sections at once, as sudden pressure may split the plaster. Keep the base broad, flat, and sufficiently heavy so the sculpture remains stable. Refine the shape with files and several grades of sandpaper after the main carving is finished. Remove all dust, apply a matte protective finish, and attach felt underneath. Display the finished sculpture on an open shelf, entryway console, office desk, bookcase, dresser, or living room side table.
MORE IDEAS


Share
What's Your Reaction?
 Like
0
Like
0
 Dislike
0
Dislike
0
 Love
0
Love
0
 Funny
0
Funny
0
 Angry
0
Angry
0
 Sad
0
Sad
0
 Wow
0
Wow
0








