19 Wooden Shelf Bracket Designs With Unexpected Character

Wooden shelf brackets do not have to disappear beneath the shelf. With the right shape, joinery, finish, and proportion, they can become the detail that gives an otherwise simple wall its personality. A bracket can echo an old timber frame, mimic a sculptural arch, introduce contrasting wood grain, or create the illusion that a shelf is suspended inside a tiny piece of architecture. Some designs are easy weekend DIY projects, while others are better suited to careful woodworking or custom fabrication. The following approaches move beyond standard triangular supports, combining practical strength with more distinctive forms that can work in kitchens, bathrooms, reading corners, entryways, and display walls.
1. Carve a Soft Arch Into a Solid Bracket
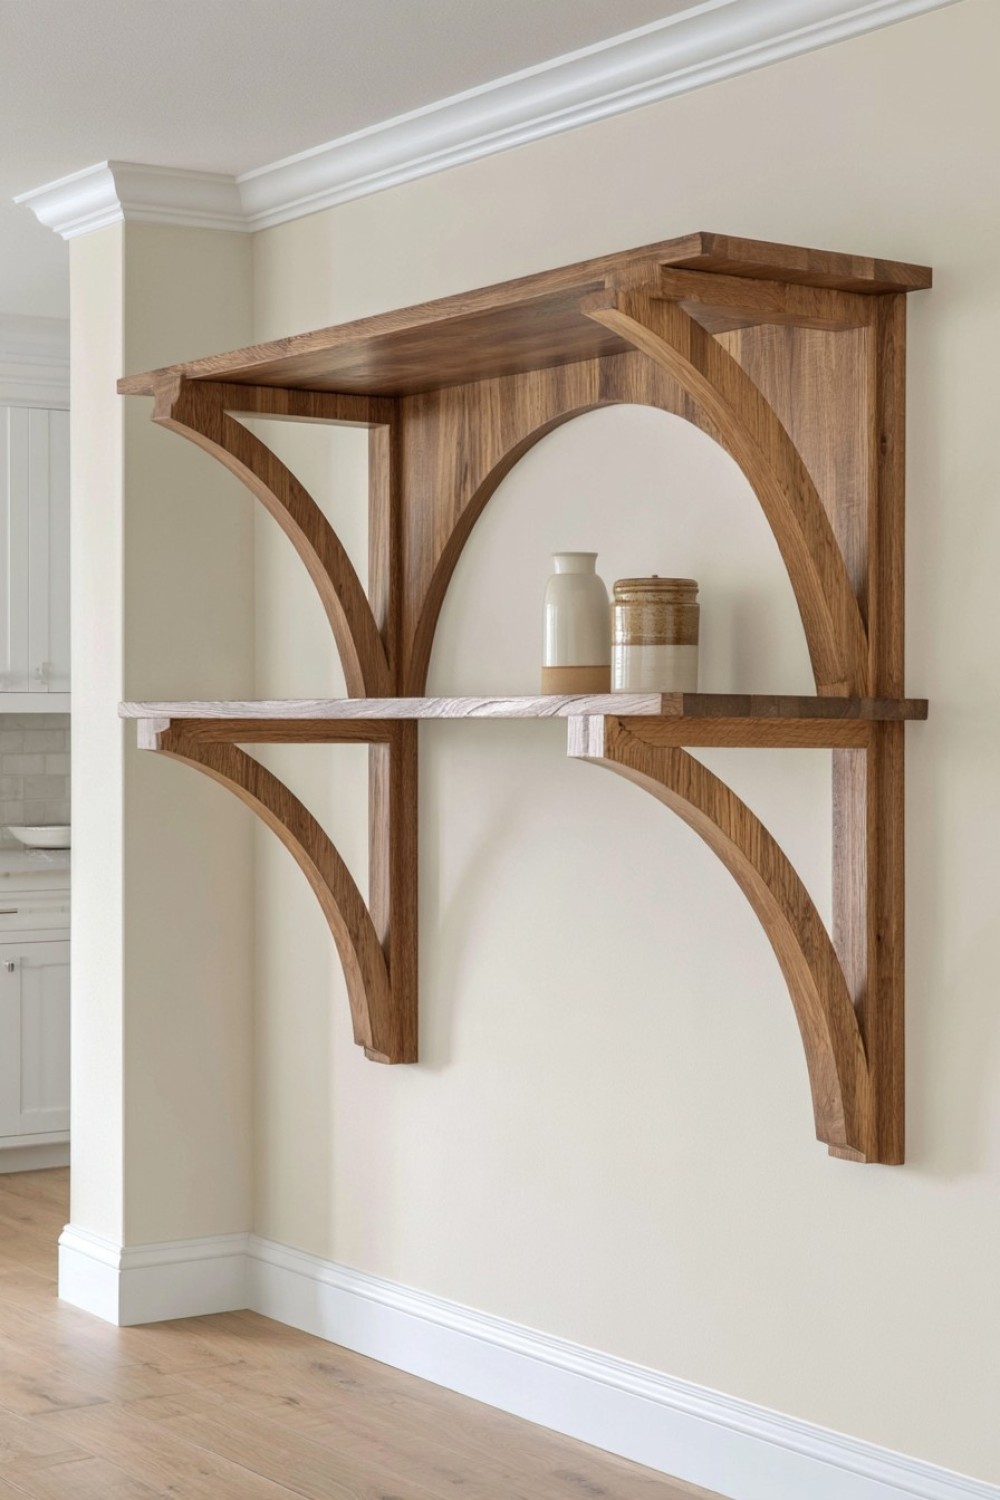
A thick wooden bracket with an arched cutout can make a basic shelf feel almost built into the architecture.
For a DIY version, start with 18–25 mm hardwood or quality plywood, depending on the load and span. You will need a jigsaw, drill, sanding block, pencil, compass or round template, wood glue, and appropriate wall fasteners.
Draw a large half-arch inside a rectangular bracket blank, leaving enough timber around the perimeter for strength. Cut the opening carefully and soften the edges with fine sandpaper.
Oak, ash, or beech gives the bracket a clean furniture-like appearance, while painted pine can work well in cottage interiors.
The arch becomes especially effective when repeated beneath several shelves because the negative spaces create rhythm along the wall.
For weight-bearing shelves, do not reduce the bracket to a thin decorative outline. Keep substantial material around the vertical and horizontal mounting areas.
2. Build a Layered Plywood Bracket With Exposed Edges
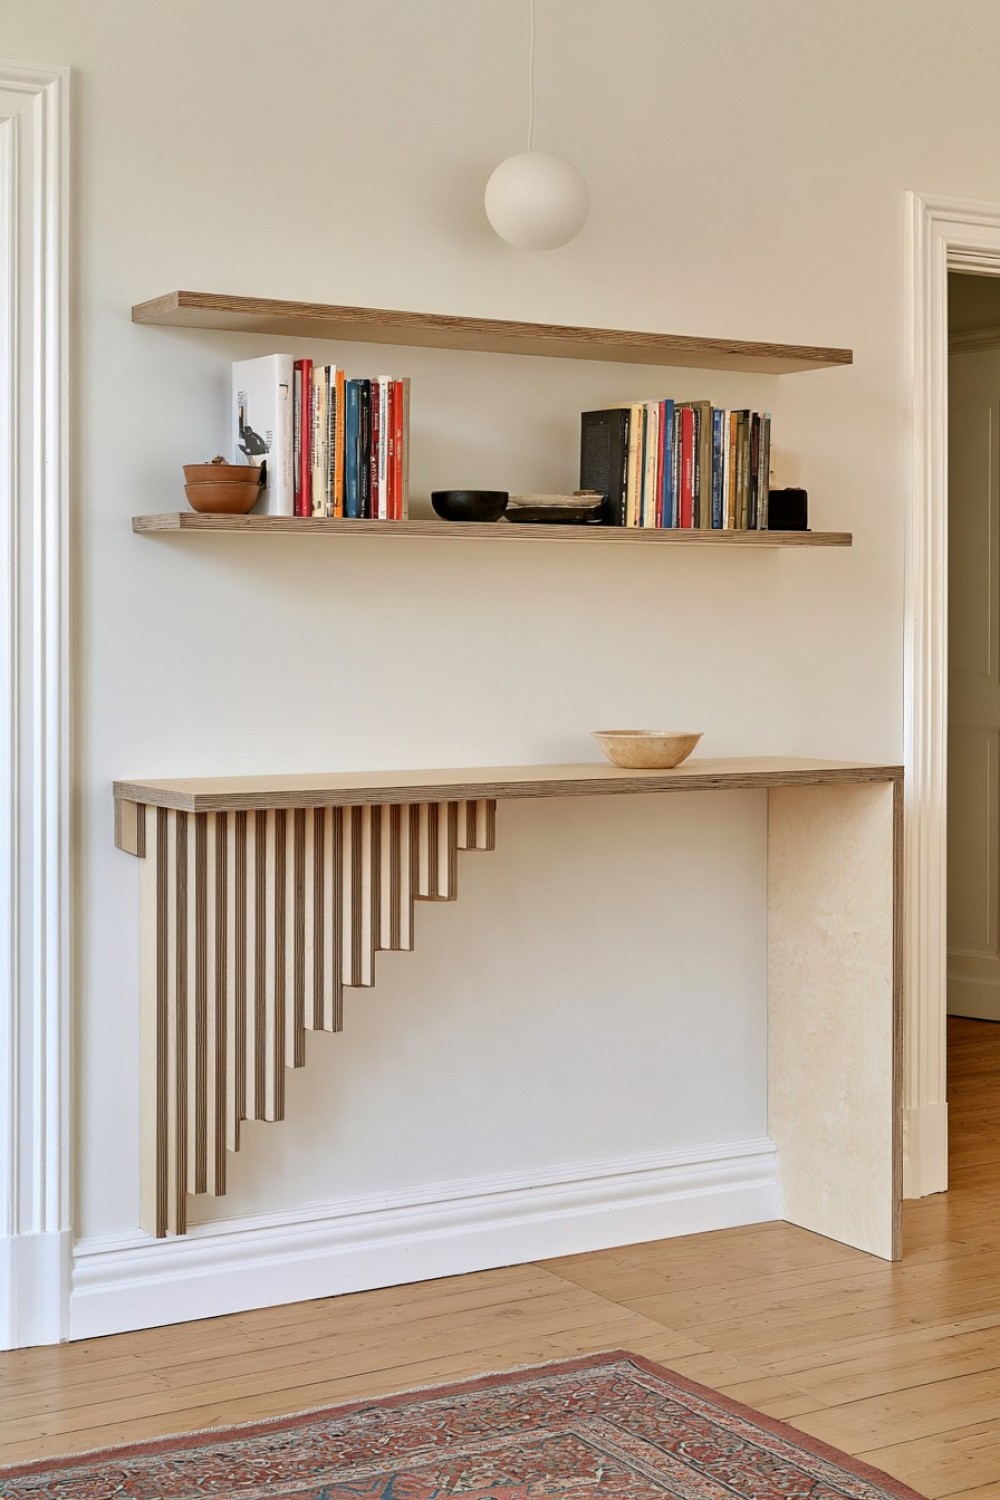
Rather than hiding plywood under paint, use its laminated edge as the main decorative feature.
Cut two or three identical bracket profiles from birch plywood and glue them together to create a thick sculptural support. Clamp the pieces flat while drying, then sand the exposed edges until the layers read as one continuous pattern.
You can keep the bracket rectangular with a diagonal notch, or cut a more organic stepped profile.
The combination of pale face veneer and darker ply lines gives the bracket a distinctly contemporary feel, especially under white, black, or matching plywood shelves.
For a more refined result, round only the front edge while leaving the wall side crisp.
This is a practical DIY approach because laminated plywood is stable and easier to shape consistently than thick solid hardwood. Still, the bracket dimensions and wall anchors should be selected according to the actual shelf depth and intended load.
3. Turn a Bracket Into a Miniature Timber Truss
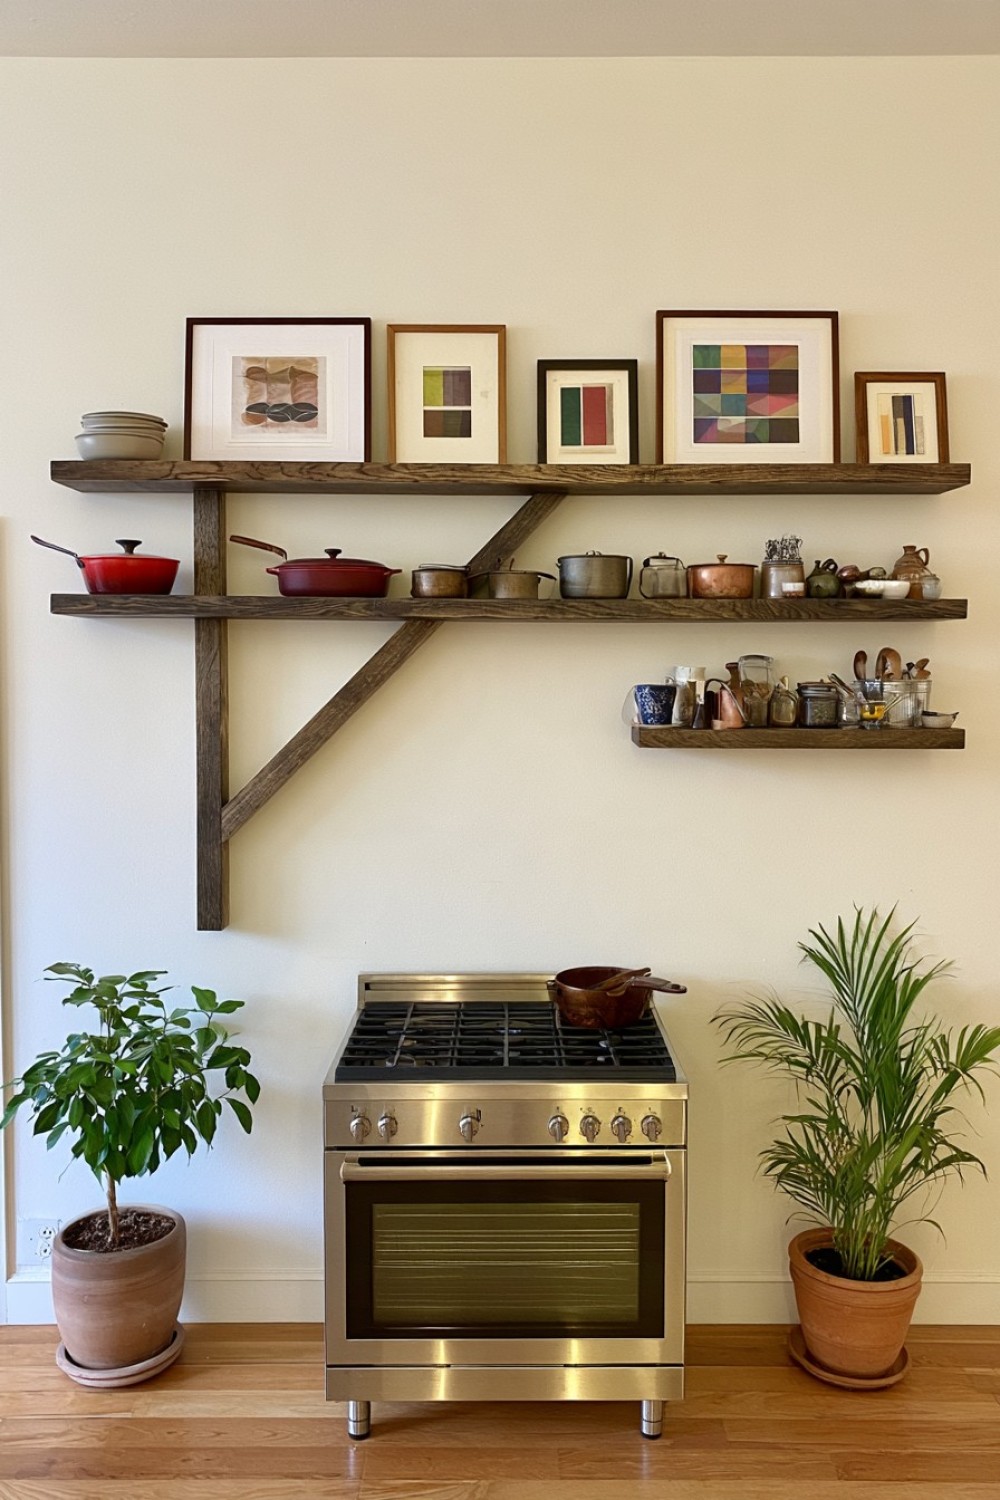
A shelf bracket can borrow the structure of a roof truss rather than using one solid triangular block.
Build a small frame from three or four narrow timber members: one vertical piece against the wall, one horizontal support beneath the shelf, and one or two diagonal braces between them.
Use hardwood dowels, half-lap joints, or carefully placed screws and plugs so the connections look intentional.
Dark-stained oak can create a rustic architectural feel, while pale ash makes the same geometry look much more modern.
This design works particularly well beneath long kitchen shelves or above a workbench where the structural language feels appropriate.
The open center keeps the bracket visually lighter than a solid triangle, yet the diagonal bracing still communicates strength.
If the shelf will carry cookware, books, or heavy ceramics, treat this as structural joinery rather than decorative assembly and size the timber and fasteners accordingly.
4. Create a Bracket From Two Interlocking Wood Species
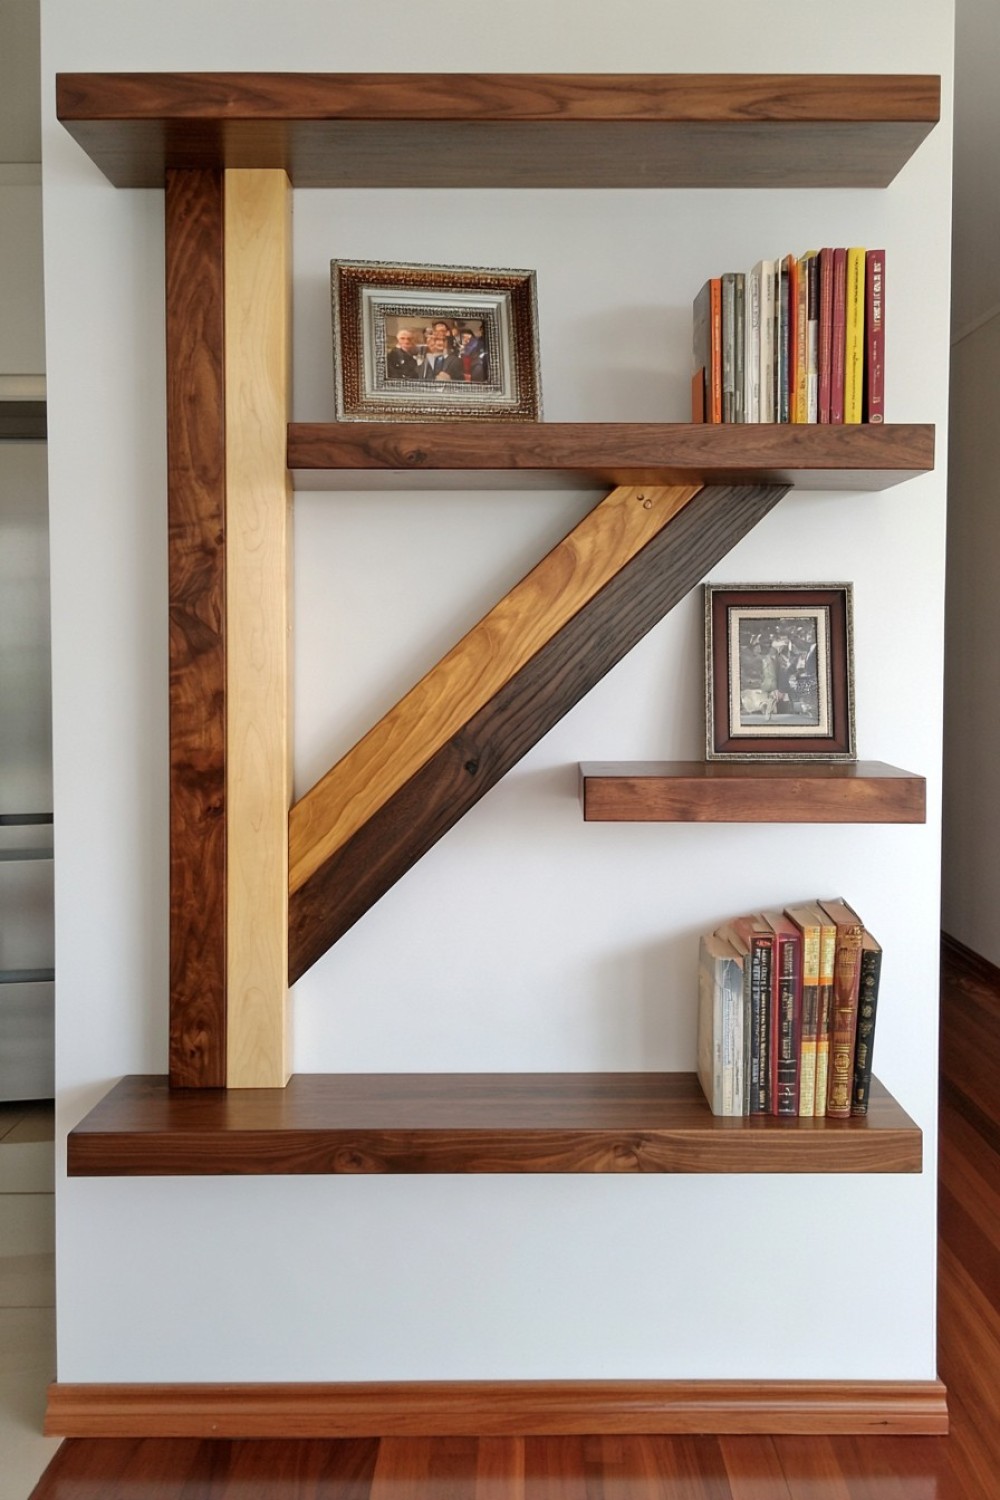
Instead of staining one piece of wood, use contrast between species as the design.
A pale maple vertical support paired with a walnut diagonal brace can make the bracket feel like a small piece of furniture. Another combination might use oak with black-stained ash.
For a DIY build, cut each component separately and join them with dowels, loose tenons, or screws concealed with matching wood plugs.
Keep the overall shape simple so the material contrast remains the focal point.
This idea is especially effective under open shelving in kitchens where timber already appears in cutting boards, cabinet fronts, or stools. The bracket can repeat those tones without requiring the entire shelf to match.
Avoid using extremely thin contrasting inserts purely for appearance if they form part of the load path. The structural pieces should remain substantial enough for the shelf's actual weight.
The result feels custom because the bracket has a material hierarchy rather than a single uniform finish.
5. Give the Bracket a Scalloped Front Edge
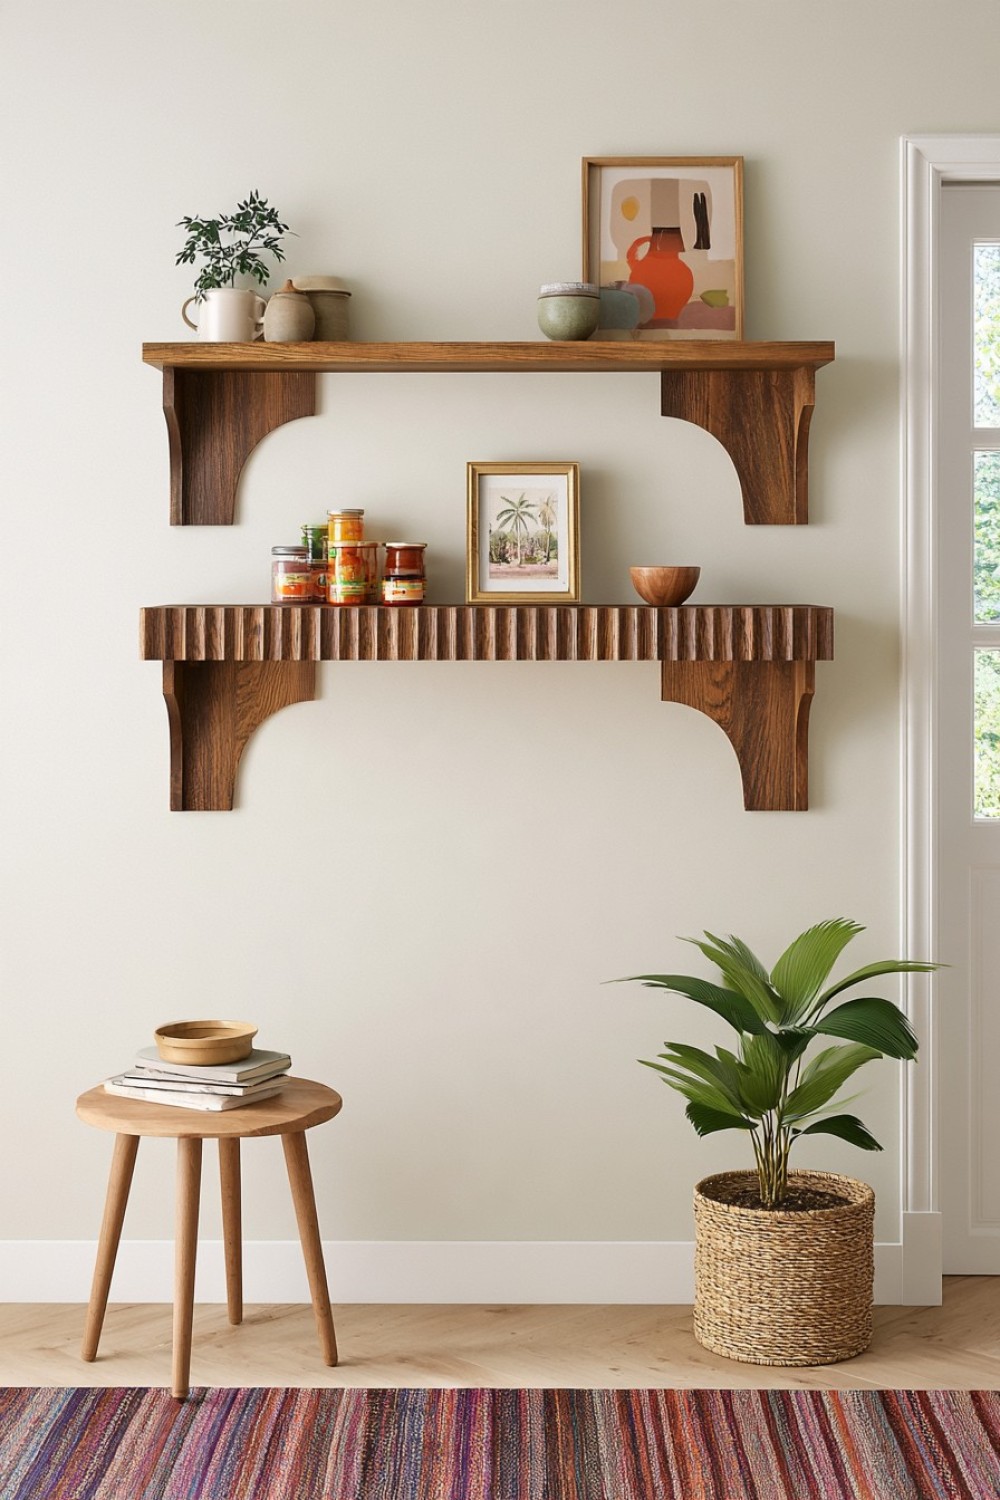
A scalloped bracket can introduce softness into rooms dominated by straight cabinetry and rectangular shelving.
Start with a wide wooden bracket blank and trace two or three overlapping circles along the front edge. Cut the profile with a jigsaw, then sand each curve until the transitions feel continuous.
Instead of making the bracket resemble ornate Victorian trim, keep the scallops broad and simple.
Painted warm white or dusty sage can suit cottage kitchens, while natural oak makes the same shape feel more contemporary.
The profile looks particularly good beneath shallow shelves holding pottery, small framed art, or pantry jars.
If you are making several brackets, create one MDF or cardboard template first so each shape matches.
The decorative cut should remain toward the front edge rather than removing material from the wall connection. That keeps the mounting area intact while allowing the visible portion to carry the character.
6. Design a Bracket That Continues Up the Wall
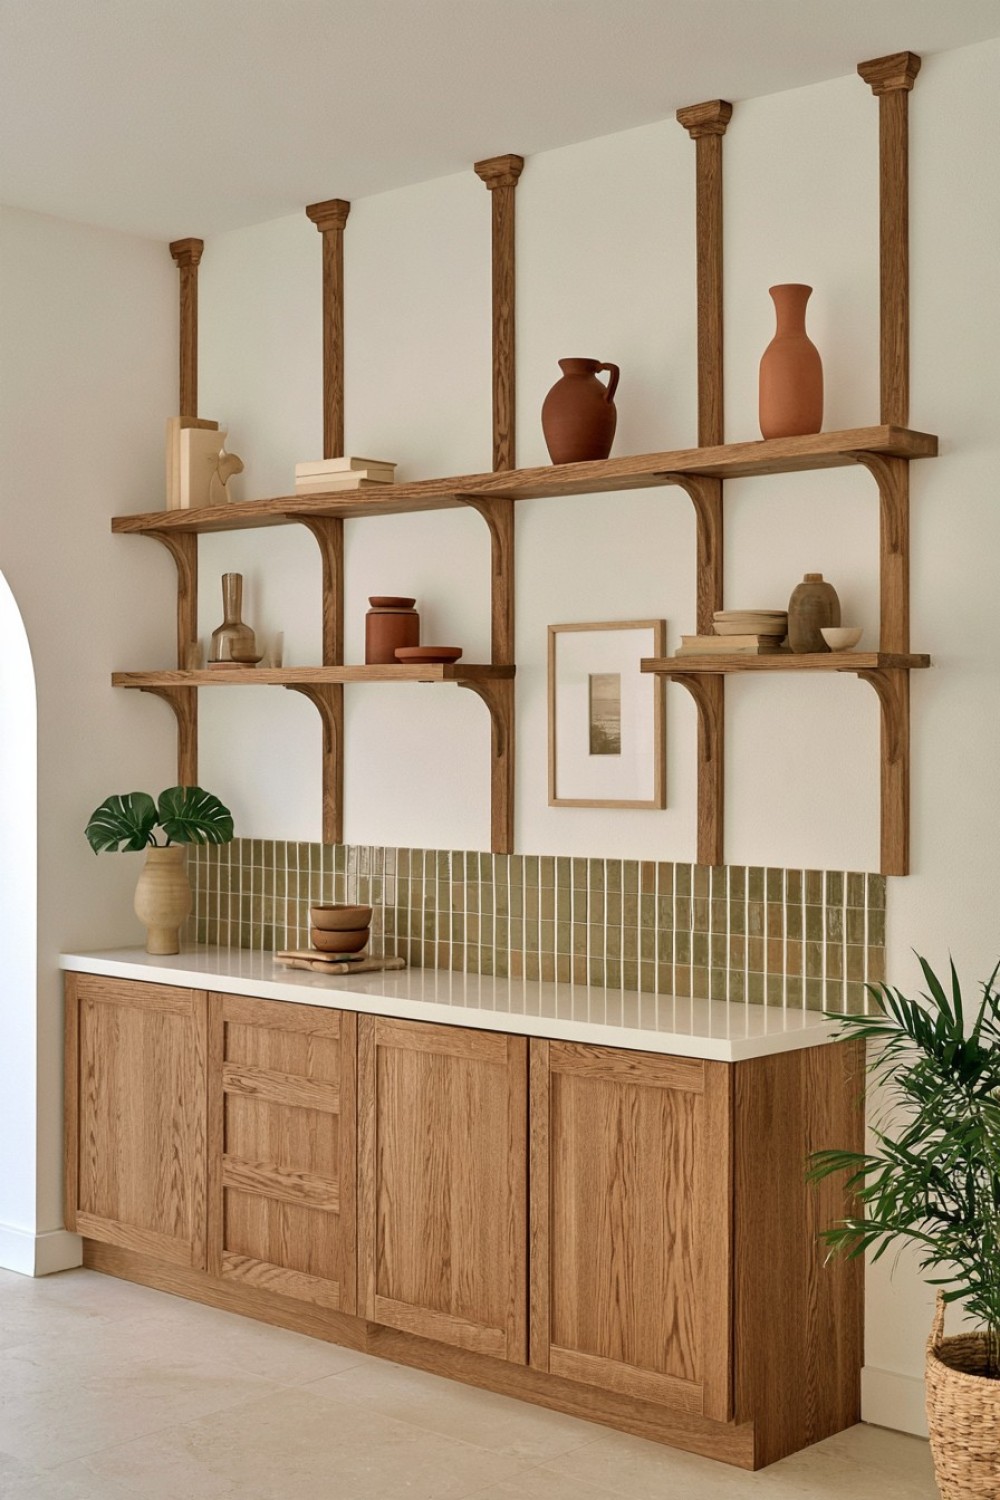
Instead of stopping at shelf level, extend the vertical part of the bracket above the shelf.
This creates a tall wooden line that can frame objects or visually divide a run of shelving.
For example, a slim oak support might extend 20–30 cm above the shelf, ending in a rounded top or shallow notch. Several repeated supports can make a simple shelf system look more like built-in furniture.
This approach works especially well in kitchens, bathrooms, or entryways where the shelf itself is relatively minimal.
A practical DIY version uses one continuous vertical board with the shelf support fixed across it at the required height. The extended section does not need to carry extra weight; it is primarily visual.
You can also drill a small hole near the top to hold a peg, lightweight hook, or hanging utensil.
Keep any added function light unless the vertical piece is engineered and anchored for additional loads.
7. Shape a Bracket Like an Oversized Wooden Peg
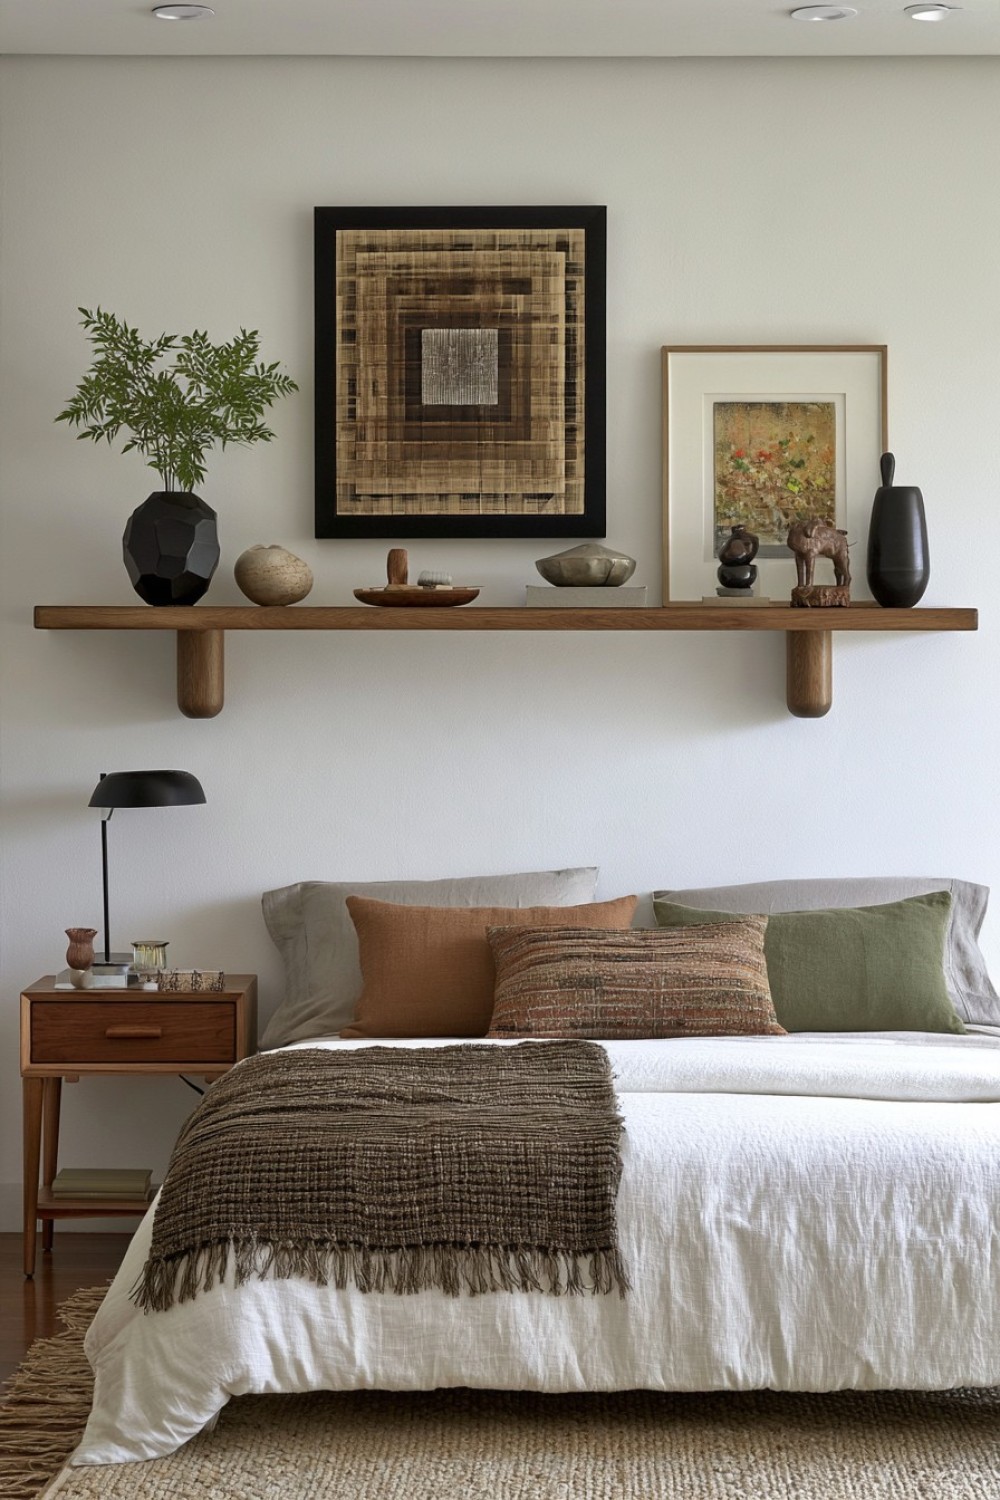
A bracket does not always need a visible diagonal brace.
For shallow display shelves, a thick turned or faceted wooden peg can become the support itself.
Use a substantial hardwood dowel or custom-shaped block that projects from the wall beneath the shelf. Flatten the upper surface so the shelf sits securely, then mount the bracket using a concealed threaded rod, structural screw, or another method suitable for the wall construction.
Two oversized pegs beneath a shelf create an unexpectedly simple, sculptural effect.
This works particularly well in minimalist interiors where conventional brackets would introduce too many lines.
Try oak for a natural look, painted red for a playful accent, or black-stained ash for stronger contrast.
Because cantilevered peg supports concentrate force around their wall connection, this style is better for shallow shelves unless the mounting system is specifically engineered for heavier loads.
8. Make a Ribbed Bracket From Stacked Timber Fins
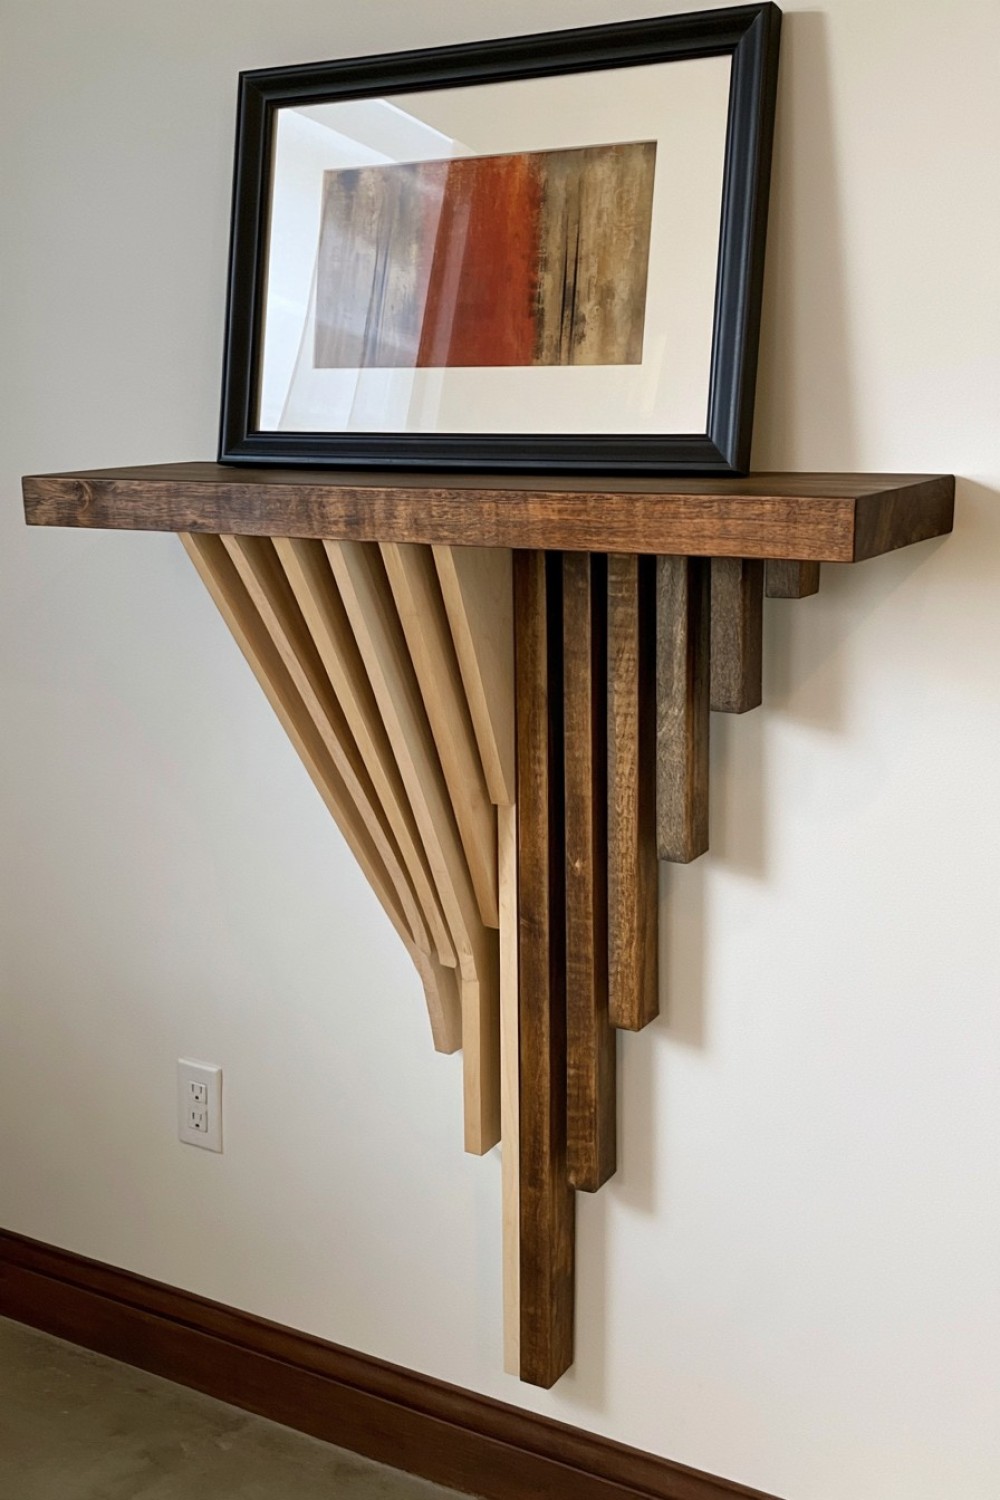
Instead of one solid support, create the bracket from several narrow wooden fins placed side by side.
Cut five to seven identical bracket profiles from plywood or hardwood, then mount them with small consistent gaps between each piece.
Viewed from the front, the support has a ribbed appearance. From the side, it still reads as a conventional bracket.
This is particularly interesting under a deep floating desk shelf or bathroom vanity shelf because the gaps produce stronger shadows than a flat wooden surface.
For a lighter result, use pale birch or oak. For something more dramatic, stain only the recesses between the fins darker.
A simple spacer block can keep each gap identical during assembly.
The fins should attach securely to a structural back plate rather than being treated as independent decorative strips. That hidden back plate distributes the load while the repeated pieces create the visual effect.
9. Add a Small Display Niche Inside the Bracket
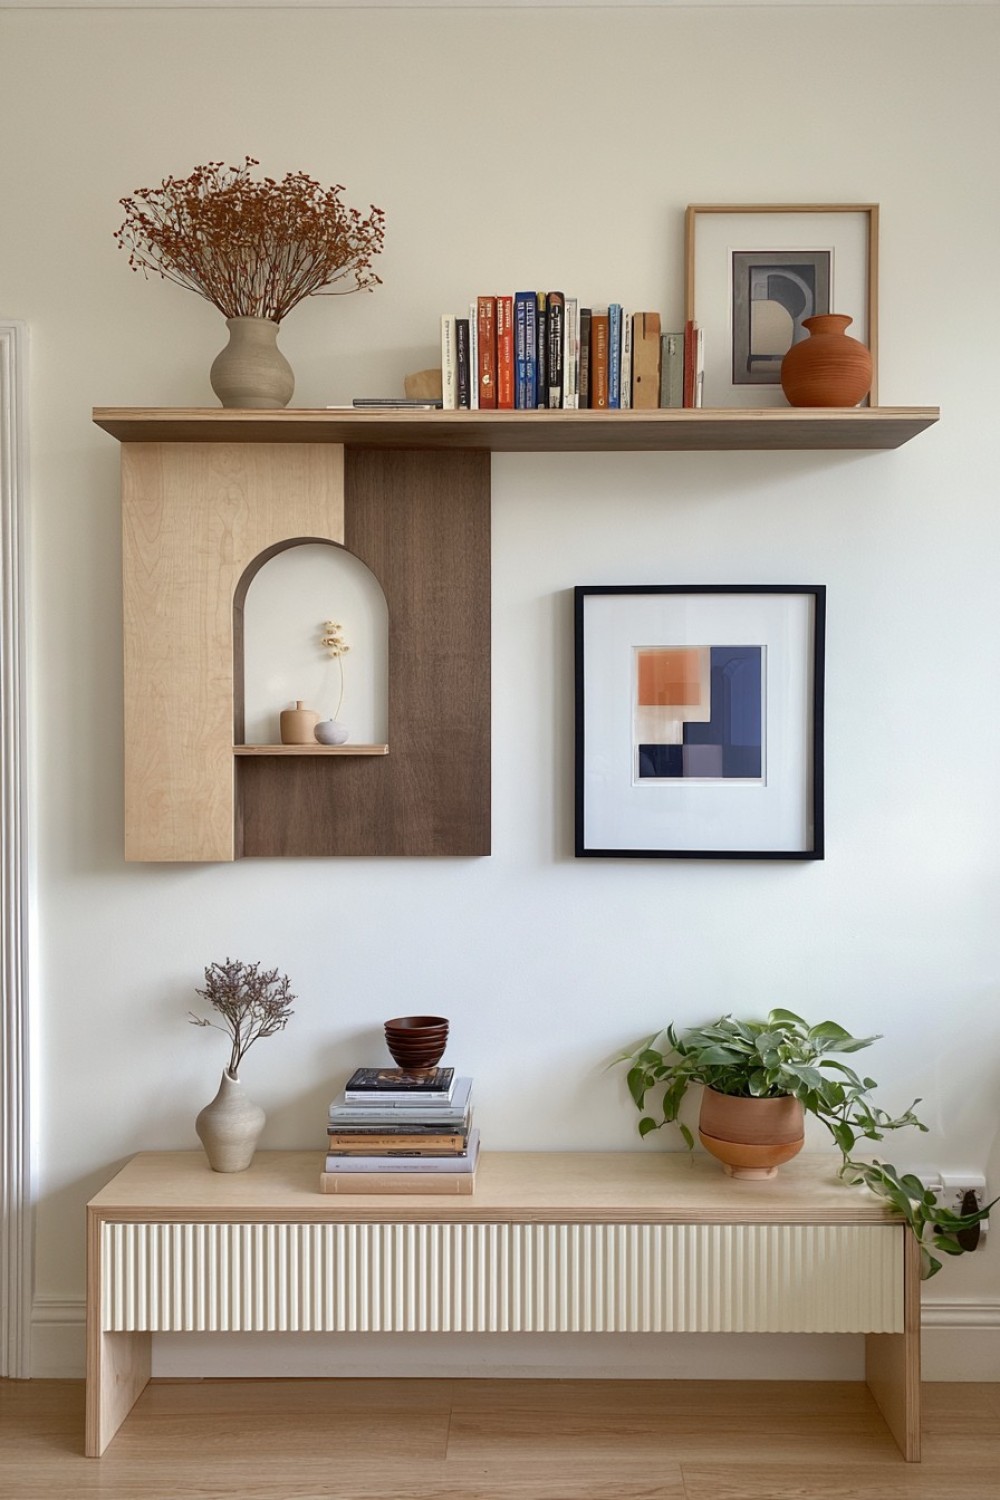
A large bracket can contain a tiny shelf of its own.
Create a deep rectangular or arched bracket, then cut a small opening through the center. Add a narrow base inside the opening so it becomes a miniature niche for a tiny ceramic, dried stem, or other lightweight decorative object.
The main shelf remains functional above while the bracket becomes part of the display below.
This works best with oversized brackets beneath thick kitchen or studio shelves, where the support is large enough for the opening to feel intentional.
For a DIY version, laminated plywood is particularly useful because you can build the shape from several layers instead of routing a deep cavity from one heavy timber block.
Keep decorative objects extremely light and do not weaken the main structural areas near screws or wall anchors.
The unusual detail rewards close viewing without making the entire shelf system overly decorative.
10. Use a Wedged Joinery Detail as Decoration
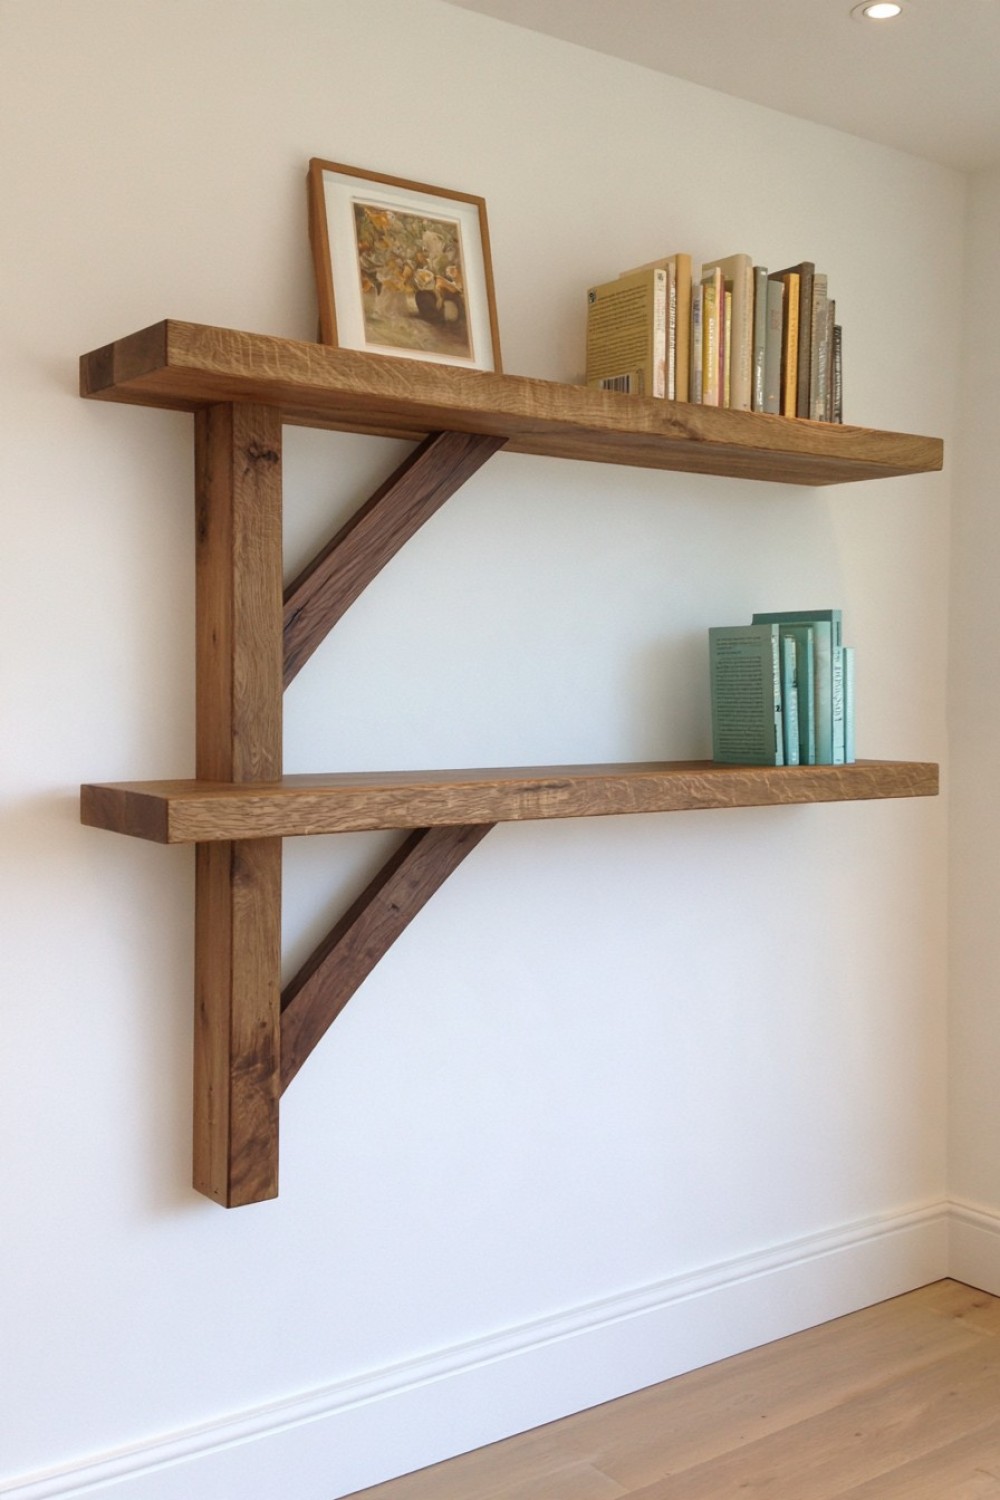
Traditional woodworking joints can become the visual identity of a bracket.
Build the vertical and horizontal members using a through-tenon that passes visibly through one piece, then lock it with a contrasting wooden wedge.
For example, an oak bracket can use a dark walnut wedge so the joinery becomes immediately visible.
This design suits Japanese-influenced, Arts and Crafts, rustic, or contemporary handmade interiors depending on the proportions.
The bracket itself can remain very simple—two rectangular members and one diagonal brace—because the joint provides enough detail.
Accurate cutting matters more than decorative carving here. A loose tenon or badly fitting wedge can weaken the connection.
If you are new to joinery, make a prototype in inexpensive timber before cutting the final hardwood.
Done well, the bracket looks crafted rather than decorated, which gives the shelf much more character without adding unnecessary ornament.
11. Curve the Bracket Forward Like a Wooden Corbel
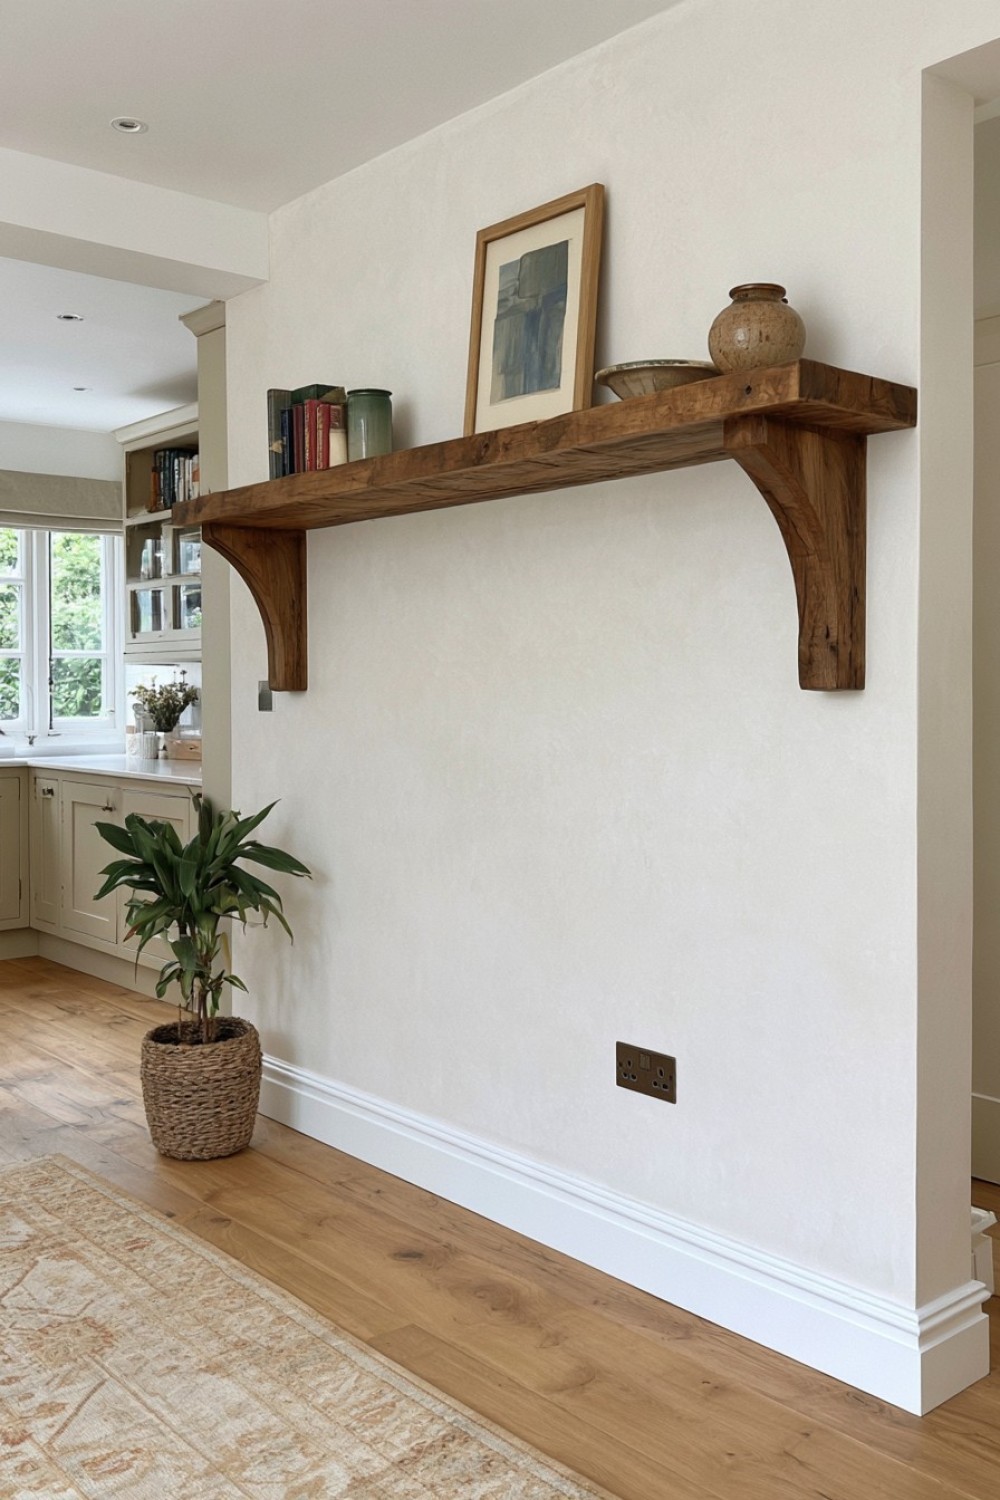
Traditional corbels can be visually heavy, but their basic curved logic can be simplified into something much cleaner.
Start with a thick bracket blank and create one continuous concave curve from the shelf underside toward the wall.
Avoid carved leaves or scrollwork. Let the silhouette do the work.
A pale oak version can complement modern plaster walls, while a painted version fits naturally beneath a cottage-style kitchen shelf.
This shape works especially well under thick shelves because the bracket visually transitions between the horizontal and vertical surfaces instead of meeting them abruptly.
For a DIY version, laminate several thinner boards before cutting the profile if solid stock of the required thickness is unavailable.
Sand the front curve carefully because uneven tool marks become obvious on large continuous surfaces.
The result feels architectural but still restrained enough to use repeatedly along a wall.
12. Create an Offset Bracket That Looks Intentionally Unbalanced
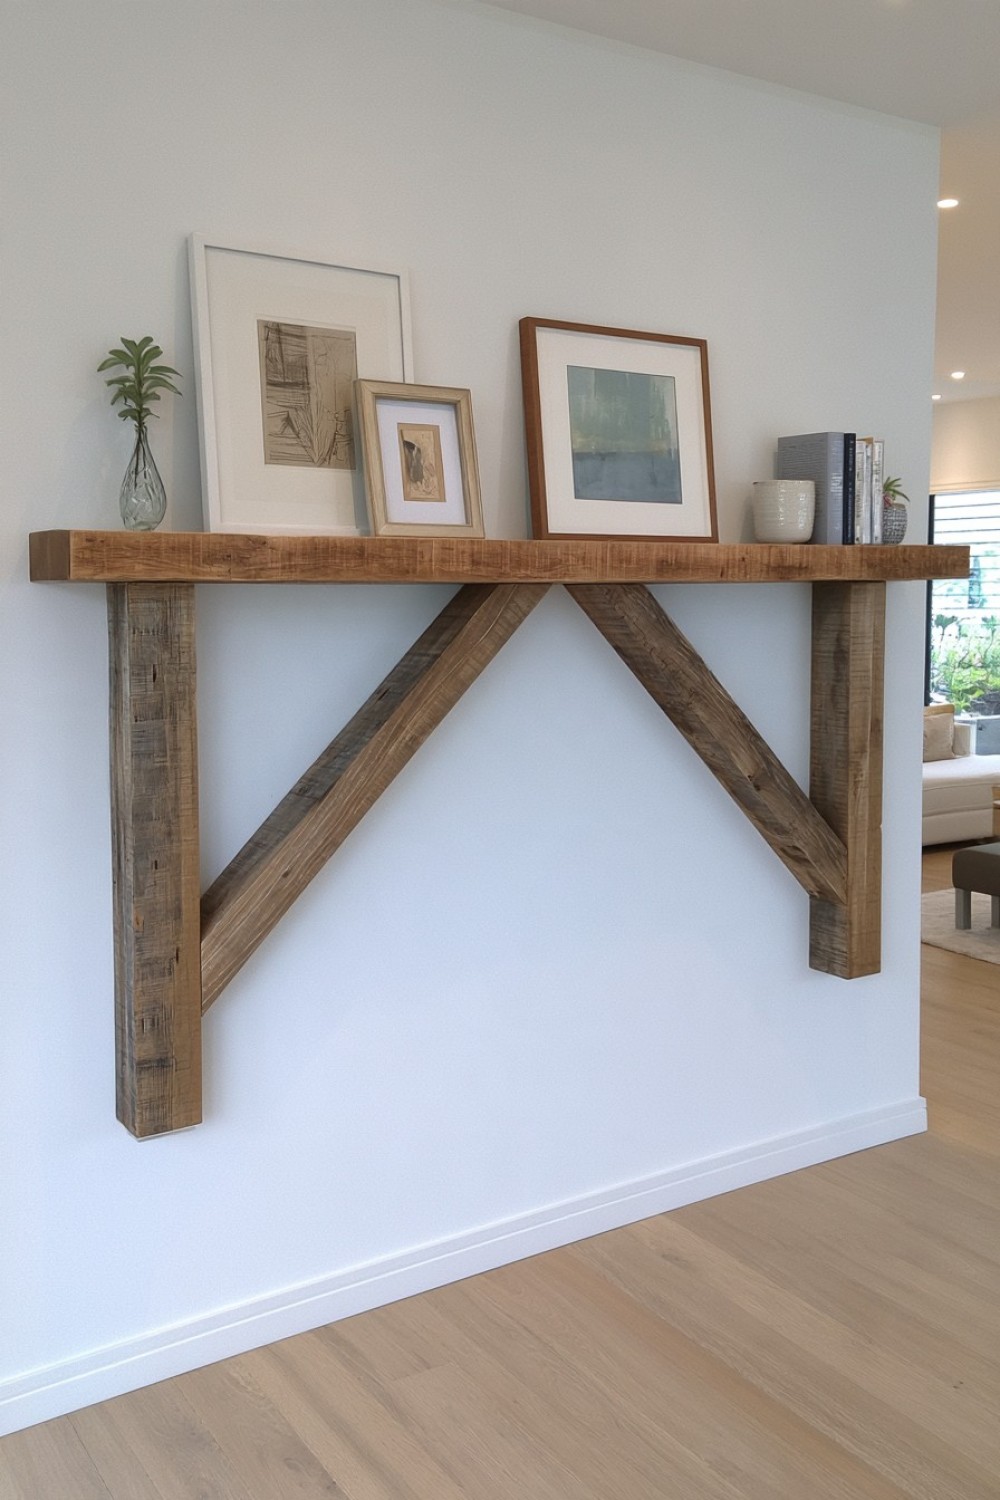
Symmetrical triangular supports are predictable. An offset bracket can create much more tension.
Place the diagonal support off-center so it connects closer to the front of the shelf on one bracket and closer to the wall on another.
Used as a pair, the supports can mirror each other or deliberately face the same direction.
This works particularly well beneath one statement shelf rather than an entire wall of shelving.
The geometry should still preserve a clear load path from the outer shelf edge back toward the wall.
Use squared hardwood stock and simple joinery so the unusual positioning remains the main feature.
A black shelf with natural oak brackets can emphasize the asymmetry, while an all-oak version feels quieter.
Before building, sketch the bracket at full size to verify that the proportions look intentional rather than simply misaligned.
13. Turn Reclaimed Stair Balusters Into Shelf Supports
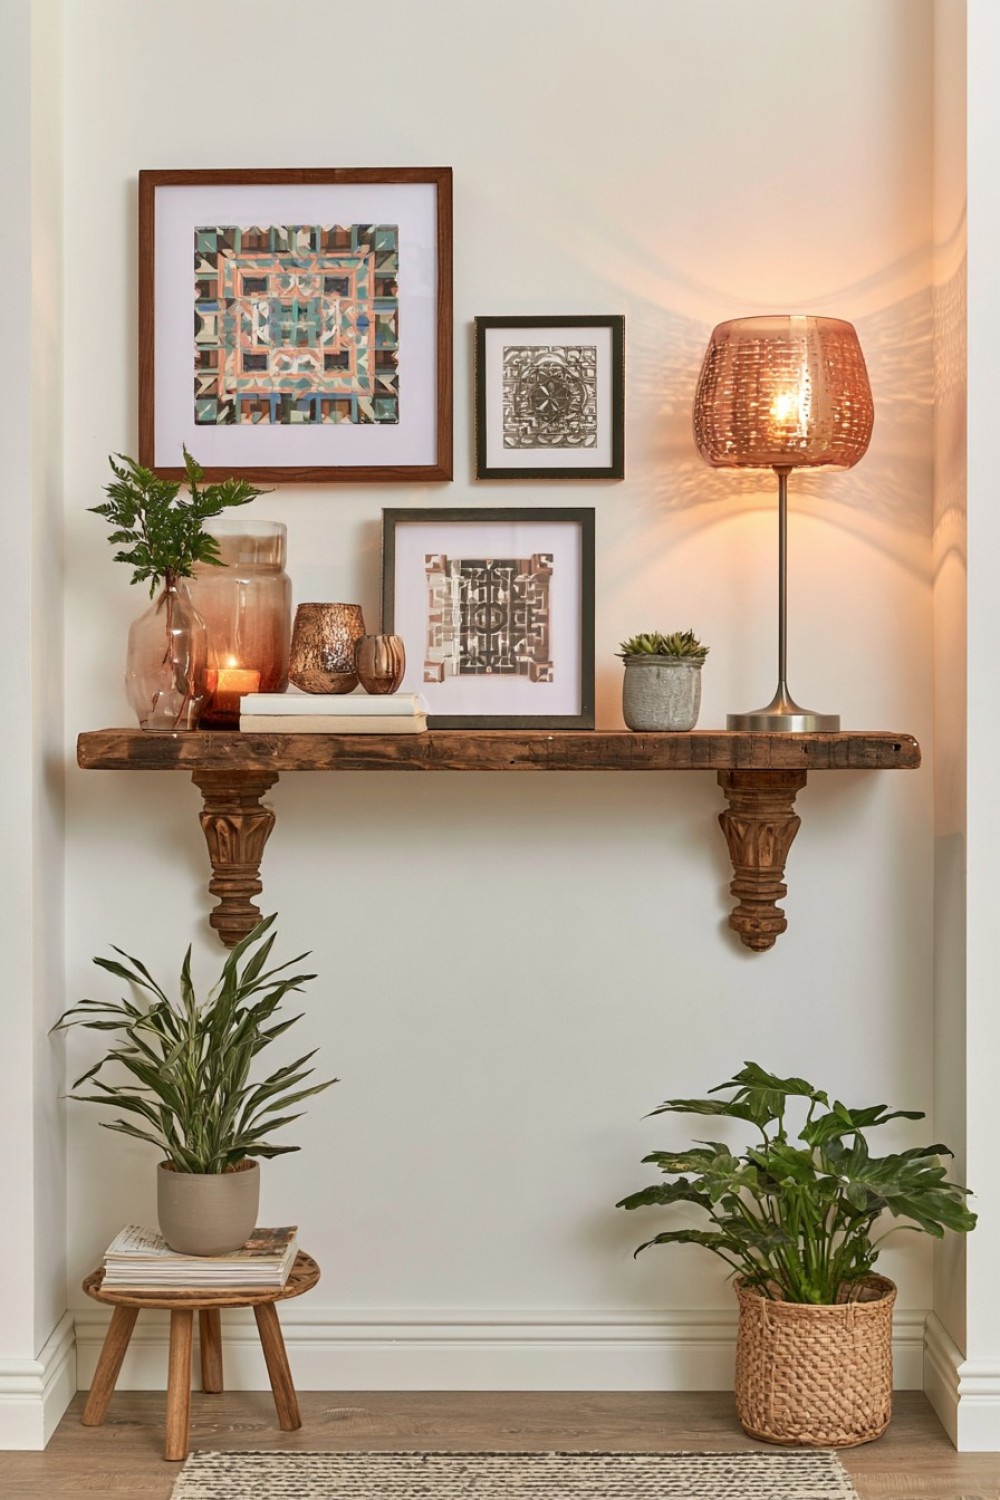
Old stair balusters can become surprisingly elegant shelf brackets when cut and reassembled.
Look for solid timber balusters with turned or fluted details. Cut each one into a shorter vertical element and pair it with a sturdy horizontal wooden support above.
The decorative baluster should not necessarily carry the entire shelf load. A concealed structural block or properly joined upper support can handle the weight while the reclaimed piece becomes the visible feature.
This approach works particularly well in vintage kitchens, cottage bathrooms, or eclectic spaces.
Strip flaky paint carefully and test old painted pieces for lead before sanding. If the original finish is safe and stable, keeping some wear can add more character than refinishing the wood completely.
Using architectural salvage this way gives the shelf a history that newly manufactured brackets often lack.
14. Make a Bracket With a Hidden Brass Inlay
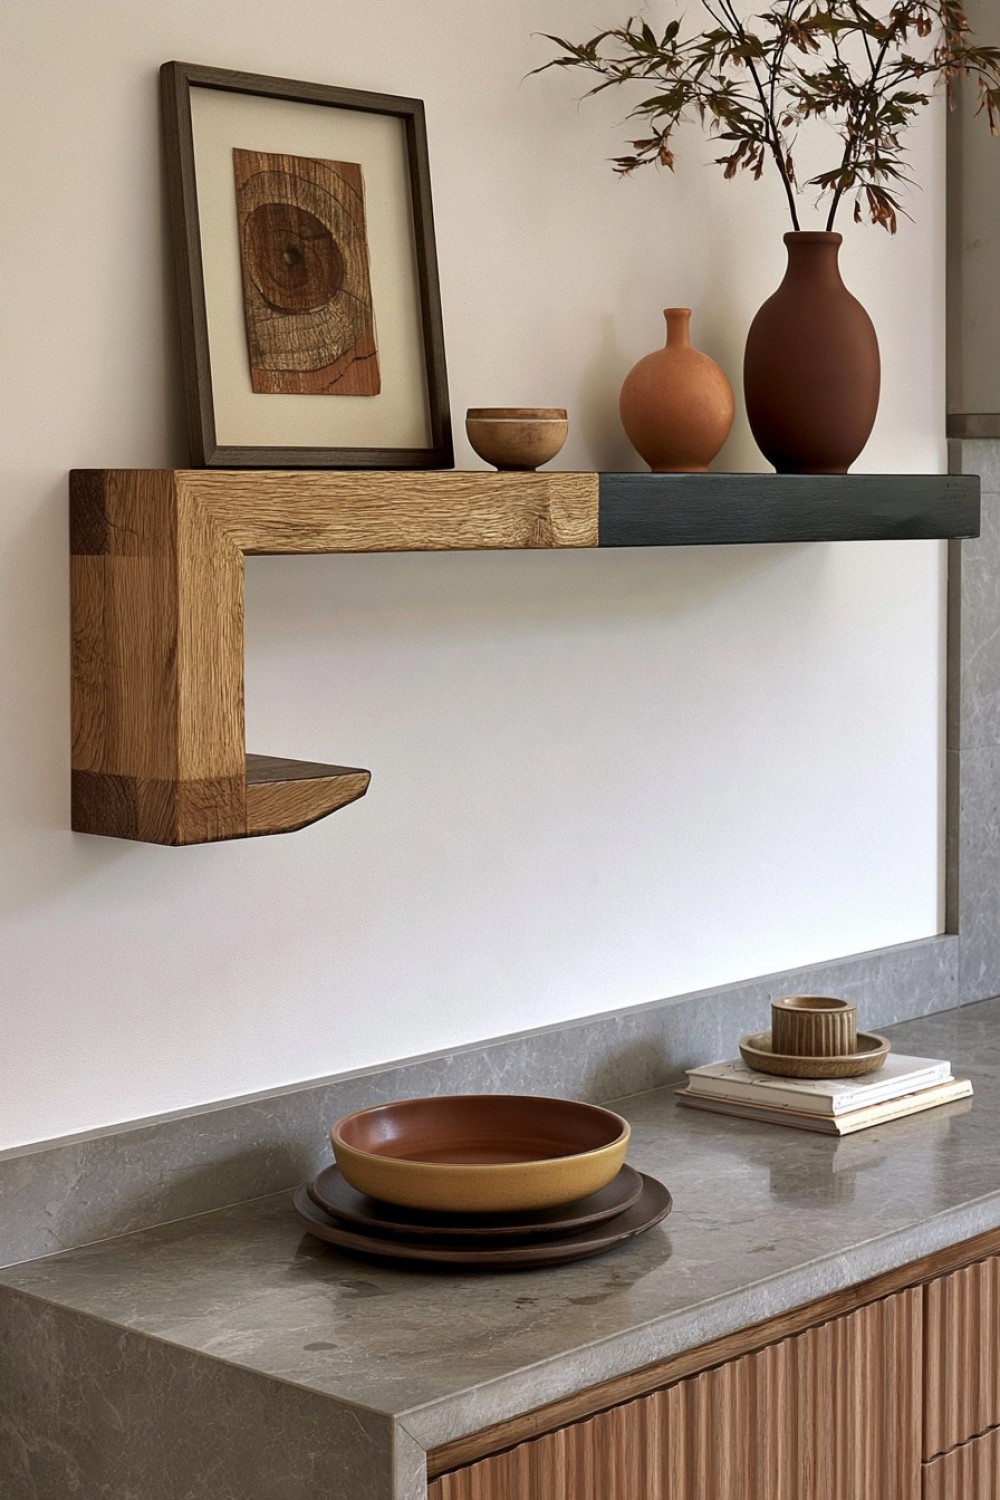
A wooden bracket can contain a metallic detail without becoming flashy.
Route a very narrow groove along the front edge or diagonal brace and insert a thin strip of brass into the channel.
Oak, walnut, and dark-stained ash all pair particularly well with aged brass.
The inlay might run the entire length of the support or appear only at one joint.
For a DIY version, use brass flat bar sized to the routed groove and secure it according to the adhesive or mechanical method appropriate for the materials. Sand and finish the surrounding wood before final polishing to avoid scratching the metal.
The brass is purely decorative and should not be expected to strengthen the bracket.
This approach works especially well in kitchens and home bars where small brass details already appear in cabinet hardware or lighting.
It gives the bracket a custom furniture feel without changing its basic structural construction.
15. Build a Bracket That Wraps Around the Shelf Edge
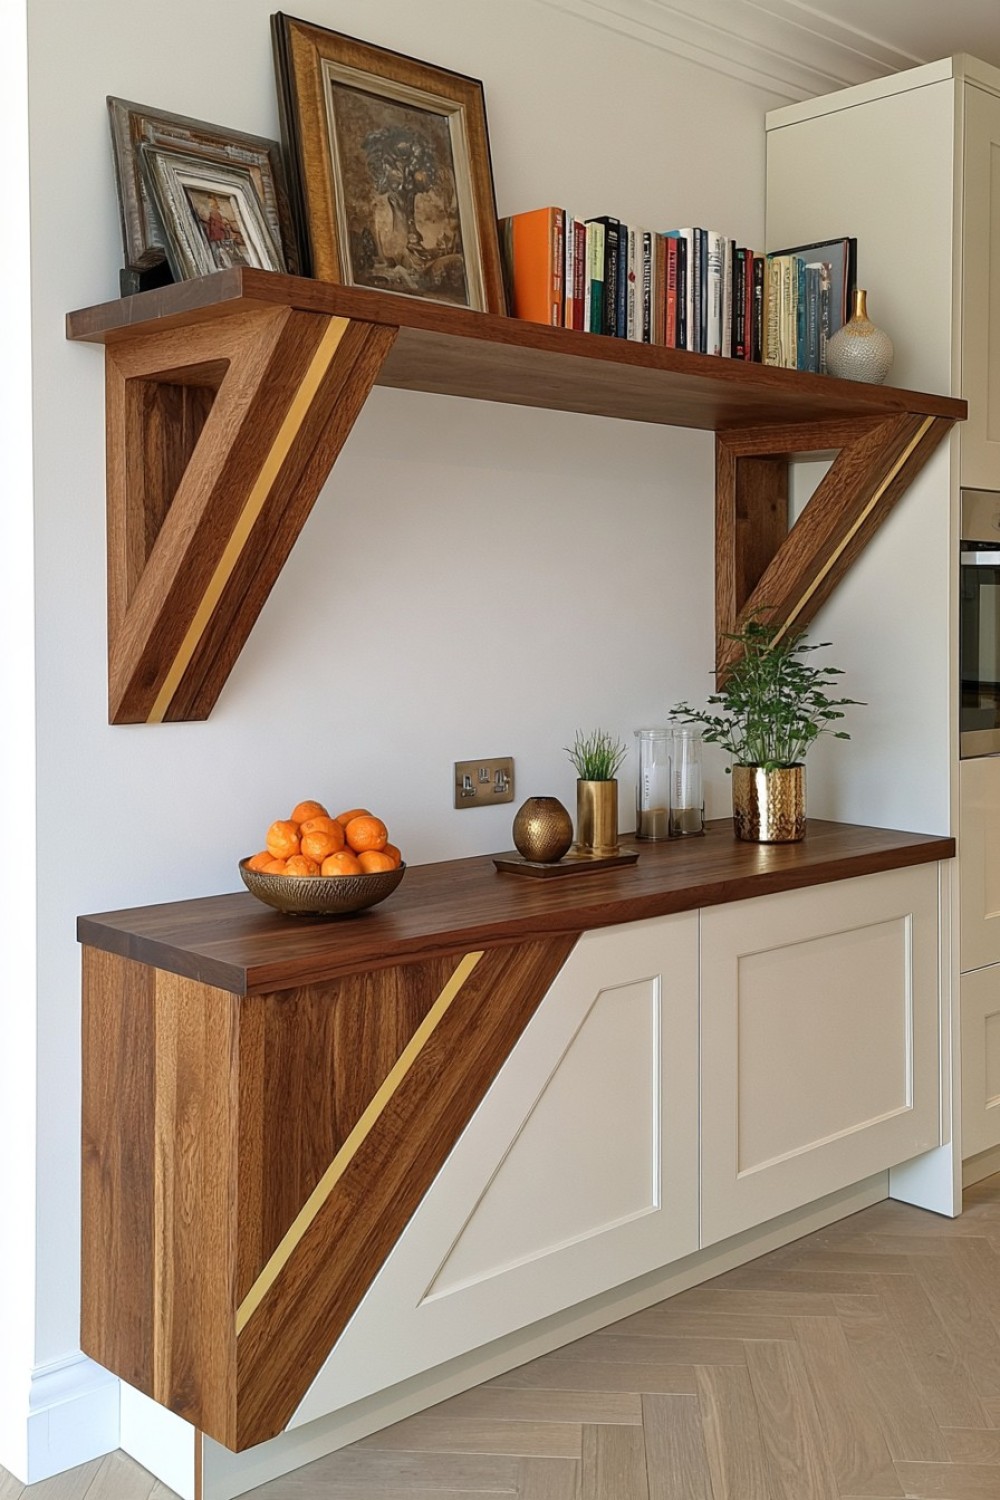
Most brackets stop beneath a shelf. Instead, extend a narrow wooden section up around the front edge.
Imagine the support as a shallow U-shaped cradle: one portion mounts to the wall, another supports the underside, and a short lip rises at the front.
The upward lip can be rounded, angled, or notched.
Besides giving the bracket an unusual silhouette, it can visually contain the shelf board and make the two pieces feel designed as one object.
This is particularly effective with contrasting materials, such as a black shelf resting inside pale oak brackets.
Keep the lip low so it does not interfere with items on the shelf.
For DIY construction, cut the cradle shape from a thick laminated blank or build it from joined components. The front lip is primarily decorative; the structural strength still comes from the horizontal support and wall connection.
16. Use Repeated Dowels Instead of One Diagonal Brace
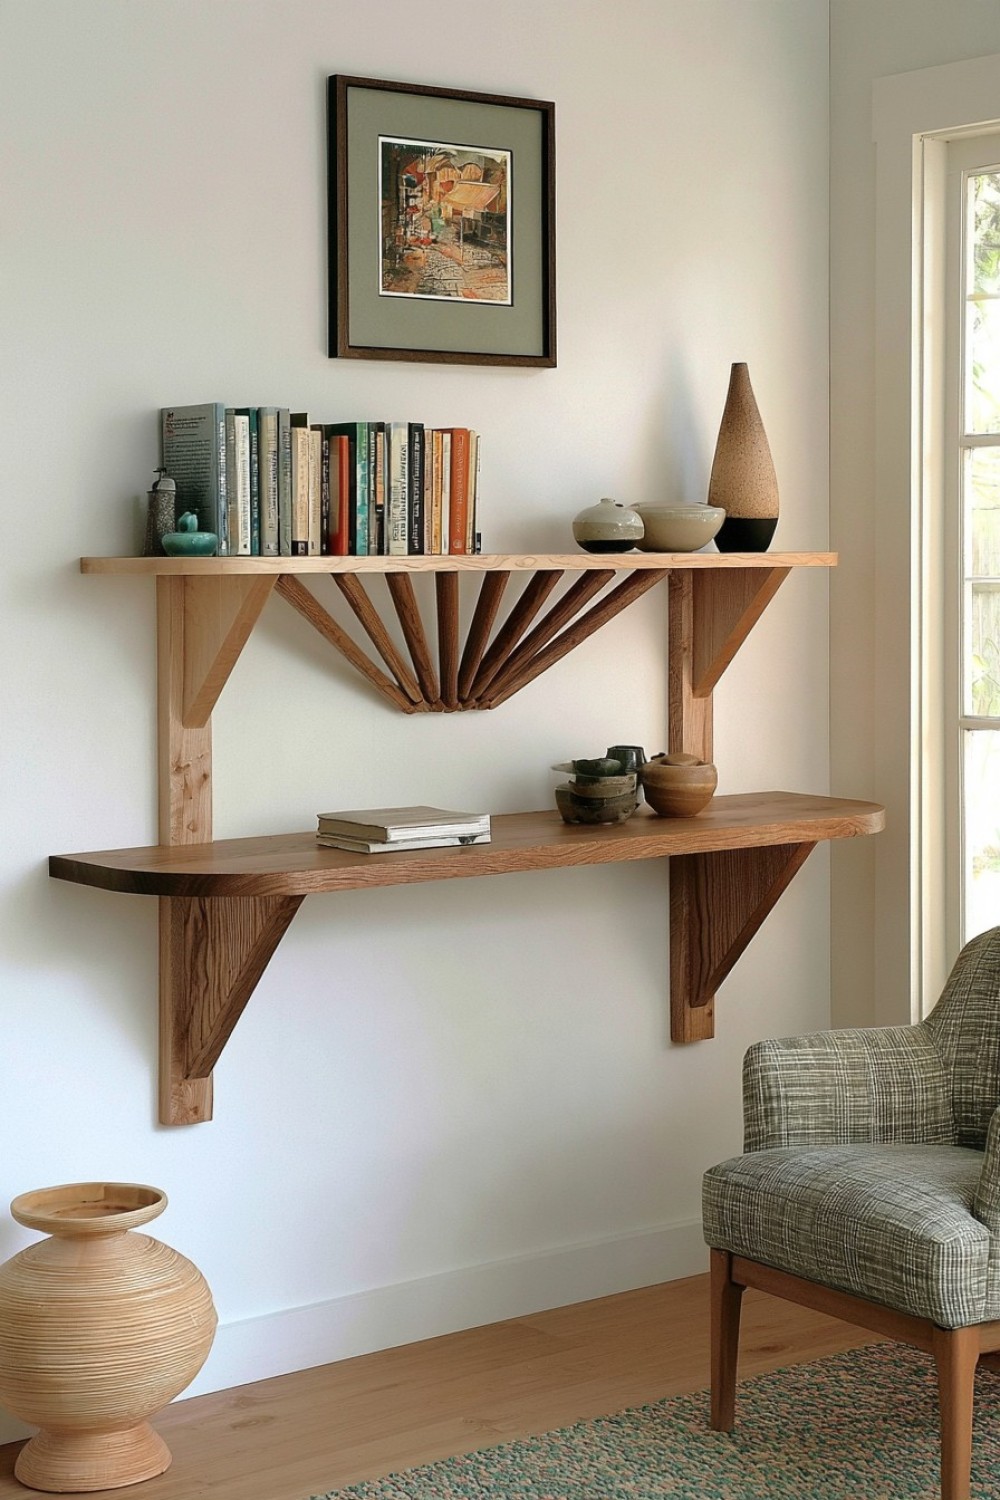
A series of wooden dowels can replace the visual bulk of a single solid diagonal.
Construct the bracket with a vertical back and horizontal shelf support, then connect them using three or four hardwood dowels at progressively different angles.
The result resembles a tiny fan or spoke structure.
Use substantial dowels and accurately drilled sockets so each member contributes to stiffness rather than merely floating decoratively.
A drill guide or doweling jig will help keep the holes consistent.
This idea works well with rounded shelves or interiors already using curved furniture because the cylindrical pieces soften the geometry.
Try matching birch dowels with birch plywood for a unified look, or use darker dowels as a contrasting graphic element.
For heavy shelving, verify the design carefully; a decorative dowel arrangement should not replace adequate structural support unless the joints and dimensions are engineered for the intended load.
17. Carve a Single Continuous Wave Through the Bracket
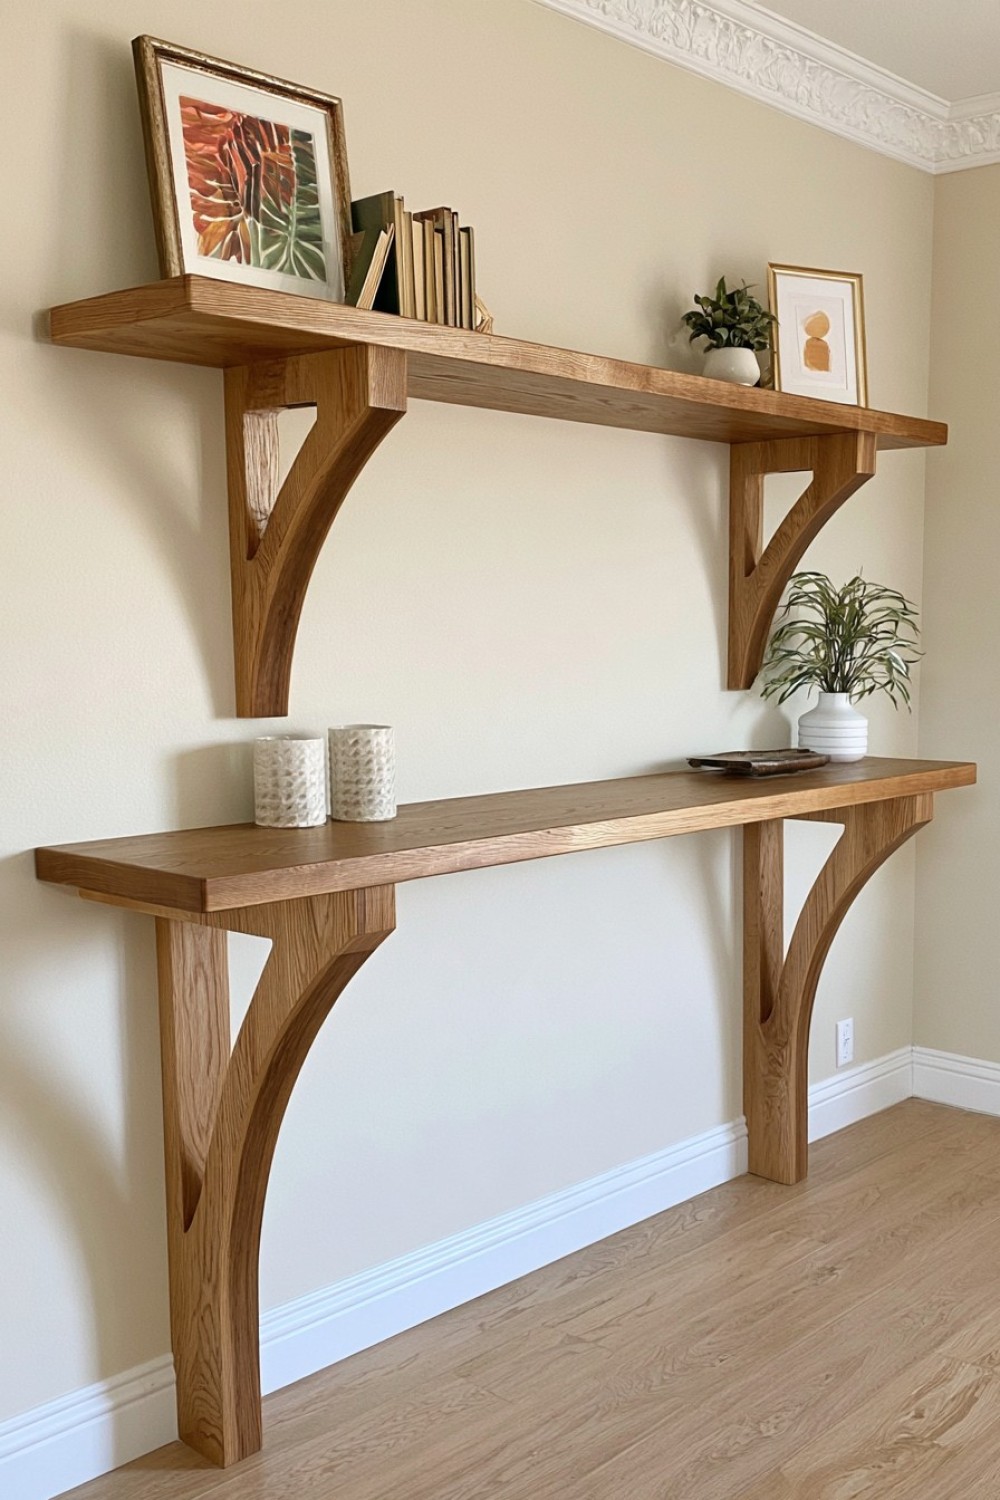
A broad wooden bracket can become almost sculptural with one uninterrupted wave cut through its center.
Start with a rectangular hardwood or laminated plywood blank. Draw a flowing S-shaped negative space that begins near the lower rear corner and moves toward the upper front area.
Cut the opening with a jigsaw or bandsaw, then smooth the curves thoroughly.
The remaining outer frame becomes the support while the interior void creates a dramatic shadow.
This works particularly well beneath one or two wide display shelves where the brackets are clearly visible.
Avoid making the narrowest portions too thin. The most attractive curve is not useful if it removes the material needed to carry the load.
A dark wall behind a pale bracket makes the cutout especially noticeable, while tone-on-tone paint creates a subtler architectural effect.
18. Incorporate a Small Rail Under the Bracket Pair
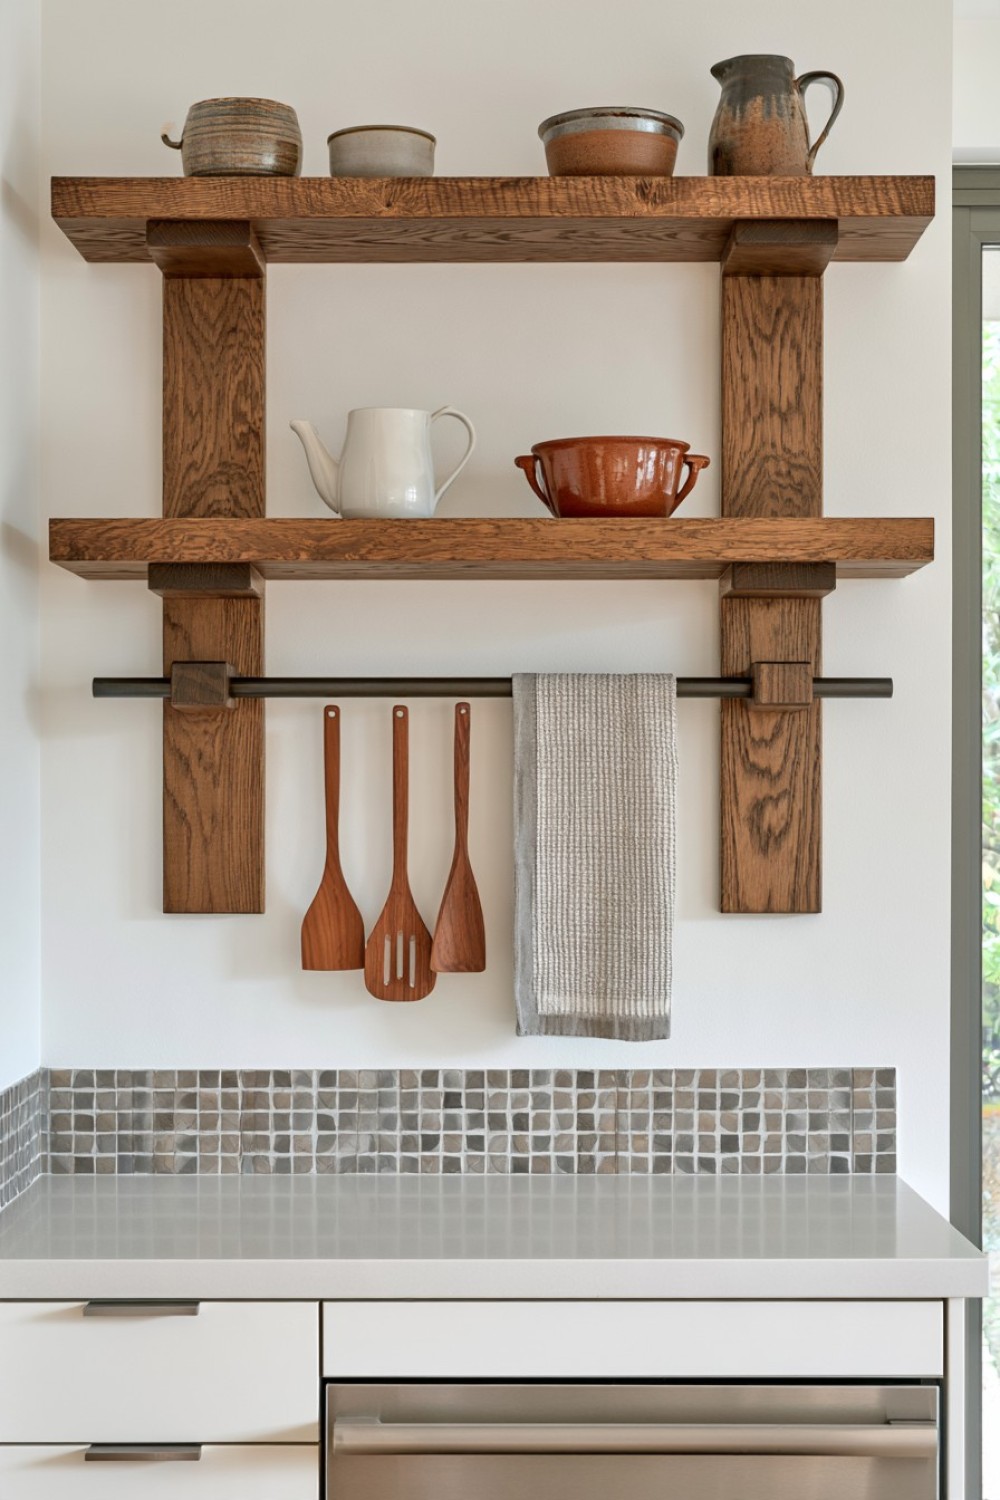
Two shelf brackets can support more than the shelf itself.
Extend the lower end of each wooden bracket slightly downward and drill aligned holes through them. Run a timber dowel or metal rod between the supports to create a hanging rail beneath the shelf.
In a kitchen, it can hold lightweight utensils or towels. In an entryway, it might carry scarves. In a craft room, it can hold rolls of ribbon.
This is particularly effective because the extra function emerges directly from the bracket geometry instead of being added as separate hardware.
For a DIY project, ensure both brackets are mounted level before fitting the rail. A removable dowel can be held in shallow sockets or secured with small end caps.
Keep the hanging load modest unless the entire bracket assembly has been designed for more substantial weight.
The combination of shelf and rail makes a compact wall area work harder without looking cluttered.
19. Design One Oversized Center Bracket as a Statement Piece
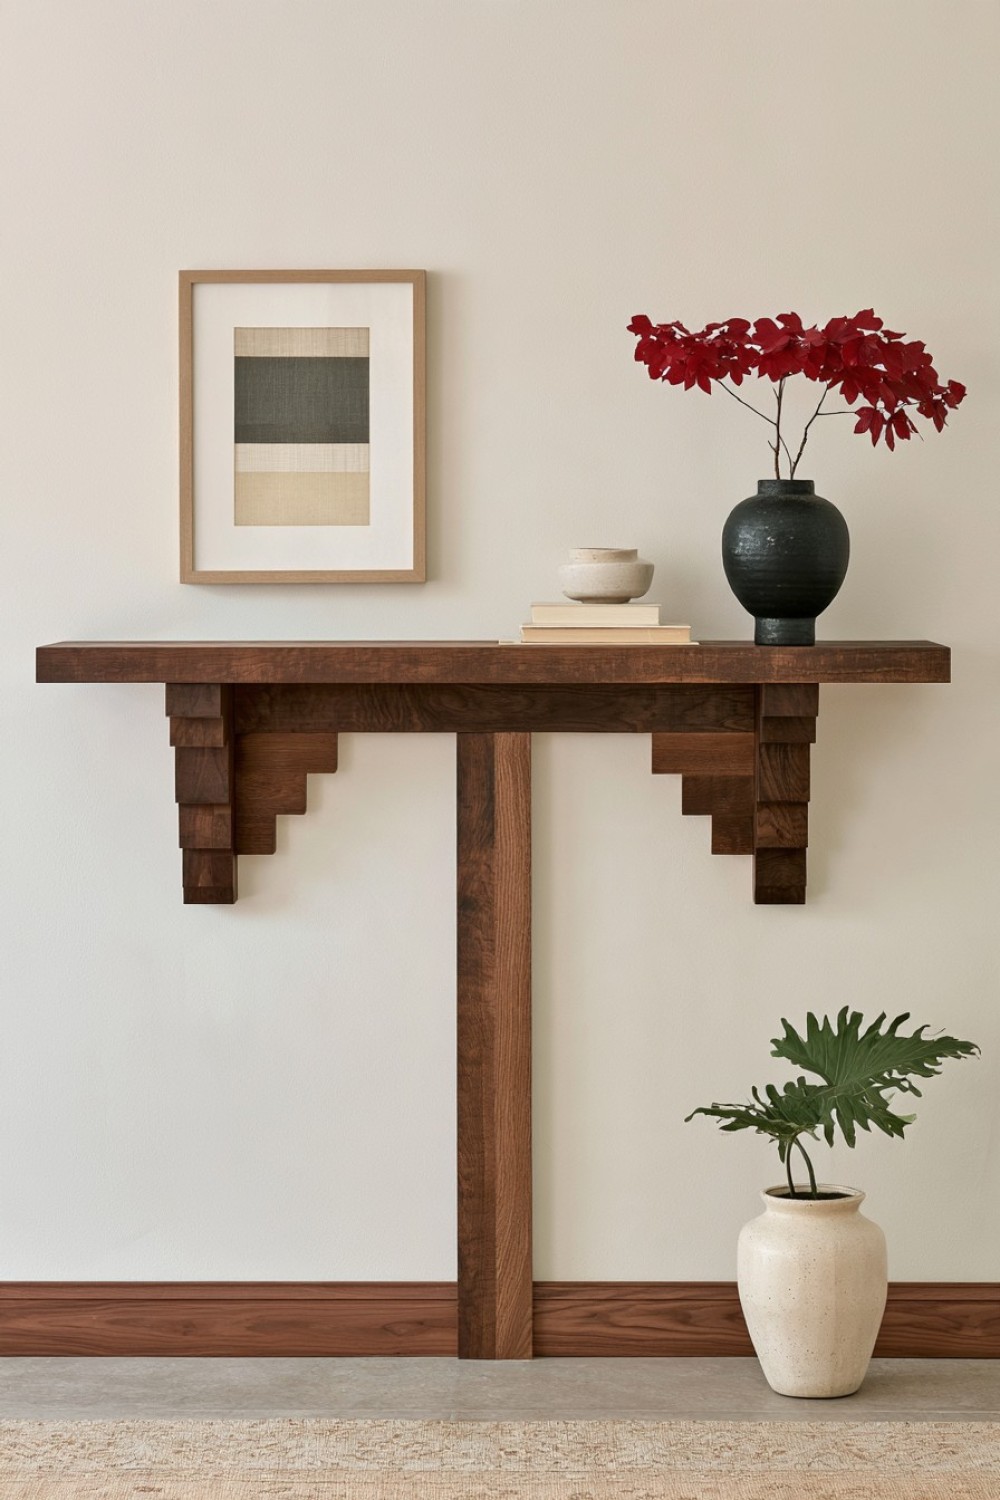
Instead of hiding several small brackets beneath a shelf, make one central support intentionally oversized.
A deep shelf can sit over a broad wooden bracket shaped like an arch, inverted trapezoid, stepped block, or abstract geometric form. Smaller concealed supports or properly rated hidden hardware can assist structurally while the central bracket becomes the visible focal point.
This gives the shelf the character of a console table attached to the wall.
The idea works especially well beneath a long entryway shelf, kitchen display ledge, or mantel-like shelf where symmetry feels natural.
Use a thicker wood species with visible grain so the large surface does not feel flat.
For an even stronger effect, position the grain vertically on the bracket while the shelf grain runs horizontally.
The visual contrast reinforces that the bracket is an intentional design object rather than merely necessary hardware.
Designing Wooden Brackets That Are Worth Seeing
A distinctive shelf bracket does not need elaborate carving. Often the strongest designs come from changing one fundamental element: the negative space, joinery, material combination, proportion, or relationship between the support and the shelf itself. A small brass inlay can refine a simple block, while stacked plywood fins or an arched cutout can turn the bracket into an architectural detail.
Before choosing the shape, consider what the shelf will actually hold. Lightweight decorative ledges allow more experimentation, whereas shelves carrying books, dishes, or cookware need substantial timber, reliable joints, and wall fixings appropriate for the wall construction. Whenever possible, fasten structural brackets into studs or other suitable structural backing rather than relying on decorative wall finishes alone.
The best bracket is therefore both visually interesting and believable as a support. When those two qualities work together, even an inexpensive shelf can feel like a custom-built part of the room.
MORE IDEAS


Share
What's Your Reaction?
 Like
0
Like
0
 Dislike
0
Dislike
0
 Love
0
Love
0
 Funny
0
Funny
0
 Angry
0
Angry
0
 Sad
0
Sad
0
 Wow
0
Wow
0