14 Cinder Block Furniture Projects for Home

Cinder blocks offer an affordable foundation for furniture that feels modern, practical, and customizable. Their hollow openings provide instant storage, while their weight creates stable bases for wood, glass, or concrete surfaces. Before building, wash every block, smooth rough edges, and check for cracks that could weaken the structure. Indoor projects need felt pads or plywood underneath to protect flooring, whereas outdoor pieces benefit from masonry sealer and weather resistant lumber. Paint can soften the industrial appearance, and cushions introduce comfort. These creative projects explain how to assemble, decorate, and adapt cinder block furniture for different spaces and needs safely.
1. Build a Garden Bench with Planter Ends
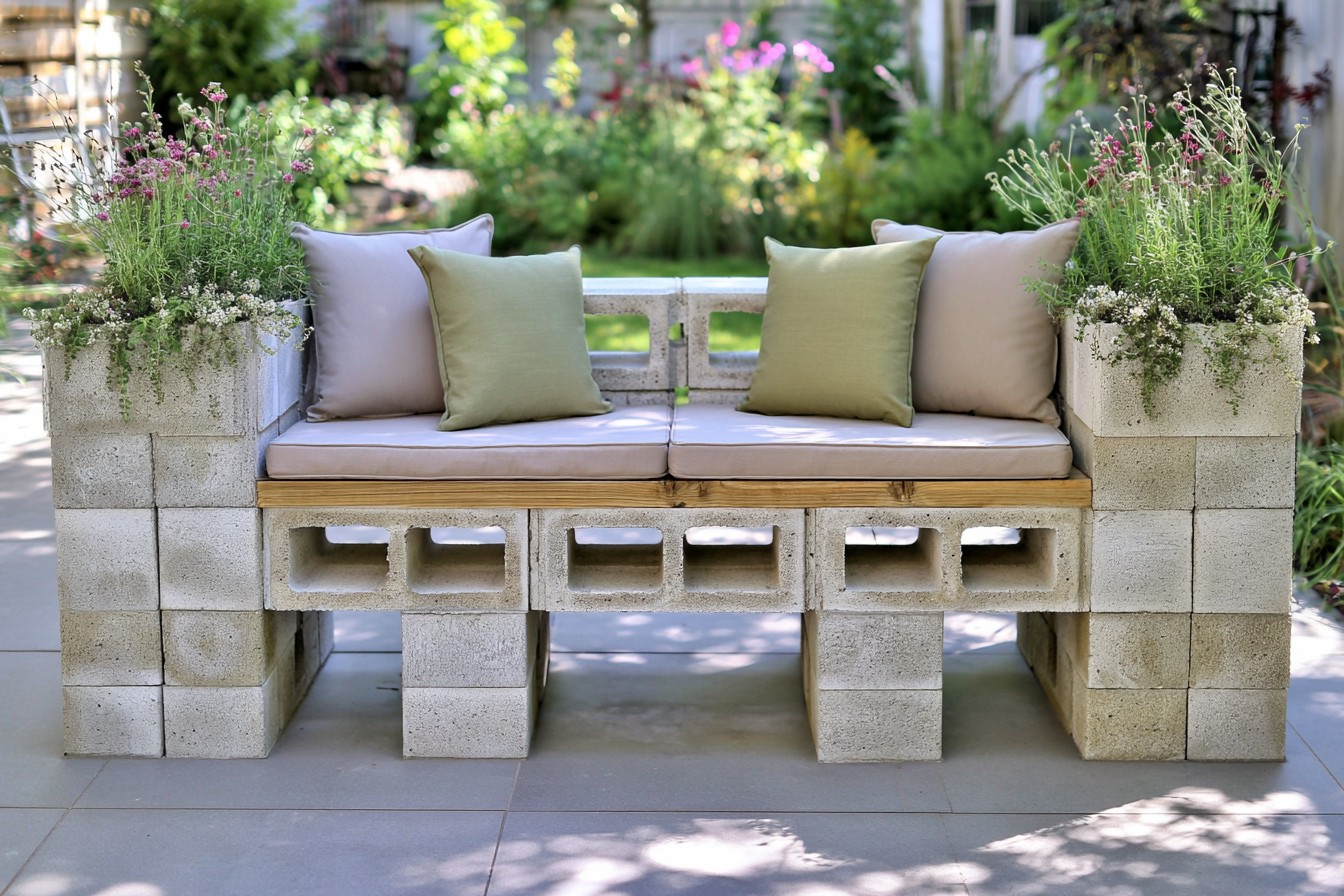
Create a garden bench by stacking two block columns and sliding sealed timber beams through the openings. Begin on a level paved surface so the seat cannot rock or settle unevenly. Bond the blocks with exterior construction adhesive, then sand and coat the beams with weather resistant stain. Turn one outward facing opening at each end upward and insert fitted nursery pots for herbs or trailing flowers. Add a removable outdoor cushion in a color that complements containers. Wider armrests can be made from reclaimed boards. Keep the structure away from unstable soil and confirm every beam supports seated weight.
2. Style a Low Coffee Table with Hidden Storage
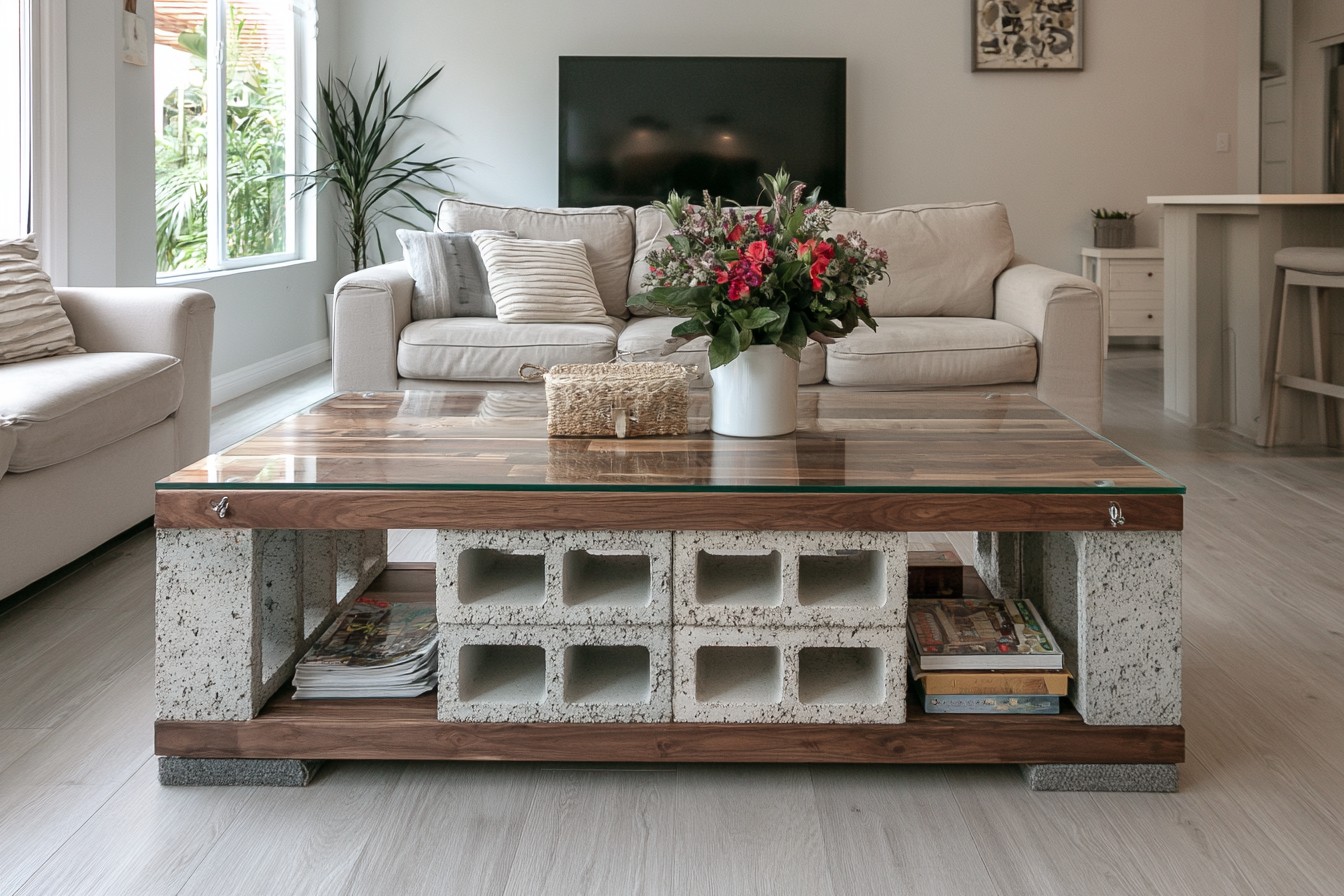
Arrange four cinder blocks in a rectangle to form a low coffee table with interior cubbies. Place the hollow sides outward, secure touching surfaces with masonry adhesive, and attach felt beneath the base if the table will stand indoors. Top the structure with thick reclaimed wood or finished tempered glass, using bumpers to prevent movement. Store magazines, baskets, or board games inside the openings. For a softer appearance, paint the blocks warm white and stain the timber walnut. Casters mounted to a reinforced plywood platform offer mobility, although locking wheels are essential to keep this table safely stationary during use.
3. Assemble an Airy Record Player Console
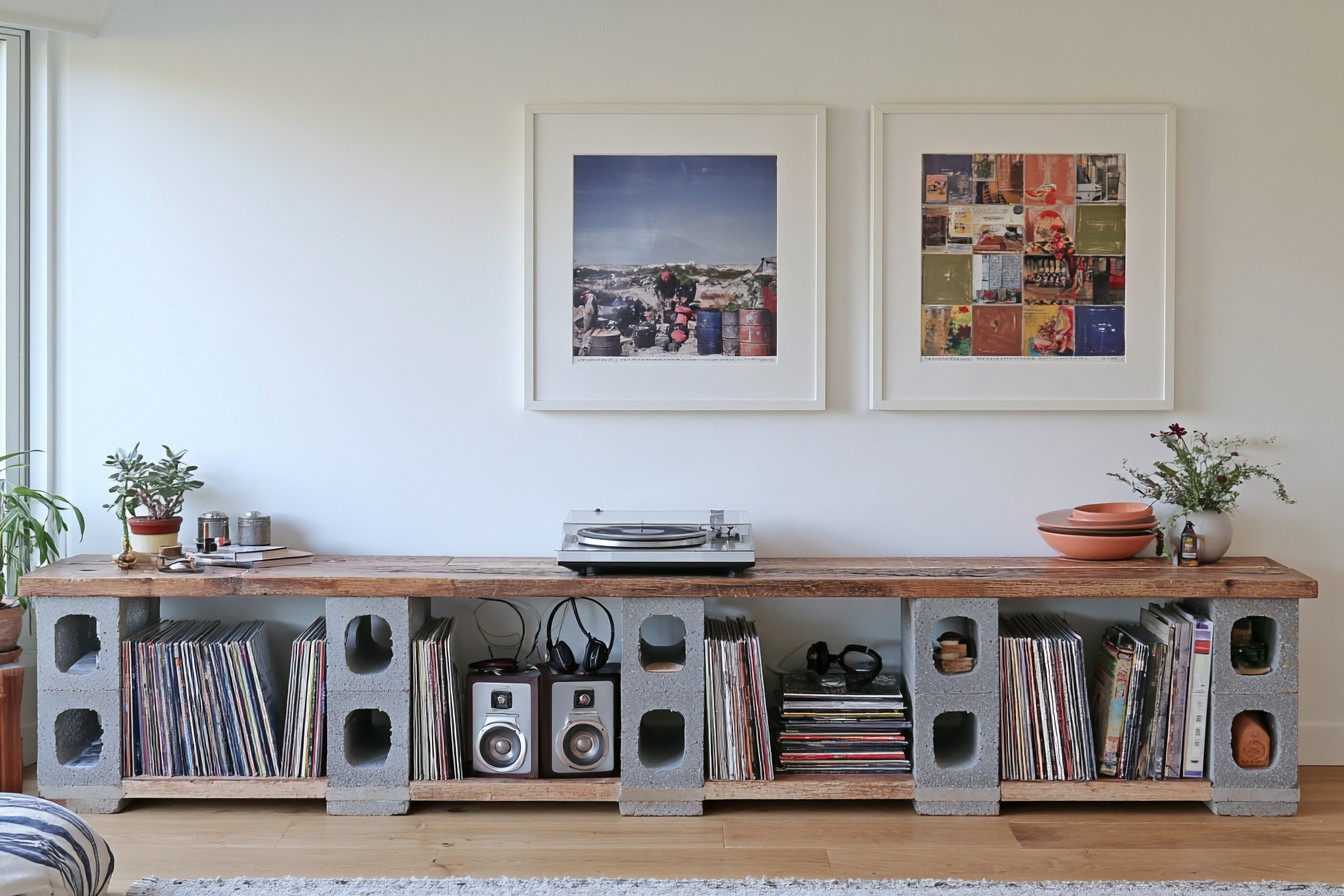
Build a media console by alternating cinder blocks with wooden shelves sized for records and audio equipment. Position two blocks beneath each shelf, keeping every support aligned from top to bottom. Seal dusty masonry, finish the boards, and add cork pads wherever wood meets concrete. The hollow openings can organize headphones, cables, or speakers, while album baskets fit between supports. Paint only selected blocks in muted terracotta or olive for an intentional color rhythm. Leave ventilation space around electronics and route cords through adhesive clips behind the unit. Anchor taller versions to the wall in homes with children or pets.
4. Create a Minimal Home Office Desk
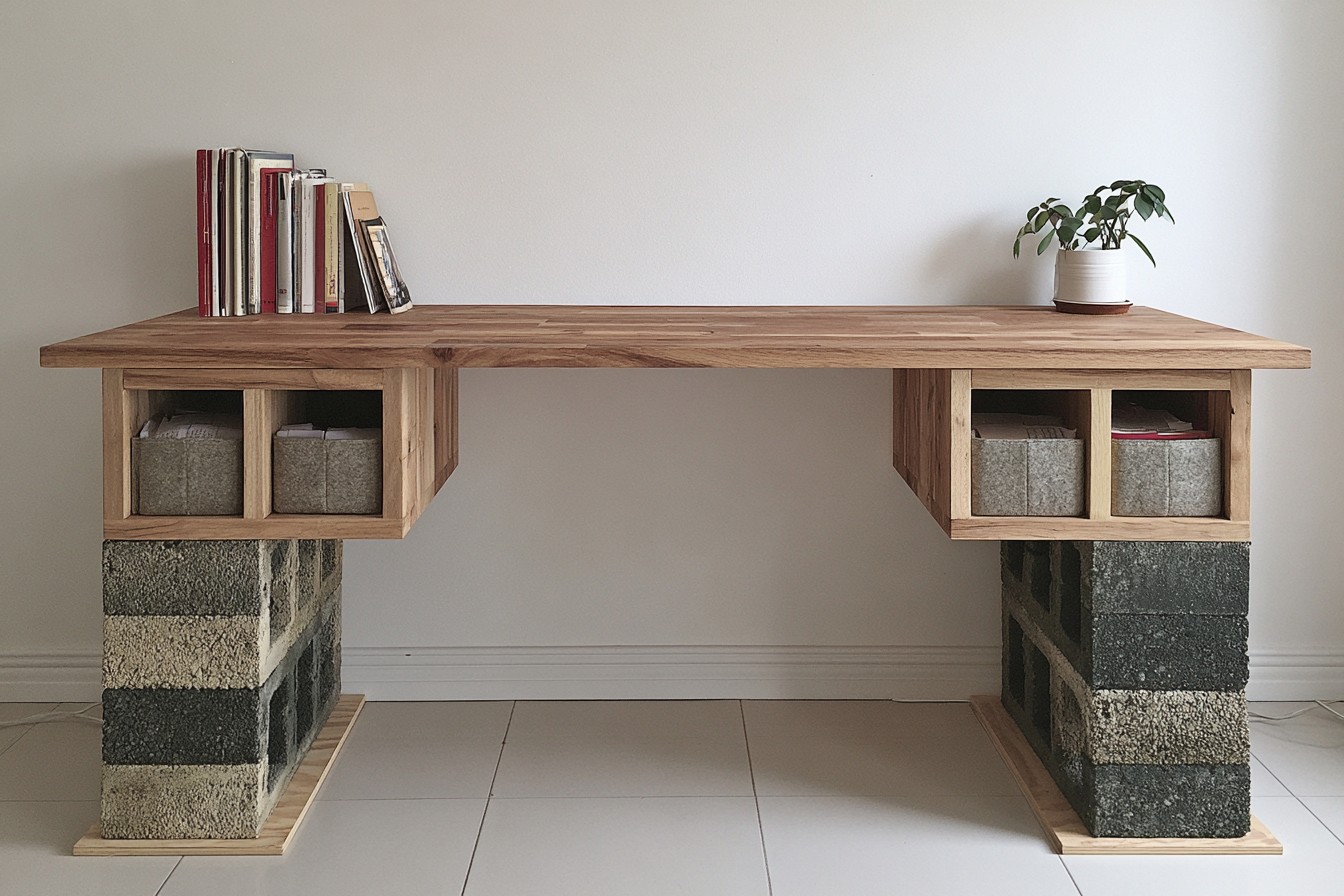
Two pairs of cinder blocks can support a desktop without complicated carpentry. Stack each pair on a plywood pad, place them at a suitable width, and secure the layers with masonry adhesive. Add a smooth wood top deep enough for a monitor and writing space, fastening it with brackets where possible. Face the openings forward to hold notebooks, charging supplies, or fitted fabric bins. Natural concrete looks crisp beside pale timber, while matte charcoal paint creates a dramatic studio mood. Check desk height before bonding anything, manage cables along the underside, and avoid leaning body weight on unsupported tabletop corners.
5. Turn Two Blocks into a Sculptural Nightstand
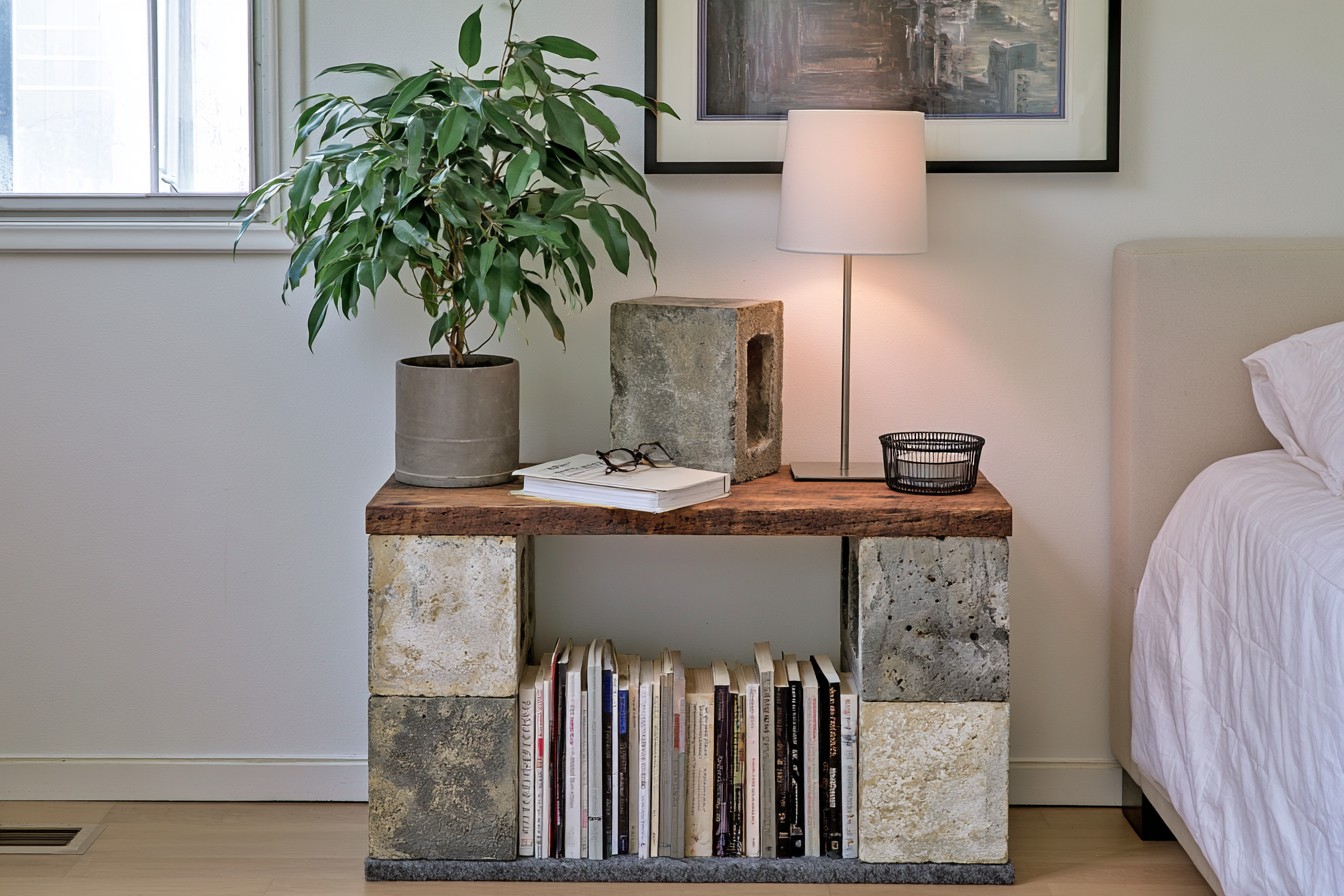
For a bedside table, stack two cinder blocks with their openings facing in opposite directions. Set the lower block horizontally for accessible book storage and rotate the upper block to create a sculptural silhouette. Join them with strong masonry adhesive and place a felt covered board underneath to prevent scratches. A small reclaimed wood topper provides a surface for items. Limewash the concrete for texture, paint one geometric section, or leave it raw for minimalist rooms. Add a shallow basket inside one cubby to contain chargers. Keep the unit clear of walkways because its corners can be unforgiving at night.
6. Design a Modular Bookshelf for Flexible Rooms
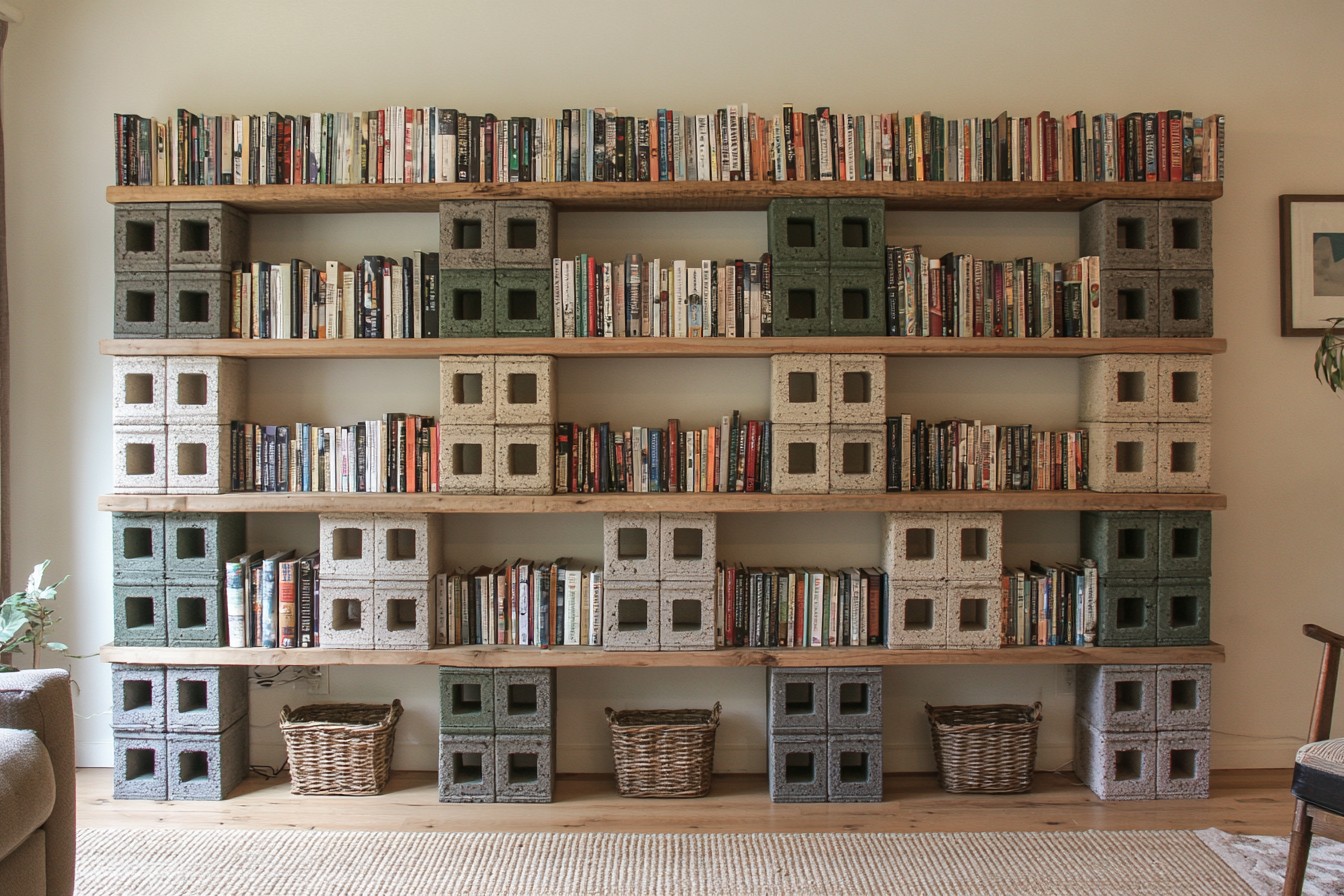
Construct a bookshelf by placing sealed boards across spaced pairs of cinder blocks. Start with the widest shelf at the bottom, verify that the floor is level, and keep the block openings facing forward for storage. Use nonslip pads between materials, secure the boards, and anchor the unit to wall studs. Alternate block positions on each level to create visual movement without compromising alignment. Paint the masonry one color and leave reclaimed boards natural for contrast. Baskets can hide small items, while books should remain near supports. Limit the height in rentals or rearrange the components as storage needs change.
7. Make a Cushioned Entryway Shoe Bench
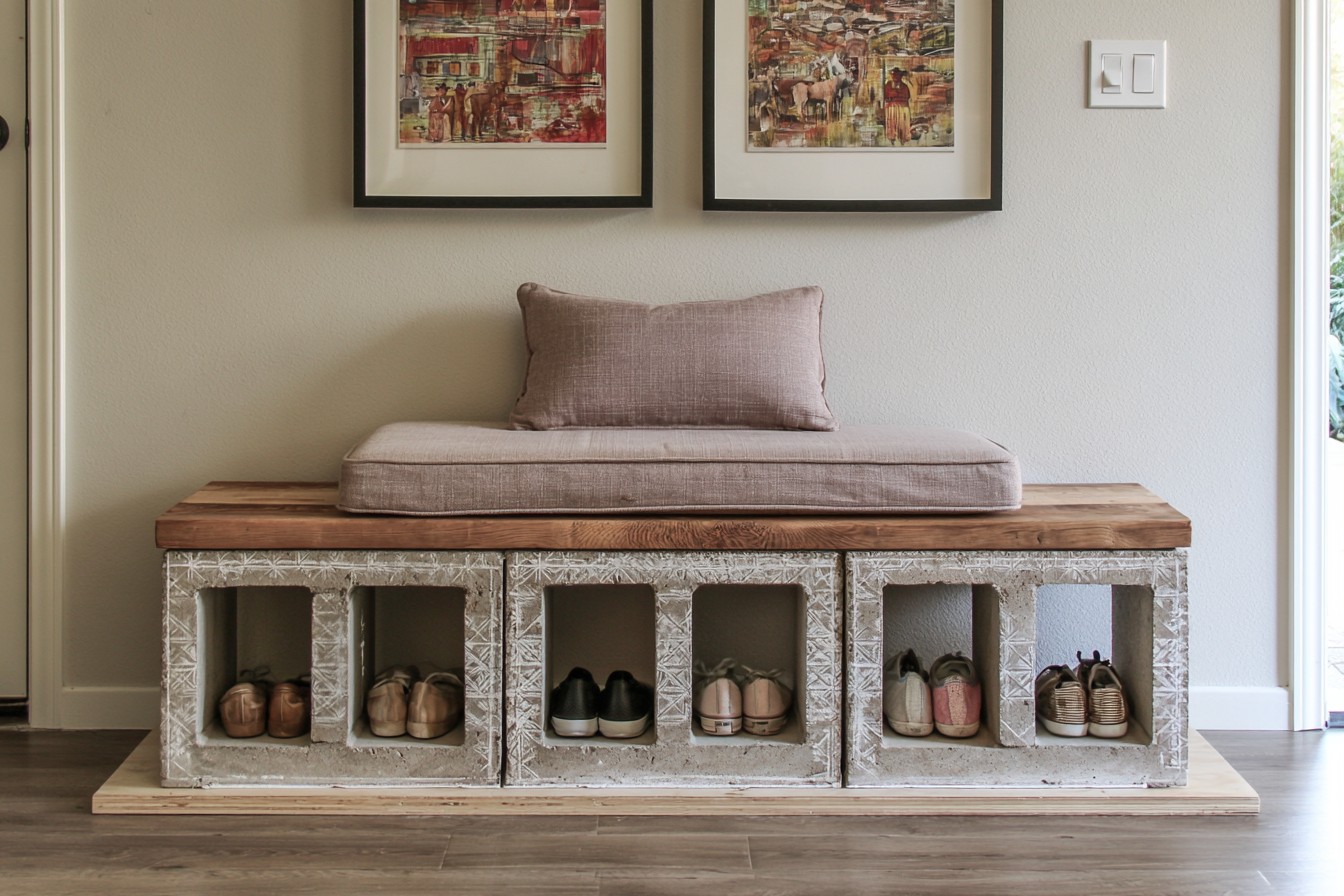
Combine footwear storage and seating with a cinder block bench designed for the entryway. Set three blocks side by side on a plywood base, keeping their openings forward as shoe cubbies. Bond the blocks together, then attach a timber seat that extends slightly beyond both ends. Make a tailored cushion from upholstery fabric and high density foam, adding ties beneath for easy cleaning. Paint the blocks the same shade as the wall to reduce visual heaviness, or stencil geometric details around the openings. Confirm the assembly cannot slide, soften exposed corners, and reserve the cubbies for lightweight everyday shoes only.
8. Construct a Patio Bar with a Timber Counter
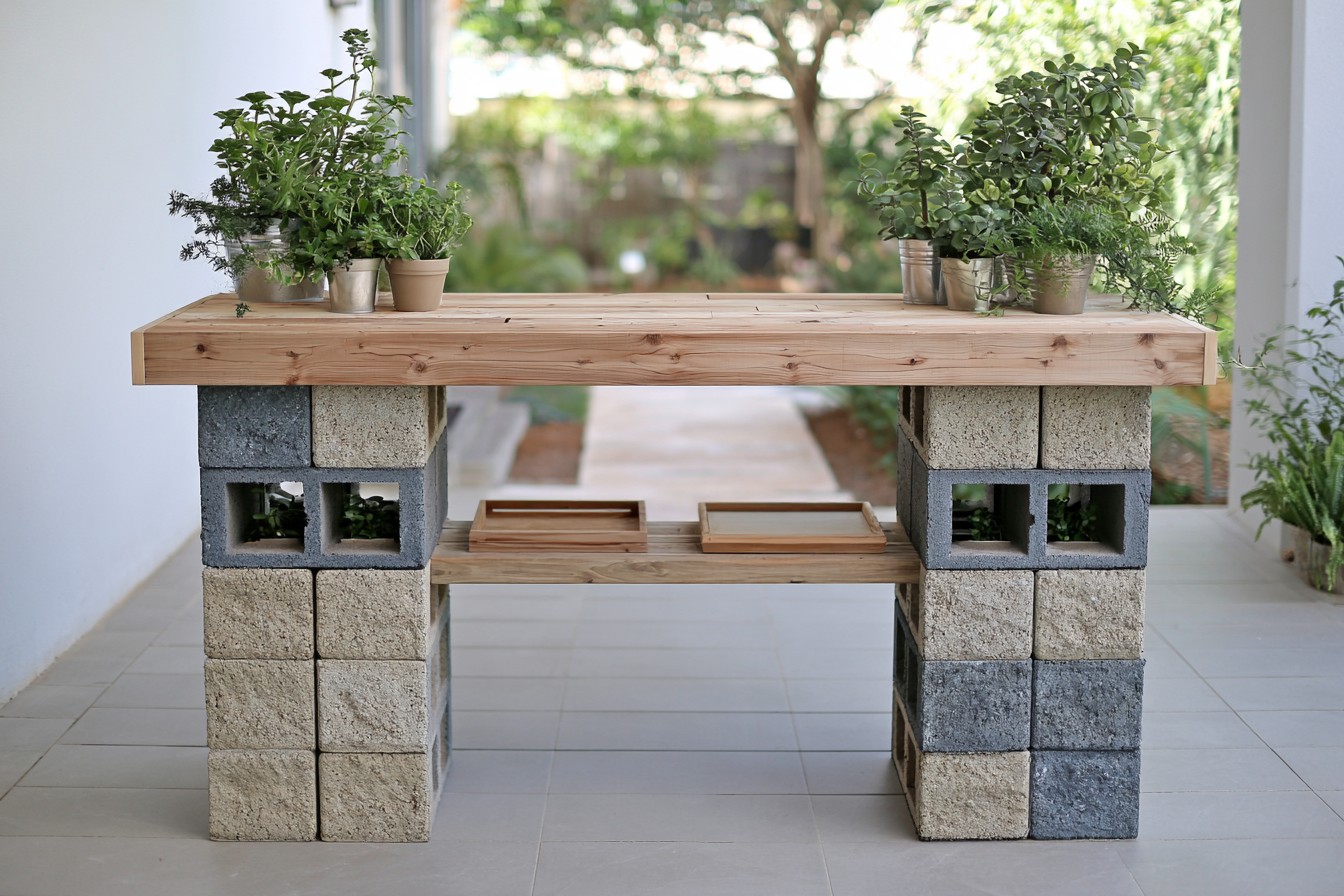
Create an outdoor serving bar by building two block piers and bridging them with a butcher block or exterior grade timber counter. Dry fit the arrangement, checking height, legroom, and stability before applying masonry adhesive. Add a lower wooden shelf between the supports for trays and serving pieces. Paint the blocks sandy beige for a relaxed patio scheme, or use charcoal beside warm cedar. Small fitted pots can occupy openings and soften the concrete. Protect the countertop with food safe outdoor finish, cover the bar during weather, and consult a professional if the design requires plumbing, electricity, or permanent construction.
9. Shape an Outdoor Sofa for a Corner Patio
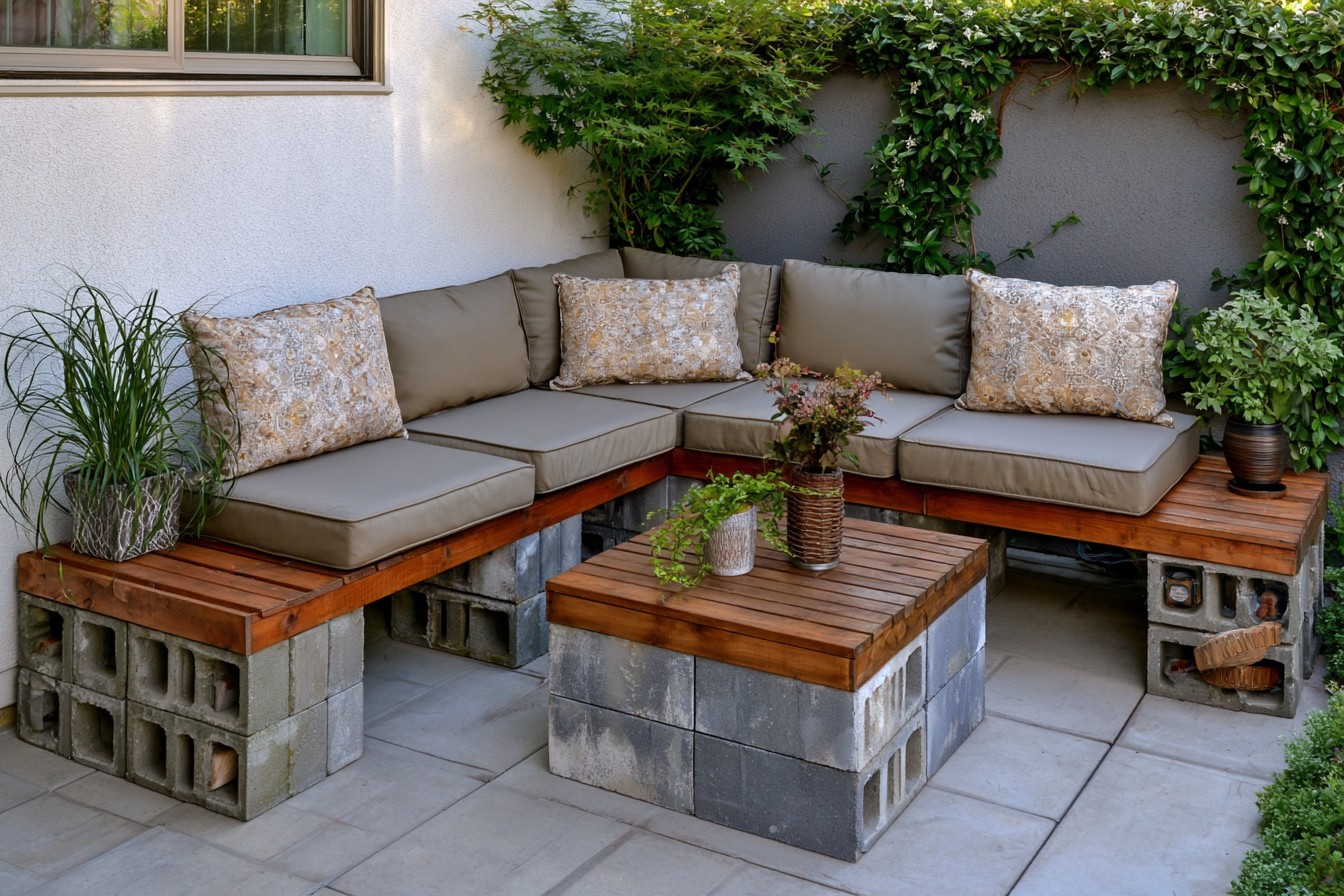
An L shaped sofa can define a patio corner using cinder block bases and wooden seat platforms. Map the footprint with tape, level the ground, and build bonded piers beneath platform joints. Secure plywood or slatted timber across the supports, ensuring no edge remains unsupported. Add outdoor cushions with removable covers. Paint the blocks a color that connects with paving, then decorate with patterned cushions for contrast. Open block cells at the ends can hold removable planters or rolled throws in baskets. Recheck joints seasonally, store textiles when wet, and never build over shifting soil or decking with uncertain capacity.
10. Elevate Plants on a Stepped Display Stand
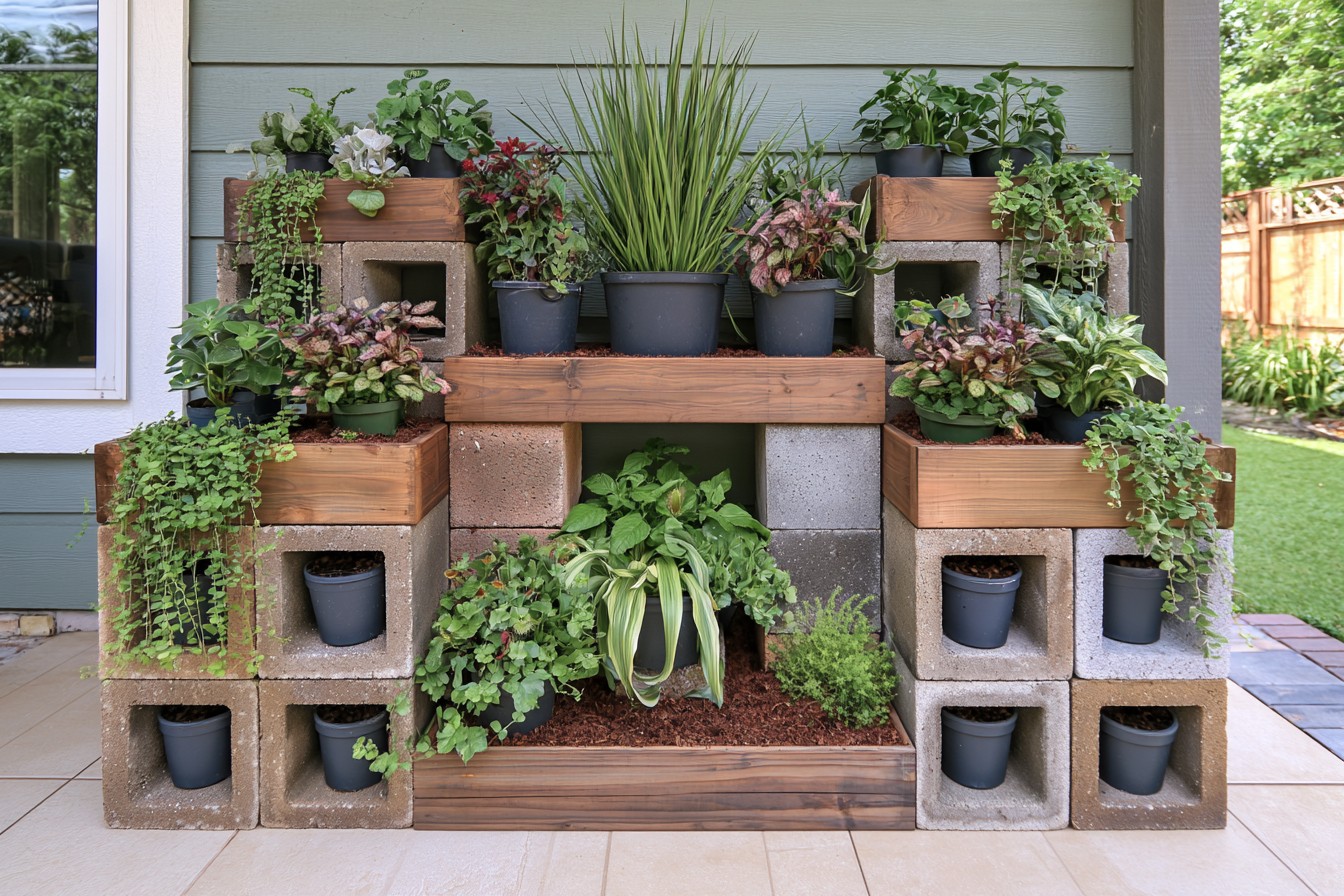
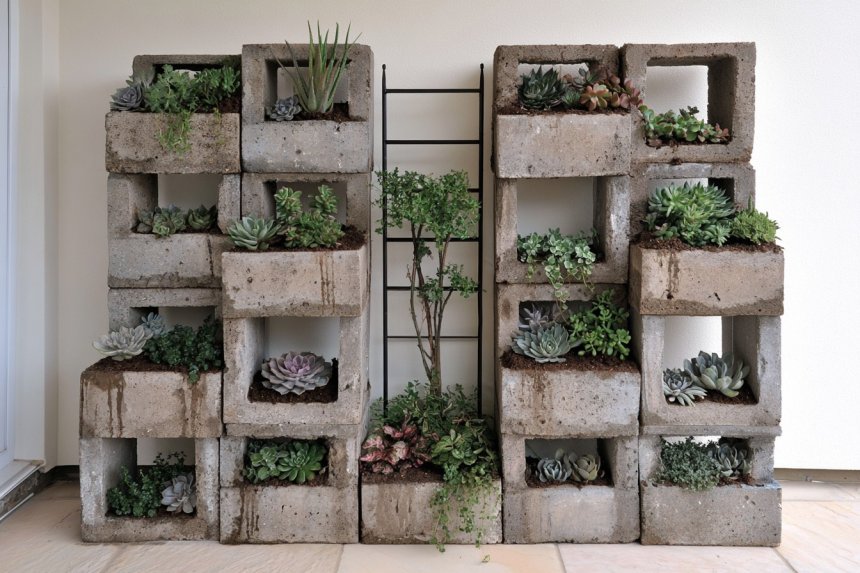
Turn blocks into a stepped plant stand that also acts as sculptural furniture. Arrange the blocks on the lowest level, rotate openings upward, and test the composition before bonding it. Insert nursery pots rather than filling block cavities directly, allowing plants to be removed for watering. Bridge some sections with cedar planks to create broader platforms for larger containers. An earthy paint color unifies mixed block finishes, while natural wood adds warmth. Position trailing plants near outer edges and upright varieties toward the back. Protect floors from moisture, distribute weight evenly, and anchor tall arrangements that could become top heavy.
11. Craft a Narrow Console for Empty Walls
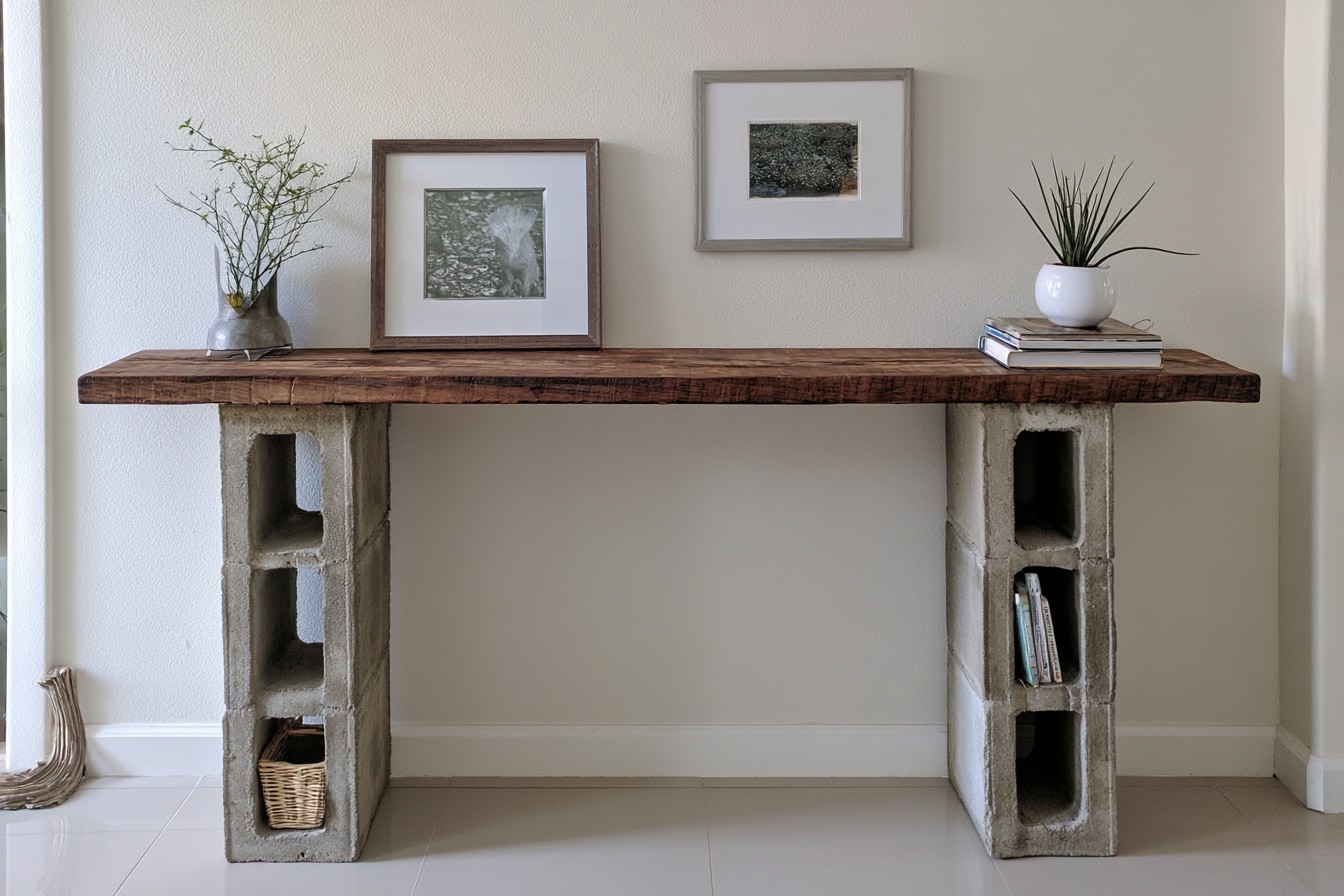
Fill a hallway or room wall with a slim console made from paired cinder block supports and a reclaimed board. Measure circulation space carefully, keeping enough room for doors and people to pass comfortably. Place blocks vertically on felt pads, secure them, and fasten the tabletop to hidden brackets or a backing rail. The open cells can display baskets or stacked books without crowding the surface. Paint the blocks in a tone close to the wall for a built in effect, then finish the wood with contrasting oil. Anchor the console, especially when decorating it with heavier objects or pottery.
12. Build a Balcony Breakfast Counter
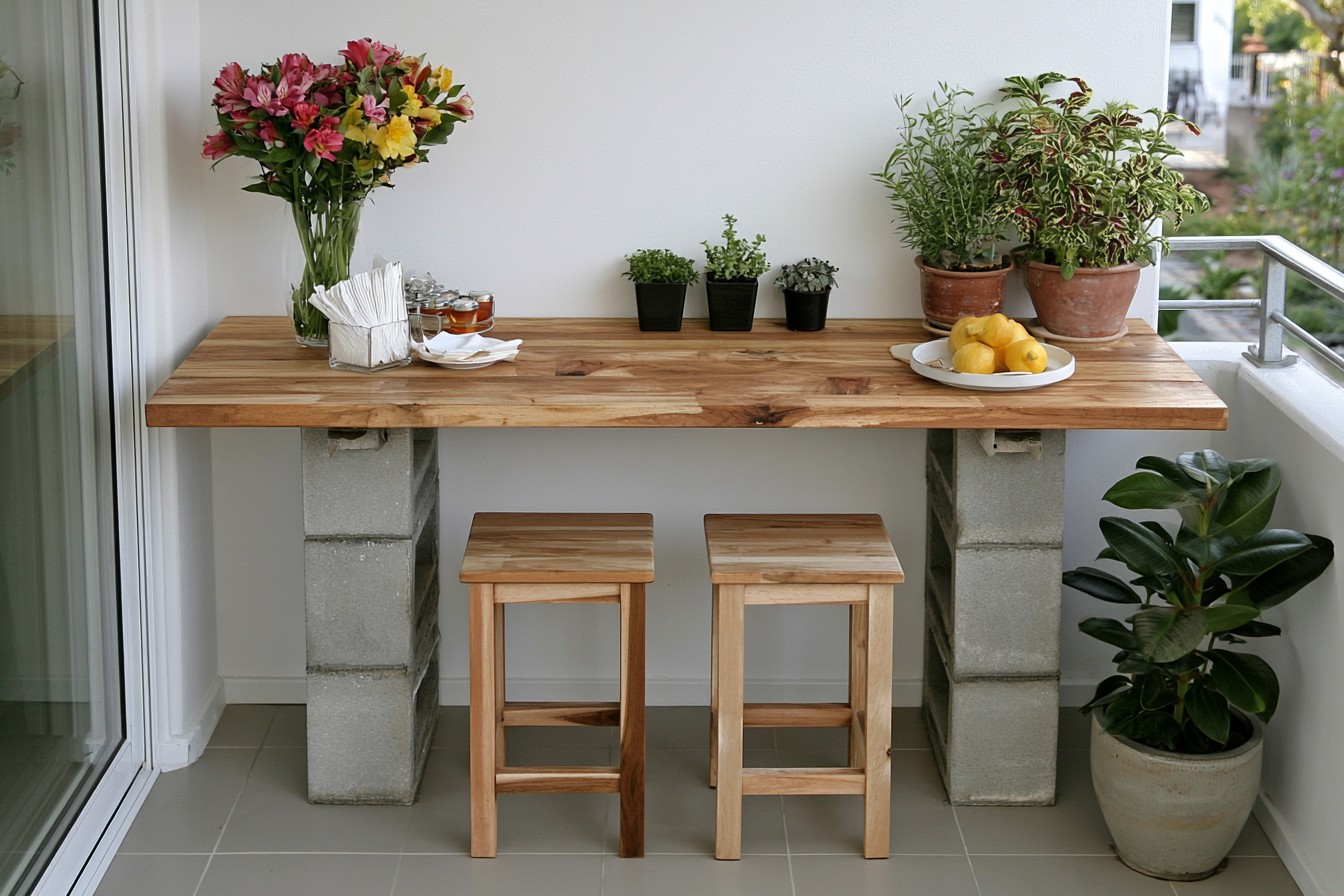
Make a compact breakfast counter for a balcony using two cinder block columns and a weatherproof wooden top. Confirm building rules and the balcony load limit before bringing heavy masonry outdoors. Position the columns against a solid wall, level them with shims, and bond the blocks securely. Choose a shallow counter depth that preserves circulation, then attach the board with brackets. Paint the blocks to match the facade or seal their gray finish. Add two stools and use the open cells for napkins or small planters. Keep drainage paths clear and protect the entire piece during freezing or stormy weather.
13. Organize Supplies with a Craft Room Worktable
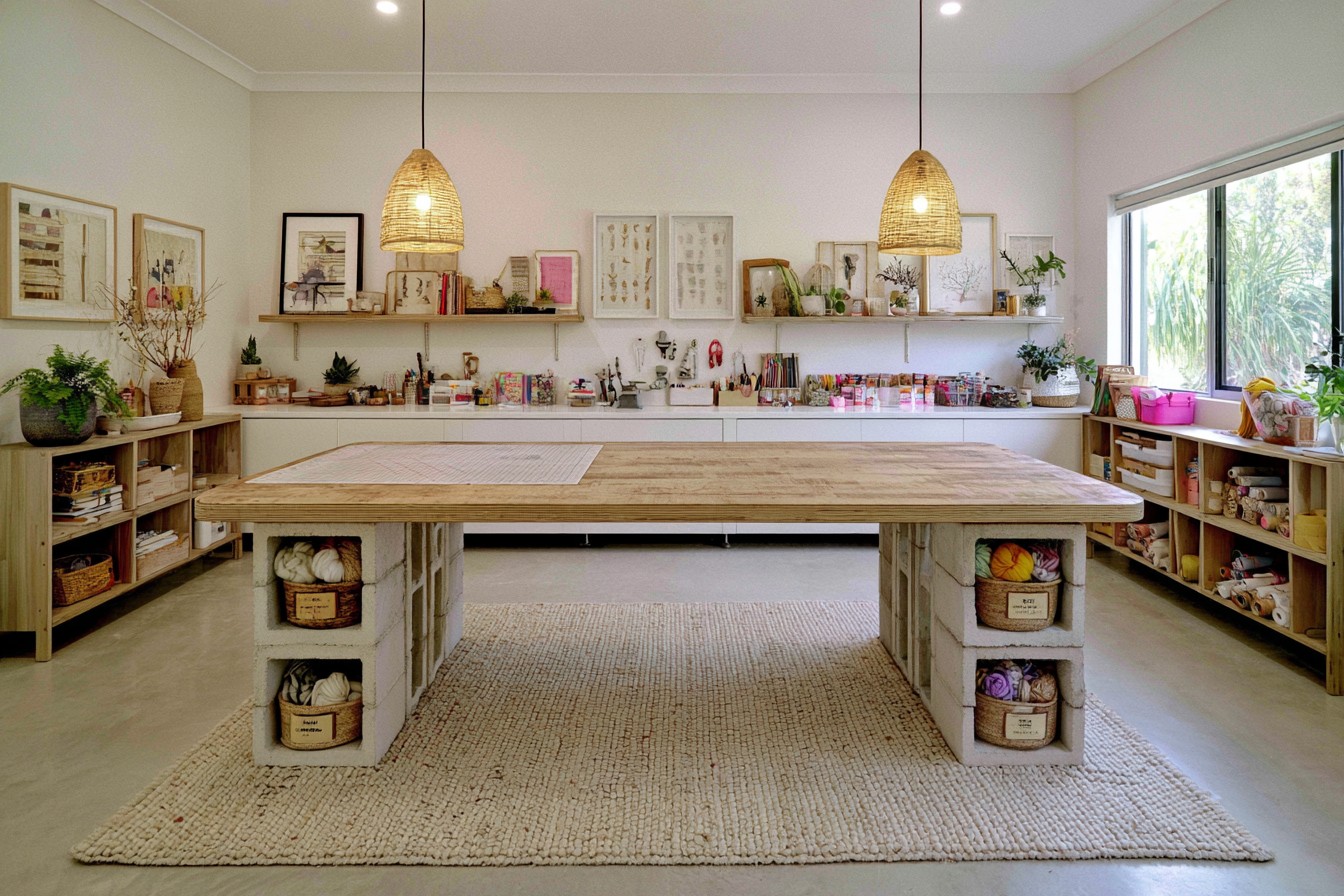
Support a craft table with cinder block towers that double as supply storage. Determine a comfortable working height, then arrange blocks at both ends over a floor protecting base. Add a plywood top with smoothly rounded edges and secure it against shifting. Slide labeled baskets, rolled paper, or yarn into the open cells, keeping heavier materials closest to the ground. White masonry paint brightens the structure, while a colorful top introduces energy without making the room busy. Install a cutting mat for surface protection. Anchor the table where needed and leave knee clearance before permanently bonding the chosen configuration together.
14. Divide a Studio with a Display Shelf
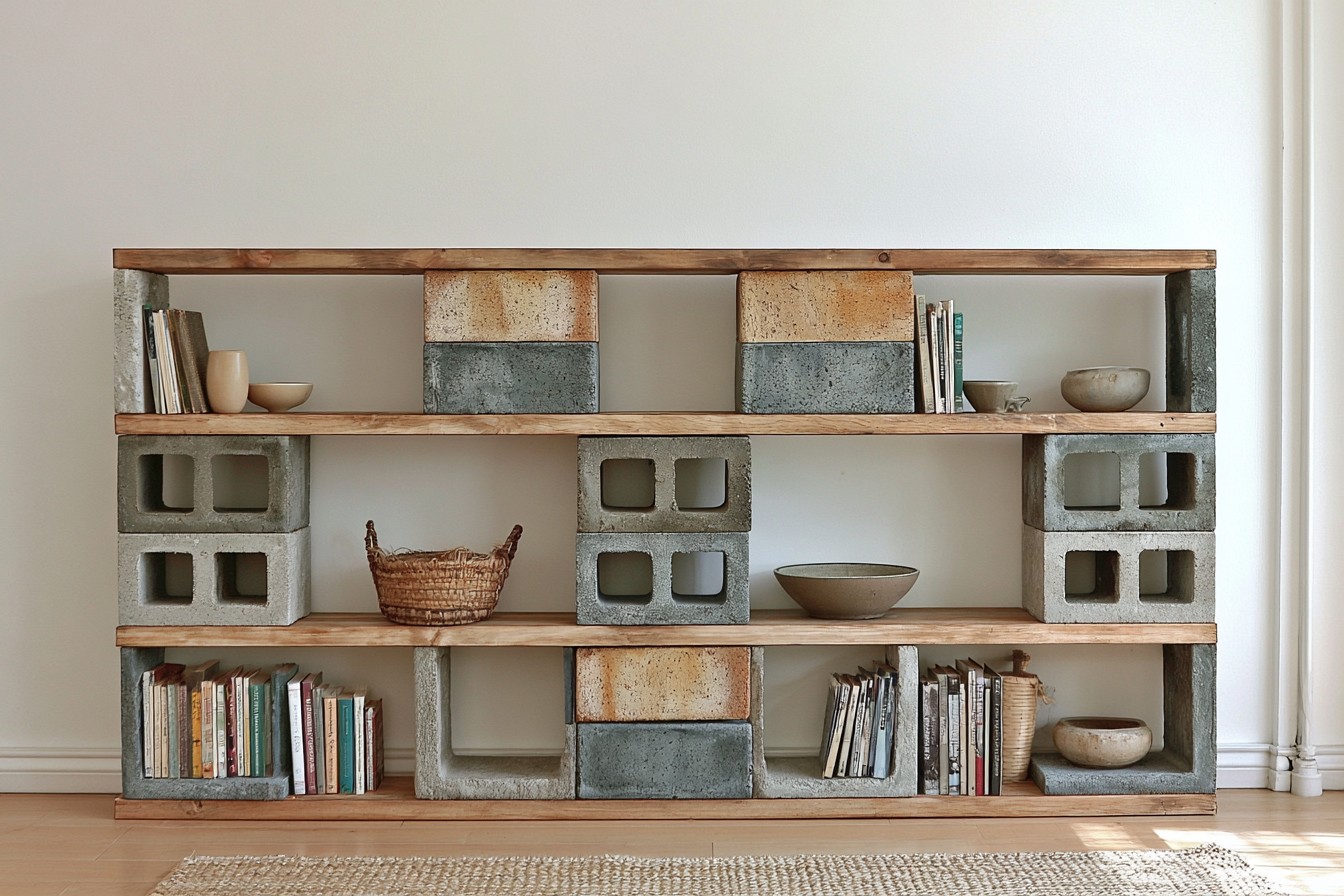
Create a room divider by combining low cinder block stacks with wooden display shelves. Plan an arrangement that separates sleeping, working, or dining zones without blocking daylight. Build from a stable base, align supports vertically, and keep the unit below shoulder height unless it can be anchored. Alternate solid sections with open cubbies for baskets, books, and ceramics. Paint the blocks soft clay or warm gray to make the divider feel intentional, and repeat that color elsewhere in the room. Finish both sides equally because each remains visible. Secure every component and avoid placing fragile objects near exposed outer edges.
MORE IDEAS


Share
What's Your Reaction?
 Like
0
Like
0
 Dislike
0
Dislike
0
 Love
0
Love
0
 Funny
0
Funny
0
 Angry
0
Angry
0
 Sad
0
Sad
0
 Wow
0
Wow
0