18+ Creative Bottle Cap Projects for Unique DIY Decorations

18+ Creative Bottle Cap Projects for Unique DIY Decorations

Bottle caps may look ordinary, yet their compact shape, sturdy construction, and colorful finishes make them adaptable craft materials. Metal and plastic caps can become jewelry, wall decorations, tabletop accessories, garden ornaments, personalized gifts, or playful learning tools. Begin by washing every piece thoroughly, removing liners when necessary, and smoothing sharp edges before decorating. Acrylic paint, patterned paper, fabric, clay, beads, wire, and clear resin offer countless finishing possibilities. Whether you preserve original branding or cover each surface completely, thoughtful color planning helps separate a polished project from a random collection. These ideas turn saved caps into characterful handmade creations.

1. Botanical Resin Bottle Cap Pins

1. Botanical Resin Bottle Cap Pins

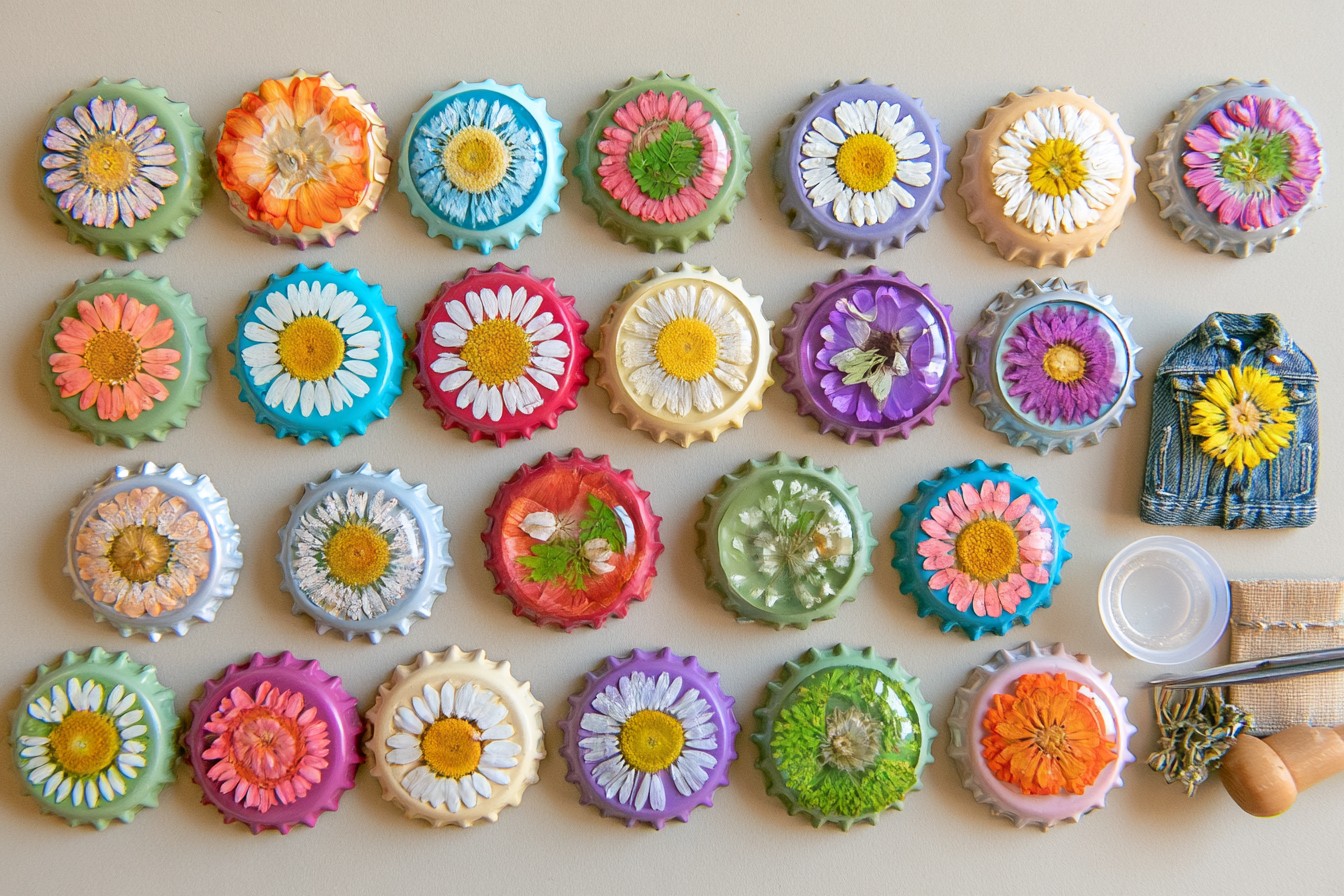
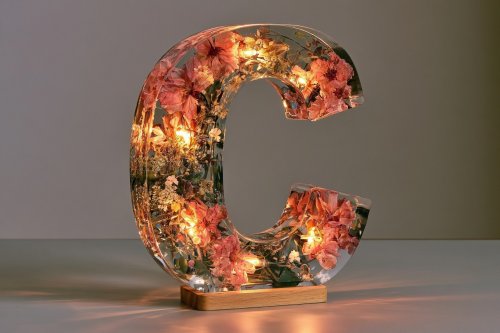
Turn small pressed flowers and delicate leaves into wearable botanical keepsakes. Clean a metal cap, flatten it carefully with a rubber mallet, and cover the printed surface with muted acrylic paint. Arrange one dried specimen in the center, securing it with a small amount of craft adhesive. Pour a thin layer of jewelry resin over the design and remove bubbles with a toothpick before curing. Attach a locking pin back using strong metal adhesive. Choose coordinated petals for a small collection, then wear the finished pieces on denim jackets, canvas bags, aprons, or fabric organizers for a charming natural accent.

2. Mini Mosaic Drink Coasters

2. Mini Mosaic Drink Coasters

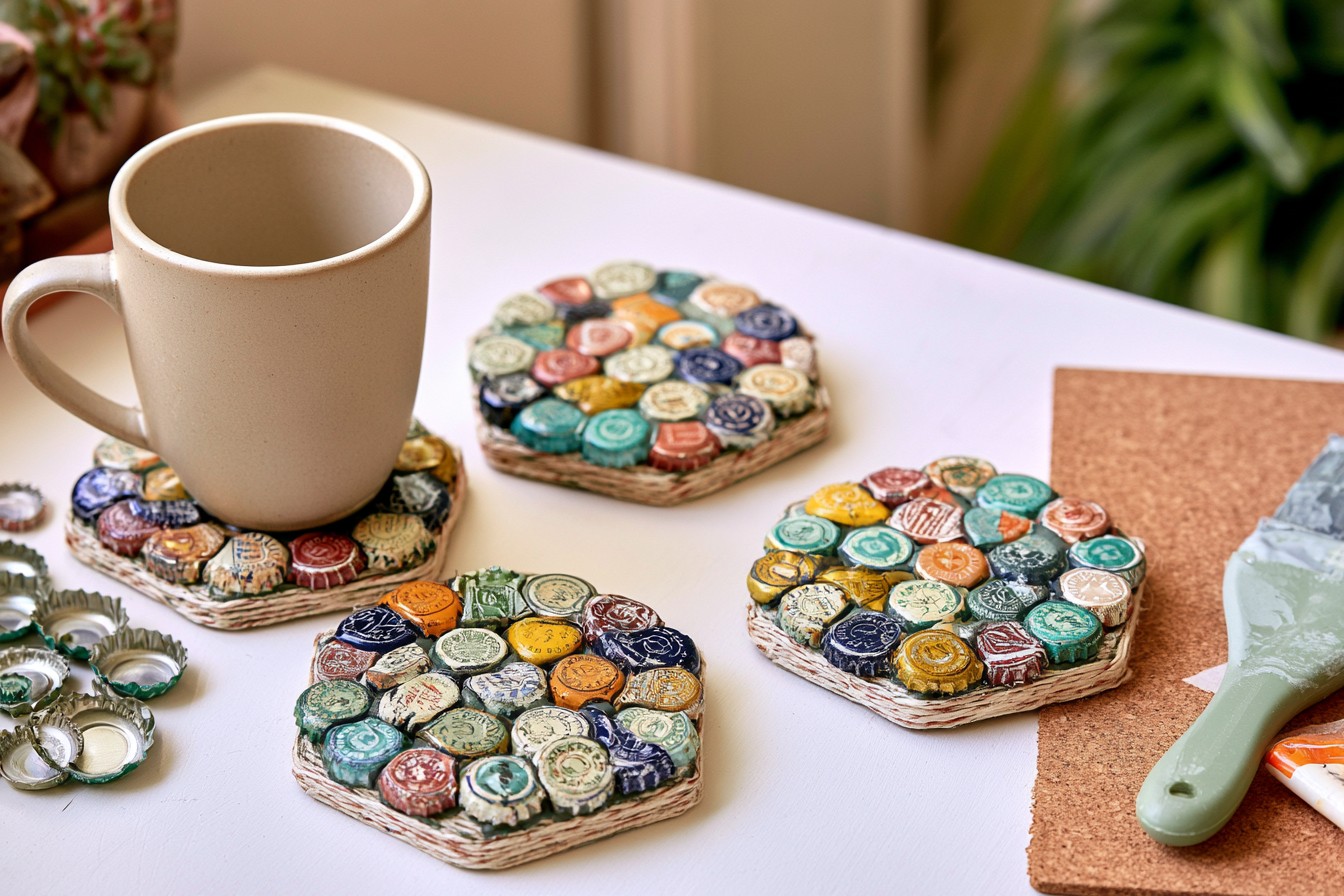
Create coasters by arranging bottle caps like miniature mosaic tiles. Cut a round or hexagonal base from thick cork, then test several layouts before applying adhesive. Caps may retain their original colors or receive coats of enamel paint in a coordinated palette. Glue them closely together, keeping the top surfaces level so cups remain stable. Fill narrow gaps with tinted grout, wipe the caps clean, and allow everything to cure fully. Finish the outer edge with cotton cord for a neat border. These durable coasters suit coffee tables, game rooms, covered patios, and casual entertaining areas while adding handmade texture.

3. Vintage Map Travel Magnets

3. Vintage Map Travel Magnets

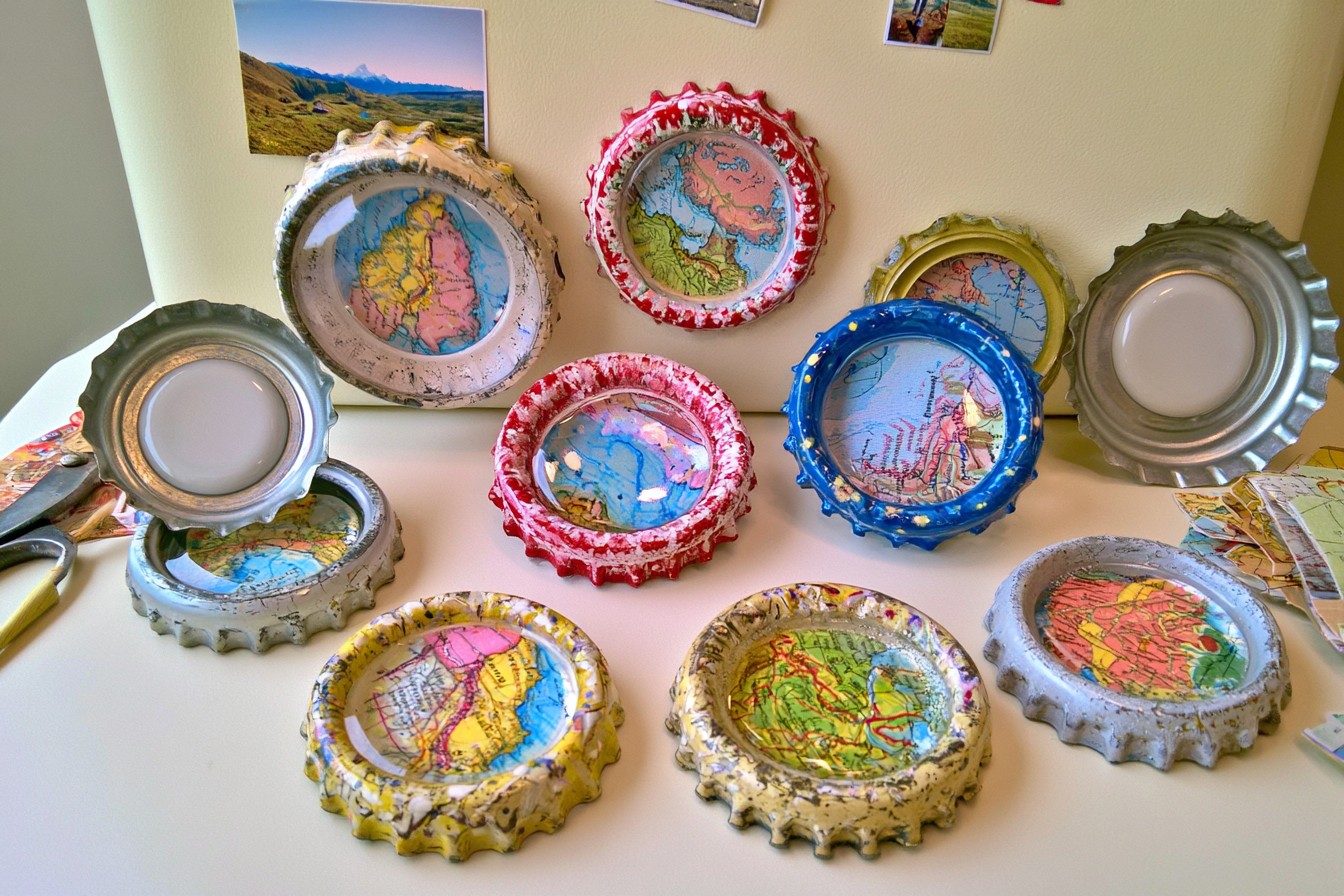
Preserve favorite journeys by turning map fragments into personalized refrigerator magnets. Trace the inner circle of each cap onto a map, choosing meaningful towns, coastlines, or landmarks, then cut the pieces. Glue each circle inside a clean cap and brush decoupage medium across the paper to protect it. For greater depth, add a clear epoxy dome after the surface dries. Fix a strong ceramic magnet to the back with industrial adhesive and let it cure overnight. Display the collection on a refrigerator, magnetic memo board, or travel planning wall. They also make thoughtful souvenirs for road trips, weddings, and reunions.

4. Geometric Bottle Cap Wall Panel

4. Geometric Bottle Cap Wall Panel

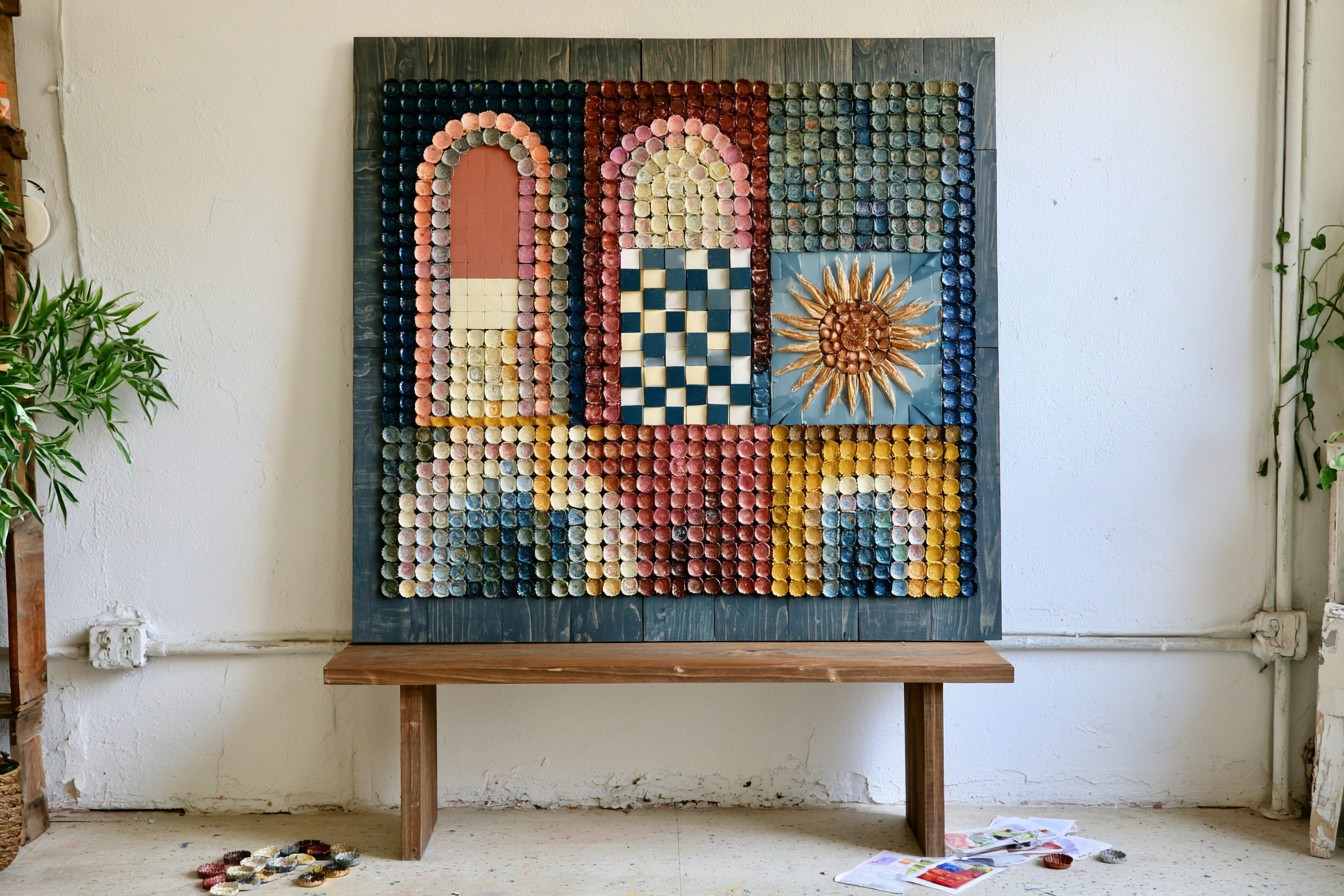
Build modern wall art by using painted caps as raised geometric pixels. Start with a square plywood panel, sand it smooth, and apply a matte background color. Sketch a simple bold arch, sunburst, checkerboard, or balanced abstract grid in pencil. Paint bottle caps in three to five complementary shades, varying the finish between matte and metallic for dimension. Arrange the pieces over the sketch before gluing, checking spacing from several angles. Heavy construction adhesive keeps them secure on wood. Add a sawtooth hanger once cured. The completed panel works especially well in studios, creative offices, entryways, and eclectic living rooms.

5. Layered Flower Garden Stakes

5. Layered Flower Garden Stakes

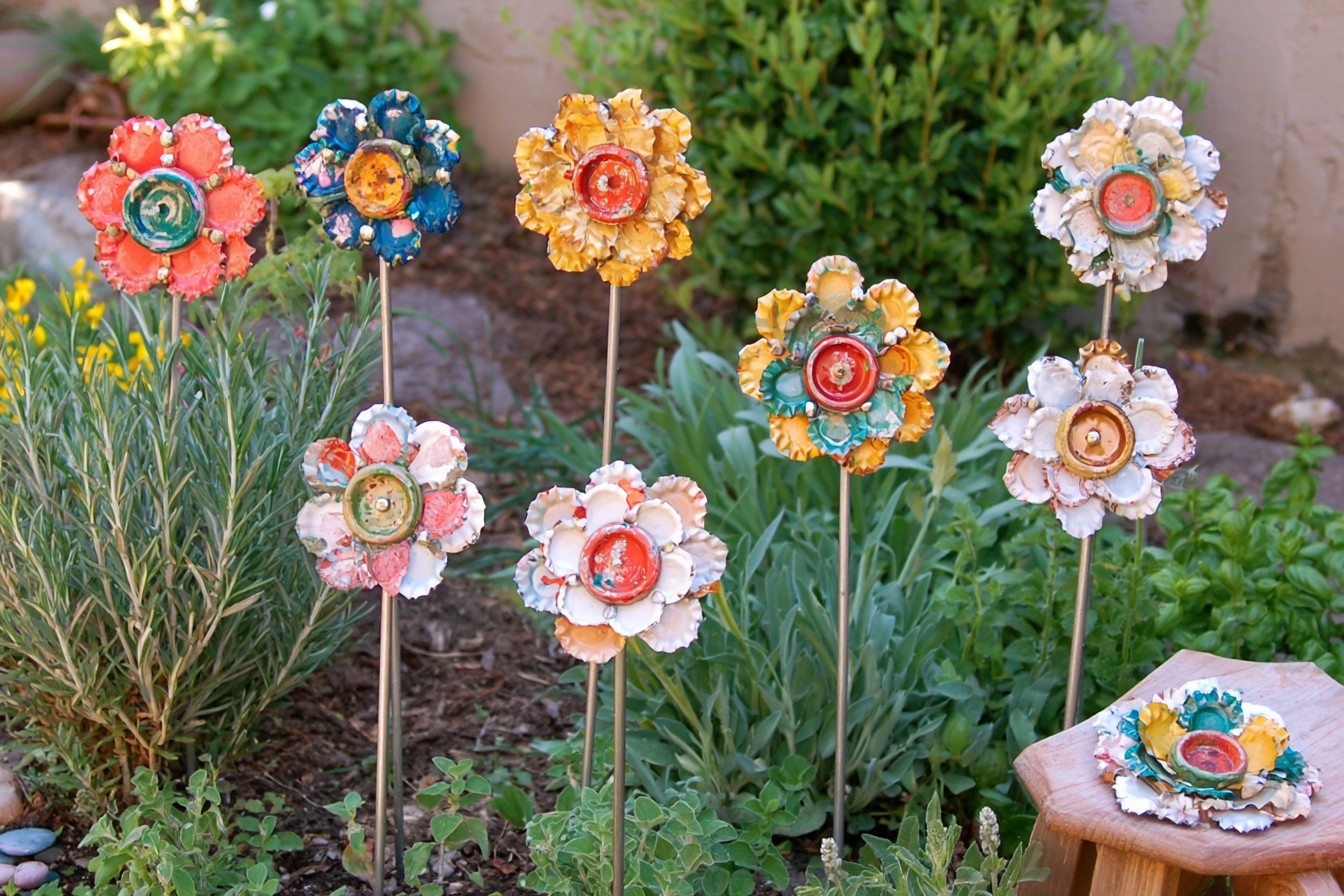
Give flower beds permanent color with bottle cap blooms mounted on slender stakes. Flatten several metal caps for petals while leaving one cap curved for each flower center. Paint the pieces with outdoor enamel, combining coral, blue, yellow, or white according to the garden palette. Arrange five or six petals around the center and fasten them to a metal disk with exterior adhesive or short rivets. Attach the bloom to a painted wooden dowel or rust resistant rod. Seal exposed surfaces against moisture before placing the stakes among herbs, border plants, or container gardens. Varying heights creates a livelier composition.

6. Patterned Serving Tray Insert

6. Patterned Serving Tray Insert

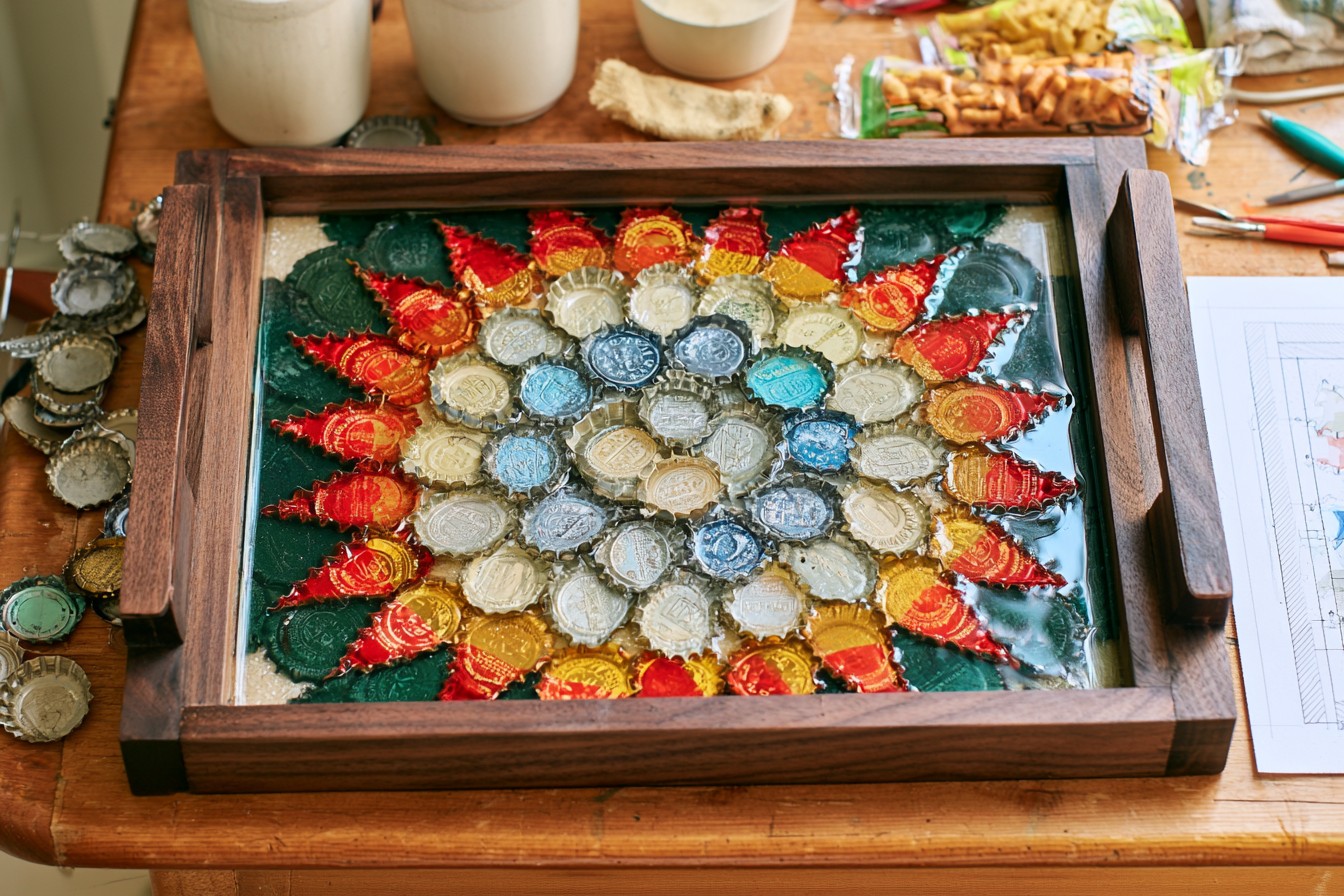
Refresh a wooden tray with an inset pattern made from collected bottle caps. Sand and paint the tray first, then arrange caps inside without glue to refine the composition. A radial pattern feels energetic, while orderly rows create a cleaner vintage look. Secure every cap with multipurpose adhesive, making certain none extend above the tray rim. Pour casting resin across the arrangement until the surface becomes level. Remove trapped bubbles and protect the tray from dust while curing. The washable finished insert is ideal for serving wrapped snacks, organizing bar accessories, or displaying small objects on an ottoman or console.

7. Fabric Covered Brooch Collection

7. Fabric Covered Brooch Collection

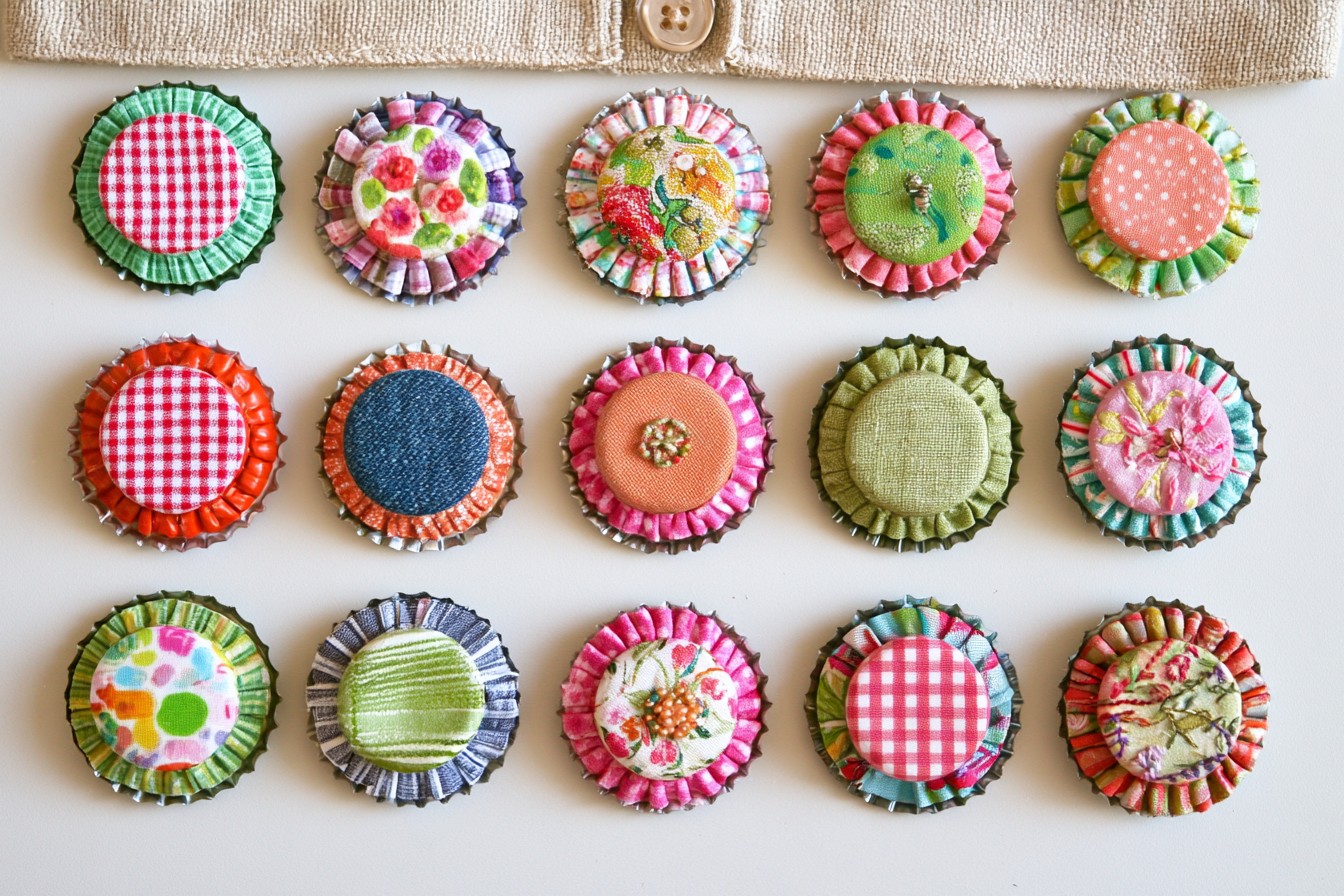
Transform leftover textile scraps into a coordinated set of tactile brooches. Select scale prints, denim, linen, or embroidered remnants, then cut circles slightly larger than flattened bottle caps. Brush adhesive over each cap, center the fabric, and fold the excess neatly around the back. Cover the raw edges with a felt circle before attaching a secure brooch clasp. A small button or stitched bead in the center can add dimension without overwhelming the pattern. Make matching groups from one fabric family and use them on cardigans, tote bags, fabric baskets, or gift wrapping. They are practical projects for treasured remnants.

8. Ocean Inspired Fish Sculpture

8. Ocean Inspired Fish Sculpture

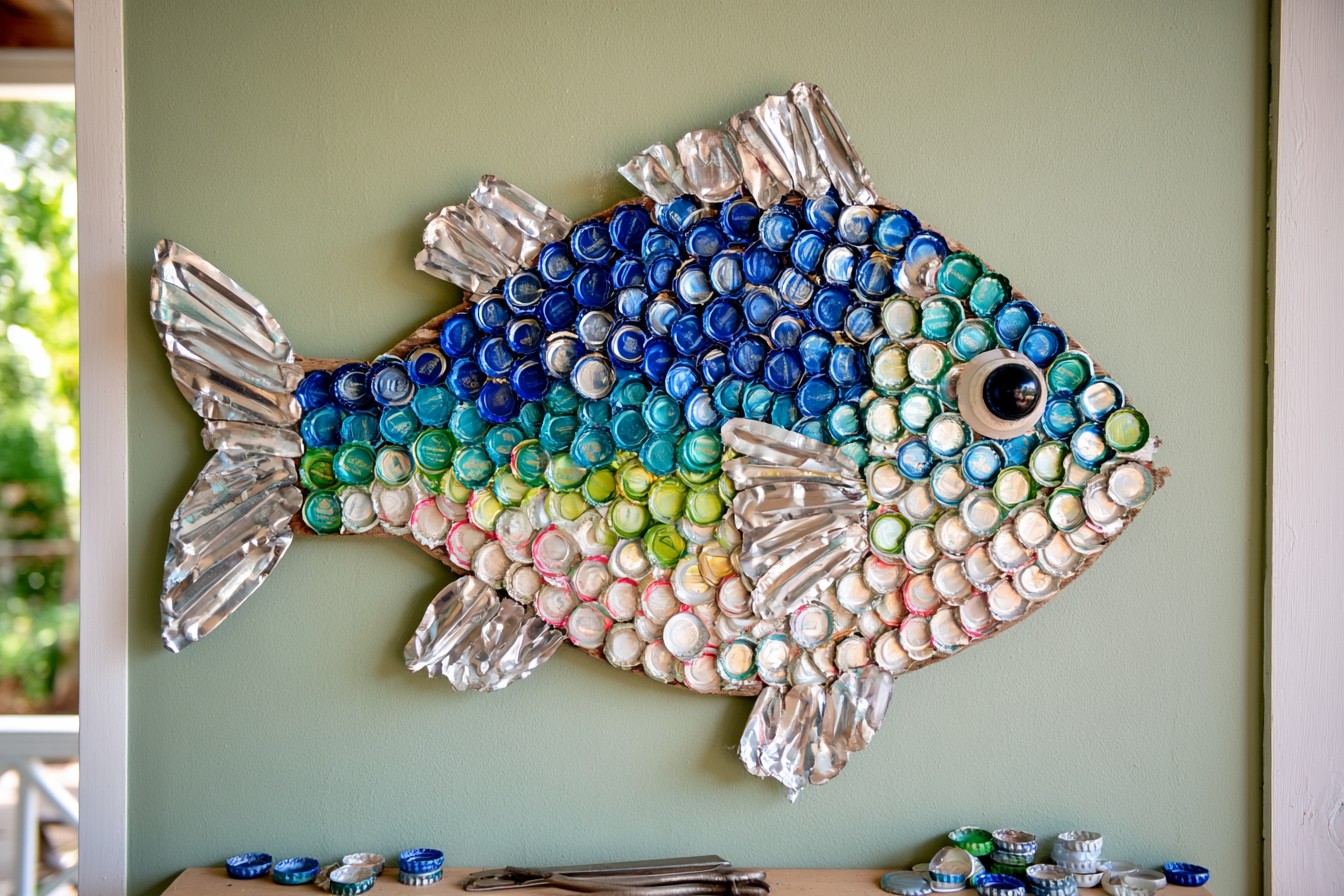
Create a playful fish sculpture by overlapping flattened bottle caps like shimmering scales. Draw a simple fish silhouette on reclaimed wood and paint the background in sandy, navy, or weathered white tones. Beginning at the tail, glue rows of caps toward the head so each new row overlaps the previous one. Mix silver, turquoise, cobalt, and softly distressed finishes for movement. Shape fins from thin aluminum sheet or additional caps, then add a bead for the eye. Seal the artwork if it will hang outdoors. This textured piece brings cheerful coastal character to bathrooms, porches, poolside walls, or vacation homes.

9. Bottle Cap Photo Garland

9. Bottle Cap Photo Garland

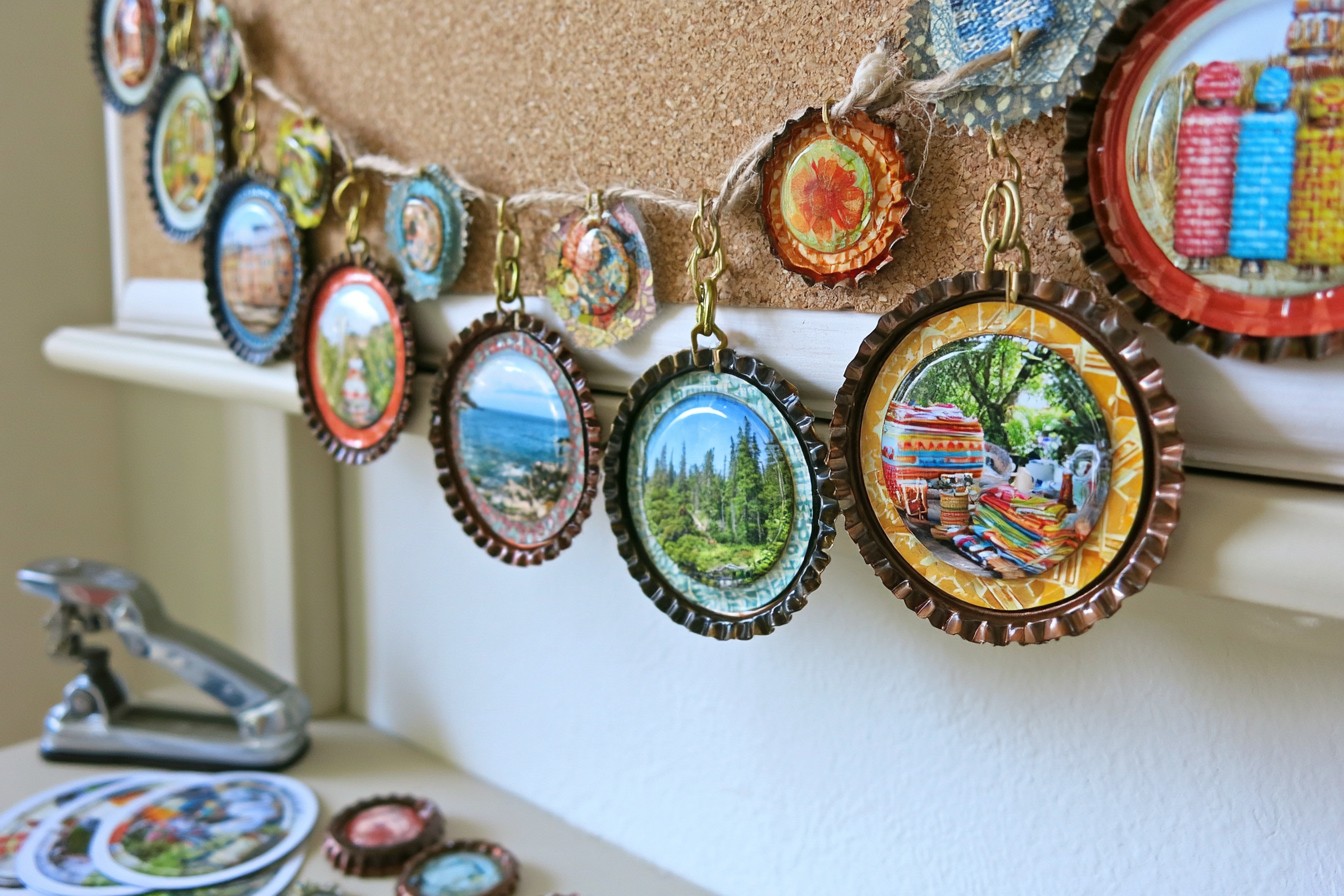
Turn favorite snapshots into a compact photo garland for a bedroom or celebration display. Resize images so faces and details fit within the cap interiors, then print them on matte photo paper. Cut clean circles, glue them inside the caps, and protect each image with dimensional glaze. Punch two holes near opposite edges using a metal punch, taking care to smooth rough areas. Connect the caps with jump rings, ribbon, or waxed cord, leaving consistent spaces between photographs. Combine portraits with patterned paper caps for visual rhythm. Hang the garland across a corkboard, shelf edge, party backdrop, or memory corner.

10. Miniature Clay Dessert Magnets

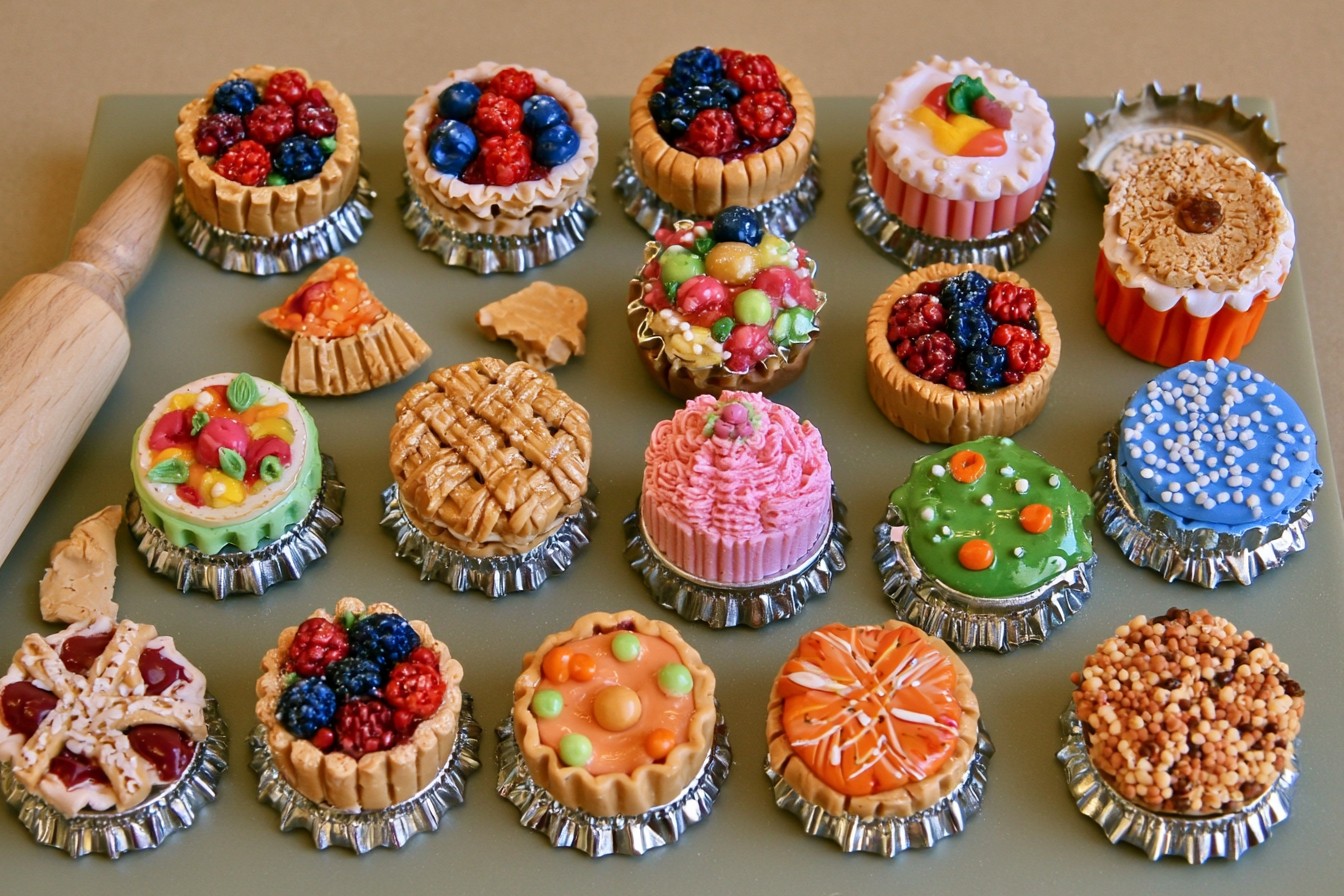
Use bottle caps as tiny baking tins for polymer clay desserts. Press a shallow layer of tan clay inside each clean cap, then add miniature fruit slices, lattice strips, frosting swirls, or pastry crumbs. Texture the surface with a needle tool and apply chalk pastel shading before baking according to the clay instructions. After cooling, secure loose details and coat areas with glaze for a freshly baked appearance. Attach a flat magnet firmly to the back. These whimsical pieces decorate refrigerators, recipe boards, bakery themed kitchens, or dollhouse displays. Package several together as a charming handmade gift for enthusiastic bakers.

11. Rustic Bottle Cap Clock

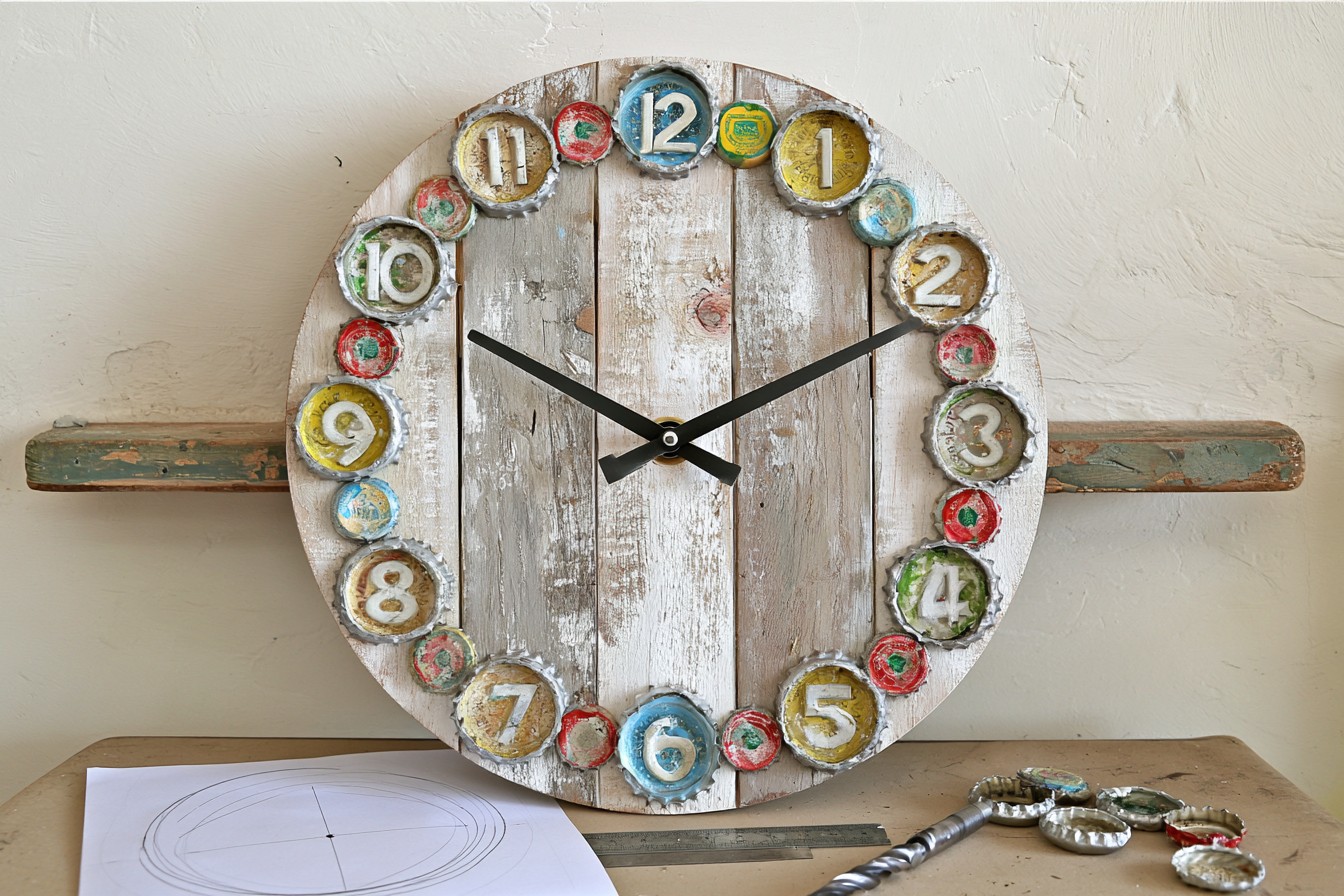
Design a functional wall clock that turns twelve caps into hour markers. Cut a plywood face, sand the edges, and finish it with stain, paint, or a whitewashed effect. Mark the center and divide the circle into equal positions using a paper clock template. Arrange matching caps for a refined appearance or use collected varieties for nostalgic character. Glue each marker securely, drill the central opening, and install a powered clock mechanism with hands that clear the raised caps. Keep the background uncluttered so time remains easy to read. Display it in a kitchen, workshop, home bar, or games room.

12. Educational Matching Game

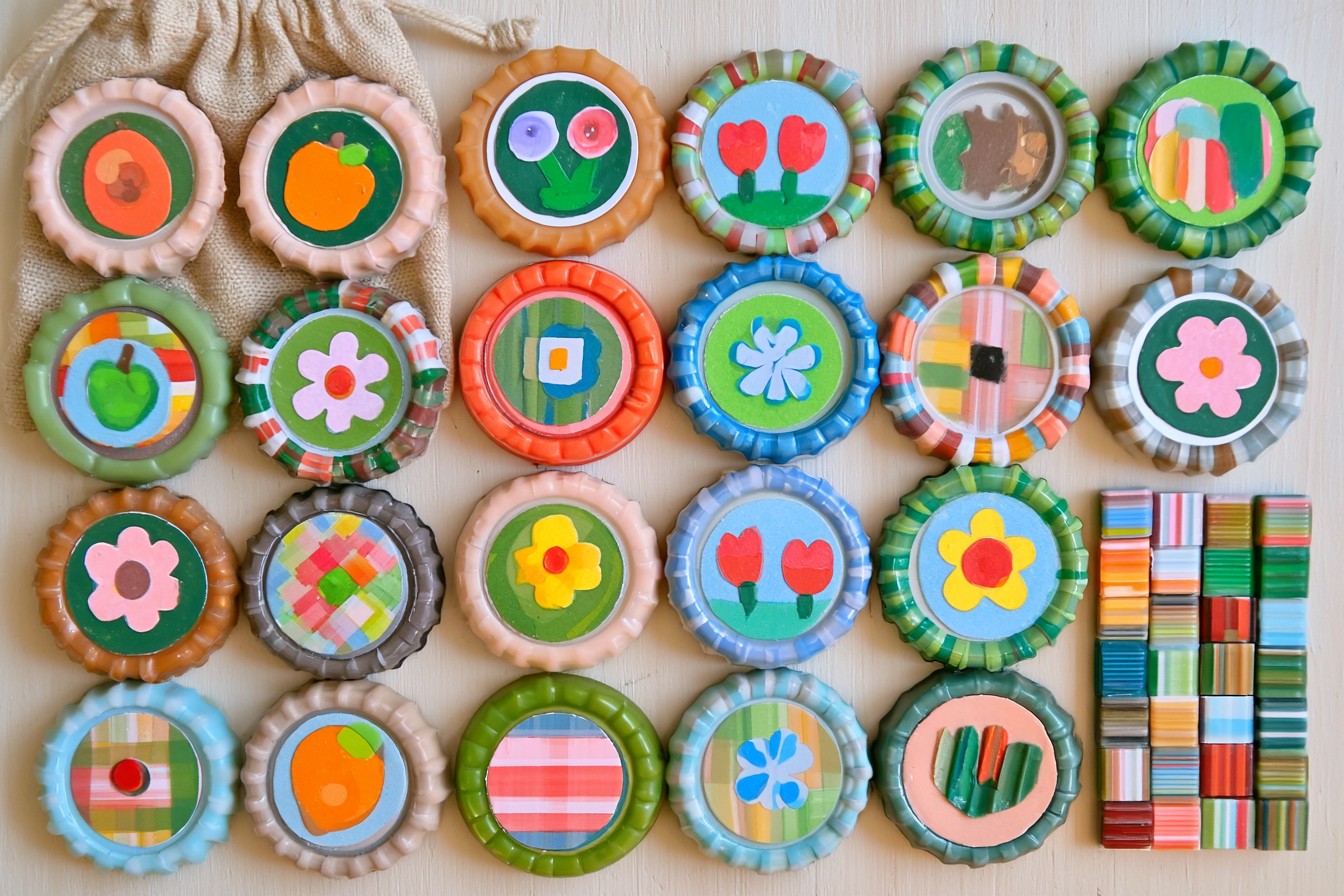
Make an inexpensive matching game that combines recycled materials with early learning. Gather pairs of plastic bottle caps in similar sizes, then add matching pictures, colors, letters, numbers, or shapes inside them. Use waterproof stickers or hand painted symbols and seal each design with nontoxic clear varnish. For younger children, choose large caps that are easier to handle and avoid small removable embellishments. Store the completed set in a drawstring pouch. Players can turn every cap face down and search for pairs, sort them by category, or build patterns. This adaptable activity suits classrooms, playrooms, travel bags, and rainy afternoons.

13. Beaded Bottle Cap Keychains

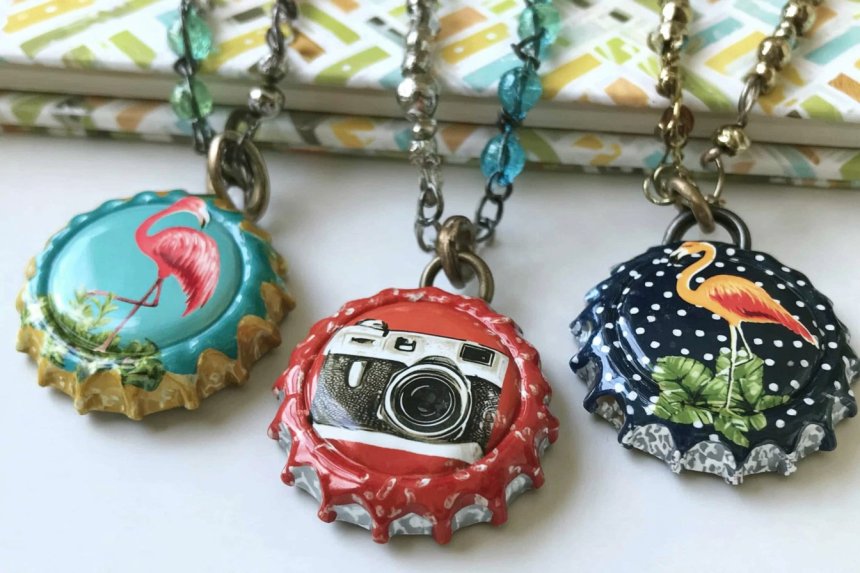
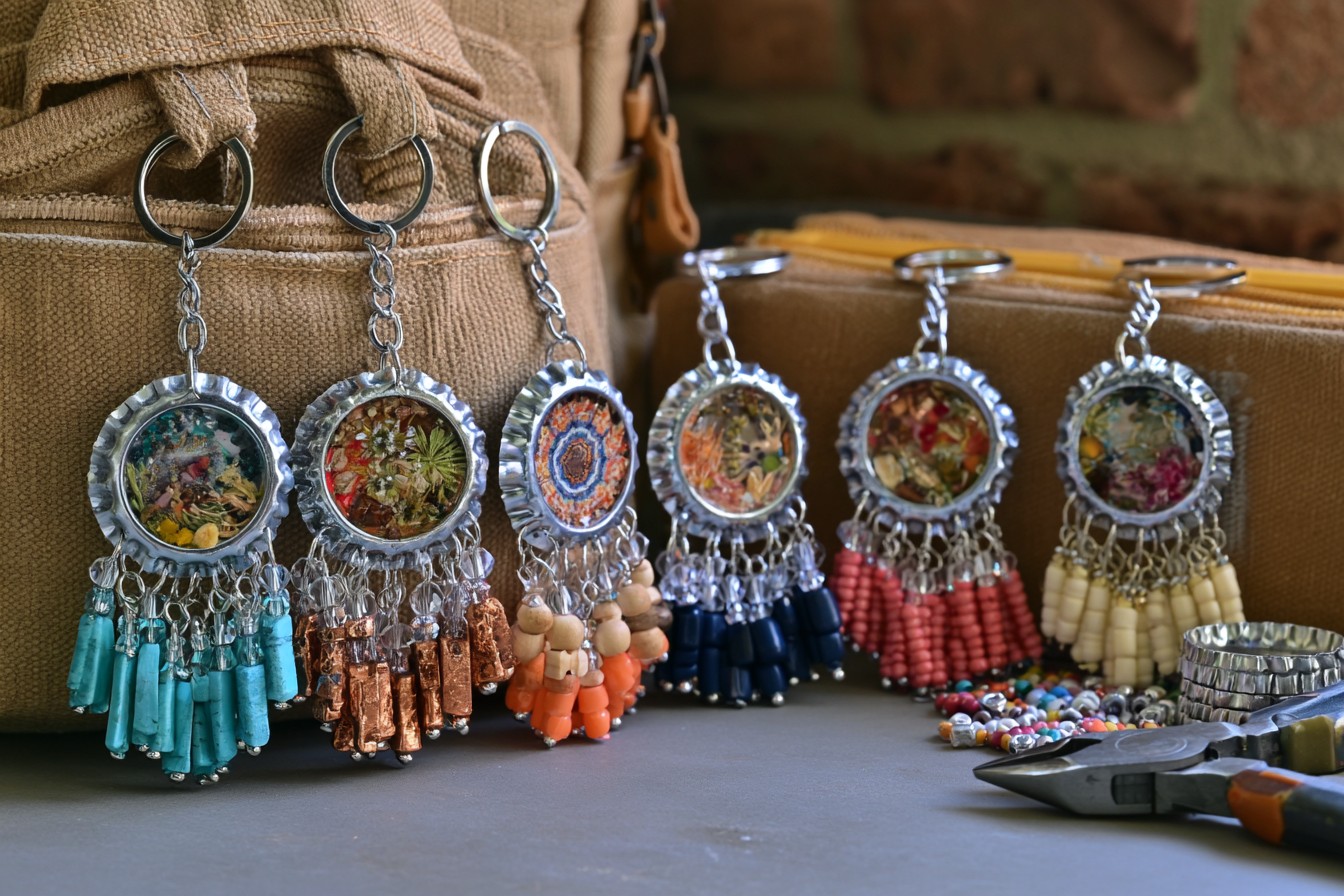
Convert decorative caps into sturdy keychains with beads and charms. Flatten each cap if desired, then punch a clean hole close to the rim using jewelry pliers or a metal punch. Decorate the front with paint, patterned paper, or a tiny illustration protected beneath resin. Thread a jump ring through the opening and connect it to a short chain, split ring, and coordinated bead dangles. Close every ring tightly so the components cannot loosen during daily use. Match colors to a backpack, pencil case, or set of keys. Personalized versions also make affordable party favors, fundraiser items, or stocking gifts.

14. Checkerboard Picnic Game

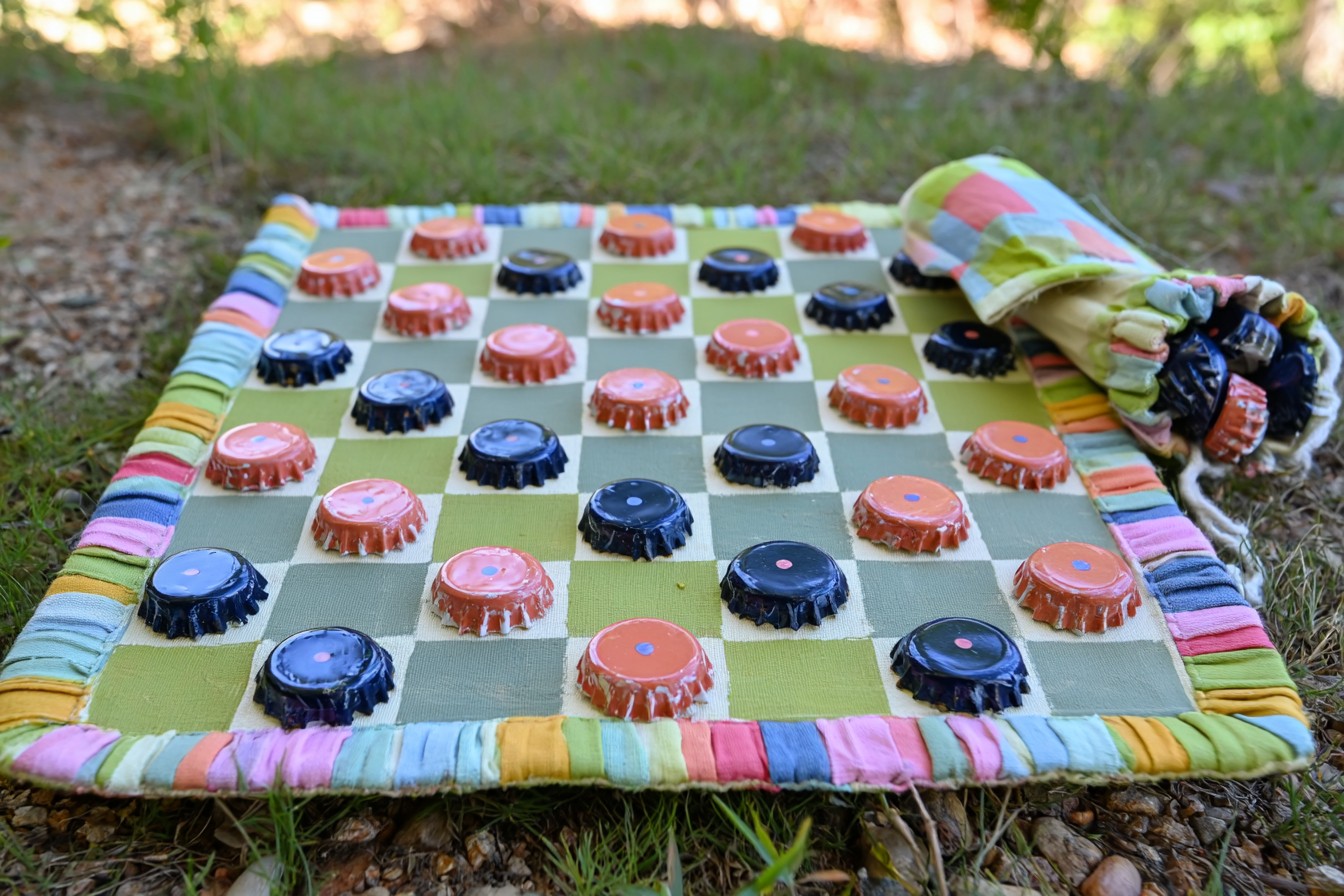
Prepare a portable checker game using two sets of painted bottle caps as playing pieces. Choose twenty four caps of equal size, clean them, and paint half in one color and half in another. Add simple dots or stripes to distinguish each team clearly. Create the board on canvas by masking and painting an eight square grid, leaving a generous fabric border. Once dry, hem the edges or attach binding for durability. The flexible board rolls around the caps and fits inside a pouch for storage. Use it during picnics, camping trips, family holidays, classroom breaks, or relaxed afternoons outdoors.

15. Embossed Metallic Necklace Pendant

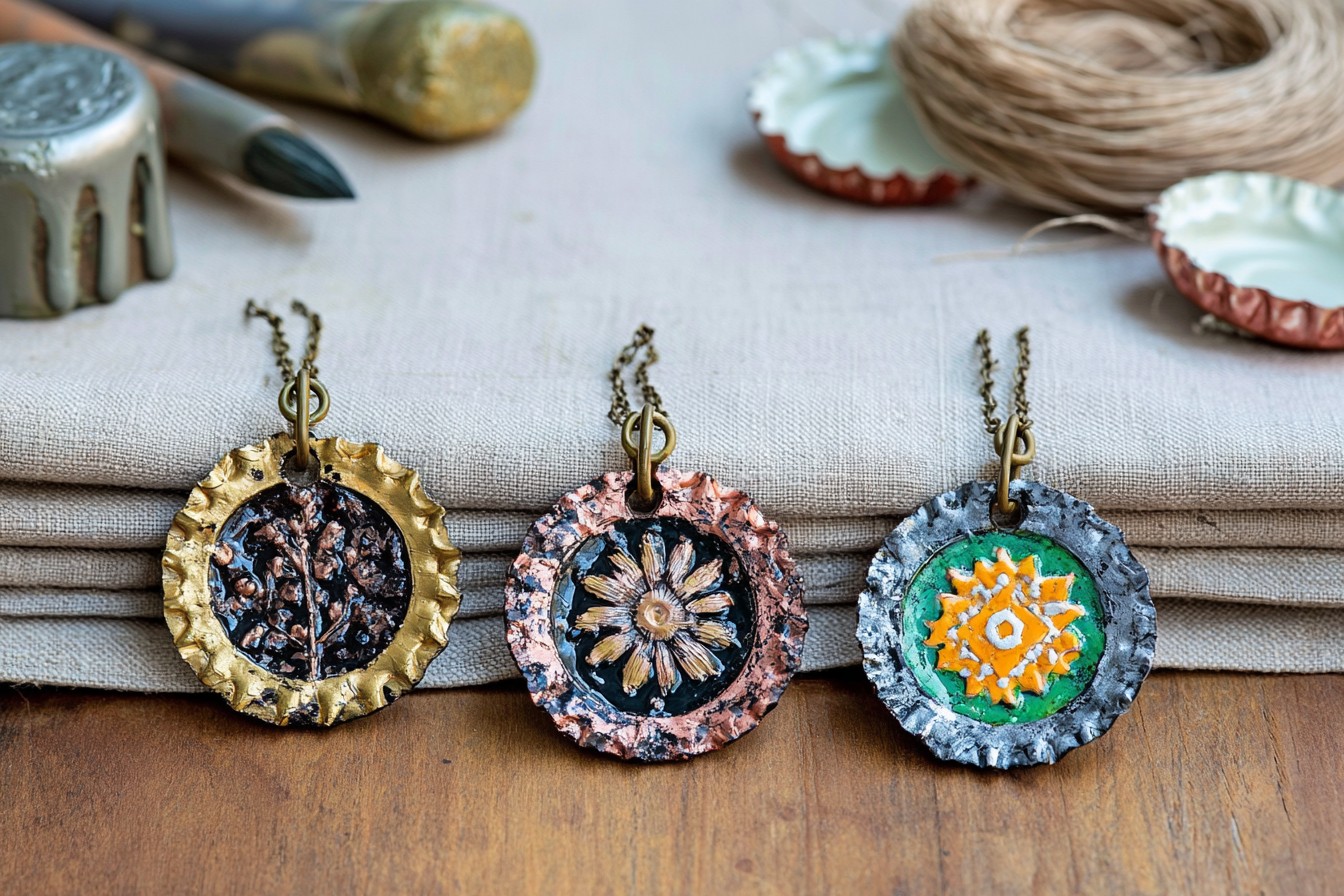
Fashion a statement pendant by giving a bottle cap the appearance of embossed metalwork. Flatten the cap, coat it with dark acrylic paint, and let the base dry. Apply modeling paste through a tiny stencil or arrange thin cord beneath metallic foil to form a raised motif. Rub antique gold, copper, or pewter wax lightly across the highest areas, allowing the darker background to remain visible in recesses. Seal the finish, punch a hole at the top, and add a jump ring with a chain. This pendant pairs with linen, denim, and neutral knitwear, and makes an elegant recycled gift.

16. Seasonal Napkin Ring Accents

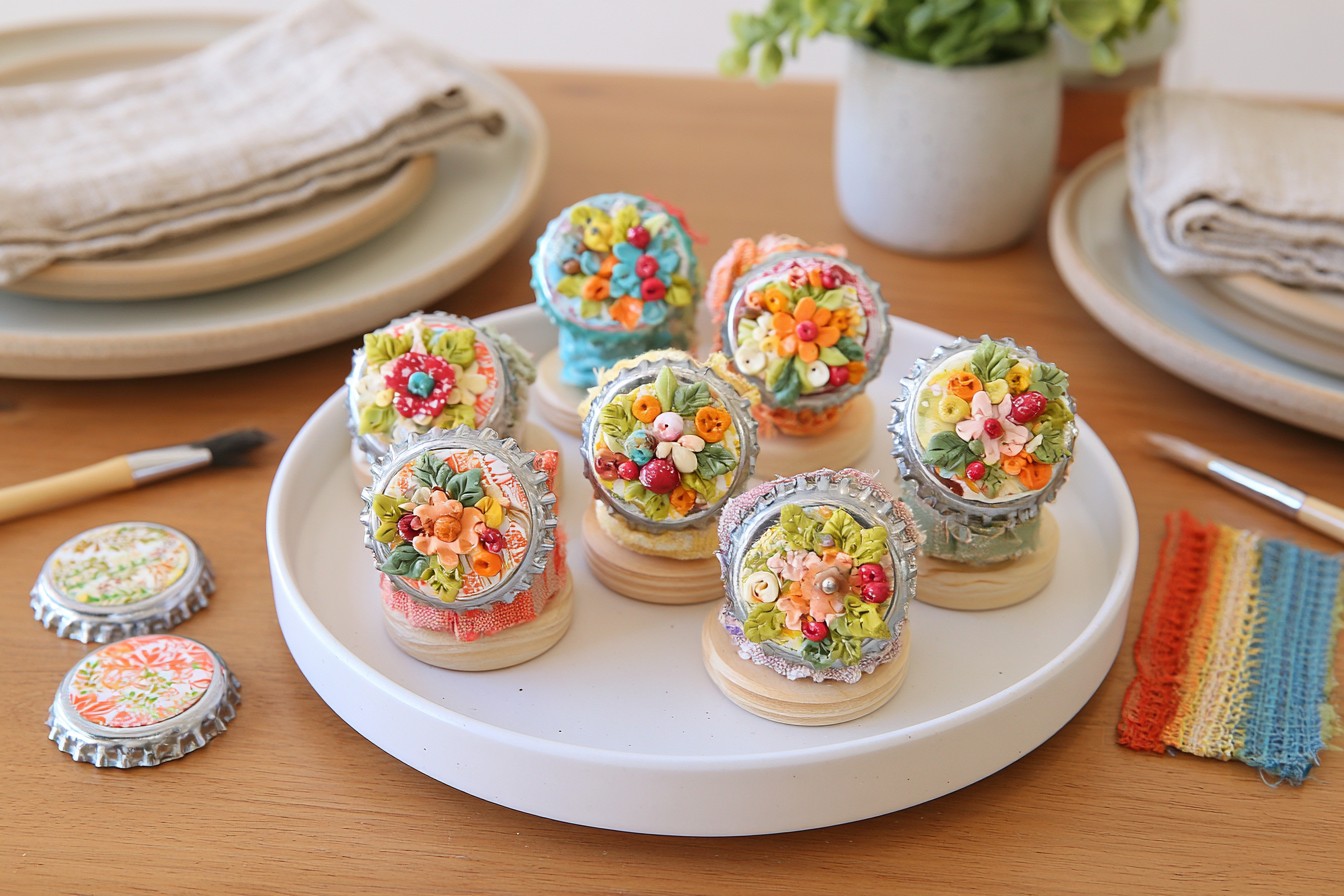
Create reusable napkin rings by decorating bottle caps with small seasonal motifs. Paint flattened caps in colors that complement your table linens, then add miniature clay leaves, paper flowers, snowflakes, fruit shapes, or stamped patterns. Keep each embellishment low enough that it will not catch on sleeves during meals. Seal the design and glue the finished cap onto a wooden, metal, or fabric covered napkin ring base. Produce a complete matching set, with slight variations for a collected handmade look. These accents can refresh spring brunches, autumn dinners, birthday tables, or holiday place settings without requiring an entirely new tablescape.

17. Textured Mirror Border

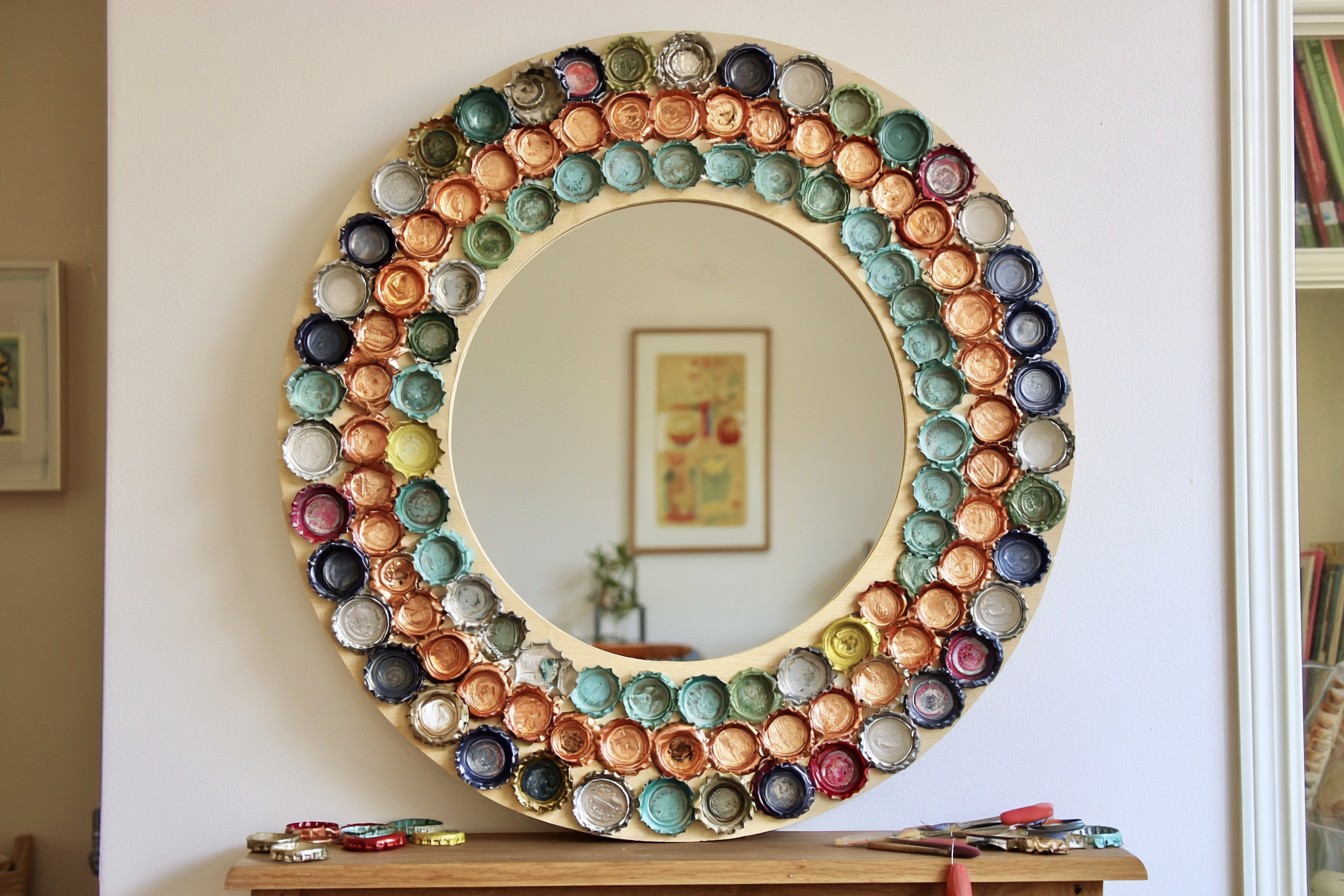
Frame a round mirror with bottle caps for a burst of texture. Choose a sturdy plywood backing several inches wider than the mirror, mark the center, and paint the exposed border. Glue the mirror in place with suitable adhesive, then arrange caps around it in concentric rings. Alternate sizes, colors, or orientations to create depth, but keep the palette controlled. Caps can be painted satin black for an industrial look or soft pastels for playful decor. Secure a strong hanging bracket to the backing. This project makes a striking accent for an entryway, craft room, powder room, or gallery wall.

18. Hanging Bottle Cap Wind Mobile

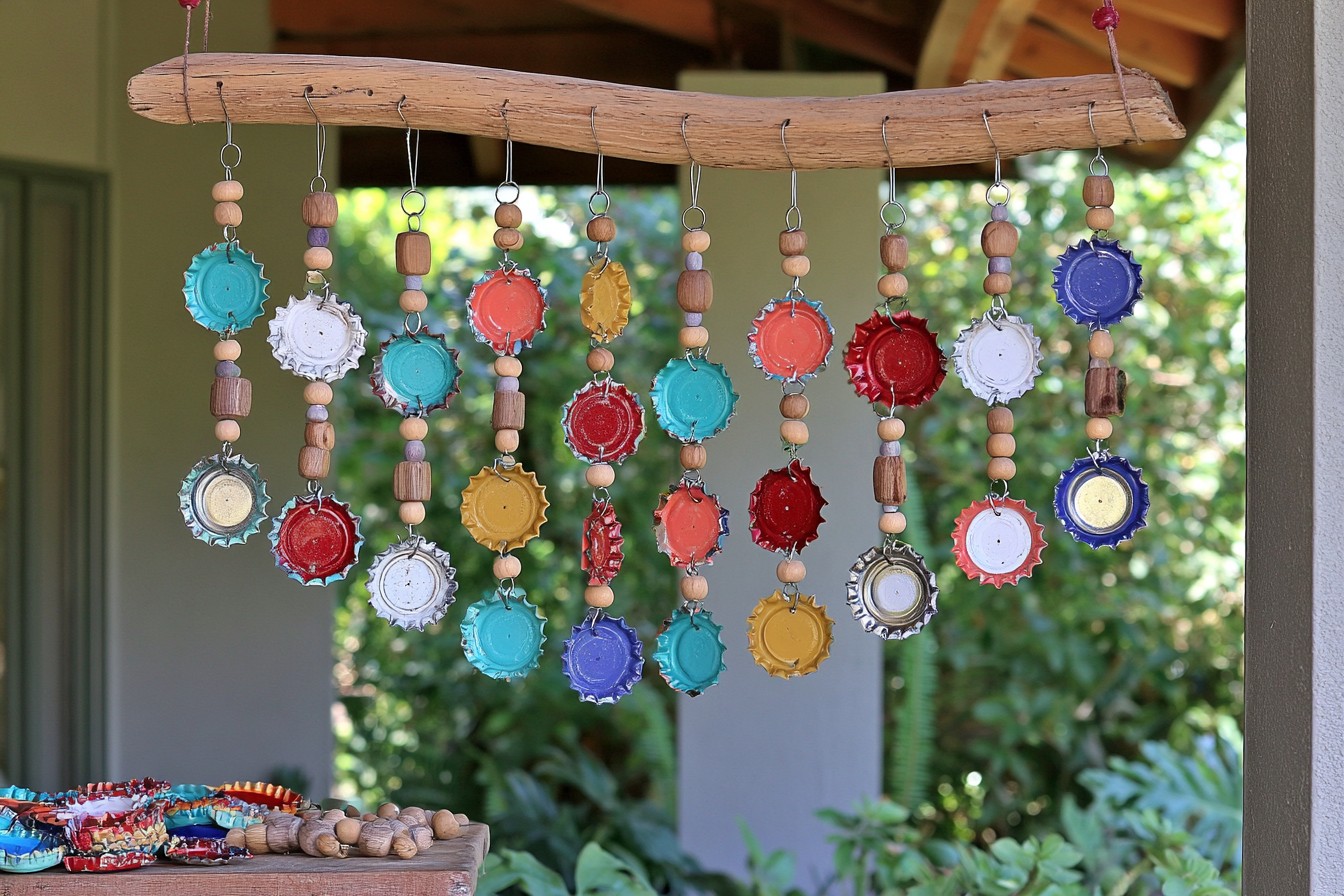
Assemble an outdoor mobile from pierced bottle caps, beads, and wire. Punch two holes in each cap, smooth the edges, and paint sides with weather resistant enamel. Connect the pieces vertically using jump rings so they can rotate freely, adding wooden beads between caps for spacing and contrast. Suspend several uneven strands from a wire frame or a small piece of driftwood. Balance the arrangement before tightening every connection, then apply outdoor sealant. Hung beneath a covered porch or tree branch, the mobile creates gentle movement and subtle sound while turning a collection of discarded caps into animated garden decor.

MORE IDEAS

18+ Creative Bottle Cap Projects for Unique DIY Decorations

Share

What's Your Reaction?

Like Like 0
Dislike Dislike 0
Love Love 0
Funny Funny 0
Angry Angry 0
Sad Sad 0
Wow Wow 0