
11 Creative DIY Copper Wire Jewelry Designs for Beginners

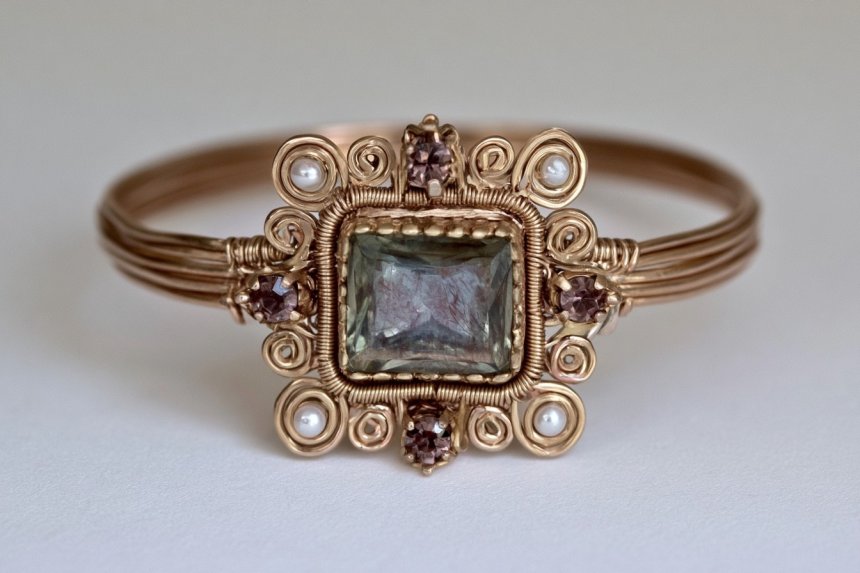
Copper wire is an excellent material for handmade jewelry because it bends easily and offers a warm, elegant metallic color. Soft copper wire works well for beginner projects, while different wire gauges can be combined to create stronger and more detailed pieces. Round nose pliers, flat nose pliers, wire cutters, a small jewelry hammer, a metal file, and a ring mandrel are among the most useful tools. Natural stones, pearls, glass beads, and crystals can also give each design a distinctive character. Techniques such as wire wrapping, weaving, coiling, hammering, and twisting make it possible to create numerous accessories from simple materials. Always smooth and round every cut wire end before wearing the finished jewelry. A transparent jewelry sealant can also be applied to slow oxidation and help preserve the original copper finish.
1. Natural Stone Forest Pendant
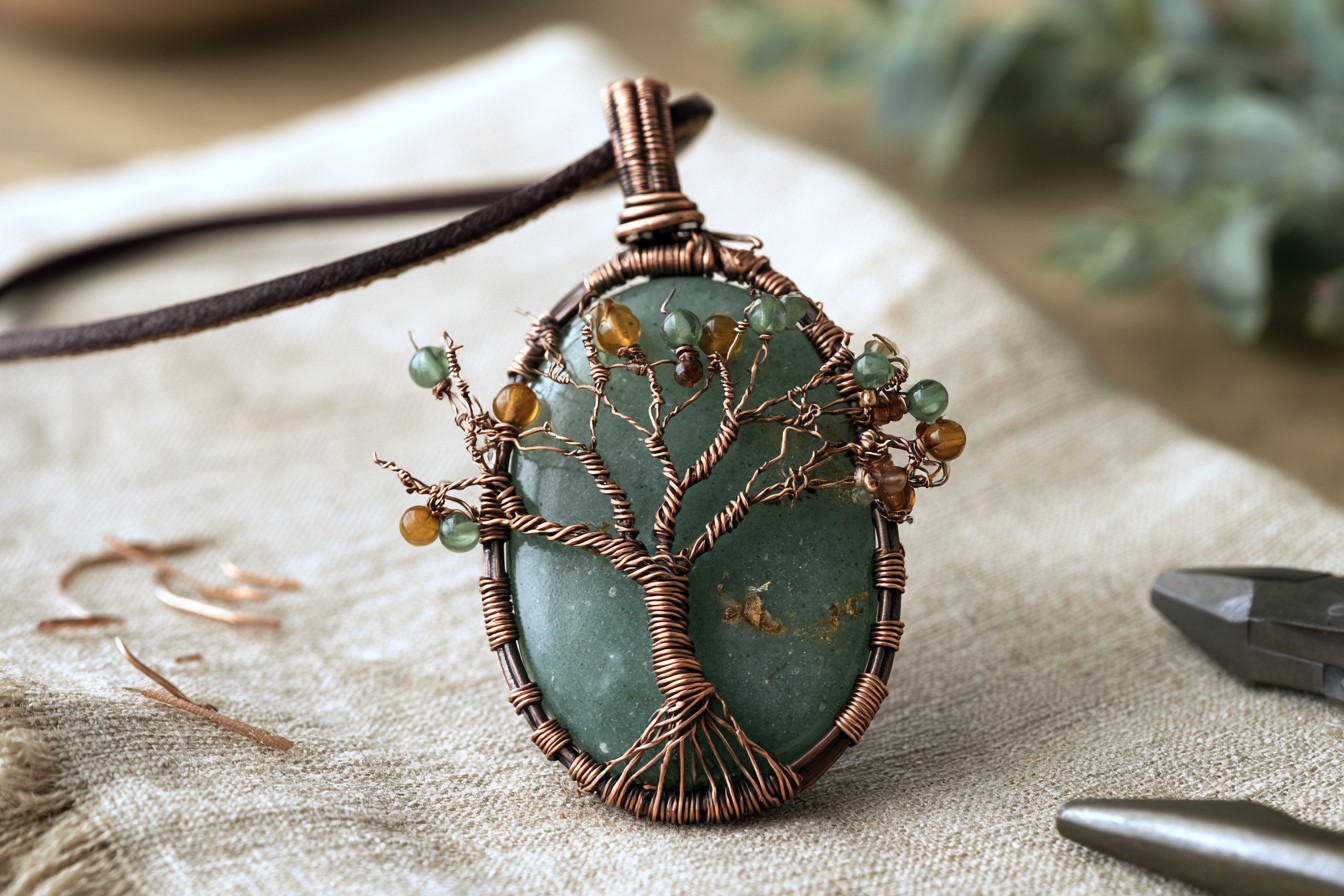
Choose a flat, undrilled stone such as agate, jasper, or aventurine for this nature inspired pendant. Use approximately 0.8 millimeter copper wire to build a supportive frame around the stone. Begin by positioning two long wire pieces across the back, then bring their ends toward the front edges to create secure holding points. Wrap thinner copper wire around the main frame at several locations so the stone cannot slip out. At the top, shape the remaining wire into small branches and add a few green, amber, or brown beads. Form a hanging loop with round nose pliers and attach the pendant to a chain or leather cord. Check that the stone is completely stable and that no wire ends touch the skin. This rustic necklace looks especially attractive with linen clothing, neutral knitwear, and earthy outfits.
2. Hammered Crescent Moon Earrings
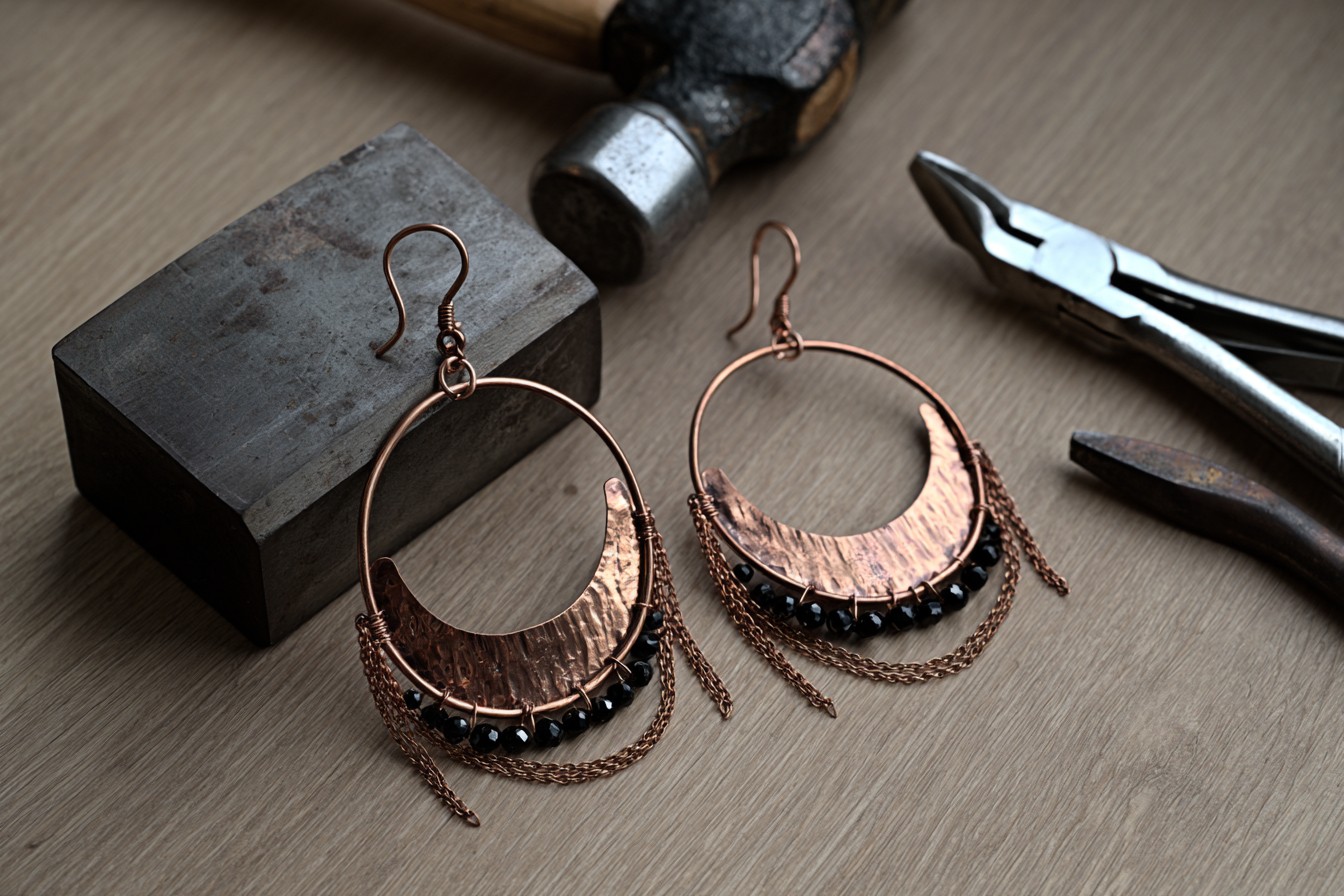
To make crescent moon earrings, cut two equal pieces of medium gauge copper wire. Bend each piece around a round container, wooden dowel, or jewelry mandrel to create matching semicircular shapes. Use the first crescent as a template when forming the second one so both earrings have the same dimensions. Place the shaped wires on a steel bench block and gently strike them with a jewelry hammer. Controlled hammering will flatten the surface, strengthen the wire, and add a handcrafted texture. Small black beads, tiny pearls, or short lengths of fine chain can be attached along the lower edge of each crescent. Add matching earring hooks and close every connecting ring with pliers. Avoid striking the copper too forcefully because excessive hammering may thin, crack, or distort the wire. File the ends carefully before attaching the hooks.
3. Adjustable Double Spiral Ring
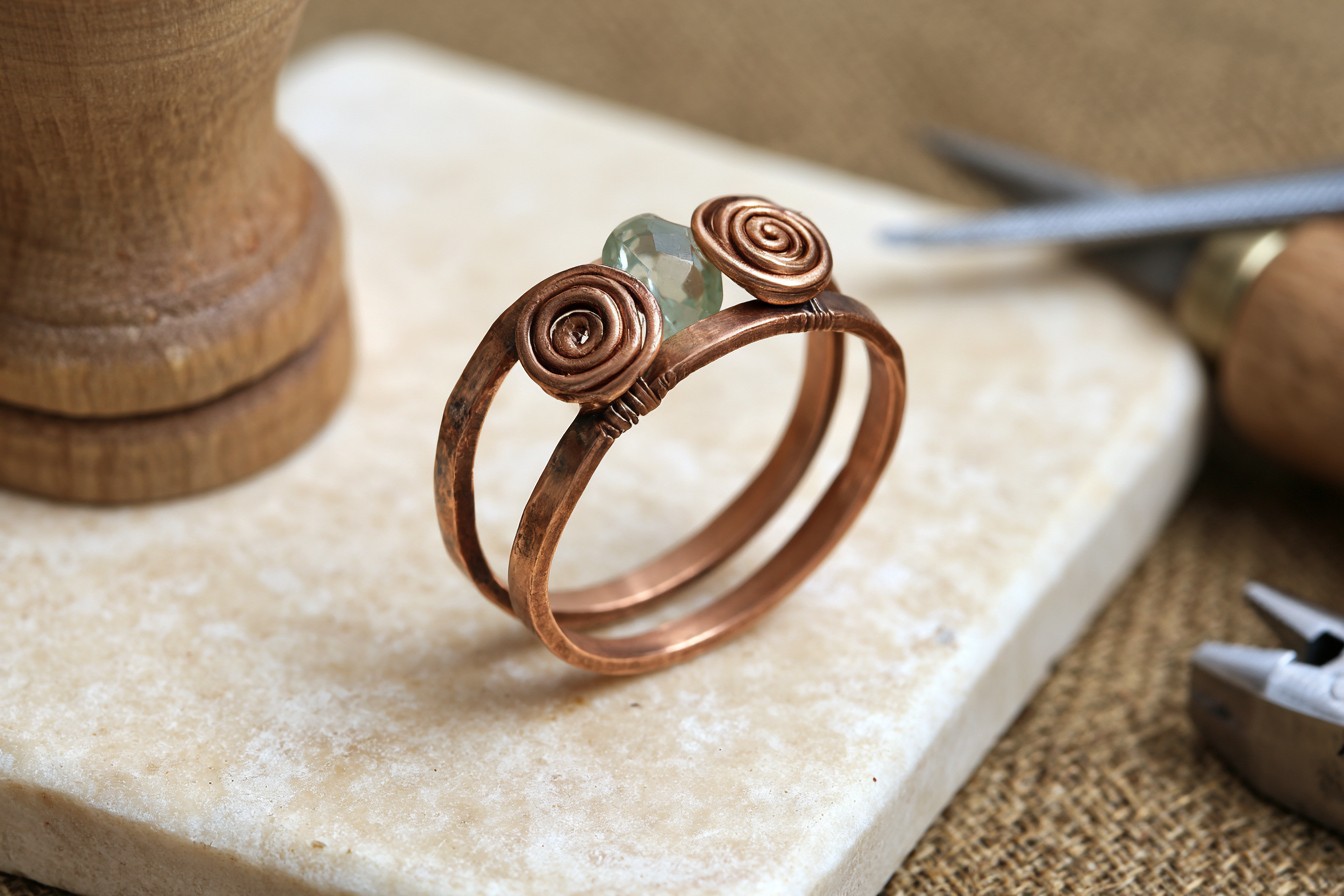
An adjustable spiral ring is a practical project for anyone beginning to explore copper wire jewelry. Cut approximately 18 to 20 centimeters of 0.8 or 1 millimeter copper wire. Position the center of the wire against a ring mandrel or another cylindrical object close to your finger size. Wrap the wire around the form twice, leaving both ends pointing toward the top of the ring. Use round nose pliers to curl one end clockwise and the other counterclockwise, creating two balanced spirals. A small crystal, pearl, or colorful glass bead can be placed between them for additional detail. Leave a slight opening underneath so the ring remains adjustable. Smooth both cut ends with a fine metal file and curve them inward so they cannot scratch the skin. Polish the finished ring with a jewelry cloth to reduce tool marks and restore the warm copper surface.
4. Woven Copper Cuff Bracelet
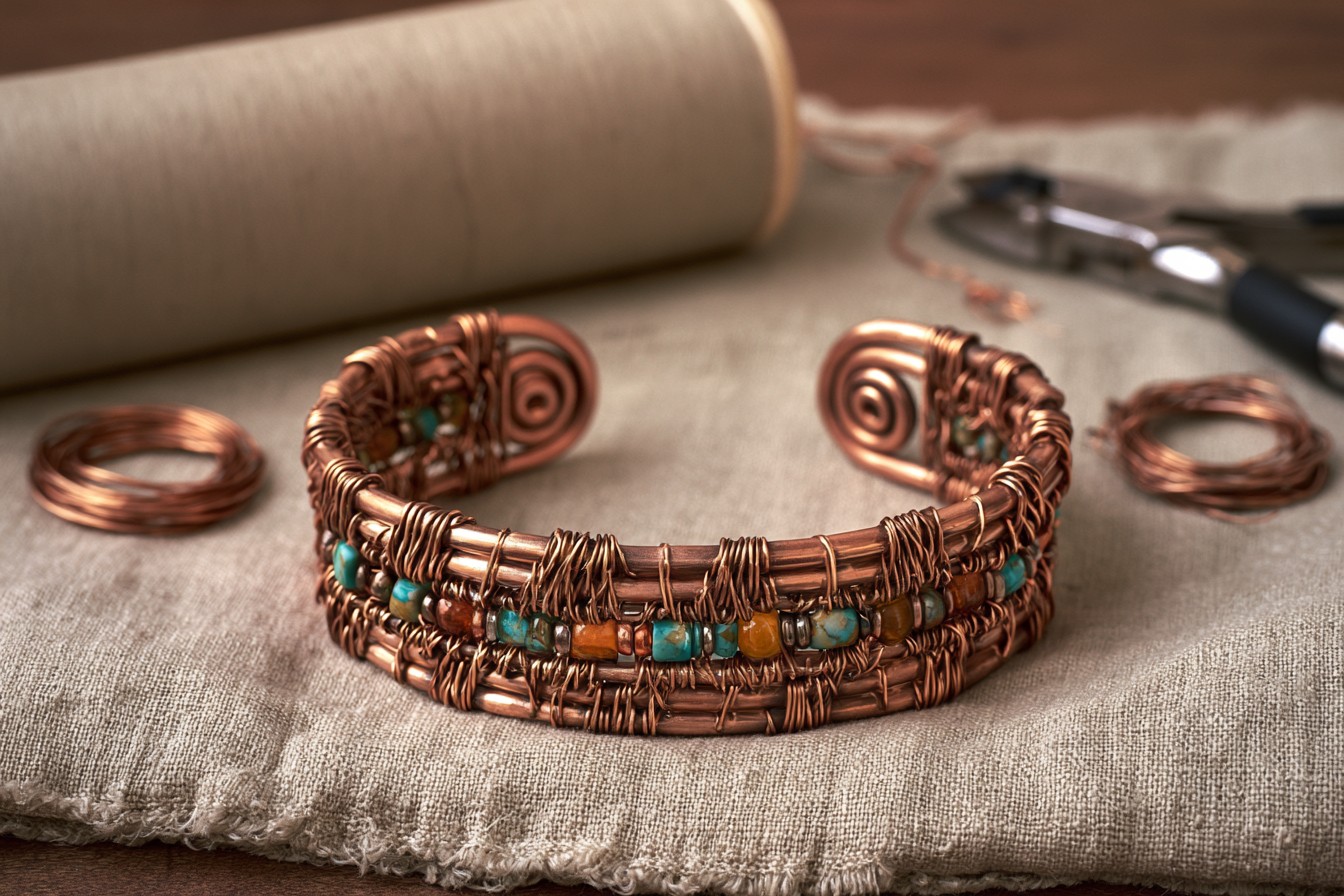
Begin this woven cuff bracelet with two or three thick copper wires that will act as the structural base. Cut them slightly longer than the circumference of your wrist and arrange them parallel to one another. Secure approximately 0.3 millimeter weaving wire around the first base wire with several tight wraps. Guide the thin wire over and under the thicker sections, gradually building a consistent woven pattern. Small beads may be included at regular intervals to create color and dimension. Keep the tension even throughout the process so the bracelet does not become twisted or uneven. When the weaving is complete, curl the exposed ends of the base wires into decorative spirals or cover them with smooth metal end caps. Shape the bracelet around a mandrel or cylindrical container, leaving a small opening between the ends. This opening allows the cuff to slide comfortably onto different wrist sizes.
5. Botanical Copper Leaf Brooch
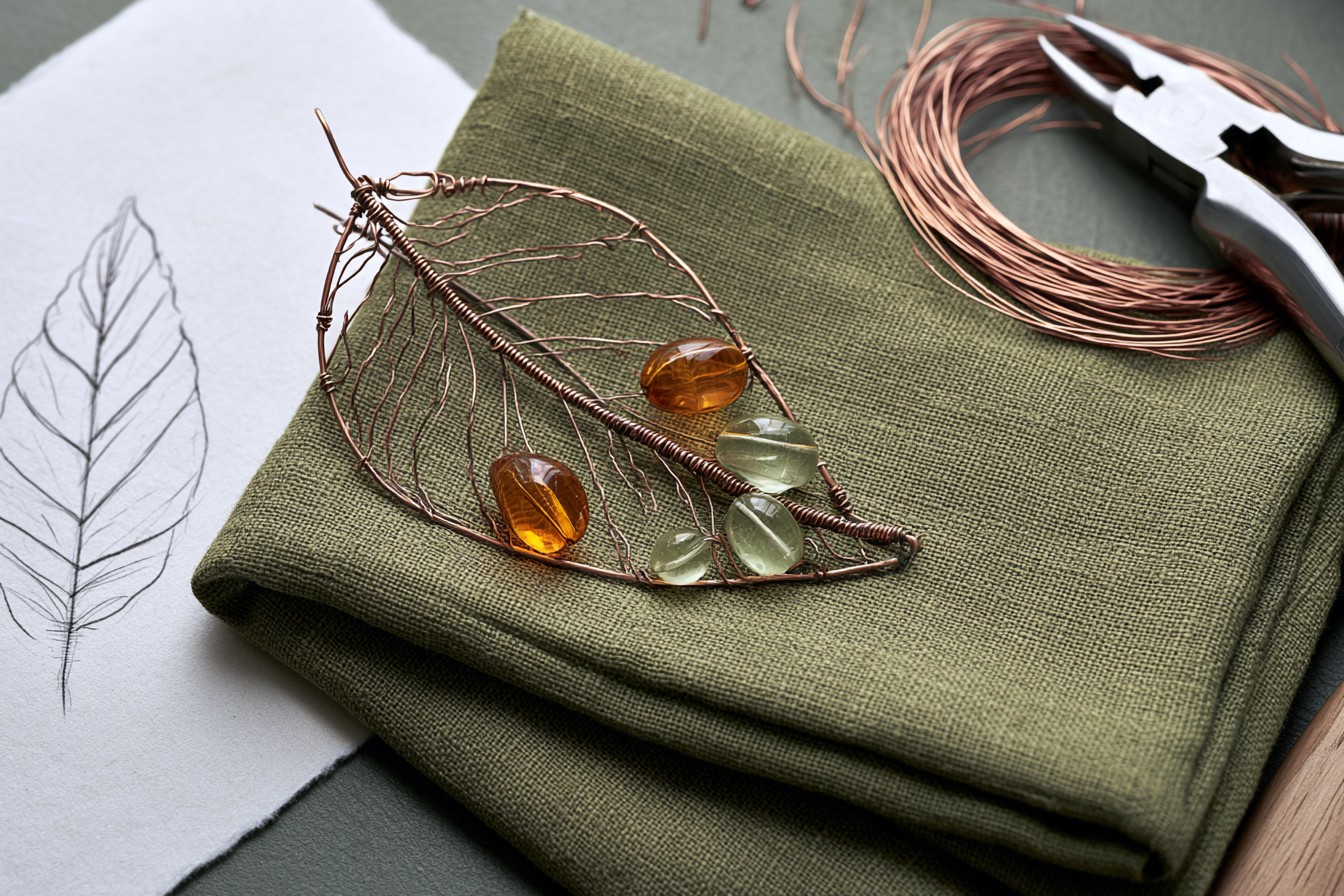
A real leaf can provide useful inspiration when designing a botanical copper brooch. Begin by drawing a simple leaf outline on paper. Bend medium gauge wire along the drawing to create the outer frame, then secure the joining point with several wraps of thinner wire. Place a straight piece of wire through the center to represent the main vein. Attach additional fine wires from the center toward the edges, creating smaller branching veins. Transparent, amber, pale green, or earthy glass beads may be added between selected sections. Gently curve the outer frame to make the leaf appear more natural rather than completely flat. Attach a metal brooch pin to the back with fine copper wire, making sure the pin can open and close freely. File every cut end and position connections behind the design. The completed brooch can decorate a jacket, fabric bag, thick scarf, or cardigan.
6. Geometric Beaded Frame Earrings
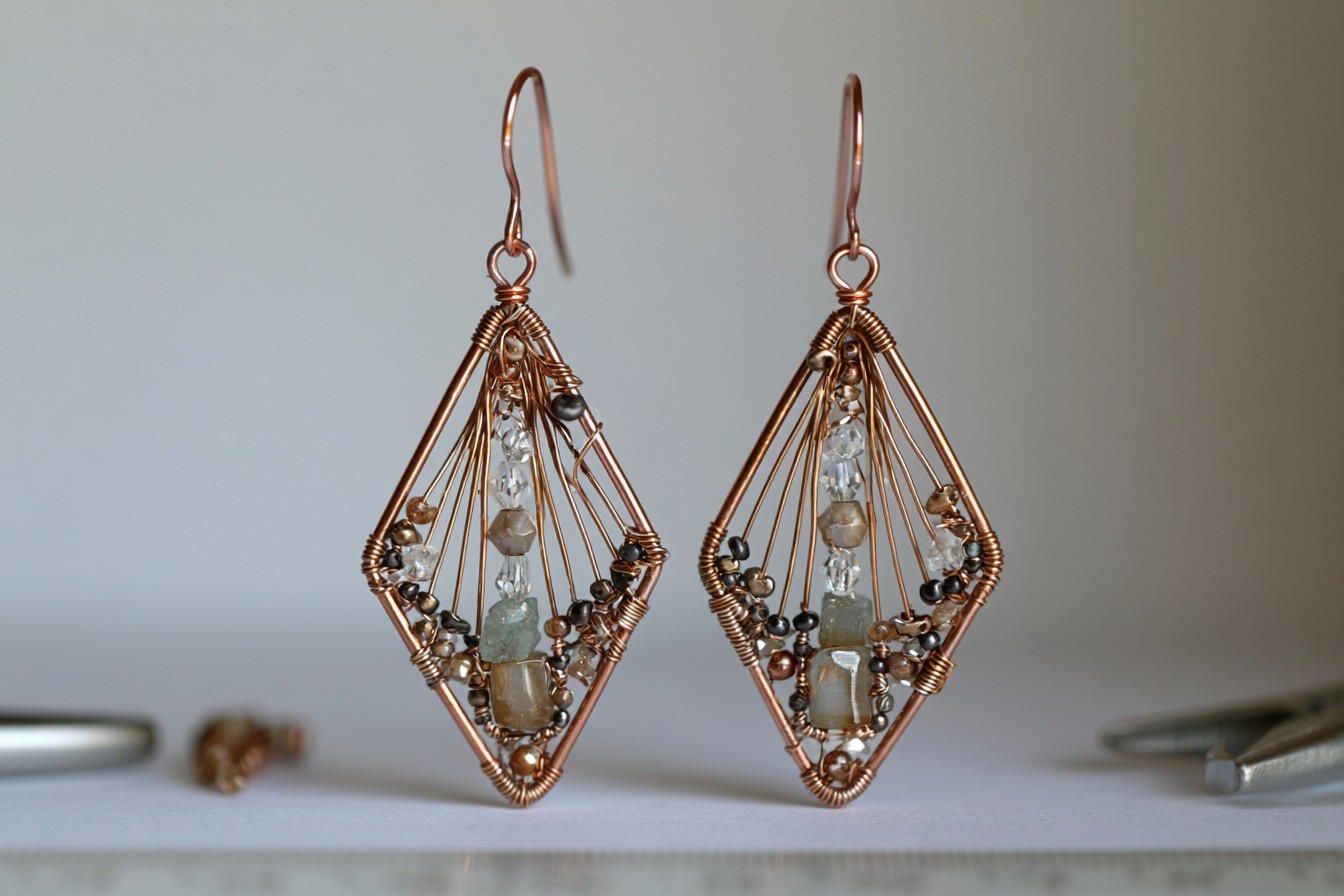
Replace traditional circular hoops with triangular, hexagonal, diamond, or elongated teardrop frames to create modern copper earrings. Cut two identical lengths of medium gauge wire and mark the bending points with a ruler. Use flat nose pliers to form each corner, checking the pieces regularly to ensure they remain equal in size. Once both frames are complete, secure a thinner wire to one side. Stretch it between opposite edges while adding small crystals, seed beads, or natural stone chips. Follow a clear geometric arrangement rather than placing the wires randomly, as an organized pattern will produce a cleaner result. Create a small loop at the top and attach a suitable earring hook. Lightweight beads are preferable because heavy materials can make the earrings uncomfortable. Slightly round sharp corners with pliers to prevent the copper from breaking or catching on hair and clothing.
7. Copper Tree of Life Pendant
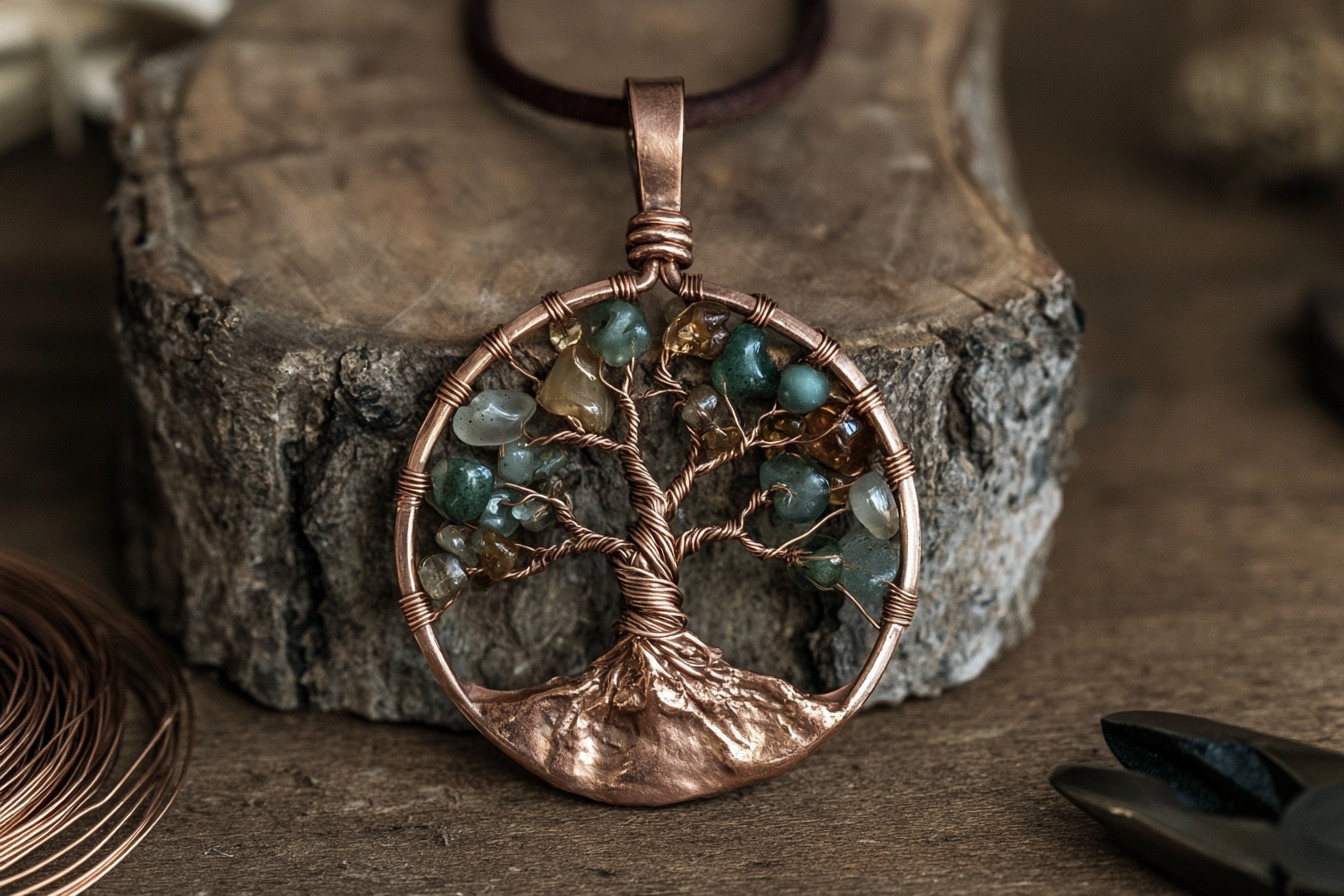
Start a Tree of Life pendant by shaping thick copper wire into a circular or oval outer frame. Leave the joining point at the top so it can become the hanging loop. Attach six to eight pieces of thin wire along the lower edge. Twist these wires together for several centimeters to create the tree trunk. Separate them into smaller groups and bend them in different directions to form branches. Thread small natural stone chips or glass beads onto the branches before wrapping each branch securely around the outer frame. Green stones can resemble leaves, while mixed gemstones create a colorful seasonal appearance. Separate the lower trunk wires into root shapes for additional detail. Keep most connection points on the back so the front remains neat. Once all the wires are secured, attach the pendant to a long copper chain or a simple leather cord and check for exposed ends.
8. Layered Bracelet with Coiled Copper Beads
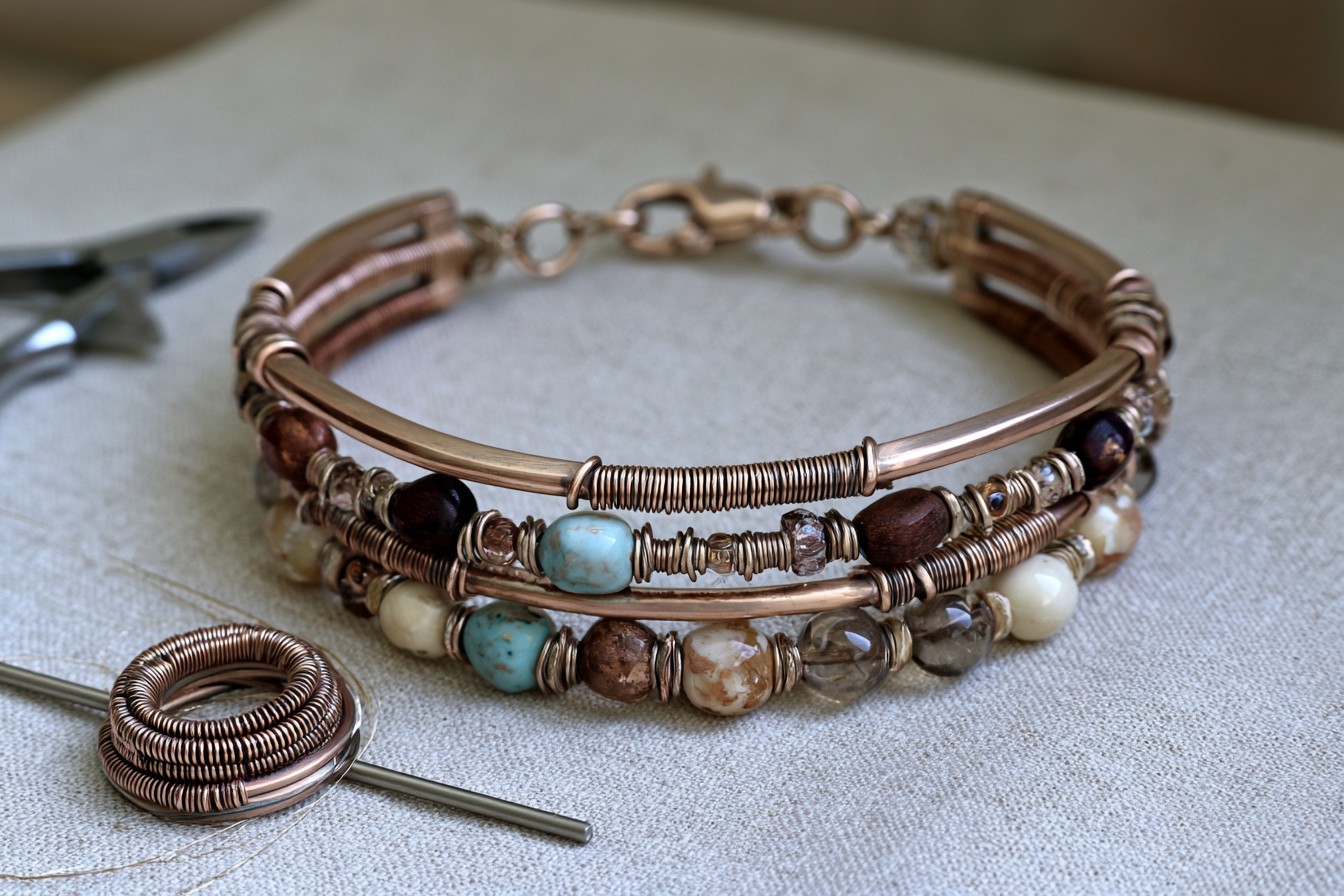
Instead of purchasing metal spacers, create your own decorative beads from copper wire. Wrap thin or medium gauge wire evenly around a knitting needle, metal rod, or narrow screwdriver. Slide the resulting coil from the tool and divide it into equal sections with wire cutters. Carefully file each cut edge before using the coils. Arrange the handmade copper beads with natural stones, wooden beads, ceramic pieces, or matte glass beads on durable jewelry wire. Prepare two or three strands in slightly different lengths to create a layered bracelet. Connect the strands to shared end pieces and finish them with a secure clasp. Avoid winding the coils too tightly around the rod because they may become difficult to remove or lose their rounded shape. Check every connecting ring after assembly. The coiled copper sections introduce texture and give ordinary beads a more distinctive handmade character.
9. Delicate Pearl Branch Necklace
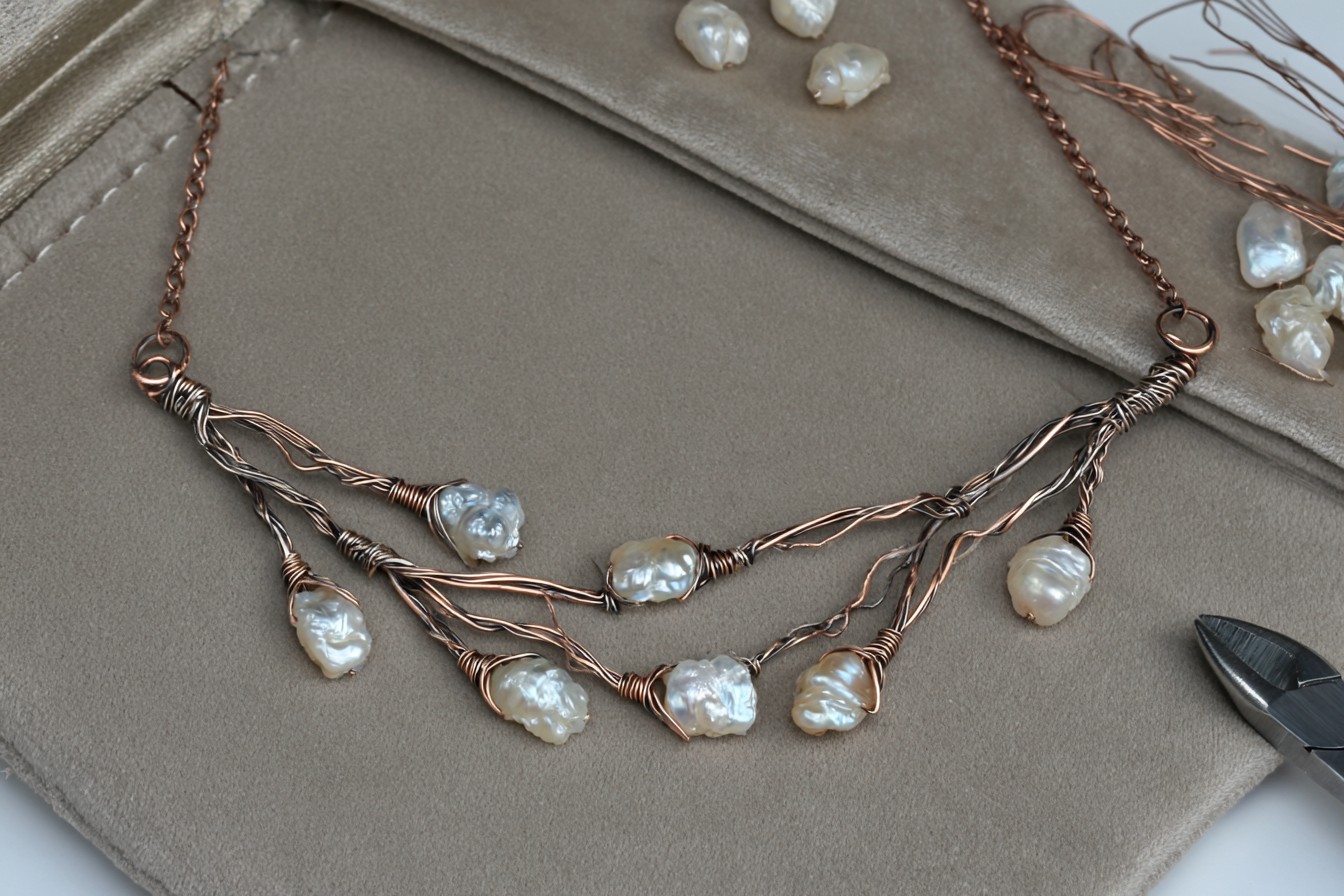
For a delicate branch necklace, gather fine copper wire, small freshwater pearls, connecting rings, and a simple chain. Cut several wire sections approximately 20 centimeters long. Place one pearl near the middle of each wire and twist the wire two or three times directly beneath it. Add more pearls at irregular intervals on both sides, forming small branches. Combine the completed branches into a gently curved arrangement that will sit across the front of the neckline. Vary their lengths slightly instead of making the design perfectly symmetrical. This gives the necklace a softer and more natural appearance. Wrap the joining points carefully and position them behind the main decoration. Form small loops at both ends and connect them to the chain. Because thin wire can bend easily, store the necklace flat inside a jewelry box. The combination of creamy pearls and warm copper creates an elegant accessory for special occasions.
10. Asymmetrical Wave Statement Necklace
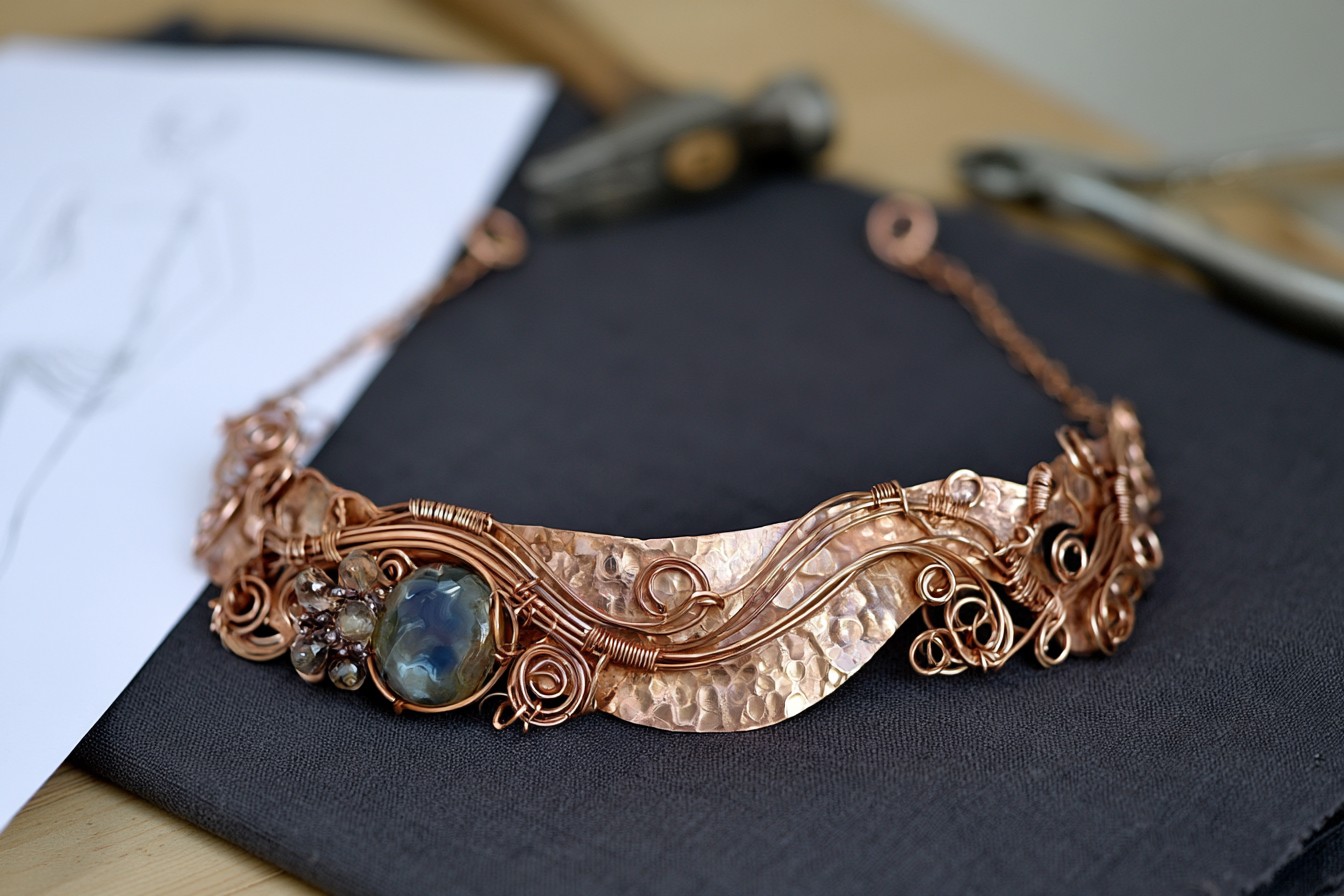
Create a bold statement necklace by shaping copper wires of different lengths into wide curves and flowing wave forms. Begin by sketching the central design on paper. Bend thick wire along the main lines of the drawing, using round nose and flat nose pliers to control each curve. Wrap thinner wire around selected areas and add smaller waves, loops, or spiral details. Place one large natural stone or a cluster of colorful beads on only one side to emphasize the asymmetrical composition. Avoid using too many heavy stones, as the necklace must remain comfortable and balanced. Create two durable attachment points so the weight is distributed evenly across the chain. Selected sections can be gently hammered to provide additional texture and strength. Keep hammering away from narrow connection points. This expressive necklace works best with plain dresses, simple shirts, and solid colored knitwear where the copper design can become the central feature.
11. Gemstone Copper Hand Chain
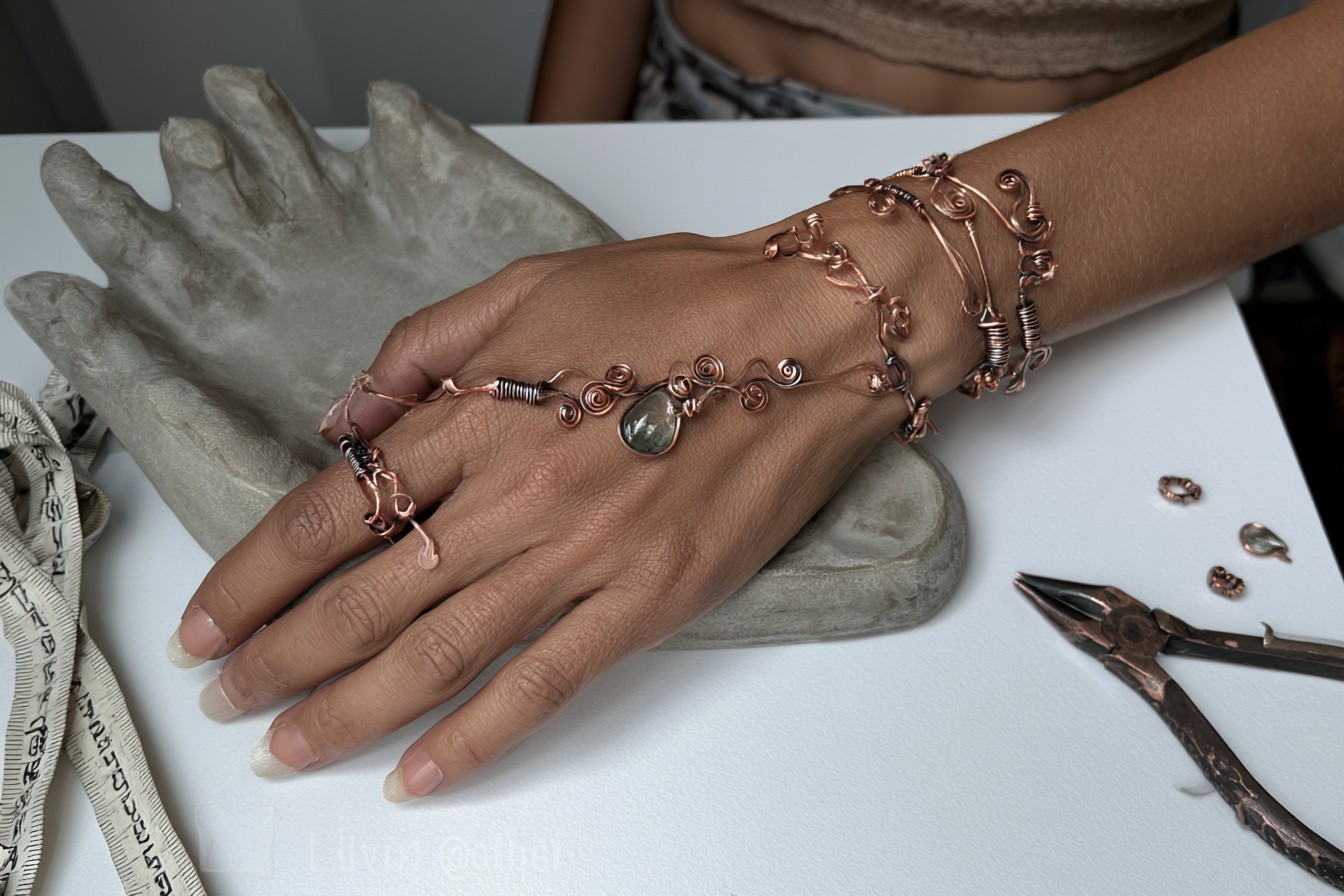
A hand chain combines a bracelet and ring with a decorative connector that rests across the back of the hand. Begin by forming a simple copper bracelet that fits comfortably around the wrist. Curve both ends into small loops and add a secure clasp. Next, create a lightweight ring for the middle finger, leaving enough room for natural movement. Measure the distance from the ring to the bracelet while your hand is relaxed. Use that measurement to prepare a flexible connector from fine copper wire. Decorate the center with small spirals, crystals, or a single teardrop shaped gemstone. The connector should not be too short because it could restrict finger movement. Try on the design and repeatedly open and close your hand to test its comfort. File all cut edges and curve them inward. The finished piece creates an elegant and unusual accessory for celebrations, special events, or creative outfits.
MORE IDEAS


Share
What's Your Reaction?
 Like
0
Like
0
 Dislike
0
Dislike
0
 Love
0
Love
0
 Funny
0
Funny
0
 Angry
0
Angry
0
 Sad
0
Sad
0
 Wow
0
Wow
0








