Stamp printing is one of the most enjoyable ways to transform ordinary materials into personalized decorations and gifts. Wine corks, vegetables, sponges, leaves, and cardboard tubes can all be used to create distinctive patterns at home. This versatile technique can be adapted for countless projects, including greeting cards, fabric bags, wrapping paper, wall art, and handmade stationery. For successful results, choose paint suitable for the surface, avoid overloading the stamp, and always make a test print before beginning the final project. The following projects were inspired by Easy Stamp Ideas to Boost Your DIY Projects and developed with fresh, original details. Every design can be personalized by changing its colors, patterns, materials, and intended use.
1. Create Colorful Polka Dots with Wine Corks
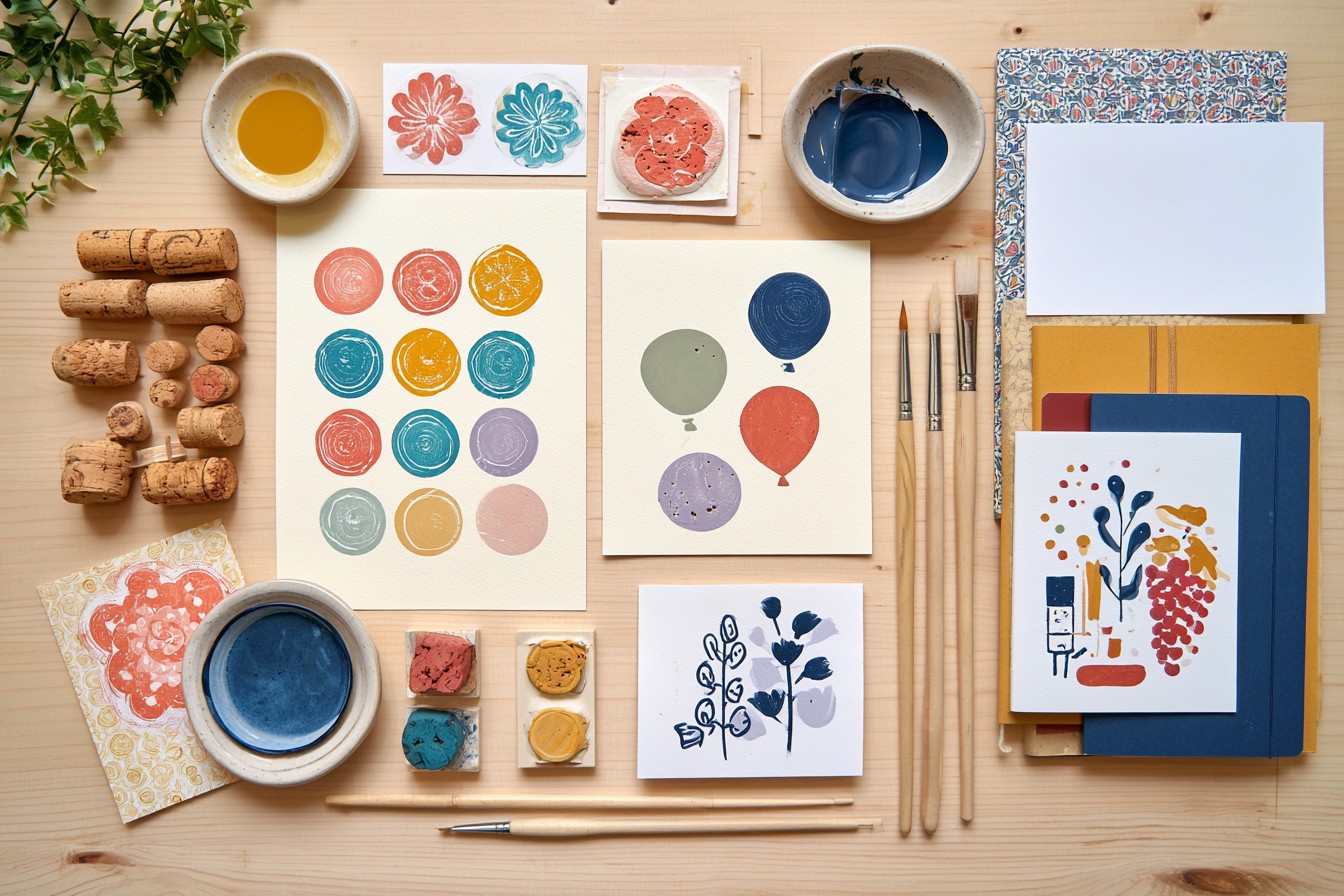
Wine corks are among the easiest stamping materials for creating neat and controlled circular patterns. For this project, you will need several corks, acrylic paint, a flat plate, a paintbrush, and paper or cardstock. Spread a thin layer of paint across the plate before gently pressing the flat end of the cork into it. Avoid applying too much paint because this can cause the edges of the circles to become uneven. Test the cork on scrap paper before working on the final surface. Use corks in different sizes to create a combination of small and large dots. These patterns can decorate wrapping paper, birthday cards, notebook covers, party banners, and scrapbook pages. You can also arrange the dots into flowers, balloons, grapes, abstract shapes, or modern geometric compositions.
2. Make Botanical Napkins with Potato Stamps
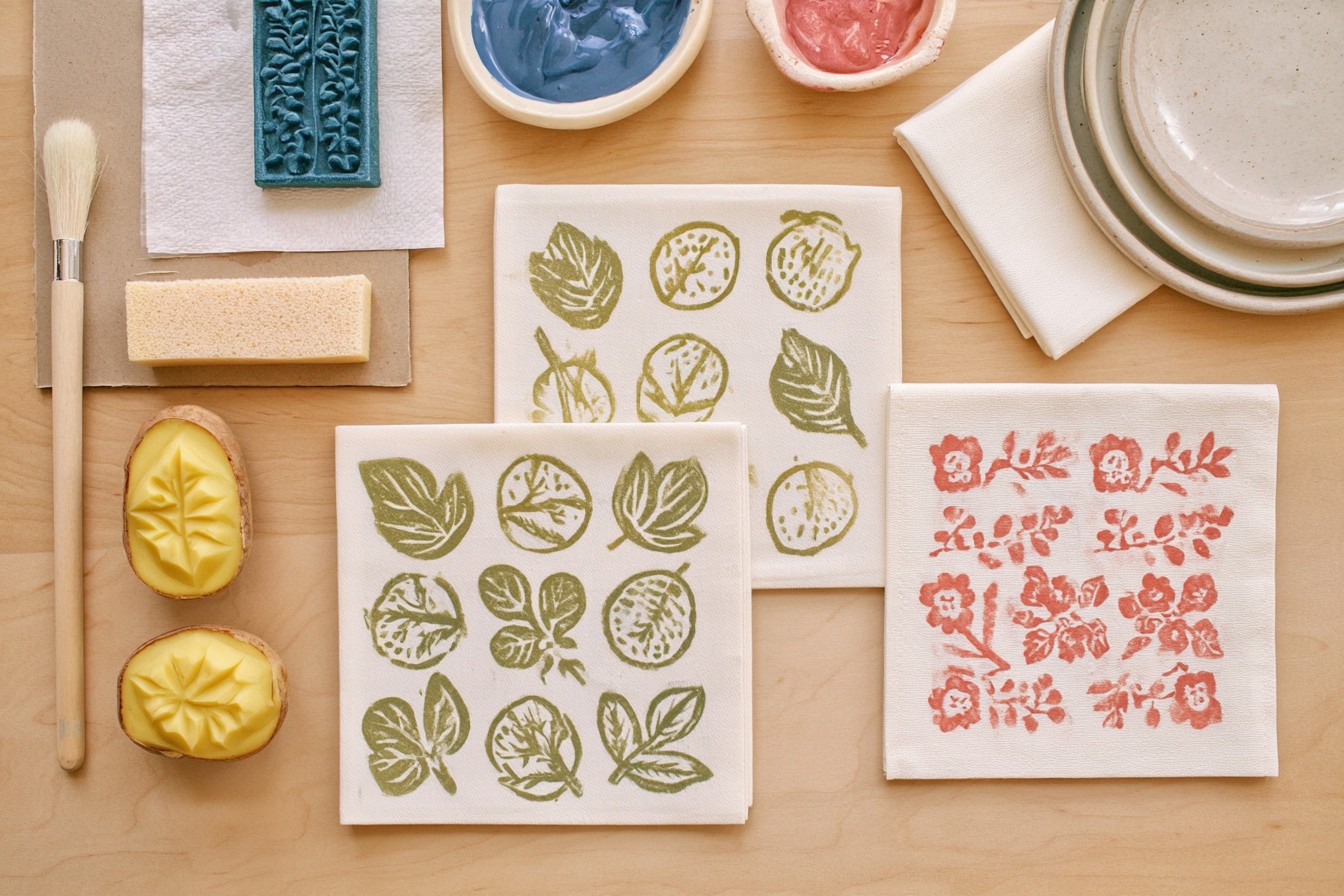
Potato stamping is an inexpensive and accessible method for transferring simple botanical shapes onto fabric. Cut a large potato in half and draw a leaf, lemon, flower, or small branch on the exposed surface. With adult supervision, carefully remove the potato surrounding the design so the selected shape remains raised. Absorb excess moisture with a paper towel before applying a thin layer of fabric paint using a sponge brush. Place cardboard underneath the cotton napkin to prevent the paint from soaking through. Press the potato firmly onto the fabric and lift it straight upward without sliding. Allow the print to dry, then heat-set it according to the paint manufacturer’s instructions. These handmade napkins are perfect for picnics, seasonal tables, brunches, and gift sets. The same technique can decorate kitchen towels, tablecloths, placemats, and reusable fabric wraps.
3. Carve a Personalized Monogram Eraser Stamp
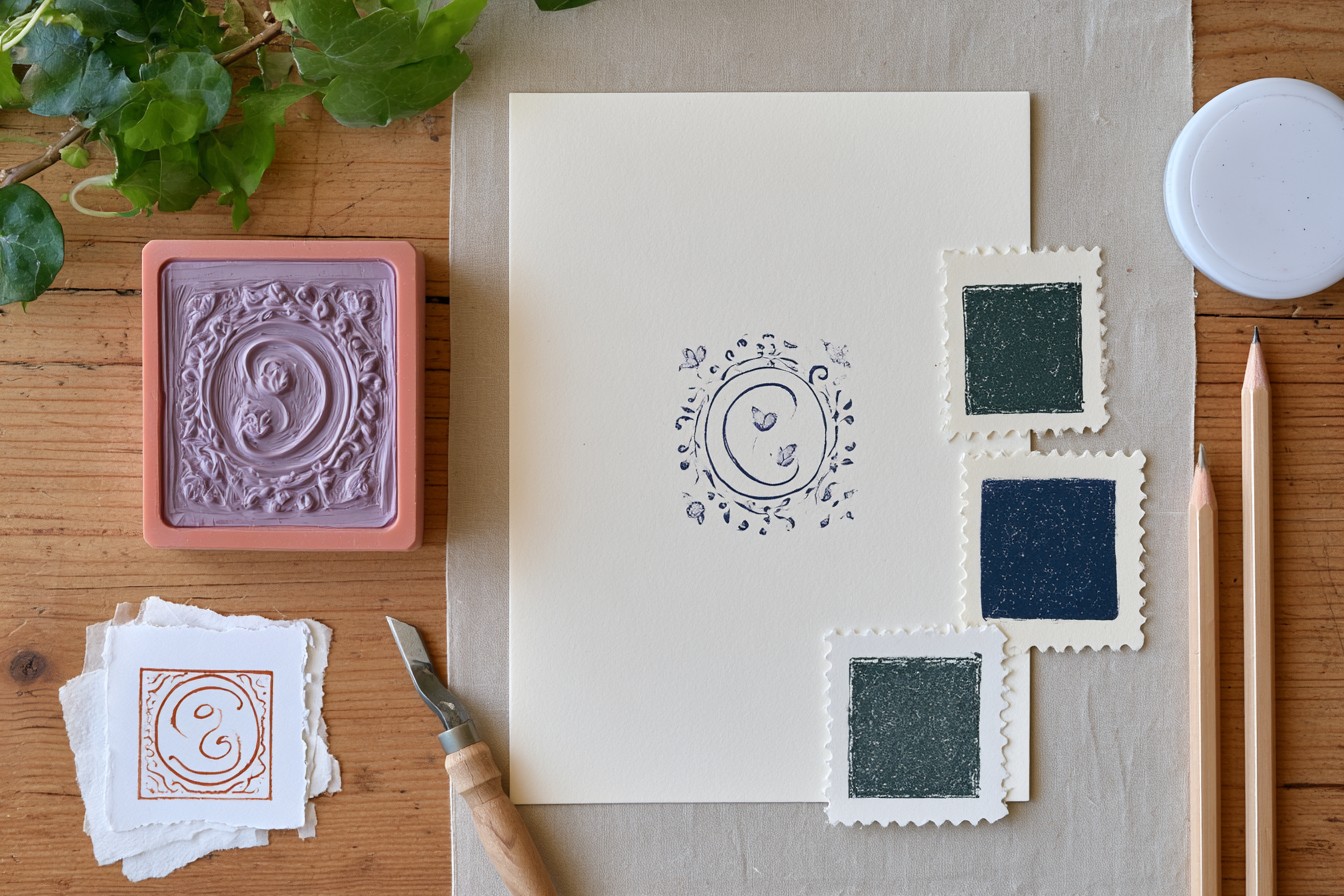
A large unused eraser can be transformed into a detailed monogram stamp for personalized stationery. You will need a flat eraser, pencil, small carving tool, ink pad, and scrap paper. Since the letter must appear correctly after printing, draw the monogram backward on the eraser. Carefully carve around the letter, leaving the printable section raised above the surrounding surface. Once the carving is complete, press the eraser onto an ink pad and make a test impression. Uneven or unwanted sections can be carefully trimmed until the design produces a clean result. Use the finished monogram stamp on envelopes, book labels, gift tags, personal notes, invitations, and handmade business cards. A small border, leaf, star, or floral accent can be added around the initial to make the design more distinctive and professionally finished.
4. Print Natural Patterns with Real Leaves
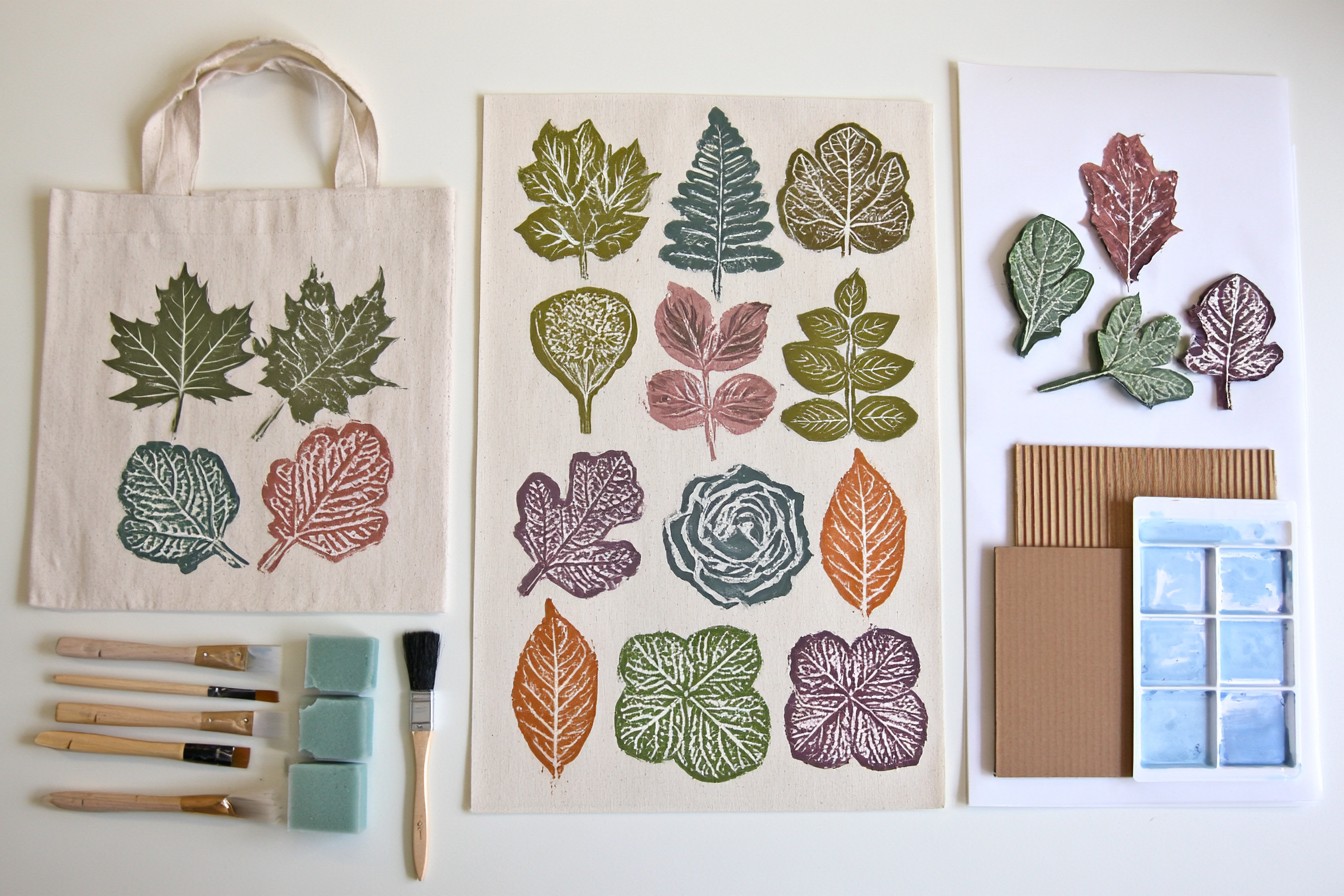
Leaves collected from the garden can be used to transfer beautiful natural details onto fabric. Select sturdy leaves with visible veins, such as maple, rose, fern, fig, or hydrangea leaves. Apply a thin layer of fabric paint to the textured underside using a sponge brush. Place protective cardboard beneath the fabric, then position the leaf with its painted side facing downward. Cover it with clean paper and press across the entire surface using your hands. Carefully lift the leaf by its stem to reveal the impression underneath. Allow the print to dry completely before setting the color according to the paint instructions. Leaf stamps can decorate plain tote bags, cushion covers, table runners, kitchen towels, and fabric storage baskets. Combine several leaf shapes with green, brown, burgundy, or earthy colors to create botanical, autumnal, or woodland compositions.
5. Form Heart and Flower Stamps from Cardboard Tubes
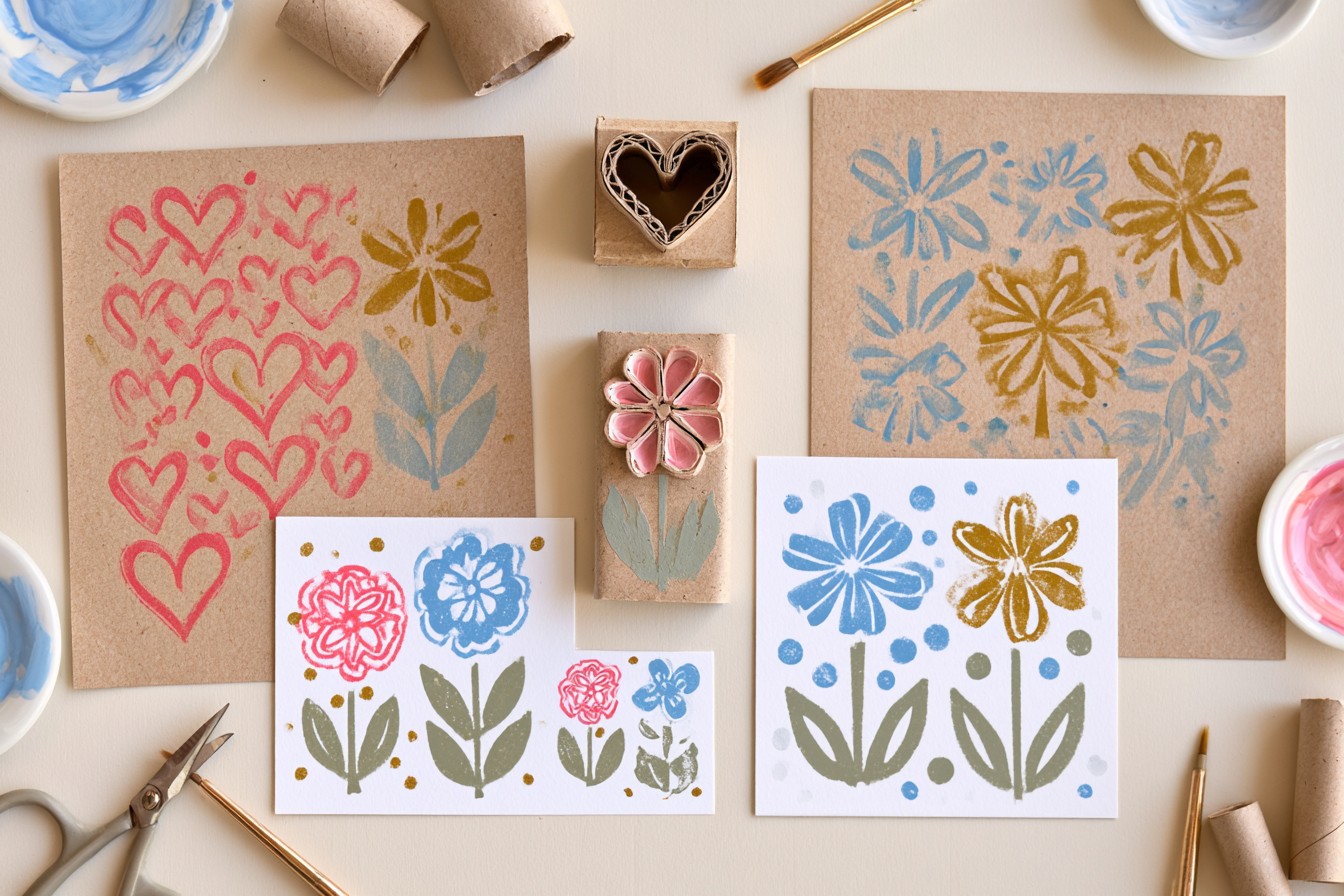
Toilet paper and paper towel tubes can be shaped into creative stamps without requiring complicated tools. To make a heart, push one side of the tube inward and pinch the opposite side into a pointed tip. For a flower, make several evenly spaced cuts around one end and fold the sections outward to form petals. Dip the shaped edge into acrylic paint and press it onto cardstock, kraft paper, or thick drawing paper. Make sure the entire edge receives an even layer of paint before each impression. Heart patterns are suitable for anniversary cards, gift wrapping, classroom art, and party decorations. Flower prints can be used for spring posters, bookmarks, handmade invitations, and scrapbook pages. Cut tubes into different sizes to create more variation. After the paint dries, add stems, leaves, dots, or smaller stamped details to complete the design.
6. Build Reusable Pattern Stamps with Craft Foam
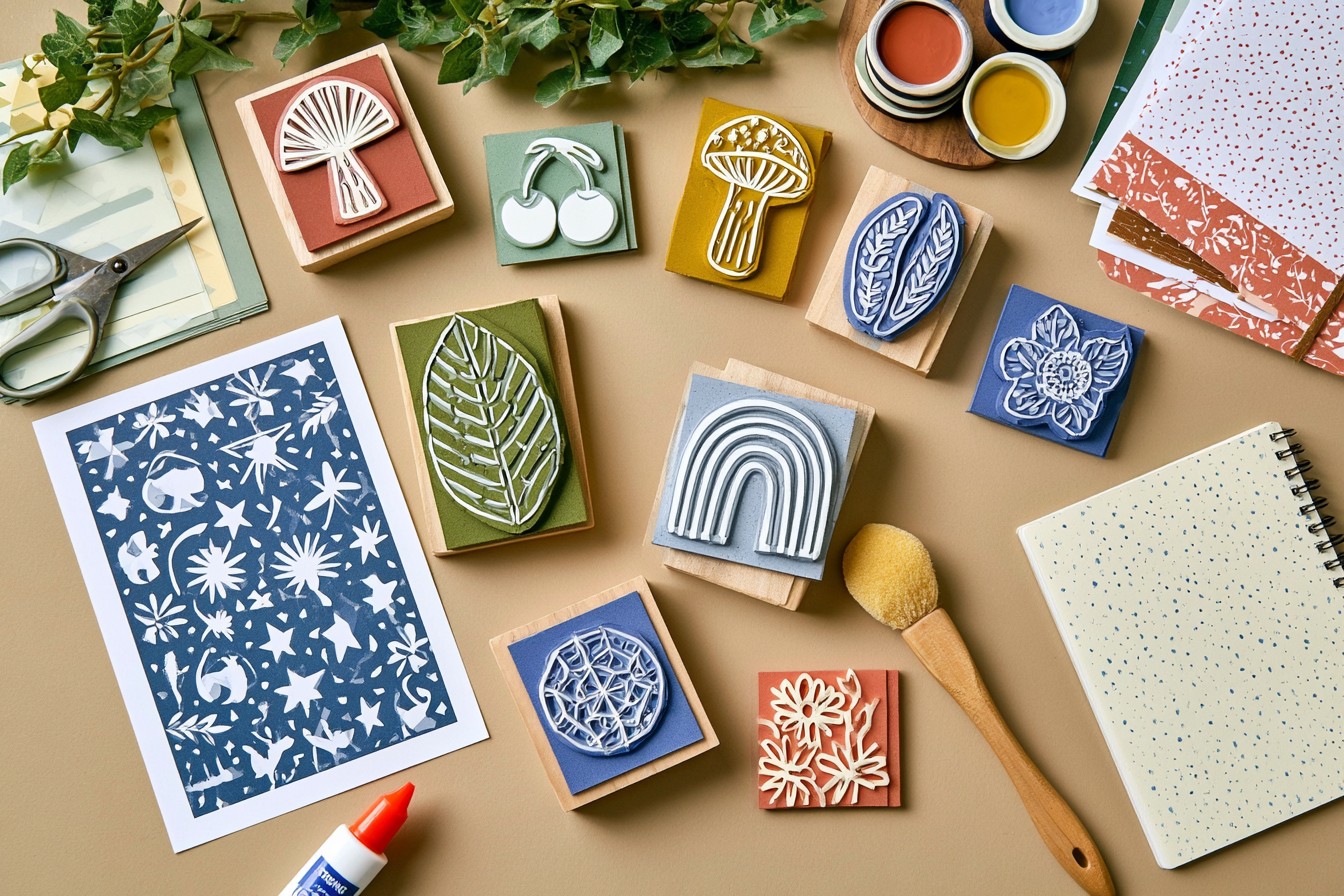
Craft foam is an excellent stamp-making material because it is easy to cut and transfers paint evenly. Begin by drawing stars, mushrooms, cherries, rainbows, leaves, or geometric shapes onto a foam sheet. Cut out the designs and attach them to a flat wooden block or thick cardboard using strong craft glue. Several foam shapes can be arranged on a single backing to create a larger repeating pattern. Allow the adhesive to dry completely before applying a small amount of paint with a sponge brush. Press the stamp evenly against the selected surface, then lift it without moving it sideways. These reusable stamps can decorate storage boxes, fabric plant pot covers, wall art, notebook covers, wrapping paper, and handmade cards. Clean the foam gently with a damp cloth before the paint dries so the stamp remains usable for future projects.
7. Design Modern Geometric Prints with Rubber Bands
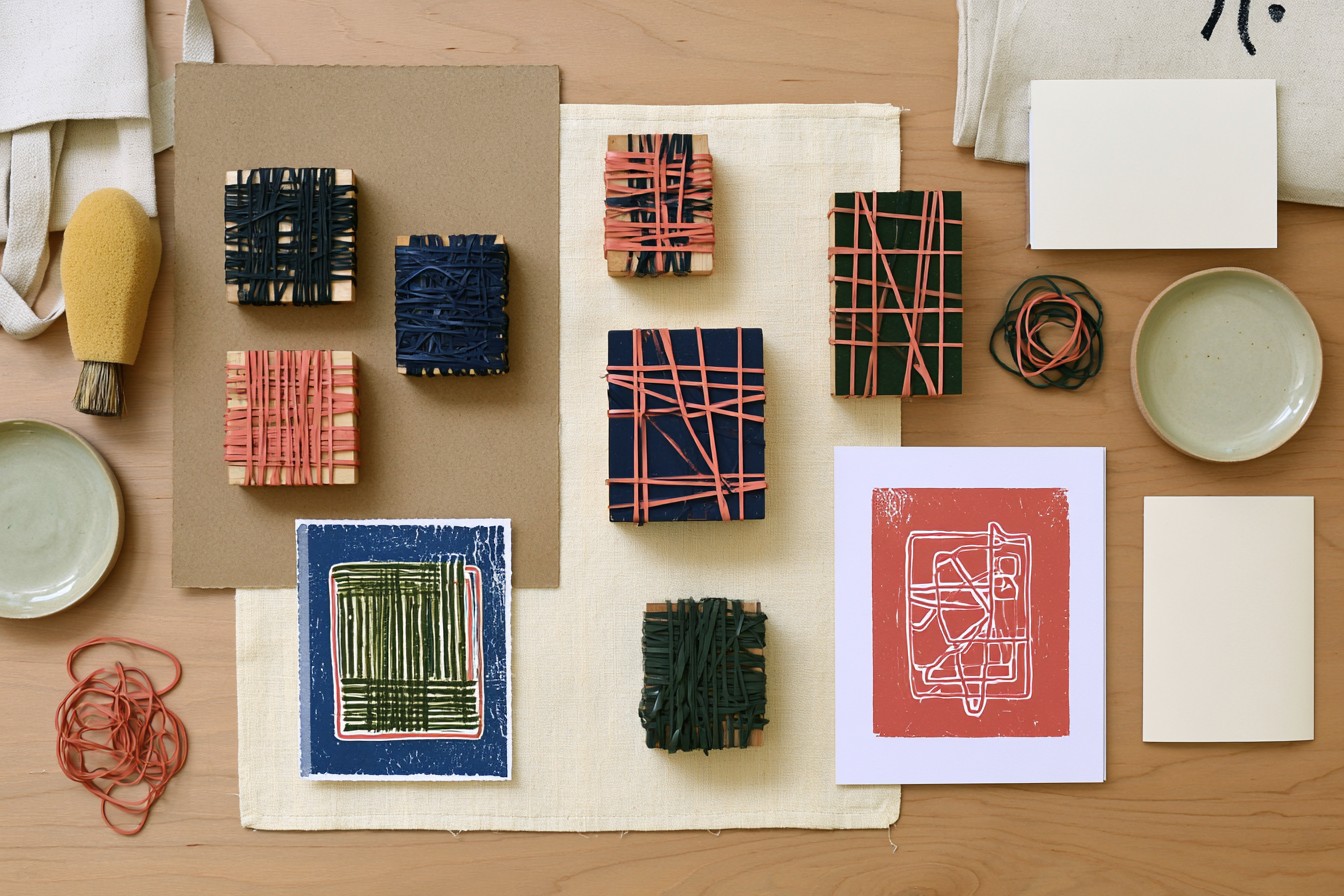
Rubber bands can produce modern abstract prints made from irregular intersecting lines. Choose a small wooden block, sturdy cardboard piece, or empty packaging box as the stamp base. Wrap rubber bands of different thicknesses around the block in horizontal, vertical, and diagonal directions. Make sure each band is tight enough to remain raised above the surface. Apply a thin layer of acrylic or fabric paint to the bands using a sponge brush, then press the block onto paper or fabric. Rotate the stamp between impressions to create layered lines and geometric intersections. This pattern works well on modern greeting cards, kraft packages, tote bags, table linens, journal covers, and abstract wall art. Black, navy, terracotta, and dark green create a bold graphic appearance, while pastel shades produce a softer and more playful finish.
8. Cut Large Soft Stamps from Kitchen Sponges
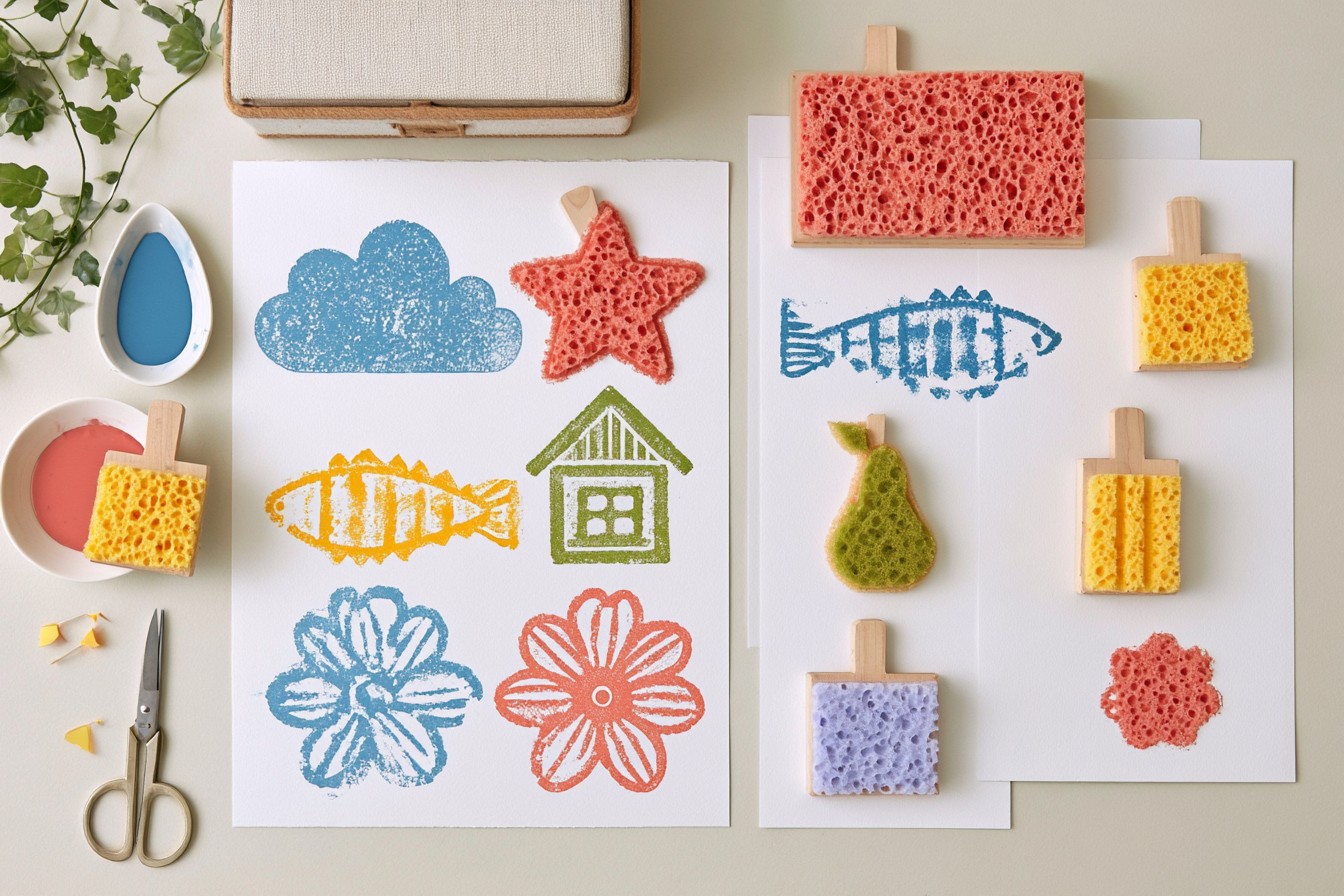
A new kitchen sponge can become a practical stamp for applying large patterns to broad surfaces. Draw a cloud, star, house, fish, fruit, flower, or another simple shape directly onto the sponge. Cut around the outline with sharp scissors, keeping the edges as neat as possible. For more comfortable handling, attach a small wooden block or bottle cap to the back. Pour paint onto a flat plate and lightly coat the sponge without soaking it completely. Gently press the shape onto paper, fabric, or paintable wood. The porous material will give the print a naturally soft and textured appearance. Sponge stamps are ideal for children’s artwork, playroom storage boxes, fabric bags, seasonal wall decorations, and handmade banners. Prepare a separate sponge for each color to prevent the shades from mixing and becoming muddy.
9. Create Floral Prints with Apples and Celery
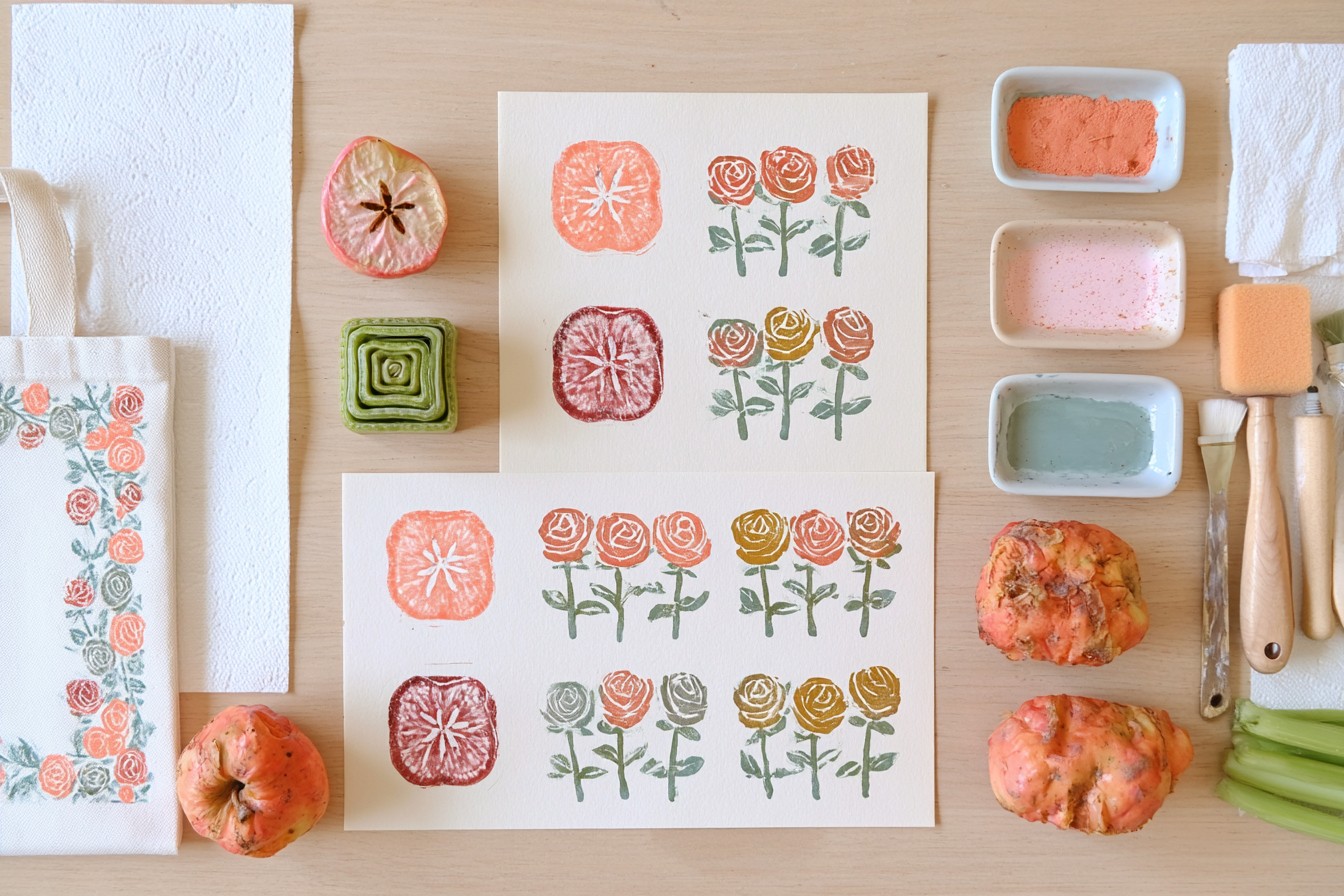
Fruit and vegetable cross-sections produce organic patterns that are difficult to recreate with manufactured stamps. When an apple is cut in half, its center reveals a recognizable shape with a subtle star around the seeds. The base of a celery bunch creates a layered pattern resembling a rose. Absorb excess moisture from the cut surface with a paper towel, then apply paint using a sponge brush. Press the produce firmly against the surface, wait briefly, and lift it straight upward. Apple prints are ideal for kitchen posters, recipe book covers, reusable shopping bags, picnic blankets, and classroom crafts. Celery prints can be arranged into flower bouquets, decorative borders, gift cards, and patterned paper. To reduce unnecessary food waste, use bruised, wilted, or leftover produce that is no longer suitable for cooking.
10. Make Textured Backgrounds with Bubble Wrap
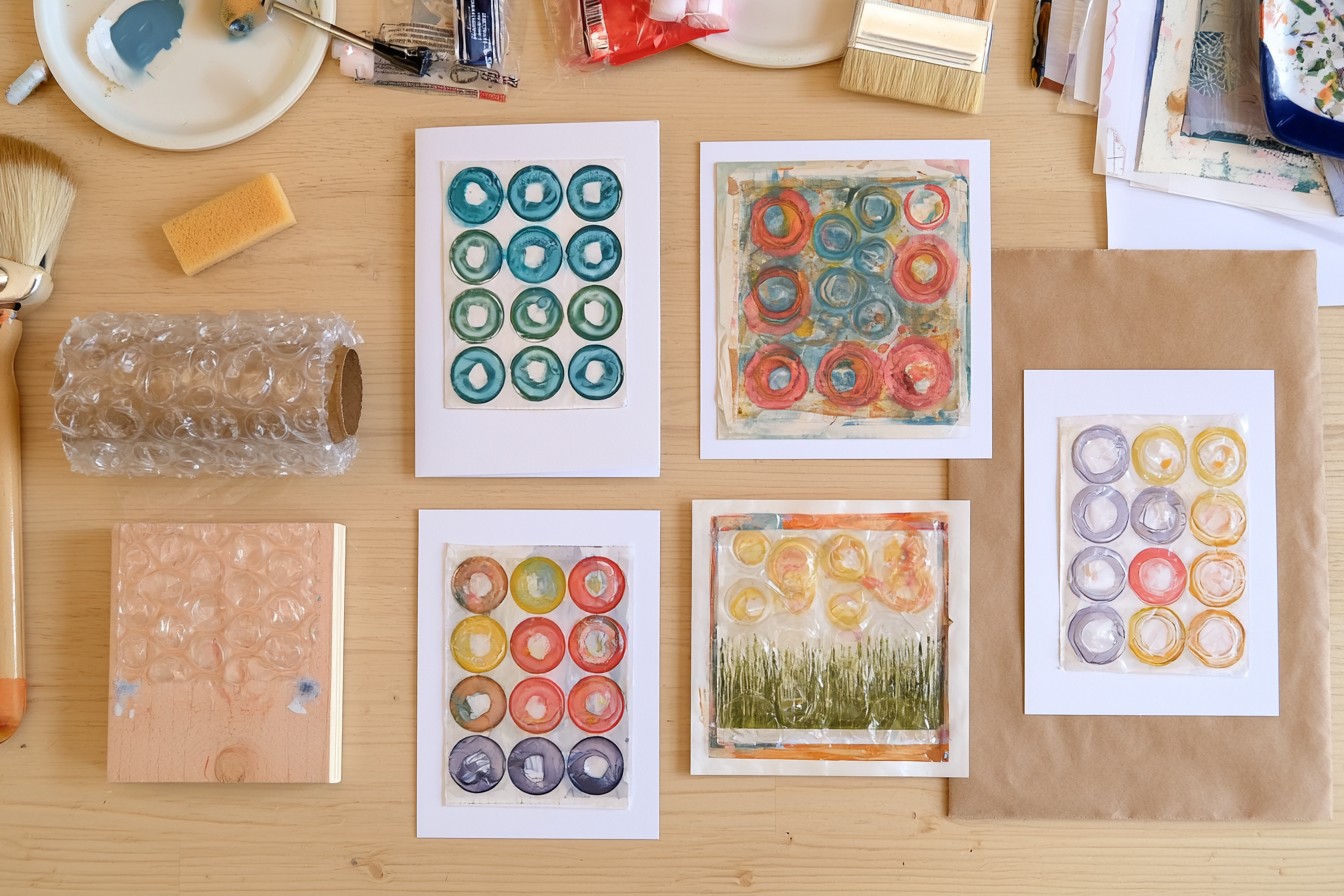
Bubble wrap saved from packaging can be repurposed into a stamp that creates lively dotted textures. Attach a piece of bubble wrap around a small rolling pin, cardboard tube, or flat wooden block with the bubbles facing outward. Apply a thin layer of acrylic paint using a sponge brush. Press a flat stamp directly onto the paper or slowly roll the cylindrical version across the surface. Layer two or three colors to add depth and movement to the pattern. This technique is particularly useful for collage backgrounds, handmade cards, art journals, wrapping paper, and children’s animal illustrations. Blue shades can suggest water, green can resemble grass, and bright colors can create a playful confetti effect. Choose bubble wrap with unbroken bubbles to achieve consistent prints, and test the paint coverage before working on the final project.
11. Turn Old Thread Spools into Circular Stamps
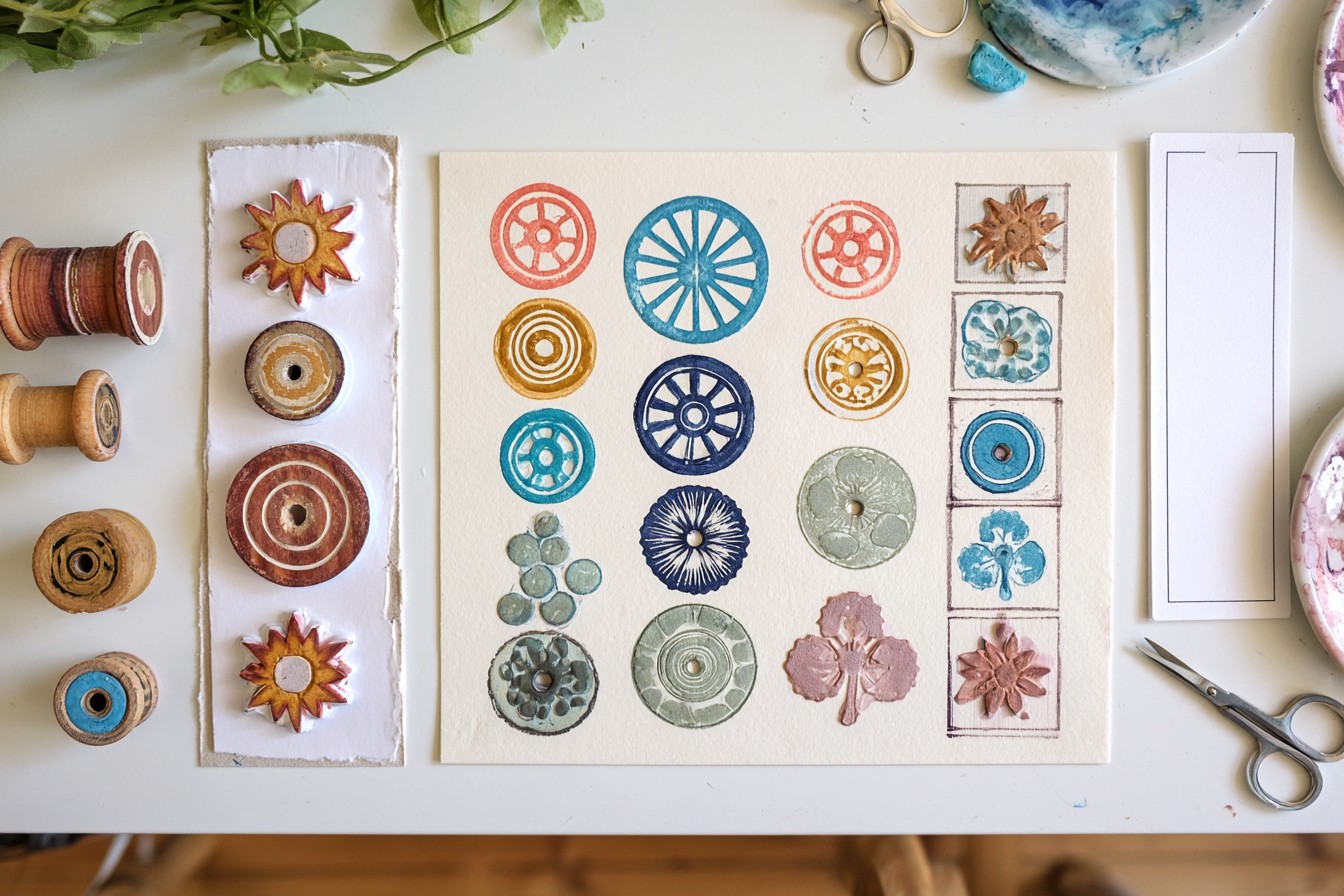
Wooden or plastic thread spools can produce circles, rings, and wheel-like patterns because of their distinctive ends. Remove any remaining thread or dust and make sure the spool is completely clean. Dip one end directly into paint to create simple circles, or glue a small craft foam shape to the end for flowers, suns, wheels, or other motifs. The center of the spool acts as a convenient handle, helping keep your fingers away from the paint. Arrange the circles into grapes, flowers, bubbles, borders, or abstract patterns. Spool stamps can be used on greeting cards, bookmarks, children’s artwork, gift tags, and handmade decorative paper. Combining several spool sizes creates visual rhythm and variety. Wash or wipe the spools before the paint dries so they can be reused with different colors in future projects.
12. Make Tiny Symbol Stamps from Bottle Caps
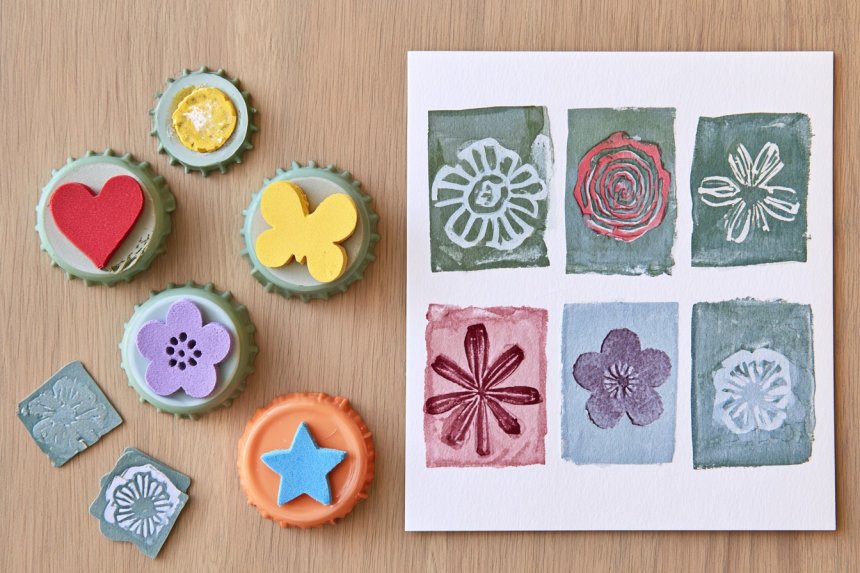
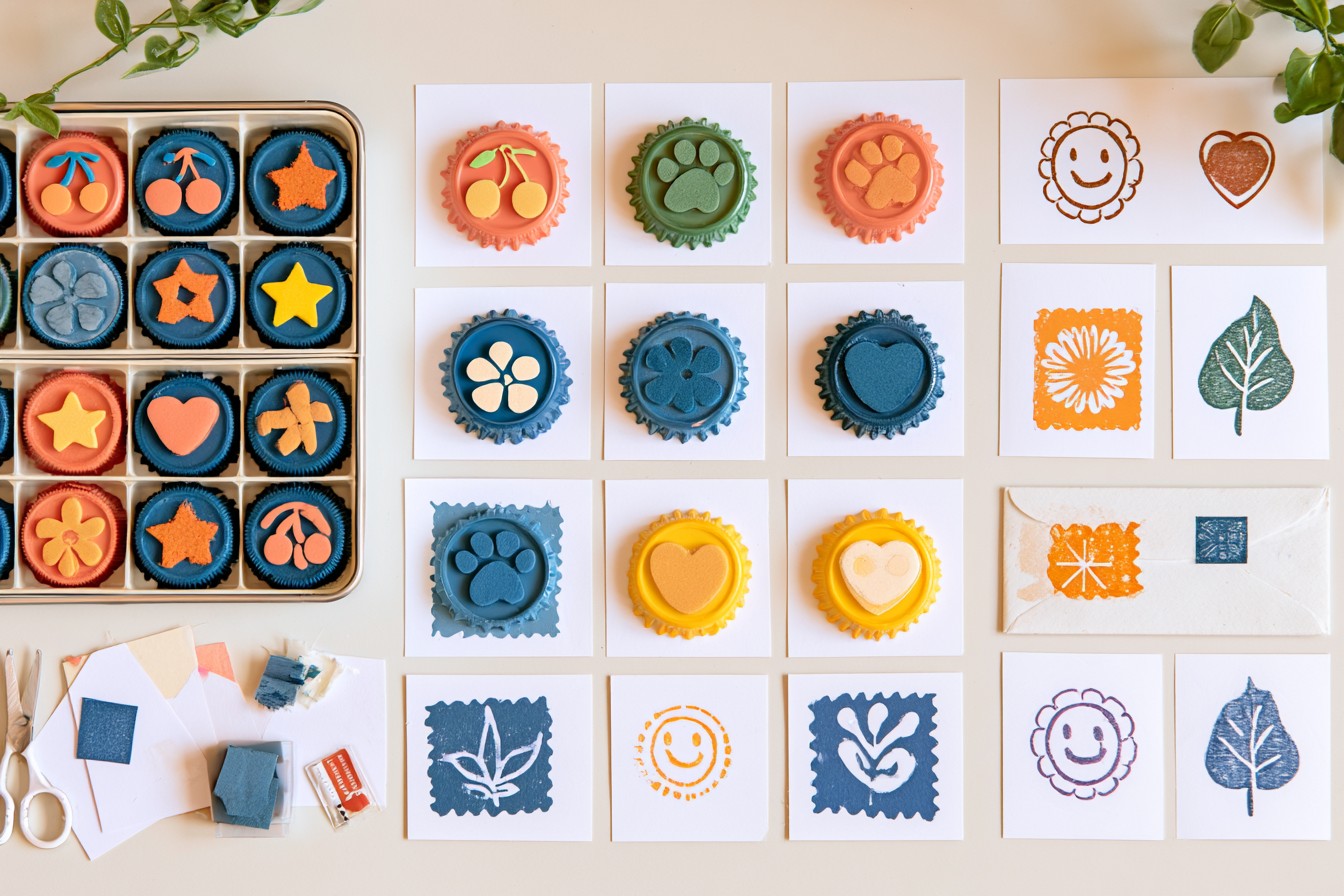
Plastic bottle caps create durable bases for small stamps that are comfortable to hold. Wash and dry the caps before beginning. Draw simple shapes such as cherries, paws, stars, flowers, hearts, or smiling faces onto craft foam. Cut out each design and attach it to the flat top of a cap using strong adhesive. Make a collection by placing a different symbol on every cap. Press the foam surface onto an ink pad or a thin layer of acrylic paint, then test it on scrap paper. These miniature stamps are useful for planners, gift tags, envelopes, children’s reward charts, notebooks, calendars, and scrapbook pages. Organize them by color or symbol in a divided container for easier use. Because the project involves small pieces and scissors, young children should complete it with adult supervision.
13. Print Seasonal Wrapping Paper with Cookie Cutters
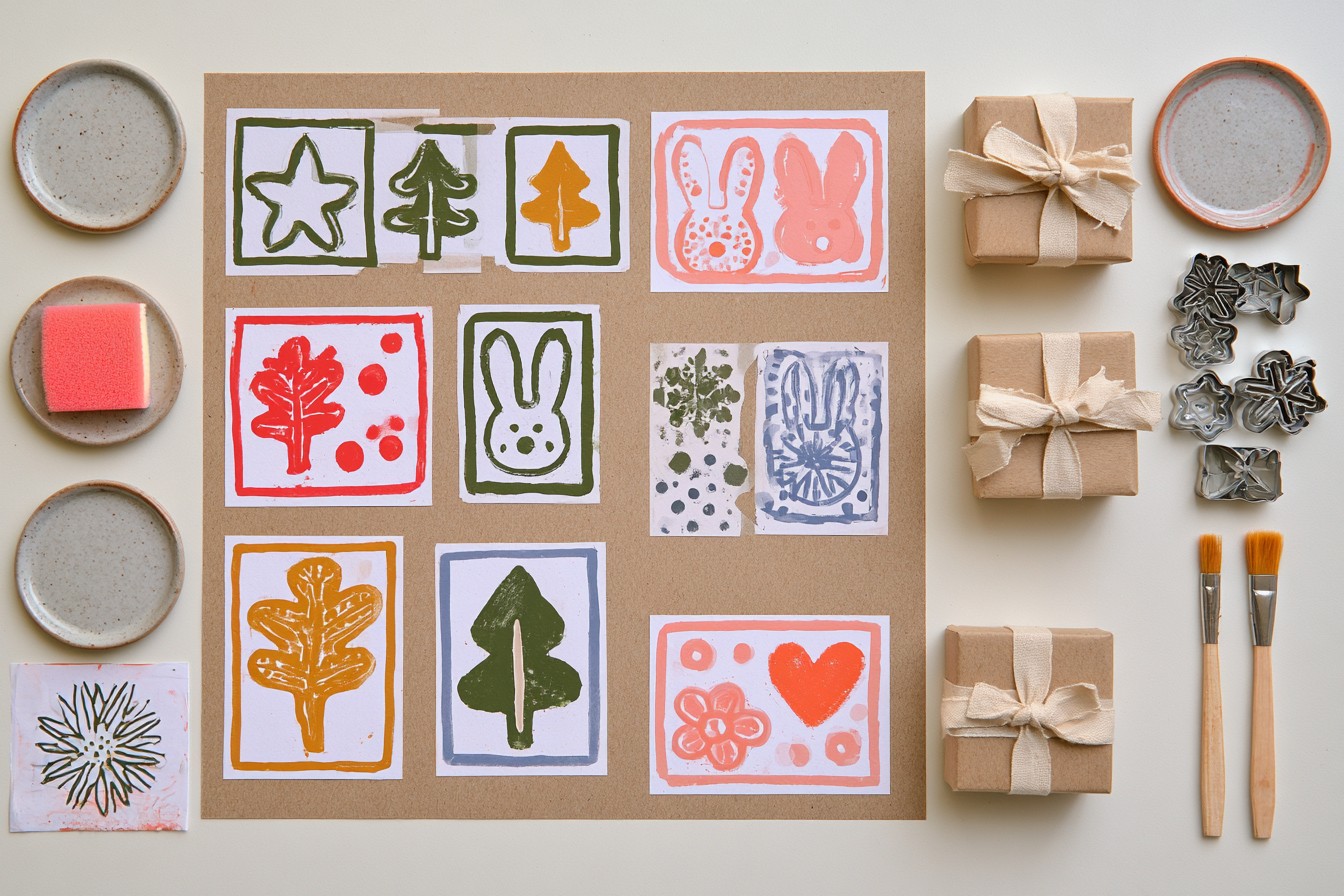
Cookie cutters can be used to create bold outlined prints for customized seasonal wrapping paper. Choose metal or plastic cutters shaped like stars, trees, leaves, hearts, rabbits, flowers, or snowflakes. Lightly dip the edge of each cutter into paint spread across a flat plate, then press it onto kraft paper. The empty center produces a clean outlined shape rather than a solid image. Once the prints dry, fill the interiors with paint, colored pencils, dots, or smaller stamped motifs if you want a more detailed design. This handmade paper can wrap birthday, holiday, spring, or special occasion gifts. The same technique works on invitations, place cards, posters, and party decorations. Keep a separate collection of cookie cutters for crafting so that cutters exposed to paint are not later used for food preparation.
Daria Kuznetsova brings a thoughtful approach to interiors, handmade projects, and everyday living through her work at Decovive.com. She focuses on approachable ways to give rooms more character, improve organization, update furnishings, and make better use of both indoor and outdoor areas.
Her articles often explore clever makeovers, repurposed materials, decorative details, garden touches, and accessible projects that can be completed without advanced skills. Rather than following a single aesthetic, Daria draws from changing trends, practical needs, and personal expression.
Her goal is to offer readers useful starting points they can shape around their own taste, budget, and space, turning simple changes into homes that feel considered, comfortable, and individual.




 Like
0
Like
0
 Dislike
0
Dislike
0
 Love
0
Love
0
 Funny
0
Funny
0
 Angry
0
Angry
0
 Sad
0
Sad
0
 Wow
0
Wow
0








