15 Attic Studio Designs for Art, Craft, and Focused Work

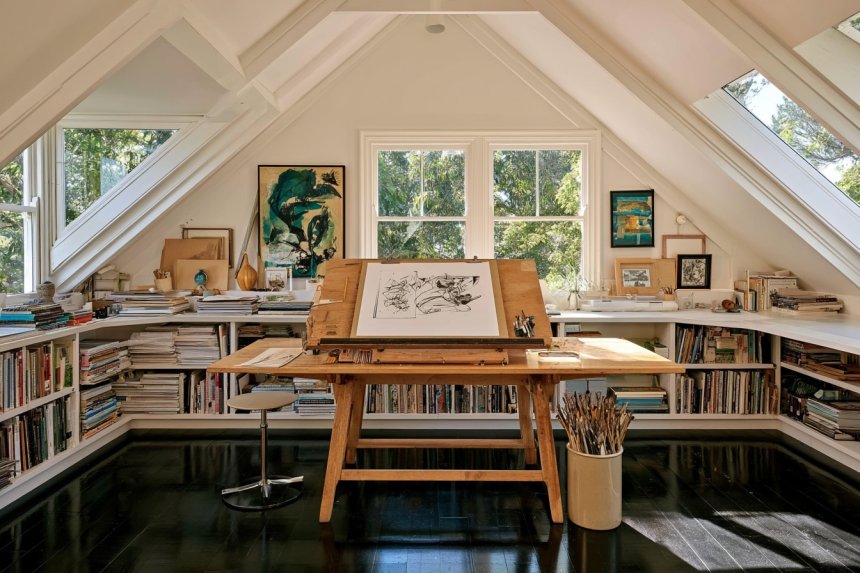
An attic can become a productive studio when its unusual architecture is treated as a design guide rather than an inconvenience. Sloped ceilings, exposed beams, dormers, and low eaves can help divide the room into focused work zones, storage areas, and quieter corners. Before furnishing the space, confirm that the floor can support the planned equipment and stored materials. Insulation, ventilation, electrical capacity, stair access, and emergency escape requirements should also be evaluated.
The most useful studio layout responds to the activity performed there. Painting requires washable surfaces and controlled daylight, sewing benefits from broad cutting space, photography needs adjustable lighting, and small crafts demand precise storage. Reserve full-height areas for standing tasks and place cabinets or seated workstations beneath lower roof sections. Layer general illumination with task lighting, keep circulation paths clear, and avoid storing heavy supplies where they are difficult to retrieve safely. These attic studio designs offer distinct solutions for different creative practices without ignoring everyday usability.
1. Organize an Artist Studio Around a Large Central Worktable
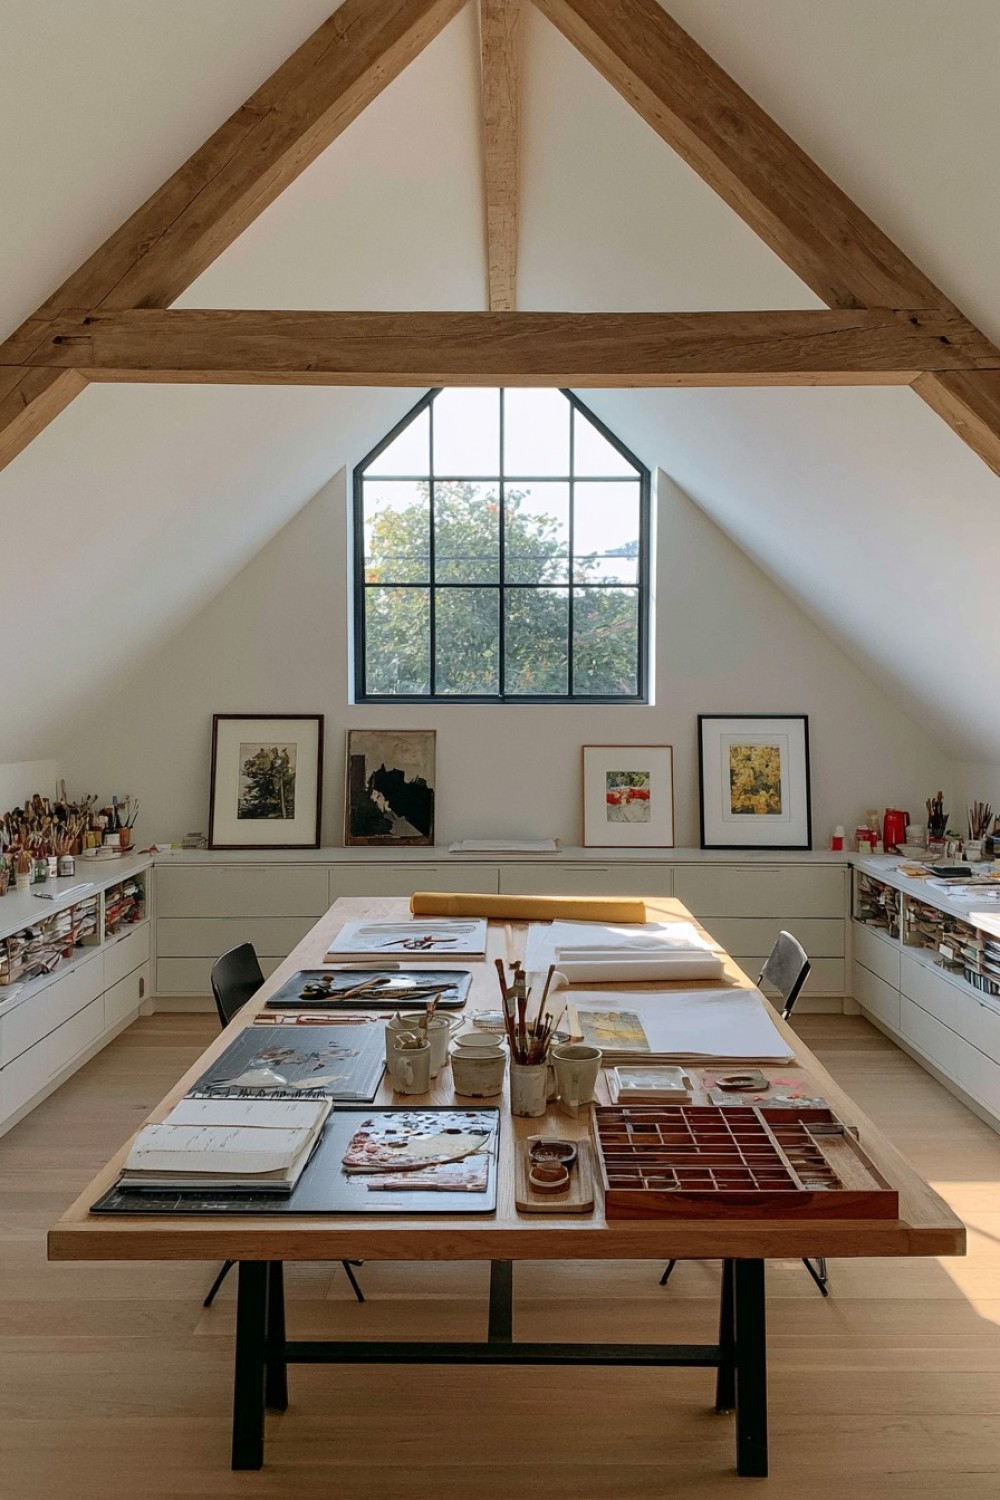
A central table creates a generous surface for drawing, painting, assembling materials, and reviewing work from several directions. Position it beneath the highest part of the roof so users can stand and move around it comfortably. A table approximately 30 inches high suits seated work, while an adjustable or counter-height surface can be more comfortable for activities performed while standing. The correct size depends on the room and materials, but a clear route should remain around every frequently used side.
Choose a durable top that can be cleaned, refinished, or covered with a replaceable cutting mat. Shallow drawers can hold brushes, pencils, and hand tools without requiring additional floor cabinets. Use the low eaves for canvases, paper racks, and closed storage, keeping heavier supplies close to the floor. Position adjustable task lights on more than one side to reduce shadows cast by the artist’s hands. Paint, solvents, and adhesives should be stored according to their labels and used only with suitable ventilation.
2. Turn a Dormer Into a Focused Illustration Nook
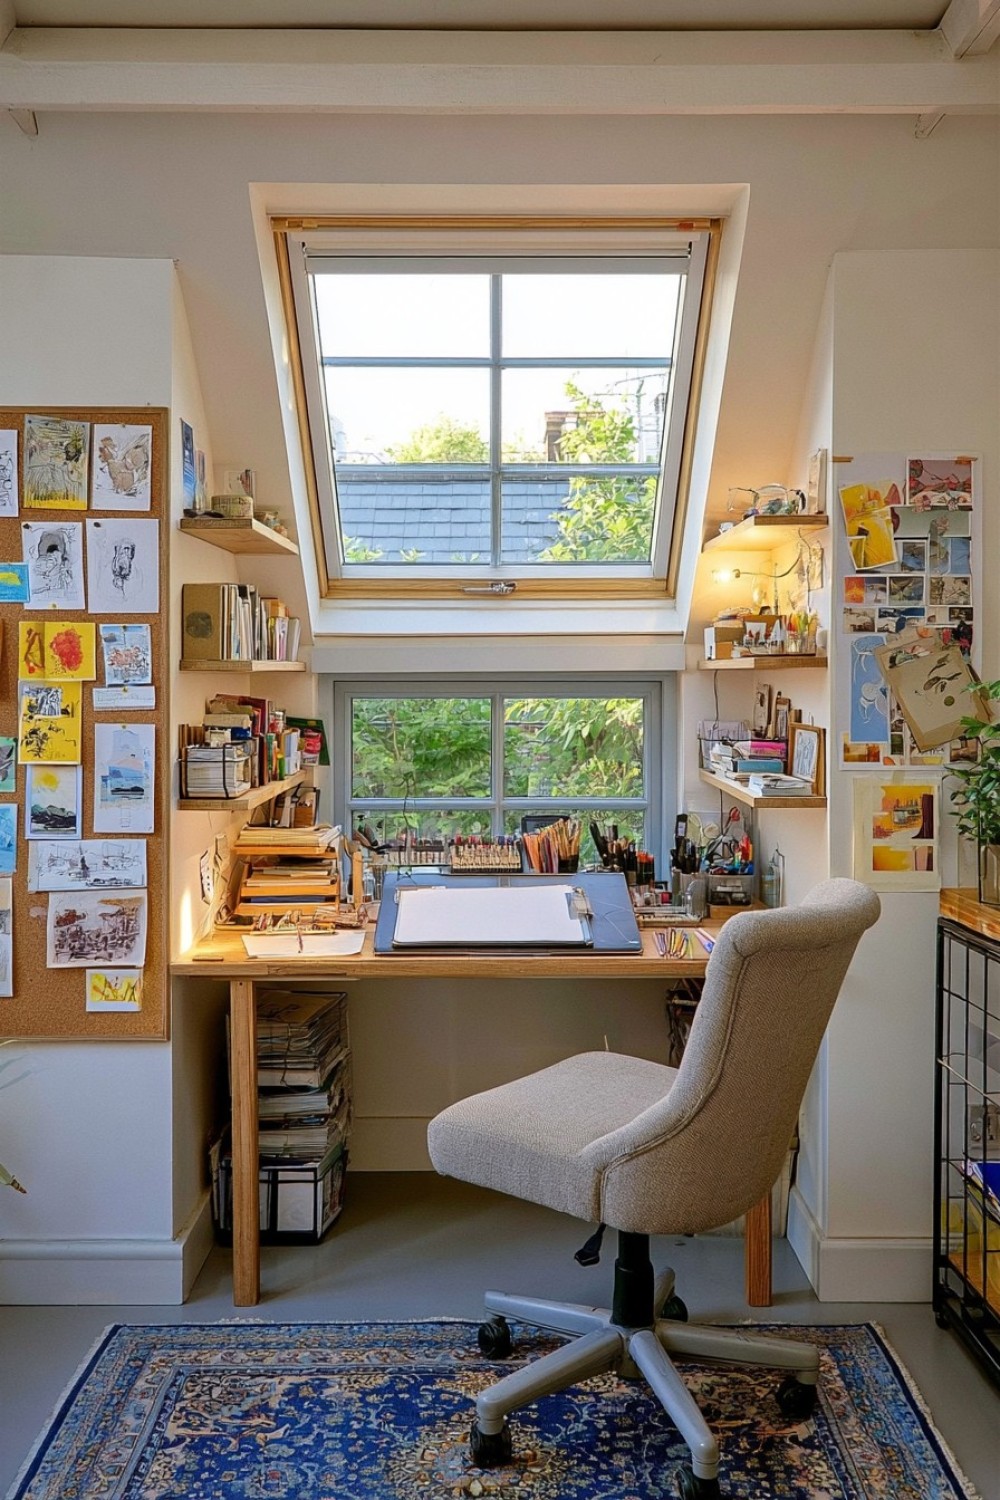
A dormer can provide a naturally defined work zone for drawing, illustration, lettering, or digital sketching. Fit a desk within the recess while preserving enough distance for an adjustable chair and comfortable legroom. Daylight is useful for evaluating color, but strong direct sun can cause glare, heat buildup, and fading. A blind or shade allows the light level to be controlled throughout the day.
Place drawing tools in shallow side drawers or narrow organizers so the central surface remains clear. If a monitor or drawing tablet is used, position it perpendicular to the strongest light where possible to reduce reflections. A desk depth of approximately 24 inches may work for compact tasks, while larger paper formats need a broader surface. Supplement daylight with a high-quality adjustable lamp rather than relying on the dormer alone. Keep radiators, vents, handles, and required window access unobstructed when designing fitted storage around the recess.
3. Prepare a Washable Attic Workspace for Hand-Building Pottery
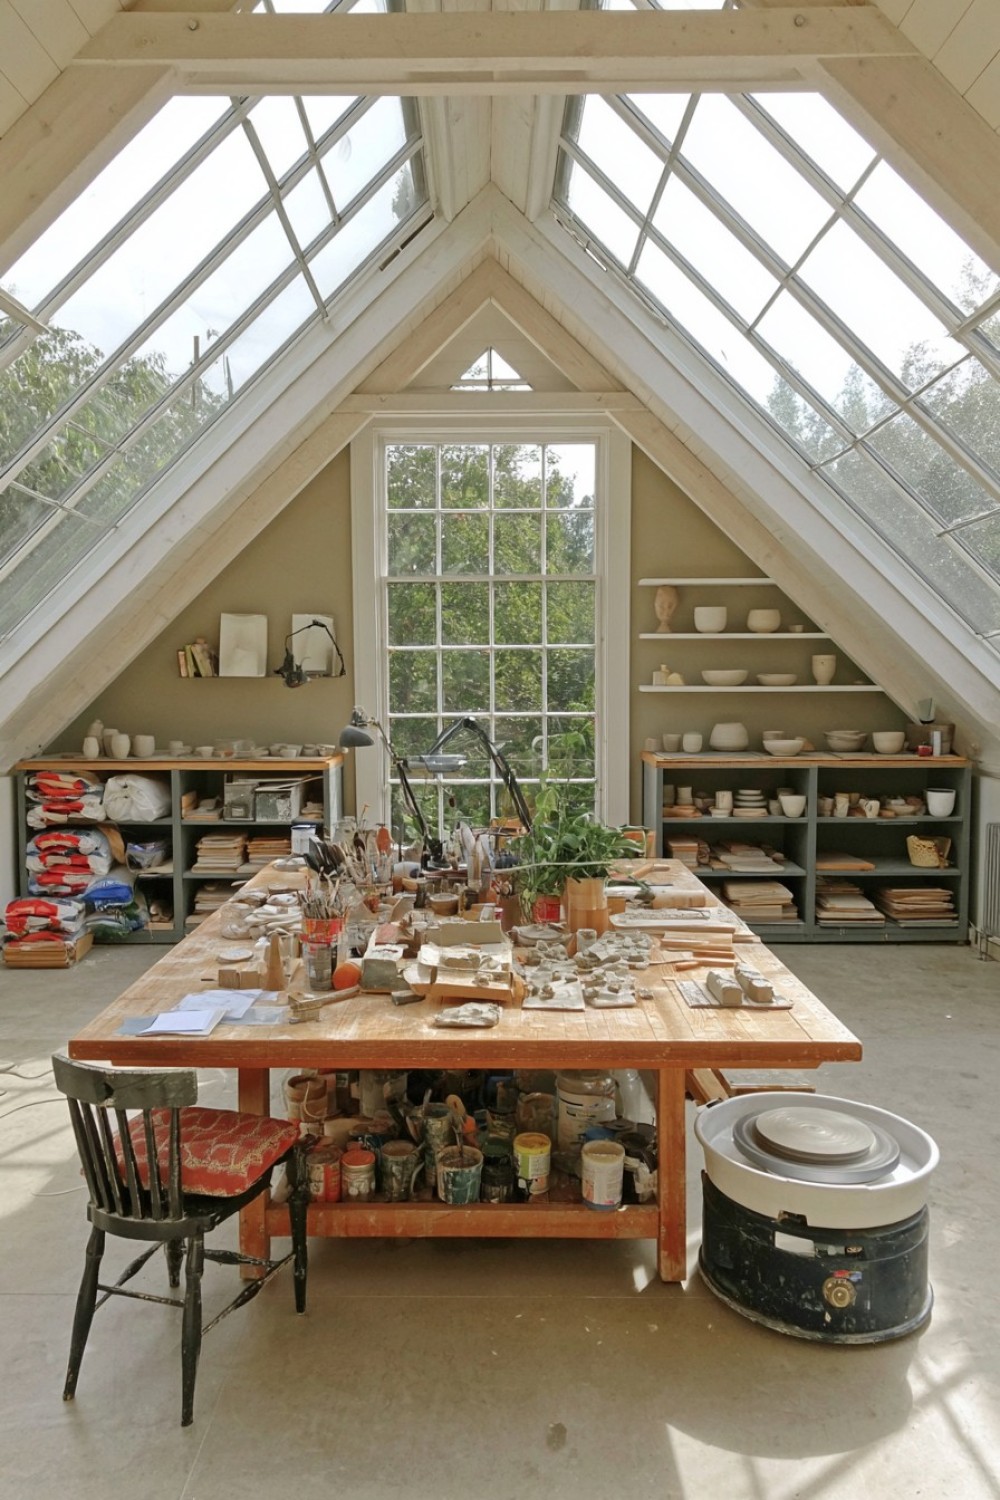
An attic pottery studio should be planned around weight, dust control, cleaning, and safe material handling. A sturdy table with a sealed or replaceable work surface can support hand-building, glazing, and small-scale sculpting. Keep clay and other heavy supplies in low cabinets positioned near supported areas rather than stacking them along lightweight shelves. Washable flooring and protected wall surfaces make routine cleanup easier.
Avoid dry sweeping or sanding clay residue because fine silica-containing dust can become airborne. Use appropriate wet-cleaning methods and follow the safety instructions supplied with each material. If the attic does not have suitable plumbing, carry only manageable quantities of water and use sealed containers for waste rather than washing clay into household drains. Installing a pottery kiln in an attic introduces substantial structural, electrical, heat, ventilation, fire, and insurance considerations. It should not be attempted without professional assessment and compliance with equipment instructions and local requirements.
4. Arrange a Sewing Studio Along the Roofline
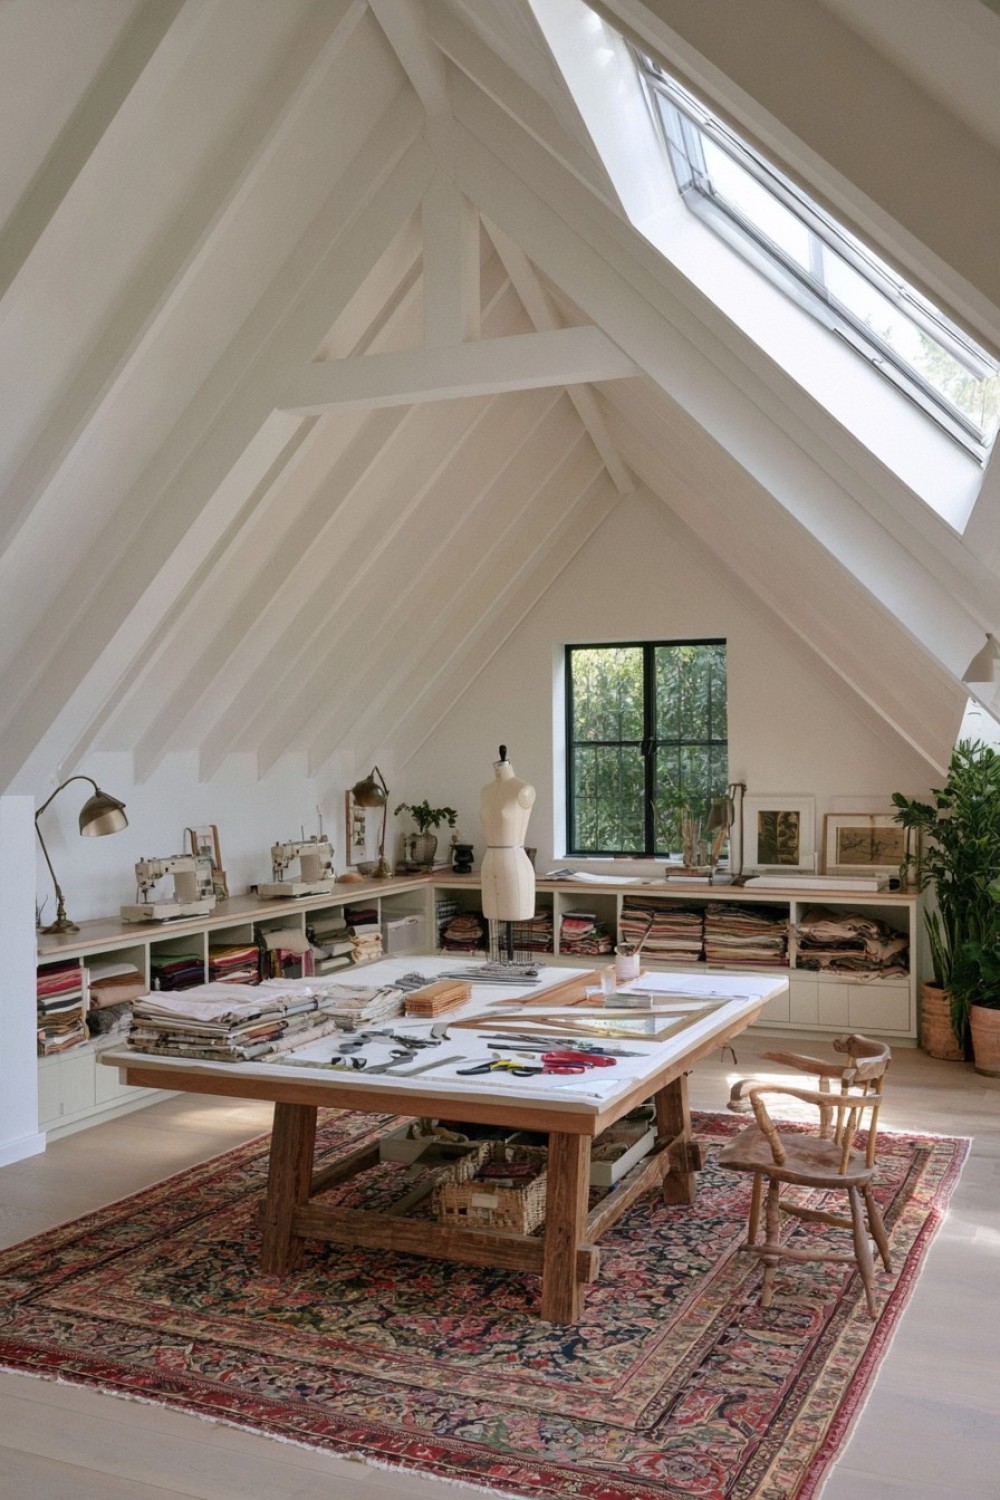
A sewing studio benefits from separating machine work, cutting, pressing, and fabric storage. Place the sewing desk where seated headroom is comfortable and direct light can reach the needle area without causing glare. Reserve the highest section for a cutting table because pattern preparation frequently requires standing and moving around more than one side. An adjustable-height surface can reduce bending during longer sessions.
Low eaves are useful for fabric drawers, pattern files, and pull-out bins. Store textiles away from damp roof surfaces and intense sunlight that may cause fading. Thread racks and small organizers should remain within easy reach but clear of the machine’s ventilation openings. Provide dedicated outlets for machines, irons, and task lighting rather than relying on overloaded extension leads. A heat-resistant pressing surface needs space around it, and the iron should be unplugged when not in use. Keeping floor-level fabric and cables away from the main walkway reduces tripping risks on the attic route.
5. Create a Quiet Writing Studio Beneath Exposed Rafters
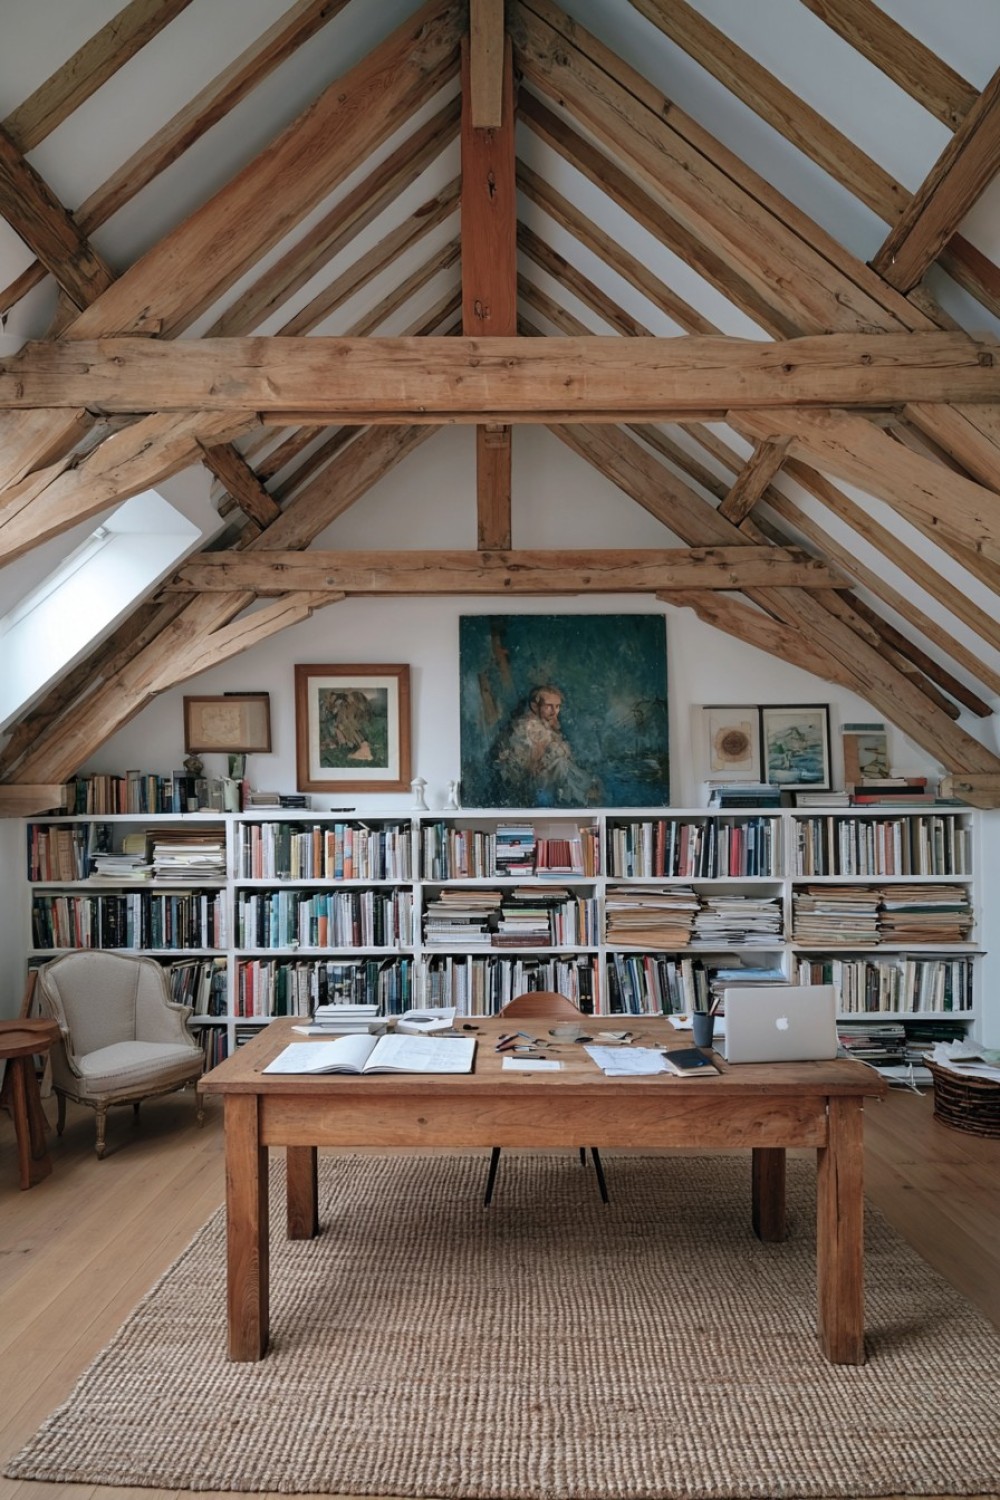
A writing studio usually benefits more from acoustic comfort and visual calm than from extensive equipment. Position the desk where the ceiling allows a comfortable seated posture and the user can stand without meeting a low beam. If daylight comes from the side, it can illuminate notebooks and keyboards without sitting directly behind the screen. Adjustable shading helps manage glare as the sun moves.
Keep the primary surface limited to frequently used tools and move files, reference books, and stationery into shallow eave cabinets. A supportive chair is more valuable than excessive decorative furniture, especially during long work sessions. Rugs, curtains, upholstered seating, and acoustic panels can reduce the echo produced by hard roof surfaces, although ventilation openings should remain uncovered. Provide dependable heating and cooling because attic temperatures often change more sharply than those on lower floors. A small reading chair can establish a second zone without distracting from the principal workspace.
6. Combine Photo Editing With a Compact Shooting Area
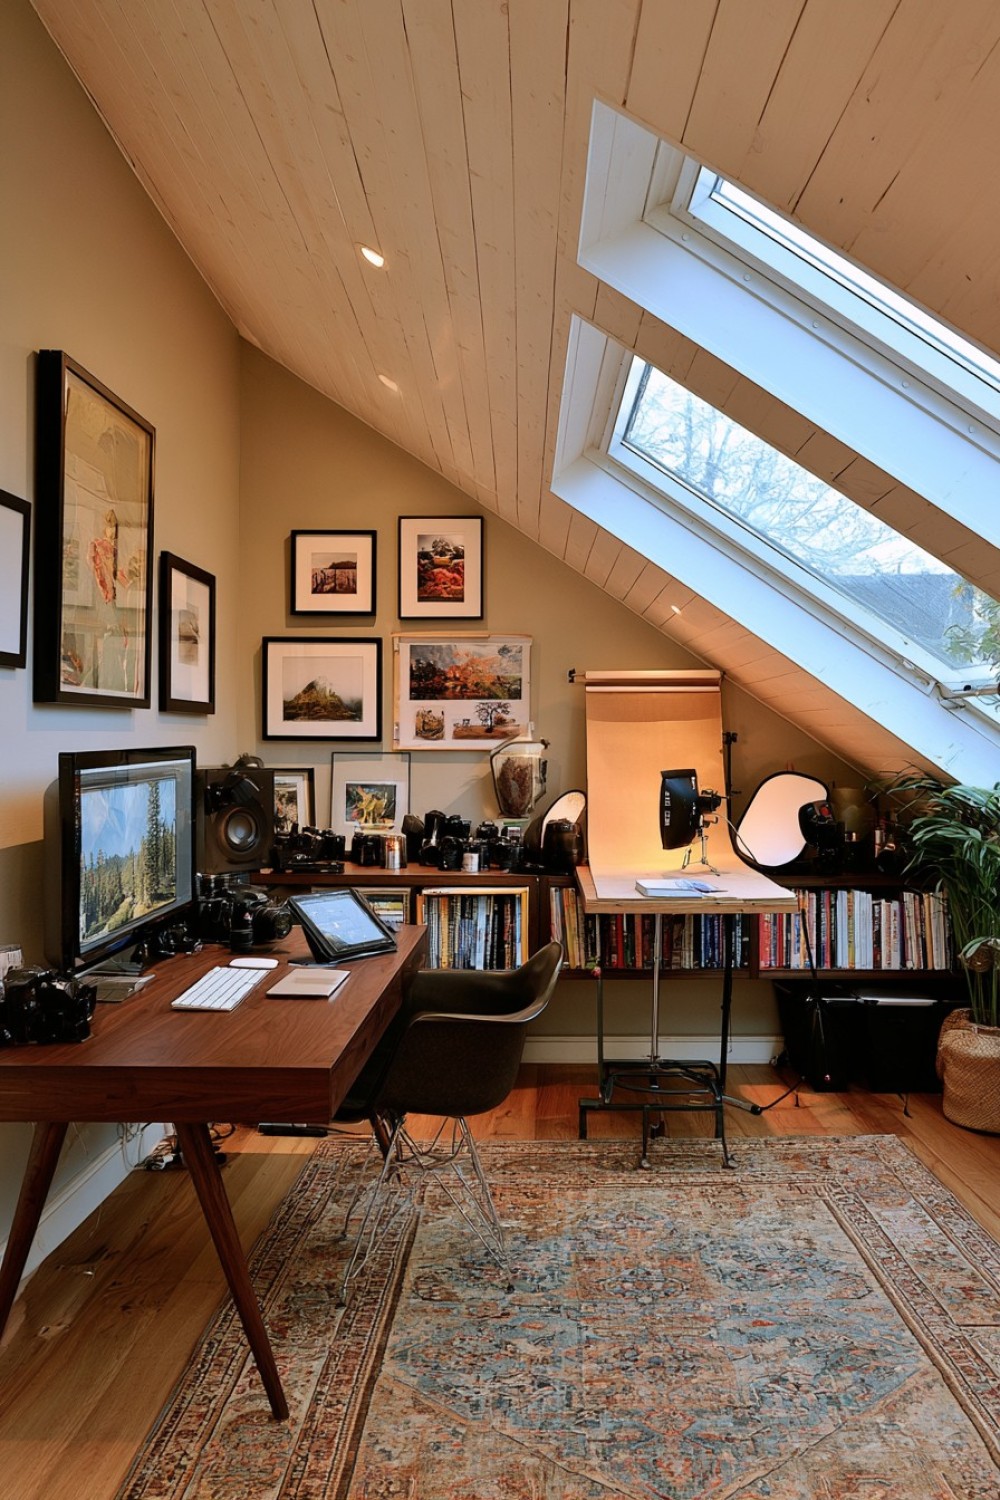
Divide a photography attic into a controlled editing station and a flexible area for small product or portrait setups. The computer screen should be positioned away from direct reflections, while blinds or blackout coverings can stabilize ambient light during color-sensitive editing. Neutral wall finishes are useful because strongly colored surfaces may influence how images and products appear under reflected light.
Reserve the highest roof section for light stands and backdrop supports. Sandbags, tripods, and cables need secure storage so they do not block the stair route or create hazards during a shoot. Wall-mounted background systems save floor area but must be fixed to a suitable structure. Store cameras and lenses in dry, enclosed cabinets rather than against surfaces prone to condensation. Multiple electrical devices may operate simultaneously, so confirm that the available circuits and outlets are appropriate. Hot lights require clearance from fabric, insulation, and roof materials; cooler-running equipment can be easier to manage in a compact attic.
7. Convert a Sloped Wall Into an Accessible Supply Library
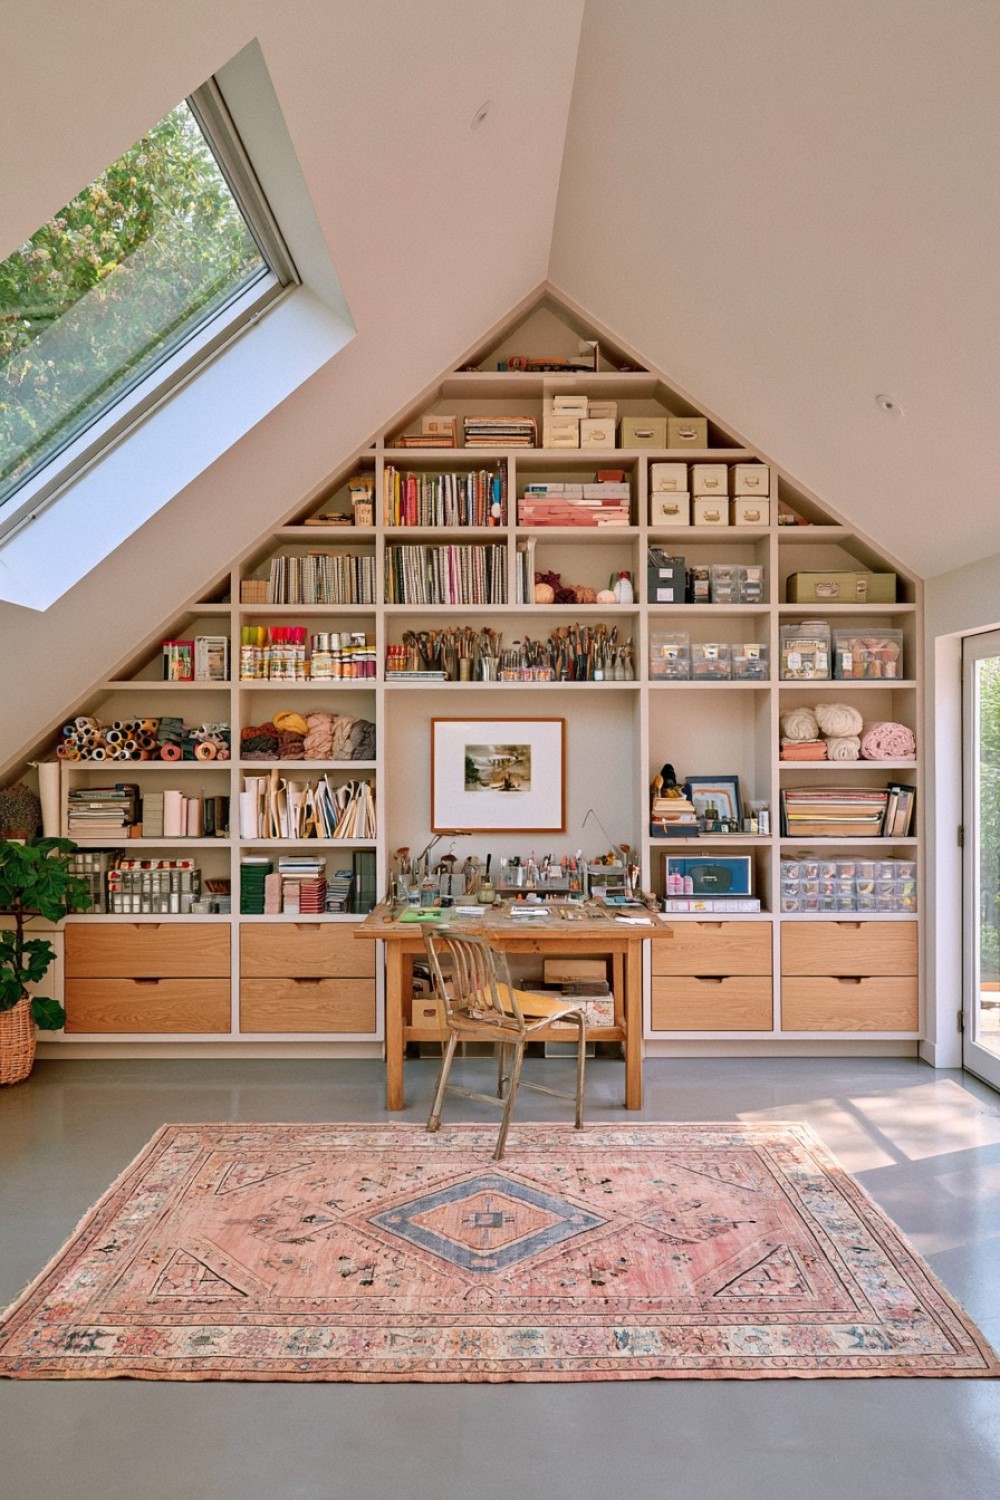
Custom storage beneath a sloping wall can turn difficult attic geometry into a useful supply library. Install deep drawers or pull-out trays near floor level, medium-height cabinets farther up the slope, and shallow compartments where roof clearance becomes limited. This graduated arrangement follows the architecture while making materials easier to retrieve than they would be from deep fixed cupboards.
Organize supplies by activity and frequency rather than color alone. Transparent containers help identify small materials, but light-sensitive products should remain in opaque storage. Label shelves and drawers clearly so tools return to the same location after use. Heavy paper, clay, equipment, and liquid containers belong on lower levels, while lightweight textiles and empty packaging may be stored higher. Maintain a small gap where needed for airflow and avoid building cabinets over electrical junctions, ventilation paths, roof access panels, or areas requiring inspection. Anchoring tall components to appropriate structural surfaces reduces the possibility of tipping.
8. Establish a Botanical Illustration and Flower-Pressing Station
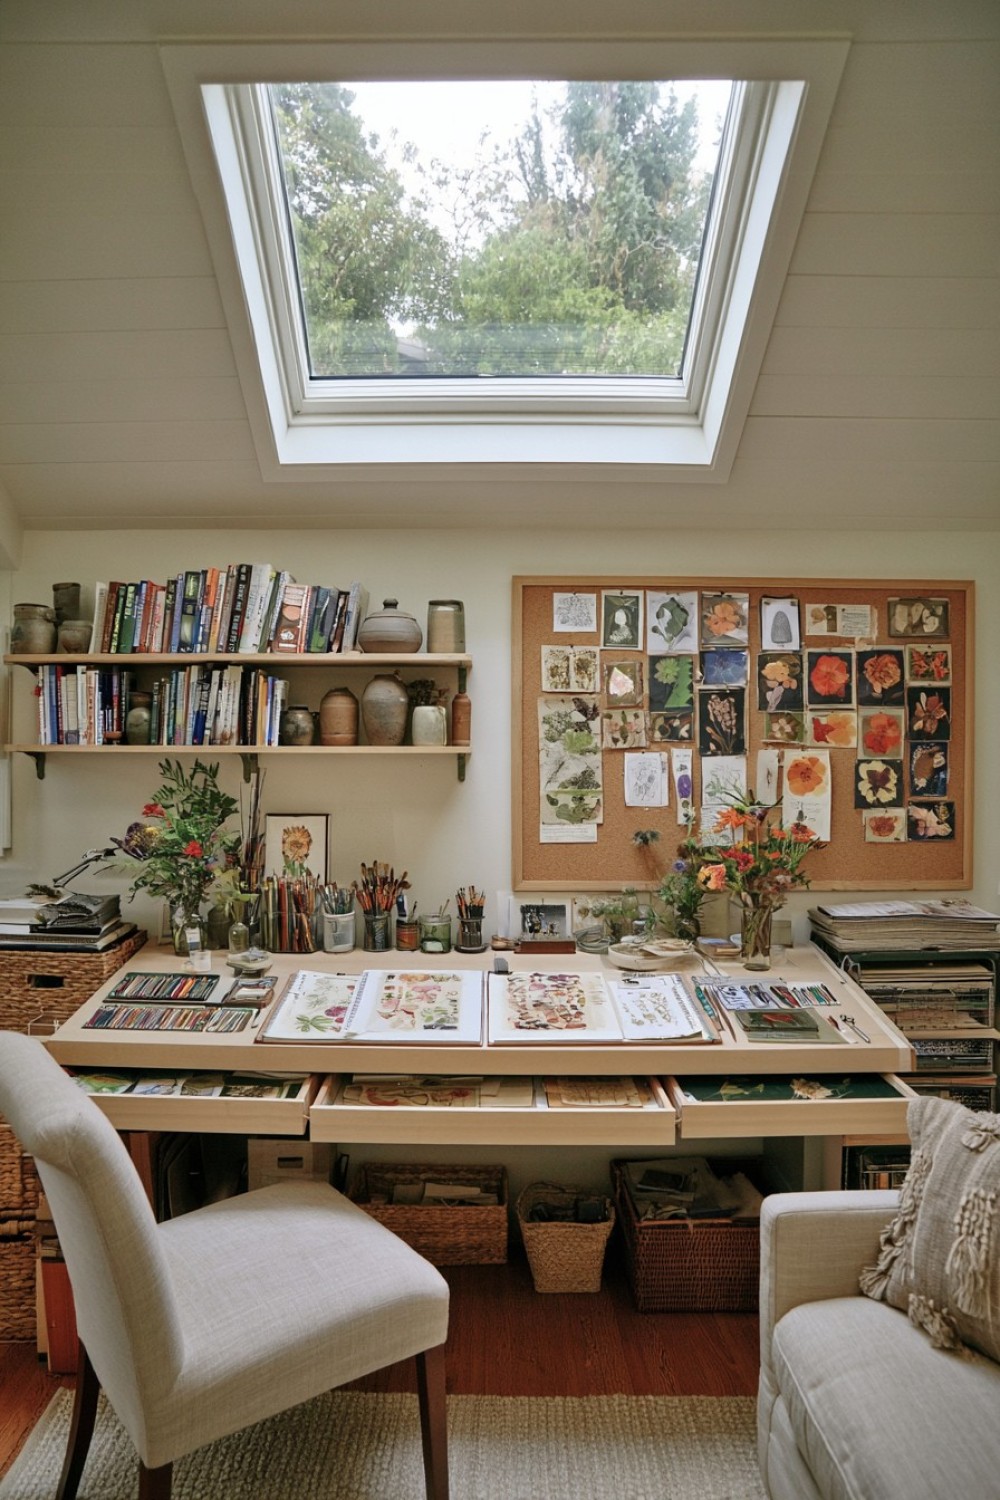
A botanical studio requires a clean drawing surface, controlled storage for delicate specimens, and a separate place for handling fresh plant material. Position the illustration desk where natural light can be softened with a shade, then add an adjustable lamp for consistent work after daylight changes. Flat drawers are useful for paper, completed artwork, and dried specimens that should not be folded or crushed.
Keep flower presses on a stable shelf with enough clearance to lift and move them safely. Fresh plant material should be inspected for moisture, insects, and signs of decay before being brought into long-term storage. Drying materials need ventilation, while completed pressed specimens benefit from a dry environment protected from intense light. Use acid-free paper and appropriate archival storage when preservation matters. A small washable tray can contain loose leaves and soil during preparation. Avoid collecting protected plants or removing material from private land without permission.
9. Design a Jewelry Bench With Precision Storage
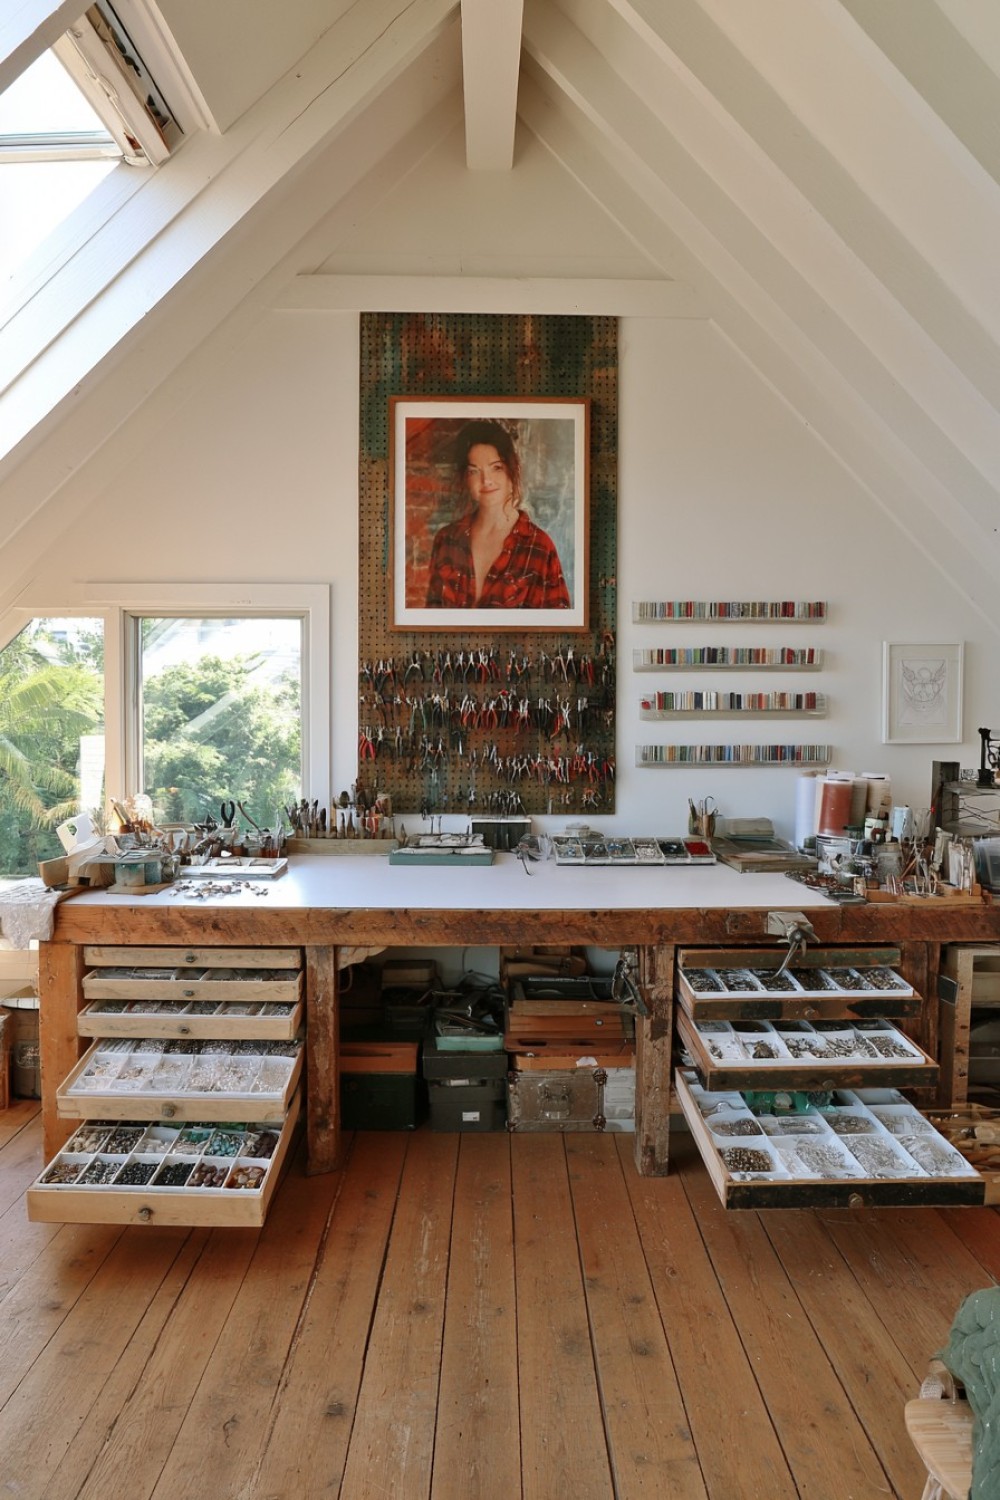
Jewelry work needs focused illumination and organized storage for very small components. A stable bench with a light-colored or replaceable work surface makes dropped pieces easier to locate. Shallow divided drawers can separate findings, wire, beads, and tools without creating deep containers that require searching. Position frequently used hand tools on a rack within reach while keeping the central working area unobstructed.
Use an adjustable task lamp and, where needed, a magnifying light that can be repositioned without tipping. Install a bench skin, tray, or raised edge to catch small parts before they reach the floor. Activities involving soldering, chemicals, polishing dust, or powered tools require appropriate ventilation, protective equipment, and manufacturer-recommended safety practices. A decorative attic desk is not automatically suitable for hot work. Keep flammable materials away from heat sources and store chemicals in compatible labeled containers. Electrical cords should not hang across the approach to the bench.
10. Use Rolling Stations for a Flexible Mixed-Media Workshop
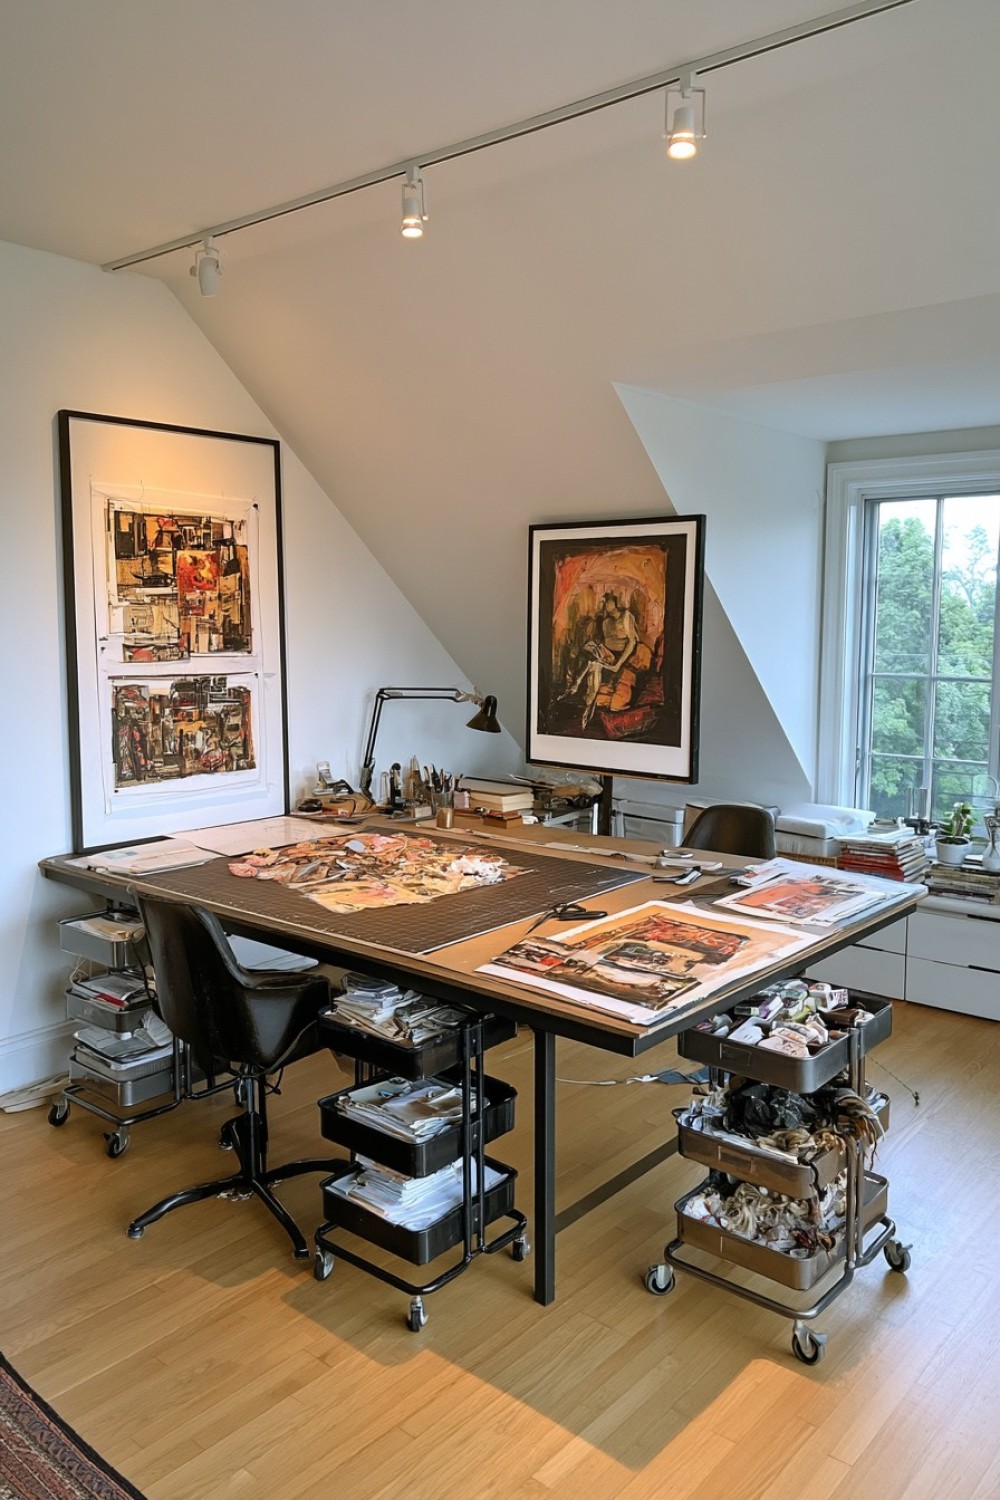
Mixed-media work often involves changing combinations of paper, paint, adhesives, textiles, and small tools. Rolling carts allow supplies to move to the central worktable and return to the eaves when the session ends. Assigning each cart a category—such as painting, collage, cutting, or textiles—reduces setup time and prevents every material from remaining visible at once.
Select casters rated for the loaded weight and use locking wheels so the station does not move during detailed work. Carts should fit beneath the lowest usable roof section without blocking drawers or ventilation. Keep sharp tools in enclosed compartments and store heavy liquids near the bottom to improve stability. Adhesives and paints need storage conditions consistent with their labels, particularly in an attic where temperatures may fluctuate. Mark a permanent parking position for every unit so the main route remains open. A washable central table covering can then be changed according to the project rather than dedicating separate furniture to every craft.
11. Plan an Architectural Model-Making Loft
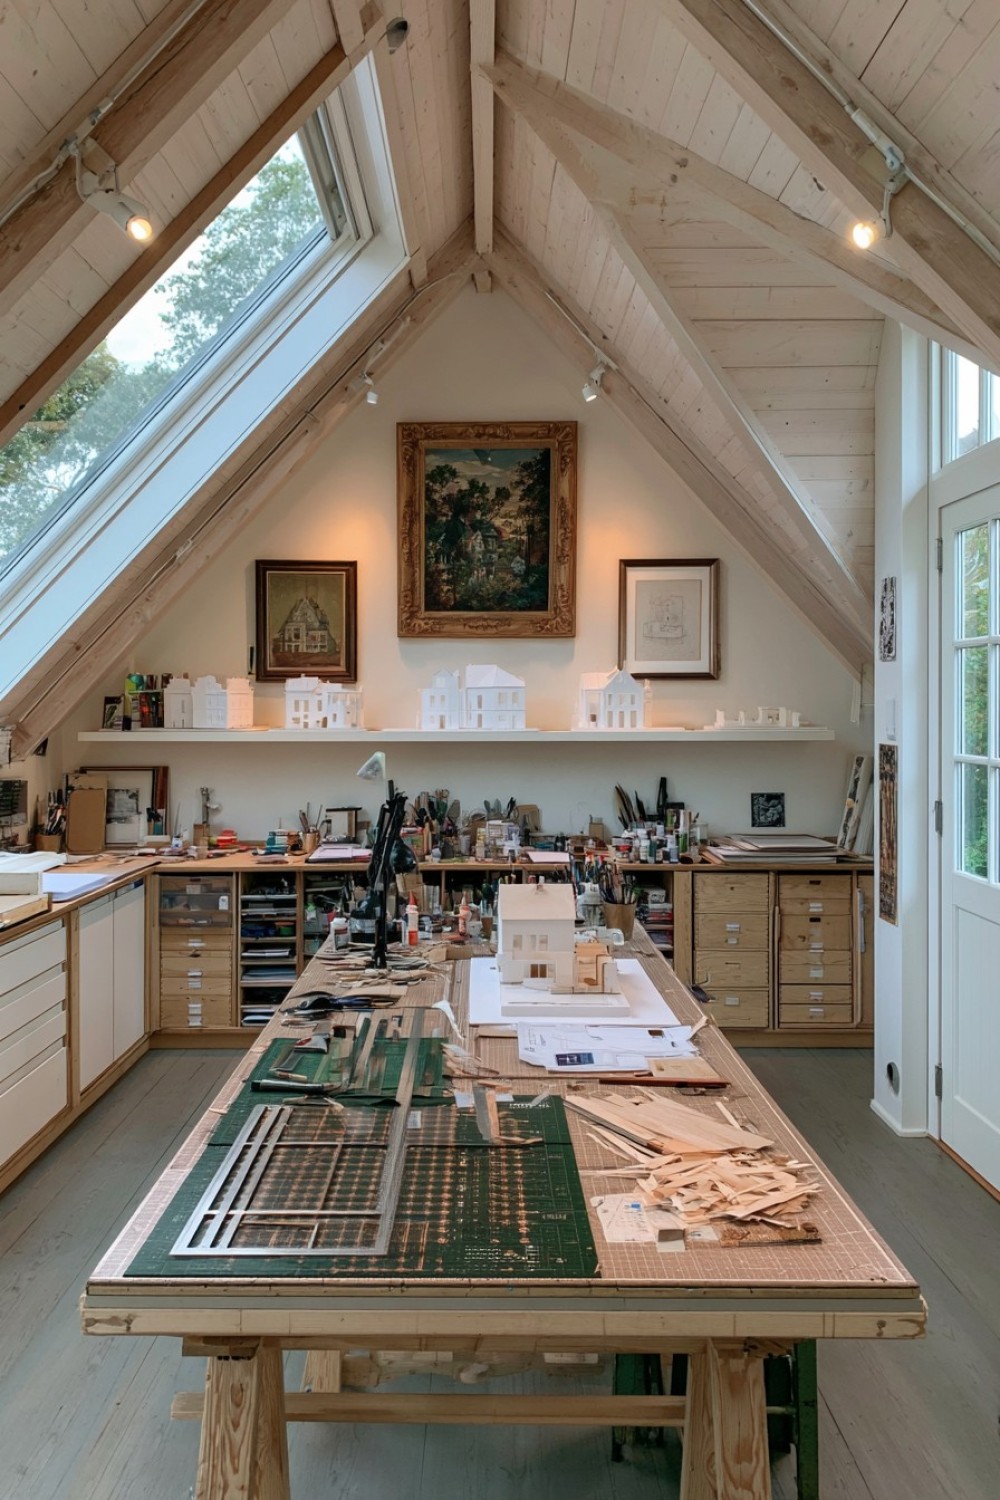
Architectural model making requires a flat assembly surface, protected storage for fragile work, and safe areas for cutting. Cover the principal table with a self-healing mat and keep measurement tools within reach on a shallow shelf or wall organizer. A separate clean desk for drawings and digital work prevents adhesive, dust, and cutting debris from reaching electronics.
Completed models need shelves deeper than ordinary display ledges and sufficient vertical clearance to prevent accidental damage. Sliding trays beneath the eaves can store foam board, card, veneer, and sheet materials horizontally. Long rulers and cutting guides should have dedicated vertical slots rather than leaning in a corner. Use task lighting from both sides to reduce shadows when assembling small components. Cutting tools, spray products, and adhesives must be handled according to their safety instructions, with appropriate surface protection and ventilation. Keep large models away from the stair opening, where carrying and turning may be difficult.
12. Add a Working Sample Wall to a Creative Home Office
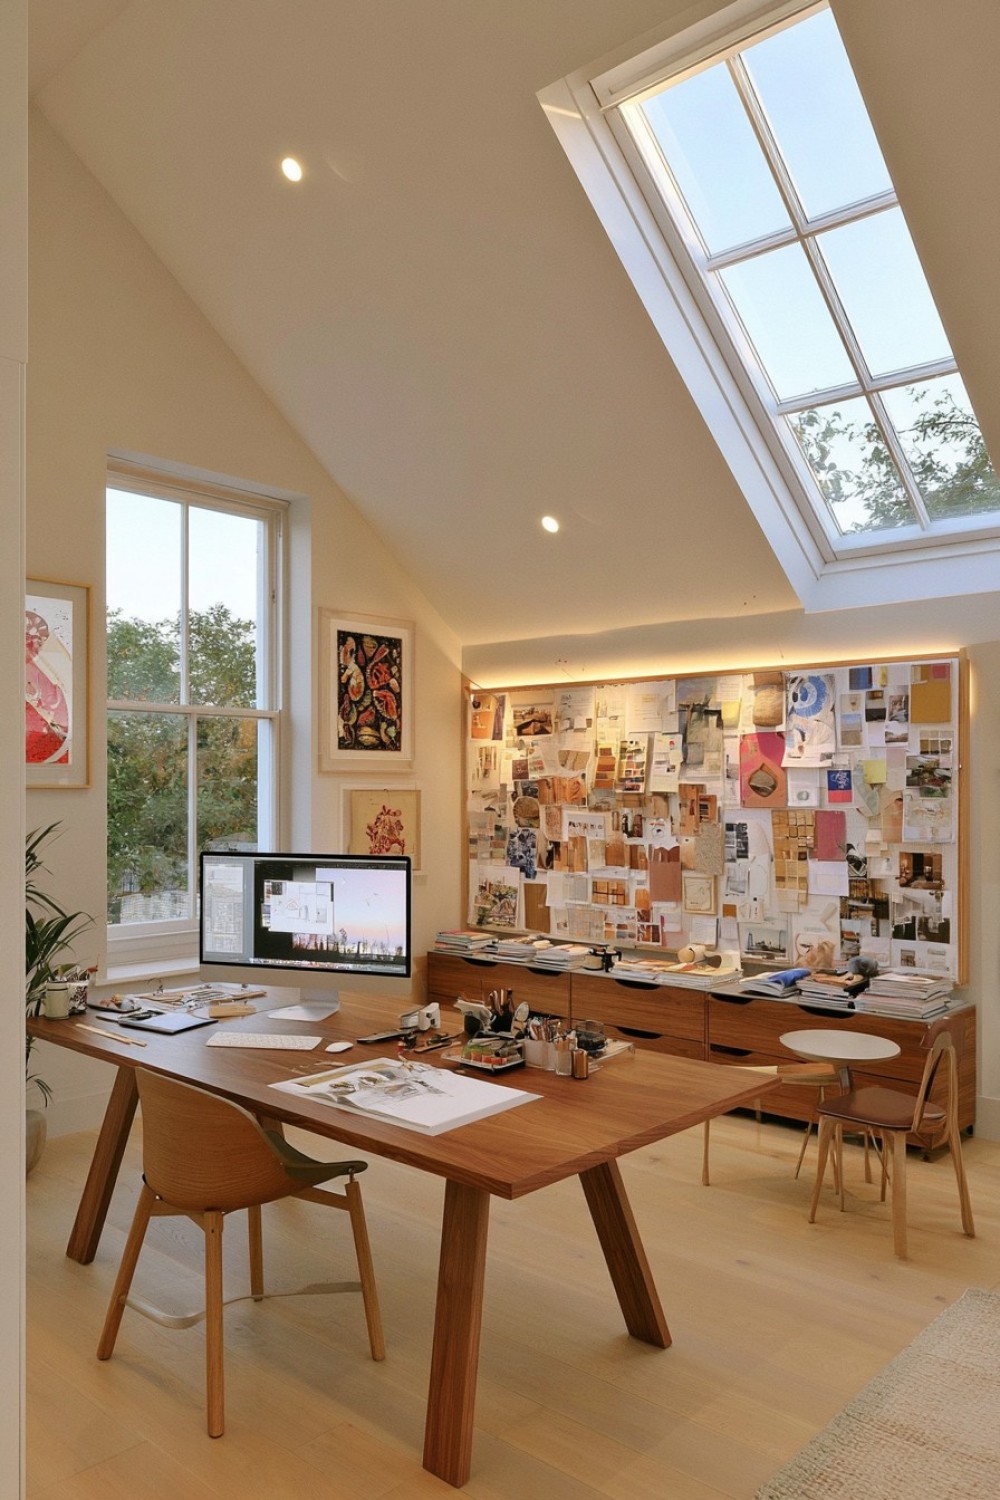
A sample wall can help designers, stylists, and makers compare colors and materials without covering the desk. Use removable hooks, shallow ledges, rails, or pinboard panels to display fabric, finish samples, sketches, and active project references. Limit the wall to current work so it remains a practical decision-making tool rather than a permanent collection of visual clutter.
Position samples where daylight can reach them indirectly, then review critical colors under the lighting conditions relevant to the final project. Materials that fade should not remain in direct sun. Store the larger archive in labeled drawers or binders beneath the roof slope. The office desk should maintain enough depth for a monitor, notebook, and keyboard without forcing the user too close to the sloping ceiling. Cable management, accessible outlets, and a supportive chair will contribute more to long-term comfort than decorative accessories. Photograph and date temporary sample arrangements before clearing the board for the next project.
13. Prepare a Printmaking Studio With Dedicated Drying Storage
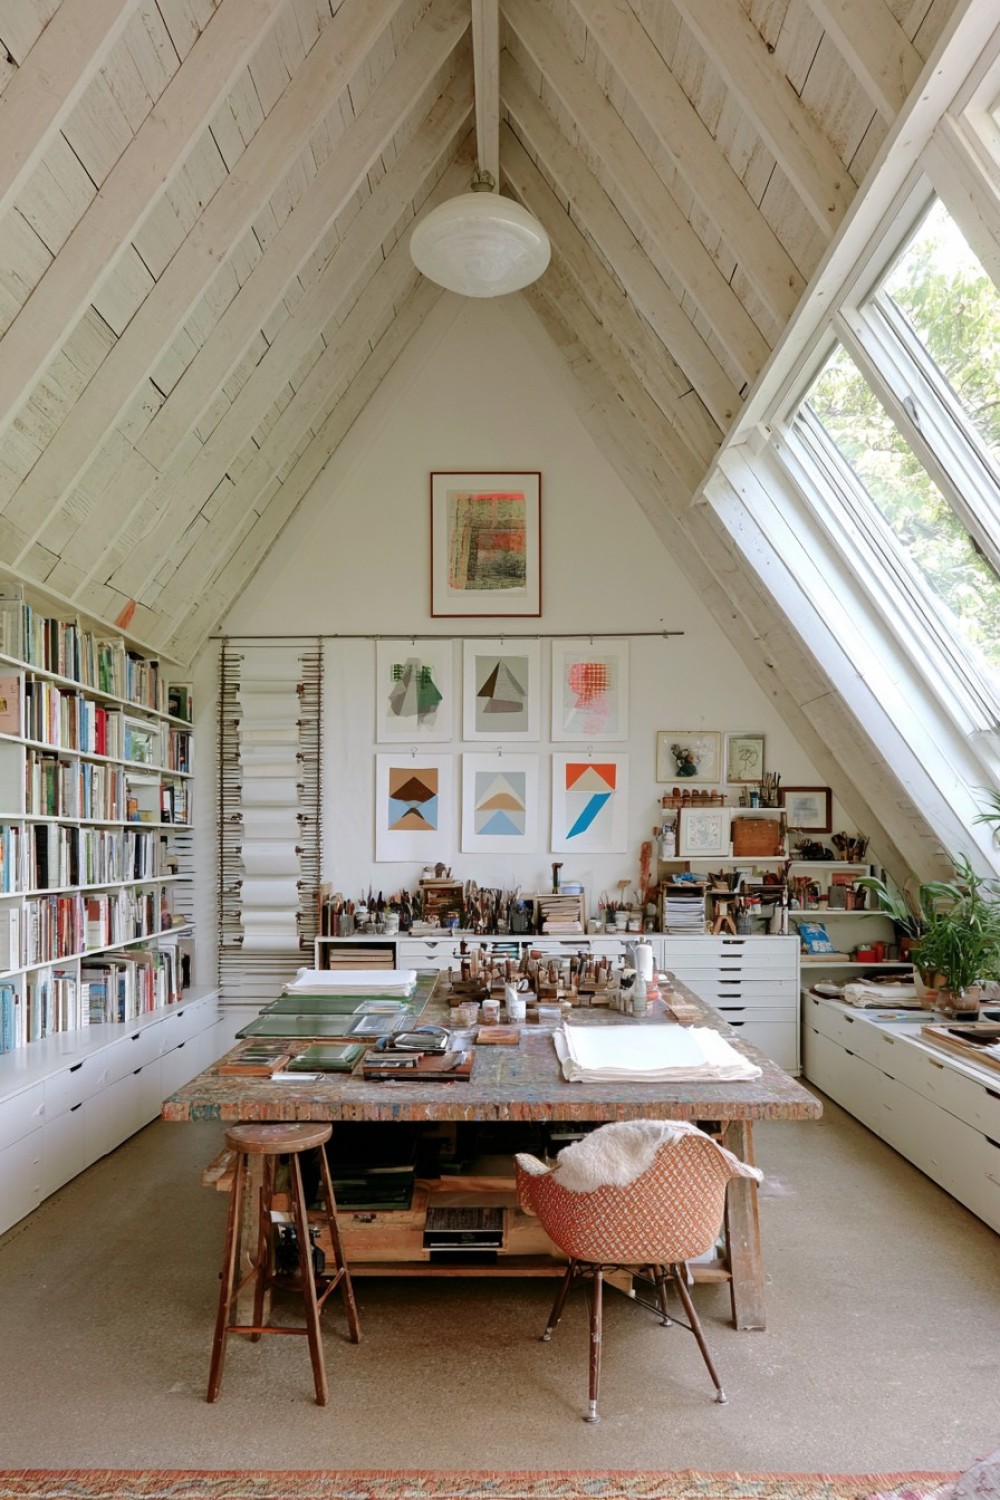
A printmaking studio should separate clean paper storage, inking, pressing, and drying. Flat files beneath the eaves can protect large sheets, while a washable table supports plate preparation and ink application. Drying racks with removable shelves use vertical space efficiently and prevent fresh prints from being stacked. Position them where air can circulate but where dust and direct sunlight are limited.
Printing presses and paper collections can be heavy, so the floor structure and furniture capacity should be assessed before equipment is installed. Locate heavier items away from weak spans and keep the approach clear for safe handling. Water-based materials may simplify cleanup, but every ink, solvent, cleaner, and plate product still requires use according to its label. Processes producing fumes or dust need suitable ventilation and protective measures. Never assume that an operable window alone provides sufficient control for a particular chemical process. Store cutting tools securely and keep clean paper away from sinks, damp roof areas, and open containers.
14. Create a Sculpting Area With Movable Work Pedestals
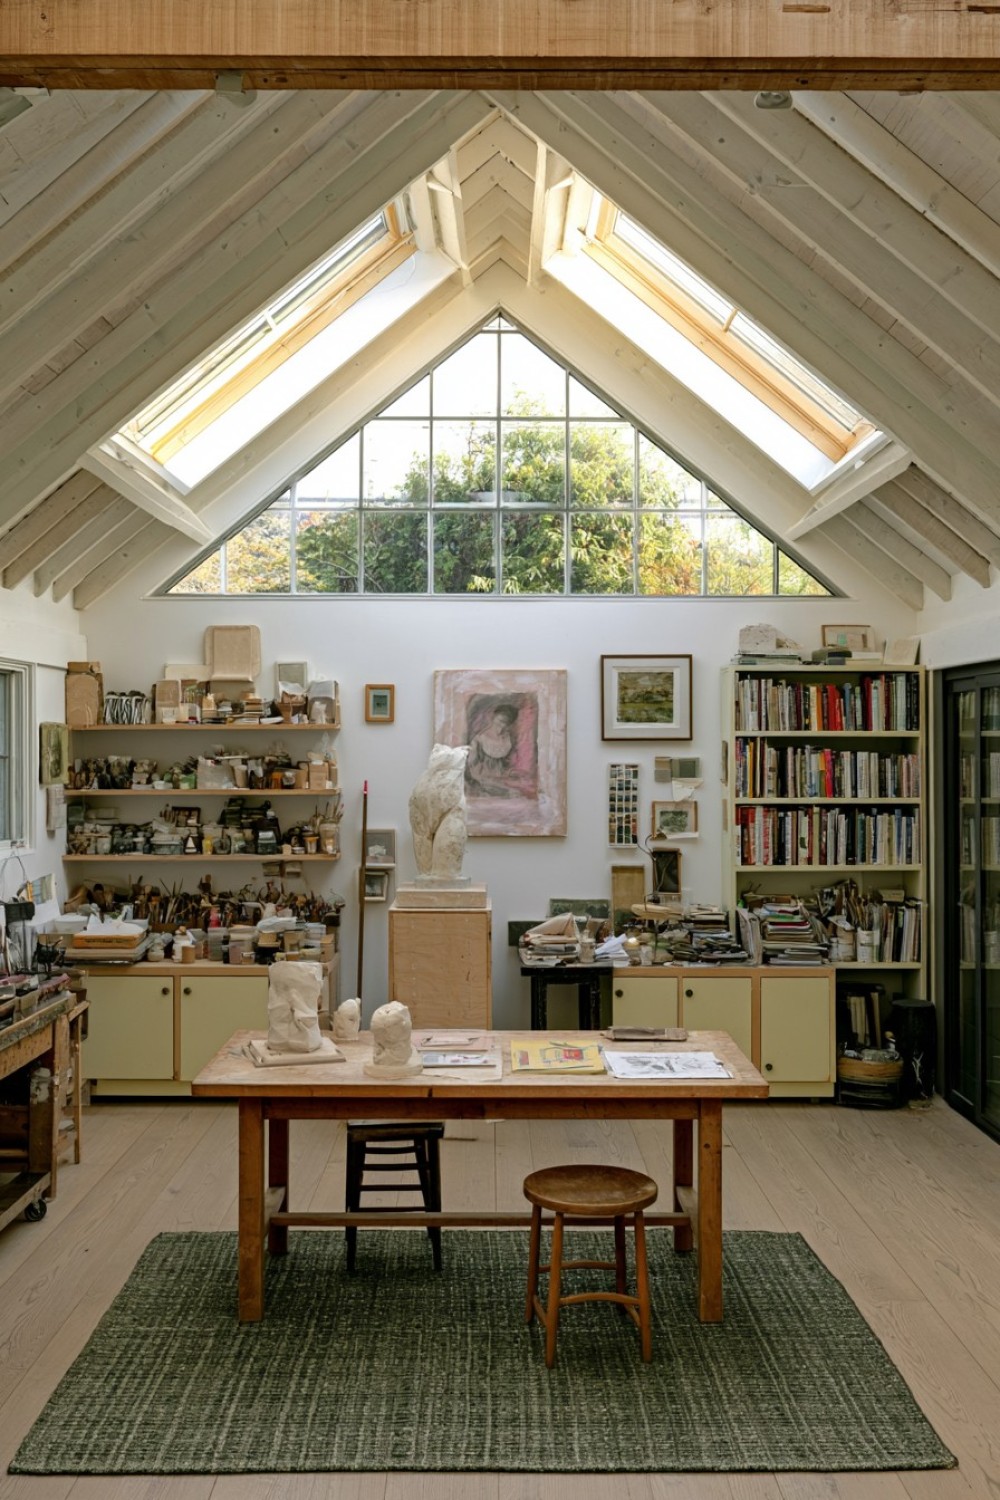
Freestanding pedestals allow a sculpture to be viewed and worked on from several angles. Place them beneath the highest roof section and preserve enough space to walk around the active piece. A rotating top can reduce unnecessary lifting for smaller work, but it must remain stable and be rated for the object’s weight. Different pedestal heights can support seated modeling, standing carving, or display.
Sculpture materials vary greatly in weight and risk. Stone, large clay pieces, plaster, and stored casting materials may impose loads unsuitable for an attic without structural assessment. Dust-producing or chemical-based processes also need controls that go beyond ordinary room ventilation. Choose the studio’s permitted activities according to the building rather than forcing every process into one space. Protect the floor with a durable removable surface, store tools in closed mobile cabinets, and keep heavy materials low. The path to the stairs must remain clear enough to remove finished work without unsafe lifting or difficult turns.
15. Combine Several Creative Practices With Sliding Workstations
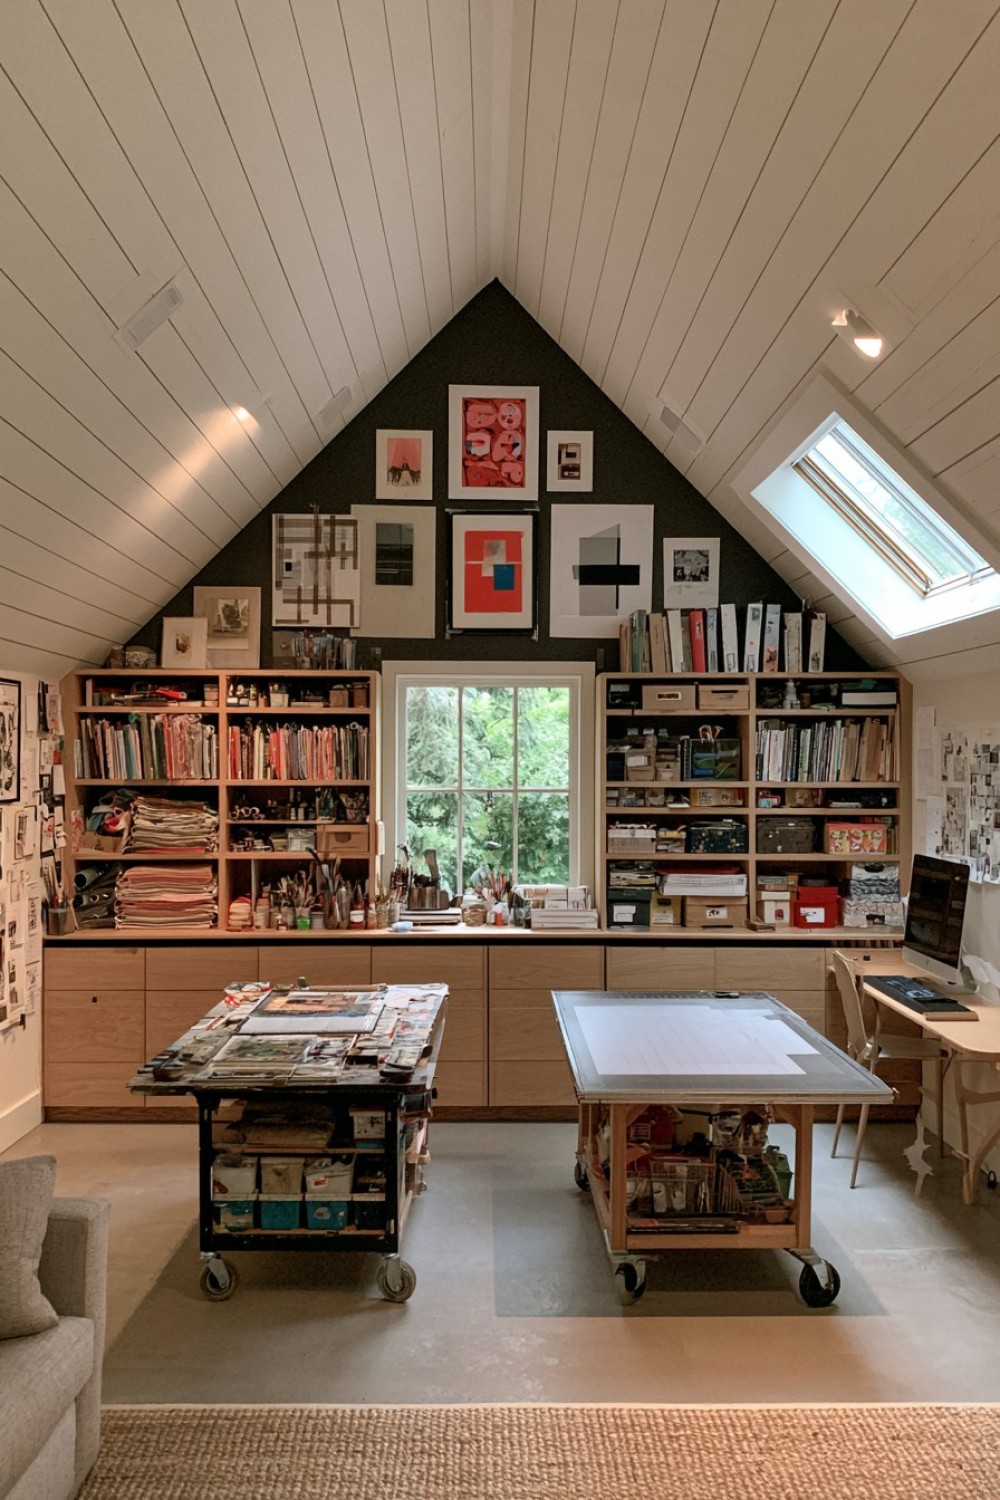
A multi-discipline attic can support drawing, sewing, craft work, and digital projects when each activity has a compact station instead of a permanent full-sized table. Worktops that slide from low cabinets, fold-down surfaces, and rolling modules allow the central floor to change according to the current task. Equipment that requires frequent setup should remain grouped with its own tools and supplies.
Plan the closed position before designing the extended arrangement. Drawers, doors, and sliding tops must not block the stairs or trap the user beneath a low roof section. Folding worktops need reliable supports, while rolling units require locking casters and stable weight distribution. Provide task lighting and outlets for every intended position so extension cords do not cross the room. Separate incompatible activities—for example, dusty craft work and computer editing—even if they share the same studio. A consistent cabinet finish can visually unite the different stations while labels and internal organizers preserve the practical distinctions between them.
MORE IDEAS


Share
What's Your Reaction?
 Like
0
Like
0
 Dislike
0
Dislike
0
 Love
0
Love
0
 Funny
0
Funny
0
 Angry
0
Angry
0
 Sad
0
Sad
0
 Wow
0
Wow
0