20 Creative Recycling Projects for Kids to Make

Recycling projects for kids transform packaging into lessons about creativity, responsibility, and resourcefulness. Instead of sending cardboard, jars, fabric, or plastic directly to the bin, children can explore how materials change through cutting, building, painting, and imaginative play. These activities strengthen fine motor skills, encourage problem solving, and make sustainability easy to understand. Before crafting, adults should wash containers, remove labels, cover sharp edges, and handle hot glue or difficult cutting. Set out child safe supplies, then invite experimentation rather than perfection. The following projects offer colorful, practical ways to create at home, school, or during Earth Day celebrations together.
1. Cereal Box Puppet Theater
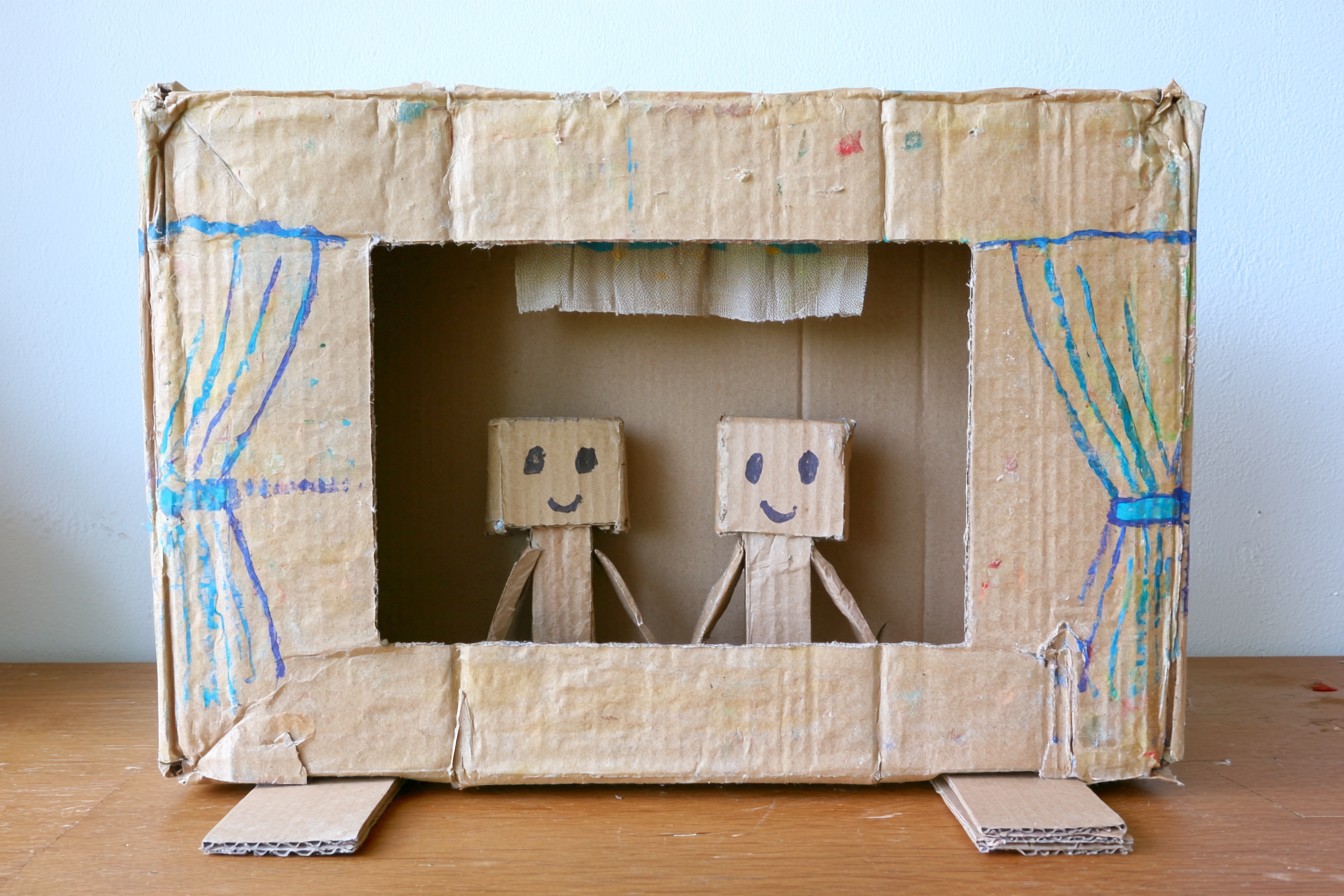
Turn an empty cereal box into a stage that encourages storytelling after craft time ends. An adult should cut a rectangular window in the front, leaving a sturdy border, then open the bottom for access. Children can cover printed packaging with scrap paper, paint curtains beside the opening, and add a lettered theater sign. Make characters from leftover cardboard, paper bags, or clean wooden sticks, using yarn and magazine cutouts for details. Tape a fabric scrap across the top as a curtain. For a freestanding version, attach folded cardboard feet, then store every puppet inside the box between performances safely.
2. Cardboard Tube Adventure Binoculars
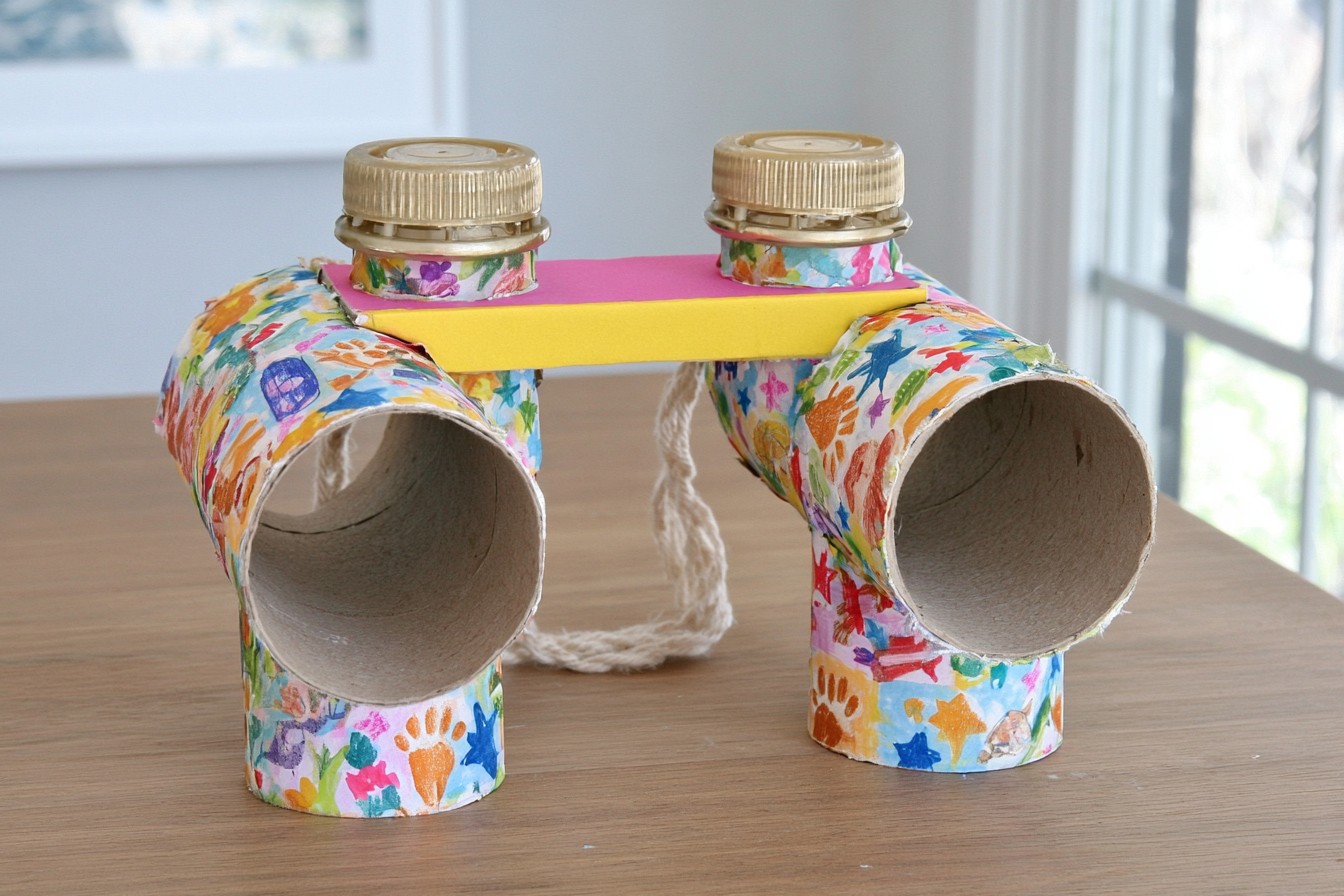
Pair two toilet paper tubes to make binoculars for backyard safaris, scavenger hunts, or imaginary expeditions. Paint the tubes first, or wrap them with leftover gift paper, maps, and strips from magazines. Once dry, join them side by side with paper tape and reinforce the center using a decorated cardboard band. An adult can punch one outer hole in each tube, allowing children to thread yarn through for a neck strap; keep it short and supervise its use. Add bottle cap dials, sticker symbols, or drawn animal tracks. Create matching observation cards from packaging so explorers can record discoveries outdoors.
3. Egg Carton Butterfly Garden
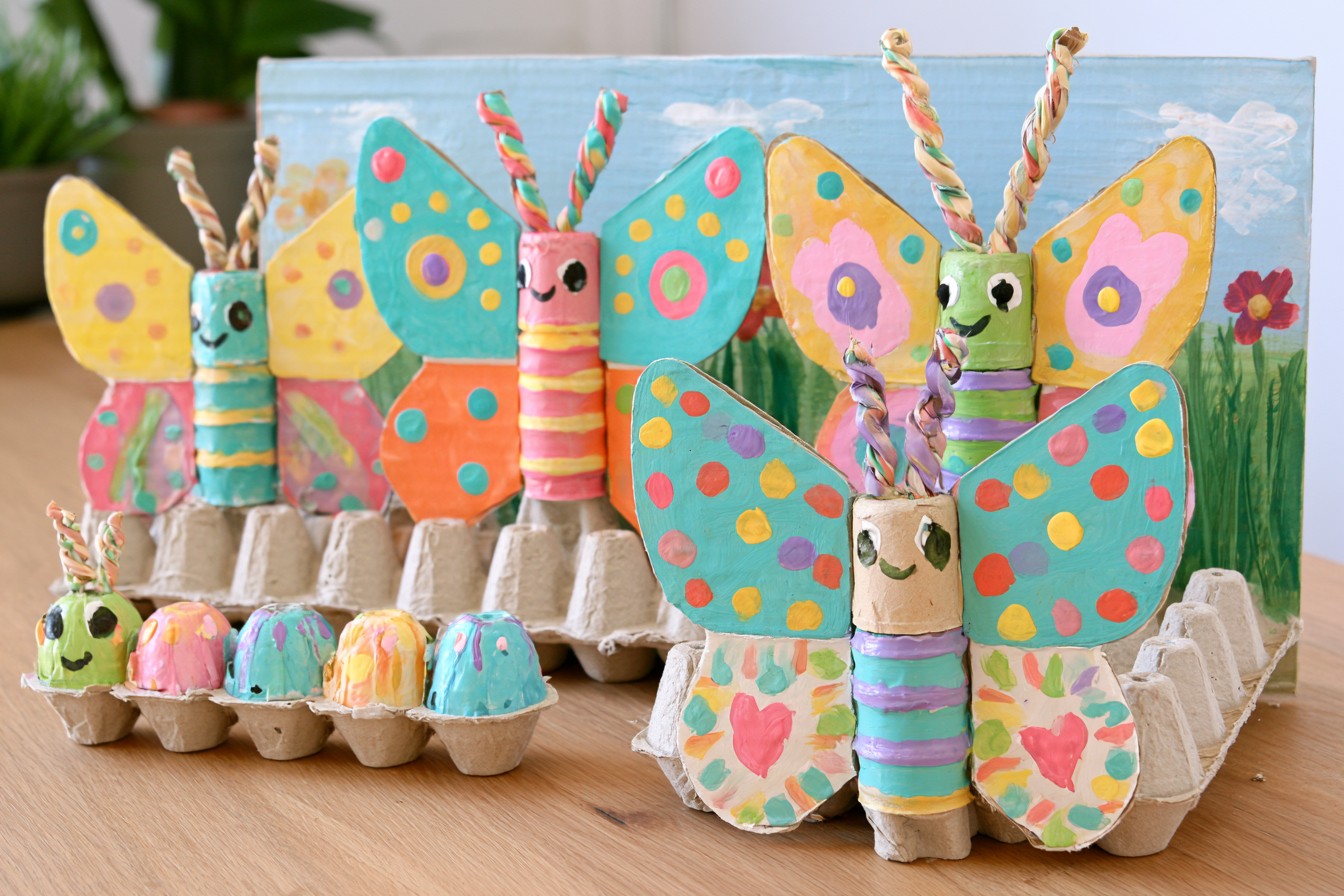
Cut connected cups from a cardboard egg carton to form butterflies, caterpillars, and flowers for a garden. Adults can prepare the pieces, while children paint each raised section with washable colors. Fold cereal box shapes into wings, decorate them with dots or symmetrical patterns, and glue them behind the bodies. Twisted paper strips make safer antennae for younger makers than wire. Arrange the finished insects on a shipping box panel painted like grass and sky. Add leaves cut from green packaging, names written on reused labels, or child drawn facts about helpful pollinators. Display the garden beside a classroom window.
4. Bottle Cap Ocean Mosaic
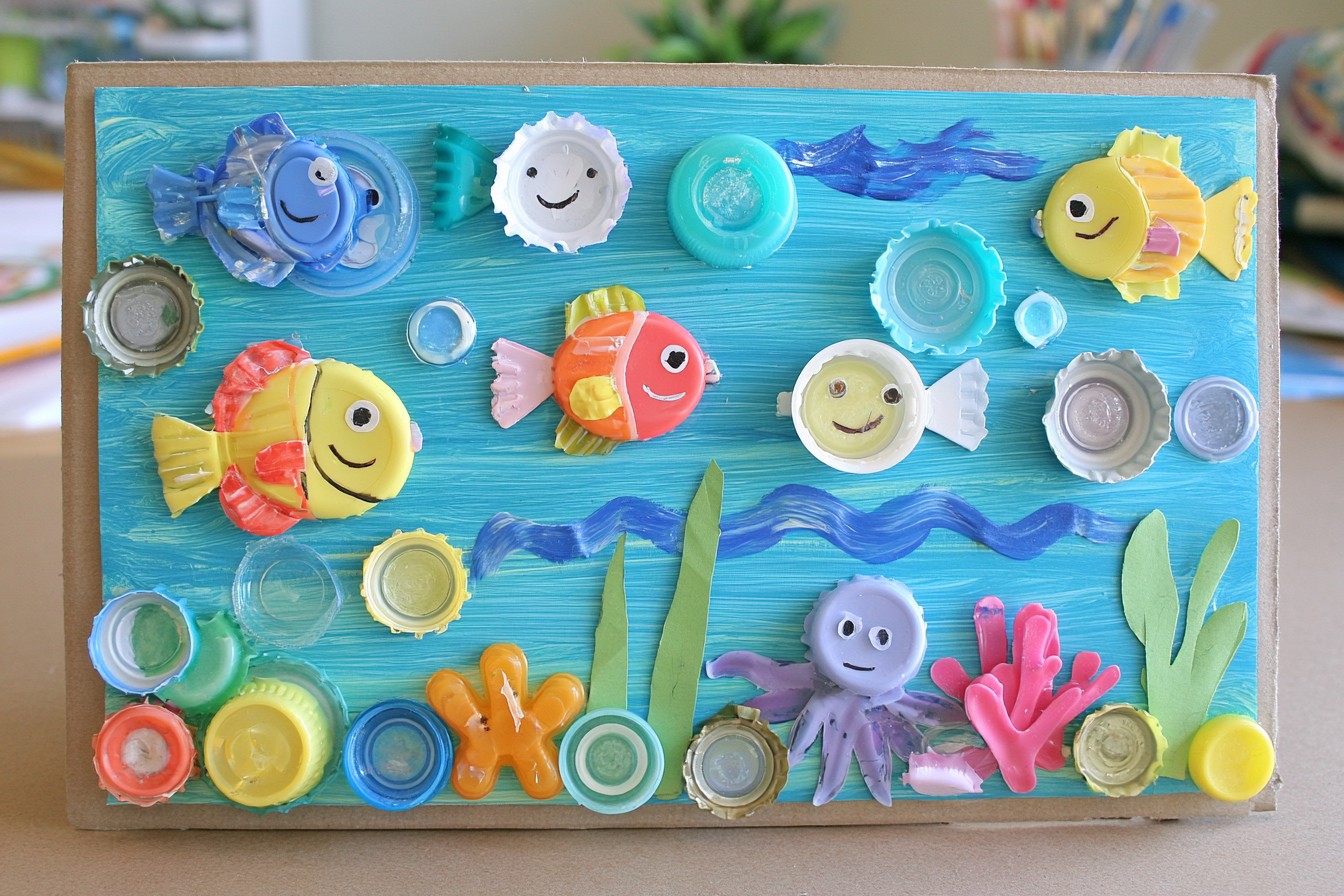
Collect clean bottle caps in colors, then arrange them into fish, bubbles, waves, or coral on a reused cardboard panel. Children should test the composition before anything is attached, sorting caps by shade and size as part of the activity. An adult can secure each piece with strong craft glue and supervise closely because caps are choking hazards for small children. Paint the exposed cardboard blue, add seaweed made from paper scraps, and draw scales inside lids with permanent marker. Turn the artwork into a name sign, classroom mural, or framed bedroom decoration. Avoid caps with sharp inner plastic edges.
5. Plastic Bottle Space Rocket
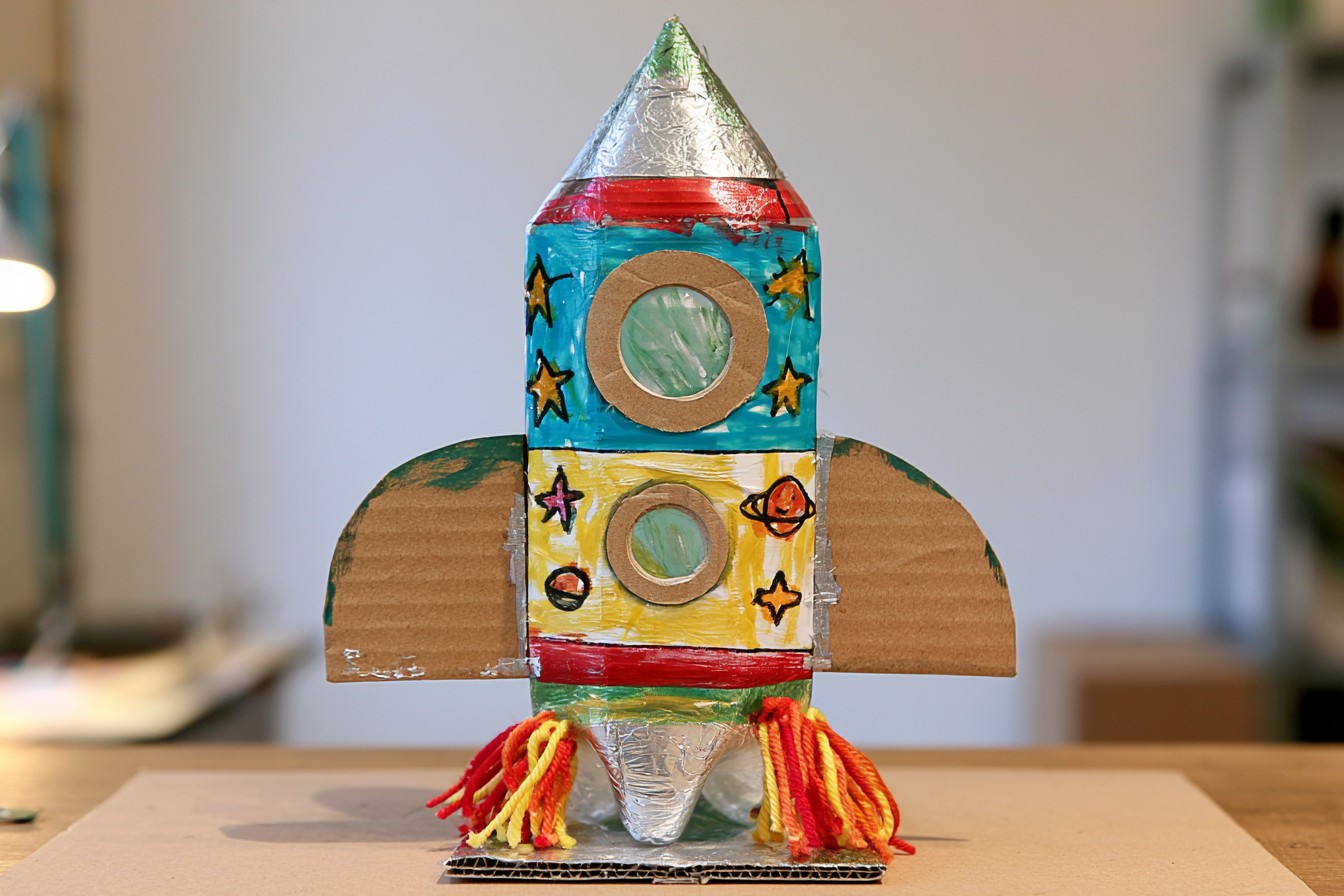
Transform a rinsed plastic drink bottle into a rocket ready for imaginative missions. Let the bottle dry, then cover it with paper scraps or child safe paint suitable for plastic. An adult should cut fins and a nose cone from a cereal box; children can color these pieces before they are taped firmly in place. Add round paper windows, foil details, and yarn flames in red, orange, and yellow. Write a spacecraft name across the side using alphabet stickers. For a standing display, glue the bottle to a cardboard base. This model is decorative only and should never be launched.
6. Newspaper Paper Bead Jewelry
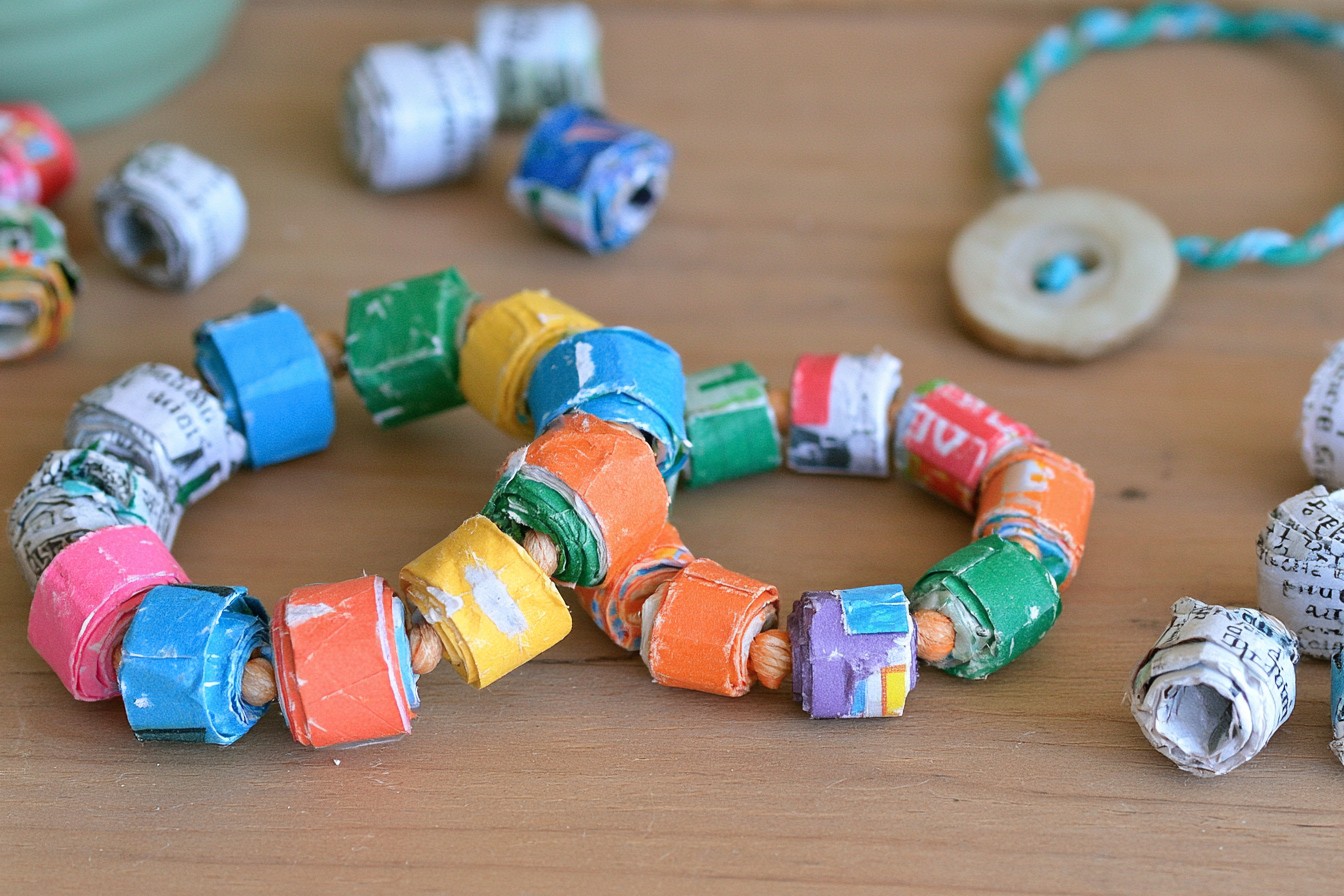
Newspapers and magazines become colorful beads with only glue, rolling, and patience. Ask an adult to cut long triangular strips, making them wide at one end and pointed at the other. Children can wrap each strip around a paper straw, brushing diluted nontoxic glue over the final section to hold it. Slide the bead off and leave it to dry. Seal finished beads with child safe decoupage medium if desired. Thread them onto elastic cord for bracelets, or combine them with buttons and fabric scraps for necklaces. Younger children need supervision because beads are small and cords can tangle easily.
7. T-Shirt Yarn Friendship Bracelets
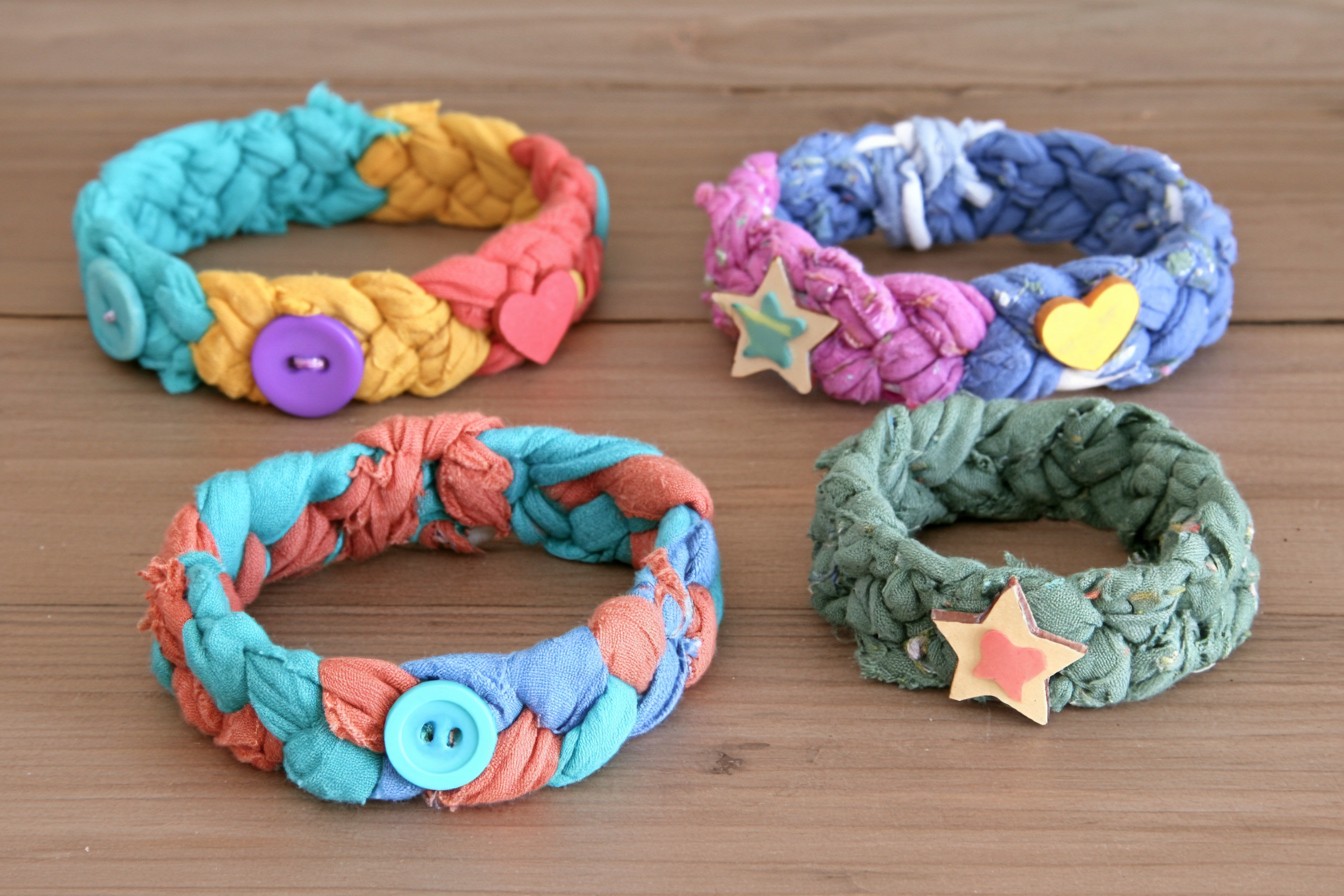
Give an outgrown cotton T-shirt another purpose by turning strips into braided friendship bracelets. An adult should cut across the fabric to create loops, remove thick seams, and gently stretch each strip until it curls into yarn. Children can choose three colors, knot them together, and tape the knot to a table before braiding. Finish with another knot and trim the ends. Decorate the bracelet with large reclaimed buttons or cardboard charms, avoiding tiny pieces for younger kids. Wider braids can become headbands, bookmarks, or handles for paper bags. Wash the shirt first and supervise all scissor work carefully.
8. Shimmering CD Color Spinner
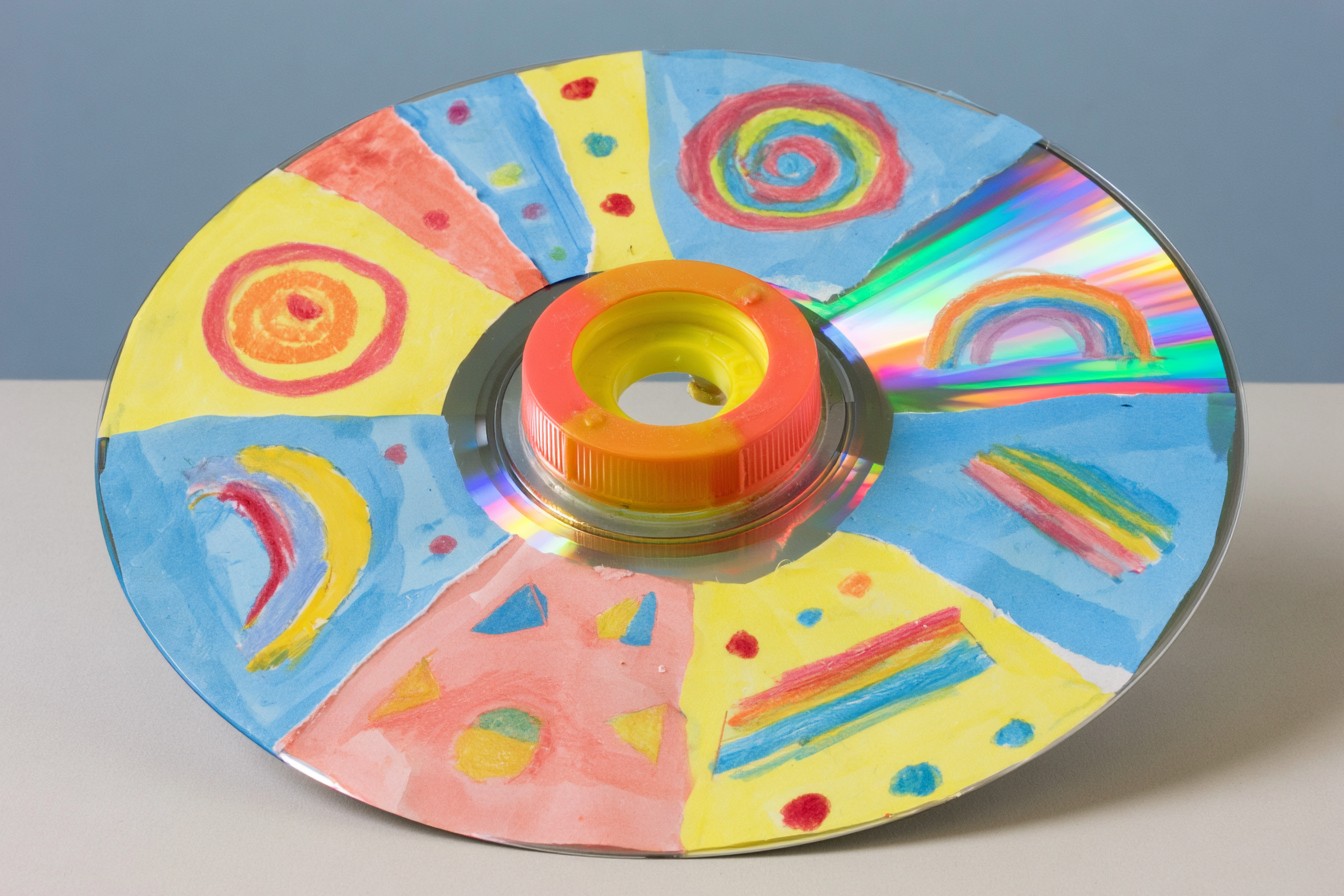
Use a CD to explore color, light, and motion through a simple spinning toy. Cover the printed side with a circle cut from scrap paper, then divide it into wedges, spirals, or repeating patterns. An adult can attach a large bottle cap over the center hole using strong glue, creating an easy handle once fully cured. Children may decorate the shiny side with removable stickers while leaving reflective areas visible. Spin the disc on a table and compare how different designs blur together. Keep damaged or cracked discs away from children, and use this finished craft only under adult supervision.
9. Cardboard Box Marble Maze
Build a reusable maze insid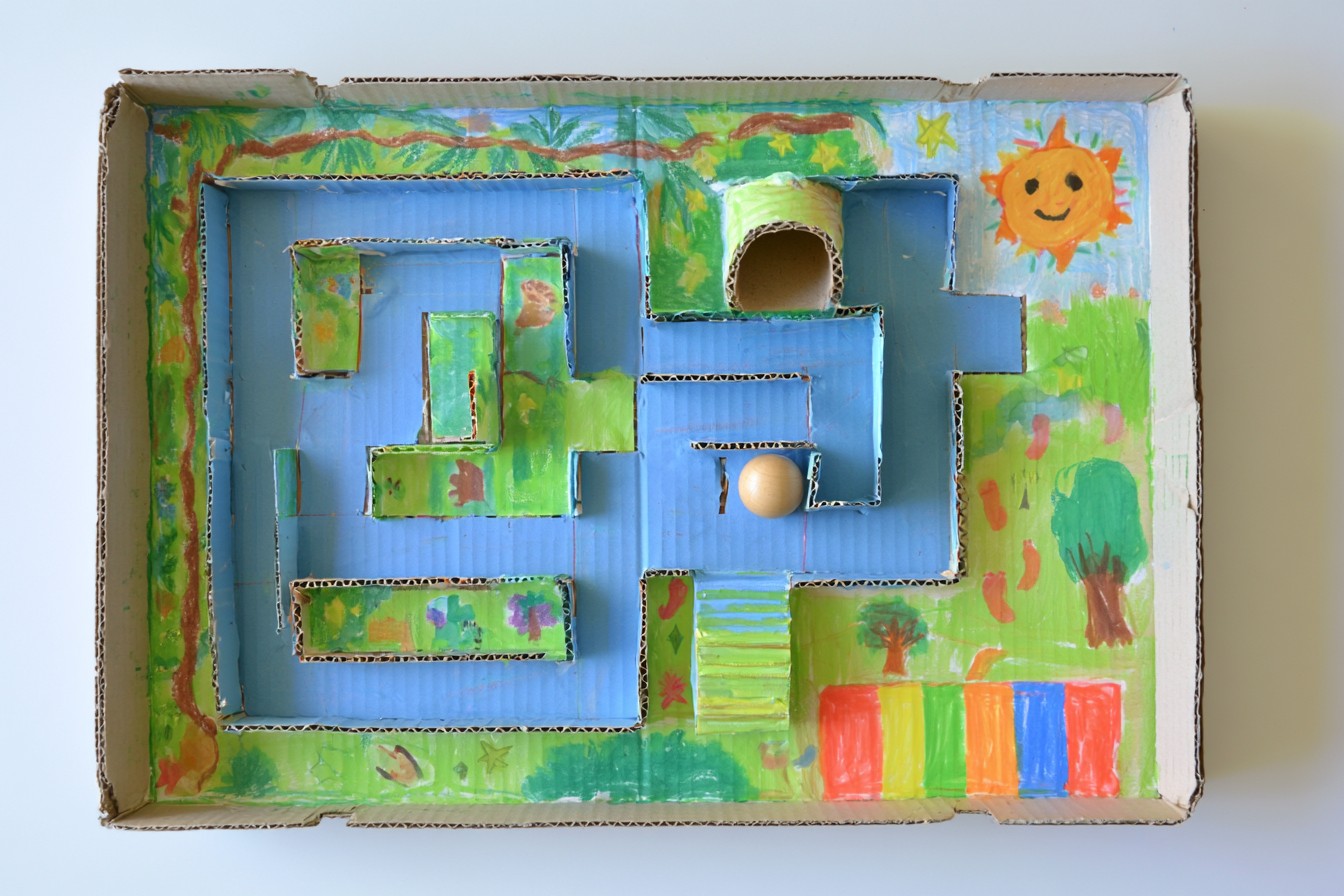 e a delivery box lid using strips cut from corrugated packaging. Children can sketch a path in pencil, including a starting point, finish zone, and several dead ends. An adult should cut the wall pieces; young designers can arrange and glue them upright. Decorate the base as a jungle, city, racetrack, or outer space map with crayons and scrap paper. Add tunnels from short paper tubes and small ramps from folded card. Tilt the box gently to guide a wooden bead through the course. Use marbles only with older children because they pose a choking hazard.
10. Safe Tin Can Rhythm Drum
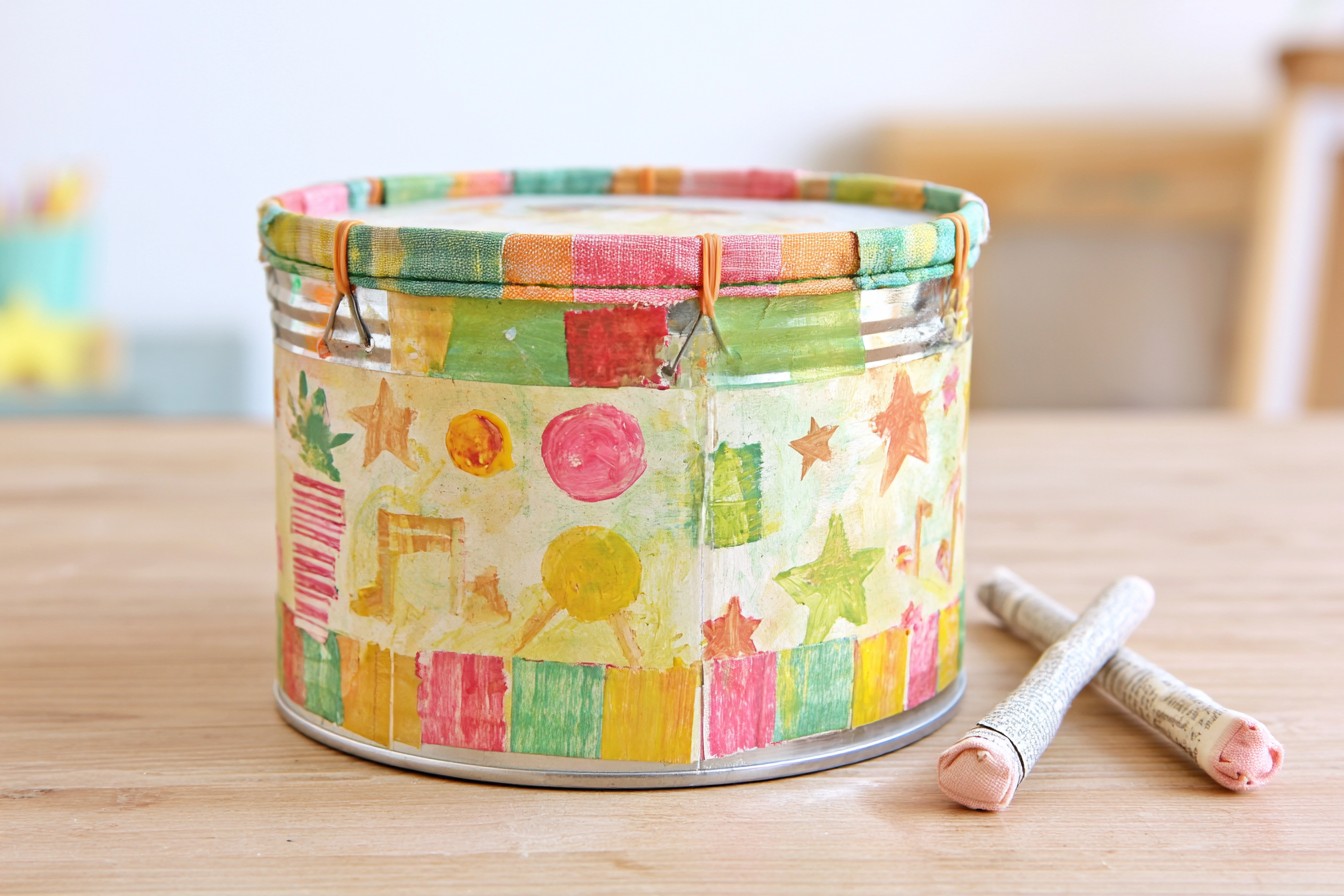
Create a rhythm drum from a clean can prepared entirely by an adult. Choose a container with no sharp rim, inspect it carefully, and cover every edge with strong tape. Stretch a piece of sturdy balloon or fabric tightly across the opening, then secure it with rubber bands. Children can wrap the outside in reused paper, paint geometric patterns, or add their names with letter cutouts. Make drumsticks from tightly rolled newspaper padded with fabric at each tip. Experiment with loud, soft, fast, and slow beats during a music session. Never let children handle unprepared cans or loose balloon fragments.
11. Yogurt Cup Seedling Faces
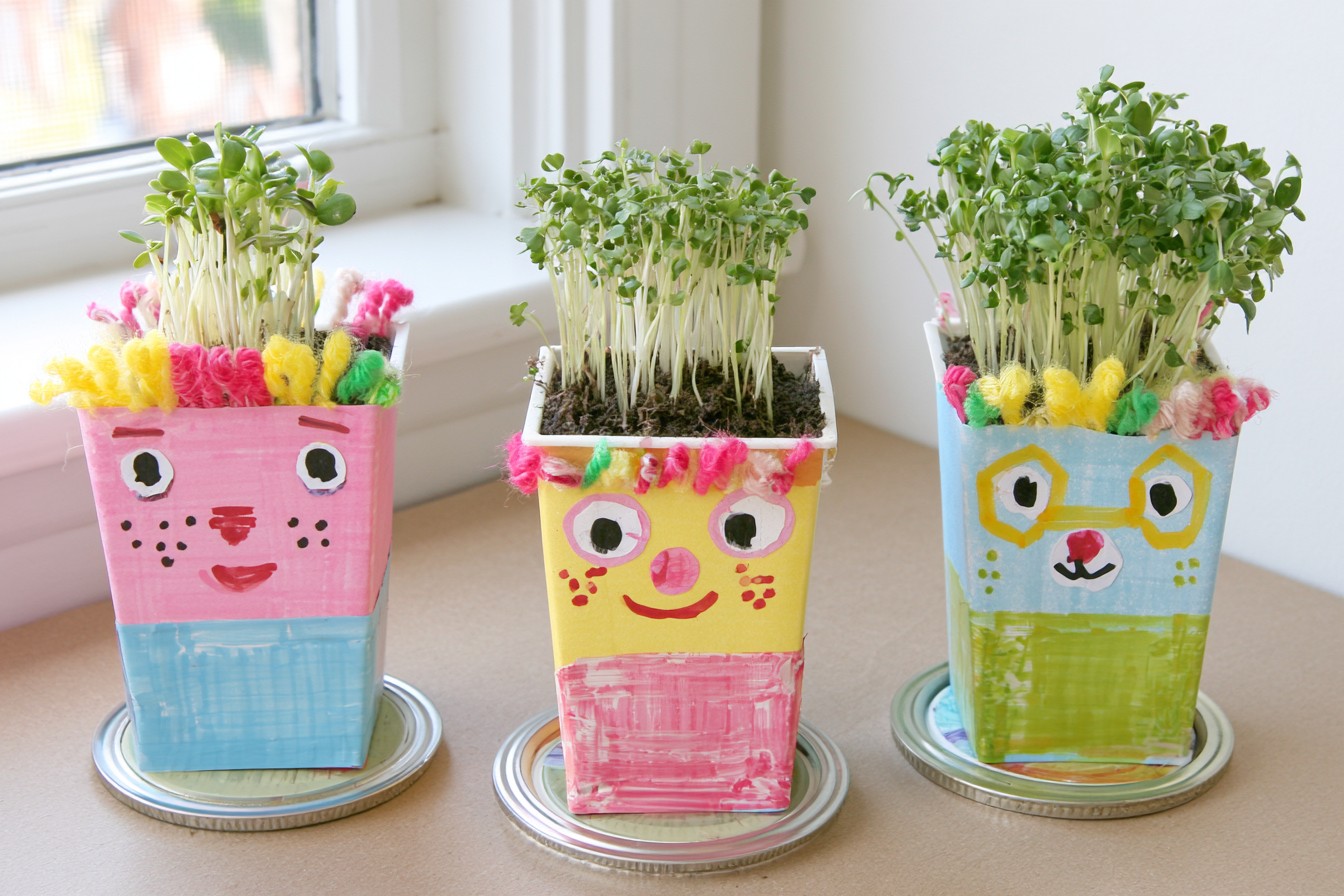
Clean yogurt cups make seedling pots that let children observe plant growth. An adult should create two drainage holes and place each cup on a reused jar lid or shallow tray. Children can draw funny faces on paper sleeves, add yarn hair, or decorate with waterproof stickers without covering the base. Fill the cup with seed starting mix, plant quick growing cress or bean seeds, and label the variety on a popsicle stick. Keep the soil lightly moist near a window. Measure sprouts weekly on a cardboard chart. Transplant growing plants before roots crowd the cup, then reuse it again.
12. Paper Bag Story Puppets
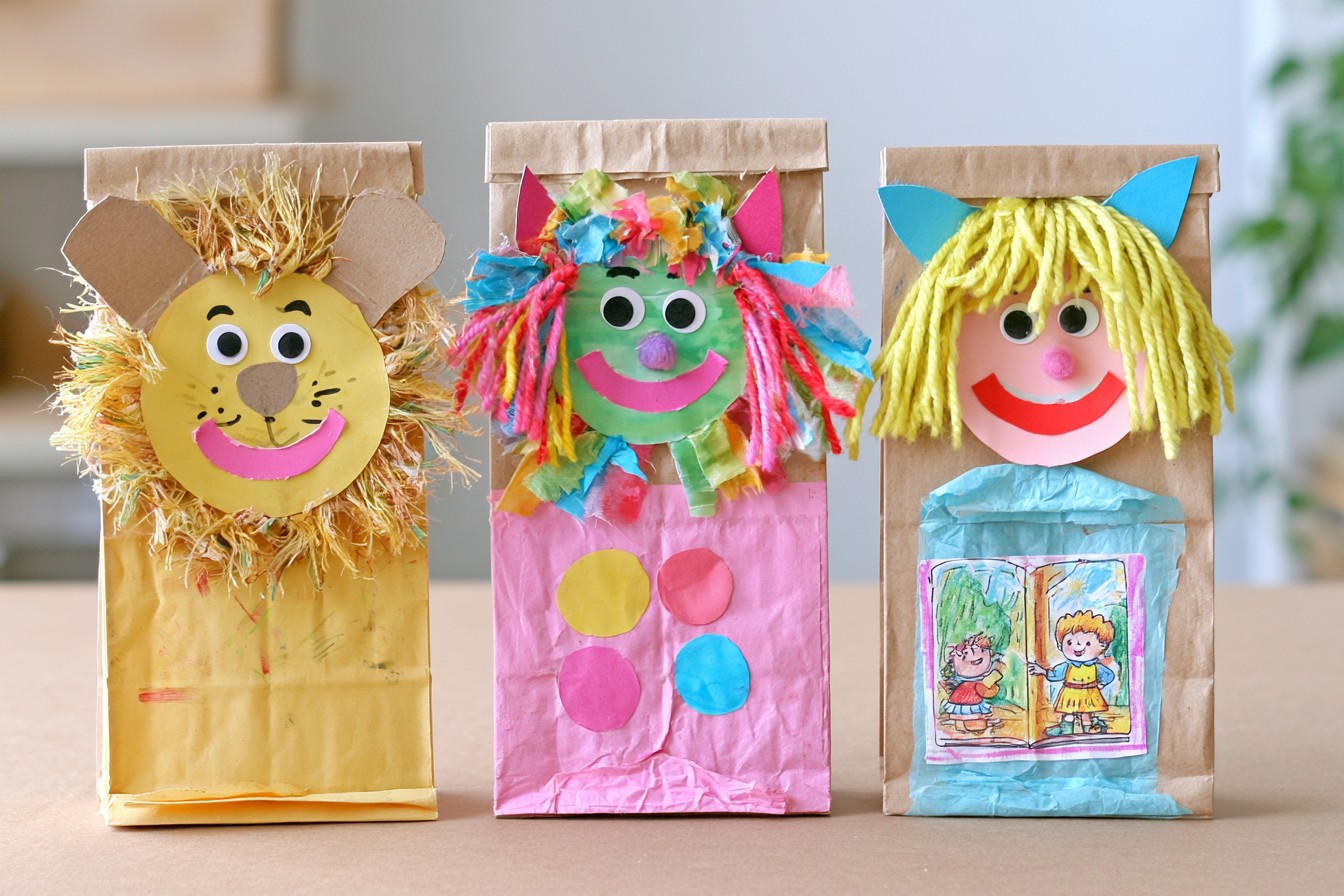
Save paper grocery or lunch bags for puppets that require no complicated structure. Place a bag flat with its folded bottom facing upward; that flap becomes the puppet's moving mouth. Children can glue on eyes cut from packaging, yarn hair, fabric ears, and paper teeth. Draw facial details with crayons, then add a costume using magazine patterns or wrapping paper. Create animals, storybook characters, family members, or entirely invented creatures. For an extended DIY activity, build a background from a flattened delivery box and write a script together. Choose paper glue instead of staples so hands remain protected during play.
13. Magazine Collage Earth Poster
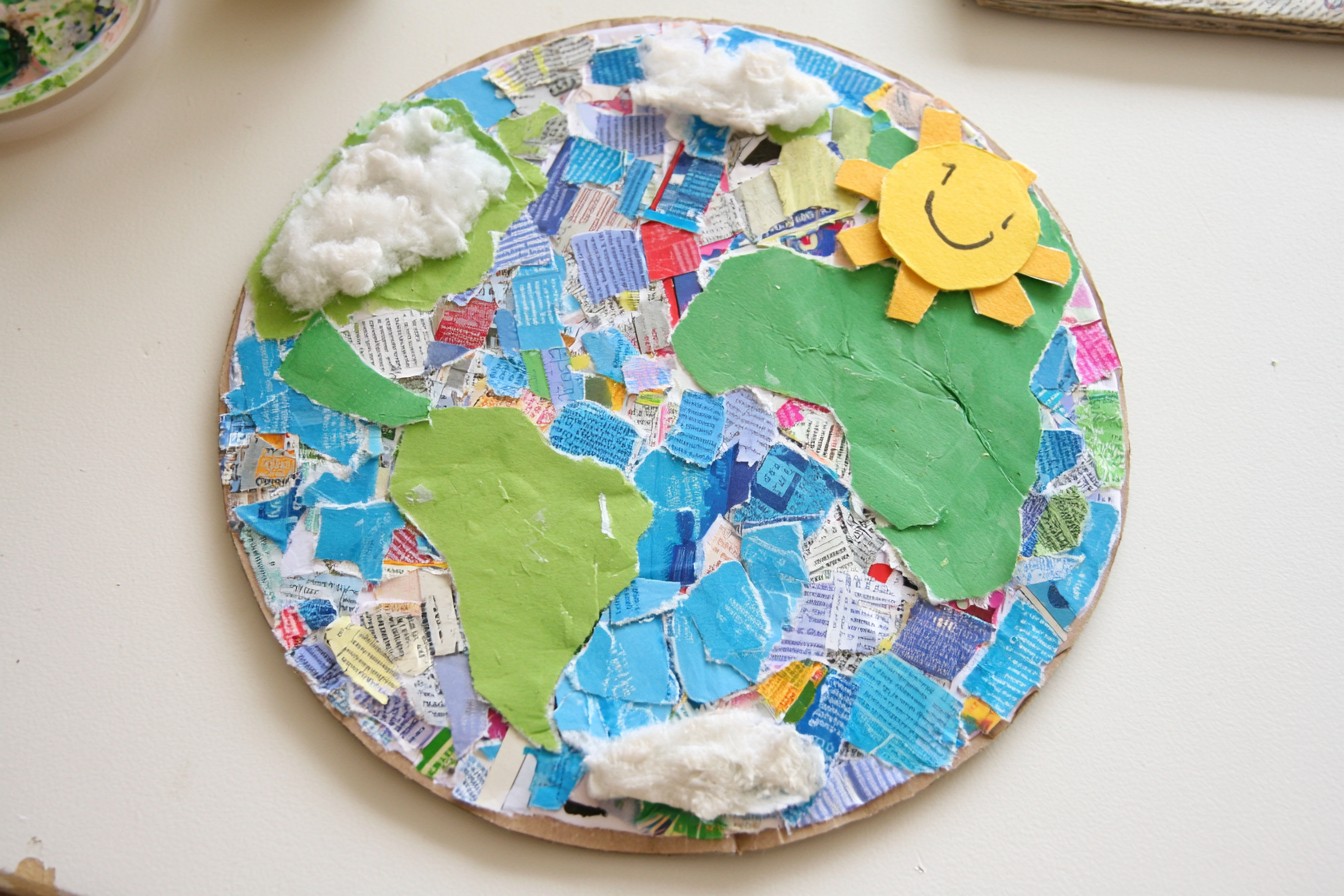
Turn old magazines into an Earth poster while discussing which materials families can reduce, reuse, and recycle. Draw a circle on the plain side of a cereal box, then invite children to tear blue and green paper into pieces. Sort colors, arrange ocean and land shapes, and glue them down with a layer of nontoxic adhesive. Add clouds from white envelope scraps and a border made from paper packaging symbols. Older children can include captions about saving water or repairing belongings. Punch two holes for a yarn hanger, or mount the planet on reused cardboard for an Earth Day display.
14. Shoebox Wildlife Habitat
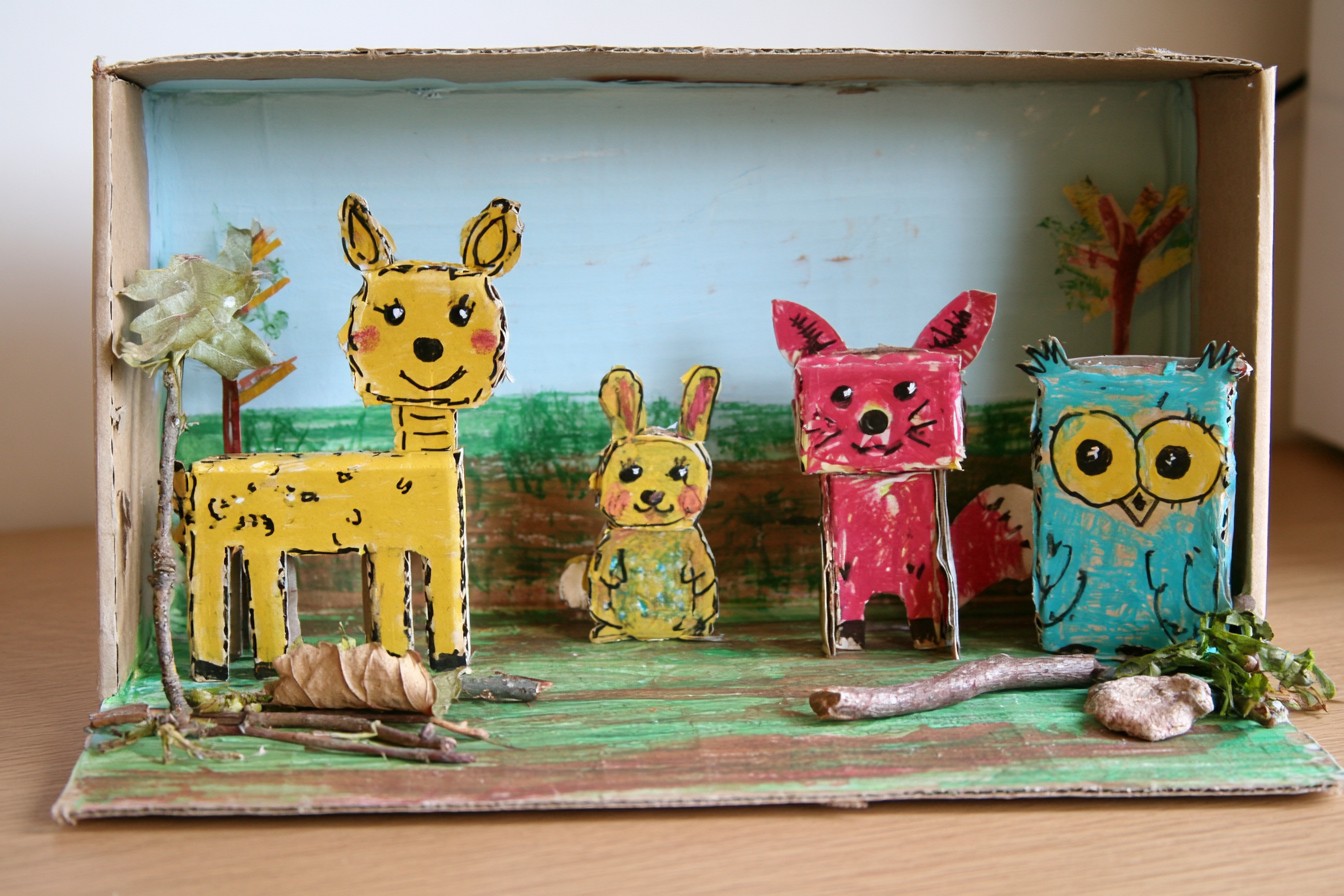
A shoebox can become a forest, desert, pond, or polar habitat for a science craft. Turn the box on its side and paint the interior background, or cover it with reused blue and brown paper. Children can shape animals from cardboard, cork, and newspaper, then add rocks, twigs, dried leaves, or paper plants. Use folded cardboard tabs to help figures stand. Research which animals share the chosen ecosystem and include only suitable species, food, and shelter. Label important features with narrow packaging strips. Keep natural materials clean and dry, avoid unknown plants, and display the habitat away from household pets.
15. Jar Lid Memory Game
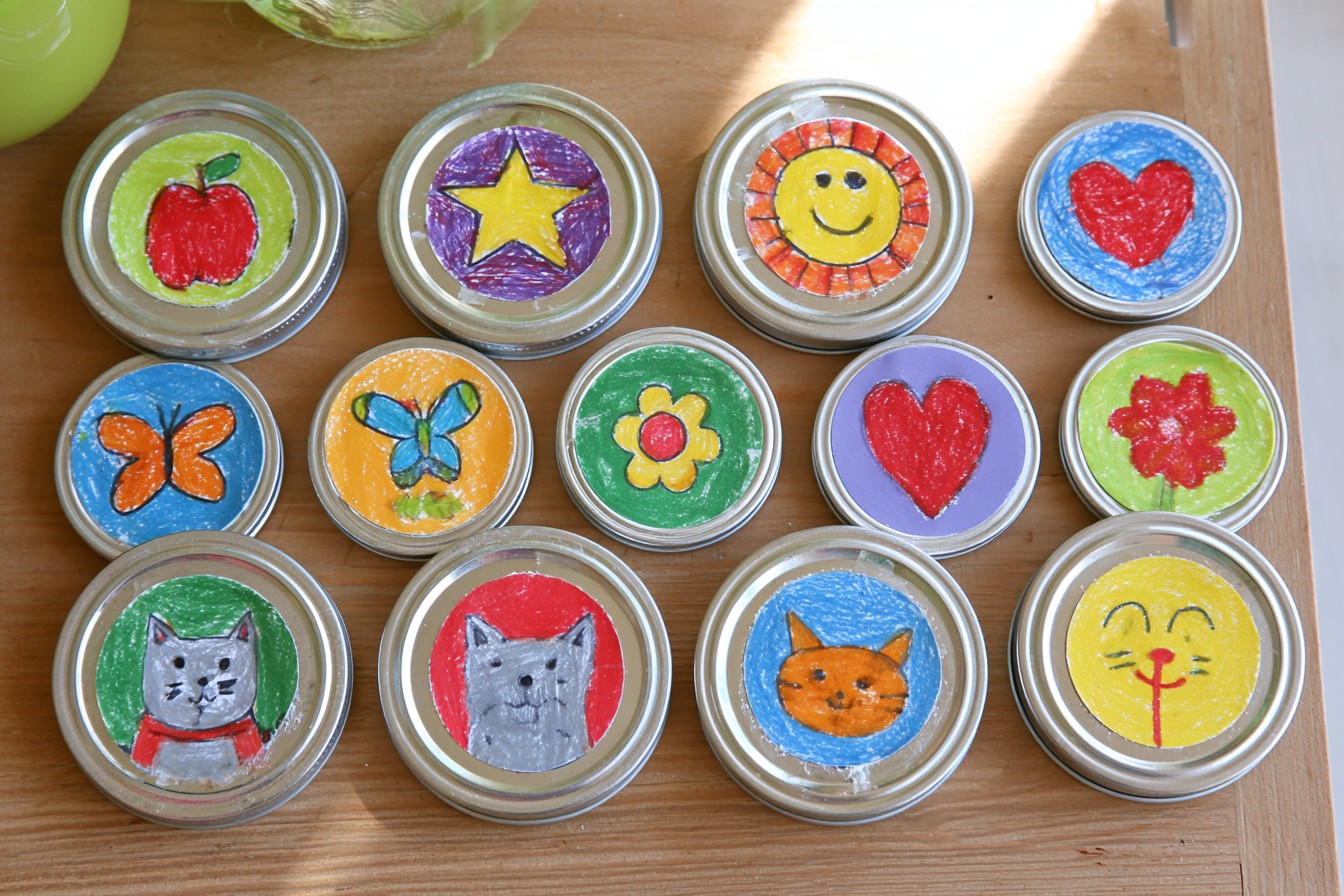
Matching games are easy to customize with pairs of jar lids. Trace each lid onto scrap paper, draw two copies of every symbol, and cut the circles with adult help. Choose themes such as fruits, letters, emotions, shapes, or local animals. Glue one picture inside each lid and let everything dry fully. Paint or cover the outer surfaces alike so no pair can be recognized from the back. Arrange the lids face down, then take turns revealing two at a time. For younger players, begin with four pairs. Inspect lids for rust or sharp edges and discard unsafe pieces immediately.
16. Paper Roll Storybook Castle
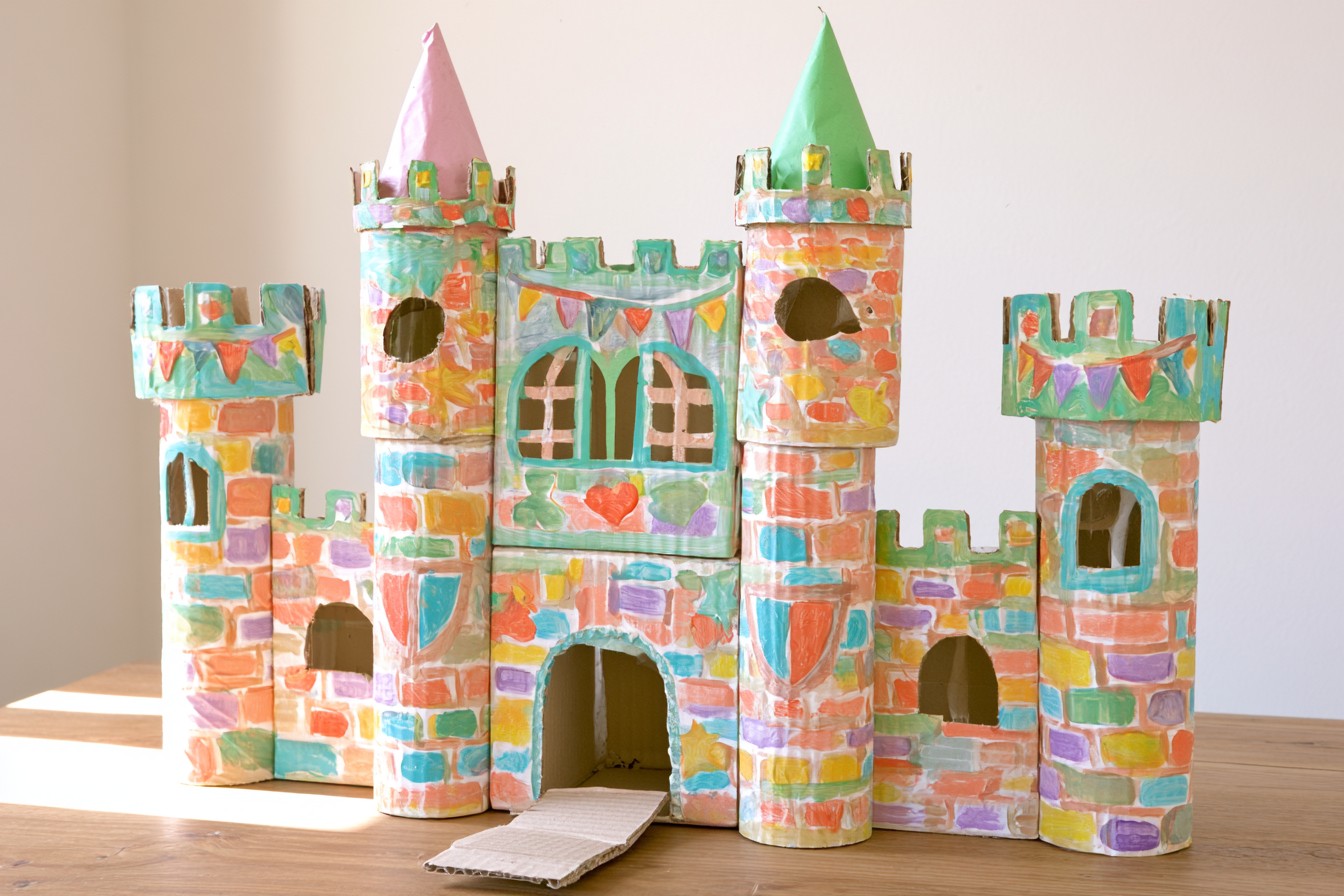
Construct a storybook castle from paper rolls, small boxes, and saved cardboard without buying a plastic playset. Stand several tubes around a tissue box, then join them with paper tape. An adult can cut doorways, windows, battlements, and cone shaped roofs; children can paint stones, bricks, vines, or banners across the surfaces. Add a drawbridge made from a packaging flap and soft yarn, keeping cords short. Bottle caps may become shields for older children, while large paper circles suit preschoolers. Build cardboard characters and invent a tale about the castle. Store loose pieces inside the central box when playtime finishes.
17. Recycled Lid Sorting Board
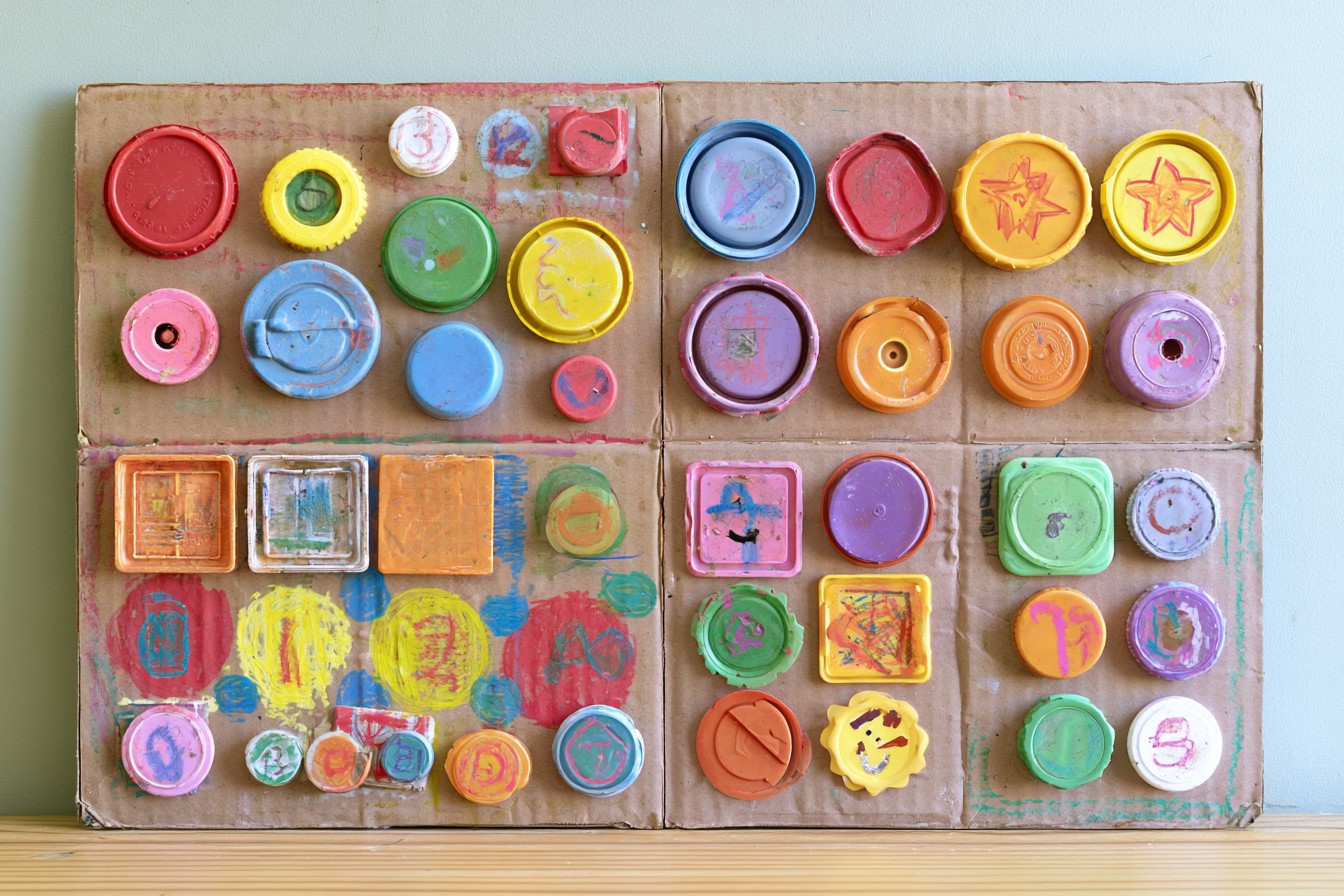
Create a sorting board from plastic lids and a flattened cardboard carton. Draw several circles or compartments, then assign each one a color, size, number, or shape category. Children can paint sample symbols inside the sections and place matching lids on top. For counting practice, write numerals beside groups; for pattern play, arrange alternating sequences for another player to continue. Older children can design rules and score cards from scrap paper. Do not glue the lids, because movable pieces make the activity reusable. Wash everything thoroughly and supervise young children, since small caps can become dangerous choking hazards if mouthed.
18. Fabric Scrap Weaving Loom
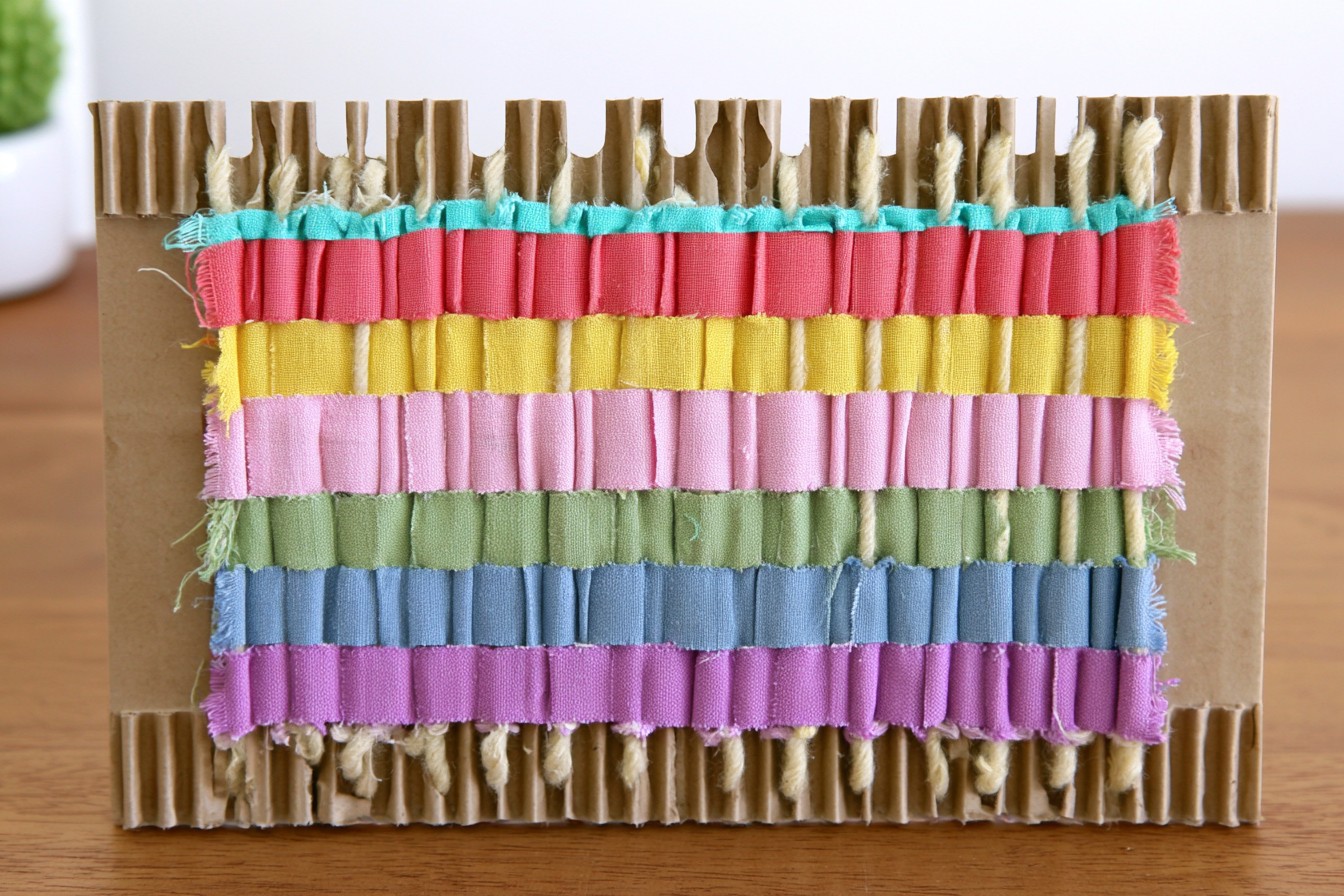
Make a weaving loom from corrugated cardboard and transform fabric offcuts into colorful textile art. An adult should cut spaced notches along two opposite edges. Wrap reused yarn vertically through the notches to create the warp, tying it securely behind the board. Children weave narrow fabric strips over and under the strings, alternating the starting direction on each row. Push rows together with a wide craft stick and change colors for stripes. Add ribbons, soft packaging twine, or T-shirt yarn for texture. When finished, display the weaving on its loom, or remove it and turn it into a coaster.
19. Cardboard Tube Flower Printing
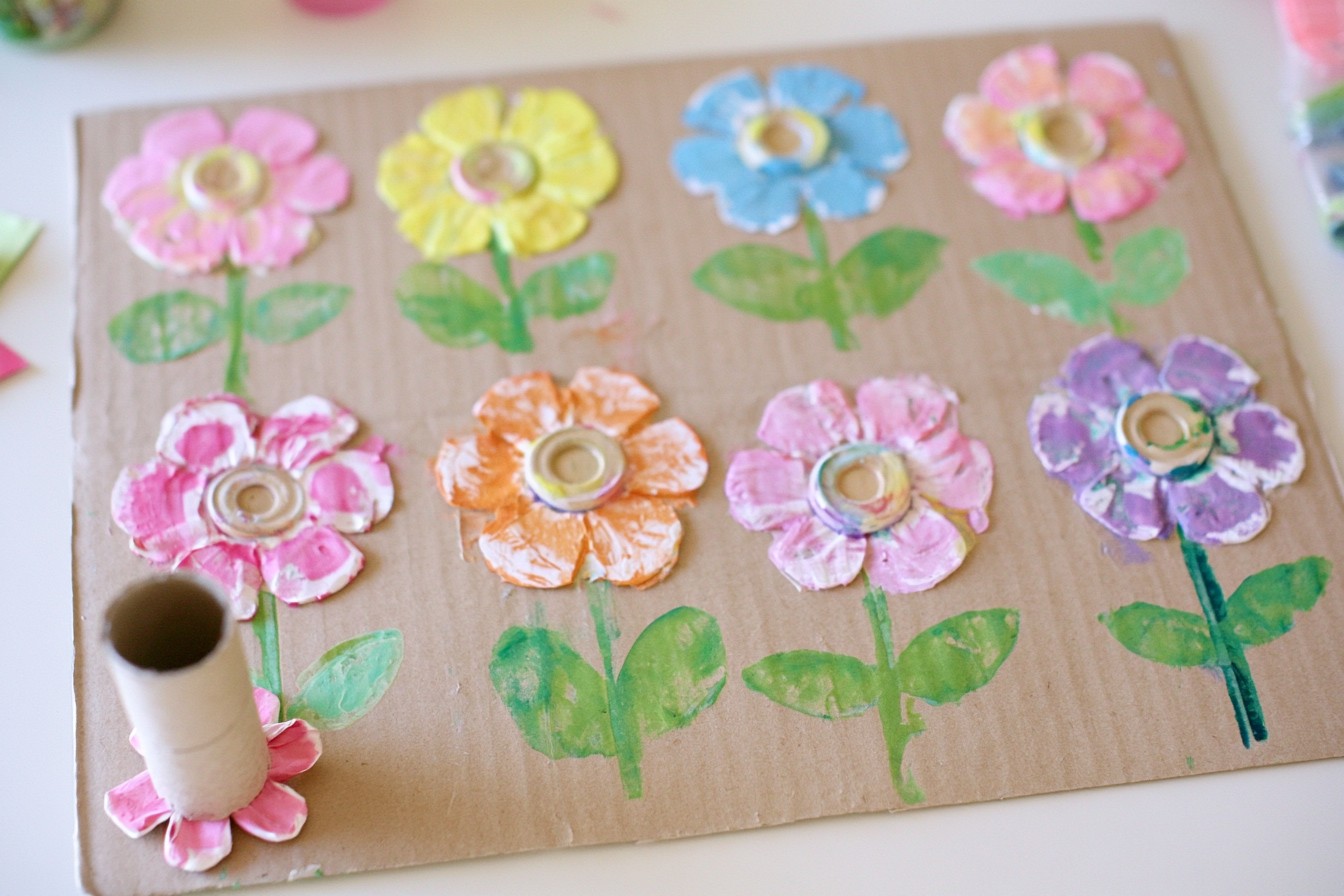
Flatten and shape the end of a cardboard tube to create stamps for artwork. Pinch it into a petal, heart, leaf, or star outline, then dip the edge lightly into paint. Children can print petals around bottle cap centers on the plain side of opened packaging. Add stems with a brush and glue on leaves cut from green magazine pages. Try overlapping colors to make a meadow, greeting card, gift wrap, or spring garland. Keep one tube shape for each color to prevent muddy prints. Cover the table, use washable supplies, and recycle the dry tubes after repeated stamping sessions.
20. Carton Bird Feeder Café
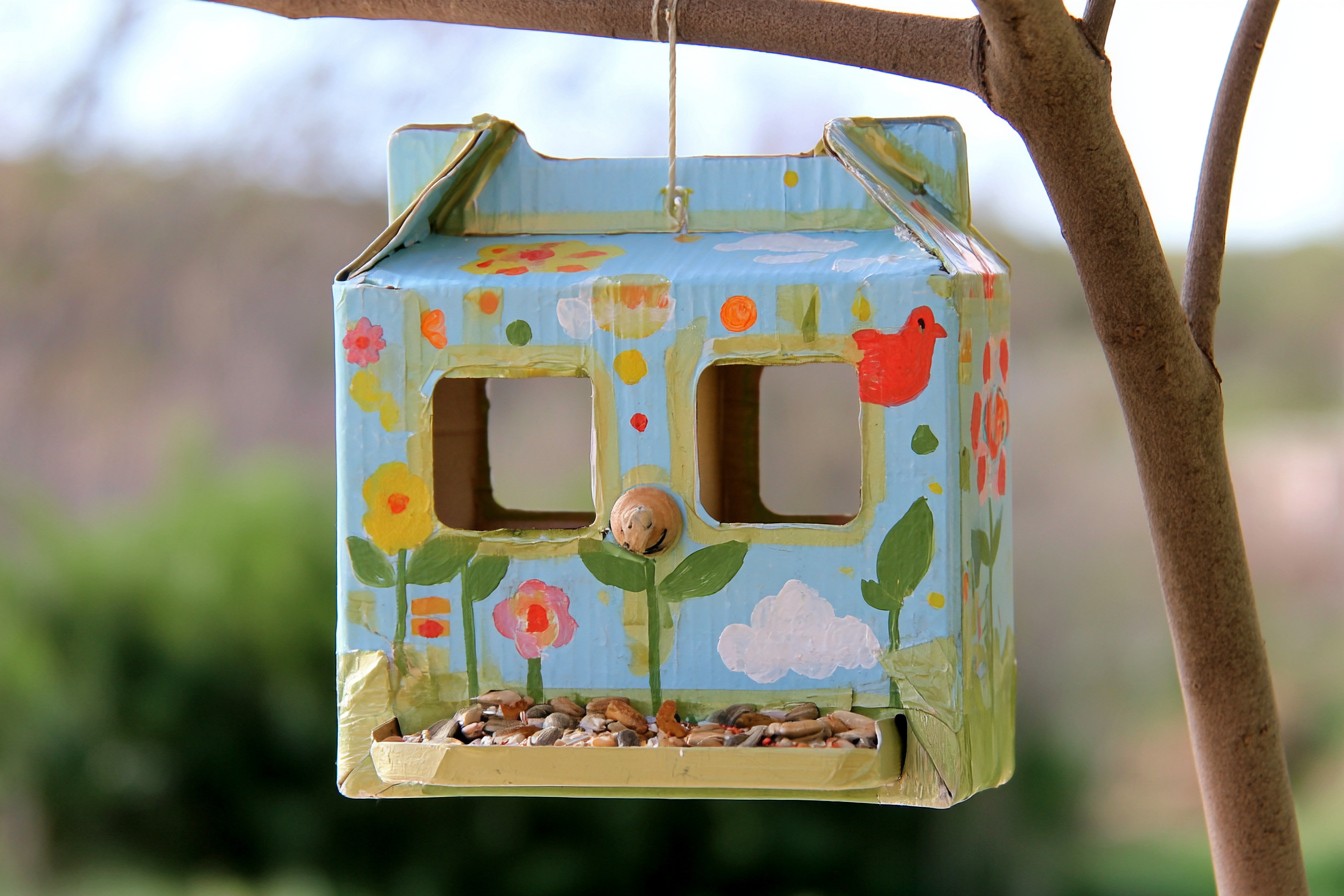
Turn a clean beverage carton into a bird feeder for observing neighborhood wildlife. An adult should cut two openings on opposite sides, leaving a tray at the bottom, and cover cut edges with weather resistant tape. Children can decorate the exterior with nontoxic outdoor paint, paper leaf shapes sealed against moisture, or bird silhouettes. Punch holes near the top and add a sturdy hanging cord, installed by an adult. Fill the base with an appropriate local seed mix, then hang it where cats cannot reach. Clean the feeder, replace damp seed promptly, and record visiting species in a handmade notebook.
MORE IDEAS


Share
What's Your Reaction?
 Like
0
Like
0
 Dislike
0
Dislike
0
 Love
0
Love
0
 Funny
0
Funny
0
 Angry
0
Angry
0
 Sad
0
Sad
0
 Wow
0
Wow
0