How to Build a Multi-Level Pallet Fairy Garden

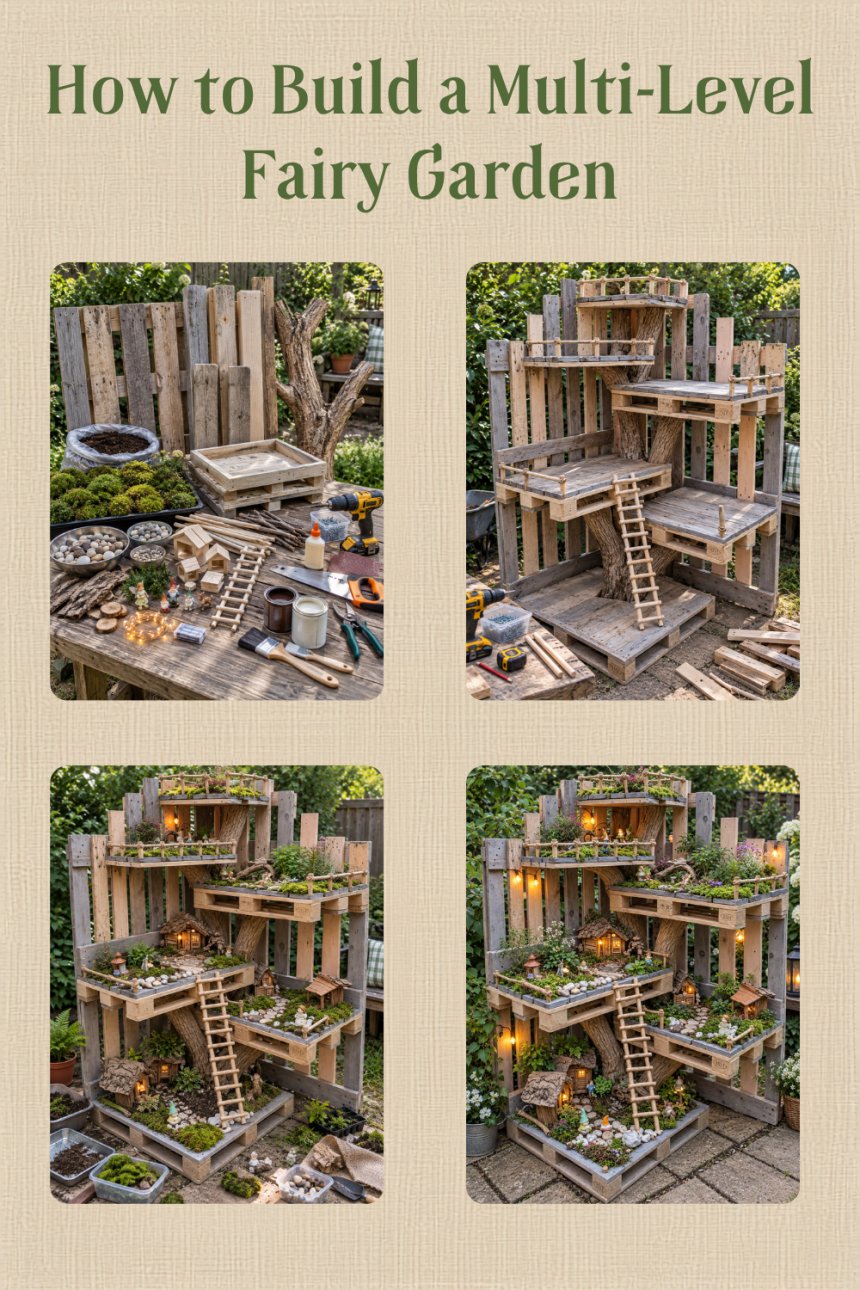
The project in the reference image works because it treats a fairy garden as a small vertical landscape rather than a single planter. Staggered wooden platforms create separate scenes at different heights, while a central branch gives the composition the appearance of a miniature treehouse village. Moss, stone paths, tiny cabins, railings, ladders, and restrained lighting then connect those levels visually.
The version below is designed as a decorative garden feature rather than a load-bearing structure. Its exact dimensions should be adapted to the available space and the reclaimed wood you have. Before cutting anything, measure the finished footprint, planned height, platform depth, and the clearance needed around the project.
Step 1: Gather the Materials
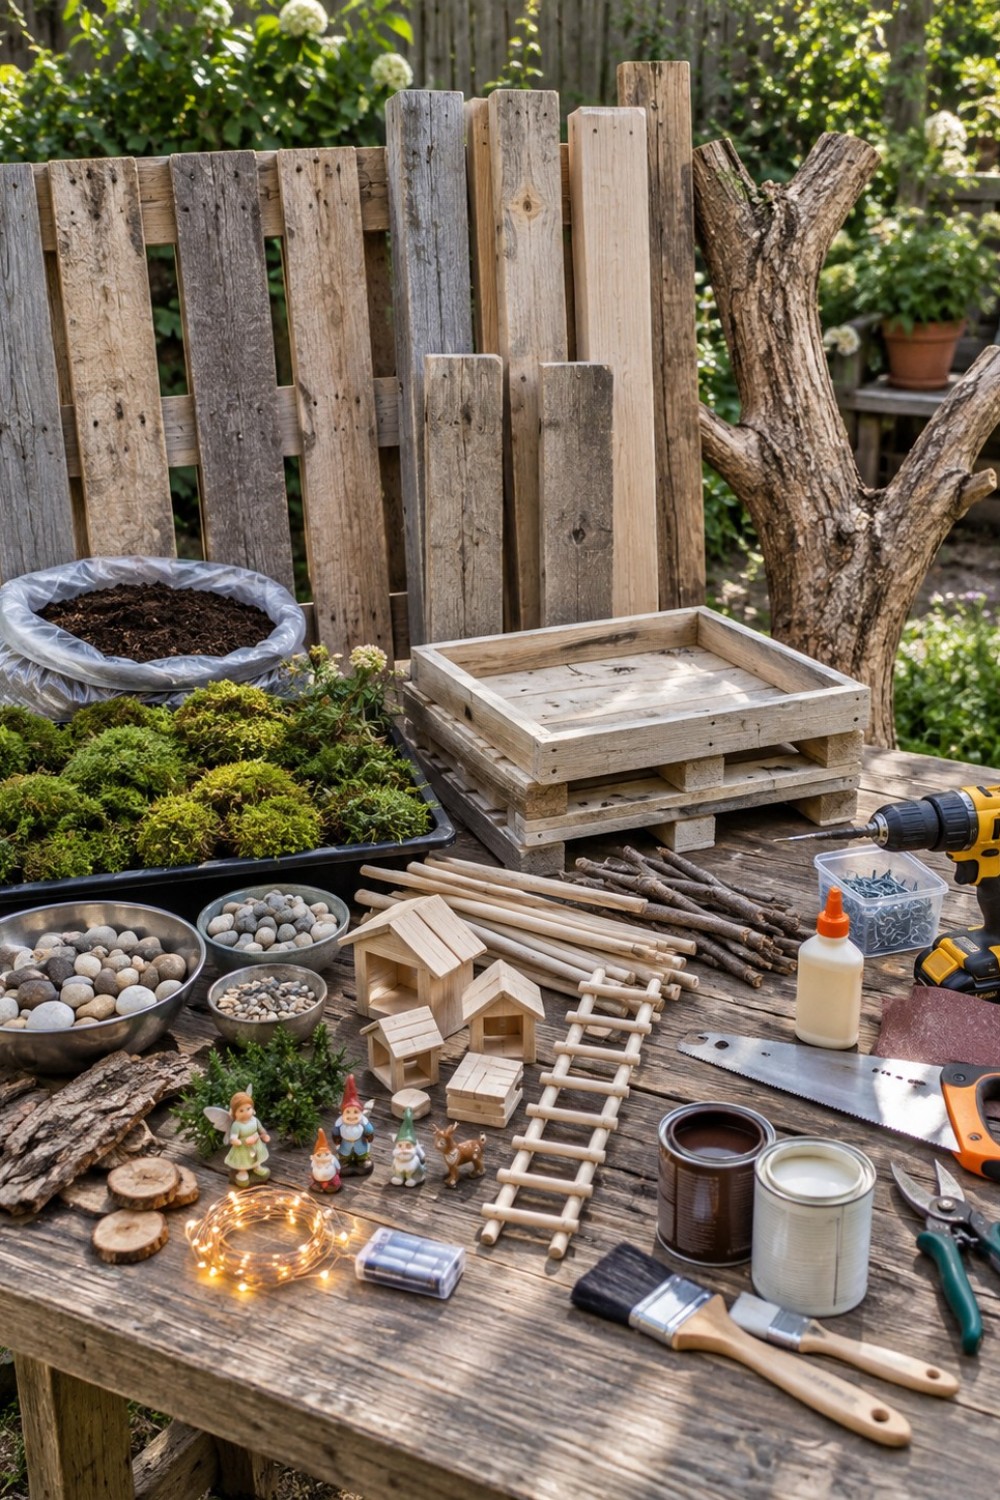
Start by separating the project into three material groups: the structural frame, the miniature landscape, and the finishing details. This prevents a common mistake with elaborate fairy gardens: decorating too early and then discovering that another platform or support still needs to be drilled into place.
Structural materials
For a build similar to the reference image, prepare:
- Reclaimed pallet boards or exterior-grade timber
- Thicker timber strips for vertical supports
- A dry branch or section of decorative trunk
- Narrow wood strips for platform edging
- Thin dowels or straight twigs for railings
- Small dowels for the ladder
- Exterior-rated wood screws
- Small finishing screws or brads for miniature components
- Exterior wood glue where appropriate
- Exterior wood stain, oil, or paint if the timber needs protection
If using pallet wood, inspect every board carefully. Avoid wood with chemical spills, strong odors, rot, extensive splitting, or uncertain treatment history. Clean timber intended for outdoor reuse is preferable. Any exposed nails or staples should be removed before sanding.
Landscaping materials
Prepare preserved or suitable garden moss, small pebbles, gravel, bark fragments, miniature plants or low-growing plants, shallow planting medium where live plants will actually be grown, miniature houses, small figurines, and decorative branches.
Live moss and plants require different conditions from preserved craft moss. Do not assume every moss sold for crafts can remain outdoors permanently.
Tools
A drill/driver, appropriate drill bits, saw, tape measure, pencil, square, sandpaper or a sander, pruning shears, clamps, and a screwdriver will cover most of the work.
For lighting, choose low-voltage battery-powered miniature lights specifically suitable for the intended environment. Keep the battery compartment accessible and protected according to the manufacturer's instructions.
Before construction begins, lay everything out and decide which pieces are structural and which are decorative. A miniature house can be glued in place; a projecting wooden platform should instead be mechanically fastened to a suitable support.
Step 2: Build the Frame and Platforms
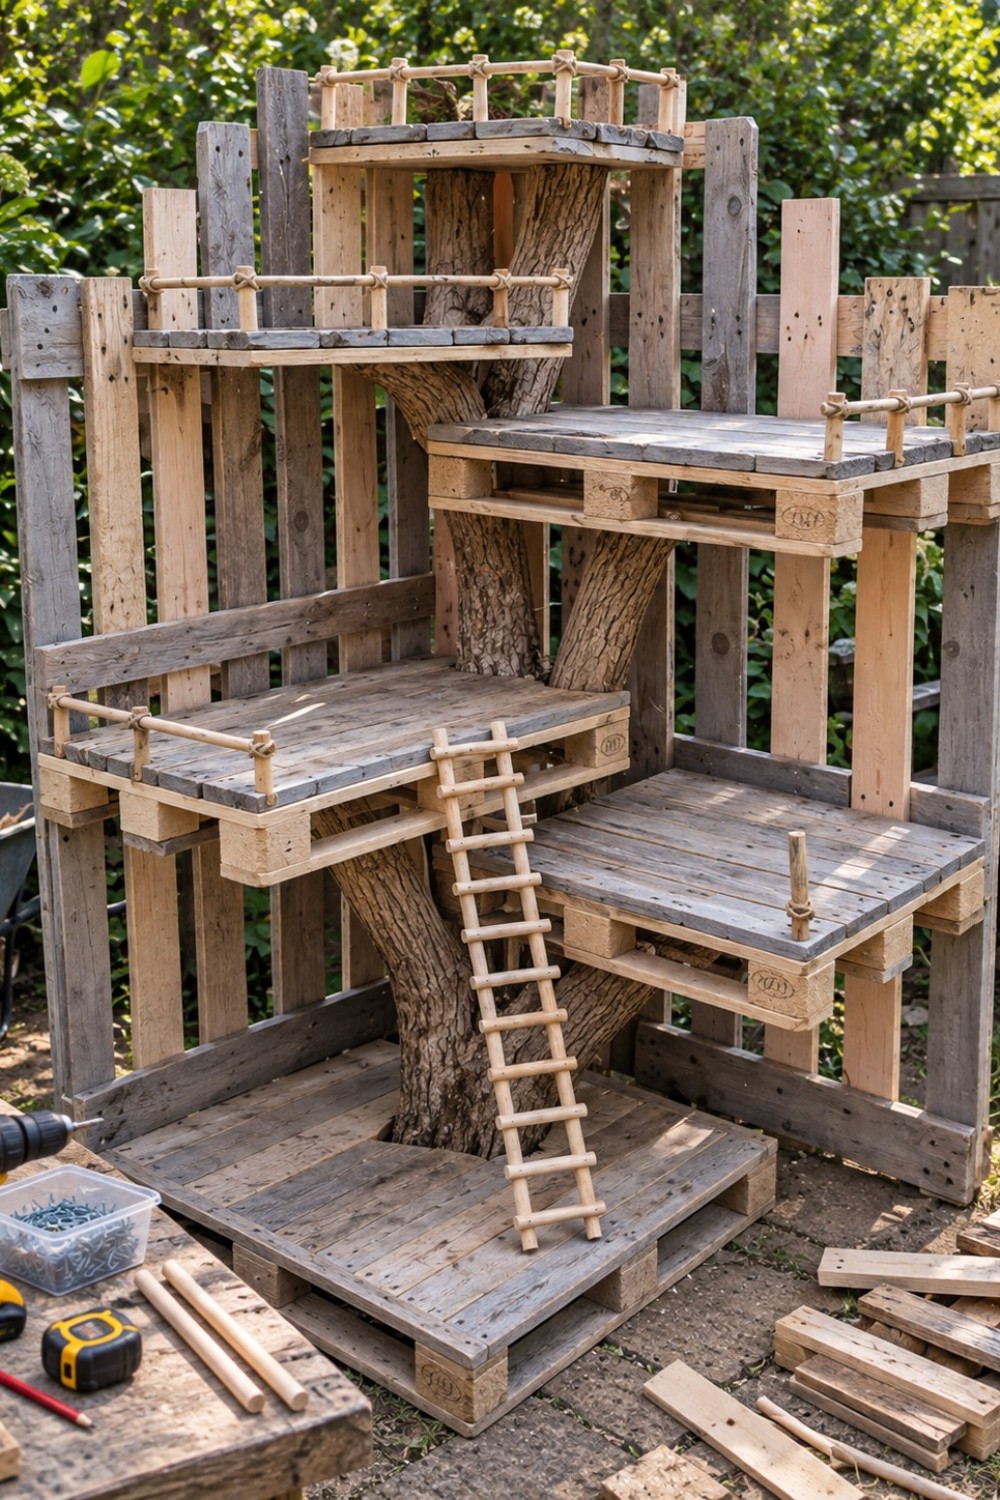
The visual character of the reference project comes from its irregular arrangement, but the underlying frame still needs to be stable. Build the structure from the bottom upward, rather than attaching platforms randomly around the central branch.
Begin with a broad base that sits flat on a firm surface. Paving, a stable patio, or another level foundation is more suitable than soft soil because the completed project becomes considerably heavier after adding wet planting material and stone.
Next, install the rear and side supports. Check them with a square while fastening them so the frame does not gradually lean as additional levels are added.
The central trunk effect can be created with a dry, structurally sound branch secured to the freestanding base. Avoid driving screws into a living tree merely to support a decorative project. The branch is primarily a visual anchor; the platforms should rely on the timber frame for support.
Create several staggered decks rather than stacking identical shelves directly above one another. In the reference composition, the offsets allow each miniature garden to remain visible from the front. Before fixing a platform permanently, check:
- whether the level beneath it remains visible;
- whether a miniature house can fit comfortably;
- whether your hand can still reach the area for maintenance;
- whether the platform is securely supported on more than a decorative twig or branch.
Predrilling near the ends of reclaimed boards helps reduce splitting. Sand cut edges and corners before assembly because these areas become difficult to reach once the landscaping is installed.
The railings can now be made from thin dowels or straight twigs. Treat them as decorative barriers rather than structural handrails.
Finally, make the miniature ladder from two parallel dowels and evenly spaced rungs. Build it separately on a flat surface before attaching it to the structure.
Important: this is a decorative miniature display. The decks, ladder, and railings are not designed to support a person, pet, or climbing child.
Step 3: Add Moss, Paths, and Miniature Buildings
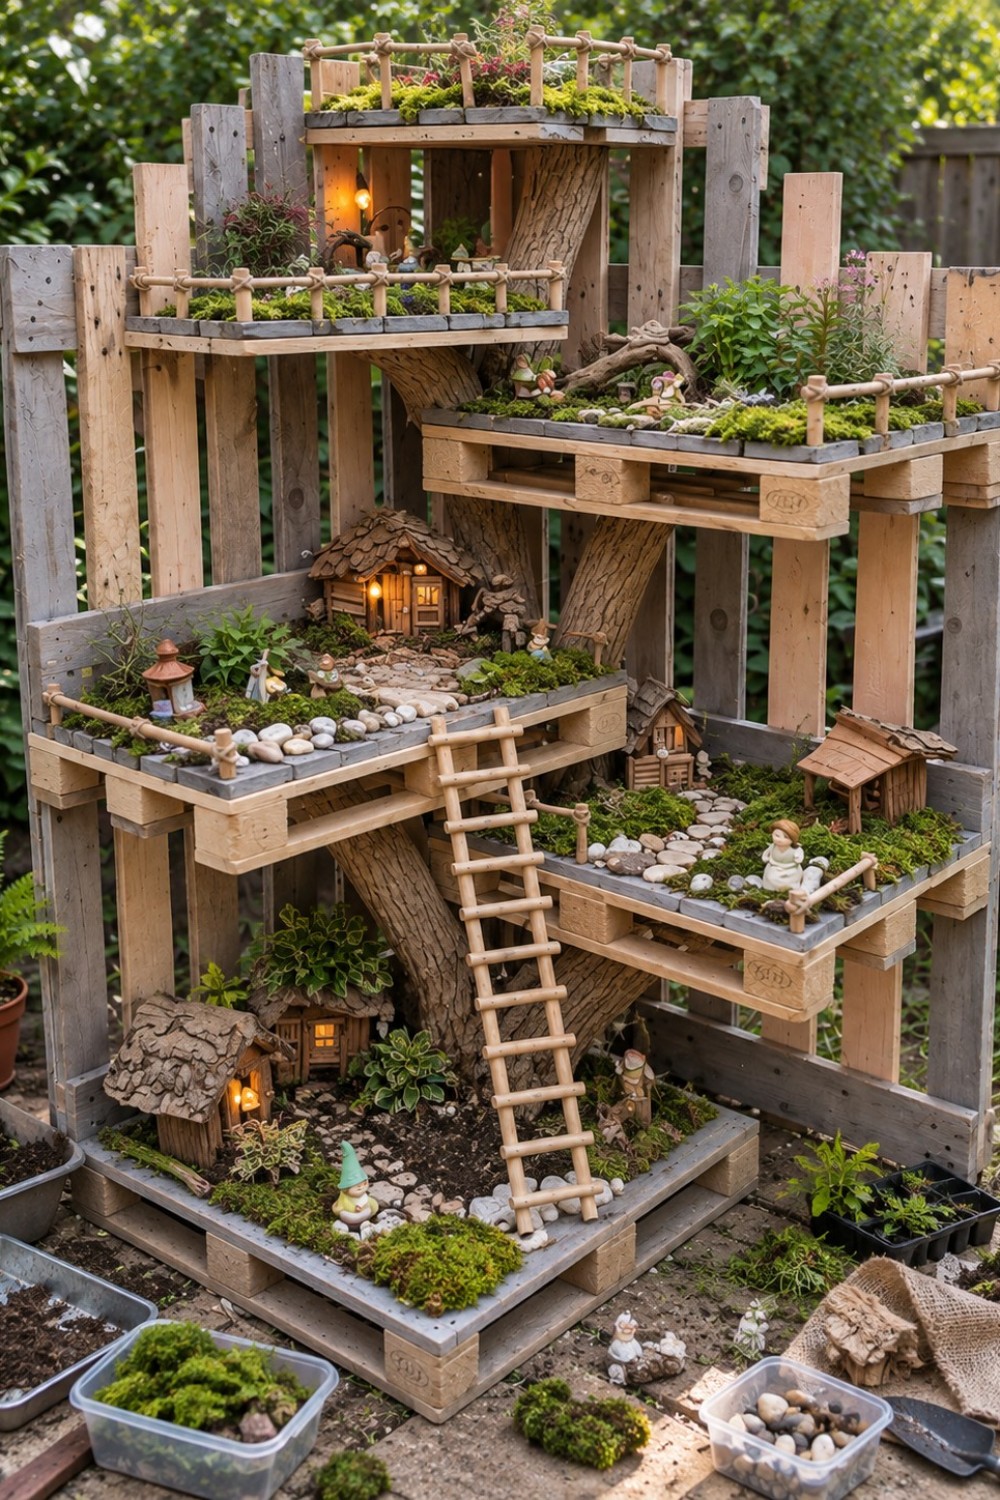
Once the wooden frame is complete, treat every platform as a separate miniature garden scene.
Do not simply cover the entire structure with moss. Leaving some timber visible makes the project easier to read visually and prevents the details from becoming a single mass of green.
Start with the larger elements. Position the miniature houses first, then define paths and planting areas around them. This order matters because it is much easier to move loose stones than to relocate a house after moss and planting material have been arranged around it.
For a composition close to the reference image:
- Place one main cottage on a broad middle or lower platform.
- Use smaller huts on secondary platforms.
- Create narrow pebble paths that lead toward doors, ladders, or platform edges.
- Add moss in irregular patches rather than perfectly straight borders.
- Position driftwood or small branch fragments where a level needs more natural texture.
- Add figurines sparingly so each platform has a focal point.
Scale is important. If the house, stones, plants, and figurines are all dramatically different in scale, the miniature landscape quickly loses coherence. Small pebbles usually read more convincingly as paths than full-size garden stones.
If using live plants, provide sufficient growing medium and drainage instead of placing soil directly onto unprotected timber. Trapped moisture can shorten the life of reclaimed wood. A removable shallow planting tray or liner makes watering and later maintenance easier.
For a lower-maintenance display, preserved moss and artificial miniature plants can be used, but check whether those materials are suitable for prolonged outdoor exposure.
This is also the right stage to test the composition from several viewing angles. If the upper levels hide the cottages below, move the decorative elements before permanently fixing them.
Step 4: Finish the Details and Lighting
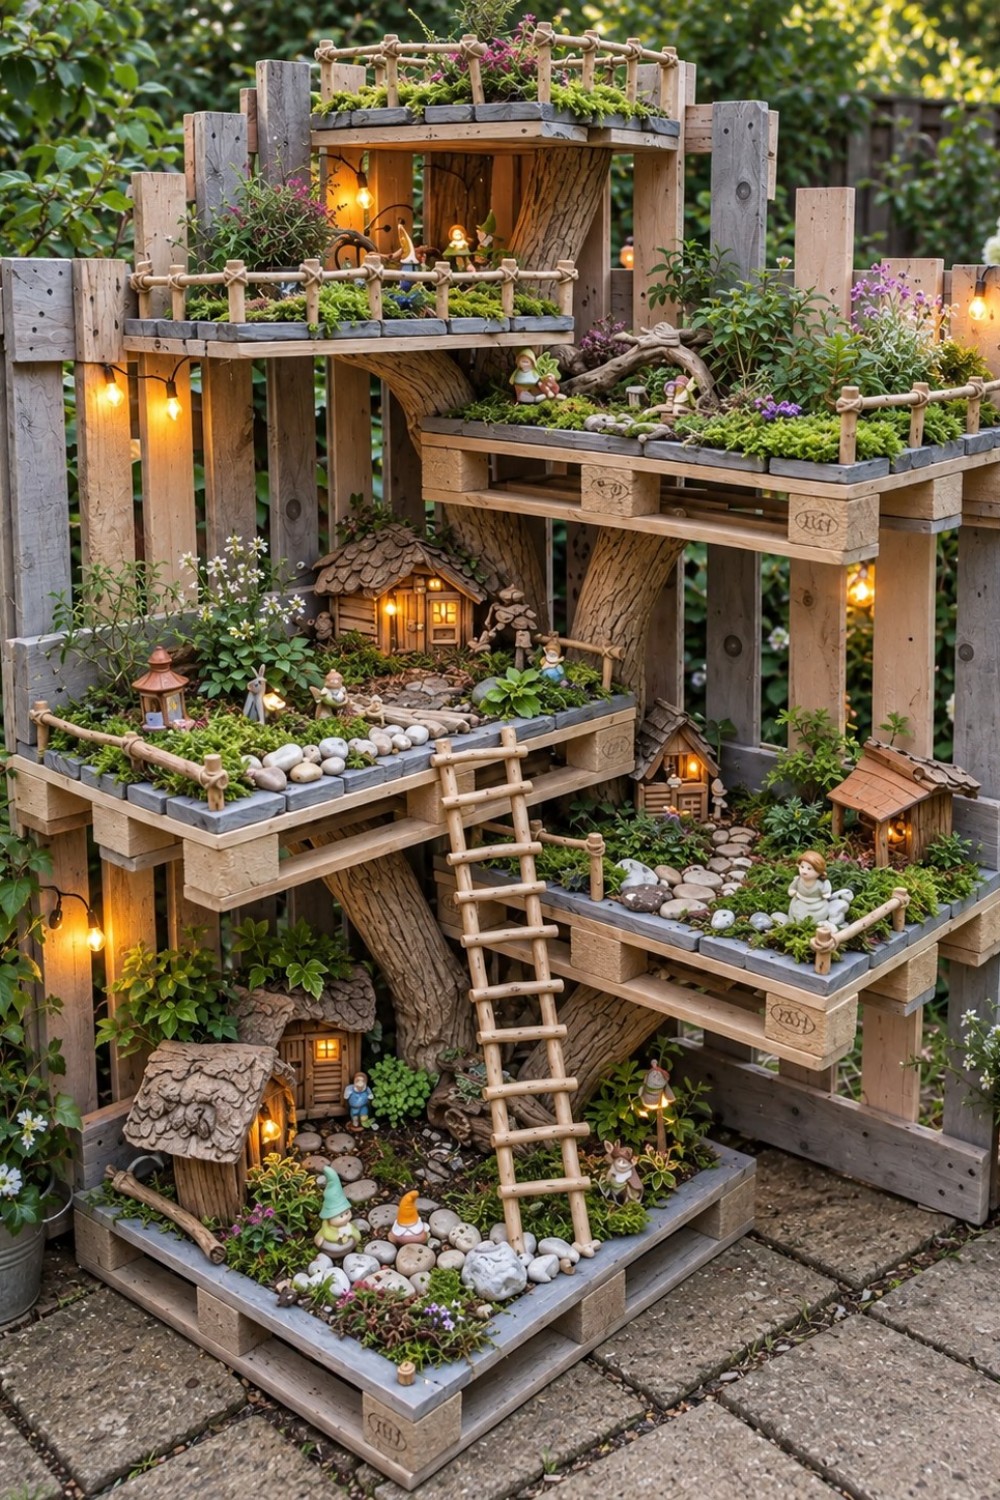
The final stage is about visual balance rather than adding as many decorations as possible.
Start by filling obvious empty areas with small moss patches, miniature planting, bark pieces, or a short continuation of a pebble path. Then step back from the project. The eye should move naturally from the lower garden, up the central ladder, and across the higher platforms.
The railings help visually connect otherwise separate terraces. Keeping their material consistent—such as natural dowels, thin branches, or lightly weathered wood—makes the different levels feel like one miniature settlement.
Install the lighting last
Place miniature lights inside cottages or behind structural elements where the source is partially concealed. A small amount of warm light usually creates a stronger effect than covering the entire project with visible wiring.
Route cables where they will not sit in pooled water or interfere with planting maintenance. The battery holder should remain accessible; do not permanently bury it under moss or soil. Follow the lighting manufacturer's outdoor-use and moisture instructions.
Check the finished structure
Before placing the fairy garden permanently, inspect:
- every platform for movement;
- screws that may have loosened during decorating;
- sharp exposed fasteners;
- loose stones near platform edges;
- unstable miniature houses;
- electrical components exposed to inappropriate moisture;
- areas where soil or moss holds water against untreated wood.
If the finished structure feels visually crowded, removing several ornaments is often more effective than adding more. The original project's charm comes from layering and depth, not from filling every available surface.
Maintenance
Outdoor miniature gardens need periodic attention. Remove fallen leaves and debris with a soft brush, reposition loose pebbles, trim live plants before they overpower the houses, and inspect timber joints after prolonged wet weather.
Where live planting is used, monitor how much water reaches the wooden structure. Replace degraded moss or miniature elements individually rather than dismantling the entire display.
Wood finishes also need occasional inspection. How frequently they require renewal depends on the timber, finish product, rainfall, sunlight, and whether the project remains outdoors year-round.
Why This Design Works
The most effective feature of this fairy garden is its vertical hierarchy. Instead of trying to fit every miniature into one shallow bed, the platforms create several distinct scenes while using a relatively compact footprint.
The central branch provides visual continuity, the offset decks prevent one level from completely concealing another, and the pale stones contrast with the dark moss and weathered timber. Repeating materials—wooden railings, pebble paths, small cottages, and moss—also keeps a highly detailed project from appearing random.
For a smaller garden, the same concept can be reduced to two or three levels without losing the character of the design. For a larger version, it is better to enlarge the platforms and supports rather than simply adding more decorative objects.
Share
What's Your Reaction?
 Like
0
Like
0
 Dislike
0
Dislike
0
 Love
0
Love
0
 Funny
0
Funny
0
 Angry
0
Angry
0
 Sad
0
Sad
0
 Wow
0
Wow
0