15 Kitchen Cabinet Designs for Smarter Storage and Everyday Function

Kitchen cabinets influence storage, preparation space, cleaning, circulation, and the overall character of the room. A successful design begins with an inventory of cookware, dishes, food, appliances, and daily routines rather than a preferred door color. Frequently used items should remain close to the work area where they are needed, while occasional equipment can occupy higher or less accessible storage.
Material durability also matters. Cabinet finishes must tolerate moisture, grease, repeated cleaning, heat, and regular contact around handles and drawers. Appliances require ventilation and service access, while doors and pull-outs need enough clearance to open without colliding. Before ordering cabinetry, measure walls, corners, windows, plumbing, outlets, and appliance specifications carefully. The following cabinet designs combine distinctive visual features with practical storage and everyday functionality.
1. Give Base Cabinets the Character of Freestanding Furniture
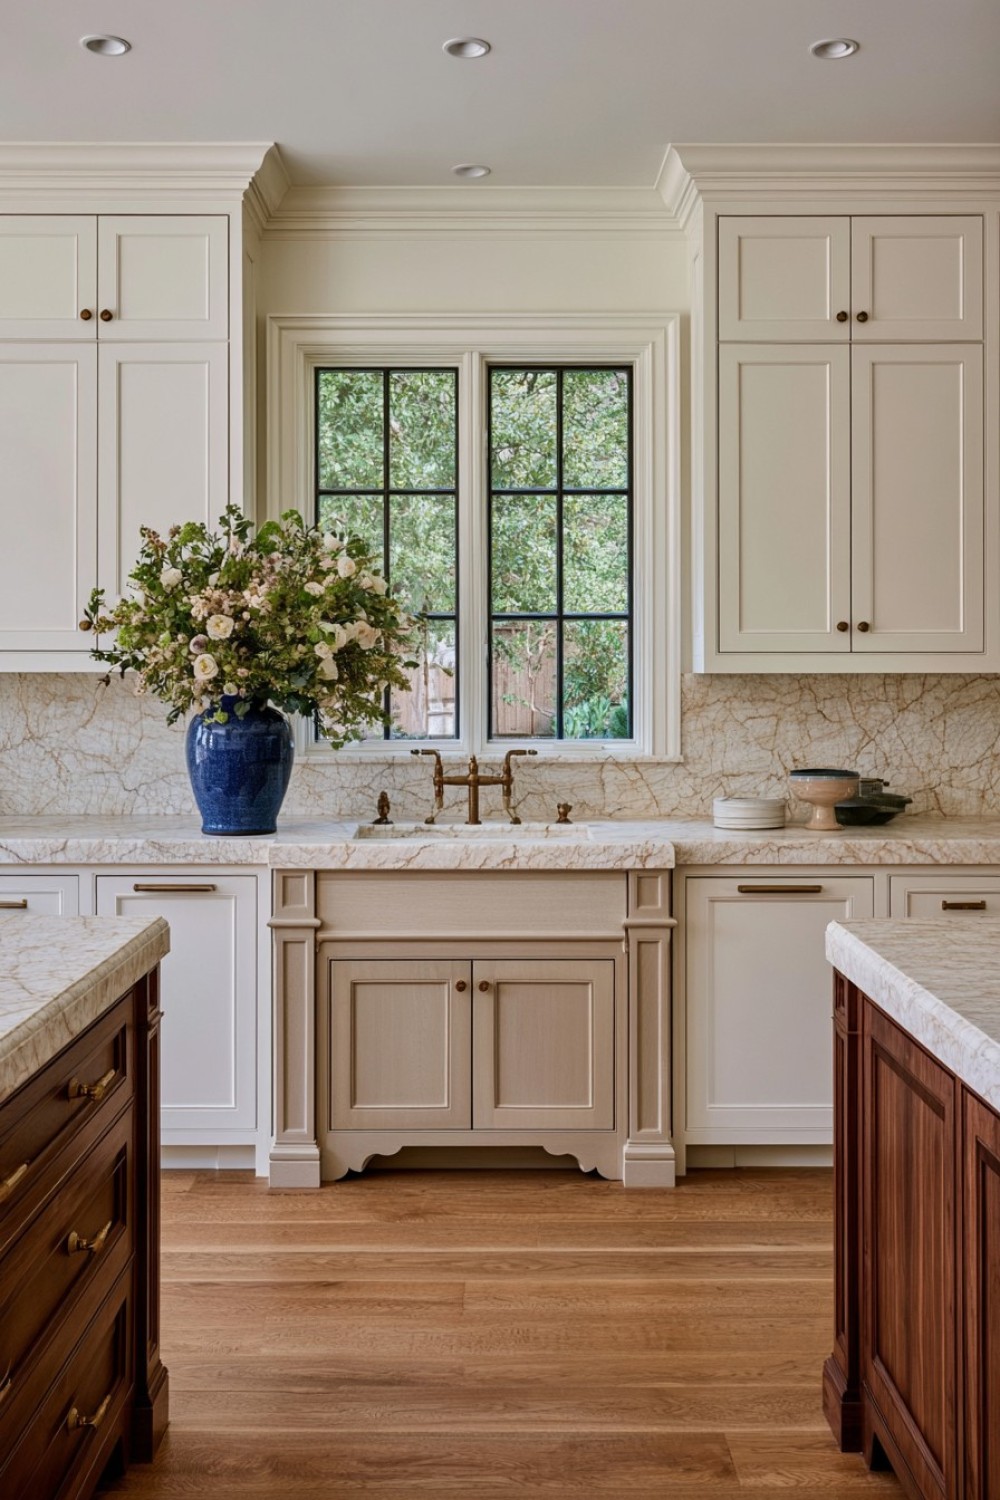
Furniture-style cabinetry can make an island, sink unit, or separate storage wall feel more individual than a continuous line of standard cupboards. Decorative feet, recessed plinths, framed side panels, and carefully positioned hardware create the impression of a substantial freestanding piece while retaining fitted storage inside.
Use these details selectively because elaborate bases create additional edges where crumbs and grease can collect. Feet should not reduce structural support or make cleaning beneath the cabinet unnecessarily difficult. Moisture-prone areas still need suitable materials and protected lower edges. If the cabinet houses a sink or appliance, preserve plumbing access and ventilation rather than allowing decorative panels to block them. Keeping surrounding cabinets simpler helps the furniture-style section become a deliberate focal point instead of making the whole kitchen visually heavy.
2. Layer Mushroom Cabinetry With Warm Neutral Surfaces
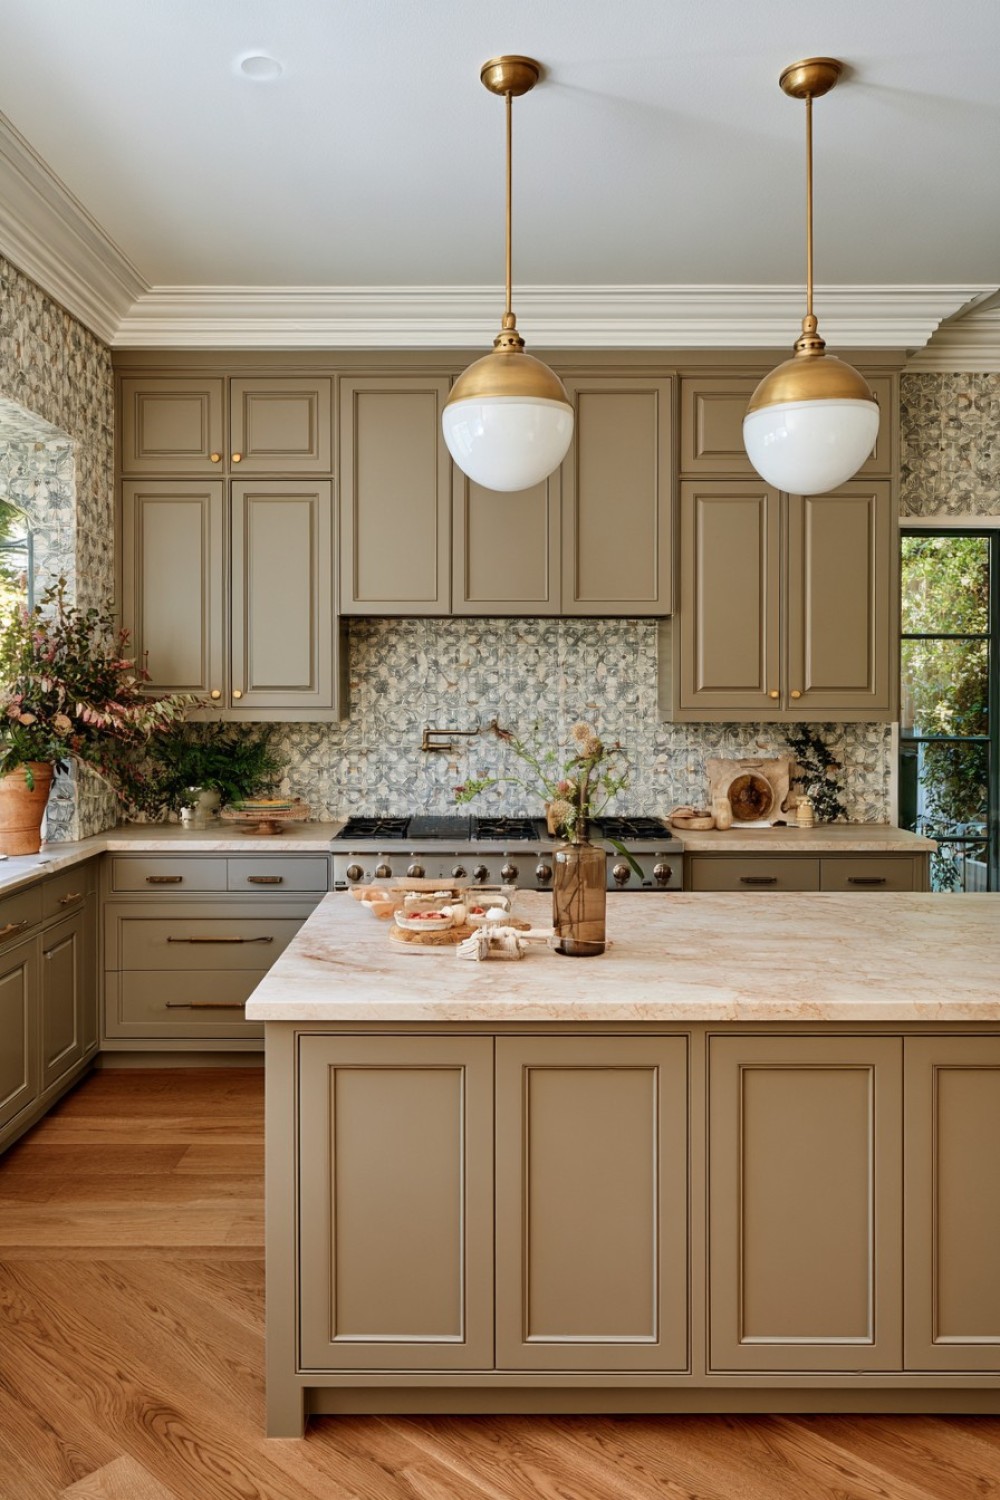
Mushroom, taupe, and warm gray cabinetry can provide more depth than plain white while remaining flexible enough to coordinate with timber, stone, and metal. Select a cabinet color whose undertone works with the countertop and flooring. A green-gray finish may conflict with a strongly pink stone, while a warmer taupe can appear muddy beside cool blue lighting.
View large samples vertically in the actual kitchen at different times of day. Cabinet colors often look darker than small sample cards once they cover several walls. Introduce variation through a lightly veined counter, textured backsplash, or timber shelf instead of choosing every surface in the same beige. Use a durable, washable cabinet finish around handles and cooking areas. A slightly deeper tone on the island can create definition, but it should remain connected to the main cabinetry through repeated hardware or countertop material.
3. Recess Frequently Used Appliances Into a Dedicated Niche
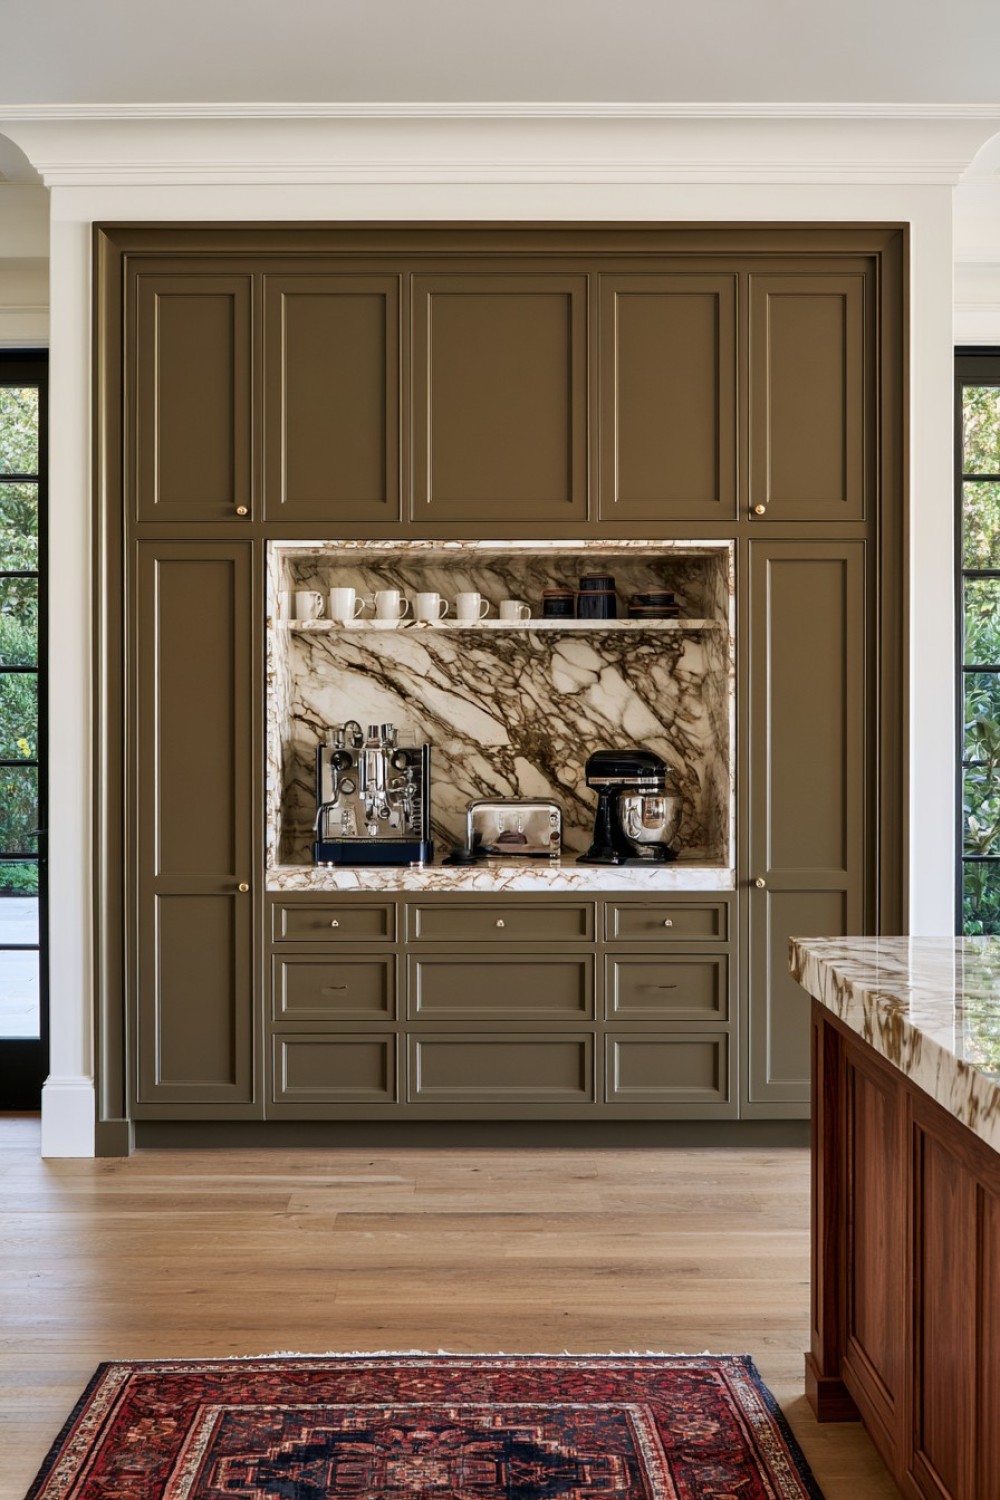
An appliance niche can keep a coffee machine, toaster, mixer, or kettle accessible without allowing it to dominate the principal countertop. Measure each appliance in its working position, including open lids, extended trays, handles, and removable water tanks. The niche should be deep and tall enough for operation rather than simply large enough to store the appliance when switched off.
Heat-producing appliances require the clearances, ventilation, and surface protection stated by their manufacturers. Steam from kettles and coffee machines can damage cabinetry above if there is insufficient space or no moisture-resistant finish. Install accessible outlets and avoid running cords through door hinges or drawer openings. Pocket or folding doors can conceal the station, but they should remain fully open during use when required. A pull-out shelf may improve access for a heavy mixer, provided the mechanism is rated for the equipment and remains stable when extended.
4. Use Narrow Pull-Out Cabinets in Forgotten Gaps
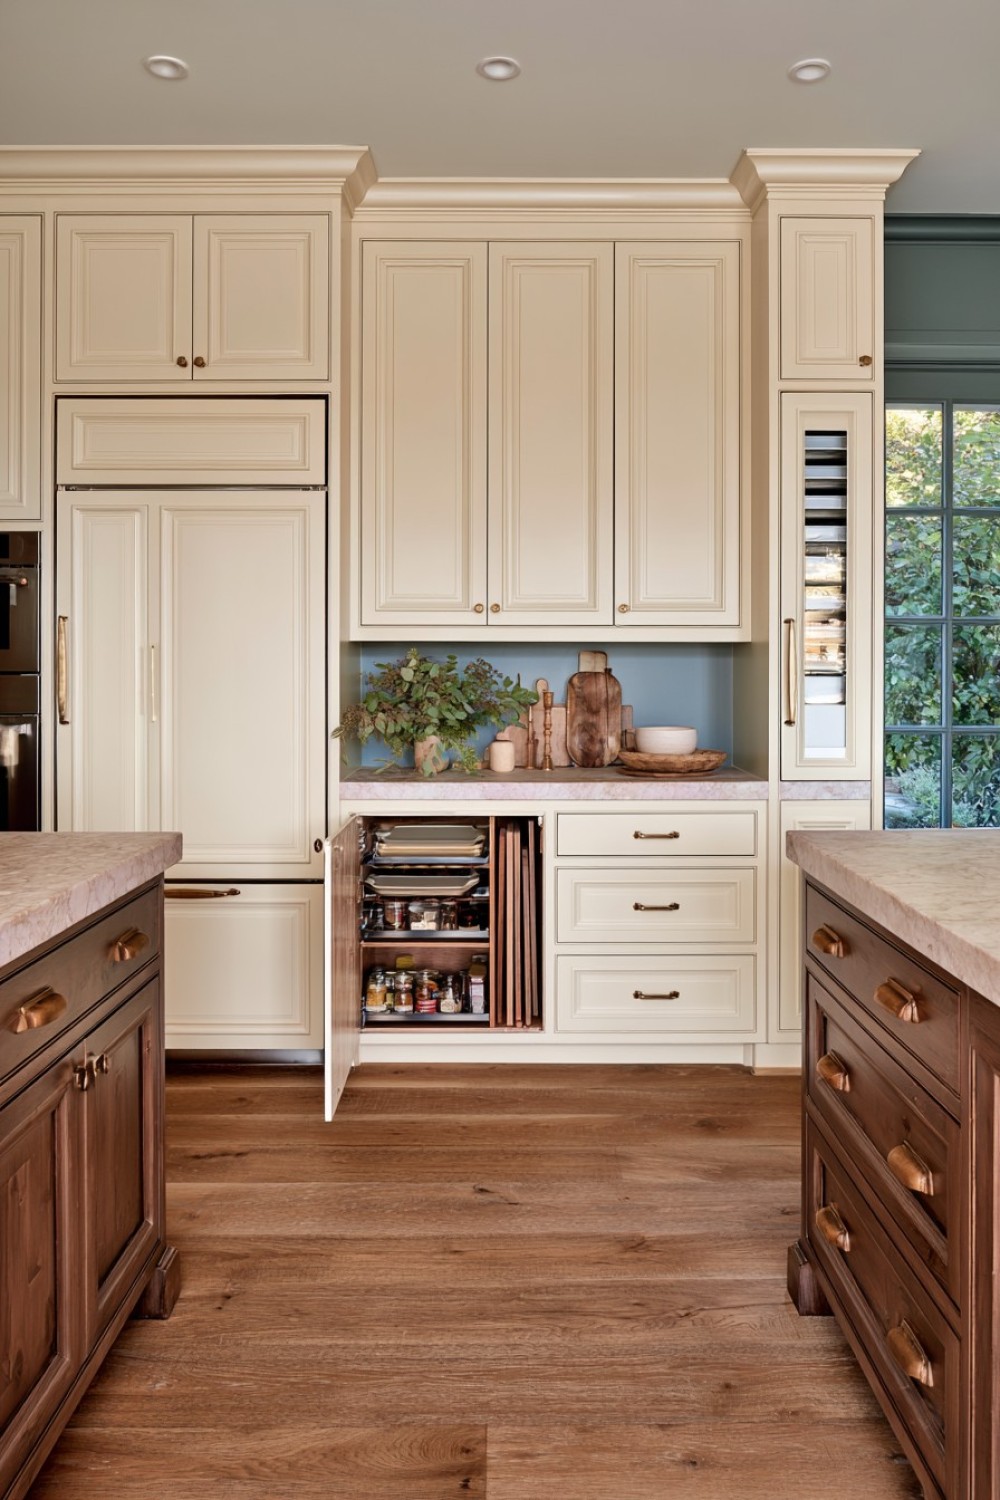
A narrow pull-out can transform the space beside a refrigerator, oven housing, or cabinet end into storage for bottles, trays, cutting boards, spices, or cleaning supplies. Assign the contents before selecting the internal fittings. A vertical tray divider needs a different width and access pattern from a bottle rack or multi-level pantry pull-out.
Tall narrow units can become heavy and place substantial force on their runners when fully loaded. Choose hardware rated for the intended weight and avoid concentrating glass bottles on an unsupported upper level. Items should remain restrained when the unit moves so they cannot fall behind the mechanism. Heat-sensitive food and oils should not be stored directly beside an oven unless the cabinet construction and appliance clearances make the location appropriate. Include a filler where necessary so handles and pull-outs clear neighboring walls and doors.
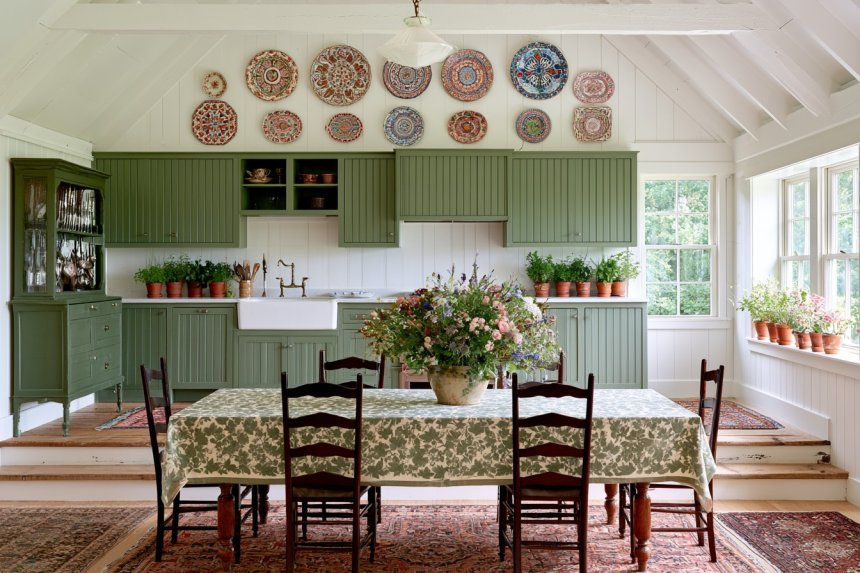
5. Contrast Deep Olive Cabinets With a Pale Worktop
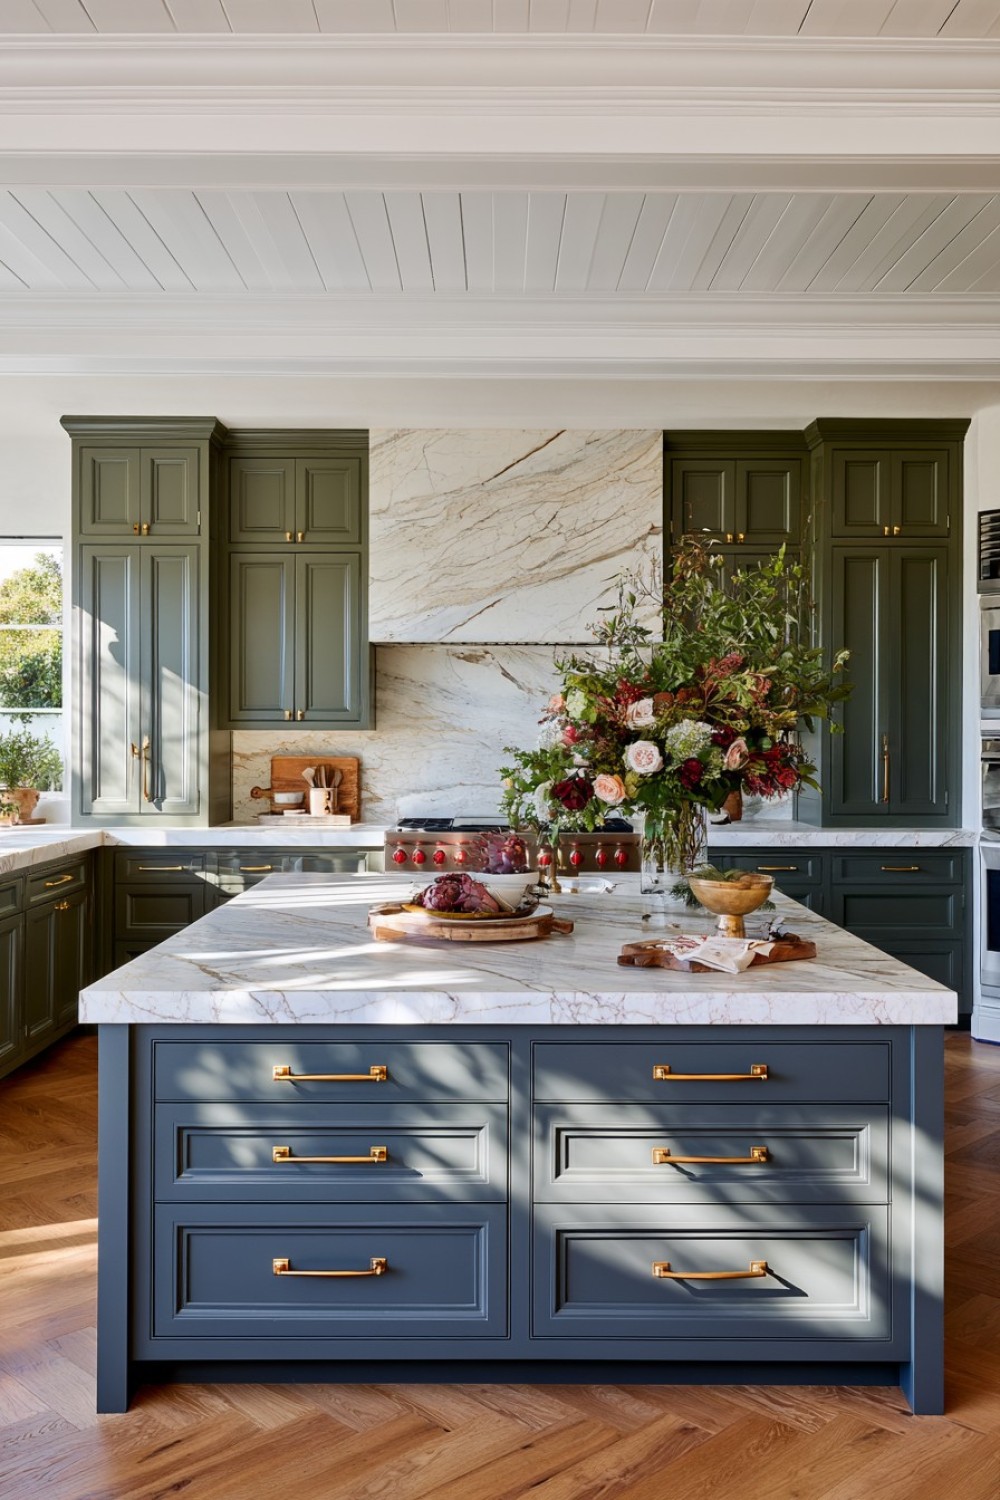
Olive cabinetry introduces color while remaining closely connected to natural wood, cream, brass, bronze, and stone. Use a pale worktop to reflect light and define the preparation surface against the deeper cabinet fronts. Warm olive produces an earthy effect, while a cooler green-gray can support a more restrained contemporary room.
Dark saturated finishes show dust, cooking marks, and worn edges more readily than some mid-tone surfaces, so select a durable cabinet coating and follow its cleaning instructions. Test the green beside the actual countertop sample and under both daylight and artificial lighting. If the kitchen is small or receives limited light, use olive on the lower cabinets or island while keeping taller units quieter. Restrained hardware and a simple backsplash will allow the cabinet color to remain the primary feature.
6. Apply Fluted Timber to Selected Cabinet Panels
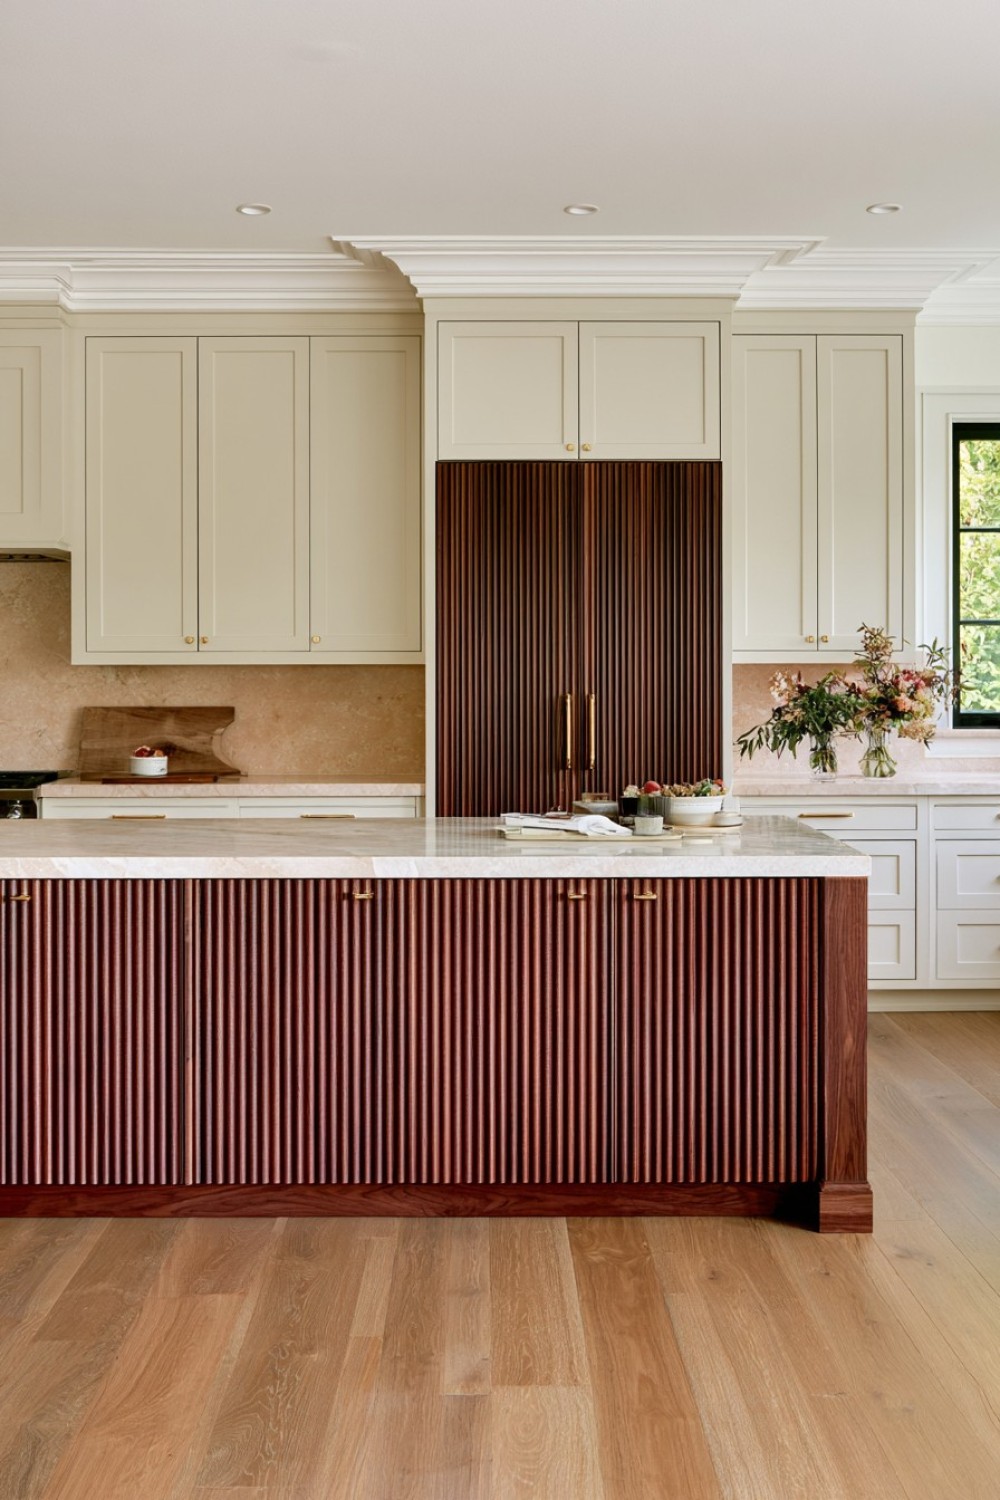
Fluted or ribbed wood can give an island front, pantry door, or small cabinet bank more texture without adding a separate decorative object. Apply it where the vertical pattern can be seen clearly and is unlikely to receive constant grease or water exposure. Smooth surrounding doors will prevent the kitchen from becoming overly detailed.
Deep grooves collect dust and cooking residue more readily than flat panels, so consider how easily the chosen profile can be cleaned. Near a cooktop, a heavily textured unfinished surface may become difficult to maintain. Use properly sealed material and protect vulnerable lower edges from mops and spills. If fluting conceals a door, ensure the handle or opening method remains easy to locate and operate. Matching the wood tone with one shelf or furniture piece can connect the textured panel to the rest of the room.
7. Divide Two-Tone Cabinets According to Kitchen Function
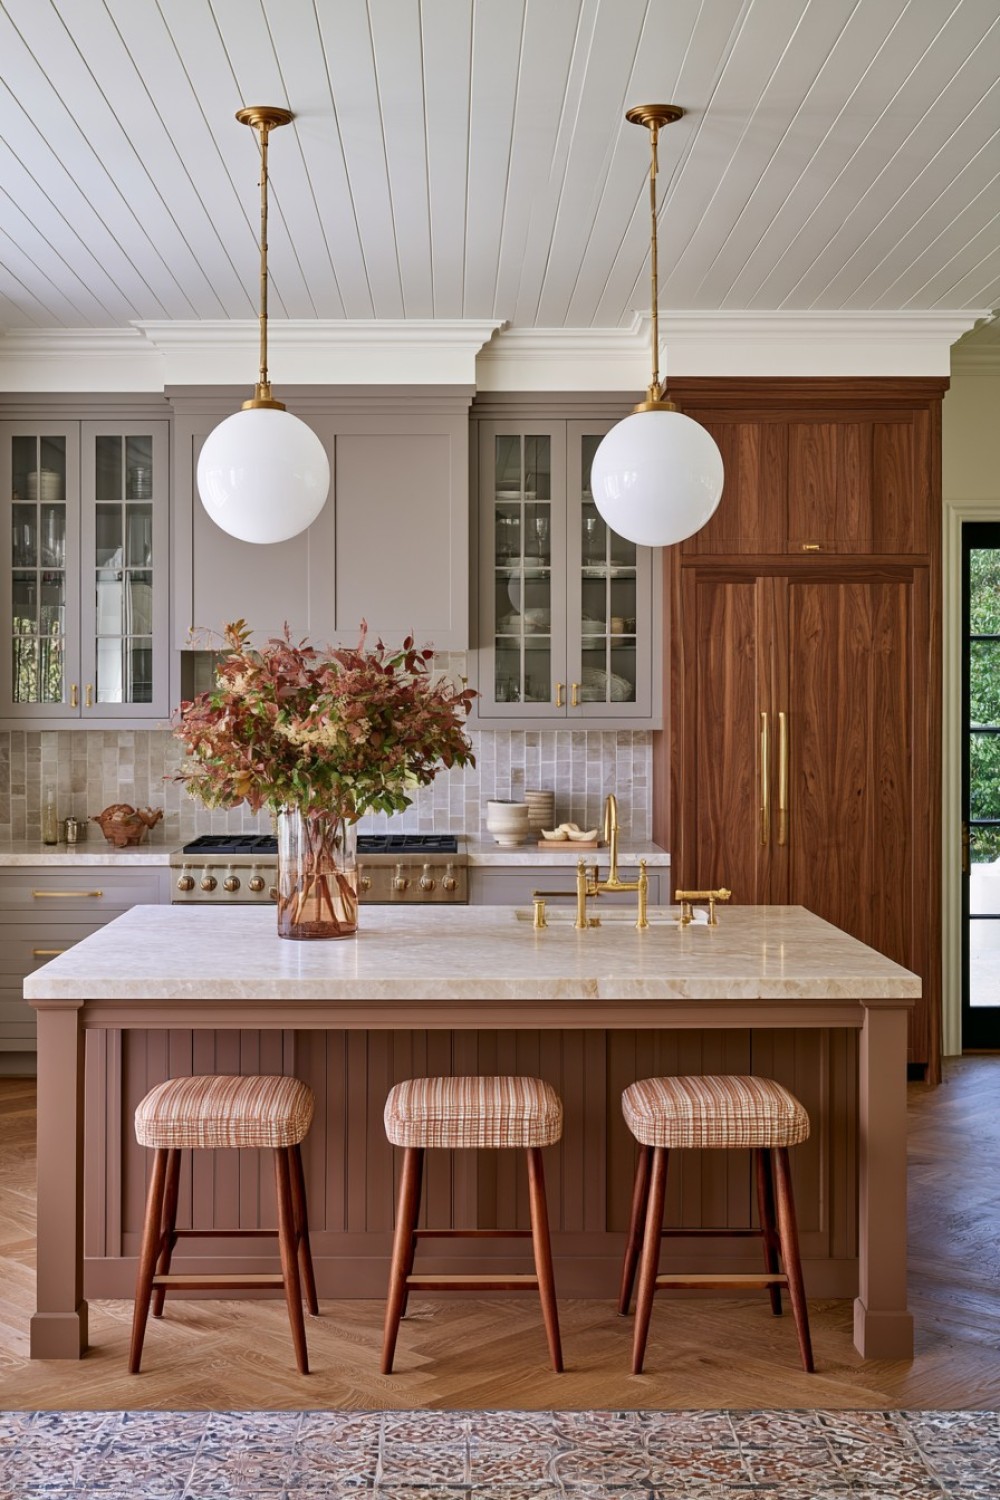
Two-tone cabinetry does not have to follow the familiar formula of dark lower cabinets and light upper units. Color can identify separate working zones instead. A tall pantry wall may use one finish, while the cooking and sink cabinets share another. Alternatively, an island can receive a timber finish that distinguishes food preparation from the surrounding painted storage.
Each color area should correspond to a clear architectural boundary rather than stopping at an arbitrary cabinet door. Connect the finishes through one repeated element such as hardware, backsplash, or countertop. Limit the palette to two main cabinet treatments unless the kitchen is large enough to support additional variation. When replacing only selected fronts, confirm that door thickness, hinge placement, edge profiles, and finish durability remain compatible with the existing units.
8. Soften Upper Storage With Arched Cabinet Doors
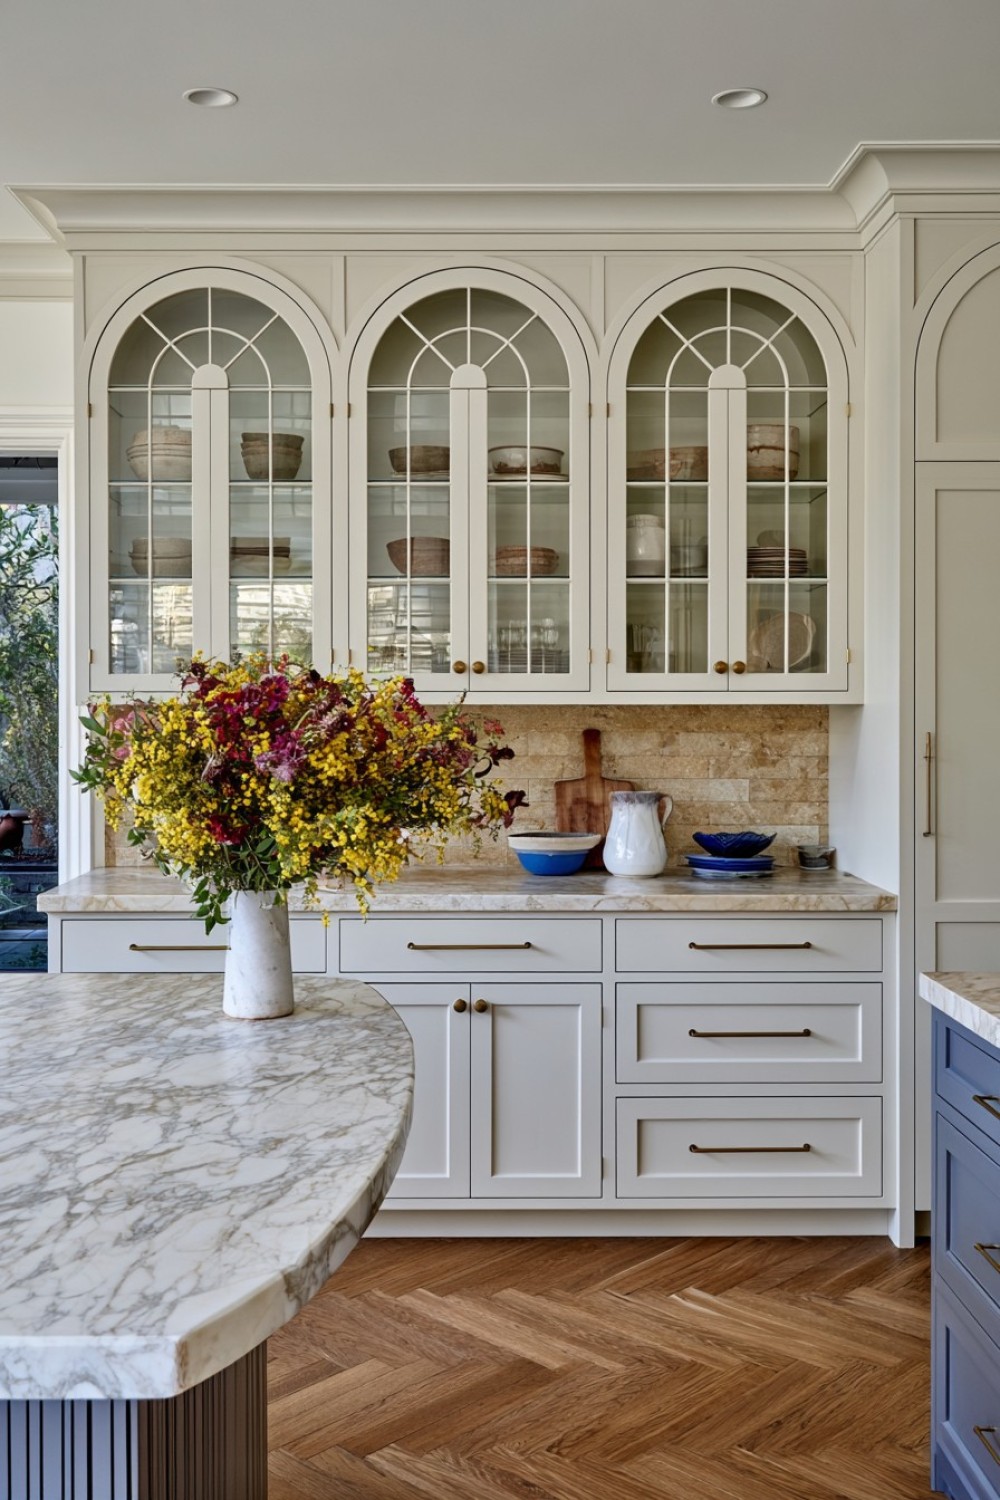
Arched door panels can soften a kitchen filled with rectangular counters, appliances, and tiles. Use the curve on a limited number of upper cabinets, a dresser-style section, or a glass-fronted display unit. Repeating it selectively creates an architectural rhythm without making every door resemble a decorative feature.
Check how the curved panel affects glazing, hinges, interior shelves, and the usable opening. Decorative frames should remain smooth and easy to wipe clean. Glass doors are best used for items that can stay organized, while everyday mismatched supplies are usually easier to manage behind solid fronts. If the kitchen includes another arch in a doorway or alcove, relate the cabinet curve to it without forcing an exact copy. Simple lower cabinets provide enough visual contrast for the upper detail to remain effective.
9. Let Walnut Grain Replace Excessive Cabinet Hardware
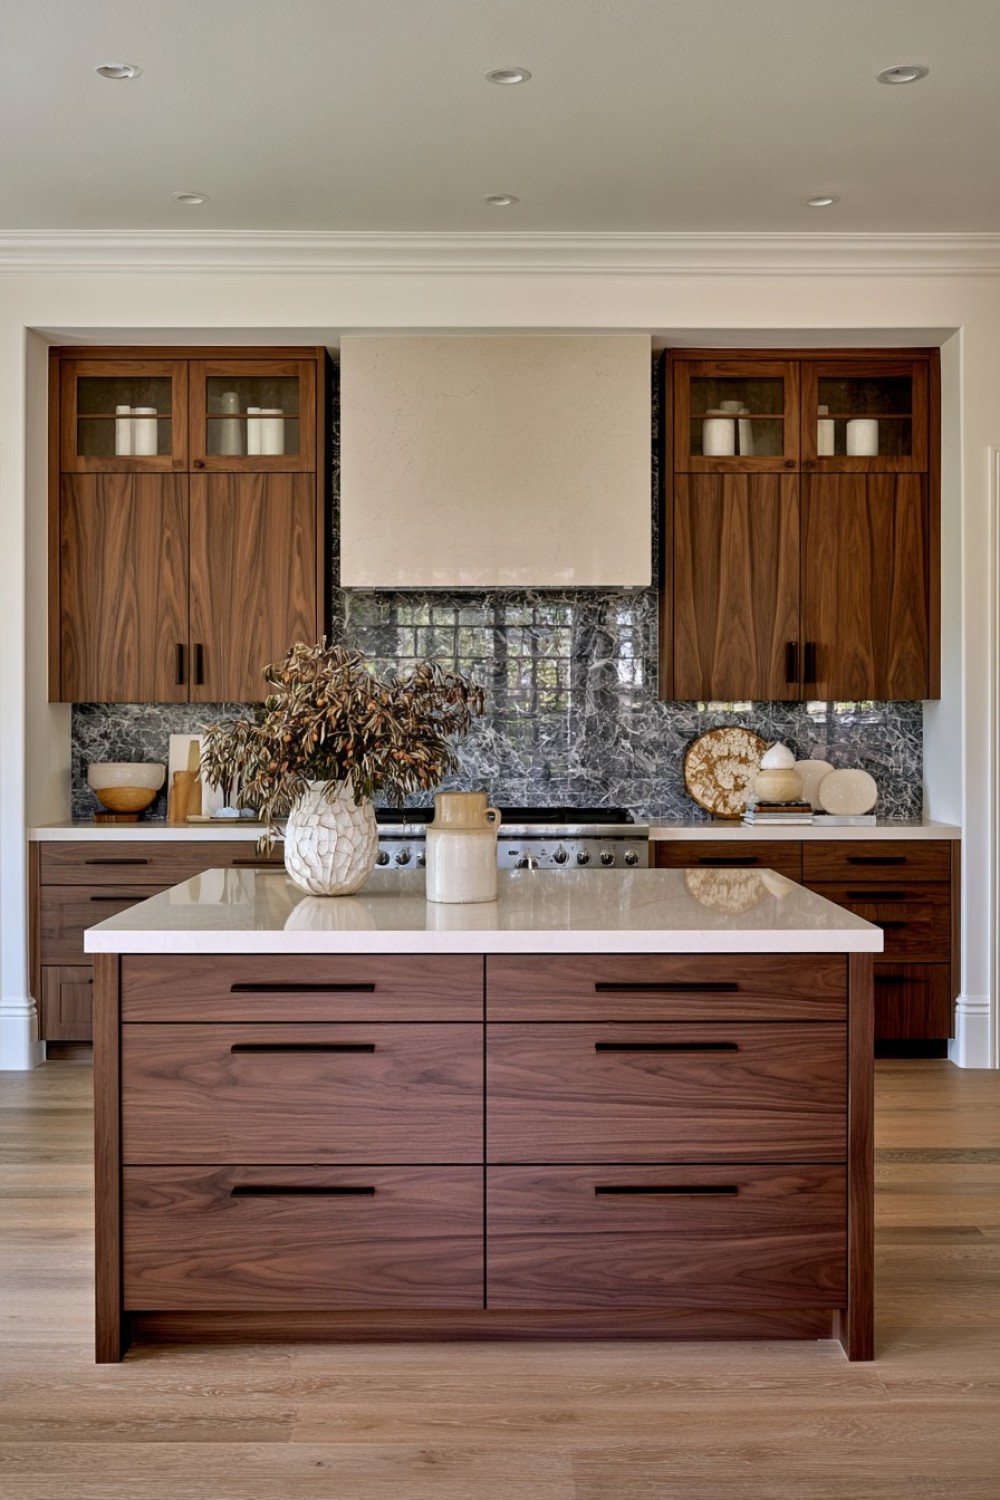
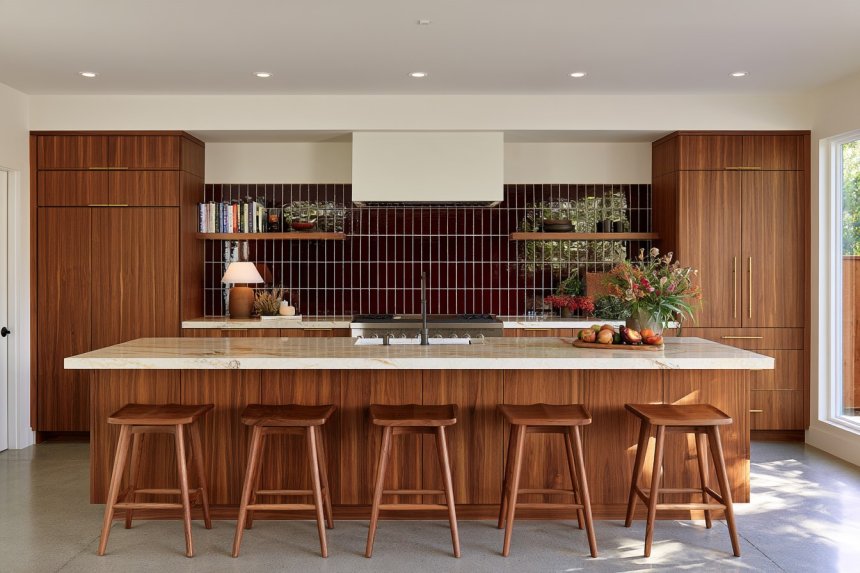
Walnut cabinetry can provide substantial visual interest through its grain and tonal variation. Flat fronts allow the timber to remain prominent, while slim pulls, edge handles, or integrated channels maintain a quieter elevation. Grain matching across neighboring doors can produce a refined result, although it may increase material planning and fabrication requirements.
Handle-free does not always mean easier to use. Test recessed pulls and push-open mechanisms with wet hands and consider the needs of every household member. Touch-latch doors can show fingerprints and may open when leaned against. Walnut veneer offers greater stability and material efficiency in many applications, but exposed edges and clamp positions need protection. Use a finish appropriate for kitchens and follow its care instructions. Pale counters and controlled task lighting prevent a full walnut installation from making the workspace unnecessarily dark.
10. Frame the Range Without Restricting Ventilation
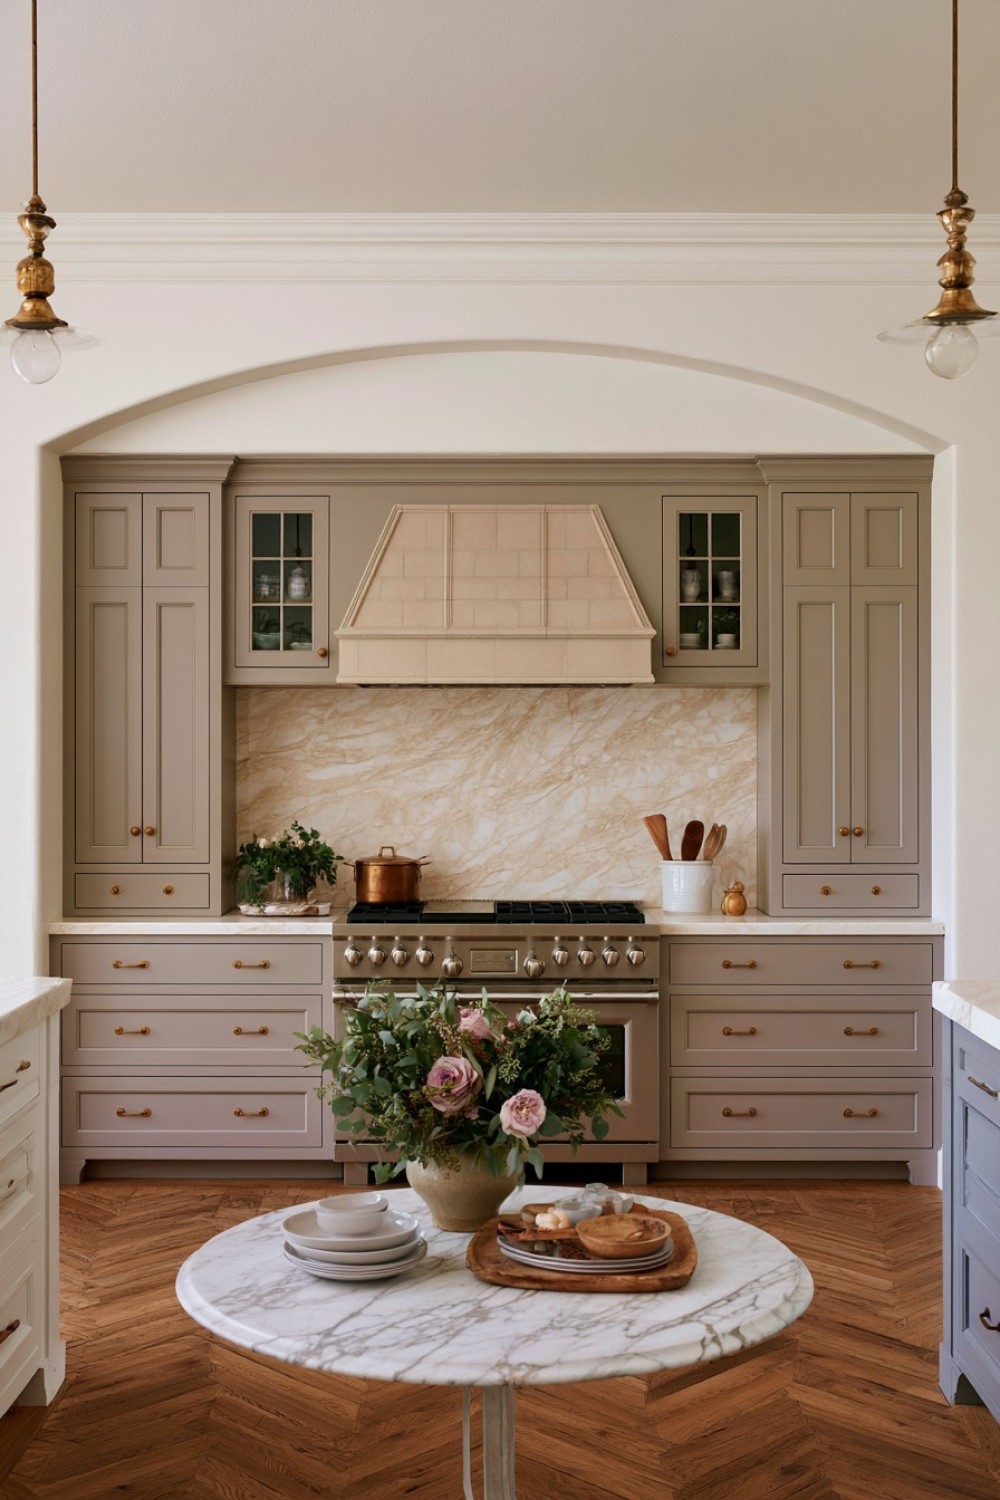
Cabinetry can frame the range and hood to create a strong focal point while keeping cooking tools and ingredients nearby. Symmetrical side cabinets provide a formal appearance, while a slightly offset arrangement may respond better to an existing window or preparation area. Store frequently used cookware in drawers below and place oils or seasonings where they are not exposed to damaging heat.
Combustible materials, cabinetry, and ventilation equipment must maintain the clearances specified by the appliance manufacturers and applicable local requirements. Decorative hood surrounds cannot block filters, service panels, exhaust paths, or required airflow. Surfaces near cooking need finishes that tolerate heat, steam, and regular degreasing. Do not position projecting handles where they interfere with pot movement. Planning the hood, duct route, range, electrical or gas services, and cabinetry together prevents expensive conflicts during installation.
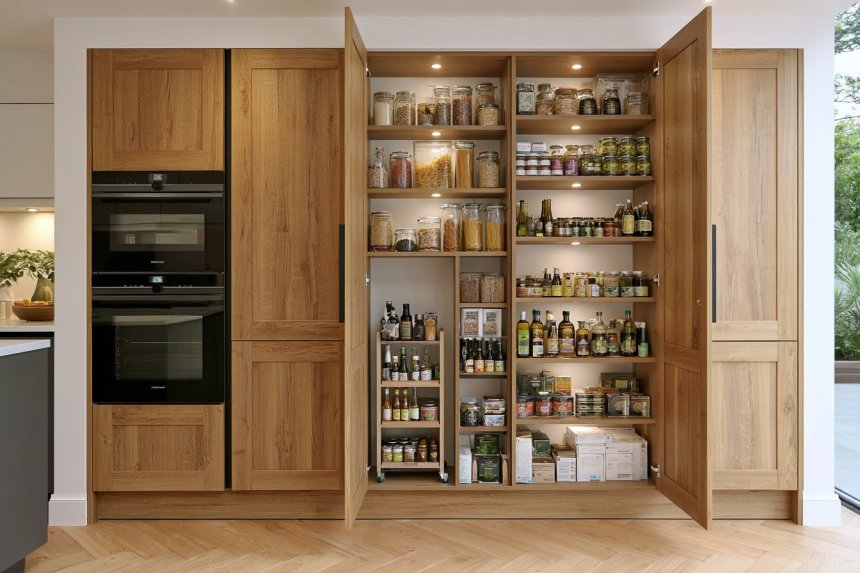
11. Conceal a Pantry Behind Cabinet-Matched Doors
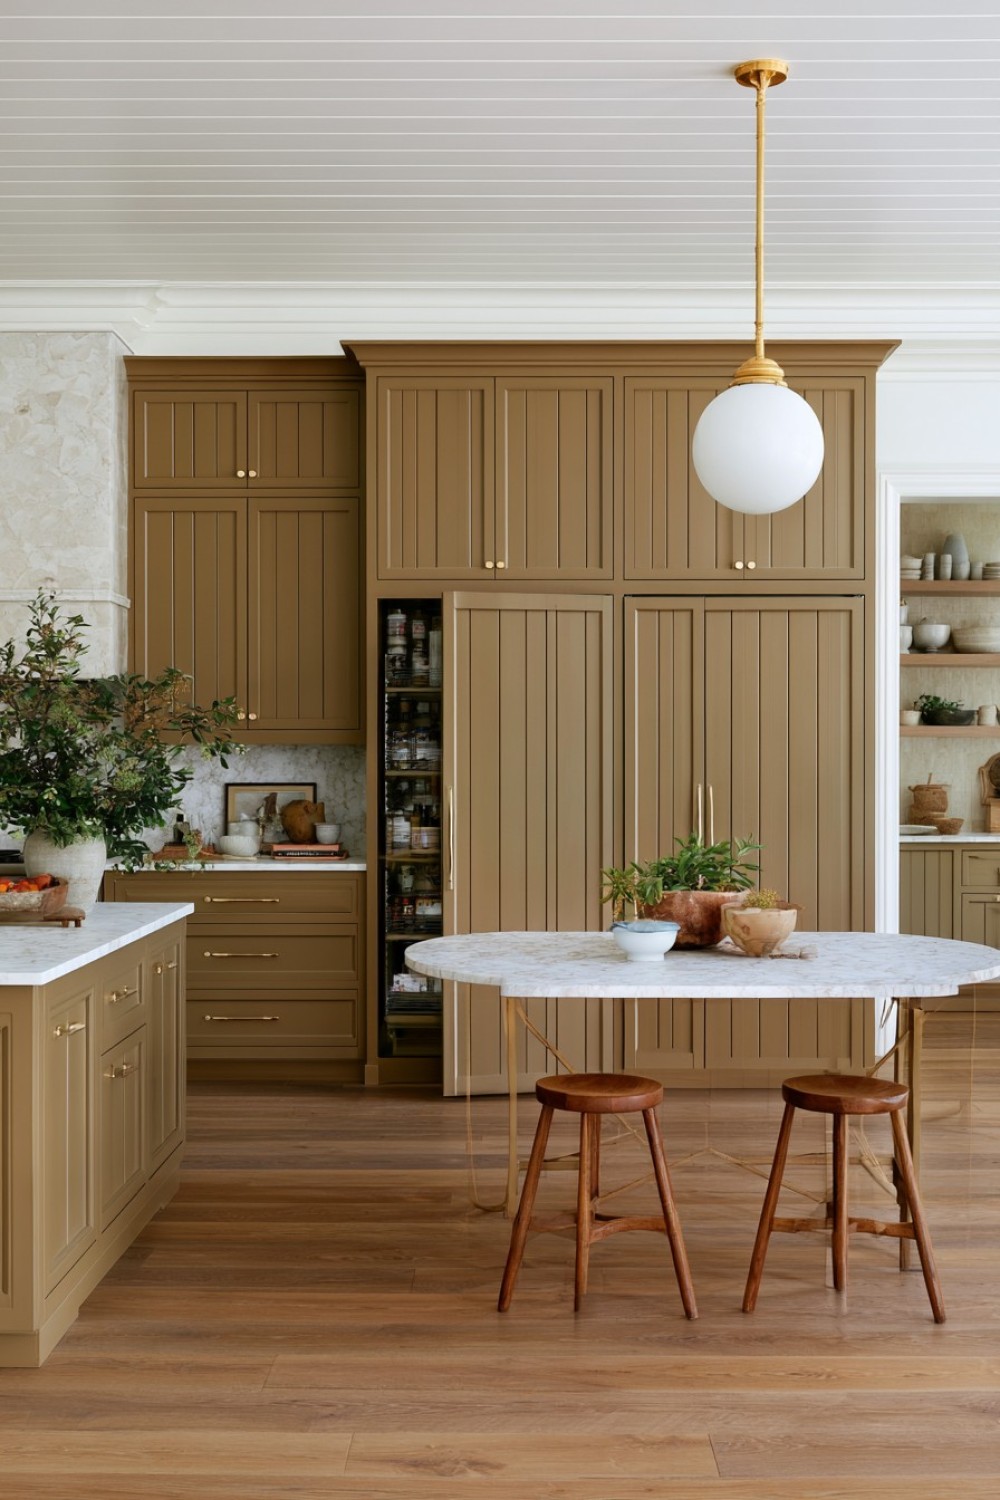
A pantry door aligned with the surrounding cabinets can make a tall storage wall appear continuous. Match panel proportions, finish, and hardware while providing a clear opening method. The concealed effect should not make the door difficult to identify for household members or visitors, especially if the space contains frequently used food and appliances.
Use hinges and framing rated for the door’s weight, since a cabinet-faced panel can be substantially heavier than a standard interior door. Provide ventilation where required and make sure shelving does not block the door swing. The pantry needs appropriate lighting with an accessible switch or sensor. Avoid using this treatment for required exits, utility access, or spaces that must remain immediately recognizable. A recessed handle or consistent pull can preserve the visual continuity while making operation intuitive.
12. Fit Low Cabinets Beneath a Kitchen Window
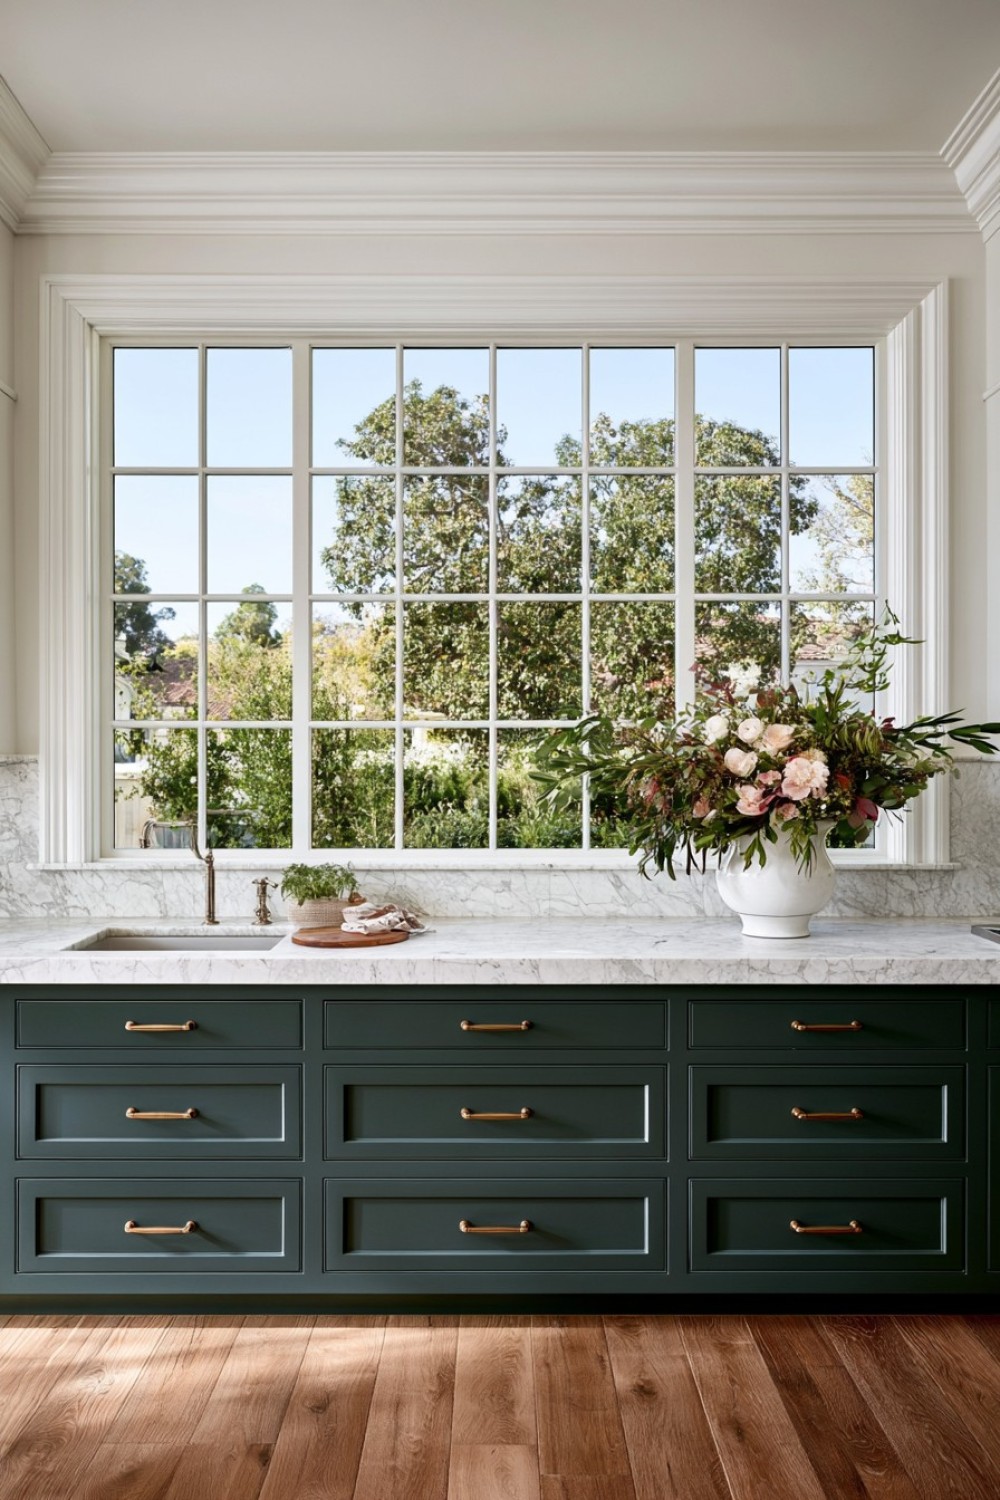
Low cabinetry can use the area beneath a window for drawers, preparation space, or a sink while preserving daylight and views. Measure the sill height, window operation, handles, trim, and required access before setting the finished counter level. An inward-opening window may conflict with a tall faucet or objects placed on the worktop.
Moisture-resistant finishes are important where condensation, rain, or sink splashes may reach the cabinet. Keep window drainage and ventilation features unobstructed. Deep drawers beneath the counter can hold dishes, cookware, or food containers more accessibly than shelves. If the window receives strong sun, avoid storing heat-sensitive food directly below it and select a countertop material suitable for repeated light exposure. A removable tray for plants or herbs prevents water from sitting on the surface.
13. Use Oversized Handles as a Controlled Graphic Detail
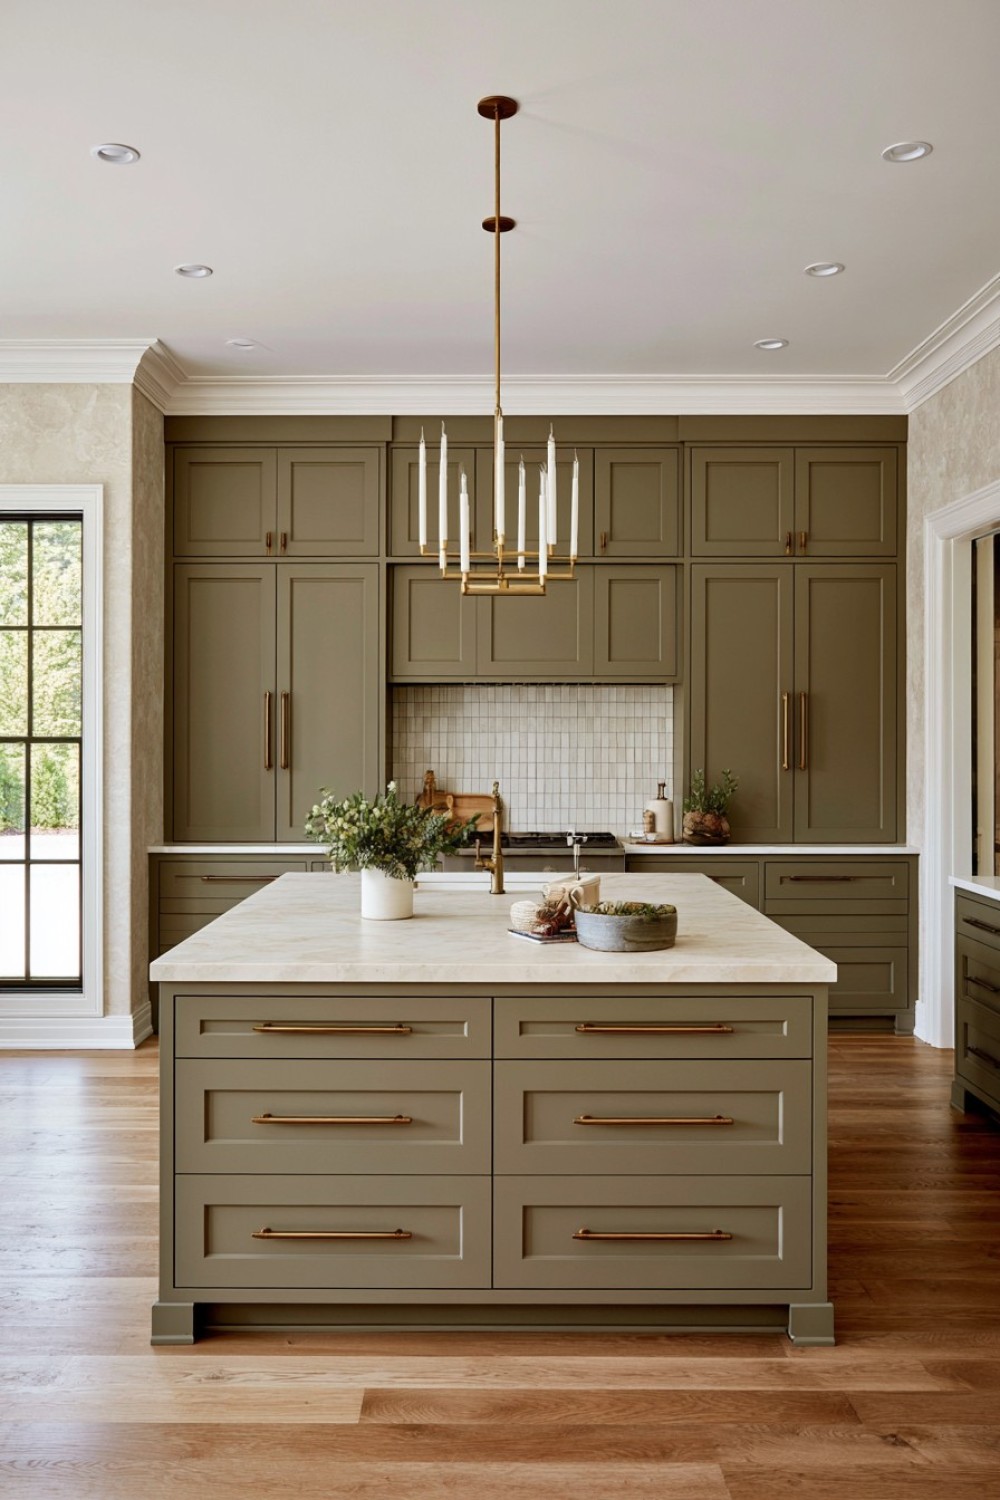
Long timber, brass, or dark metal handles can emphasize cabinet height and introduce a strong vertical rhythm. Apply them to a pantry wall, appliance housing, or selected cabinet bank rather than every drawer. Proportions should relate to the doors so the hardware appears deliberate instead of simply oversized.
Projecting handles can catch clothing or interfere with neighboring doors in a narrow kitchen. Test their depth, grip, edge comfort, and position before ordering the full set. Long pulls require accurately spaced fixing points and doors strong enough to support them without distortion. Hardware beside a corner, refrigerator, or wall may need additional clearance. Finishes touched frequently should tolerate regular cleaning. Keeping the surrounding cabinet fronts plain allows the handles to function as the intended graphic feature.
14. Insert One Open Display Cabinet Between Closed Storage
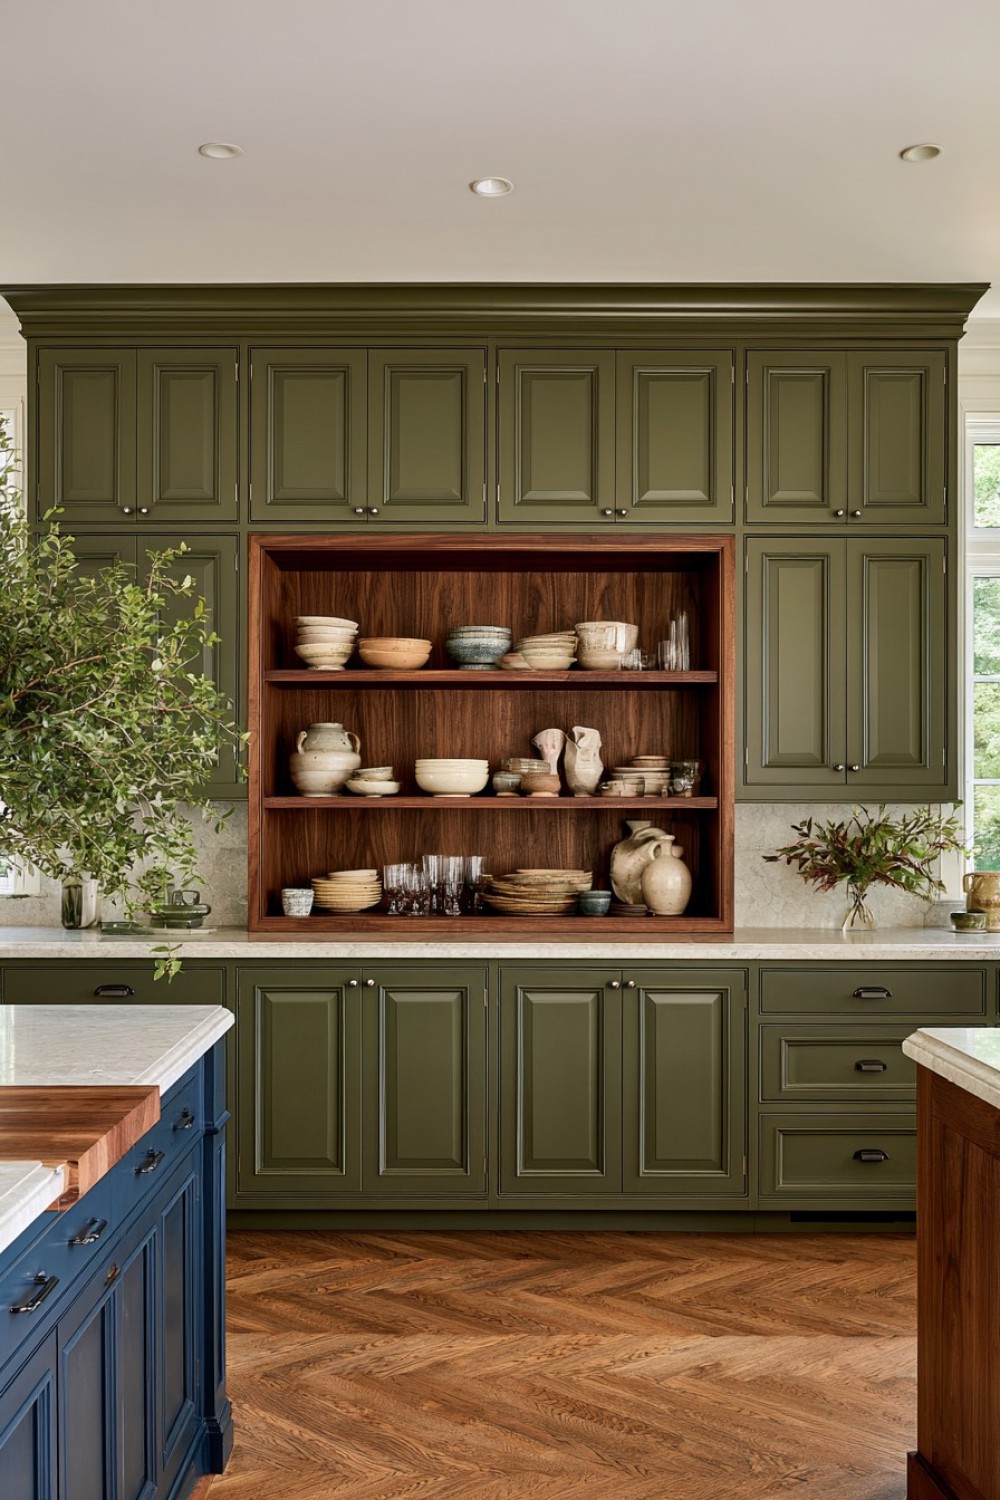
A single open cabinet can interrupt a large wall of closed doors and provide convenient access to everyday cups, bowls, or serving pieces. A contrasting timber or painted interior gives the recess depth while helping it read as a purposeful section. Position it near the activity it supports rather than choosing the location solely for symmetry.
Open shelves collect dust and cooking residue more quickly than closed cupboards, particularly when placed near a range. Keep the display edited and choose washable interior finishes. Shelves should be rated for dishes and secured against movement. Frequently used items belong within comfortable reach, while fragile ceramics should not sit directly above a busy preparation surface. Integrated lighting may improve visibility, but wiring and fittings need to be suitable for the cabinet and accessible for maintenance.
15. Combine a Full-Height Storage Wall With a Small Workstation
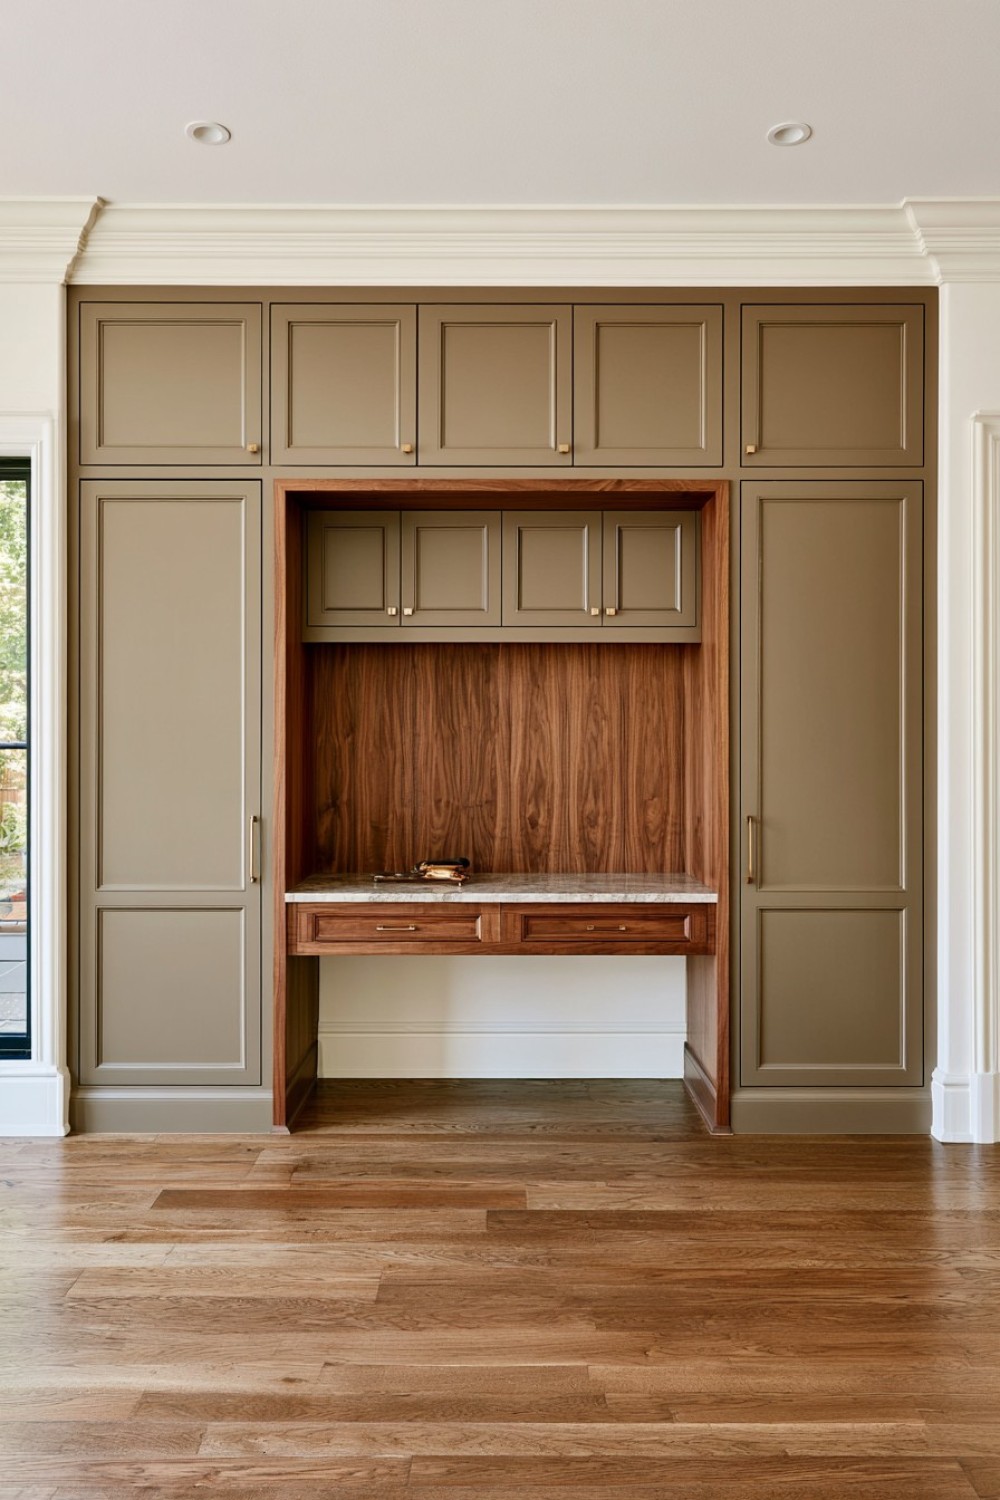
A tall cabinet wall can include a compact desk for meal planning, household administration, charging devices, or occasional laptop use. Recessing the workstation between pantry cabinets gives it a defined location without requiring a separate room. The surface should provide adequate depth for its intended activity and enough space beneath for comfortable seating.
Keep the workstation outside the busiest cooking route and away from sink splashes or direct range heat. Provide accessible outlets and cable management so charging leads do not spread onto food-preparation surfaces. Drawers can hold stationery and household documents, while upper cabinets retain kitchen storage. If doors conceal the desk, they must open without blocking the user or adjacent walkway. Task lighting should illuminate the surface independently from the kitchen’s general fixtures. Separating paperwork and electronics from food storage keeps the integrated area practical and easier to maintain.
MORE IDEAS


Share
What's Your Reaction?
 Like
0
Like
0
 Dislike
0
Dislike
0
 Love
0
Love
0
 Funny
0
Funny
0
 Angry
0
Angry
0
 Sad
0
Sad
0
 Wow
0
Wow
0