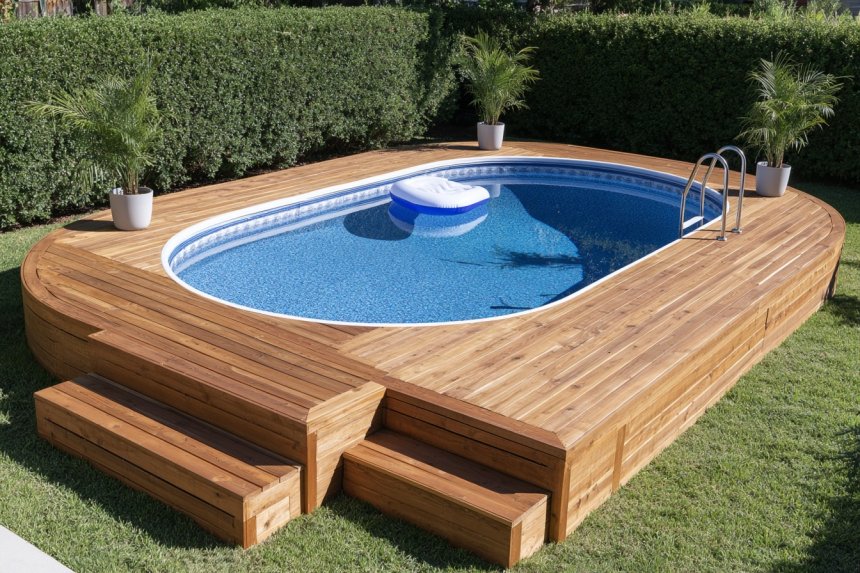
A wraparound wood deck can make an above-ground pool feel more integrated with the backyard while providing a stable walking surface, easier pool access, and space for maintenance. The key is to treat the deck as a separate freestanding structure, not as something supported by the pool wall.
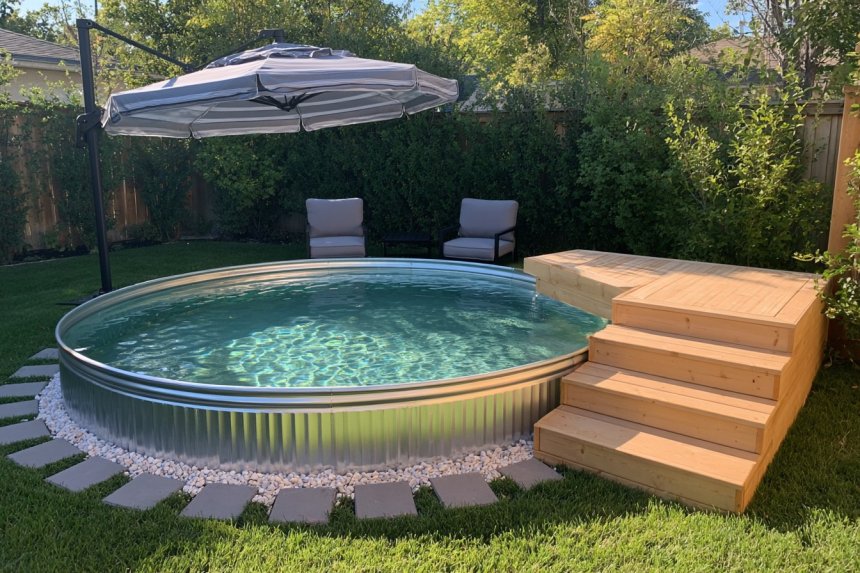
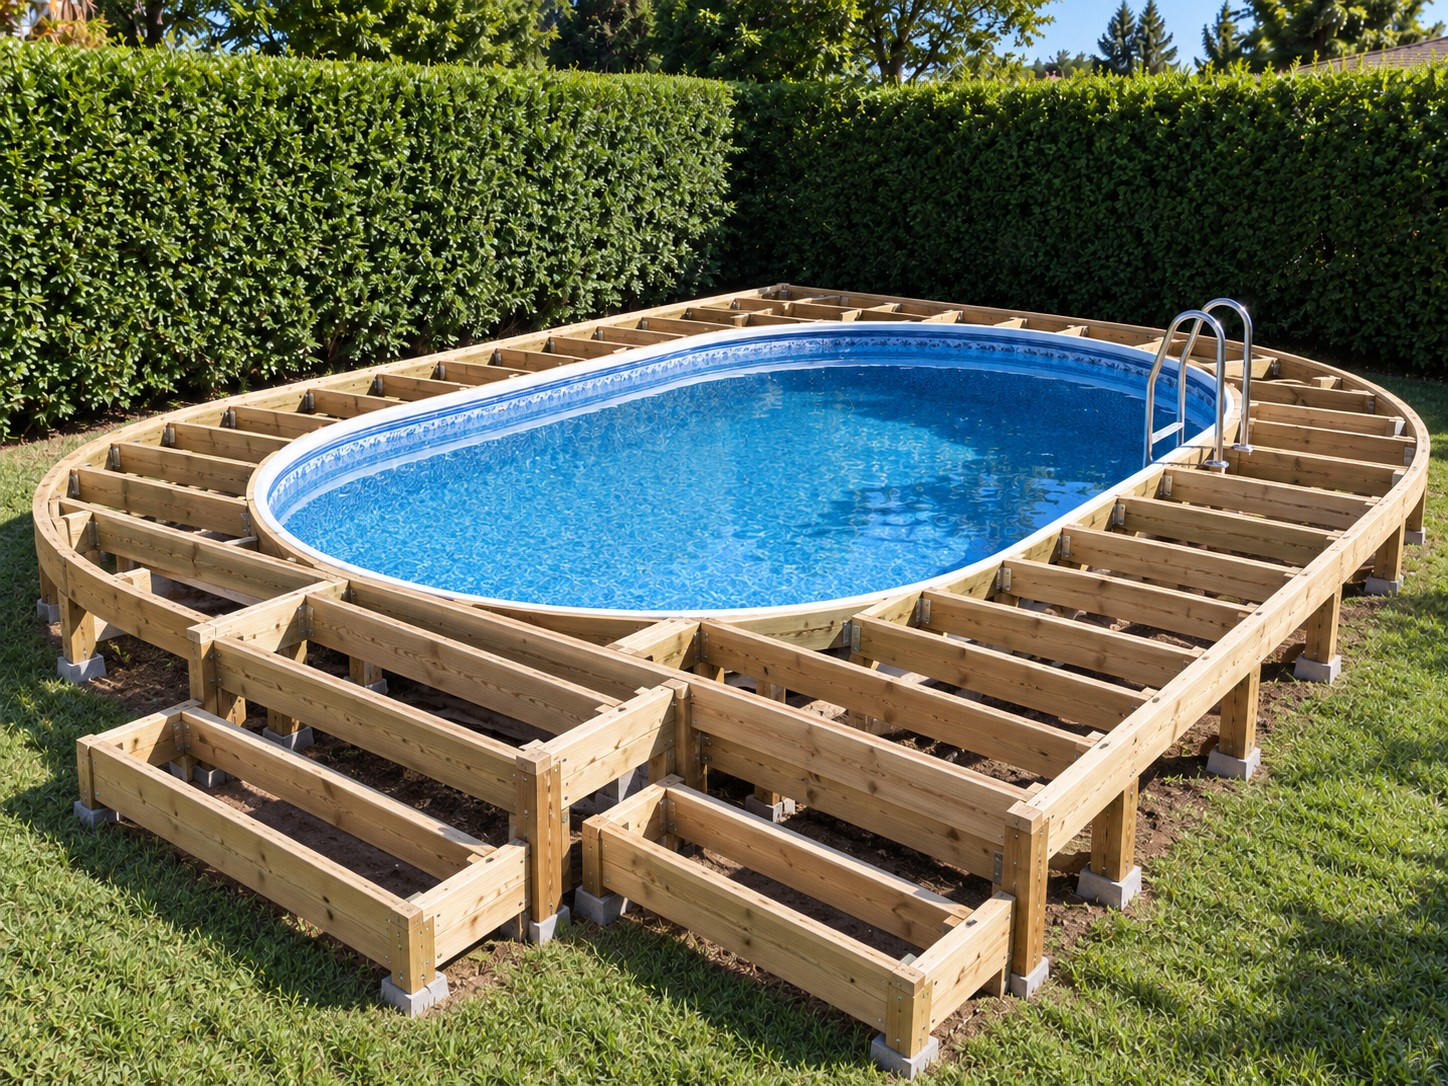
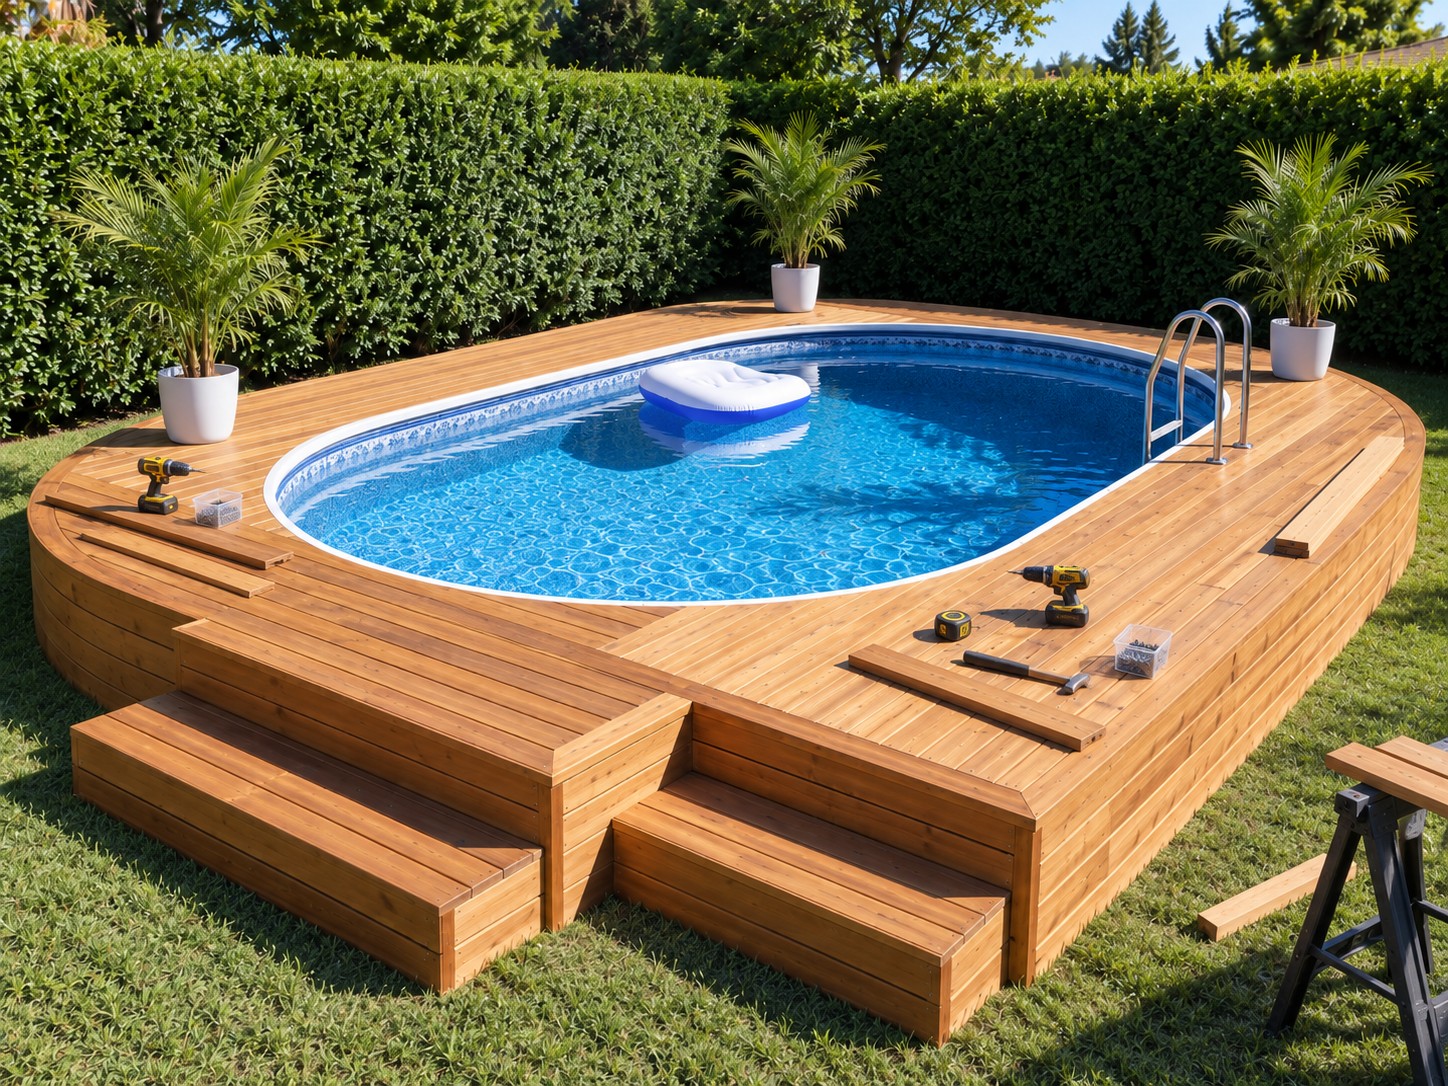
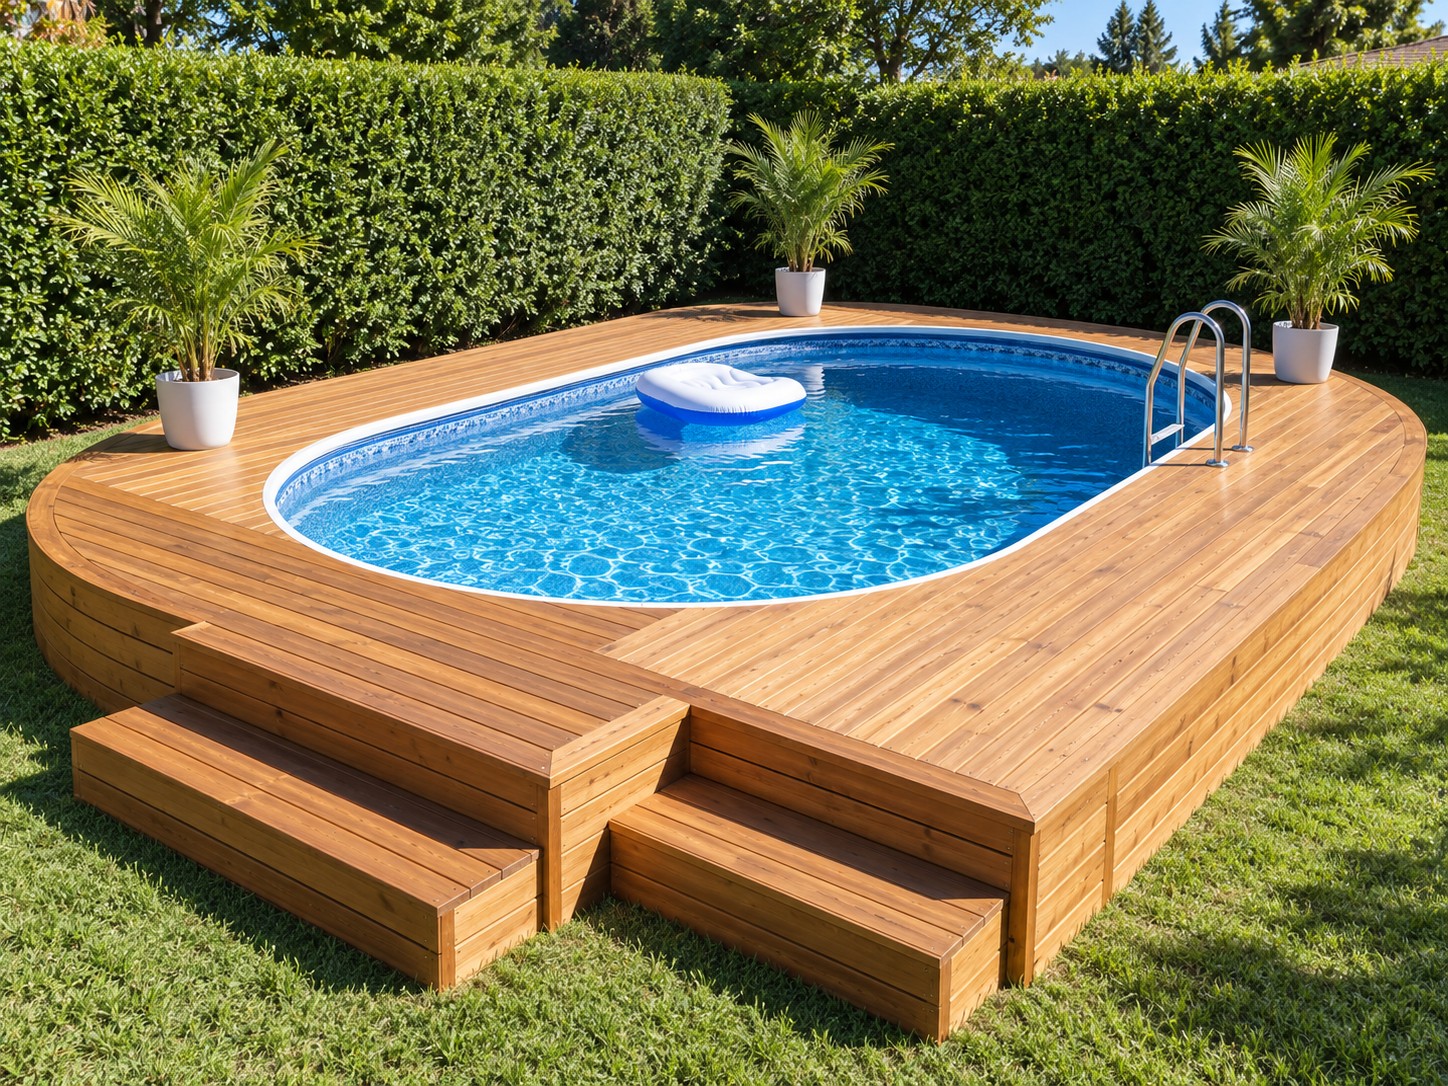
The design below uses a wide timber platform that follows an oval pool, finished with horizontal decking boards and broad front steps. The exact dimensions must be adapted to the pool, yard, soil conditions, local building requirements, and the pool manufacturer's installation instructions.
This is a structural outdoor project. Footings, framing spans, stair geometry, barriers, and pool access rules can be regulated locally. Where permits, engineering, or electrical bonding are required, those requirements take priority over generic DIY dimensions.
Step 1: Measure the Pool and Plan the Deck
Before buying lumber, measure the actual installed pool rather than relying only on the nominal size printed on the packaging.
Record:
Overall pool length
Overall pool width
Height from finished ground to the pool top rail
Width and projection of the pool's top rail
Location of skimmer and return fittings
Pump and filter access
Ladder location
Uneven ground around the pool
Space needed for future liner or wall maintenance
For planning purposes, a practical walking deck often uses approximately 1.2 to 1.5 m (4 to 5 ft) of usable width around the pool. A narrower section may work in constrained areas, but it should not interfere with circulation or maintenance.
Example layout
For an oval pool approximately 3.7 × 7.3 m (12 × 24 ft), a wraparound deck with about 1.2 m (4 ft) of usable space may produce an overall platform footprint around 6.1 × 9.8 m (20 × 32 ft).
That is only a planning example. Calculate the actual outer dimensions from:
Pool dimensions + desired deck width on both sides
Avoid setting the finished boards tightly against the pool wall or top rail. Leave the clearance required by the pool manufacturer so the pool can move slightly and components can still be removed for maintenance.
Finished deck height
The deck surface can sit near the upper portion of the pool, but it should not trap or support the pool's top rail.
A useful approach is to position the deck surface slightly below the structural top rail while maintaining the manufacturer's required clearance. This keeps the deck visually integrated without making future liner or rail replacement unnecessarily difficult.
Materials
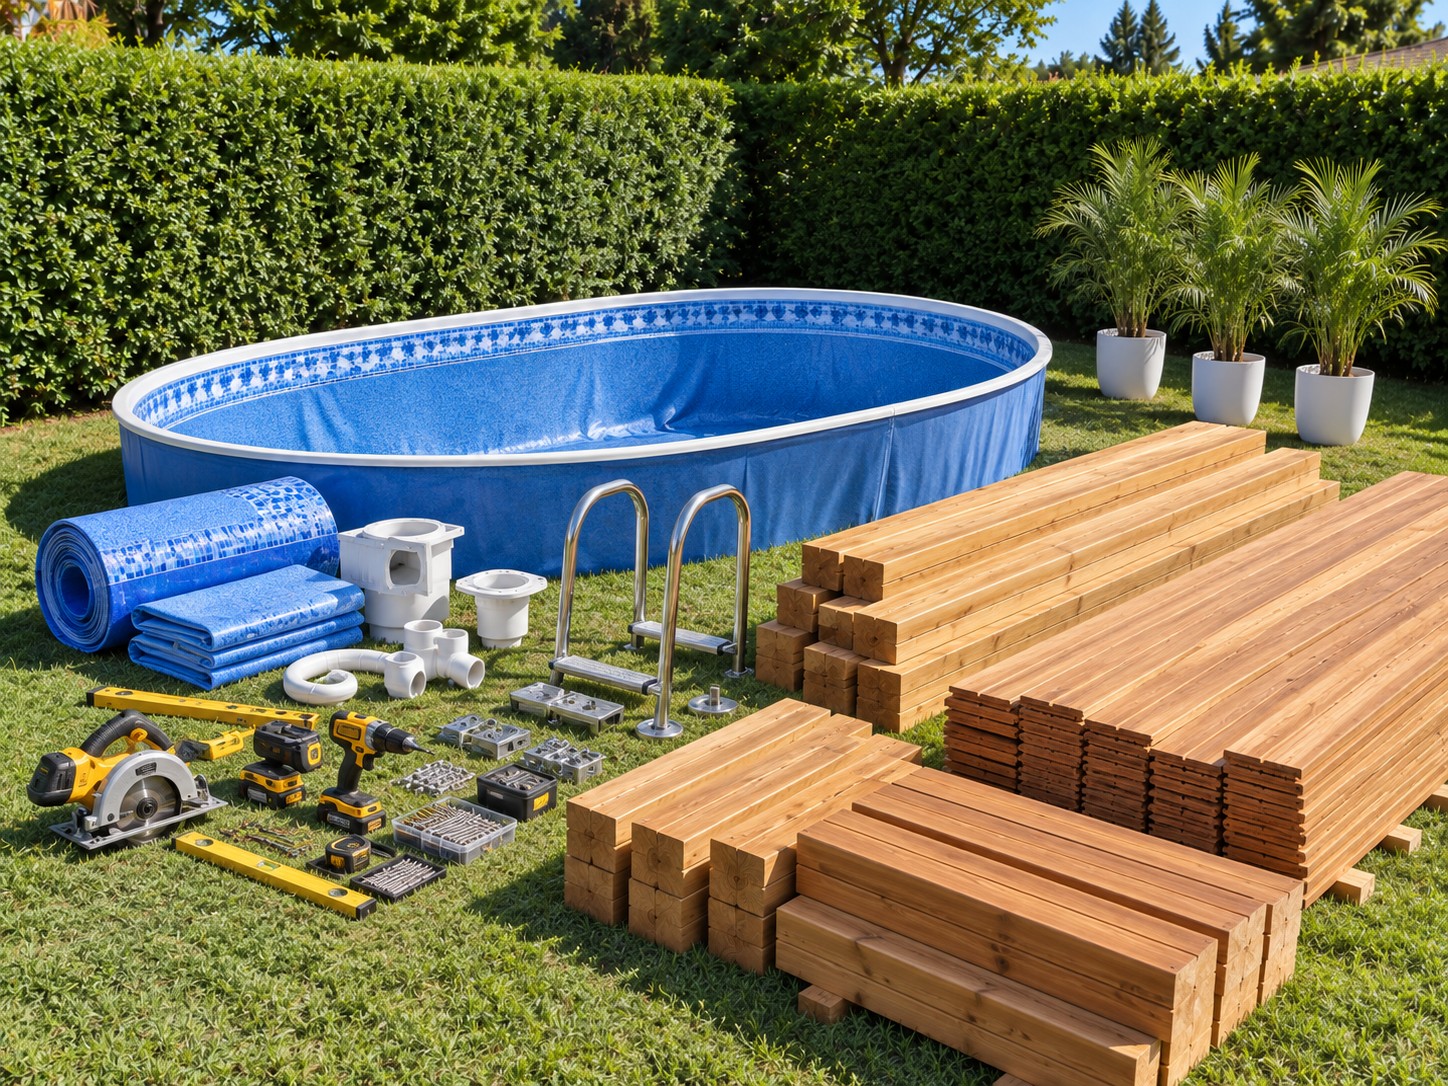
For a project of this type, expect to use:
Pressure treated structural posts
Pressure treated beams
Pressure treated joists
Rim joists
Exterior decking boards
Stair stringers
Stair tread boards
Fascia boards
Concrete footings or approved deck foundation system
Galvanized or stainless structural screws
Hot dip galvanized joist hangers
Matching approved hanger nails or structural connector screws
Post bases
Beam to post connectors
Angle brackets where specified
Exterior rated structural bolts with washers and nuts
Gravel for footing drainage where appropriate
End grain preservative for cut pressure treated lumber
Exterior wood finish suitable for decking
Do not substitute ordinary drywall screws or general purpose interior screws for structural deck connections. Connectors and fasteners should be compatible with modern pressure treated lumber because some treatments are corrosive to unsuitable metals.
Step 2: Set the Footings and Build the Frame
The framing carries the load of the entire deck, so this stage deserves more attention than the visible decking boards.
Begin by marking the outside perimeter with stakes and string. Then mark the position of beams and support posts.
Footing layout
Footing size, depth, and spacing depend on:
Soil bearing capacity
Frost depth
Deck height
Beam size
Joist span
Local structural requirements
For this reason, there is no universally correct footing diameter or spacing.
In frost prone regions, footings commonly need to extend below the local frost depth. In warmer climates, requirements may be different.
Do not place structural supports against the pool wall.
The deck should stand independently so normal deck movement does not transfer force into the pool shell.
Typical structural arrangement
A practical low freestanding deck may use:
100 × 100 mm or 140 × 140 mm posts
Structural beams running around the perimeter
Joists at approximately 400 mm centers
Additional blocking at curved edges, stairs, and board joints
In North American nominal lumber sizes, this may translate to combinations such as 4×4 or 6×6 posts with 2×8 or 2×10 framing.
Those sizes are not universal specifications. Required member sizes depend on actual span and load.
Frame around the oval pool
A rectangular structural frame is easier to construct and verify than trying to create every structural member as a curve.
Build the main joist system first, then create the rounded visual edge with short blocking and segmented rim framing.
The framing should never bear on the pool.
Keep enough separation around:
Skimmer
Return fitting
Pool plumbing
Filter connections
Wall uprights
Top rail
Access panels can be incorporated where equipment would otherwise become enclosed.
Fastening the frame
Use approved structural connectors at critical joints.
A typical connection sequence may include:
Post base anchored to footing
Post secured to base
Beam connected to post with approved hardware
Joists attached to beam or ledger style rim using hangers
Blocking installed between joists
Outer rim secured
Stair framing tied into the main frame
Use the exact fastener type specified by the connector manufacturer.
A joist hanger with empty holes or installed with inappropriate screws may not provide its rated strength.
Check before decking
Before covering the frame, verify:
Deck is level
Posts are plumb
Beams are secure
Joist spacing is consistent
Frame is square where appropriate
Curved sections follow a smooth line
Blocking is installed
No framing touches the pool wall
Plumbing remains accessible
Stair openings are properly reinforced
This is the easiest stage to fix framing mistakes.
Step 3: Install the Decking and Build the Steps
Once the structural frame is complete and inspected where required, install the decking.
The design works best with boards running in consistent directions and carefully planned transitions around the curved pool.
Deck board installation
For pressure treated wood, board spacing depends partly on its moisture content at installation.
Very wet boards can shrink considerably as they dry, while kiln dried decking may require an intentional installation gap.
Follow the lumber supplier's recommendations rather than using one fixed gap for every product.
Fasten boards with:
Exterior deck screws
Stainless screws in highly corrosive environments
Approved hidden fastener system if compatible with the board type
Place fasteners consistently and avoid driving them so deeply that they crush the wood fibers.
Curved pool edge
Do not force straight deck boards against the pool's oval shape.
Instead, create the curve through:
Segmented perimeter framing
Carefully cut board ends
A curved or segmented border board
Consistent clearance around the pool
A border board around the pool opening gives the installation a more intentional finish and hides irregular board ends.
Build the entrance steps
The wide steps shown in this type of design also act as a transition between lawn and deck.
Plan the total rise first.
For example, if the deck surface is approximately 900 mm above grade, divide that height into comfortable, consistent risers rather than deciding the step count visually.
Every riser in the same stair flight should remain consistent.
The stair assembly may require:
Pressure treated stair stringers
Structural screws or bolts
Stringer connectors
Tread boards
Blocking between stringers
Side fascia boards
Concrete or another stable landing surface below
Wider stairs require more stringers so the tread boards do not flex excessively.
Do not support the bottom of the stairs directly on loose soil. Seasonal soil movement can alter stair geometry and destabilize the stringers.
Two sided stair arrangement
If using the split stair arrangement shown in this design, build each stair section as its own properly supported assembly.
Avoid using the decorative fascia between the stairs as structural support unless it has been framed specifically for that purpose.
Step 4: Finish the Fascia and Protect the Deck
Once the main boards and stairs are installed, close the visible outer framing with horizontal fascia boards.
The fascia creates the clean, furniture like appearance of the finished deck, but it should not block necessary ventilation.
Wood framing lasts longer when moisture can escape.
Protect cut ends
Every new cut through pressure treated lumber can expose less protected interior wood.
Where required by the lumber manufacturer, apply an appropriate end cut preservative to:
Joist ends
Beam cuts
Stair stringer cuts
Notches
Drilled areas
Finish the wood
Allow new pressure treated timber to reach the moisture condition recommended by the coating manufacturer before staining or sealing.
A penetrating exterior deck finish can help reduce:
Water absorption
Surface checking
UV discoloration
Uneven weathering
Do not assume freshly installed pressure treated lumber should always be sealed immediately. Moisture content varies substantially.
Pool Specific Safety Details
A pool deck requires more safety planning than an ordinary garden platform.
Do not attach the deck to the pool
The deck and pool should remain structurally independent unless the pool manufacturer explicitly provides an approved attachment method.
Keep equipment accessible
Do not permanently enclose:
Skimmer
Pump
Filter
Valves
Return fittings
Electrical connections
Future repairs should not require dismantling the deck.
Provide slip resistant surfaces
Pool decks become wet frequently.
Avoid finishes that create an excessively smooth or glossy surface. Keep decking clean of algae, sunscreen residue, and standing water.
Consider barriers and controlled access
Depending on jurisdiction, a pool deck may require:
Guardrails
Pool barriers
Self closing gates
Child resistant latches
Specific barrier heights
Restrictions on climbable objects near the pool
Local pool barrier regulations should be checked before construction.
Electrical work requires particular care
Electrical systems near swimming pools are subject to special requirements involving grounding, bonding, receptacles, pumps, and equipment clearances.
Have required electrical work performed or reviewed by a qualified professional in accordance with applicable electrical regulations.
Drainage Around the Deck
A good deck should not create a basin around the pool.
Grade the soil so rainwater moves away from structural footings and does not accumulate beneath the platform.
Keep organic debris from building up under the deck, particularly where timber remains close to the ground.
Where the frame sits near soil, additional ground clearance and drainage planning can significantly improve service life.
Choosing the Right Wood
Pressure treated pine is widely used because it is economical and readily available.
Cedar offers better natural resistance to decay and a more refined appearance but generally costs more.
Composite decking can reduce some surface maintenance, although the framing underneath is still usually timber and must remain correctly designed.
If composite boards are chosen, follow their specific joist spacing and stair tread requirements because they may differ from timber decking.
Estimating Lumber
Do not estimate this project based only on square footage.
Calculate framing and surface materials separately.
For decking:
Deck surface area minus pool opening = approximate deck coverage
Then add an allowance for cuts and waste.
For framing, calculate:
Perimeter rim length
Number of joists
Beam runs
Blocking
Post quantity
Stair framing
Fascia
Curved perimeter pieces
A curved or oval pool generally creates more offcuts than a simple rectangular deck.
Common Construction Problems
Deck Boards Begin to Cup
This may result from moisture movement, incorrect fastening, or unsuitable board orientation. Replace severely distorted boards and check drainage and ventilation beneath the deck.
Pool Rail Becomes Difficult to Remove
The deck was built too tightly around the pool. Maintain service clearance from the start rather than cutting the deck later.
Stairs Feel Bouncy
Possible causes include excessive stringer spacing, inadequate blocking, or insufficient tread thickness. Address the structural cause instead of adding cosmetic fascia.
Water Collects Beneath the Deck
Improve grading and drainage. Persistent moisture can accelerate deterioration of framing and footings.
Curved Edge Looks Uneven
Create the outer shape using repeated measurements from the pool edge rather than estimating each board cut individually.
Maintenance After Construction
Inspect the deck at least periodically and after severe weather.
Pay particular attention to:
Loose fasteners
Splintered boards
Soft or decaying timber
Movement around steps
Corrosion on connectors
Standing water
Loose fascia
Soil contact with wood
Pool clearances
Clean the surface with products suitable for the decking material.
Avoid aggressive pressure washing at very close range because it can damage soft wood fibers.
Why This Layout Works
The wraparound configuration makes the pool feel intentionally integrated into the landscape instead of simply sitting on the lawn.
A broad wood surface provides room to walk around the water, while the rounded outer corners visually echo the oval pool. The horizontal fascia hides the structural framing, giving the deck a cleaner architectural profile.
The two broad front stair sections also distribute the transition between lawn and deck rather than concentrating access through one narrow staircase.
Most importantly, the design can remain serviceable because the pool and deck are treated as two independent systems. The pool carries the water load, while the deck transfers people and furniture loads through its own joists, beams, posts, and footings.
That separation is the detail that makes the design not only visually cleaner, but also easier to inspect, maintain, and repair over time.
Daria Kuznetsova brings a thoughtful approach to interiors, handmade projects, and everyday living through her work at Decovive.com. She focuses on approachable ways to give rooms more character, improve organization, update furnishings, and make better use of both indoor and outdoor areas.
Her articles often explore clever makeovers, repurposed materials, decorative details, garden touches, and accessible projects that can be completed without advanced skills. Rather than following a single aesthetic, Daria draws from changing trends, practical needs, and personal expression.
Her goal is to offer readers useful starting points they can shape around their own taste, budget, and space, turning simple changes into homes that feel considered, comfortable, and individual.


 Like
0
Like
0
 Dislike
0
Dislike
0
 Love
0
Love
0
 Funny
0
Funny
0
 Angry
0
Angry
0
 Sad
0
Sad
0
 Wow
0
Wow
0