Modern Backyard Pool Build With Stone Coping and Wood Deck

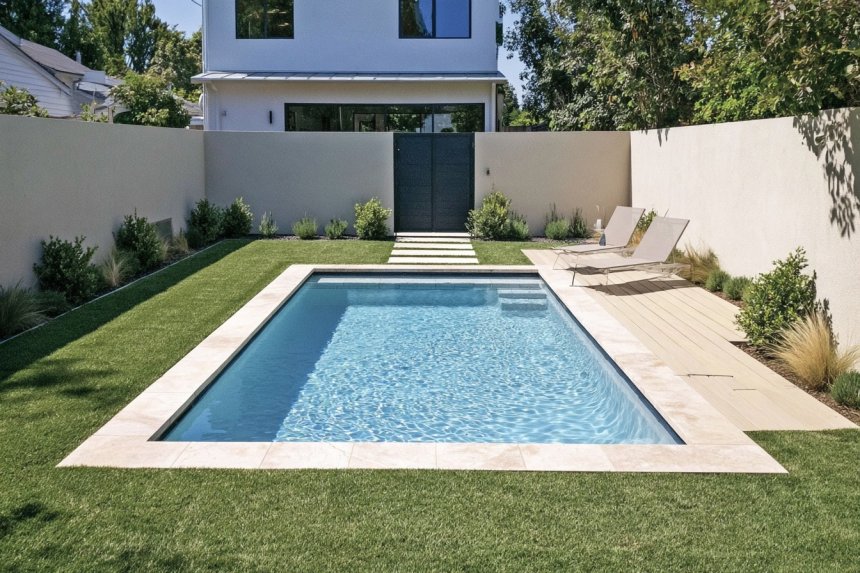
A compact rectangular pool can work especially well in a narrow modern backyard because its clean geometry leaves usable lawn, planting beds, and circulation space around the water. The finished appearance may look simple, but the quality of the project depends heavily on what happens below the surface. Excavation depth, compacted base material, reinforcement, plumbing placement, drainage, coping support, and surrounding deck construction all need to be planned before finishing materials are installed.
This project follows the same four stages shown in the construction images: preparing the complete material set, forming the structural pool shell, completing the pool and surrounding surfaces, and finally finishing the landscape. The measurements below are useful planning references for a compact residential pool, but structural reinforcement, electrical work, setbacks, and final excavation dimensions should always follow local code and an approved pool plan.
Step 1: Prepare Materials and Tools
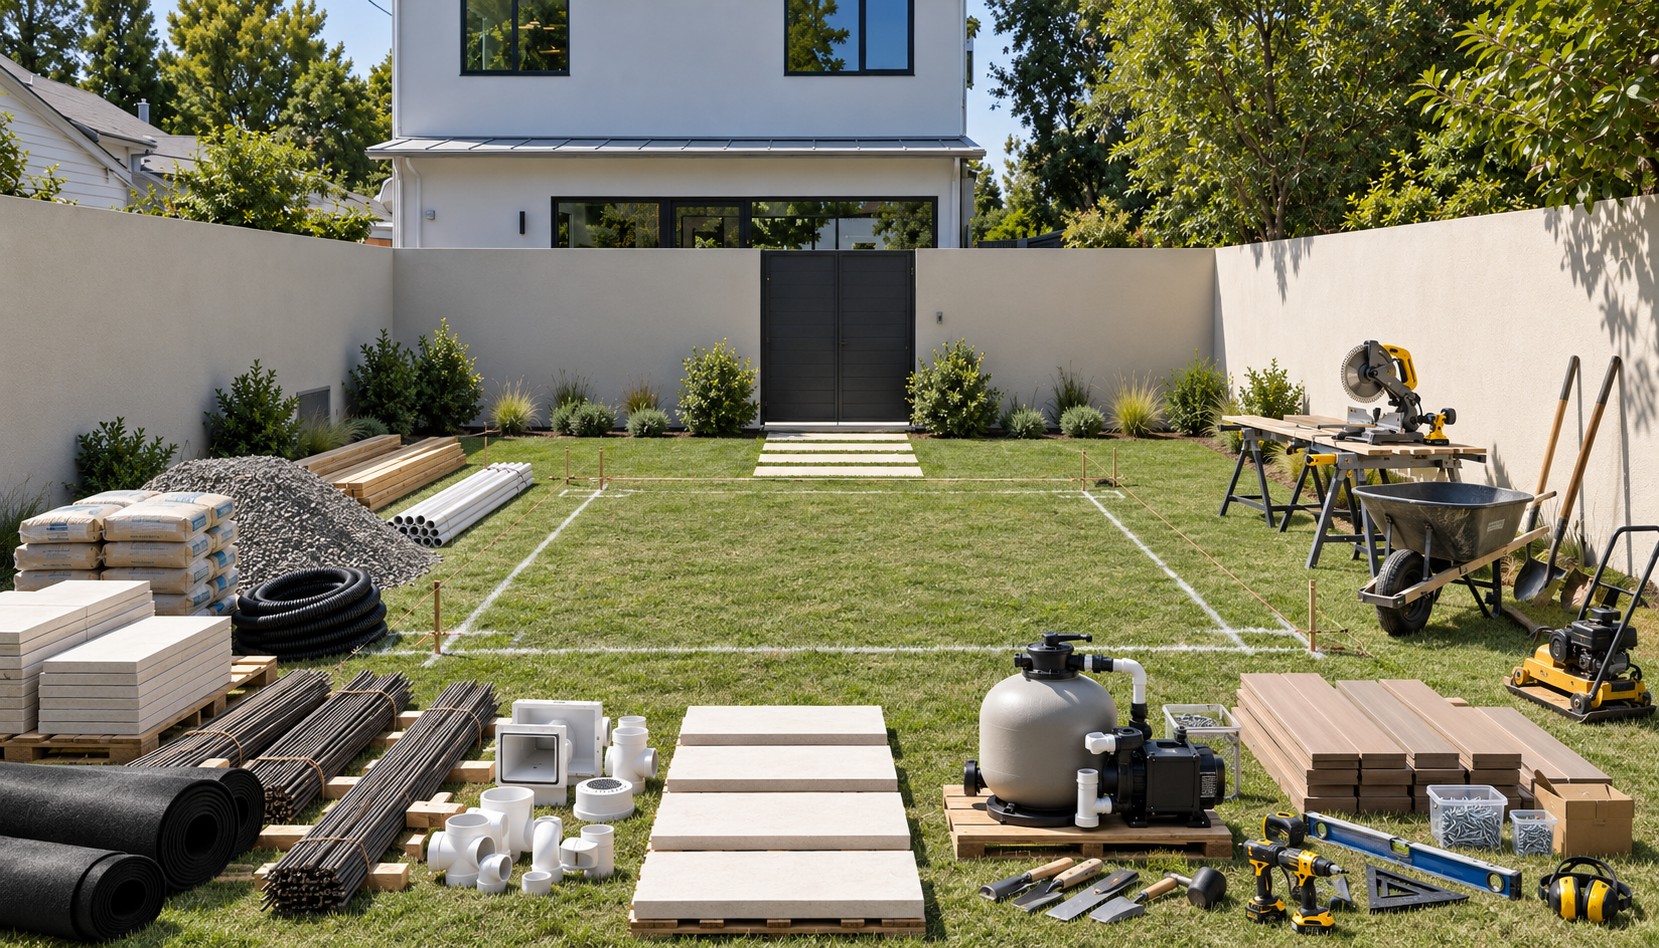
Start by establishing the finished pool dimensions before ordering concrete, reinforcement, plumbing, or coping. For a backyard similar to the example, a pool around 10 ft wide by 20 ft long, approximately 3 x 6 m, creates enough swimming space while leaving room for landscaping and a narrow deck.
The excavation will be larger than the final pool because construction workers need space outside the shell. Allow approximately 24 to 36 in, 60 to 90 cm, beyond the outside face of the pool structure where site conditions permit.
For a project of this type, the material area should include the structural, plumbing, surface, and landscaping components from the beginning.
Typical construction materials include:
• Reinforcing steel specified by the structural plan, commonly #3 or #4 rebar, approximately 10 or 12 mm diameter, depending on engineering requirements
• Reinforcement chairs or approved spacers to maintain concrete cover
• 2 x 4 in or 2 x 6 in pressure treated or construction grade lumber for temporary formwork where required
• 3 in exterior structural screws for temporary timber form connections
• Crushed stone or road base, usually installed in a 4 to 6 in, 10 to 15 cm compacted layer beneath the pool floor where specified
• Concrete or shotcrete designed for pool construction, commonly around 4,000 psi, approximately 28 MPa, when required by the structural specification
• 1.5 or 2 in pressure rated PVC pipe for circulation plumbing
• Compatible PVC elbows, tees, unions, valves, primer, and solvent cement
• Main drain, skimmer, wall returns, and suction fittings designed for pool use
• Pool pump and correctly sized filtration system
• Waterproof pool finish or interior surface system
• Stone or porcelain coping around 12 x 24 in, 30 x 60 cm, depending on the desired layout
• Exterior rated setting mortar and compatible grout
• Composite or exterior rated timber deck boards where a deck section is planned
• Landscape soil, lawn turf, and planting materials
The main tools should also be ready before excavation begins. Use a rotary laser or long builder's level for elevations, a tape measure for layout, mason line and timber stakes for corners, a plate compactor for the stone base, and shovels and rakes for fine grading.
For timber and deck work, a compound miter saw is useful for repeat cuts while a circular saw handles longer boards. A cordless drill and impact driver are needed for temporary formwork and deck fasteners.
Rebar cutting and bending should be completed with suitable rebar tools rather than ordinary woodworking equipment. Safety glasses, hearing protection, gloves, and appropriate respiratory protection are important whenever cutting masonry, concrete, or treated lumber.
Before excavation, also confirm the location of buried utilities.
Step 2: Excavate and Build the Pool Structure
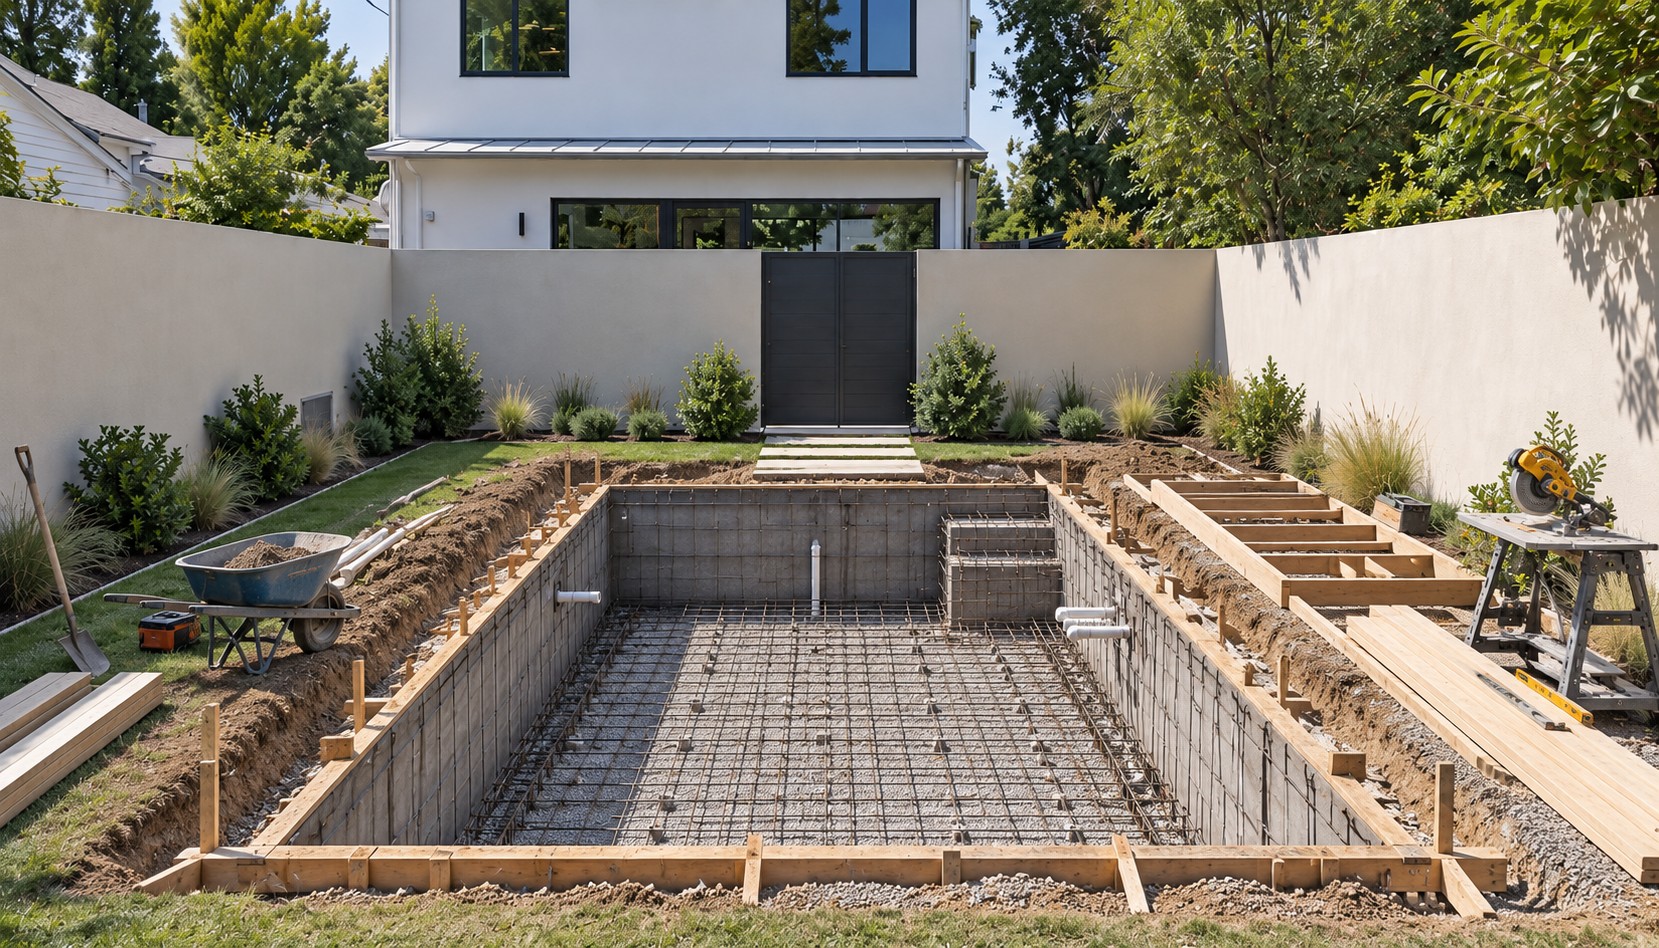
The second image should represent the structural stage clearly. At this point the finished landscaping and coping should not yet exist. The pool should still show excavation, reinforcement, formwork, plumbing penetrations, and the unfinished shell.
Begin by marking the outside construction footprint with stakes and string. Check both diagonals so the rectangular pool is square before excavation starts.
The actual excavation depth depends on the chosen pool profile.
For example, if the finished water depth is approximately 4 ft, 1.2 m, the excavation has to account for the structural floor, compacted base, interior finish, coping elevation, and construction tolerances. A pool with a deeper section will require correspondingly deeper excavation.
Do not rely on one fixed excavation number for every site. Soil conditions, frost depth, groundwater, shell design, and local engineering requirements can significantly change the excavation.
Once the main excavation is complete, remove loose and organic material from the bottom. The subgrade should be firm rather than disturbed or muddy.
Where specified, place approximately 4 to 6 in, 10 to 15 cm, of compactable crushed aggregate.
Spread the aggregate evenly and compact it in lifts rather than dumping the full depth and compacting only the surface. A plate compactor works well on accessible areas. Check elevations repeatedly with a laser level or long level.
A poorly compacted base can contribute to later settlement.
Install the reinforcement
The reinforcement must not simply rest directly on the soil or gravel.
Use approved chairs or spacers to position the steel so it maintains the concrete cover required by the structural specification.
Rebar spacing varies according to the engineering design. Residential reinforced pools commonly use relatively close reinforcement spacing, but the exact bar diameter, spacing, overlap, and wall to floor connection should come from the structural plan rather than being improvised on site.
At wall and floor intersections, reinforcement needs to remain continuous according to the engineered cage design.
Tie intersecting bars with appropriate rebar tie wire. The purpose of the tie wire is to maintain reinforcement position during construction. It does not replace the structural function of the steel itself.
Rough in the plumbing
Pool plumbing must be installed before the shell is completed.
Position the skimmer, wall return lines, drain lines, vacuum connection, and any other planned penetrations according to the hydraulic layout.
For many residential installations, 1.5 in or 2 in schedule rated PVC is used, but pipe sizing must match the pump flow rate and local requirements.
Dry fit the complete plumbing route first.
Once alignment is correct, clean the PVC surfaces, use compatible primer where required, apply solvent cement, and fully seat each joint with the correct twist and hold procedure recommended by the pipe cement manufacturer.
Pressure test concealed plumbing before covering it with concrete or backfill.
This is one of the most important quality control stages of the entire project. Repairing an accessible pipe now is far easier than locating a leak after the pool and landscaping are finished.
Step 3: Install the Pool Finish, Coping, and Deck
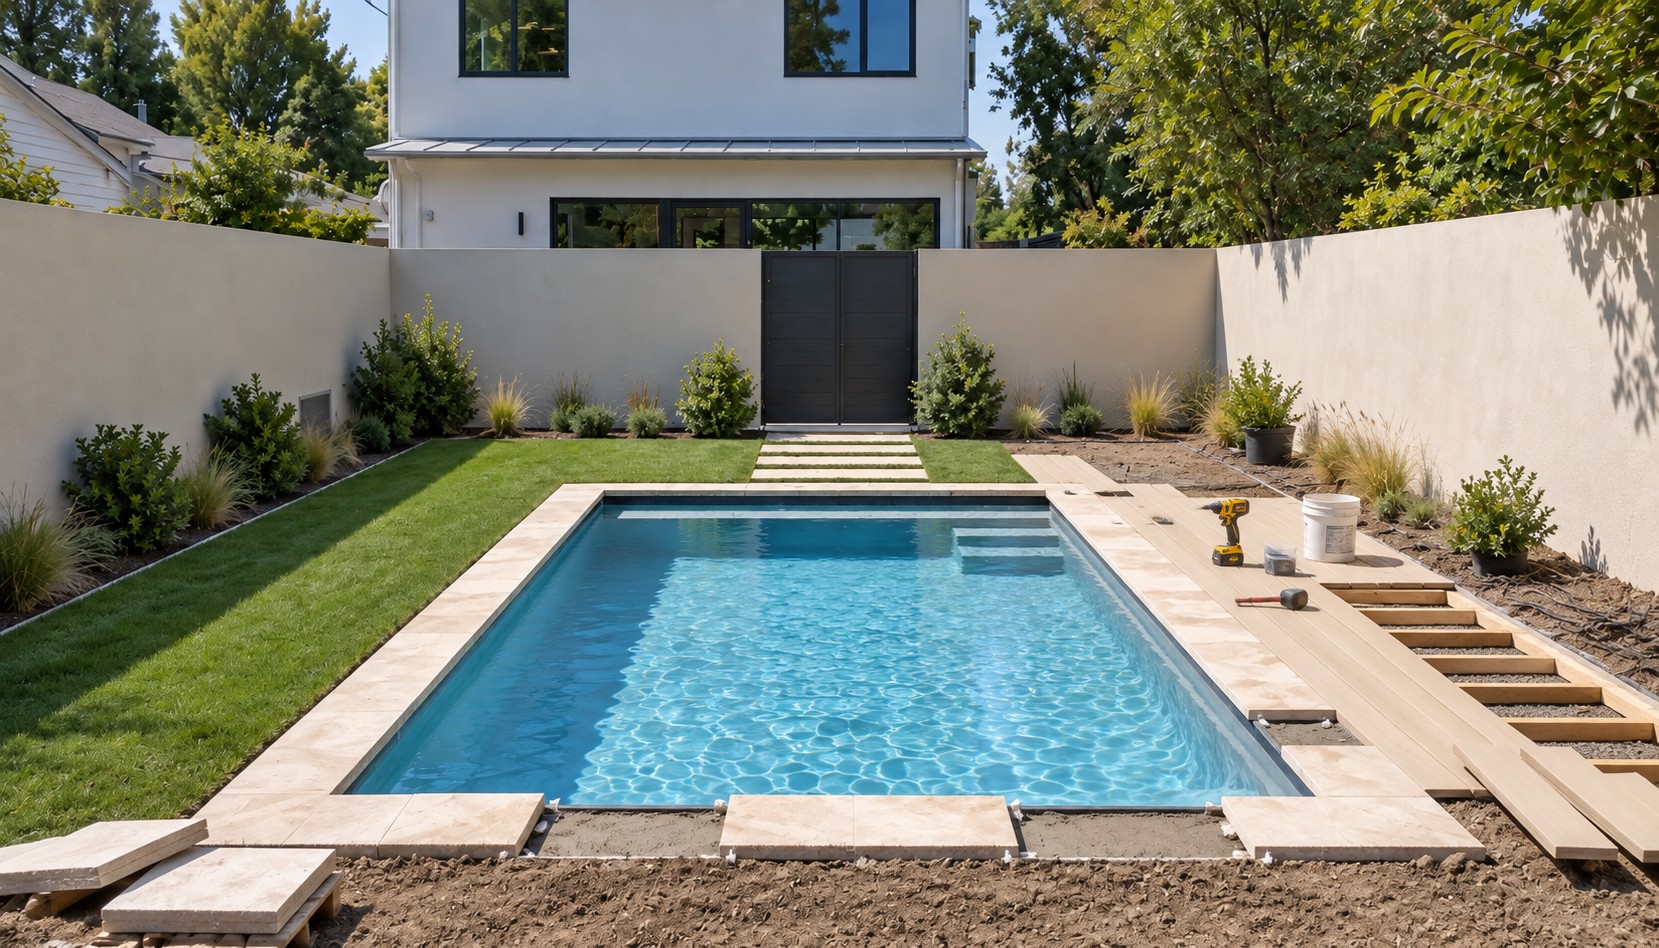
The third image should look clearly different from the finished project. The pool shell can already be functional, but tools, incomplete deck areas, unfinished soil, exposed construction edges, spare coping, and installation materials should still be visible.
Once the structural shell has reached the required condition for finishing, complete the approved waterproofing and interior pool surface.
The exact system varies. Some concrete pools receive plaster, quartz, tile, pebble finish, or another manufacturer approved interior coating.
Follow the curing requirements of the shell and the chosen finish. Applying waterproofing or finish material to concrete that has not reached the required condition can shorten the service life of the surface.
Set the coping
The pale stone coping creates the clean frame visible around the finished pool.
Before installation, dry lay several pieces to establish the joint pattern. Avoid ending a highly visible edge with an unnecessarily narrow cut.
Use an exterior and pool compatible mortar system rather than general interior tile adhesive.
Maintain the drainage slope required by the coping and surrounding surface design. Water should move away from structures and should not continually drain into the pool simply because the surrounding surface was installed completely flat.
Expansion or movement joints around the pool should follow the pool system and local construction requirements.
Build the deck section
In the example, a narrow wood or composite deck runs along one side of the pool.
If a framed timber deck is used, pressure treated framing should normally remain structurally independent of the pool shell unless the engineered construction documents specifically provide another attachment method.
A common residential deck frame may use 2 x 6 or larger joists, but joist size and spacing depend on span, deck material, and code.
Many decking manufacturers allow approximately 12 or 16 in on center joist spacing, but composite decking can require closer spacing in some applications. Use the manufacturer's published span table.
Secure structural members with exterior rated structural fasteners and corrosion resistant hardware.
Do not use ordinary drywall screws.
Install decking with the manufacturer's recommended expansion gap. Around water, drainage matters. Boards fitted tightly together can trap moisture and debris.
Where boards must be cut around the pool edge, use a circular saw with an appropriate blade and finish the line carefully so the border remains visually straight.
Before finalizing the deck, check that access to pumps, valves, plumbing connections, or service panels remains available.
Step 4: Complete the Pool and Landscaping
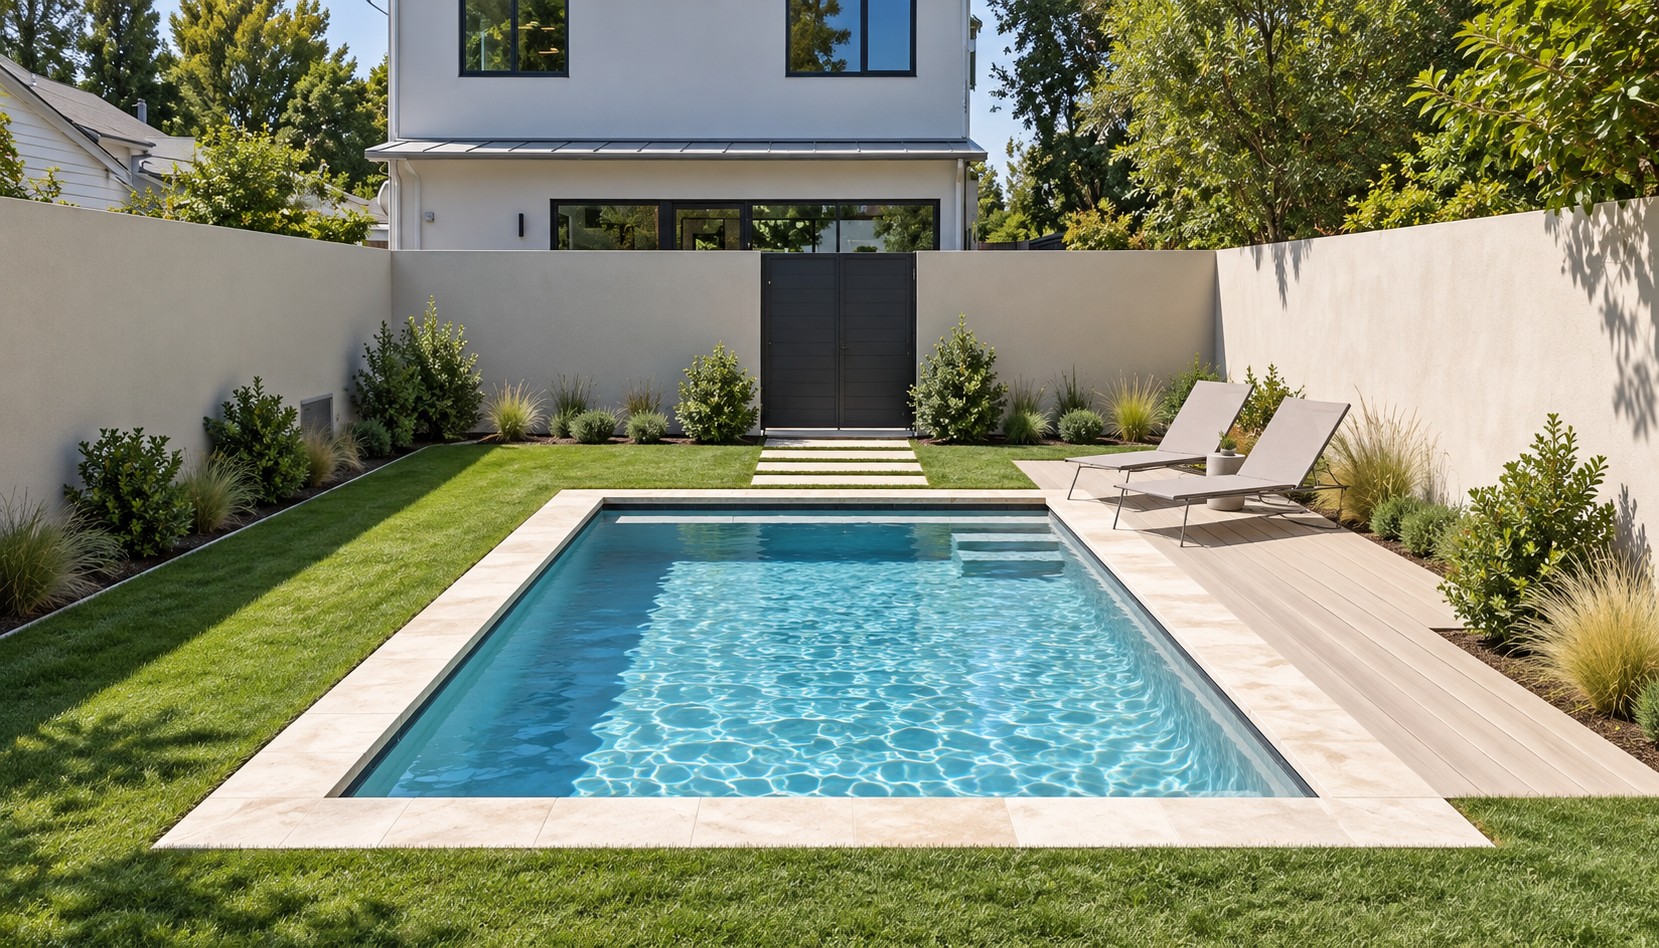
The fourth image should be the only stage that presents the project as fully finished.
Remove all construction materials, exposed hardware containers, temporary boards, cutting equipment, loose stone, and unfinished soil.
The finished design works because the pool remains visually simple.
Light stone coping creates a strong border around the water, while the narrow pale deck provides a sitting zone without covering the entire backyard with paving. Lawn on the opposite side softens the hardscape and keeps the space feeling residential rather than fully paved.
Two lounge chairs can fit comfortably on the deck without blocking the circulation route.
Try to retain approximately 36 in, 90 cm, of unobstructed walking space where practical, although local pool regulations may require different clearances.
The stepping stone path leading toward the gate also helps keep traffic away from newly planted beds.
Finish the planting beds
Keep plant roots and mature plant dimensions in mind when landscaping around a pool.
Avoid positioning aggressive roots immediately beside the structural shell. Plants that constantly drop leaves, flowers, or berries into the water also increase filtration and cleaning work.
Use mulch or another appropriate landscape finish around shrubs while maintaining drainage away from the pool edge.
Check drainage before considering the project complete
Observe how the site handles water after irrigation or rainfall.
Finished grades should not direct muddy runoff into the pool. Hard surfaces should move water toward an approved drainage area.
If the property naturally slopes toward the pool, additional drainage such as a channel drain or subsurface drainage system may be necessary.
Pool Equipment and Electrical Safety
The finished pool requires more than visible construction.
Select the pump and filtration system according to the actual water volume, plumbing configuration, hydraulic resistance, and equipment manufacturer recommendations.
Electrical installations around swimming pools are subject to strict safety requirements in many jurisdictions. Pumps, lighting, bonding, grounding, outlets, and protective devices should be installed according to applicable electrical and pool codes.
This is not an area where standard household outdoor wiring should simply be extended toward the water.
Keep electrical equipment serviceable and protected from irrigation and standing water.
Before Filling the Pool
Before the final fill, inspect the complete installation.
Confirm that plumbing has passed its required testing, the interior finish has cured according to manufacturer instructions, drains and fittings are secure, coping is stable, and debris has been removed from the shell.
Fill procedures can vary according to the interior finish. Some pool finishes require continuous filling without interruption to prevent visible waterline marks.
Follow the finish manufacturer's startup instructions for water chemistry.
Do not assume that freshly filled water is immediately balanced for pool use.
Long Term Maintenance
A well built pool still needs routine inspection.
Check coping joints for movement, maintain proper water chemistry, clean filters according to the equipment schedule, and inspect pump baskets and circulation fittings regularly.
Deck boards should be checked for movement or surface damage. Natural timber may require periodic refinishing, while composite decking still needs cleaning and inspection.
Watch the landscaping as it matures. Plants that were small during installation can eventually interfere with paths, pool equipment, or drainage.
The finished backyard succeeds because the construction beneath the visible surfaces receives as much attention as the styling. Proper base preparation, correctly positioned reinforcement, tested plumbing, compatible exterior finishes, controlled drainage, and serviceable equipment produce a pool area that looks simple while functioning as a complete outdoor system.
Share
What's Your Reaction?
 Like
0
Like
0
 Dislike
0
Dislike
0
 Love
0
Love
0
 Funny
0
Funny
0
 Angry
0
Angry
0
 Sad
0
Sad
0
 Wow
0
Wow
0