
12 DIY Clay Magnet Designs for Creative Home Decor

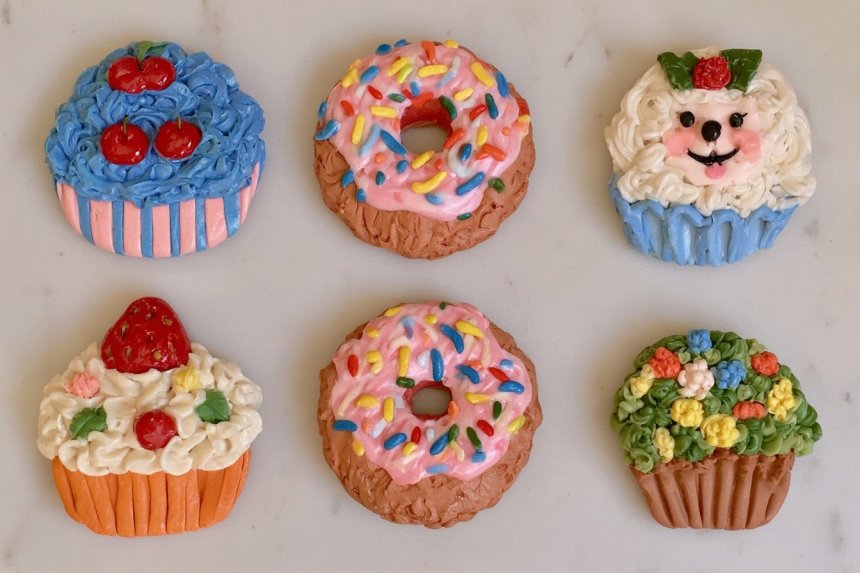
Clay magnets offer a simple way to add small but personal decorative details to refrigerators, magnetic boards, office cabinets, and metal surfaces around the home. The following projects combine creative designs with practical instructions, suitable materials, important safety considerations, and helpful suggestions for where each magnet can be used.
1. Colorful Mini Fruit Magnets
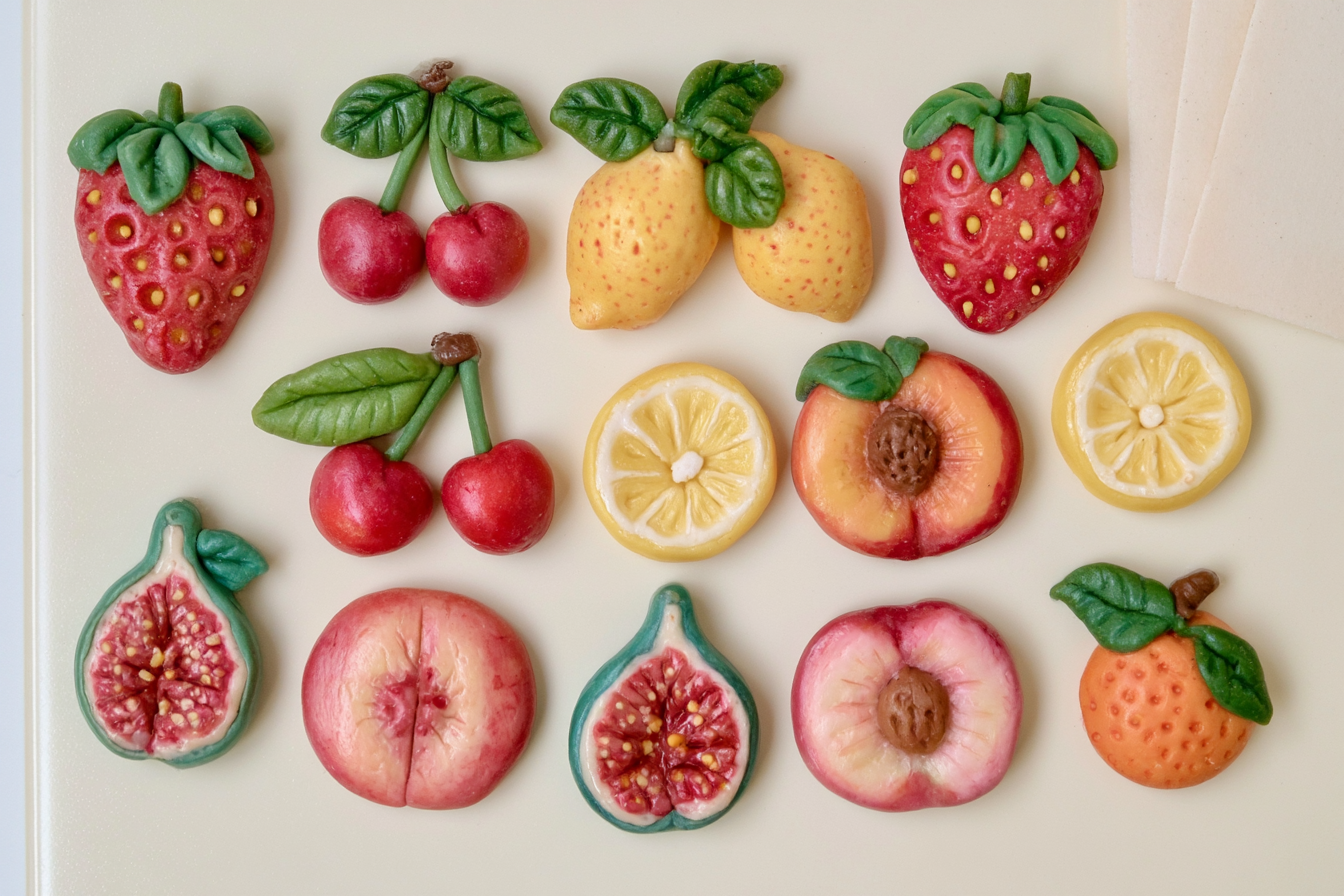
Create a cheerful magnet collection featuring strawberries, cherries, lemons, figs, peaches, and other colorful fruits. Begin by softening polymer clay between your hands before shaping the main fruit forms. Add leaves, seeds, stems, and peel textures using a fine modeling tool. Instead of relying on a single solid color, gently blend lighter and darker shades to give each fruit a more natural appearance. Bake the polymer clay according to the temperature and time recommended by the manufacturer. Once every piece has cooled completely, attach a strong neodymium magnet to the flat back using a suitable adhesive. Make sure the magnet does not extend beyond the clay shape. These playful designs can hold shopping lists and recipes on the refrigerator or decorate a metal board near a coffee station. Keep small magnets away from young children and pets.
2. Cottagecore Mushroom Magnets
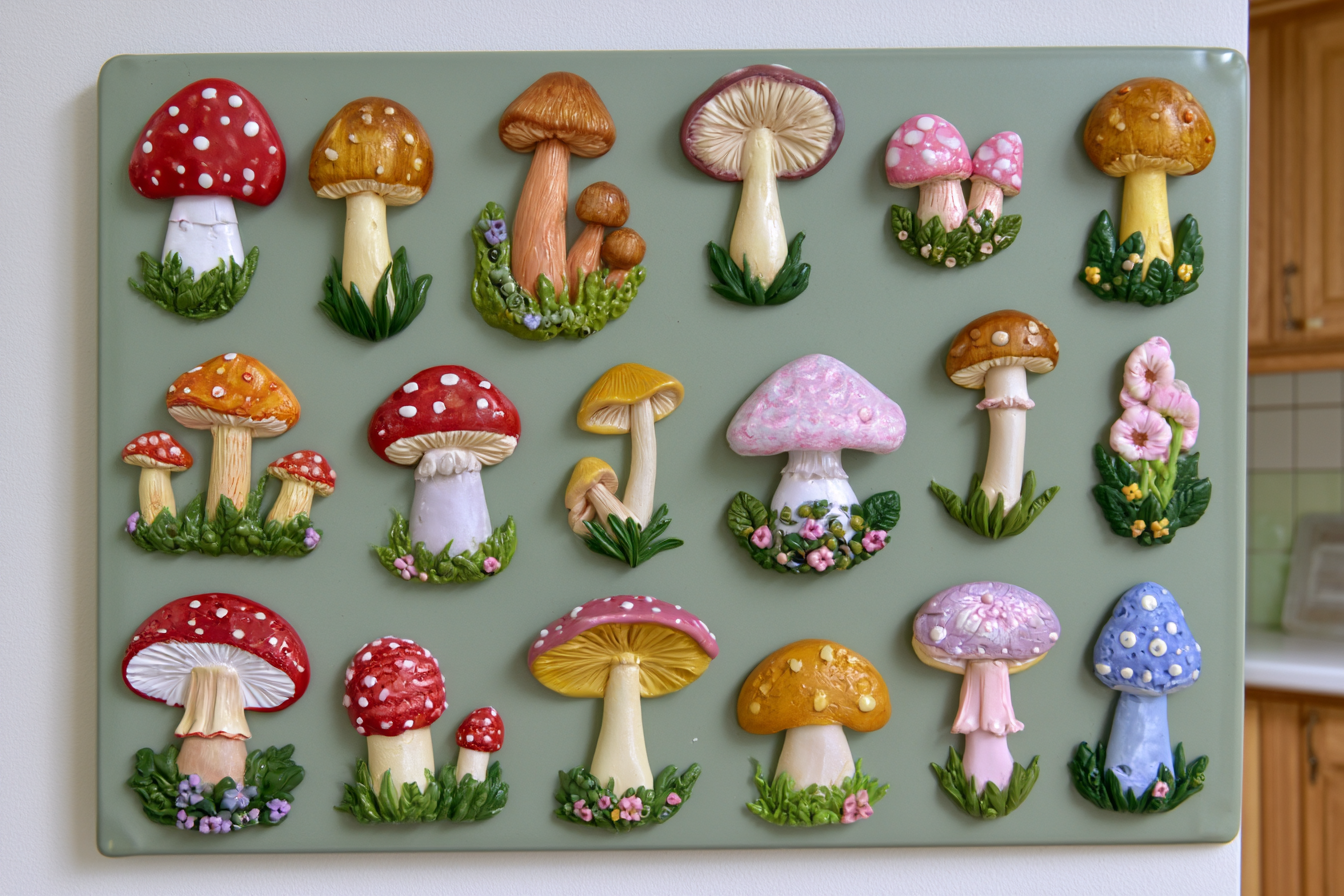
Red spotted mushrooms, woodland varieties, and pastel fantasy mushrooms can form a charming magnet set for cottagecore interiors. Start by shaping a short, sturdy stem from light colored clay. Create the mushroom cap separately, then press the two pieces together carefully. Add fine lines underneath the cap to recreate the delicate gills found on real mushrooms. Avoid making the stem excessively long or thin because fragile sections can break after drying or baking. A slightly flattened design will also sit more securely against a metal surface. Once the clay has hardened, finish it with a matte protective varnish if desired. Keep the back free from varnish so the adhesive can bond properly. Mushroom magnets look lovely on rustic refrigerators, gardening boards, office memo surfaces, and metal entryway cabinets. Create several mushrooms in coordinating colors and varied sizes to achieve a more attractive collected woodland appearance.
3. Terrazzo Arch Magnets
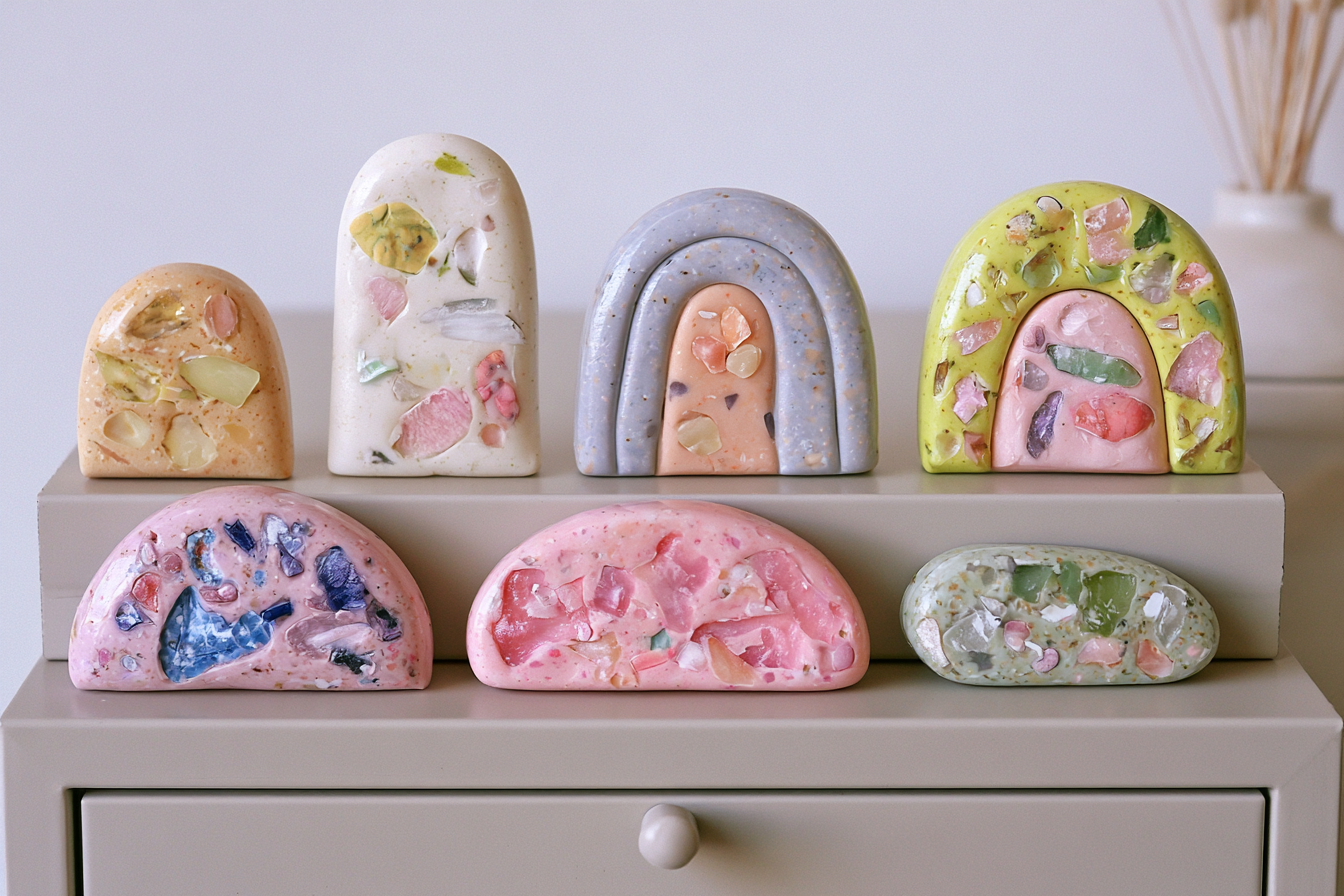
Terrazzo arch magnets are a stylish choice for colorful modern homes. Roll beige, off white, or pale gray clay into a sheet approximately four millimeters thick. Scatter tiny pieces of contrasting clay across the surface, then gently roll over them so they become embedded in the base. Use a clay cutter or clean craft blade to create a rounded arch shape. Smooth the edges with a silicone modeling tool for a more polished finish. Clay that is too thin may crack, while an excessively thick design can become unnecessarily heavy. After the piece has been baked or dried, attach a strong magnet that is appropriately sized for its weight. Terrazzo arches can decorate minimalist kitchens, home office boards, filing cabinets, and simple metal furniture in the entryway. Use the same color palette across several different shapes and sizes to create a coordinated collection without making the display appear repetitive.
4. Botanical Magnets with Pressed Flower Textures
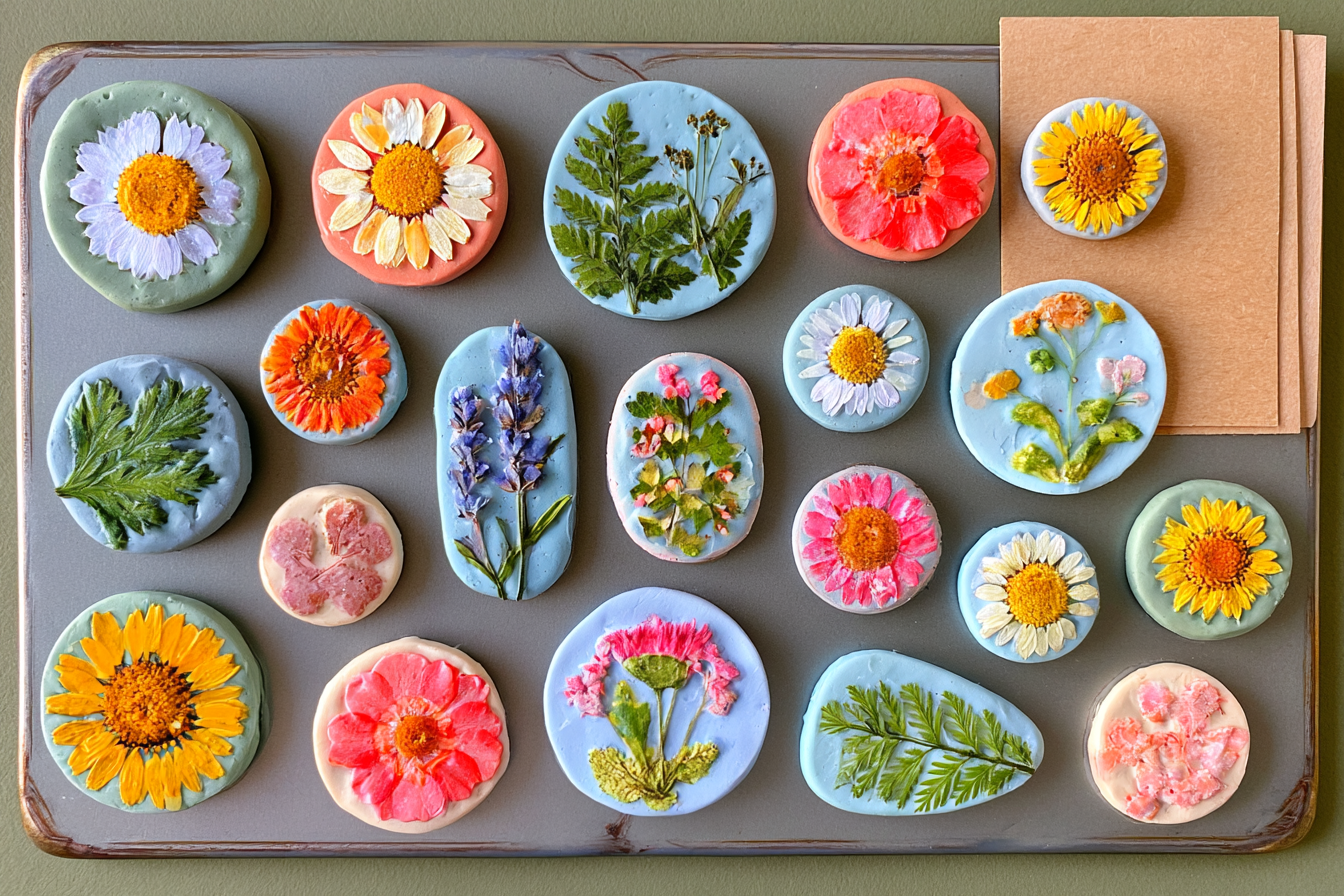
Transfer the delicate textures of daisies, ferns, lavender, or small leaves onto clay to create nature inspired magnets. Roll air dry clay on a clean surface and cut it into circles, ovals, or irregular organic shapes. Place a clean, dry leaf on the clay and press it down gently. Carefully lift the leaf to reveal the natural vein pattern left behind. Once the clay has dried completely, use a fine brush to paint the recessed details in green, mustard, terracotta, or soft pastel shades. If you choose to leave a real dried flower on the surface, protect it with an appropriate moisture resistant coating. Turning the pieces before they are fully dry can cause warping. Botanical magnets are suitable for kitchen spice racks, home office inspiration boards, metal gardening stations, or surfaces used for displaying plant care notes. Air dry clay designs should not be placed in damp bathrooms or exposed directly to water.
5. Cute Breakfast Food Magnets
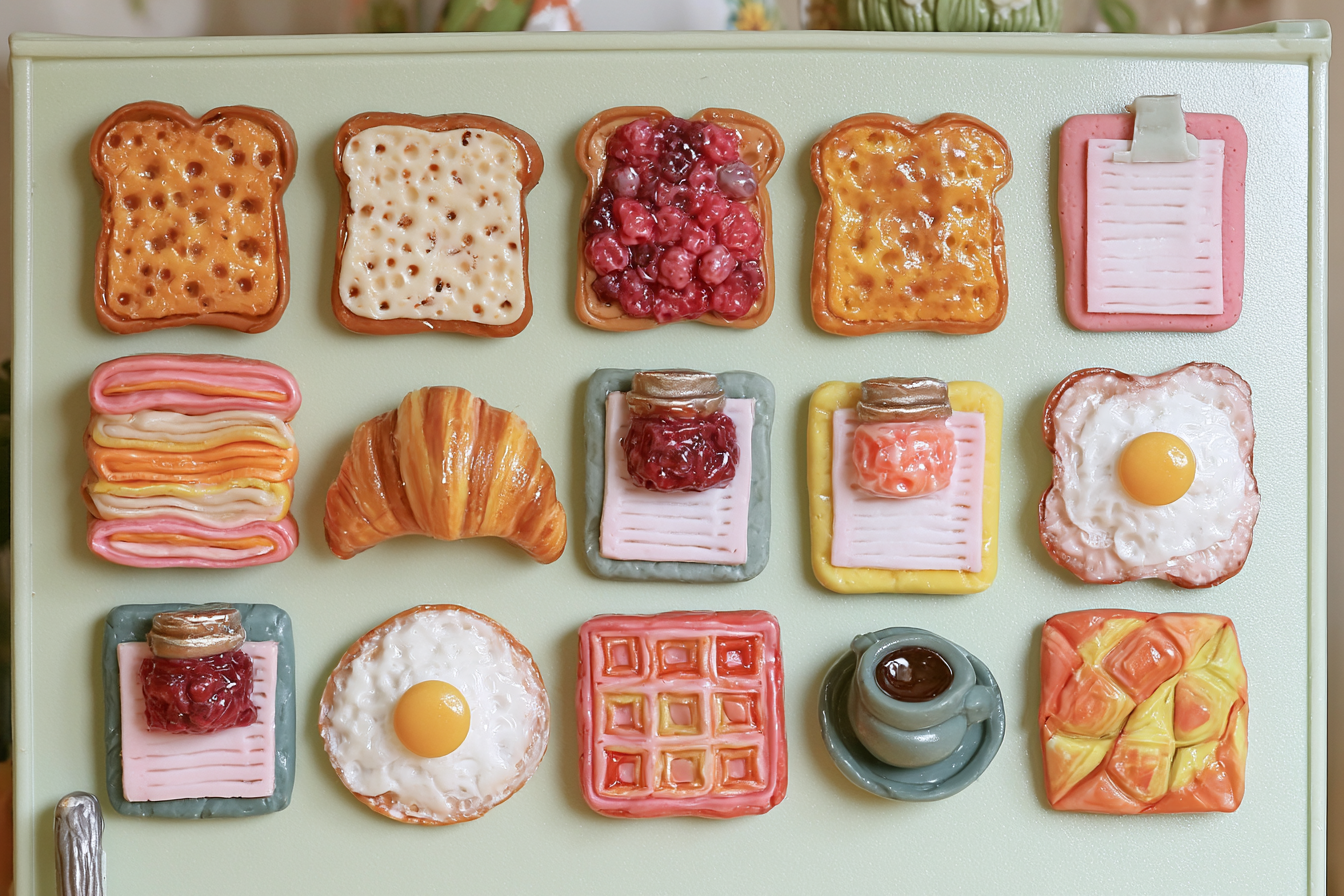
Miniature toast, croissants, waffles, jam jars, coffee cups, and fried eggs can bring a playful personality to the kitchen. Rather than sculpting every item as a fully three dimensional object, create a raised design with a flat back. This method reduces weight and helps the magnet rest securely against the surface. Add tiny dots to toast, curved layers to croissants, and evenly spaced squares to waffles for a more recognizable finish. Color can be added with different shades of clay before baking or with acrylic paint afterward. Allow the paint to dry thoroughly before applying a water based protective varnish. These breakfast magnets are perfect for holding weekly menus, recipe cards, and shopping notes on the refrigerator. Thin elements such as mug handles can break easily, so connect them firmly to the main body and avoid making them too narrow. A coordinated breakfast collection can also decorate a kitchen coffee station.
6. Personalized Pet Portrait Magnets
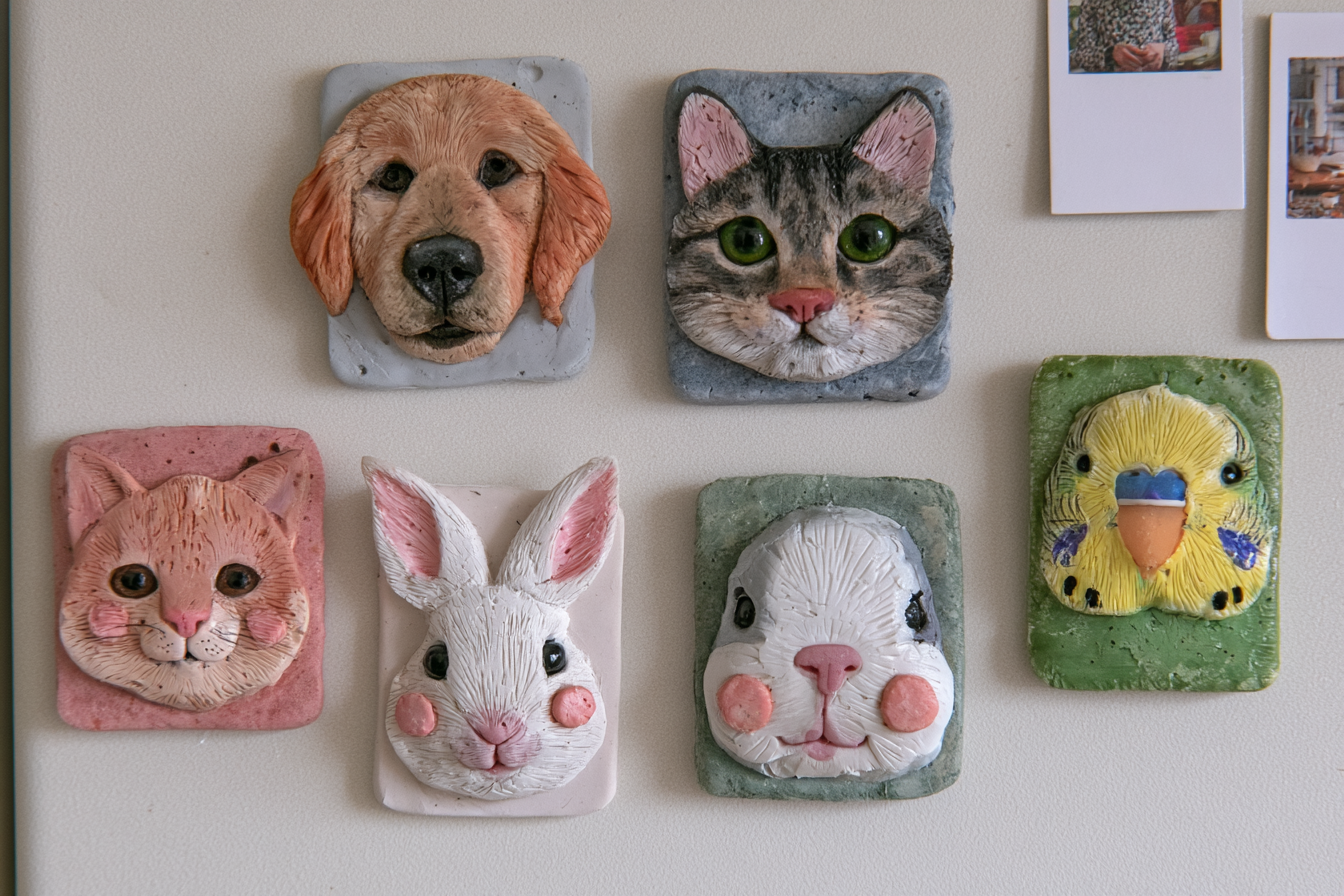
Turn the face of a cat, dog, rabbit, or bird into a small clay portrait for a truly personal decoration. Begin by studying the animal’s most recognizable characteristics. Ear shape, fur color, facial markings, nose structure, and eye placement are the details that create a convincing resemblance. Form the head on a thin clay base, then add the cheeks, eyes, nose, and other features in separate layers. Use a rounded modeling tool to create fur texture without cutting too deeply into the clay. Keep the back completely flat and leave enough room for the magnet. If you are working with polymer clay, never place plastic eyes or other accessories that are not heat safe in the oven. Pet portrait magnets can hold family photographs, display veterinary reminders, or organize feeding schedules on the refrigerator. They also make thoughtful handmade gifts for pet owners and can be customized for different animals.
7. Seashell and Coral Texture Magnets
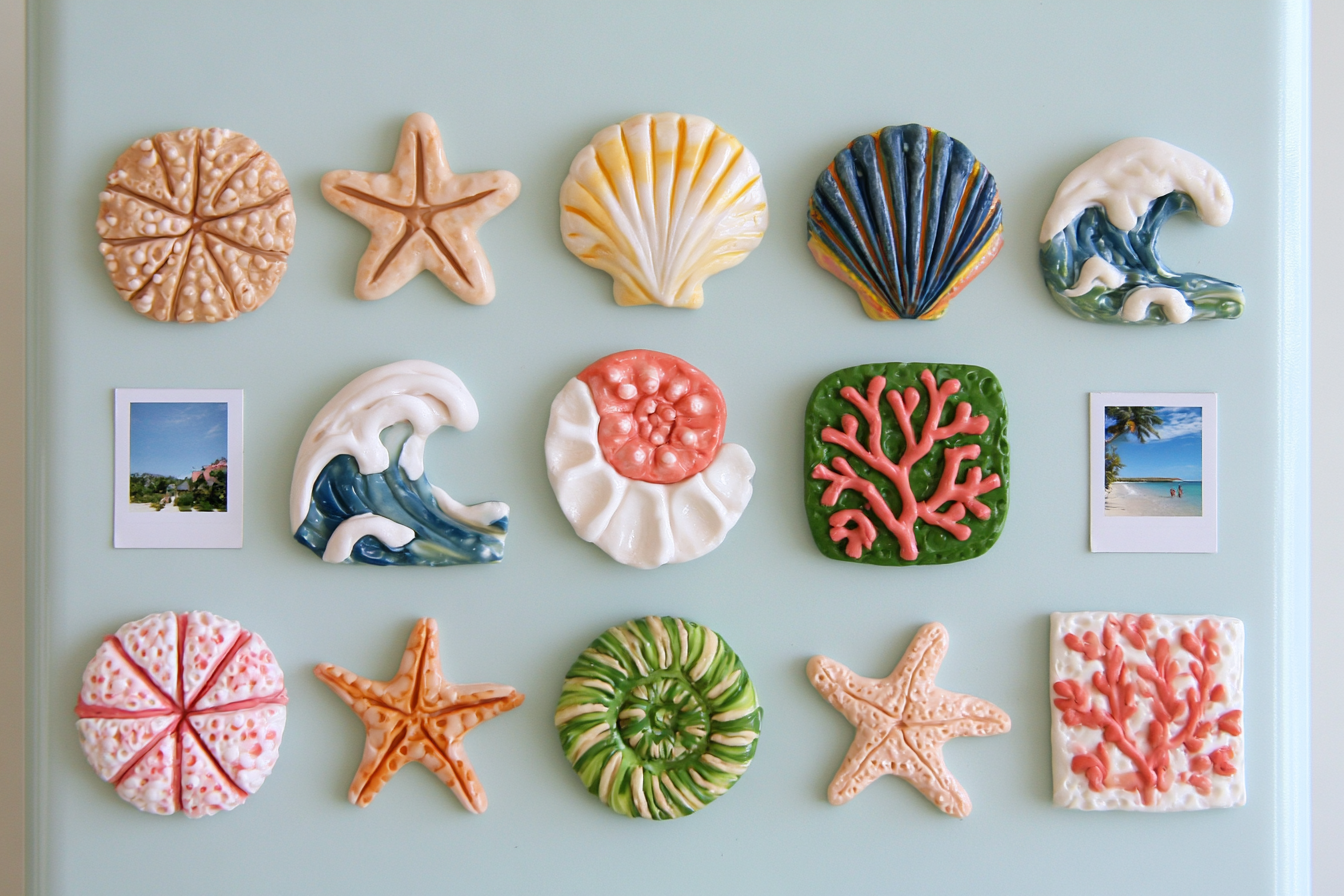
Create a coastal collection featuring seashells, starfish, waves, and coral inspired forms. Cream, sandy beige, muted blue, sea green, and soft coral shades provide a balanced color palette for this theme. Instead of turning real shells into magnets, press clean shells into soft clay to transfer their natural patterns. This technique recreates coastal textures while allowing the shells to remain intact. The clay should be firm enough to hold the impression without sticking heavily to the shell. Once the pieces have hardened, lightly brush a paler color over the raised surfaces to emphasize the texture. Attach magnets strong enough to support the weight of the finished clay. Coastal magnets can be used on refrigerators in beach houses, magnetic bathroom cabinets, or boards displaying vacation photographs. Keep air dry clay pieces away from sinks, showers, and other areas where they may regularly come into contact with moisture.
8. Moon Phase Magnet Set
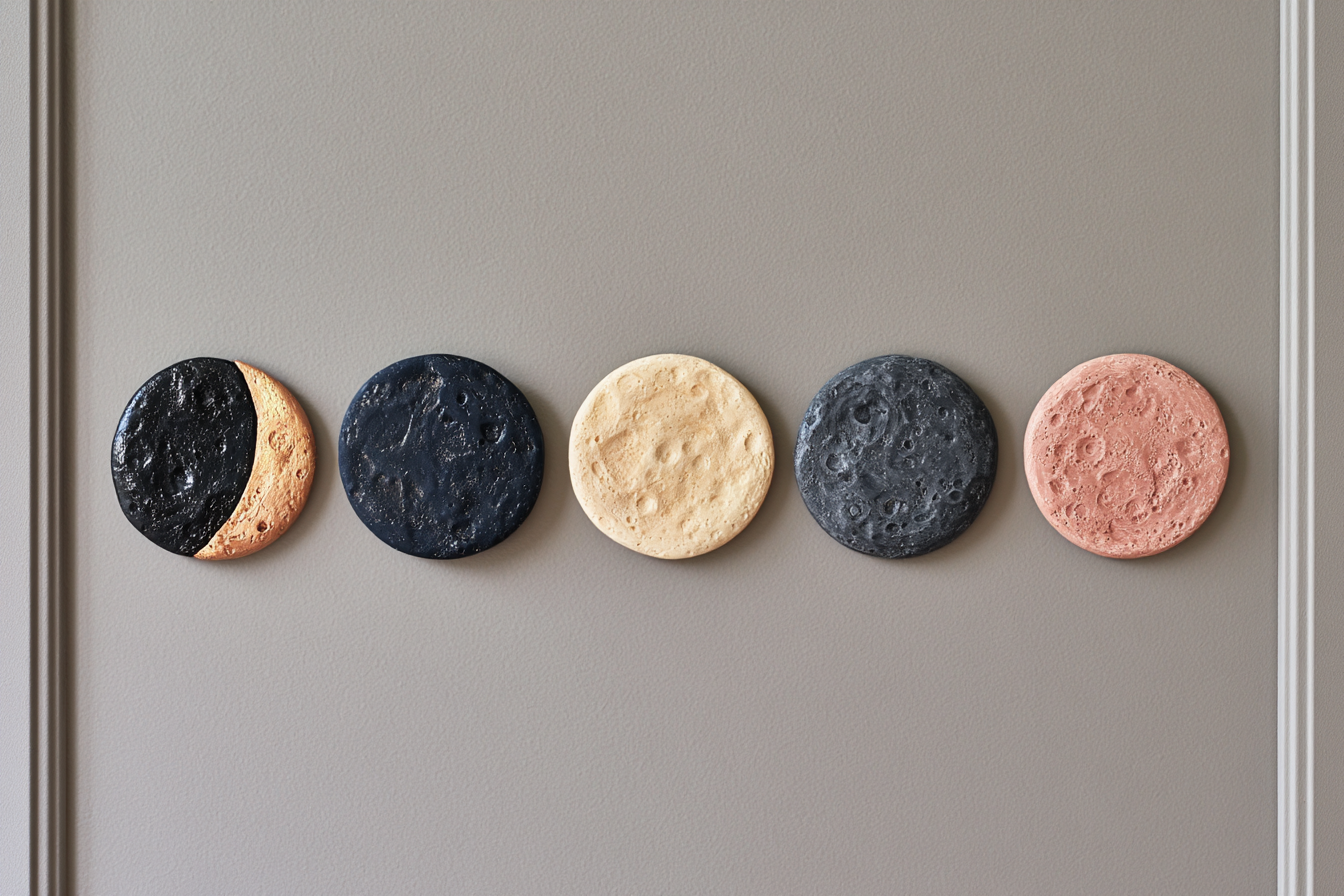
A magnet collection representing the new moon, crescent moon, first quarter, full moon, and last quarter can give a workspace a calm and artistic character. Roll black, dark blue, charcoal gray, or earthy clay to an even thickness. Cut circles in the same size, then shape or paint each piece to represent a different lunar phase. Use a rounded tool to add subtle craters and surface textures. Small metallic paint details can highlight the raised areas, although excessive glitter may reduce the refined appearance of the set. Attach every magnet at the same position on the back so the pieces line up neatly when displayed. Moon phase magnets can mark monthly goals on a home office board, organize calendar reminders, or decorate a metal bedroom cabinet. Strong magnets must always be kept out of reach of young children. Displaying the phases in their correct sequence creates a more thoughtful and visually organized arrangement.
9. Miniature Colorful House Magnets
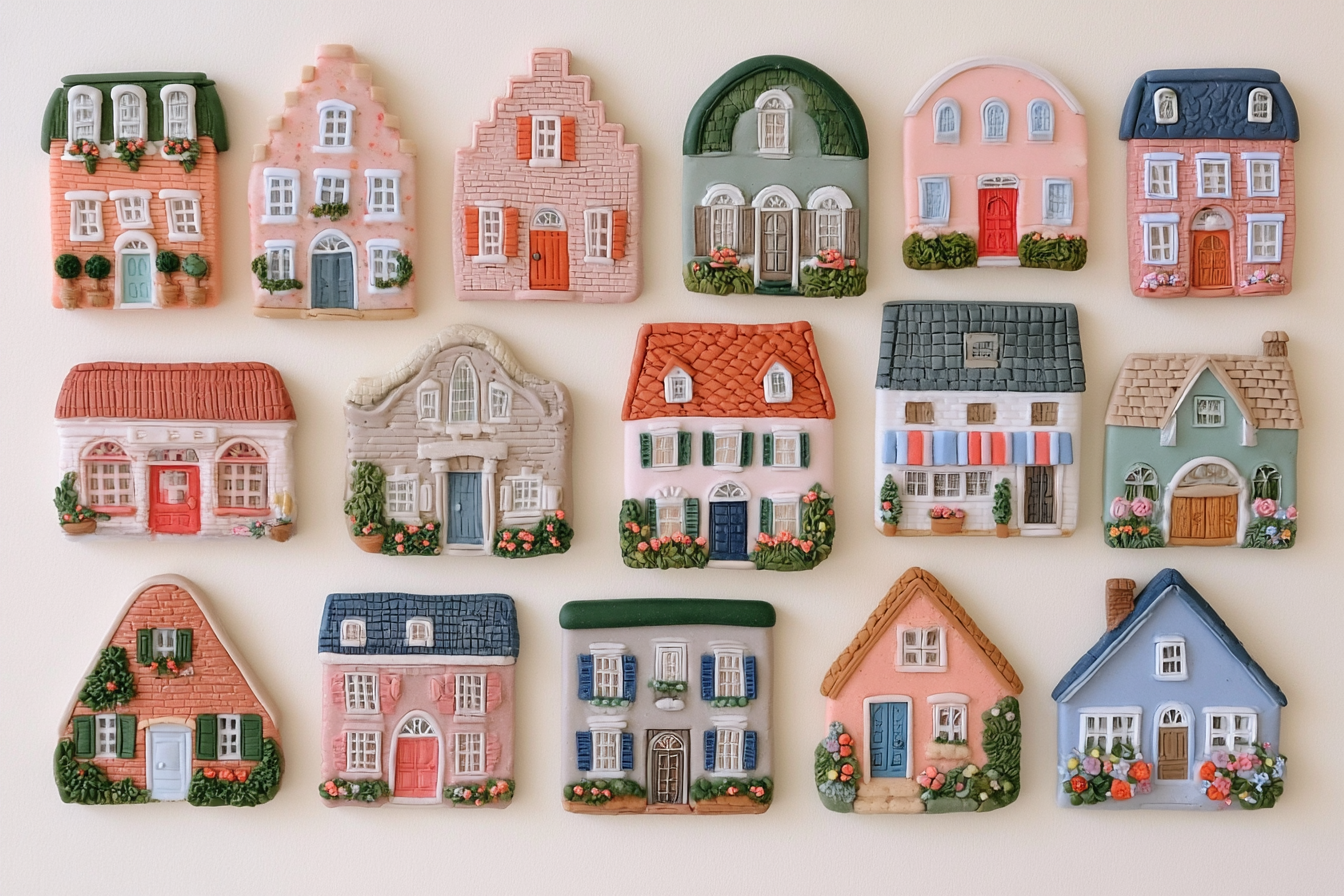
Design a collection of pastel houses, small shops, and charming town buildings to create a miniature street across the refrigerator. Begin with rectangular clay bases and shape the upper sections into triangular, curved, or stepped roofs. Add doors, windows, awnings, bricks, and roof tiles using thin pieces of clay. Keep the details slightly raised rather than heavily three dimensional to improve durability. Limiting each house to two or three main colors will help the entire collection look coordinated. You can prepare small paper templates in advance to keep windows and doors consistent in size. Miniature house magnets can organize family notes on the refrigerator, decorate a metal key cabinet in the entryway, or create an imaginary town on a child’s magnetic board. Vary the building heights, roof shapes, and architectural details so the finished street looks creative and lively without becoming visually crowded.
10. Clay Patchwork Quilt Magnets
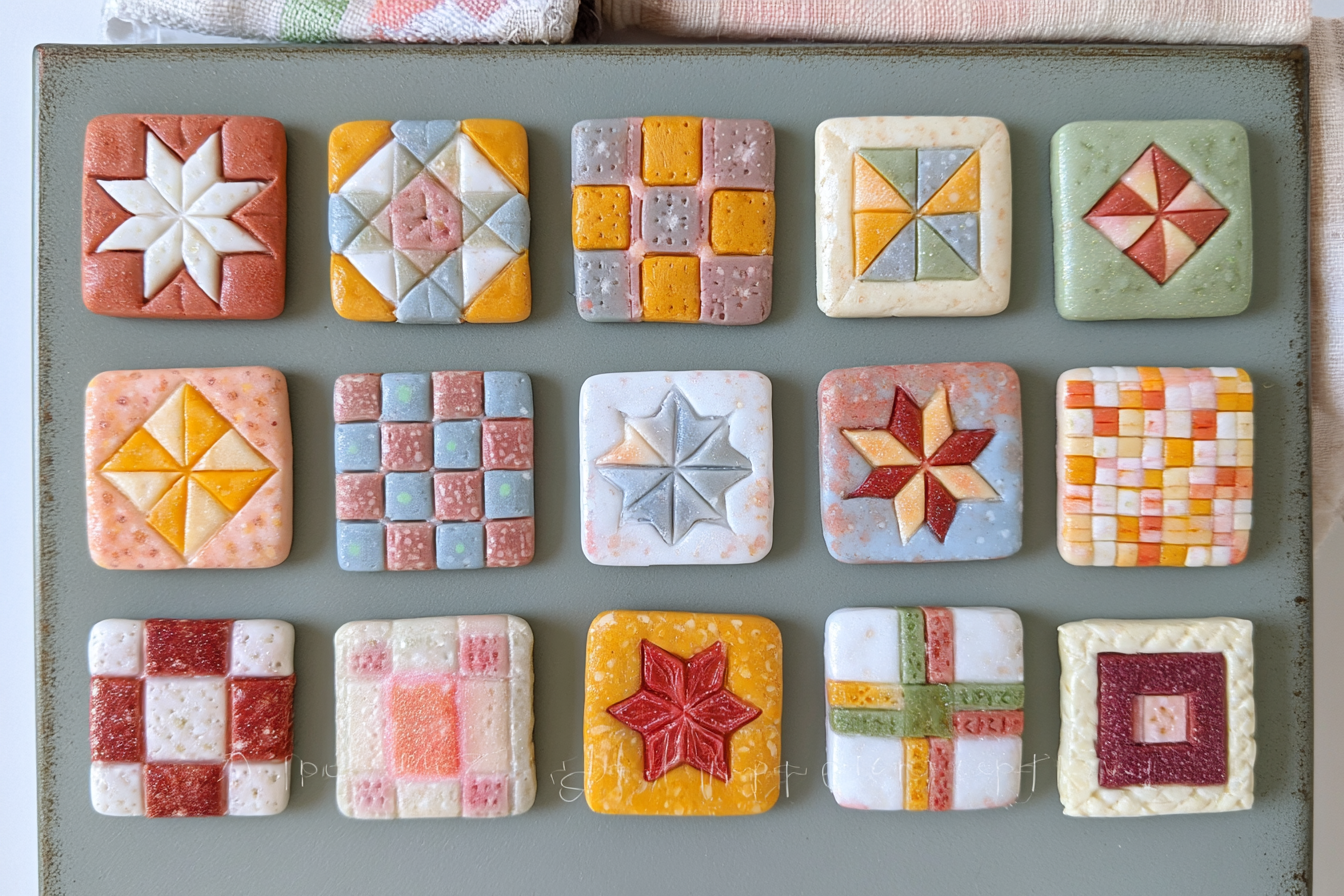
Combine traditional patchwork patterns with contemporary colors to create square magnets suited to country, farmhouse, and modern interiors. Cut small triangles, squares, and strips from several shades of clay. Arrange the pieces into star blocks, checkerboard patterns, pinwheels, or geometric flowers. Once the design is complete, cover it with parchment paper and roll over it very gently to join the sections. Excessive pressure may distort the shapes or blend the colors together. Use a square cutter so all magnets have consistent dimensions, then smooth the edges before hardening the clay. Attach the magnet in the center of the back for balanced support. Patchwork magnets can organize family recipes in the kitchen, hold fabric samples in a sewing room, or decorate a metal craft cabinet. This project is also an excellent way to reuse small leftover pieces of clay and reduce unnecessary material waste.
11. Interchangeable Seasonal Magnet Collection
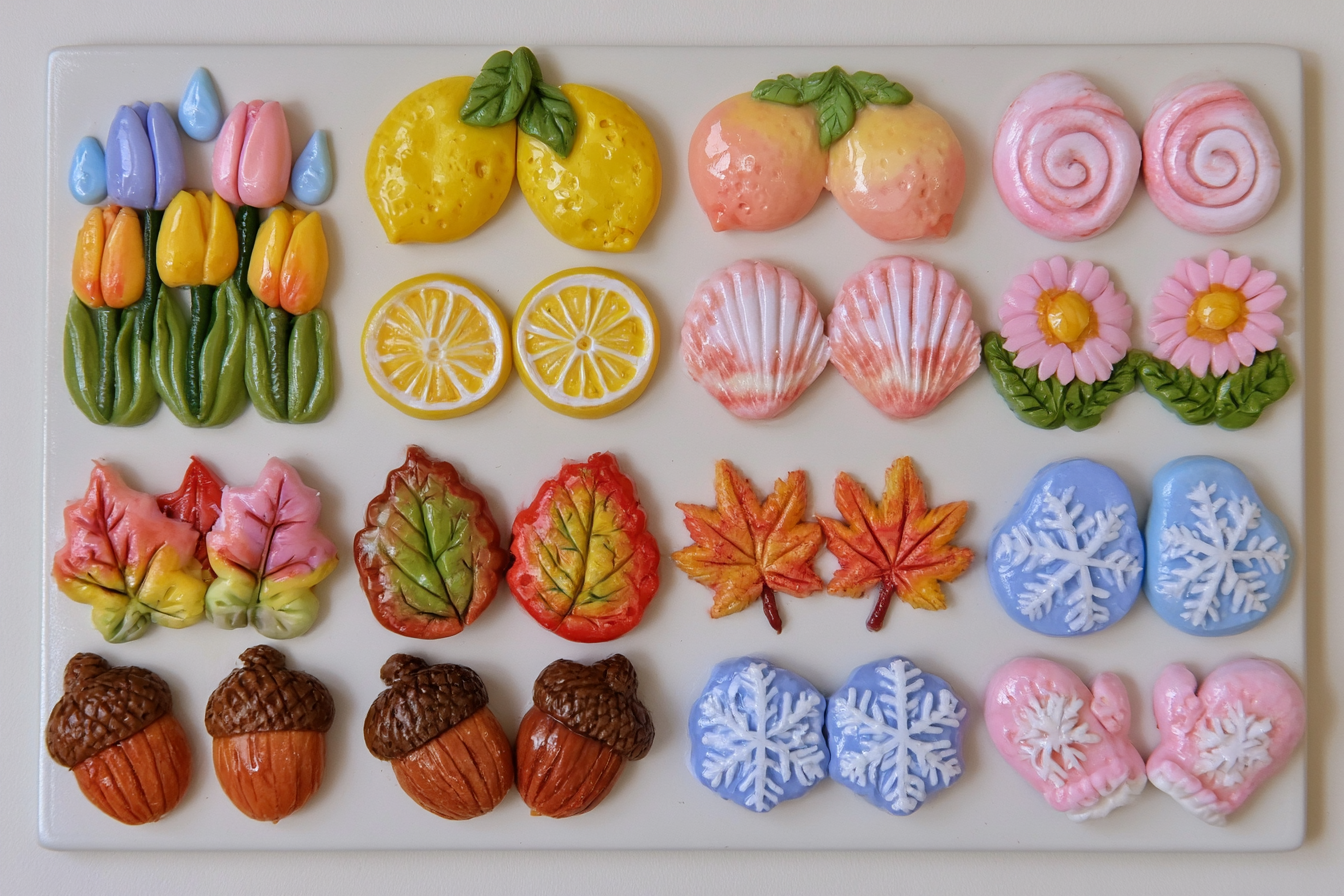
Make a collection that changes throughout the year by creating small clay symbols for every season. Choose tulips and raindrops for spring, lemons and seashells for summer, leaves and acorns for autumn, and snowflakes or mittens for winter. Maintain a similar size, thickness, and shared color palette so all the pieces feel like part of one coordinated set. Whenever possible, form small details directly from the main clay body instead of attaching many fragile projections. This will make the magnets less likely to break while being stored. Keep designs that are not currently in use inside a metal box with enough separation to prevent scratching. Seasonal magnets can decorate a family calendar, identify seasonal recipes on the refrigerator, or organize reminders on an entryway board. Adding several new designs each year can gradually turn this simple project into a meaningful handmade decorating tradition for the home.
12. Functional Clay Note Holder Magnets
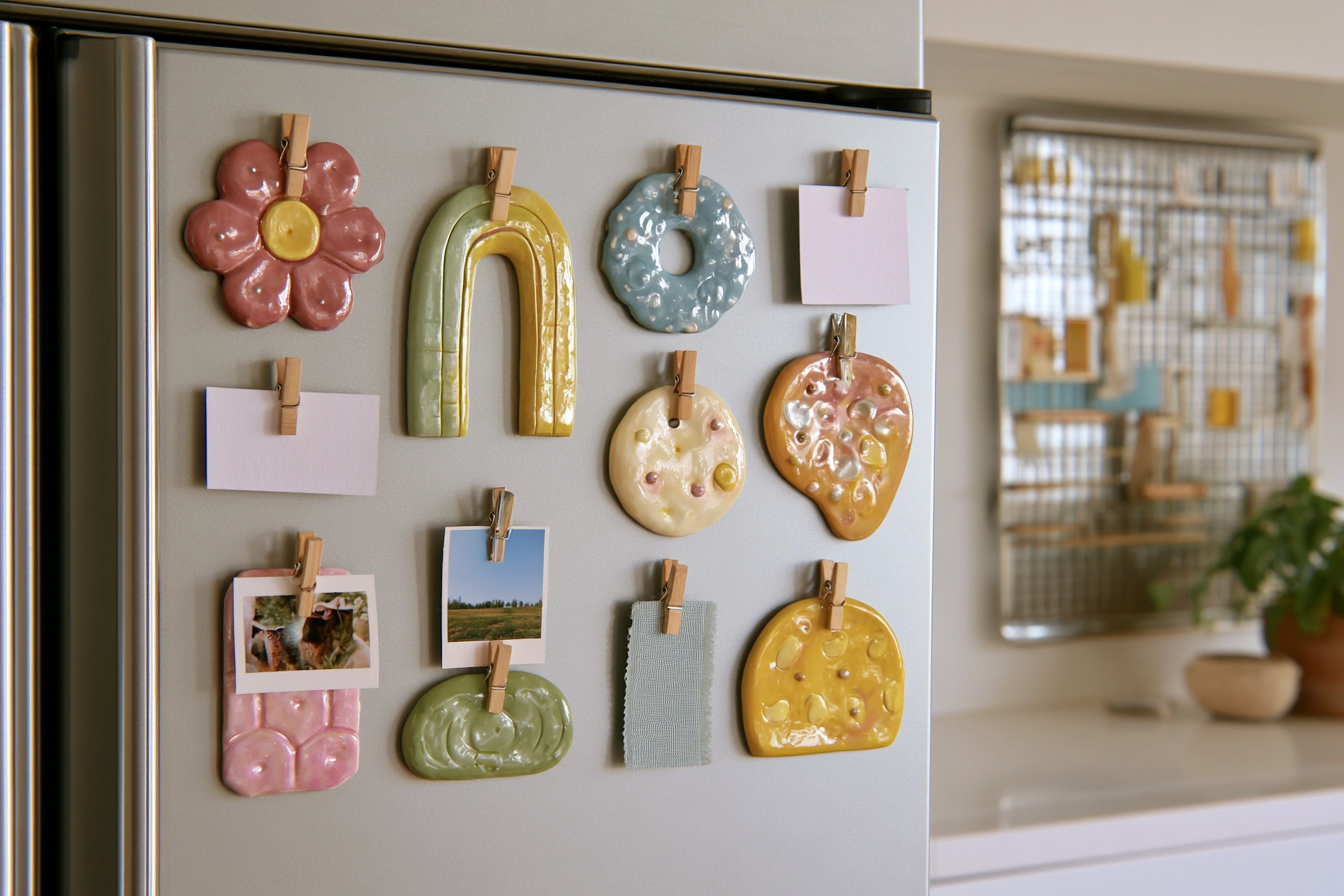
Combine decorative clay bases with miniature wooden clothespins or metal clips to create magnets that are both attractive and practical. Begin with a strong clay base in the shape of a flower, arch, circle, or irregular organic form. Leave enough space on the back for a magnet and on the front for the chosen clip. Do not attach the clip before the clay has finished baking or drying because pressure and movement may cause cracking. Secure all separate components afterward with a strong adhesive suitable for clay, metal, or wood. Position the clip so opening it does not put excessive pressure on the decorative base. These functional magnets can hold shopping lists, recipe cards, children’s schedules, delivery reminders, photographs, or small fabric samples. The clay should not be unnecessarily thick because extra material increases the overall weight. Select a magnet capable of supporting the completed design as well as the paper or card held by the clip.
MORE IDEAS


Share
What's Your Reaction?
 Like
0
Like
0
 Dislike
0
Dislike
0
 Love
0
Love
0
 Funny
0
Funny
0
 Angry
0
Angry
0
 Sad
0
Sad
0
 Wow
0
Wow
0








