
13 Beautiful DIY Leaf Projects to Decorate Your Home

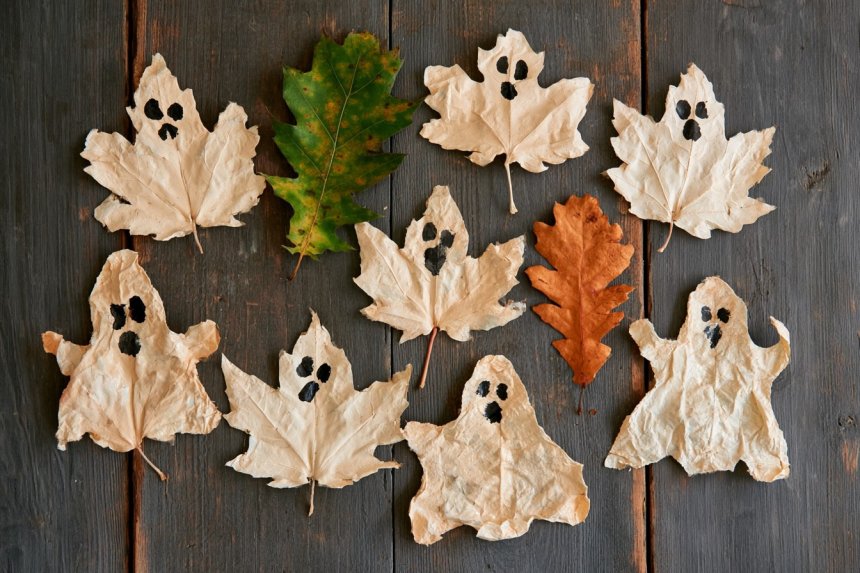
Leaves collected from nature are among the most affordable and versatile materials you can use for handmade home decorations. Their distinctive shapes, veins, sizes, and seasonal colors can be transformed through pressing, drying, painting, printing, and molding techniques. Leaf crafts are not limited to autumn decorating. Fresh green leaves are suitable for spring and summer projects, while dried leaves in earthy colors can create timeless botanical accents throughout the year. Before beginning, make sure every leaf is clean, dry, and free from insects. The following projects include clear instructions, recommended materials, practical tips, and creative ways to display finished leaf crafts in different areas of your home.
1. Create Framed Botanical Art with Pressed Leaves
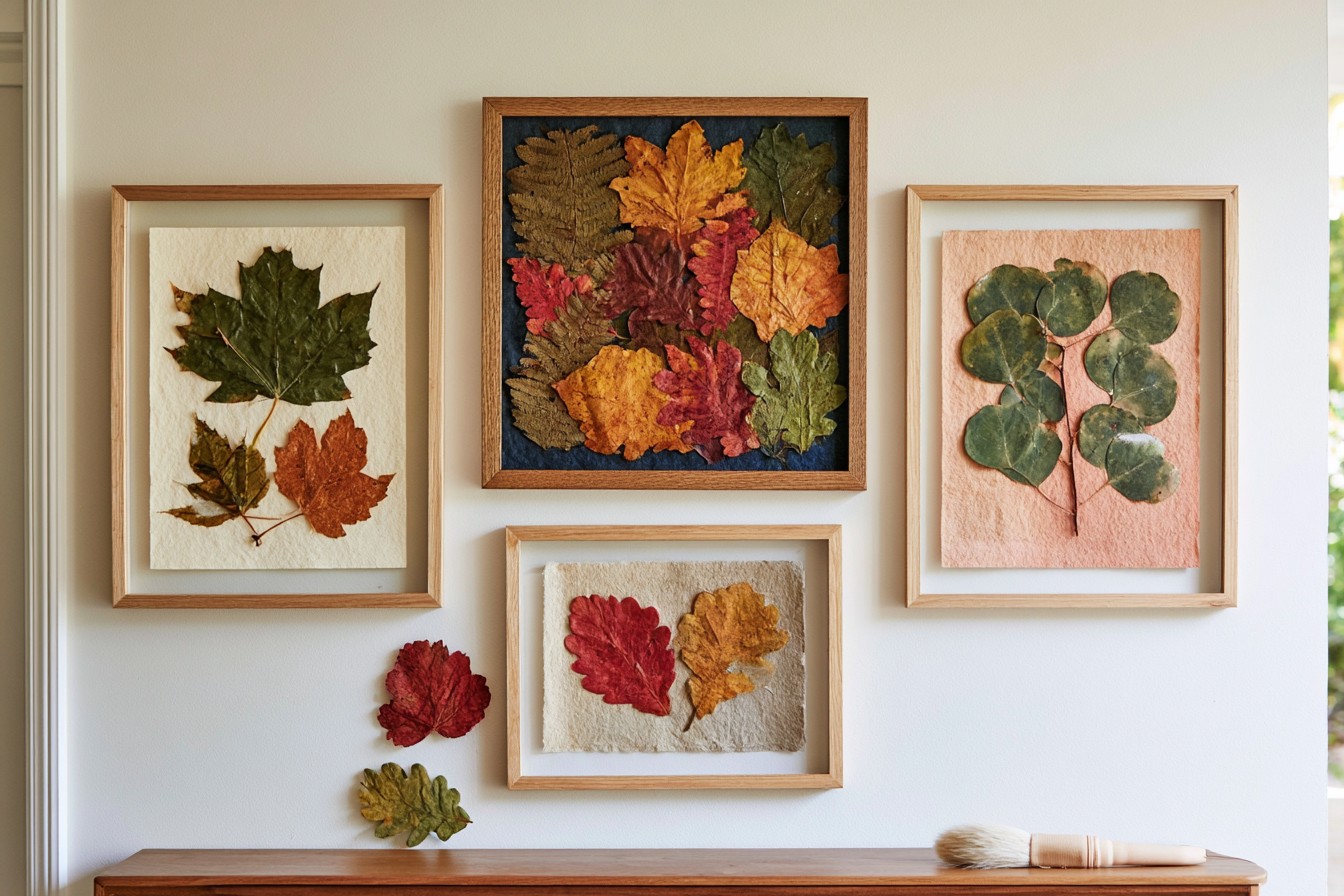
To create botanical wall art, gather leaves in different sizes and shapes, heavy books, absorbent paper, thick cardstock, acid-free glue, and a glass-fronted frame. Position each leaf between two sheets of absorbent paper and place them inside a heavy book for approximately one week. Once the leaves are completely dry and flat, arrange them on cream, beige, soft green, or another neutral background. Experiment with their positions before applying glue so you can develop a balanced composition. Use only a small amount of adhesive on the back of each leaf to prevent visible marks. Display the finished artwork in a hallway, home office, living room, or along a staircase. You can also make three coordinated frames featuring different leaf varieties to create a sophisticated botanical gallery wall.
2. Make an Air-Dry Clay Leaf Trinket Dish
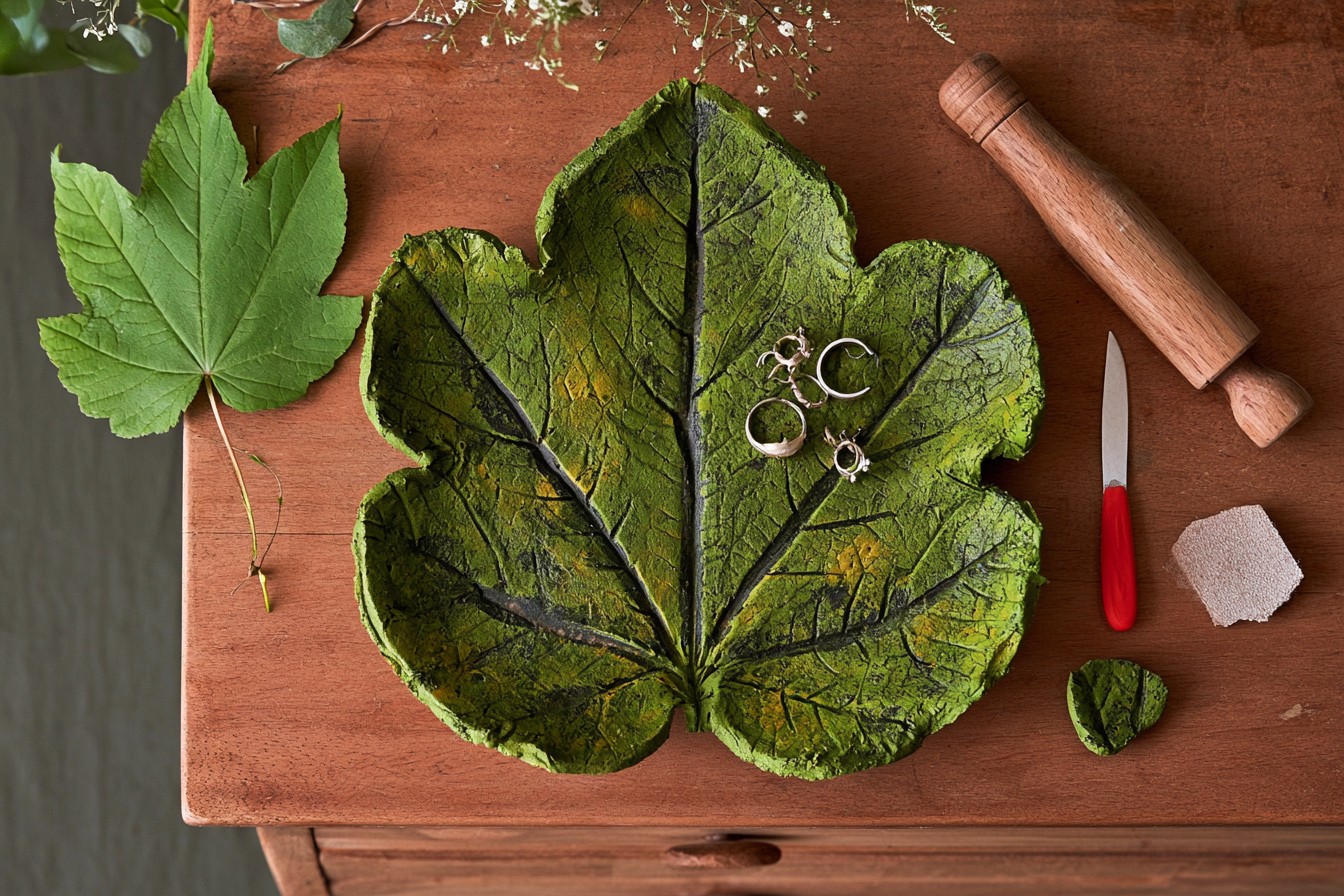
An air-dry clay leaf dish can hold rings, earrings, keys, coins, or small office supplies while adding a natural accent to your room. You will need air-dry clay, a rolling pin, a leaf with clearly defined veins, a modeling knife, water-based paint, and protective varnish. Roll the clay until it is approximately half a centimeter thick. Place the veined side of the leaf against the clay and gently press it down with the rolling pin. Carefully remove the leaf and cut around its outline. Lift the clay edges slightly to form a shallow dish. After the clay has dried completely, smooth rough areas with fine sandpaper. Paint the recessed veins in a darker shade to highlight the botanical texture. Use the finished dish on an entryway table, bedroom dresser, bathroom counter, or home office desk.
3. Design a Leaf-Printed Linen Tablecloth
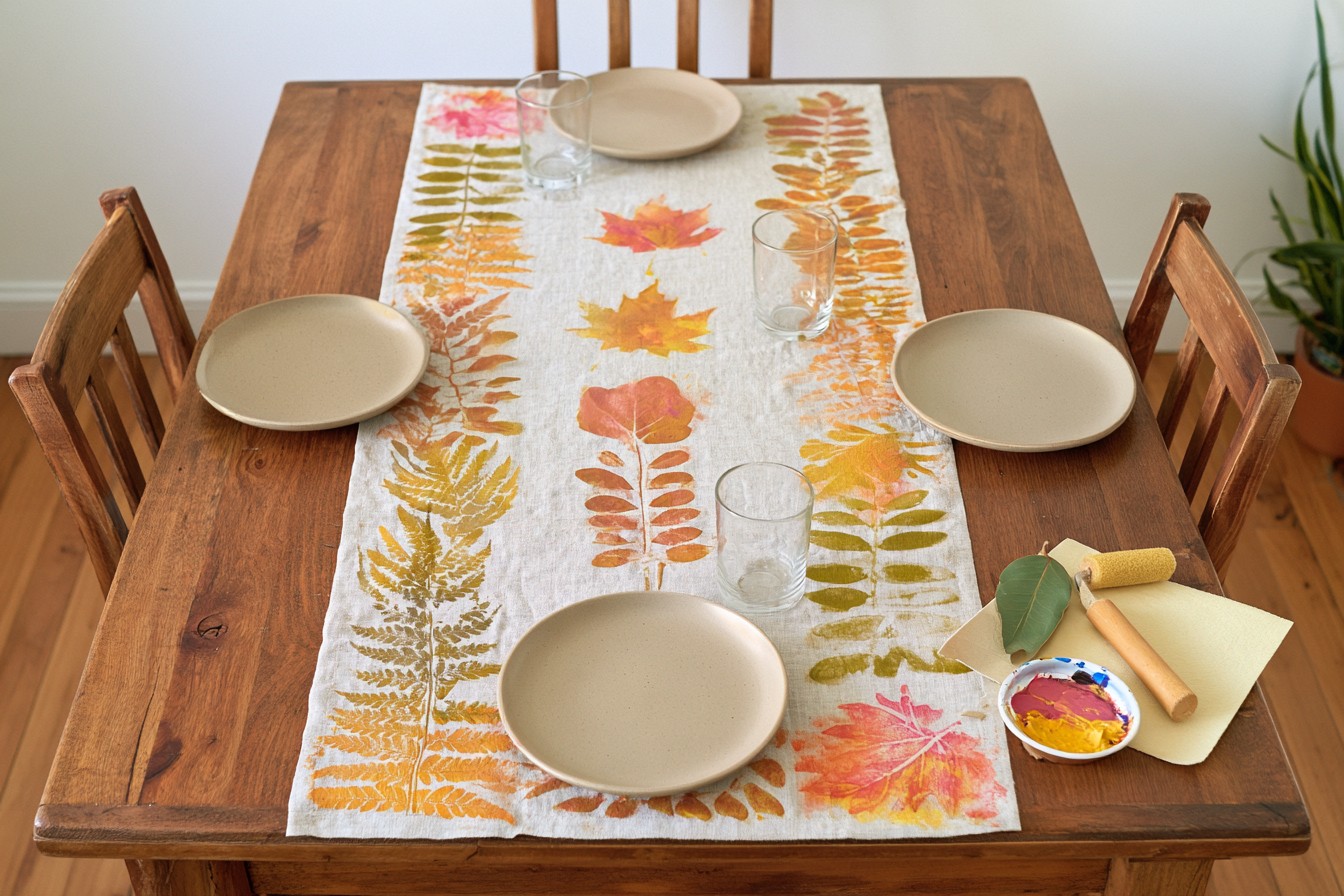
Transform a plain tablecloth with natural botanical prints using cotton or linen fabric, fresh leaves, fabric paint, a sponge roller, protective cardboard, and an iron. Wash and press the fabric before beginning so it lies flat on your work surface. Insert cardboard beneath the fabric to prevent the paint from transferring to the opposite side. Apply a thin, even layer of textile paint to the veined side of a leaf. Place the painted surface against the fabric, cover it with clean paper, and press firmly without moving the leaf. Repeat the technique around the tablecloth border or create a controlled pattern through the center. Once the paint is dry, heat-set it from the reverse side according to the manufacturer’s directions. The completed tablecloth can decorate a dining table, balcony table, kitchen breakfast area, or seasonal gathering.
4. Assemble a Seasonal Leaf Door Wreath
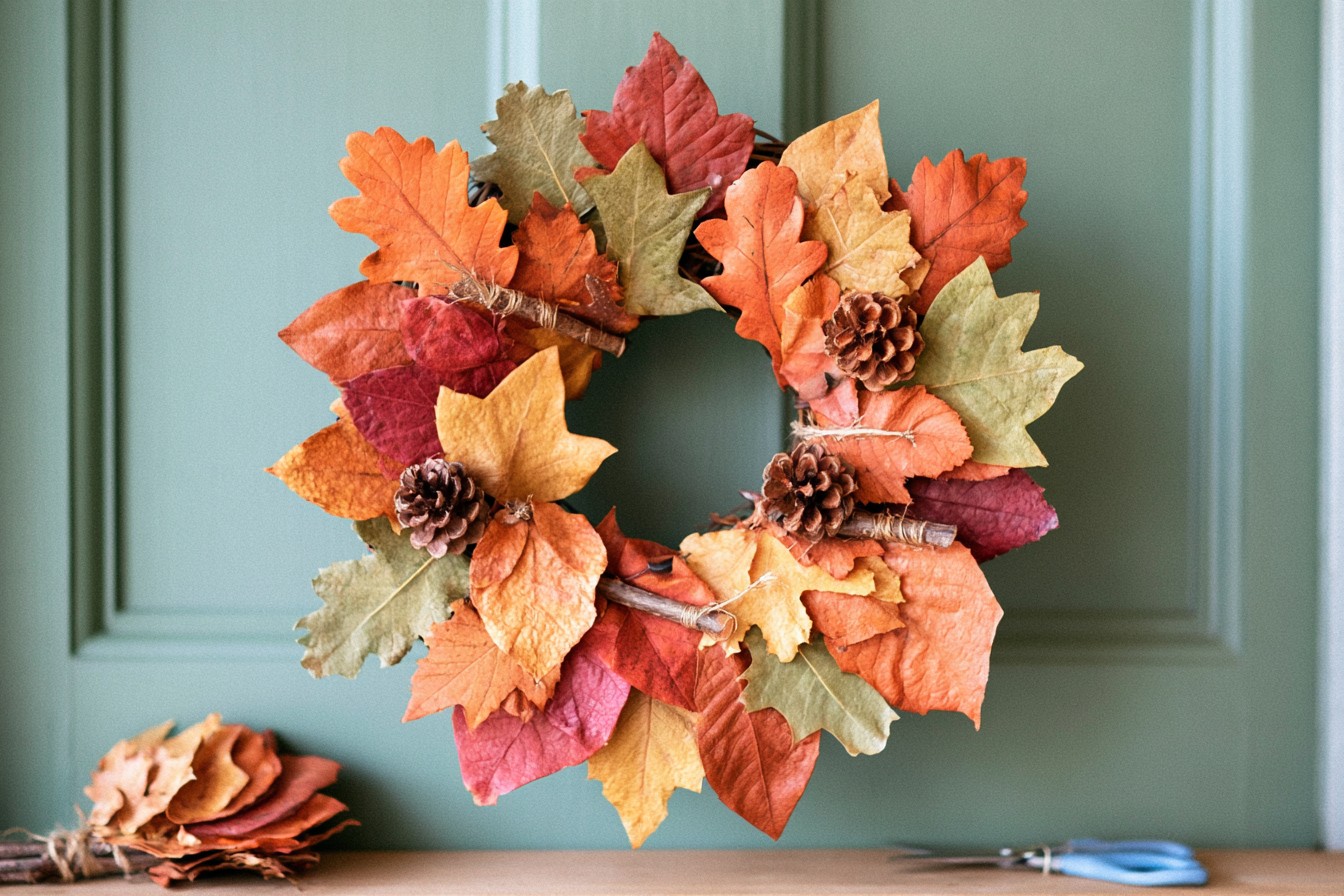
For a reusable seasonal wreath, gather a grapevine or flexible branch base, dried leaves, pinecones, small twigs, natural string, and hot glue. Sort the leaves according to color, condition, and size before arranging them. Attach the largest leaves first to build a full background layer. Place medium and smaller leaves over the open areas, changing their direction occasionally to create natural movement. Allow several leaf tips to extend beyond the base so the wreath does not appear overly structured. Add pinecones and short branches only at selected points to keep the arrangement balanced. Apply hot glue near the sturdy stems rather than directly onto fragile leaf surfaces. Hang the finished wreath on an entrance door, veranda wall, kitchen wall, or hallway hook. When the colors begin to fade, remove the old leaves and decorate the same wreath base with newly collected seasonal materials.
5. Decorate a Wooden Storage Box with Leaf Decoupage
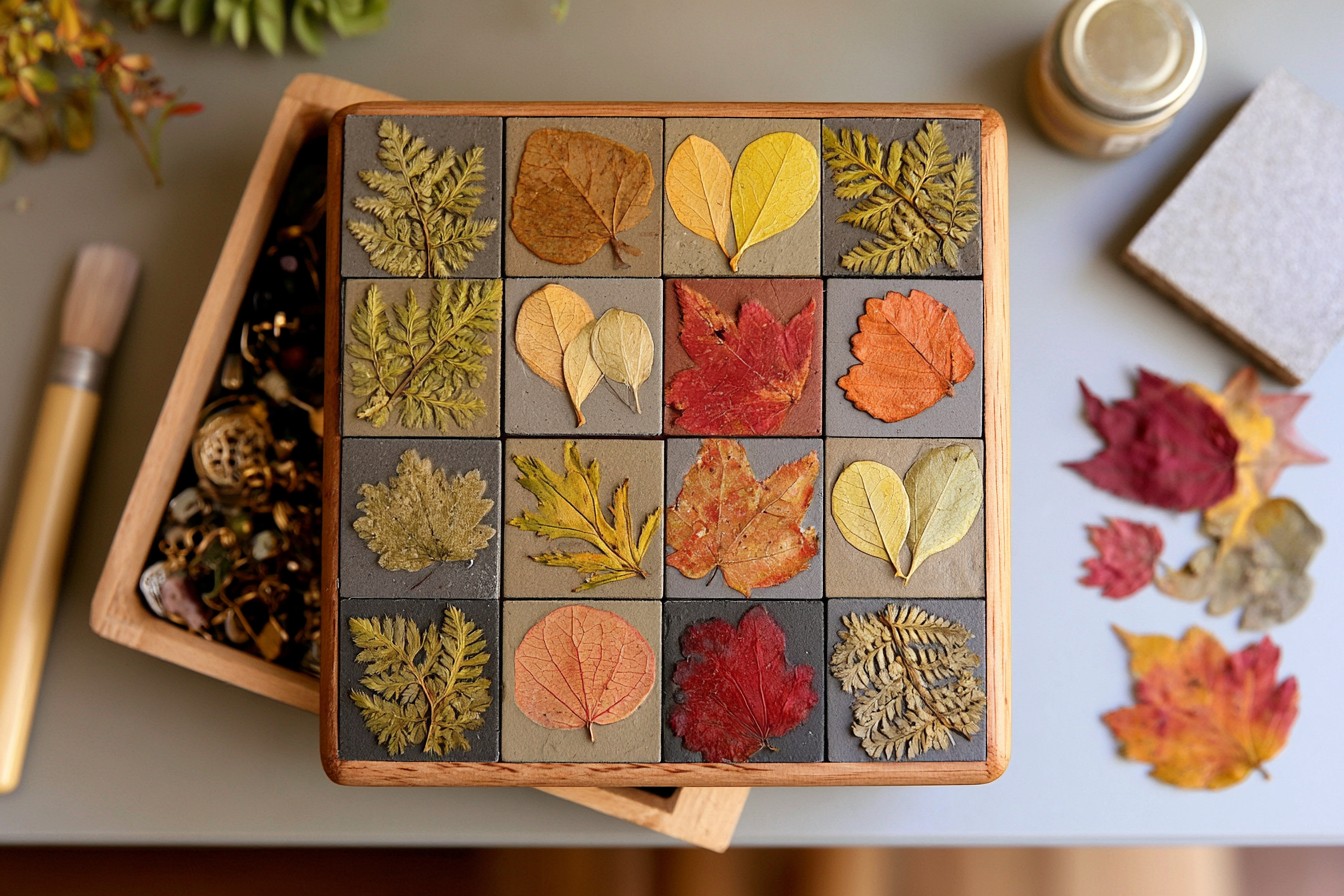
A plain wooden box can become an attractive organizer using pressed leaves and a simple decoupage technique. Prepare a small wooden box, fine sandpaper, water-based paint, pressed leaves, decoupage glue, a soft brush, and matte varnish. Lightly sand the box and remove all dust before applying the background color. Muted cream, warm gray, clay, and pale green work particularly well with natural foliage. Arrange the pressed leaves on the dry surface before gluing them so you can refine the composition. Apply a thin layer of decoupage glue, position the leaves, and gently brush from the center toward the edges to remove trapped air. After the first layer dries, protect the entire surface with two thin coats of varnish. Use the completed box for remote controls, stationery, jewelry, sewing supplies, photographs, or other small household items.
6. Craft a Transparent Pressed Leaf Bookmark
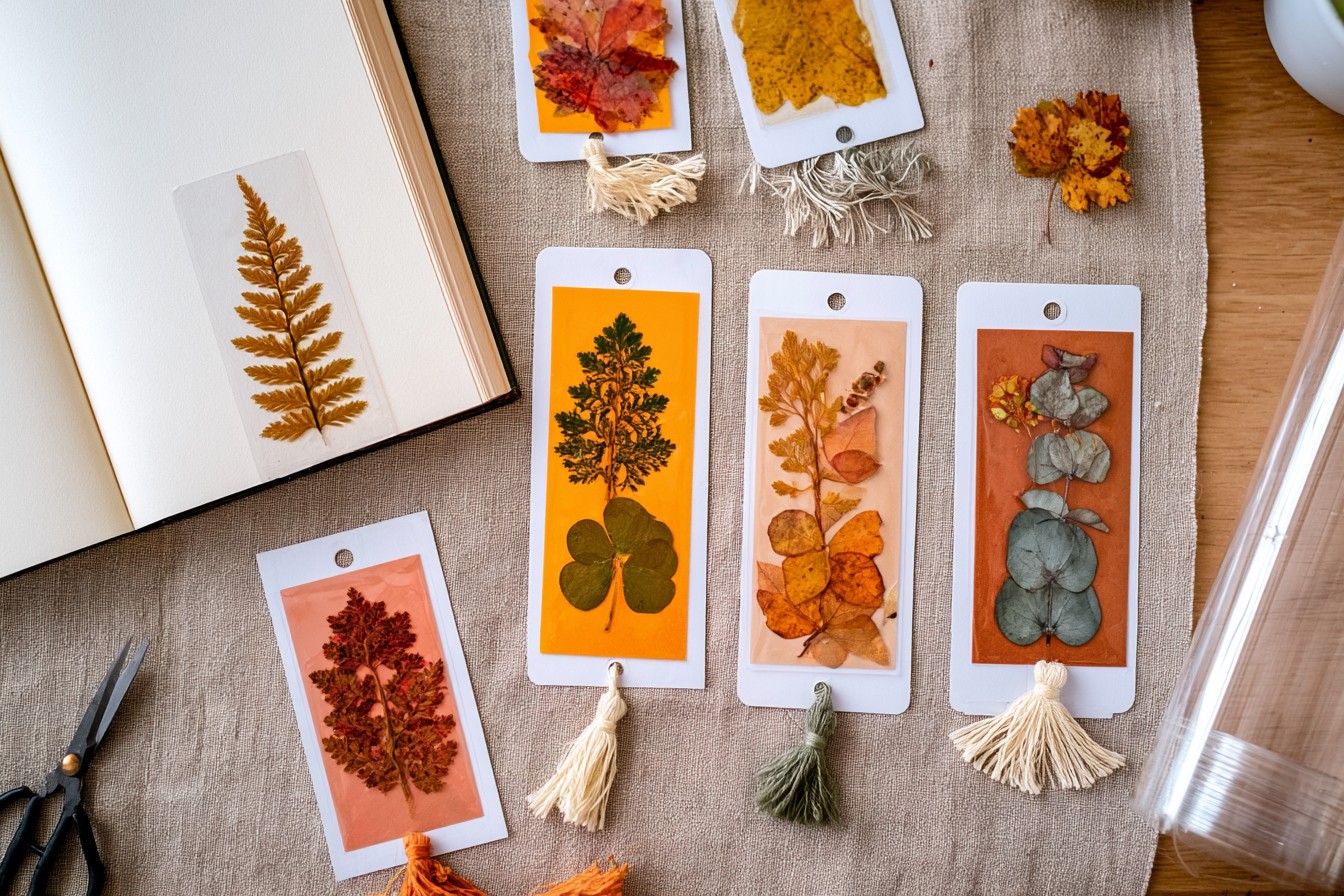
Pressed leaf bookmarks are practical for personal use and thoughtful enough to give as handmade gifts. You will need small leaves, absorbent paper, heavy books, a laminating pouch or wide transparent tape, scissors, a hole punch, and cotton cord. Press the selected leaves between sheets of paper for several days until they are completely dry and flat. Arrange them in a narrow rectangular composition, leaving enough space around each leaf to seal the edges. Place the arrangement inside a laminating pouch and run it through a laminator. If you do not have a machine, carefully seal the leaves between two strips of wide transparent tape. Trim the bookmark into an even shape, round the corners, and punch a hole near the top. Attach a short cotton tassel or cord. These bookmarks are ideal for readers, teachers, students, journal writers, and nature enthusiasts.
7. Make Handmade Leaf Greeting Cards and Gift Tags
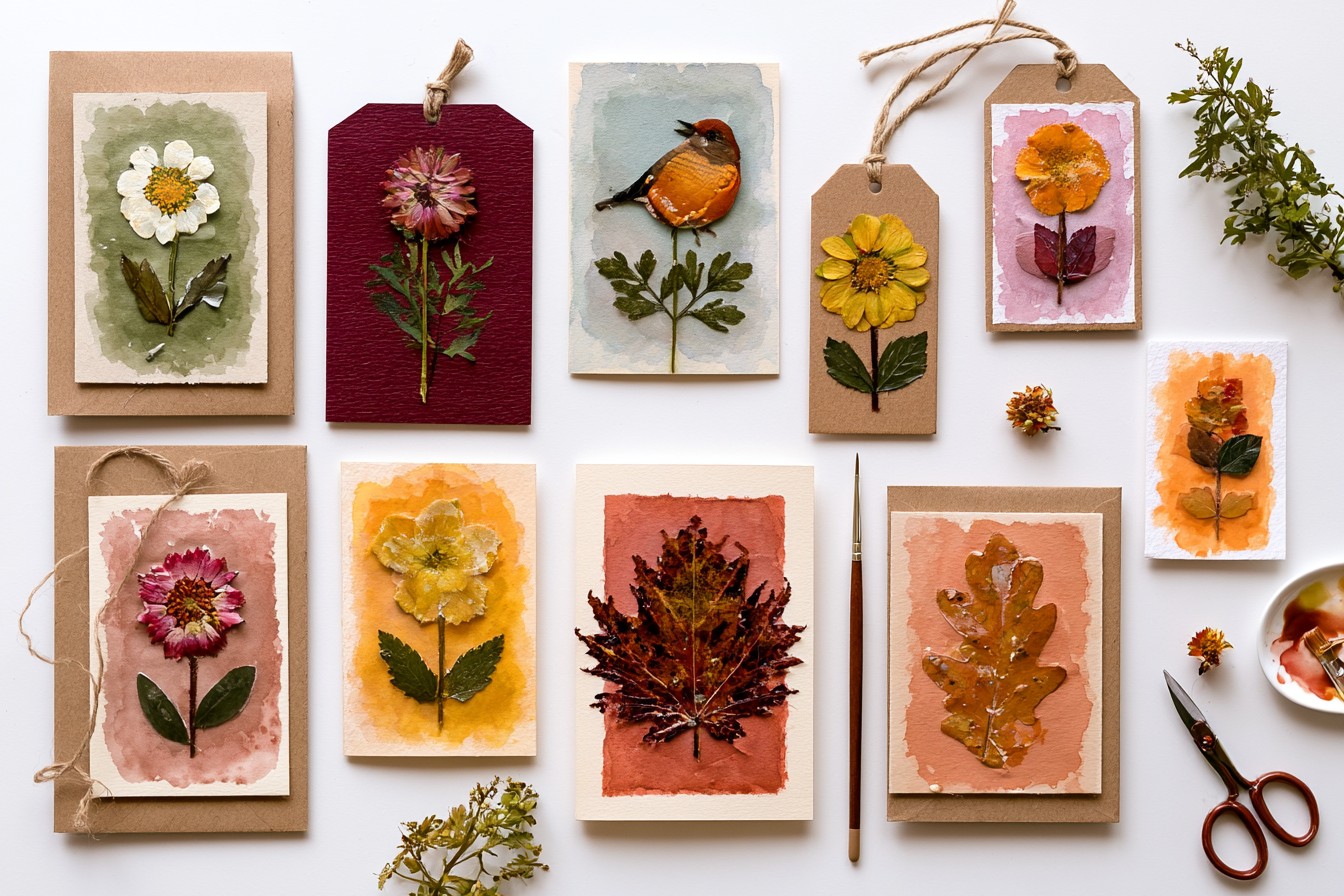
Natural leaves can turn simple cardstock into distinctive greeting cards, place cards, and gift tags. Gather thick kraft paper, pressed leaves, acid-free glue, watercolor paint, a fine brush, and paper scissors. Cut the cardstock to the required size and fold it carefully down the center. Before attaching anything, arrange the leaves on the front to test several compositions. You can use complete leaves or combine smaller sections to form flowers, trees, birds, and geometric patterns. Add a subtle watercolor wash behind the arrangement to make the natural textures more visible. Once the paper is dry, secure each leaf with a minimal amount of adhesive. Place the finished card beneath a light book overnight to keep it flat. Use these designs for birthdays, thank-you notes, housewarming gifts, seasonal celebrations, dinner place settings, or handmade product packaging.
8. Build a Transparent Leaf Window Decoration
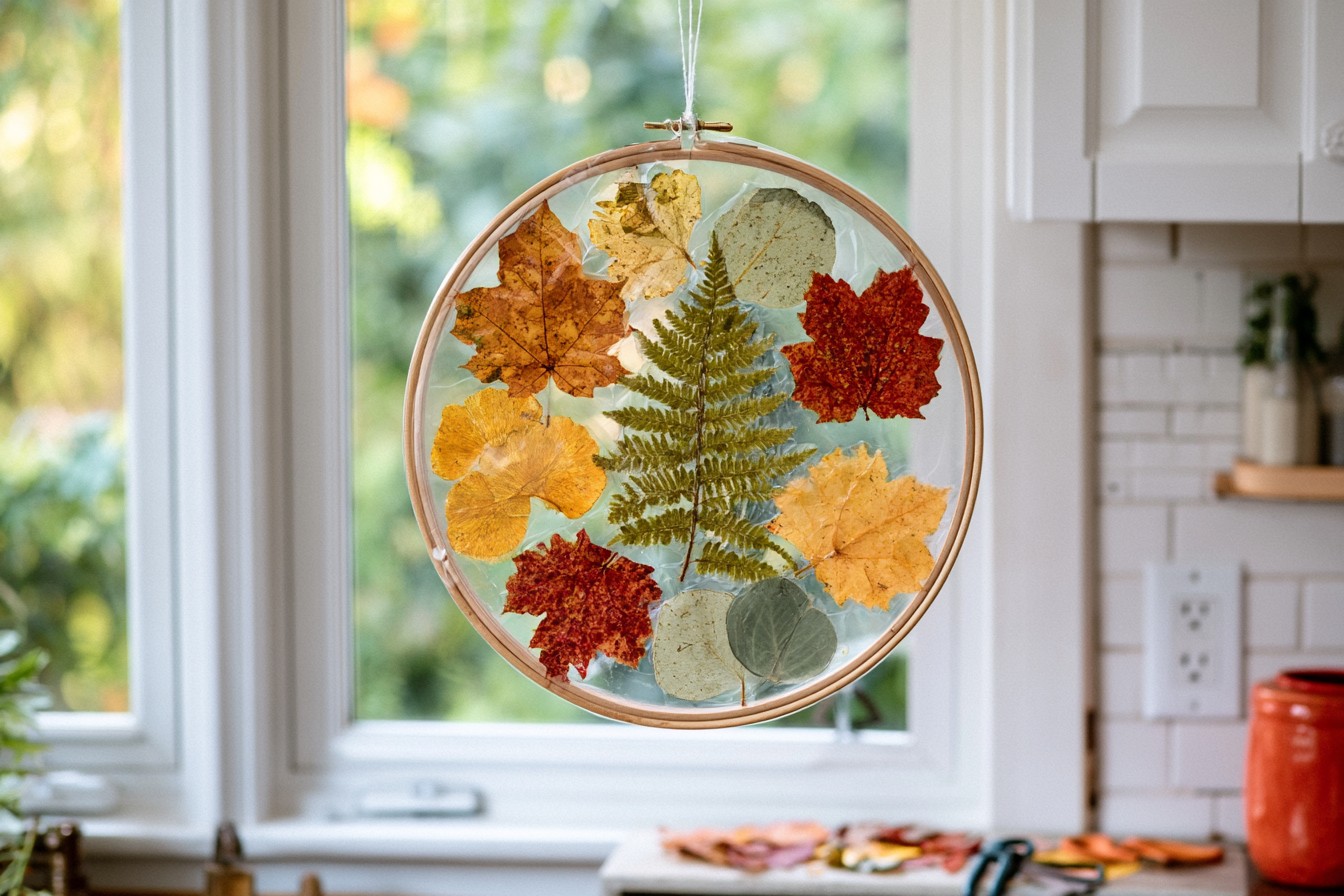
Create a colorful botanical window ornament with pressed leaves, transparent self-adhesive contact paper, scissors, a thin wooden embroidery hoop, and clear thread. Cut two matching pieces of contact paper. Remove the backing from the first piece and arrange the leaves across its sticky surface. Leave small gaps between them so the individual shapes and colors remain noticeable. Carefully place the second transparent sheet over the arrangement, pressing from the center toward the edges with a soft cloth to remove air bubbles. Cut the sealed piece into a circle, arch, oval, or large leaf shape. Secure it inside the wooden hoop and add clear thread for hanging. Display the completed piece in a kitchen window, enclosed balcony, child’s bedroom, studio, or home office. Natural leaves may gradually change color in direct sunlight, giving the decoration a softer and more aged botanical appearance over time.
9. Create Playful Leaf Animal Pictures with Children
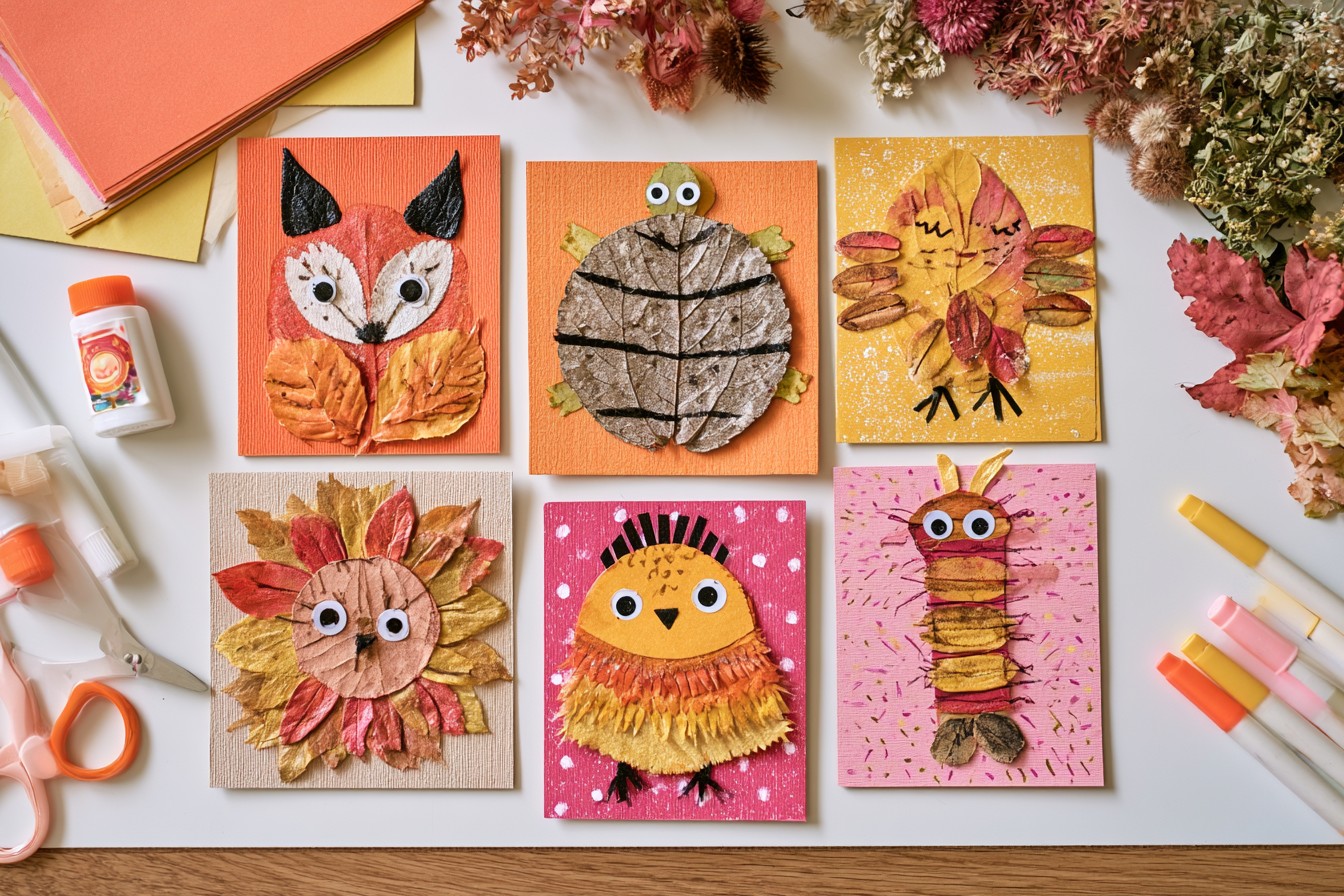
Leaf animals encourage children to recognize natural shapes while developing their creativity and fine motor skills. Collect dry leaves in different sizes, colored cardstock, child-safe glue, washable markers, craft eyes, and safety scissors. Spread the leaves across a table and ask children what type of animal each shape resembles. A long leaf might become a fish, a round leaf can form a turtle shell, and pointed leaves work well as bird wings or fox ears. Glue the chosen leaves onto cardstock and draw the remaining legs, tails, faces, and environmental details with markers. An adult should handle any difficult cutting, particularly when working with younger children. Display the finished pictures on a child’s bedroom wall, classroom activity board, refrigerator, or family art gallery. You can also label each creature and turn the project into an educational animal-matching activity.
10. Produce Durable Leaf-Shaped Refrigerator Magnets
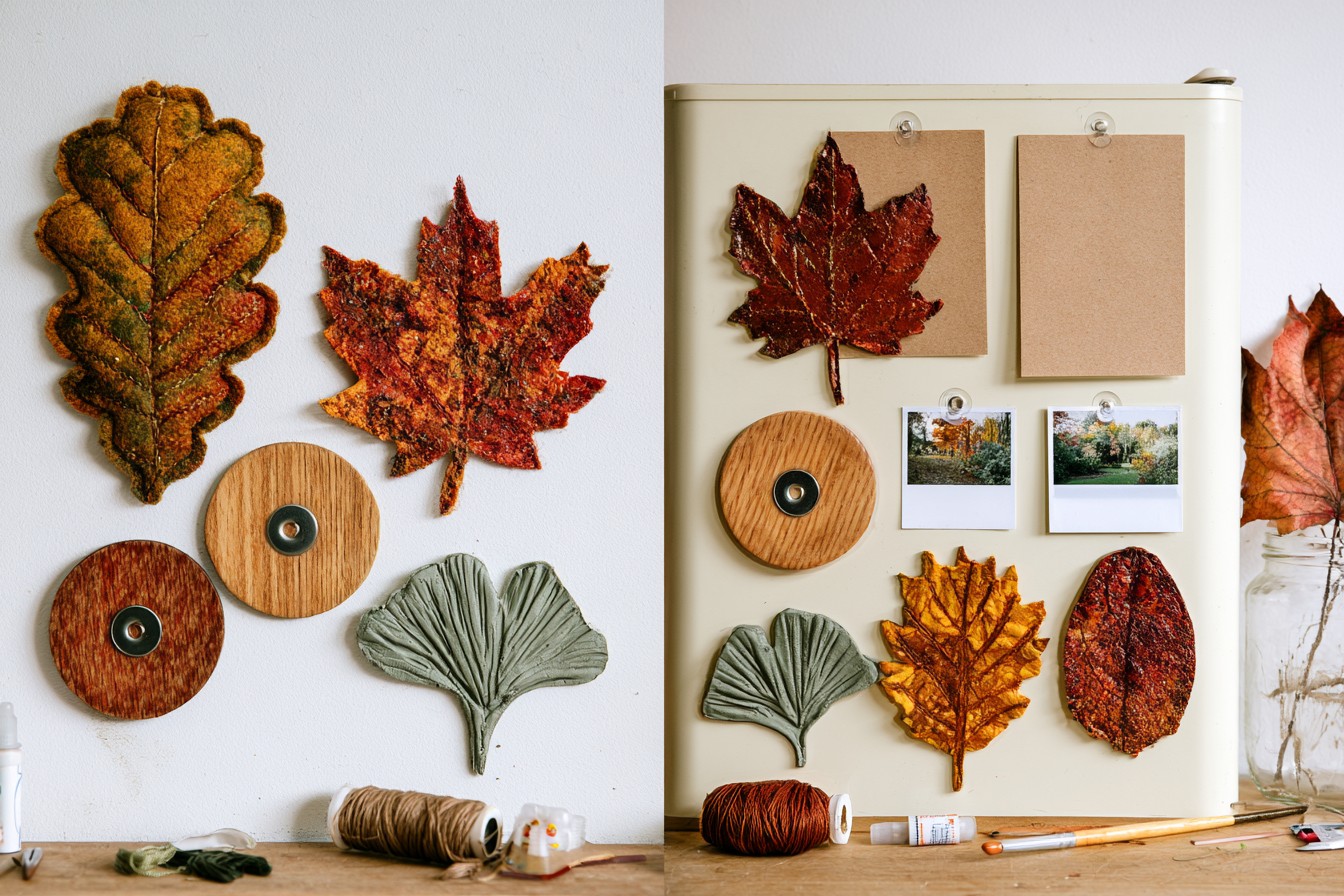
To make leaf magnets that last longer than natural foliage, transfer real leaf shapes onto felt, thin wood, or air-dry clay. Trace the outline of a carefully selected leaf onto your chosen material. If you are using felt, cut two identical shapes, add a small amount of filling between them, and stitch around the edge with embroidery thread. For clay magnets, press the veined side of the leaf into soft clay, cut around the outline, and allow it to dry completely before painting. Attach a strong disk magnet to the back using a suitable craft adhesive. Leave it undisturbed until the glue is fully cured. Use the finished magnets to hold recipes, shopping lists, photographs, and reminders on a refrigerator, office cabinet, or metal notice board. Create a coordinated collection inspired by several tree species for an attractive miniature botanical display.
11. Construct a Natural Branch and Leaf Mobile
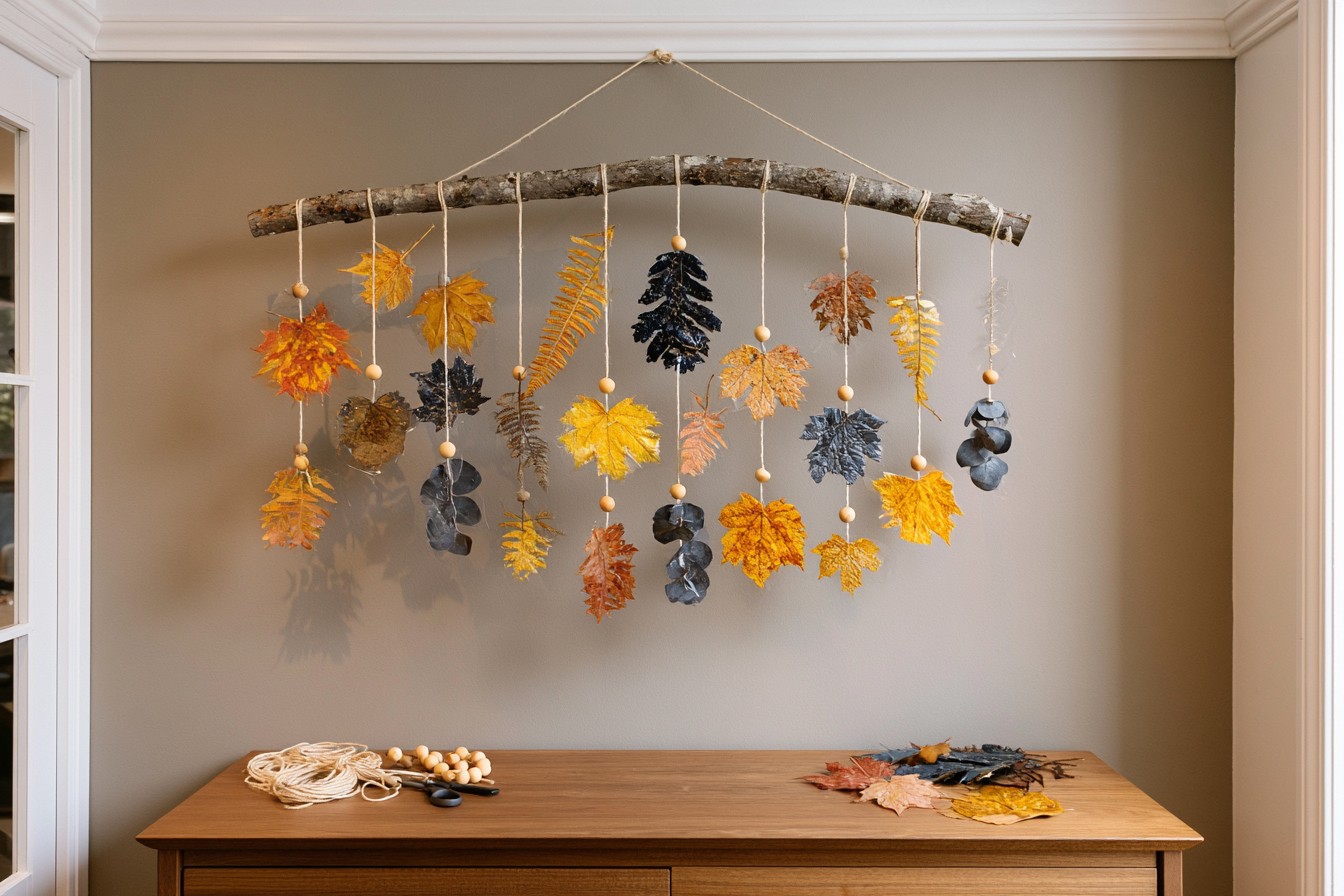
A branch and leaf mobile introduces organic texture and gentle movement without occupying valuable furniture space. Gather a clean branch, pressed leaves, natural string, small wooden beads, transparent protective spray, and scissors. Clean the branch thoroughly, let it dry, and remove any loose pieces of bark. Arrange the leaves according to size and color before attaching them to separate lengths of string. Reinforce delicate stems with a small piece of transparent tape to prevent them from breaking. Add a limited number of wooden beads to several strings for visual balance and additional weight. Tie the strings to the branch at different heights and check that the entire arrangement hangs evenly. Display the mobile above a desk, against an entryway wall, in a protected balcony corner, or in a child’s room beyond easy reach. Keep it away from excessive moisture to preserve the leaves.
12. Form Concrete or Plaster Leaf Relief Decorations
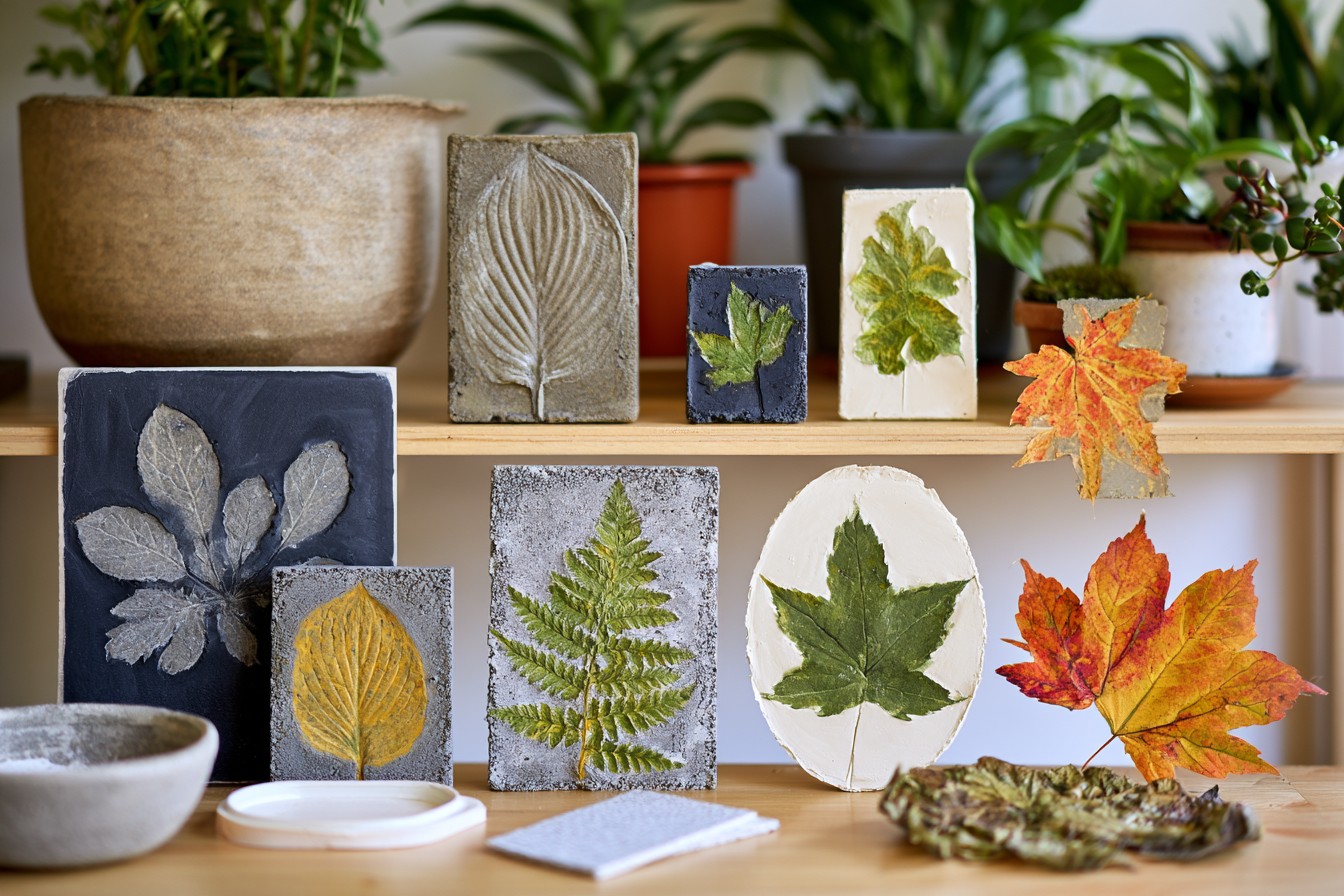
Capture the detailed structure of leaves in a durable material by creating small concrete or plaster reliefs. You will need fine craft concrete or plaster, a mixing bowl, protective gloves, water, shallow molds, textured leaves, and fine sandpaper. Prepare the mixture according to the product instructions and pour it into the selected mold. Place the veined side of a leaf onto the wet surface and press gently without allowing the material to cover the entire leaf. Remove it carefully before the mixture becomes completely firm. Allow the relief to cure, release it from the mold, and smooth any sharp edges with fine sandpaper. Keep the piece in its natural color or add diluted paint only inside the vein impressions. Attach the relief to a large planter, display it on a plant shelf, or create practical botanical markers for garden beds and indoor pots.
13. Preserve Dried Leaves in Resin Coasters
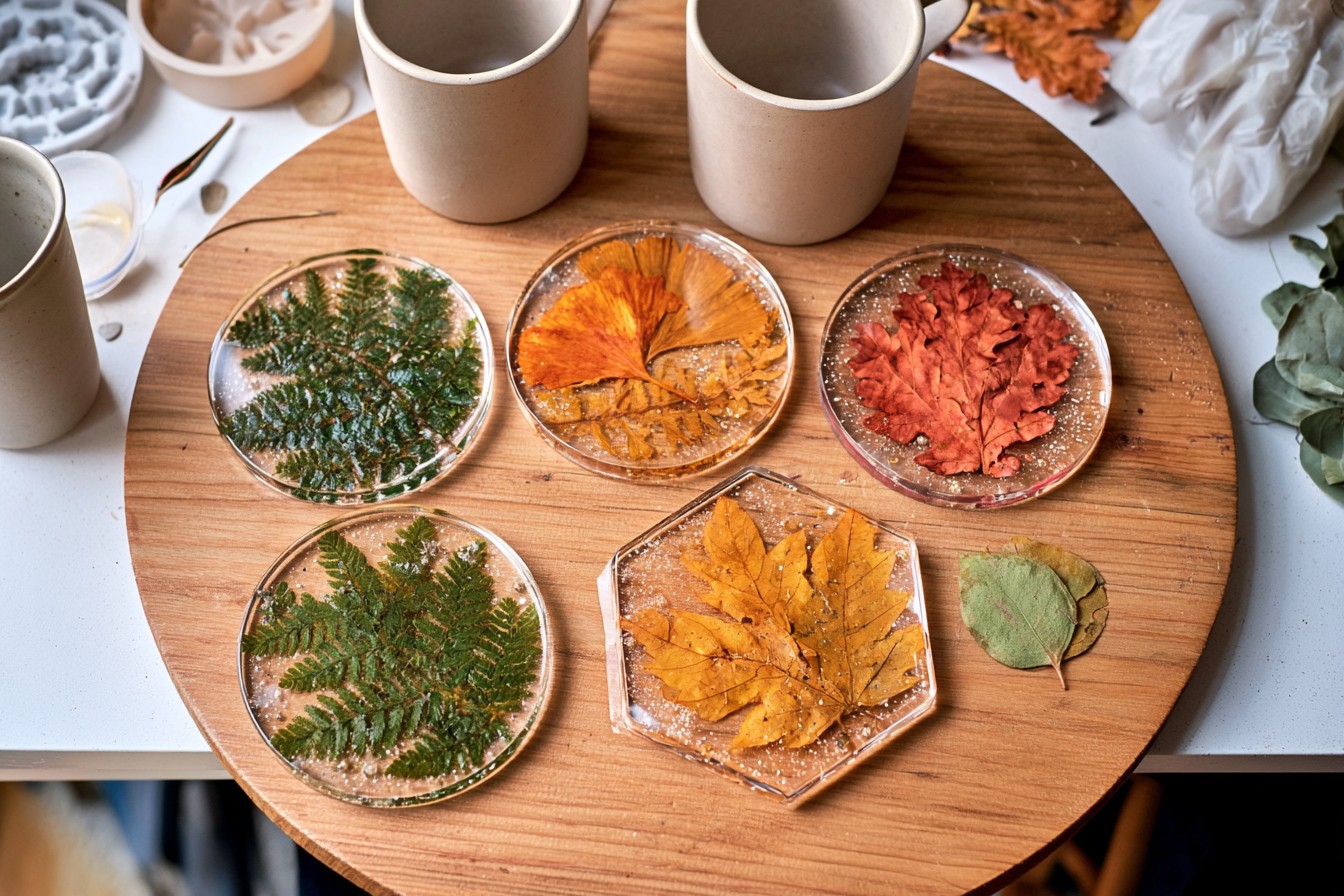
Transparent resin coasters allow you to preserve small leaves while creating functional table decorations. Gather completely dried leaves, a silicone coaster mold, clear craft resin, mixing cups, stirrers, gloves, tweezers, and a protective surface covering. Any moisture remaining inside a leaf can create cloudiness, so press and dry the foliage thoroughly before use. Mix the resin in a well-ventilated area according to the manufacturer’s specified ratio. Pour a thin first layer into the mold and allow surface bubbles to rise. Position the leaf with tweezers, then slowly add the remaining resin without disturbing the arrangement. Leave the mold untouched for the full curing period. Once hardened, remove the coaster and smooth any rough edges with fine sandpaper. Use the completed set on a dining table, coffee table, desk, or serving area. A coordinated set of four also makes an attractive handmade housewarming gift.
MORE IDEAS


Share
What's Your Reaction?
 Like
0
Like
0
 Dislike
0
Dislike
0
 Love
0
Love
0
 Funny
0
Funny
0
 Angry
0
Angry
0
 Sad
0
Sad
0
 Wow
0
Wow
0








