15 Nail Polish Storage Systems for a Smarter Collection

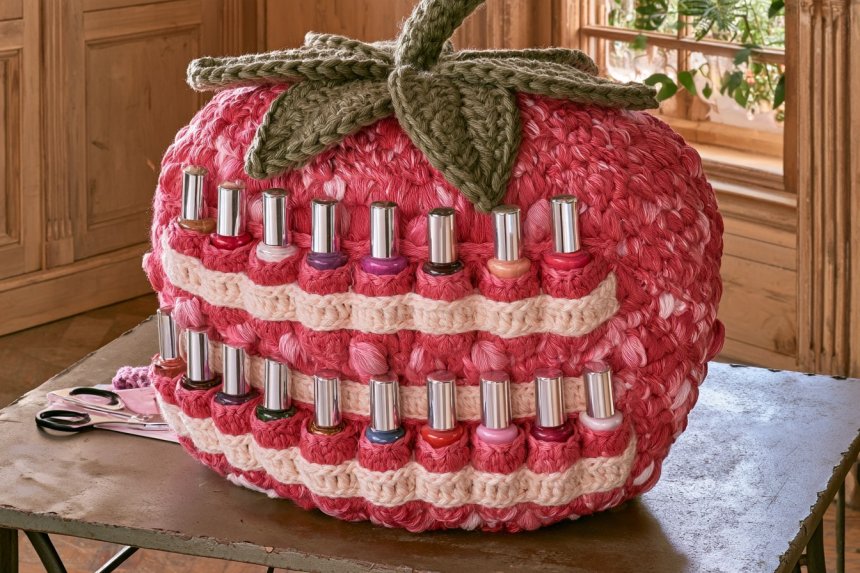
A growing nail polish collection can become surprisingly difficult to use once bottles disappear into drawers, duplicate shades accumulate, and favorite colors end up buried behind products that rarely leave the shelf. Good organization should make choosing a manicure faster, protect bottles from unnecessary heat and sunlight, and let you see what you already own before buying another nearly identical shade. Instead of relying on one large box, it often works better to combine visual swatches, shallow storage, movable trays, and smaller collections based on how you actually paint your nails. These nail polish storage ideas range from simple DIY systems to compact display solutions that can make even a large collection feel more like a personal nail studio.
1. Build a Swatch Library Instead of Searching Through Bottles
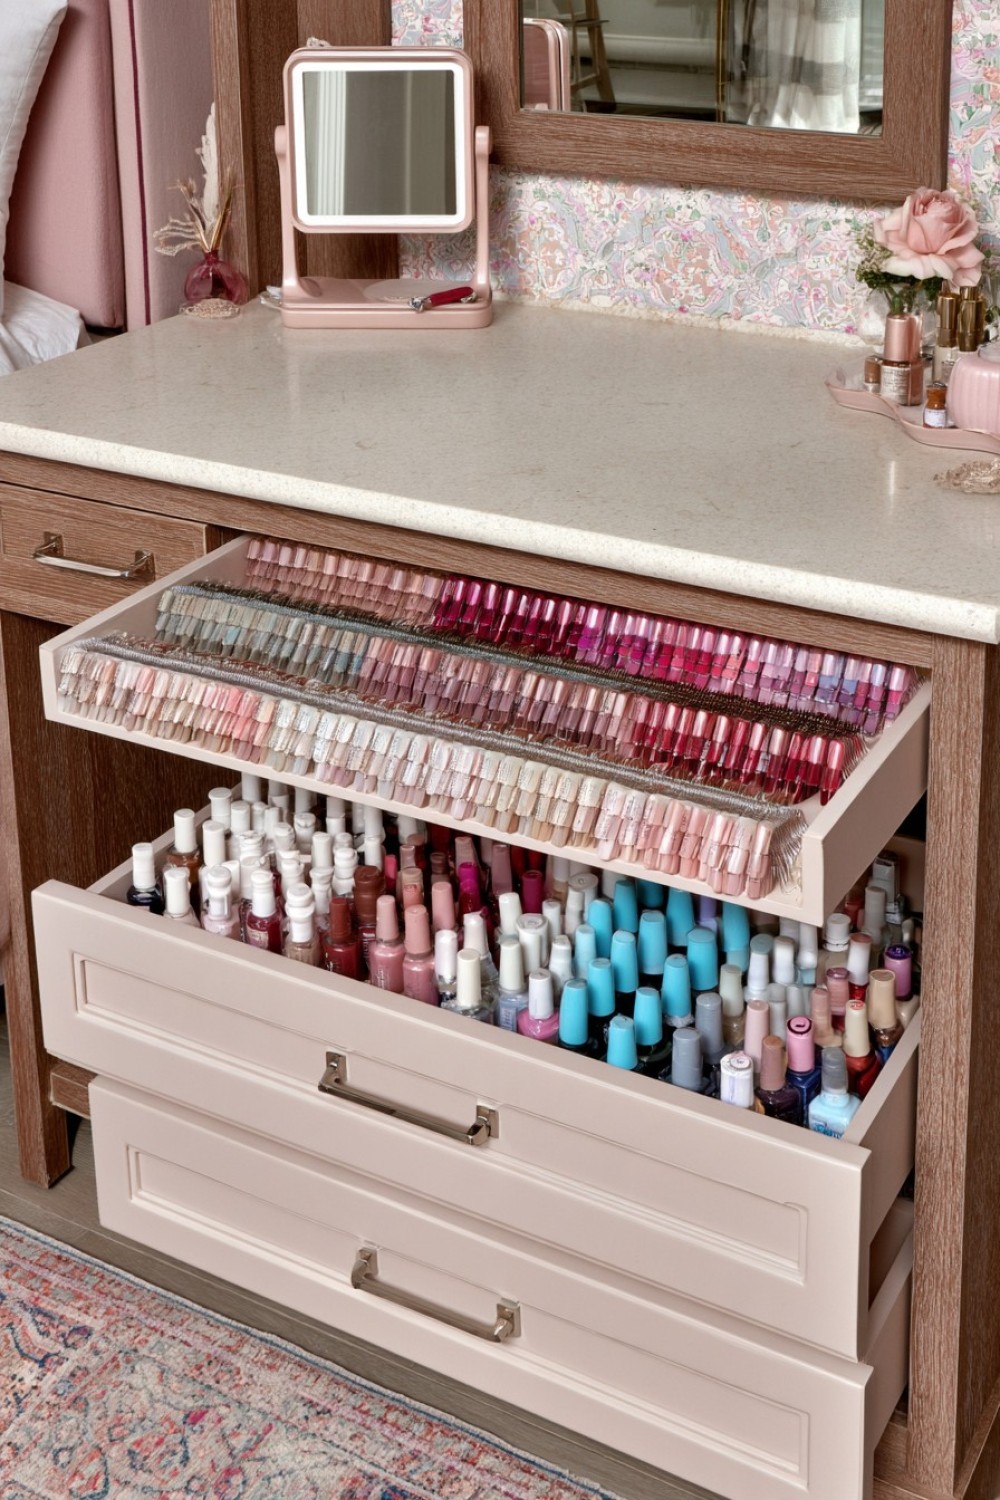
One of the smartest ways to organize nail polish is to separate color selection from bottle storage.
Buy clear nail swatch sticks or small plastic sample discs and paint one with every polish you own. Write a small number on each swatch, then place the matching number on the bottom of the bottle.
Store the swatches on metal binder rings according to broad families such as neutrals, reds, blues, glitters, and sheer finishes.
Now you can compare twenty shades next to your skin without removing twenty bottles from storage.
This system becomes especially useful when several polishes look almost identical through their glass bottles but appear completely different after two coats.
For a larger collection, add a second notation for finish—C for crème, G for glitter, S for sheer, or M for metallic—so choosing a color becomes more like browsing a professional sample library.
2. Create a Shallow Drawer With Adjustable Bottle Lanes
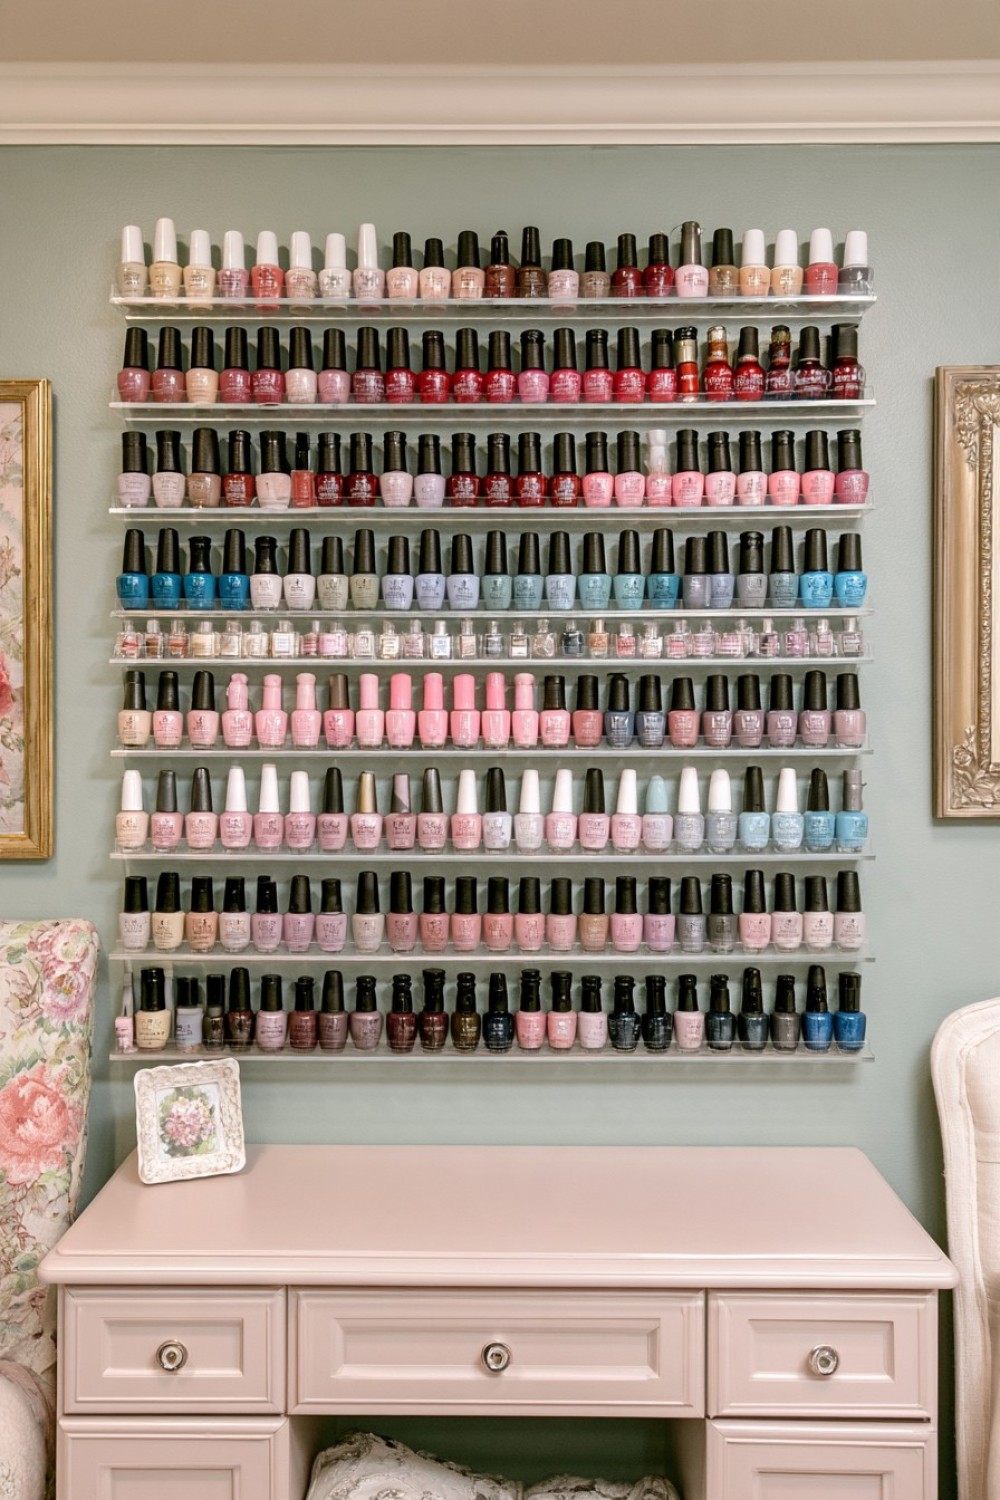
Deep drawers encourage nail polish bottles to disappear behind one another.
A better solution is to turn a shallow drawer into several narrow lanes using adjustable dividers.
You will need a drawer, thin acrylic or wooden dividers, non-slip drawer liner, and optional label tabs.
Measure your widest bottles first, then make each lane only slightly wider than necessary. Store bottles upright in single rows so every cap remains visible from above.
Instead of organizing every lane strictly by color, consider dividing by use: everyday neutrals, bold colors, special finishes, base coats, top coats, and treatment products.
A non-slip liner prevents glass bottles from sliding when the drawer opens.
This setup works particularly well beneath a vanity because the entire collection can disappear when not in use while still remaining completely visible the moment the drawer is opened.
3. Turn a Narrow Wall Section Into a Mini Polish Gallery
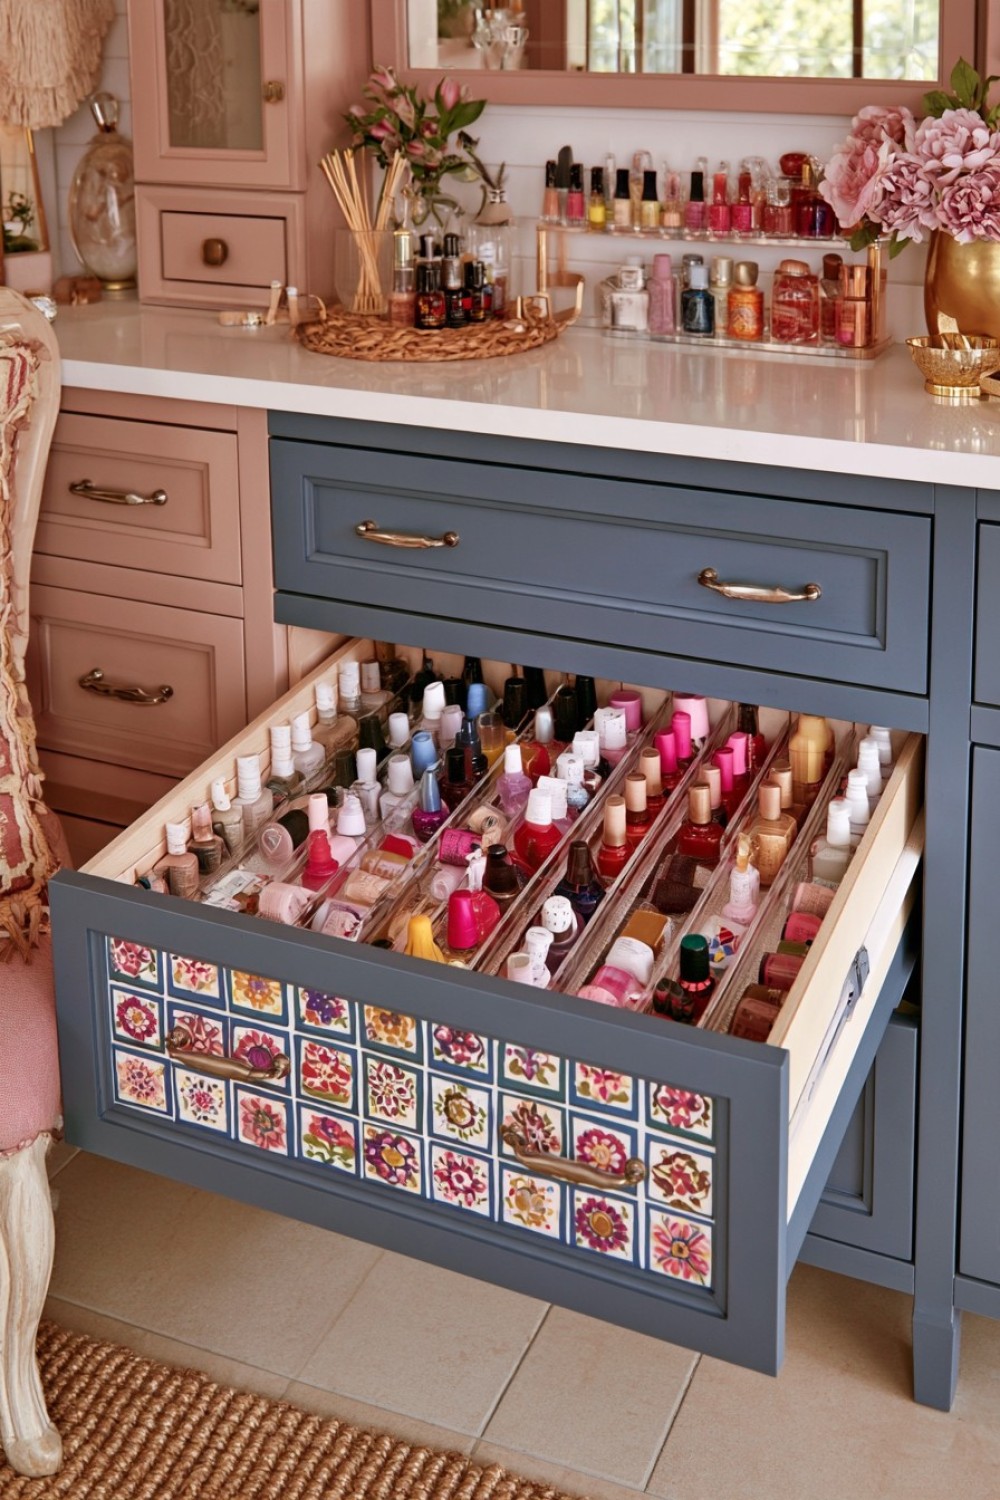
If drawer space is limited, a very shallow wall rack can hold bottles without making the room feel cluttered.
Build several narrow ledges from timber or acrylic, each with a small raised front lip to prevent bottles from falling.
The shelves only need enough depth for one row of polish.
Instead of filling a large wall, use a narrow vertical section beside a vanity mirror or inside a dressing-area cabinet.
Arrange bottles by a gradual color transition so the collection becomes visually pleasing as well as practical.
For a cleaner appearance, keep treatments and removers elsewhere and display only colored polish.
Avoid placing the rack where it receives direct sunlight or sits near a radiator. Nail polish generally lasts better when stored upright in a cool, stable environment away from excessive heat and light.
4. Build a Rotating Polish Tower for a Vanity Corner
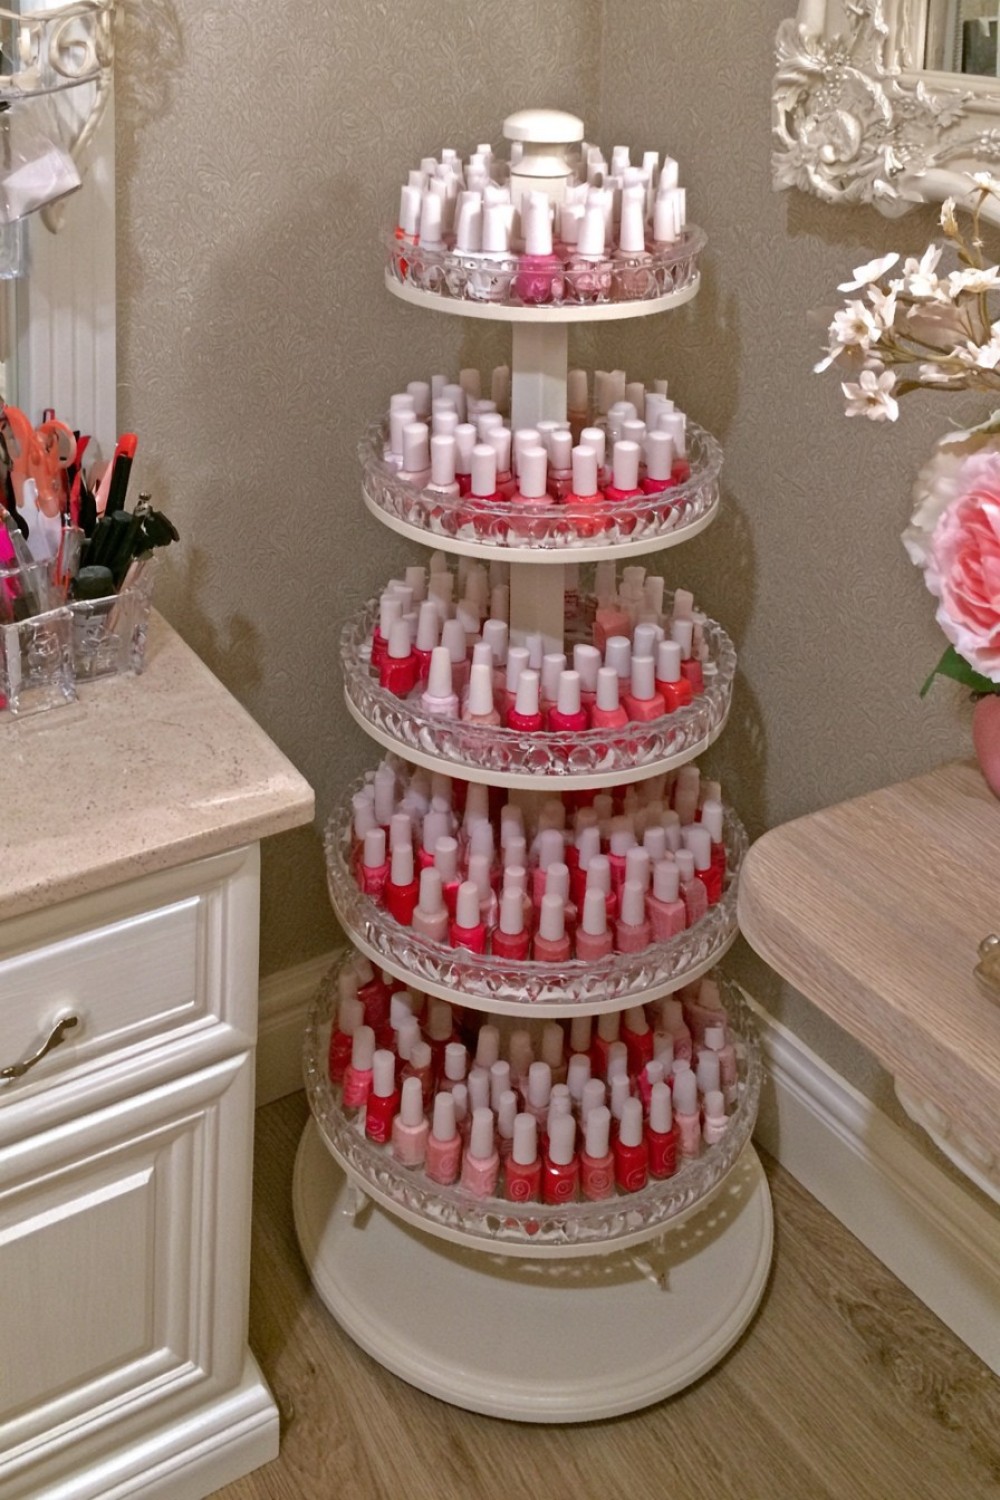
A rotating organizer can make excellent use of an awkward vanity corner.
Instead of using a generic cosmetic carousel, create several shallow circular tiers with narrow perimeter rails so the bottles remain secure as the unit turns.
You will need plywood or acrylic discs, a sturdy turntable bearing, spacers, edge rails, and a stable base.
Make the lower tier slightly larger for wider bottles and keep frequently used shades around the easiest-to-reach middle level.
Organize the carousel by quarter sections—perhaps neutrals, warm colors, cool colors, and special finishes.
The major advantage is visibility. Bottles that would normally sit three rows deep can be brought forward with one rotation.
Keep the tower low enough that it remains stable and does not obscure a mirror or other products on the vanity.
5. Use a “Current Manicure” Tray Instead of Leaving Bottles Everywhere
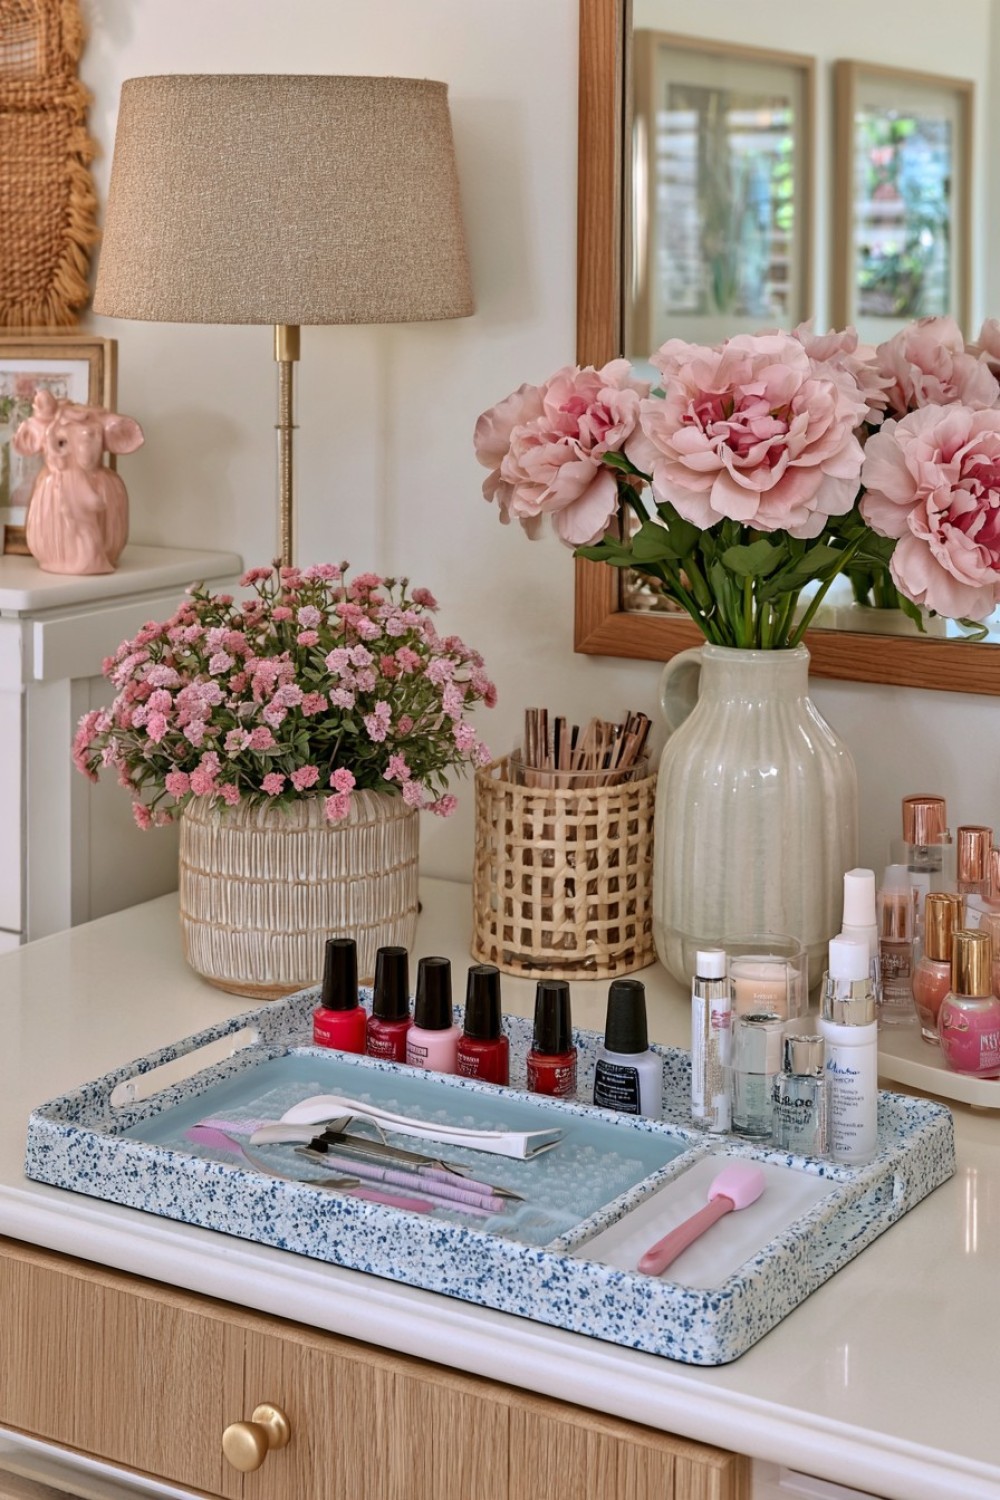
Organization often breaks down while you are actually doing your nails.
Create a small working tray that holds only the products needed for the current manicure: polish, base coat, top coat, nail file, cleanup brush, and remover accessories.
Choose a shallow tray with a raised edge so bottles remain upright.
Once you finish, the entire set returns to its storage area together instead of individual products being scattered across a desk or bathroom.
This system is particularly useful for nail art, where six or seven small products can quickly spread across a surface.
For an extra touch, place a small silicone mat inside the tray. It provides a washable working surface and can protect furniture from minor drips.
The tray should remain empty between manicures, preventing it from becoming another permanent dumping ground.
6. Create Seasonal Polish Capsules
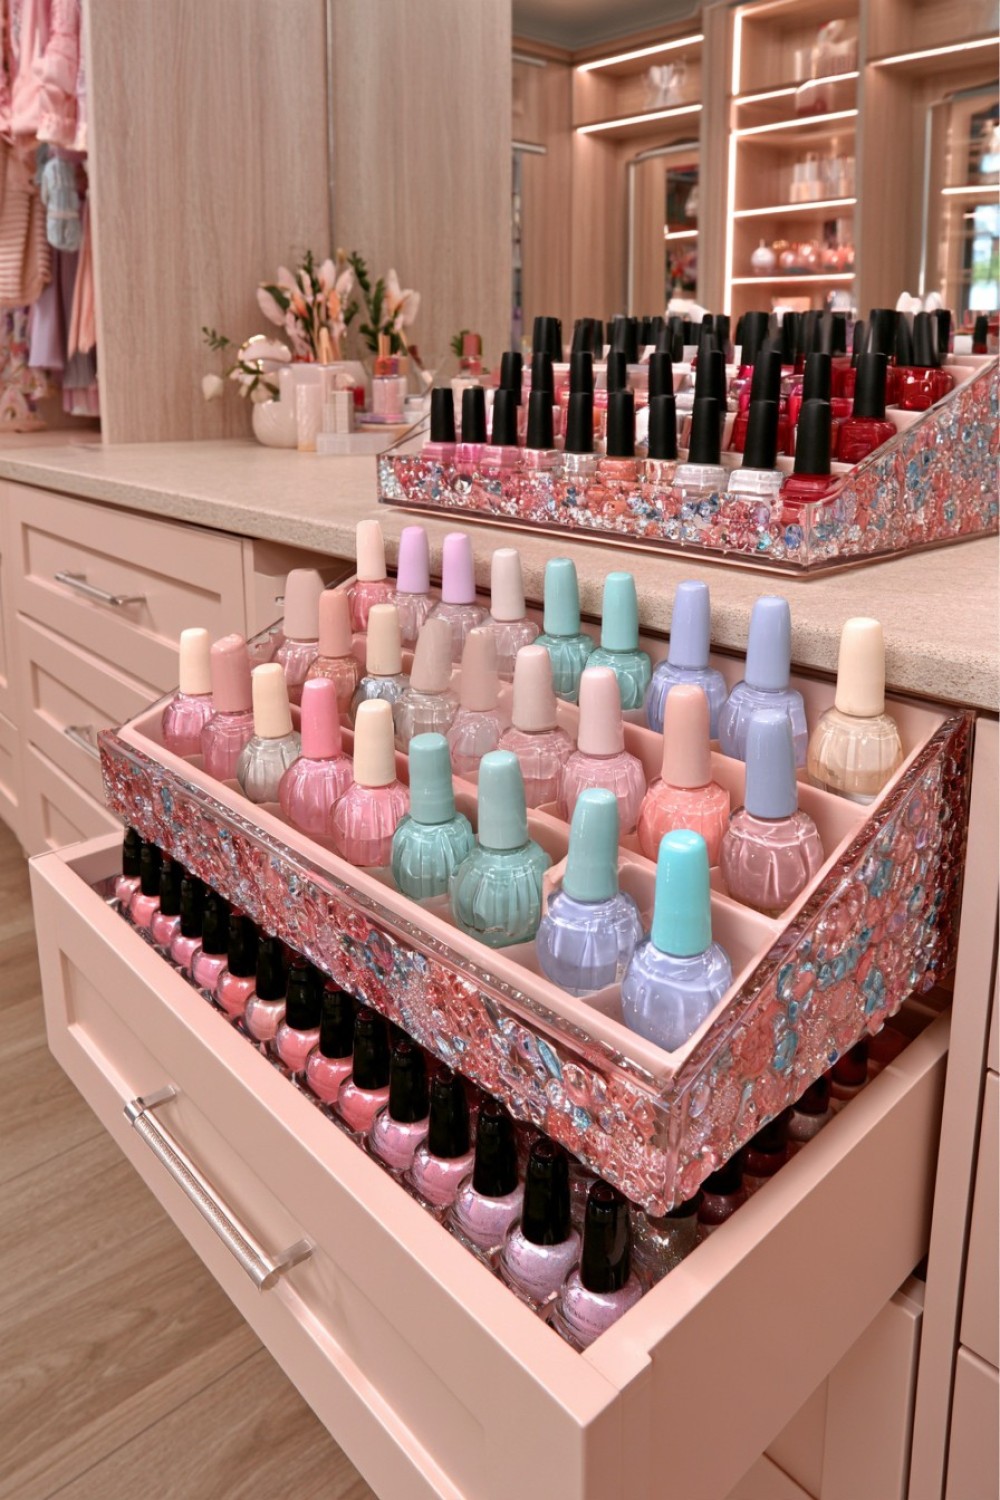
Instead of keeping your entire collection equally accessible, rotate a small selection of shades every few months.
Create one removable tray for the current season and store the rest of the collection in your main organizer.
A spring capsule might include soft greens, translucent pinks, pale lilacs, and cream finishes, while autumn could bring out deeper reds, browns, olive tones, and metallics.
Keep around eight to fifteen bottles in the active tray depending on how frequently you change your nails.
This approach makes a large collection feel new again because forgotten shades periodically return to view.
It also helps reveal which bottles you never choose. If a polish passes through several seasonal rotations without being used, it may be a candidate for responsible disposal or decluttering.
The result is less visual overload without forcing you to reduce the collection immediately.
7. Turn a Vintage Spice Rack Into Nail Polish Storage
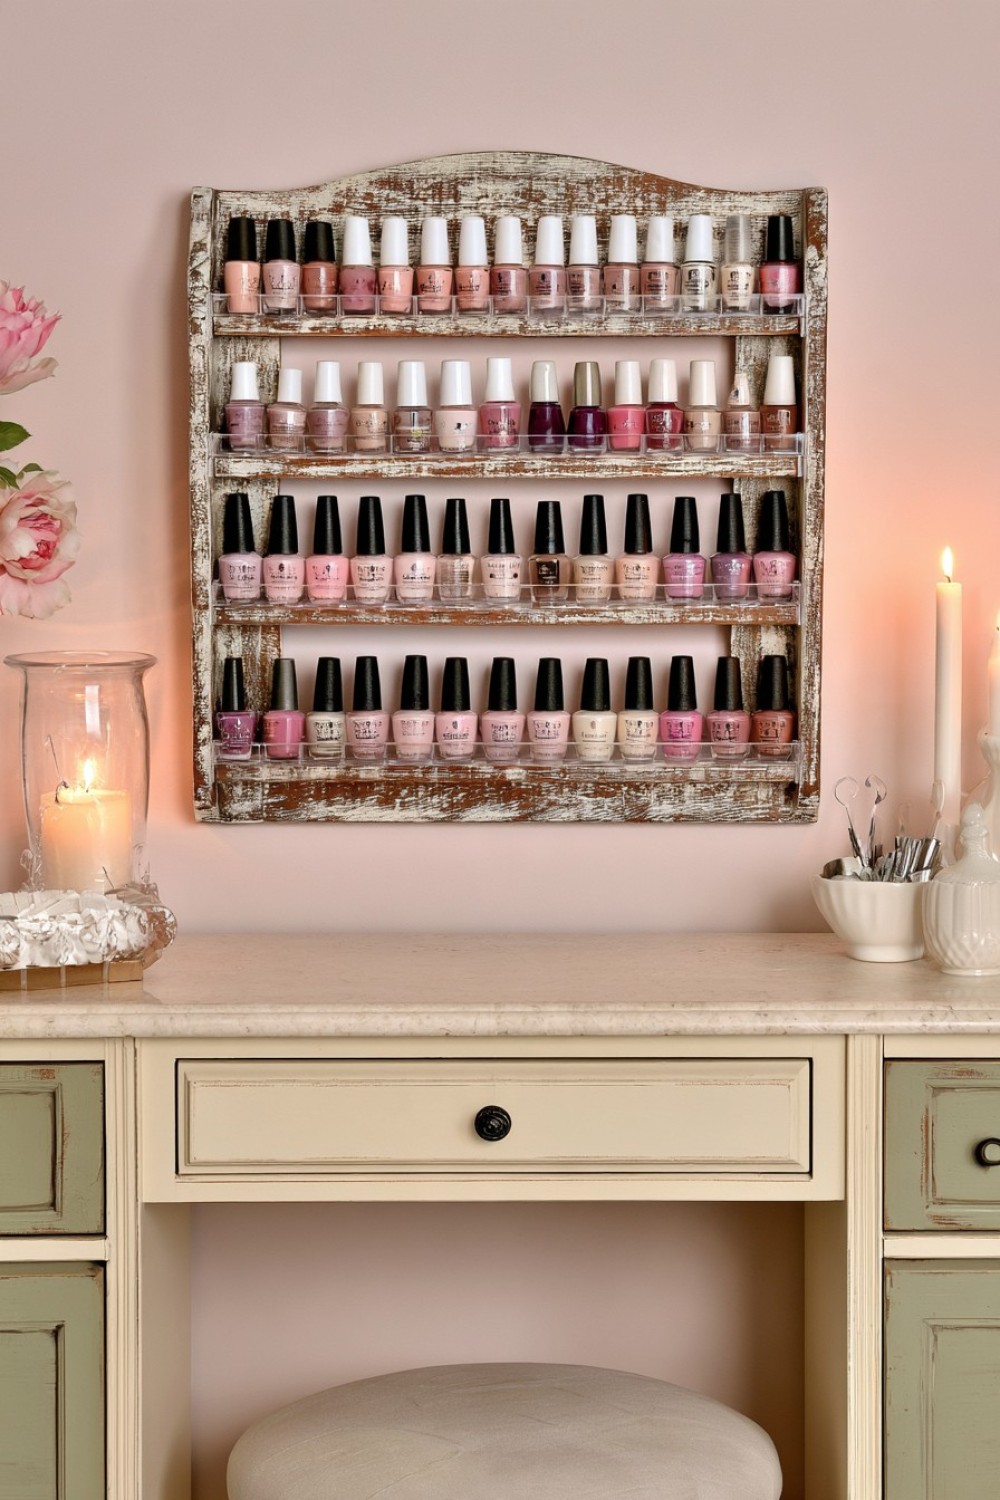
A wooden spice rack can be surprisingly well suited to nail polish because both spice jars and polish bottles require shallow, visible storage.
Look for a wall-mounted or freestanding rack with several narrow rails.
Clean it thoroughly, sand worn areas if necessary, and repaint or refinish it to suit your vanity.
For a more customized result, add thin acrylic strips along the front edge so bottles remain secure without hiding their colors.
You can even attach tiny swatch dots to the shelf edge beneath each bottle.
Older wooden racks look particularly good in romantic, vintage, or cottage-style dressing spaces, while a matte black finish can make the same object feel more contemporary.
Before repurposing one, check shelf spacing carefully. Some polish bottles are taller than traditional spice jars, so each level should have enough clearance for the tallest caps in your collection.
8. Make a Magnetic Color Index Without Magnetizing the Bottles
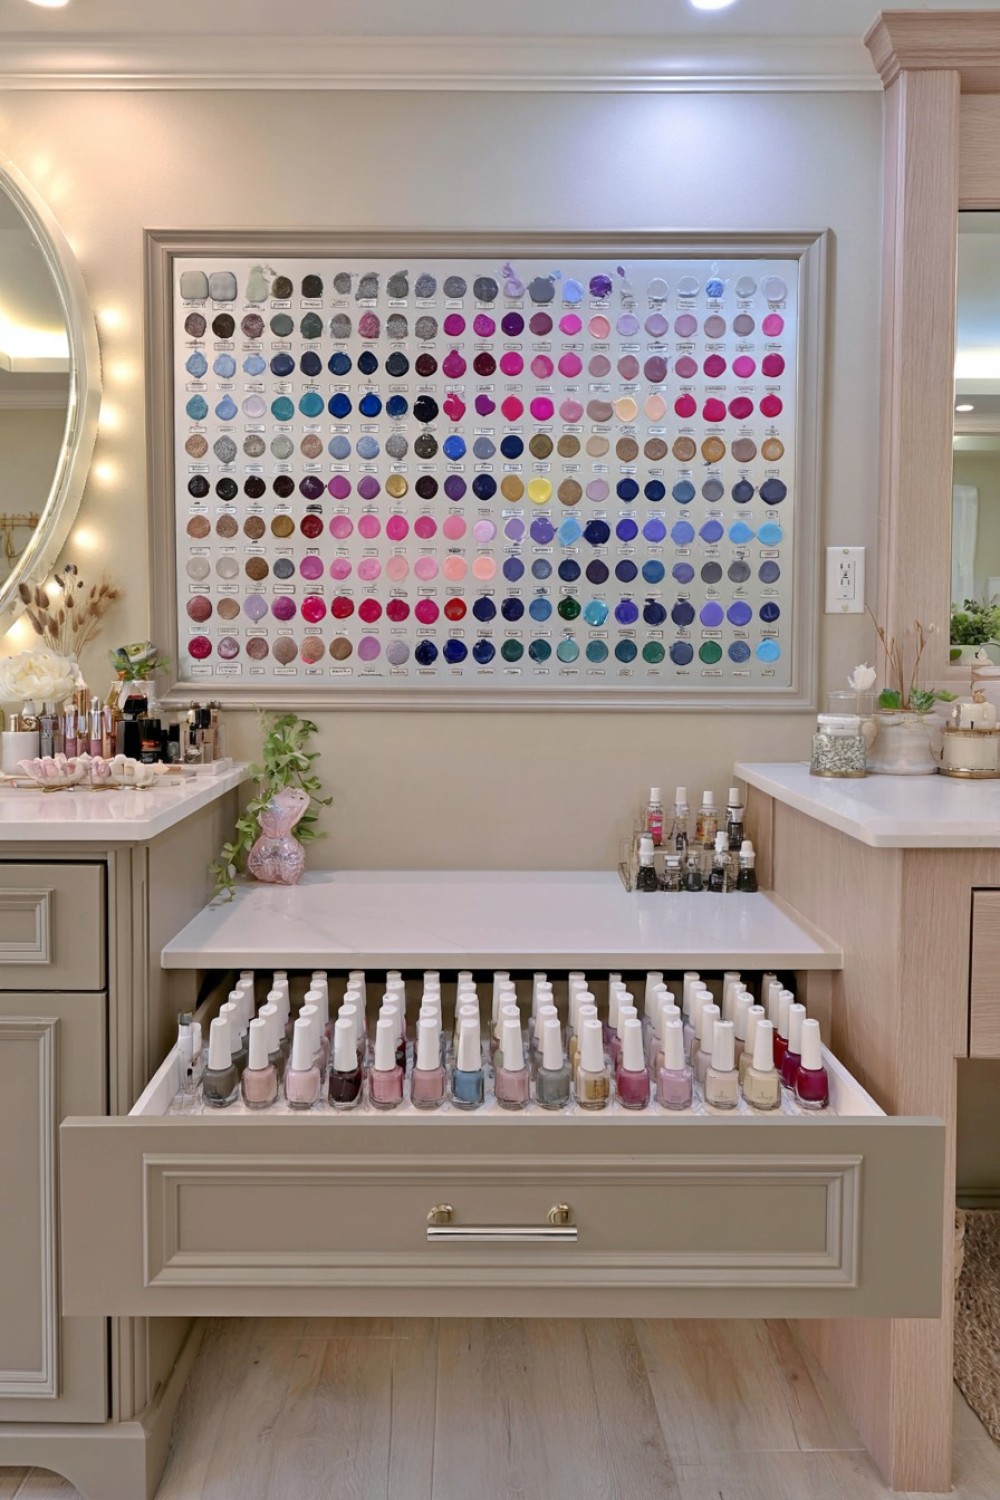
Instead of attaching magnets directly to every nail polish bottle, create a magnetic catalog of your collection.
Paint small sample dots on lightweight metal-backed labels, bottle-cap-sized discs, or magnetic swatch tiles. Add the corresponding bottle number underneath.
Arrange the tiles on a metal board near your vanity.
The bottles themselves can remain safely stored upright inside a cabinet or drawer.
This gives you a complete visual overview without putting glass containers on the wall or modifying their packaging.
You can move the tiles around whenever you want to compare colors, build manicure palettes, or group potential combinations.
For nail art, temporarily place three or four swatches together to see whether they work as a set before opening any bottles.
The board becomes both an inventory system and a creative planning tool.
9. Create Pull-Out Polish Trays Inside a Cabinet
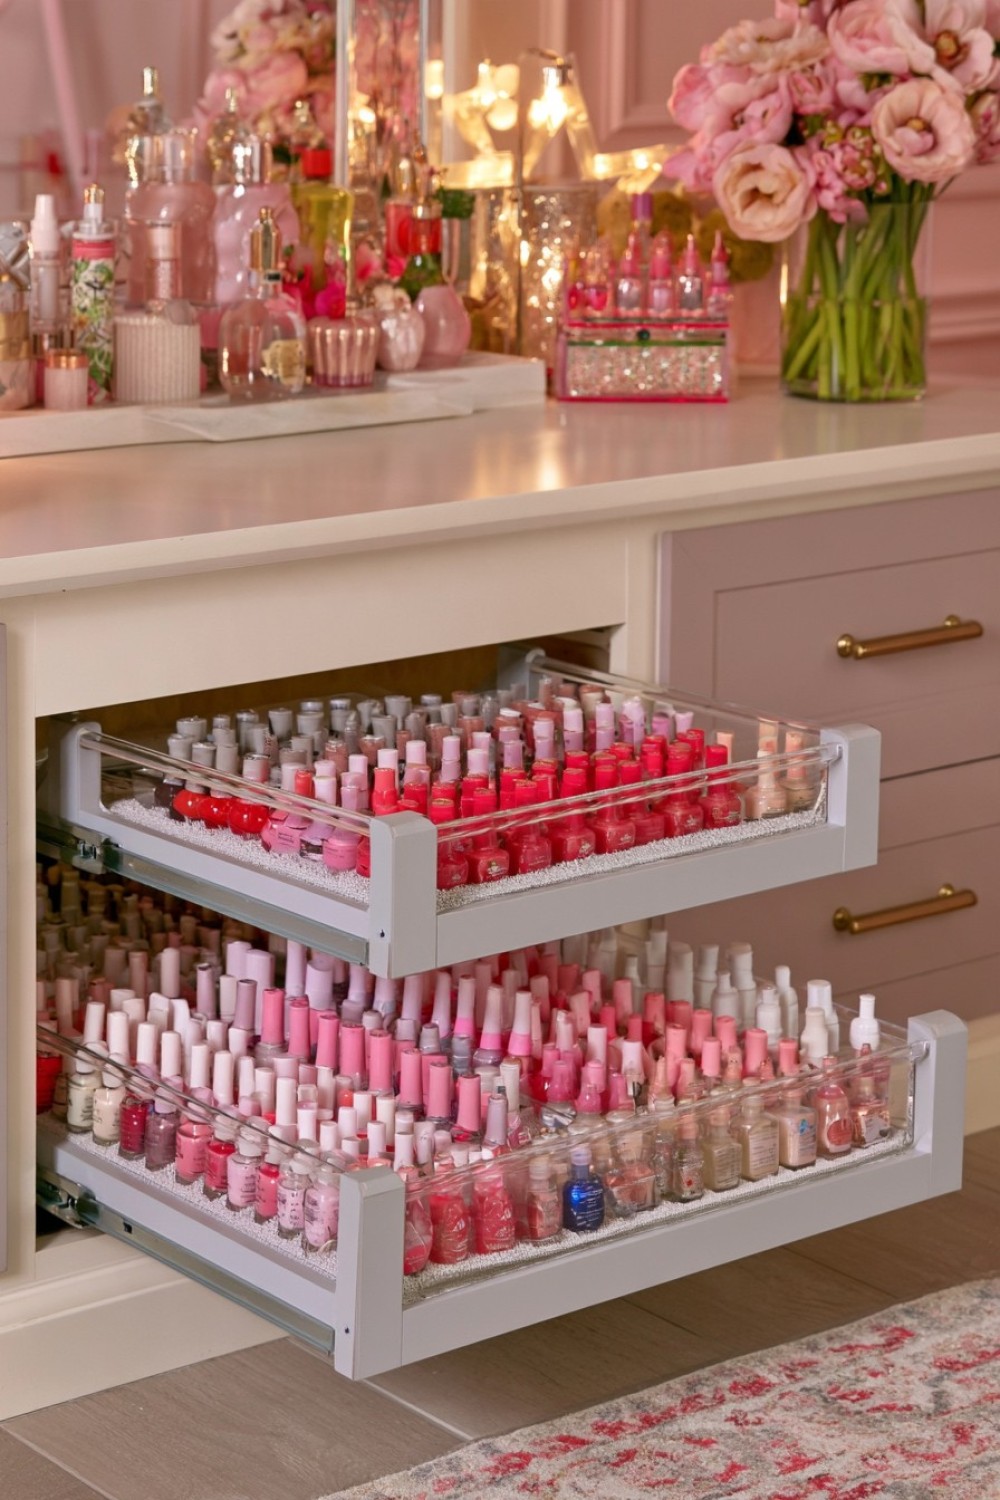
Deep vanity cabinets often waste space because the bottles at the back become difficult to reach.
Install two or three narrow pull-out trays on drawer slides instead.
Each tray can hold one or two rows of bottles and slide completely forward when needed.
Use plywood, acrylic, or ready-made narrow organizers mounted onto full-extension runners.
A small front rail helps prevent bottles from tipping, while a non-slip base keeps them stable.
This system is particularly effective if you have a large collection but do not want polish displayed openly.
Rather than reaching into a dark cabinet, you pull out the entire row and see every shade at once.
Arrange one tray for standard colors, another for specialty finishes, and another for nail-care products.
Make sure all bottles remain upright and that the cabinet stays away from heat sources.
10. Sort by Finish Before Color
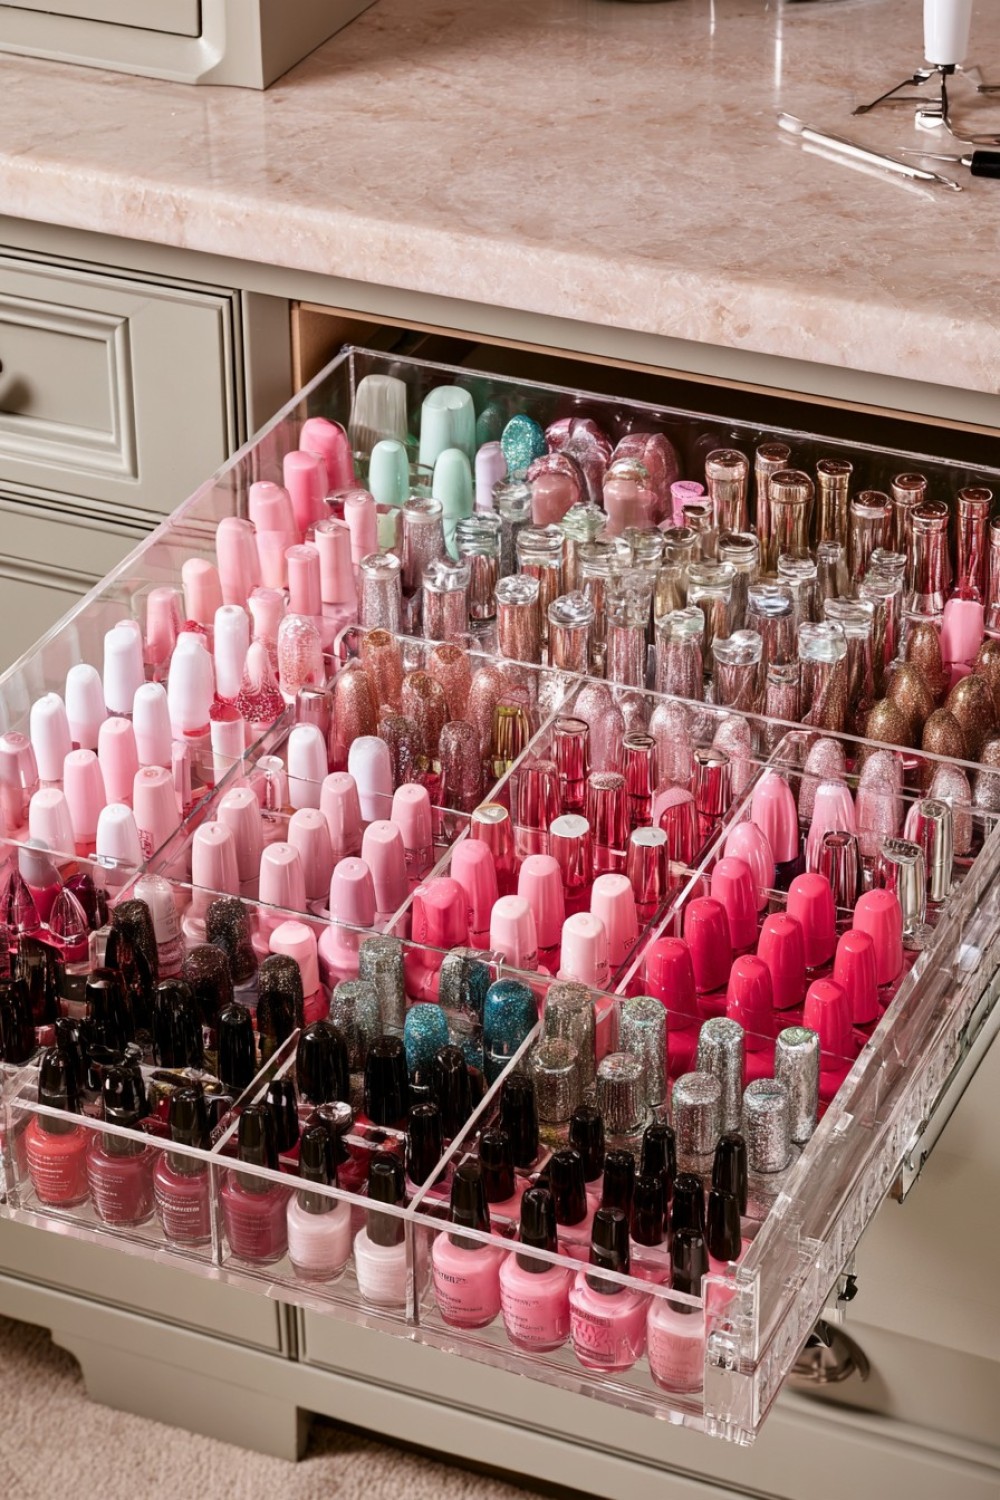
Color is not always the most useful way to organize nail polish.
If you frequently choose a manicure based on the effect you want, organize the collection by finish first.
Create sections for crème, jelly, sheer, metallic, chrome, glitter, magnetic, shimmer, and topper formulas. Within each section, move from light to dark.
This makes it much easier to answer questions like “I want a sheer pink” or “I need a silver glitter topper” without scanning an entire rainbow of bottles.
Use shelf dividers or drawer labels to keep each finish category separate.
If your collection is small, combine similar categories so the system does not become unnecessarily complicated.
This approach can also expose duplicates more effectively. Three red polishes may actually serve very different purposes if one is opaque crème, another translucent jelly, and the third contains shimmer.
11. Build a Polish “Library Drawer” With Numbered Locations
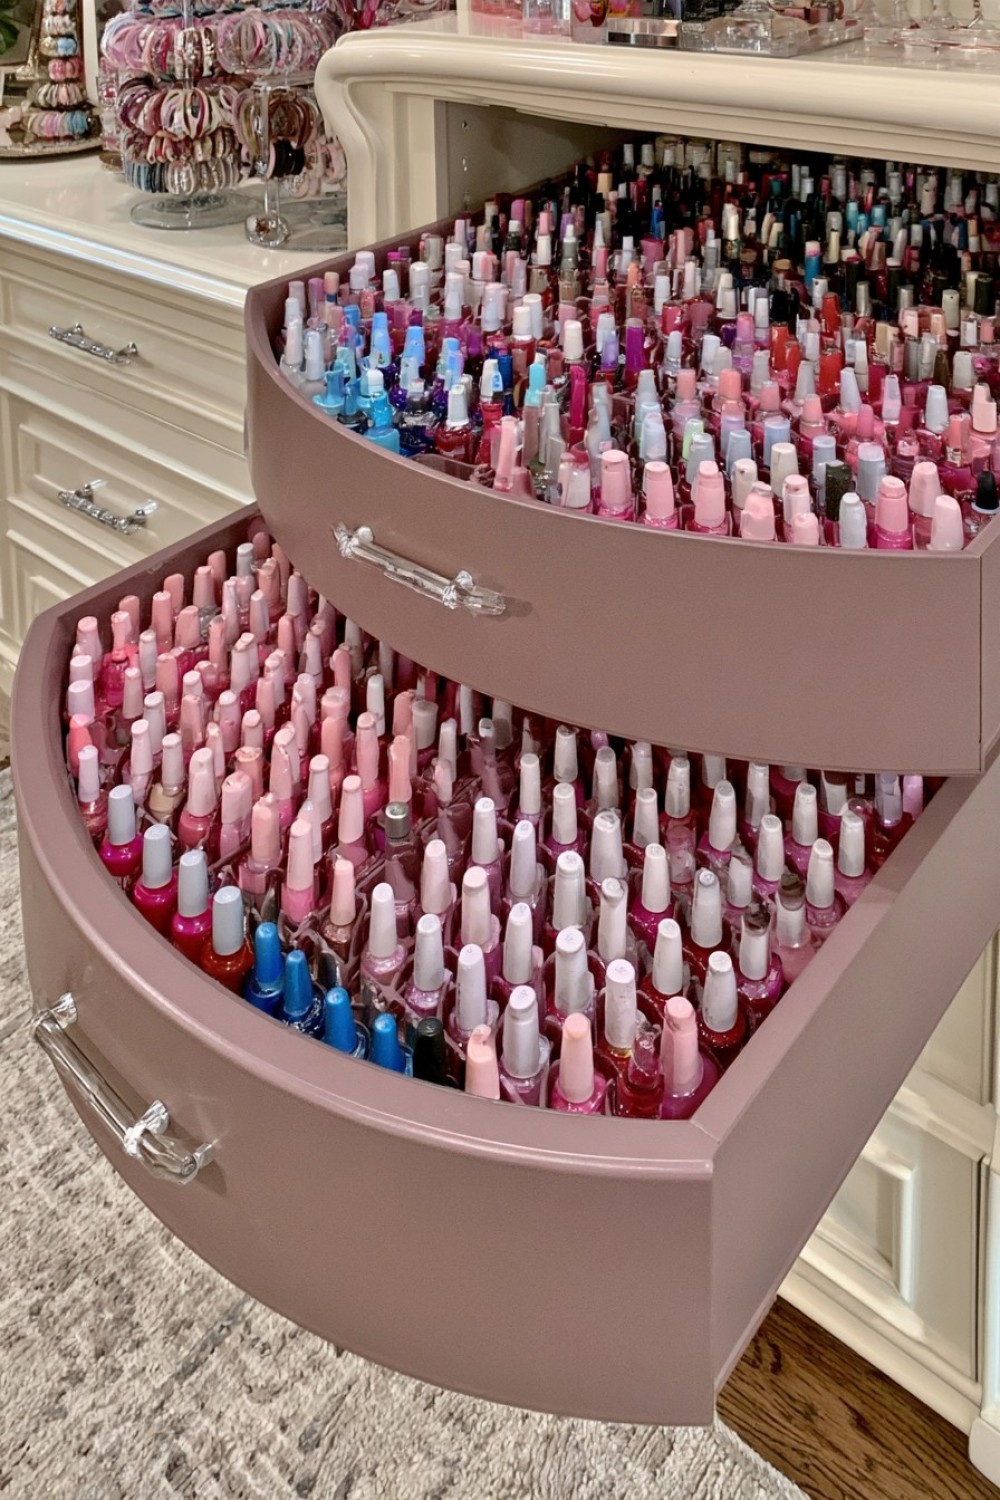
For a very large collection, stop trying to remember where individual colors live.
Give every storage position an address.
For example, Drawer A could contain slots A01 through A30, while Drawer B contains B01 through B30.
Assign each bottle a location number and record it in a simple phone note or spreadsheet together with brand, shade name, color family, and finish.
Your swatch sticks can carry the same codes.
If you choose shade A17 from the sample ring, you immediately know exactly where the bottle is stored.
This may sound excessive for twenty bottles, but it becomes extremely effective once a collection grows into the hundreds.
It also means you can organize storage for maximum space efficiency rather than worrying about keeping every similar color physically together.
The swatch library handles visual selection; the numbered drawers handle inventory.
12. Give Mini Bottles Their Own Raised Stadium
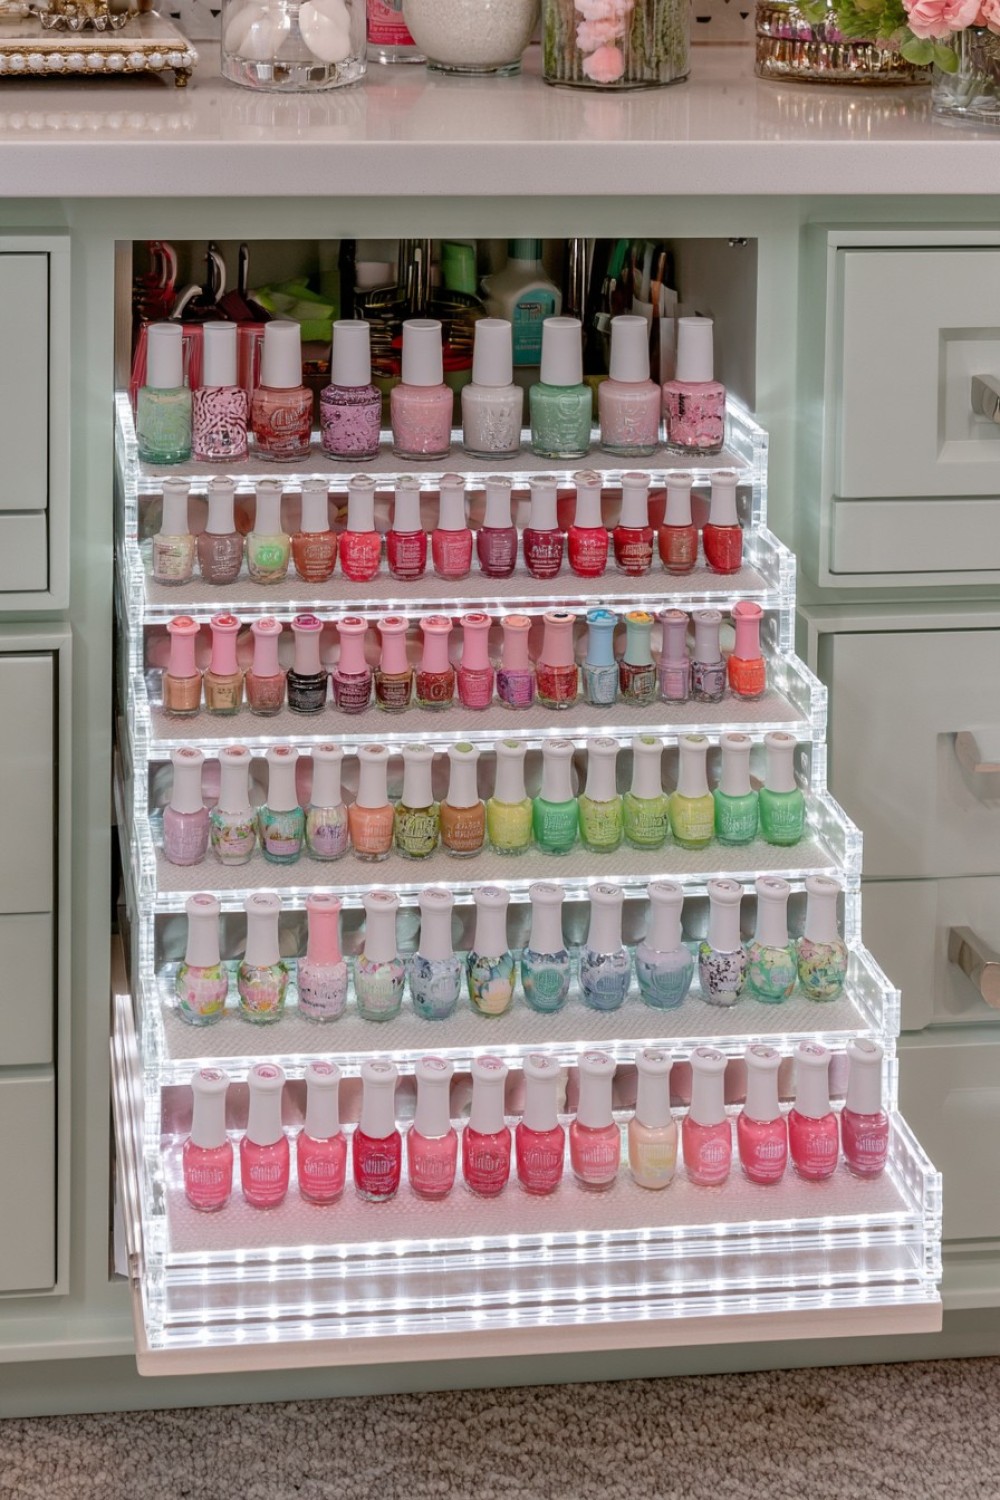
Mini polishes often disappear behind full-size bottles because their caps sit much lower.
Create a stepped insert that raises each row slightly higher than the one in front.
You can make one from thin plywood, acrylic, or even sturdy foam board covered with a durable surface.
Each step should be deep enough for one row of bottles.
Use the smallest bottles at the front and taller bottles toward the back so labels and caps remain visible.
A stepped display works well inside a deep drawer, cabinet, or enclosed vanity shelf.
The same insert can also organize sample-size treatments or nail-art bottles.
Instead of adding another container, the design solves the real problem: different bottle heights.
13. Build a Dedicated Nail Art Cartridge System
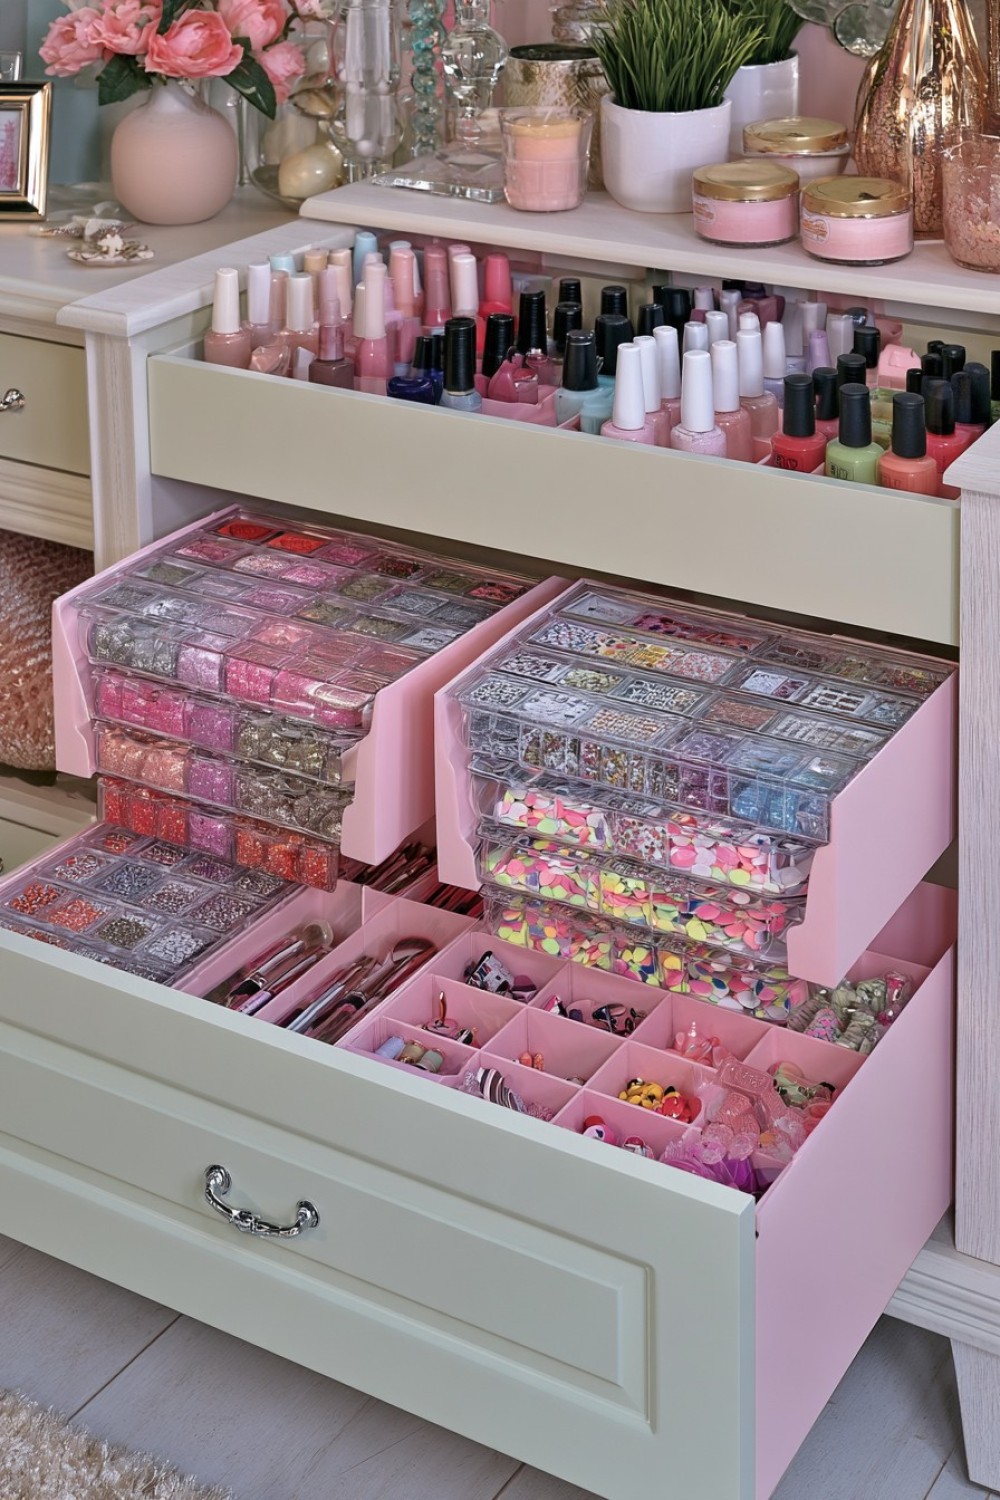
Nail art supplies often create more clutter than the polish itself.
Create shallow removable “cartridges” for different techniques: stamping, chrome powder, decals, dotting, striping, gems, and brushes.
Each cartridge should be a thin lidded tray that slides vertically into a file-like organizer.
When you want to do chrome nails, remove only the chrome cartridge. For stamping, pull out the stamping kit.
Keep the main polish collection separate.
This prevents tiny tools, powders, foils, and accessories from invading every drawer.
Transparent lids make it easy to see each kit without opening it.
For DIY storage, shallow document cases or photo-storage boxes can work extremely well.
The system organizes by activity rather than object type, which often matches the way nail art is actually done.
14. Add an “Almost Empty” Row
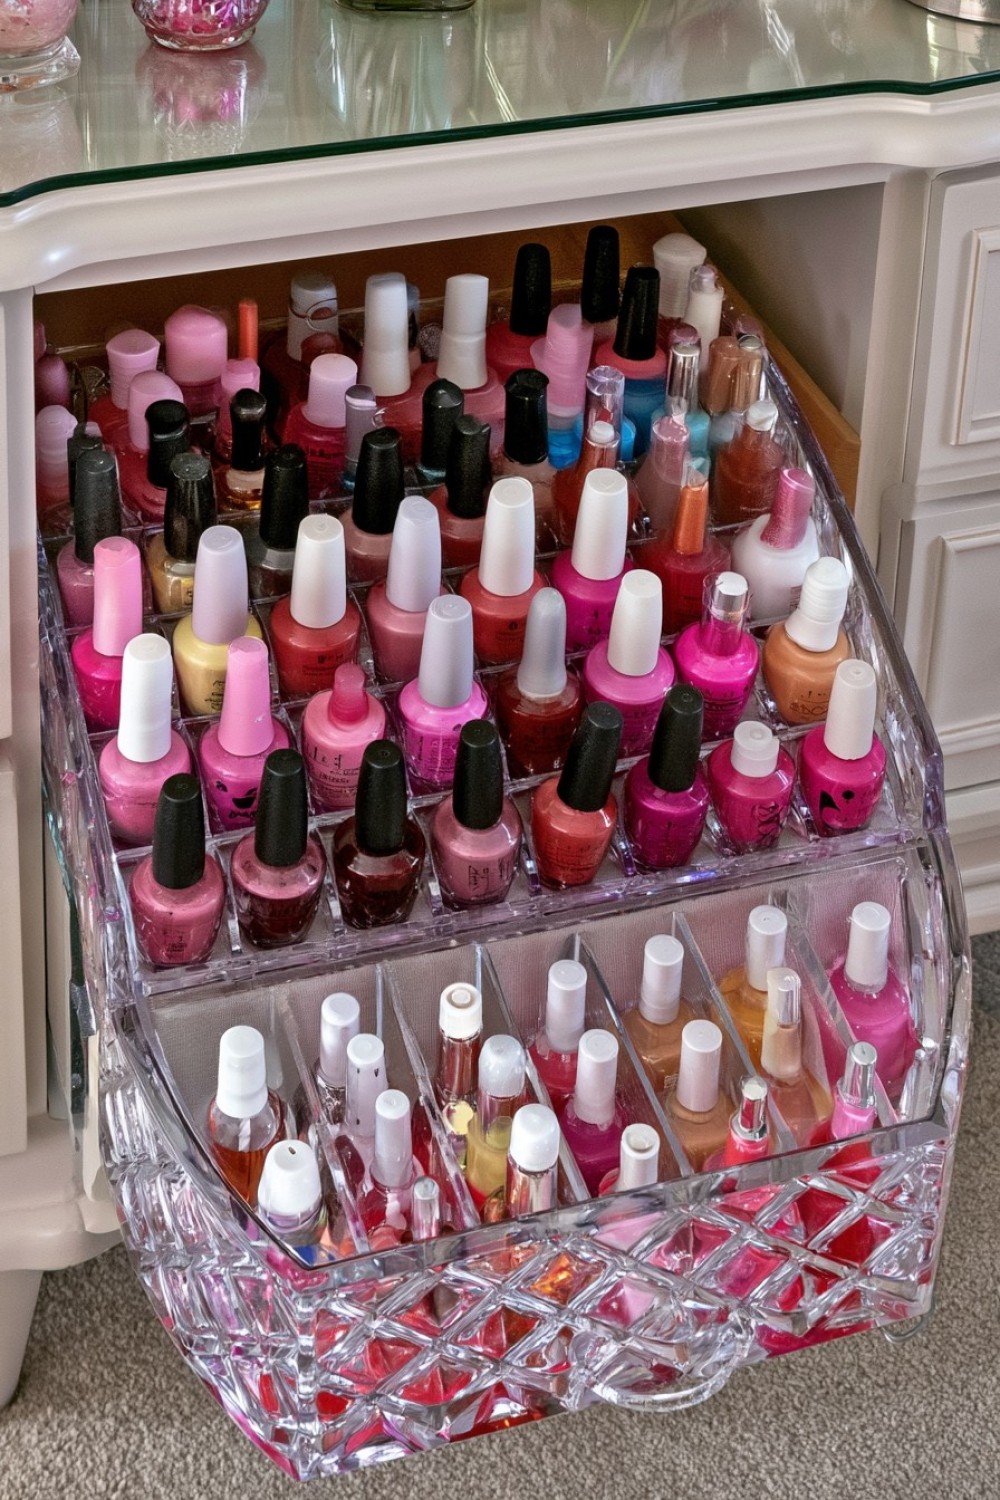
Nearly empty bottles tend to get lost in a large collection until they become too thick to use comfortably.
Create one small section specifically for bottles that are getting low.
This might be a narrow front row in your drawer or a separate small tray.
Seeing them regularly encourages you to finish favorite shades before opening similar replacements.
It also makes it easier to notice when a staple base coat, top coat, or favorite neutral needs replacing.
Do not automatically thin old polish unless you are using a product specifically designed as nail-polish thinner and compatible with the formula; ordinary acetone is not a universal substitute.
An “almost empty” section turns inventory maintenance into part of the organization system rather than something you only discover halfway through a manicure.
15. Create a Shade-Duplication Check Zone
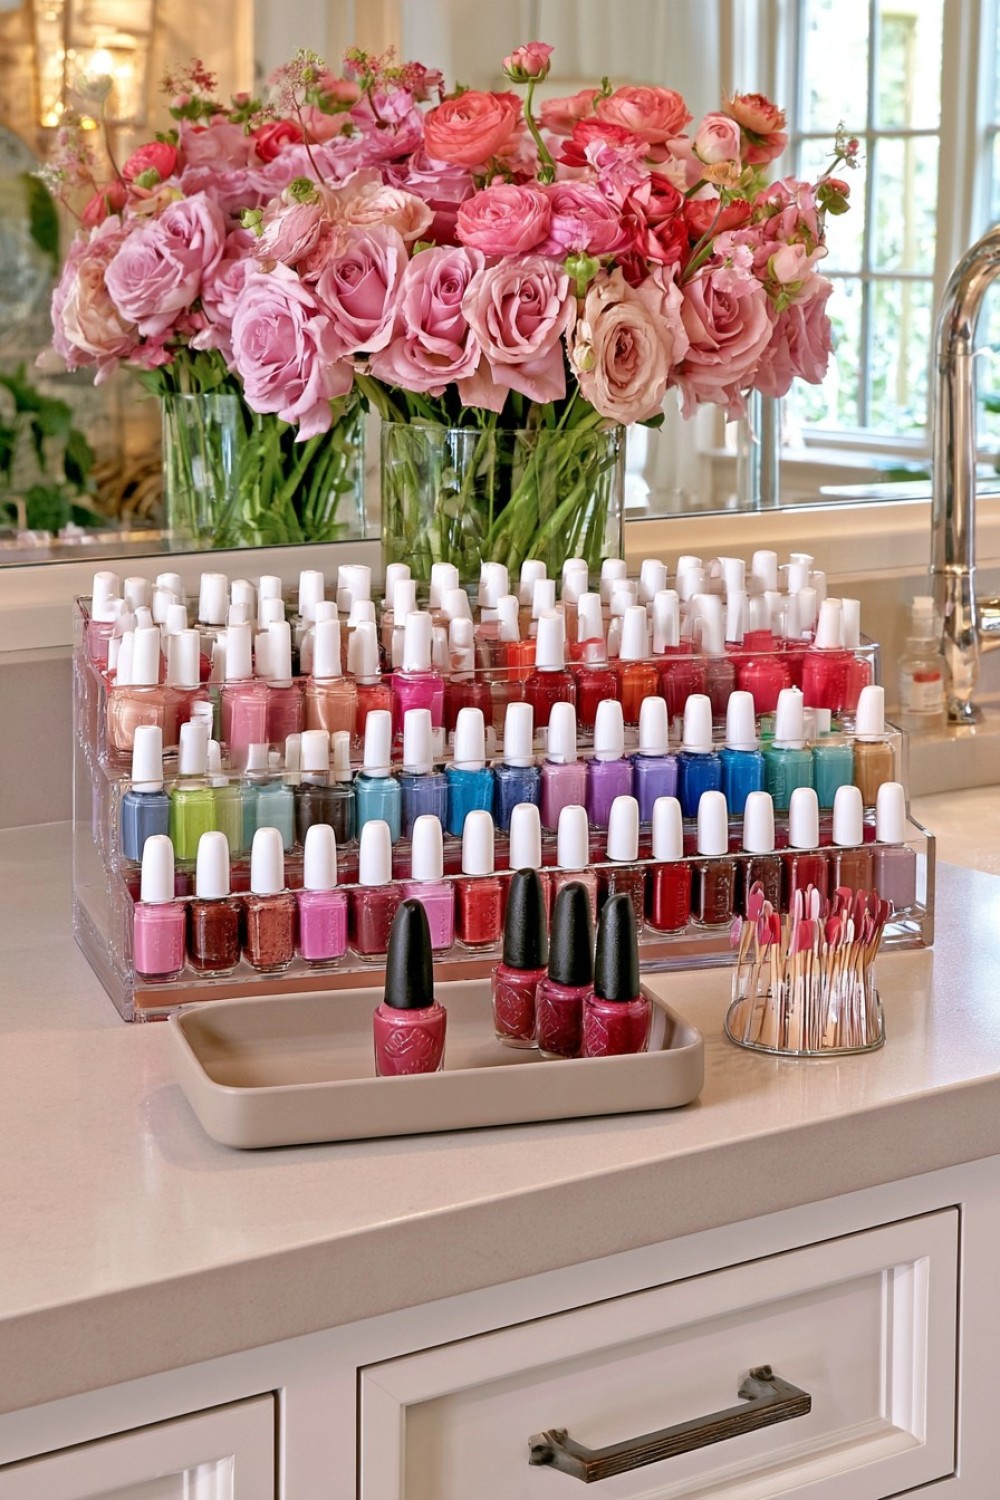
One surprisingly useful organizing feature is a tiny space dedicated to preventing duplicate purchases.
Keep a ring containing swatches of your most common color families—nudes, reds, pinks, blacks, or whichever shades you tend to buy repeatedly—near your handbag or vanity.
Before purchasing a new polish, compare it against the existing swatches.
At home, maintain a small “comparison tray” where new bottles remain temporarily before joining the permanent collection.
Place the new shade beside its three closest existing colors and compare them under daylight.
If the formula, finish, or tone is genuinely different, assign it a permanent location. If it duplicates something you already own, you can make a more deliberate decision before the bottle disappears into the collection.
This small workflow can prevent nail polish storage from becoming a cycle of repeatedly organizing colors you accidentally bought twice.
Make the Collection Easy to Use, Not Just Neat
The best nail polish organization system is the one that shortens the distance between choosing a color and actually using it. Swatch libraries make shades easier to compare, shallow drawers keep bottles visible, project trays contain temporary mess, and numbered locations can make even a very large collection manageable.
Think about storage conditions as well as appearance. Nail polish bottles should generally remain tightly closed and upright in a cool, dry place away from direct sunlight, flames, and strong heat sources. Because many nail products contain flammable solvents, avoid storing large collections beside heaters or other ignition sources.
Most importantly, organize around your habits rather than forcing the entire collection into one aesthetic arrangement. If you choose by finish, store by finish. If you rotate seasonally, create capsules. A useful system should make the collection easier to enjoy—not simply prettier to photograph.
MORE IDEAS


Share
What's Your Reaction?
 Like
0
Like
0
 Dislike
0
Dislike
0
 Love
0
Love
0
 Funny
0
Funny
0
 Angry
0
Angry
0
 Sad
0
Sad
0
 Wow
0
Wow
0